The other day a gentleman came into the detailing shop we own in Chicago to get a “Complete Exterior”. We took a look at this car and saw that it was in fair condition with a few deep scratches in key areas. We decided to take it in and told him he could pick it up at the end of the day. Do not misinterpret this, just because it doesn’t need much work doesn’t mean that we can cut corners! Let’s take a dive into the process!
Step 1: Car Wash
Regardless of what treatment the paint needs, washing the car is the first step. We used a nice thick foaming soap to break down and lift contaminants off of the paint. Washing the car to prep for a polishing job is critical because we need to be able to see the paint clearly and prescribe the correct treatment.
Step 2: Dry the Car
Drying the car goes without saying. But using the right materials to dry the car without creating more scratches is important. A nice waffle weave microfiber towel works great. The key to using a waffle weave is to have it slightly damp before using it; this will enhance the towel’s ability to absorb water.
Step 3: Clay the Car
Many “detailing” shops skip this step for potentially a couple of reasons. Reason #1: clay is pretty expensive. Reason #2: skipping this step to save time. DO NOT SKIP STEPS! Our job is to make sure that the job is done well and done correctly! Claying the car is a necessary step before polishing because it removes contaminants that are stuck in the paint that don’t come off during the wash. If we were to polish without claying then we would create swirls in the paint because the polish machine would grab these contaminants and grind them into the paint with the pad.
Step 4: Observe the Paint
After the car has been cleaned and clayed, it’s important to inspect the car for scratches. By observing the whole car at this time, we will be able to determine the the areas of the car that require the most attention and decide the best course of action in regards to compound and pad levels.
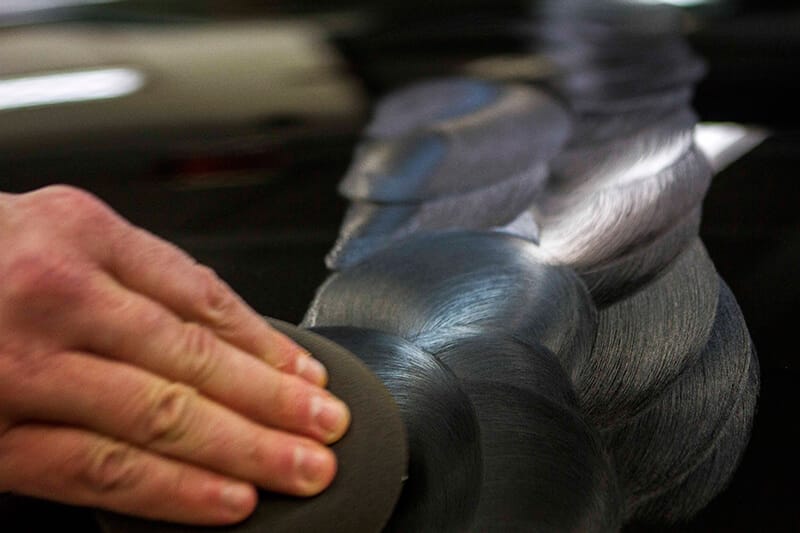
Step 5: Buff/Polish the Car
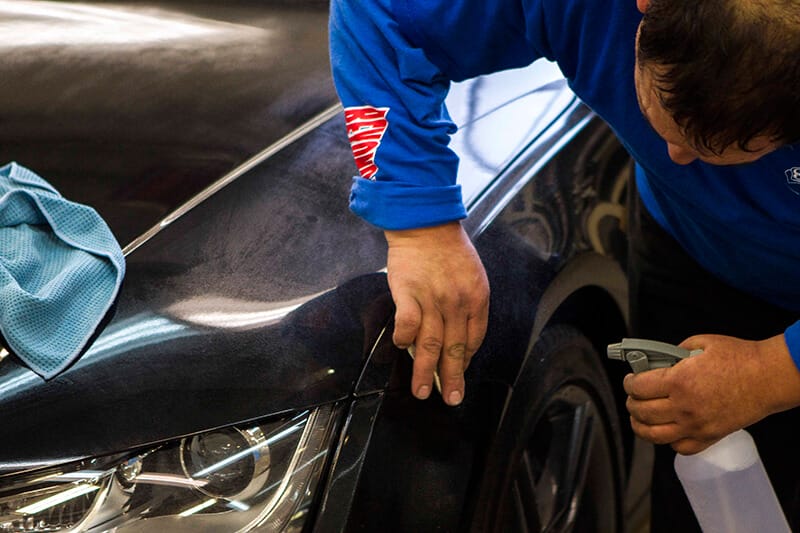
Now that we know the plan of attack, polishing is the next step. Here we cover the whole car to remove as many scratches as possible without sheering off too much of the clear coat. One of the most challenging things about polishing is knowing what scratches you can get and which ones you can’t. This takes time and practice but it’s best to take it slow and remove a little at a time and see where it takes you. Then you have the option to be more aggressive. You may notice that I did not include a step for taping off the car. Normally before polishing, all the rubber trim, emblems, and name plates would be taped off to protect them from the polish. This Audi was a special case because it doesn’t have any rubber trim and many of the emblems were removed when it was customized.
Step 6: Rinse and Dry the Car
After polishing the car and making sure to completely cover the car as thoroughly as possible, there is going to be plenty of debris kicked around due to the machine polish. Not to worry, a quick rinse with a pressure washer removed all the debris and the car is clean again. This step is necessary because the paint needs to be clean before any application of product.
Step 7: PlasmaCoat the car Panel by Panel
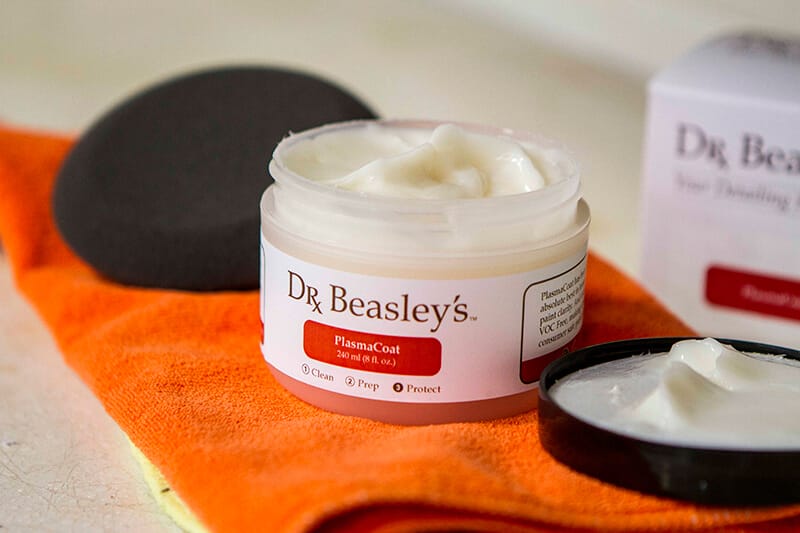
PlasmaCoat, is a 100% VOC free paint protectant. It’s not a wax, nor a polymer, it’s a new category called Plasma. PlasmaCoat is designed to last for up to a year and provide a great shine while also offering durable protection. It also bonds instantly. The reason I’m saying these things is because it’s key as to why it was used and how it’s used. Because it’s winter and we’re in Chicago, protection from the snow, the ice, and the salt is key to preserving the paint. Furthermore, the customer can’t afford to wait over night for their car or leave it in a garage somewhere away from the elements, so we use PlasmaCoat because it bonds instantly and will begin protection as soon as it’s applied. Regardless of the car, the customer, or the severity of the correction, the job is done right and done professionally. It’s crucial to invest in the time. We take pride in a job well done. So should you.
We would love to hear from you as well. What are you best practices and maybe some stories about superior jobs?