


Last Updated July 17, 2024

Plexiglas is a branded term for a type of transparent acrylic plastic often used as a lightweight alternative to glass. Known for its clarity, durability, and versatility, Plexiglas is often seen on boat windshields and convertible top windows.
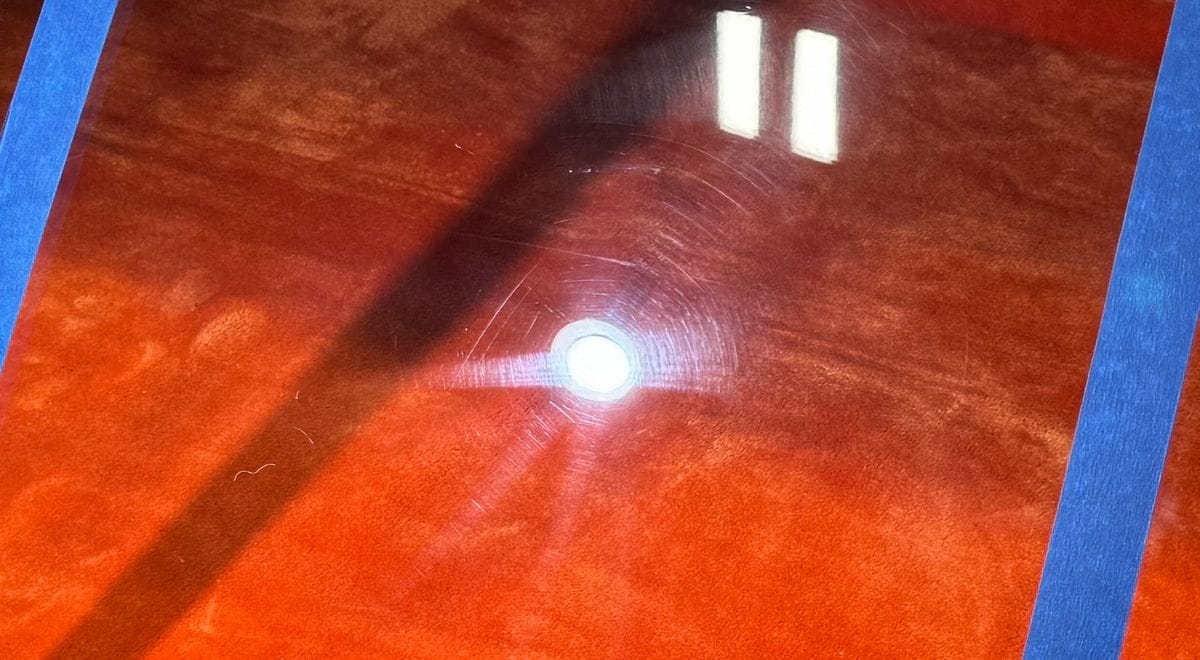
The problem with Plexiglas? Despite its durability, it scratches pretty easily. It’s also susceptible to oxidation from the sun, which clouds the clear appearance. On top of that, any water spots or bird droppings that appear can be hard to remove.
So how do you remove scratches from Plexiglas? It’s actually not much different than removing scratches from paint — it’s all a matter of polishing. In this article, we’ll take a look at four different methods for polishing plexiglas, ranging in difficulty and aggressiveness.
BEFORE YOU START: Is It Lexan or Plexiglas?
Before you start polishing, you should find out if the surface you’re working with is truly Plexiglas or if it’s a different kind of material like Lexan.
Lexan is a trademarked brand name for polycarbonate plastic invented by Dr. Daniel W. Fox also the inventor of General Electric’s LEXAN® polycarbonate. Polycarbonate is not as easily modified to be UV resistant as acrylic plastic and for this reason companies like General Electric, when manufacturing Lexan plastic windows apply a special coating to both sides of the Lexan plastic window.
Because of this coating, Lexan is much harder than Plexiglas. This makes it almost impossible to polish. In fact, I’ve NEVER seen it sanded and polished. I’ve also never seen Lexan with any swirls and scratches polished out to be clear like glass or clear like it was when it was new. On top of this, Lexan has a secondary coating applied to normally both sides to provide extended UV protection. Attempting to sand or polish on Lexan will compromise this coating.
WARNING: Before polishing on any plastic window, do everything you can to find out exactly what type of plastic it is you’re working on. This will save you time and prevent you from damaging the window!
If you cannot find out exactly what type of plastic it is you’re working on, then be sure to do a “Test Spot” to a small area before working on the entire plastic window. A Test Spot is where you test out the products, tools, pads and process to a small area and PROVE your choice of products, tools, pads and process will work to fix this one small area before tackling the entire window. If you cannot fix a small area, you will not be able to fix the entire window and you’ll be glad you only experimented to a small area.

How to Remove Swirls, Scratches, Water Spots, Oxidation & Yellowing from Plexiglass
Here are the ways to remove defects like swirls and scratches out of Plexiglass windows from the least aggressive approach for Plexiglass windows in fairly good condition to the most aggressive approach for Plexiglass windows in severely neglected and abused condition.
Listed in order of least to most aggressive process.
- Hand polishing.
- Machine polishing with orbital polishers.
- Machine polishing with a rotary polisher followed by an orbital polisher.
- Dry sanding by machine followed by polishing with a rotary polisher and an orbital polisher.
The good news is, if you’re a DIY or Do-it-Yourselfer – you CAN remove swirls and scratches out of Plexiglass windows and restore like-new clear results by HAND. Yes, you read this correctly. This goes back to what I shared previously, that is Plexiglass, or acrylic plastics are soft while Lexan or polycarbonate plastics are hard, very hard.
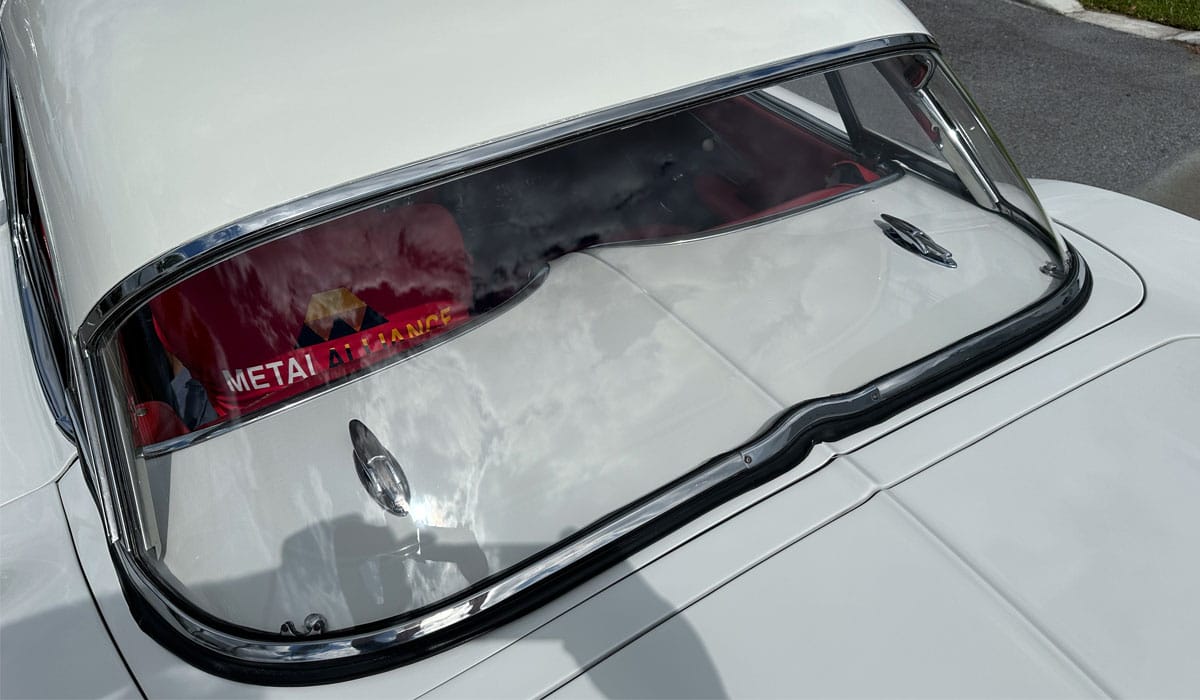
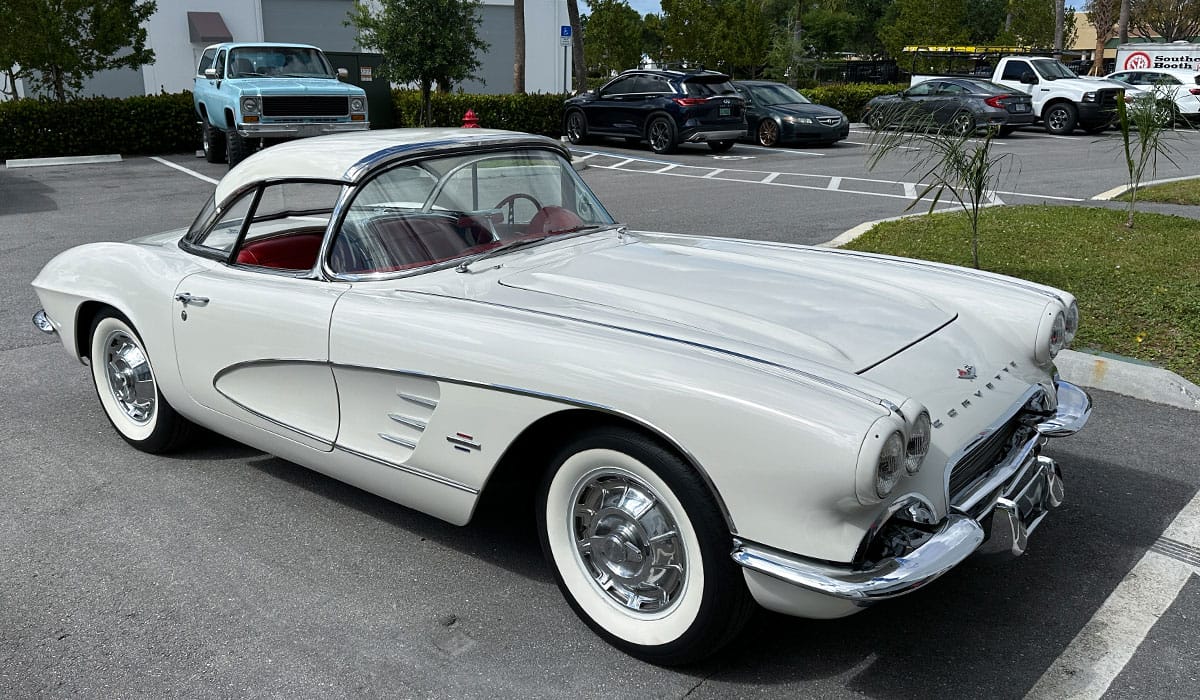
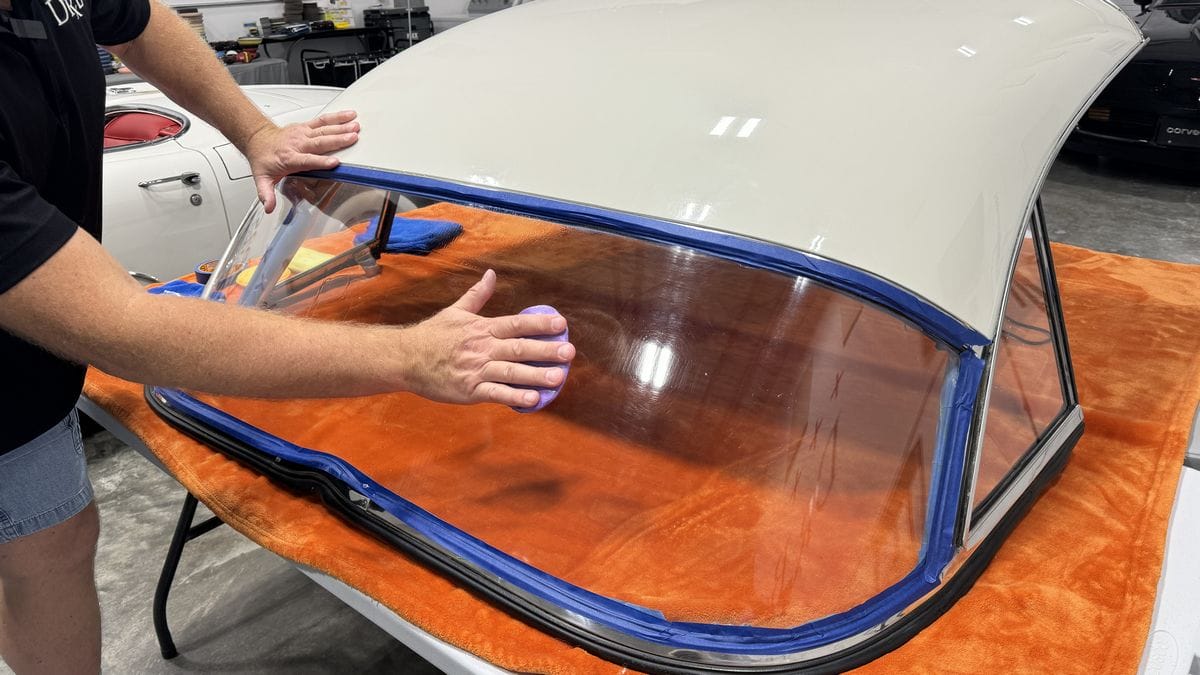
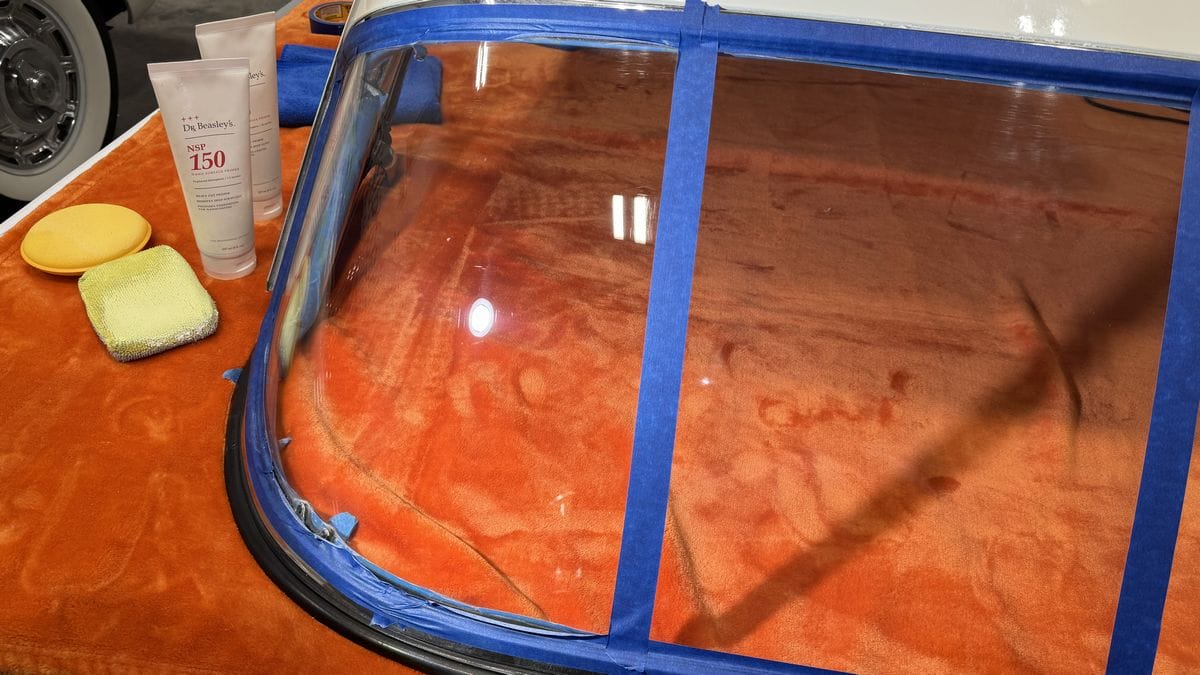
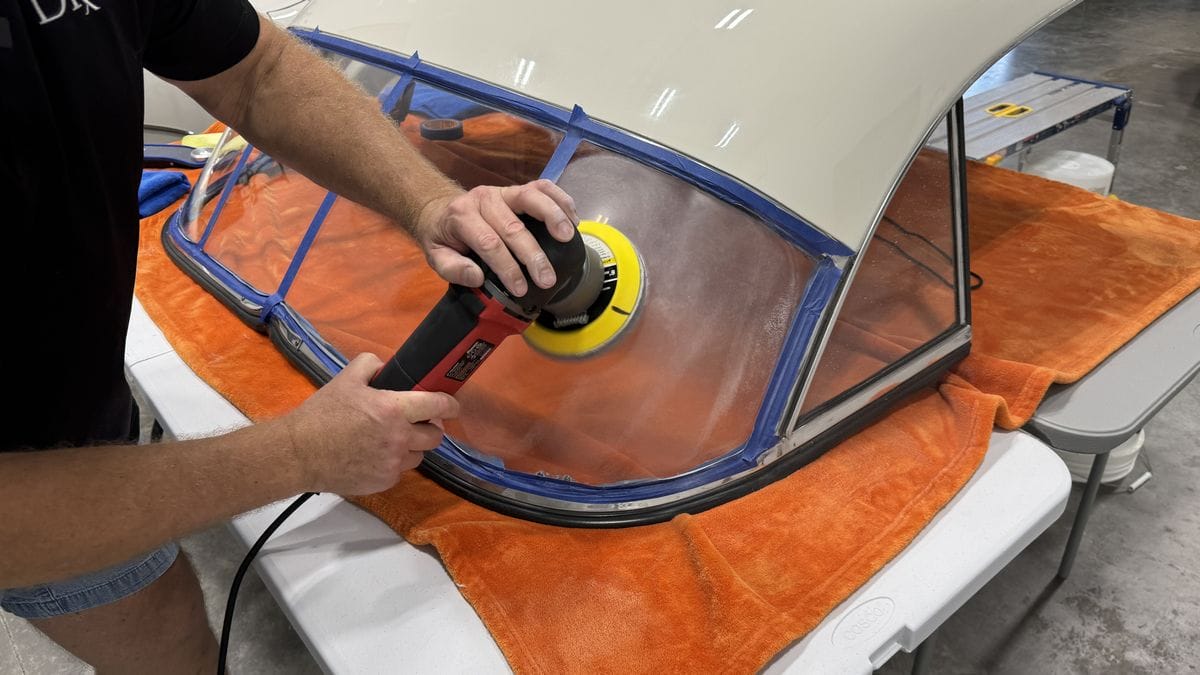
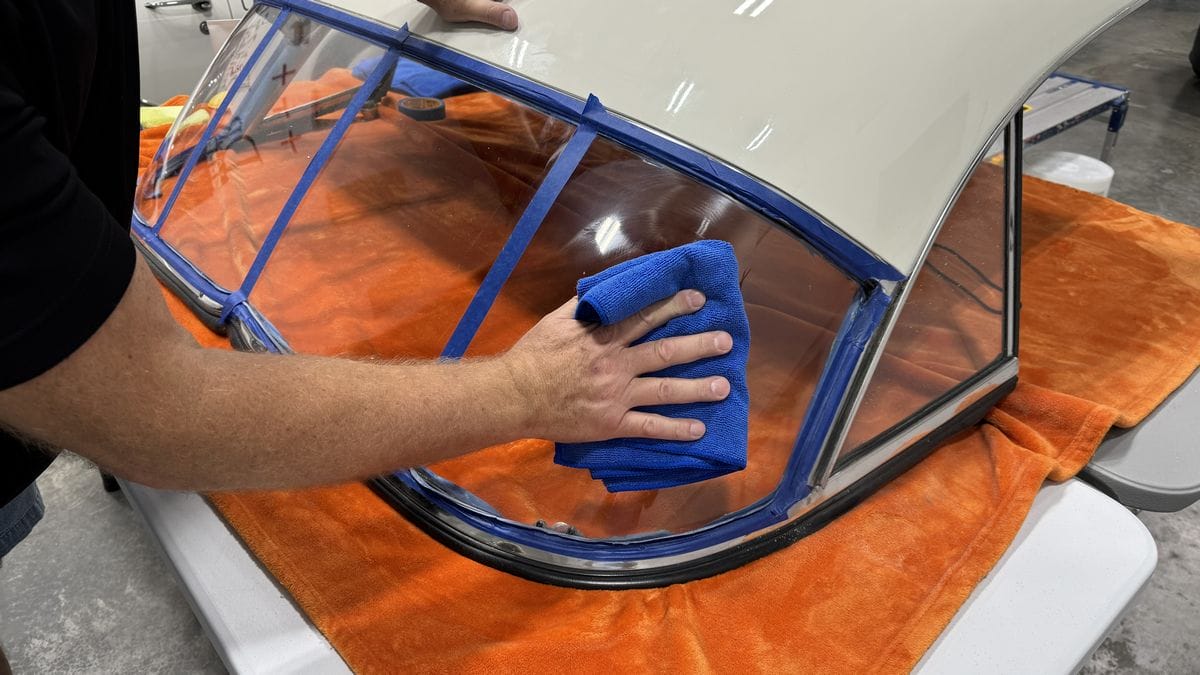
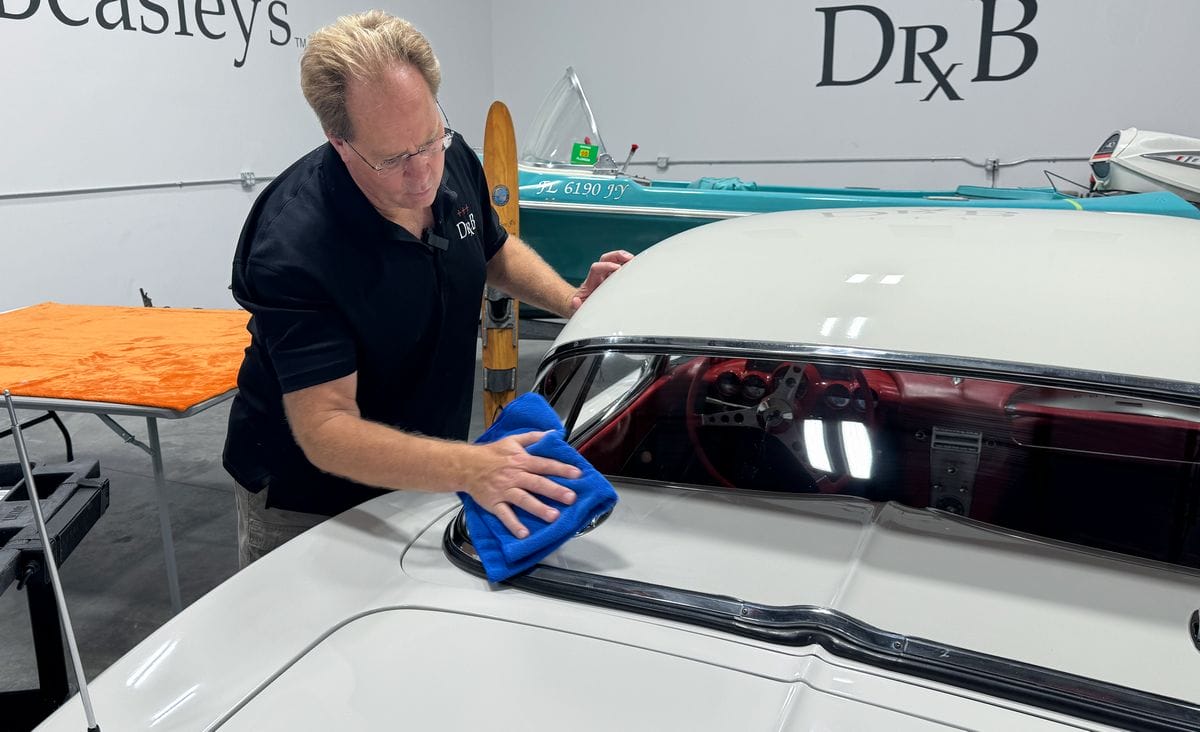
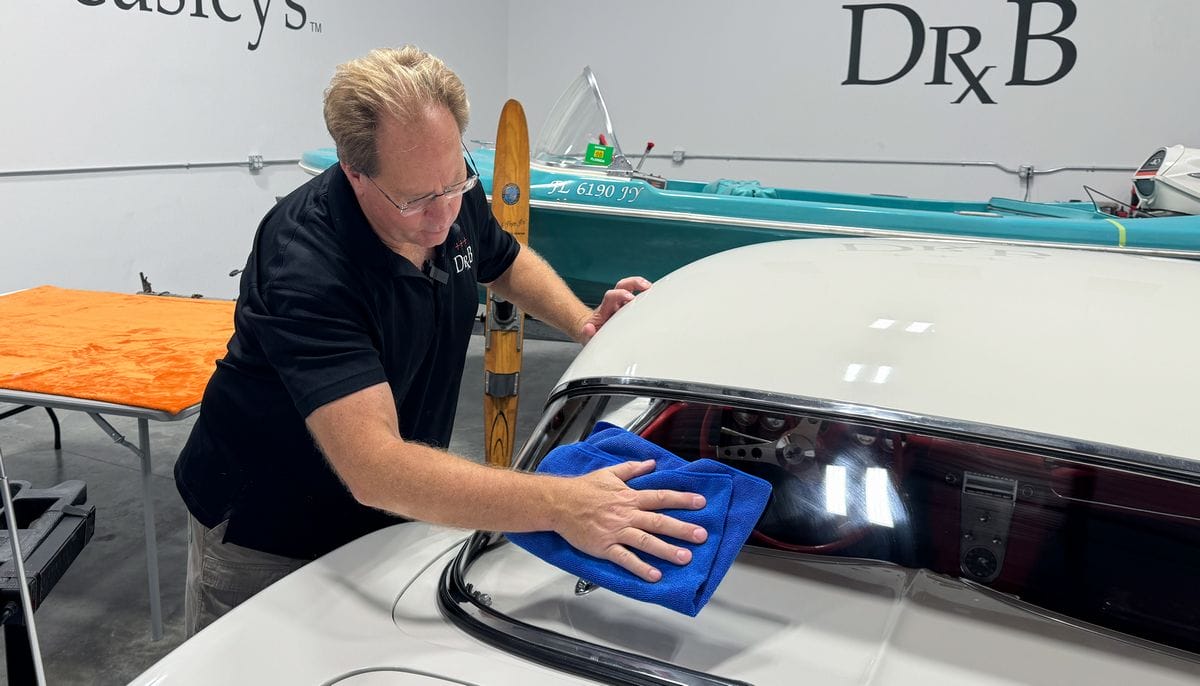
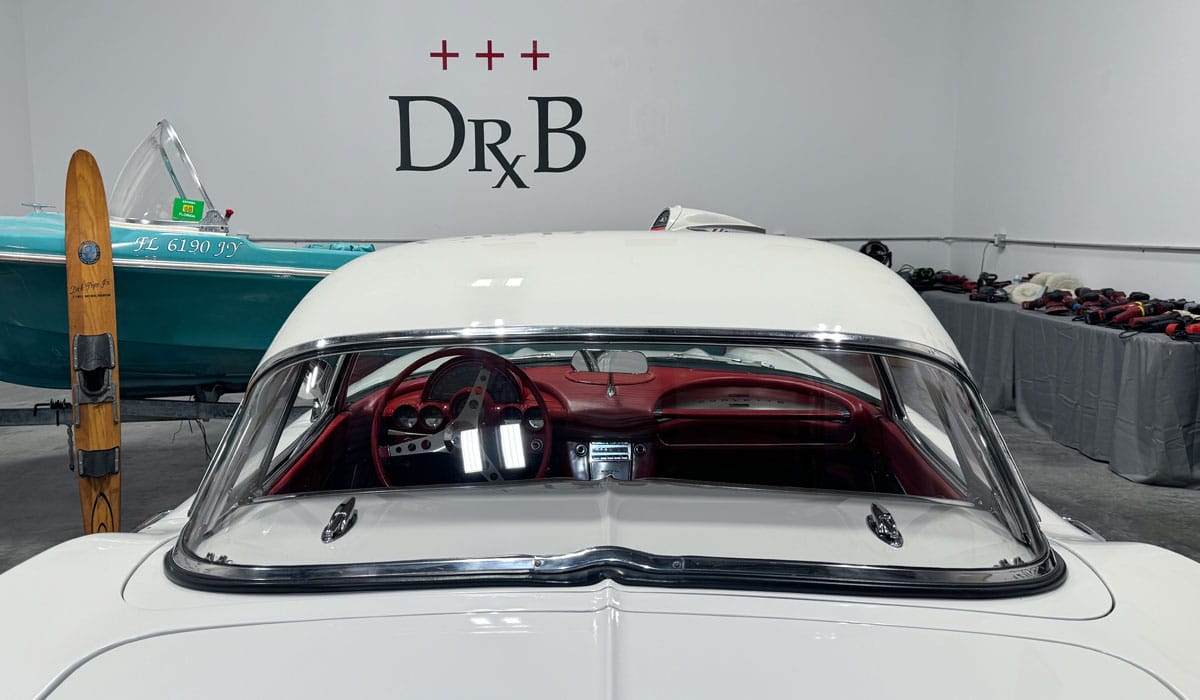
For this demonstration I will be polishing the back window of a 1961 Corvette convertible hard top, however keep in mind the process would be the same for a boat windshield or any other plexiglass surface.
How to Polish Plexiglass By Hand
Recommended For Light Scratches
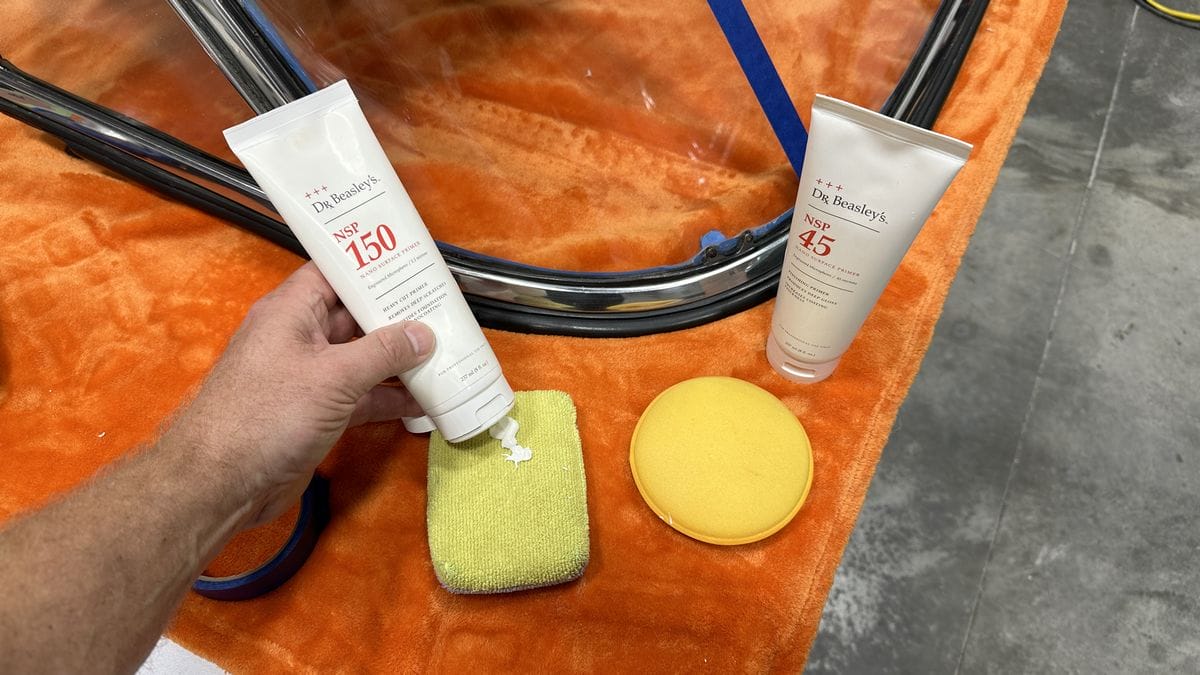
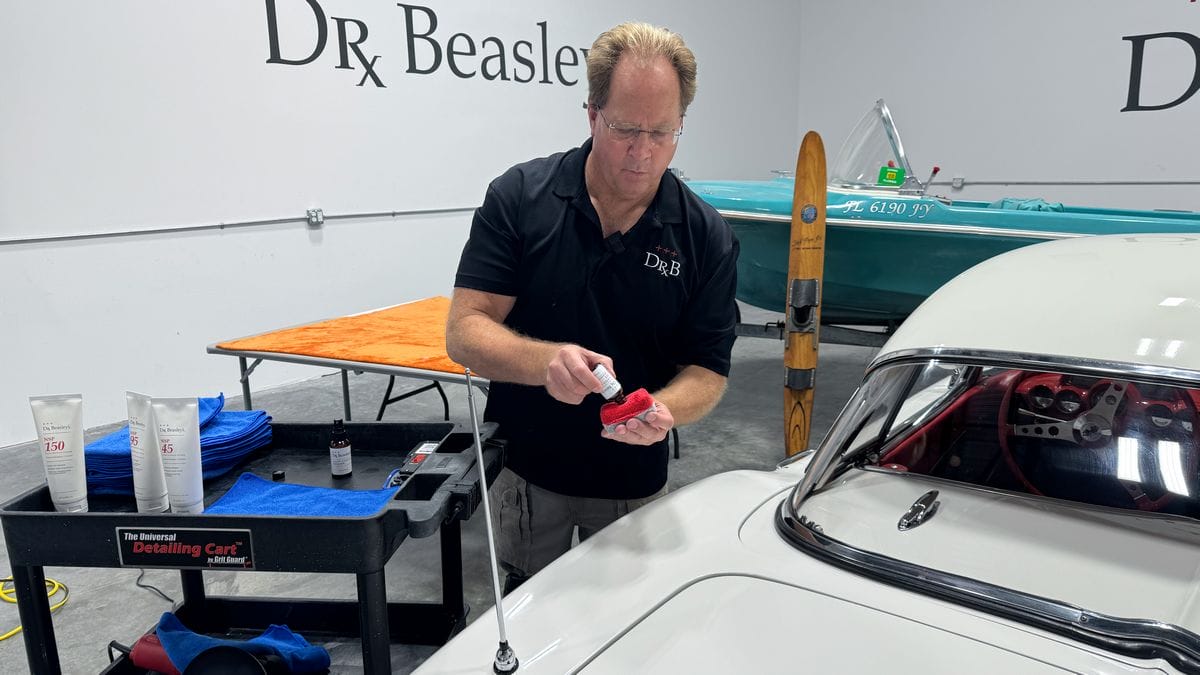
Supplies Needed
- Microfiber applicator pads
- Foam applicator pads
- Compound
- Finishing Polish
- Lots of clean, uncontaminated microfiber towels
- High powered inspection light
Basic Steps
- Clean Surface & Tape Off Sensitive Areas
- (OPTIONAL) Decontaminate with Detailing Clay
- Apply Compound with Microfiber Applicator
- Apply Finishing Polish with Microfiber Applicator
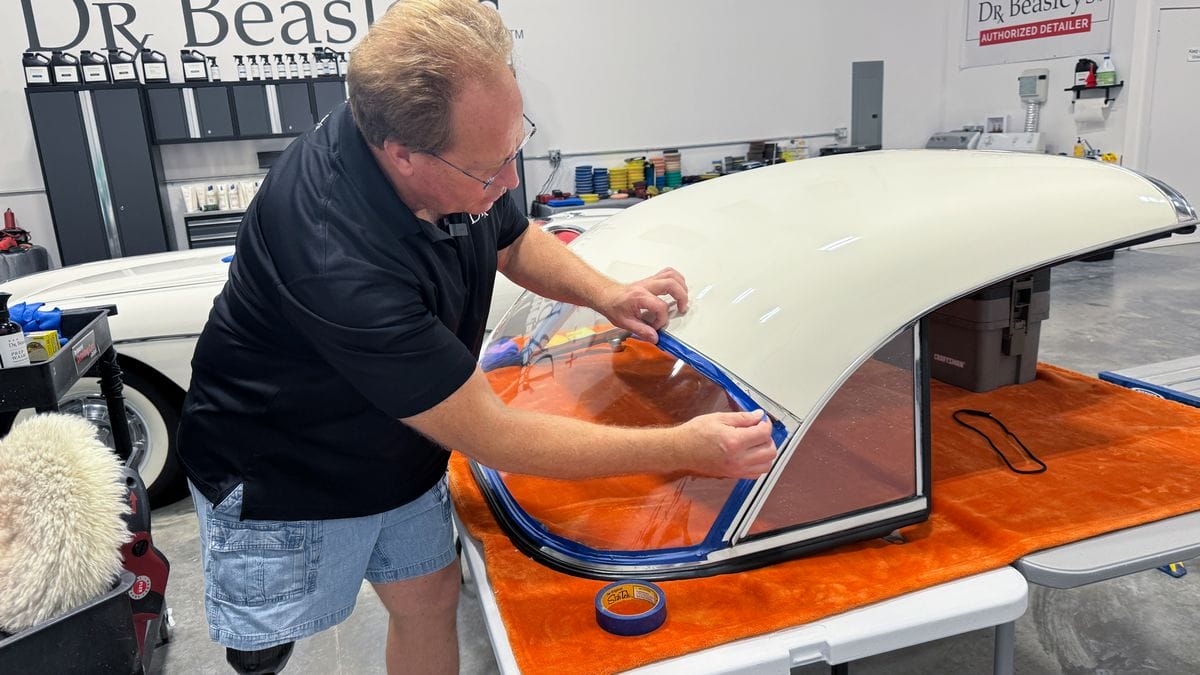
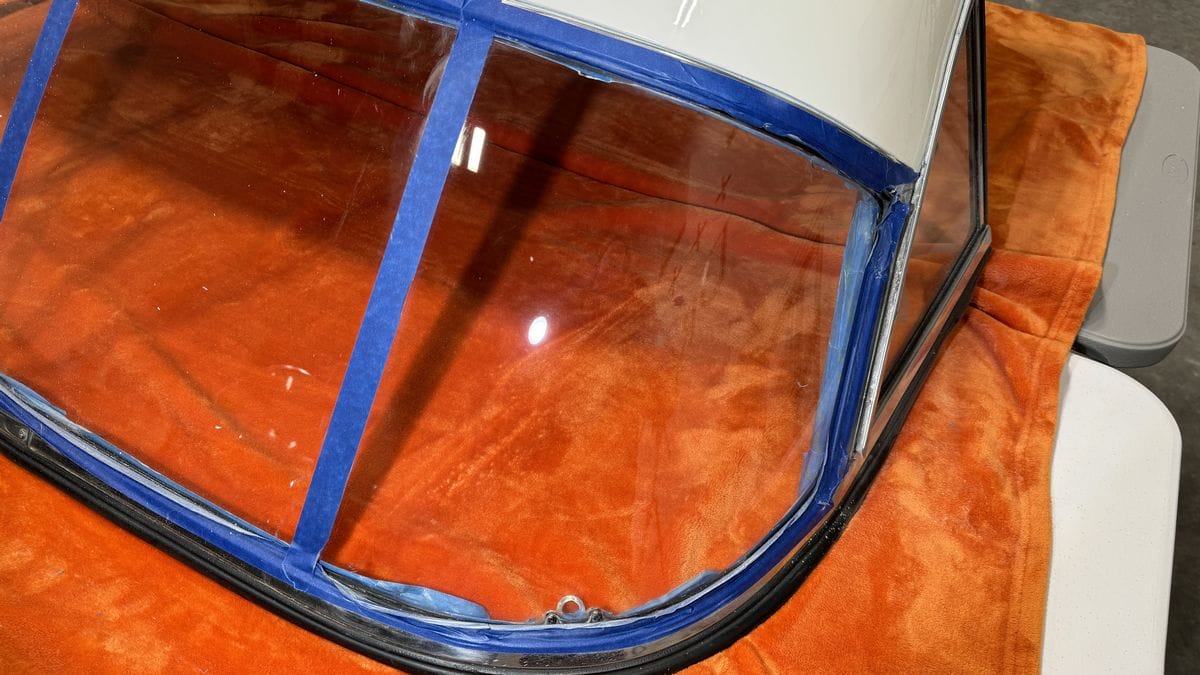
Step 1: Clean Surface & Tape Off Sensitive Areas
Before you start, clean the plexiglass by washing or wiping clean with a waterless wash. Use painter’s masking tape to cover over and protect any gaskets around the window to protect them from splatter from the buffing process.
Step 2 (OPTIONAL): Decontaminate with Detailing Clay
If you do the Baggie Test and discover some form of bonded contamination on the surface of the Plexiglass windshield, just like car paint, you can use detailing clay to clay the Plexiglass to remove the contamination. Just keep in mind that claying, be it traditional detailing clay, or a clay substitute like a clay towel, mitt or disc, can put marring into the plastic that you’ll have to remove during the polishing step.
While polishing can remove bonded contamination, generally speaking, using a mechanical decontamination process will tend to be more effective than polishing alone.
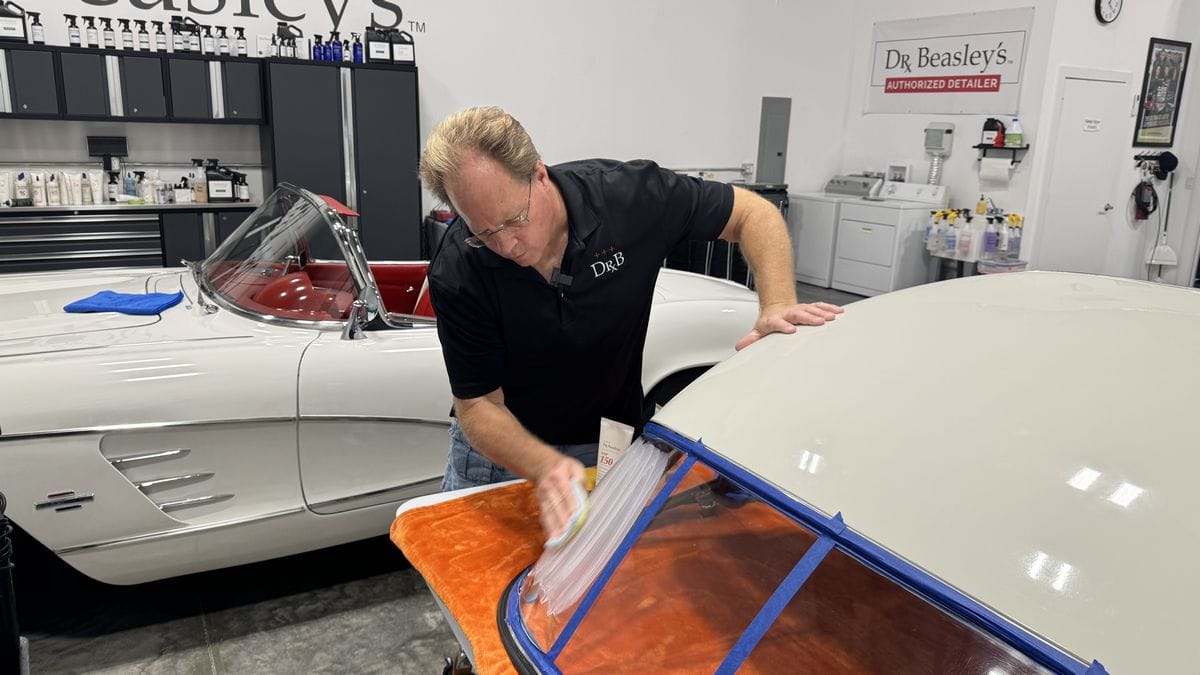
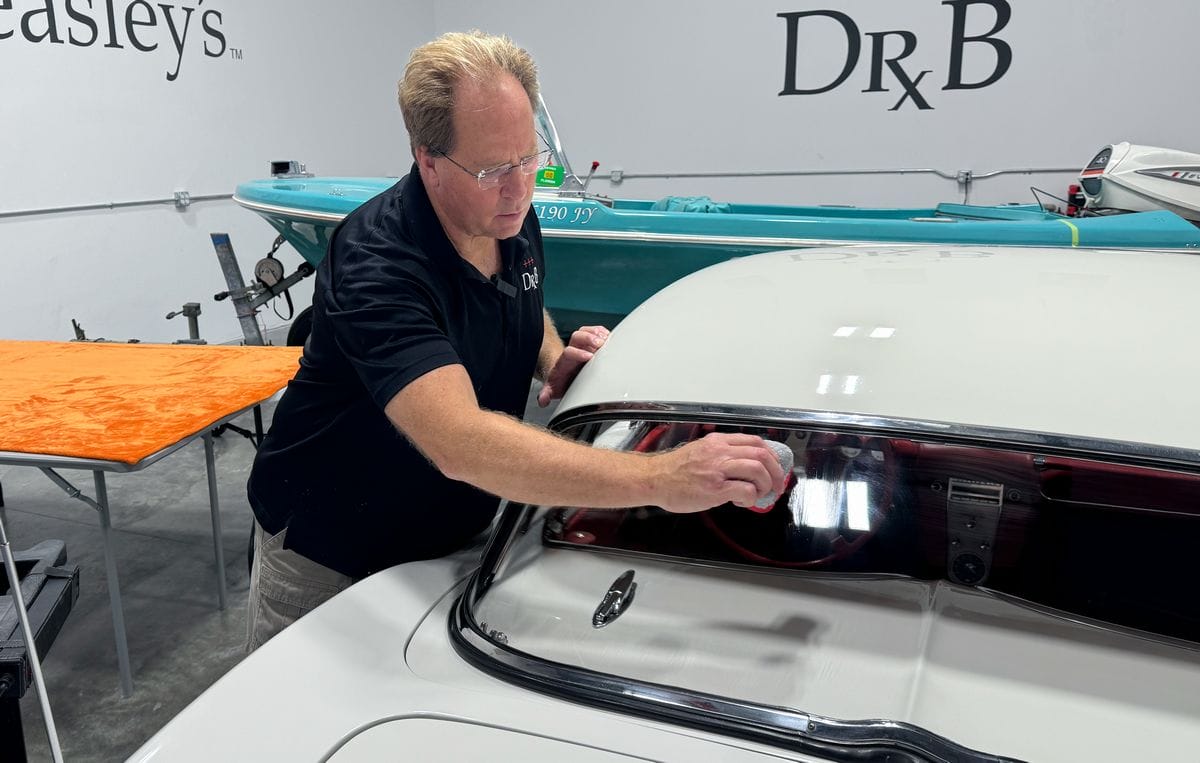
Step 3: Apply Compound with Microfiber Applicator
Start by applying a quarter size drop of the compound onto one end of the microfiber applicator pad. Using an overlapping circular motion, spread the product out over a small section of the windshield. Spreading the product over creates a uniform layer of abrasive technology and lubrication for you to work that section. After spreading the product out, switch to a straight-line motion to work the product over the surface.
Why straight lines? Moving your hand back and forth at high speed with firm pressure is simply easier on you than rubbing in overlapping circular motions at high speed with firm pressure. As long as your applicator is clean and uncontaminated and you’re using great abrasive technology, then it doesn’t matter which direction you move your hand.
Use a fast back and forth rubbing action and an overlapping tight pattern or side-to-side motion. It’s important to thoroughly rub the surface and as you move your hand from side to side, move only a small distance at a time. This is referred to as a tight pattern.
Don’t use a wide overlapping pattern, this will look like you’re making the letter M or the letter W as you move your hand across a section of plastic. A tight pattern ensures UMR (Uniform Material Removal) and this results in a uniform, clear appearance.
Work one section at a time for a minute or two. After each section you work, carefully remove any excess product and inspect the results using a high-powered inspection light.
How long you need to rub on a single section of the Plexiglass windshield depends on how severe and/or how deep the defects are that you’re trying to remove.
For shallow swirls and scratches, for example from years of wiping clean with a towel, these swirls and scratches should be fairly shallow and easy and fast to remove.
For deeper swirls and scratches, you many need to work each section 2 or 3 times before moving on to the next section.
If you’re going to tackle your project by hand or machine, anytime you’re moving onto the next section, be sure to overlap a little into the previous section for good UMR. Continue this process until you have rubbed out the entire inside of the windshield.

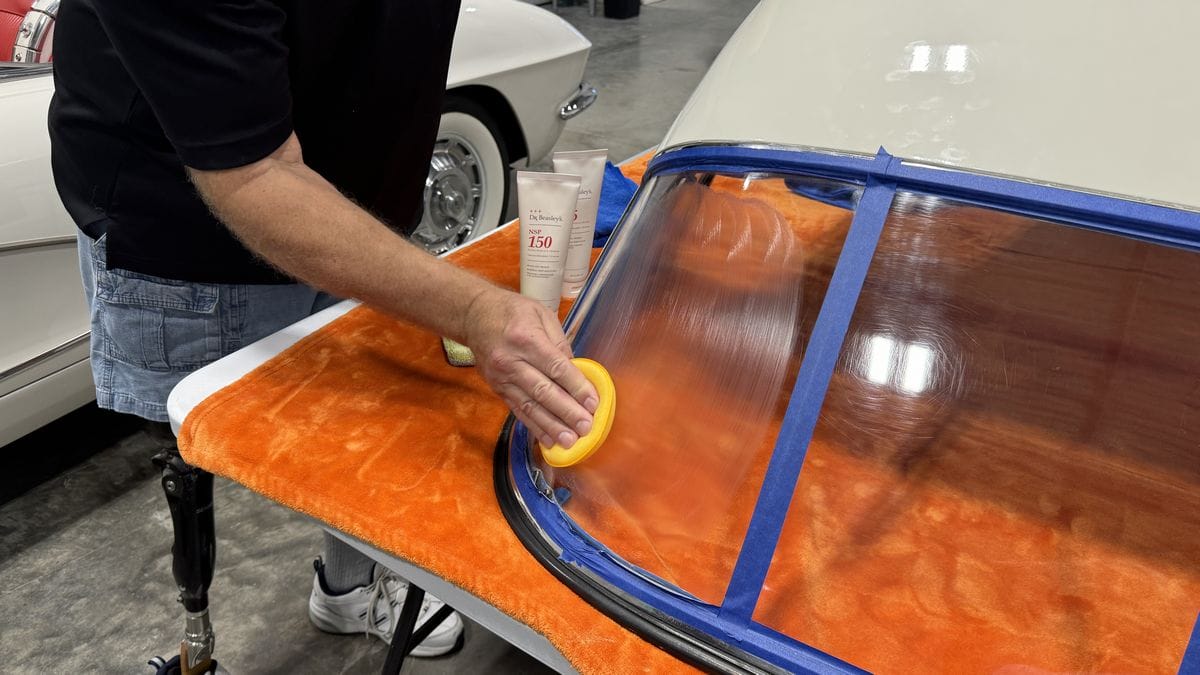
Step 4: Apply Finishing Polish with Microfiber Applicator
For this second-hand polishing step, you want to switch over to a clean, uncontaminated foam applicator pad. The uniform surface texture of foam helps to remove any fiber marring from the first step, (normal), to refine and perfect the surface, which results in a more clear plastic surface. Repeat the process used in step 3. The polishing step usually goes faster and takes less work than the first step because at this point you’re simply abrading the surface to refine the results created by the first step.
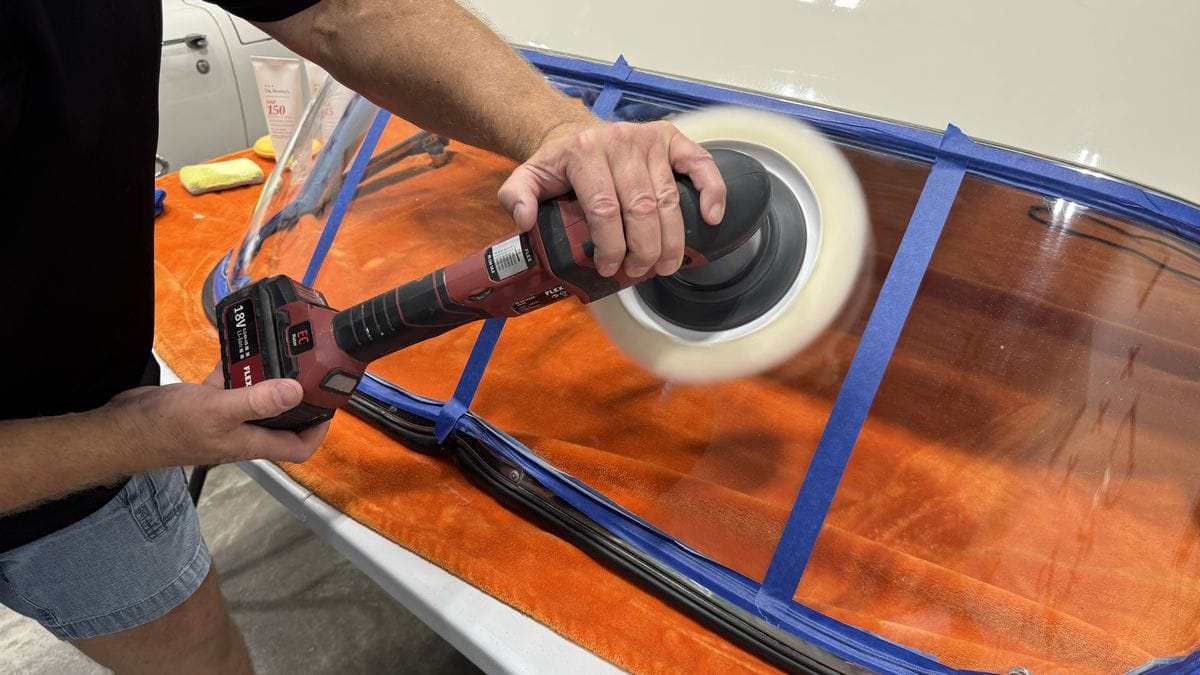
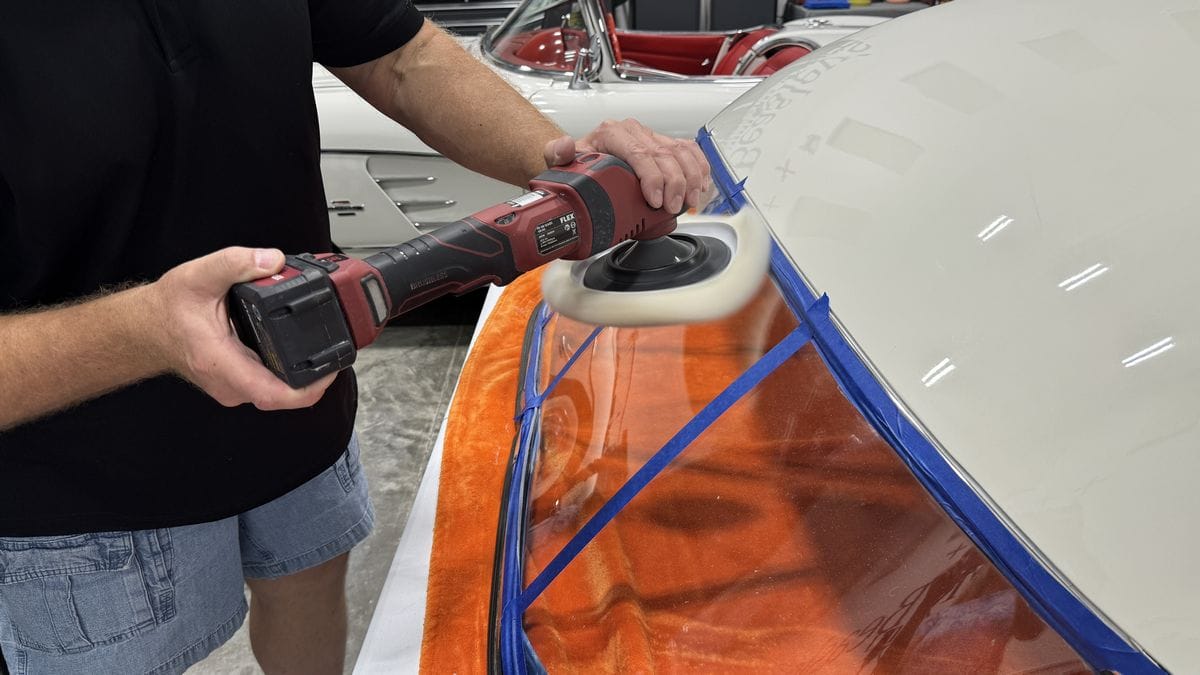
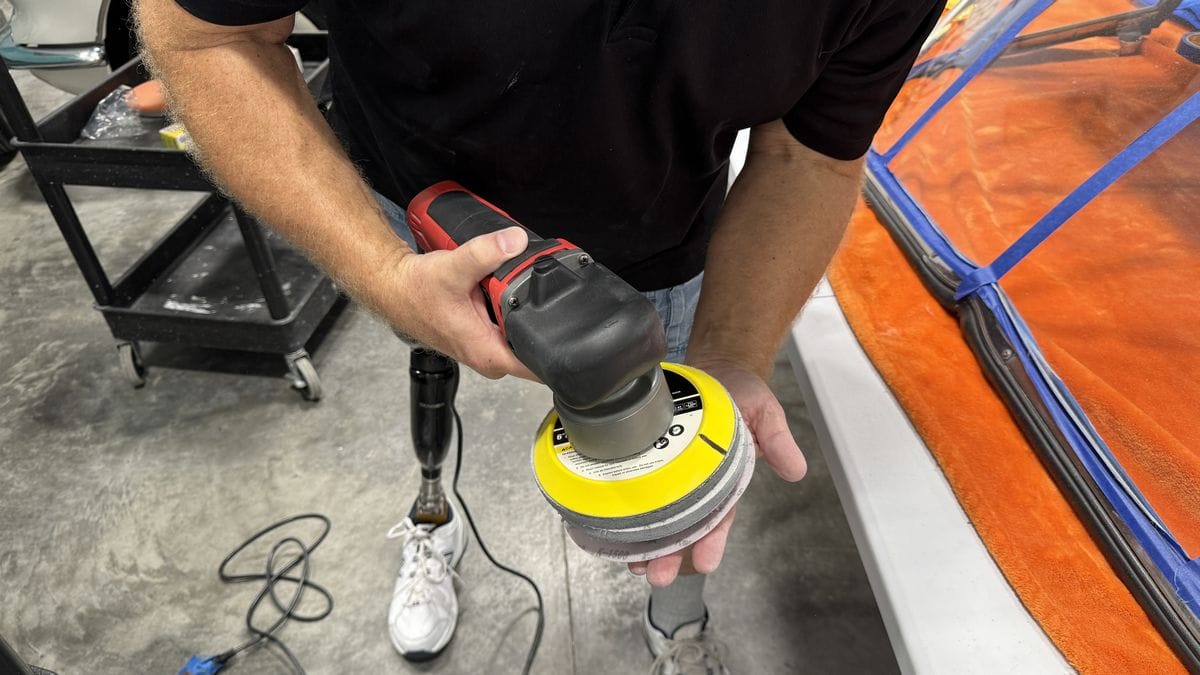
How to Polish Plexiglass with an Orbital Polisher
Recommended for Medium Scratches
Supplies Needed
- Orbital Polisher
- Foam polishing and finishing pads
- Compound
- Finishing Polish
- Lots of clean, uncontaminated microfiber towels
- High powered inspection light
Basic Steps
- Clean Surface & Tape Off Sensitive Areas
- (OPTIONAL) Decontaminate with Detailing Clay
- Apply Compound with Orbital Polisher & Foam Polishing Pad
- Step 4: Apply Finishing Polish with Orbital Polisher & Foam Finishing Pad
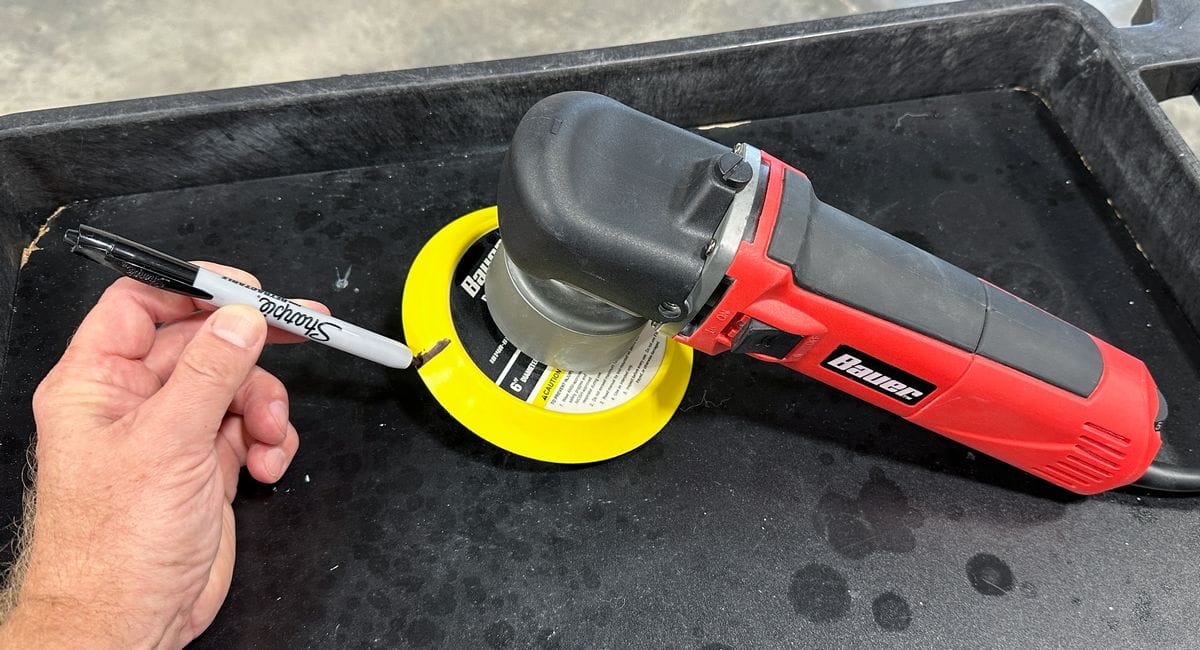
PRO TIP: Using a free spinning random orbital polisher? Use a black sharpie marker and place 2-3 lines on the outer edge of the backing plate. These marks on the back of the backing plate will make it much easier for your eyes to monitor buffing pad rotation or sanding disc rotation OR if the buffing pad or sanding disc is stalling out (not rotating).
Effective buffing and sanding take place when the tool is able to maintain a slow rate of pad or disc rotation. Place the face of the buffing pad or sanding disc against the surface to be buffed or sanded and turn the tool onto a slow speed setting. Next, turn the speed up until you see good pad or disc rotation.
Step 1: Clean Surface & Tape Off Sensitive Areas
Before you start, clean the plexiglass by washing or wiping clean with a waterless wash. Use painter’s masking tape to cover over and protect any gaskets around the window to protect them from splatter from the buffing process.
Step 2 (OPTIONAL): Decontaminate with Detailing Clay
If you do the Baggie Test and discover some form of bonded contamination on the surface of the Plexiglass windshield, just like car paint, you can use detailing clay to clay the Plexiglass to remove the contamination. Just keep in mind that claying, be it traditional detailing clay, or a clay substitute like a clay towel, mitt or disc, can put marring into the plastic that you’ll have to remove during the polishing step.
While polishing can remove bonded contamination, generally speaking, using a mechanical decontamination process will tend to be more effective than polishing alone.
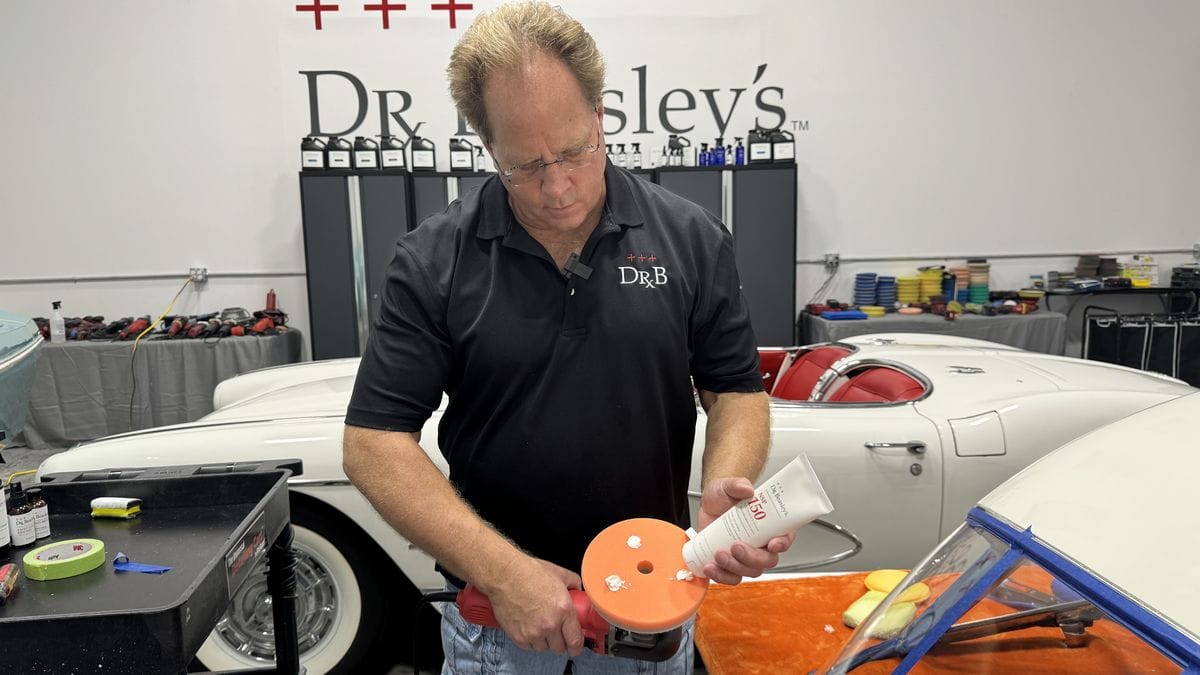
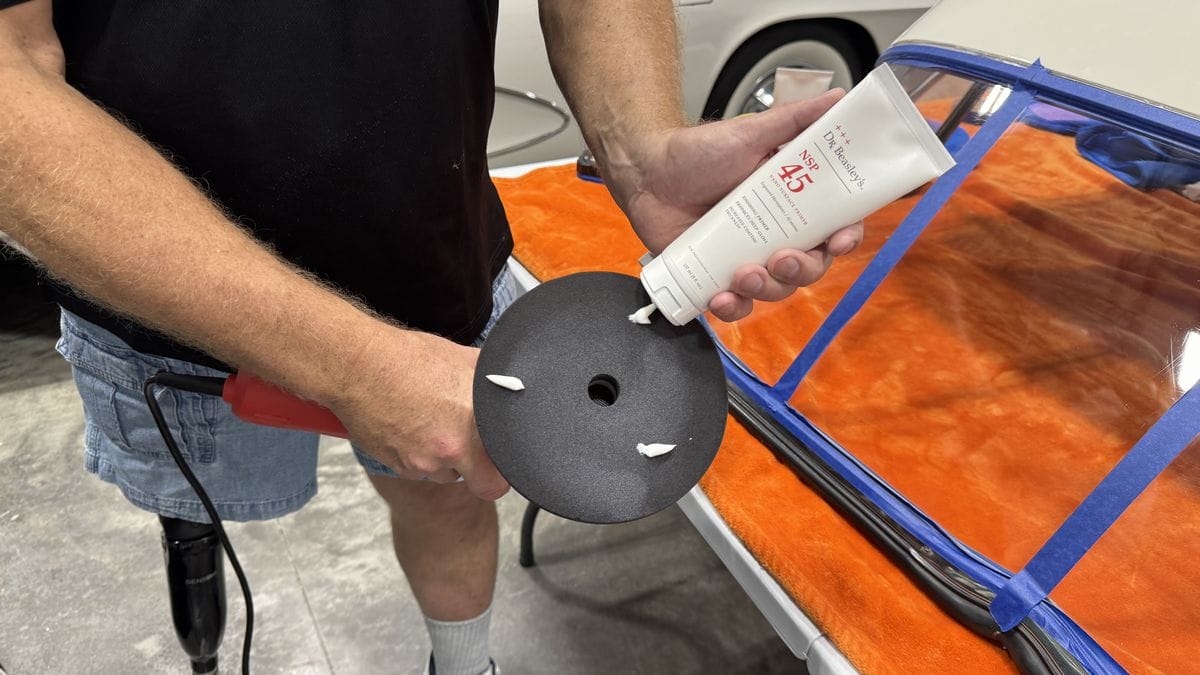
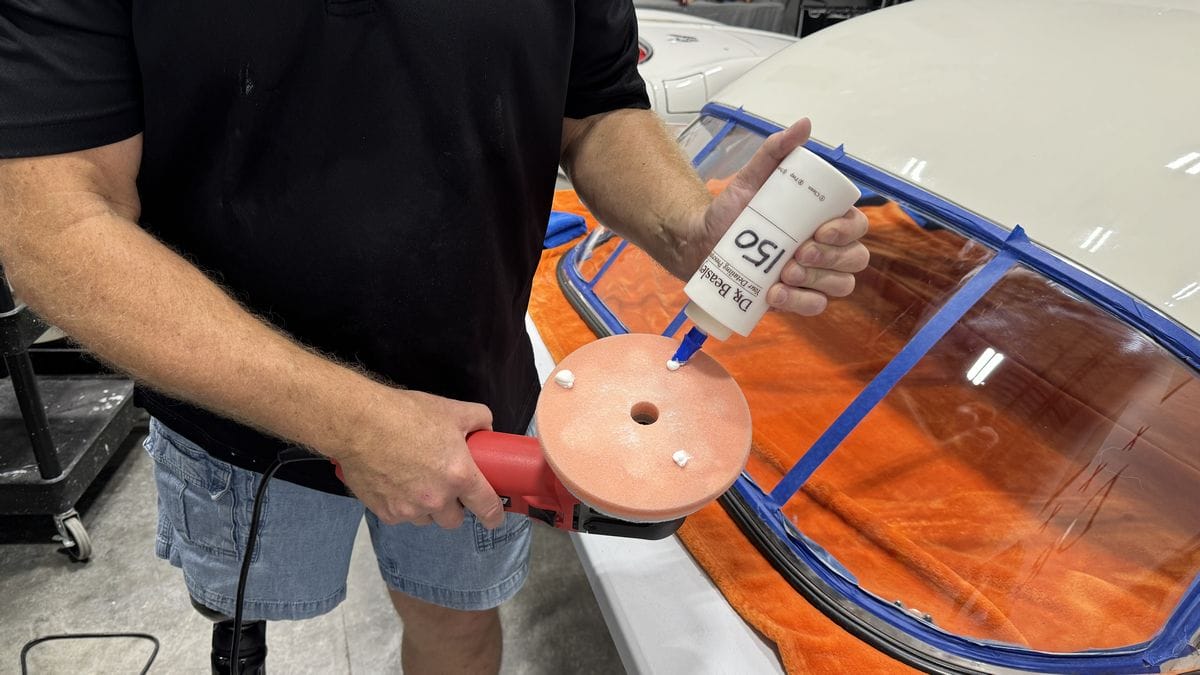
Step 3: Apply Compound with Orbital Polisher & Foam Polishing Pad
Apply four dime sized drops of compound to the face of the foam finishing pad. Place the face of the pad against the Plexiglass windshield BEFORE turning the polisher on.
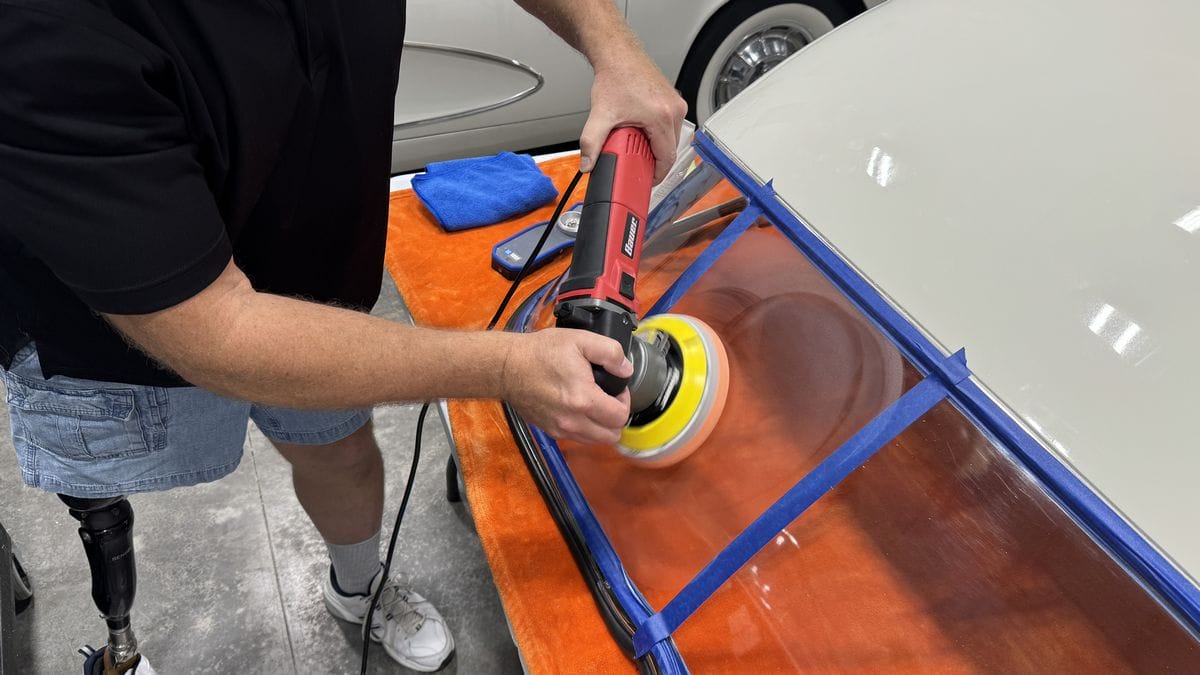
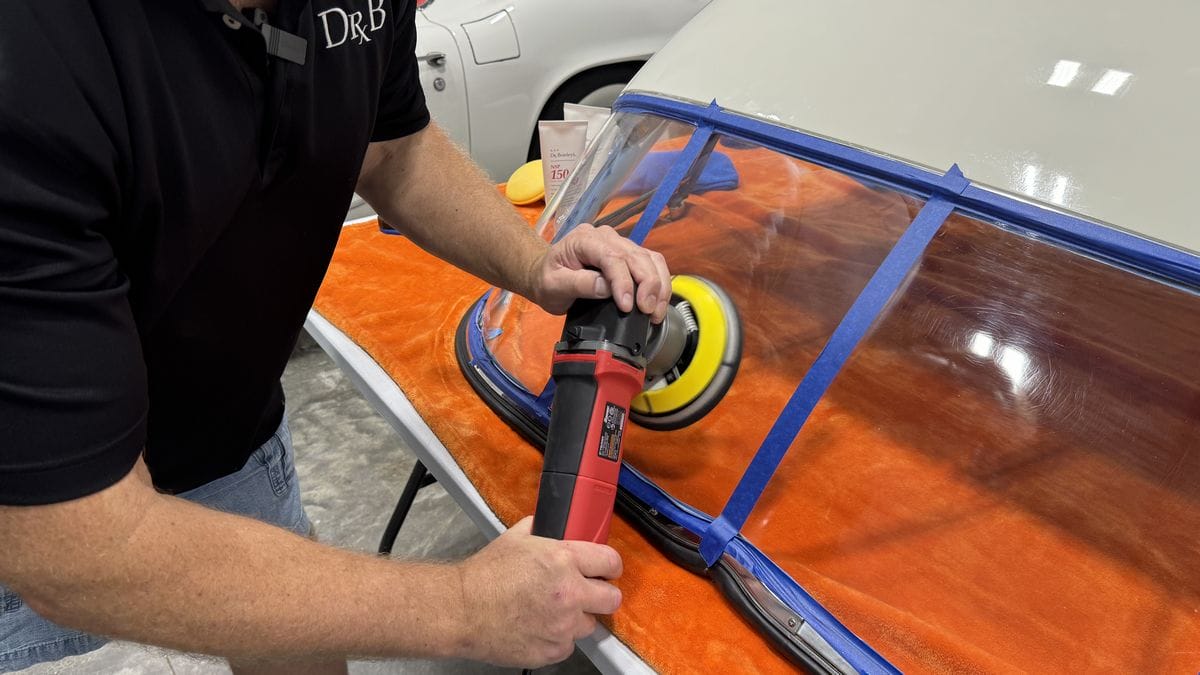
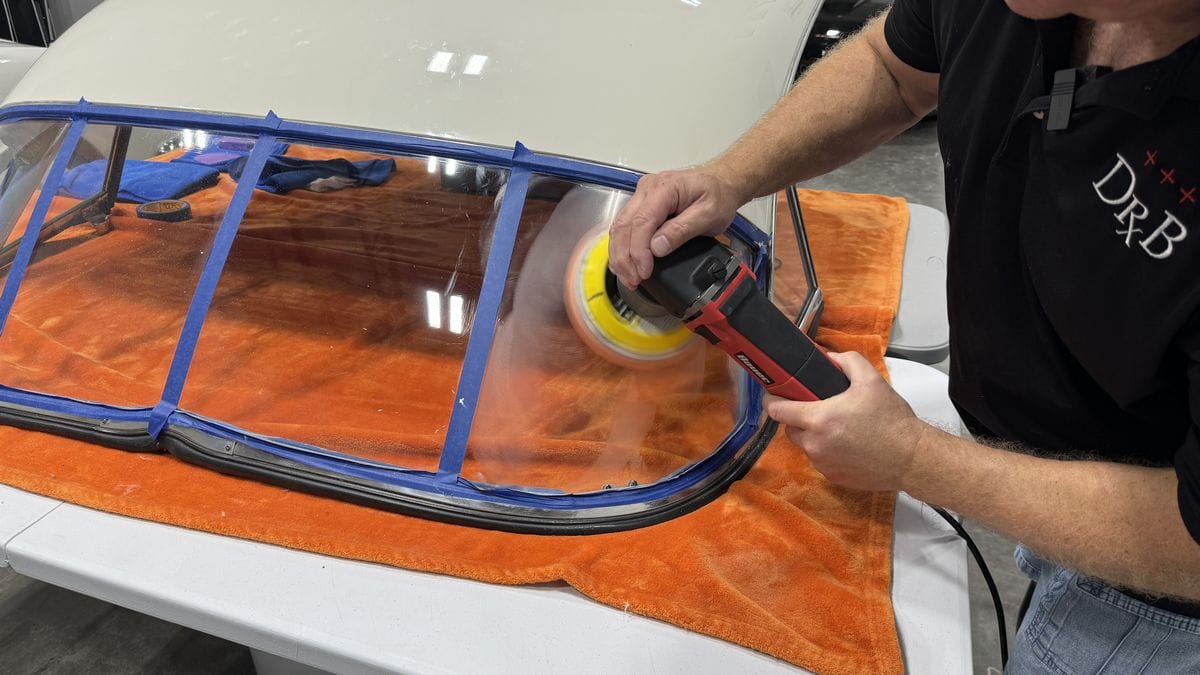
With the polisher on a medium speed setting, spread the product over the surface and then bring the polisher speed up to the highest setting and begin making a crosshatch pattern overlapping your passes by 50%.
Use a slow arm speed, moving the polisher slowly over the surface. Make around 8-10 section passes.
After buffing a section, turn the polisher off, carefully remove any product residue from the surface and inspect. If the results look great, move onto a new section and be sure to overlap a little into the previous section for good UMR or Uniform Material Removal.
If the defects are not removed to your satisfaction, re-apply fresh product and buff this section a second time.
Optional: You can also switch to a more aggressive pad, product or tool. Or increase the number of section passes until you have removed the defects to your satisfaction or your comfort level. In the case of buffing out Plexiglass, you could switch over to a foam CUTTING pad and use this with the compound.
Keep in mind that anytime you increase the aggressiveness of a process, for example switching to foam cutting pad, you will likely get better and faster defect removal but the more aggressive pad can leave behind its own cutting marks called micro-marring. No problem — this can be removed by re-polishing with a less aggressive foam polishing pad and a less aggressive polish.
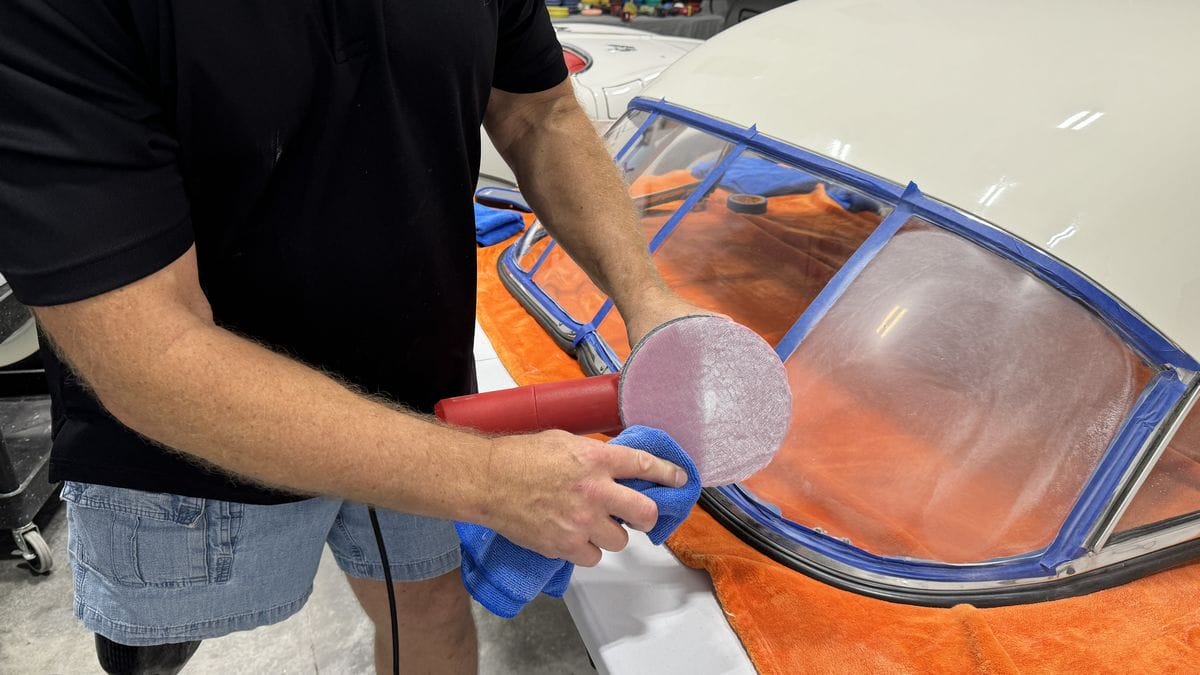
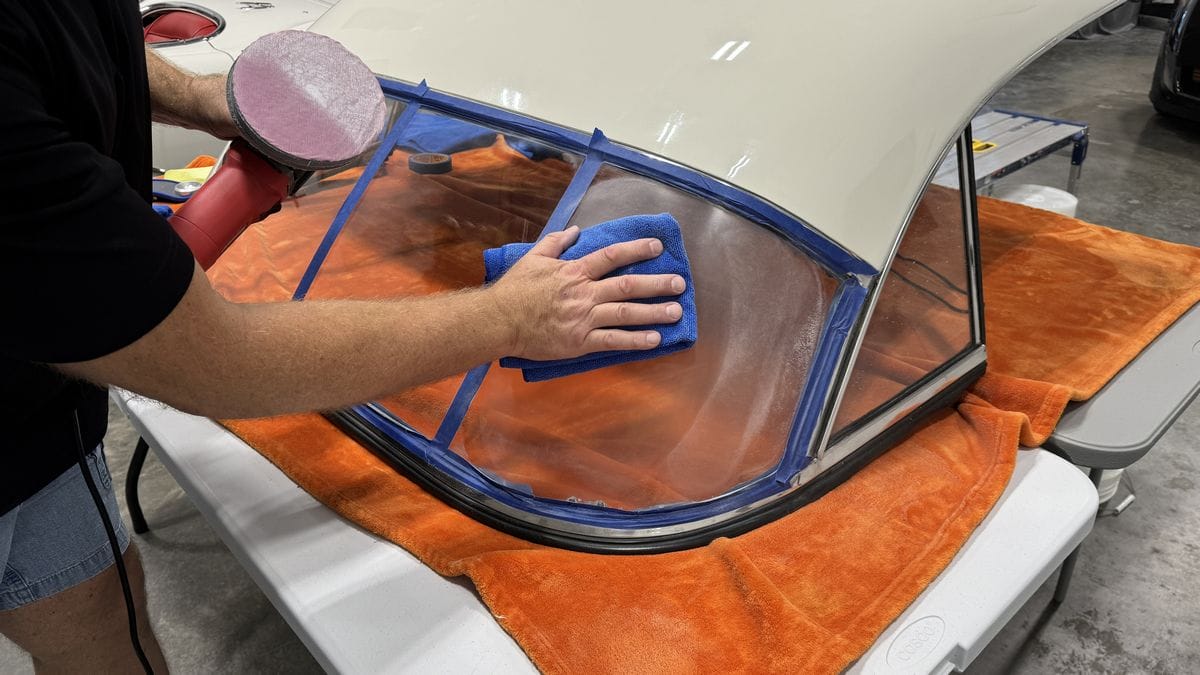
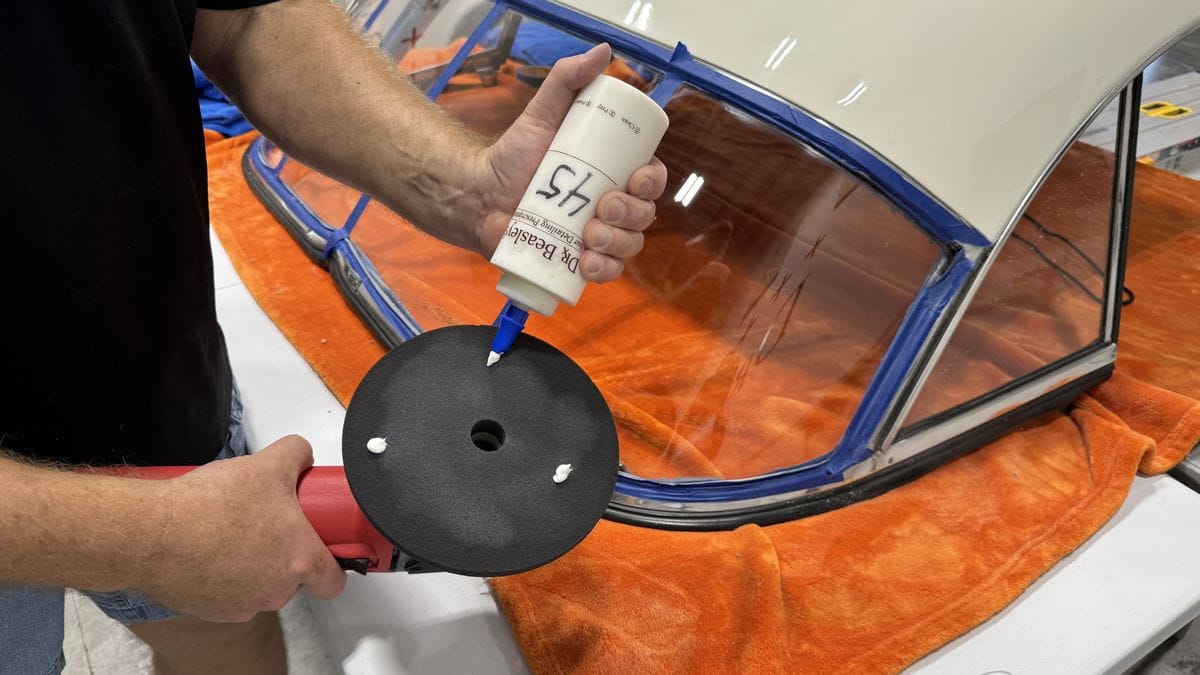
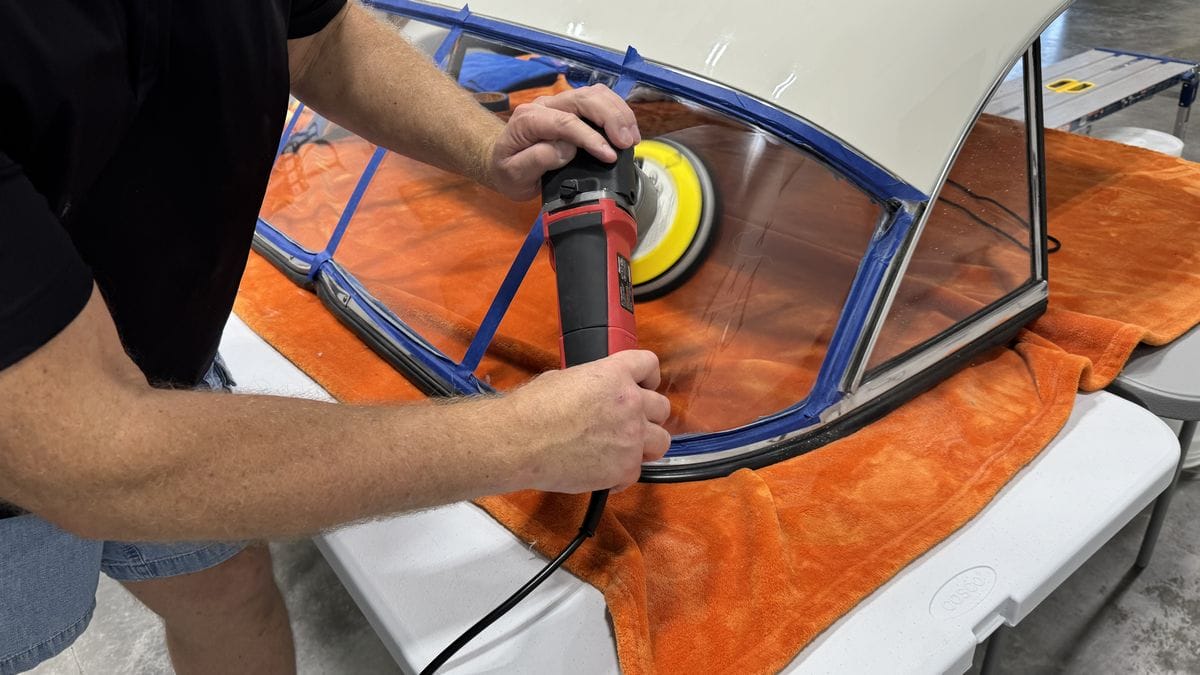
Step 4: Apply Finishing Polish with Orbital Polisher & Foam Finishing Pad
Plexiglass is soft and, in most cases, to get full clarity and perfection, you’ll want to re-polish using a finishing polish and a soft foam polishing pad. If the other two previous steps have worked to remove swirls and scratches this final step will maximize the clarity and final results.
Apply four dime size drops of finishing polish to the foam finishing pad and repeat the process from step 3.
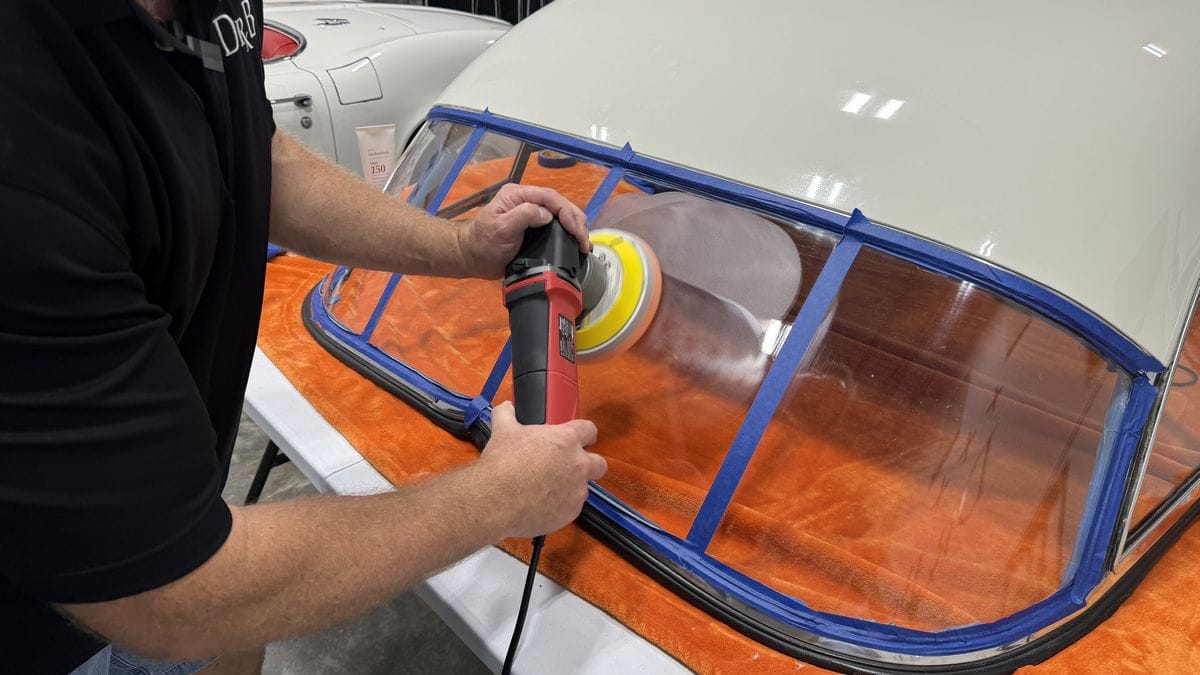
How to Polish Plexiglass with a Rotary Polisher
Recommended for Heavier Scratches
Supplies Needed
- Rotary polisher
- Wool cutting pad
- Orbital polisher
- Foam polishing and finishing pads
- Compound
- Finishing Polish
- Lots of clean, uncontaminated microfiber towels
- High powered inspection light
Basic Steps
- Clean Surface & Tape Off Sensitive Areas
- (OPTIONAL) Decontaminate with Detailing Clay
- Apply Compound with Rotary Polisher & Wool Pad
- Apply Compound with Orbital Polisher & Foam Polishing Pad
- Apply Finishing Polish with Orbital Polisher & Foam Finishing Pad
WARNING: Rotary polishers are powerful tools that can generate a lot of heat! That heat can easily deform the plexiglass while you’re buffing.
What I normally do is buff for about a minute and then place my clean hand on the surface where I’m buffing to check the temperature. If the plexiglass feels warm, you’re fine. If you jerk your hand away via your fight-or-flight reaction to prevent a burn? That’s too hot. Stop buffing in this area and allow the Plexiglass to cool down.
Wool or Foam Pads?
For Plexiglass in really bad shape, you’ll get more cut using a wool pad versus a foam pad. The only drawback? The fibers of a wool pad leave hologram scratches on the plexiglass surface. These can be easily removed with a foam pad on an orbital polisher.
In my opinion and experience, the faster and more effective results you can achieve using a wool pad on a rotary justify the use of this tool for the first step or major correction step despite the holograms inflicted.
Step 1: Clean Surface & Tape Off Sensitive Areas
Before you start, clean the plexiglass by washing or wiping clean with a waterless wash. Use painter’s masking tape to cover over and protect any gaskets around the window to protect them from splatter from the buffing process.
Step 2 (OPTIONAL): Decontaminate with Detailing Clay
If you do the Baggie Test and discover some form of bonded contamination on the surface of the Plexiglass windshield, just like car paint, you can use detailing clay to clay the Plexiglass to remove the contamination. Just keep in mind that claying, be it traditional detailing clay, or a clay substitute like a clay towel, mitt or disc, can put marring into the plastic that you’ll have to remove during the polishing step.
While polishing can remove bonded contamination, generally speaking, using a mechanical decontamination process will tend to be more effective than polishing alone.
Step 3: Apply Compound with Rotary Polisher and Wool Pad
Apply compound to the wool pad in a circle. This will help prevent product sling when turning on the polisher.
Before turning the polisher on, place the face of the pad against the surface to be buffed and then using a slow speed setting, turn the polisher on and spread the product over the area to be worked.
On the cordless FLEX PE-150 Rotary Polisher, I usually run this polisher on the 3-speed setting which is just under 1200 RPM. Make slow passes with light to medium pressure using a crosshatch pattern, overlapping your passes by 50%. For ease of maneuverability, use the edge of the wool pad to navigate near the edges.
Make 6-8 section passes, then wipe with a microfiber and inspect with a strong inspection light. If the results are not satisfactory, then you may want to add some more product and make more section passes.
As discussed above, wool pads and even foam cutting pads will leave their own scratch pattern behind called hologram scratches. These hologram scratches will be shallow because as long as you’re using great abrasive technology, the only thing leaving the holograms behind are the fibers of the wool pad or the coarse texture of the foam cutting pad.
Here’s the results after using a wool pad on a rotary to remove swirls and scratches. The plastic looks hazy and this is caused by the hologram scratches. This is normal and these holograms will be removed in the next step.
Step 4: Refine with Compound, Orbital Polisher & Foam Polishing Pad
Repeat step 3 using an orbital polisher and a foam polishing pad. If the results look good, move onto the next area and repeat the process. If there are still holograms left in the Plexiglass, you can:
- Re-polish only make more section passes using the same pad and product.
- Swap to a more aggressive foam cutting pad.
Step 5: Apply Finishing Polish with Orbital Polisher and Foam Finishing Pad
Apply the finishing polish to a foam finishing pad and repeat the polishing process. If the other two previous steps have worked to remove swirls and scratches this final step will maximize the clarity and final results.
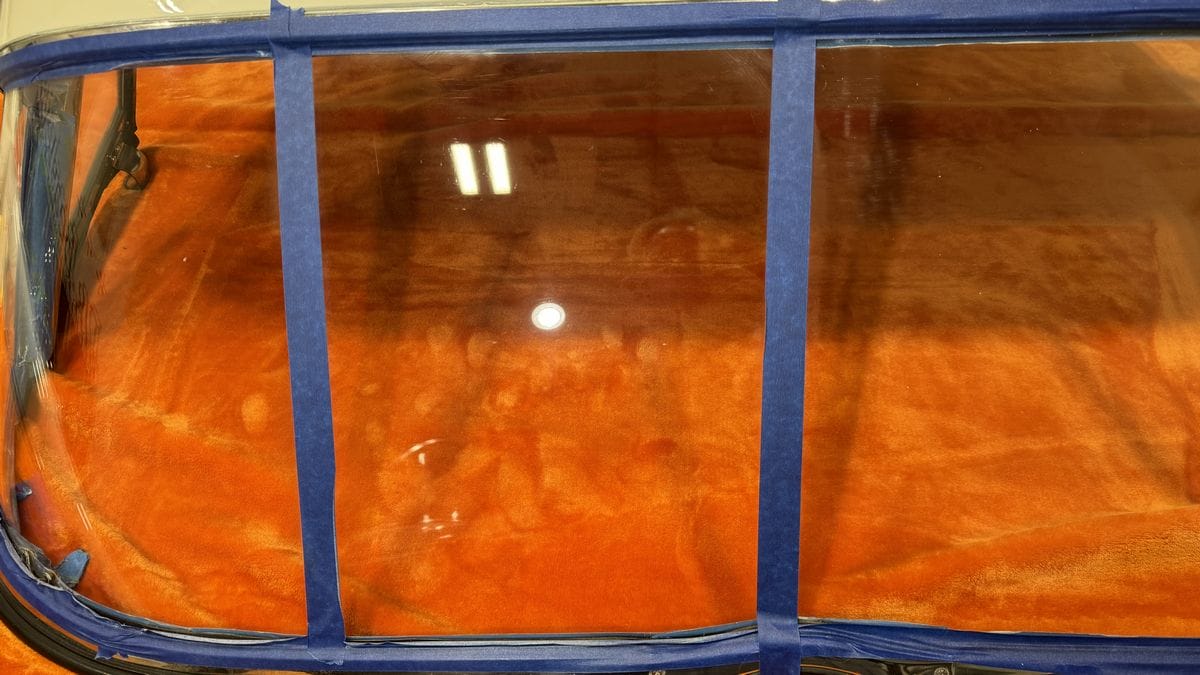
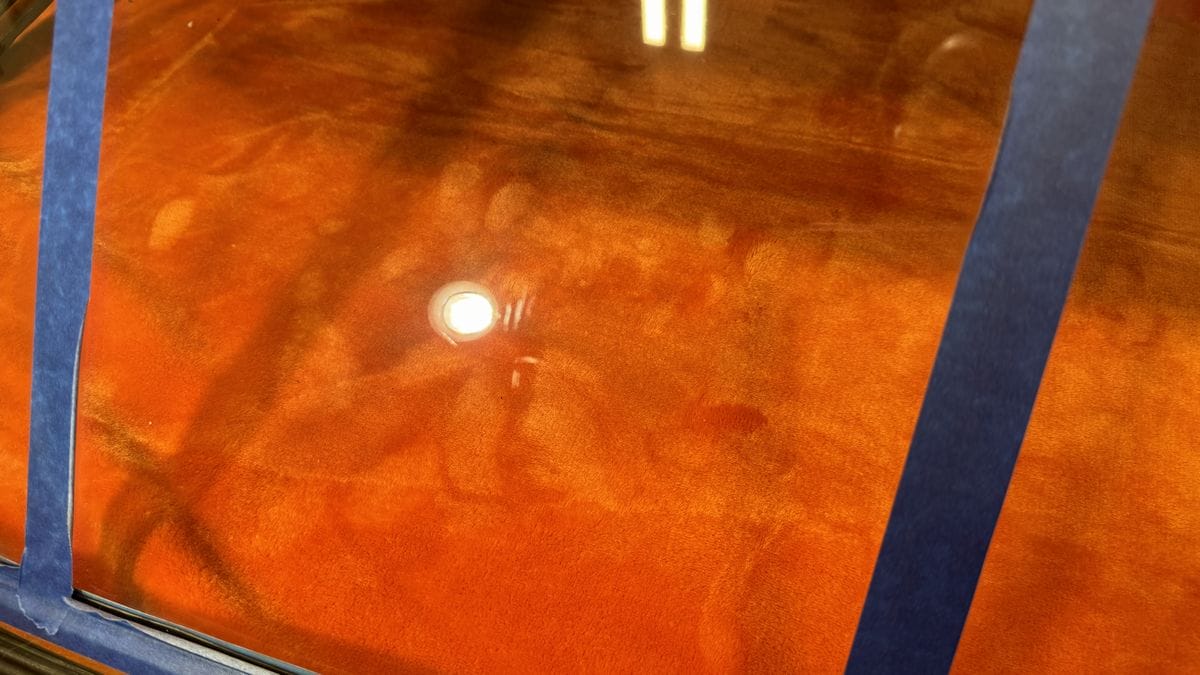
Here’s the final results for this rotary/orbital process. These final results are better than the first two approaches.
How to Sand Plexiglass with an Orbital Sander
Recommended for Deeper Scratches
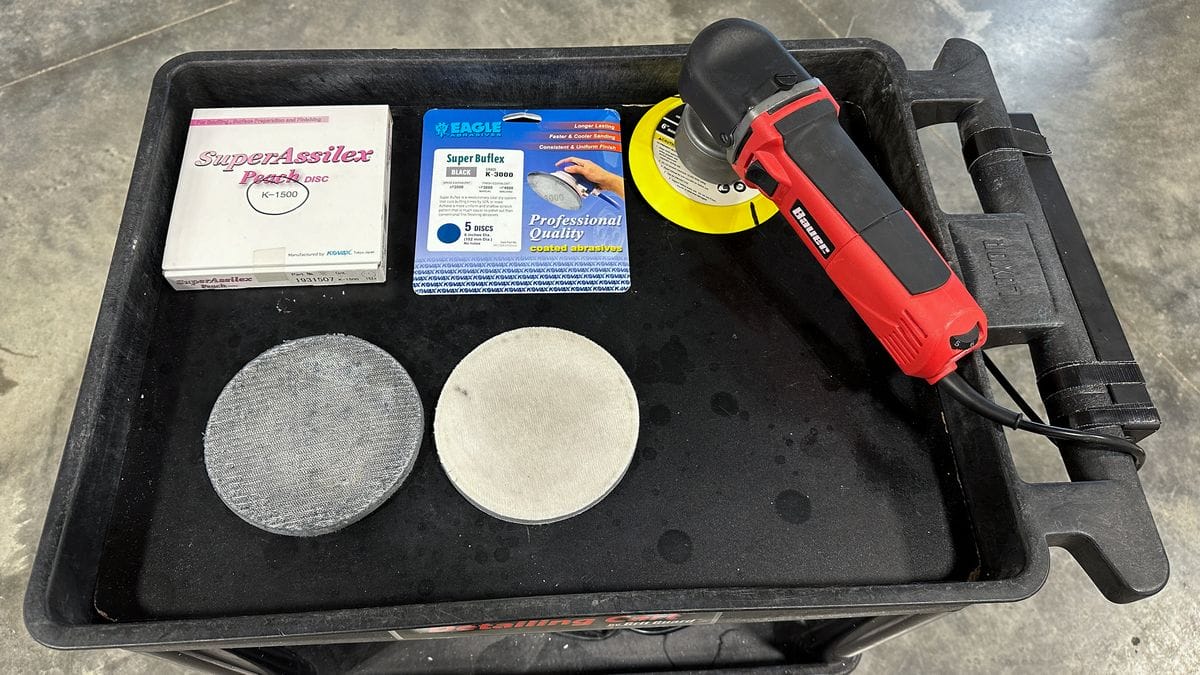
Supplies Needed
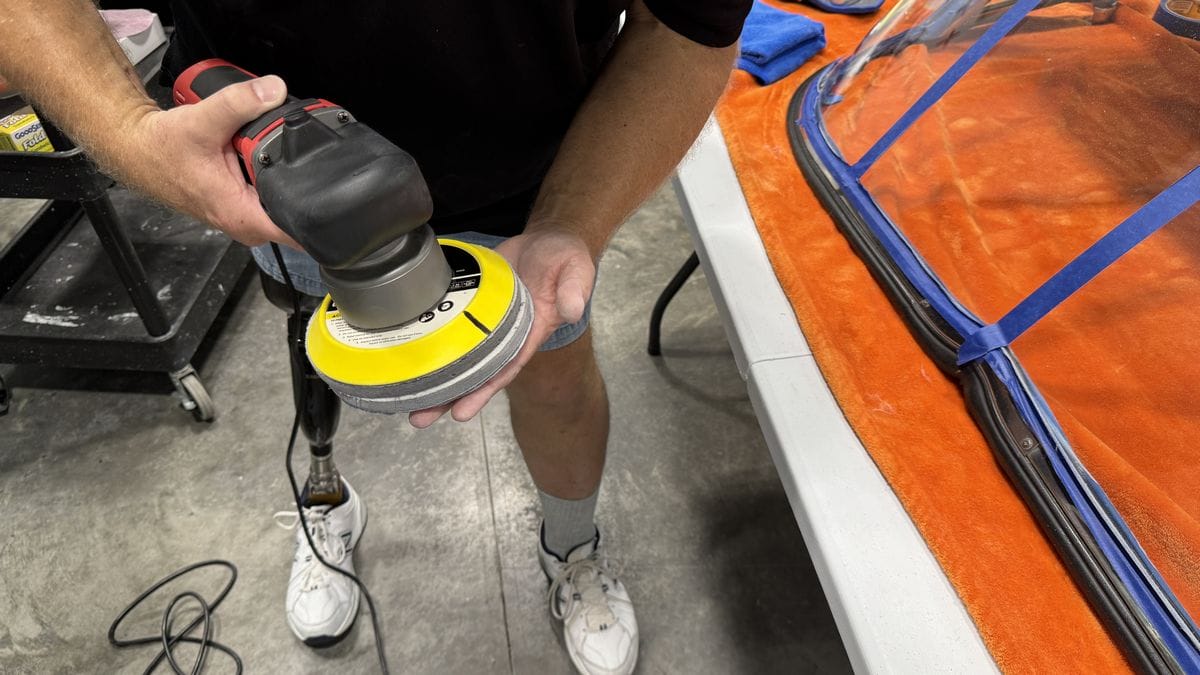
- Orbital sander or free spinning random orbital polisher
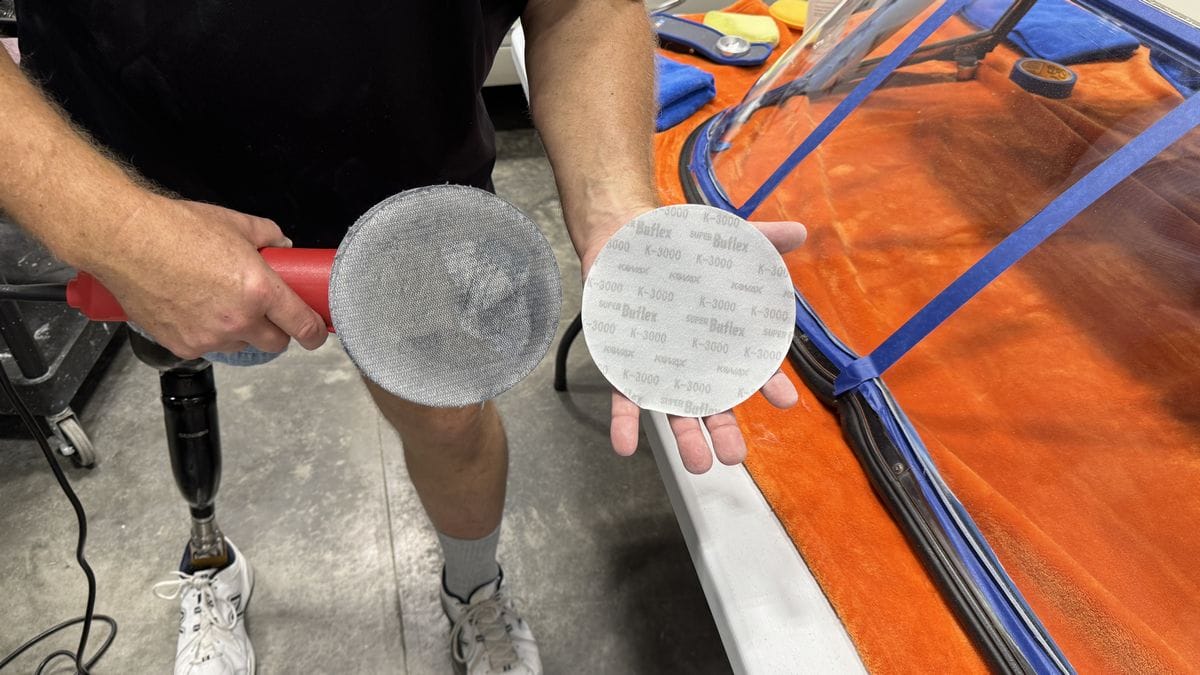
- 6” 1500 Grit Sanding Discs
- 6” 3000 Grit Sanding Discs
- 6” Foam Interface Pads
- Lots of clean, uncontaminated microfiber towels
- High powered inspection light
Basic Steps
- Clean Surface & Tape Off Sensitive Areas
- (OPTIONAL) Decontaminate with Detailing Clay
- Sand with 1500 Grit Sanding Disc
- Sand with 3000 Grit Sanding Disc
- Remove Sanding Marks with Compound on Rotary Polisher & Wool Pad
- Remove Holograms with Compound on Orbital Polisher & Foam Polishing Pad
- Refine with Finishing Polish on Orbital Polisher & Foam Finishing Pad
Always Do A Test Spot When Sanding!
Perform a “Test Spot” on a small area of the plexiglass before tackingling the entire surface. You want to be 100% sure you can remove the sanding marks.
Use The Least Aggressive Means Possible
The process in this example starts with 1500 grit sanding discs. You can test higher grits like 2000 grit and test to see if this will work. I know from experience, the scratches in this plexiglass window are deep enough that I’ll need 1500 grit to start with in order to level the surface and thus remove the scratches.
The higher the grit you finish with the faster, easier and safer the buffing process will be. For most neglected Plexiglass windows, you can start with #2000 grit. If this is not leveling the surface fast enough or effectively enough, then you can switch to #1500 grit. I’ve never had to use anything more aggressive than #1500 grit.
Step 1: Clean Surface & Tape Off Sensitive Areas
Before you start, clean the plexiglass by washing or wiping clean with a waterless wash. Use painter’s masking tape to cover over and protect any gaskets around the window to protect them from splatter from the buffing process.
Step 2 (OPTIONAL): Decontaminate with Detailing Clay
If you do the Baggie Test and discover some form of bonded contamination on the surface of the Plexiglass windshield, just like car paint, you can use detailing clay to clay the Plexiglass to remove the contamination. Just keep in mind that claying, be it traditional detailing clay, or a clay substitute like a clay towel, mitt or disc, can put marring into the plastic that you’ll have to remove during the polishing step.
While polishing can remove bonded contamination, generally speaking, using a mechanical decontamination process will tend to be more effective than polishing alone.
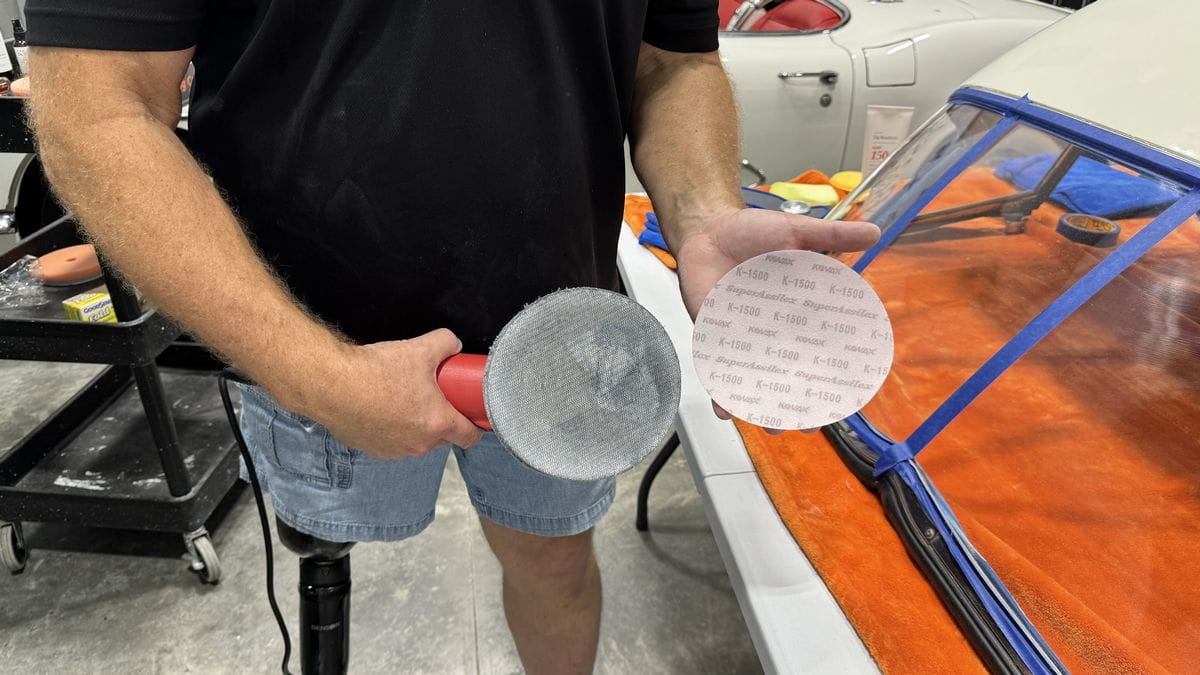
Step 3: Sand with 1500 Grit Disc
Start by sanding with a 1500 grit sanding disc at a speed of 6. As you sand or abrade the plexiglass, the small particles of plastic being abraded off the window will build up on the window and the face of the sanding disc. You need to clean this off both the window and the face of the sanding disc using a clean microfiber towel.
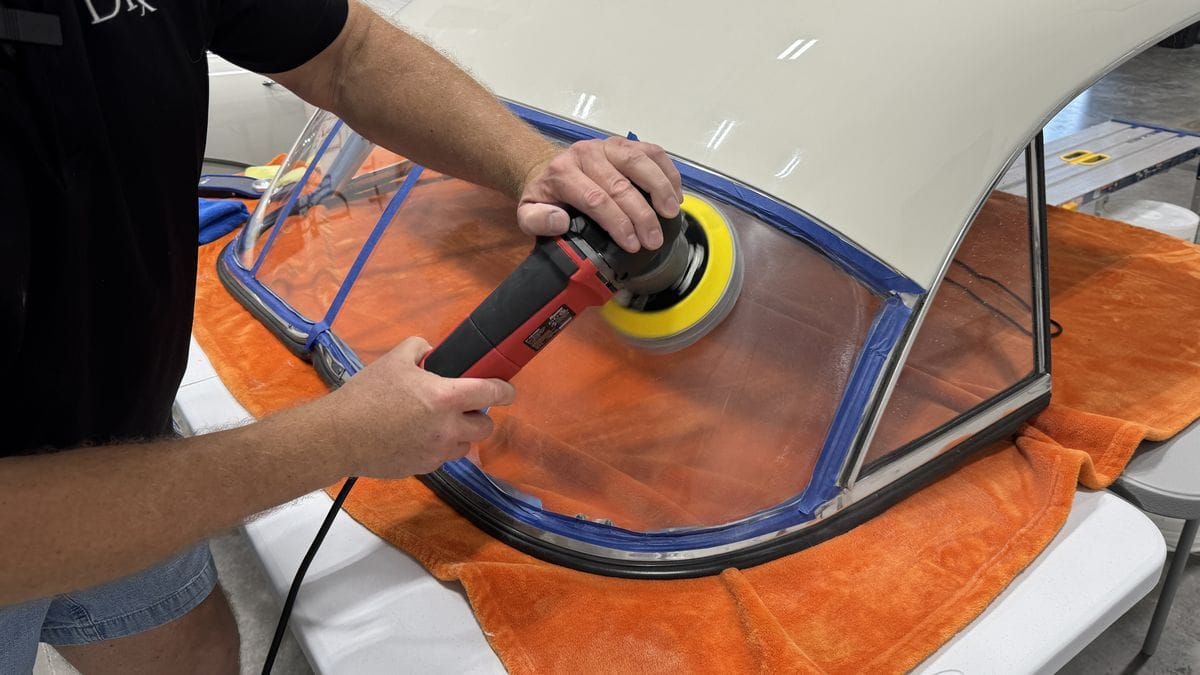
Step 4: Sand with 3000 Grit Disc
After sanding with the 1500 grit disc, I’m switching over to the 3000 grit disc. While normally I would move from 1500 to 2500, on this particular day I was out of 2500 grit discs so I used what I had, the 3000 grit discs. The good news is, the 3000 grit cuts as fast as 2000 and finishes out like 4000. So this combination is both safe and effective.
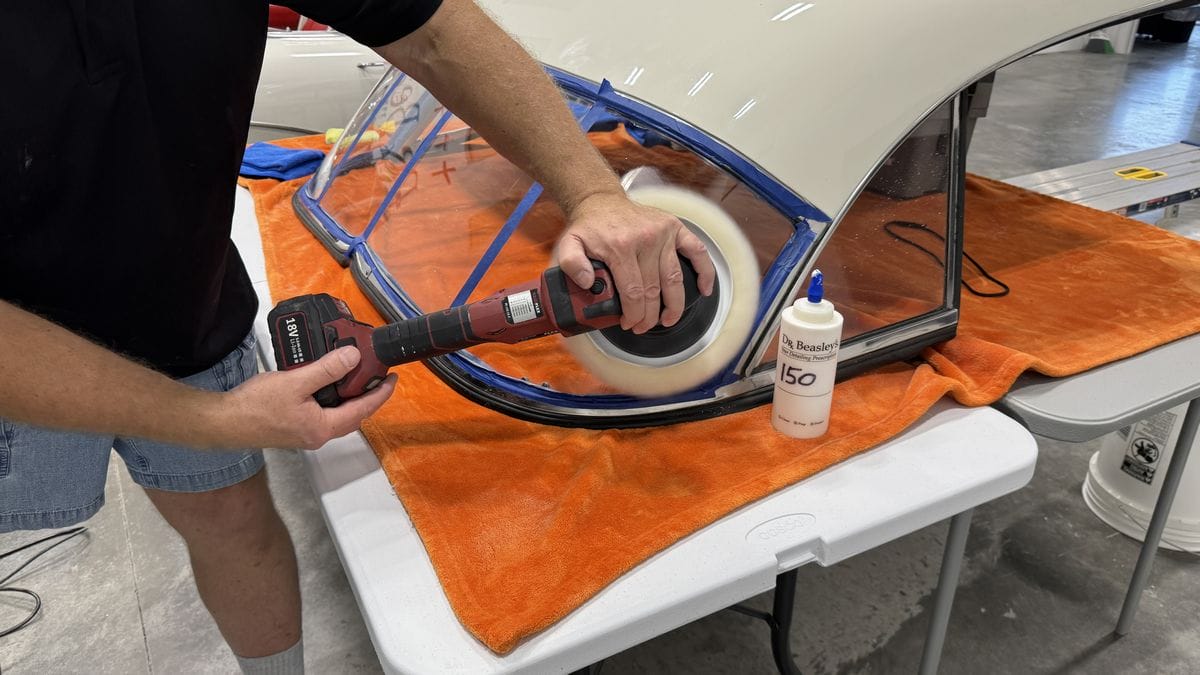
Step 5: Remove Sanding Marks with Rotary Polisher & Wool Pad
Use a compound with a rotary polisher and wool pad to remove the sanding marks.
Step 6: Refine with Compound, Orbital Polisher & Foam Polishing Pad
Remove the holograms inflicted by the wool pad using a compound on an orbital polisher with a foam polishing pad.
Step 7: Clarifying with Finishing Polish on Orbital Polisher and Foam Finishing Pad
Finish the plexiglass to a crystal clear appearance by polishing with a finishing polish on a foam finishing pad using an orbital polisher.
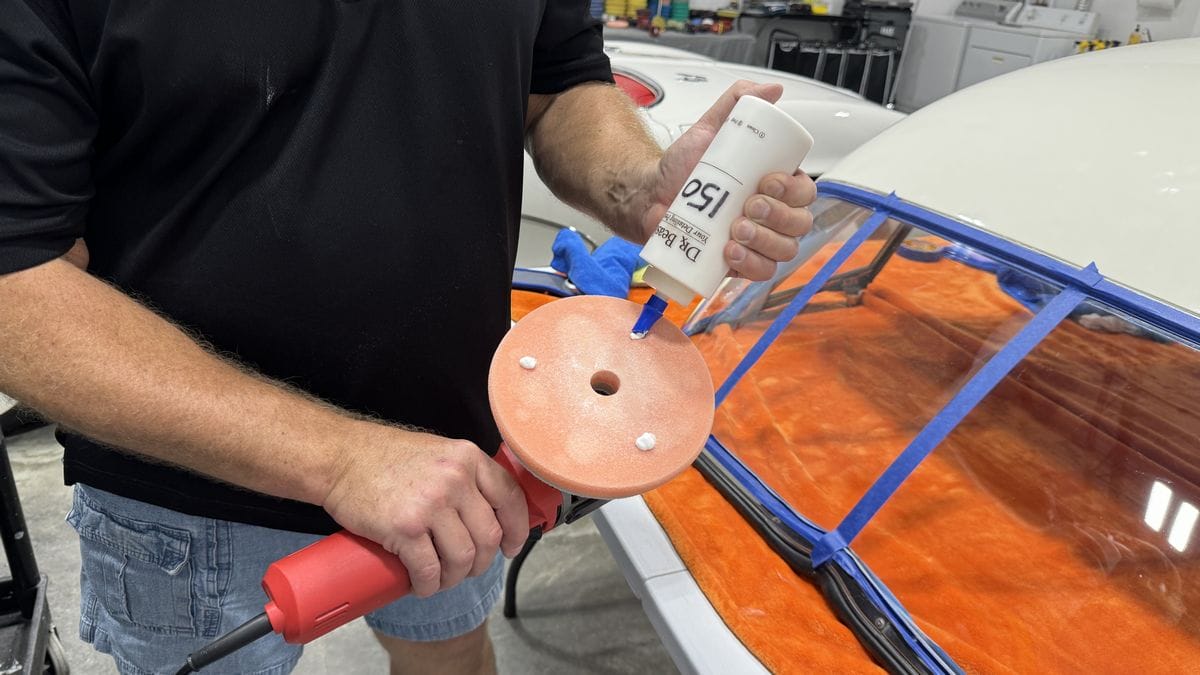
How to Protect Plexiglass with a Ceramic Coating
After all the scratches, water spots, oxidation and/or yellowing has been removed from the plexiglass, it needs to be protected so these pesky annoyances don’t pop up again in the future. A ceramic coating is usually the best option for protection as it’s the most durable.
Supplies Needed
- Ceramic coating (For this demo, we’re using Dr. Beasley’s Nano-Resin MX Kit.)
- Clean microfiber towels
- Applicator pad
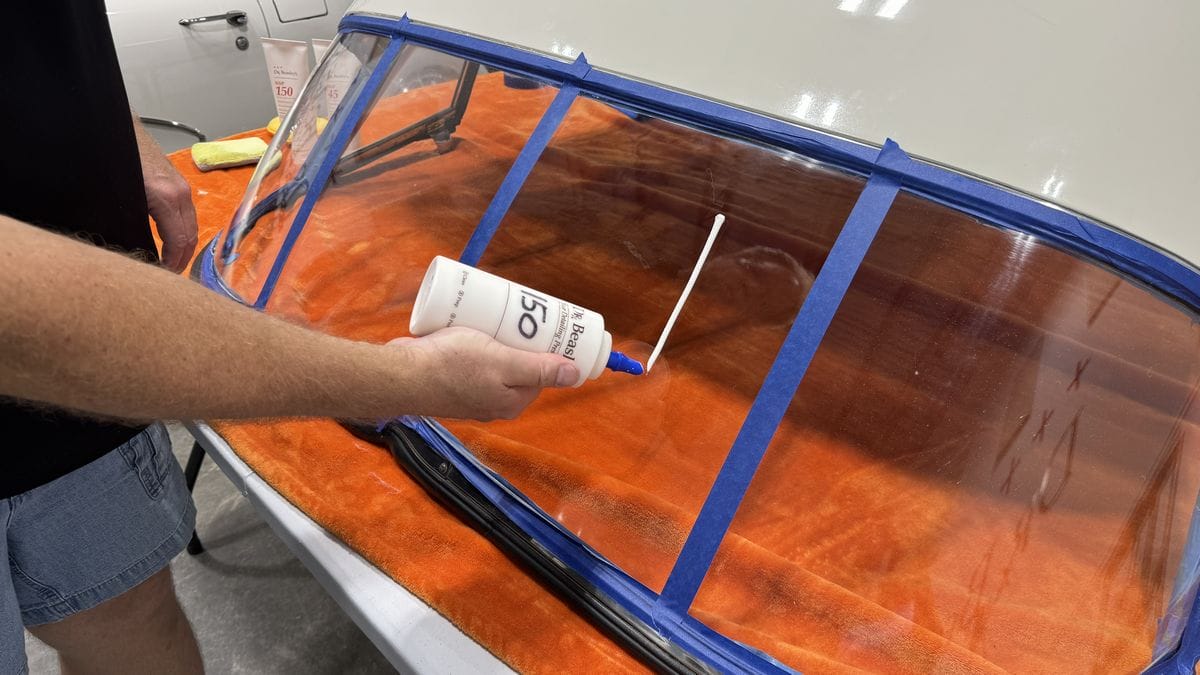
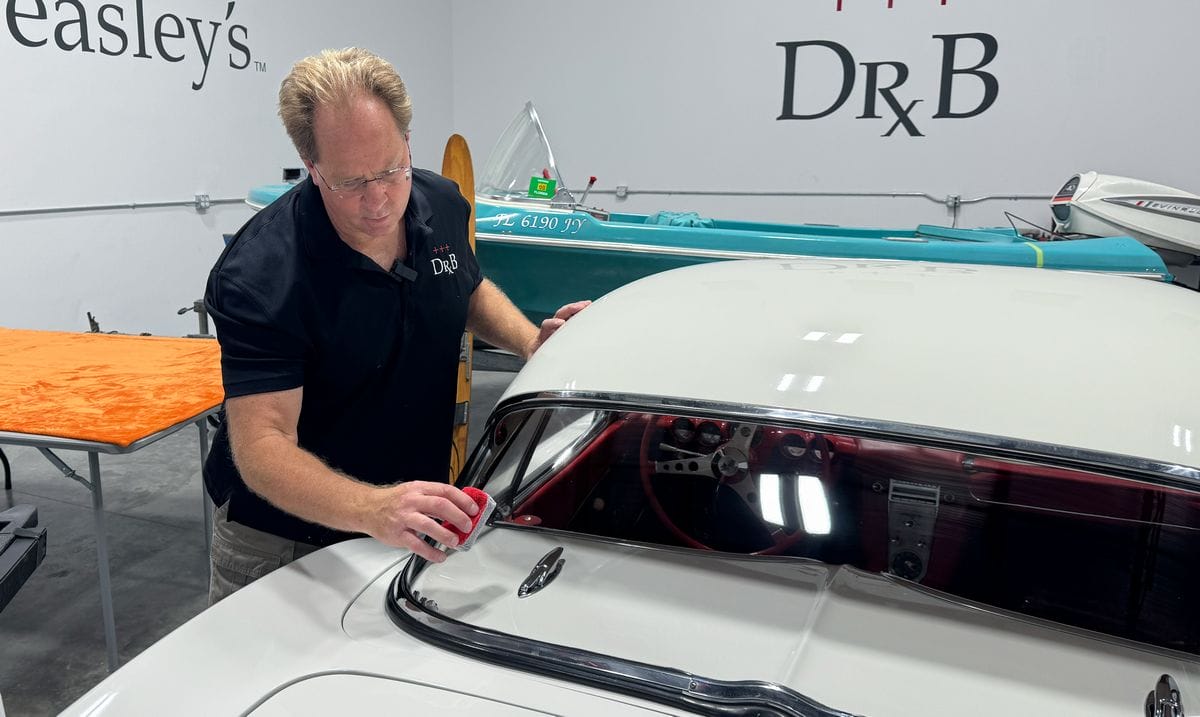
Step 1: Ensure Plexiglass is Clean
Start by ensuring the surface is clean and free of contaminants. Use a panel wipe to remove polishing oils if you did not use Dr. Beasley’s Nano Surface Primers to polish.
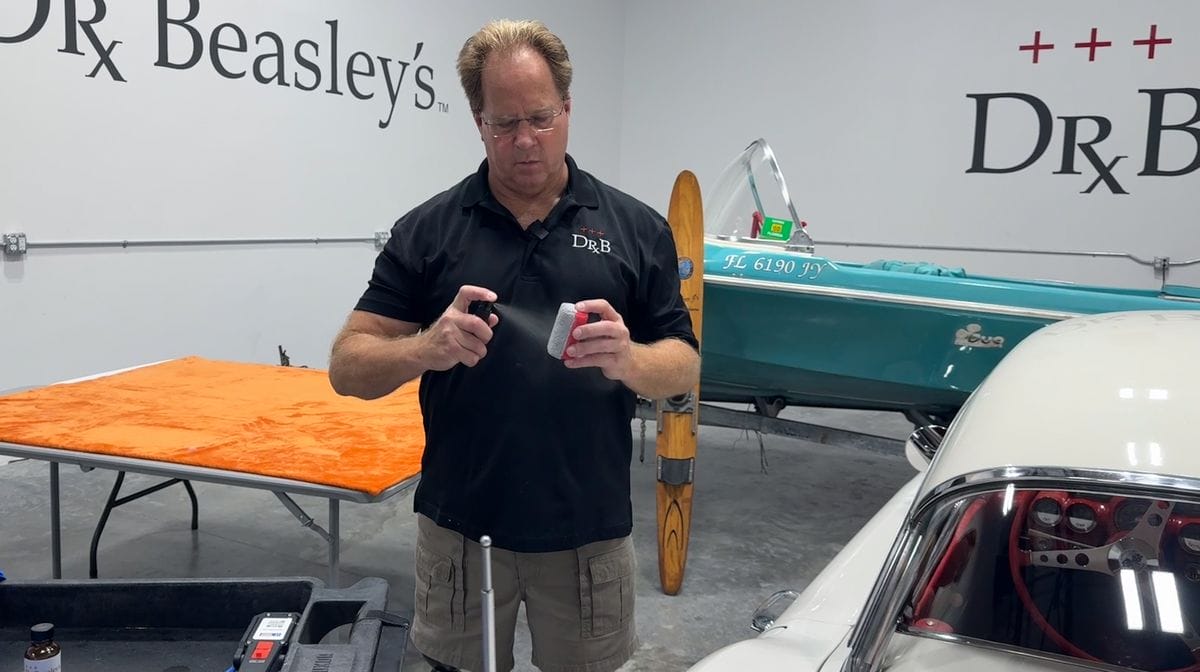
Step 2: Apply Prep Product
If you’re using a two-part coating system like Dr. Beasley’s Nano-Resin MX Kit, start by spraying the prep product (in this case Paint Coating Builder) onto the applicator then spread over a small area in an overlapping crosshatch pattern. Let sit for 2-3 minutes then wipe away excess with a clean microfiber towel.
Step 3: Apply Ceramic Coating
Next, apply a few drops of the ceramic coating (in this case Dr. Beasley’s Nano-Resin MX) to the other side of the applicator. Apply the coating to the plexiglass using the same overlapping crosshatch pattern mentioned above. Wait 30 seconds to 1 minute, then wipe away any excess to level the ceramic coating.
Plexiglass is a unique and useful type of plastic because it’s easy to custom form to any design and as you have seen here, it can easily be repaired even after 6 decades of wear-n-tear. The process shared here include the simplest method for removing swirls and scratches and that’s via working by hand with a combination of microfiber and foam applicators and of course, abrasive technology you can trust to remove the defects without leaving its own defects in their place. Then I shared 3 other methods to do the same type of correction work showing multiple tools, pads and even including sanding.
Within these 4 different methods, you the reader can decide which method works best for you, the tools you own and your own skill, experience and confidence allows.
IF you have any questions, need help or guidance, I always make myself available to assist.
At Dr. Beasley’s Future of Detailing car and boat detailing classes, we cover many of the tools, techniques and products shared in this how-to article. If you are interested in taking your knowledge and skills to a higher level, check out the dates and locations for upcoming classes here:
Dr. Beasley’s Future of Detailing Classes Schedule
If you have any questions about wool pads, pad cleaners or any other related topic, please post your questions in the comments section below.
Mike Phillips
Chief Education Officer for Dr. Beasley’s
Mike@drbeasleys.com
760-515-0444
Questions? Comments?
Email Us