


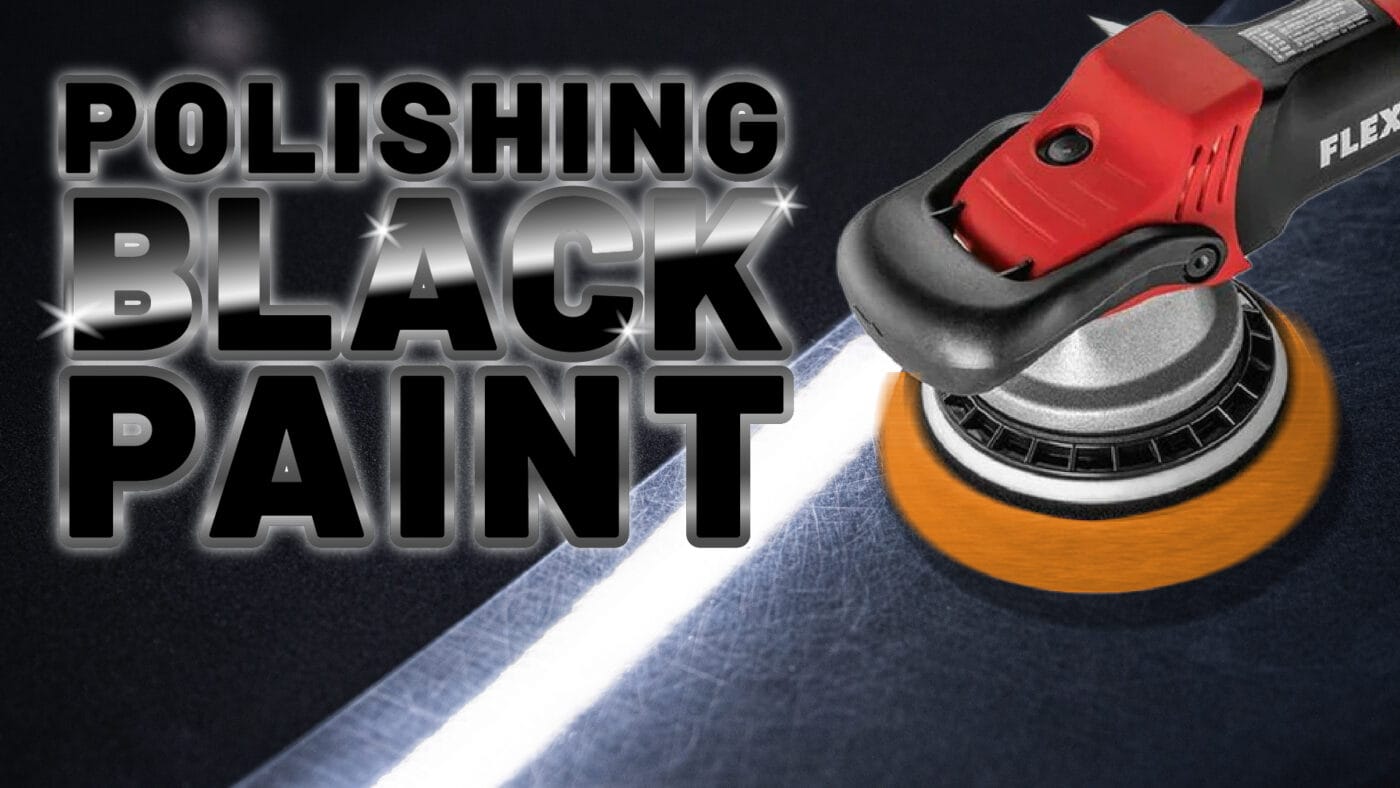
There’s a saying in the detailing world: “Black isn’t a color — it’s a full time job.” There’s a lot of truth to this statement, as black paint on cars is notoriously difficult to maintain. It’s not because it’s any more sensitive than other paint colors, but rather because it shows scratches and swirls more than lighter color paints. The darkness of the paint contrasts intensely with scratches, making them far more obvious than they would be on say, white paint.
This extreme visibility makes scratches even more difficult to remove. It’s hard to get deep black paint back to a mirror shine, and often detailers will find that even when they remove the scratches, the black paint lacks depth and richness. Considering this, you need an experienced paintwork correction professional to guide you through the process. Check out the edited video from our Chief Education Officer Mike Phillips’ recent livestream detailing class on polishing black paint below, plus a full transcript:
Below is an unedited transcript of the above livestream recording.
Okay, so what we have here is a base coat, clear coat, black finish. So modern paint technology on a classic street rod. And you can tell that it’s all swirled out. Can you come in here and do you need a light to even show it? Oh, God. Well, let me see that. Now I’m blind. I see little white lines. There you go, people.
It is totally yeah the whole car looks like this this is from being wiped hold on hold on I was going to show you see the water spots everywhere here so the first thing I got to do is the waterless wash but we’re going to go to the process to restore this back to a flawless finish so this gives me a chance to introduce a really cool product to some of you this is called prep wash And this is actually a product that Jim Lafeber, the man behind Dr. Beasley’s created, after he watched me cleaning a car with glass cleaner.
And he said, why are you using glass cleaner? And I said, because all, if not most, if not all of the waterless washes, which there’s a lot of great ones on the market, they also do things like have polymers, glossing agents, maybe carnauba, maybe… Things that you don’t want on the paint. Yeah, they’re like a finishing product. I’m trying to just get it clean. And as a professional, I tend to never wash cars like this because you introduce rust into places you cannot see.
Okay so we’ve got this thing wiped down so the next thing here’s the baggie test And I always tell guys to search around and just find the simple, cheap ones that have a fold top, not the Ziploc. You don’t need the zip. You’re not going to preserve a sandwich. Just come down here and then just feel it. And it’s not the worst car I’ve ever worked on, but it’s definitely contaminated. All right, here, be quiet for a second. Let’s see if we can hear it. Yeah. Yeah.
And so here’s the thing. So, you know, I’ve been teaching car detailing since 1987. And a most common question people will ask is they’ll say, well, Mike, won’t buffing take those contaminants off? And here’s the deal. Yes, buffing will. But if you’re using a foam pad like this or any kind of foam pad, what tends to happen is the foam in your product just tend to glide over the little bumps. They don’t actually remove it. I need that.
I left my product over there. Here’s a question for you. Sure. So the best way to move is to clay it. OK, say somebody doesn’t clay it. Could this happen? Say you’re, all right, you know what? I’m not going to clay it. I’m just going to use a buffing thing. And something that’s lodged onto the paint then get lodged into your pad, could that not induce scratches?
That could happen. It means you really got some crap stuck on the paint. But the biggest thing is you just keep in mind, if you’re buffing with foam pads and orbital polishers, in most cases, that combination is not going to remove something that’s bonded so tight that it didn’t wipe off when I wiped it off with the water to swash.
Okay, so it’s got a bond on there. It isn’t going to wash off when you wash the car a normal way. So this is the key word. The most effective way to remove bonded contaminants is using… either a detailing clay. This is a clay towel. What this is is polymerized rubber with a pulverized abrasive in it. So some people think clay works because it’s sticky, and it does kind of work because it’s sticky.
But clay has a pulverized abrasive in it. And when you rub this over the finish, it literally sands off the contaminants. And with clay, it sticks it onto itself. With this rubber, polymerized rubber interface here, it builds up on the surface, but you can take and wash it off. And then if you drop it, you can use it over and over again.
I’m a big fan of clay and detailing towels. I’m pretty much just using this one because it’s closest to my hand, as I like to say. Okay, so I just clayed this section here. Get all the contaminants off. And there’s a lot of reasons to clay a car. I’m an RIT for the IDA, and one of the things I always test guys on is why do you clay a car? Now, of course, remove the contaminants, but there’s other deeper reasons, and here’s a couple of them.
Gloss comes from a smooth surface. So if you’ve got bonded contaminants, that means you’ve got texture. You don’t have a smooth surface. So simply clay in the paint will actually amp up the gloss, even if the swirls and scratches are still there. So that’s one thing.
The other thing is, When you go to apply a wax, synthetic paint sealant, or a ceramic coating, all those three categories of products are formulated by a good chemist to bond to urethane paint, not contaminants. So one of the most common questions is, is how long will that product last? Five years? One month? And the answer is, it depends on how the surface is prepared to accept the product. Makes sense to me.
Okay, so let’s go ahead and this has been clayed and cleaned. Now let’s just take an inspection of the paint here. Oh, yeah. You can just leave it right there. OK. That’s just trash. It’s not a show car. Well, it’s a show car. It just doesn’t look like one right now. OK. So then we’re going to talk about doing a test spot. And you never know if the paint is hard or soft or if the defects are deep or shallow until you do the test spot.
So I’m going to start out doing my test spot. And this is, again, what I teach in our classes, is you don’t want to start with a cutting pad, whether it’s fiber, wool, or foam. You don’t start with the finishing pad this those are the two extremes finishing cutting so you want to start right in the middle of foam polishing pad and I’m going to use the Beast XC 3401 VRG it’s always important I always show people use your thumb to the backing plate look around look around as you’re dropping down it’s kind of like a spaceship landing on the moon you want to be perfectly centered up.
Even if you’re using orbital, you still want to be centered up. Okay, so then if we come up here, I’ve got the Z1, the 150, the 95, and the 45. This is our ceramic all-in-one, so I’m not using that because I’m going to do a show car detail of this. Here’s our most aggressive product, the 150. Here’s our least aggressive, our finishing polish, so 95 is where I’m going to start out. And I’ll see if a foam polishing pad and NSP 95 will remove the defects to 95. our expectations.
And you really, these are very concentrated products. They’re $39.99 a tube. You don’t want to be wasting this stuff. They work exceedingly well, and you get what you pay for in this world if you haven’t learned that already.
Okay, so I’m going to do a section out here. about the size of a microfiber towel. Let me go ahead and put a tape line down. That’s all on you. I’m going to put the tape line down, but I’m going to share something real quick. Whenever you do a tape line, never buff on the tape line. You know why, Yancy? Yeah, because you leave it there. Because you’ll leave a line in the paint. A lot of times you can’t get it out. Yeah, we did that once on a video, remember? A couple times, I think. And I actually wrote an article. The name of the article is called The Line, Don’t Leave One.
Okay, so would this work for you? it’ll work to show before and after yes sir okay one thing I’m just going to tell everybody up front is I’m not going to buff on it I’m going to buff up to it but not on it and for those of you at you know out in the internet land when you’re doing your test spot you do not have to put a tape line down so don’t think that it is something that this is for camera work yeah this is to show you guys a hard line line yeah okay.
So we had four drops of NSP 95. I’m going to turn the speed down. Just kind of try to prime that pad. Get some of those abrasives moving around on the surface of the pad. And now I’m just gonna make, I’m gonna make, I’m gonna spread the product out. That doesn’t count. Then I’m gonna make four solid section passes and we’ll stop the polisher and inspect.
Normally I would run up to about eight just as a random general number. But the thing is, is if we run this up to like eight, nine, 10, 12 section passes, you’ll never know at what point the scratches came out. So you undercut how many you do when you’re doing the test. So I’m gonna do four section passes.
That way you’re not overworking yourself. You’re not overworking it, yeah. But you want to know what it took to get it out. So let me just, I’m going to spread this out. There’s the area I’m going to work. Okay, so that didn’t count. Now I’m going to bring my speed up and make four solid section passes. One. Three. There is four.
Now we’ll wipe off and inspect the results. And Yancy, from your point, you can see better than I. But that looks like… About 80. I would go 99. Oh, no. Yeah, your angle is a different angle than mine. I’m seeing deeper scratches. Okay, you see a few deeper ones. But the mass swirls compared to here… Well, the swirls, yes, but there are some deeper scratches in there. Random… R-I-D-S. RIDS. RIDS. Random Isolated Deeper Scratches.
Okay, so if APAS has got me to almost… Oh, hold on. Before you get any more, because I just saw the replay on the iPad. Light? Light. And let’s get some light on it so that way those out there in the internet land can go back towards the back of the building. There you go. Right there. All right. So that’s what we got. Now come towards me. Yeah, just slightly. See, I’ve seen scratches right there. Yeah, and that’s at the end of my reach, too. Oh, here. Yeah. Careful. Don’t drop that on the car. Yeah, there’s just a couple scratches.
And the film that you see is, what do you call it? That is the part that helps the ceramic we’re going to apply bond to the paint. Let me wipe that off. All right. There. Yeah, I mean, it’s 90%, 95%? It’s pretty much. But here’s the big takeaway.
I fixed that with a foam polishing pad, a medium cut polish, four section passes, and I wasn’t even pushing on that thing hard. So what that tells me is this paint is on the soft side. I wouldn’t call it super soft, but it’s definitely not medium. It’s in the soft range. And then the good part about that is it’s not gonna kill me to try to correct it. I’m not gonna have to get a wool pad with a compound on a rotary polisher and come down and buff out this entire car.
So let me go ahead and make four more section passes, and then we’ll inspect and then I’m gonna switch over to a Rupes Rupes and because it’s soft and I brought Flex and I brought Rupes up here but generally speaking a free spinning random orbital polisher will finish out nicer on softer paints than a gear driven orbital polisher so that’s the primary difference free spinning versus gear driven so I’m not gonna add any more product Here’s a little tip.
Bring that cord up under your arm. There’s one. Now I’m pushing down a little bit. Two. Three. So that makes a total of eight solid section passes. You want to know why six is afraid of seven? What’s why? Because seven, eight, nine. Seven, eight, nine. You are, you know, you missed your calling. I am. Never know. America’s got talent. You missed your calling, Seinfeld. Okay, Rupes. This is the Bigfoot 15. This is actually the number six given to me by Rupes when they introduced this tool. I love getting low serial numbers, just kind of a, you know. Hold on, hold on. For everybody out there in the real world, look, touch.
Okay, so this is a free spinning tool and that means you can take your fingers and freely spin the backing plate or the pad This one here if I try that over here. It’s it’s not gonna spin. It’s gear gear driven, so that’s the primary difference and Okay, so now for this I’m gonna go.
This is a soft foam finishing pad and and notice there is a black mark already on the backing plate and that’s to help your eyes to monitor pad rotation and now I’m gonna switch over to our finishing polish which is the NSP 45 and again I’m just gonna put three pea-sized drops and you know what a pea-sized drop I’m not okay but you’re learning I had to change everything when I started using this abrasive technology because it’s so freaking concentrated it’s even hard to get a pea-sized drop out of the tube so but there’s my best three pea-sized drops okay Get my cord out of the way.
And just here’s a little tip. Whenever you’re buffing, a lot of guys buff like this. Take your hand and go like this. Now this cord is up instead of dragging across the paint. That’s a good tip. Okay, so low speed, just kind of prime the pad. I sort of move the abrasives over the surface there. And I’m going to bring my speed up to about… I’m going to go with the four to start with. Just the weight of the tool. You see the black line is moving. It’s not staying in one spot. So he has good rotation going on.
Not pushing too hard. Not buffing at an angle. See it coming around? All this cricket, it just stops. So you’ve got to hold the pad perfectly flat to the surface. I forgot what that was. That was one. OK. So here’s two. Three. Four Five There are six solid section. And here’s the thing about that. Usually when you’re when you’re doing the initial paint correction step that, you know, the heavier cut, you know, you need more passes. But at this point, I’m just refining to make sure that finish is perfect. So when they park this thing in full sun, it looks as good outside as it does in here.
So what is your saying? I say it’s it’s an art form. Polishing paint is an art form, not a grinding process. I’ve had people argue with me and say, Mike, it’s a craft. Well, it’s a craft to you, but you know, what I do is I bring the human elements of care and passion to the table because I care about this car and I’m passionate about what I do. Okay, so there’s wipe off.
Now, before we come down and take a look at the before and after results, I’m going to go ahead and show you one of the key benefits about the NSP primers, including the Z1, the ceramic AIO. At this point, I’m going to use, this is bad technique, but I’m going to I wanna do bad technique. Are you gonna show bad technique? I was gonna show bad technique, but here’s what I’m gonna do. I’m gonna put a bag up here, and I’ll show the products I’m gonna use. So this is a two-component ceramic coating. And the first component is the paint coating builder. So what this is gonna do is it’s gonna prep the paint for the coating, and it’s gonna add incredible slickness and gloss at the same time.
So just… I’ll give it one mist and then take the applicator pad. These come with the auto fiber coating savers, and I usually use gray for the paint builder, red like flashing red lights. Danger, danger, Will Robinson. I always use that for the coating part, but then I have a color code I can follow. Then you just apply this like a normal coating. In normal coatings, you use a crosshatch pattern when you can. If the panel is long and thin, then you just go the direction of the length of the panel and try to overlap wherever you can.
So here’s three. And there’s really no magic to four. The whole big picture idea is uniform coverage. You know, uniform coverage for uniform protection. Okay, then you want to let that sit for about two to three minutes before you wipe it off as it does this little magic voodoo on the paint surface. All right, hold on. Let me stop you right there. So I noticed that there’s residue left from the compound so that you can go straight with it. You might want to explain that because somebody might be seeing that.
If you look at that nano gel over there, that nano gel is the carrying agent. And everything that’s in these products is inorganic. Nothing’s organic, including the nano gel. So there’s nothing in there that’ll interfere with the bonding of the coating to the paint itself. And the paint coating builder kind of asks Chris, Chris Racana, our director of success, likes to use the analogy of Velcro. Once you lay that down, you put the coating on top, it makes that super strong bond. So everything we’re doing in this process, you’re always walking forward in the process, never going one step backwards.
So while that’s waiting, let me just talk about this. When they turn the cameras off tonight, the first thing I’m going to do is I’m going to take a lint roller and clean this beautiful canvas cloth top. And then I’m going to take this drop cloth and I’m going to completely cover it up. And why is that, Mike? Because… If I, by accident, throw some splatter up here in the buffing process, which I don’t do, but if I did, you gotta come back and try to get it off, and usually you leave a little marring in the cloth.
But the other reason why is just from experience, I’ve had so many convertibles go through my classes that normally we cover it up, and this one time, We covered everything up, but we were using cover-up towels, and we ran out of towels so the center wasn’t protected. And I’m thinking, well, that’s okay. No one’s gonna lift their polisher up in there at high speed and hold it there and throw splatter up there, and guess what happened? You jinxed yourself. That’s what happened. Someone got splatter in the middle of the canvas top.
So nowadays at any class, I cover everything up because I don’t know who’s going to. Okay, so then we’ll just come back down here at this clean microfiber towel. And one of the things, if you ever use this product, you can instantly notice is how slick that goes. Look how deep, dark, and black it is also. So whenever you’re working on a clear coat, keep in mind you’re not working on pigmented part.
You’re working on just pure resin. So when you’re working on a single-stage paint, like we got back here at the 58 Impala, the goal is to remove the oxidation swirls and scratches and bring out what’s called… the full richness of color for the pigments. When you’re working on clear coats, you want to maximize the clarity of the clear coat because it’s like a window to the base coat. You want to be able to see it without anything interfering with your vision. So then the next thing we’re going to do is we’re coming back.
I’m going to switch over to the red side and give this a little shake. I don’t think it needs it. But I just watched the Talladega Nights, you know, shake. Oh, my goodness. And bake. Shake and bake. Okay, so there’s the Nano Resin MX, and I’ll just leave that there. And then same thing, repeat the process.
And of course, I’ll do this to the entire car at some point. But I just want to demonstrate just how easy this product is to use, and that you can go right over the NSP150, 95, 45, and even the Z1 with no bonding. In fact, this will help to ensure that you don’t have coating filler from an improper bond. So there’s a lot of benefits to the nano or the NSP primer technology. Now that there, you wait about 30 seconds to a minute, carefully wipe it off.
You should always inspect your towels. And you know what I keep right over here, Yancy? let me guess your tweezers I keep tweezers out here and I have a if you look over here I got a little laundry hamper just use whatever you can to try to keep your towels off the ground and keep it from getting contaminated now this this actually just looks like some white fuzz.
And it is because at one of my last classes, someone thought they’d do me a favor and make a wash load, and they mixed my terry cloth towels with a load of microfiber towels. Aw, that was kind of them. Look, it’s a gift that keeps on giving. It is the gift that keeps on giving.
But this probably went scratch, but I’m kind of picky about my towels, so I’m going to wipe that off. Especially on black paint that you just got done perfecting. Exactly. And then look at it, but also feel it with your hands, because a lot of times your hands will detect things that your eyes cannot see.
Then fold it four ways. And what I always do is pull the edges up in my thumb, lay this down flat, kind of scrunch the towel between my fingers, then come down and just gently wipe that off. Flip to a clean, dry side. I’m going to pull the tape off here and give it a second wipe. And whenever you pull tape off, Yeah, let me get on that angle. Let me share a tip that’ll save you from buying someone a paint job.
Pull it low and slow at an angle. Give the adhesive time to release. I was doing a class with a longtime friend, and I was just getting ready to explain how to do this, and he grabbed the tape and lifted it straight up and pulled the paint off. Had to take it to the body shop where it was originally painted and have the whole hood repainted to make it right. So please take my advice. Do not lift straight up.
And the reason why is because when you lift straight up, you know, if there is any kind of what’s called adhesion issue between the paint, the primer, or any of this stuff, you’re going to pull that paint right off. Okay. Okay. Okay, come down here and check it out. All right, where’s your light? Here, give it to me so that way I can move it with the camera. Okay, there you go. Yeah, you know what you’re looking for.
All right. Hold it up a little higher. I’m trying to find it. There it is. All right, so there’s the before. There’s the after. So let me bring the camera back. Before. I was more in the middle there. After. After. before after does that look good yep it does so um I love these lights but they always blow everything out not to what real world is but that is the process that I’m going to use for the rest of this car and I have to tell you I’m thankful that the paint’s not hard I wish it was a little harder than it is because the biggest problem with soft paints is usually the owners can’t take care of paint like this Just, you know, you’ve got to make sure your wash mitts are clean, your drying towel is clean.
I mean, if you use compressed air like a leaf blower, that’s one thing, but a lot of people don’t have those. You know, detailers have them, but a lot of car owners don’t. So if they’re drying with some sort of drying towel or they’re wiping towels, they’re not inspecting them, this paint won’t last into that condition for very long.
yeah I know they’ll wash until the first time they wash it or wipe it and then moving forward the the what I’m going to show the owner here is as a professional and I just shared this in all my detailing classes it seems like common sense.
When you detail cars professionally always show your customer how to take care of your work so I always show them how to carefully wash it using the multiple towel system then I show them how to maintain it and in the real world if you think about it most people all they know is this how to push the button start the engine I mean that put the windows up and down that’s all people know so help them out.
But anybody can use a spray-on wipe off product like the bead hero so then again clean town look I finally got you trained to put the labels out awesome I know you have just spread that around flip to a dry side I use the two towel method but you get the idea and now it is super super slippery before now it’s really slippery people love having their paint feel slippery but that is the show car process I’m going to use on this car.
I’m thankful I don’t got to use the NSP 150 I did have blue foam cutting pads down here to test in case the first process I tested didn’t work to my expectations and if I really needed to I got microfiber pads and I got wool pads and rotary polishers I mean we could have done whatever it takes but the key thing is always do a test spot first and always use great abrasive technology. All right. That was a lot.