


Last Updated August 6, 2024
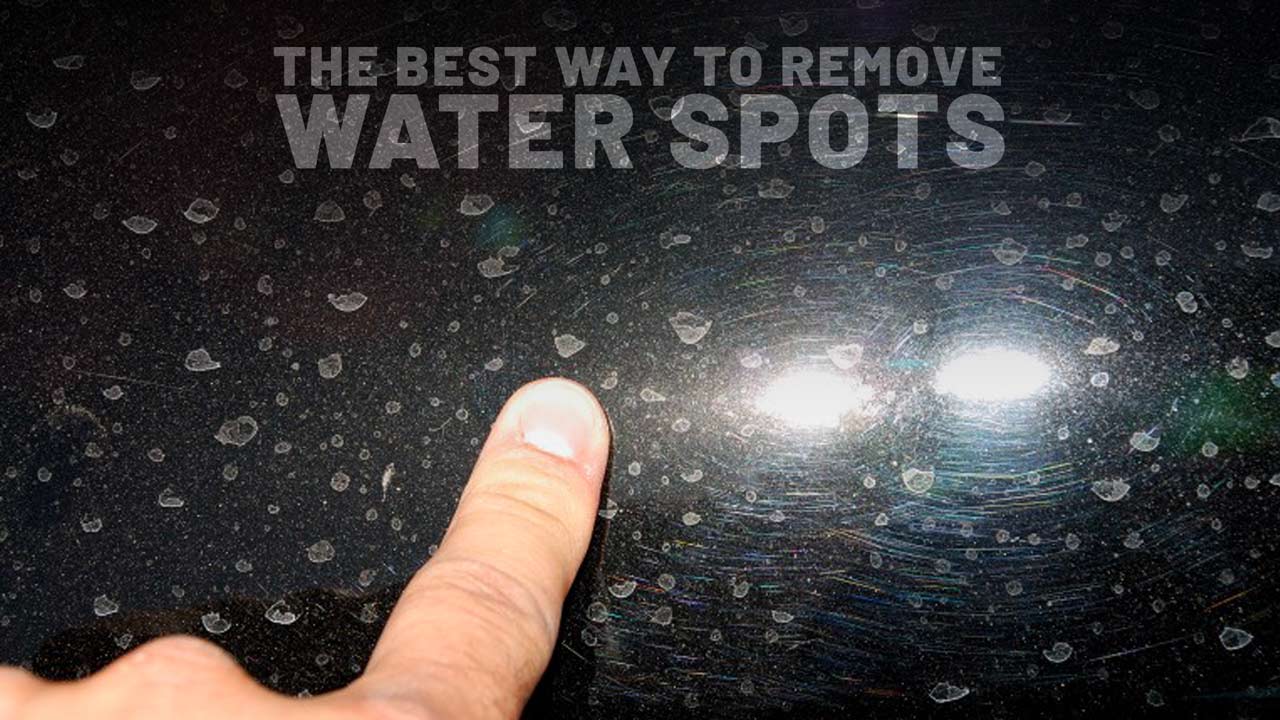
One of the most annoying paint defects to see on your car’s paint and then have to somehow remove are water spots! And while you may think removing water spots is a simple process, it can actually be quite complicated because there are more than one type of water spot.
In fact, I’m the guy that originally wrote and came up with the specific names and descriptions for the 4 different types of water spots back in 2004. Back then I only named and defined 2 types of water spots, then later in 2011 I added Type 3 and Type 4 water spots.
Today I’m updating the list with an additional four types of water spots to create the most exhaustive resource for water spot removal.
What Are Water Spots?
Water spots are spots on a car’s paint caused by evaporated droplets of water. But like I mentioned earlier, it’s not that simple: there are different types of water spots based on how the water spot has affected the paint. Sometimes a water spot is a simple stain you can easily wipe away; other times a water spot is an etch mark in the paint that requires polishing to remove.
It’s important to be able to distinguish between the different types of water spots in order to use the best process to remove them. It’s also important to distinguish between the different types of water spots so that when we’re talking about water spots, we’re all on the same page.
The Different Types of Water Spots
Before we start defining the different types of water spots and how to remove them, here’s a quick reference for your convenience:

As you can see, while all these defects are technically “water spots”, they vary in how much and to what extent they’ve damaged the paint. That will change how you go about removing them, which is why we divide water spots into the different types.
Now that we’ve established the different types of water spots, I’ll explain each in-depth and provide basic instructions for removal.
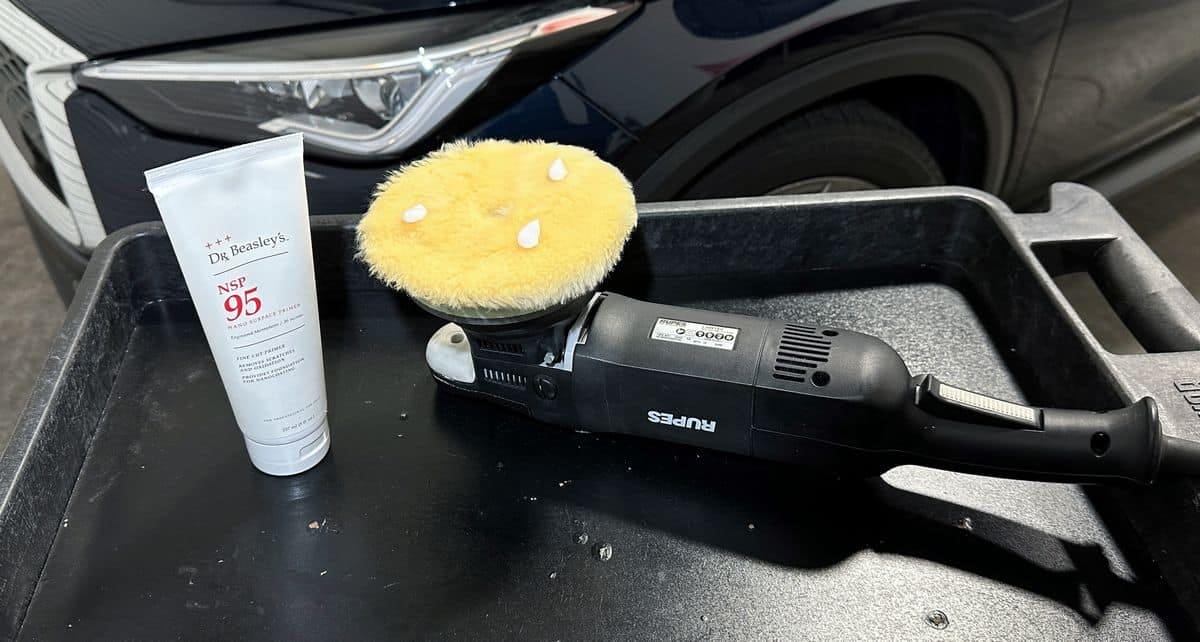
How to Remove Type 1 Water Spots – Fresh Hard Water Spots/Mineral Deposits
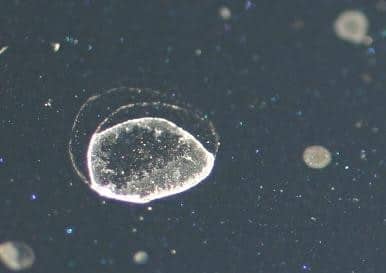
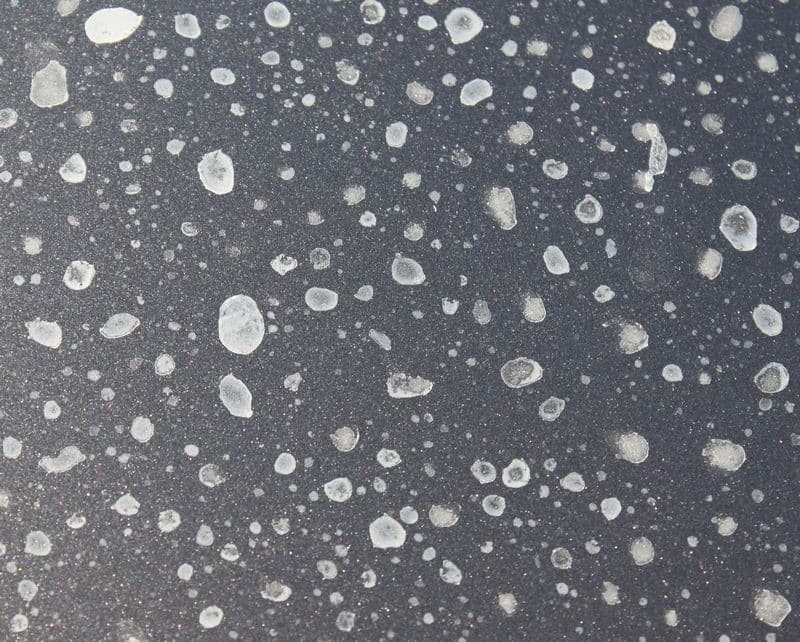
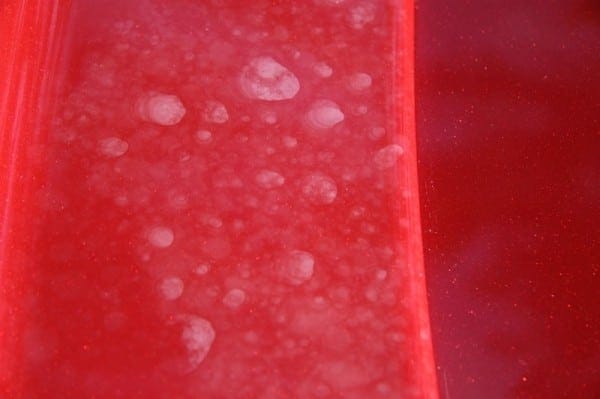
Type 1 water spots are usually some form of mineral deposits, also referred to as hard water spots. These are the most common types of water spots, typically formed by water left behind from washing or errant droplets from a sprinkler system.
These types of water spots tend to look like crusty particles left behind on the surface after water with dissolved minerals and/or other impurities has evaporated off the surface. Type I Water Spots can also be air-borne dirt or air-borne particles of industrial fallout or pollution left behind after water from rain has evaporated off the finish.

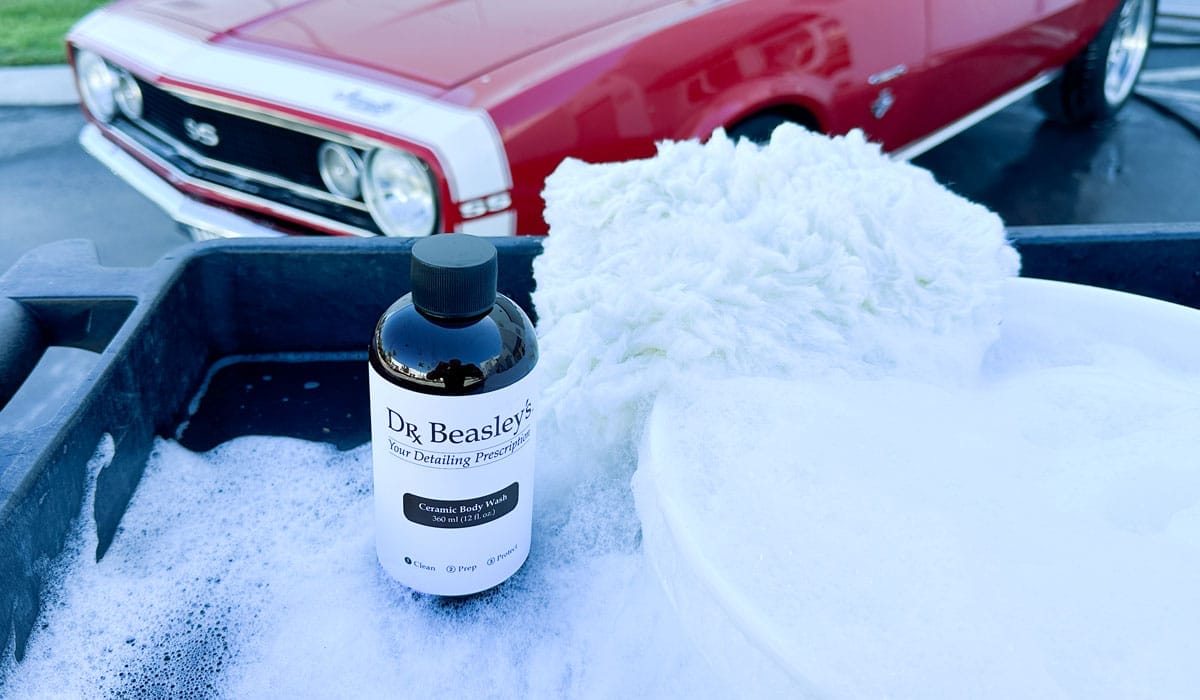
Because Type 1 Water Spots are surface stains and not bonded to the paint, you can normally remove them using a normal contact car wash using quality wash mitts and a quality pH balanced car wash shampoo.
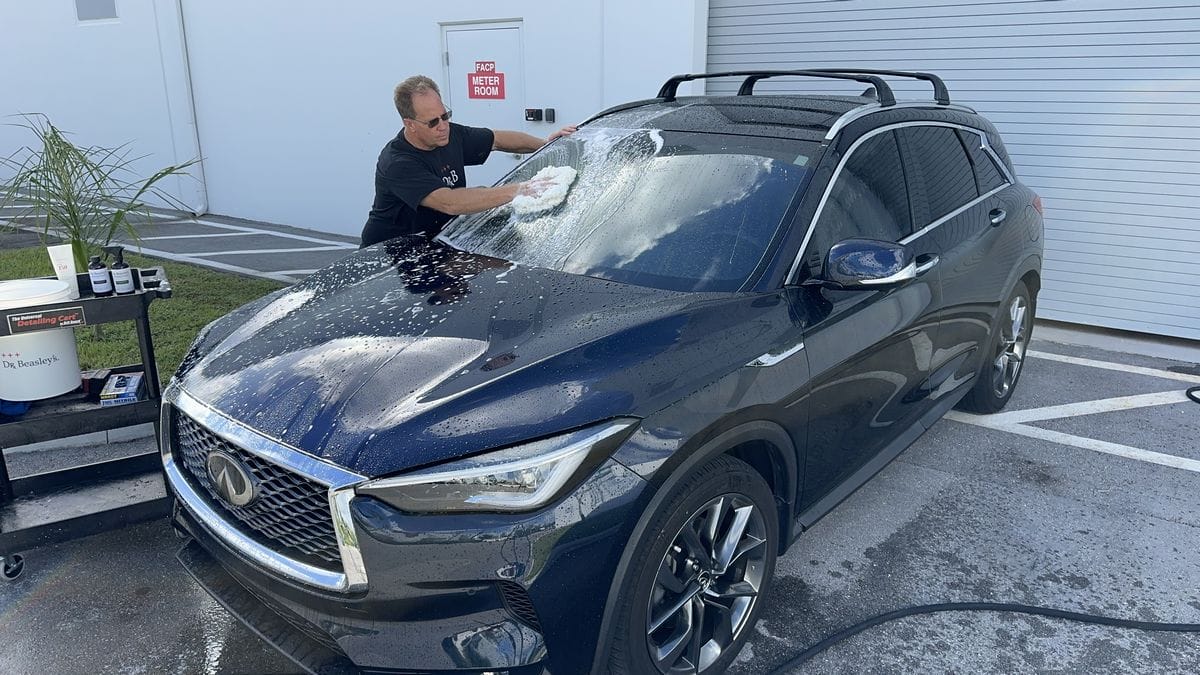
Other options include using a waterless wash, rinseless wash and even a spray detailer.

What If The Water Spots Won’t Come Off?
If the water spots won’t come off with a wash or spray detailer, they’re likely bonded to the paint (Type 2) or etched into the paint (Type 3).
How to Remove Type 2 Water Spots – Bonded Hard Water Spots/Mineral Deposits/Chemical Contamination
This type of water spot is caused when the water spot bonds with the surface, making it impossible to remove with a wash or spray detailer. This typically occurs when mineral deposits or chemical contamination bake in the sun after staining the paint.
What’s important here is that these types of water spots are still ON the paint, not IN it. So they can still be removed without abrasive means — you just need the right chemical for the job.

Just to note, some water spot removers are intended to be used during the washing process. Be sure to read the instructions and follow them to the T. Some water spot removers recommend applying to dry paint, while others recommend applying to wet paint, so be sure to follow the manufacturer’s instructions for best results.
What If The Water Spots Won’t Come Off?
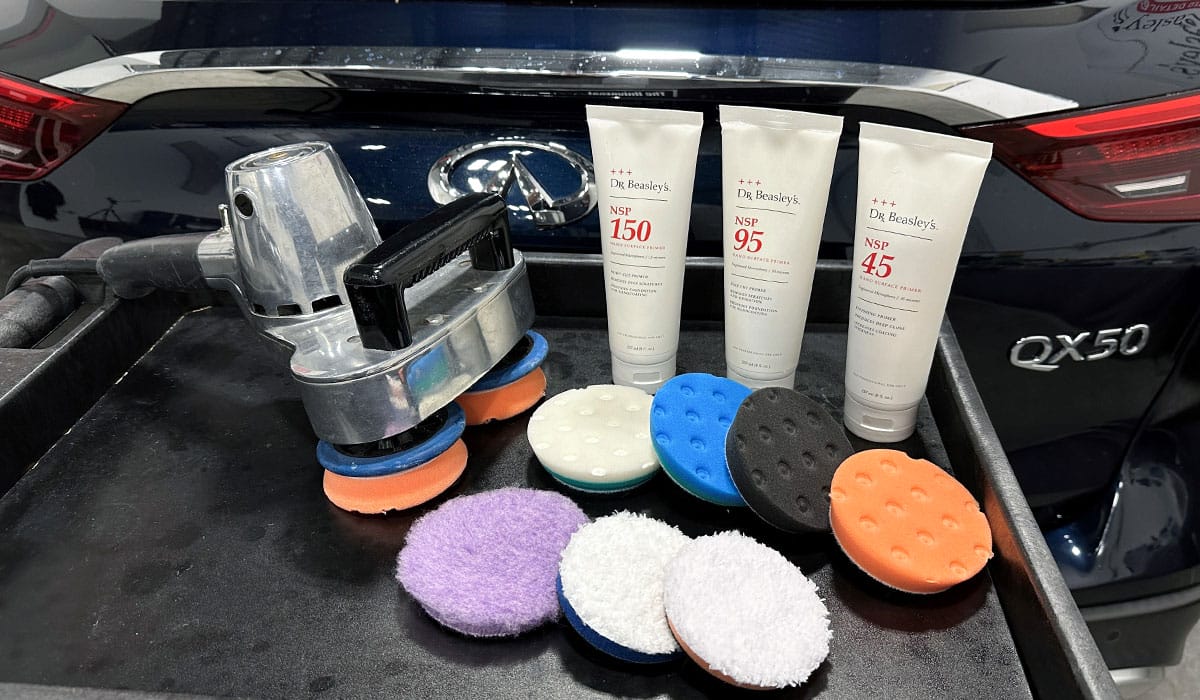
If a topical (on the surface) water spot won’t come off through chemical means, an abrasive approach may be required. In this case, you would want to use a machine polisher along with a light polish or “AIO” (All-In-One) polish to remove. An AIO has the benefit of being able to remove light swirls, scratches and Type 2 Water Spots AND leave behind ceramic protection. Thus it will clean, polish, and protect in one-step.
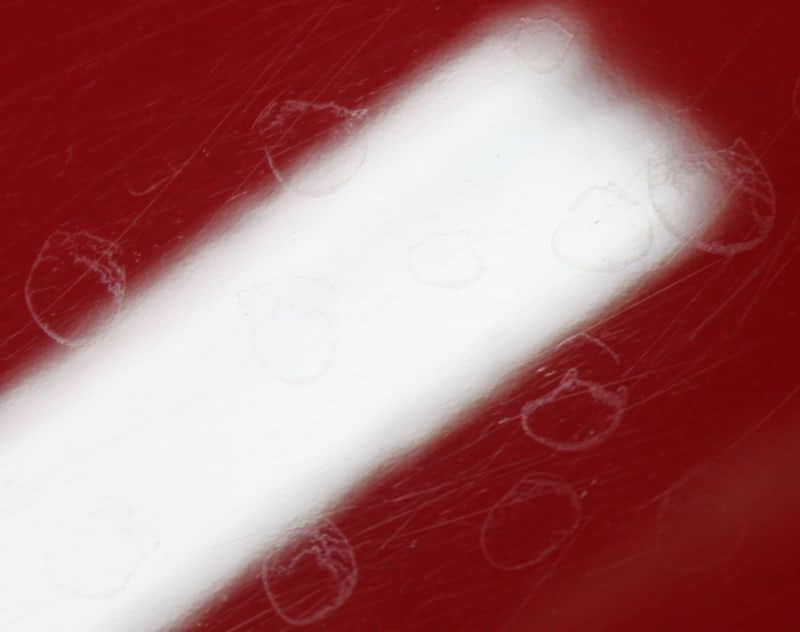
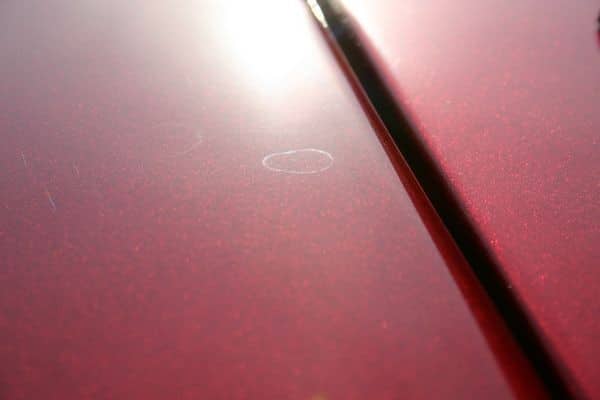
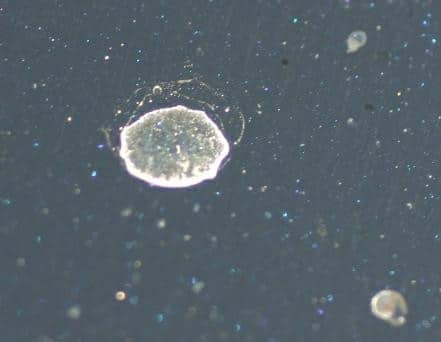
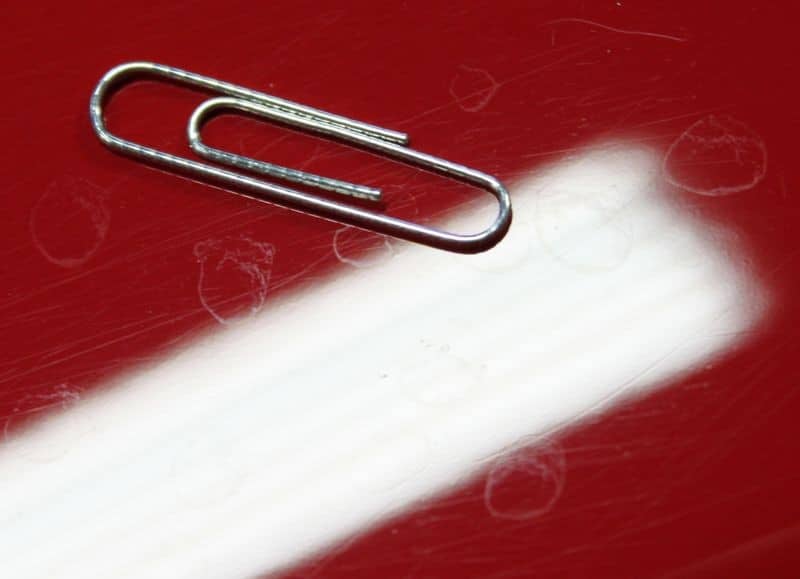
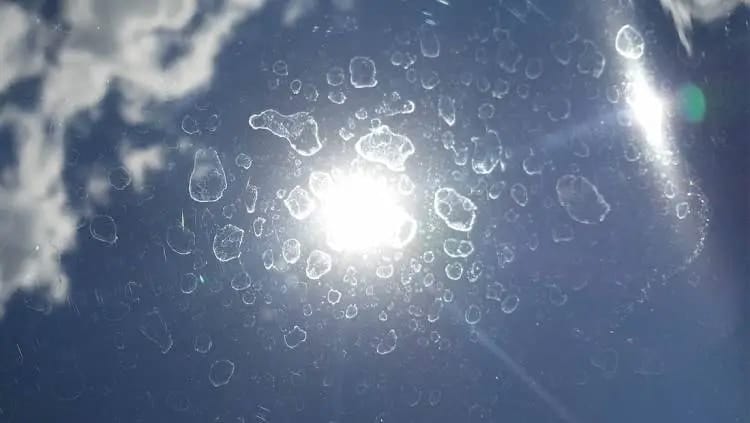
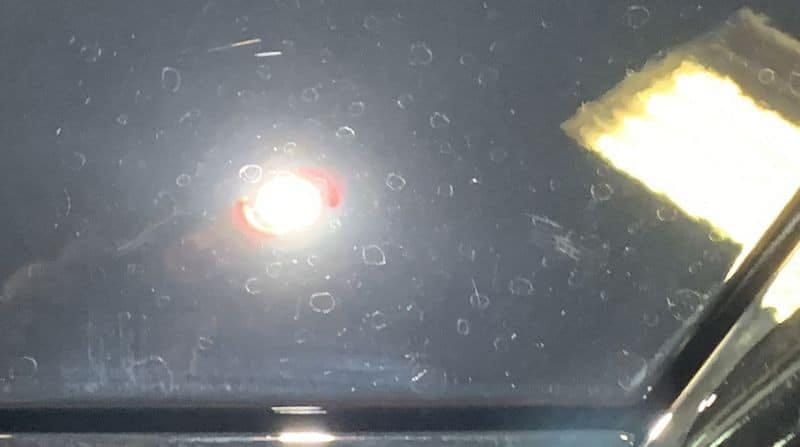
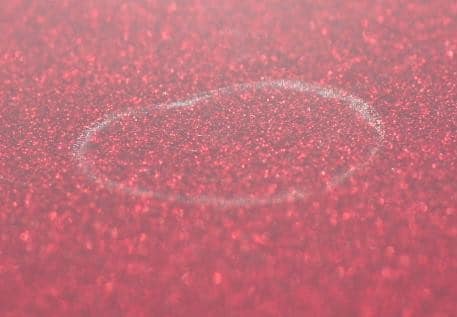
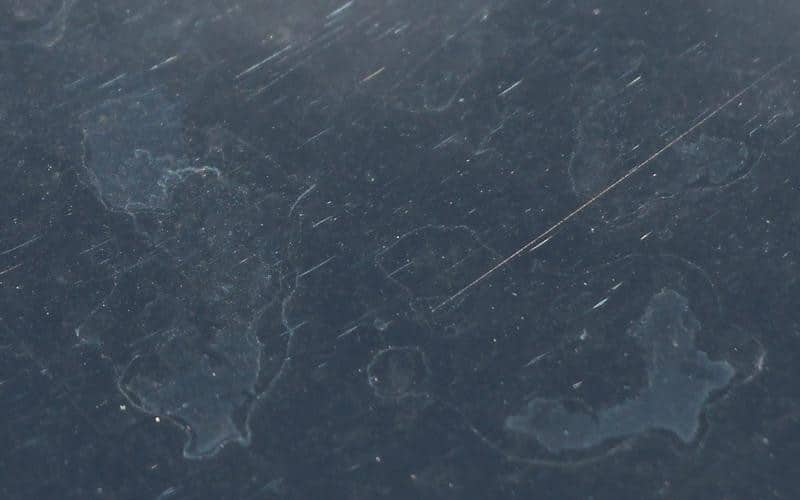
How to Remove Type 3 Water Spots – Imprint Rings or Etchings
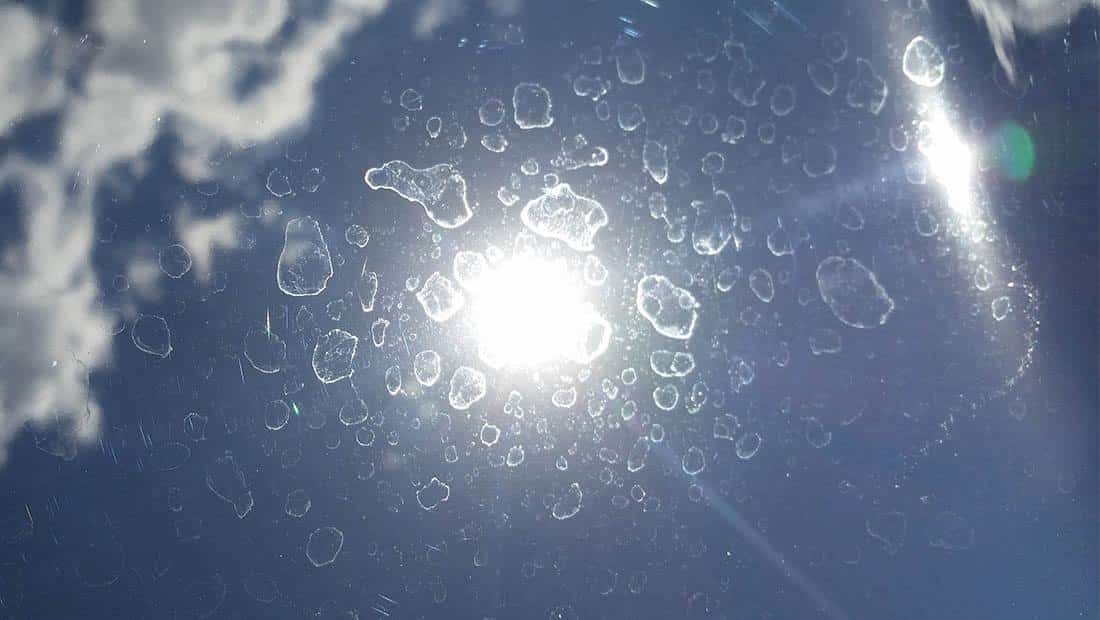
Type 3 water spots leave an irregular looking imprint ring in the paint mimicking the perimeter of the water drops while the water drops were still in liquid form. Type 3 water spots form or etch into the paint when there’s a repeated pattern of some form of water landing on the paint and then pooling on the paint in the same pattern over and over again.
This repeated pattern establishes where future water spots will pool and form circular drops that will remain until they evaporate. Over time, the corrosive elements in the water have repeated opportunities to etch into the paint instilling imprint rings.


Because these types of water spots are IN the paint, the only way to remove them is via mechanically abrading the paint using a compound, polish or AIO. This levels the surface to the lowest depths of the imprint ring etching, effectively erasing it from the finish.
The best practice is to always use the least aggressive product and process to get the job done to minimize the amount of paint removed while leveling. Thus you can start with either a polish or an AIO first using foam pads on orbital polishers. If this careful approach does not remove the defect to your satisfaction, then you can escalate to a more aggressive product, pad, and/or tool.
For most paint systems, a light cutting polish, together with either a foam pad or microfiber pad on a dual action polisher will get the job done.
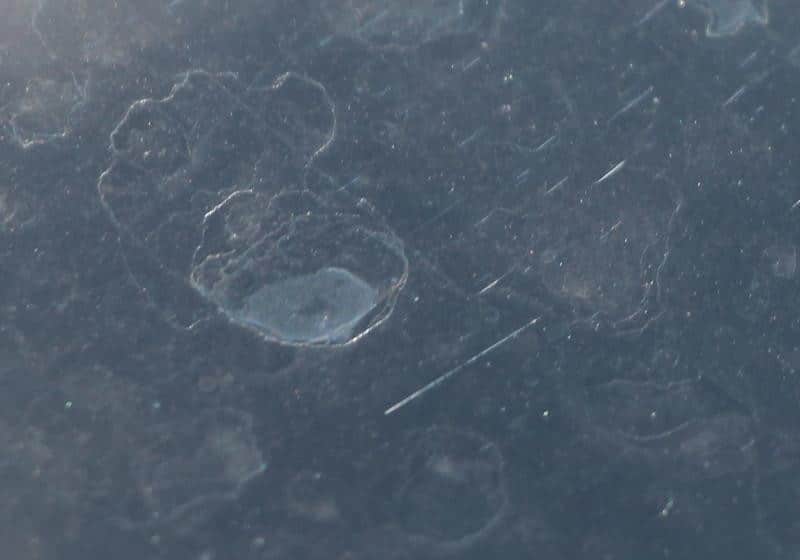
How to Remove Type 4 Water Spots — Deeper “Crater” Etchings
Type 4 “Crater” etchings come from a source of water so contaminated by corrosive elements that they eat into the paint, leaving an etch mark so deep that attempting to remove it can expose the basecoat underneath.
“Crater” etchings are the most severe form of water spots because they damage paint more than any other kind of water spot. With a crater etching, the physical paint inside the circular spot is now missing as it’s been chemically eaten or dissolved via whatever the corrosive substance was in the water.
Like Type 3 Water Spots, (Imprint Rings), in order to remove this type of water spot, you’ll likely need to use a more aggressive approach including using an aggressive compound, aggressive pad and powerful tool. The only way to remove this type of water spot is via mechanically abrading the paint using a compound, polish or AIO and level the surface with the lowest depths of the crater etching. And of course, always test the least aggressive approach that will get the job done as this will remove the defects while leaving the most paint behind to last over the service life of the car.
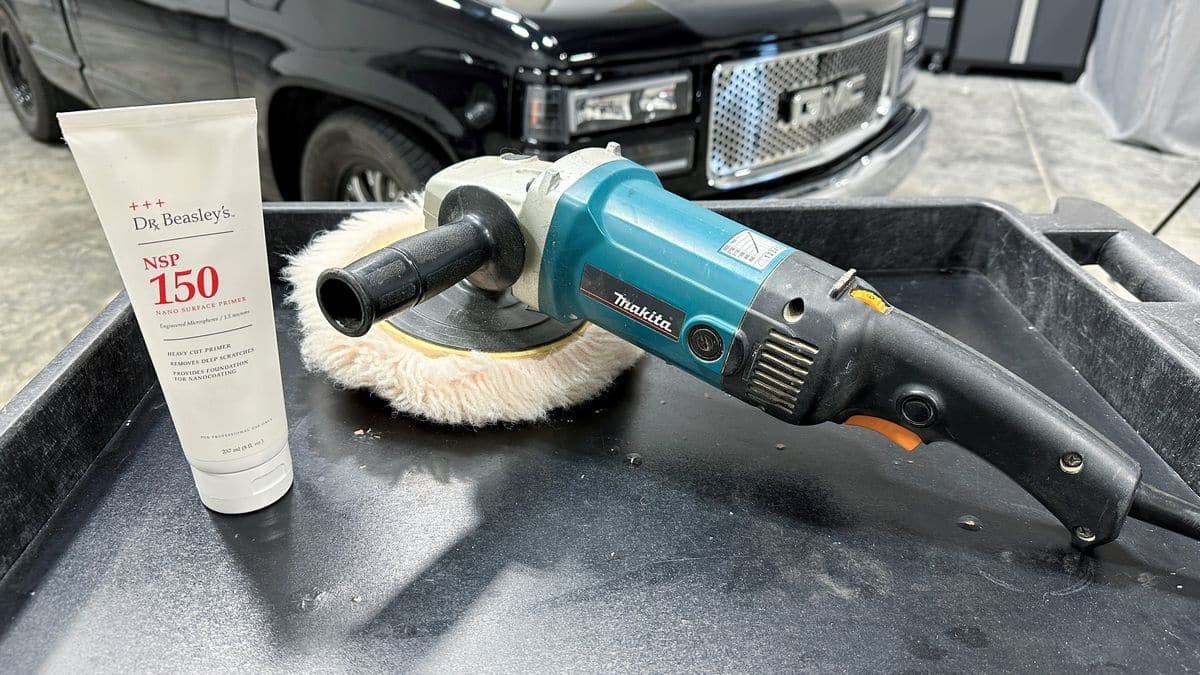
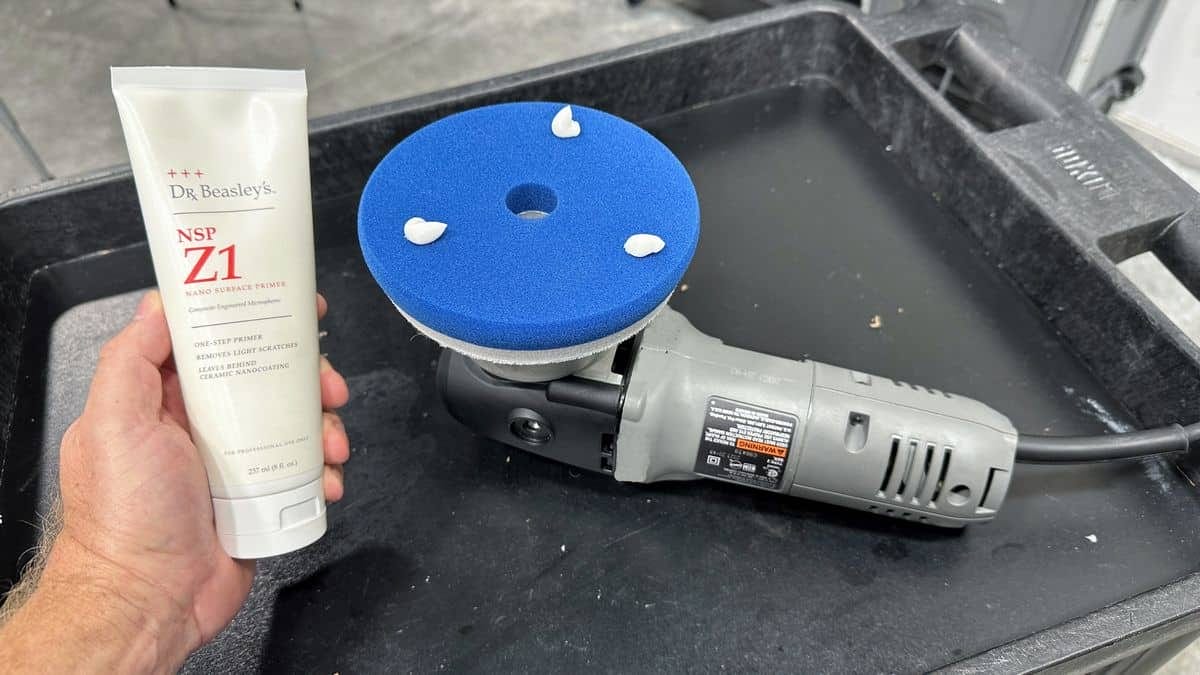
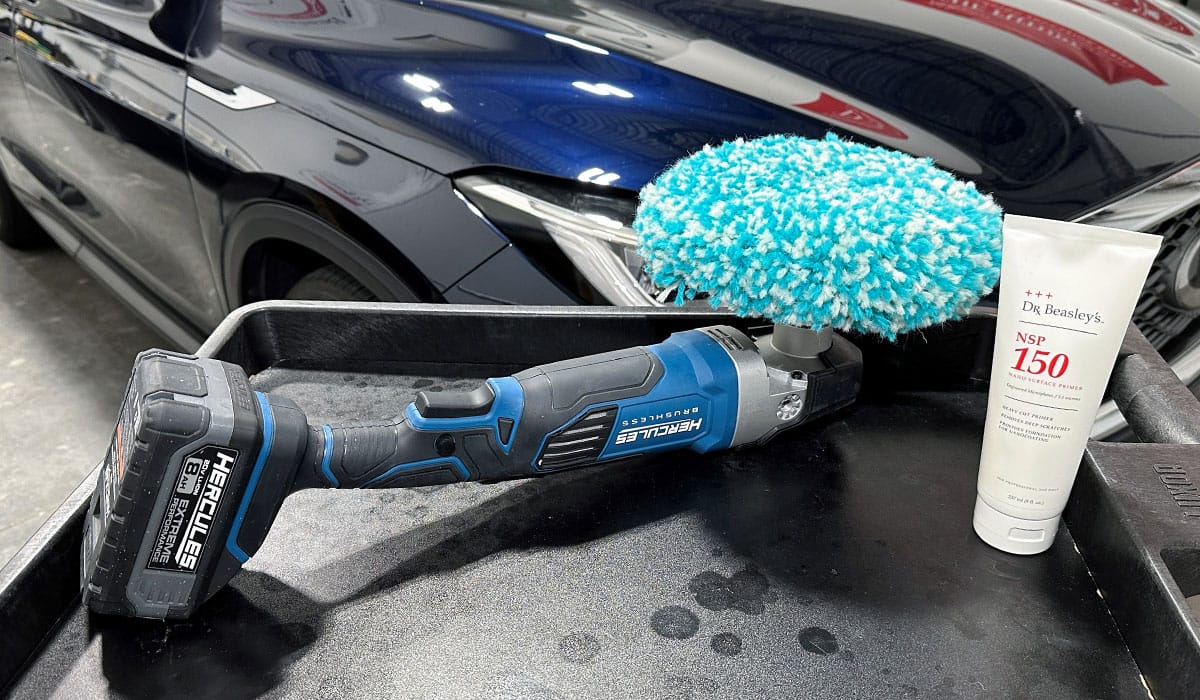
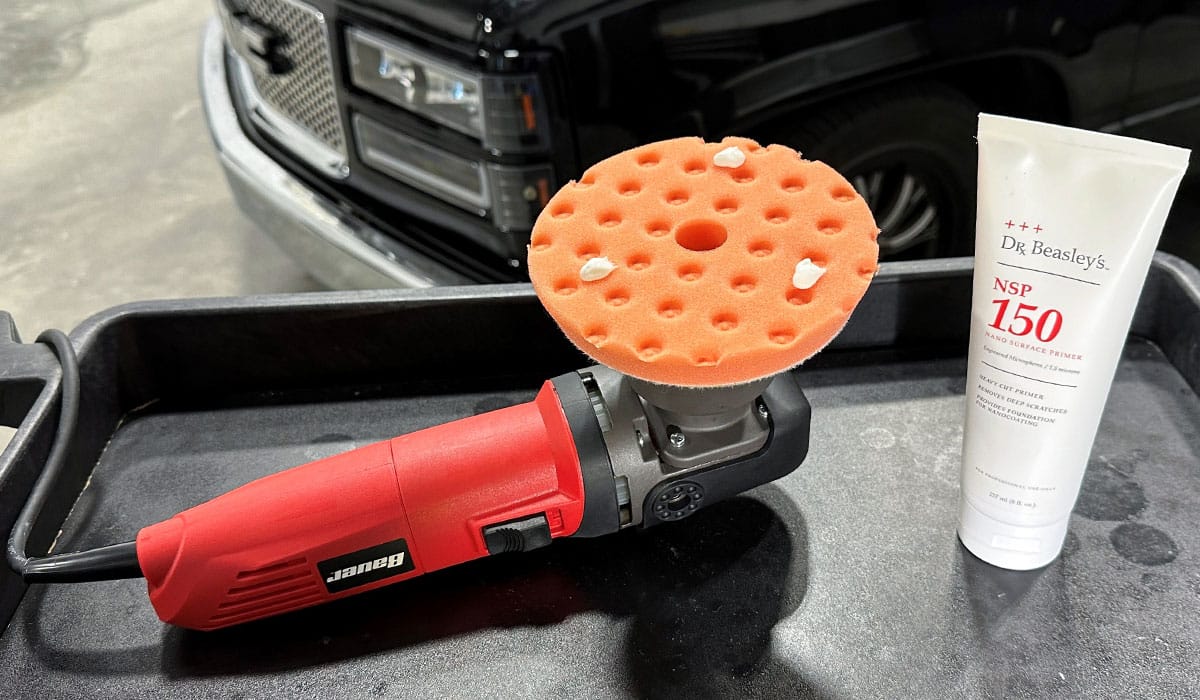
Pictured above is a light cutting compound from Dr. Beasley’s together with a Makita Rotary Polisher and a Lake Country Wool Cutting Pad. In most cases a combination like this will remove any Type 4 Water Spots. Remember, anytime you use a wool pad on a rotary polisher, it’s a good best practice to do a follow-up polishing step using a foam pad on an orbital polisher with a less aggressive polish.
NOTE: Paint varies in softness and hardness which can affect how aggressive of a polish and pad you’ll need to remove the water spots. Test your process with the least aggressive product and pad first before moving to more aggressive approaches if the paint is hard.
How to Remove Type 5 Water Spots – Acid Rain Water Spots
Acid rain comes from normal moisture in clouds, mixing with gaseous air pollution composed of Sulfur Dioxide, which the abbreviation is SO2. Sulfur Dioxide is a common air pollutant contained in exhaust fumes, created from the burning of sulfur-containing fuel such as coal, petroleum oil, gasoline, or diesel fuel. Acid rain water spots from all the automotive exhaust emitted into the air is common in big cities, where there’s high traffic volume 24 hours a day, 7 days a week, like Los Angeles, California.
The acid rain can also come from industrial pollution being spewed into the air around the area you live. Another source of acid rain can be engine exhaust from transport ships when cars are transported over the sea. Acid rain water spots can be caused by any acidic contaminated water source like rain that lands on your car’s paint and is allowed to dwell and eventually dry. As the water evaporates off the finish, it leaves behind a concentrated form of the sulfur dioxide.
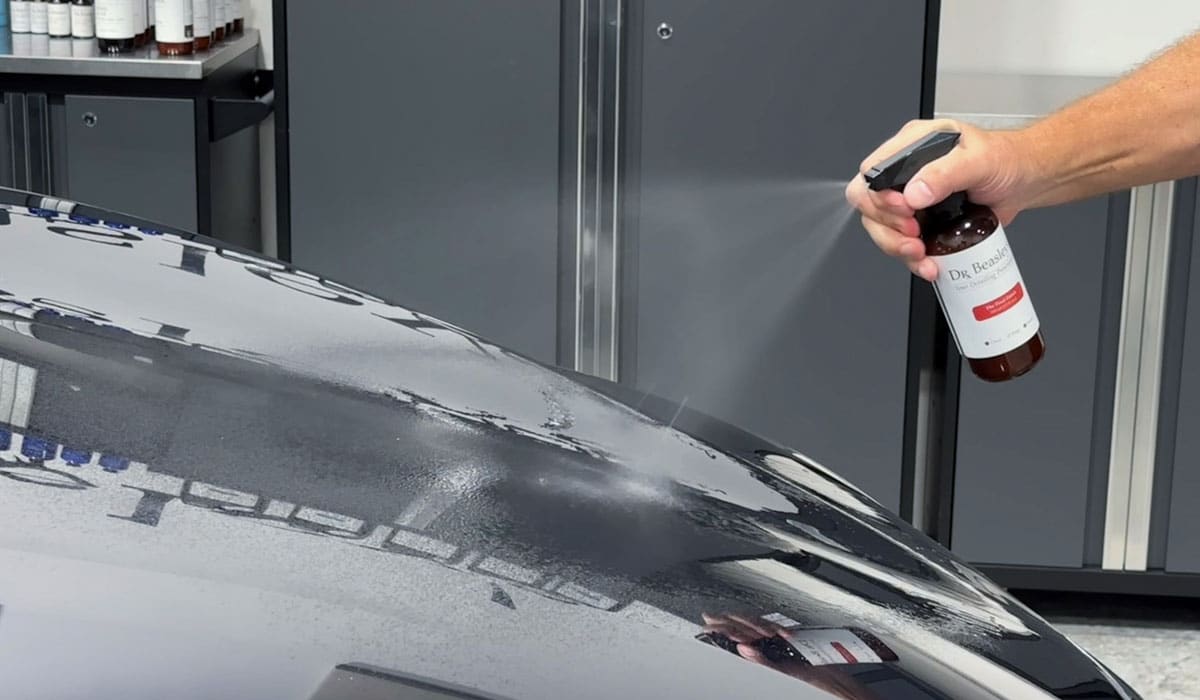
The first step to removing acid rain is to neutralize the exterior of your car using a pH balanced car wash soap. A thorough washing with any quality pH balanced car wash soap should remove any remains from the original exposure to acid rain.
After washing you’ll need to machine polish any affected areas using a quality polish and a foam pad on an orbital polisher. It’s always a good idea to have a few different products to test, each with their own level of abrading power or finishing ability. Then after doing some testing to dial in the best product and pad, you can tackle the project and remove the Type 5 Acid Rain Water Spots.
For stubborn acid rain spots, you may have to use a more aggressive combination, for example test using a compound with a microfiber pad on an orbital polisher and in worse-case scenarios, you may need to use a wool cutting pad on a rotary polisher with an aggressive compound. After any paint correction work be sure to seal the paint surface using a car wax, synthetic paint sealant or ceramic coating.
How to Remove Type 6 Water Spots – Alkaline Rain Spots (Wildfire Ash Spots)
Wood ash from fires, also called “Hot Snow”, is a combination of calcium and potassium and is high on the alkaline scale. Airborne wood ash from forest fire smoke and even brush fire smoke, can mix with rain and when this alkaline mixture lands on your car’s finish it can cause alkaline water spots. Besides getting alkaline rain water spots from rain in areas of fires, if the dry forest fire ashes land on your car’s finish and there is moisture present such as morning dew, there can also be alkaline stain etchings in your car’s paint.
Not only is fire ash chemically aggressive, but it’s very gritty too. If you find wood ash has landed on your car’s finish, before washing with a pH balanced car wash soap, do your best to blast any ash residues off the finish using strong spray of water from a water hose or even a pressure washer.
Because fire ash is high in alkalinity, you should avoid using a high alkaline car wash soap, the type sold for doing strip washing. A pH balanced car wash soap will be a better choice as it will ensure that the paint surface remains at or close to a neutral pH of 7.0.

After washing to remove any of the physical components of the forest fire ash, if there are any alkaline water spots or etchings left behind in the paint, the only way to effectively remove these is via the same process used to remove acid rain water spots. That is you’ll need to do some paint correction via machine polishing and perhaps machine compounding.
How to Remove Type 7 Water Spots – Whitish Colored Water Stains IN Single Stage Paint
Type 7 water spots are primarily found in older single stage paints like solvent-evaporation lacquers and enamels. Older single stage paints tend to be soft and permeable, or porous. Liquids introduced to the surface of these types of paints can actually penetrate and be absorbed INTO the paint. When this happens, the paint will have what looks like a white cloudy stain. This typically happens where water has pooled and then dwelled for some measure of time.
Modern clear coat paints tend to be harder and a lot more impermeable, or non-porous, so liquids like contaminated water will not penetrate easily INTO the clearcoat. Thus Type 7 Water Spots tend to only affect single stage paints.
I have seen clear coats with whitish colored water stains, but these tend to be isolated to the very top surface or topical and this is because it’s harder for liquids to penetrate into clearcoats.

Because this staining effect is IN the paint or below the surface, the only way to remove this type of water spots is via a mechanical polishing process. This means testing a polish and if this isn’t working effectively enough, then you may have to test a more aggressive compound.
Caution: With this type of water spot, in my personal experience you cannot remove it 100%. To try to do so will end up with you buffing off so much paint that you expose the primer under the colored or pigmented layer of paint. Once you buff through the paint and expose the primer, the only way to fix this new problem is to repaint the affected areas.
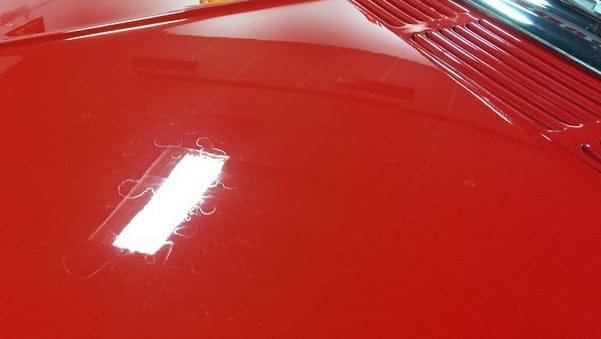
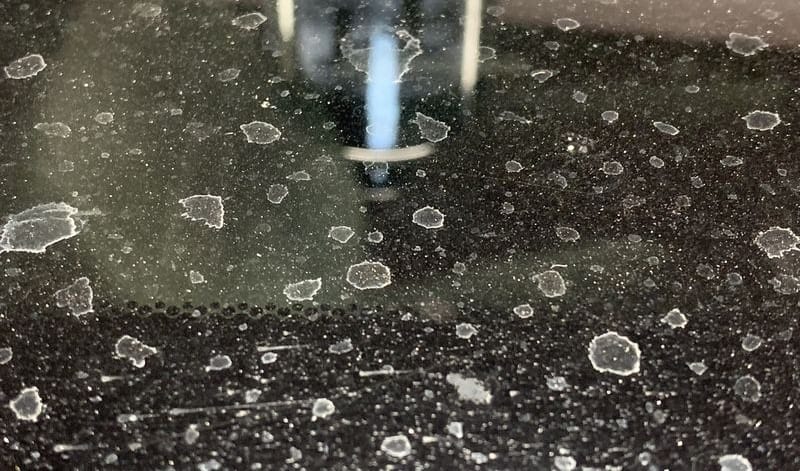
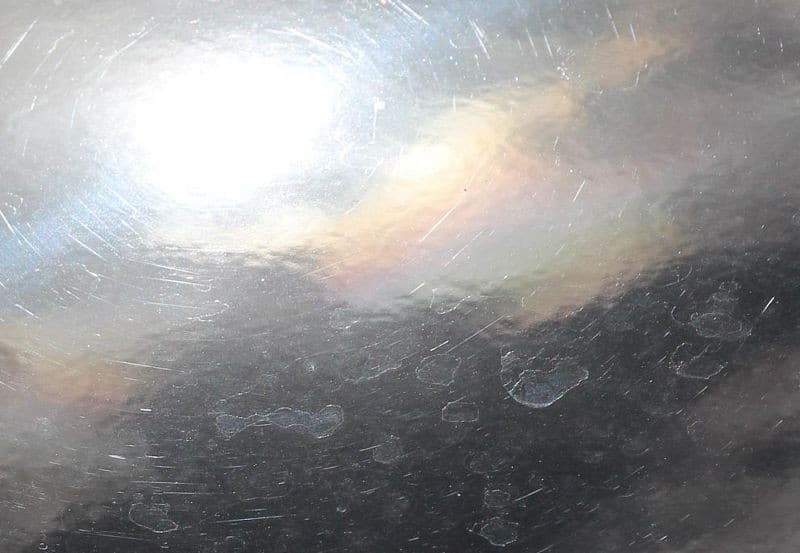
How to Remove Type 8 Water Spots – White or Whitish Colored Water Stains IN Basecoat Clearcoat Paint
This is a very peculiar type of water spot in that water or long-term exposure to water moisture on the surface of the paint will leach INTO the very top surface of the clearcoat and give the paint a whitish appearance.
How to Remove Water Damage from Car Covers, Plastic Tarps or Plastic Drop Cloths
Sometimes you see this type of water spot staining on modern clearcoats when the car in question has been covered with a car cover, a plastic tarp, and/or a plastic drop cloth. What happens is some good-intentioned person covers their car to protect it, and somehow moisture gets trapped between the paint and the cover material. The water migrates into the clearcoat and gives the clearcoat a milky, whitish appearance. This type of water spot stain is normally only found on horizontal surfaces.
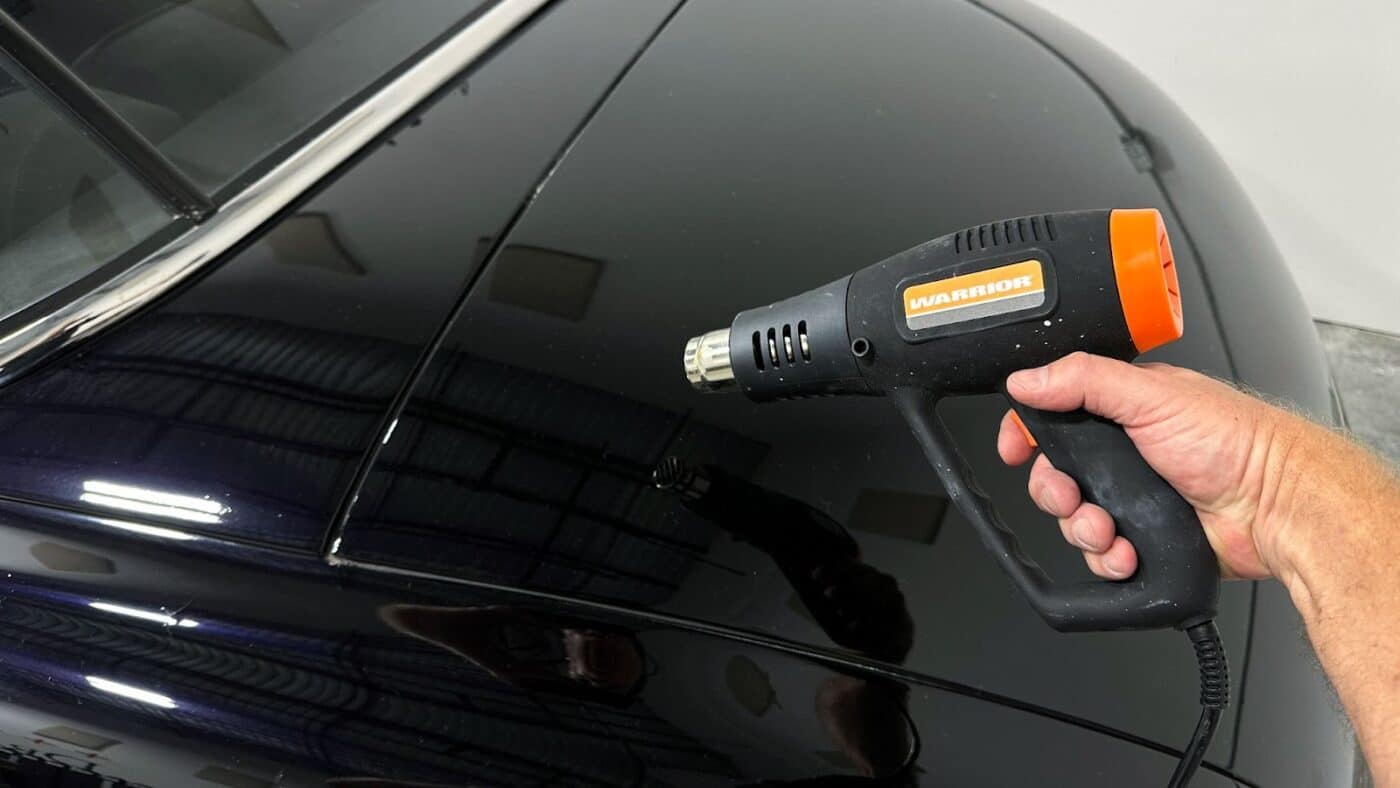
The first approach to removing Type 8 Water Spots is to try to warm-up the paint, which will cause the water, which is a liquid, to convert to a gas and then evaporate out of the paint.
The safest way to warm up the paint is to move the car outside and expose it to overhead, bright sunlight. The sunlight will heat-up the paint and in a few hours, the moisture trapped in the clearcoat paint should completely outgas.

If exposing the vehicle to bright overhead sunlight is not an option (perhaps it’s cloudy outside or winter in the area you live) then you can test using a hair dryer or even a heat gun. Caution should be used with both, but especially use caution if using a heat gun so that you don’t overheat the paint and melt it. This is pretty easy to test to see if it will work, simply aim the air flow out of the hair dryer or a heat gun at a portion of water stained paint for a few minutes and visually inspect to see if this option works.
Can You Remove Water Spots from Car Paint by Hand?
The answer is yes, but from years of experience teaching car detailing classes, I would say most people don’t possess the skills or tenacity to effectively rub some type of applicator over the paint in a uniform matter to remove the spots over large panels. For isolated areas, it would of course be a lot easier.
How to Remove Water Spots by Hand
Just like doing machine paint correction, it’s always a good idea to have a collection of products, some on the more aggressive side and some on the gentler side, this way you can test the least aggressive product in order to find out what it will take to remove the water spots.
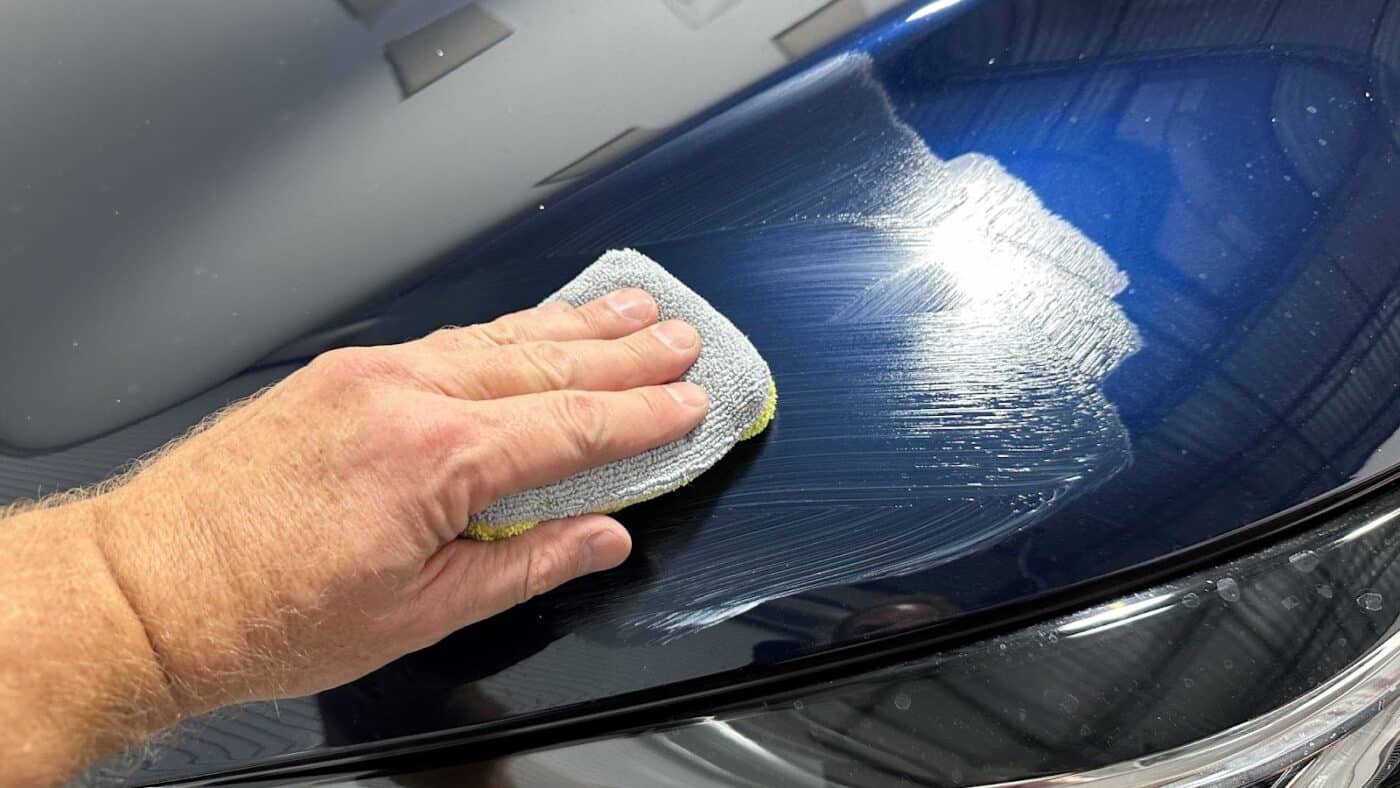
There are three basic types of hand applicator pads, cotton, foam, and microfiber. For removing water spots, no matter which type, a microfiber applicator pad will provide some extra polishing strength while still being gentle to scratch-sensitive clearcoat paint finish.
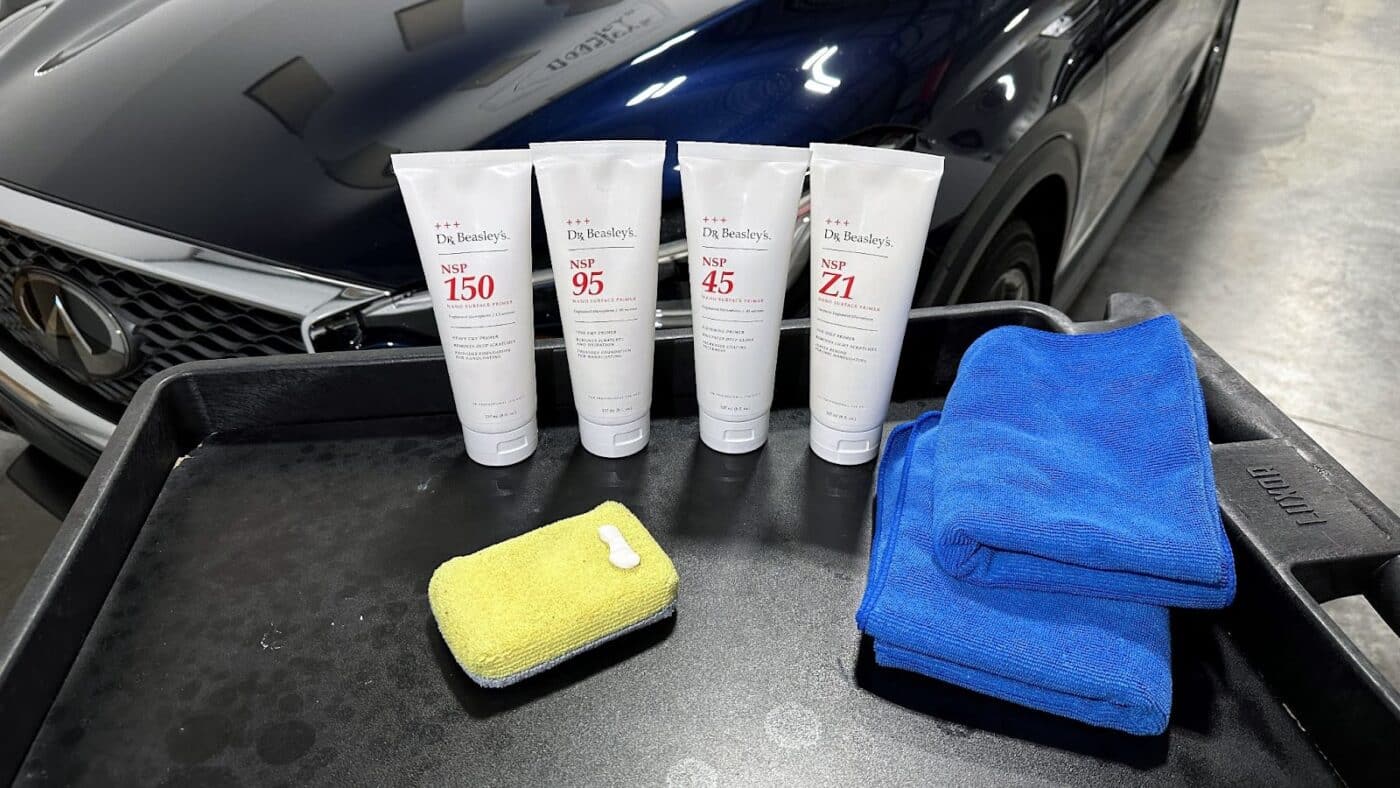
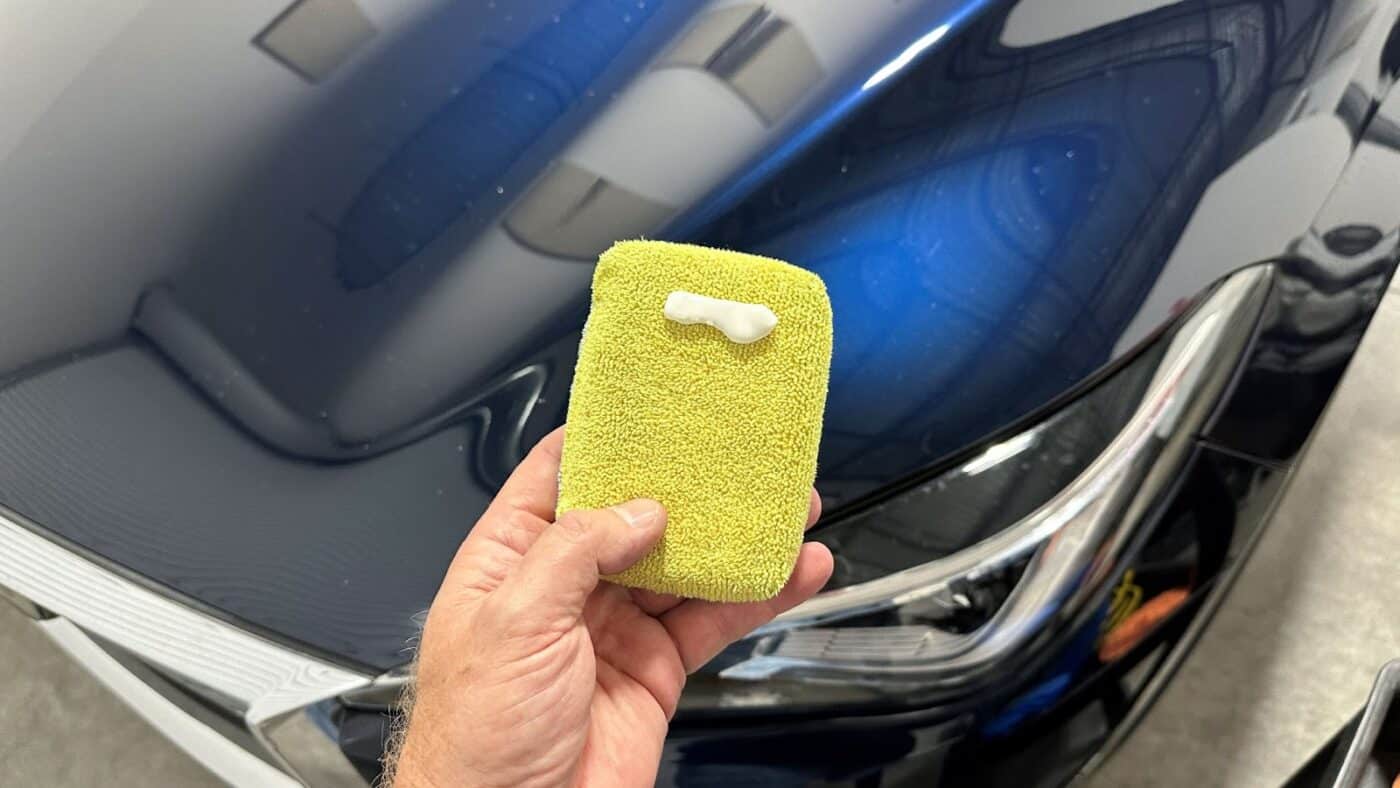
After applying some product to the face of one side of the microfiber applicator pad, massage the product with light pressure over the paint for 10 to 20 seconds and then wipe off the residue and inspect.
Final Thoughts…
Before attempting to remove any type of water spots, it is important to first do your best to diagnose which type of water spot is affecting your car’s paint and then use the above guide to safely remove the spots.
Anytime your only option is to do some form of paint correction, always start out by testing with different combinations of products, pads, and tools. A great best practice is to always use the least aggressive process to get the job done as this will act to preserve the most paint as possible.
Do You Have a Passion for Perfection When it Comes to Detailing Your Cars?
- Would you like to take your detailing skills to a higher level?
- Do you find you learn better by doing versus sitting in a chair looking at a PowerPoint presentation about car detailing?
Here at Dr. Beasley’s O.R., (Operating Room), in sunny Stuart, Florida, we teach the most hands-on car and boat detailing classes on planet Earth. And we prove it too. You can find write-ups on the Dr. Beasley’s Blog that photo-documents just how hands-on our classes are plus you’ll see the kinds of cars and boats you’ll be training on.
Click the link below to find the dates, locations, topics, and prices for all upcoming detailing classes.
Upcoming Detailing Classes – Prices – Info – Topics – Locations
And if you ever have any questions, always feel free to reach out to me personally via text, phone call or email.
I hope to see you in a future detailing class!
Sincerely,
Mike Phillips
Chief Education Officer for Dr. Beasley’s
[email protected]
760-515-0444
A few weeks ago a customer with a 1965 Mustang called me to see if could fix a problem with his paint. When I arrived it had a car cover on it, and it looked exactly like Type #7. I did not know what it was, but now the mystery is solved! Thanks Mike.