


Last Updated October 7, 2024
The color black is an incredibly popular color for all makes and models of cars, including modern cars, trucks, and SUVs. It’s also a super popular color when restoring classic cars, muscle cars as well as supercars and exotics.
Everybody always says the same thing about a black car, and that is, when the paint is polished to perfection, black paint looks amazing! But… when the paint is dull or is filled with swirl marks and scratches, maybe even holograms, then the entire car looks bad.

How do black cars get all these swirls and scratches? It has to do with how people TOUCH black cars, and the most common way we touch our car is washing. Everytime you wash your car, especially when you use dirty or low quality wash mitts and towels, you inflict small scratches that show up as swirls in the paint when you look under the sun.
On lighter color cars, this isn’t a big deal. But on black cars, the contrast between the black paint and the white-ish scratches makes swirl marks look even worse. That’s why it’s important to MINIMIZE scratches as much as possible when washing a black car. In this article, I’ll share the technique for washing black cars I’ve developed over my 40+ years of detailing so you can wash your black car with zero scratches.
Why Is It Important to Avoid Scratches While Washing a Black Car?
Like I mentioned in the introduction, the contrast between the light scratch and the dark paint makes swirls look particularly severe on black paint. This dulls the paint, hiding the rich, dark black color below. Removing these swirls is a time-consuming process. So, remember this all important fact:
It takes HOURS to buff out a car. It only takes SECONDS to put swirls and scratches into the paint.
By this I mean, it takes hours to do a full machine paint correction to remove swirls and scratches for an average size passenger car. It takes even longer for tall SUVs and trucks. After perfecting the paint, if you touch the paint with ANYTHING that is contaminated, you’ll probably put swirls and scratches back into the paint. When this happens, the only way to undo the damage is to start over at the beginning and do the paint correction steps a second time. That’s a LOT of time! Not to mention energy and perspiration.
The Most Important Rule for Washing a Black Car: Use Soft, CLEAN Mitts & Towels
Like I said above, the way we put swirls and scratches into the paint on our cars, trucks, and SUVs is by the way we TOUCH it! And we primarily touch it with 3 different tools:
- Wash Mitts
- Drying Towels
- Microfiber Wiping Towels

There are hundreds of different types of wash mitts, drying towels and microfiber wiping towels. Most are good quality when new. The problem is over time, these three things can and will become contaminated.
What I practice for my own cars and what I teach in all our car and boat detailing classes is to be PROACTIVE in both selecting wash mitts, drying towels and microfiber wiping towels and also being proactive at keeping them uncontaminated.
What Wash Mitts & Towels Are Best for Washing a Black Car?
Below are my recommendations for wash mitts and towels when washing a black car.
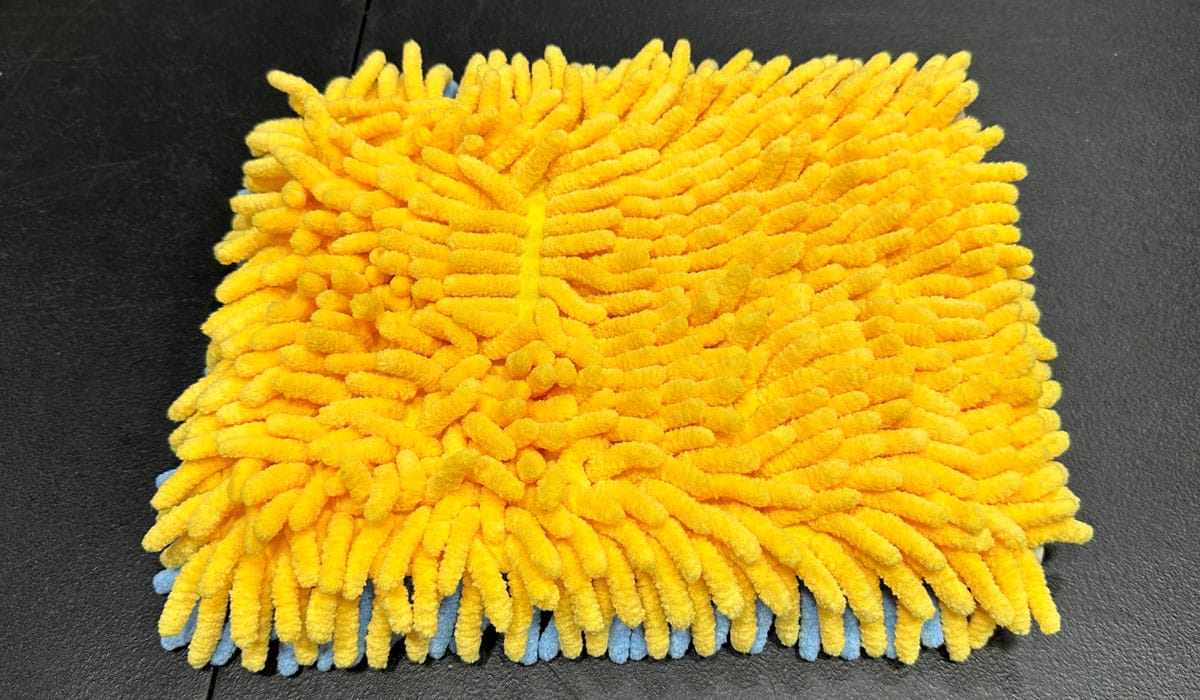
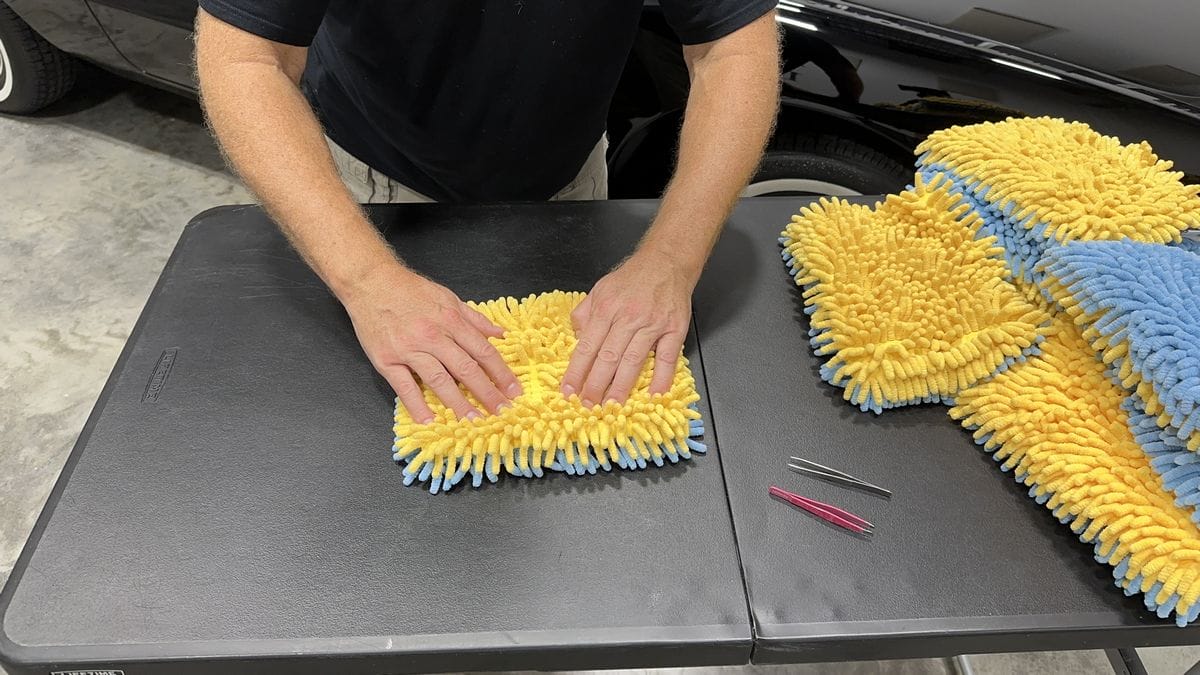
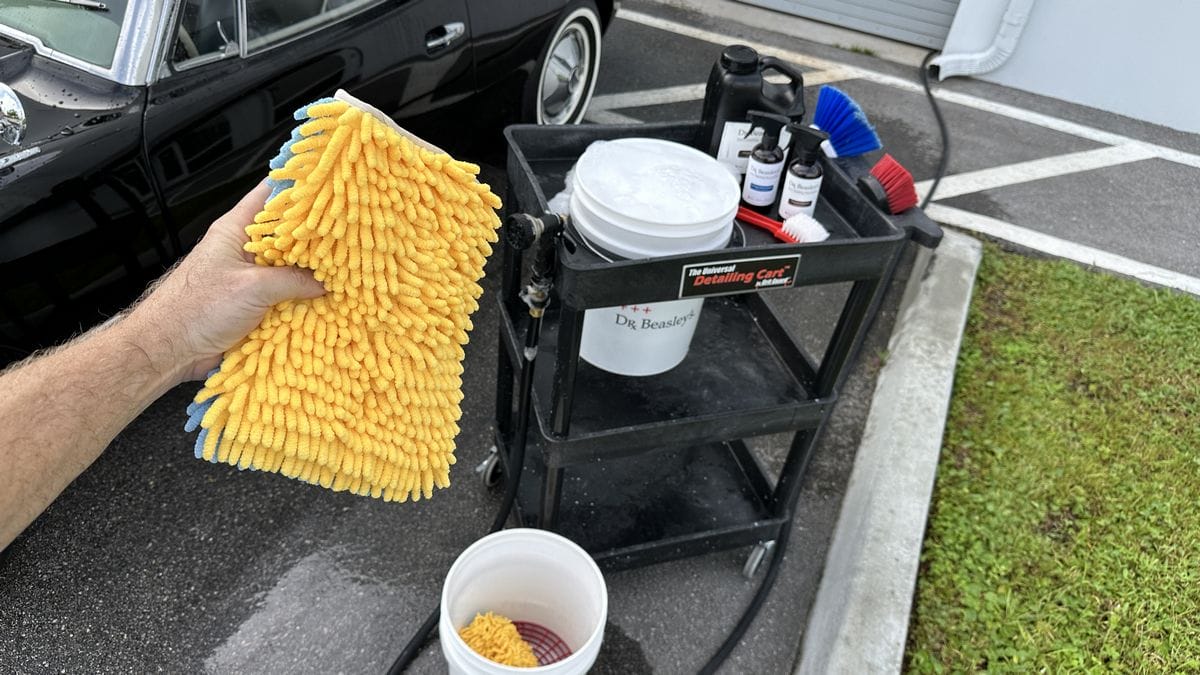
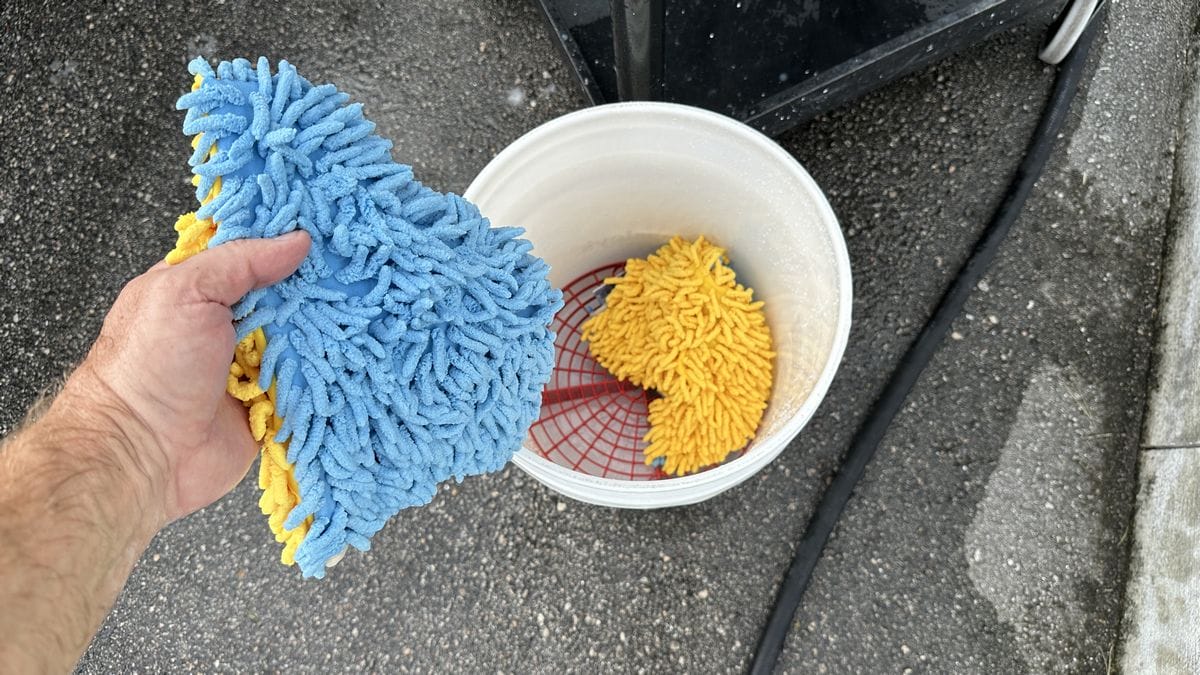
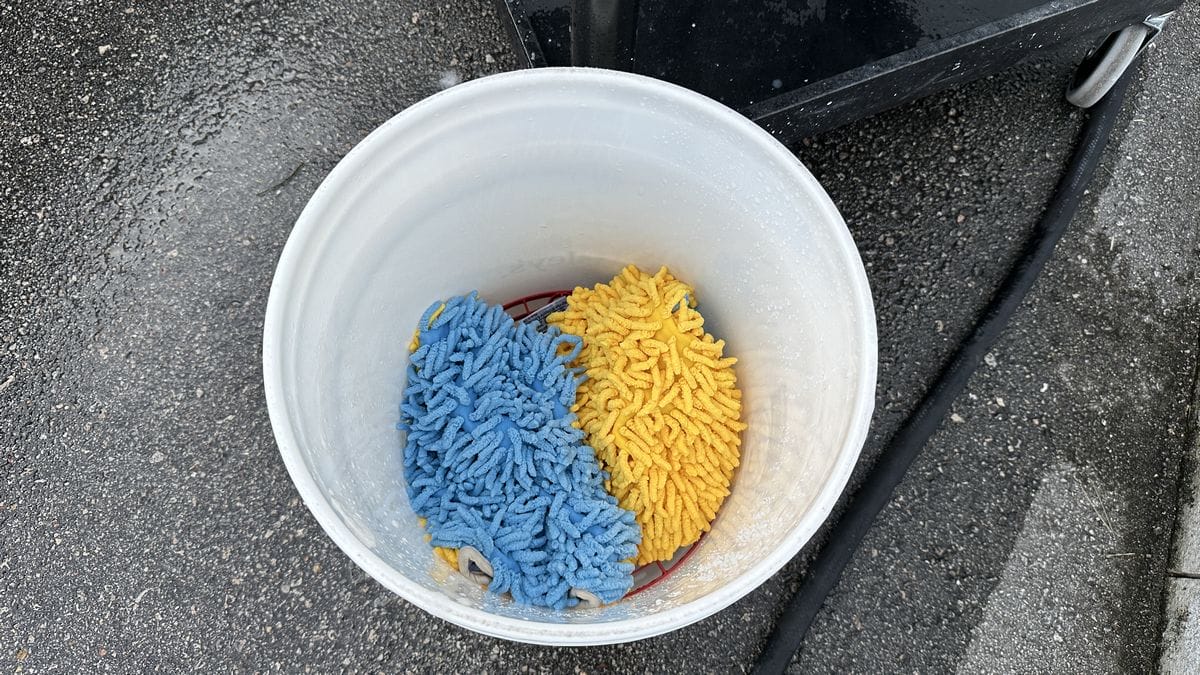
Recommended Wash Mitt for Black Cars: Chenille Microfiber Wash Mitts
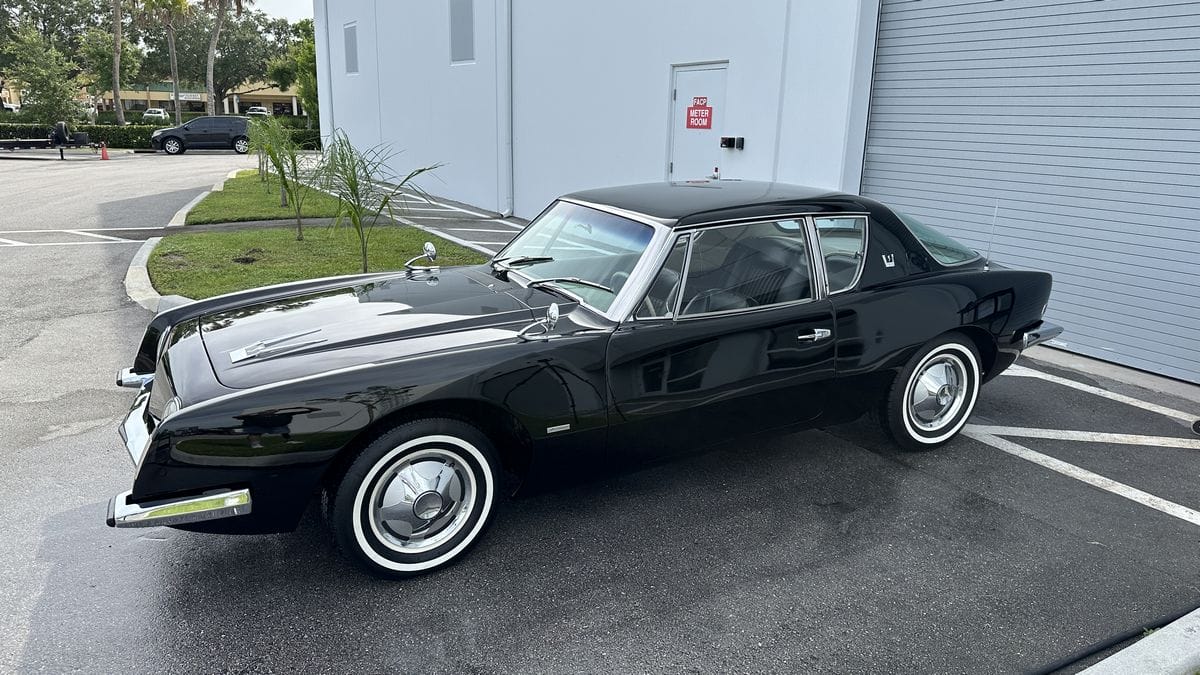
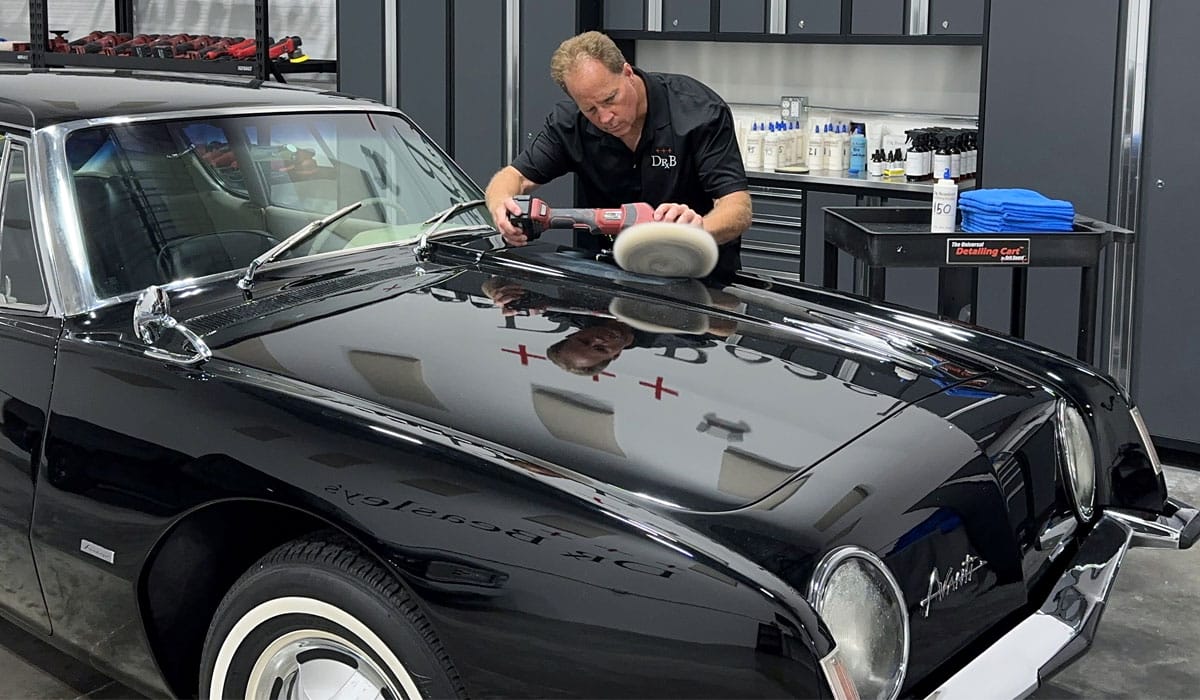
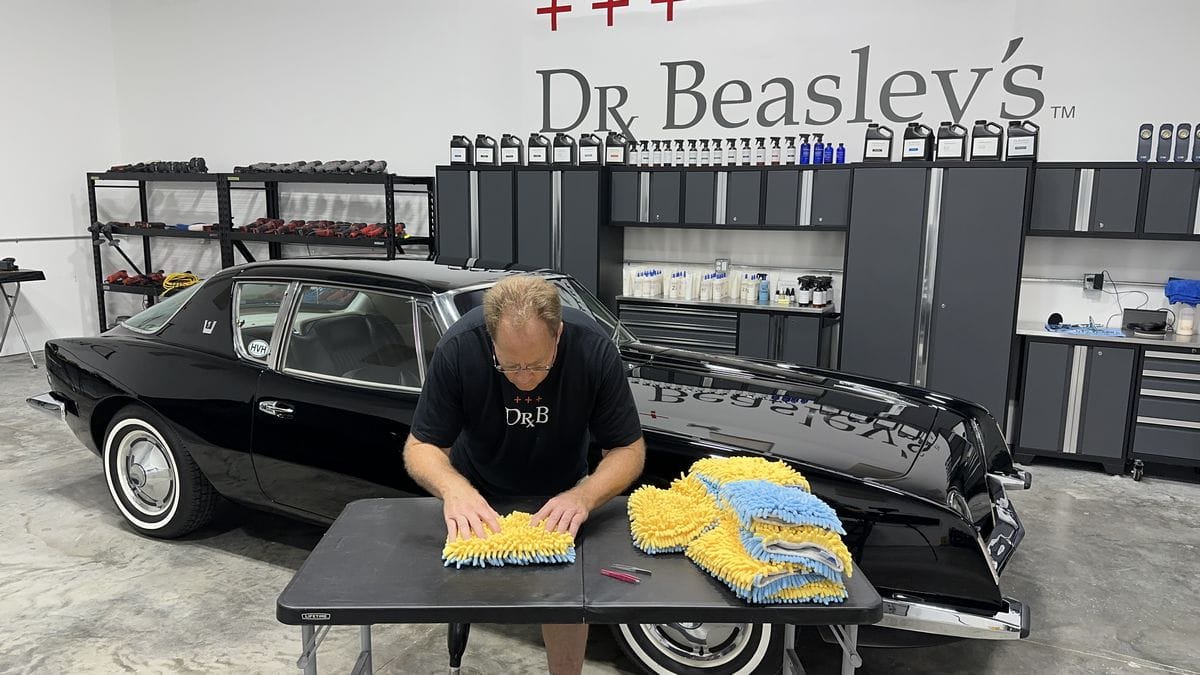
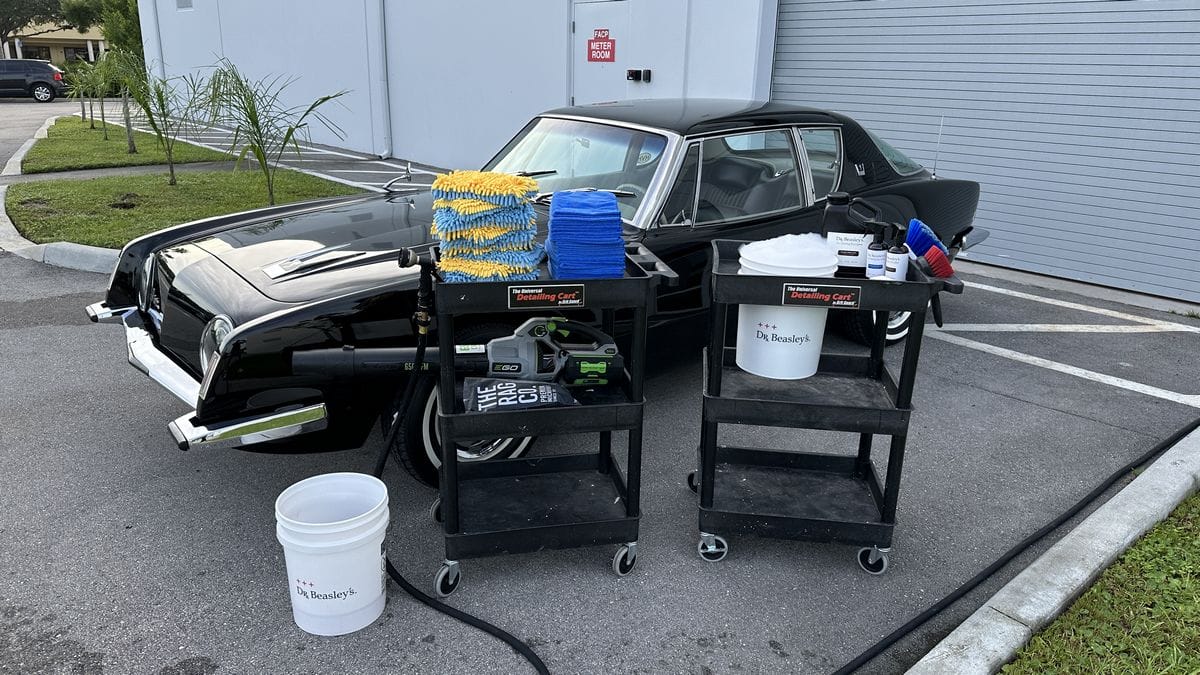
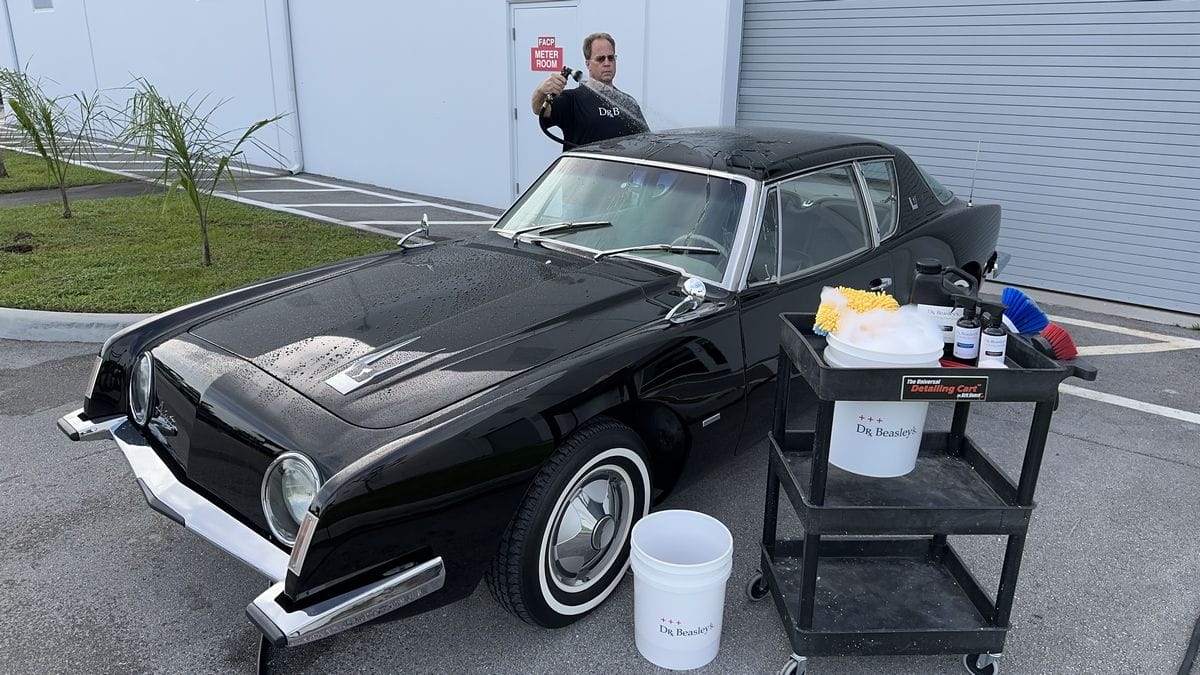
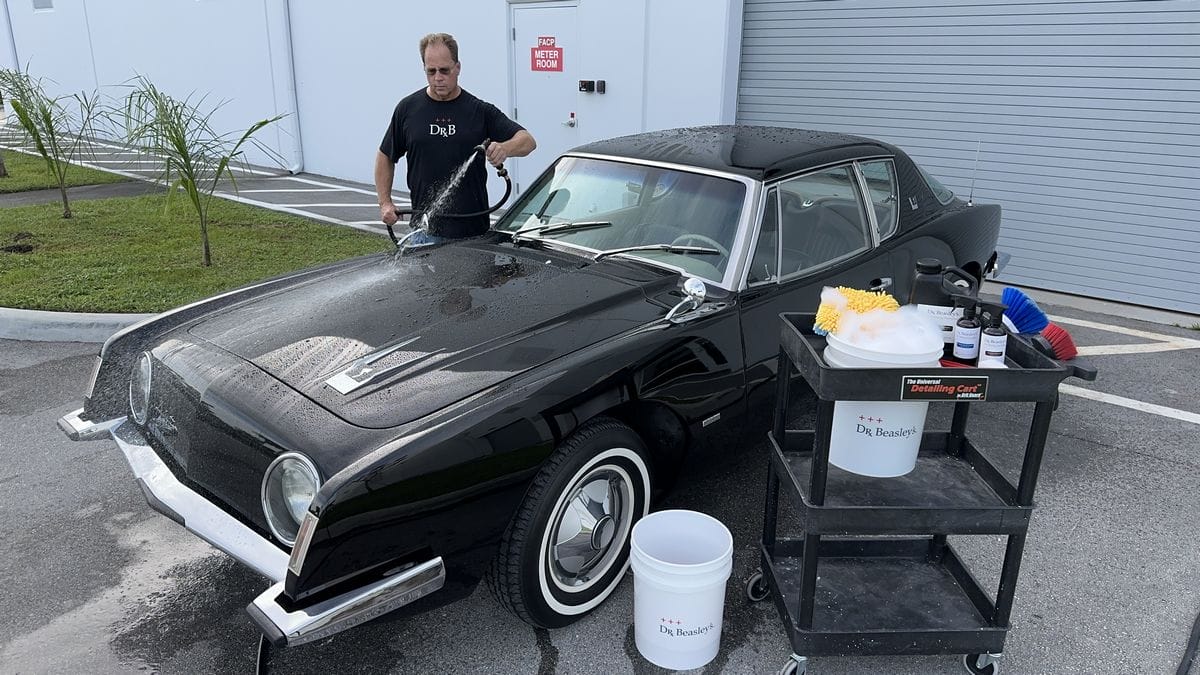
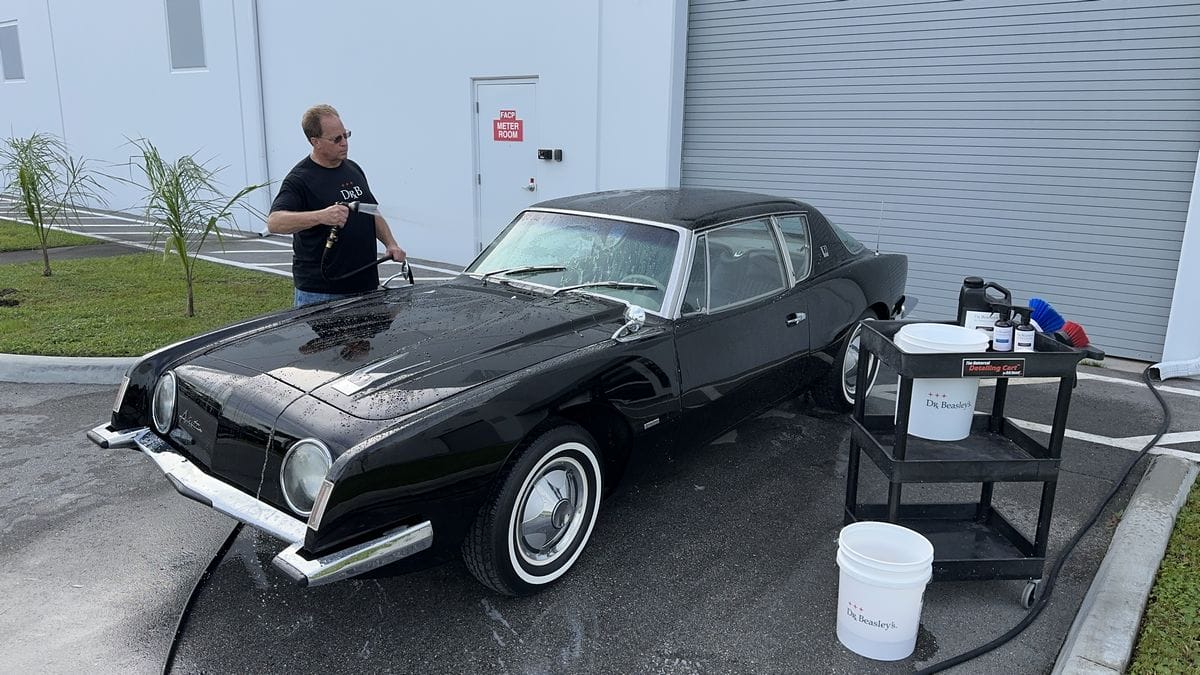
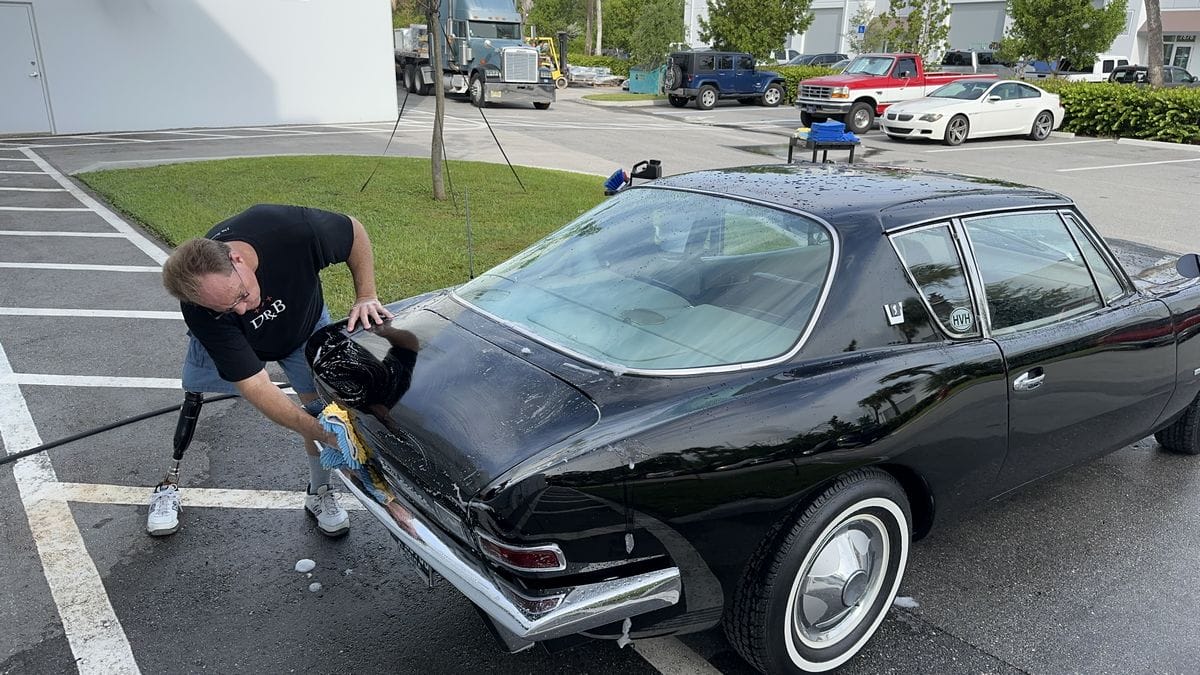
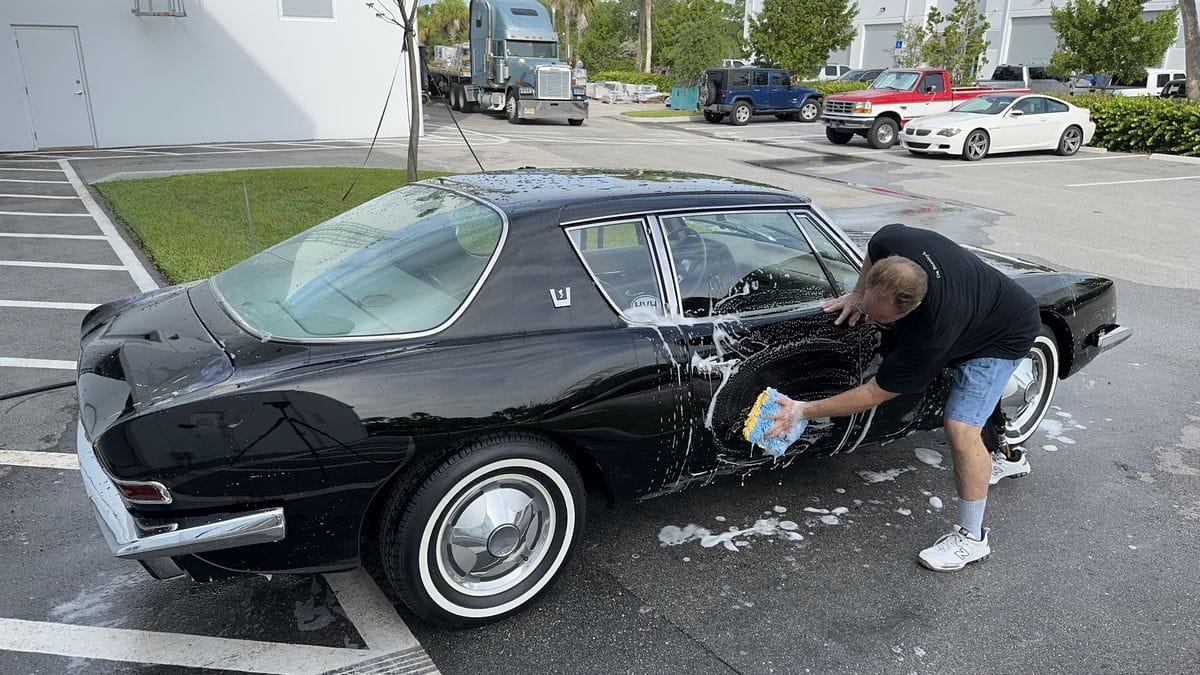
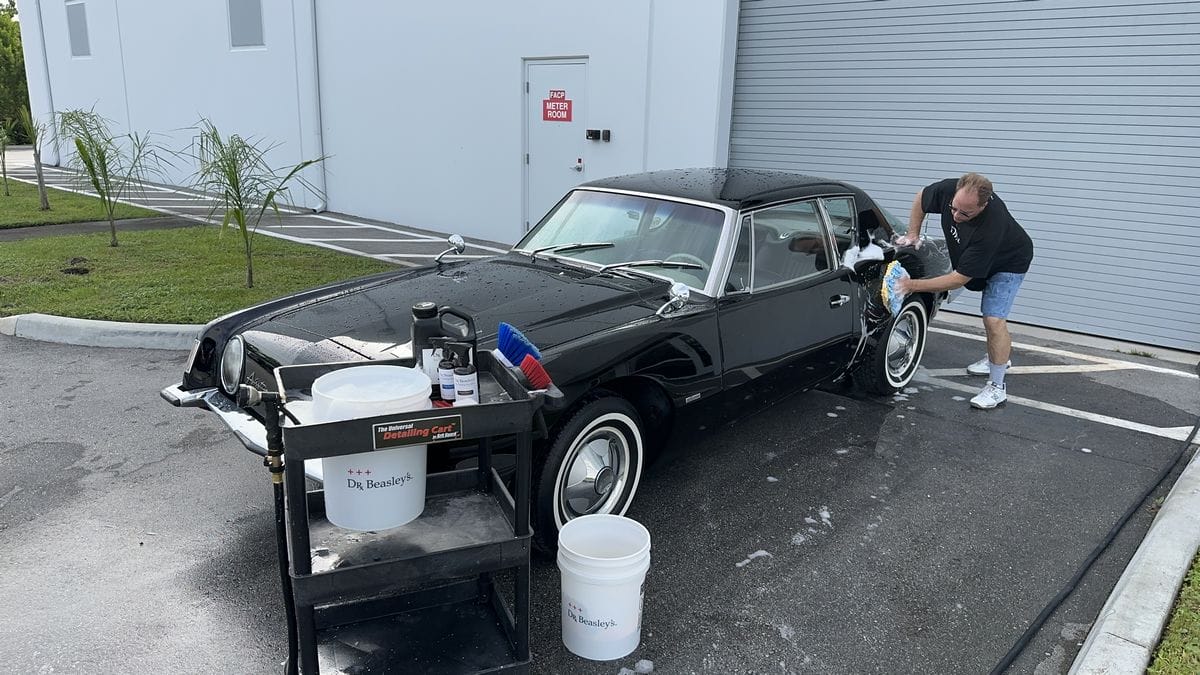
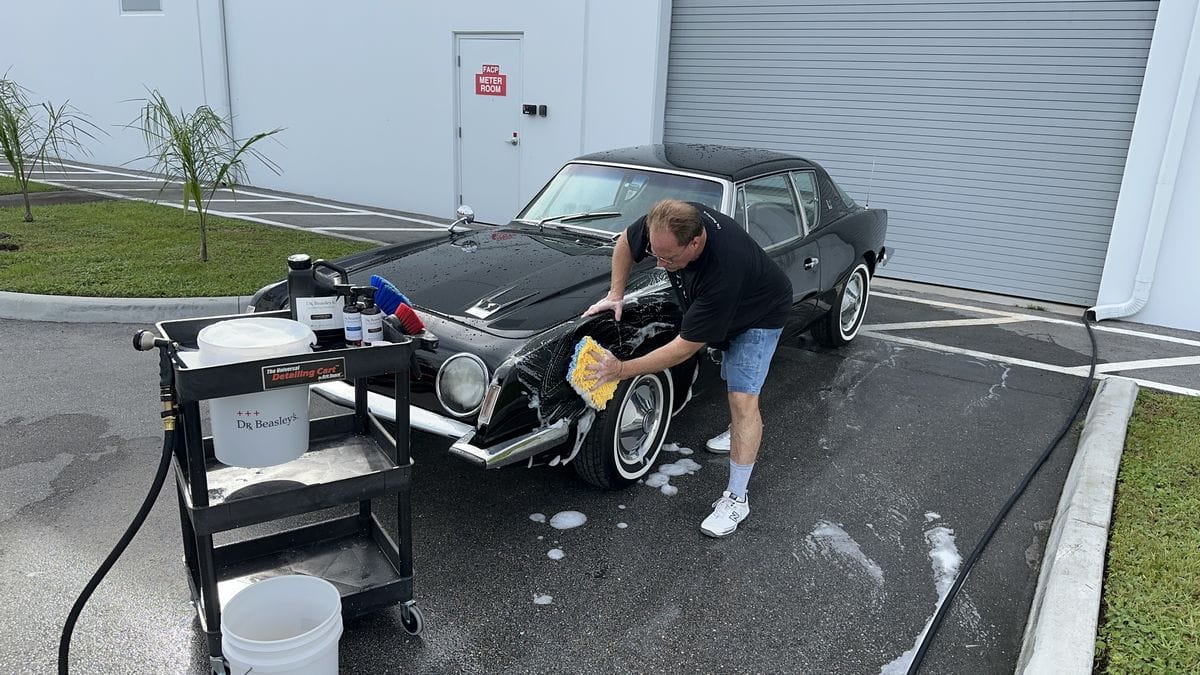
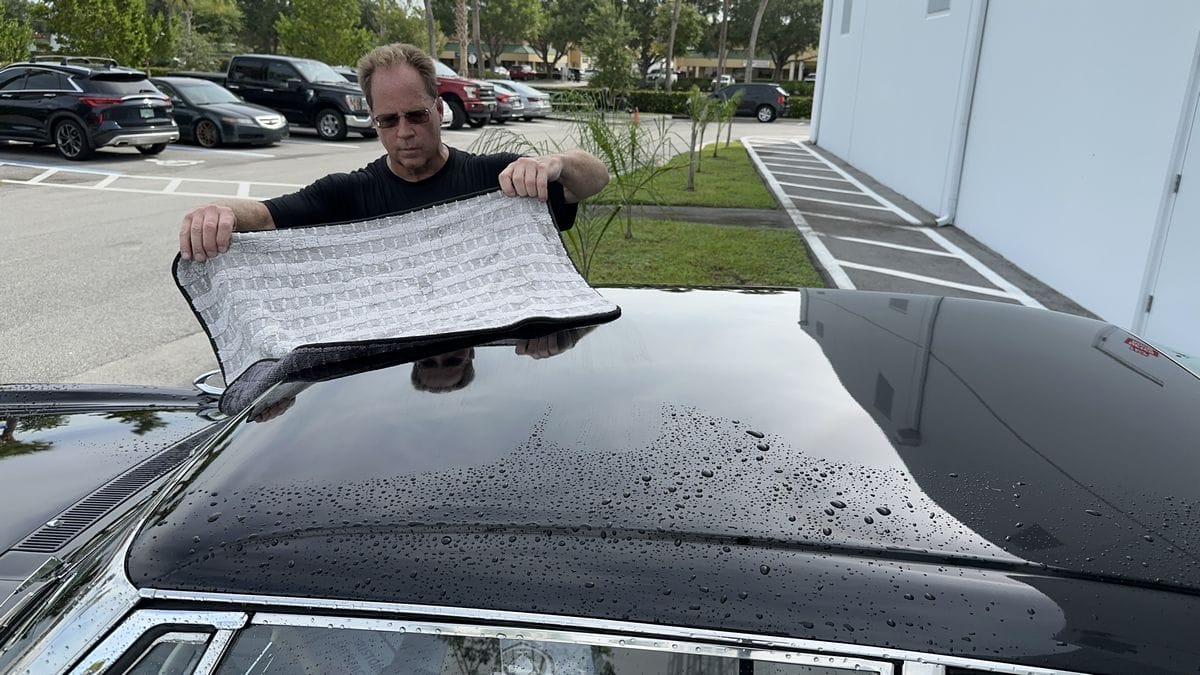
The Chenille Microfiber Wash Mitts you’ll see on the cart and that I will use to wash this black, 1963 Studebaker Avanti R2, cost $9.99 apiece. So the wash mitts cost $5.00 more than what a quality microfiber towel costs.
At the time I wrote the first version of this article, I shared the multiple microfiber towel method to make this style of car wash more appealing due to the lower upfront cost of the towels. For this how-to article, I’m going to show an even MORE careful approach for washing a black car and instead of using microfiber towels, I’ll use and show Chenille Microfiber Wash Mitts.
I believe that using multiple wash mitts is actually a safer approach, but ONLY if you’re using clean, uncontaminated wash mitts. The wash mitts I prefer and recommend are the Chenille Microfiber Wash Mitts and I’m happy to explain why.

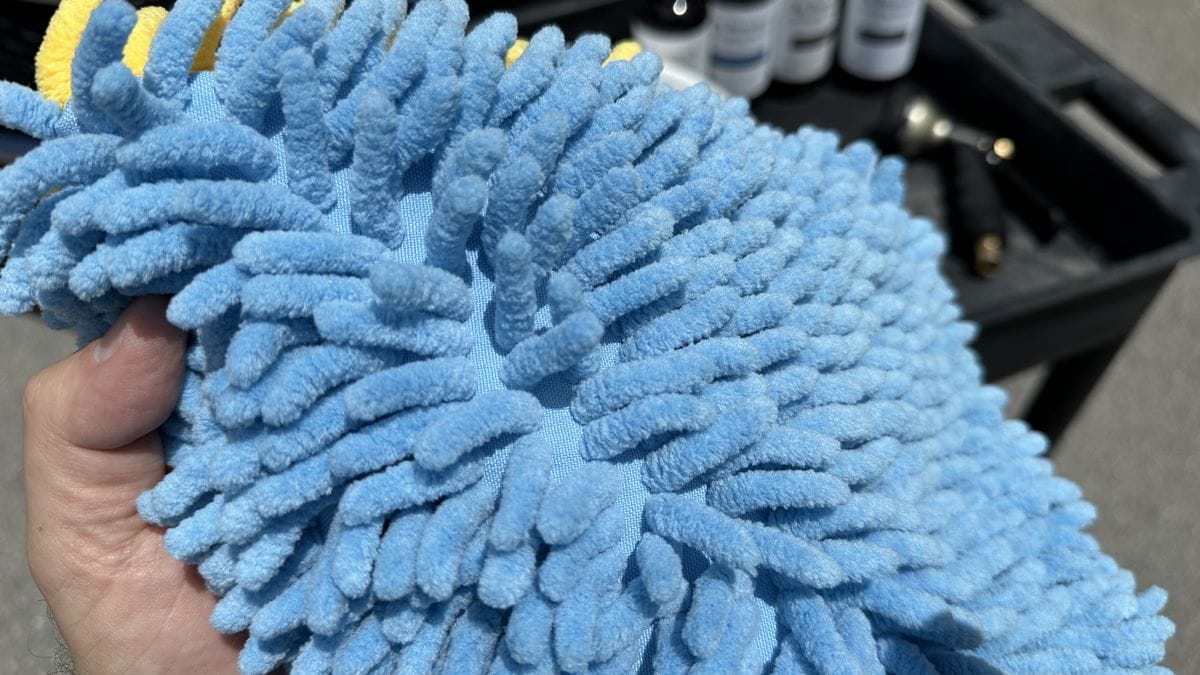
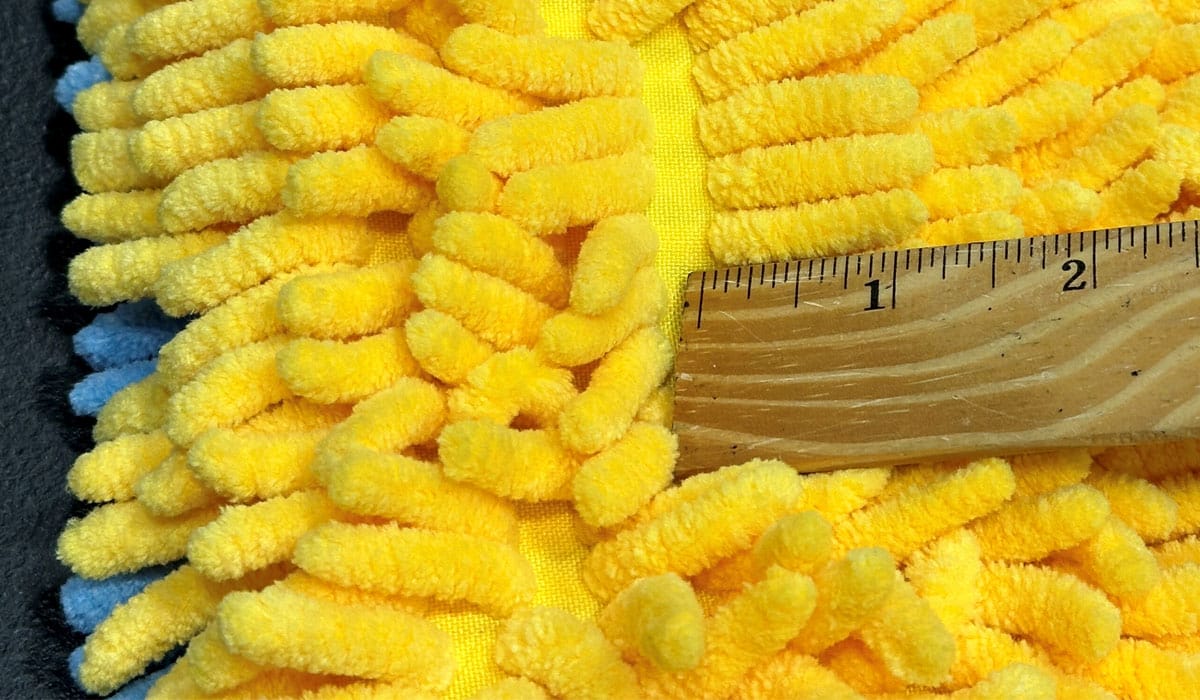
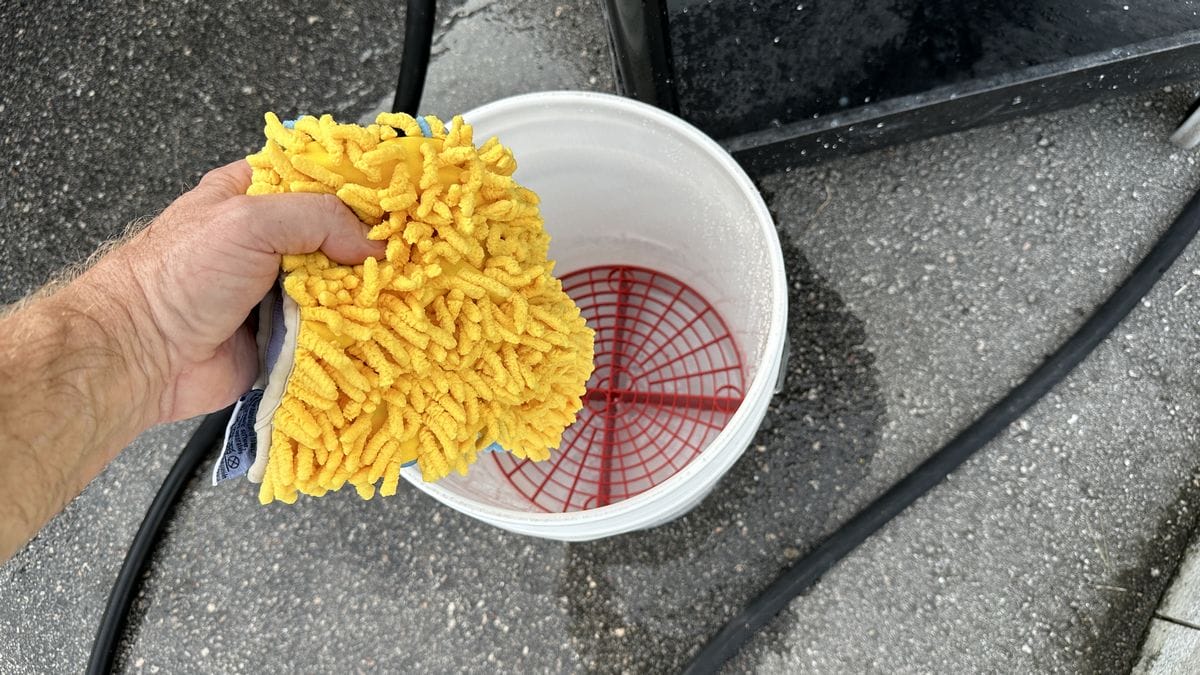
The Microfiber Chenille Wash Mitt has hundreds of individual microfiber FINGERS or what I like to call, Alien Caterpillars, because they look so foreign compared to other types of microfiber products.
These microfiber fingers offer 4 benefits:
Maximum Surface Area: When washing the car, these microfiber fingers can flop around, continually exposing a fresh side of the finger. Because these microfiber fingers are a little over 1” in length, there’s plenty of material to gently agitate the car wash soap and loosen any surface dirt and/or contamination.
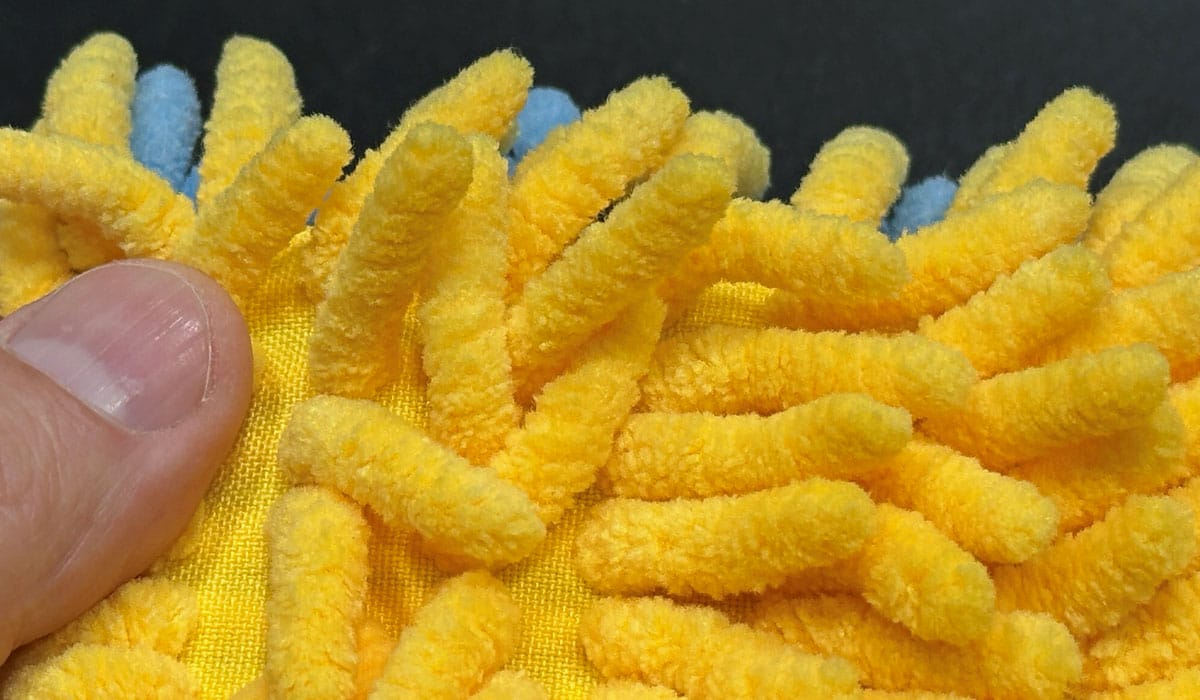
Soft Tufts of Fiber on Each Finger: The surface of these microfiber fingers themselves have very tiny tufts of fiber, which both aids in gentle cleaning but also RESISTS becoming contaminated with repeated use.
Easy to Clean in Washing Machine: The loose, multiple microfiber fingers come clean when washed. When you place these in a washing machine, as the washing machine runs through the wash and rinse cycles, the microfiber fingers will easily jiggle and flop around and this enables any dirt lodged onto the surface to flush off the microfiber fingers.
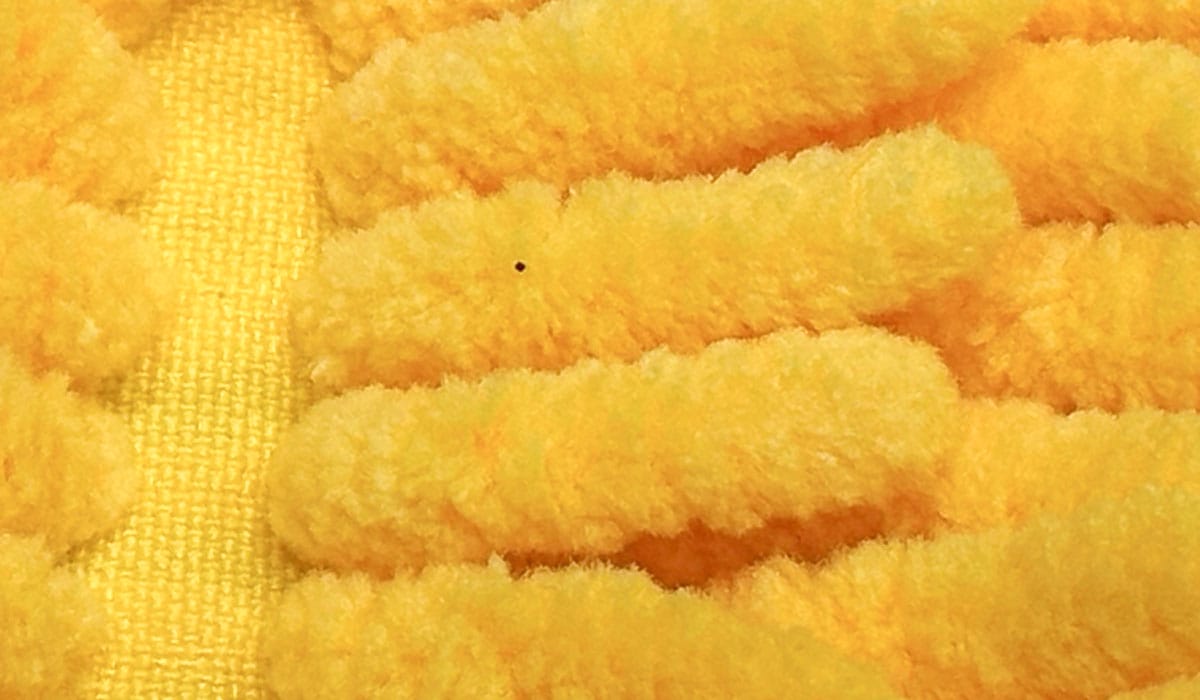
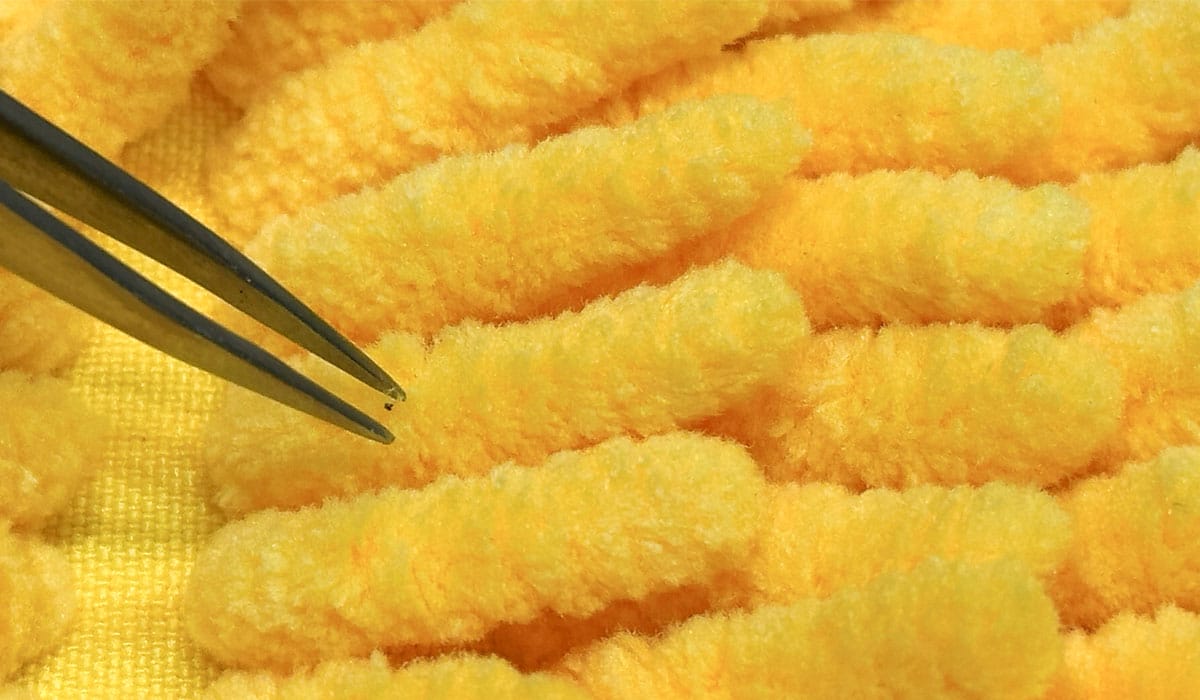
Easy to Inspect: Because the microfiber fingers can easily be separated this makes them easy to inspect both tactically with your hands and also visually. Then if any contamination is discovered, it can easily be picked out of the tiny, short tufts of fibers.
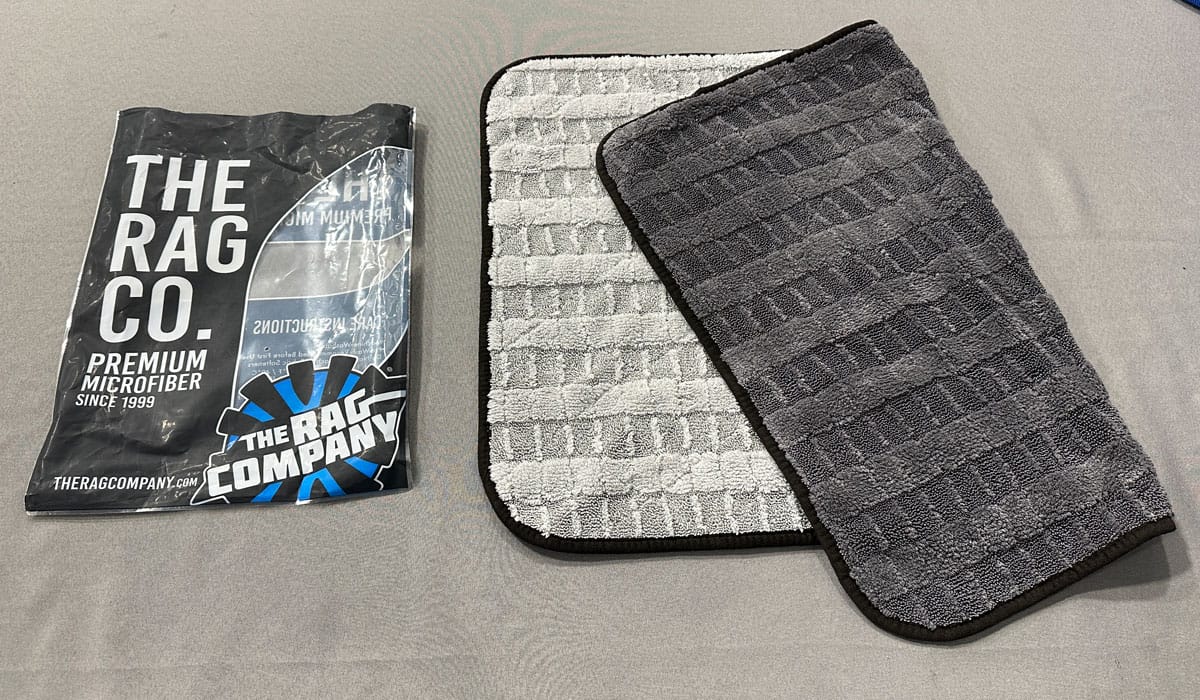
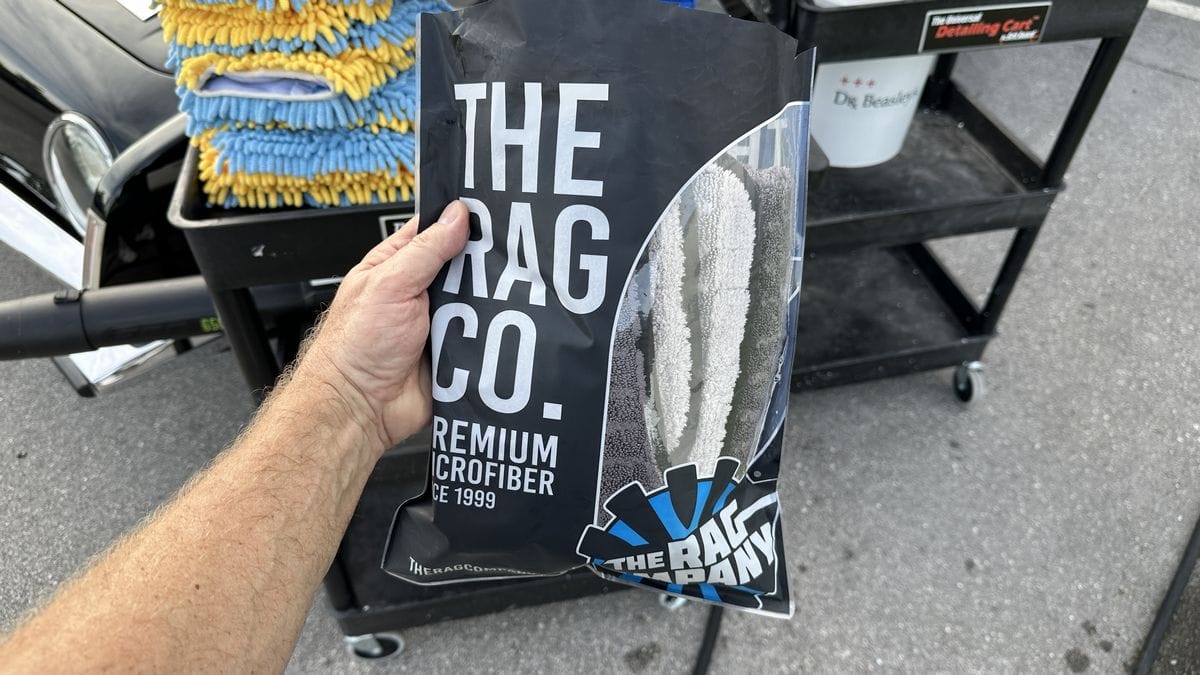
Recommended Drying Towel for Black Cars: 20”x30” Gauntlet by The Rag Company
For drying towels, there are a lot of great options on the market today. The KEY thing is, whichever brand and style you choose to use, just be sure to avoid dropping these towels onto the ground when drying your car.
The really good drying towels are the large or long nap microfiber towels. The large or long nap makes them super plush when wiped over scratch-sensitive clear coat paints. This long fiber nap also holds tons of water so depending upon the size, you can usually dry your car with a single towel.
The towel I currently like and will show below is called the 20” x 30” Gauntlet from the Rag Company. I keep the original bag and use this to store this microfiber drying towel after washing and drying.
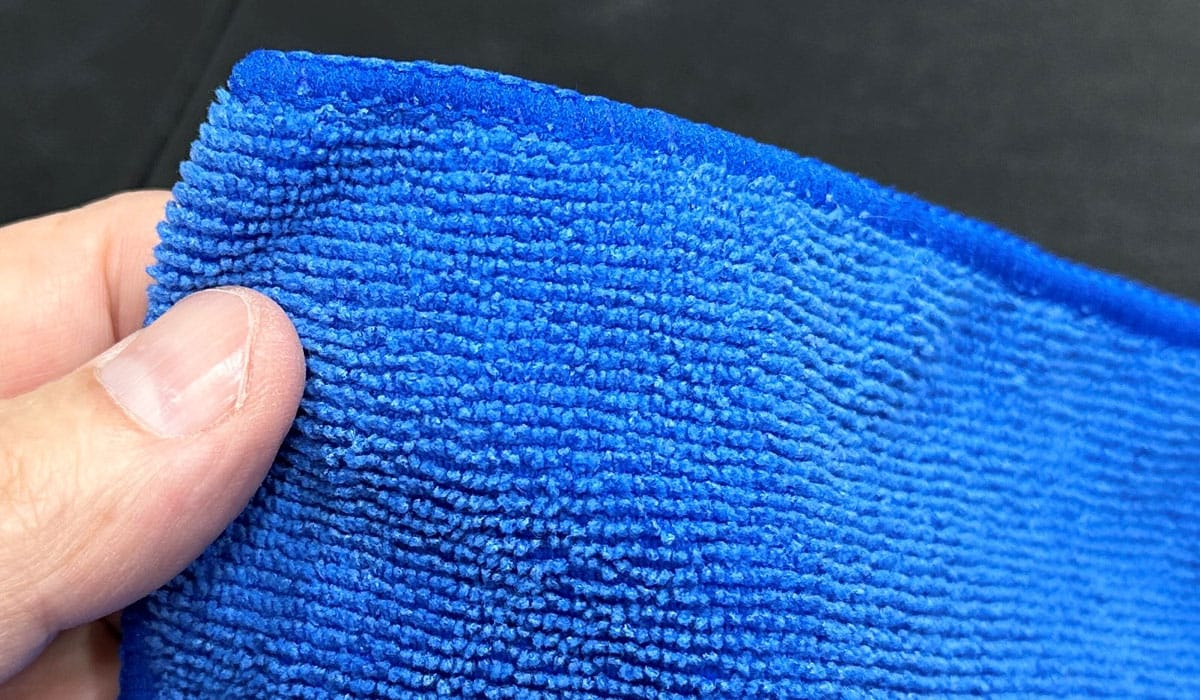
Recommended Washing Towel for Black Cars: Short Nap Microfiber Towels
While the method I teach in this article calls for multiple wash mitts, multiple microfiber towels can also be used to wash a black car. Years ago I wrote this same article sharing how I wash black cars to avoid putting swirls and scratches into the paint. In this article, I shared the multiple towel method primarily because it costs less to use multiple towels, versus purchasing and using multiple wash mitts.
The blue, microfiber towels you’ll see on the detailing cart cost $3.99 apiece and yes, you can find microfiber towels for less money, but like all things in life, you get what you pay for. Using quality microfiber towels to wash a black car is also, in my opinion and experience, a better option than using a single wash mitt to wash a car.
These towels have a SHORT NAP, or short pile length. This means they have very short or tight fibers that make-up the surface of the towel. Here’s why that’s good for washing a black car:
- Doesn’t Trap Particles Easily: Extremely fluffy or long fiber nap style microfiber towels collect particles and contamination in their fibers over time. Short nap microfiber towels, however, tend to remain uncontaminated. This makes them safer for washing cars or anytime you need to remove a detailing product like a spray detailer, polish, or wax.
- Easy to Inspect: The short nap makes it faster and easier to both FEEL the towels when inspecting after washing and drying as well as to see and remove any discovered contaminants.
If you’re on a budget and you prefer to keep the washing process as simple as possible, then use the multiple microfiber towel method, which usually requires 7 to 12 towels, depending on how large of a vehicle you’re washing and how many body panels it has. There’s a huge difference in the number of microfiber towels needed to wash a Cadillac Avalanche versus a Toyota Camry.
How to Wash a Black Car: The Multiple Wash Mitt Method
Washing a black car without scratching the paint is very similar to how you would wash a car normally. All I’m going to do is tweak your technique a tiny bit.
WARNING: NEVER Wash a Black Car in the Sun — Always Wash in the Shade!
You should always wash a black car, and actually any car, out of direct sunlight. The problem with washing a car in direct sunlight is that the UV rays and the heat created by the sunlight will always be trying to dry the car as you’re washing the car. This can lead to water spots and streaks.
We’re lucky that at our shop, the entire front of the garage is in shade until about noon. For good measure, we always start early while temperatures are low.
Tools You Need to Wash a Black Car
First gather all the tools, products, brushes, etc., that you’ll need to do a proper wash job for your specific vehicle:
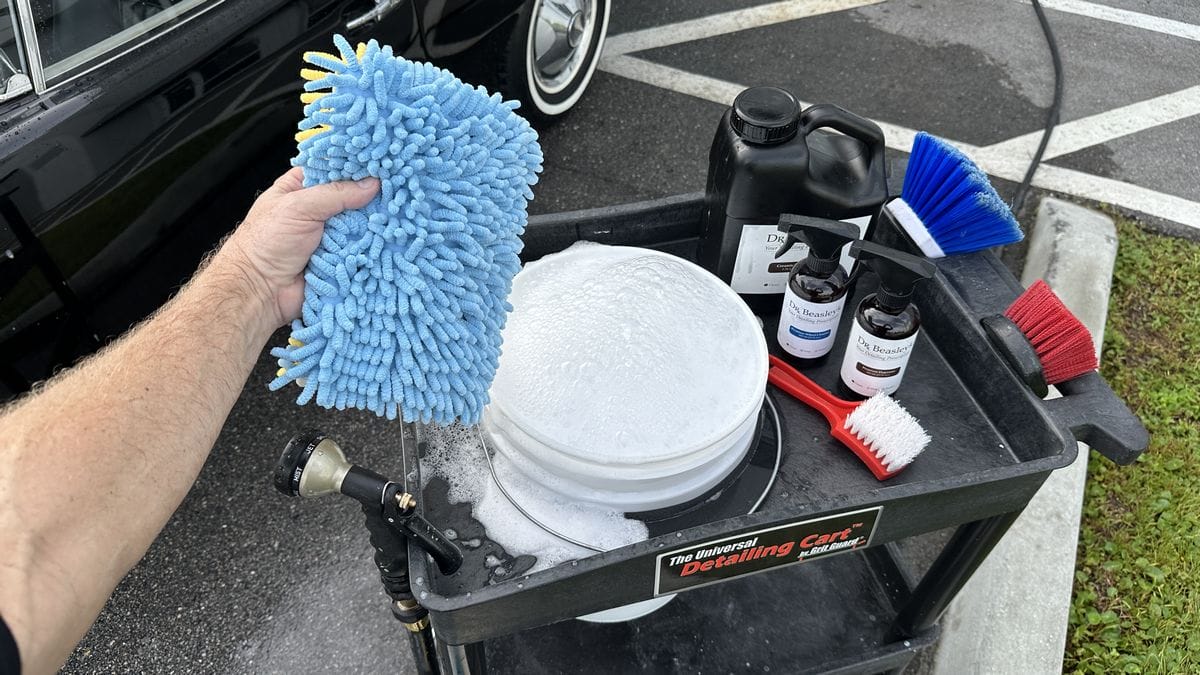
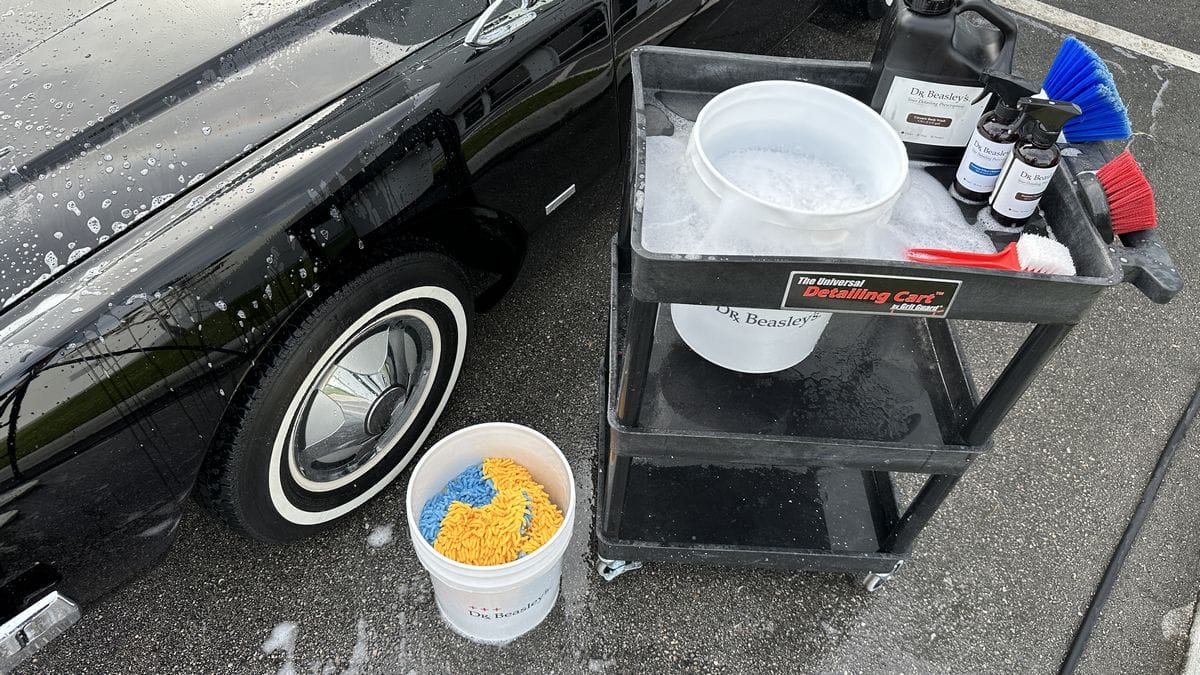
Buckets and Grit Guards: For me, I have two of the Grit Guard Universal Detailing Carts, one with a hole in the top shelf to hold my 5-gallon bucket of car wash solution, (now I don’t have to bend over each time I need to dunk a wash mitt), and a second Grit Guard Universal Detailing Cart to hold my wash mitts, leaf blower and drying towels.
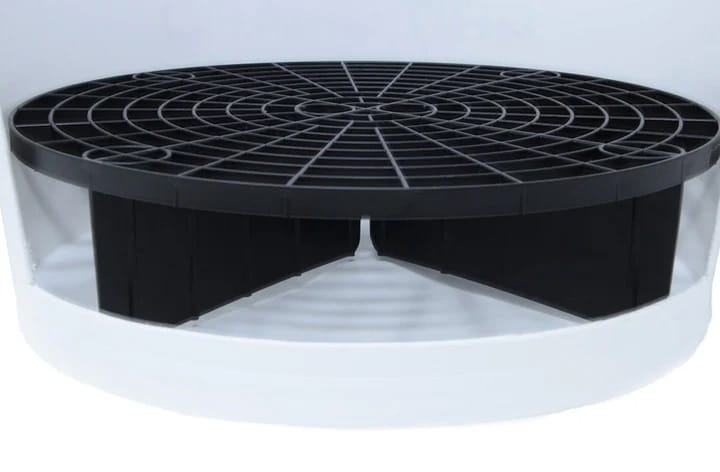
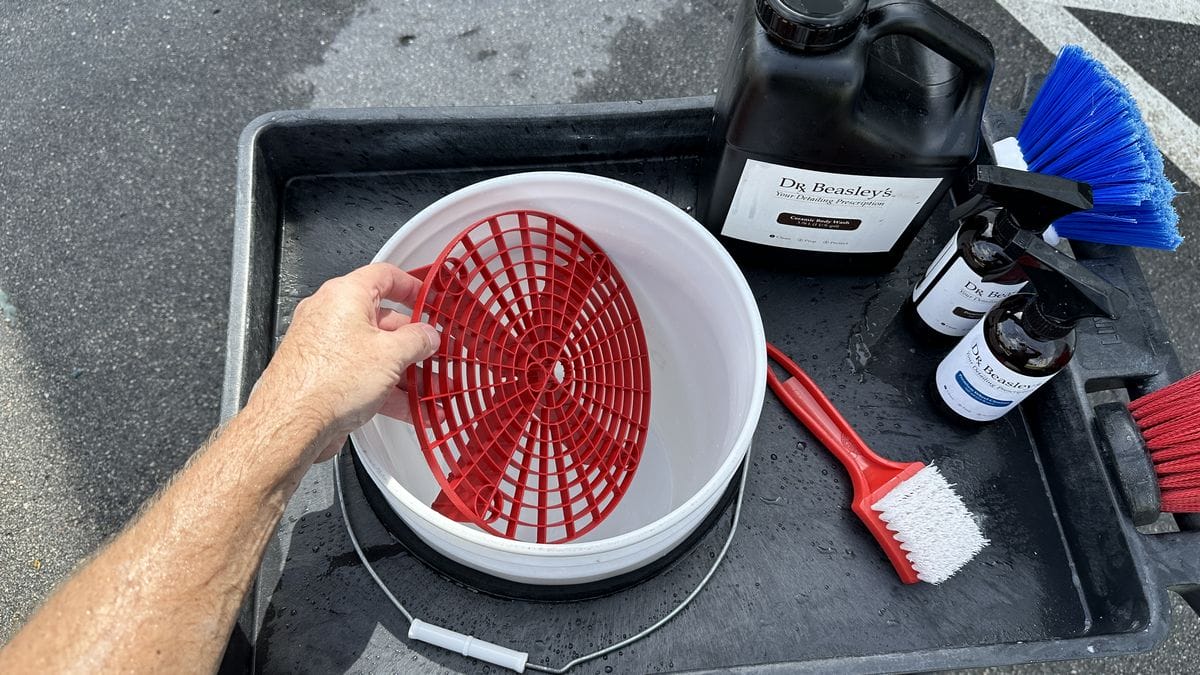
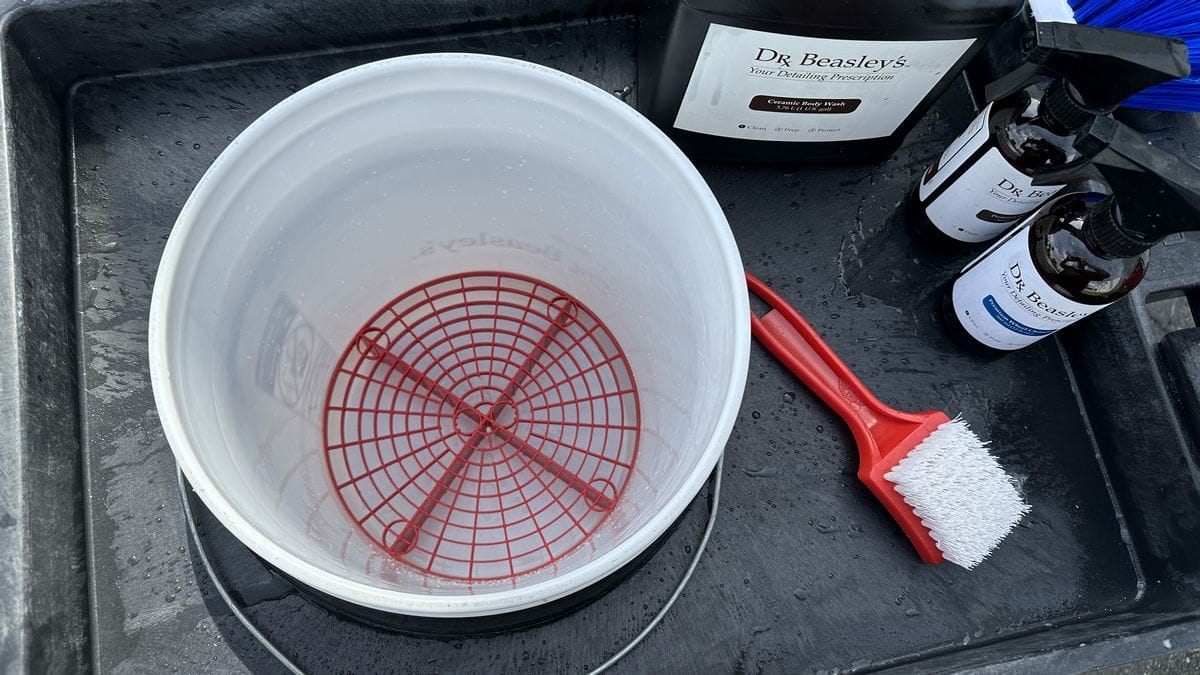
If you’ve never seen or used the original scratch preventer, the Grit Guard Insert, I strongly recommend getting one. The Grit Guard Insert costs around $8.00 but is worth every cent. The way this insert works is there’s a grill suspended about 2” off the bottom of the bucket by 4 vanes.
As you dip your wash mitt into the bucket to gather fresh soap, the idea being to press and rub the wash mitt against the top of the Grit Guard Insert as this will loosen any dirt accumulated onto the wash mitt so it can fall off.
After any loose dirt or contaminants come off the wash mitt, they are trapped UNDER the Grit Guard Insert. The vanes act to help prevent any swirling of the water, which can lift the dirt off the bottom of the bucket and mix it back into the body of water above the Grit Guard Insert, where it can re-contaminate the wash mitt.
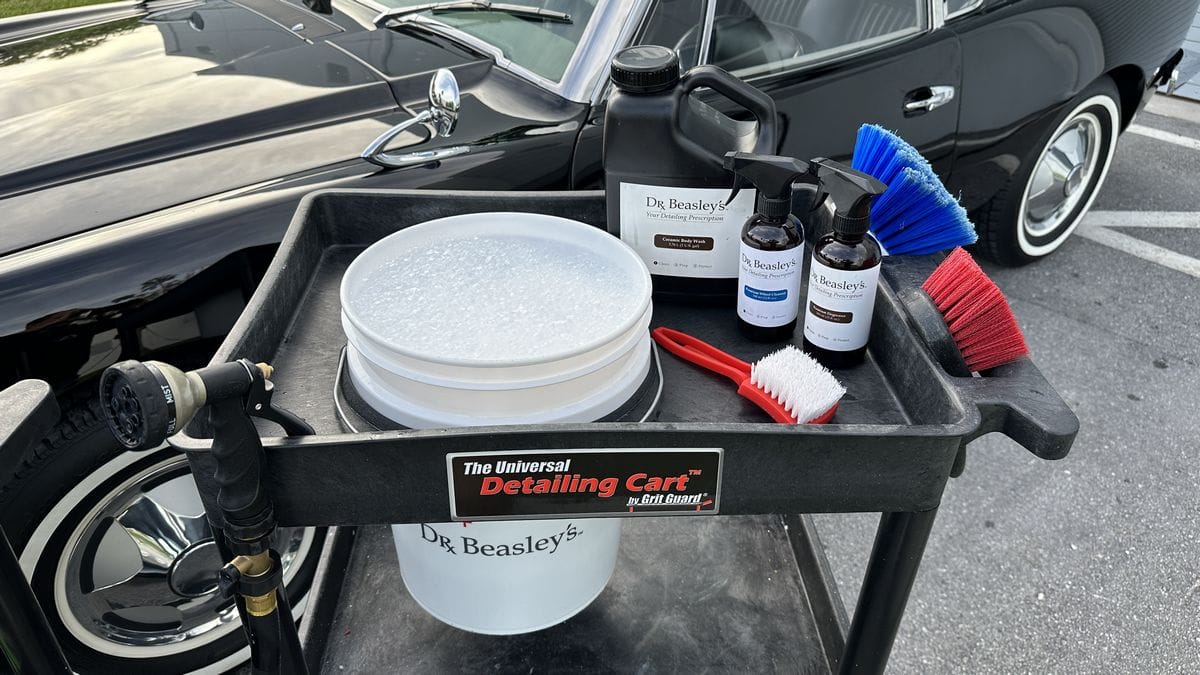
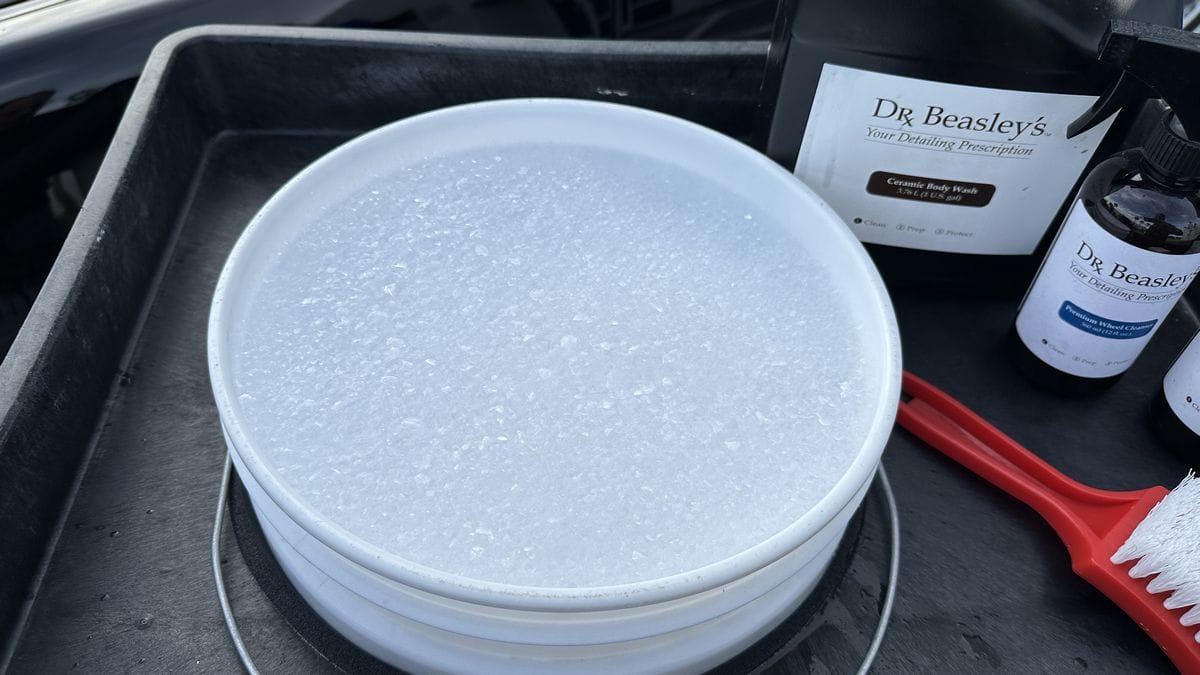
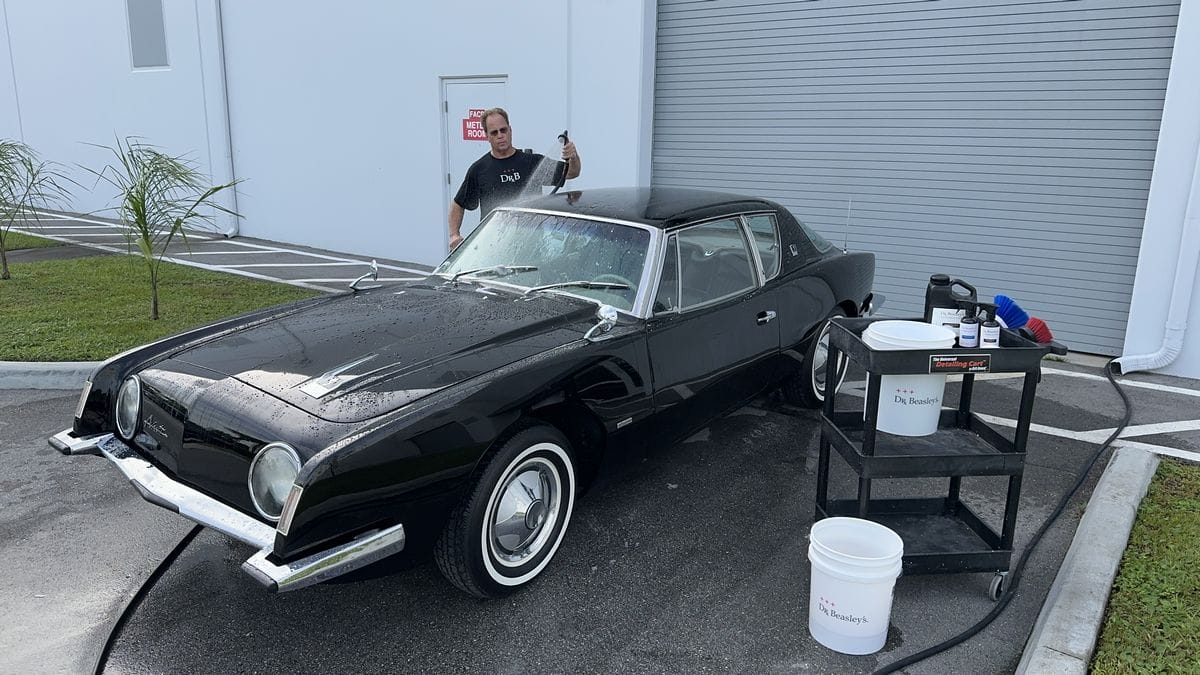
Premium, pH Balanced Wash Soap: The Dr. Beasley’s car wash soaps are all pH balanced and formulated to clean well while also providing plenty of lubrication. Another reason I like using a cart for the wash process is because it will hold other products like wheel and tire cleaners I normally use plus a collection of wheel and tire cleaning brushes. All important for a proper wash job.
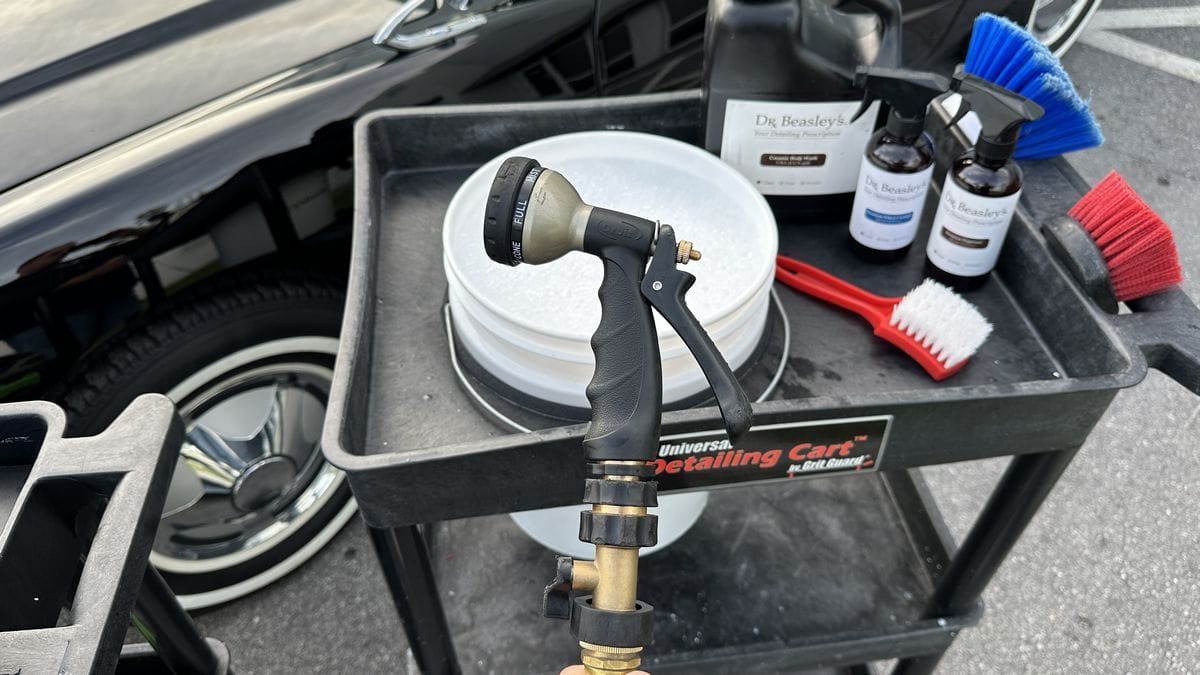
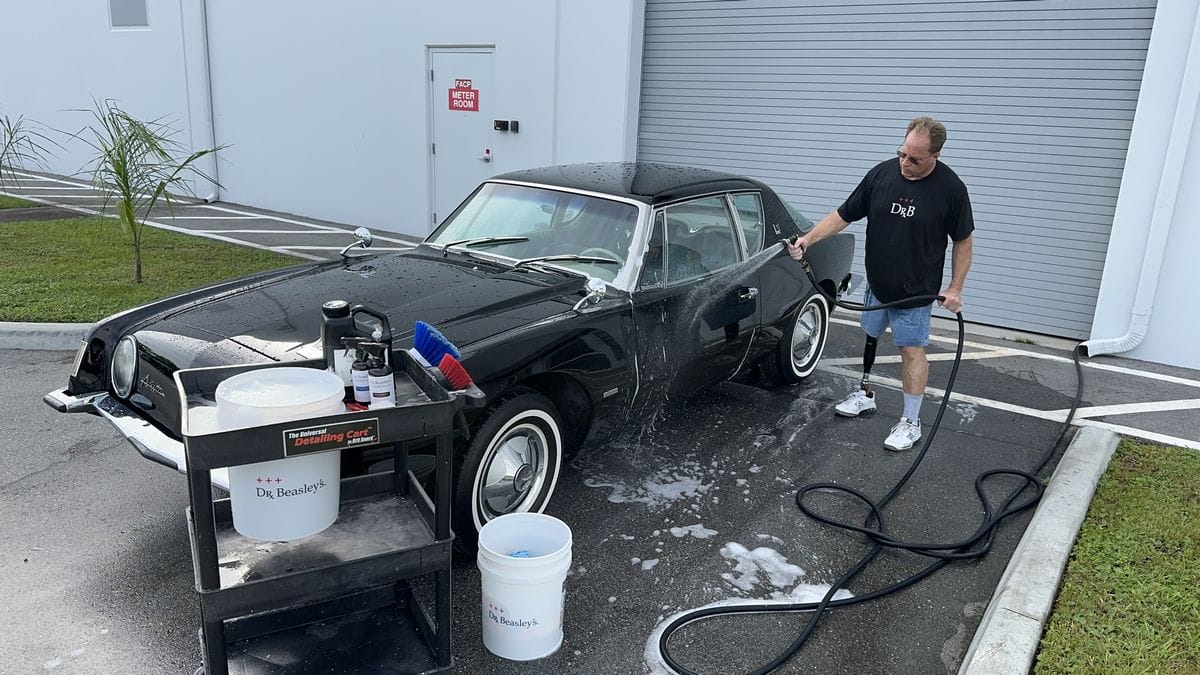
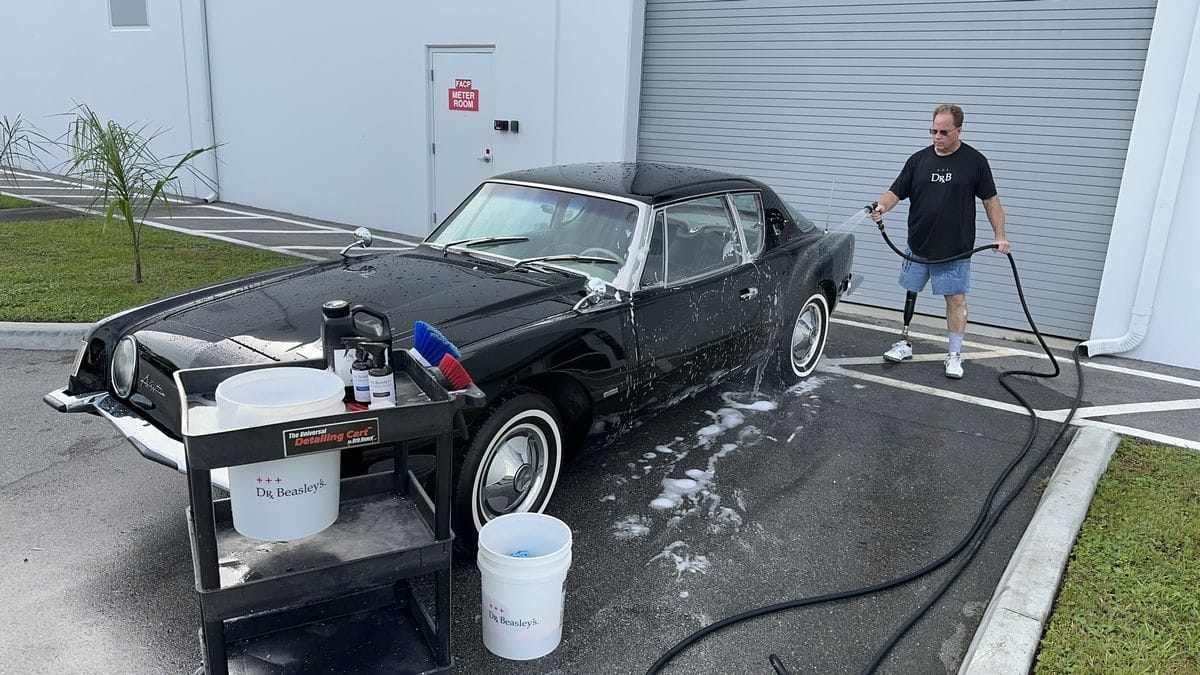
Quality Water Sprayer for Hose: The sprayer I like is the Orbit Garden Sprayer, which can be found at most hardware stores. I also like to use brass water connectors to make turning the water off and on at the end of the hose easier. These types of tools also enable you to remove and switch to other tools like Foam Guns and Foam Cannons. See the connectors in the picture above.
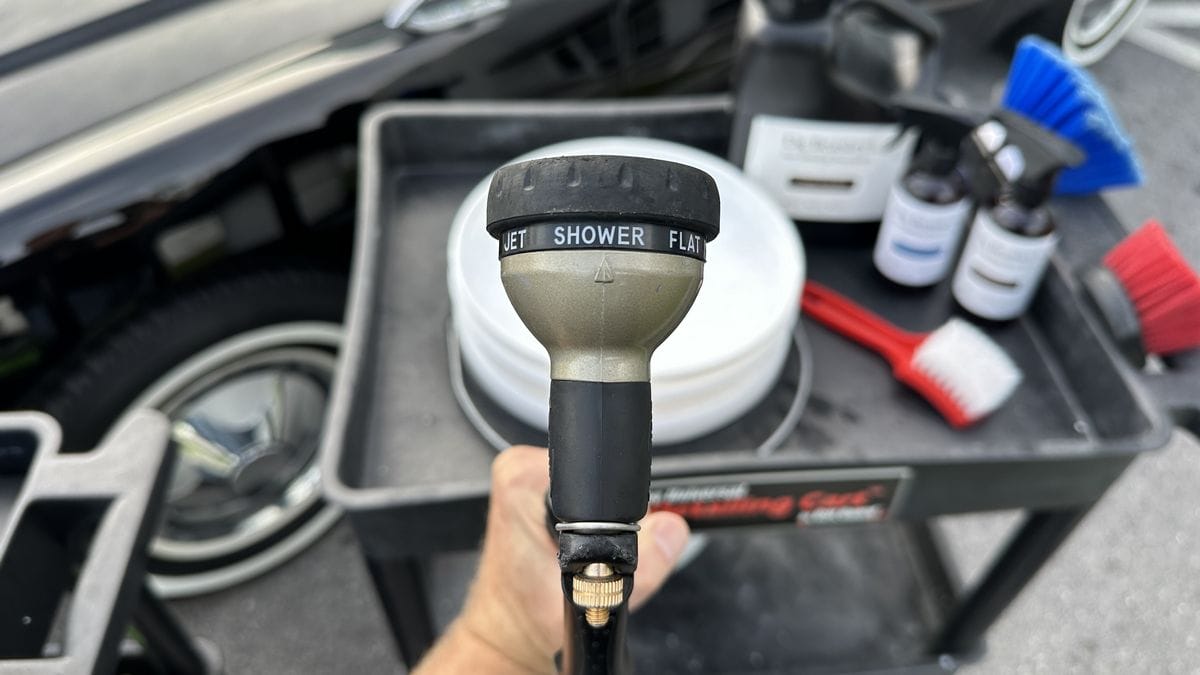
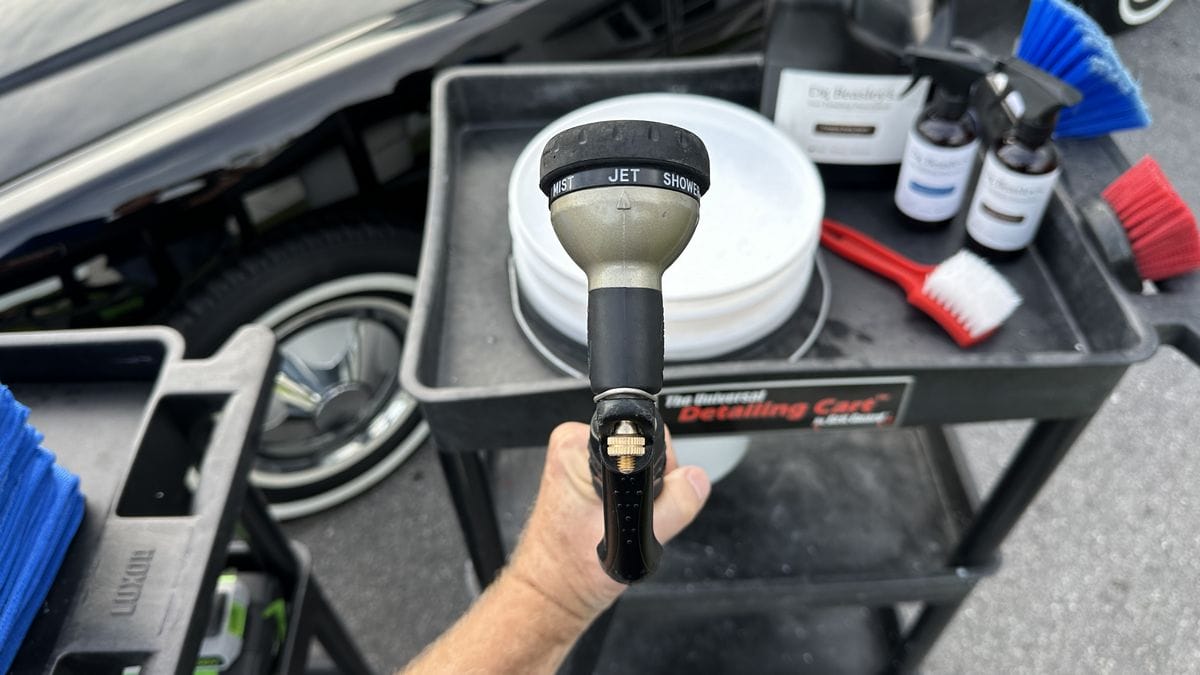
The reason I like this sprayer is because it offers multiple spray pattern settings. For the most part, the two settings I normally use are the Shower & Jet settings. I use the shower setting for things like wetting a dry car and flushing off car wash soap after washing a body panel. I like the Jet setting for blasting water and any loose dirt out of cracks, crevices, emblems, etc.
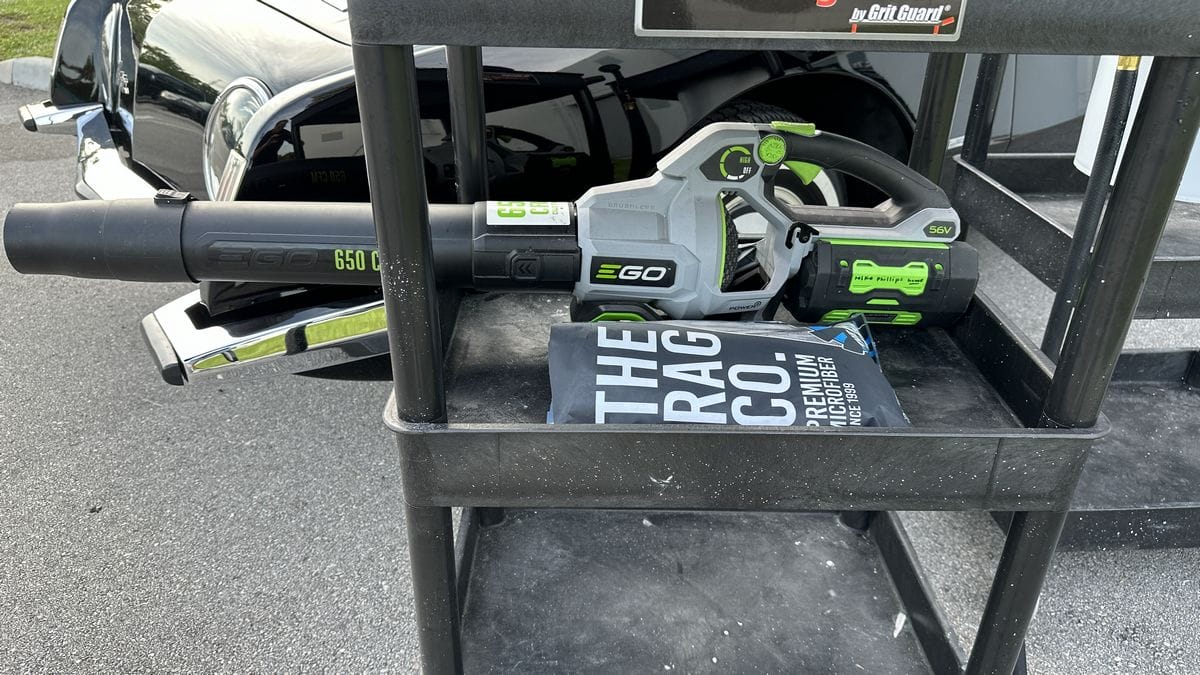
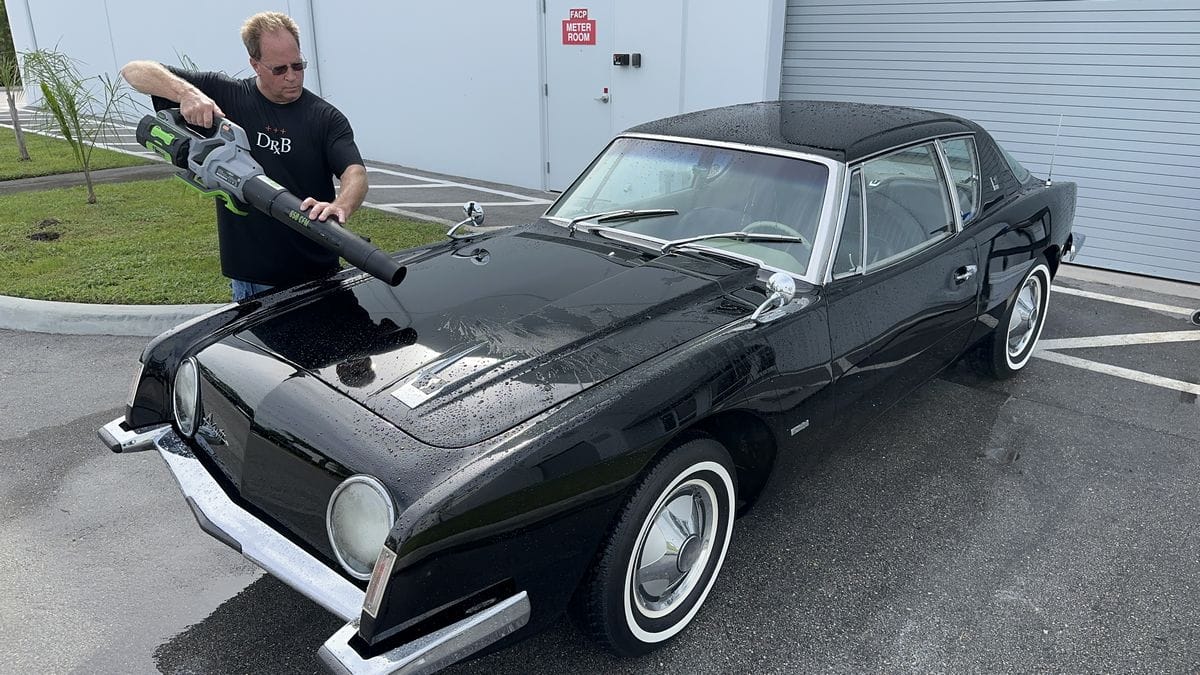
Drying Tools: Also on my detailing cart I store the EGO Cordless Leaf Blower and my Rag Company Gauntlet Microfiber Drying Towel.

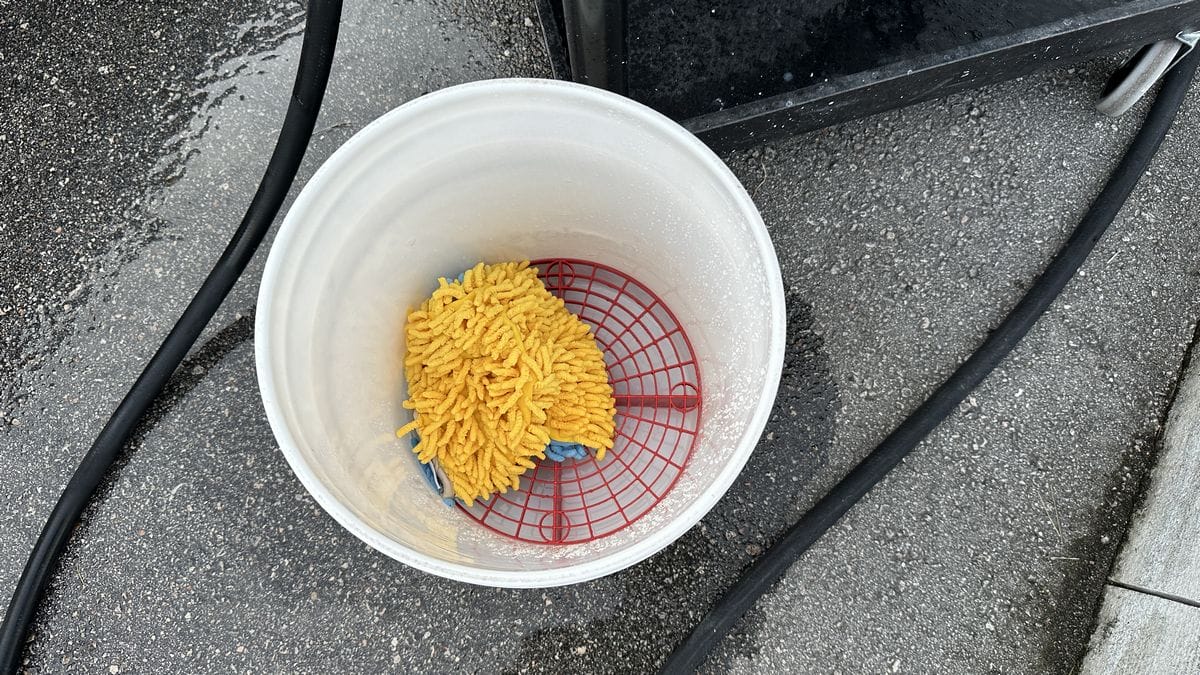
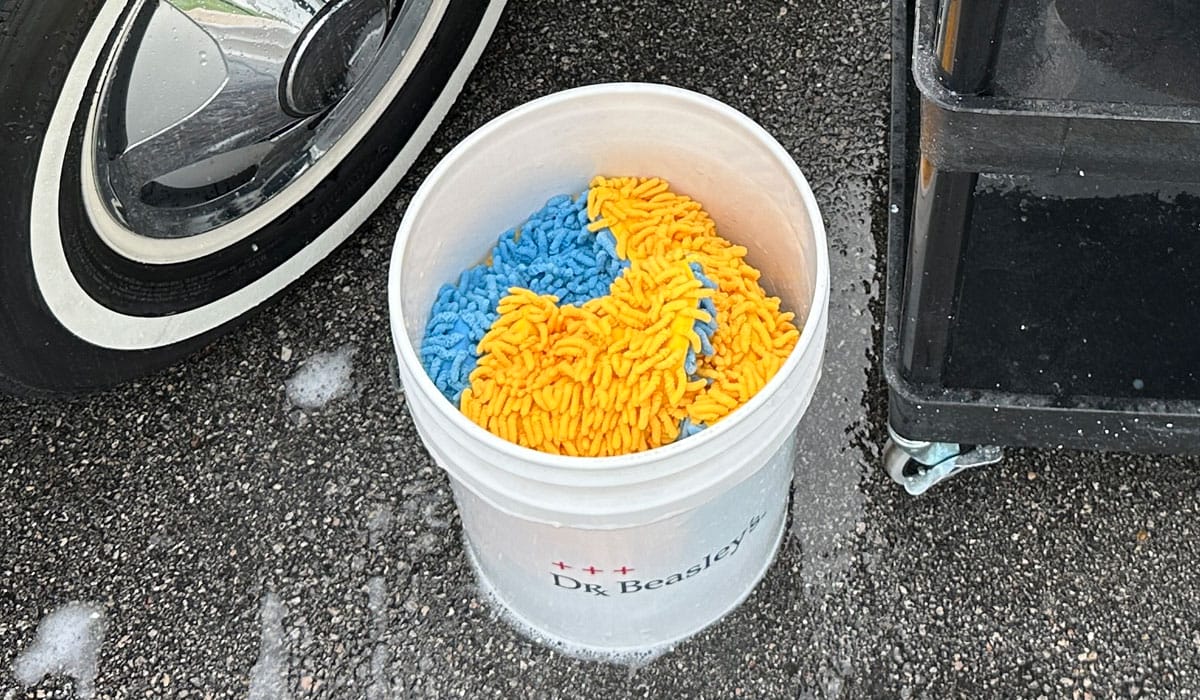
Bucket for Dirty Mitts and Towels: Besides all the tools and supplies I’ll need to safely wash this highly polished black car; I also have an extra CLEAN 5-gallon bucket with a Grit Guard Insert placed inside the bucket. This clean bucket is where I’ll place each wash mitt after using the mitt on one or two body panels.
This is the main secret to maintaining a swirl-free finish on a black car and that’s using multiple wash mitts and just as important, every time you wash your car, do everything you can to prevent your microfiber tools from dropping on the ground and becoming contaminated.
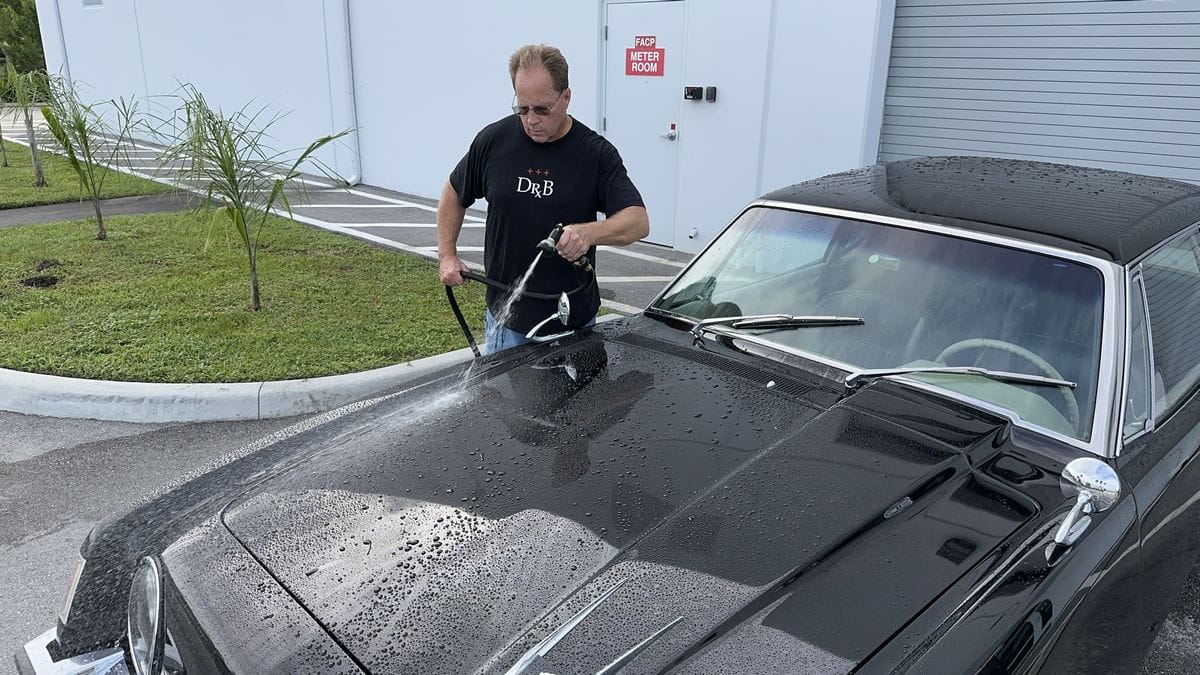
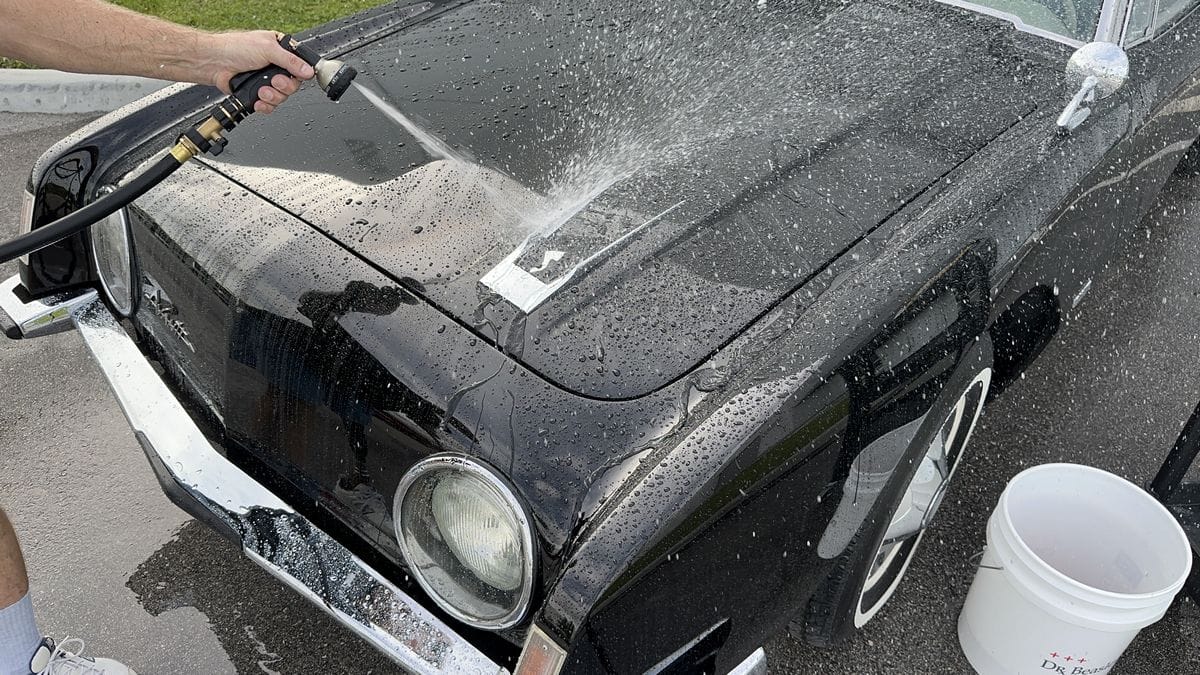
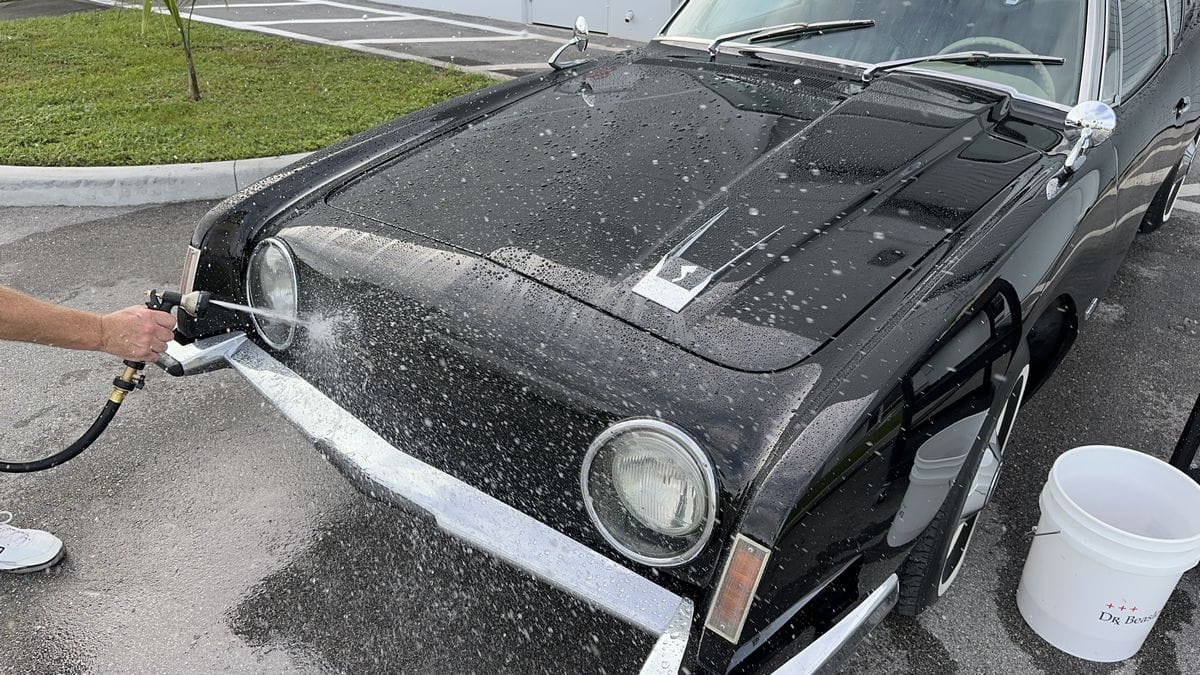
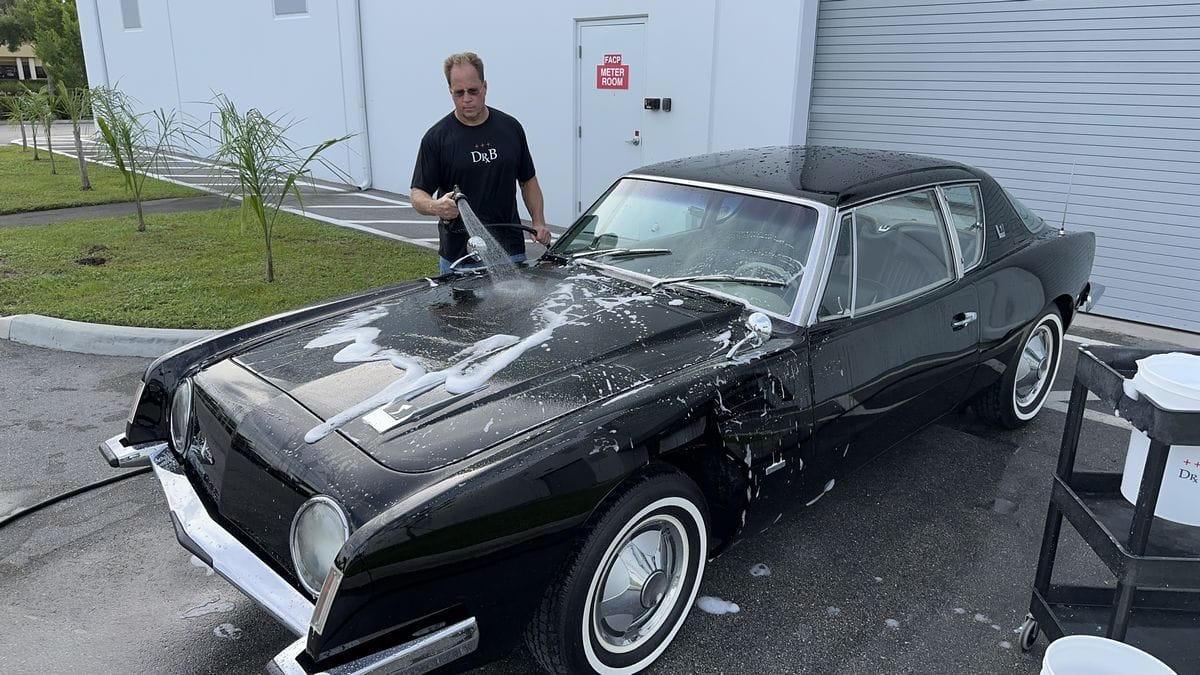
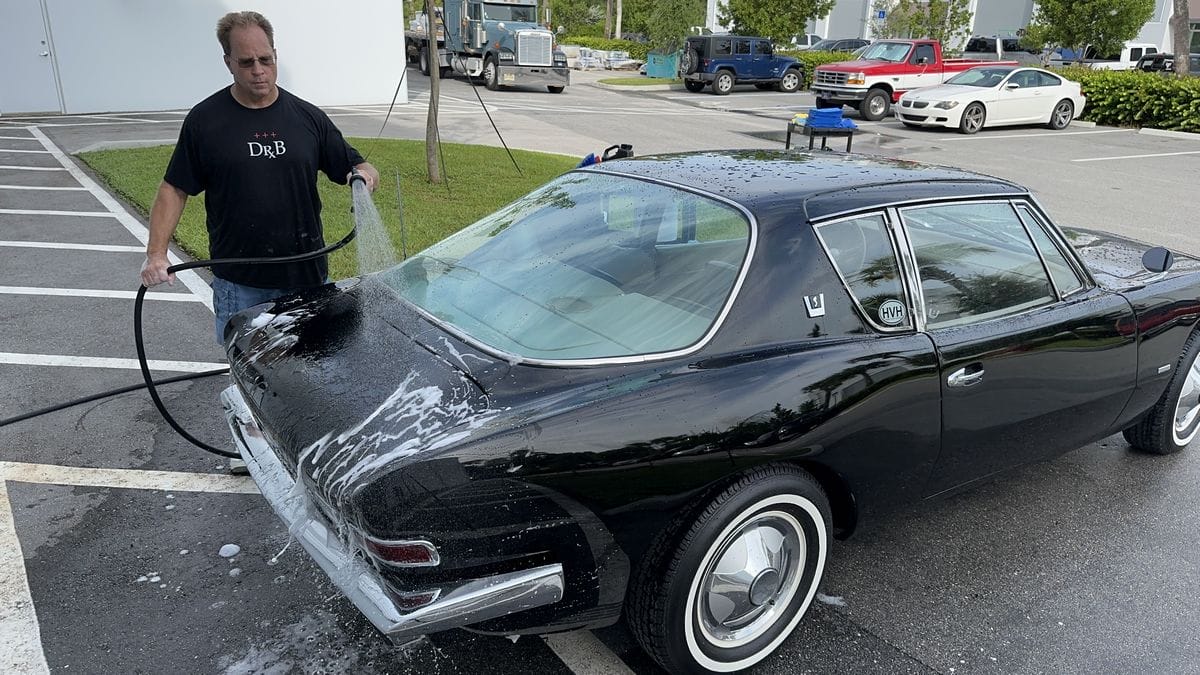
Step 1: Thoroughly Rinse Car
This removes loose dirt on the car. For this initial wetting of the car, I use the Shower setting.

Once the entire car has been wetted down and rinsed, next I like to use the Jet setting to blast any crevices, like you see in the below pictures where I’m blasting out any loose dirt in the channel between the hood and fender.
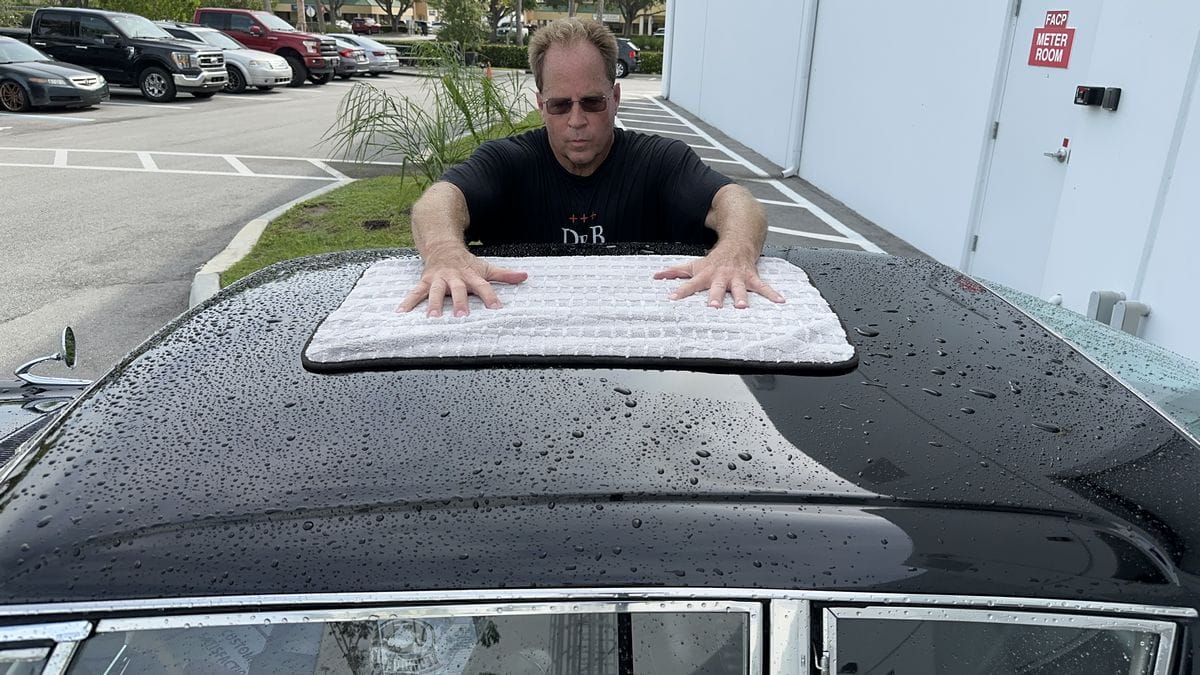
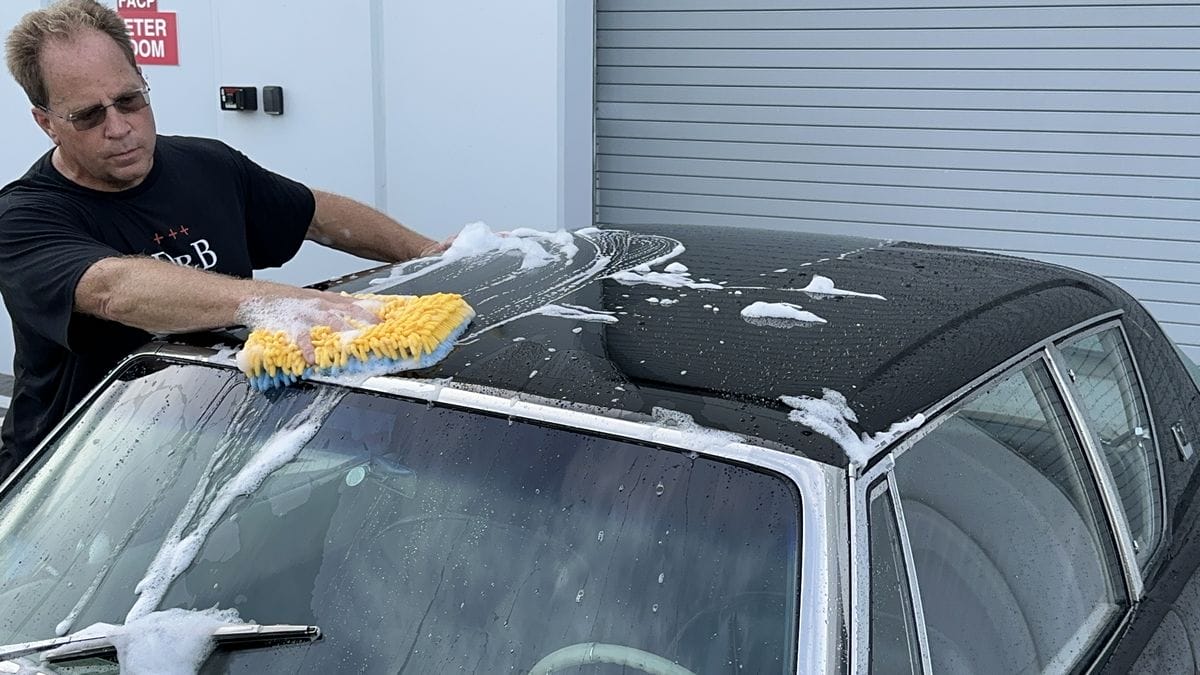
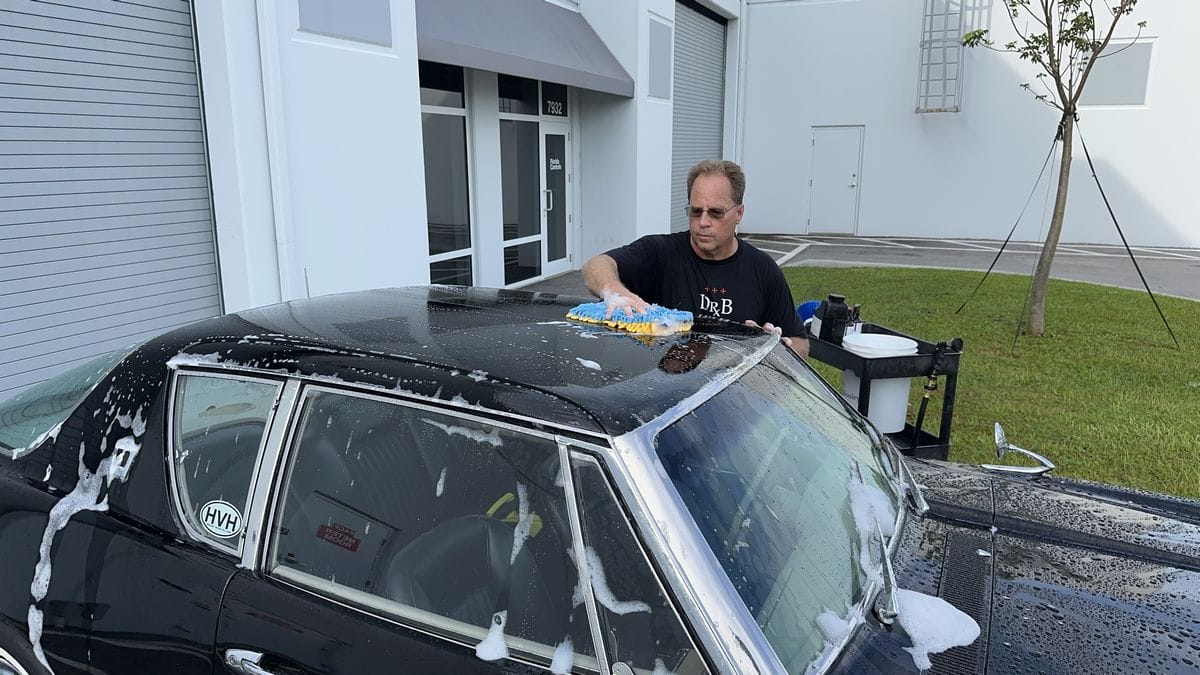
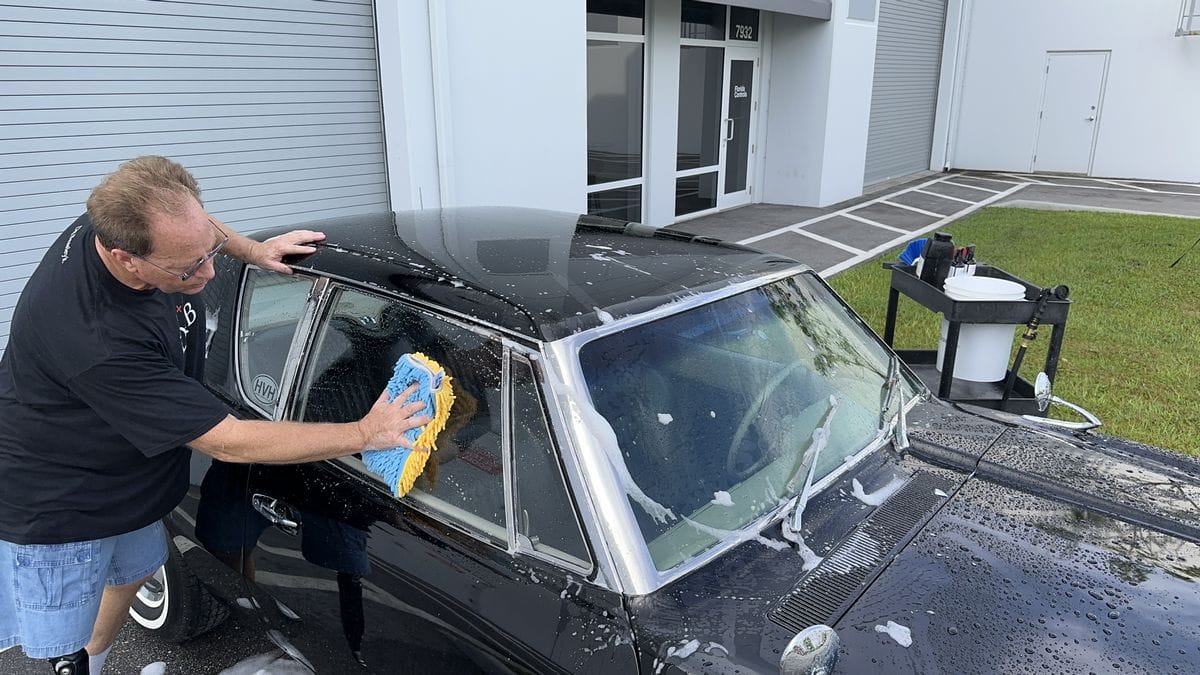
Step 2: Wash Both Sides of Roof + All Glass
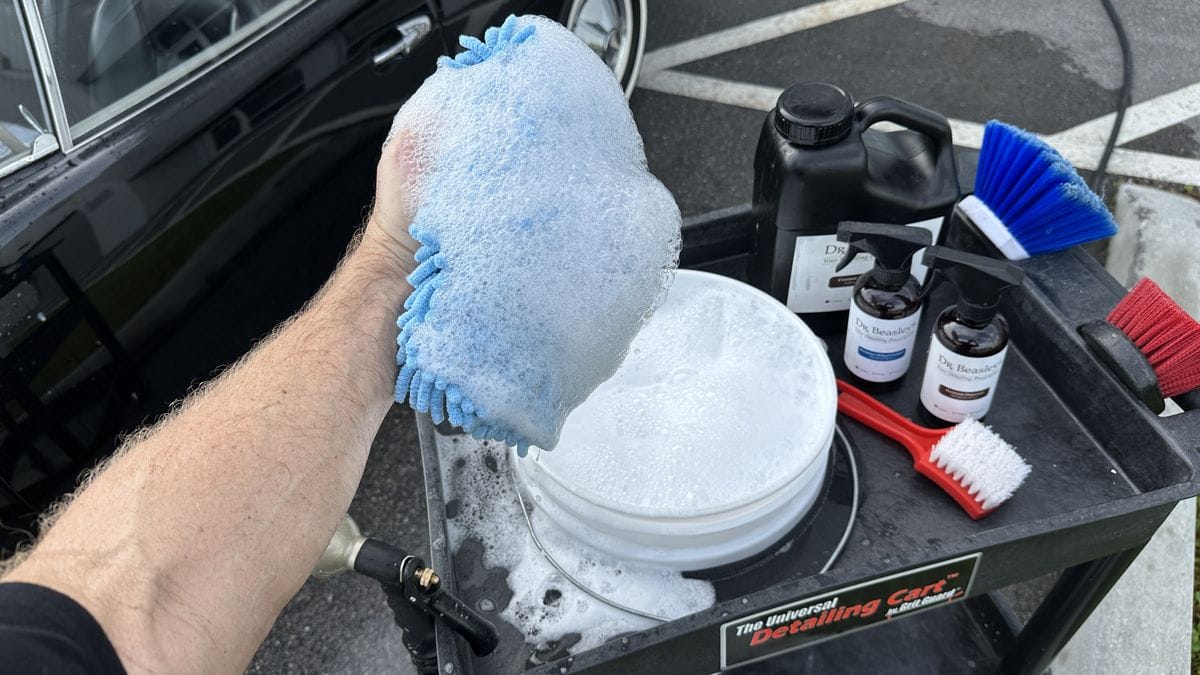
Start with your first wash mitt, gather some soapy water and wash both sides of the roof and all the glass.
WARNING: Be Gentle — Never Scrub Black Paint!
When washing a black car, don’t SCRUB the paint with your wash mitt.
For example on the roof, place the mitt in the middle of the hood as far as you can comfortably reach, hopefully to the middle portion. If you cannot reach the middle of the roof of your car you may need a step stool or work platform.
Next, make gentle back-and-forth motions from the front of the car to the back of the car. After each pass, move the wash mitt towards you until you’ve made enough back-and-forth motions to move the mitt over the entire half of the roof.
You only need to make one or two passes over each section of paint. Any more than this and now you’re scrubbing. The goal is to LOOSEN any dirt that did not flush off when you rinsed the car.
Assuming the paint on your black car is in fact in good or well-maintained condition – it shouldn’t take any more than this gentle approach to loosen the dirt so you can rinse it off the car.
What I see most people do when they wash their car is they excessively SCRUB the paint and if there is dirt on the car, you’re now RUBBING or GRINDING the dirt INTO the paint causing swirls and scratches.

Don’t scrub the paint on your car. THINK about what you’re doing as you’re doing it.
After washing one side of the roof, FLIP the wash mitt over and use the other still clean and uncontaminated side of the wash mitt to wash the other side of the roof.
By using this technique, you only use one side of the wash mitt to wash one side of the roof, and then use the other (clean) side of the wash mitt on the other side of the roof – thus you NEVER risk rubbing any dirt removed off one side of the roof panel and now on one side of the wash mitt over the other side of the roof. You use this same technique for each body panel.
Then with this same wash mitt, go ahead and wash all the glass. While it’s important to never use a used side of the wash mitt on a second body panel, it’s not as much of a concern when washing the glass because glass is MUCH HARDER than car paint and the little bit of dirt on the mitt, (removed from the roof), will not cause swirls and scratches to the glass.

The BIG PICTURE idea is to wash the roof safely, but don’t waste a new, fresh wash mitt just to wash the glass.
You’re officially done using this wash mitt. Place it in the clean 5-gallon bucket for washing in your washing machine later. It’s these little details that are keeping the things that touch your car’s paint from becoming contaminated over time that reduces the risk of putting swirls and scratches into your car’s paint.
Now rinse the roof and all side glass.
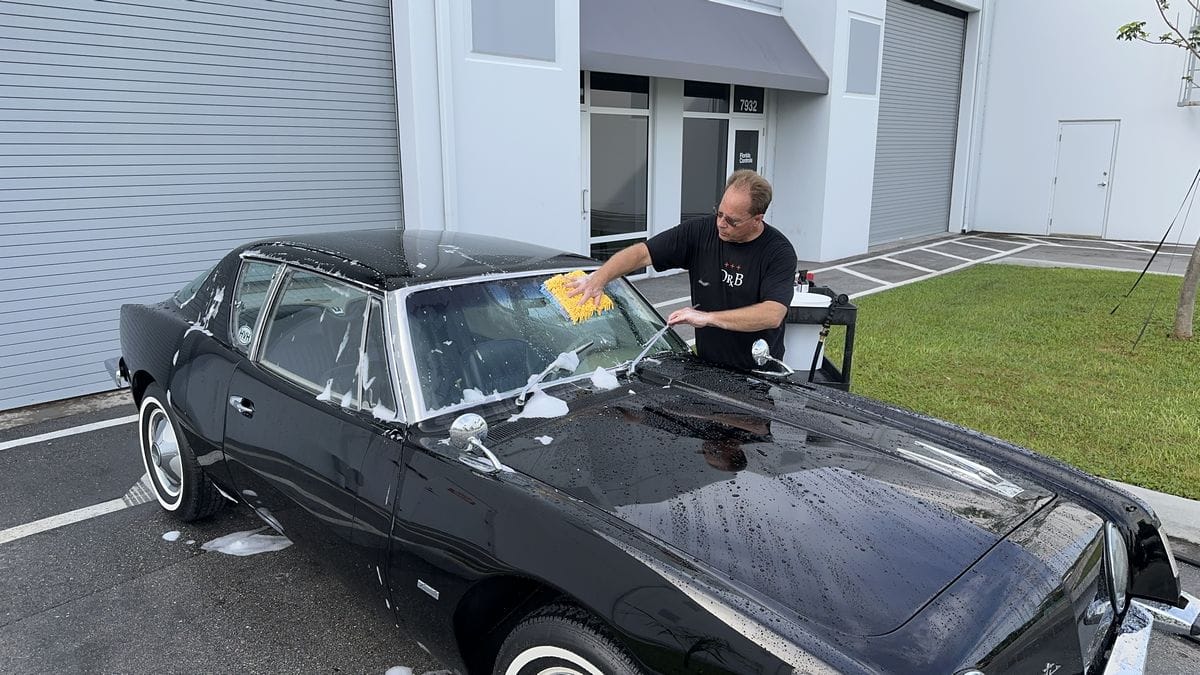
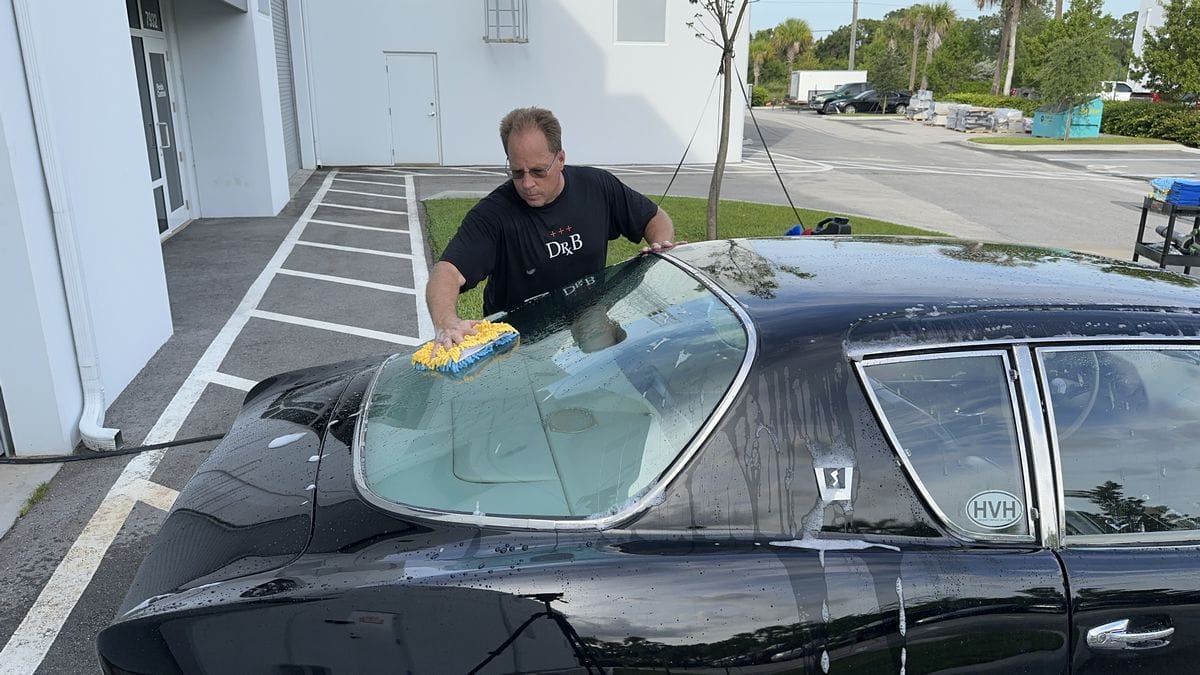
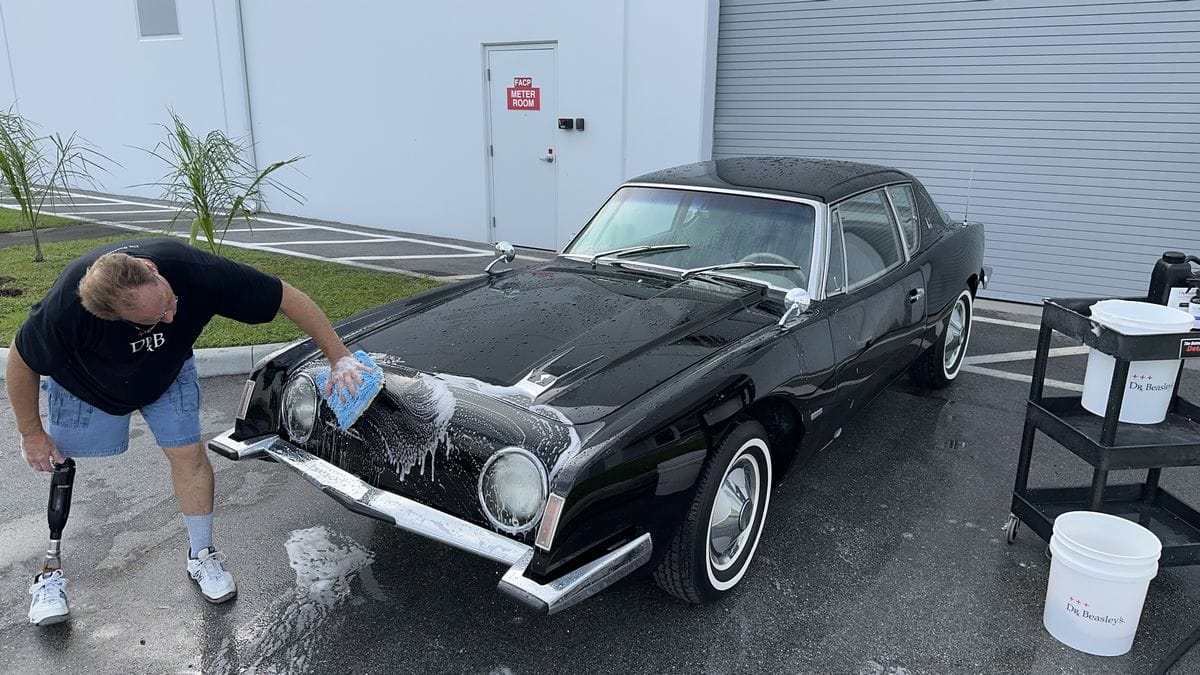
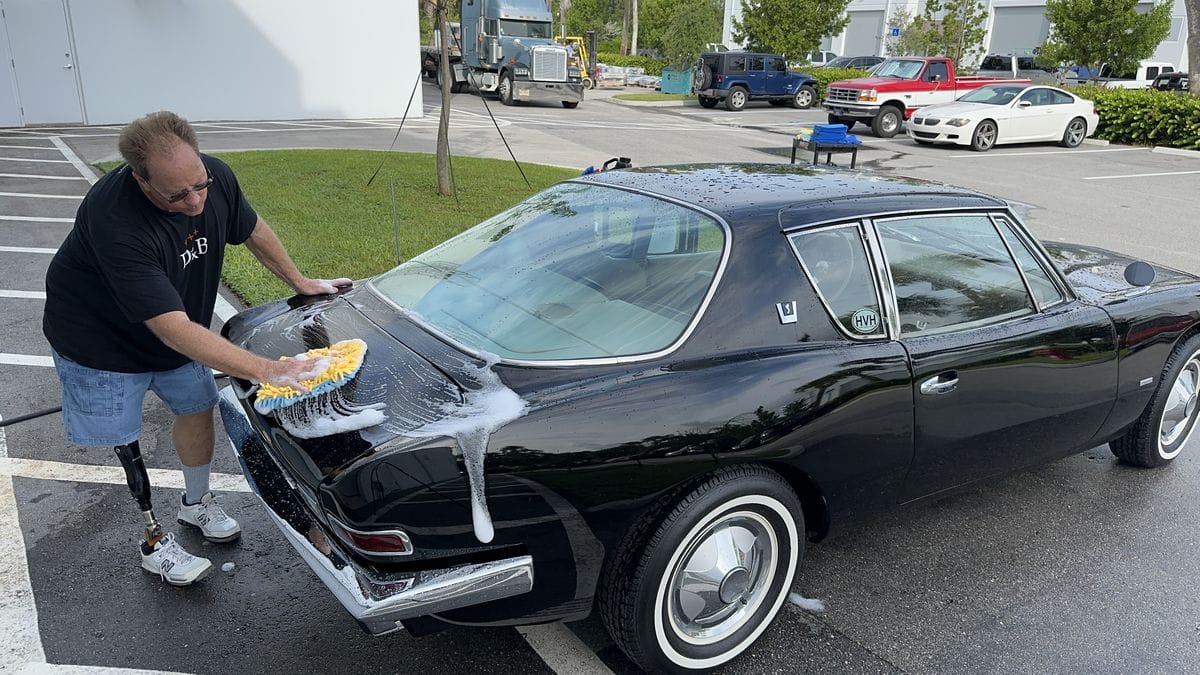
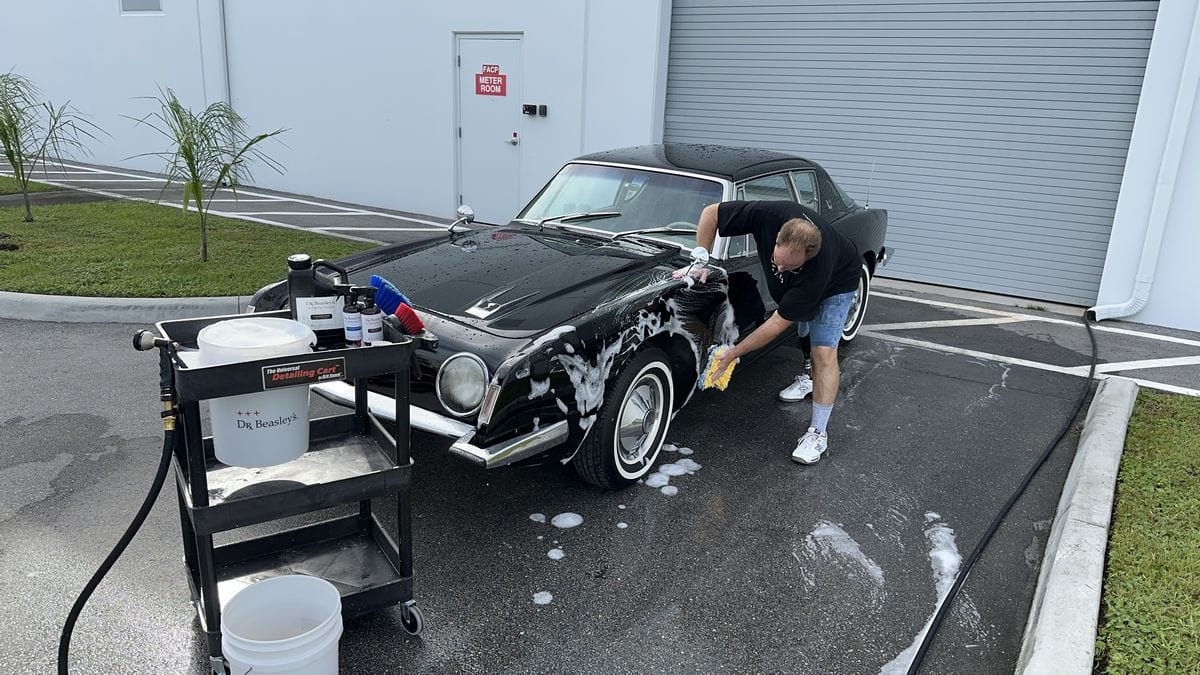
Step 3: Wash the Hood & Trunk Lid
Grab a FRESH, unused wash mitt, dunk the mitt into your car wash soap solution and now repeat the same process used for the roof to the hood. For most cars, the roof, the hood and sometimes the trunk lid are the major, large body panels. These panels, because they are horizontal or flat tend to get the most accumulated dirt build-up in-between regular washes.
Like washing the roof, place the wash mitt in the middle of the hood and then work your way out to the outer edge of the top fender using gentle, straight line back-n-forth motions.
Don’t SCRUB the paint.
Let the chenille microfiber wash mitt together with the cleaning agents and lubricants in the car wash soap solution do their job by loosening and emulsifying the dirt and road film on the paint.

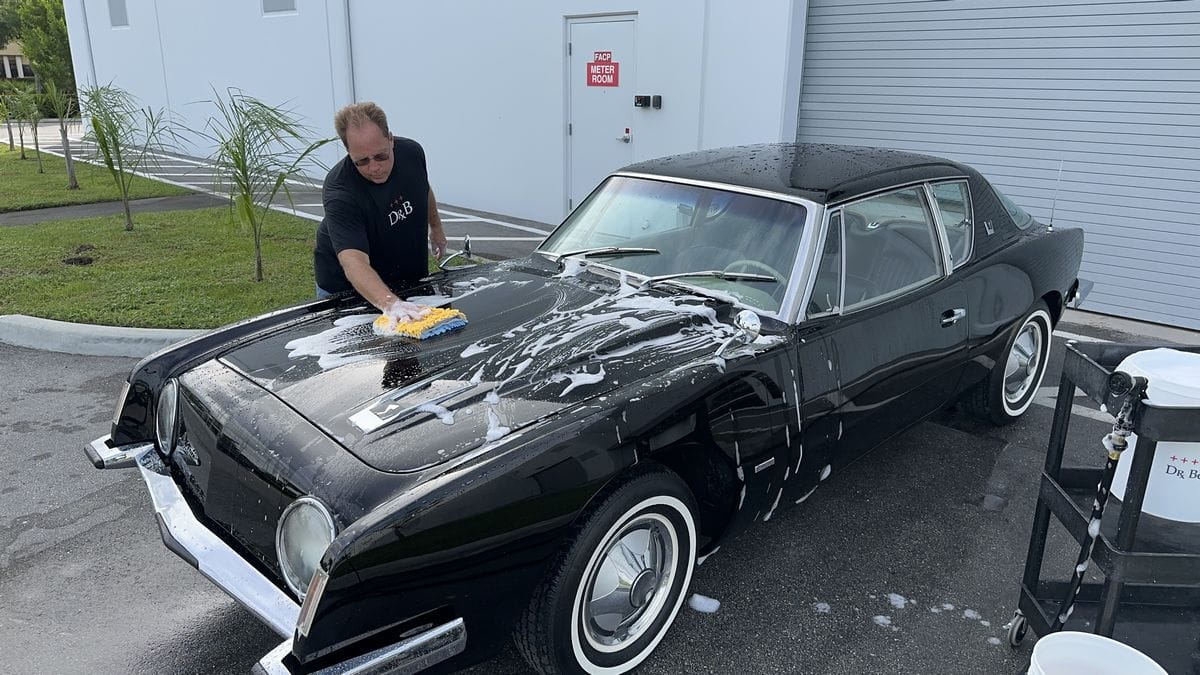
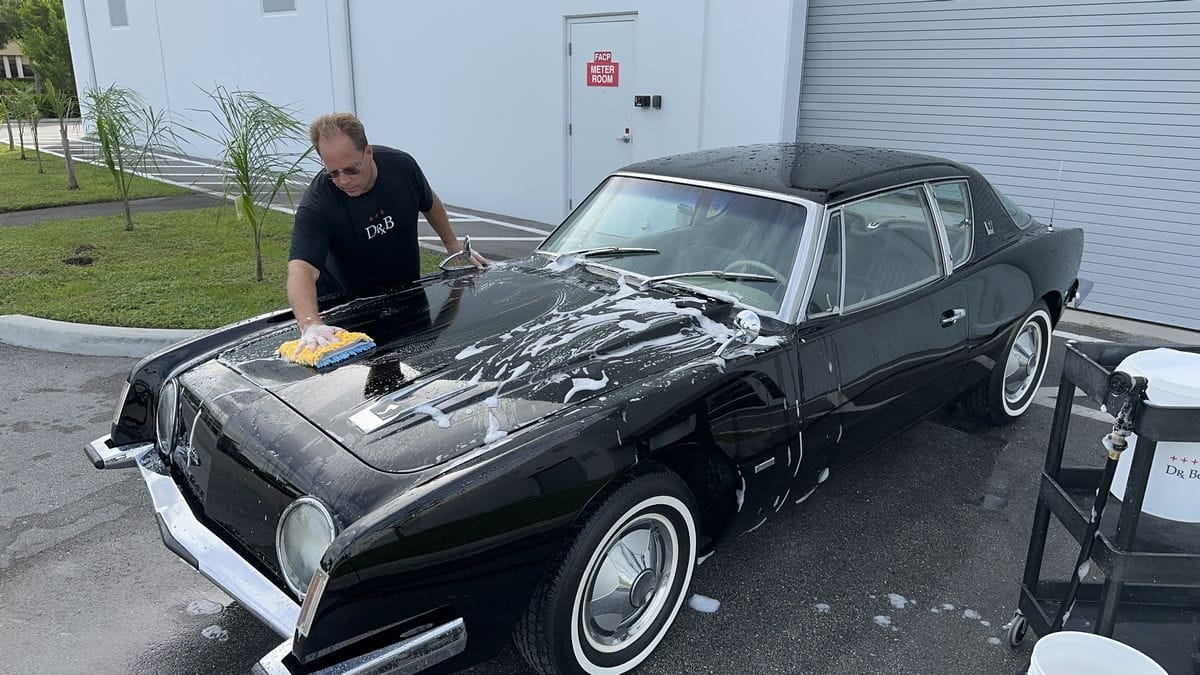
After washing one side of the hood, flip the wash mitt over to the clean, unused side and wash the other side of the hood and then rinse.
Note: Because this car has a large, flat front end without a grill, I chose to wash it separately from the flat portions of the hood just to ensure none of the soapy water on the hood could have a chance to dry. Rinsing while the car wash soap solution is still wet on the surface is one way to avoid soap film or soap streaks on the paint after washing.
You’re officially done using this wash mitt. Place it in the clean 5-gallon bucket for washing in your washing machine later. The general rule of thumb is you can get one large panel like the roof, hood and trunk lid using a single wash mitt, flipping to the unused side as you work from one side to the other side.
Grab a fresh, unused wash mitt and continue this process to the trunk lid and the back of the car.
After washing the trunk lid and any other minor portions of rear body panels, give the rear of the car a thorough rinse.
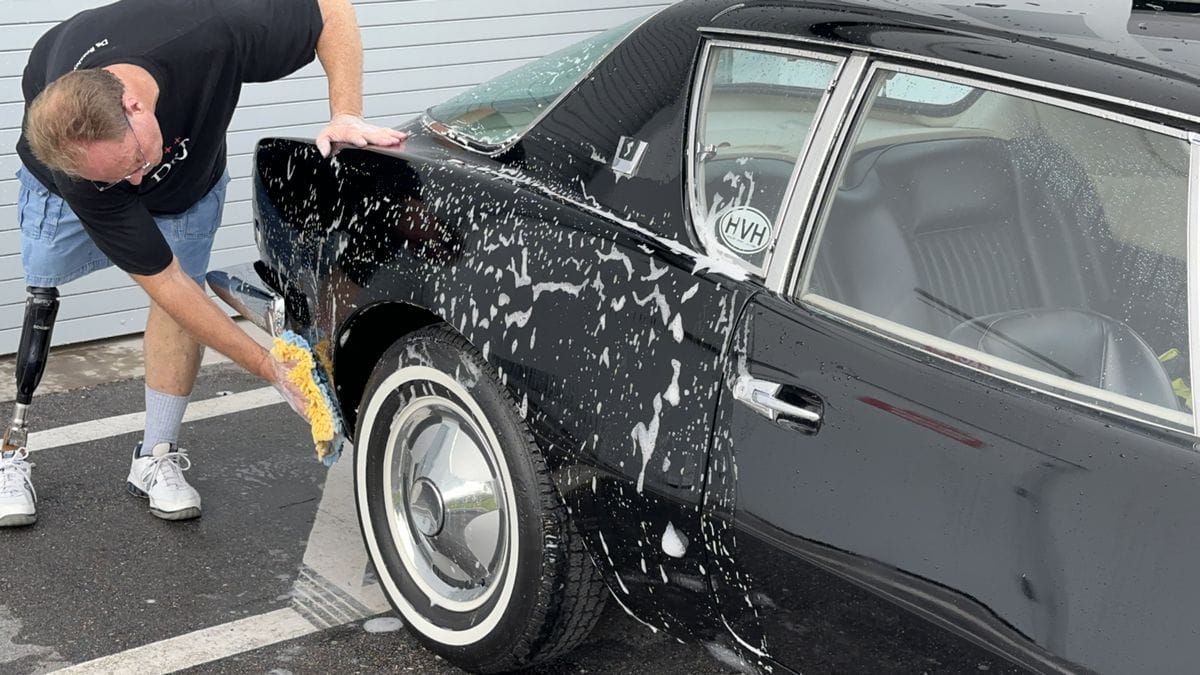
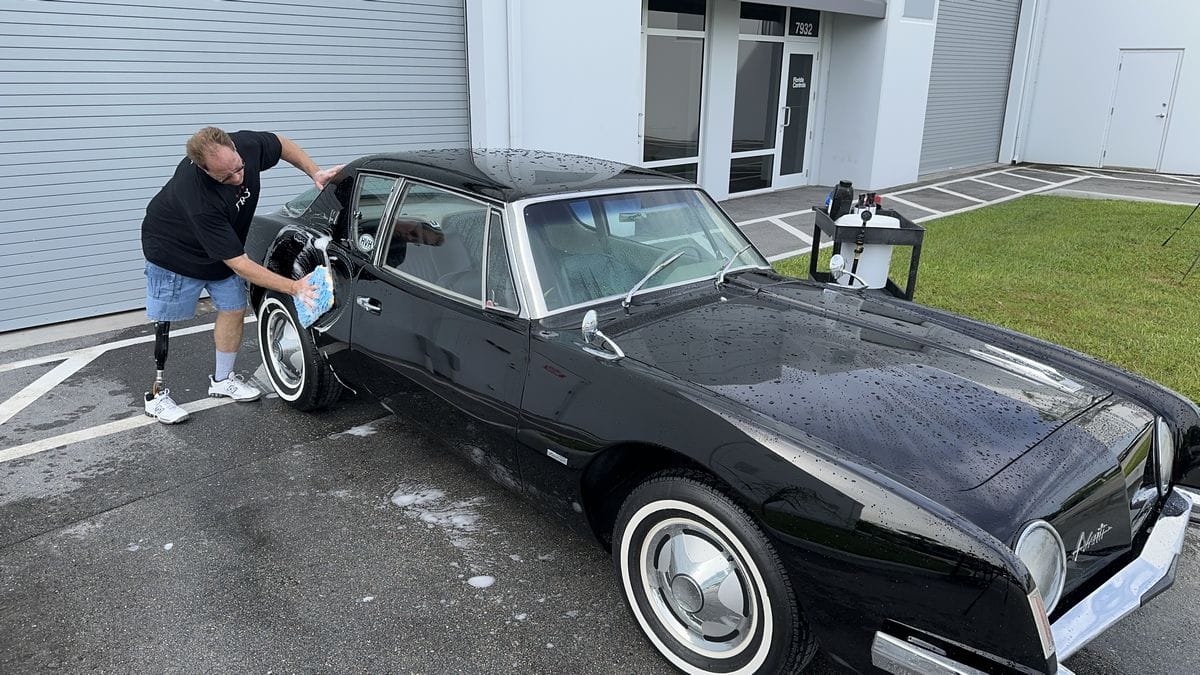
Step 4: Wash Vertical Panels
Grab a fresh, unused wash mitt and continue this process to the vertical panels. For vertical body panels, use one side of the wash mitt for one panel, like a fender, and the other side of the wash mitt for a door. Again, only using one side of a wash mitt per panel.
Technique Tip: When washing vertical panels, start at the top of the panel and work your way down.
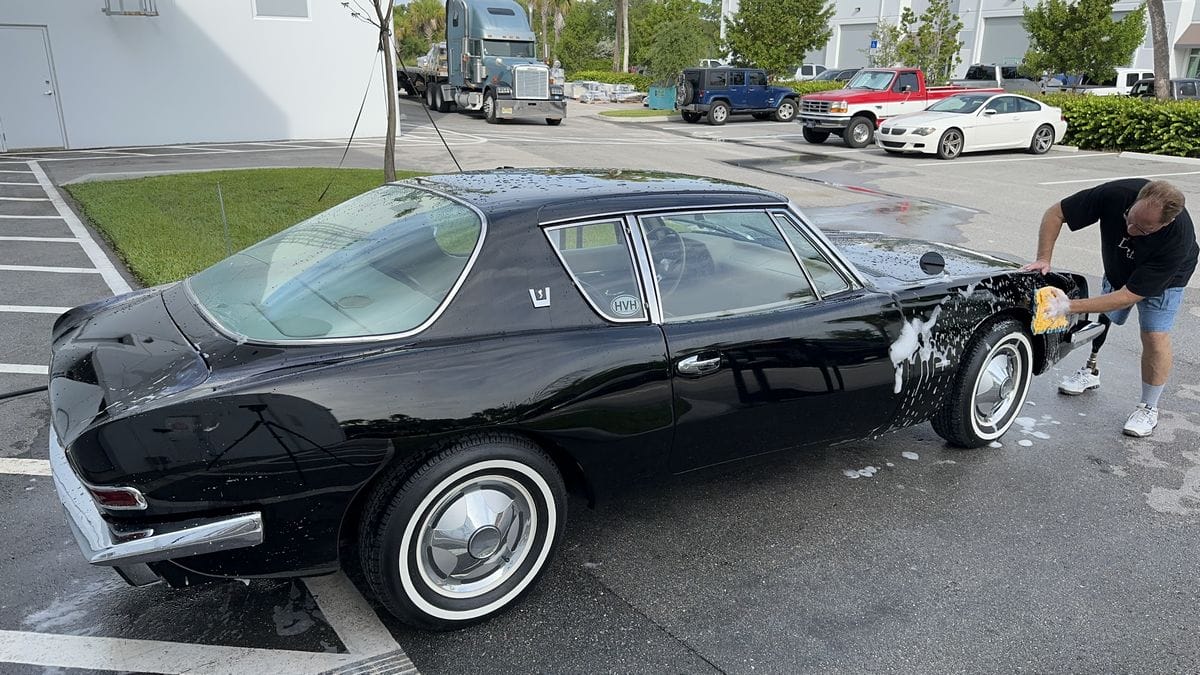
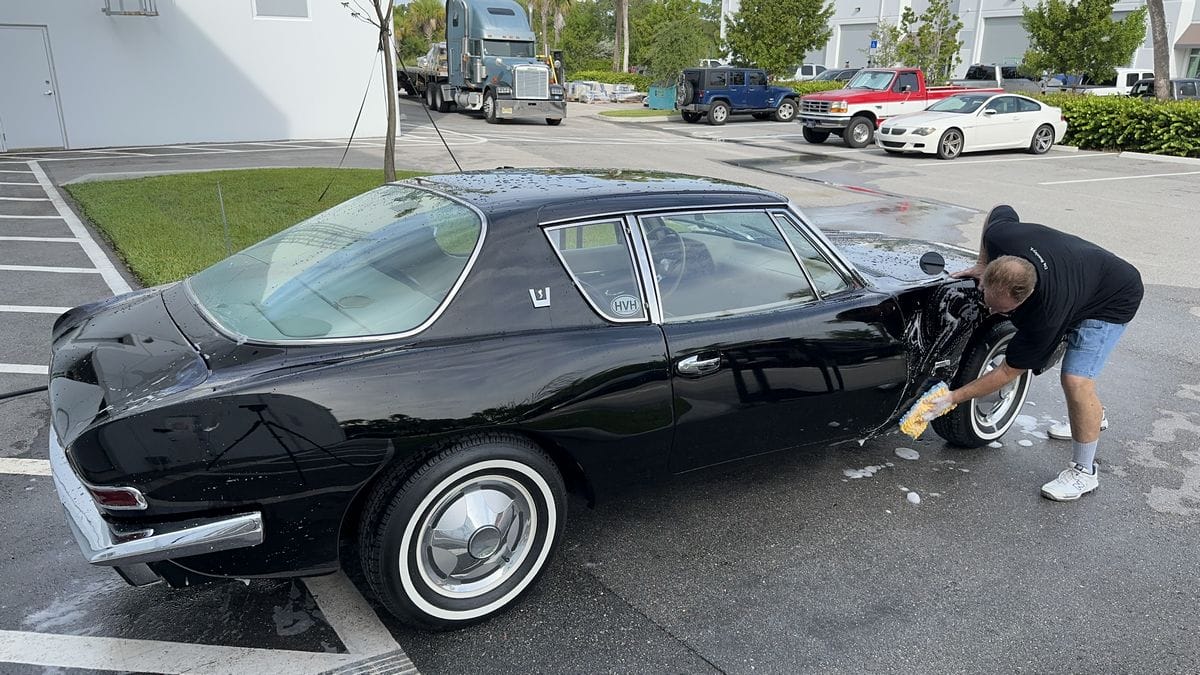
After I washed the passenger side front fender, I flipped my wash mitt to the unused side and next washed the passenger side door. Remember, one side of a wash mitt per panel then flip the mitt over for the next panel and then place the wash mitt in your clean bucket for washing later after the job.
Rinse each set of body panels after washing to avoid any risk of having car wash soap film drying on the paint.
Grab a fresh wash mitt, dunk it in your car wash solution and continue working around the car.
Then rinse thoroughly.

Grab a fresh wash mitt, dunk it in your car wash solution and move to the other side of the car. Again, only use ONE side of the wash mitt per body panel.
Flip the mitt to the unused side and wash the next panel, working from the top to the bottom.
After washing, rinse thoroughly.
The last body panel I need to wash is the driver’s side front fender. Because I used both sides of the previous wash mitt for the driver’s side door and rear fender, I again grab a fresh, clean, uncontaminated wash mitt to knock out the front fender.
Next rinse the driver’s side front fender.
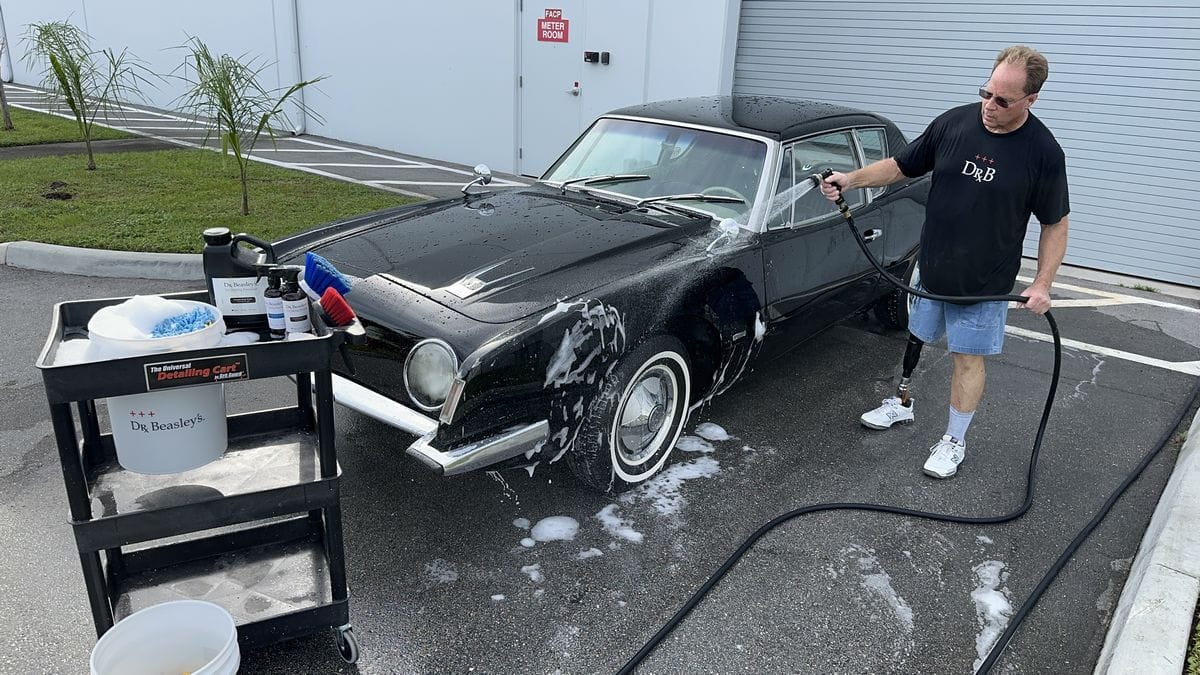
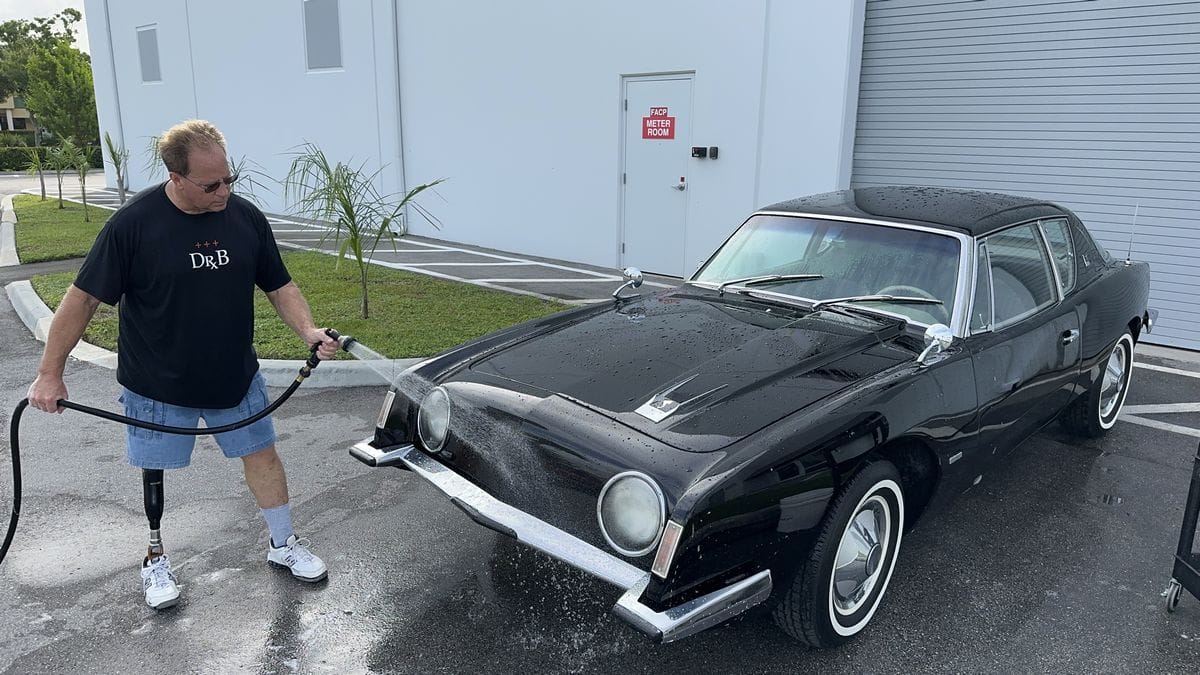
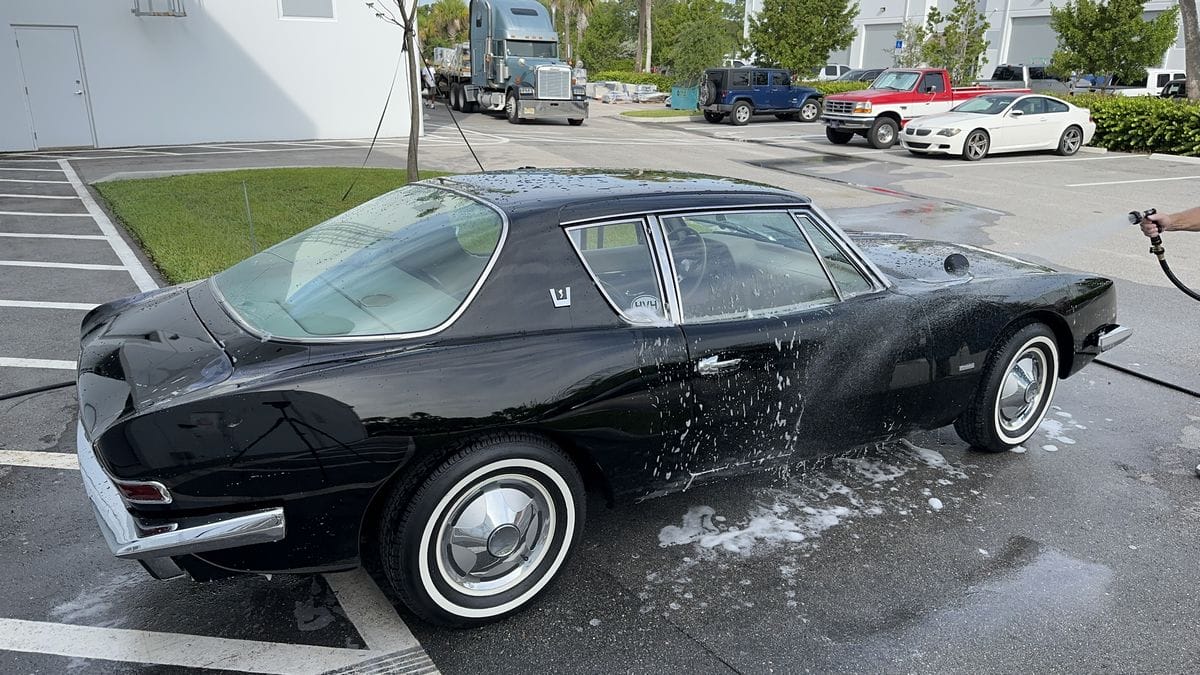
And last and so important, give the car a final thorough rinse and be sure to use the Jet setting to blast any cracks, crevices, body seams, fuel doors, emblems, etc.

In total I used 7 individual wash mitts to wash a 2-door passenger car.
A 2-door passenger car has 9 body panels.
- Roof
- Hood
- Trunk lid
- Driver’s side front fender
- Driver’s side door
- Driver’s side rear fender
- Passenger’s side front fender
- Passenger’s side door
- Passenger’s side rear fender
Because with this style of wash mitt you have 2 dedicated sides to use when washing, 7 wash mitts is a good average.
If you’re washing larger vehicles like SUVs or trucks, count the body panels and be sure to stock up on enough wash mitts to only use one side of a single wash mitt per body panel.
The exception is the roof, hood, and trunk lid where you can usually use one side of the wash mitt for one side of the panel and the other side of the wash mitt for the other side of the panel.
How to Dry a Black Car: The Blower + Microfiber Towel Method
When it comes to getting any standing water off the car, the two safest ways is to use a quality leaf blower or a premium quality microfiber drying towel. My preference is to use a combination of both.
I start with the leaf blower but give the entire car a final wipe using my microfiber drying towel. The reason I do this is because I have found that if I ONLY use a leaf blower, I will oftentimes find tiny water marks or tiny water droplet stains left behind on the paint, especially the horizontal panels.
By giving the paint a final wipe after using the leaf blower, once the drying towel become slightly damped, (from the first panel you wipe), the moisture in the towel will be enough to re-liquify and water marks and then remove them as you wipe or drag the microfiber towel over the paint.
Recommended Blower for Black Cars: EGO 650 or 765 CFM
There are a lot of options in the market for battery powered leaf blowers. Besides the CFM or Cubic Feet per Minute that a leaf blower is rated for in the context of how much air or wind power it delivers, there’s also the issue of battery technology.
You can do your own research and come up with your own decision, but at the time I’m writing this article, the EGO brand of leaf blower offers the most CFM and the best battery technology in the industry. You get longer run time with the EGO battery technology. The most cycle life, which is how many times you can recharge a fully drained battery, and the shortest recharge time to take a fully drained battery to full charge.
The EGO model you see in the pictures is the EGO 650 CVM Leaf Blower. Since I purchased this, they have introduced the EGO 765 CFM. When it comes to blasting water off a car, more CFM is better. This is especially true for blow drying the wheels.

How to Dry a Black Car: The Microfiber Towel Blotting Method
If you’re OCD about maintaining a flawless scratch and swirl-free finish on your black car, then besides the no-touch option of using a leaf blower, the next best thing is called the Blotting Technique.
What most people do is ball-up their drying towel or chamois and rub it over the paint. Don’t be this person.
Instead, use the blotting technique to absorb the water off the car without ever rubbing the towel against the paint.
Here’s the roof with a lot of standing water.
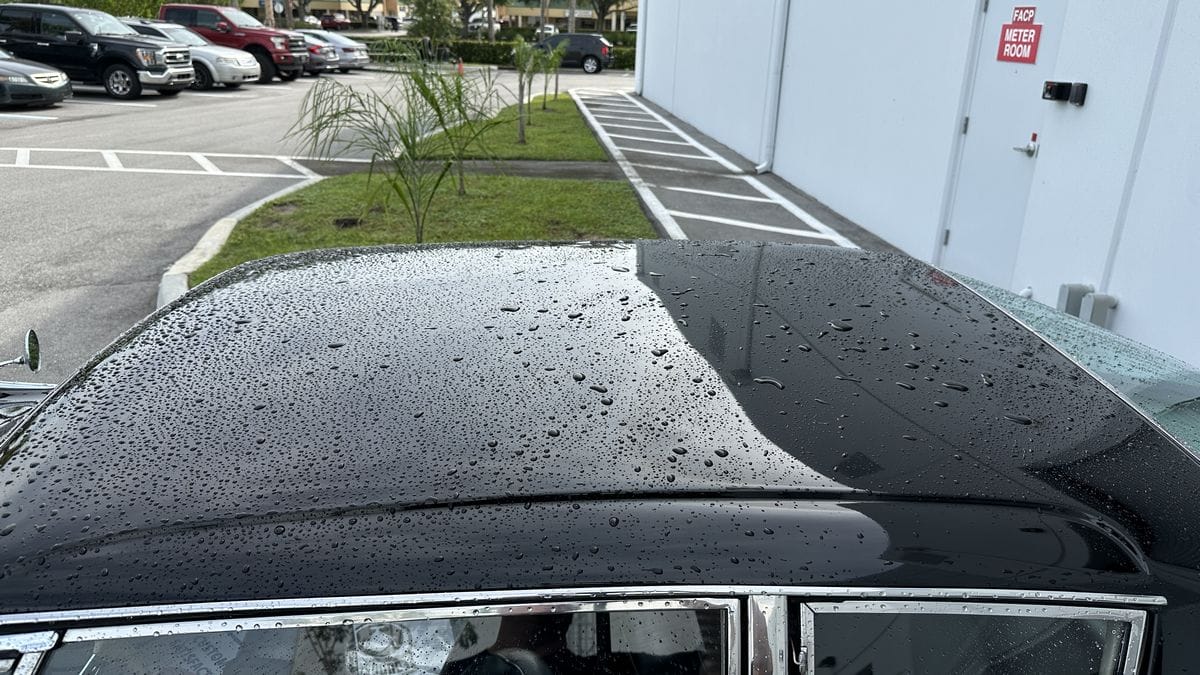
I start by placing the Gauntlet 20” x 30” microfiber drying towel FLAT onto a section of paint in the middle of the hood. Next, I move my hands over the towel, pressing lightly, to force the microfiber to absorb the standing water.
Next, grab the corners of the edges of the towel furthest away from you and lift the towel off the car.
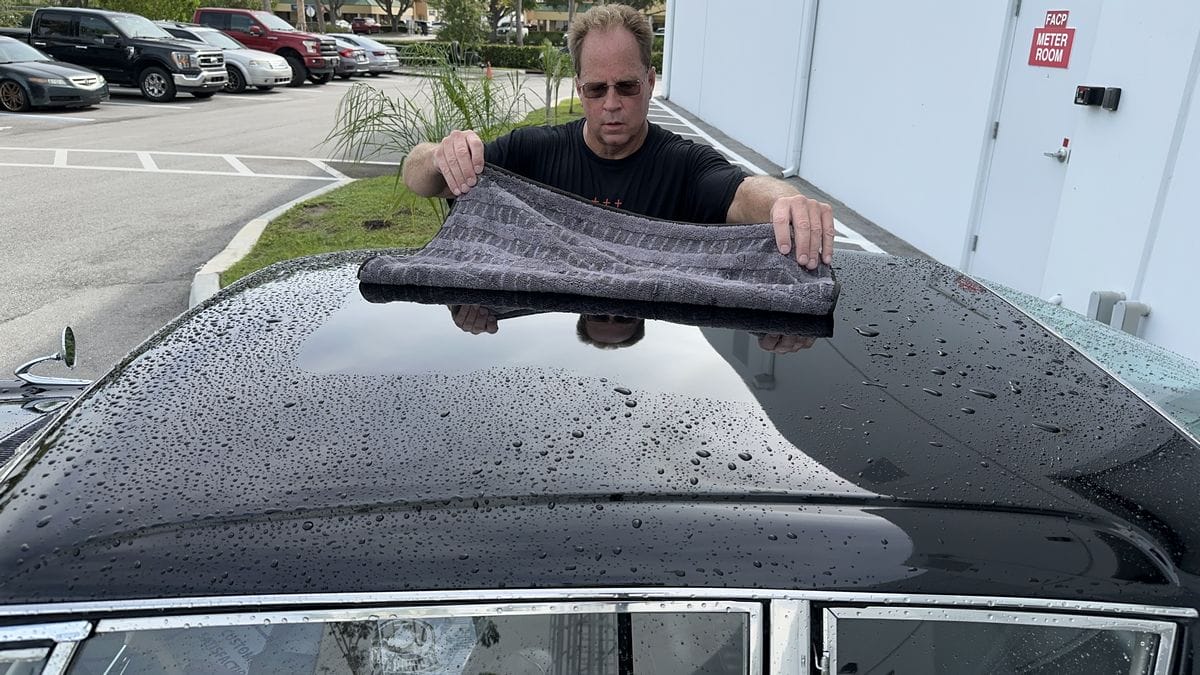
Because you’re never rubbing the drying towel against the paint, this is the least aggressive method to remove water and thus preserve the factory new finish on your black car.
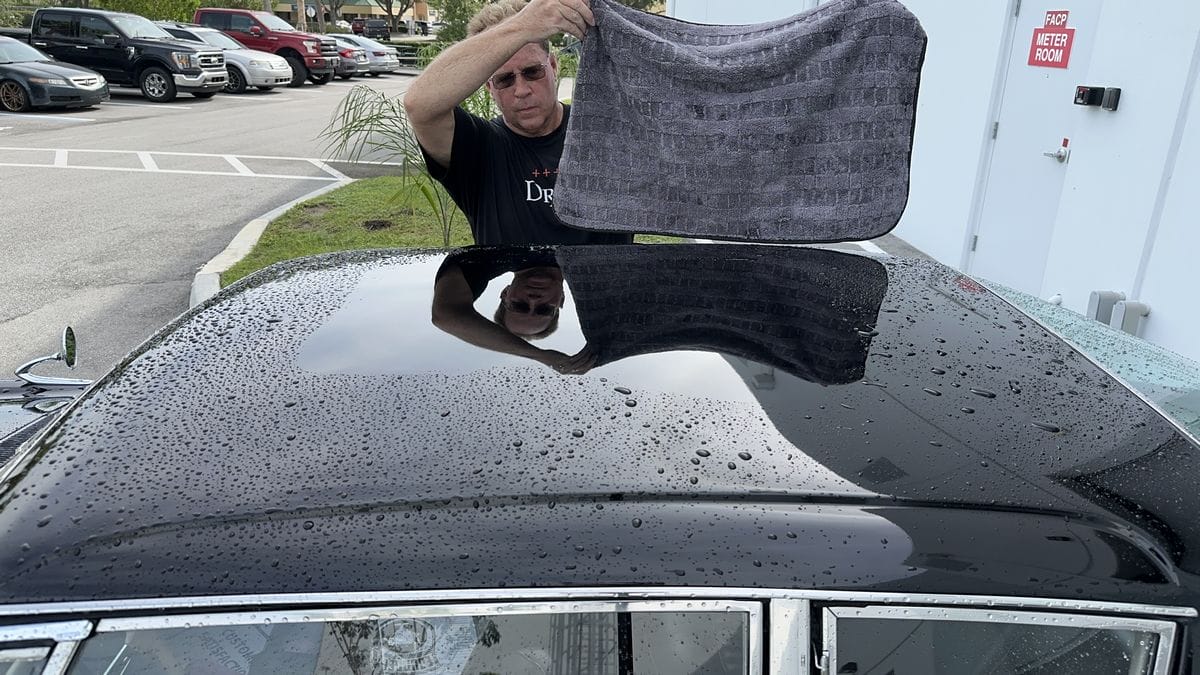
If you’re a tick less OCD, you can draw the microfiber towel over the paint. Simply spread the towel out over a section of paint with standing water and then s-l-o-w-l-y draw or drag the towel towards you.

By moving the towel slowly over the paint you provide plenty of time for the water to move via capillary action off the paint and into the microfiber drying towel. Not as gentle as the blotting technique but still a VERY SAFE way to dry your black car.

Final Results
If you follow these techniques, you can safely wash your black car, truck or SUV and avoid swirls, scratches, and streaks in the paint.
The Real Secret to Washing Black Cars Without Scratches: Maintaining Uncontaminated Wash Mitts, Drying Towels and Washing Towels
The REAL SECRET to washing a black car in a way that you don’t accidently instill swirls or scratches comes down to the cleanliness of the things that will touch the paint, this includes,
- Wash mitts
- Drying towels or chamois
- Microfiber wiping towels
If any of the above are contaminated, then nothing else matters as the contaminants embedded into these fiber tools will scratch the paint.
This is why I have protocols or best practices in place to do as much as I can to keep my microfiber tools CLEAN. Having a clean bucket next to the car as you wash it so you have a CLEAN place to put dirty wash mitts or microfiber towels may seem like a mundane, simple idea, but it ensures your wash mitts and other tools don’t come into contact with the ground.
In my life, when visiting other detail shops or my buddies, this is what their wash mitts usually look like:
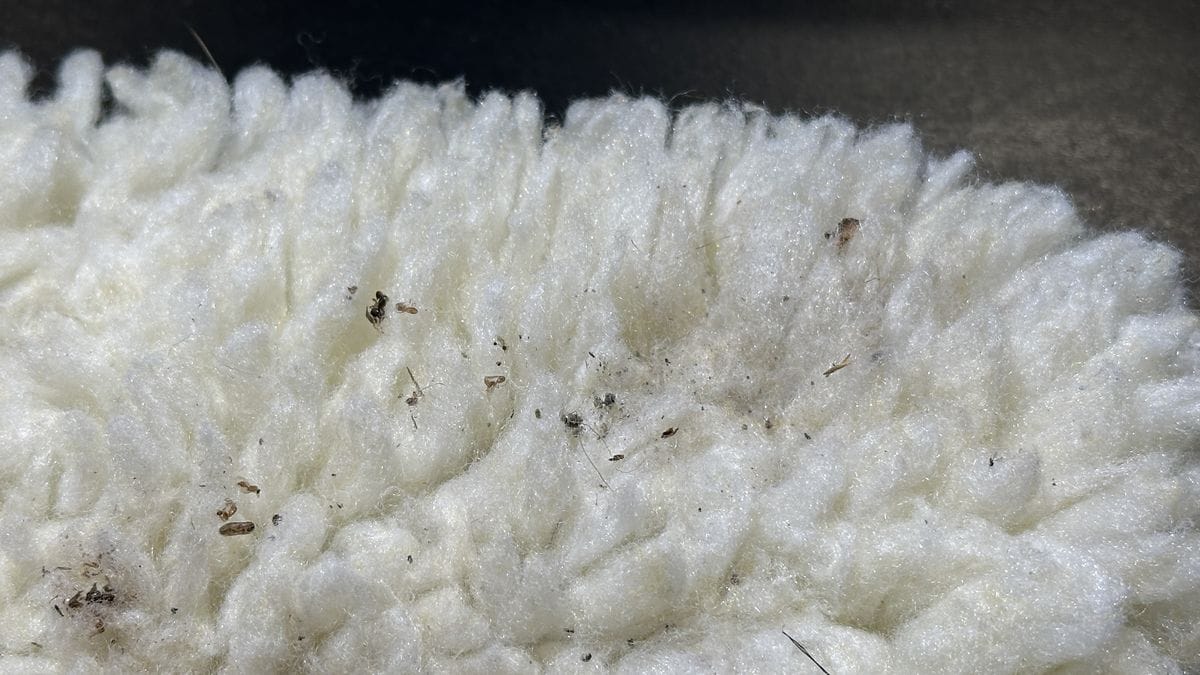
And then they wonder,
Where do all the swirls and scratches come from?
Because you’ve made it all the way through this lengthy but meaty article, you know the answer to the above question.
How long a black finish stays looking nice depends on how the paint is TOUCHED!
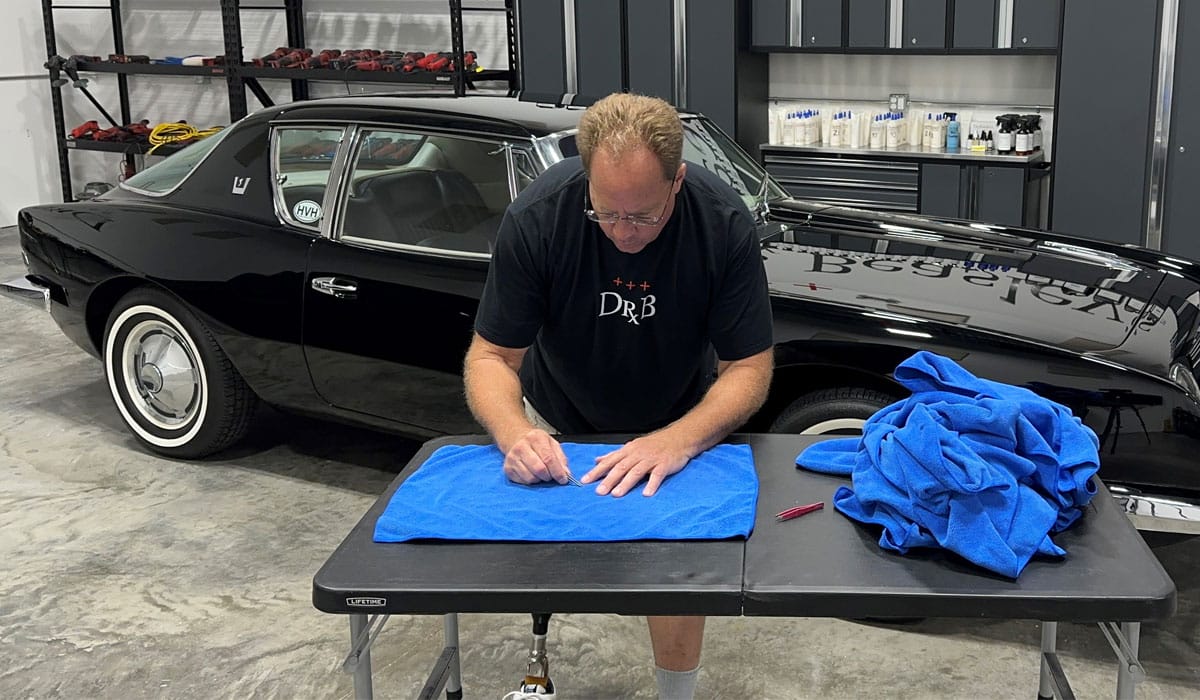
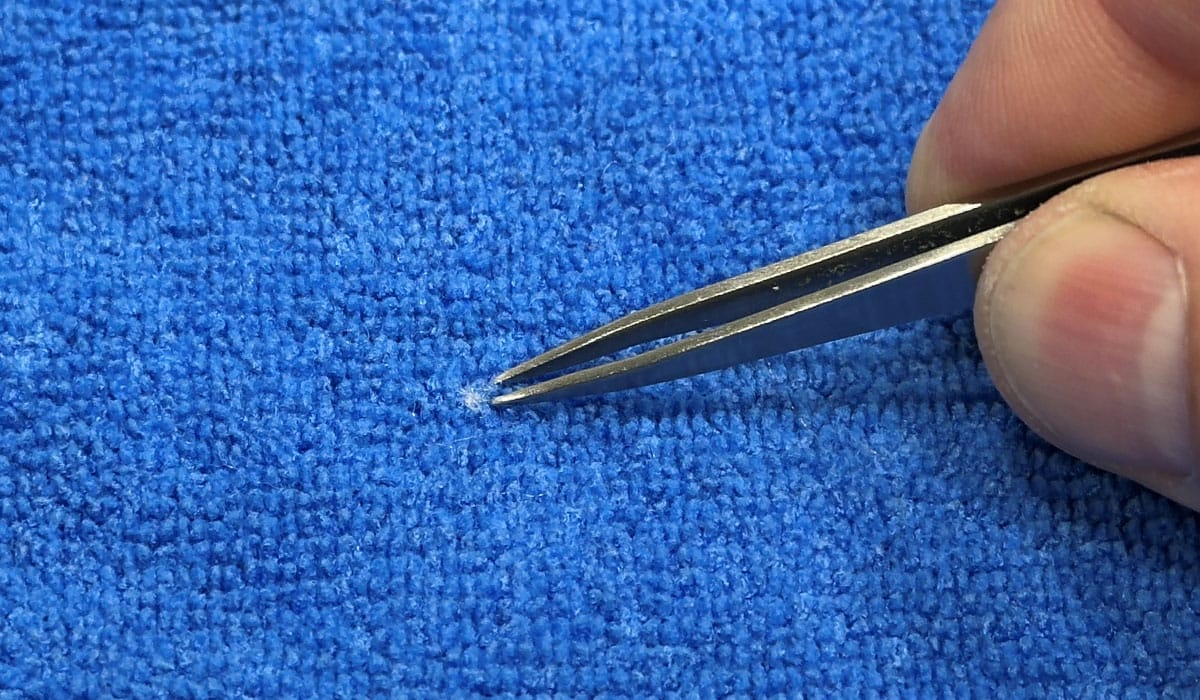
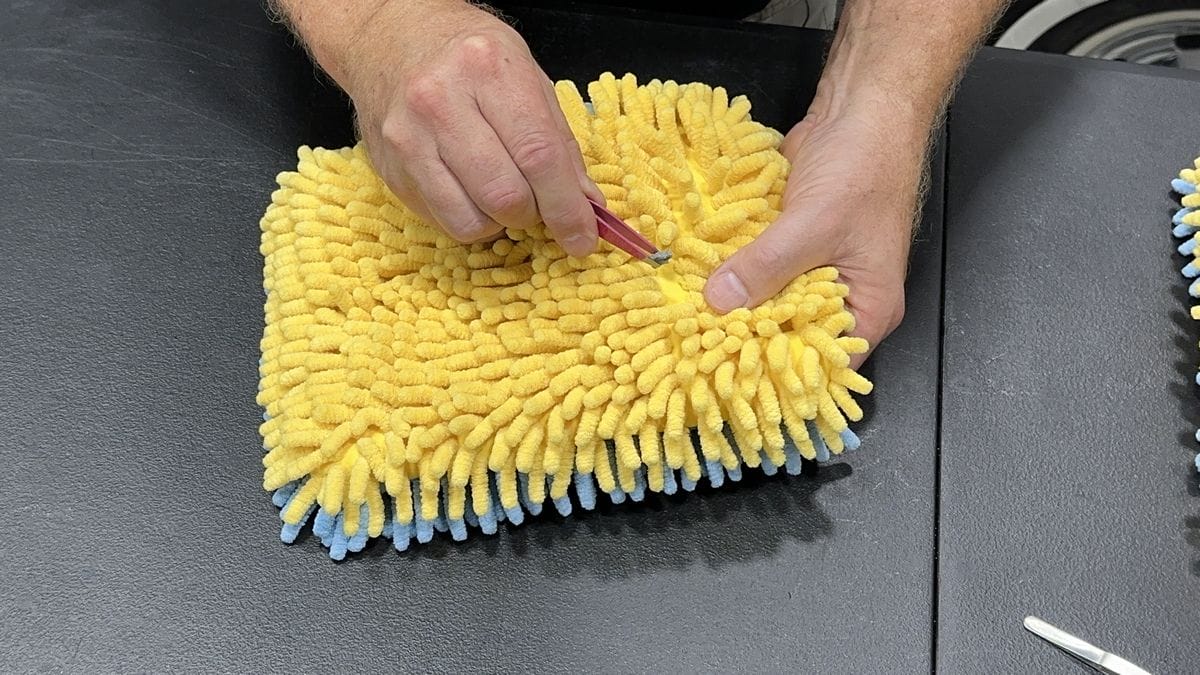
So keep your microfiber tools clean both when using and when storing. And always inspect these things using your eyes, sense of touch and with a set of handy, dandy tweezers.
In order to keep your microfiber tools clean, however, you will need to wash them. You can read my article on how to wash microfiber towels here.
So, to sum up: If you do all of the above, plus use a quality car wash soap and use good techniques, all these things go a long way when it comes to maintaining a show car finish on a black car.
Do You Have a Passion for Perfection When it Comes to Detailing Your Cars?
- Would you like to take your detailing skills to a higher level?
- Do you find you learn better by doing versus sitting in a chair looking at a PowerPoint presentation about car detailing?
Here at Dr. Beasley’s O.R., (Operating Room), in sunny Stuart, Florida, we teach the most hands-on car and boat detailing classes on planet Earth. And we prove it too. You can find write-ups on the Dr. Beasley’s Blog that photo-documents just how hands-on our classes are plus you’ll see the kinds of cars and boats you’ll be training on.
Click the link below to find the dates, locations, topics, and prices for all upcoming detailing classes.
Upcoming Detailing Classes – Prices – Info – Topics – Locations
And if you ever have any questions, always feel free to reach out to me personally via text, phone call or email.
I hope to see you in a future detailing class!
Sincerely,
Mike Phillips
Chief Education Officer for Dr. Beasley’s
[email protected]
760-515-0444
Hi Mike. I normally don’t leave comments because my writing is not the best poor punctuation. I do know a little about detailing cars. I wanted to share how I wash cars. I use an inline filter on my hose to eliminate water spots. Aqua crest $20 on Amazon. Spelling may not be right. I use sheep skin wash mitt. I get my mitt wet with the hose I put soap on my mitt. I have a pressure valve under my spray nozzle I turn the pressure down. Switch over to the shower setting. I constantly put water on the car right where I’m washing I rotate my mitt like every 10 seconds. I will rinse my mitt gently while I’m still washing the car using a back and forth motion starting at the top and go 3/4 of the way down. I do that in 2 foot wide strips. I also have separate mitts for different parts of the car. This way works very well for me. Thank you for reading.
I want to say something else. I started detailing cars when I was 18 years old and worked at several professional detailing shops. I started color sanding and got hooked on it. I started working for myself. Anyways over the years of detailing I stumbled across something. It’ has to do with 2 chemicals. Combined together I can put an armor like coating on the paint. You can scratch it like a person scratches there dog and nothing happens. If there was a detailing competition l guarantee I would win. So what happens if you use my formula against not me but someone else. You would win. I’m 48 years old and never shared this with anyone. I believe money can be made off of this. I don’t have a clue where to start. If you are interested in maybe working together and make a little extra money please let me know. I ask kindly not to make the second part of my comment where I talk about my gold operation..lol visible to the public. Thank you
Hi Stephen,
First, you write/type just fine! Better than most people.
Thank you for reading the article and taking the time to post your comments. There’s a matching video for this technique using this same car in editing. Should be live by next week.
The technique you use is another great way to wash a car. You could actually combine the multiple wash mitt or multiple microfiber towel method with the technique you’re using and make your technique even more risk free. Rinsing your mitt after washing a panel and flooding the panel with water is a very good method to clean a car and reduce the risk for accidently swirls and scratches. I saw this technique in a video probably about 20 years ago.
As for your product, this blog article you’re reading is on the Dr. Beasley’s website and I work for Dr. Beasley’s. So, working with an outside person on a non-Dr. Beasley’s product would be improper. Thank you for asking though.
Mike Phillips
Thank you for all the details on washing black cars, we have two.
We do use dianized filtering to prevent water spotting,
Thank you for the article it was a very good refresher with some additional ideas !! This process is a lot easier than polishing out the car every 6-8 months. It’s a little investment but worth it!