


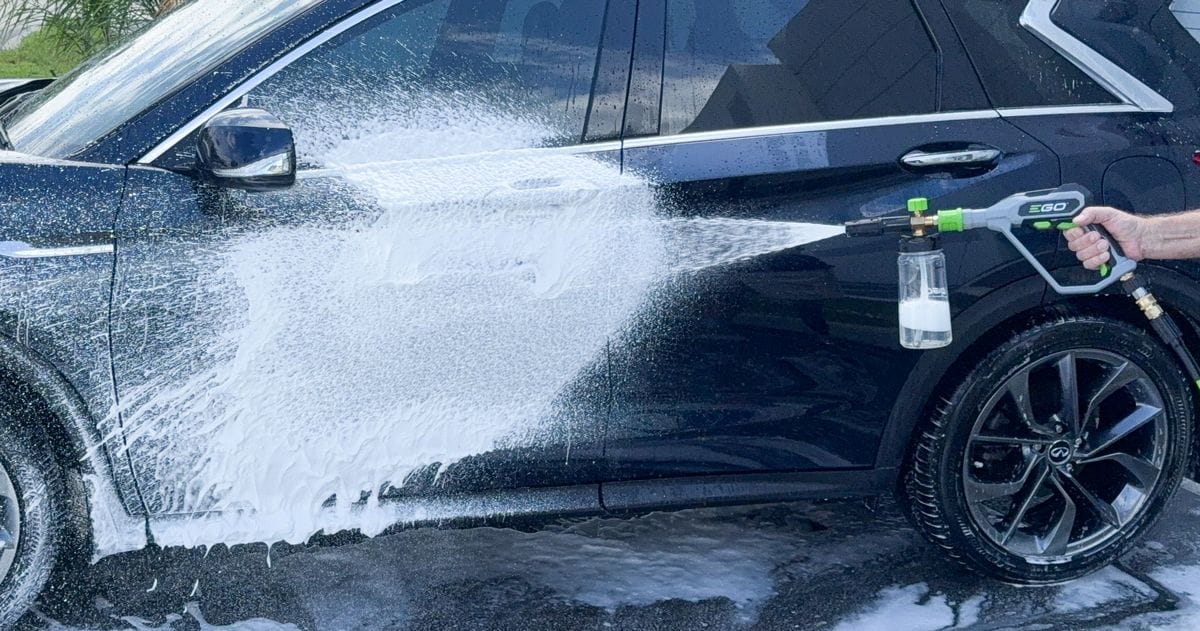
Foam cannons are unique soap-delivery systems for washing cars. They spray layers of thick, sudsy soap foam that help loosen and break down dirt, grime and other types of contamination.
Professional detailers love them because they speed up the washing process and provide extra lubrication between your wash mitt and the paint to prevent scratches.
Foam cannons have one drawback in that they can be a tick confusing to use. They require a pressure washer, which not everyone has, and it can be hard to adjust the nozzle properly or know what the ideal soap-to-water ratio is.
In this article, I’ll do my best to explain how foam cannons work, why they’re different from foam guns, how to properly adjust the nozzle and dial-in your soap-to-water ratio.
What’s the Difference Between Foam Guns & Foam Cannons?
The main difference between a foam gun and a foam cannon is pretty simple.
- Foam Cannons are attached to a pressure washer hose. The high pressure from the pressure washer hose generates a thick blast of soap foam that covers the car in seconds.
- Foam Guns are attached to a garden hose. The low pressure from the garden hose generates a light spray of soap foam at a relatively slow speed.
While foam guns do a very good job of creating foam, the extremely high pressure water shooting out of a foam cannon simply creates more foam and thicker suds, almost like shaving cream in consistency.
How Does a Foam Cannon Work?
Foam cannons work by blasting a mixture of water, soap and air at high speeds, creating a thick cloud of foam. Here’s a step-by-step breakdown:
- Water and soap are mixed in the reservoir.
- Pressurized water moves through the cannon and creates suction, siphoning the soap solution out of the reservoir and into the mixing chamber.
- The suction effect inside the mixing chamber combines air, soap and water together into a thick foam that blasts out of the cannon nozzle.
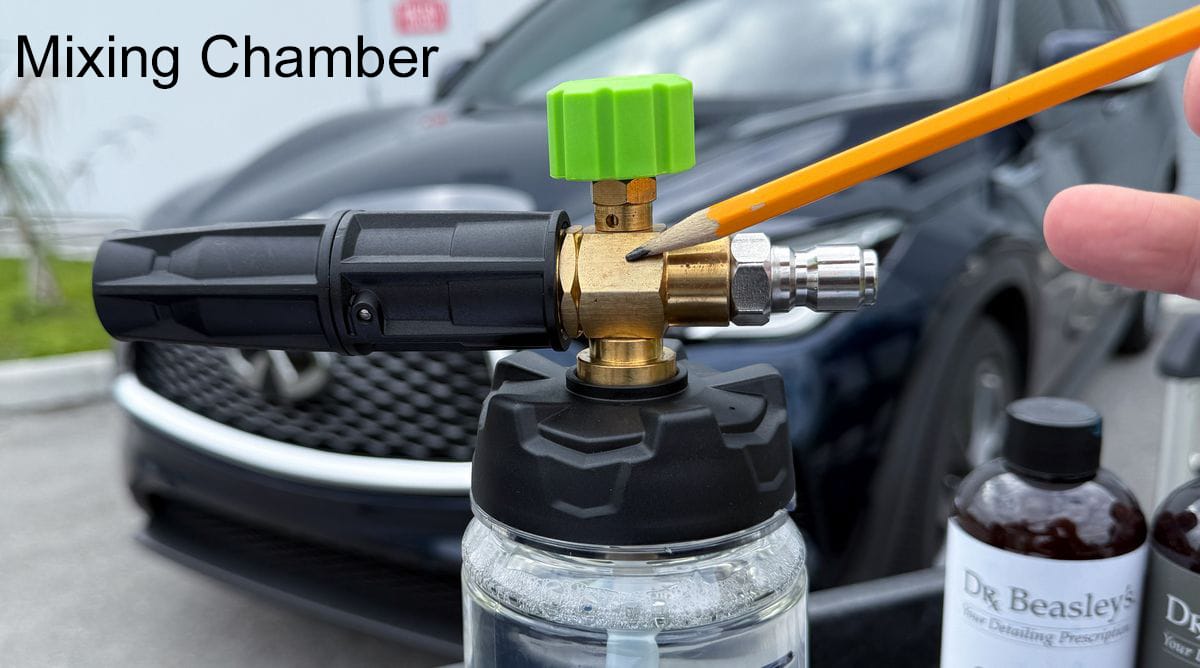
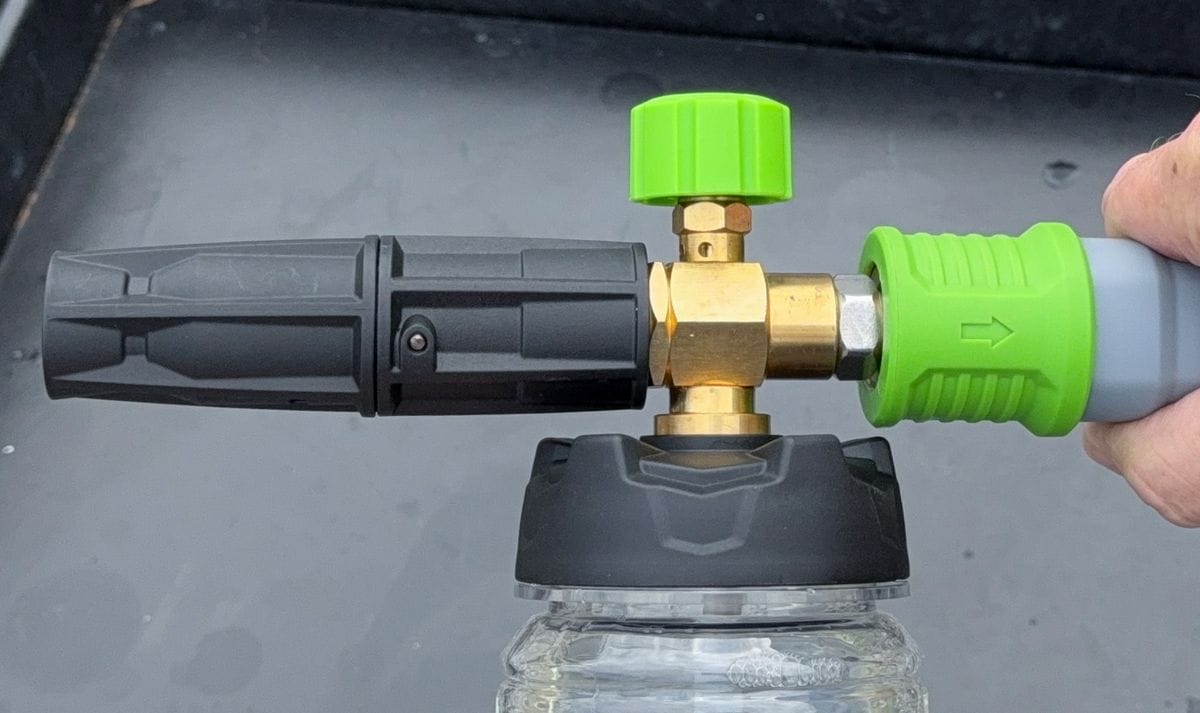
The Adjustable Nozzle
Foam cannons typically come with an adjustable nozzle that controls foam thickness and spray pattern.
The spray pattern on most foam cannons can be controlled in two ways: width and direction.
Adjusting Width
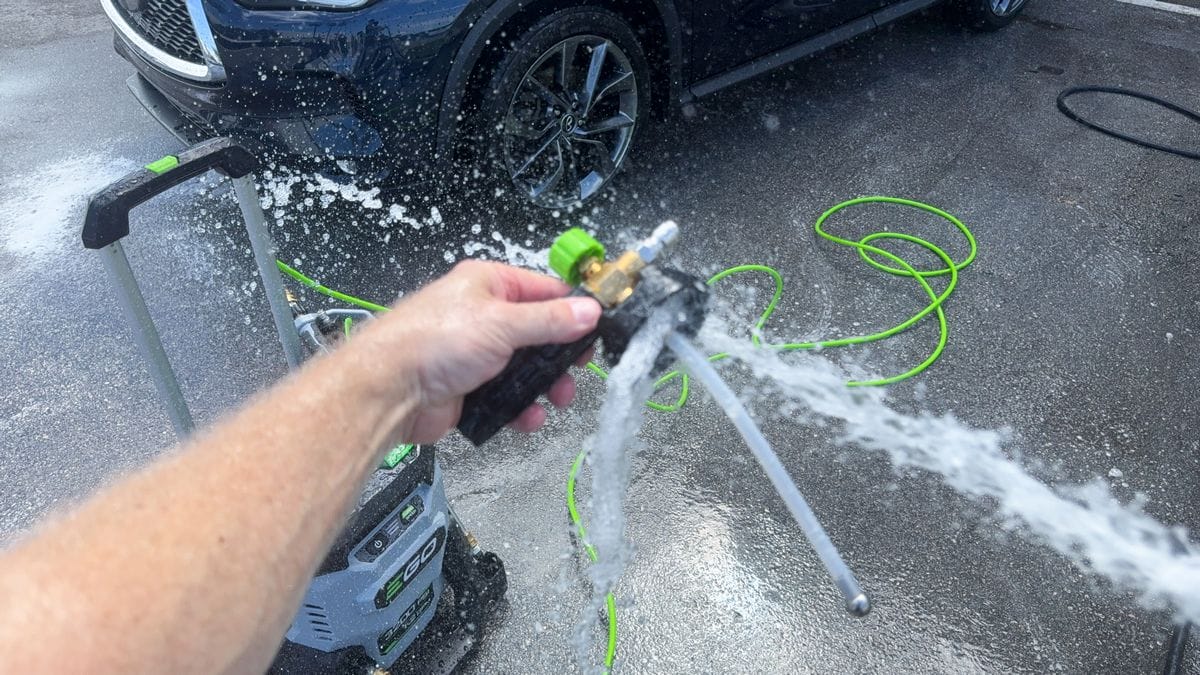
In the photo below, I’ve set the nozzle to the widest spray pattern possible.
To adjust the spray pattern width:
- Narrow Pattern: Turn Clockwise
- Wide Pattern: Turn Counter Clockwise
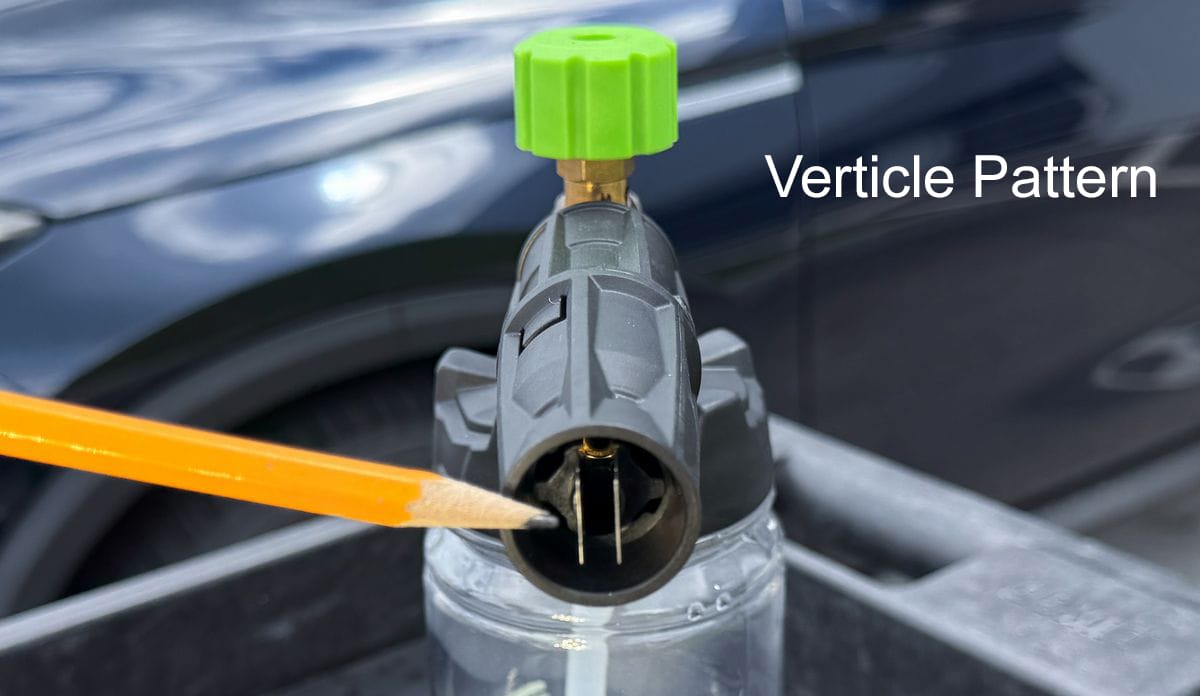
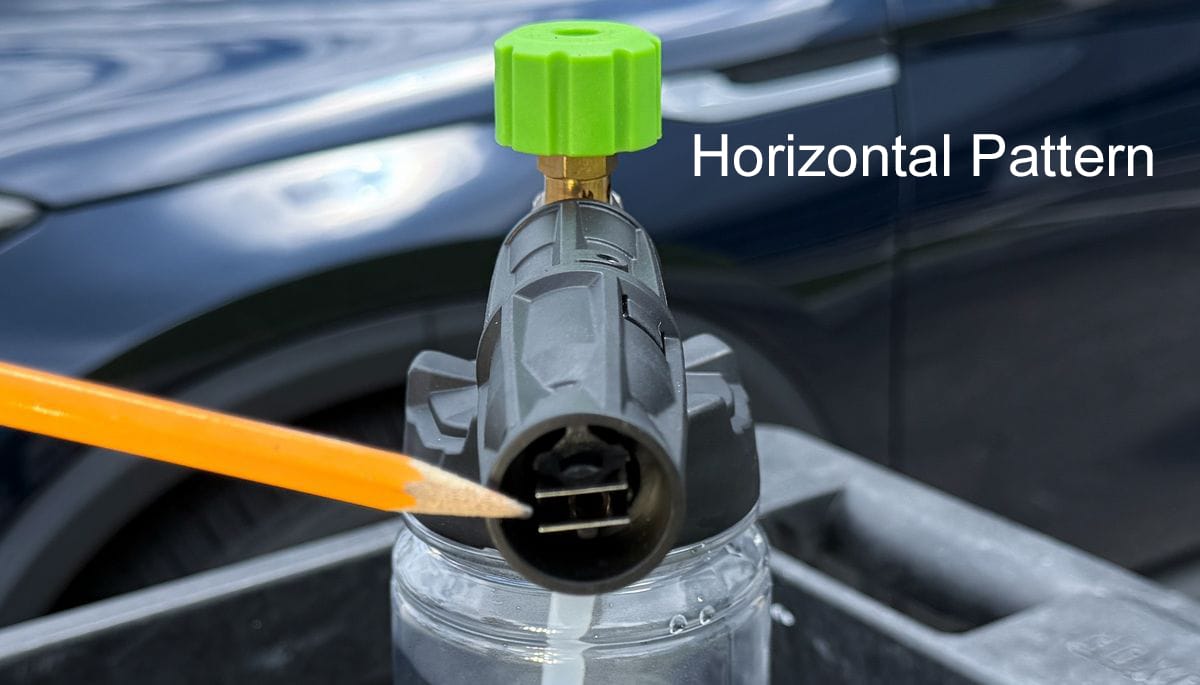
Adjusting Direction
By twisting the portion of the nozzle closest to the mixing chamber you can change the direction of the spray pattern from up-and-down (vertical) to side-to-side (horizontal).
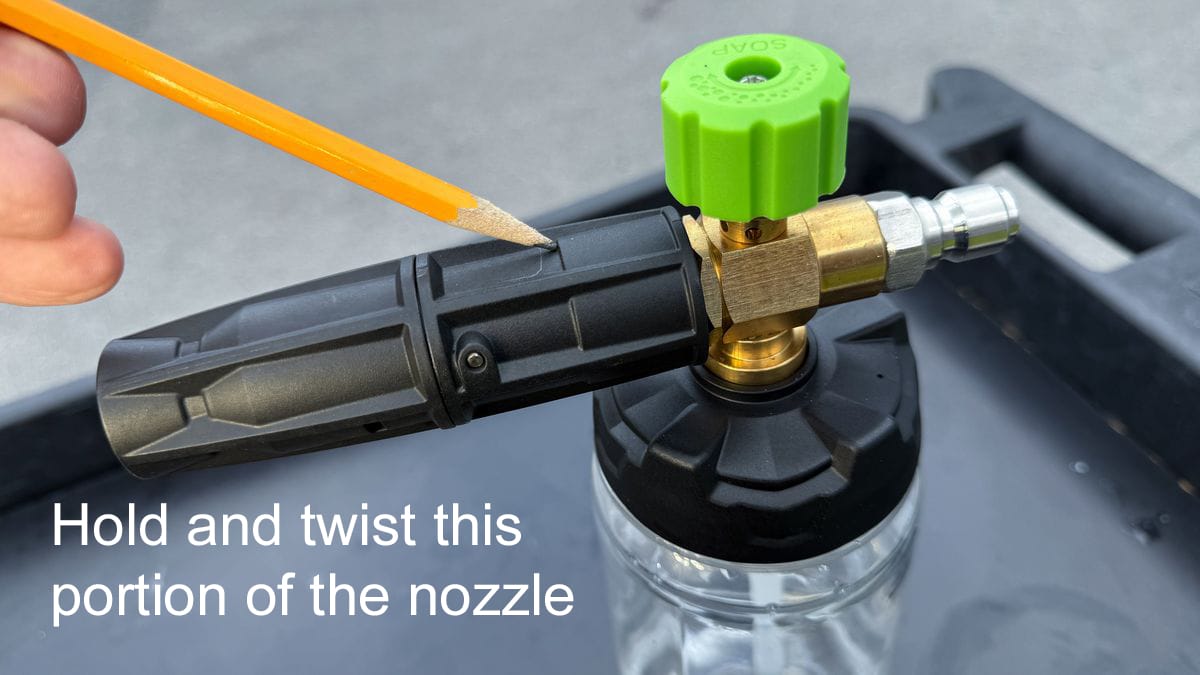
In the picture below you can see how I twist the back of the nozzle clockwise to switch from a vertical to horizontal pattern.
Adjusting Foam Volume
On the top of the spray nozzle is a knob for controlling the volume of foam emitted from the nozzle. You can adjust all the way from thick like shaving cream to thin for light suds.
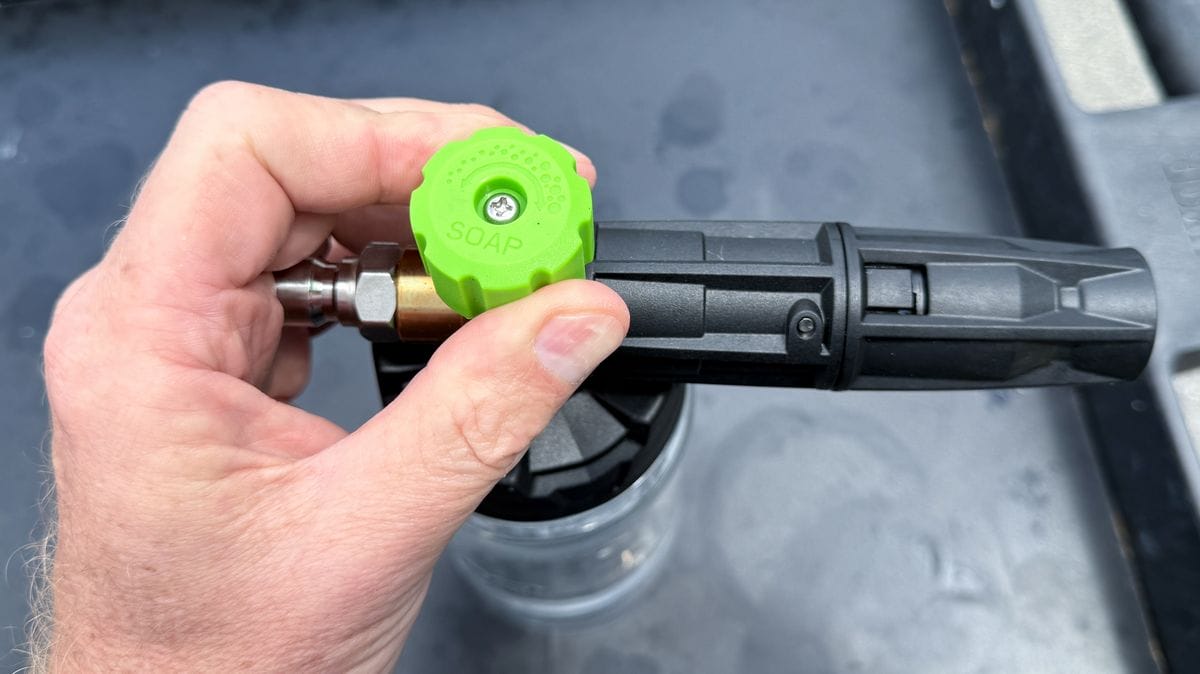
To be honest? I’ve never set this knob to anything but MAXIMUM FOAM. It’s simply better for cleaning. I’ve never met anyone who wants less foam, but ultimately it’s about personal preference.
Why I Love To Use Foam Cannons
Although you’ll usually see me doing a conventional two-bucket wash, I love using foam cannons too. There’s a few reasons why I like using them:
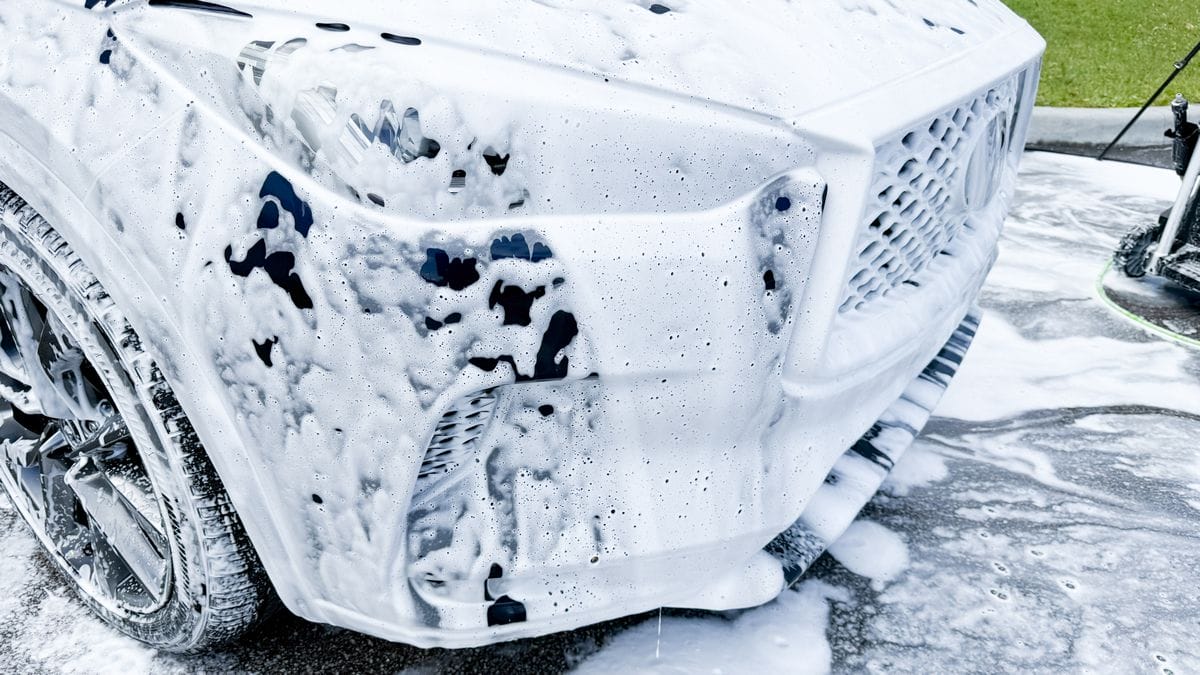
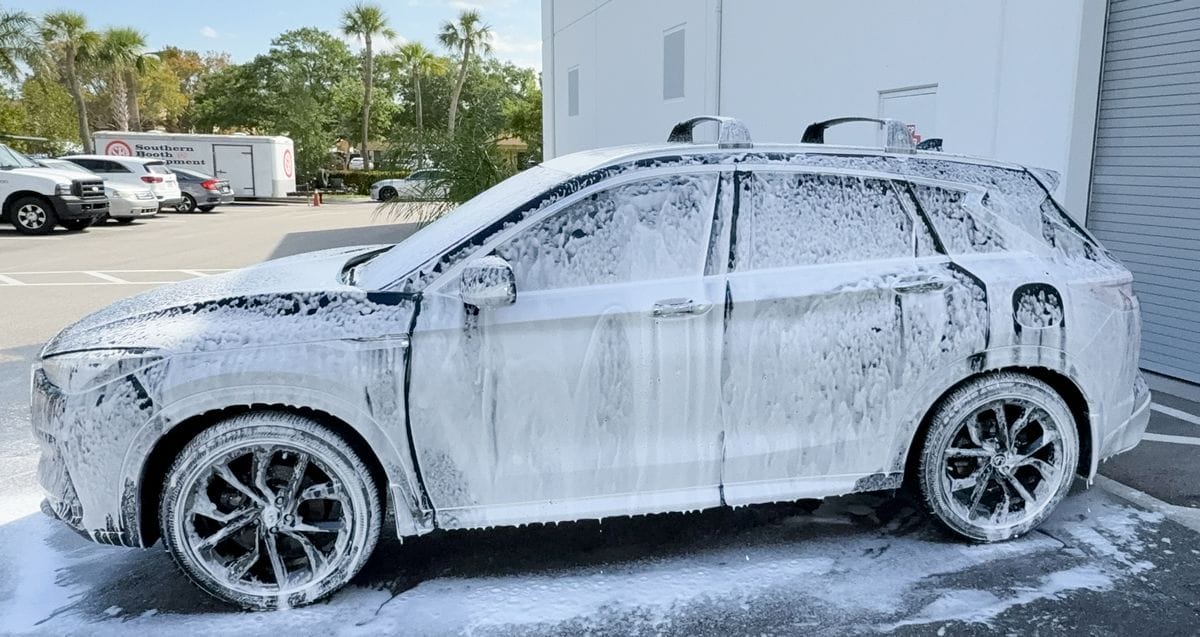
- Thick Foam = Awesome: It’s hard to understate how cool the foam looks after it’s sprayed all over the car in a thick, frothy layer.
- Clinging Foam = More Dwell Time: Because the thick foam clings to the paint so well, the soap is able to dwell longer and break down the road grime and built-up dirt and traffic film. This makes it so you don’t need to wash as aggressively, reducing the chance of instilling swirls and scratches.
- Clinging Foam = More Lubrication: One of the biggest concerns when washing your car is inflicting swirl marks with your wash mitt. The clinging foam provided by a foam cannon helps to lubricate the surface so the wash mitt doesn’t create as much friction as you agitate the suds.
Do Foam Cannons Allow For No Contact Washing?
Yes and no… while the thick suds from a foam cannon do a great job of breaking down contamination without wash mitts, they can’t always break down everything. It ultimately comes down to two things:
- How Dirty is the Car? Lightly dirty cars, especially those that are ceramic coated, can usually be cleaned with nothing more than foam and a rinse.
- Is the Car Ceramic Coated? Ceramic coatings help resist grime, making it easier to wash off the paint. If your car is protected with a ceramic coating, you could probably do a contact-free wash if the contamination is relatively light.
Contact-free washes are really only possible with a foam cannon if the contamination is very light (like dust on a garage kept car) and the vehicle is protected with a ceramic coating.
For most people, though, you will need to use a wash mitt to agitate the suds and get a thorough clean.
What Soap Works Best in a Foam Cannon?
Believe it or not, not all car wash soaps work well in a foam cannon. Not all car wash soaps are formulated to produce heavy suds.
So how do you know whether a soap will work with a foam cannon? I recommend looking at the manufacturer directions for the soap you’re considering. If the soap is intended for foam cannon use, there will typically be dilution strength information in the instructions.
If you don’t see instructions or information like this on the packaging, label or website product page, you’ll have to use trial and error to determine whether the soap is appropriate for a foam cannon.

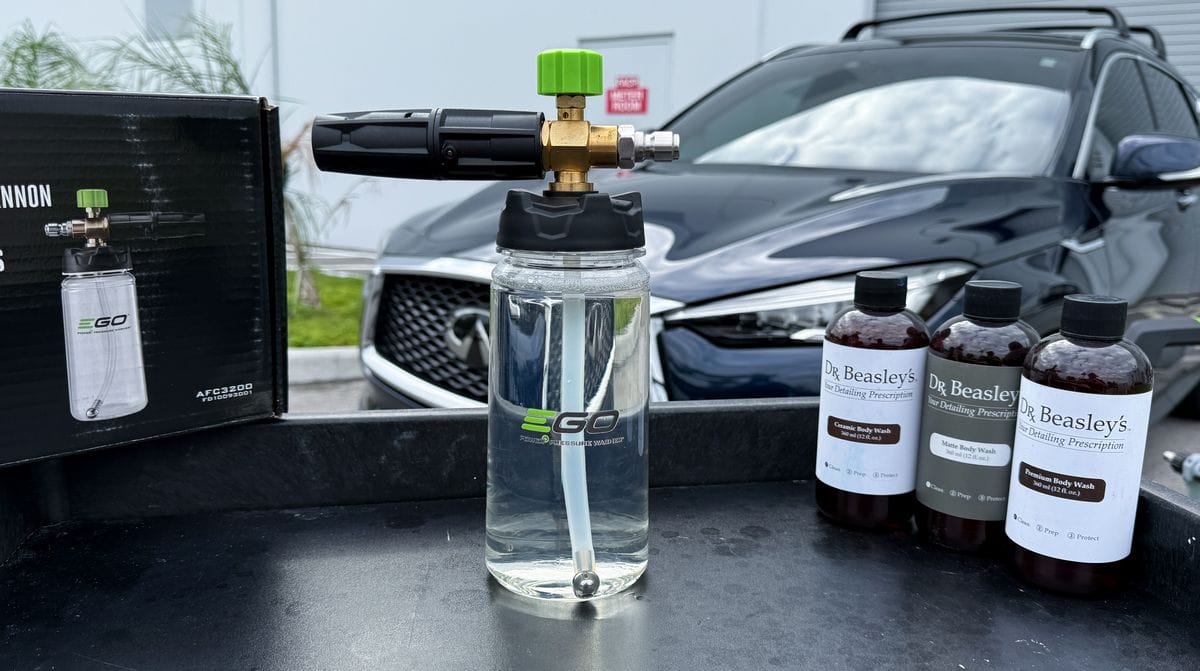
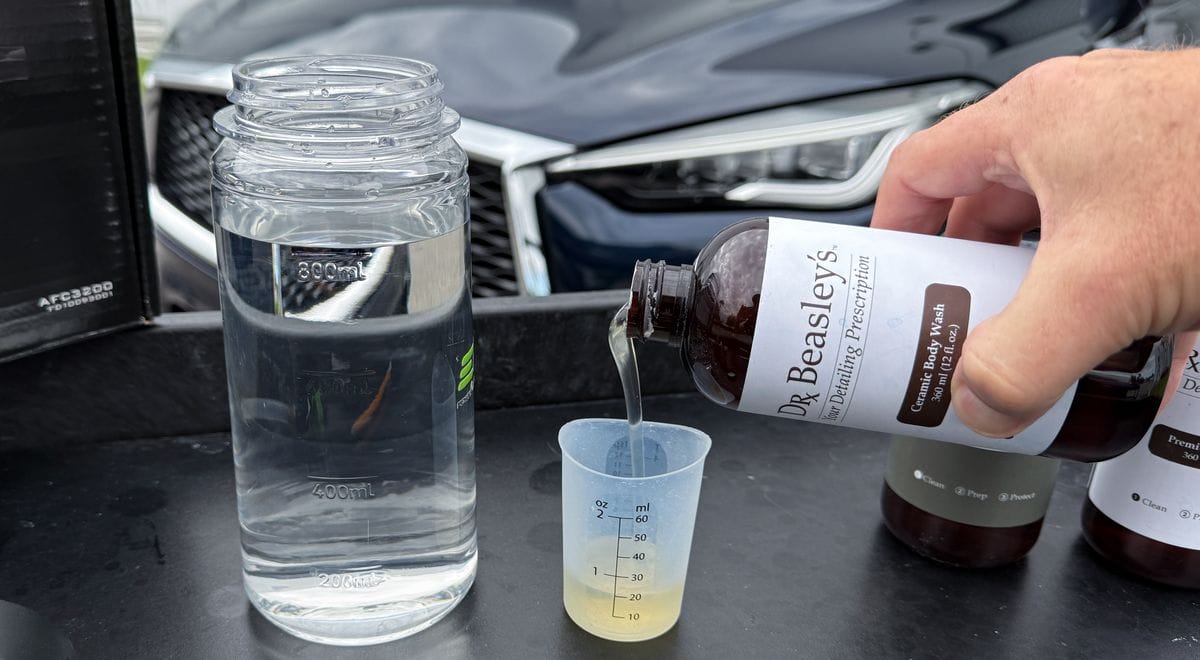
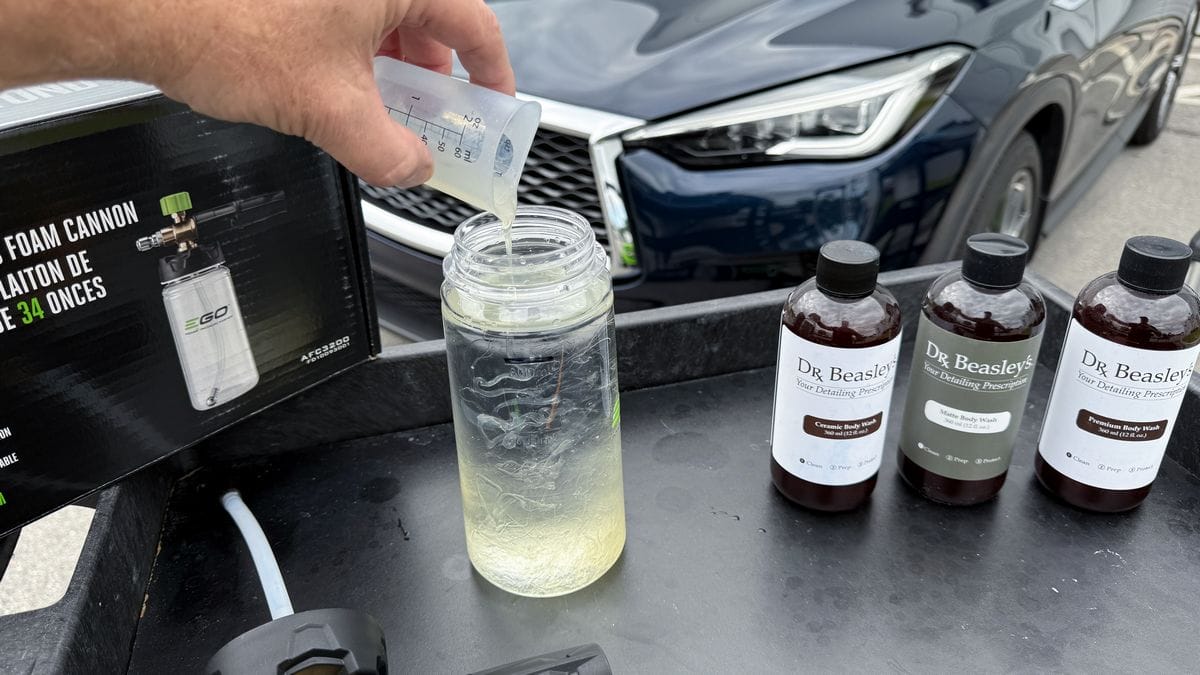
I personally like to use Dr. Beasley’s wash soaps for my foam cannon washes, though I may be a bit biased considering I am their “Chief Education Officer”. Their “Premium Body Wash” soap works great in foam cannons and they have soaps for ceramic coated vehicles and matte finish vehicles as well.
What Are The Best Foam Cannons?
There are a lot of different foam cannons out there and they all vary greatly in quality and performance. Like most things, you get what you pay for.
That being said, there are a number of key features and attributes that make some foam cannons better than others.
What to Look for in a Foam Cannon
Easy-to-Clean or Replaceable Internal Mesh Filters
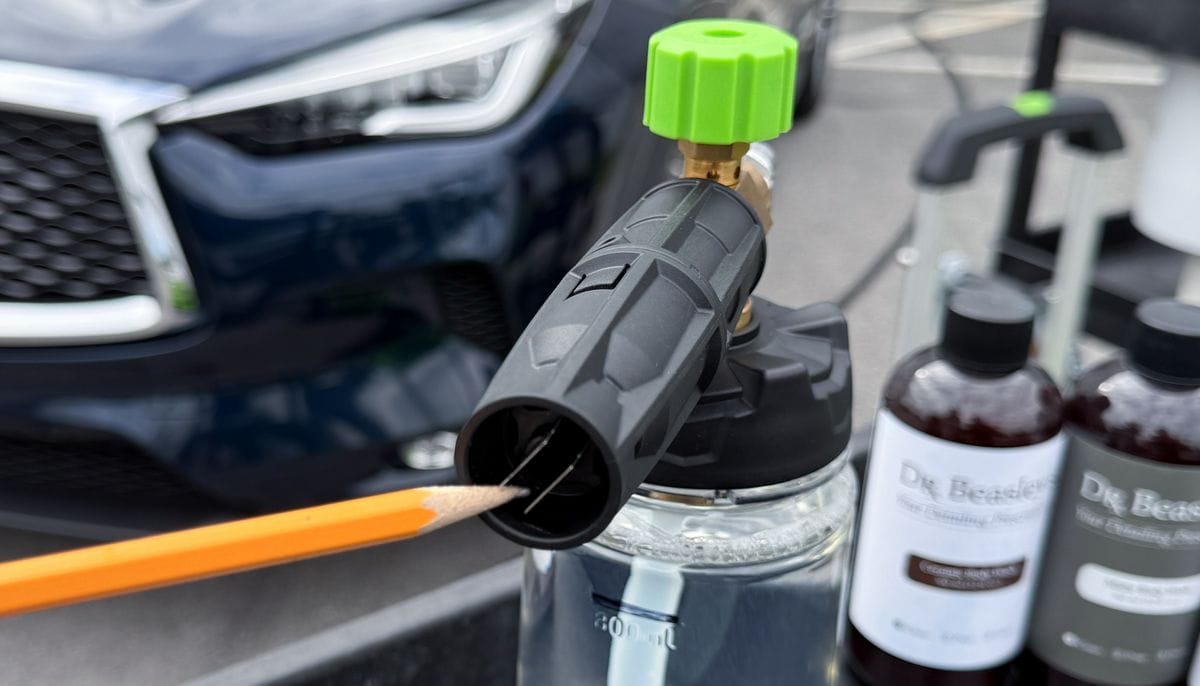
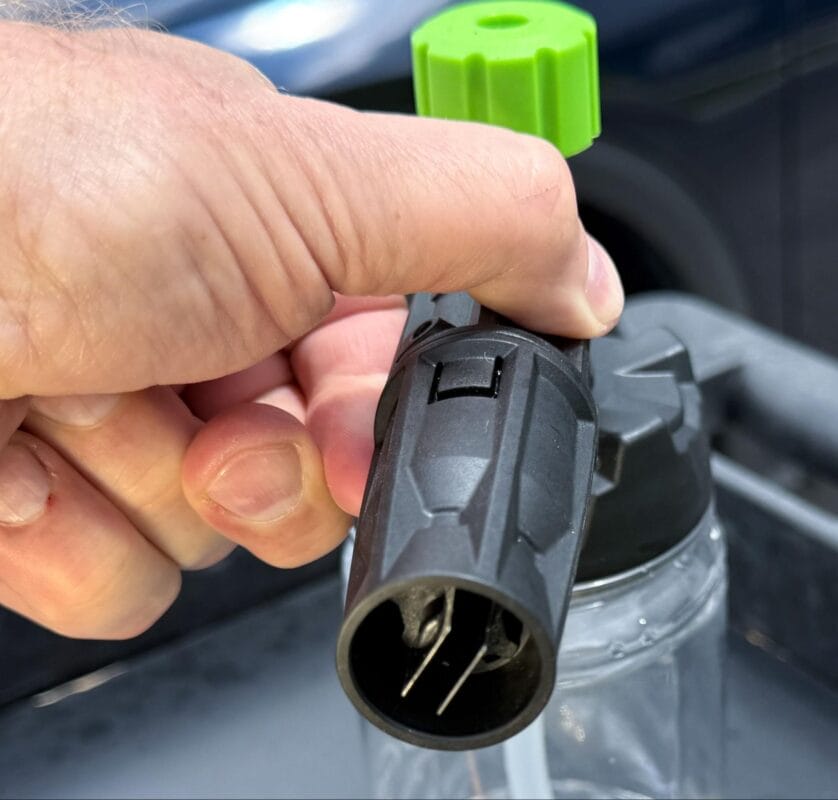
Inside the sprayer housing is a mesh filter that helps produce foam and block any small debris or undissolved soap particles. This filter can get dirty over time or wear out. When purchasing a foam cannon, look for sprayers with replaceable mesh filters or easy-to-clean ones.
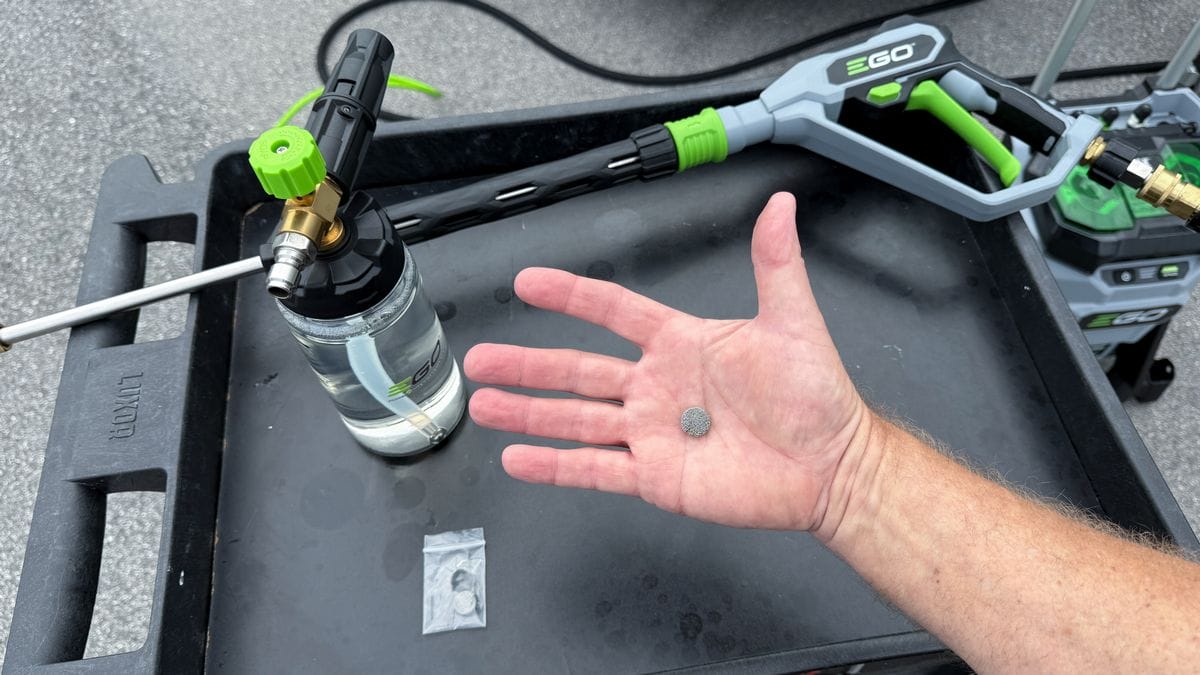
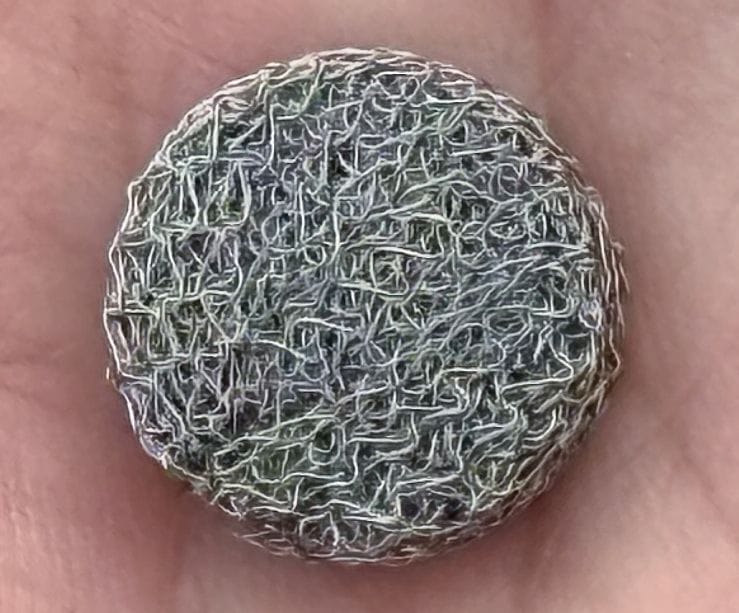
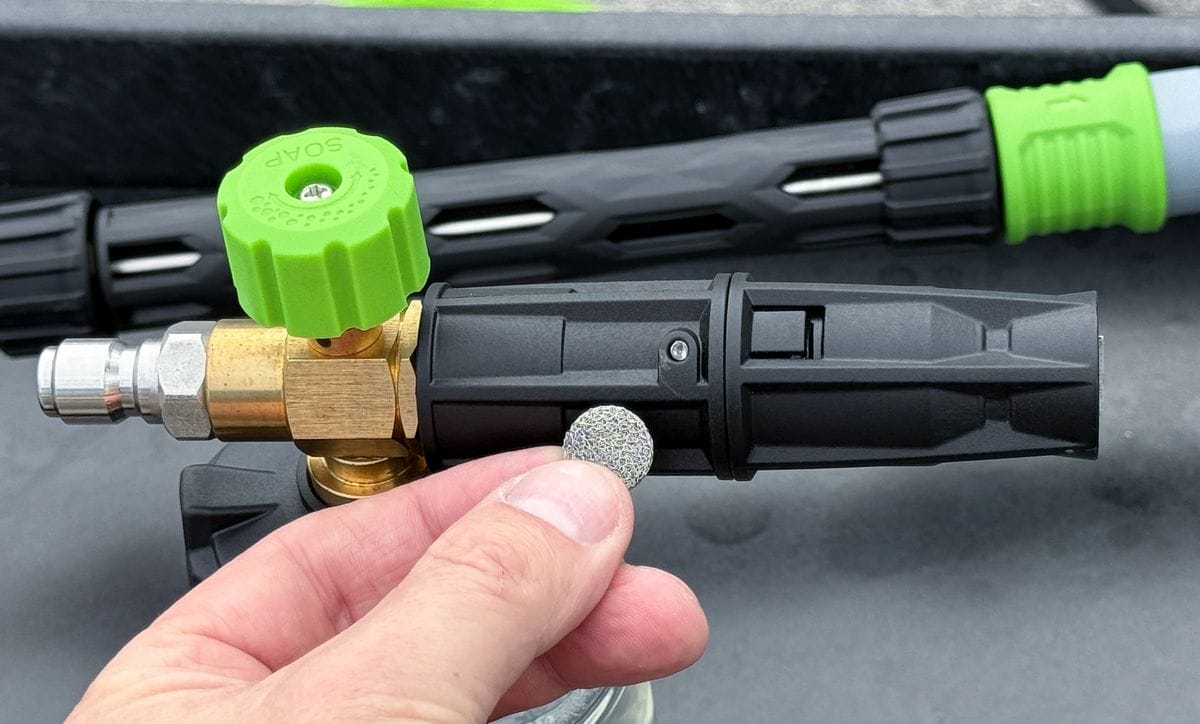
You can see where the internal mesh reservoir is located inside the foam cannon below.
Some foam cannons don’t make it easy to access the mesh filter and some can’t be replaced at all. Most foam cannons allow you to disassemble the sprayer by pressing out the locking pin connecting the two sections of the sprayer nozzle, as shown below.

Wide Mouth Reservoir for Easy Filling
Some foam cannon reservoirs have smaller openings that are difficult to pour soap and water into. Look for a foam cannon reservoir that has a large opening so you can easily pour and mix your soap into the tank.
Large Capacity Reservoir
When it comes to foam cannon reservoirs, larger is always better. Keep in mind, however, that the larger the reservoir, the heavier it will be while holding the foam cannon sprayer.
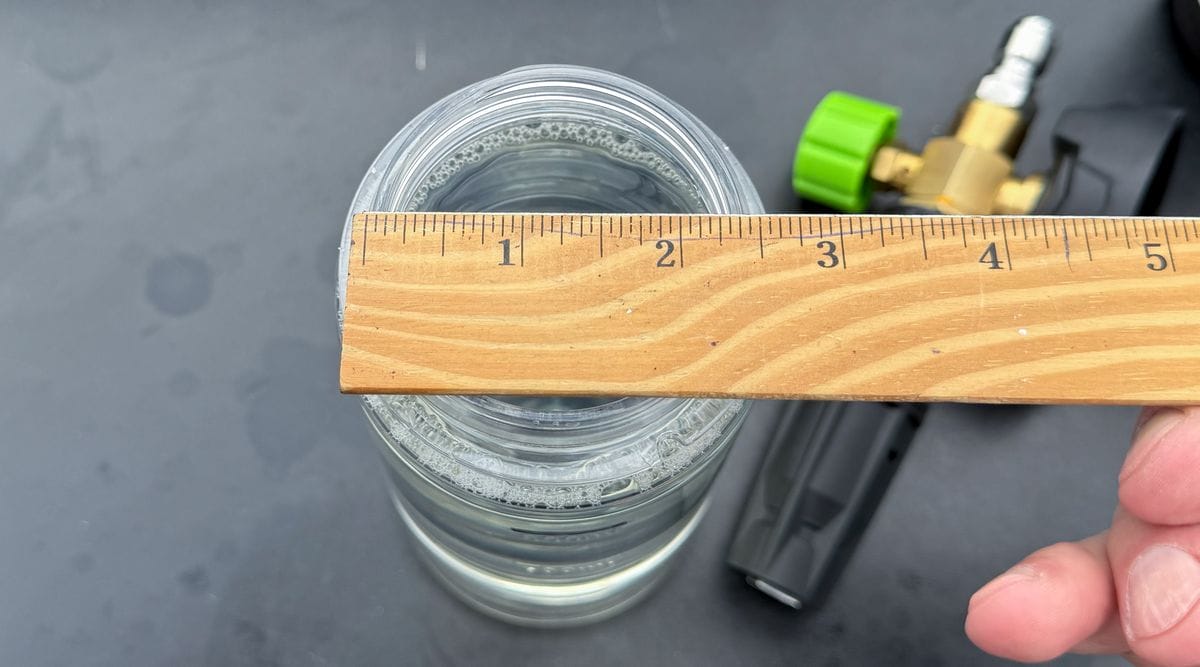
If you’ve got good hand/arm/shoulder strength, I recommend going with the most common and preferred size reservoirs at 1 liter or 34 ounces in volume. Smaller reservoirs are about half the size at 500 mL / 16 oz reservoir.
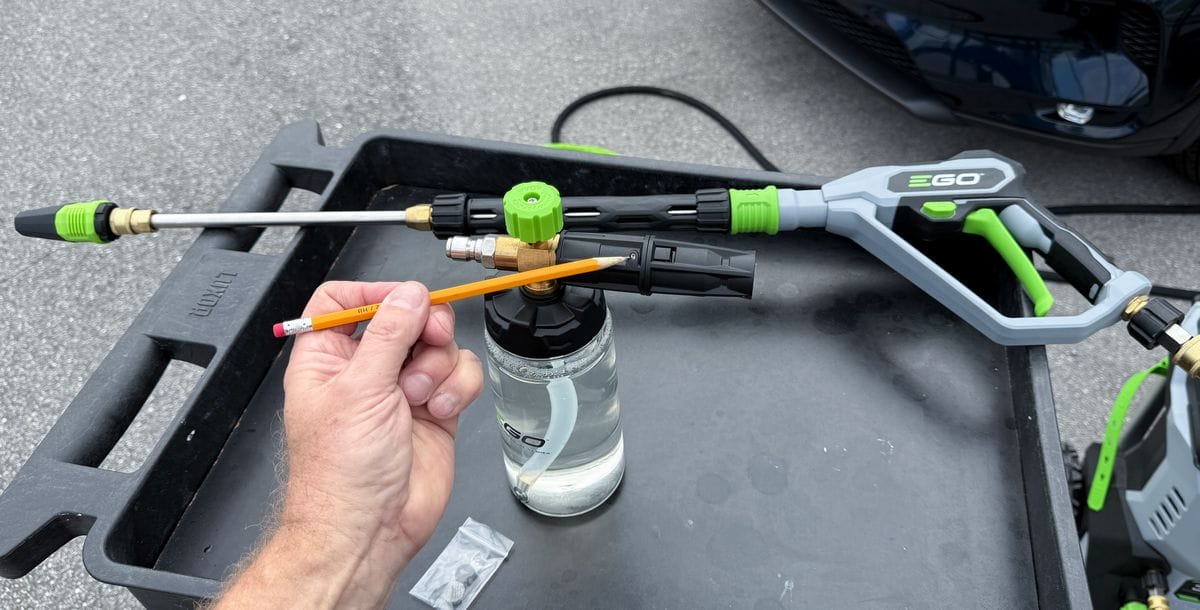
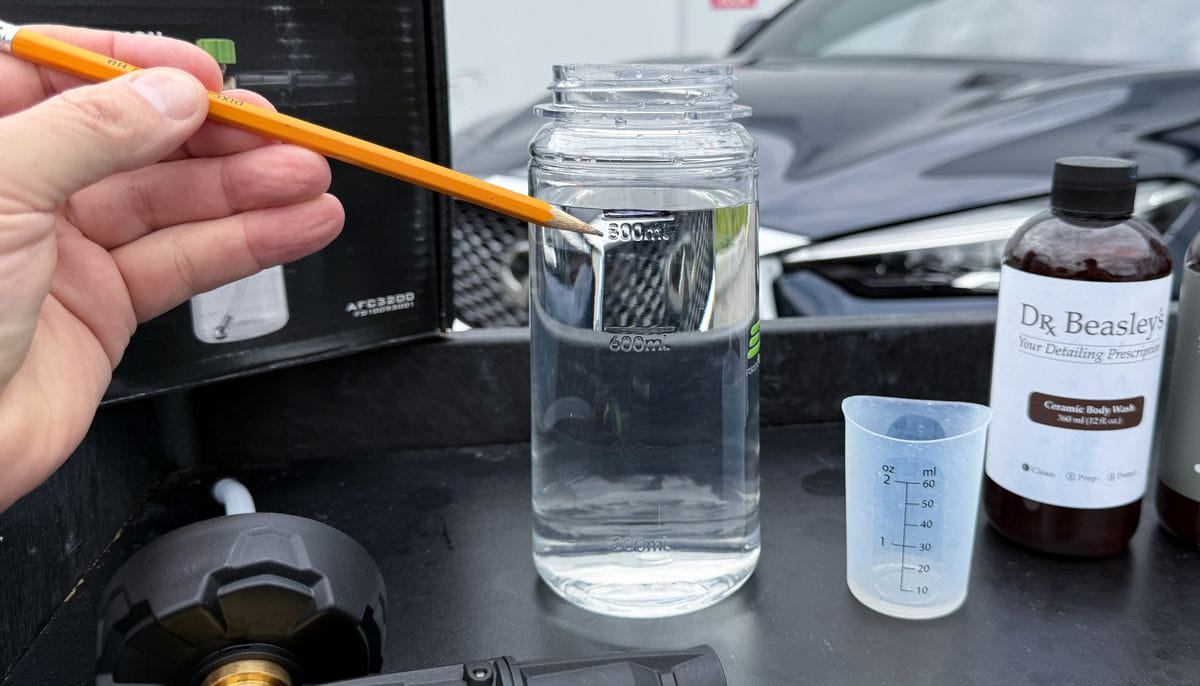
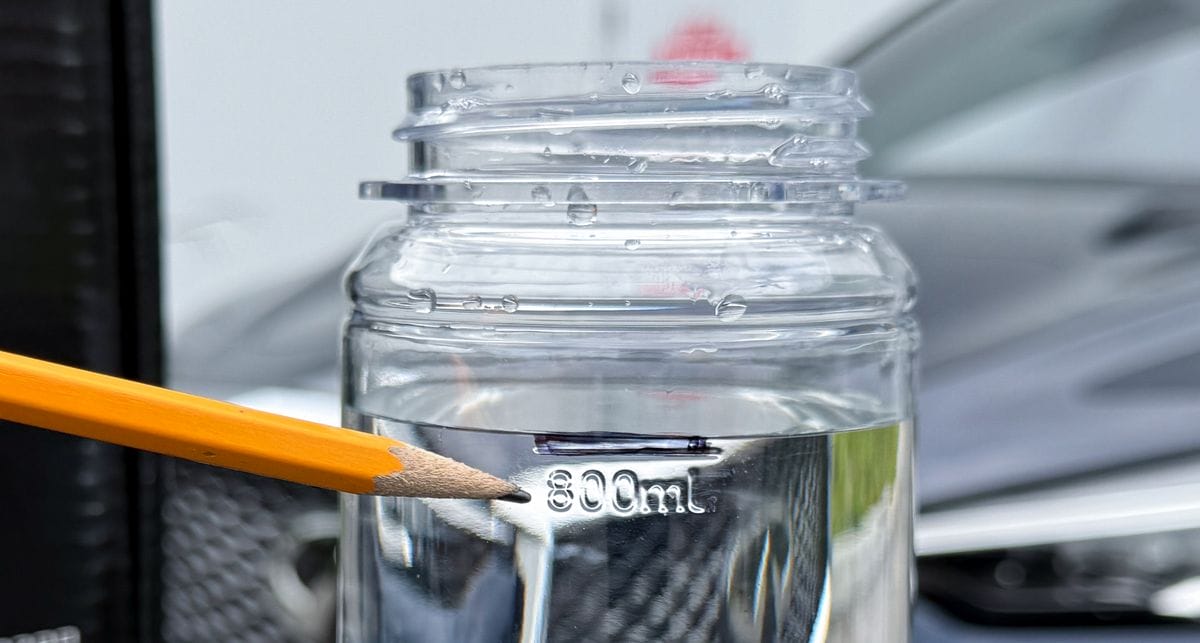
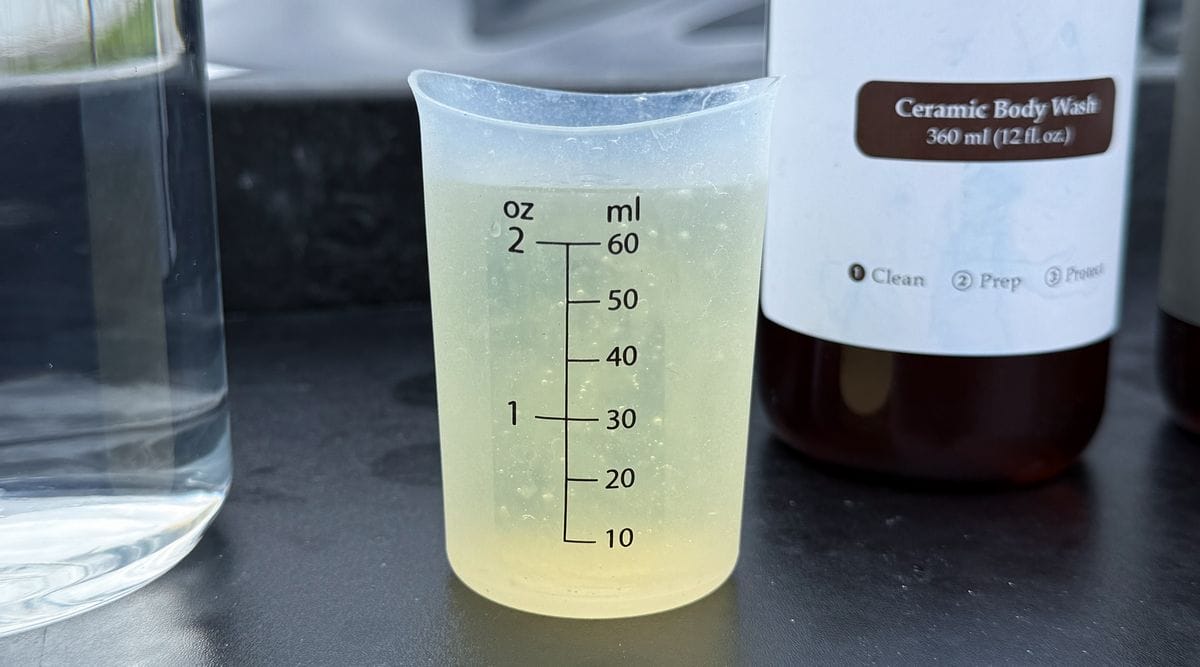
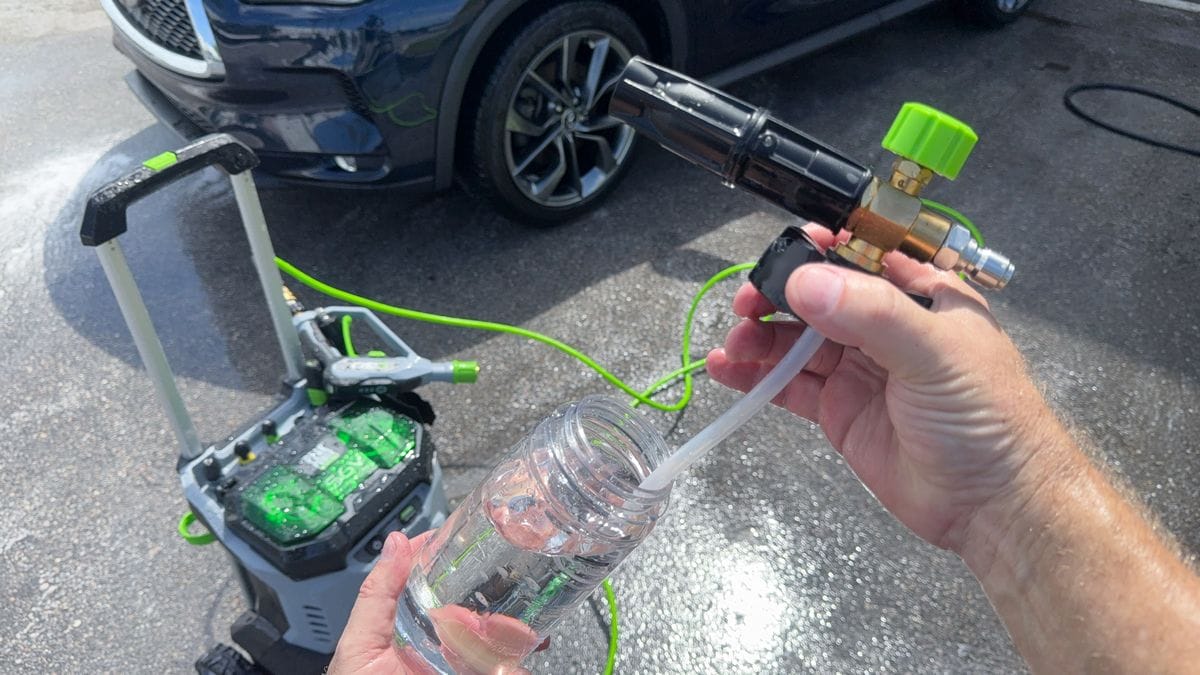
The EGO Foam Cannon has a 1000 ml reservoir but be sure when adding water to leave room for the car wash soap. For this example, I’ve placed 800 mls into the reservoir and next I’ll add 2 ounces of car wash soap.
Quality Materials & High Build Quality
Higher quality foam cannons use brass and stainless steel for any of the mechanical parts and high quality plastic for the reservoir and other components like adjustable spray nozzles. Brass and stainless steel nozzles will last longer as they are resistant to corrosion, and high quality plastics are more durable than brittle and weak cheap plastics.
Build quality is also important. Lower quality foam cannons will be shoddily mass-produced and prone to failure. Higher quality foam cannons are better engineered and will stay in good working condition for longer.
How To Use a Foam Cannon
When it comes to washing cars, there are two basic kinds of washes with different goals: maintenance washes and prep washes.
A maintenance wash is for cleaning lightly dirty vehicles that are washed regularly and have some type of protection applied to the paint. When using a foam cannon, a maintenance wash can be done without touching the paint at all. Once the contaminants are broken down and loosened by the soap, the pressure from your pressure washer’s water jets will be enough to get the paint surface clean.
A prep wash is for thoroughly cleaning neglected or scratched paint in order to prepare the paint for correction and ceramic coating application. These types of washes require the use of wash mitts to agitate the foam and help break down the contamination. The level of contamination plus the need for a perfectly clean surface for correction and protection means you can’t rely on the pressure washer alone.
In this guide, I will cover both types of washes separately because they have different steps.
How To Do a Maintenance Wash with a Foam Cannon
Step 1: Mix Water & Soap in Reservoir
Start by adding water to your reservoir, then pour in your car wash soap. Do NOT add the soap first. This can cause foam to build up in the reservoir, leaving you with a tank filled with half soapy water and half foam, which is mostly AIR.
When it comes to how much soap and how much water you should add, be sure to read the foam cannon’s instructions for any specific recommendations on the ideal ratio for creating thick foam.
Don’t rely on two bucket hand wash instructions for a foam cannon wash. Remember, a foam cannon has a much higher volume of water going through the sprayer as opposed to the 3-5 gallons you’d use in a wash bucket. For the Dr. Beasley’s car wash soaps we recommend adding 2 ounces of soap to 800 millimeters of water as you see in the above pictures.
Once you’ve filled the reservoir with soap and water, re-attach the reservoir lid and attach to your pressure washer wand.
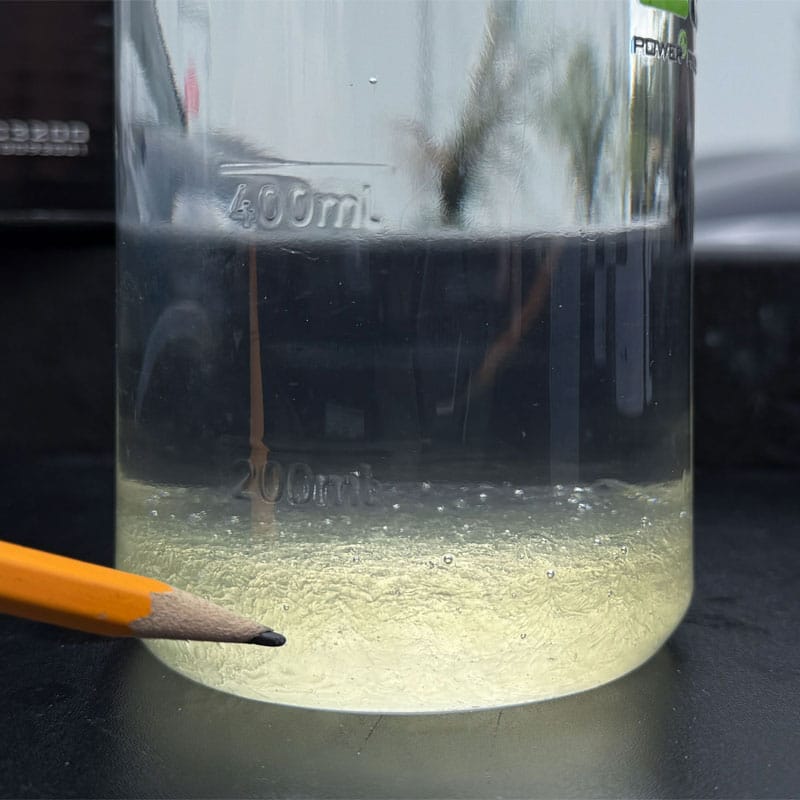
⚠ IMPORTANT: Mix Soap and Water Before Use! When adding car wash soap to the reservoir, the soap will tend to sink to the bottom and settle as seen above. Be sure to stir the water and soap to create a uniform solution before you start washing. Otherwise, the soap at the bottom of the reservoir won’t get sucked up by the siphon tube because it is too thick.
Step 2: Thoroughly Pre-Rinse Vehicle
Because the goal of a maintenance wash is to avoid using wash mitts, start by blasting off any loose dirt, dust, pollen or larger debris like sticks, leaves and bugs with the pressure washer wand.

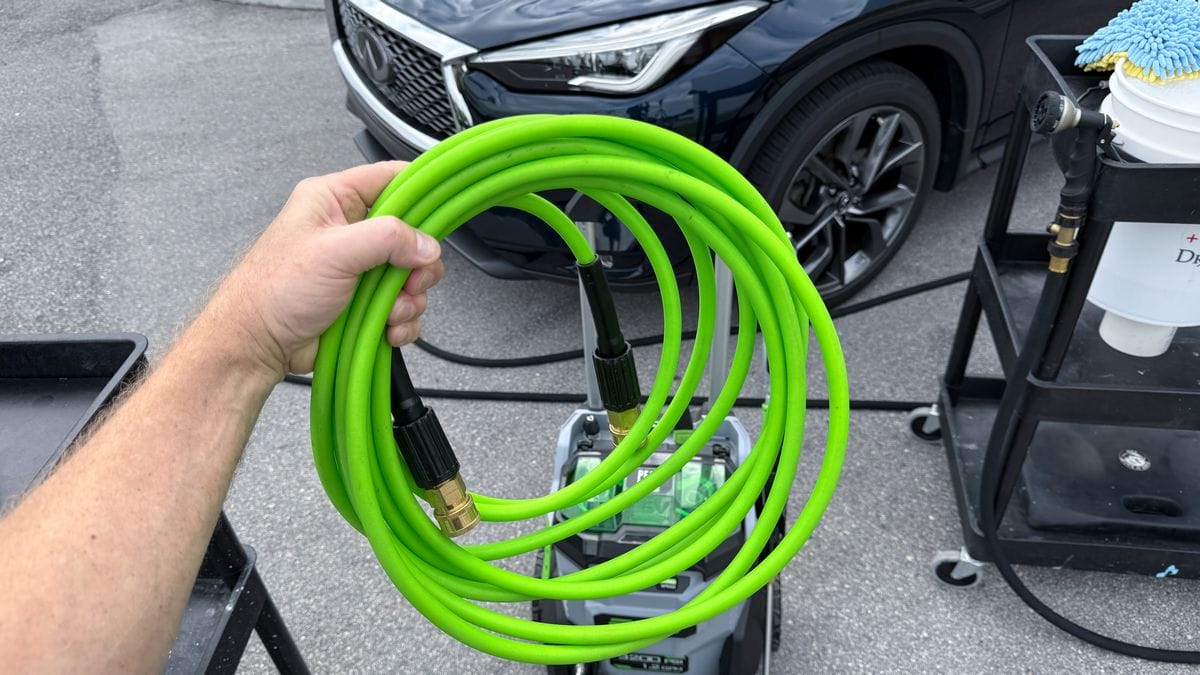
Step 3: Attach Flexible High Pressure Hose
For this guide, I’ll be using the EGO Pressure Washer. On the front of the EGO Pressure Washer are two fittings. The lower fitting is where you attach the water hose that feeds water into the pressure washer. The upper fitting is where you attach the flexible high-pressure hose that attaches to the foam cannon sprayer.
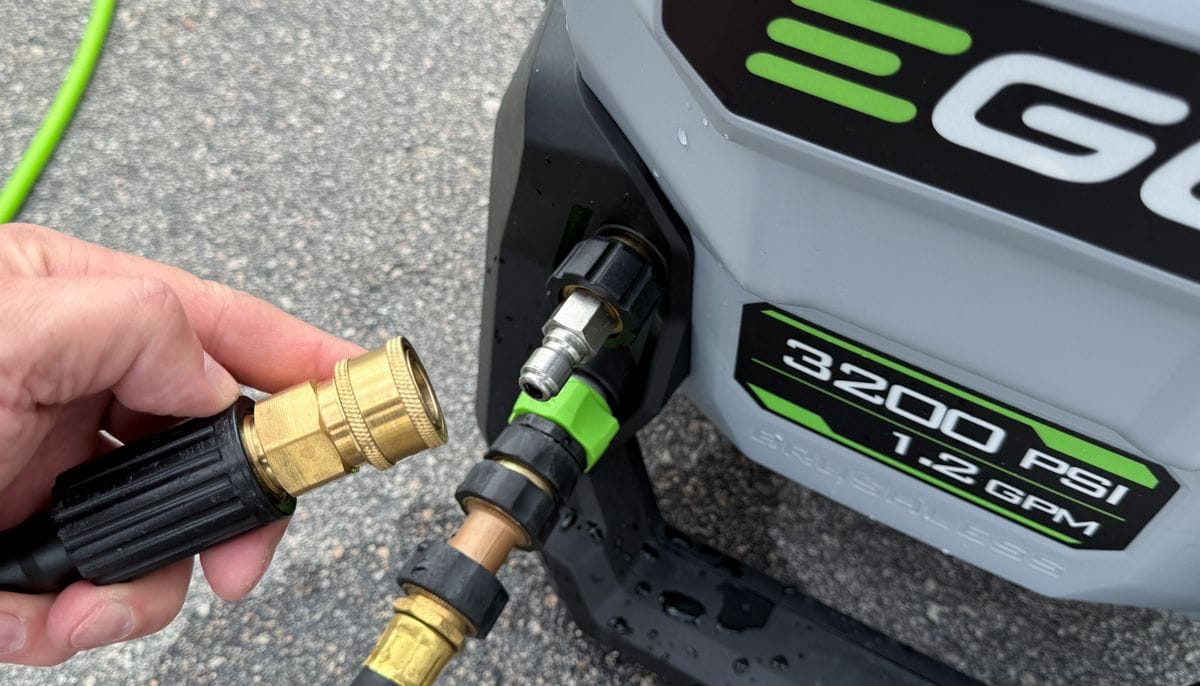
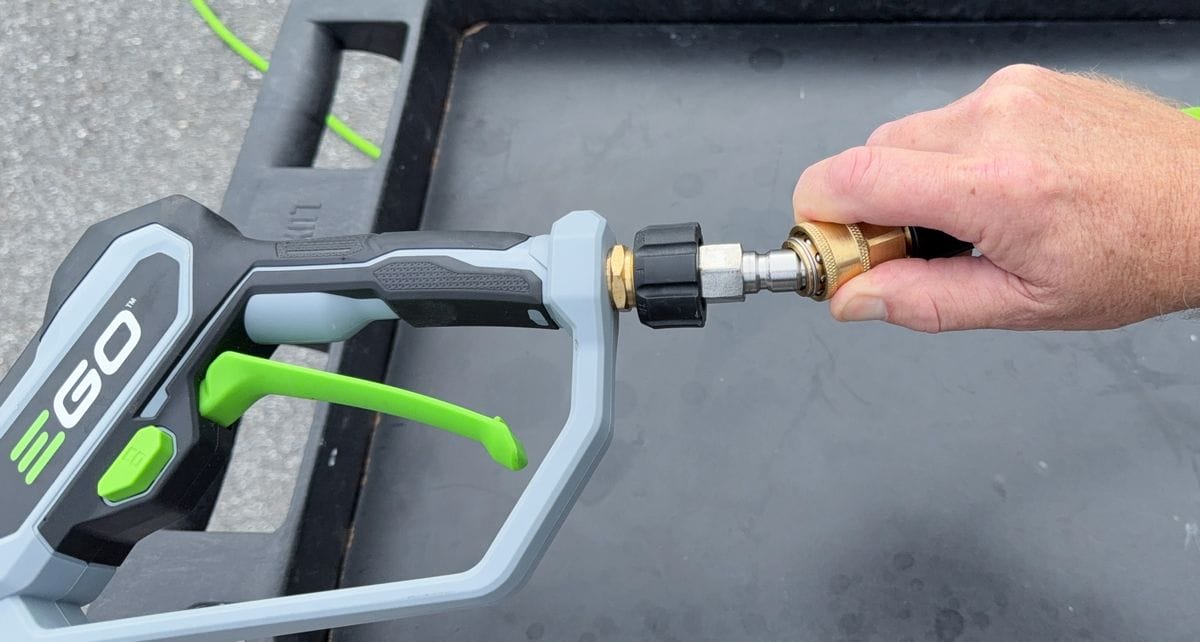
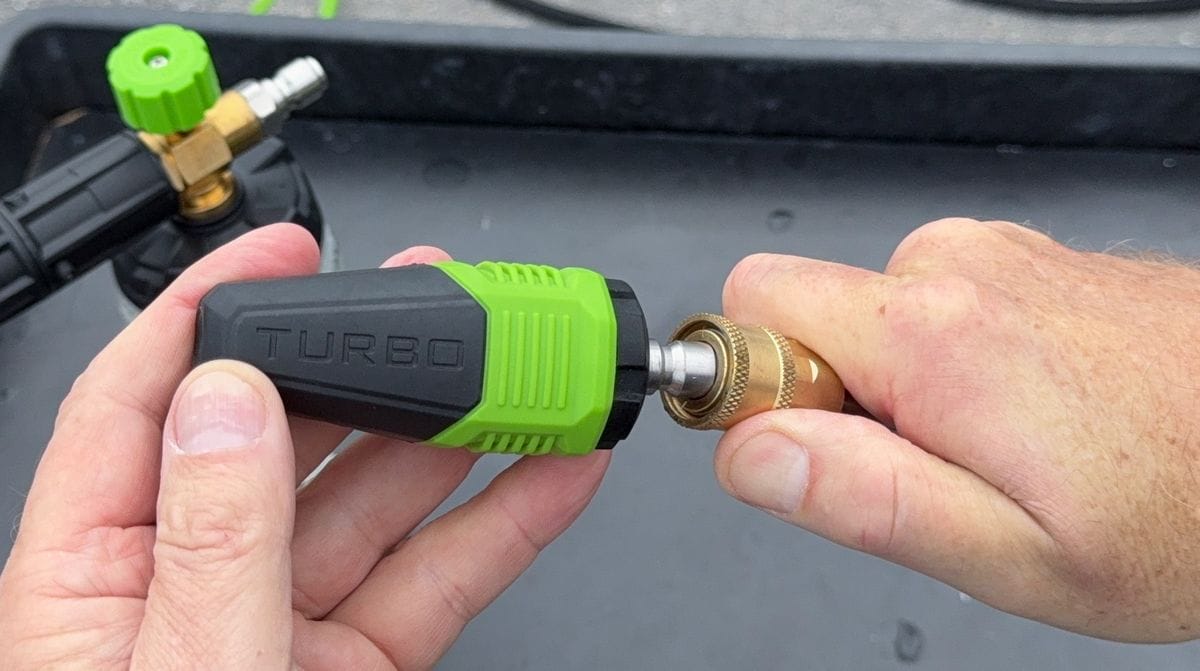
How to Attach Hose to Fitting
If you’re not experienced with pressure washers it can be a tick confusing attaching the hose to the fittings.
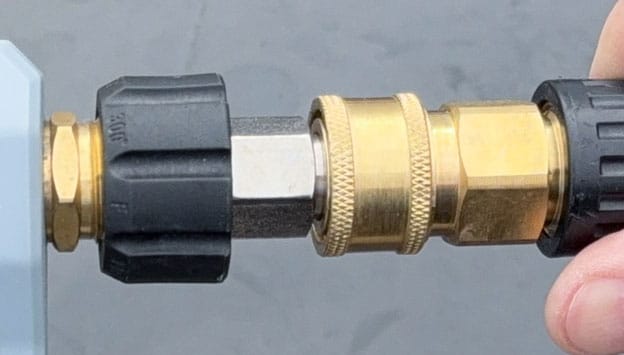
Pressure washers use universal ¼” quick connector hose couplings with a male end. To attach the female end of the hose to the male end of the pressure washer, you need to grip the spring-loaded collar and pull it back so it fits onto and LOCKS onto the male fitting.
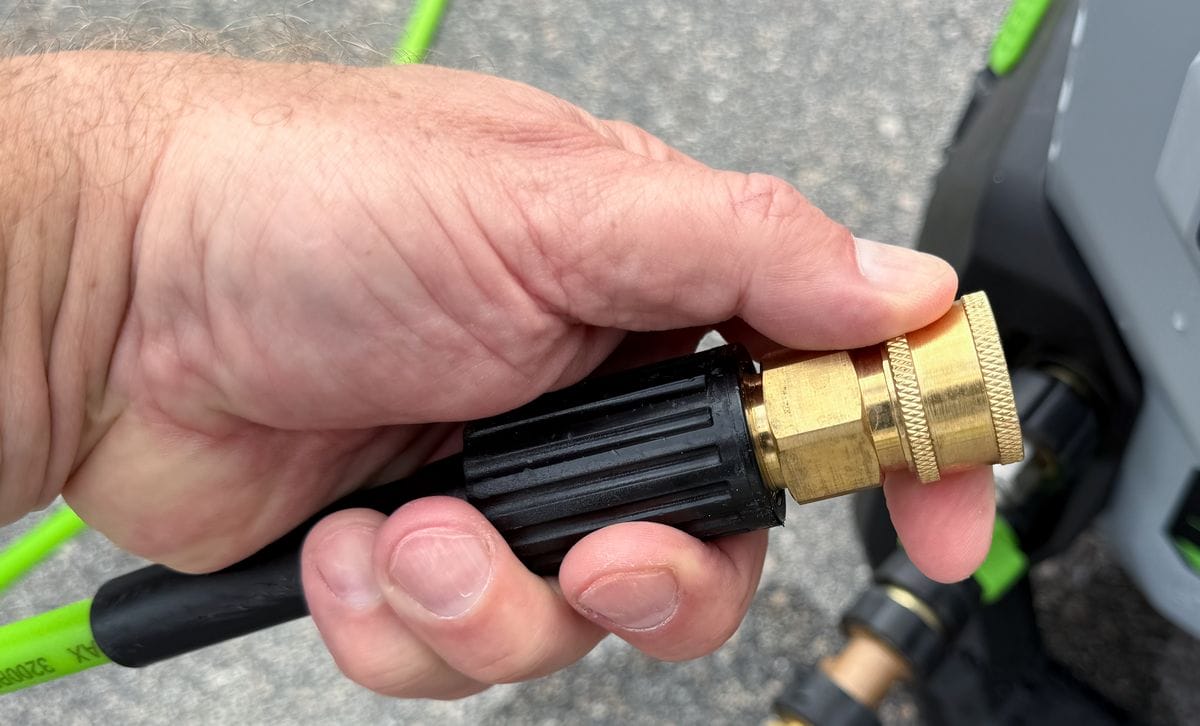
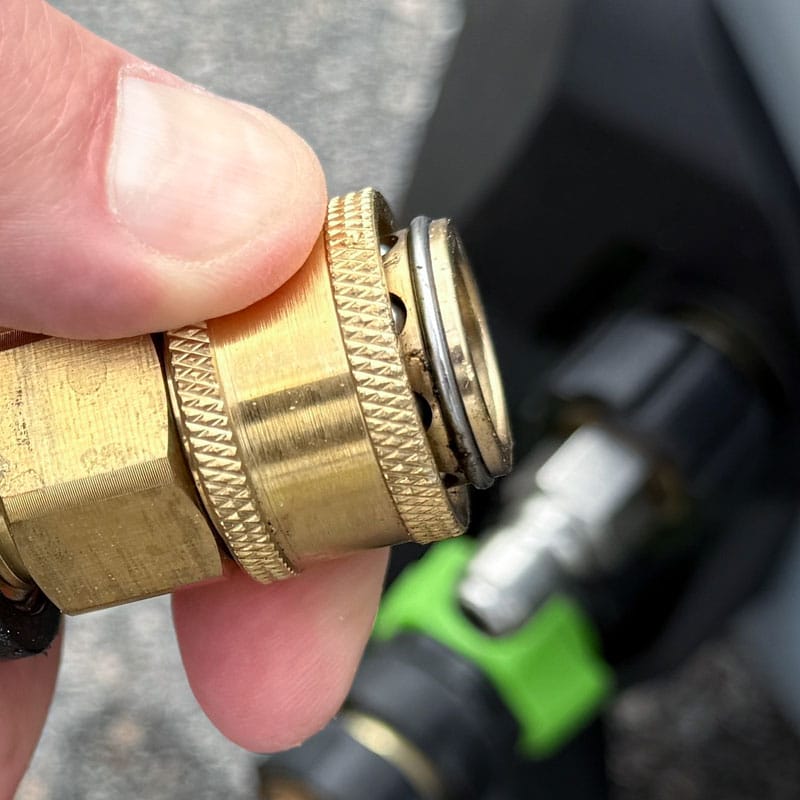
⚠ IMPORTANT: Be sure the spring-loaded female side COMPLETELY LOCKS onto the male side, otherwise it will pop off while you are using the pressure washer.
Step 4: Attach Foam Cannon to Pressure Washer Wand
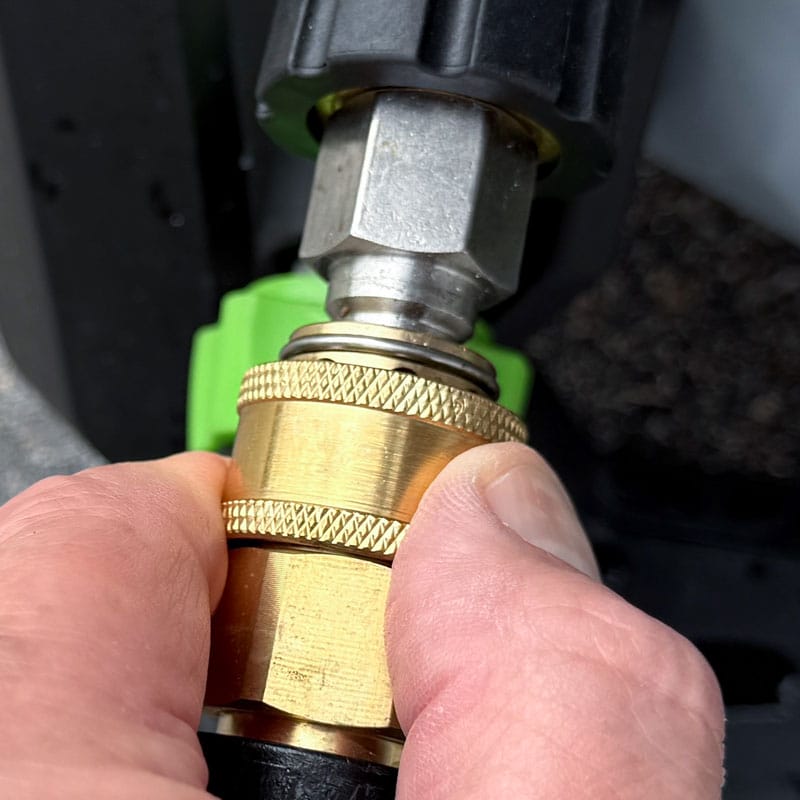
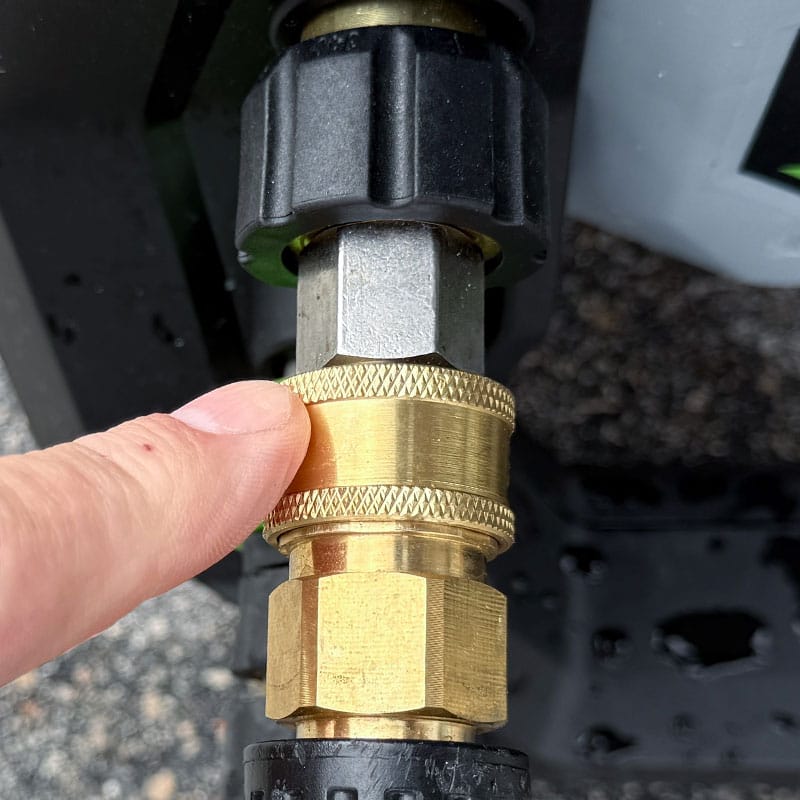
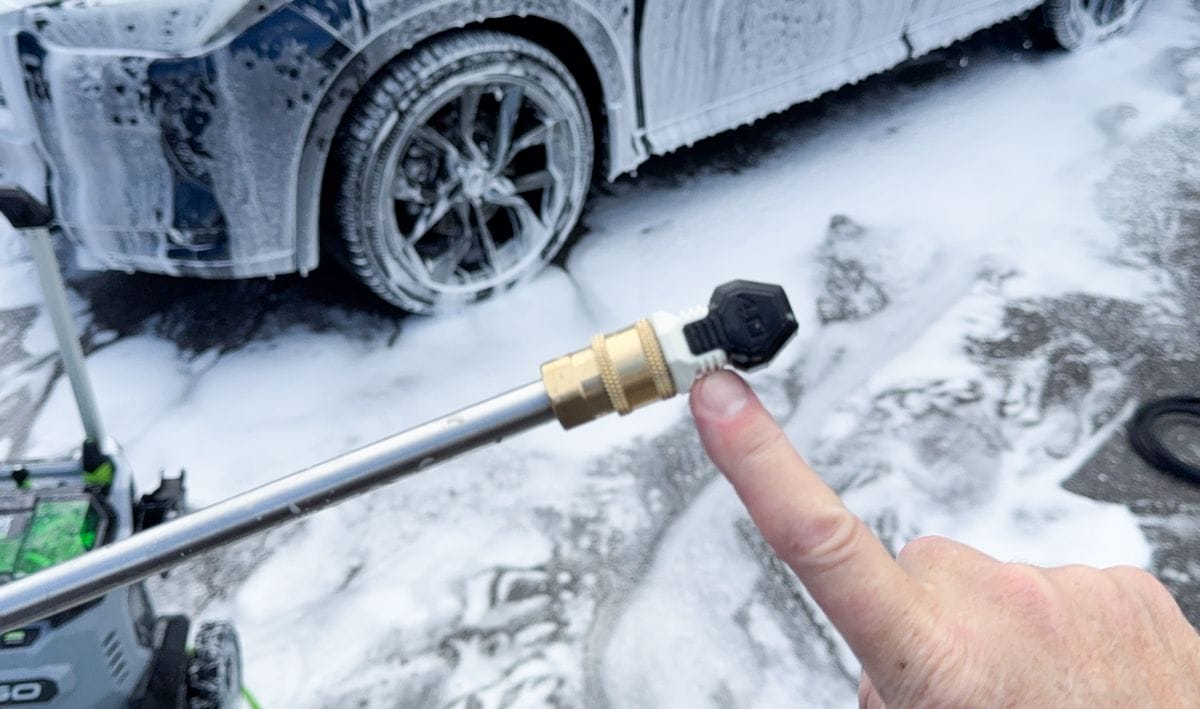
When you attach the foam cannon to the pressure washer wand, it’s SUPER IMPORTANT that the spring-loaded collar on the wand snaps SECURELY onto the foam cannon fitting with the female Quick Connector Collar fully seated onto the male ¼” Quick Connector.
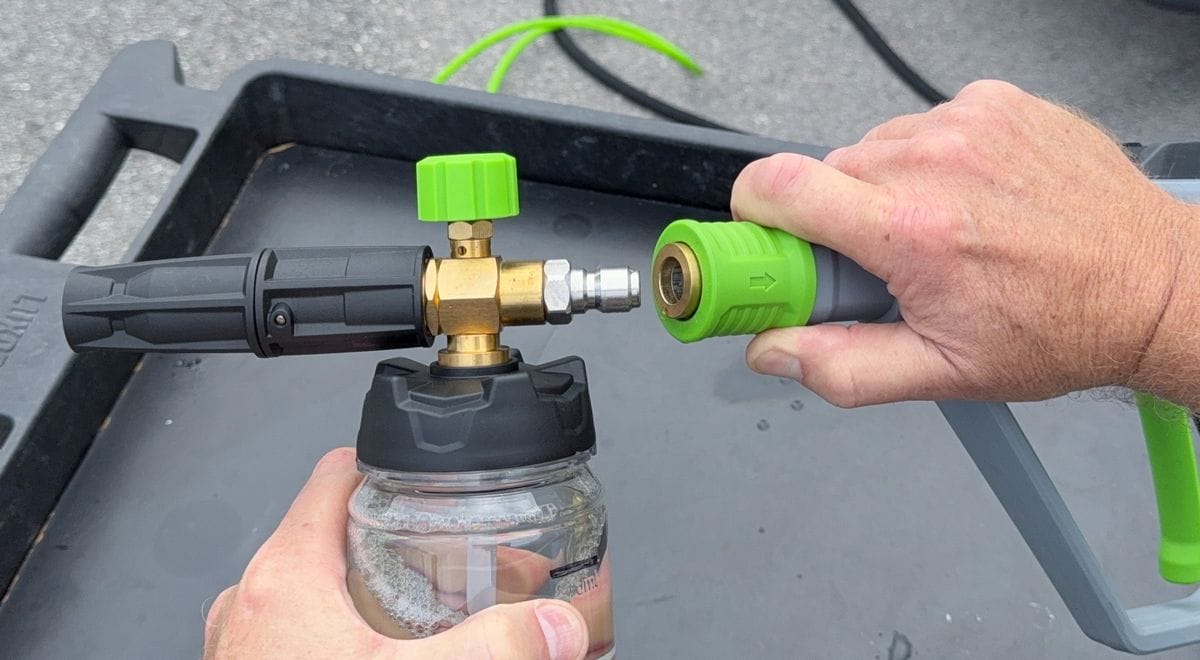
⚠ IMPORTANT: If you don’t fully secure the female connector collar with the male connector, it is possible the extreme water pressure will literally PUSH the foam cannon OFF the wand, slamming it onto your car’s paint. Ouch! So be sure when you connect the foam cannon to the pressure washer wand that the female connector is FULLY seated onto the male connector.
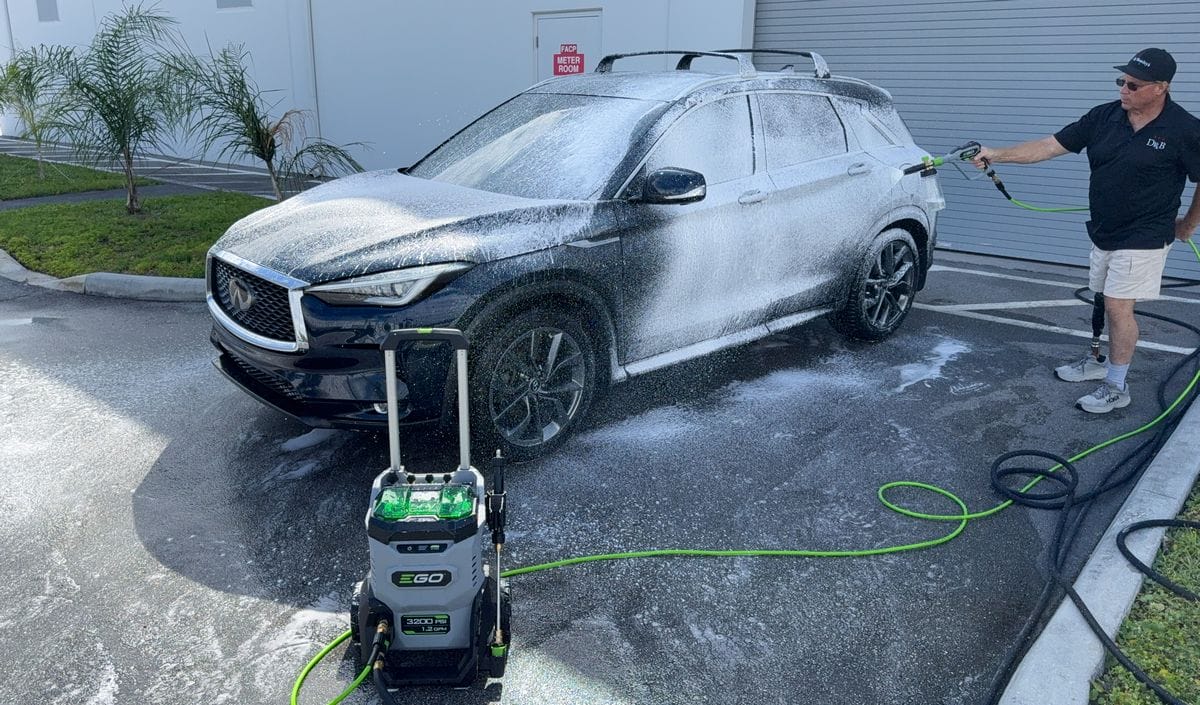
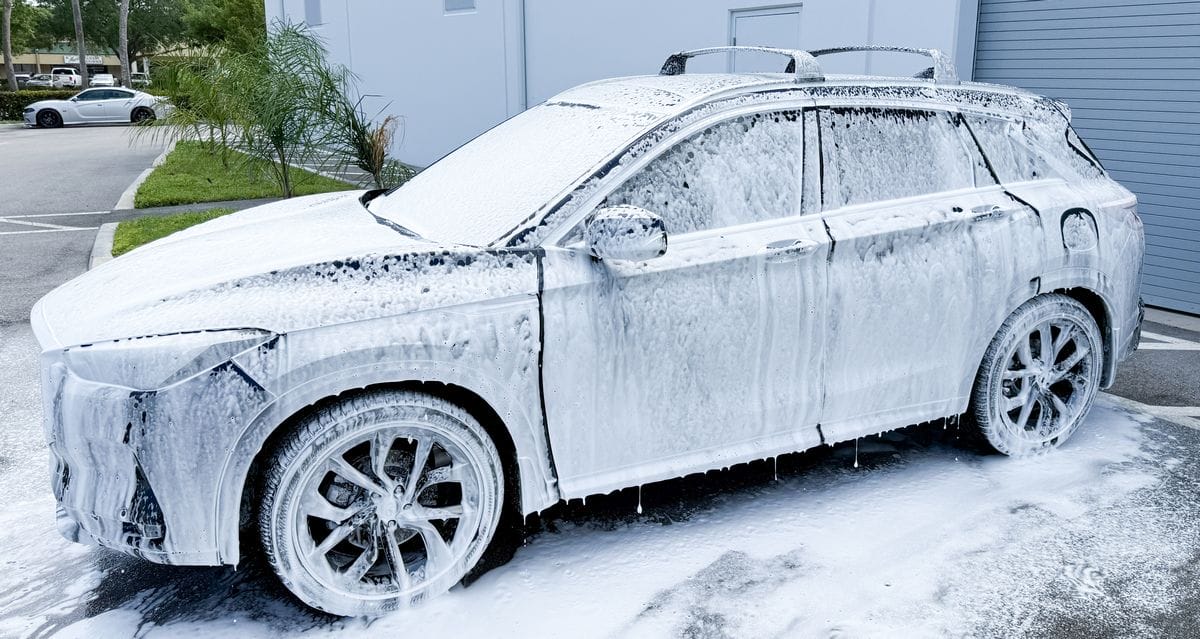
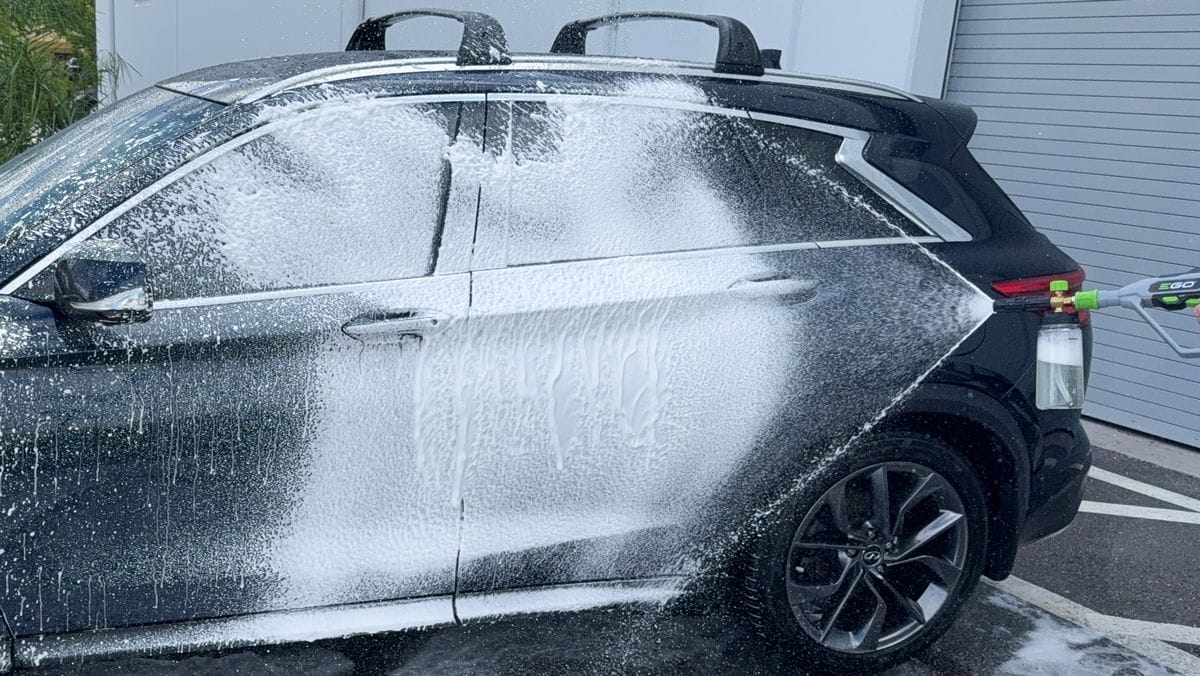
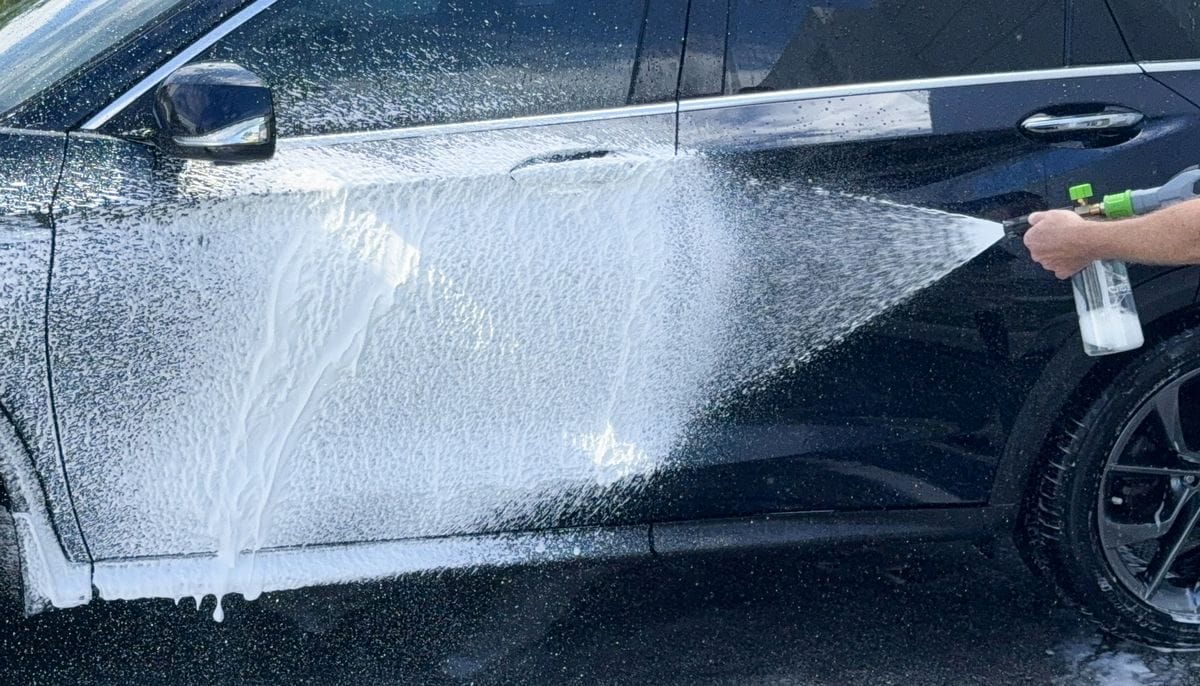
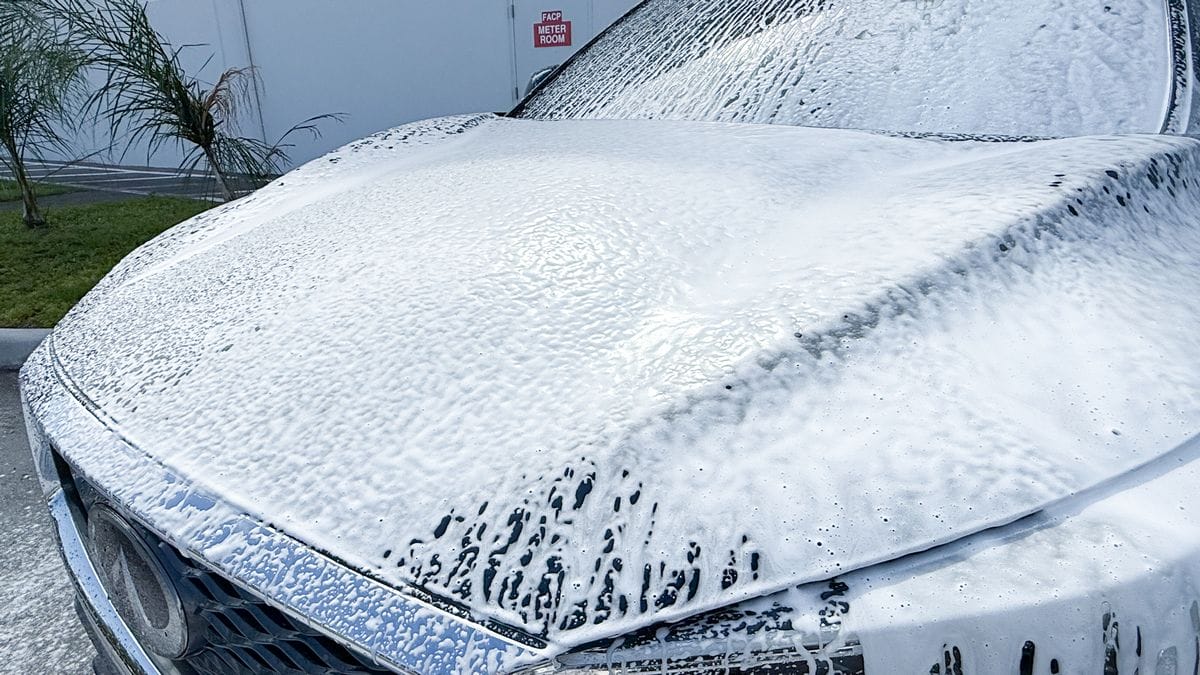
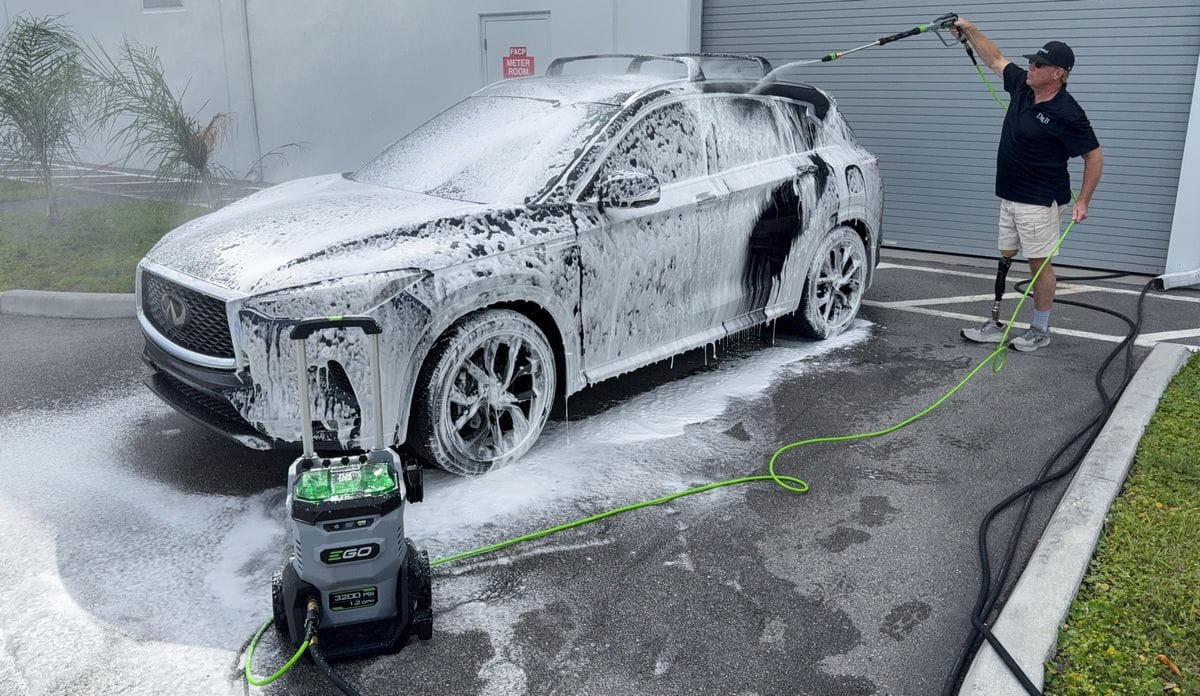
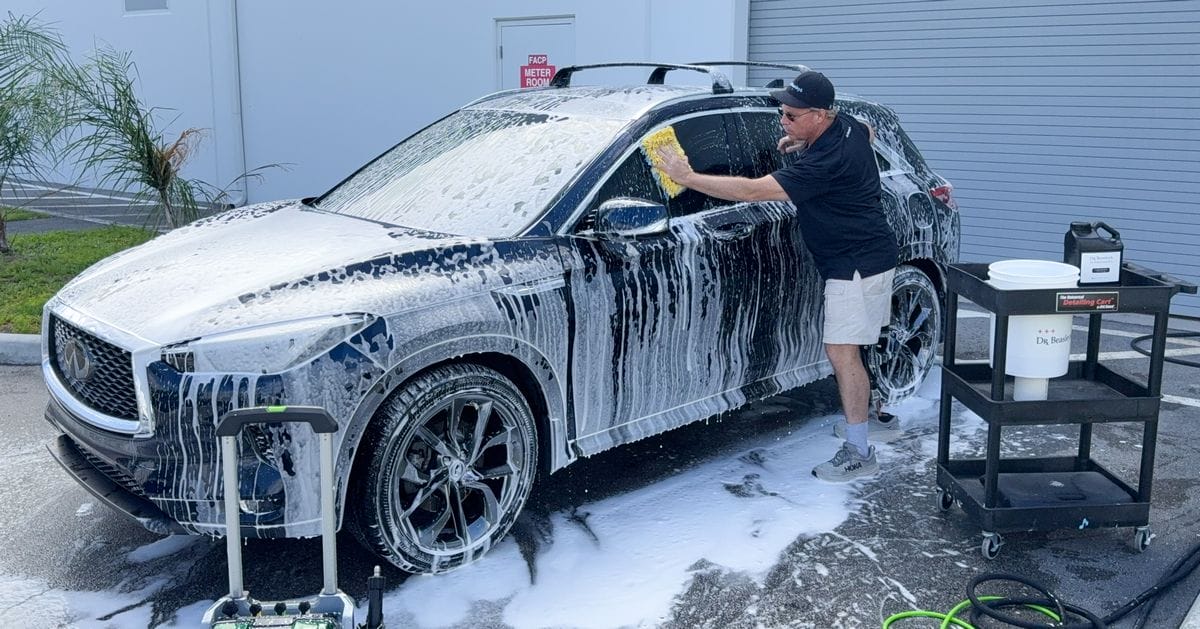
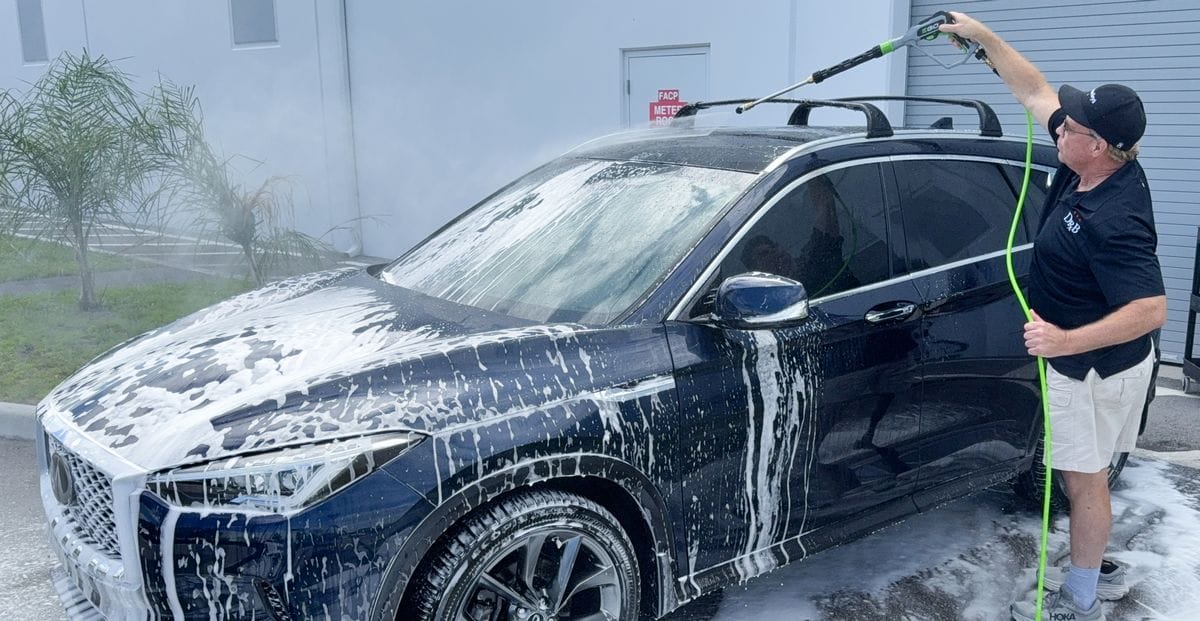
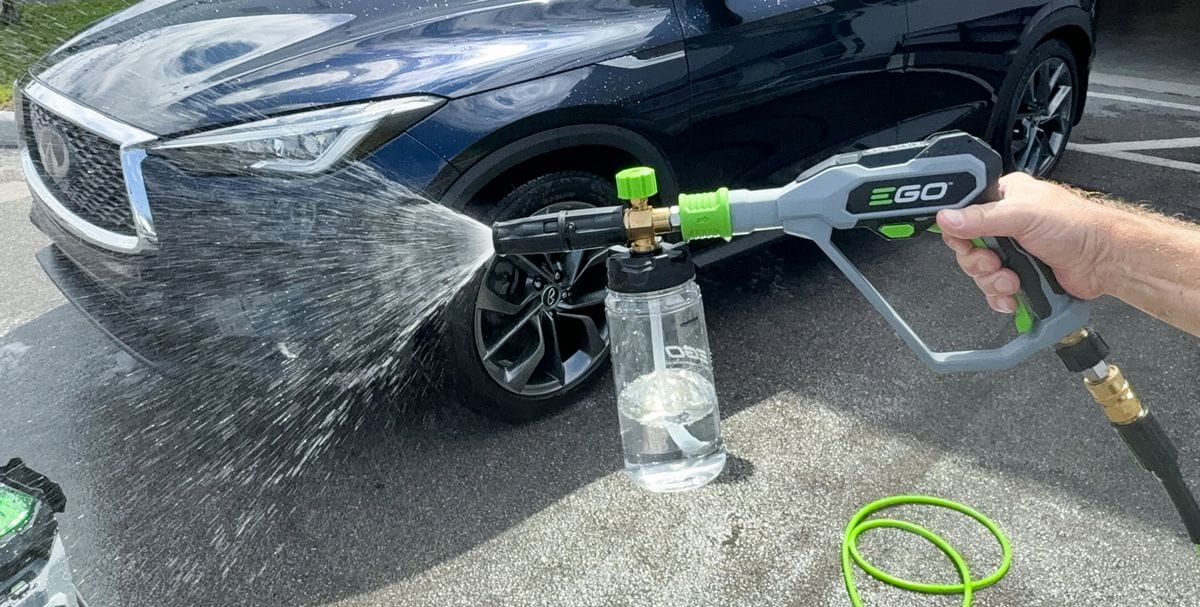
Step 5: Spray Foam Onto Car
Starting from one side of the vehicle, hold the foam cannon a few feet away, pull the trigger on the pressure washer wand and spray the vehicle with a thick layer of foam, being sure to fully cover the top, sides, wheels and tires.
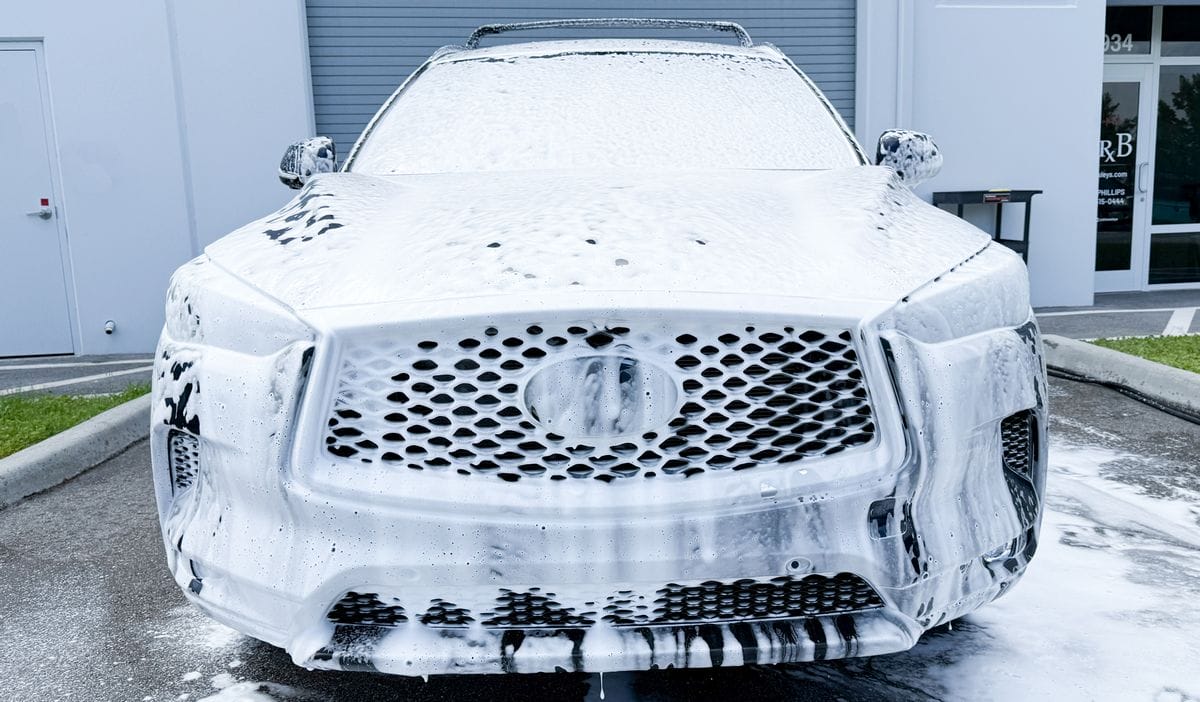
Step 6: Let Foam Dwell (Without Drying)
The idea here is to allow the chemical cleaner in the soap to dwell on the surface long enough to dissolve dirt, road grime and traffic film to the point where it can be blasted off with just a rinse, no agitation required.
At the same time, you NEVER want to let any brand of soap dry on the car. Dried soap can create stubborn residue stains that are hard to remove. So while you do want to let the soap dwell as long as possible (usually a minute or two) you don’t want to wait so long that it dries.
Pro Tip to Avoid Drying Soap: Work in the Shade or When Temps Are Low
In a perfect world, you would always wash your car in a garage or in the shade, OUT of direct sunlight. The heat from the sun makes the suds dry up on the paint, resulting in residue stains that are hard to remove.
If you don’t have access to an enclosed space or shade, it’s best to work in the morning or late in the evening when temperatures are low and the sun isn’t beating down.
Here at the Dr. Beasley’s “Operating Room” in Stuart, Florida, we’re lucky enough to get full shade for washing cars until about noon due to the construction of the building. Plenty of time to wash and dry a car out of full sun!
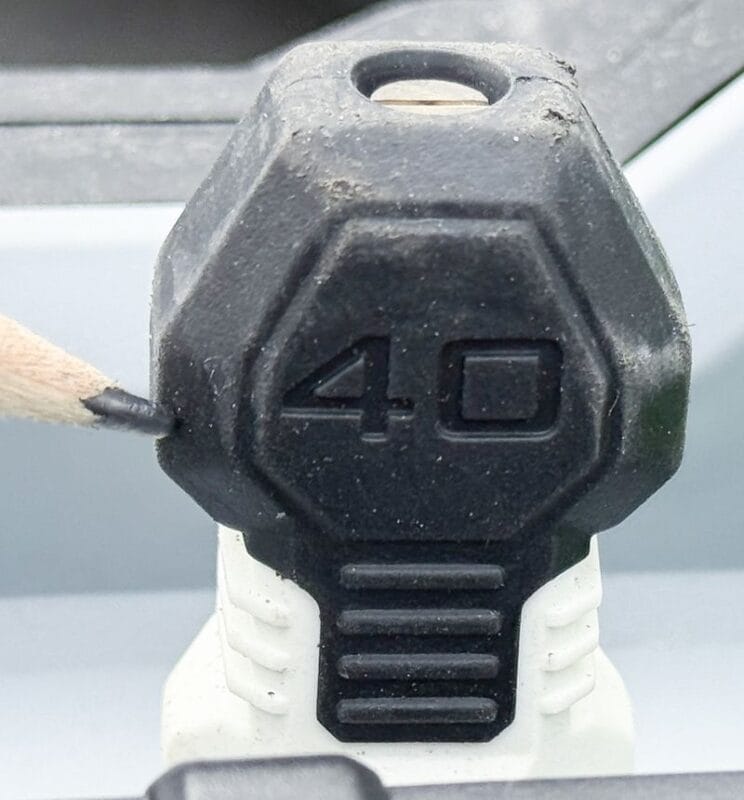
Step 7: Attach a 40-Degree Nozzle Tip
While you let the foam dwell, remove the foam cannon from the pressure washer wand and attach a 40-degree nozzle tip.
Most pressure washers come with various nozzle tips that control the spray angle or fan width. A 40-degree tip creates a broad fan of water while keeping pressure low enough to avoid stripping protection like ceramic coatings.
For wheels and tires, a 25 degree nozzle is recommended. As a quick reference, here’s a breakdown of different pressure washer nozzle spray patterns.
| Nozzle Color | Spray Pattern Degree | Spray Pattern |
| Red | 0 degrees | Pinpoint – Most powerful, concentrated straight stream of water |
| Yellow | 15 degrees | Narrow fan spray for intense cleaning |
| Green | 25 degrees | Standard cleaning – Balance between power and coverage |
| White | 40 degrees | Low pressure – safest, widest spray pattern for delicate work |
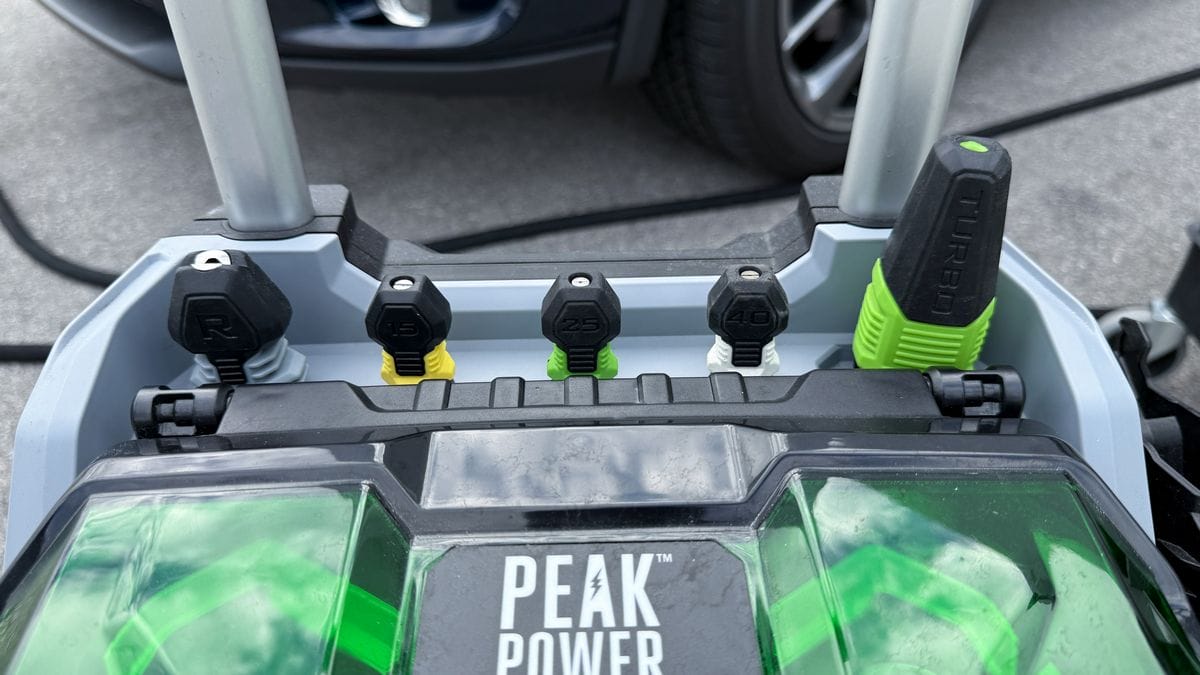
OPTIONAL: Use the EGO Pressure Washer Turbo Nozzle
Like I mentioned earlier, for this guide I am using the EGO Pressure Washer. The EGO Pressure Washer comes with five different nozzles as opposed to the four most pressure washers come with. The nozzle on the far right in the picture below is the “Turbo Nozzle”, named because it SPINS the water jet in a radial, circular motion.
The Turbo Nozzle gives your water spray more BLASTING power. So, if you have the EGO Pressure Washer, I recommend using this attachment instead of the white 40 degree nozzle. You’ll be able to blast away loose contaminants more easily which is incredibly important when trying to avoid using wash mitts.
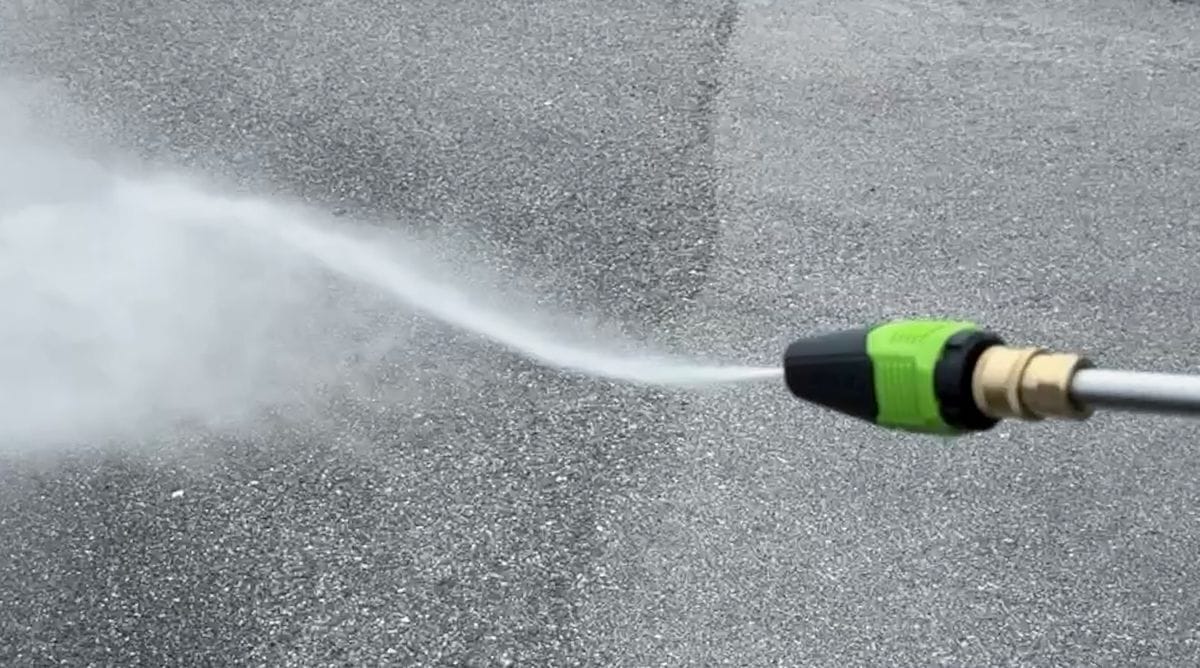
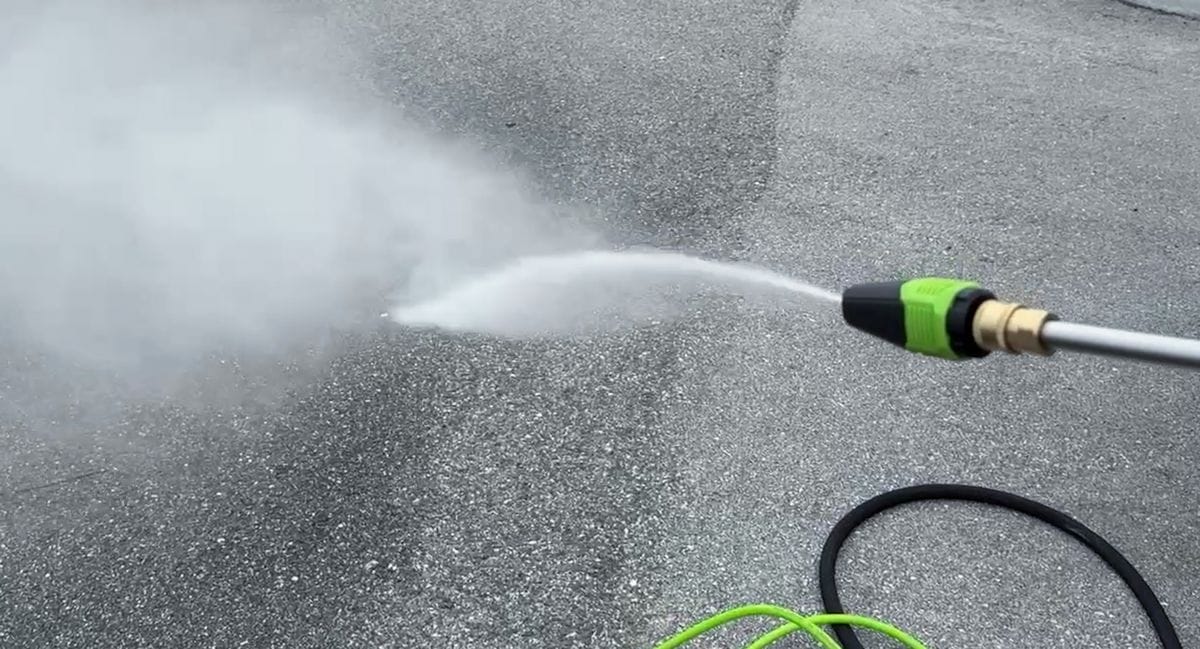
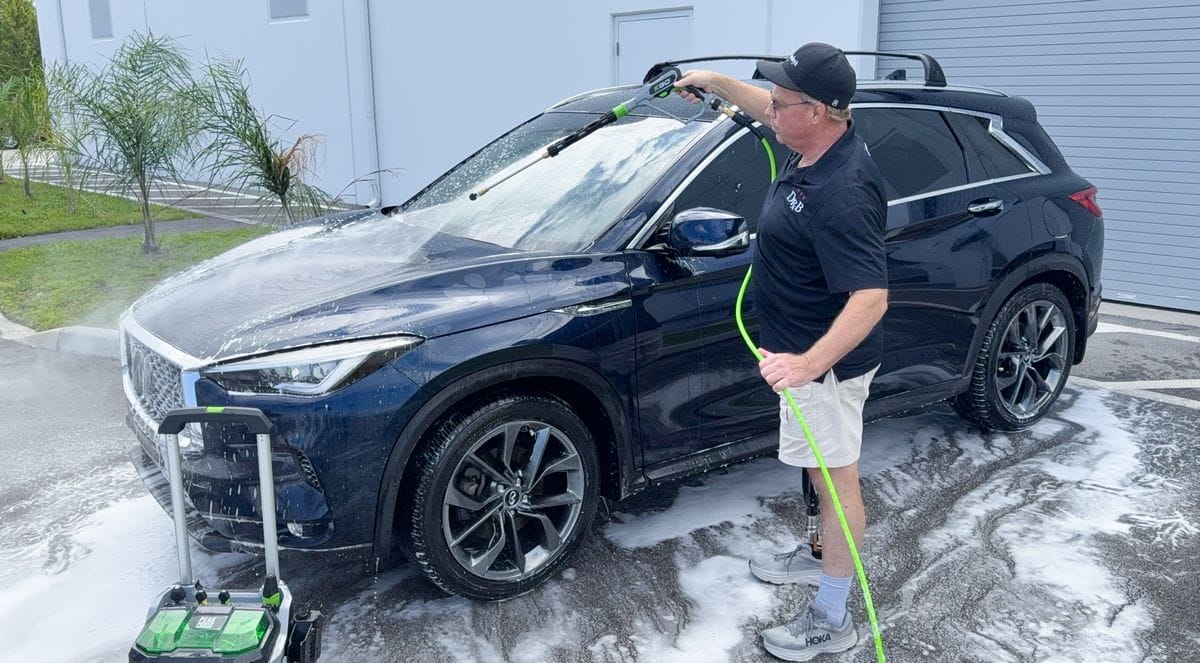
Step 8: Power Blast Foam Off Car
Starting from the highest point of the car, blast all the foam, loosened dirt, road grime and traffic film off the car before it can dry.
Repeat this same process on the other side, the front, back and of course the wheels and tires too. You can see the turbo spray action in the photo below.
Step 9: Dry Car with Compressed Air or Drying Towel
Once all the soap and grime is cleared away you need to remove any standing water remaining on the vehicle.
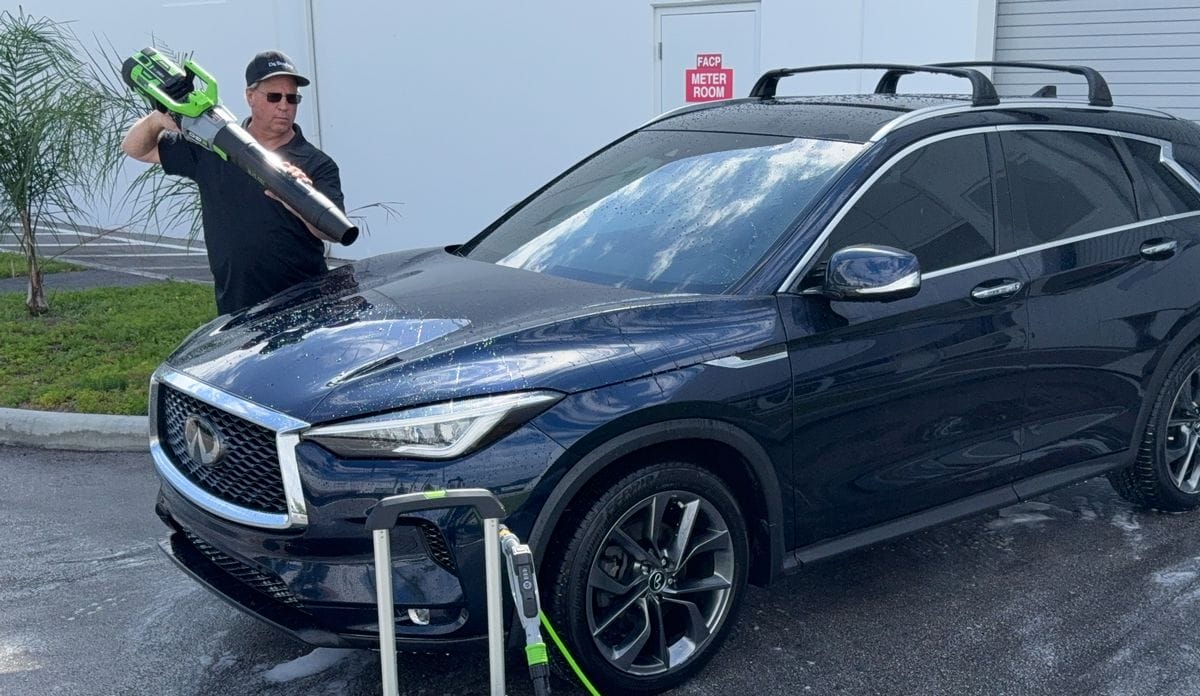
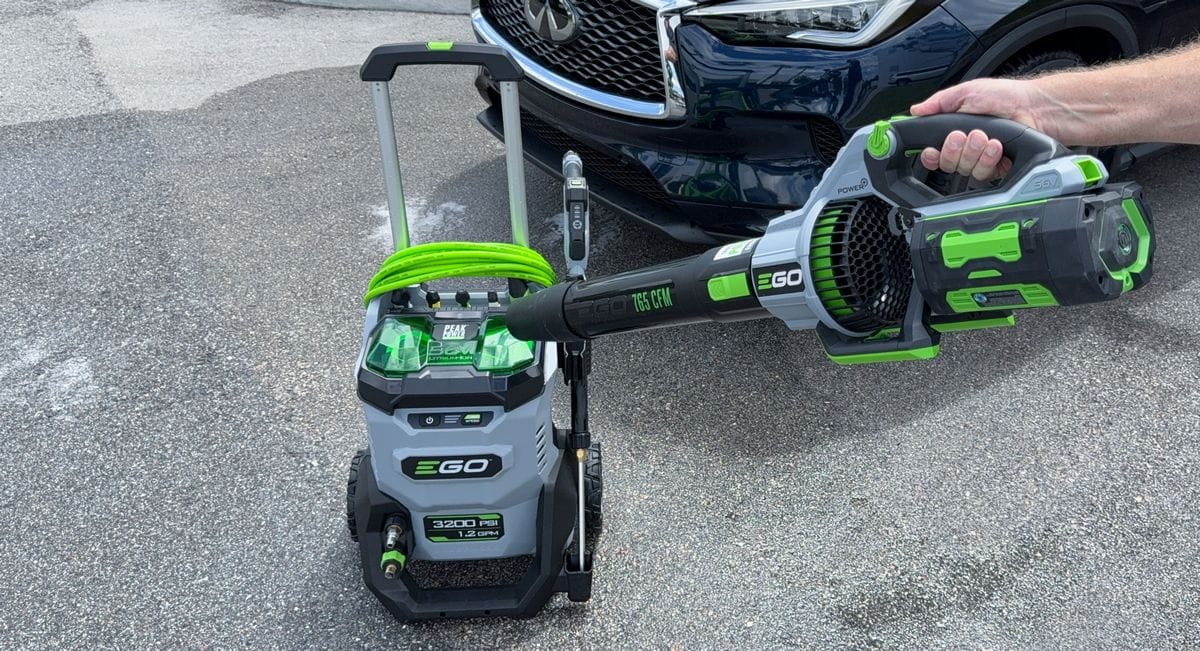
Recommended Method: Cordless Leaf Blower
A popular way to dry a car without touching the paint is by using a powerful, cordless leaf blower. Here at our shop we use the EGO 675 Leaf Blower. I like it because it has high wind speeds (200mph) and really long lasting rechargeable batteries.
The big advantage of using a leaf blower to dry is besides not having to touch the paint, it makes it easier to get inside nooks and crannies to blow out any water that’s seeped in.
Whether it’s emblems, door handles, lights, trim, side mirrors, a blower will help you blast out any moisture you can’t easily dry with a towel.
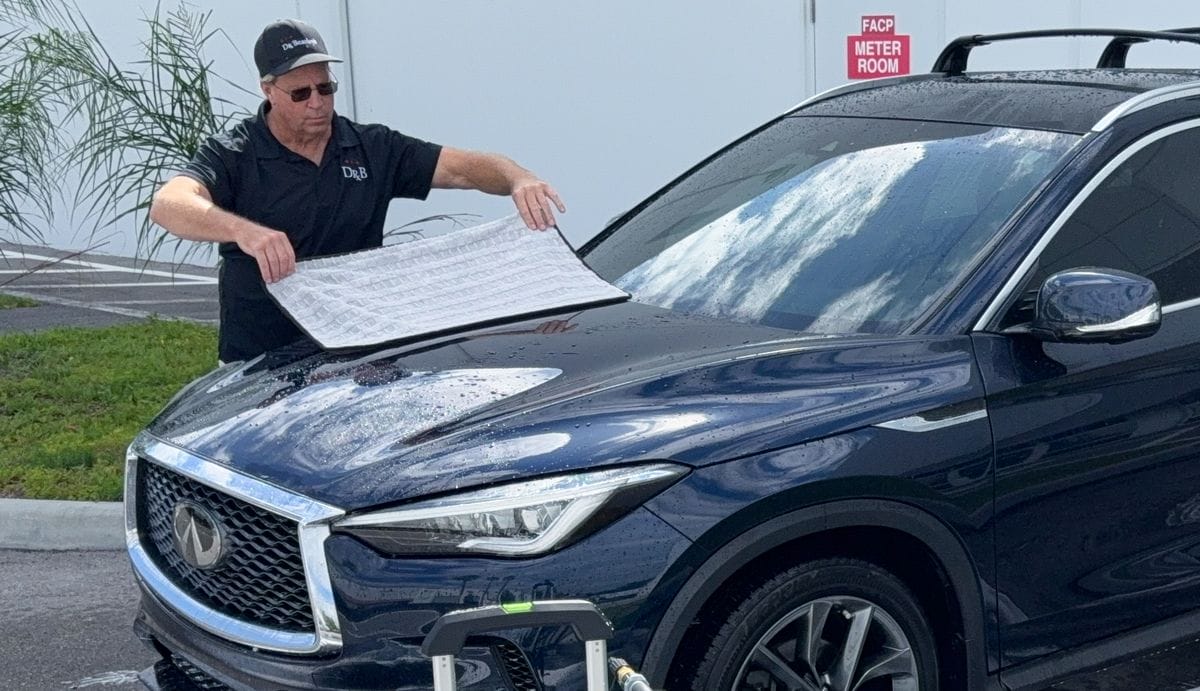
Acceptable Alternative: Microfiber Drying Towels
A lot of people don’t have leaf blowers, and in that case you can also dry your car the traditional way using your favorite drying towel.
A good drying towel usually has high nap and high absorption as measured in grams of water per square meter (GSM). I personally like to use the Gauntlet towel from the Rag Company, as shown below.
Before you use any towel, be sure to fully inspect the fibers visually (with your eyes) and tactically (with your hands) make sure there aren’t any sharp or pokey contaminants stuck onto or embedded in the fibers of the drying towel as these can scratch the paint.
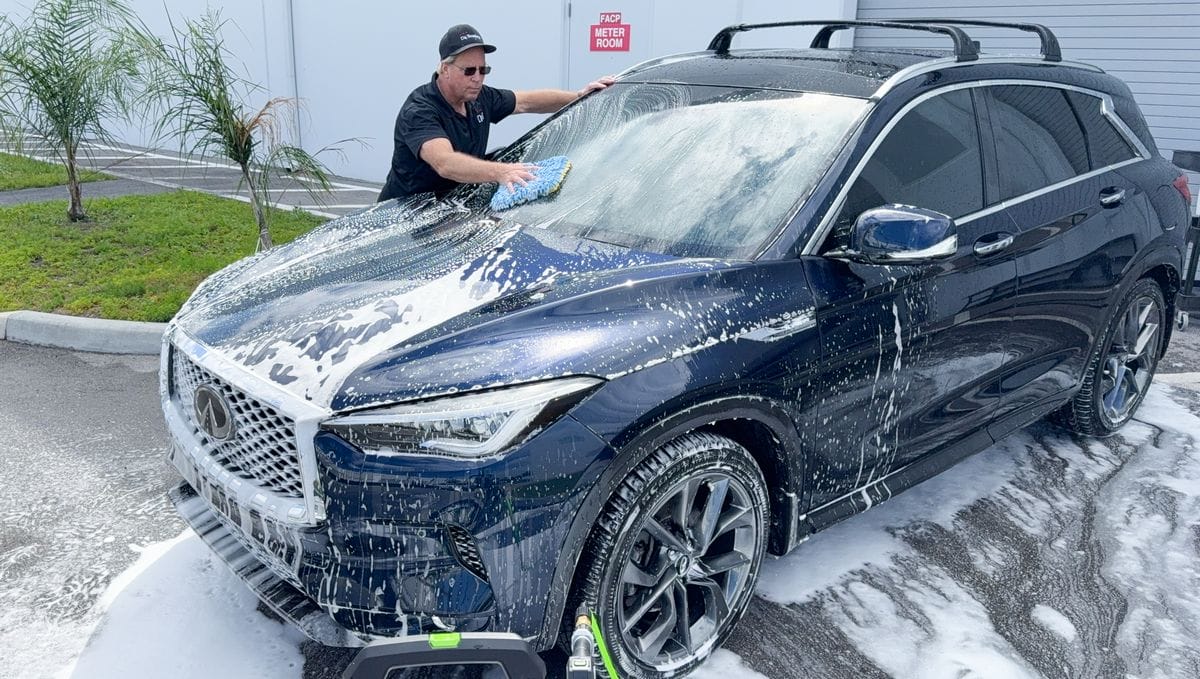
How To Do a Prep Wash with a Foam Cannon
The other main type of car wash is a “Prep Wash”. A prep wash, like I mentioned earlier, is a type of wash where you thoroughly wash the car to prepare for paint correction and ceramic coating.
This means the vehicle needs an intensive level of clean that requires you to agitate the foam. For a Prep Wash, you’ll follow the same process as a maintenance wash, except you’ll be agitating the foam with a wash mitt after letting the foam dwell for a few minutes. Here are those steps again:
- Mix Water & Soap in Reservoir
- Thoroughly Pre-Rinse Vehicle
- Attach Flexible High Pressure Hose
- Attach Foam Cannon to Pressure Washer Wand
- Spray Foam onto Car
- Let Foam Dwell (Without Drying)
Once the foam is dwelling on the car’s paint, you can proceed in one of two ways depending on how carefully you want to wash the vehicle:
- Power rinse, re-foam and agitate with wash mitts
OR - Agitate foam with wash mitts before rinsing
Step 7 Option A: Rinse, Re-Foam and Agitate with Wash Mitts
This approach is best for avoiding putting new swirls and scratches into the paint. Starting with contact-free foaming and rinsing steps helps to remove as much contamination off the paint BEFORE you touch the paint so you don’t rub bits of dirt and grime with your wash mitt and inflict scratches.
The only downside with this technique is the time it adds onto the process. Basically, you rinse off the foam, re-foam the car then use a wash mitt to wash each body panel starting at the top and working your way down and round the vehicle.
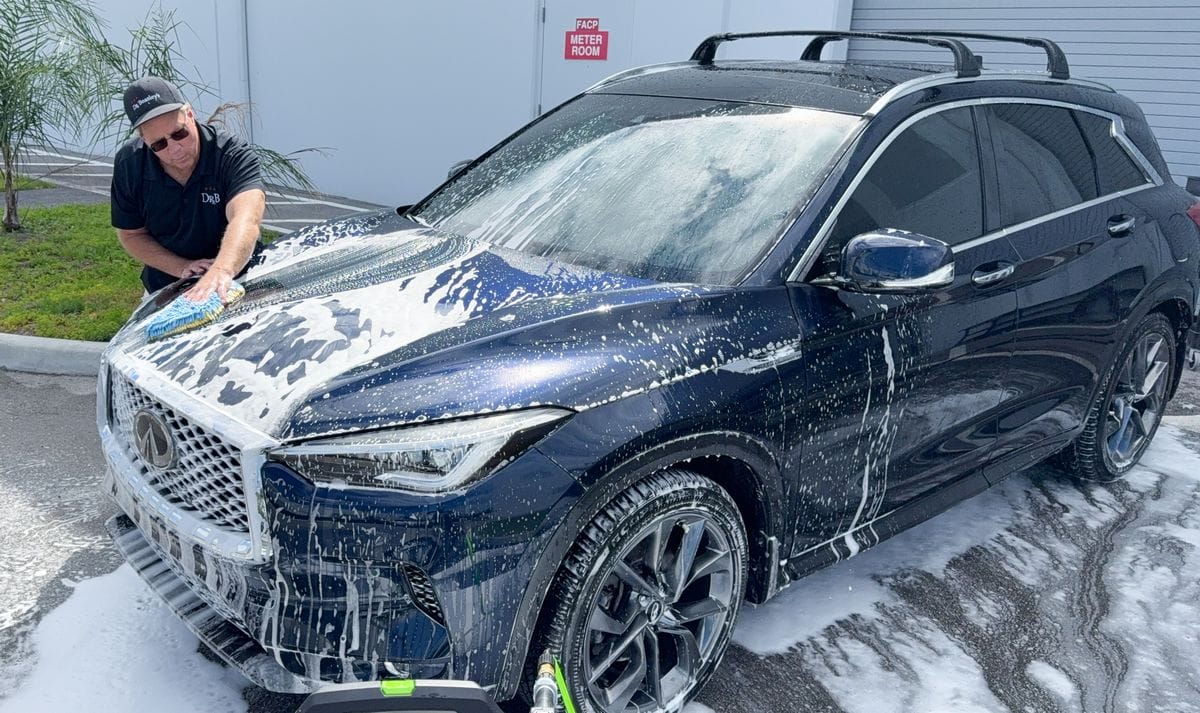
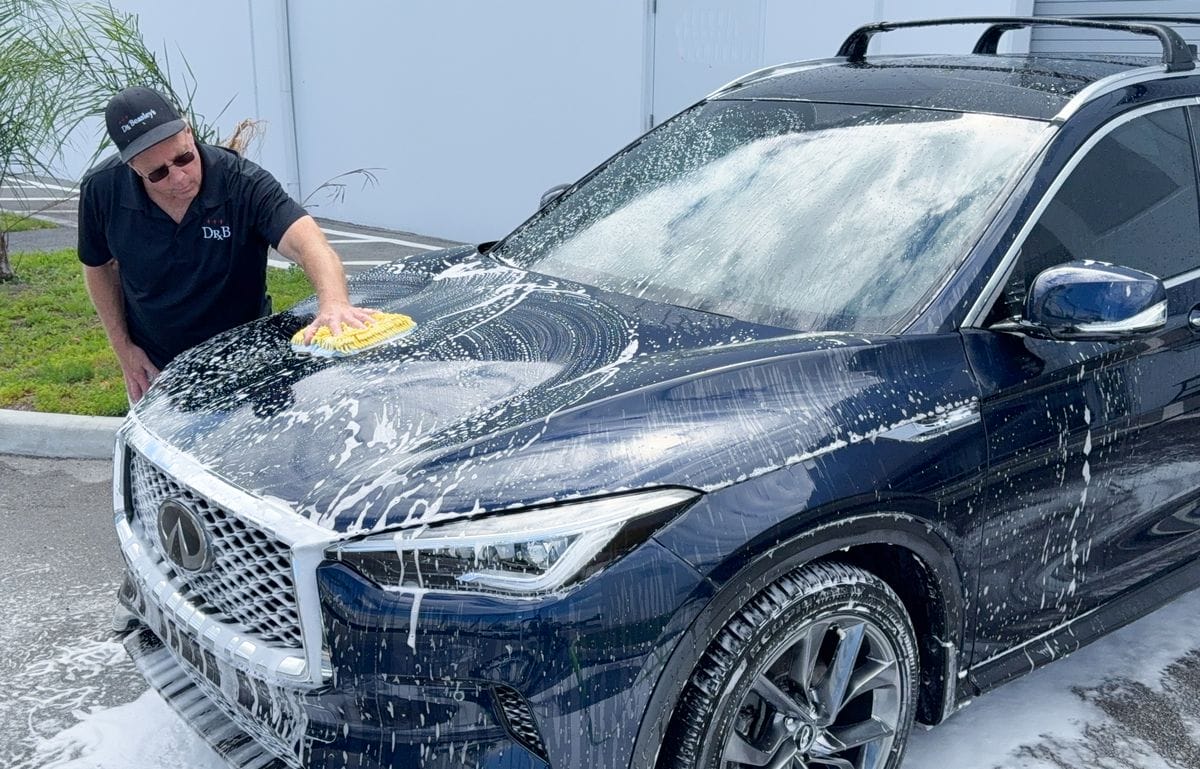
Step 7 Option B: Go Straight to Agitating Foam
With this step you go right to agitating the foam with your wash mitt, skipping the additional rinsing and foaming steps. Once the foam has dwelled, you go straight to agitating the foam with wash mitts, panel by panel working from the top down and around.
This approach is faster as it requires less steps and less work, but it does increase the chance of putting fresh swirls and scratches in the paint.
That being said, if you’re already planning to machine polish the paint to remove swirls, any new swirls you inflict will be removed at the same time. So I tend to just go with this method to save time.
Proceed to Rinsing & Drying Steps
From here the process is the same as the maintenance wash, you rinse off the foam then dry with a blower and/or microfiber towel.
How to Keep Your Foam Cannon in Good Condition
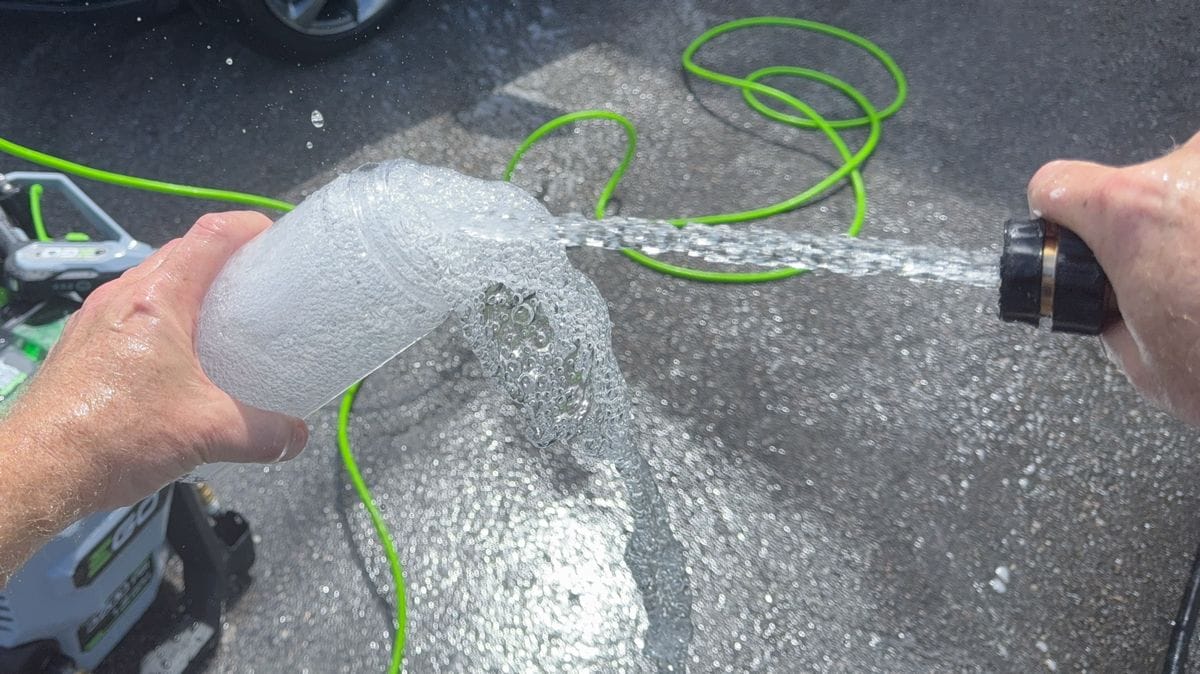
After washing your car, it’s a good idea to rinse and flush out both the reservoir and the foam cannon using clean, fresh water so any residue inside won’t solidify and clog the foam cannon.
The easiest way to do this is to empty out any remaining soapy water solution from the reservoir.
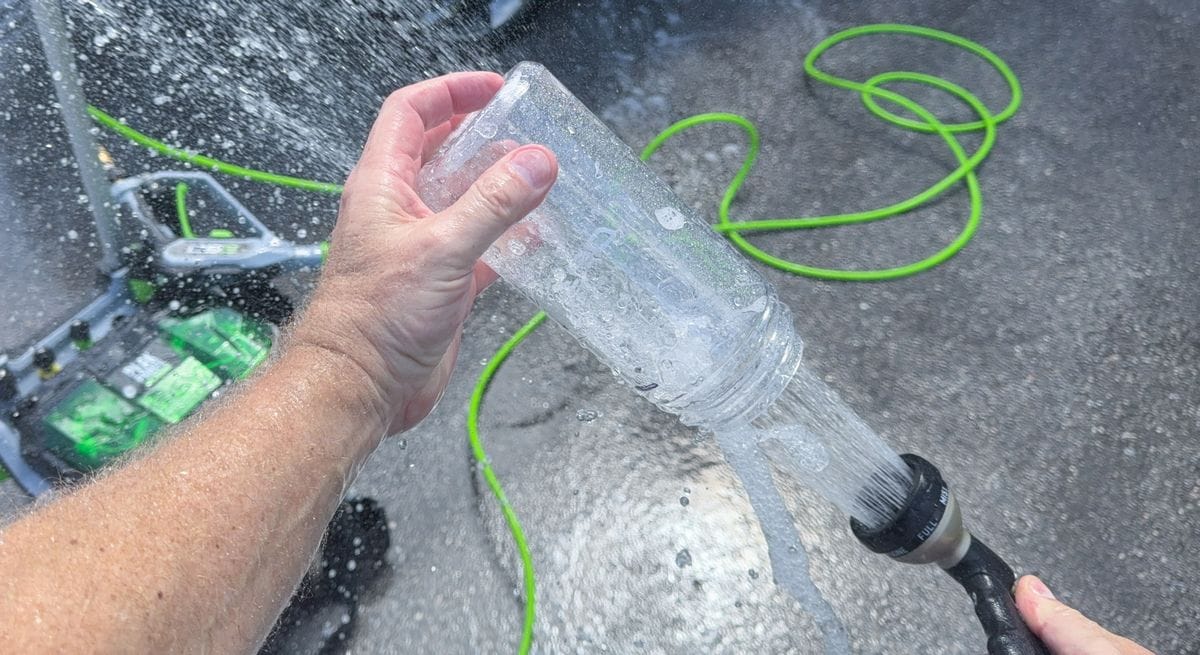
Next, fill the reservoir with clean, fresh water and then spray the water through the foam cannon until the reservoir is empty and free of residue.
It only takes a few extra minutes to clean your foam cannon but you’ll save you hours of frustration removing solidified residue next time you use it.
And of course, it’s always a good idea to rinse and dry your pressure washer to keep it clean for the next job.
Final Results After a Prep Wash

Besides working great, washing your car with a foam cannon can also be fun. There’s something about spraying foam all over your car that is interestingly enjoyable. Knowing the cleaning agents in the car wash soap have a longer dwell time than whatever soap suds you get from a normal bucket-wash also makes good sense for getting your car clean and doing it in the safest manner possible.
My Personal Offer to Help
I’ve been answering car detailing questions professionally since 2002 and moving forward, if after reading this article you have any questions about polishing and waxing, or how to use an AIO, my contact information is below, reach out to me, I’m always happy to help.
Would You Like to Learn How to Machine Polish Like a Pro?
- Would you like to take your detailing skills to a higher level?
- Do you find you learn better by doing versus sitting in a chair looking at a PowerPoint presentation about car detailing?
Here at Dr. Beasley’s O.R., (Operating Room), in sunny Stuart, Florida, we teach the most hands-on car and boat detailing classes on planet Earth. And we prove it too. You can find write-ups on the Dr. Beasley’s Blog that photo-documents just how hands-on our classes are plus you’ll see the kinds of cars and boats you’ll be training on.
Click the link below to find the dates, locations, topics, and prices for all upcoming detailing classes.
Upcoming Detailing Classes – Prices – Info – Topics – Locations
And if you ever have any questions, always feel free to reach out to me personally via text, phone call or email.
I hope to see you in a future detailing class!
Sincerely,
Mike Phillips
Chief Education Officer for Dr. Beasley’s
760-515-0444
Dr. Beasley’s Contact Information
Questions via Email: [email protected]
Customer Care Hotline: 773-404-1600