


If you like to wash your car regularly, one of the handiest tools you can own is a pressure washer.
Pressure washers excel at cleaning just about anything with minimal effort. The high pressure water jet blasts the contaminants away while you simply hold the wand and aim.
There are a lot of consumer-friendly options for pressure washers these days, including entry level budget models and high-dollar units and everything in-between.
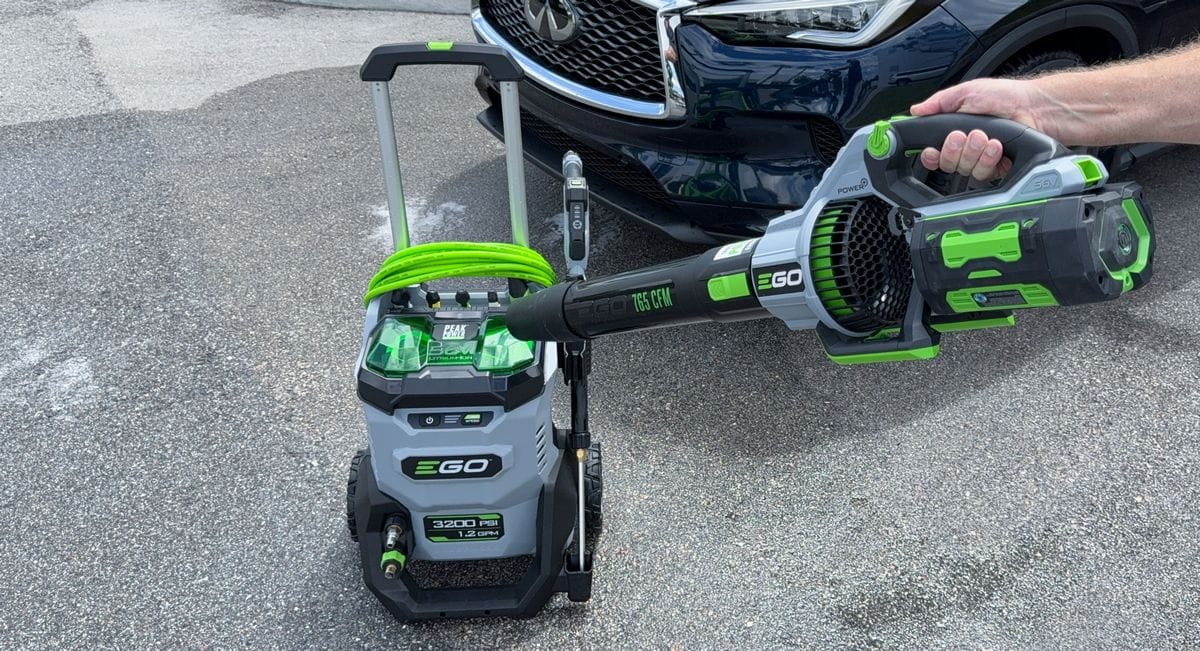
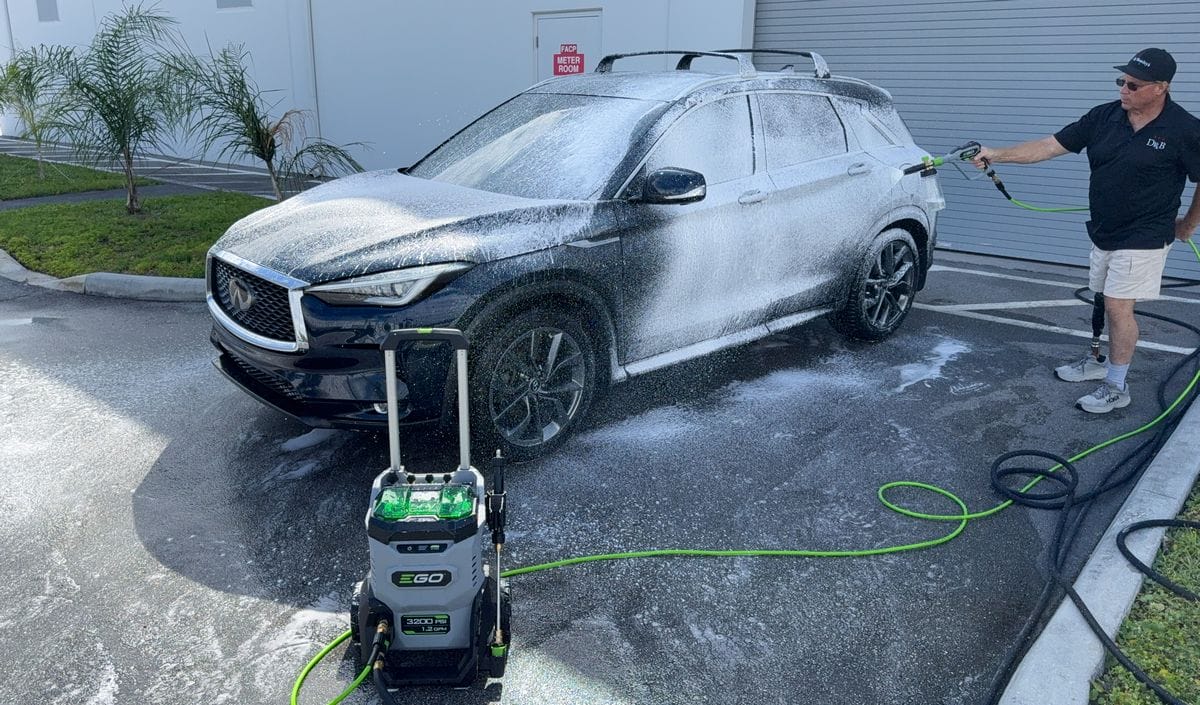
One popular option in the detailing world right now is the EGO Power+ 3200 PSI pressure washer. The EGO Power+ 3200 PSI pressure washer is unique in that it’s fully battery powered, allowing detailers to wheel it anywhere their hose can reach while washing in the field.
In this article I’ll review the EGO Power+ 3200 PSI pressure washer and provide a detailed guide for how to use this powerful tool that excels at everything from cleaning cars to the driveways they park on.
Let’s get started!
Unboxing the EGO Power+ 3200 PSI Pressure Washer
When you purchase the EGO Power+ 3200 PSI Pressure Washer you have the option of buying the standalone pressure washer unit or a full kit including two 56 volt 6 amp batteries and a battery charger.
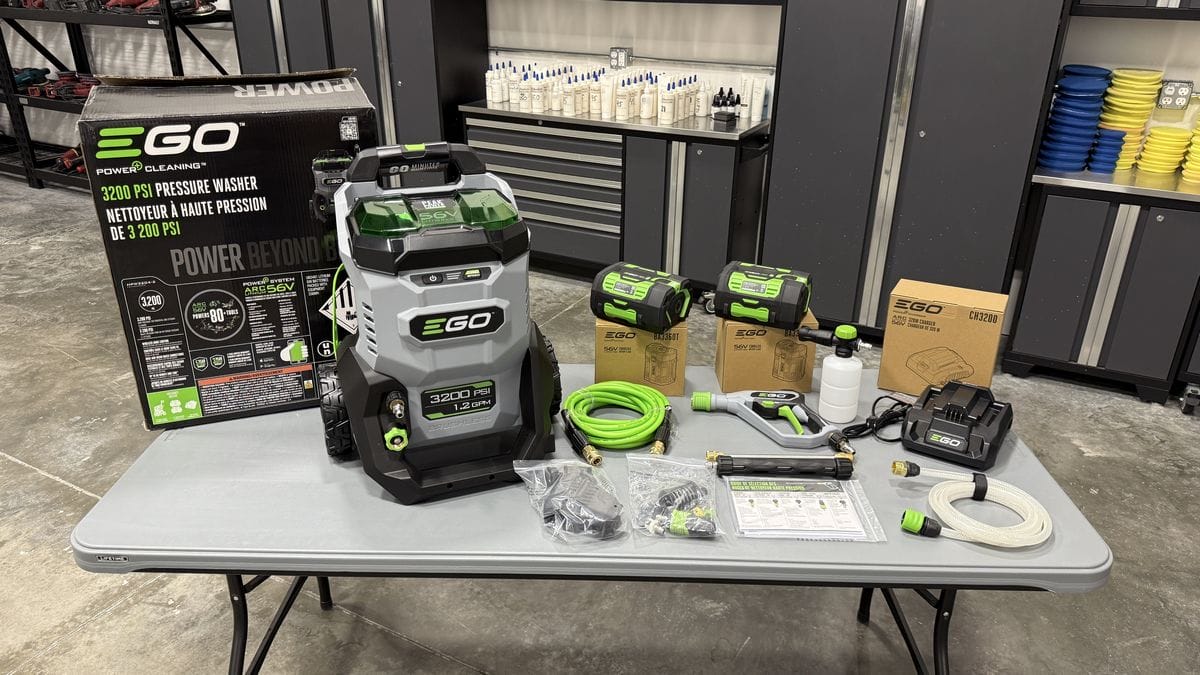
Here’s what comes in the full kit:
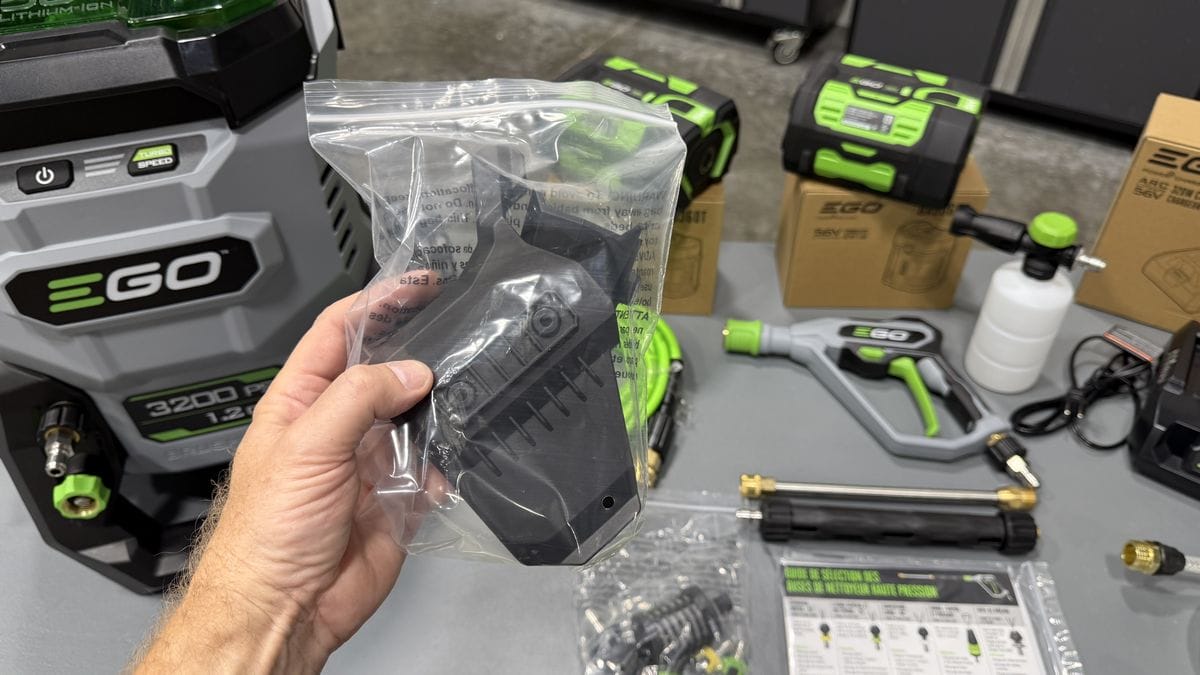
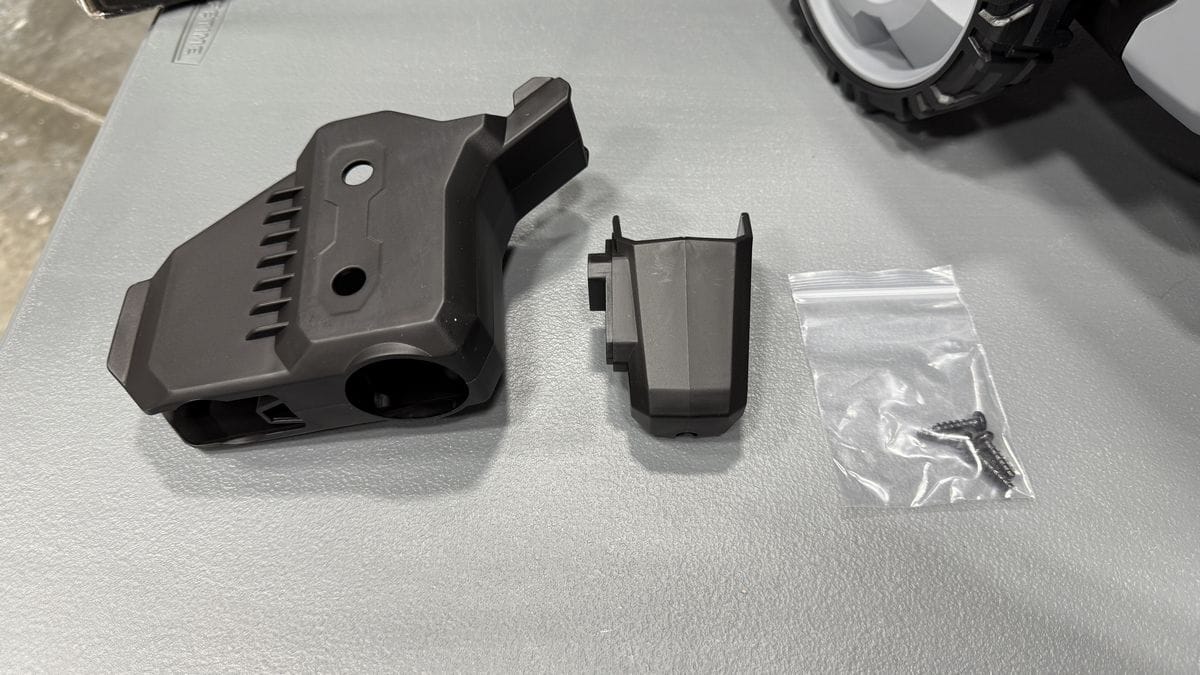
- Gun Rack Bracket
- Gun Stock Bracket
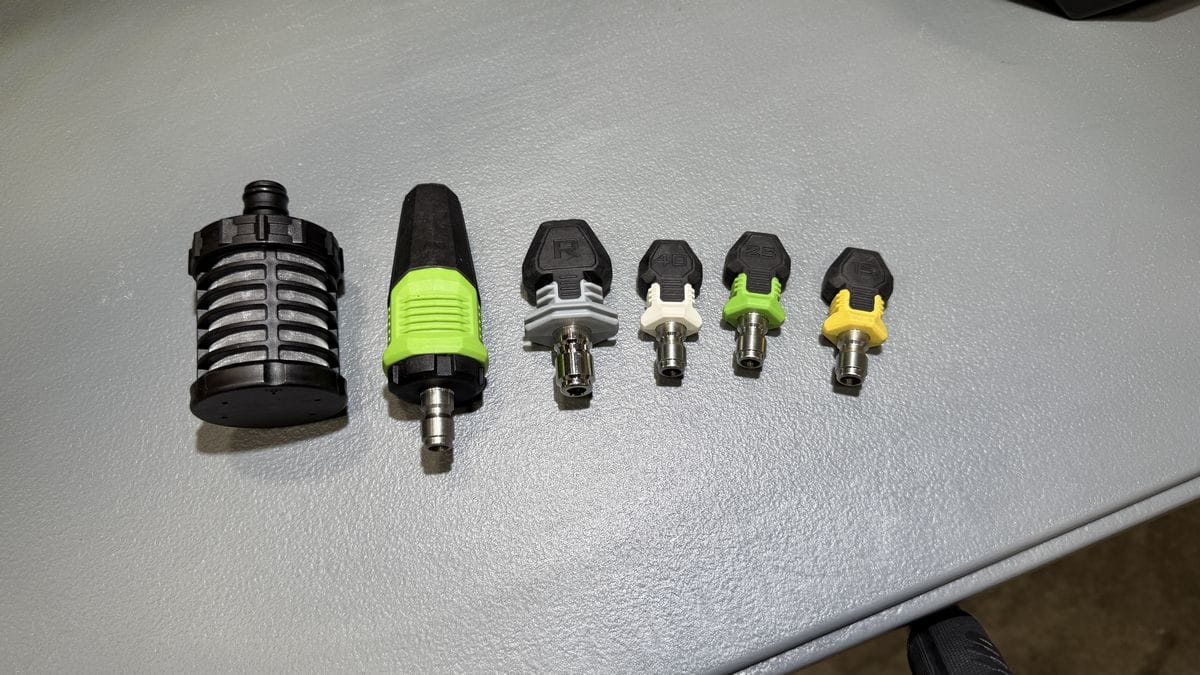
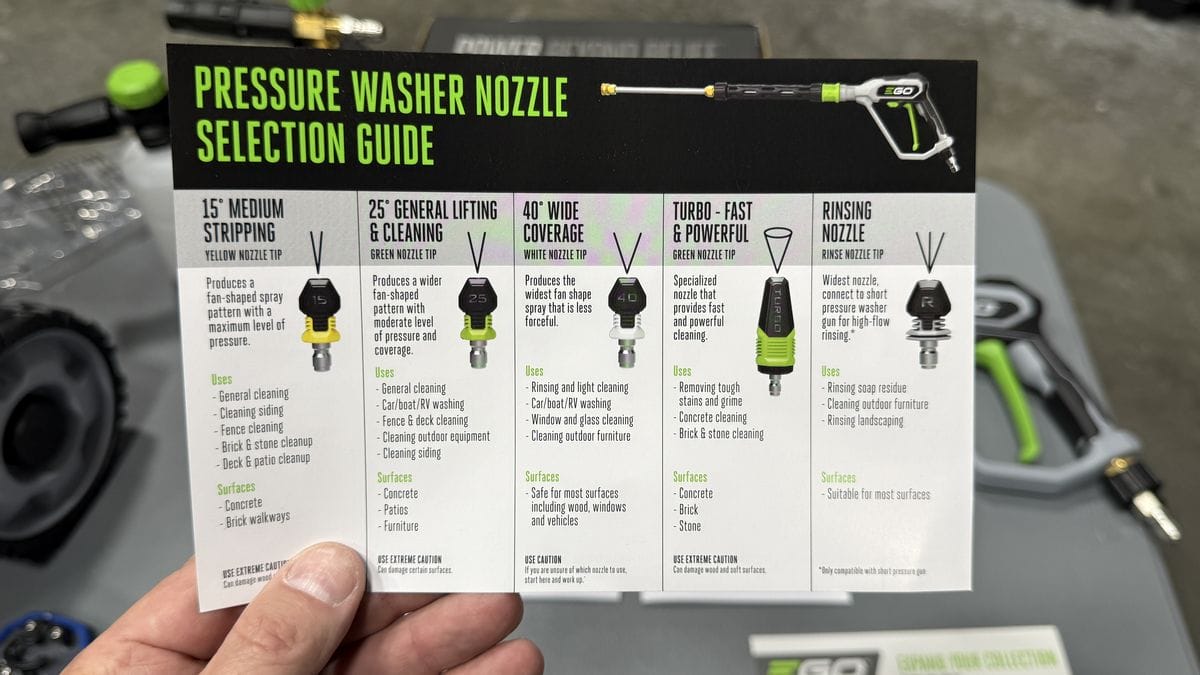
- Pressure Washer Nozzles
- Turbo
- Rinse
- 40 Degree
- 25 Degree
- 15 Degree
- Filter for the Siphon Hose
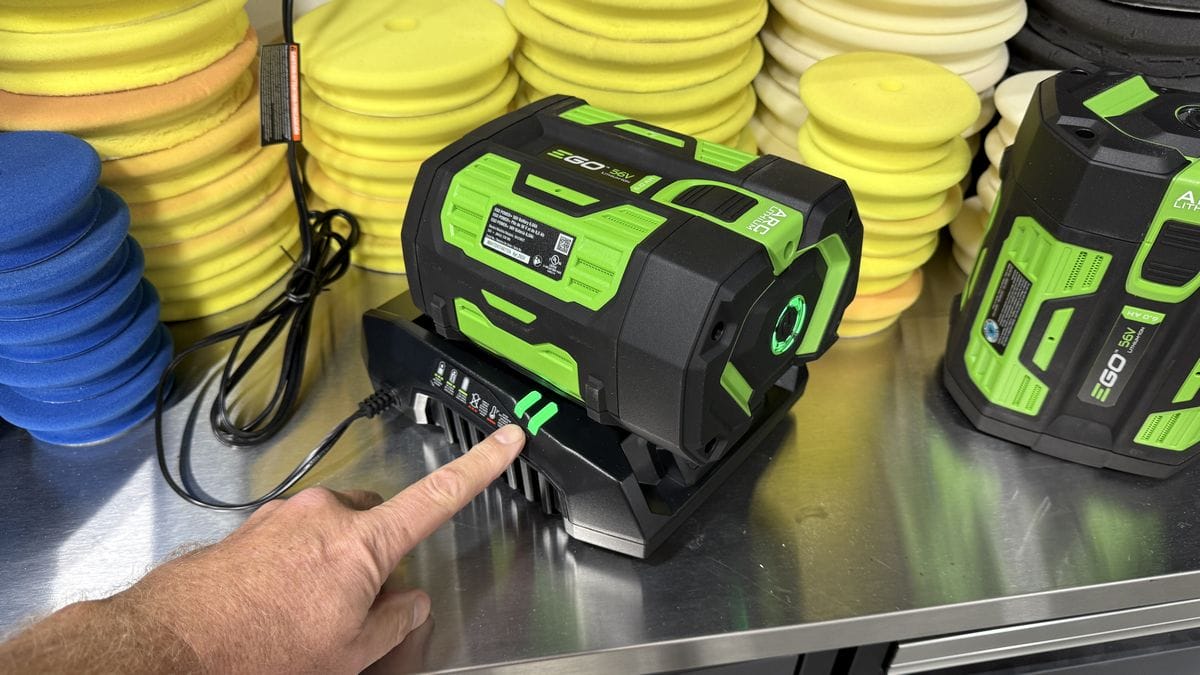
- x2 56V – 6.0 Ah ARC Lithium Batteries
- 320W Battery Charger
- Siphon Hose
- 25’ Flexible High Pressure Hose
- Spray Gun
- Gun Lance
- Mid Lance
- 500mL reservoir foam cannon
Setting Up the EGO Power+ 3200 PSI Pressure Washer
Once you’ve unboxed the EGO Power+ 3200 PSI Pressure Washer you’ll need to assemble and attach several components crucial to the proper operation of the machine.
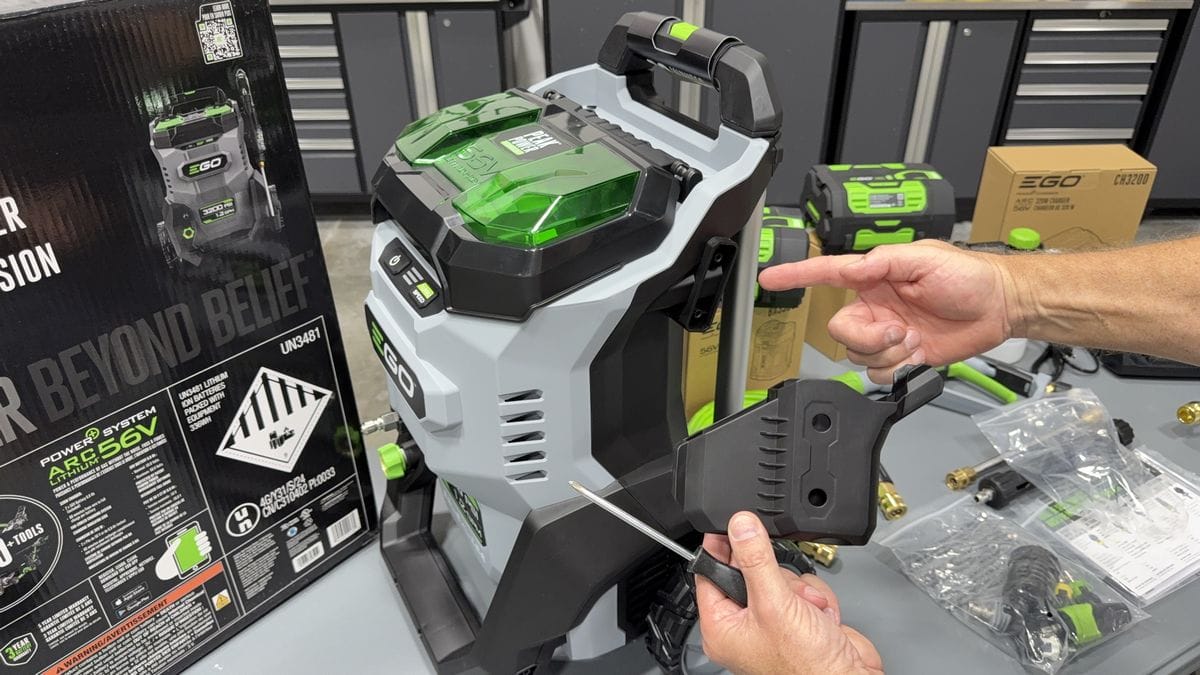
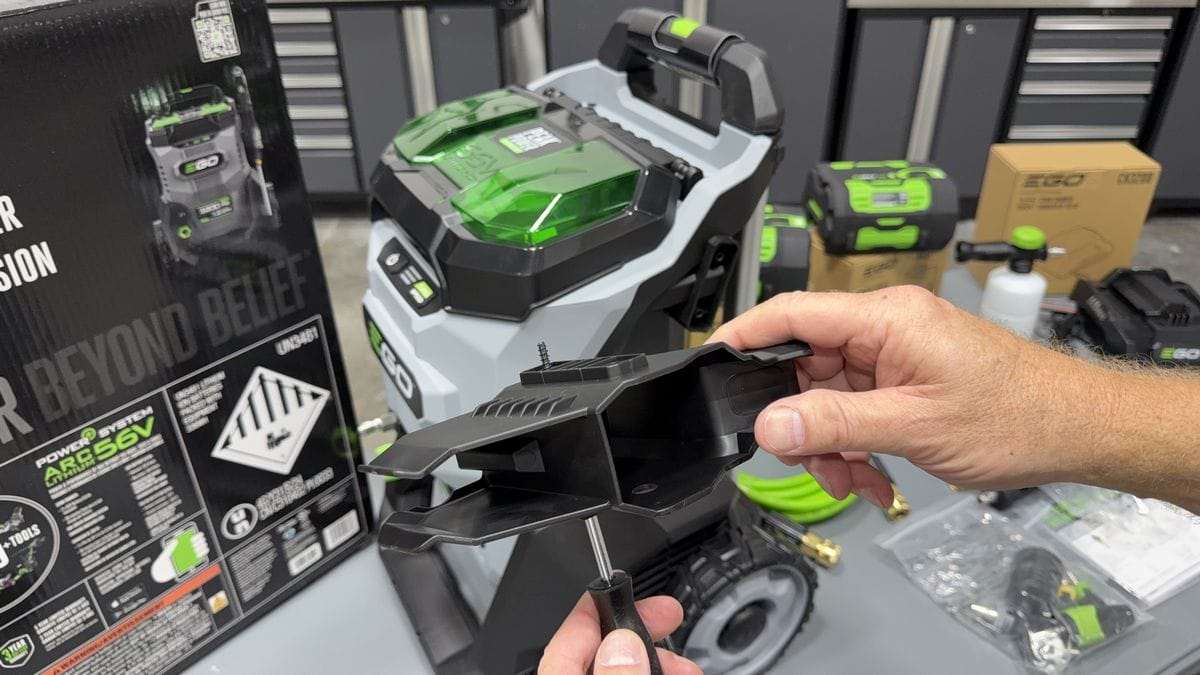
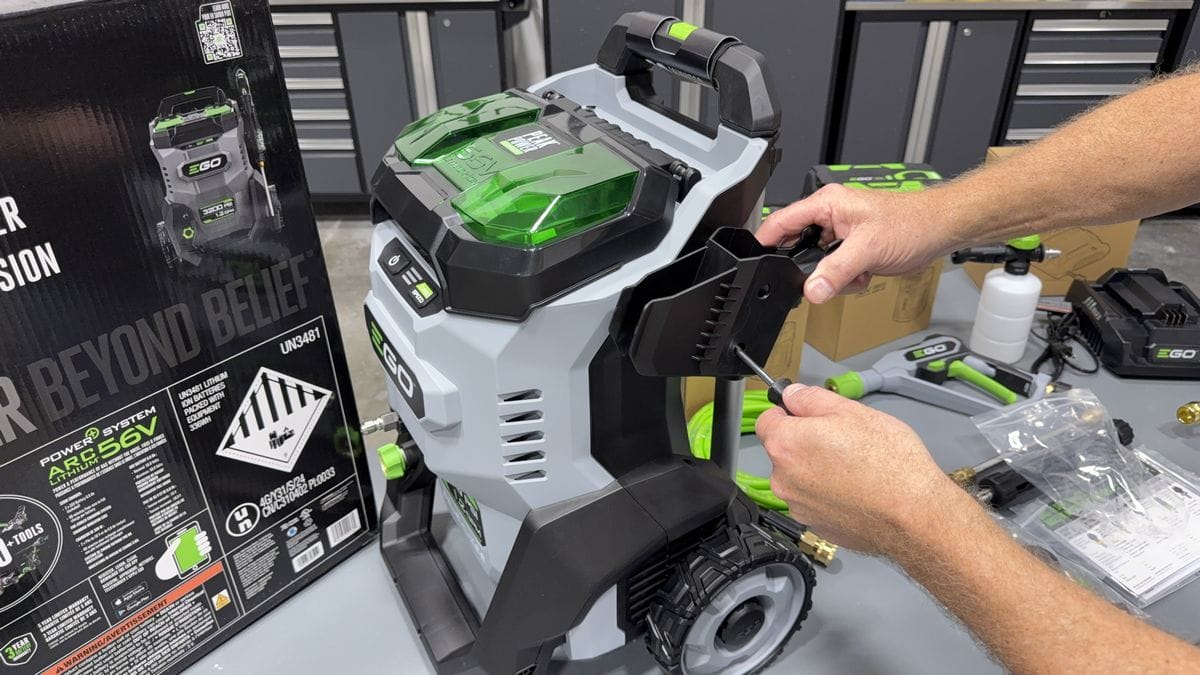
Attaching Gun Stock & Gun Rack
When you remove the gun stock and gun rack brackets from their bag you’ll find a small package with four screws. Use these screws to attach the brackets to the side of the unit on both the top and bottom, as shown in the photos below.

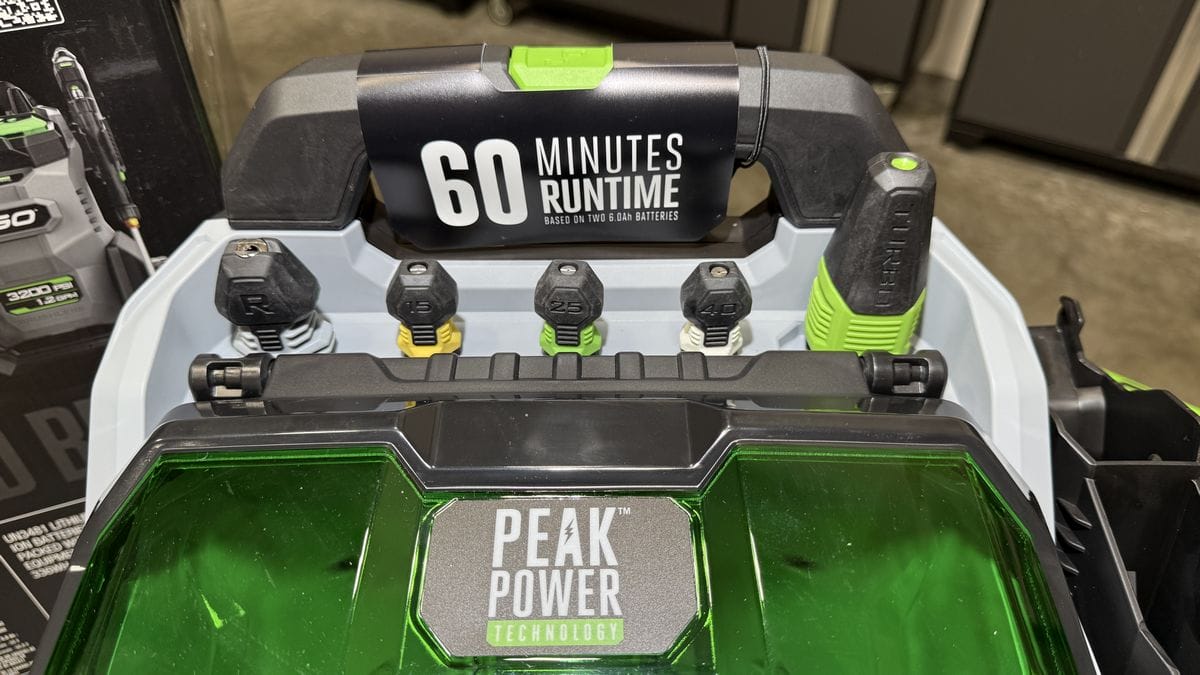
Organize Nozzles Inside Onboard Nozzle Storage Rack
Once you’ve removed the five different nozzles included with the EGO Power+ 3200 PSI Pressure Washer, place each nozzle into one of the rubber grommeted sockets inside the onboard nozzle storage rack for easy access.
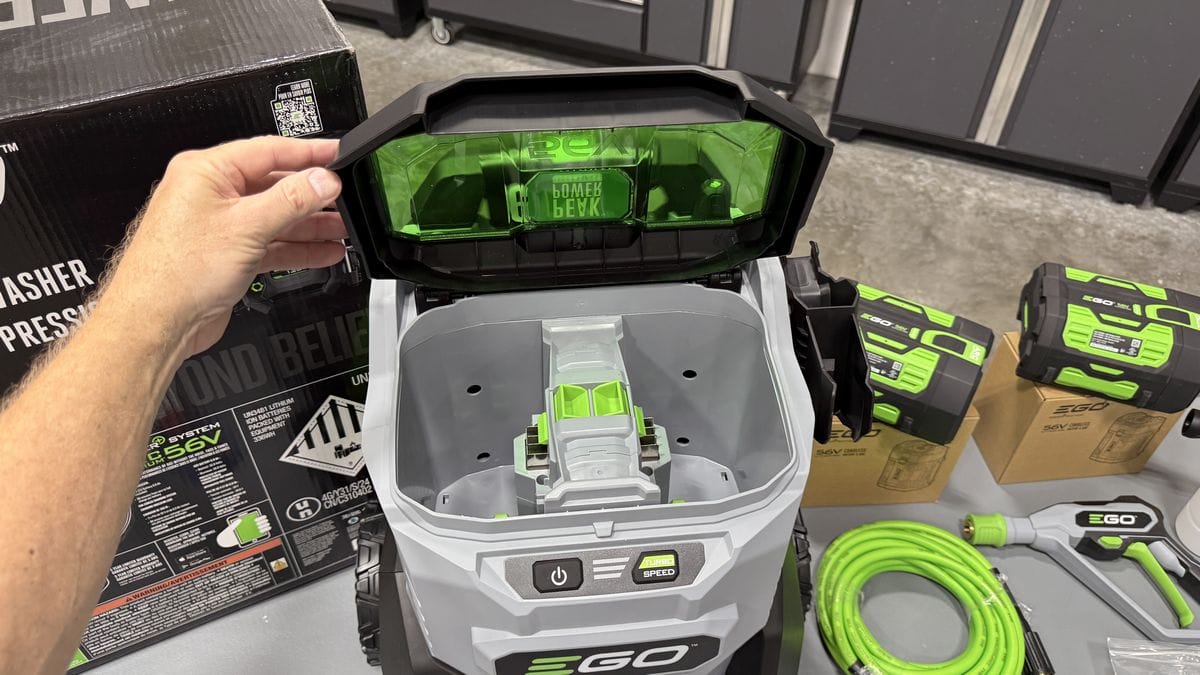
Loading Batteries Into Pressure Washer
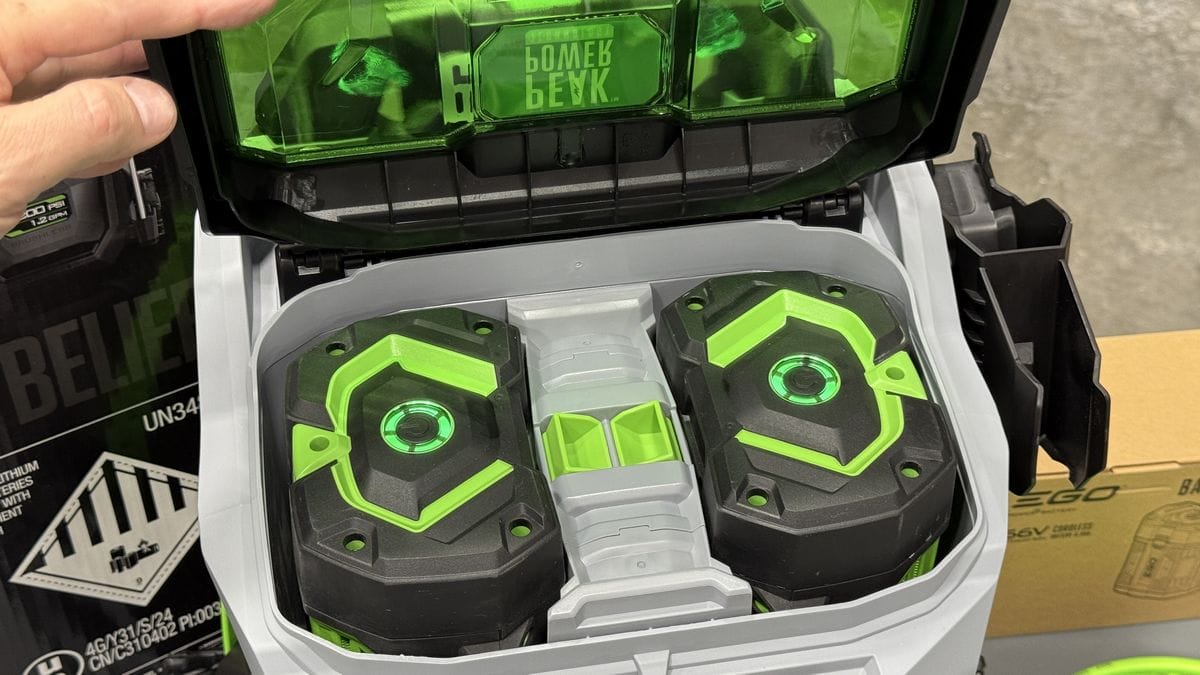
In the front of the onboard nozzle holders you’ll find a spring-loaded cover. Opening the cover will reveal a battery compartment. You can use this compartment to store your batteries.
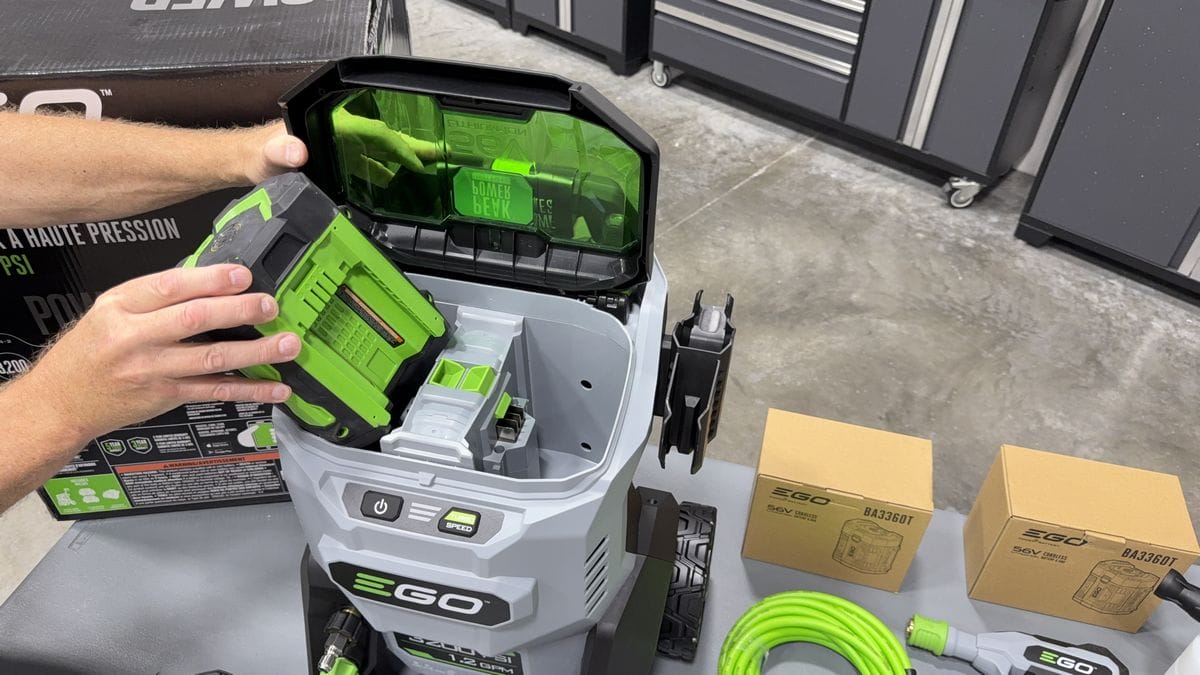
While the batteries do ship with a charge, I recommend charging them to full power prior to first use.
To load the batteries into the battery compartment, simply lift the spring loaded cover and insert the batteries. When the battery is fully inserted, you will hear a sharp >CLICK< sound, indicating the battery is fully attached.

During operation, you can always check the current battery charge status by pressing the round button inside the circle of light bars.
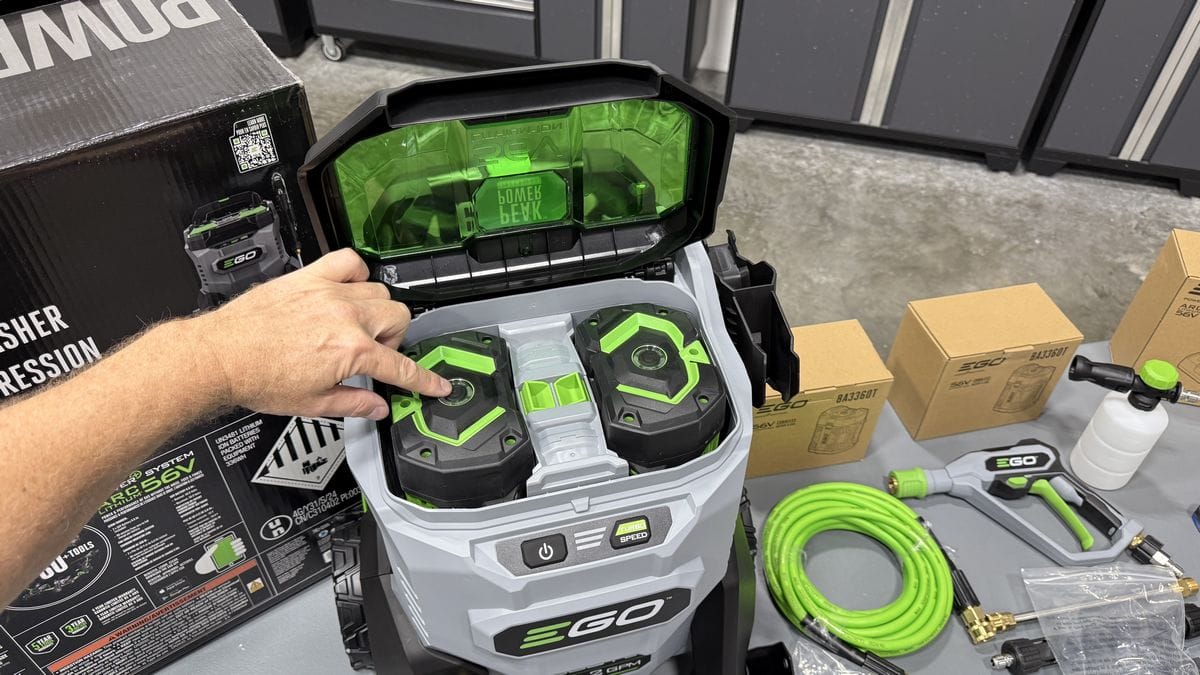
As you can see these new batteries are fully charged and ready to power the pressure washer.
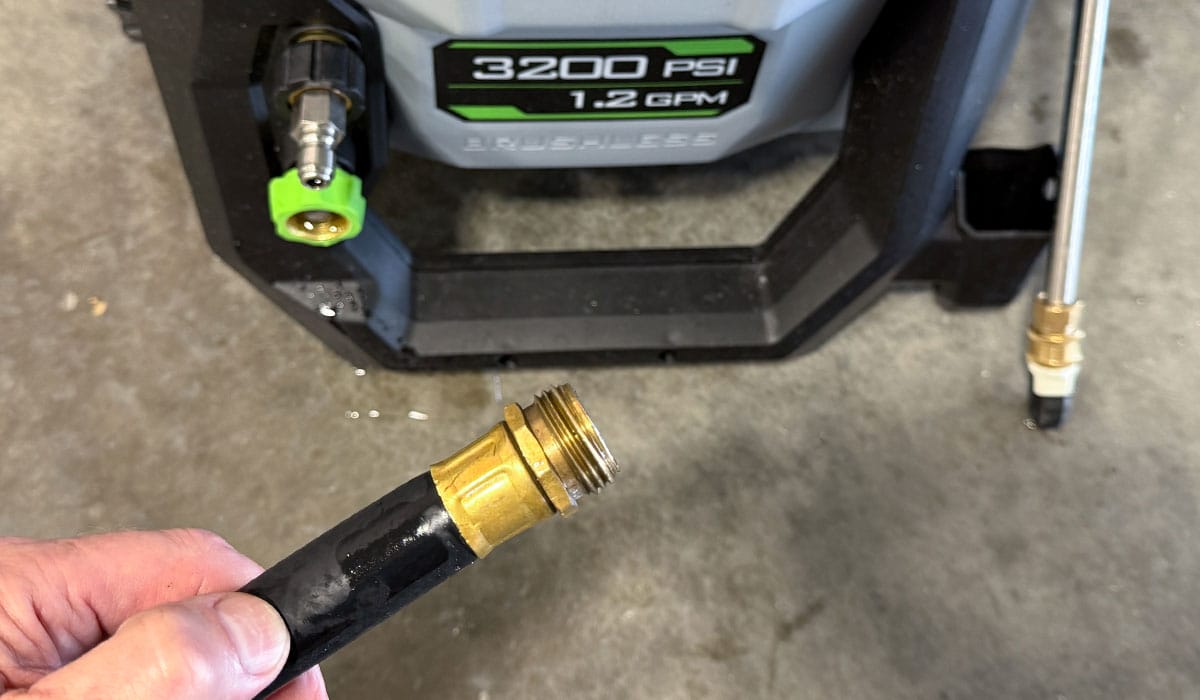
Attaching the 25’ High Pressure Hose
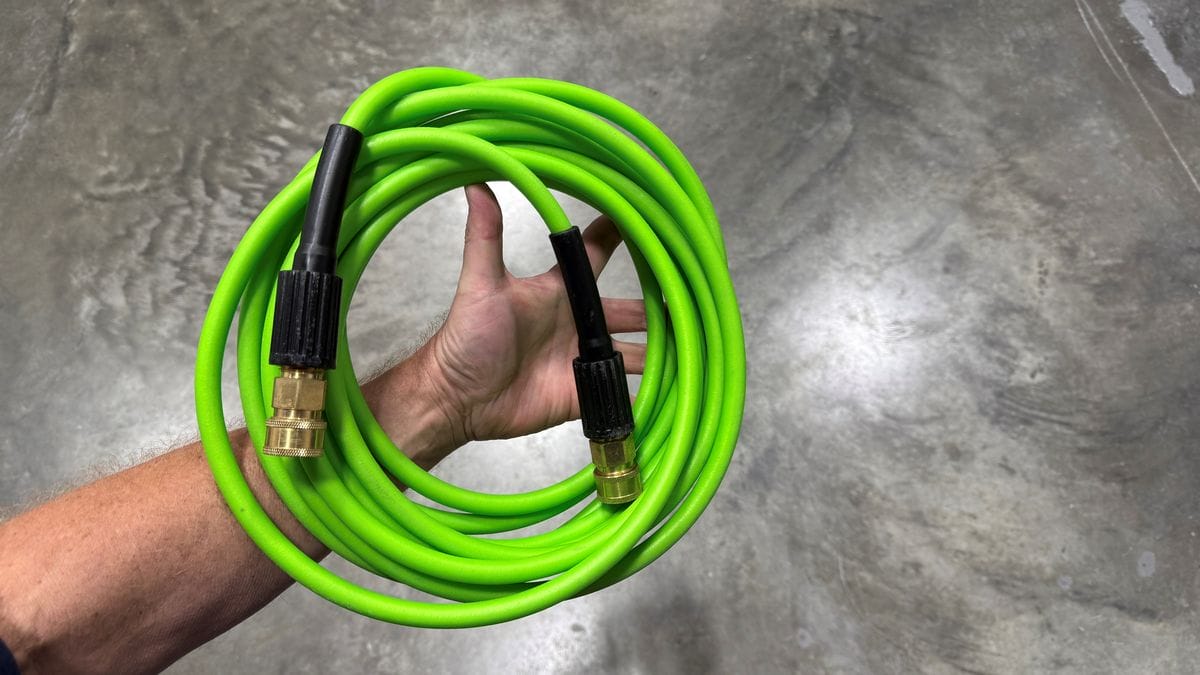
The green high pressure hose that comes with the EGO Power+ 3200 PSI Pressure Washer is a tick over 25’ long and has brass quick connectors on both ends.
First attach one end of the hose to the water outlet port on the pressure washer, which is the top quick connector on the lower left hand side. To attach, pull backwards on the spring-loaded connector and press onto the male connector.
To demonstrate what 25’ looks like, I connected one end of the high pressure hose to the back wall and then measured using a 25’ measuring tape.
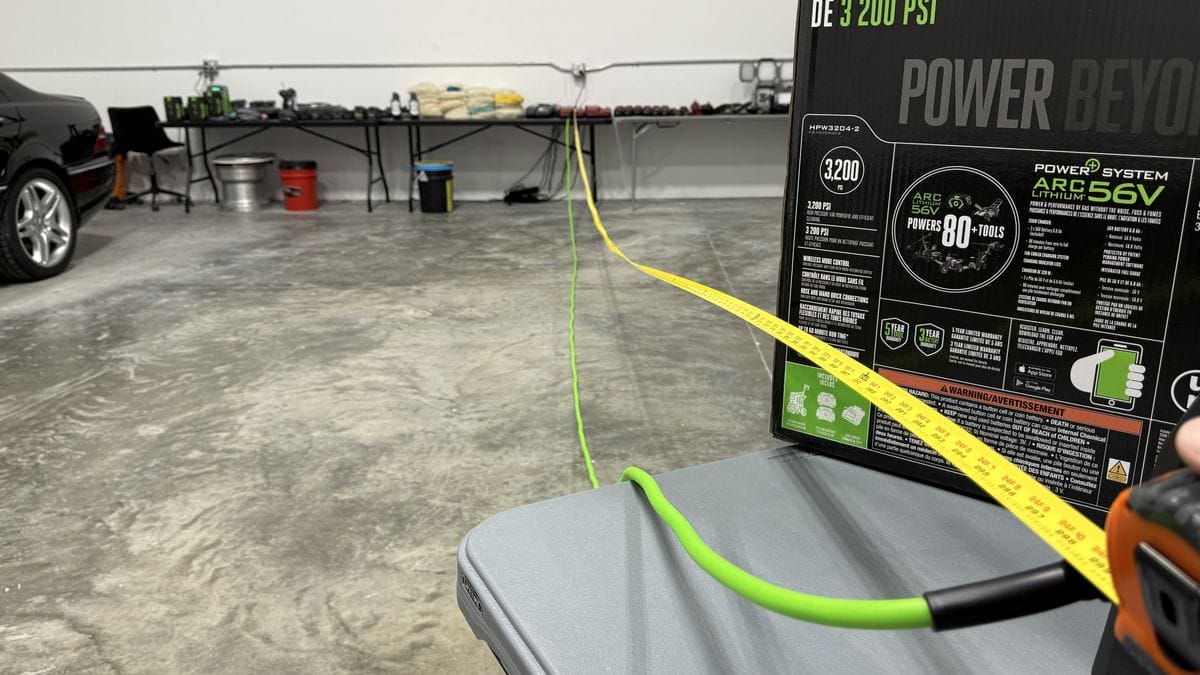
That’s long!
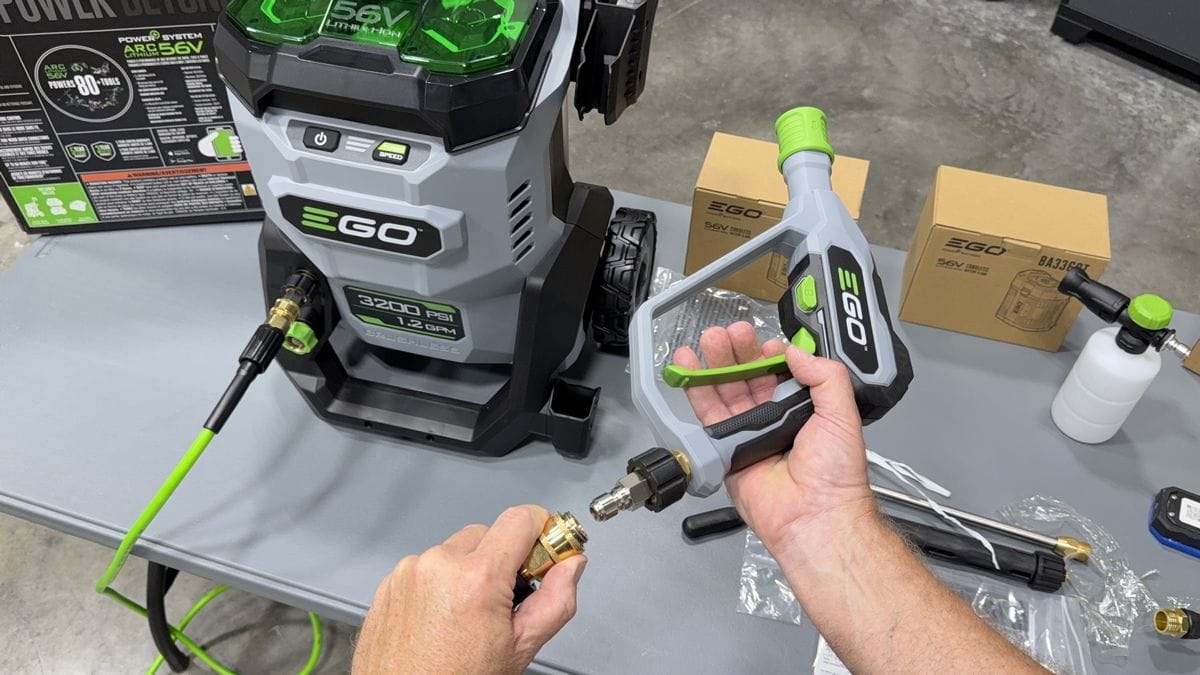
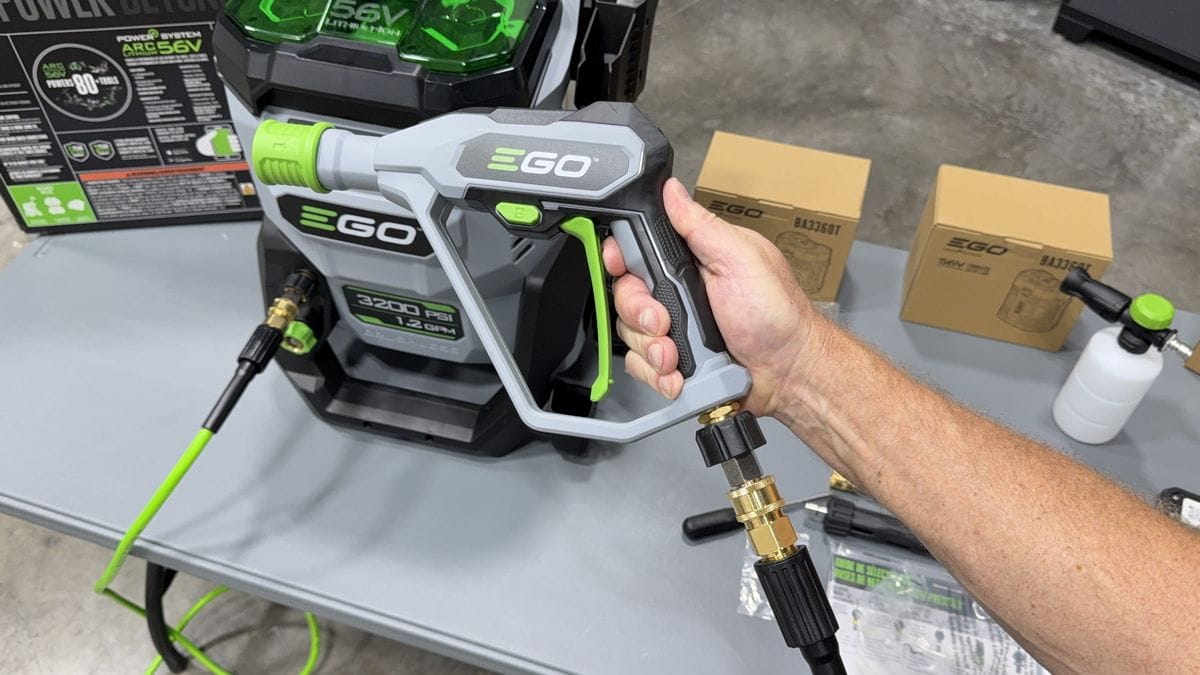
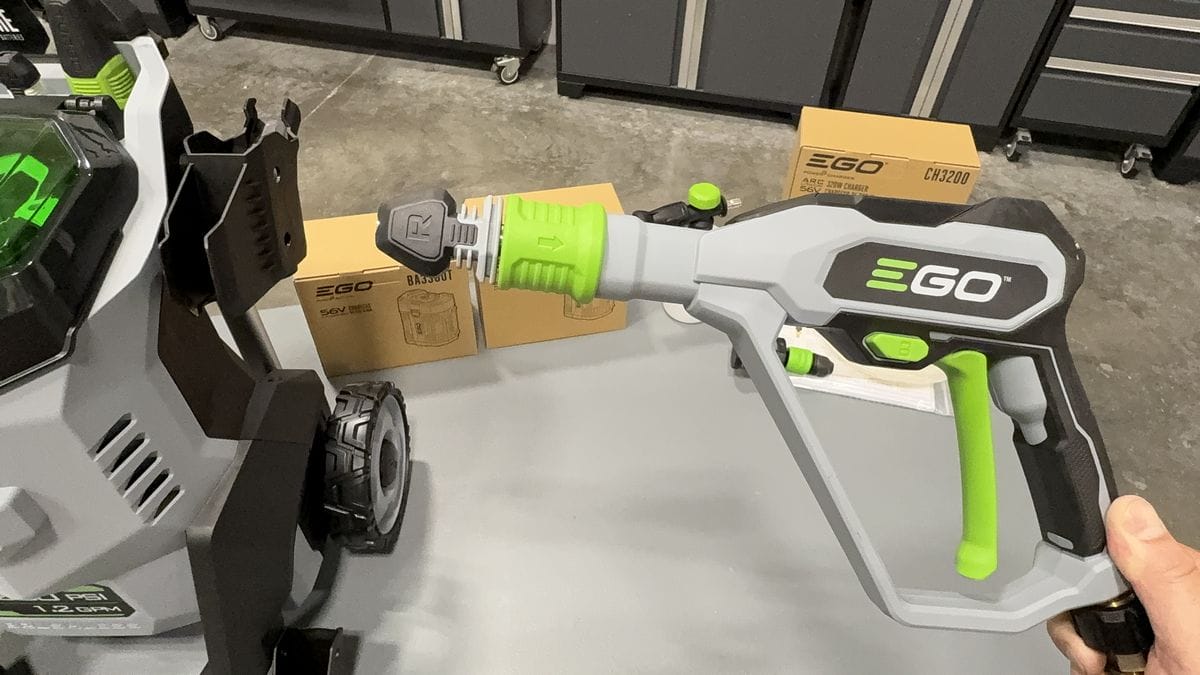
Attaching the Spray Gun
Once you’ve attached one end of the hose to the pressure washer, take the other end and attach to the male connector at the bottom of the spray gun in the same way you connected the hose to the washer.
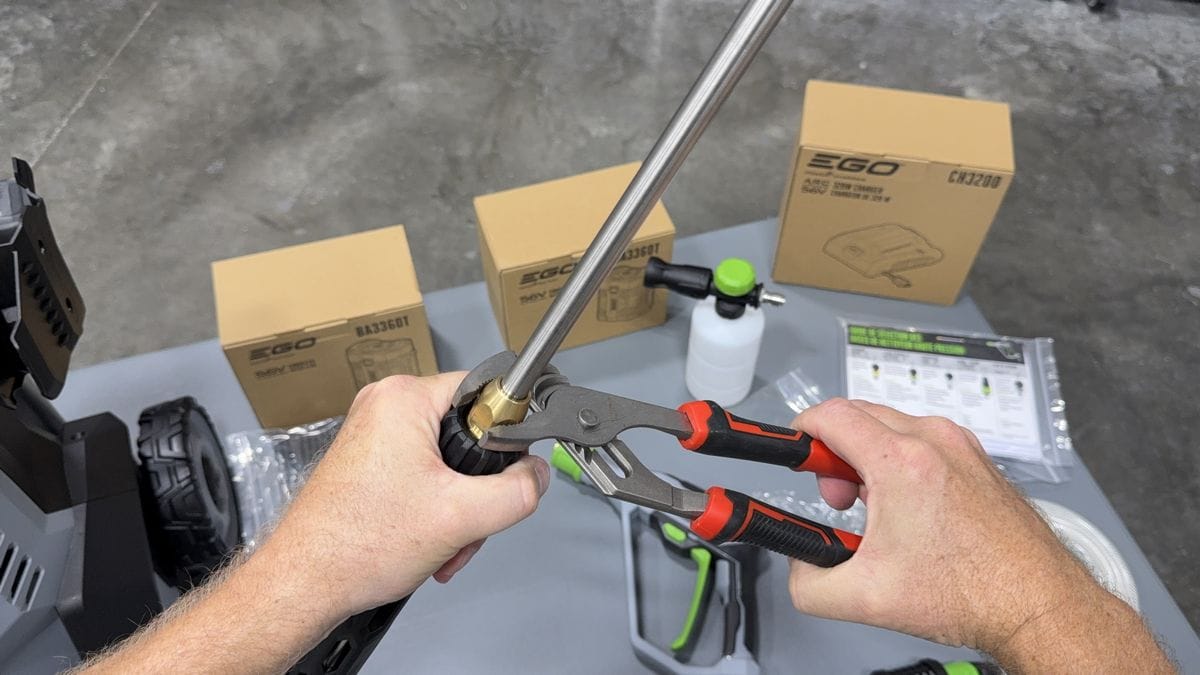
Attaching the Mid Lance and Gun Lance
With the spray gun attached, you now need to affix the lance itself. First connect the gun lance to the mid lance by spinning the mid lance’s plastic locking fastener onto the threaded side of the gun lance.

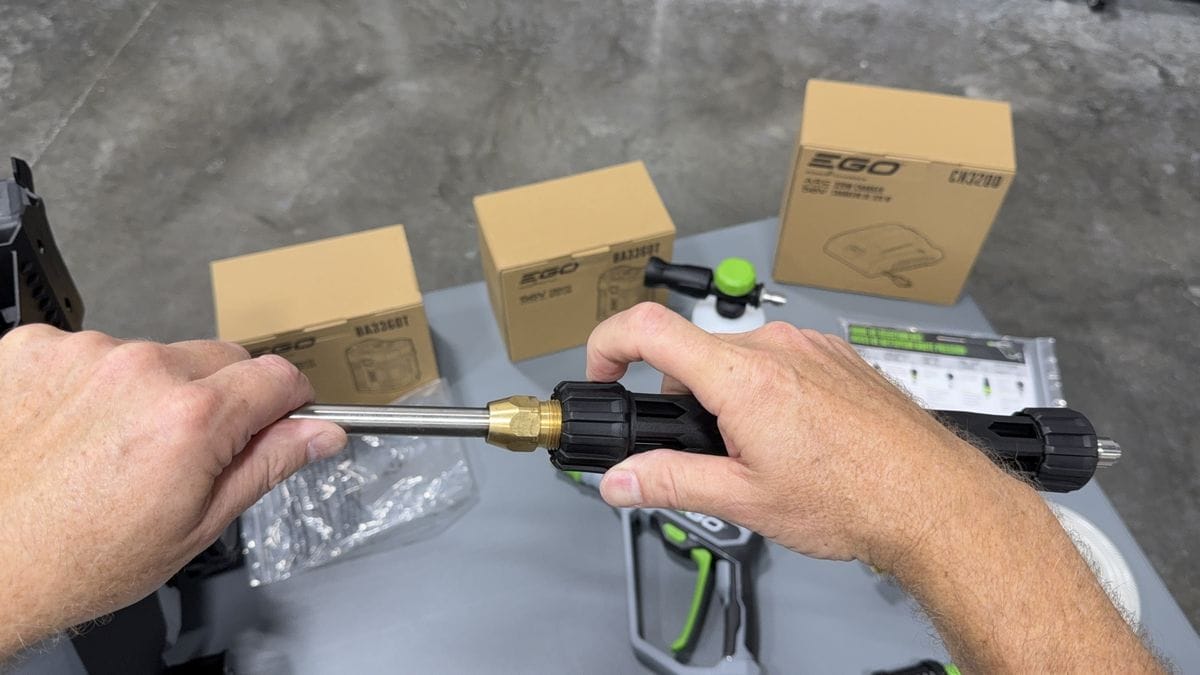
Use a set of pliers or wrench to tighten the lance until snug.
Once the lance is snug, attach to the spray gun by inserting the lance and pulling the green quick release back about an 1/8th of an inch. Release the green collar and make sure it FULLY locks onto the male end.
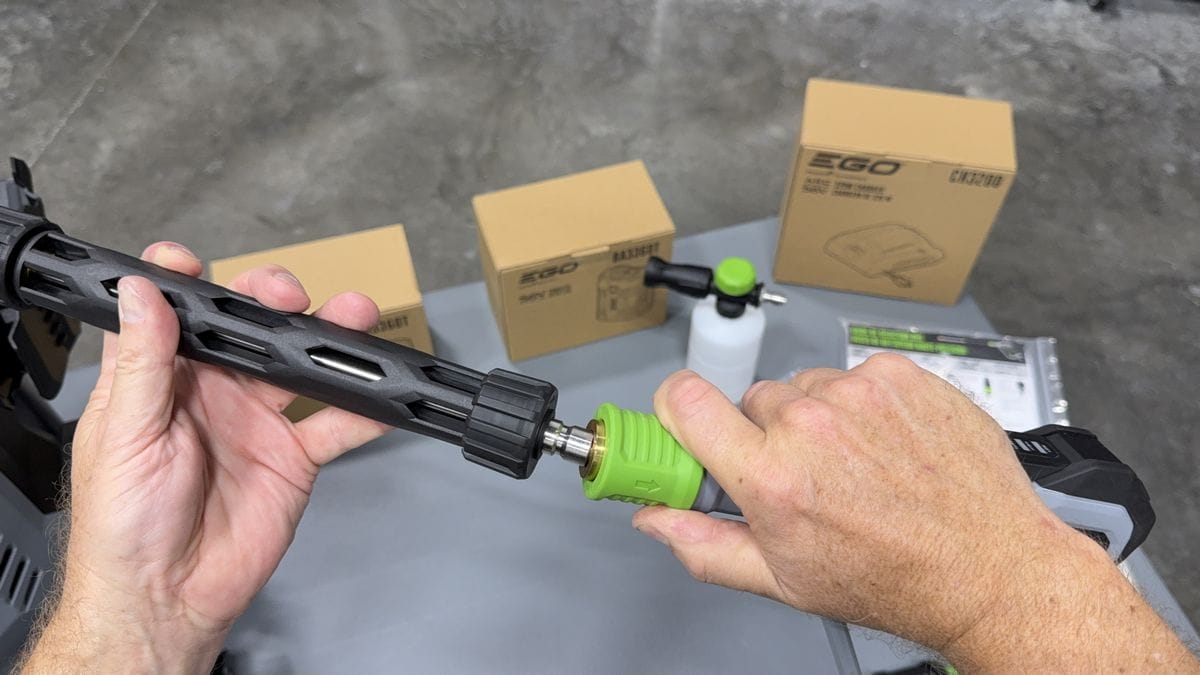
Once the lance is locked on the green collar, tighten the locking collar nut to the spray gun.

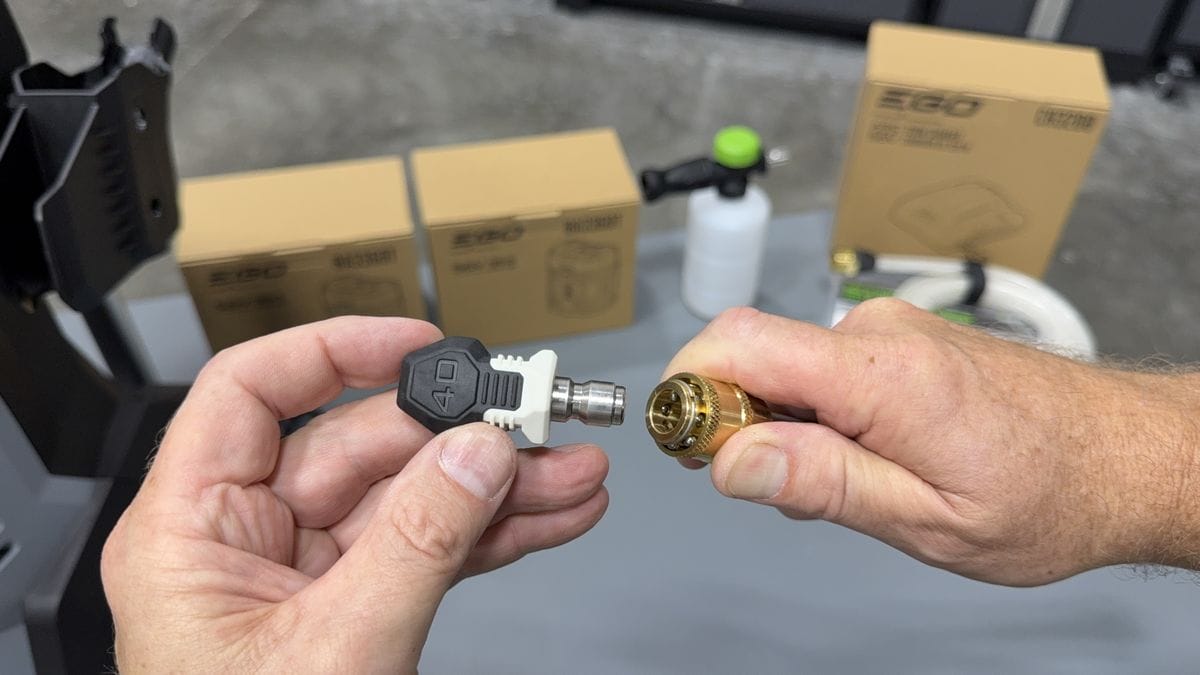
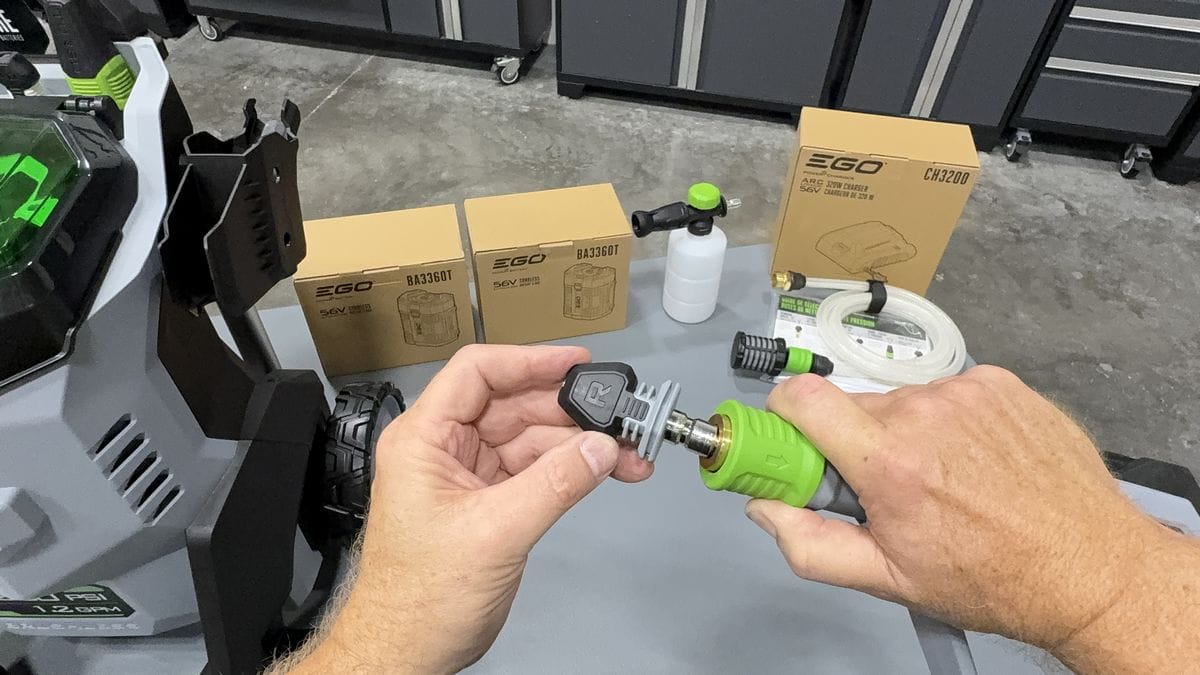
Inserting Nozzles
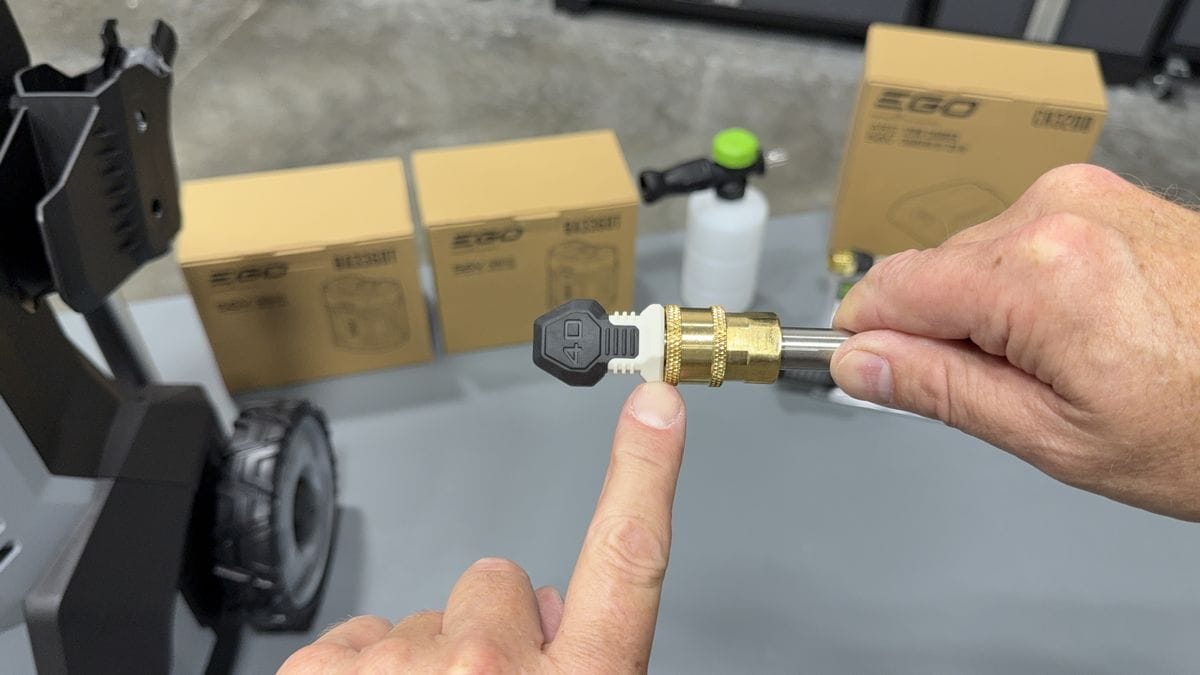
All pressure washer nozzles use the same ¼” quick connector hose couplings. To insert a nozzle, pull back on the gun lance’s brass collar and insert the male connector before releasing the collar. Once inserted, check to make sure the brass collar is fully locked onto the nozzle.
You can use this same procedure for all nozzles included with the pressure washer except for the rinse nozzle, which can only be attached directly to the spray gun.
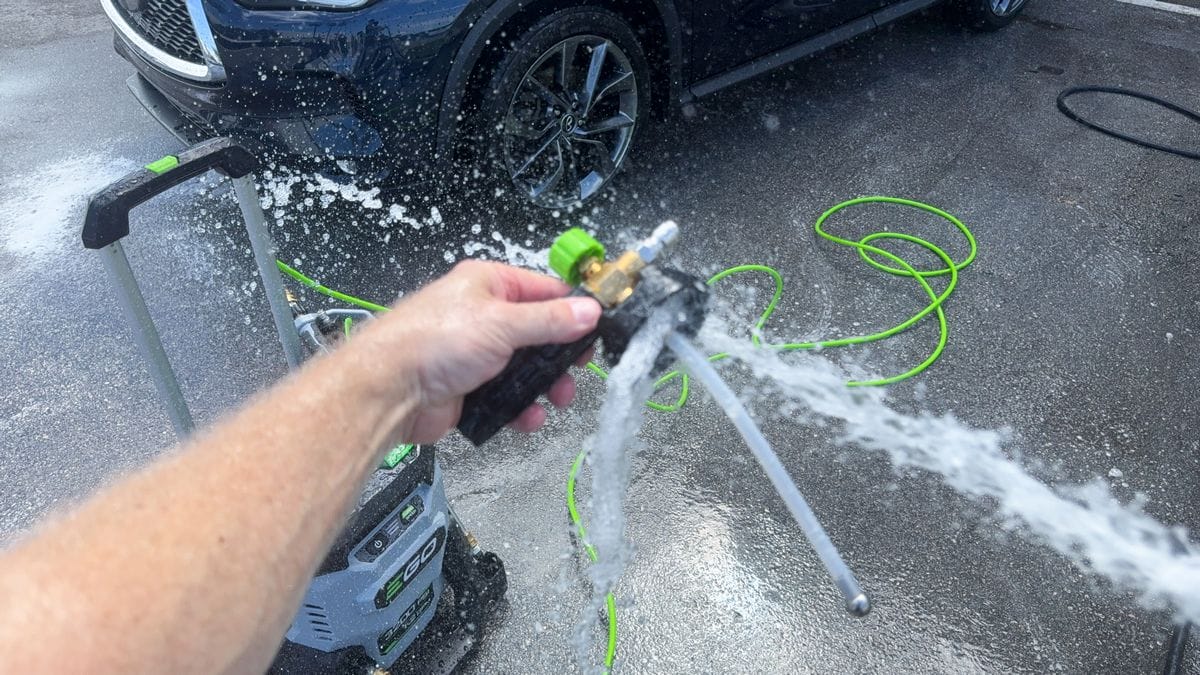
Why I Don’t Recommend Using the Rinse Nozzle
To be honest, I don’t see a need or use for the rinse nozzle. It has a weak water flow that barely dribbles out of the tip. I don’t know why a person would use this nozzle and I don’t recommend it for washing cars.
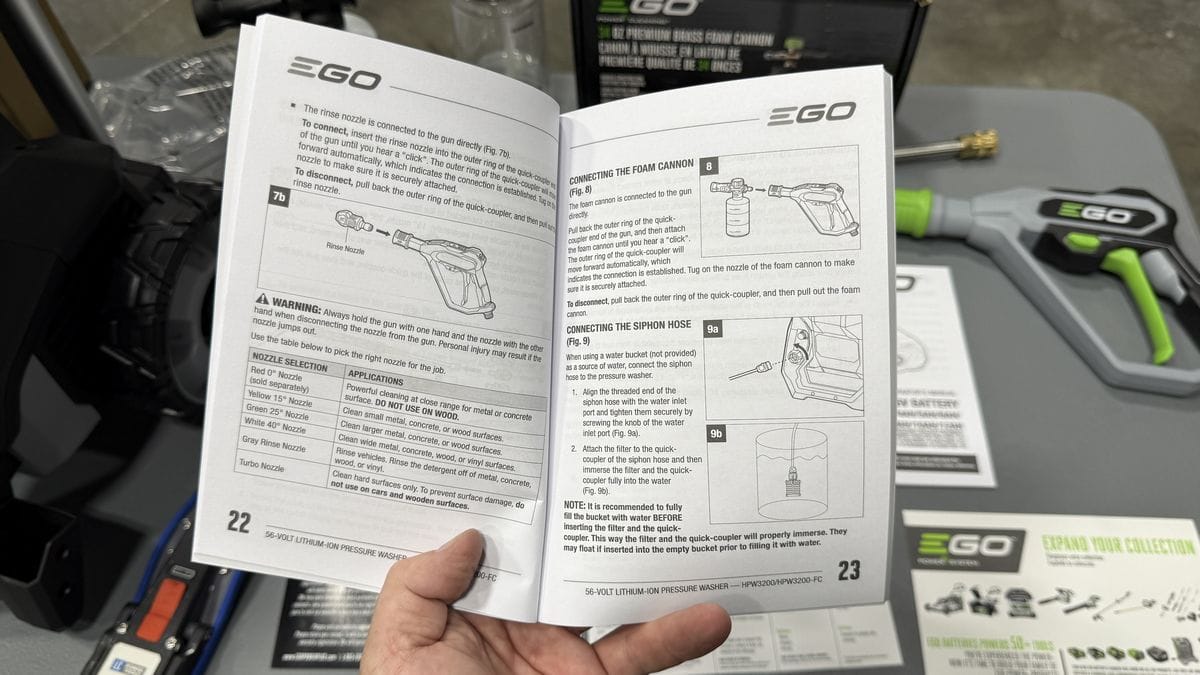
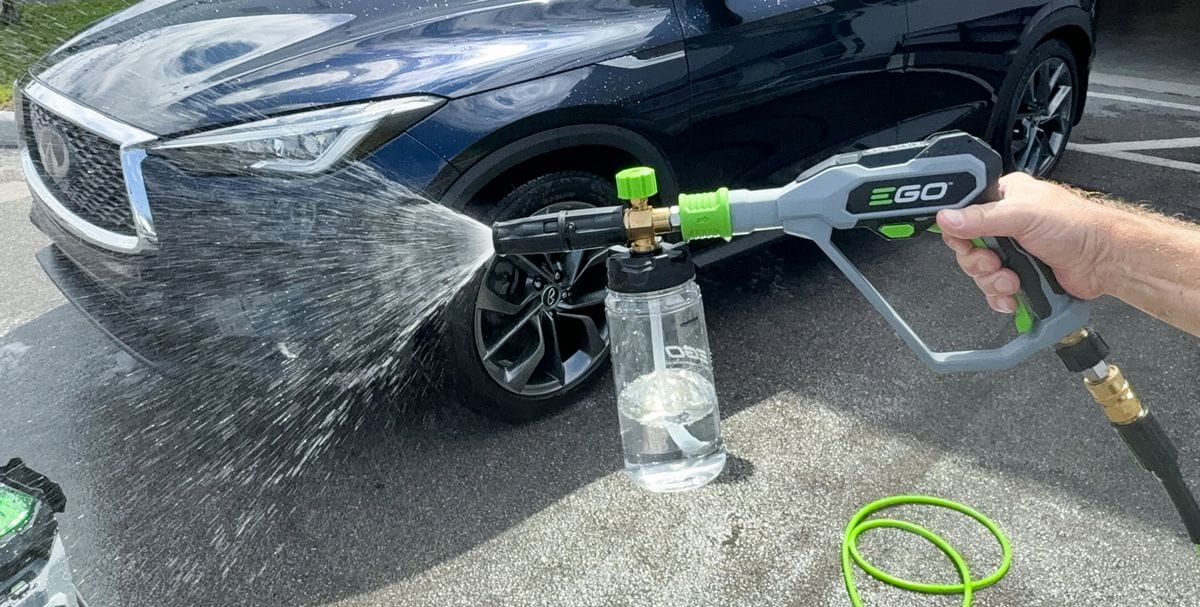
Attaching the Foam Cannon
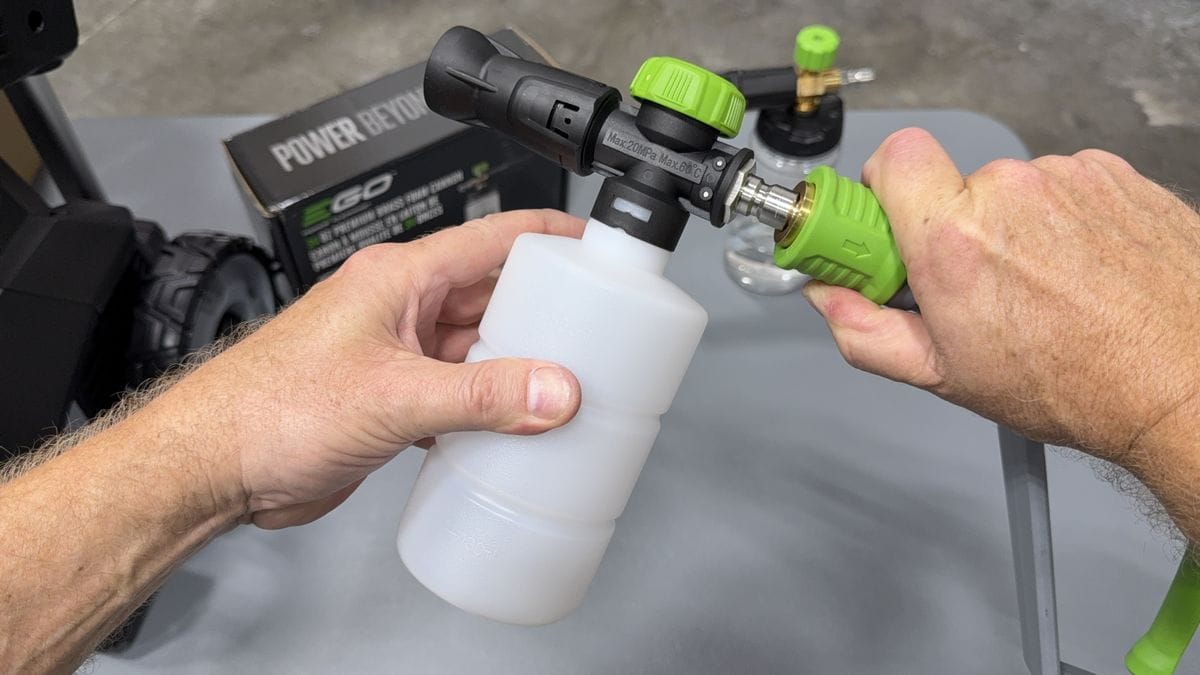
After assembling the pressure washer itself you can now attach any accessories you plan to use. In this case, I am going to attach a foam cannon for washing cars.
Foam cannon attachments can be secured directly to the spray gun using the universal ¼” quick connector hose coupling.
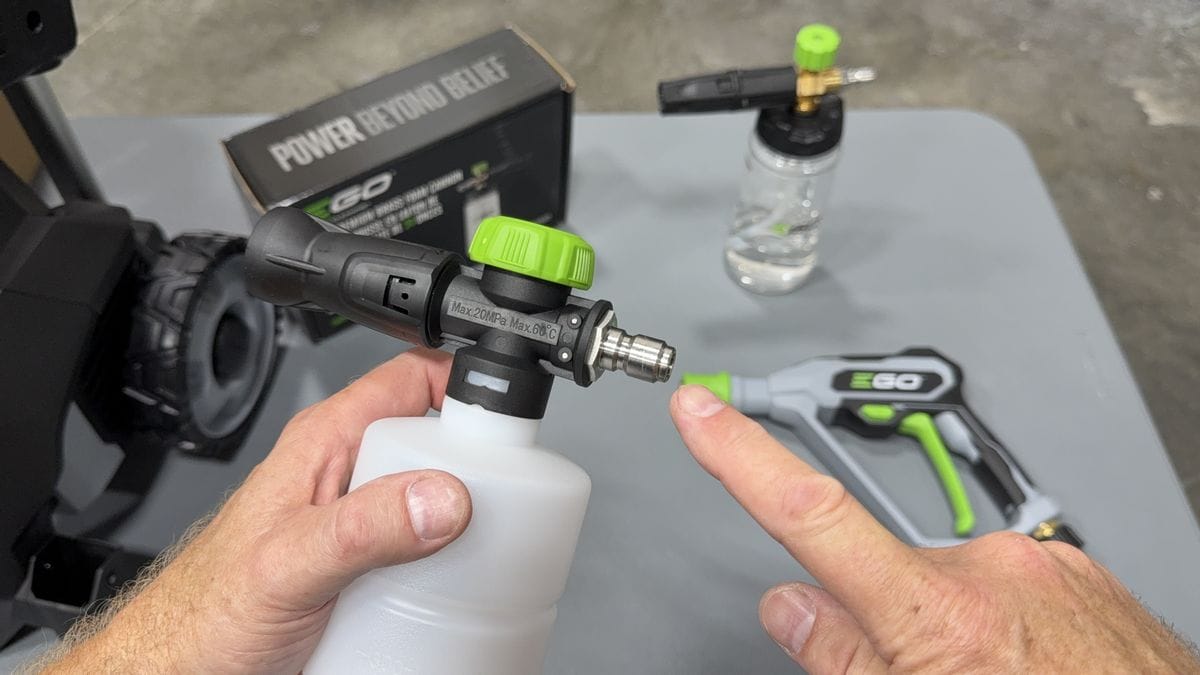
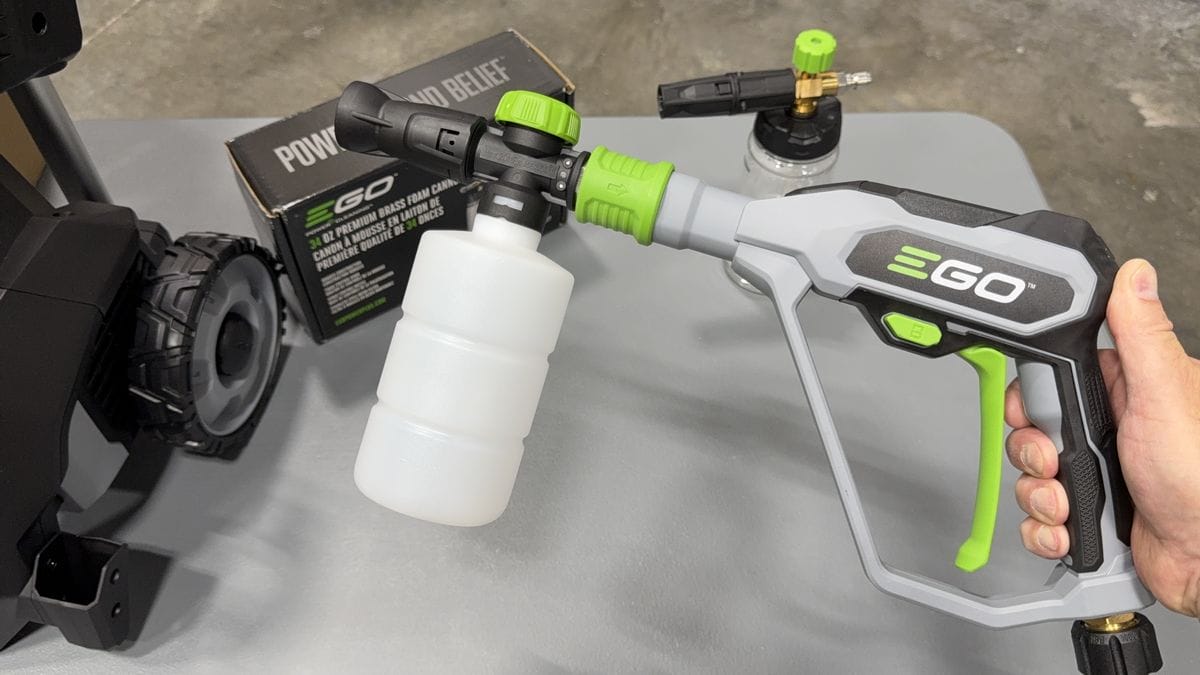
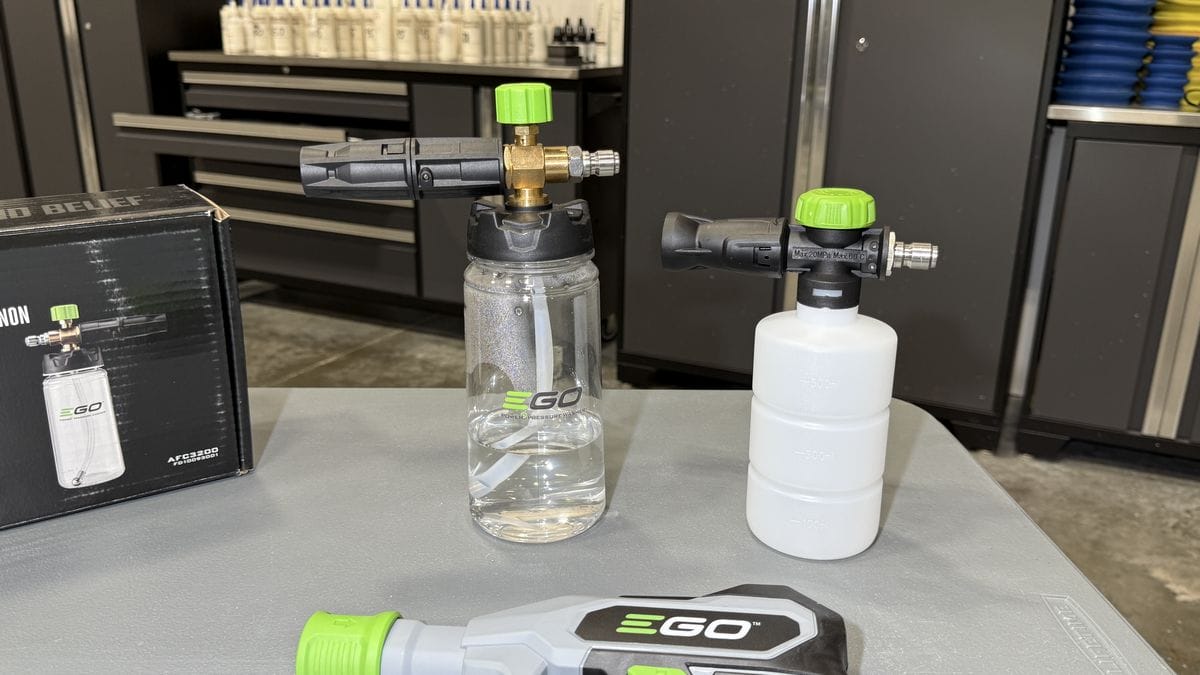
The foam cannon attachment that comes with the EGO Power+ 3200 PSI Pressure Washer has a 500mL reservoir. This is a tick on the small size, so if you’re planning to wash larger vehicles like trucks and SUVs I recommend getting EGO’s 34 oz Premium Brass Foam Cannon as an upgrade.
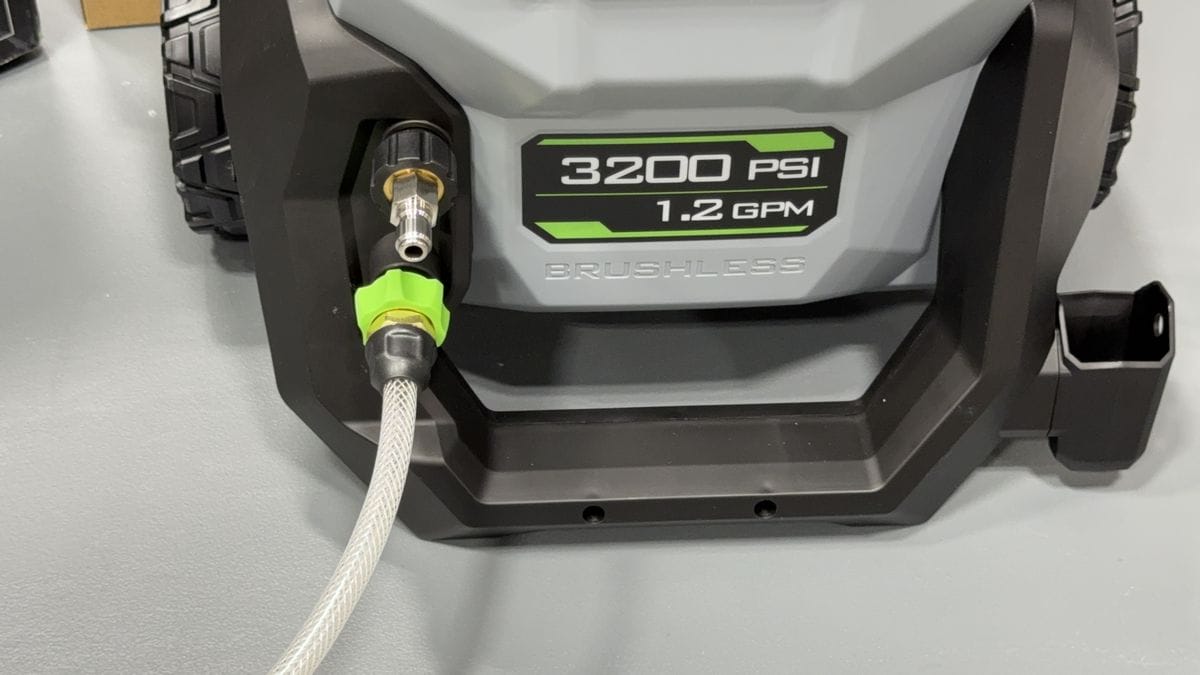
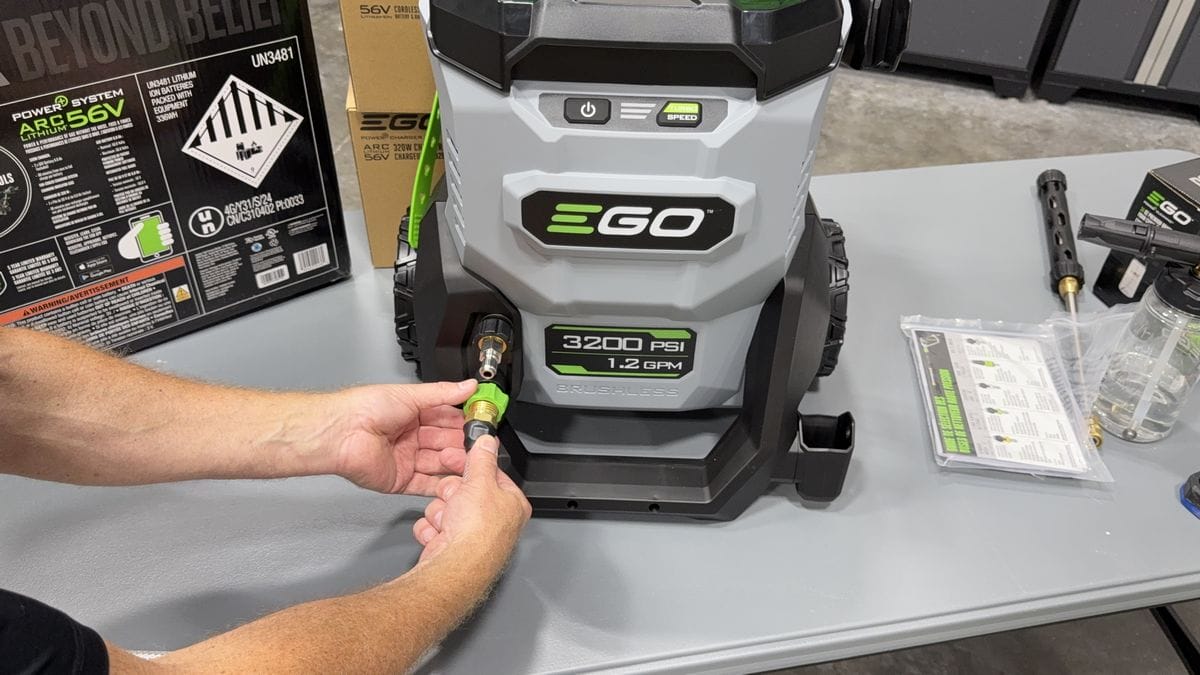
Attaching Water Source Hose
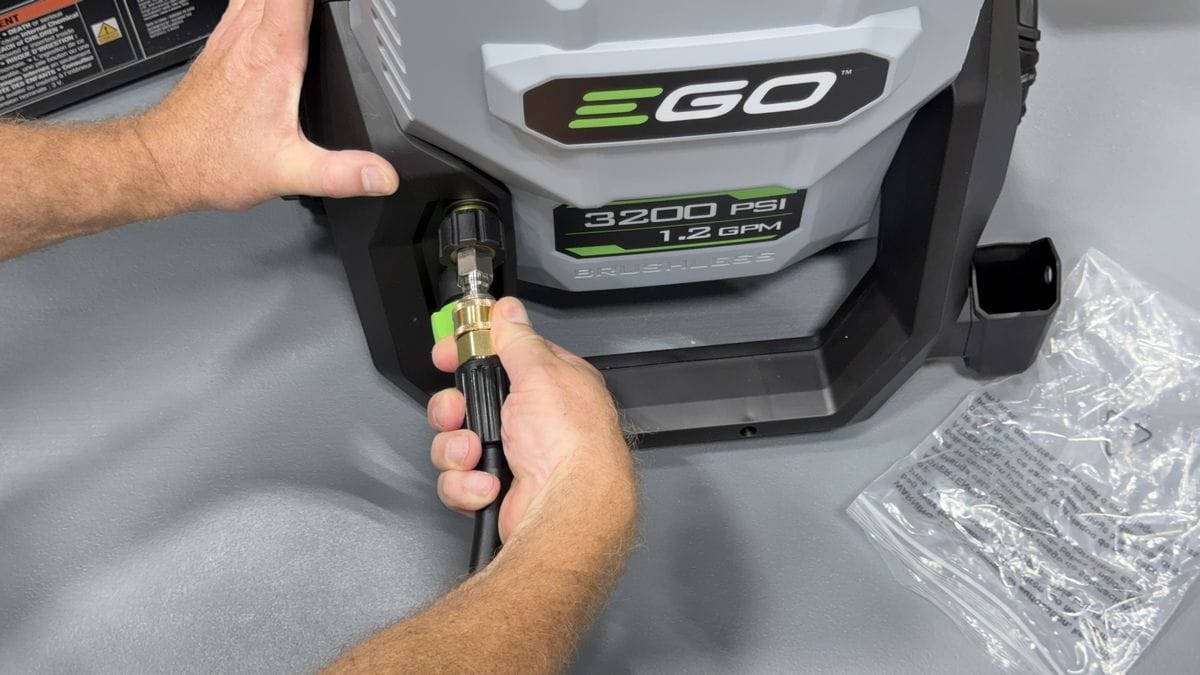
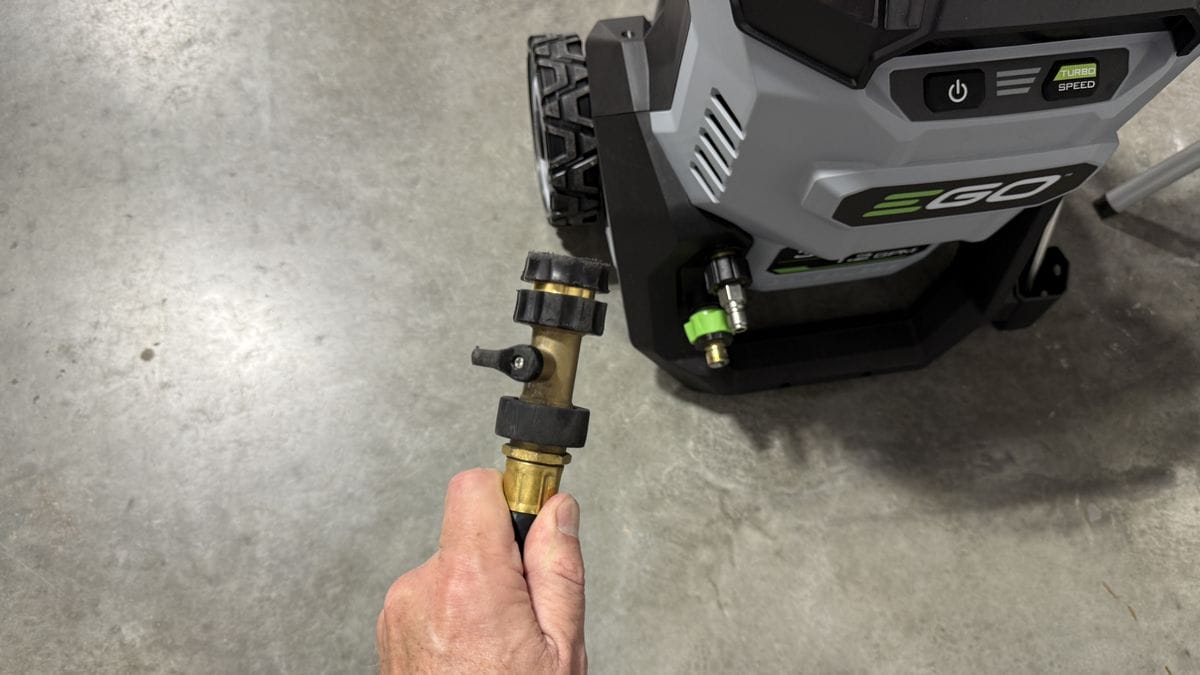
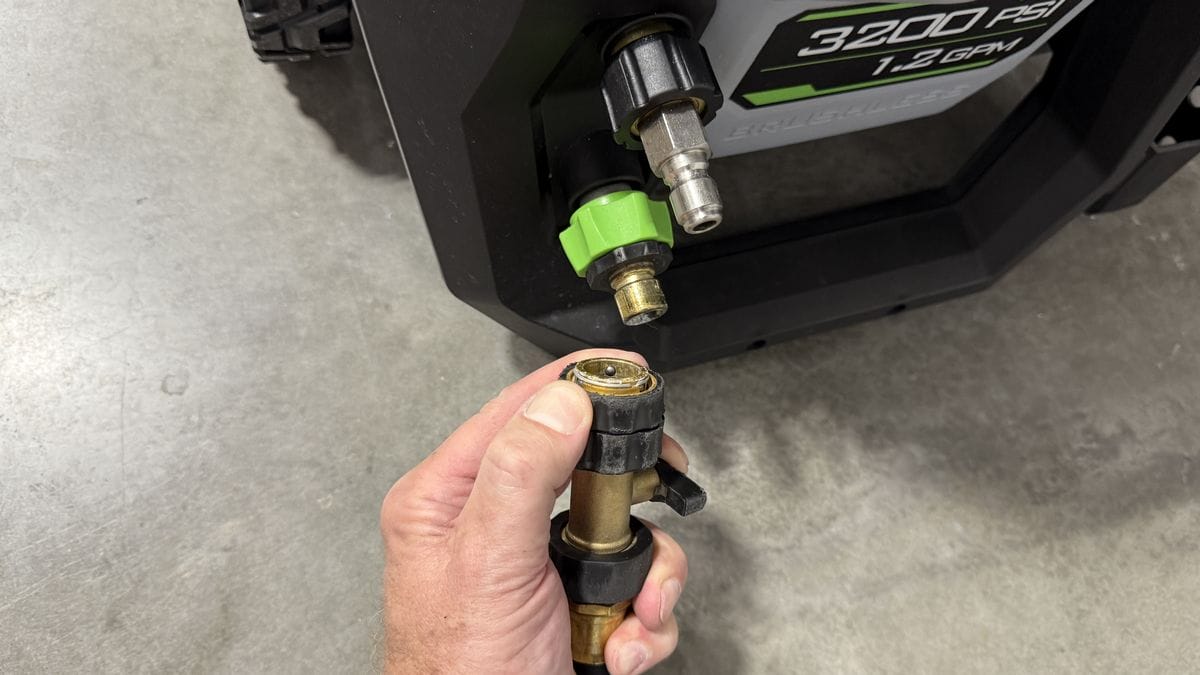
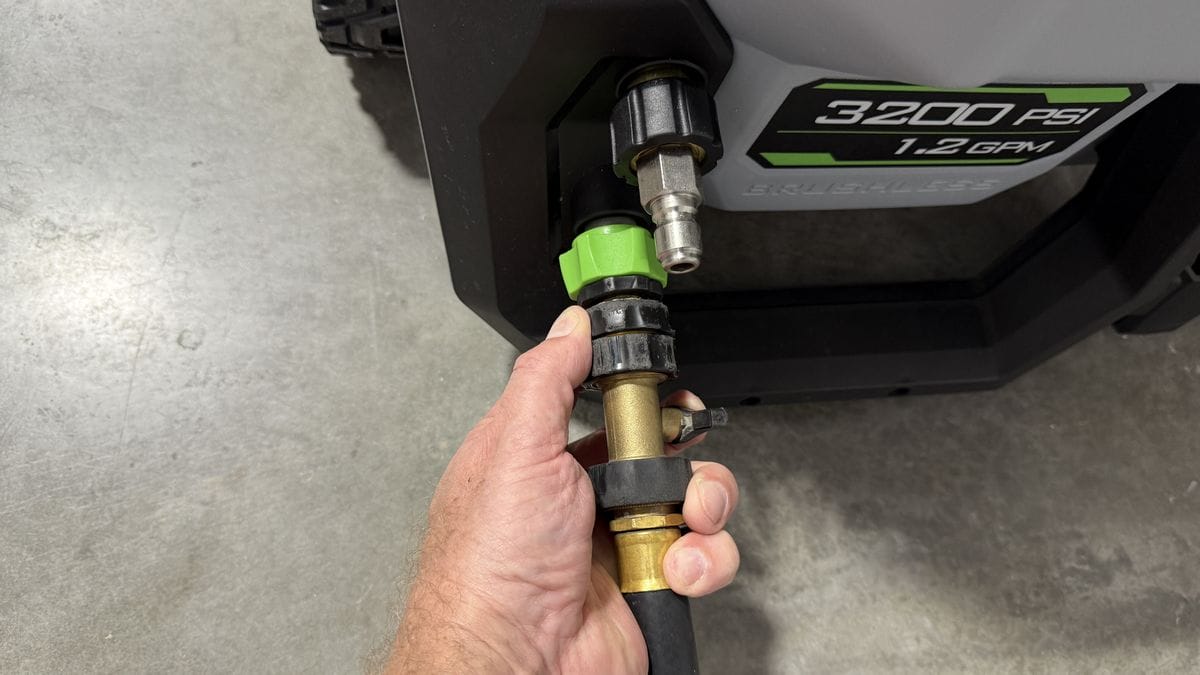
Below the water outlet port is the water inlet port. To supply water to the pressure washer you’ll need to use either a garden hose hooked up to a running water source or the included siphon hose to suck up water from a standing water source.
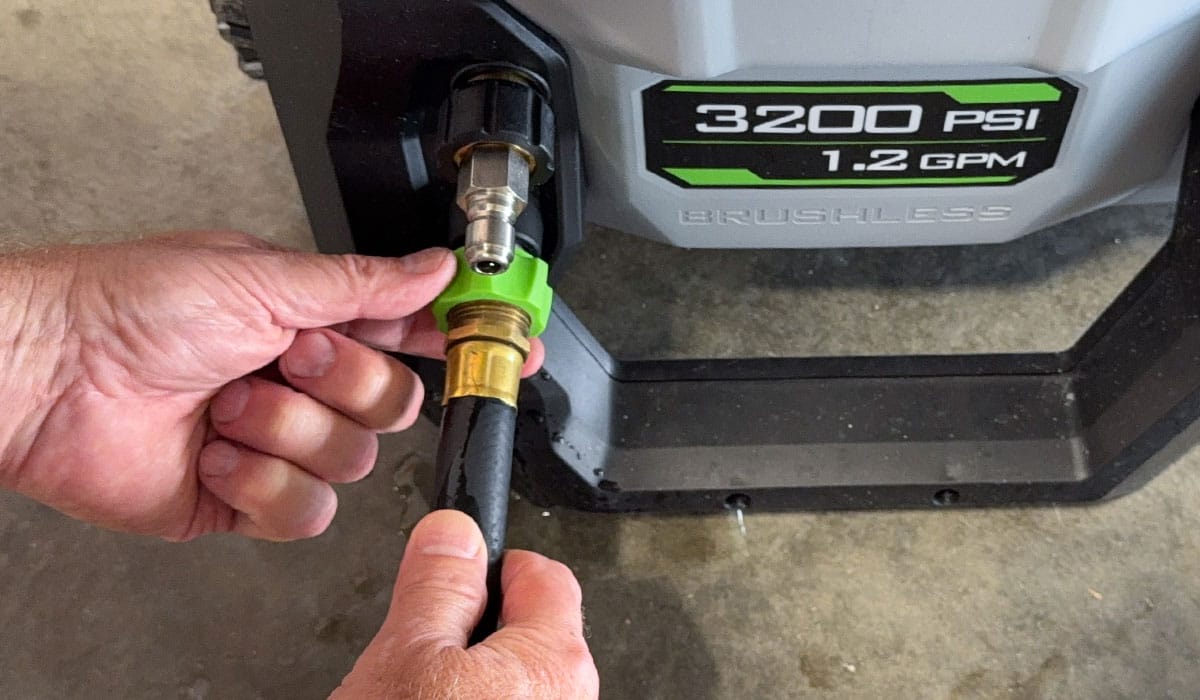
As a tip, I recommend getting a Quick Connector for your water hose like you see in the pictures below. You can source them at most hardware stores, and they’re great because they allow you to turn off the water pressure at the end of the hose when disconnecting and re-connecting. That way you don’t have to turn the water off first and release the pressure before disconnecting.
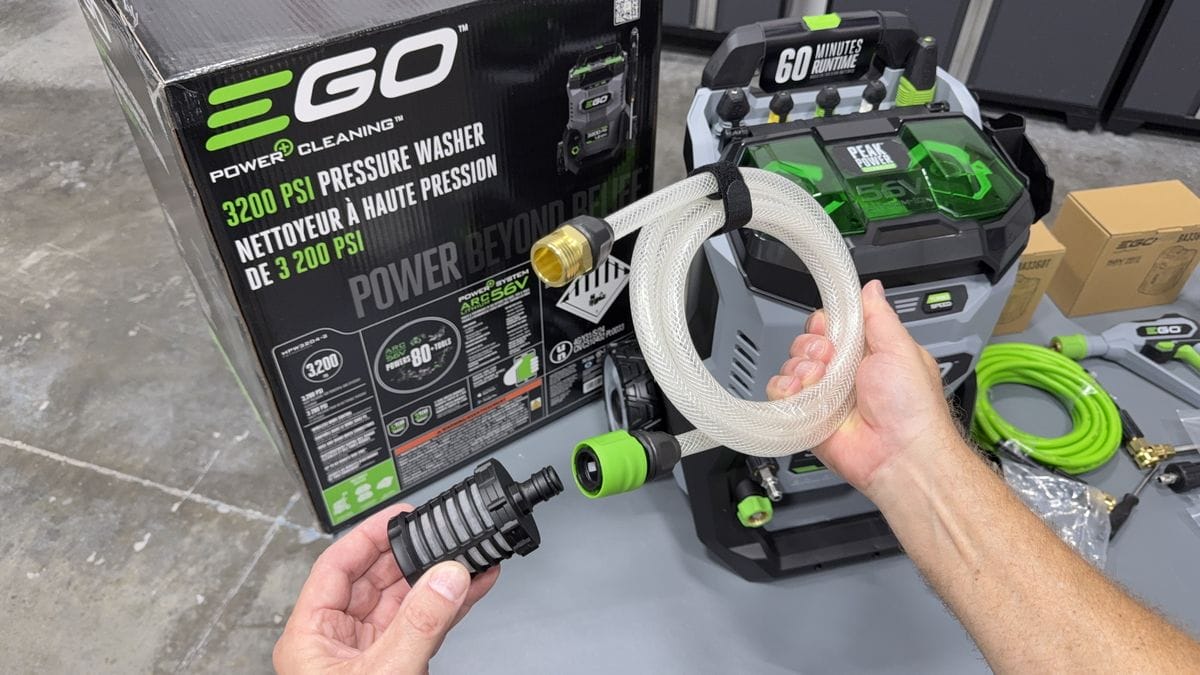
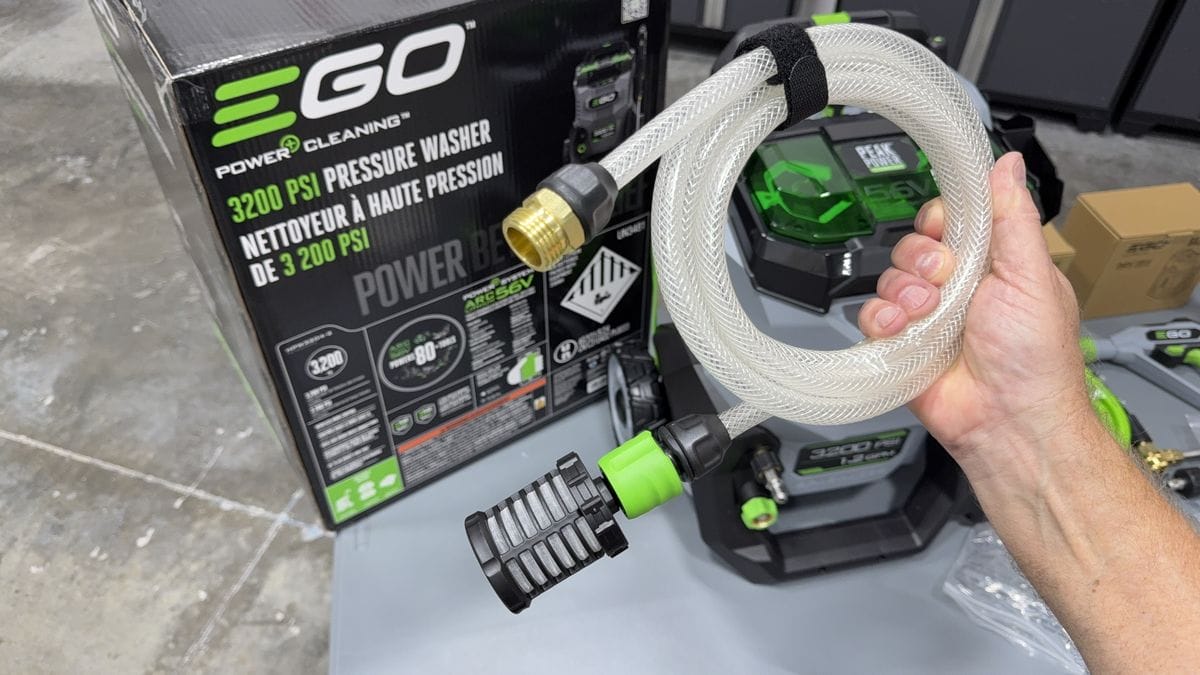
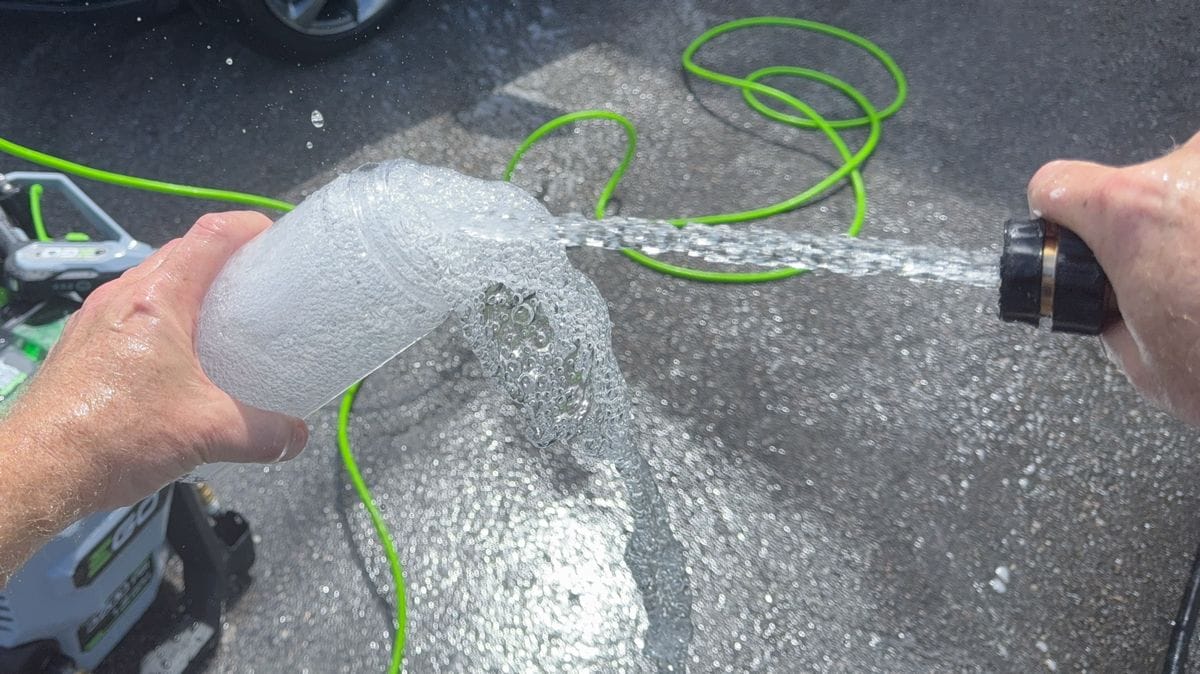
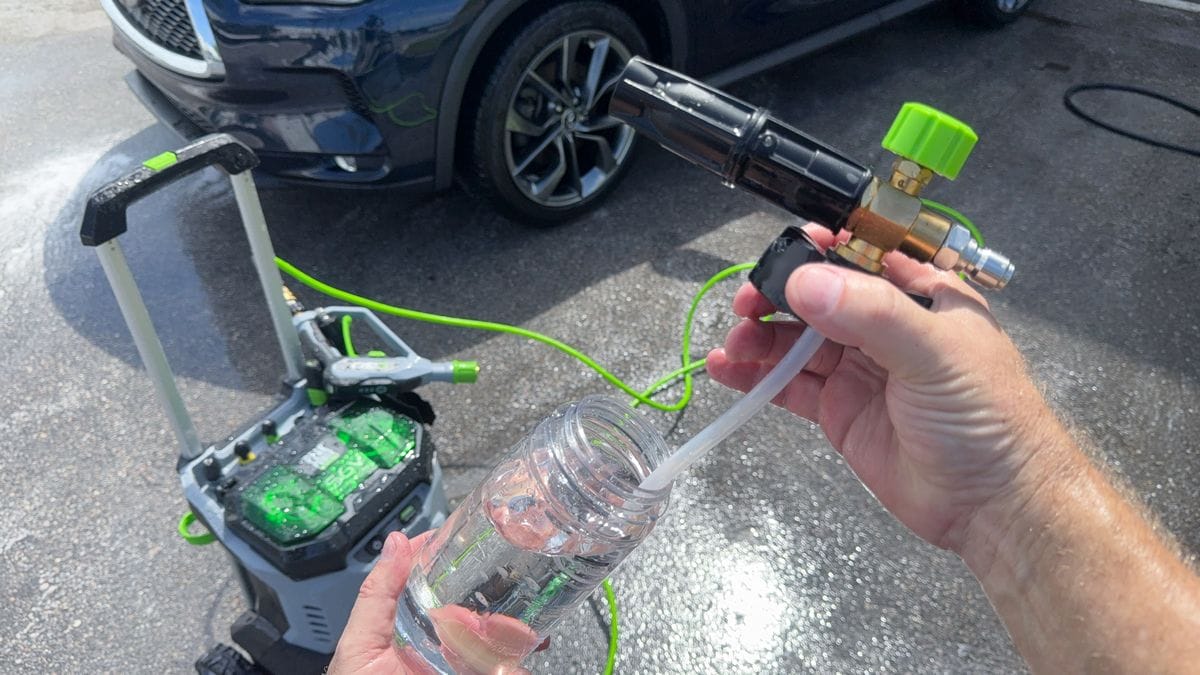
Using the Siphon Hose
If you don’t have access to running water, you can use the siphon hose to draw water from any source like a bucket or water or even a pond.
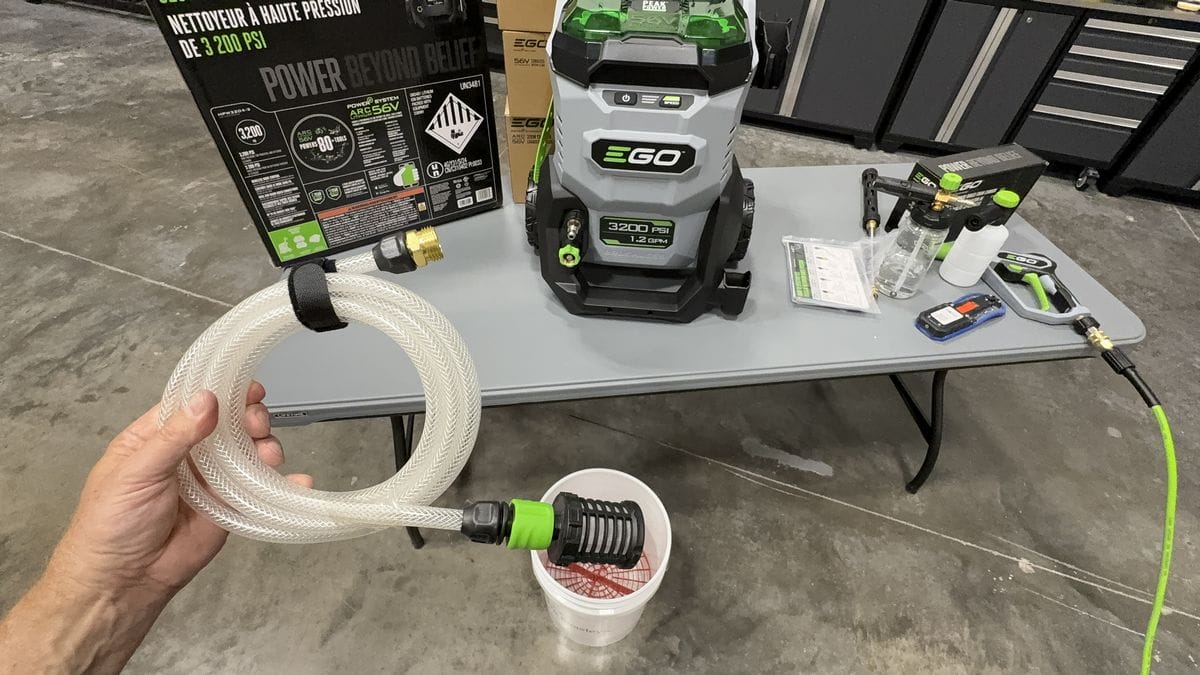

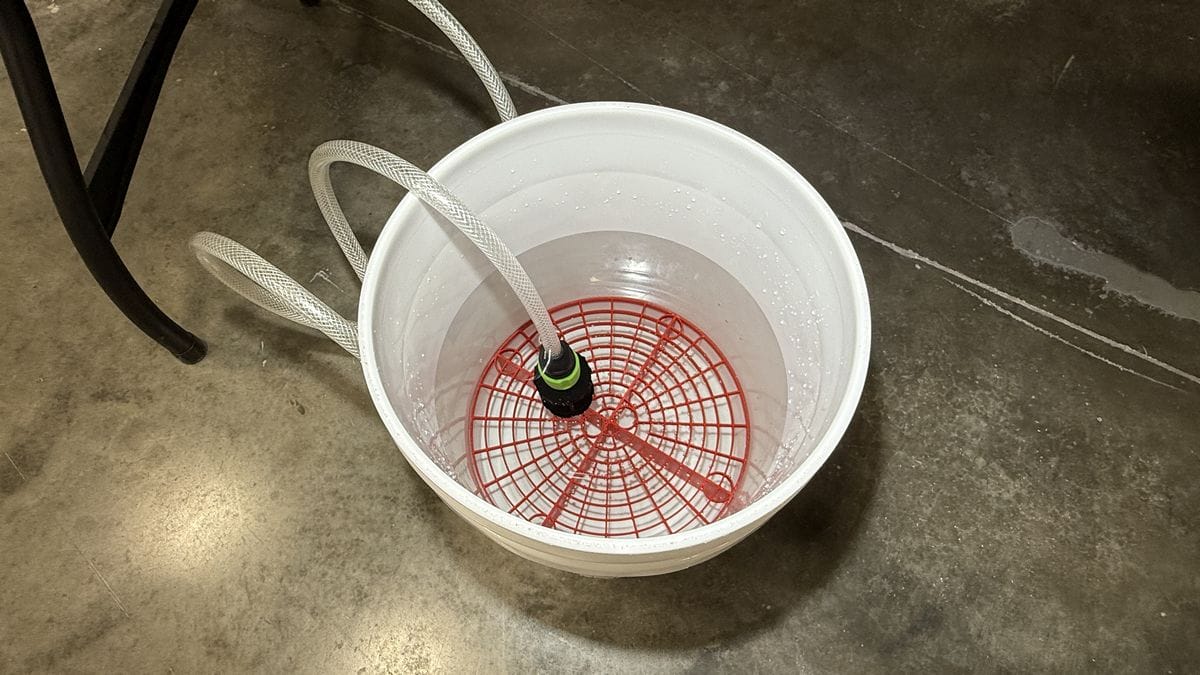
Before you use the siphon hose, be sure to install the filter to prevent any debris from getting sucked up into the pressure washer. To install the filter, pull the green spring-loaded connector backwards and insert the filter.
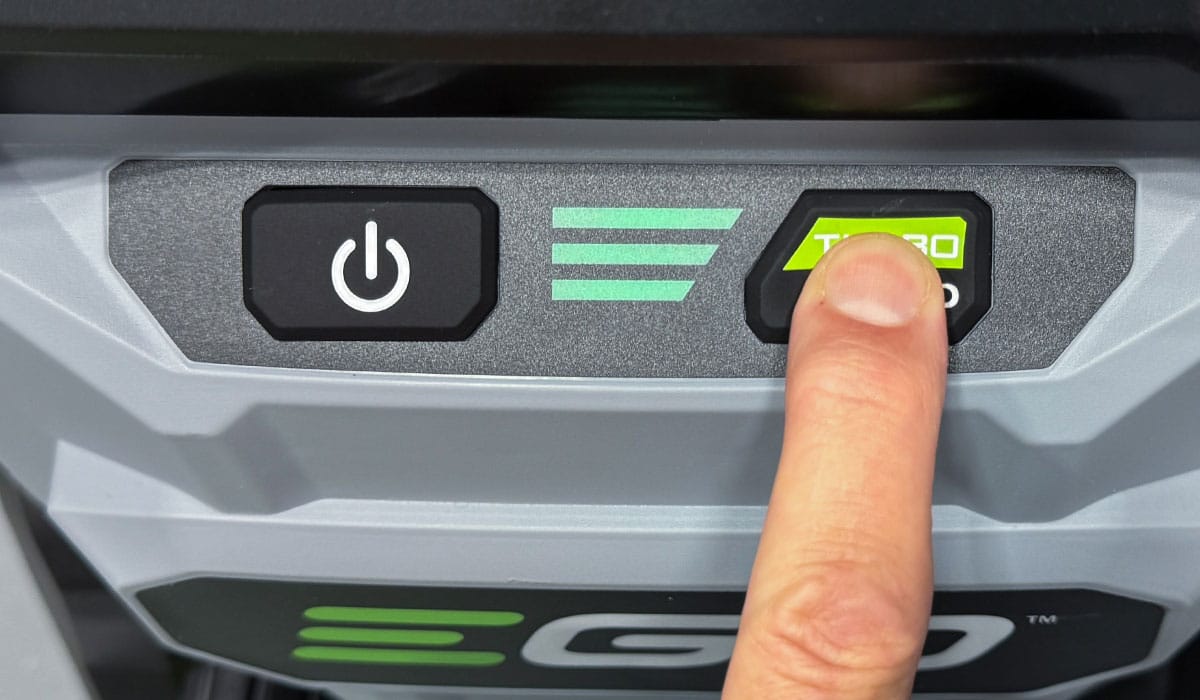
Control Buttons on EGO Power+ 3200 PSI Pressure Washer
The EGO Power+ 3200 PSI Pressure Washer has numerous buttons in various locations around the unit, including controls on the spray gun, something unique to this pressure washer. Here’s a quick guide.
Power On/Off Button
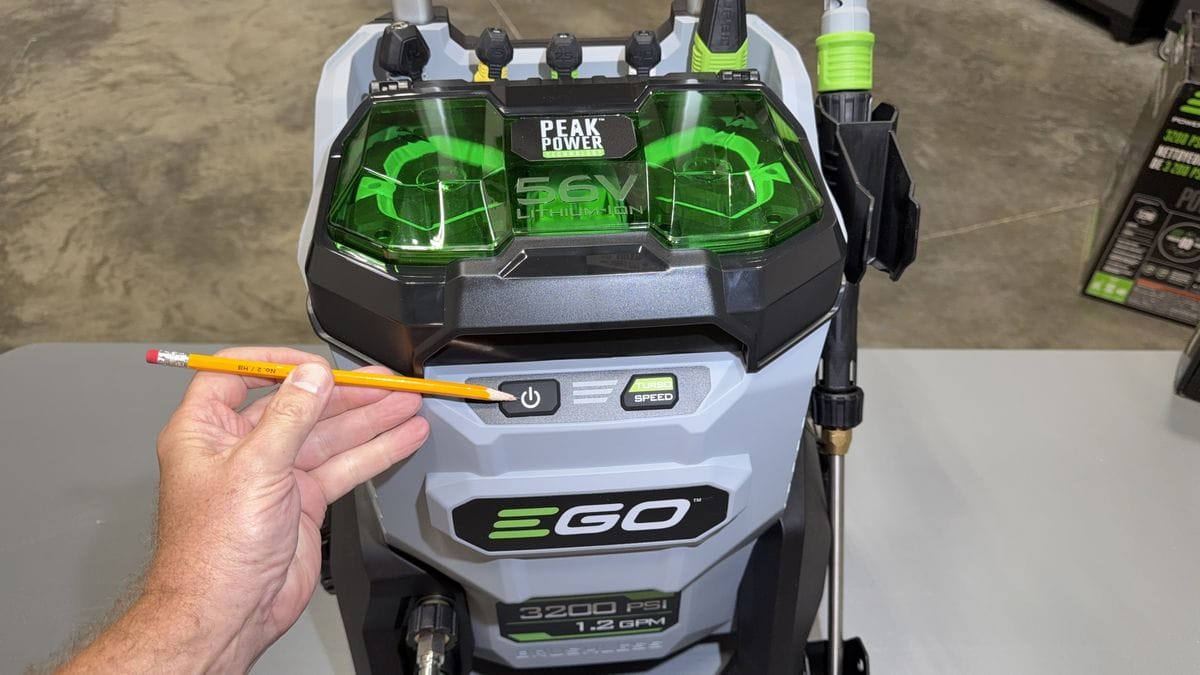
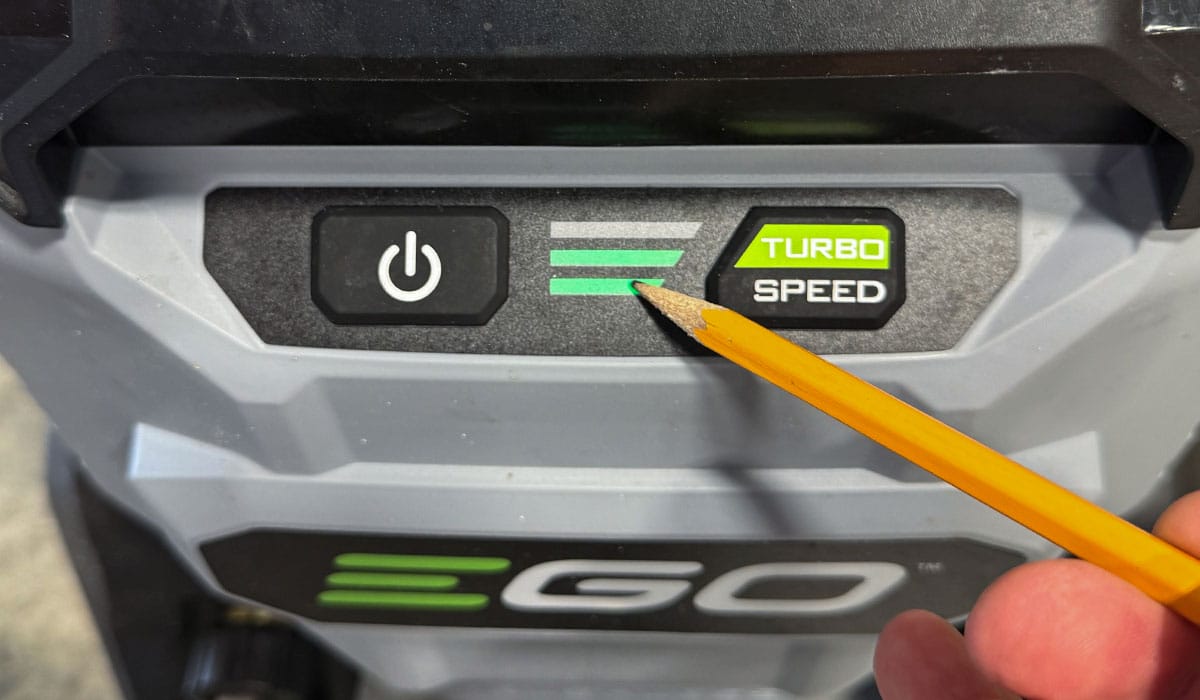
Pressure Washer Unit Speed Setting Indicator Bars
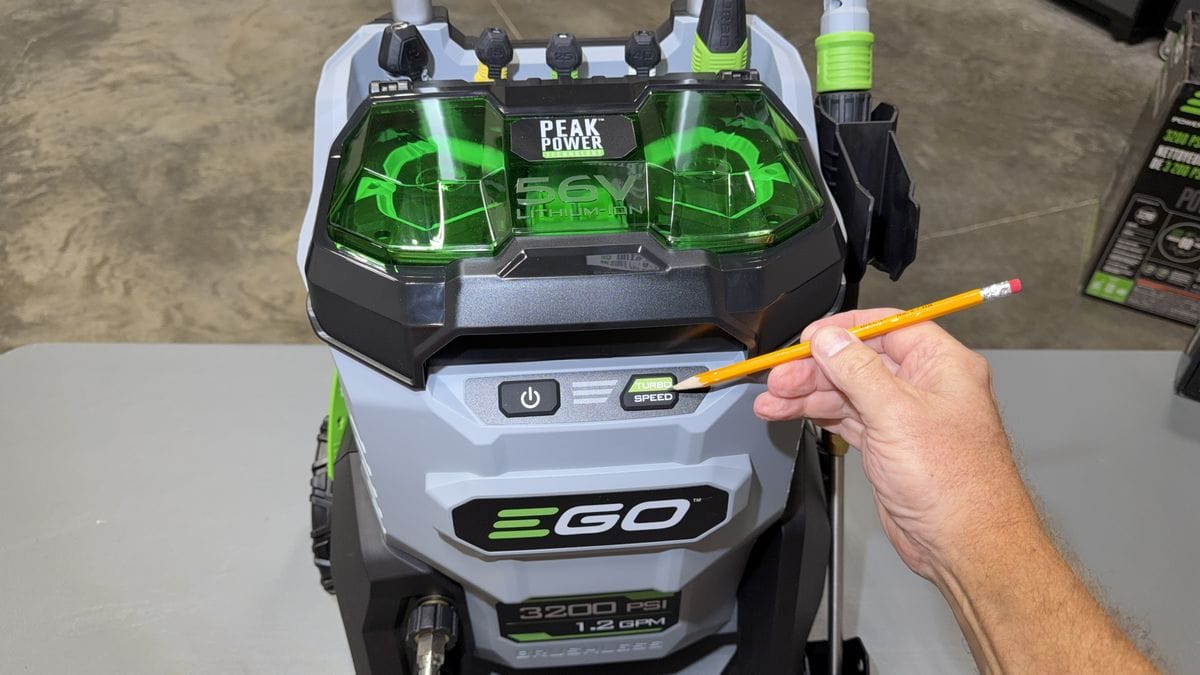
Pressure Washer Unit Speed Button
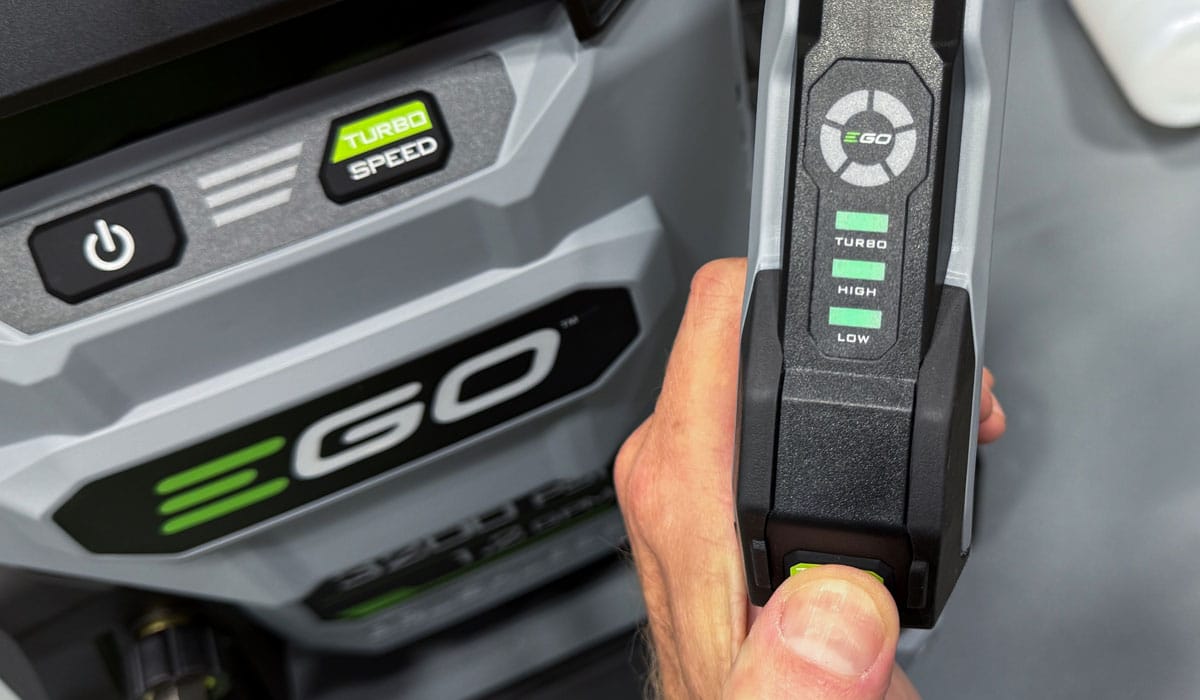
Spray Gun Speed Selector Button
To change the speed settings, simply press the speed button while looking at the speed setting indicator bars to select the best and/or safest speed setting for your project.
Spray Gun Onboard Battery Compartment Bluetooth Connectivity
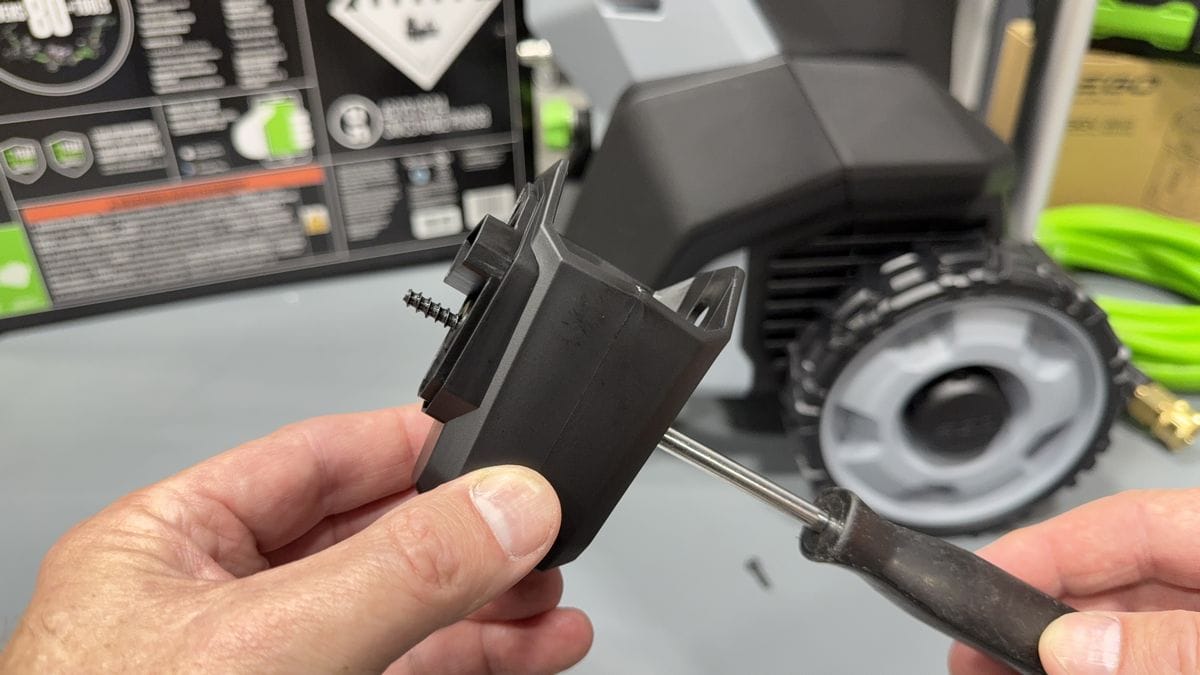
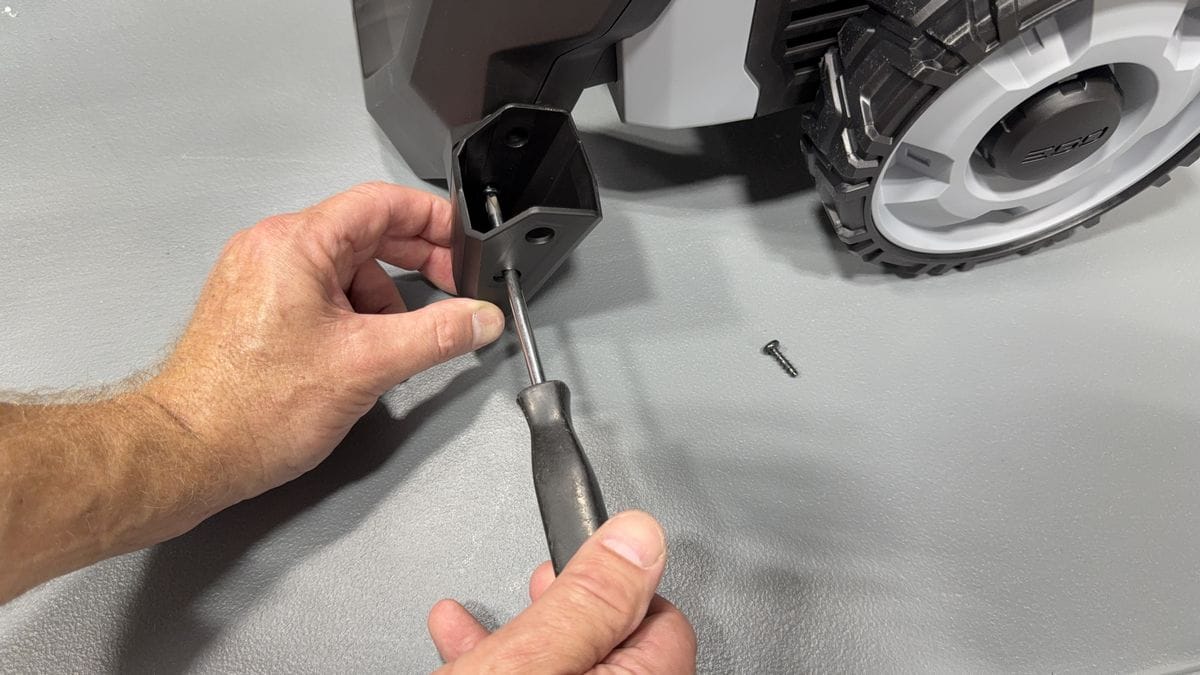
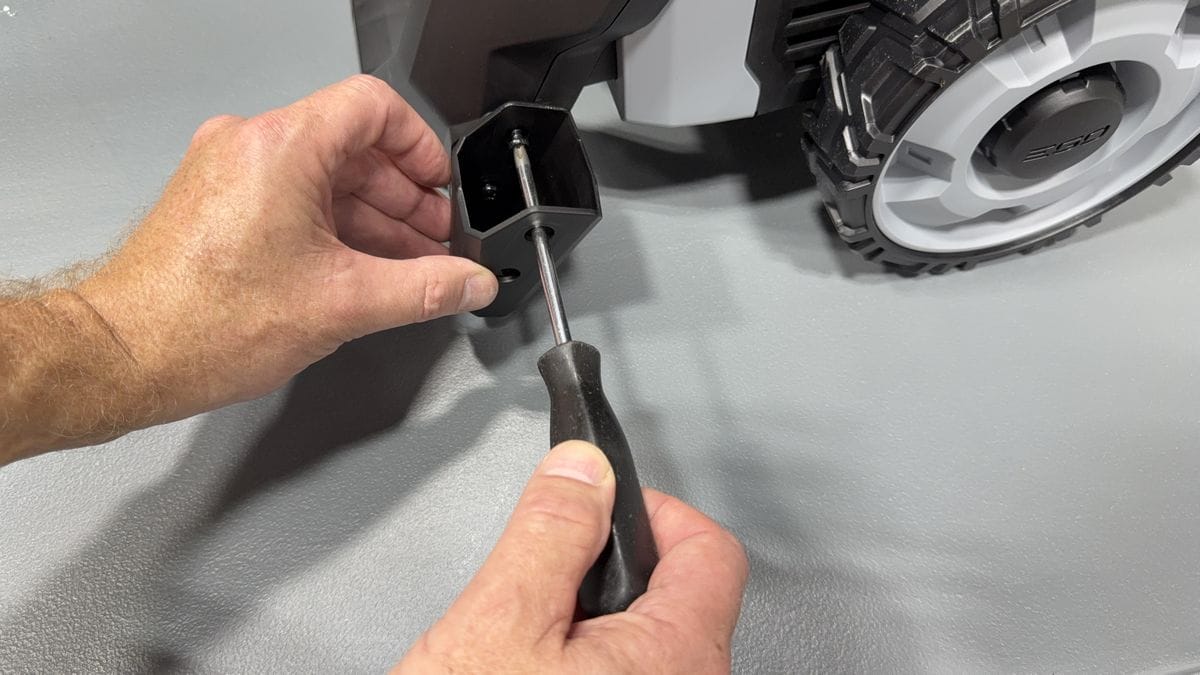
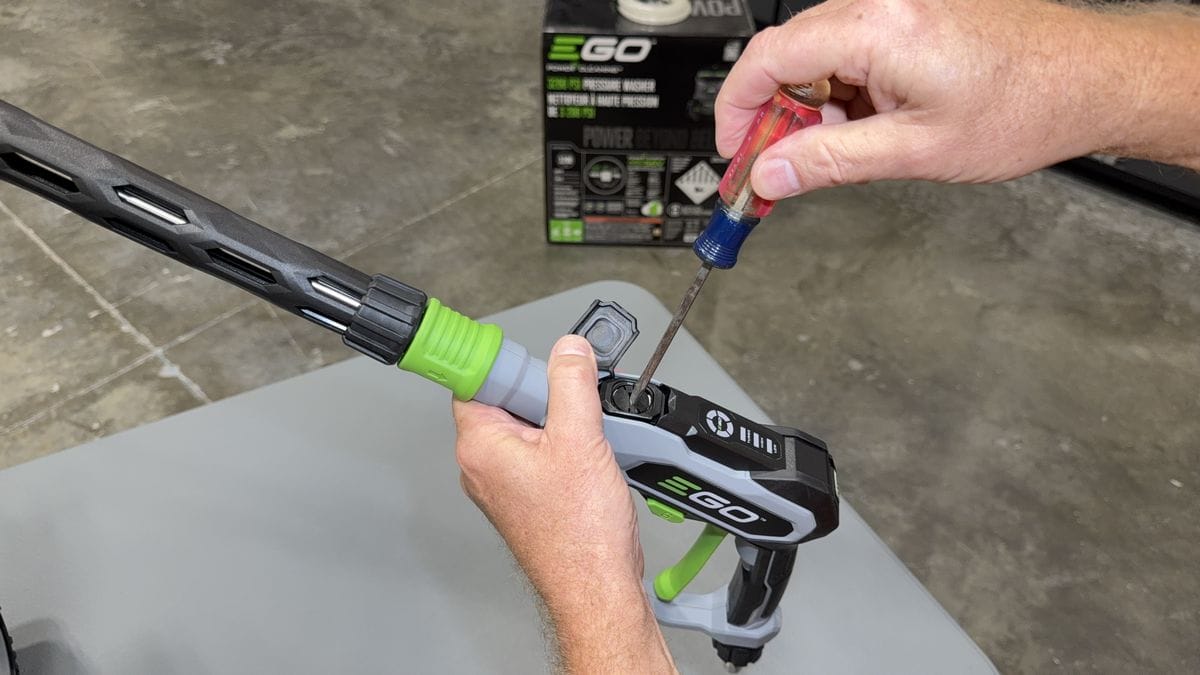
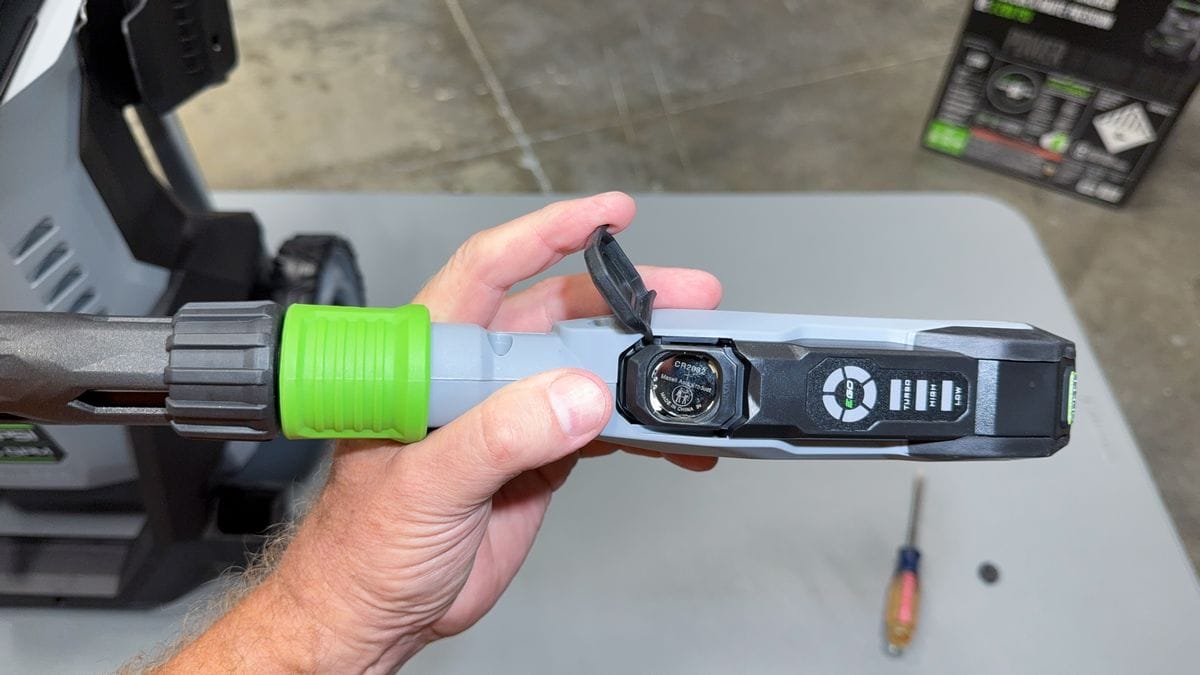
The Spray Gun communicates with the EGO Power+ 3200 PSI Pressure Washer unit via Bluetooth connectivity, which is powered by a watch-style CR2032 battery.
The battery compartment is a rubber cover on top of the Spray Gun. To access the battery, lift the rubber cover and remove the plastic cap underneath with a screwdriver. You can then replace the battery.


How to Connect the Spray Gun to the Pressure Washer Unit via Bluetooth
The Spray Gun needs to pair with the EGO Power+ 3200 PSI Pressure Washer before it can be used to control the water flow.
To pair the gun with the pressure washer unit, turn the pressure washer on. Once the pressure washer is turned on, next do a LONG PRESS on the SPEED button until you see all three green light bars flashing in unison.
Holding the Spray Gun near the pressure washer unit, press and hold the speed button on the Spray Gun until you see all three light bars on the gun flashing in unison. Once you see this the Spray Gun is paired and connected with the pressure washer unit.
NOTE: You will need to re-pair the Spray Gun whenever you replace the onboard Spray Gun battery.
Spray Gun Trigger Lock
To prevent the trigger from activating the pressure washer, locking it in place, press the trigger lock button on the side of the Spray Gun as shown below.

To release the trigger lock, press the button back to its original position from the other side of the Spray Gun.
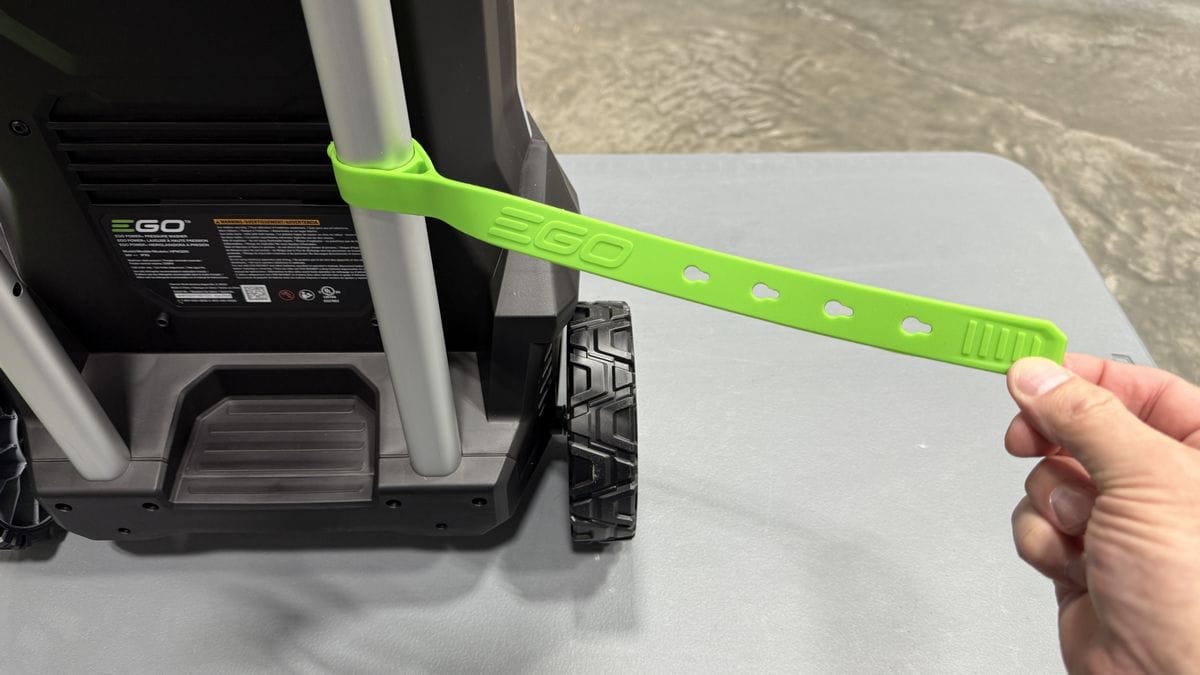
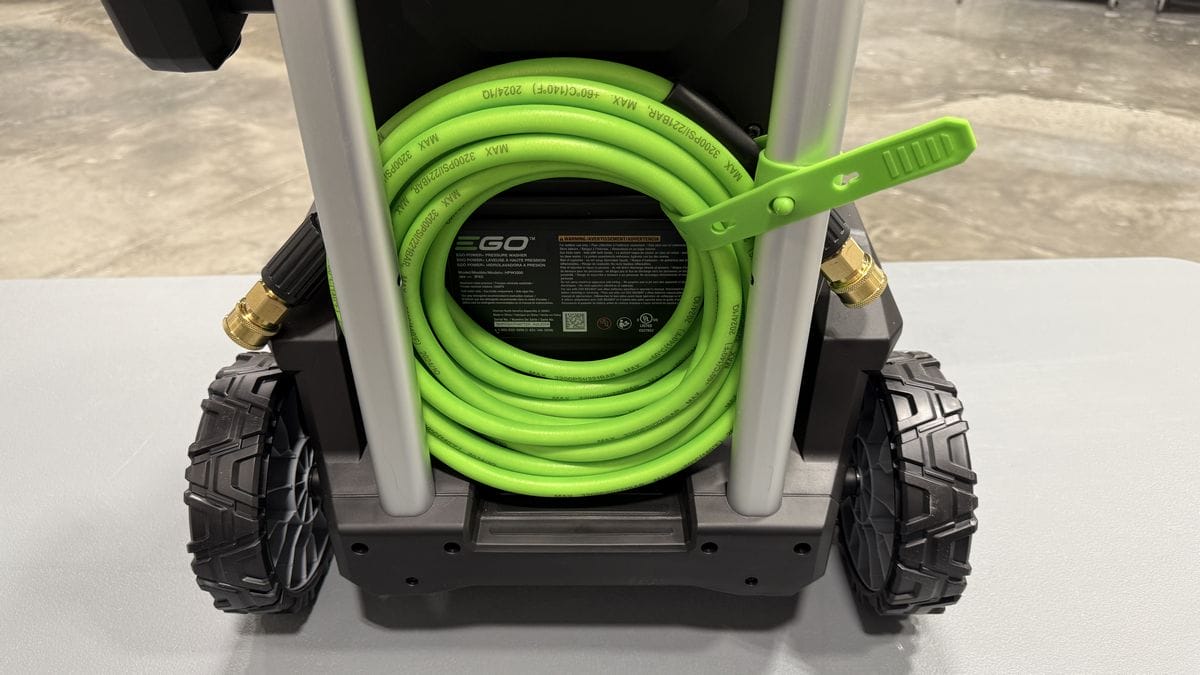
Onboard High Pressure Hose Storage
On the back of the pressure washer you’ll find a green rubber strap. Use this strap to secure the high pressure hose on the back of the pressure washer while not in use, as seen in the photos below.
Large, Sturdy Wheels
The EGO Power+ 3200 PSI Pressure Washer is equipped with two large plastic wheels that make rolling the pressure washer over rough terrain much easier.
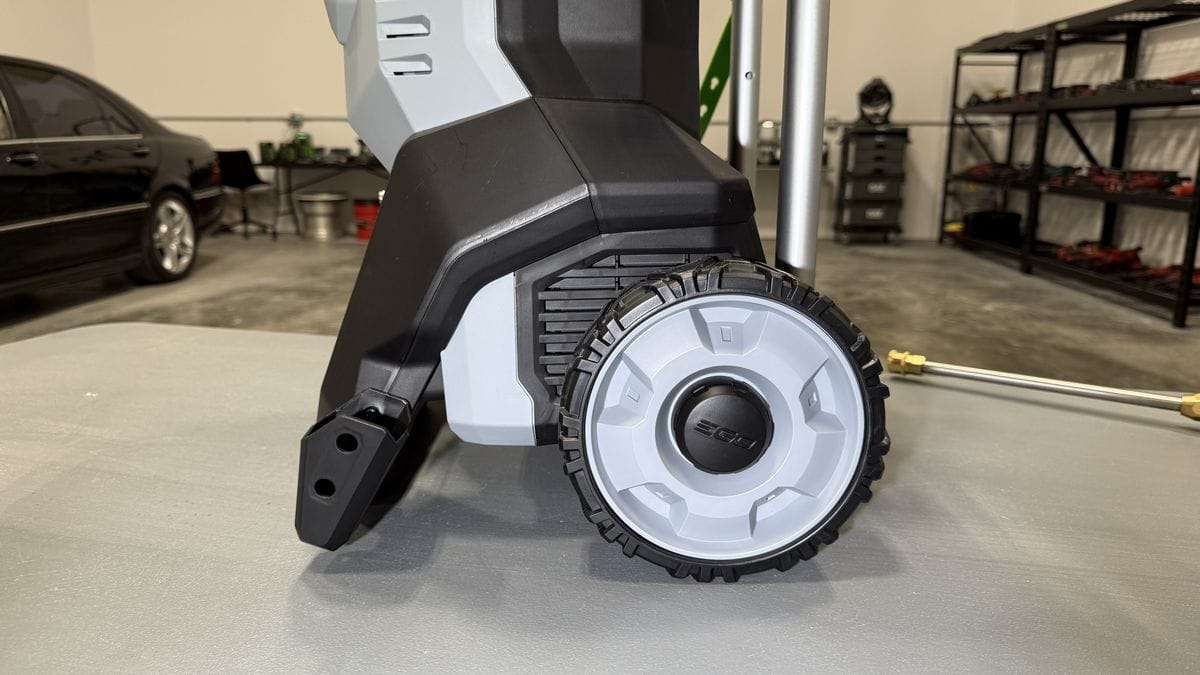
Recessed Step
On the back of the uni there’s a conveniently located recessed step that enables you to tilt and push the pressure washer with your foot in case the wheels are blocked by an obstructing object on the ground.

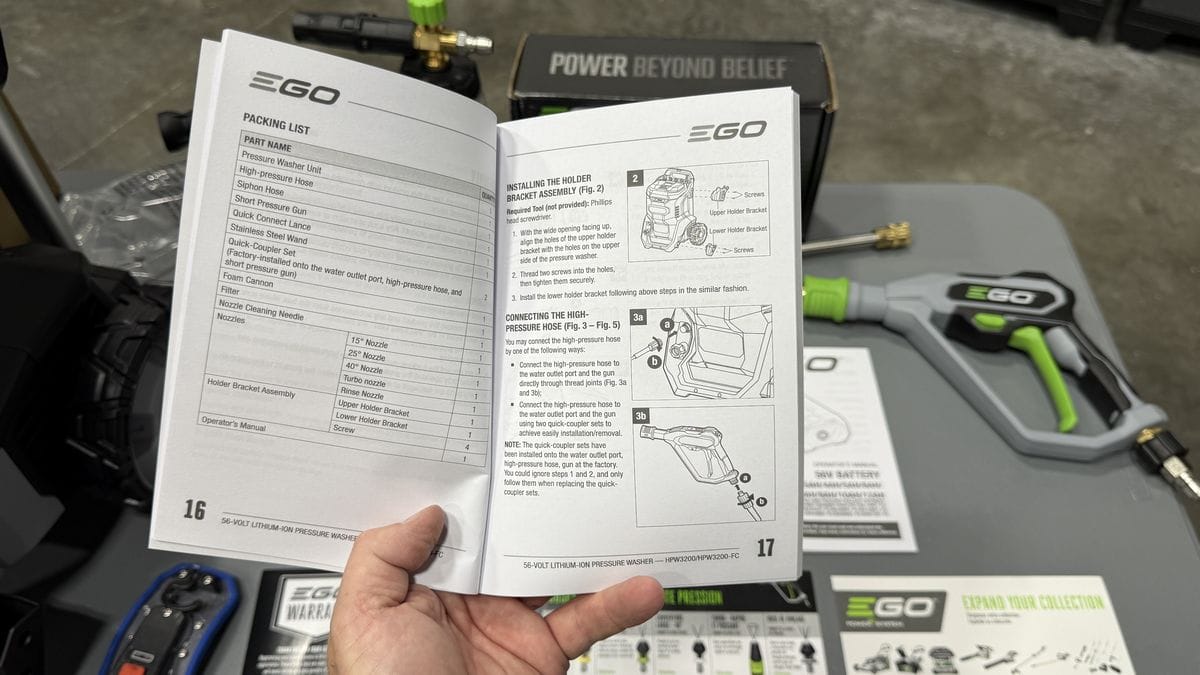
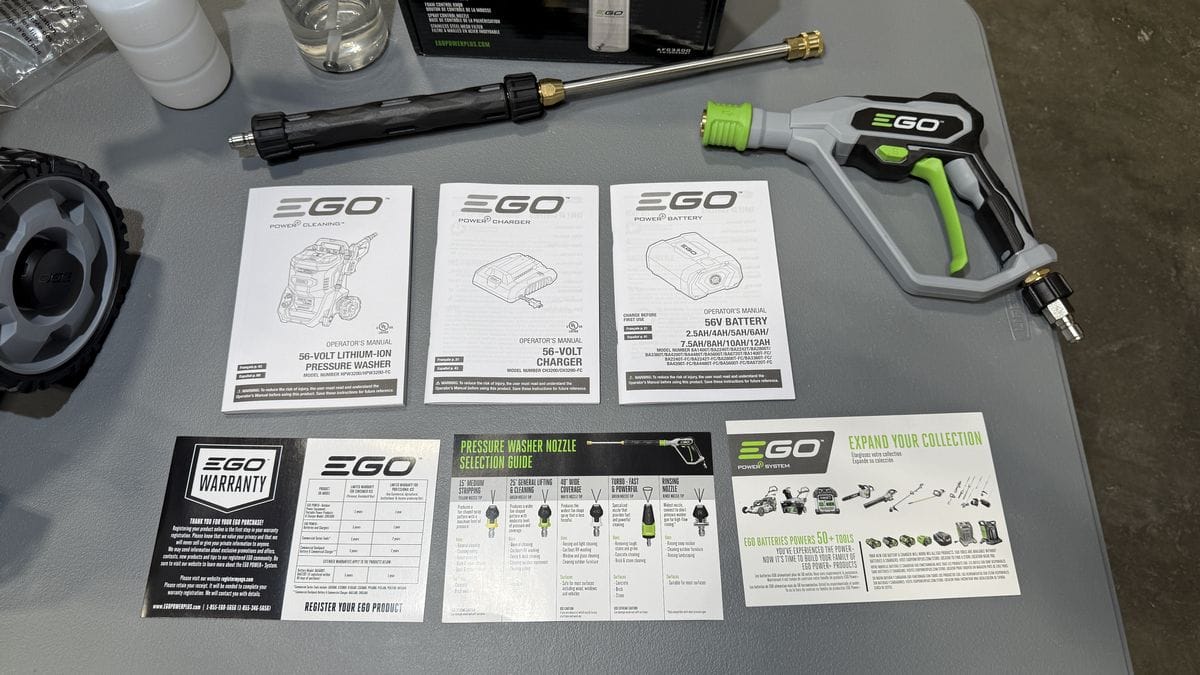
Owner’s Manual
The included owner’s manual is very well-written and shares a lot of the same information in this article. That being said, EGO’s manual doesn’t have all the big full-color pictures I’ve included to walk you through the process of assembling and using the EGO Power+ 3200 PSI Pressure Washer!
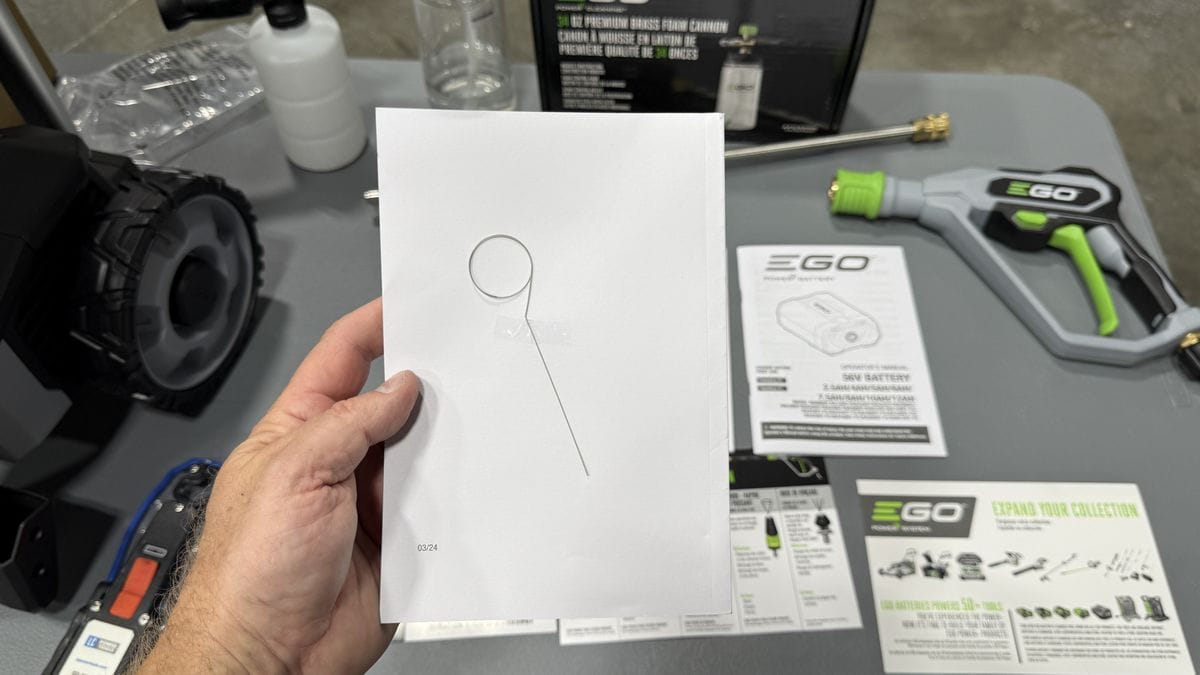
On the back of the owner’s manual you’ll find a nozzle cleaning needle. DO NOT LOSE THIS! I’ll show you how to use it later when I cover how to clean the unit.
Beyond the owner’s manual, there are also manuals for the batteries and battery charger as well as a warranty card, guide to similar EGO products and a pressure washer nozzle guide for your convenience.
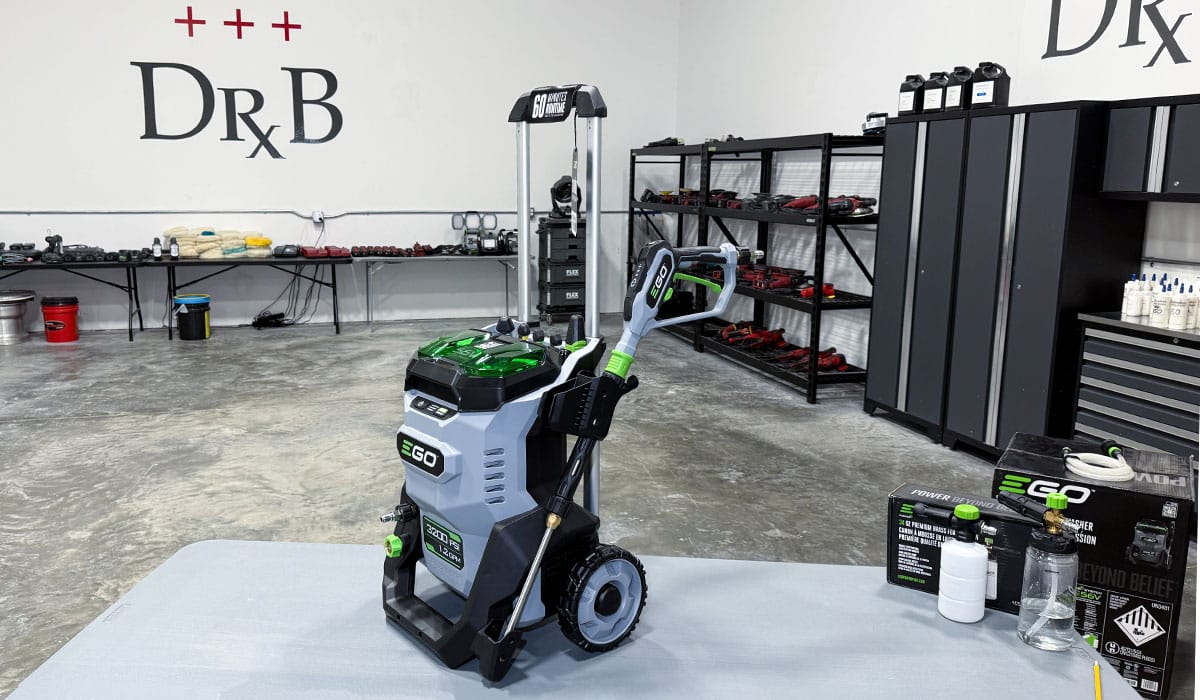
And there you have it: your EGO Power+ 3200 PSI Pressure Washer is ready to go!
How to Use the EGO Power+ 3200 PSI Pressure Washer
I recently covered how to use the EGO POWER+ 3200 PSI Pressure Washer with a foam cannon for my article “How to Use a Foam Cannon” which you read here.
How to Clean & Maintain the EGO Power+ 3200 PSI Pressure Washer
After washing your car, it’s a good idea to rinse and flush out both the reservoir and the foam cannon using clean, fresh water so any residue inside won’t solidify and clog the foam cannon.
The easiest way to do this is to empty out any remaining soapy water solution from the reservoir.
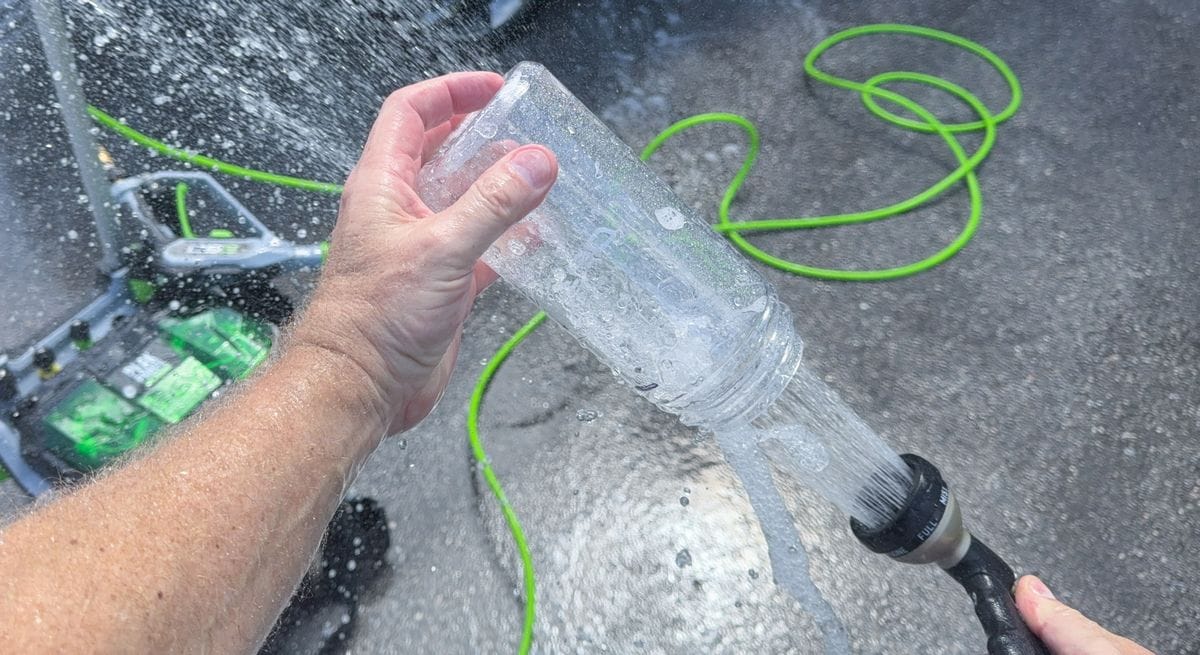
Next, fill the reservoir with clean, fresh water and then spray the water through the foam cannon until the reservoir is empty and free of residue.
It only takes a few extra minutes to clean your foam cannon but you’ll save you hours of frustration removing solidified residue next time you use it.
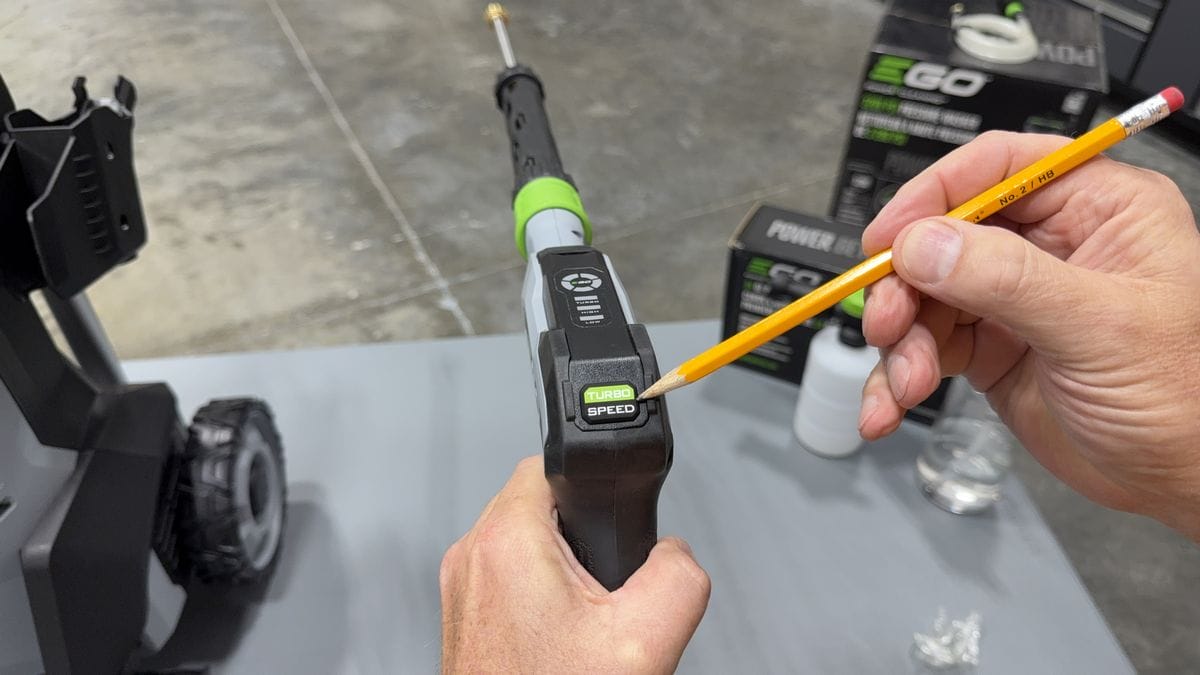
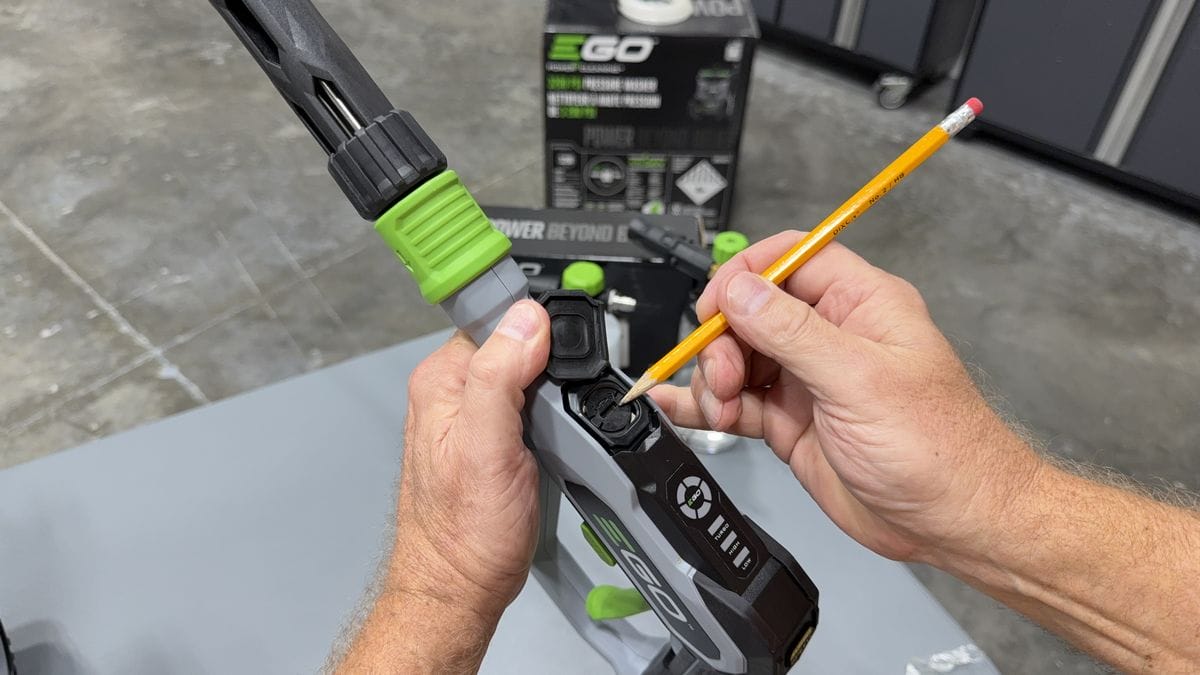
You’ll also want to clean the tip of any nozzle you used while washing. Depending upon the volume of dissolved minerals in your water supply, (Hard Water), from time to time, the nozzle may become plugged or partially plugged. When this happens, foam volume coming out of the nozzle will decrease.
To clean the tip on any of the nozzles, simply insert the Nozzle Cleaning Needle into the opening at the tip of the nozzle. Run the Nozzle Cleaning Needle in and out a few times and in most cases, this will dislodge any accumulated mineral deposits or other gunk.


And of course, it’s always a good idea to rinse and dry your pressure washer to keep it clean for the next job.
REVIEW: EGO Power+ 3200 PSI Pressure Washer
I’ve used multiple types of pressure washers over the years, both electric and gas-powered. For the most part they all pretty much work the same with the primary difference coming down to the source of power: the PSI or Pounds Per Square Inch and the GPM or Gallons Per Minute.
PSI, in simple terms, tells you how much water pressure FORCE is exiting the nozzle.
The GPM, on the other hand, tells you how much water VOLUME is going through the pressure washer.
Generally speaking, high PSI + high GMP results in a POWERFUL pressure washer effective for most cleaning projects.
The EGO Power+ 3200 PSI Pressure Washer is impressive because it offers a sold mid-to-high range of PSI and good GPM, especially when you consider this is a BATTERY-POWERED pressure washer. Battery power combined with the ability to siphon water from any clean water source is unique in the industry and makes this pressure washer stand out in a crowded market.
Advantage: Great Fit & Finish
Besides being a powerful machine, the EGO Power+ 3200 PSI Pressure Washer features a high quality build in all aspects of the unit. Every part of this pressure washer and the accompanying attachments are to the highest level in terms of quality.
Advantage: Generous Warranty
Included with the owner’s manual is a warranty card with a QR code. You scan the QR code to register your EGO pressure washer for a five year warranty if you register within 90 days of purchase. Beyond 90 days you get a three year warranty. Either way, it’s a generous warranty and another reason this tool is so valuable.
Advantage: Long Battery Runtime
The EGO Power+ 3200 PSI Pressure Washer comes with two 56v 6Ah lithium-ion batteries. EGO’s battery technology is recognized as best in the industry, and for good reason. In my experience, I’m able to easily do a very thorough prep wash with just one set of batteries with power to spare when I’m done.
That being said, they don’t last forever. If you’re going to be washing multiple cars or tackling huge projects where you’ll need extended runtime, I recommend purchasing some extra batteries to work without interruption.
Advantage: Battery Powered — No Cords
There are a lot of situations in which a corded or gas-powered pressure washer just isn’t an option. A battery-powered unit will always be more versatile with more freedom as to where you can take it. If that sounds appealing to you, this unit is a great investment.
My Personal Offer to Help
I’ve been answering car detailing questions professionally since 2002 and moving forward, if after reading this article you have any questions about polishing and waxing, or how to use an AIO, my contact information is below, reach out to me, I’m always happy to help.
Would You Like to Learn How to Machine Polish Like a Pro?
- Would you like to take your detailing skills to a higher level?
- Do you find you learn better by doing versus sitting in a chair looking at a PowerPoint presentation about car detailing?
Here at Dr. Beasley’s O.R., (Operating Room), in sunny Stuart, Florida, we teach the most hands-on car and boat detailing classes on planet Earth. And we prove it too. You can find write-ups on the Dr. Beasley’s Blog that photo-documents just how hands-on our classes are plus you’ll see the kinds of cars and boats you’ll be training on.
Click the link below to find the dates, locations, topics, and prices for all upcoming detailing classes.
Upcoming Detailing Classes – Prices – Info – Topics – Locations
And if you ever have any questions, always feel free to reach out to me personally via text, phone call or email.
I hope to see you in a future detailing class!
Sincerely,
Mike Phillips
Chief Education Officer for Dr. Beasley’s
760-515-0444
Dr. Beasley’s Contact Information
Questions via Email: [email protected]
Customer Care Hotline: 773-404-1600