


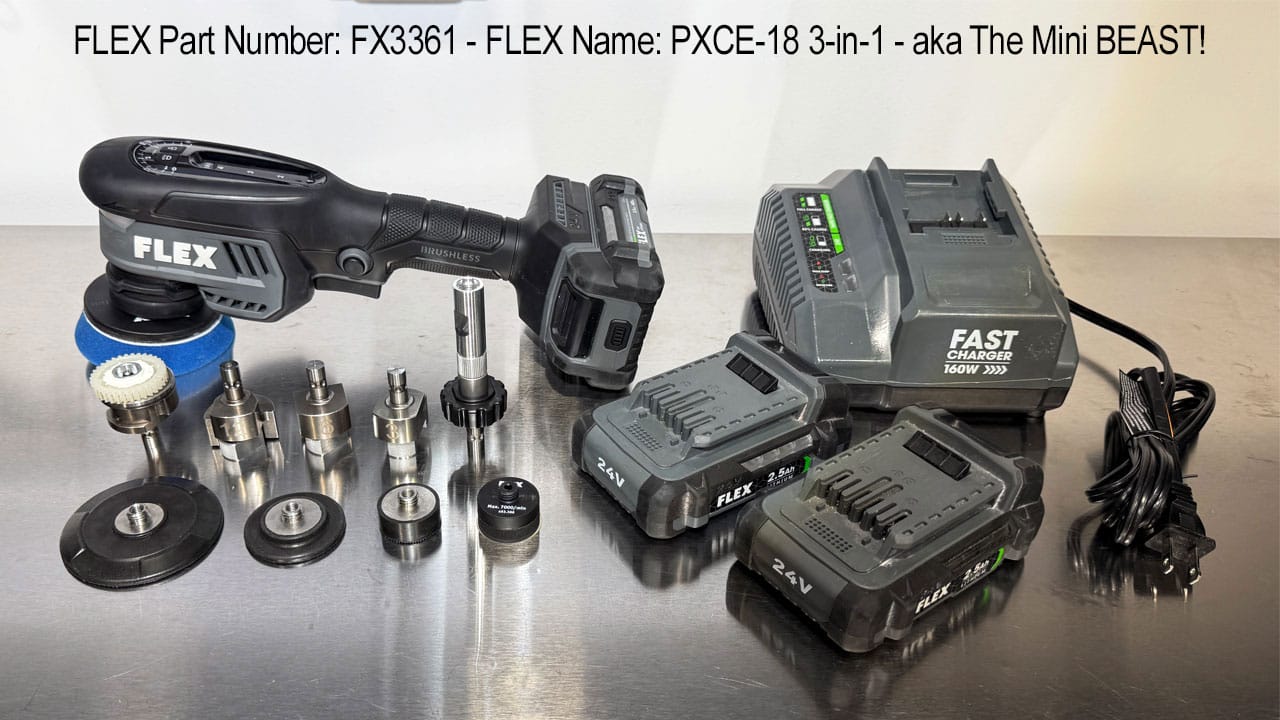
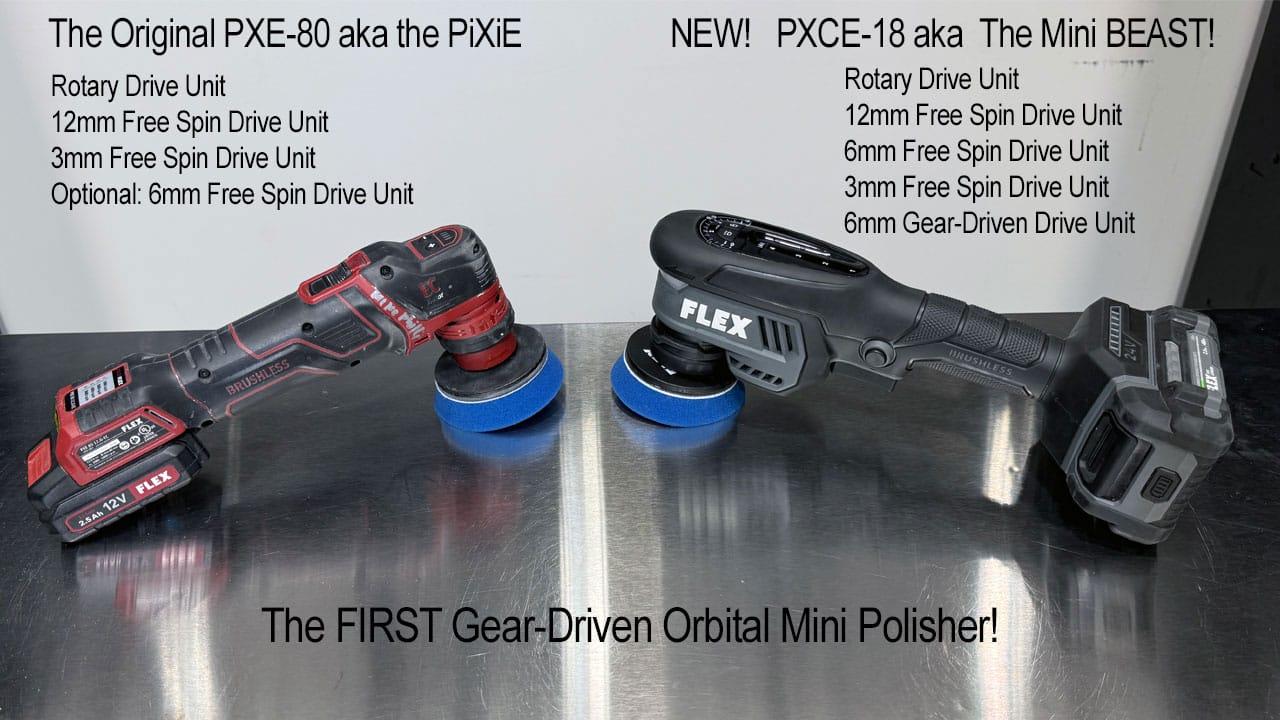
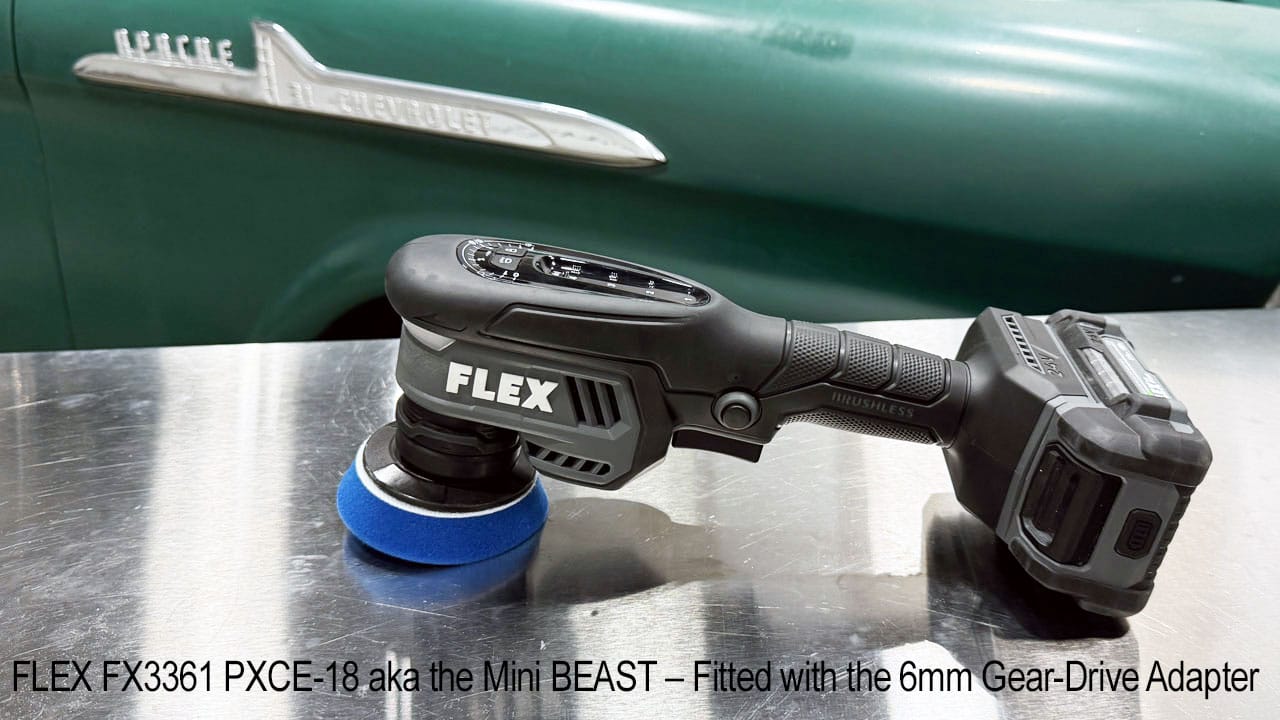
The new FLEX FX3361 Mini BEAST is a cordless mini polisher with interchangeable adapters for rotary, free-spinning random orbital, and gear-driven orbital polishing. Its 6mm gear-driven adapter provides positive pad rotation for correcting tight, intricate areas where a free-spinning pad can stall.
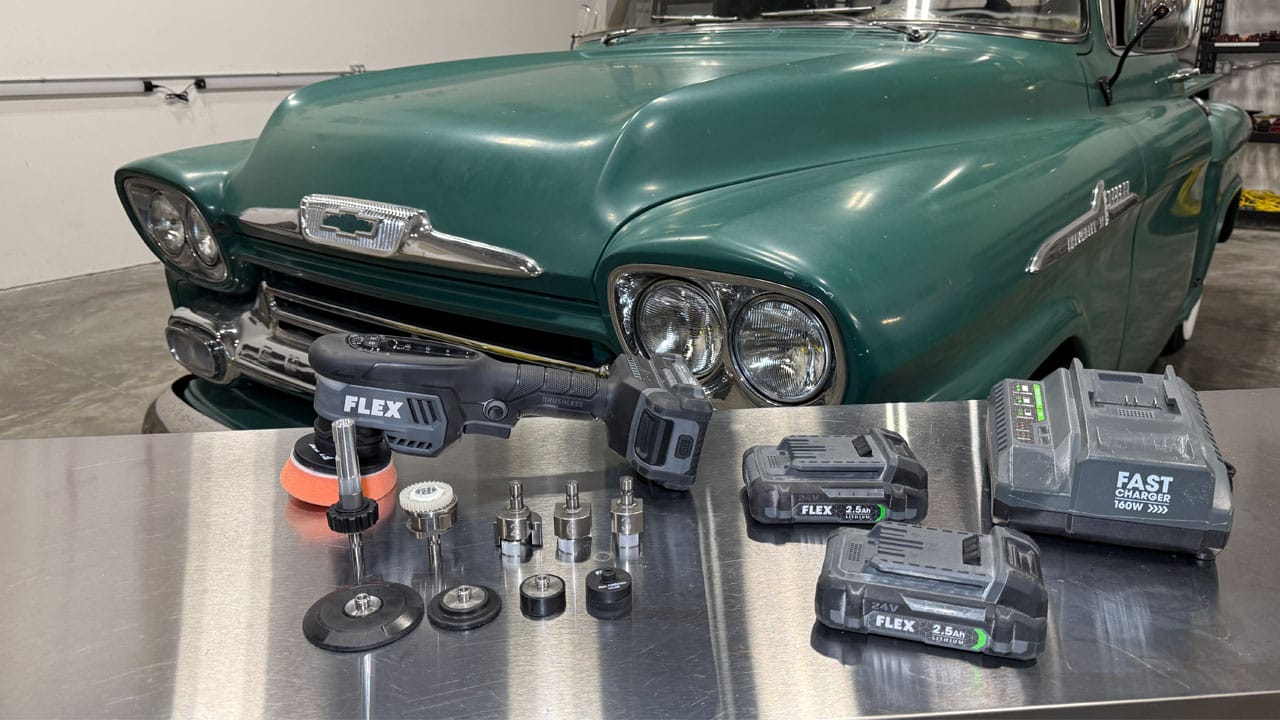
For this hands-on review, I tested the Mini BEAST on a heavily oxidized 1958 Chevy Apache pickup truck. Below, I share my findings, explain the controls, adapters, and backing plates, and show how the tool performed during the paint restoration.

Watch Mike’s review on YouTube
My FLEX FX3361 Mini BEAST review after prototype testing
Detailers have been asking for a smaller version of the original FLEX BEAST for years. With the new FLEX FX3361 Mini Polisher, that request has finally become a reality.
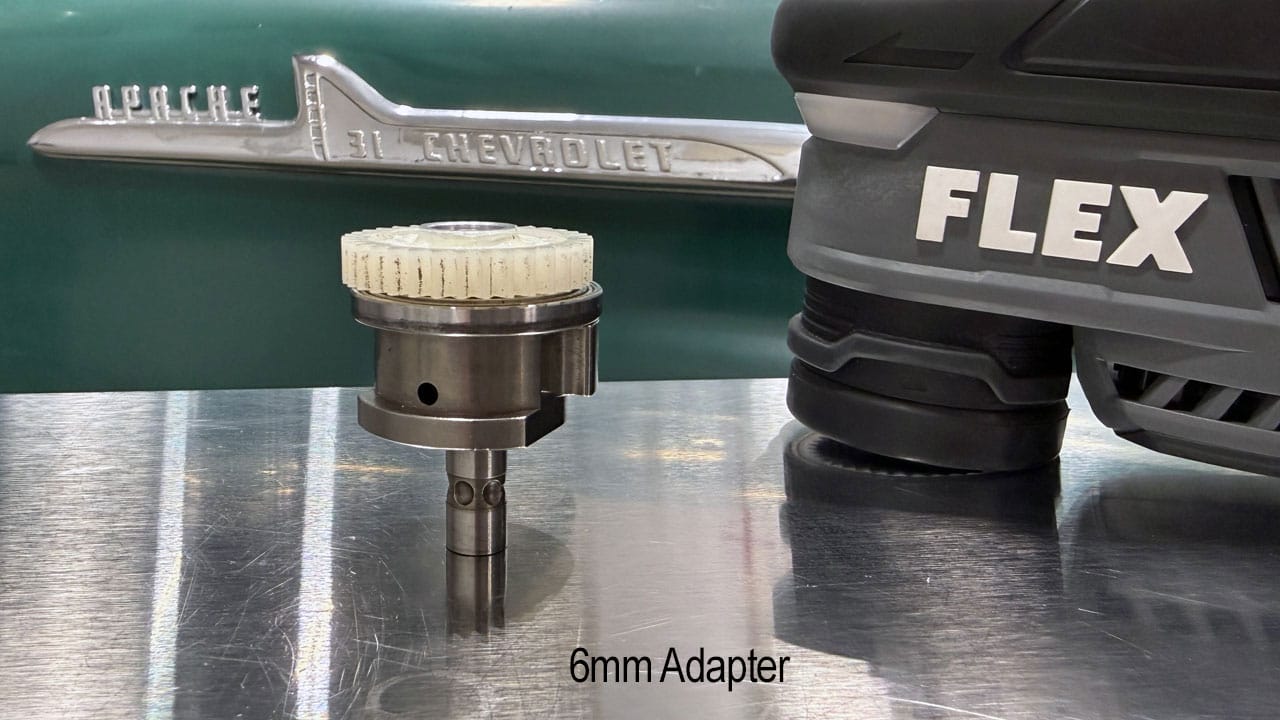
I call it the Mini BEAST, and the feature that earns it that name is the 6mm gear-driven adapter. It delivers forced pad rotation and orbital oscillation with ZERO PAD STALLING!
The Mini BEAST also offers rotary and free-spinning random orbital operation. You can switch between these movements using interchangeable adapters, making this one compact tool useful for paint correction, polishing, finishing, and machine sanding.
I’ve been testing a prototype since the summer of 2024. Here’s what stands out after putting it to work.
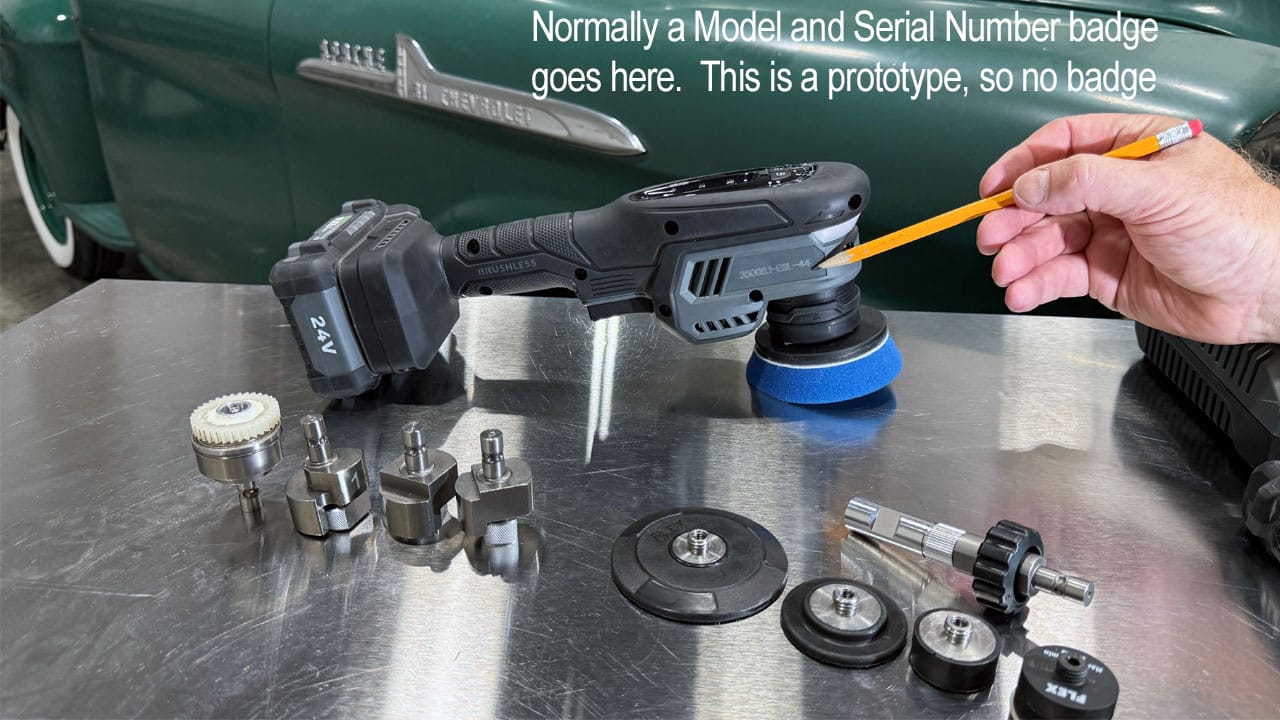
FLEX made it clear that the tool I received was a prototype—an experimental polisher intended to prove the design before production.
Knowing that, I put it to work on real detailing projects.
Throughout my testing, the prototype has never failed me, regardless of which adapter I was using or what I was polishing.
That’s my experience with this particular prototype, and it has given me confidence in the design.
Although the Mini BEAST offers several movement options, these are the three adapters I reach for most often:
- The rotary adapter for precision polishing.
- The 6mm gear-driven adapter for paint correction.
- The 6mm free-spinning random orbital adapter for machine sanding.
I occasionally use the 12mm free-spinning adapter when the job calls for it. For most of my work, however, the rotary and gear-driven adapters handle the polishing, while the 6mm free-spinning adapter handles the sanding.
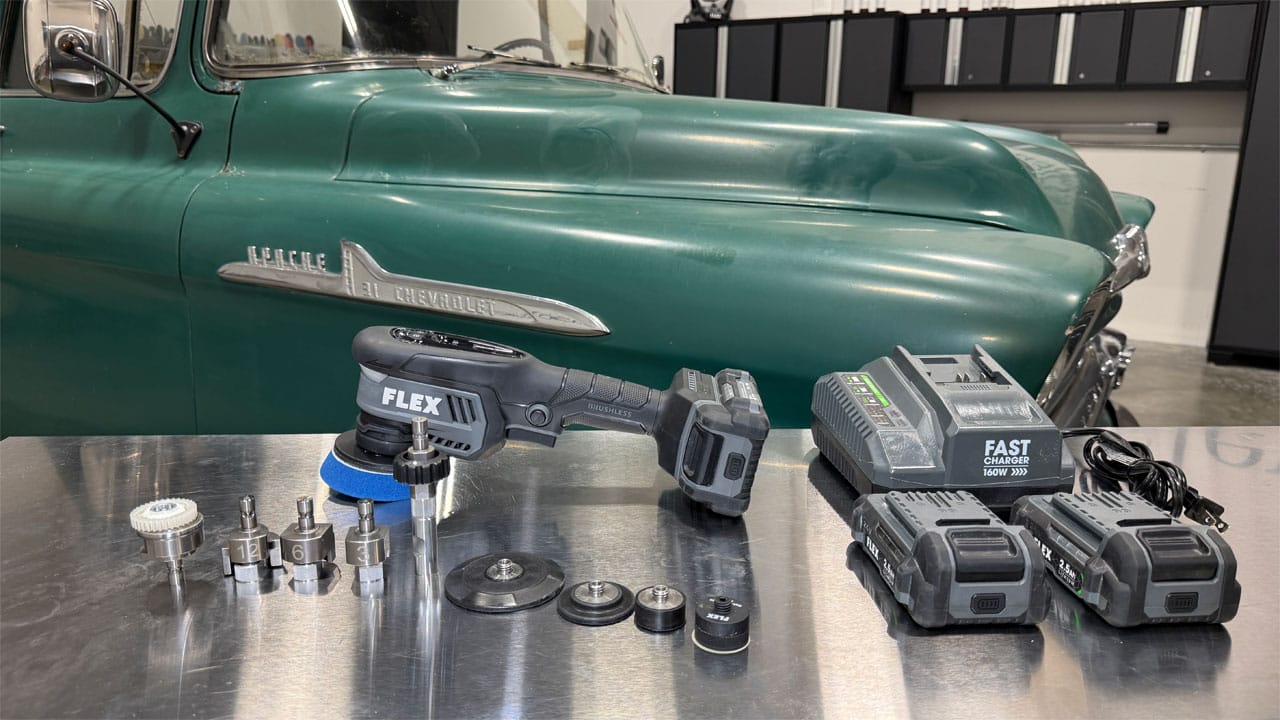
What’s included with the FLEX FX3361 Mini BEAST?
| Component | Included |
|---|---|
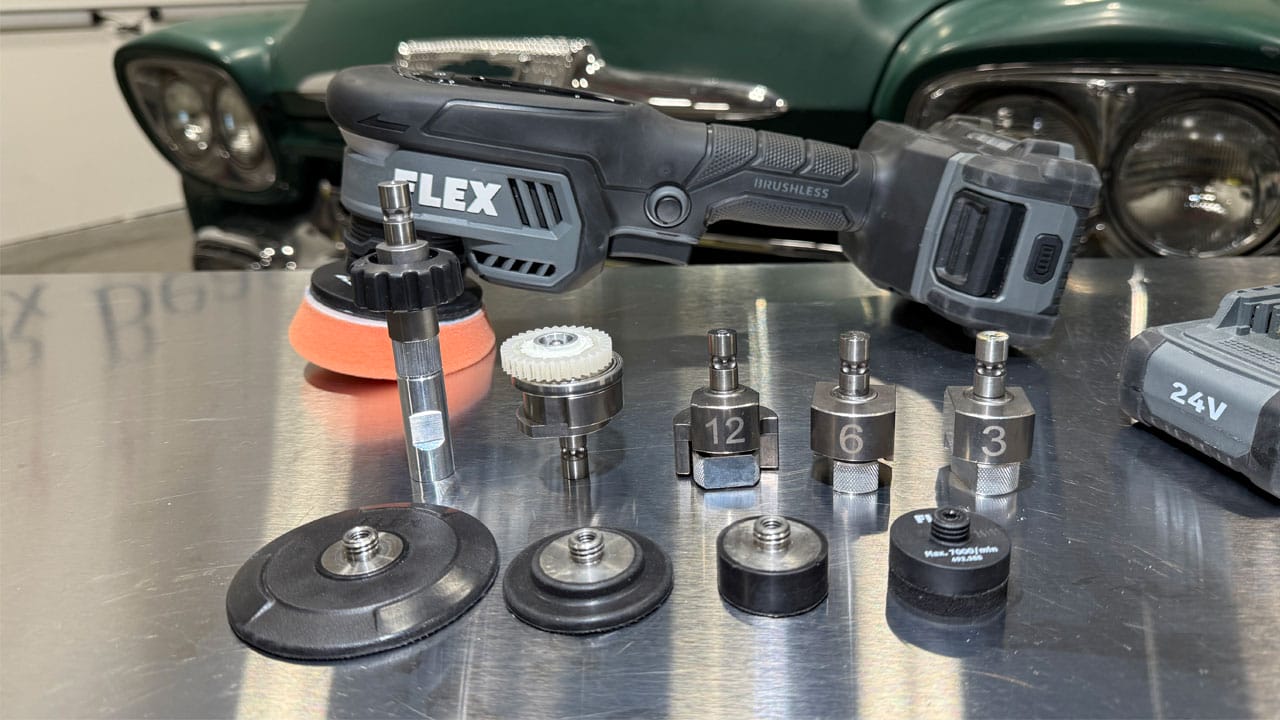
| Polisher and adapters | Mini BEAST polisher; rotary; 6mm gear-driven orbital; 3mm, 6mm, and 12mm free-spinning random orbital adapters |
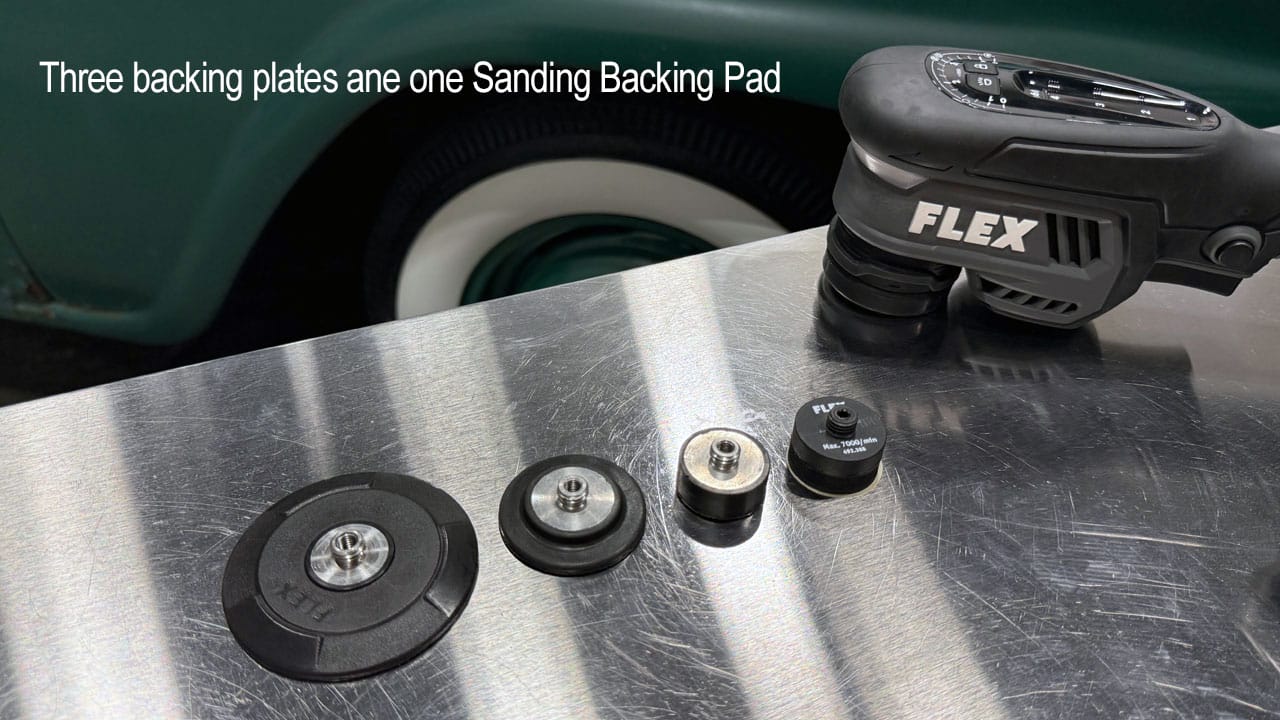
| Backing plates and sanding pad | 1-inch, 2-inch, and 3-inch backing plates; 1-inch adhesive sanding backing pad |
| Battery system | Two 24-volt, 2.5-Ah batteries and one 160-watt Fast Charger |
More kit and adapter overview photos (3 photos)
Adapters and backing plates: what I use and why
Adapter quick reference
| Adapter | How I use it | What to know |
|---|---|---|
| 6mm gear-driven orbital | Paint correction over curves, narrow sections, and intricate shapes | Mechanically driven pad rotation and orbital oscillation prevent the pad-stalling problem I encounter with free-spinning tools. |
| Rotary | Precision polishing and heavy compounding | An optional 2-inch extension adds reach and clearance. In my testing, the tool has plenty of power for 3-inch buffing pads. |
| 6mm free-spinning random orbital | Machine sanding | My preferred sanding stroke; included with this kit. |
| 12mm free-spinning random orbital | Occasional jobs that call for a larger stroke | The larger sanding orbit needs extra care near edges and raised body lines. |
| 3mm free-spinning random orbital | An additional short-stroke option | For my sanding work, its stroke felt smaller than I wanted. |
The 6mm gear-driven adapter: ZERO PAD STALLING!
A free-spinning random orbital polisher produces two movements: orbital oscillation and pad rotation.
The motor drives the orbital movement, but the backing plate rotates freely on a bearing-supported spindle. That free rotation can slow down or stop under certain working conditions, even while the driven orbital motion continues.
Tilting the pad, applying excessive pressure, working over curves, or using a pad saturated with product can make it harder to maintain rotation.
When this happens, you spend time adjusting your technique, repositioning the tool, or changing pads to get the rotation back.
That’s the pad-stalling problem.
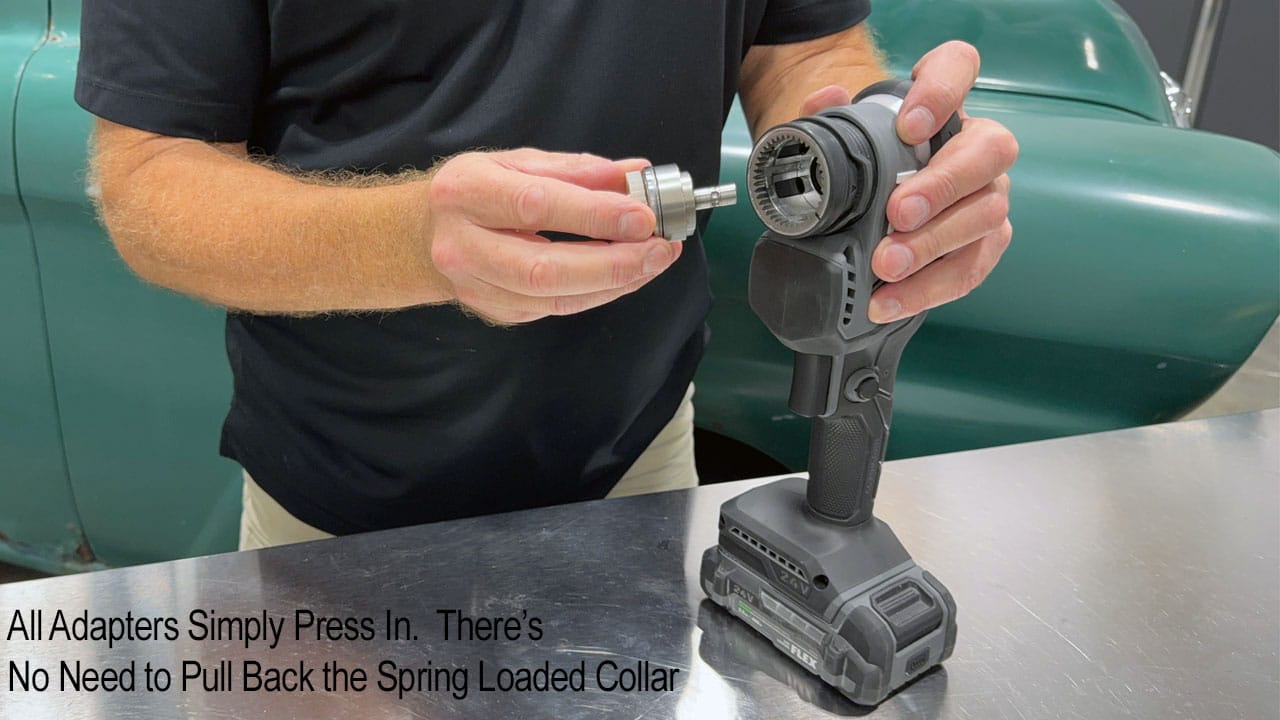
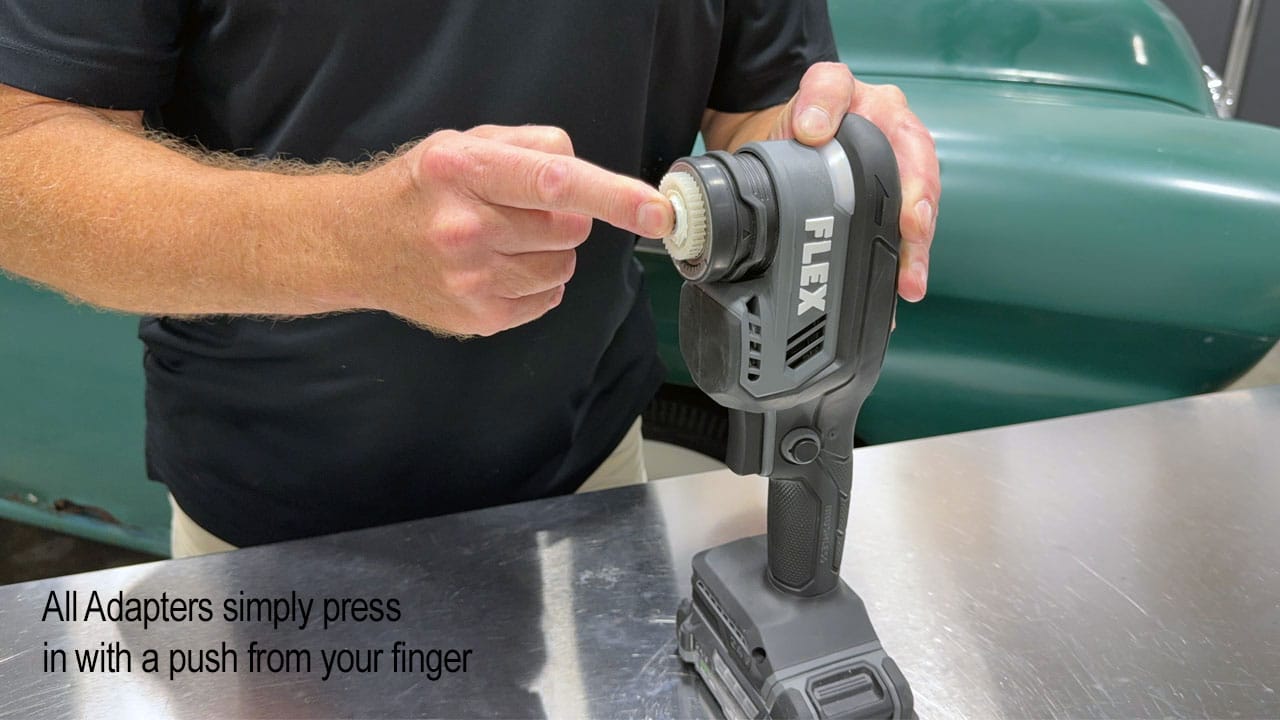
Attach the 6mm gear-driven adapter, and both pad rotation and orbital oscillation are mechanically driven.
You no longer have to constantly adjust the tool just to keep the pad rotating as you work over curves and contours.
In my testing, this is the feature that makes the Mini BEAST stand out. I can concentrate on guiding the pad and correcting the paint instead of watching for stalled rotation.
Forced pad rotation. Orbital oscillation. ZERO PAD STALLING!
For me, this is the coolest feature of the tool.
See the remaining gear-driven adapter views (5 photos)
From the PXE-80 to the Mini BEAST: why I wanted a smaller BEAST
The original FLEX PXE-80 impressed me with its versatility, compact size, and light weight. Introduced in 2019, it combined rotary and free-spinning random orbital operation in a cordless mini polisher.
The rotary adapter made it useful for precision polishing in tight and intricate areas. The optional FLEX FS-140 Flexible Shaft Set expanded those capabilities even further, allowing you to reach places a conventional buffing pad simply cannot fit.
The limitation was the free-spinning random orbital movement. As with other free-spinning polishers, maintaining pad rotation could be challenging, especially on curves, in tight areas, or when the pad became saturated with product.
Fast-forward to 2026, and FLEX has added the feature I’ve wanted most: gear-driven orbital movement in a mini polisher.
I’ve been using the FLEX XC 3401 VRG, better known as the BEAST, since 2009. I even wrote a how-to book dedicated to using it.
One of the reasons I like the original BEAST is simple: its gear-driven movement keeps the pad rotating and oscillating as I work.
For years, people have asked for that same capability in a smaller tool. But fitting a gear-driven orbital mechanism into a compact mini polisher presented an engineering challenge.
In the summer of 2024, a FLEX representative brought me a prototype of the new FX3361. He told me FLEX already had approximately one million dollars invested in the prototype.
That gives you an idea of the development involved in bringing this tool to market.
The good news? FLEX did it!
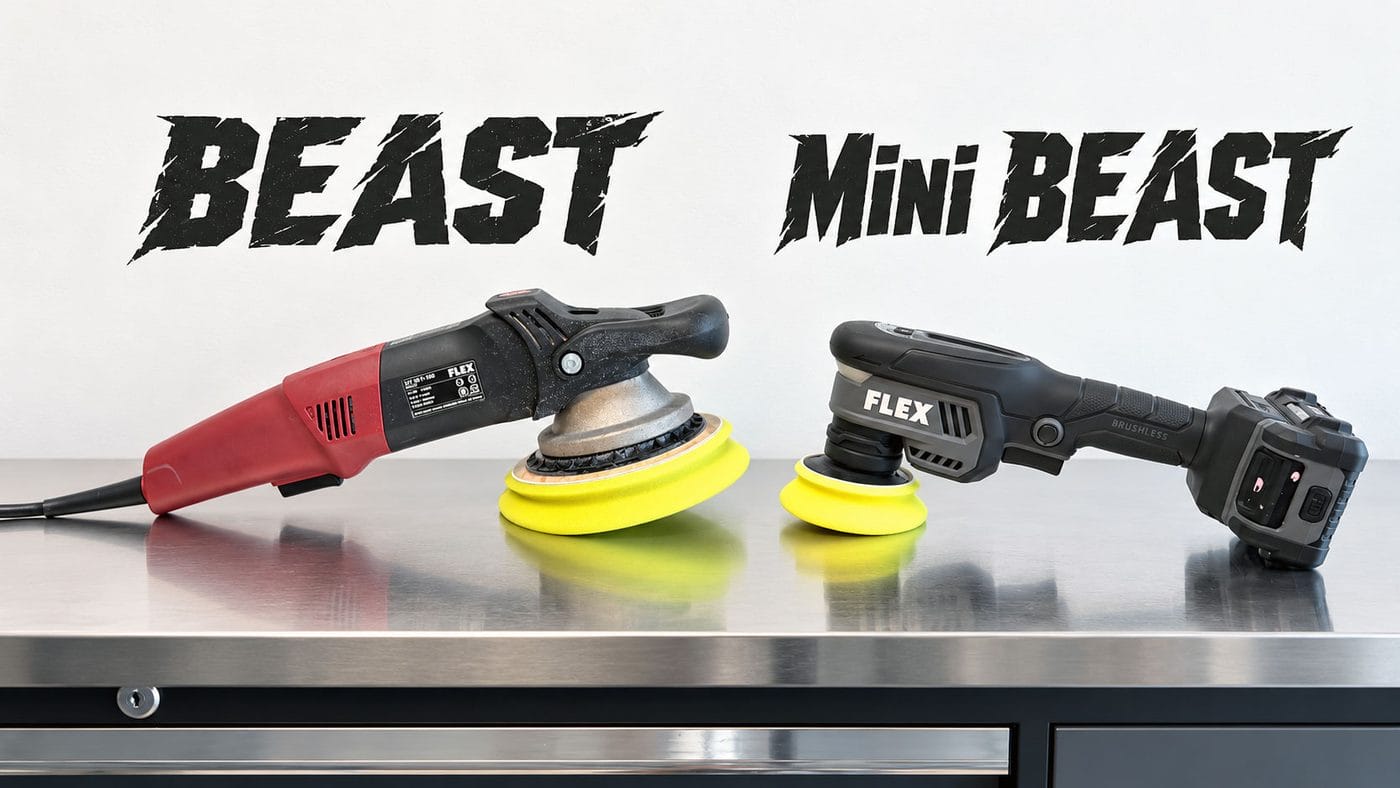
The new tool is identified as the FX3361 in the United States and the PXCE 18-EC in international markets. Throughout this review, I’ll call it the Mini BEAST.
BEAST and Mini BEAST comparison photo (1 photo)
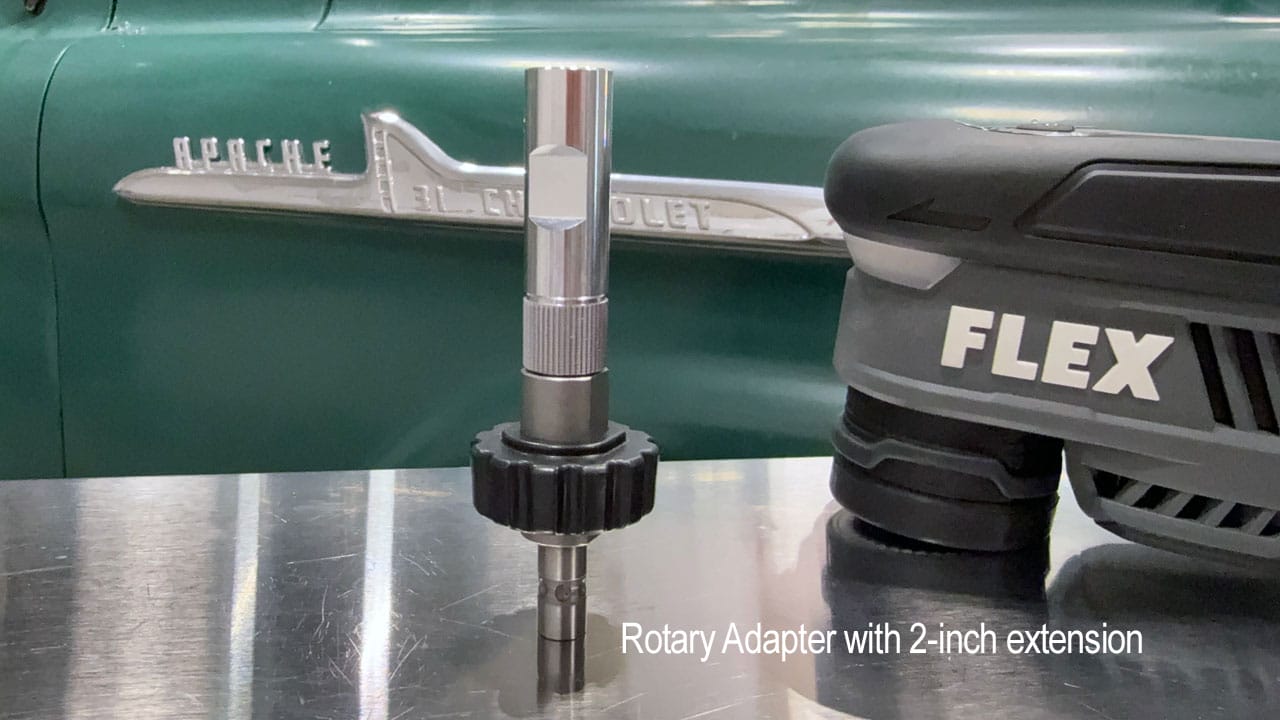
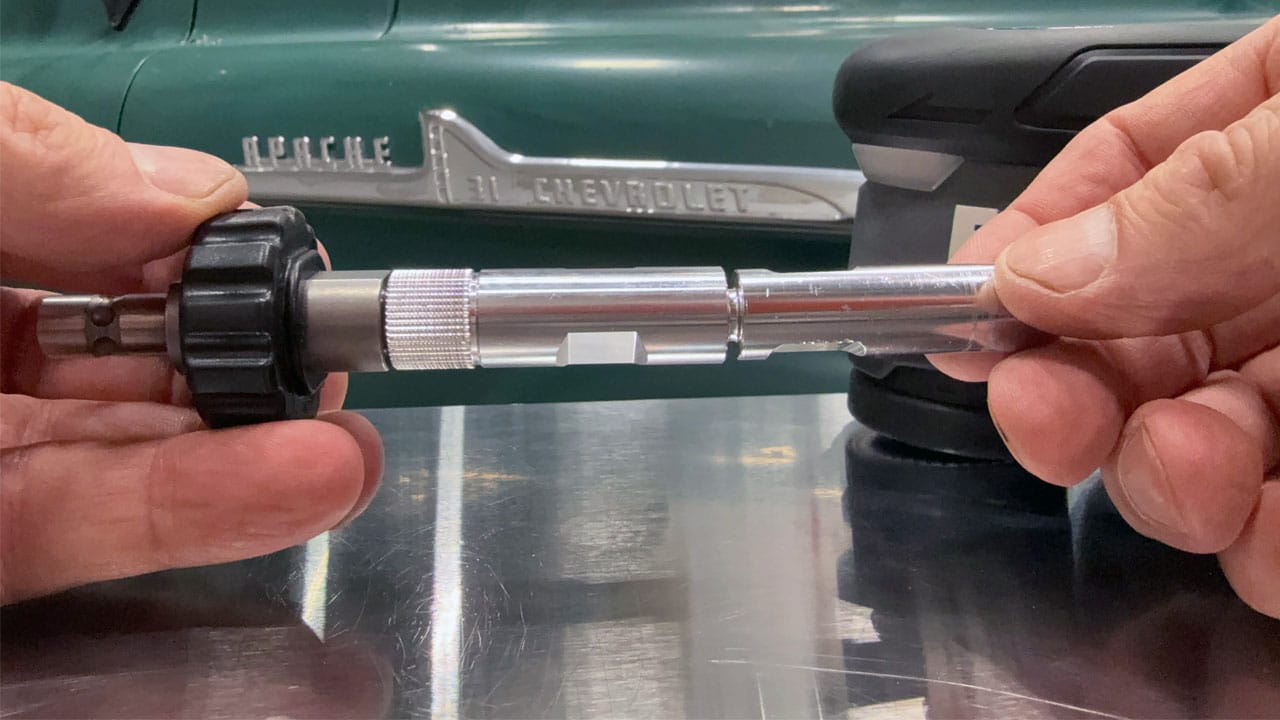
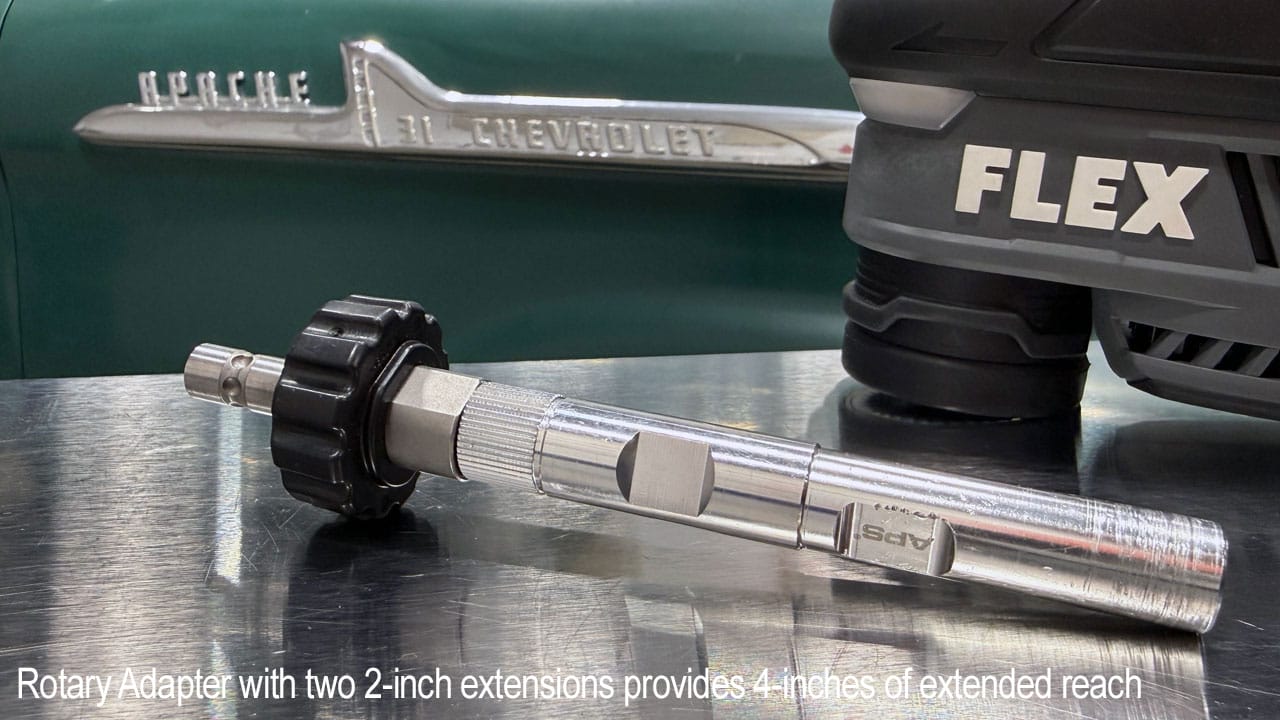
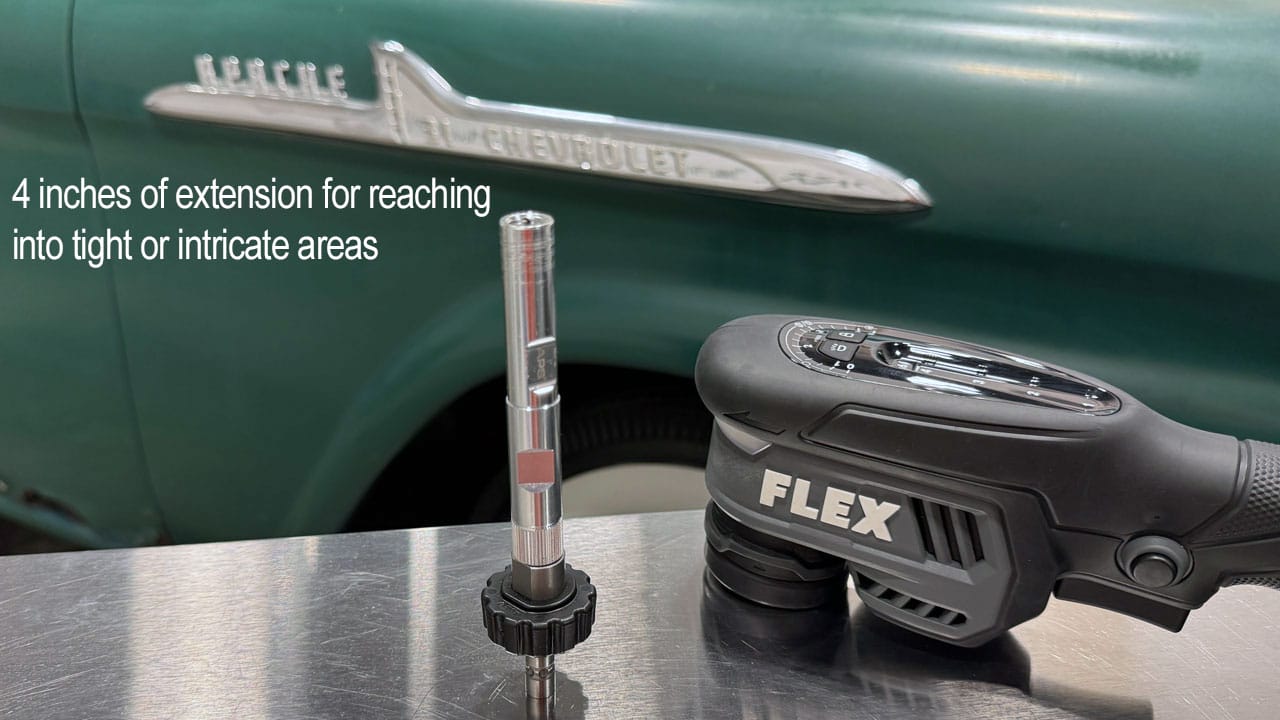
Surgical precision with the rotary adapter
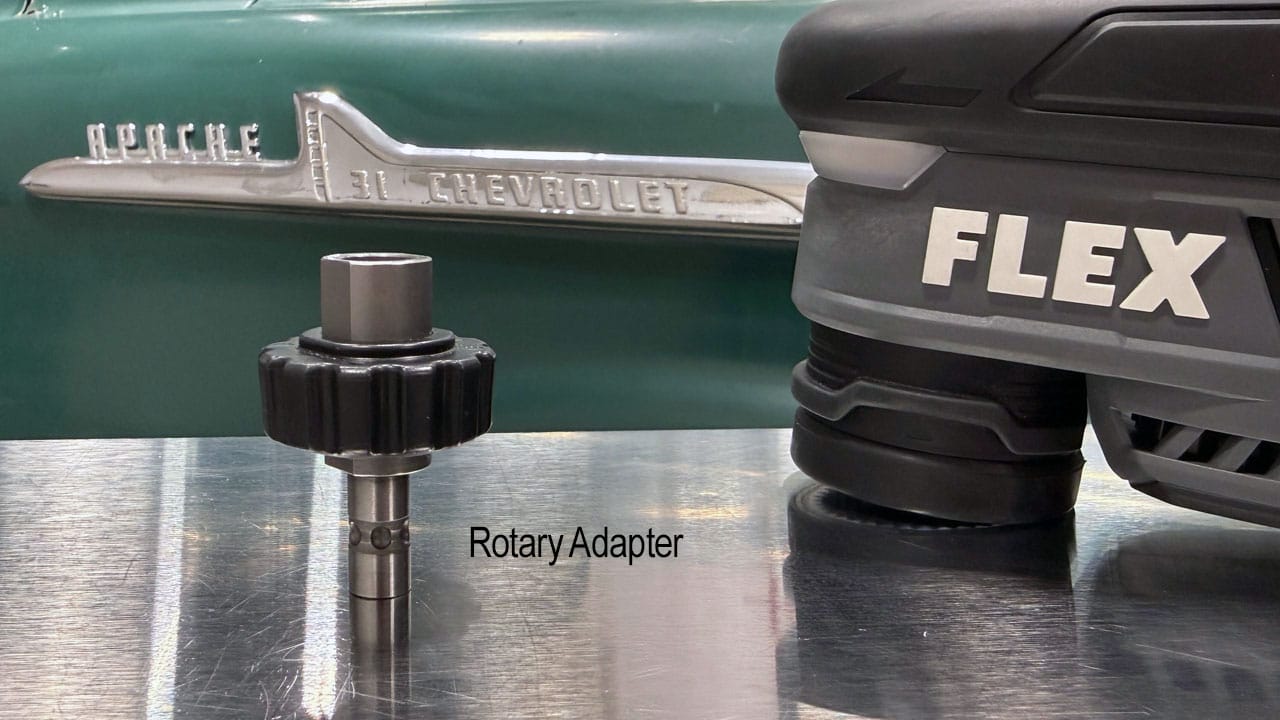
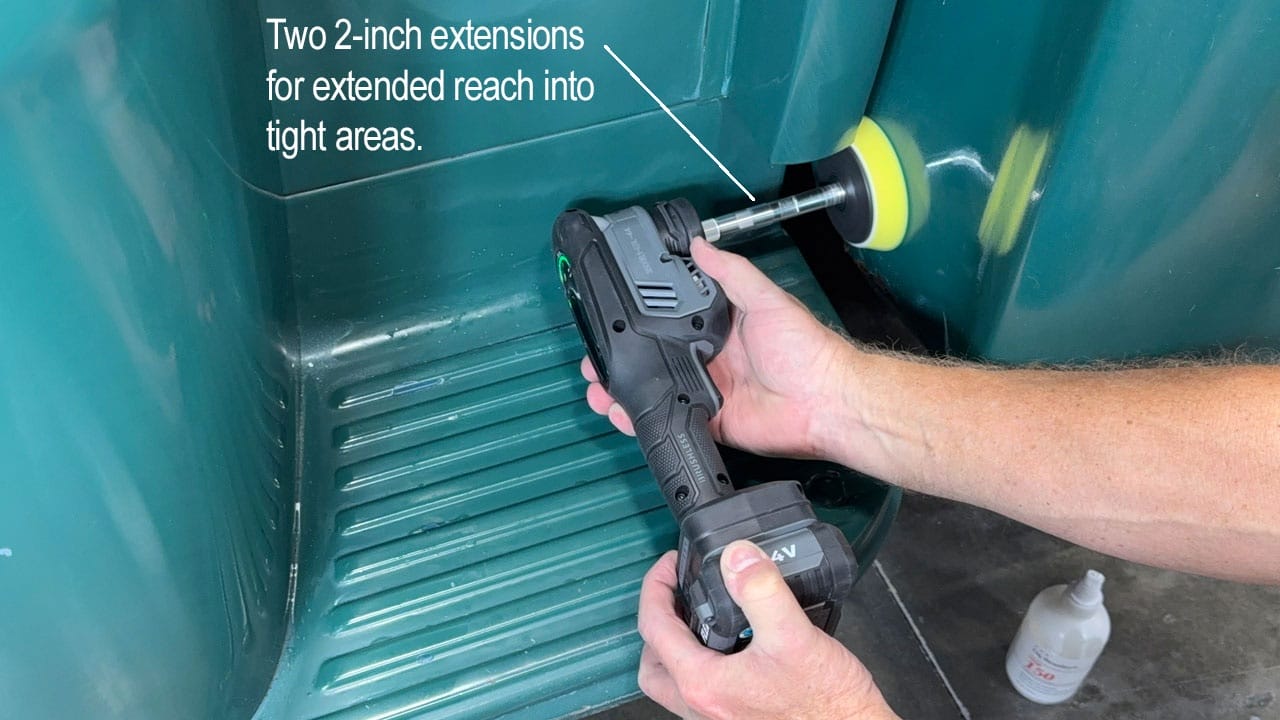
The rotary adapter turns the Mini BEAST into a compact rotary polisher for working around intricate shapes and in tight spaces.
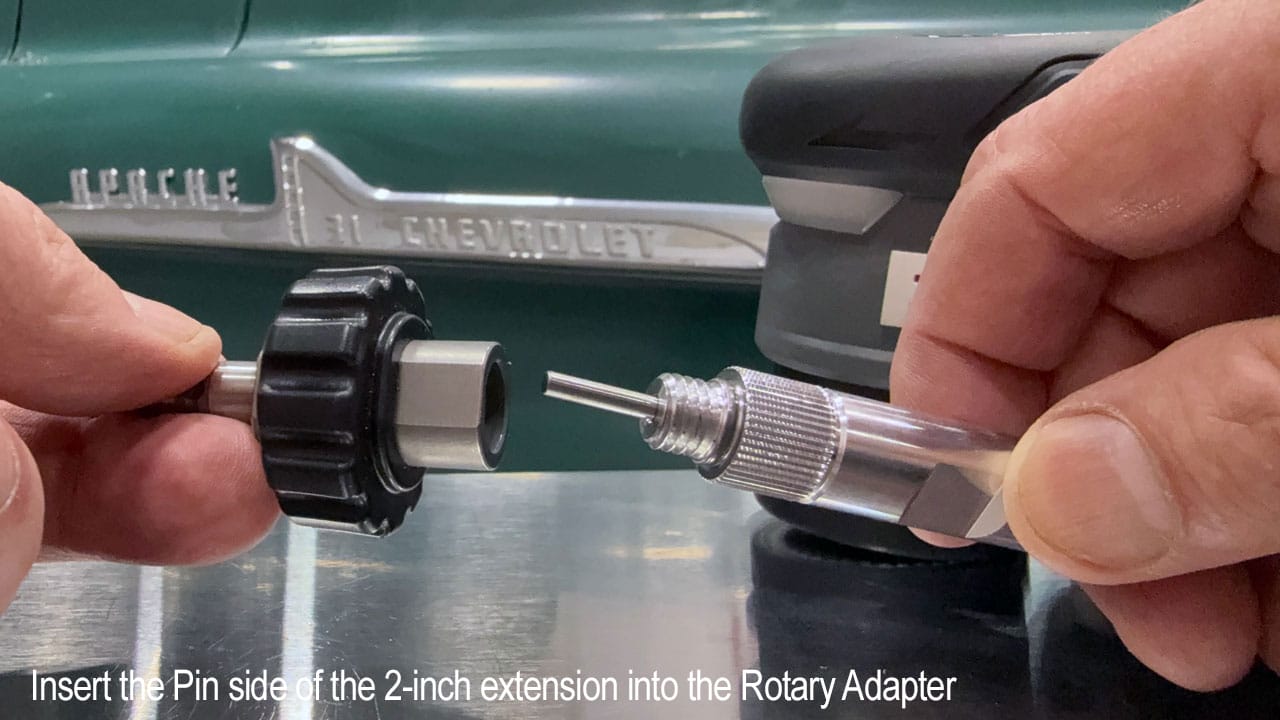
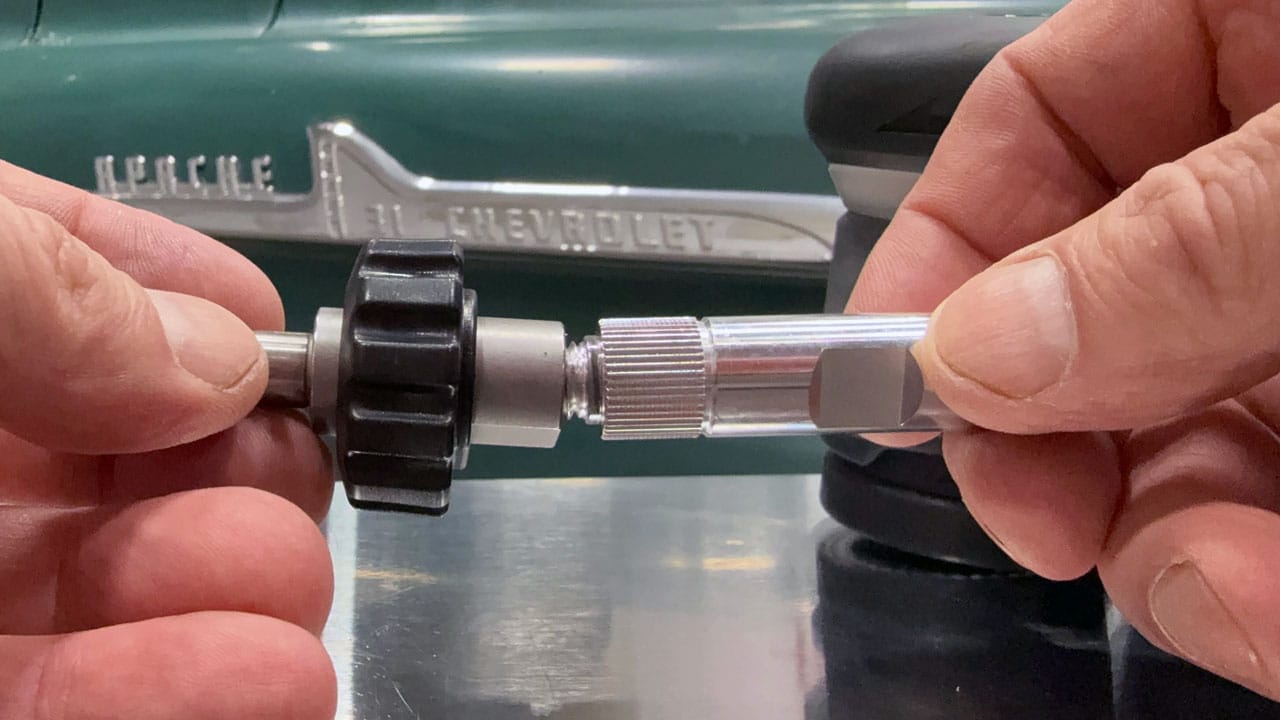
The 2-inch extension provides additional reach and clearance where the body of the tool would otherwise get in the way.
This is especially useful around trim, grille openings, mirror housings, and other areas where a larger polisher is difficult to position.
In my testing, the tool has plenty of power to run 3-inch buffing pads without feeling underpowered.
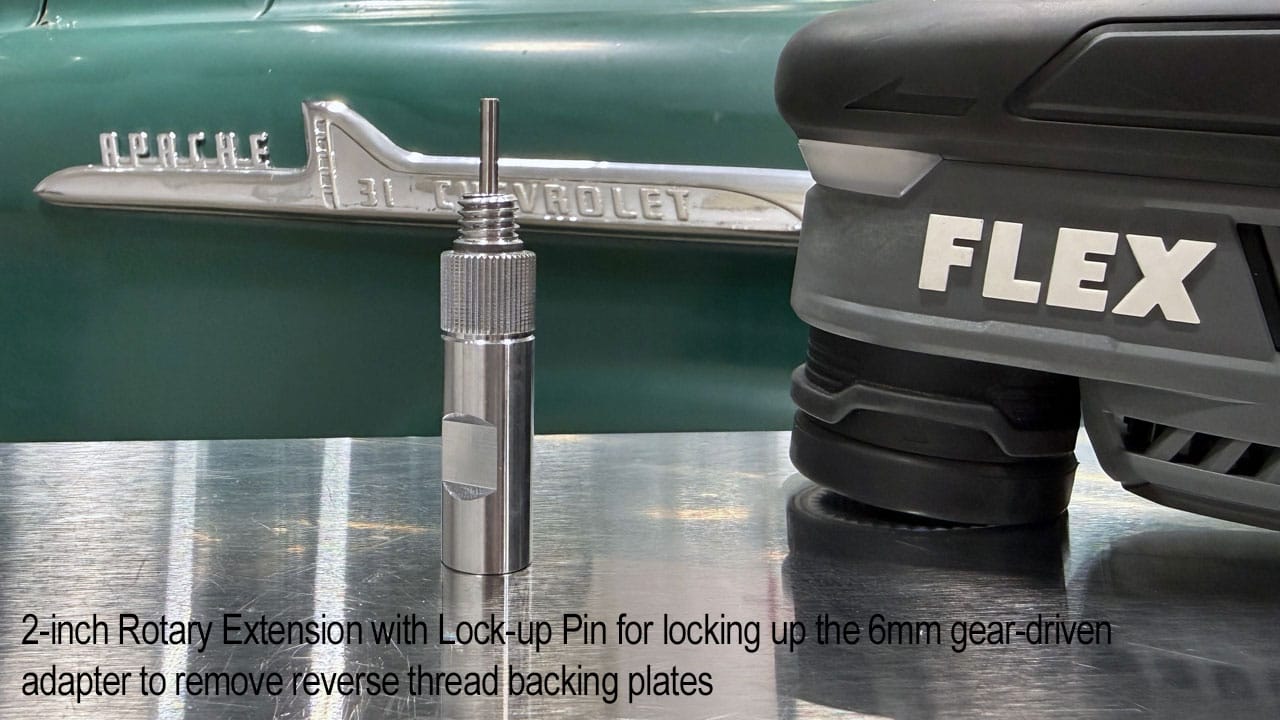
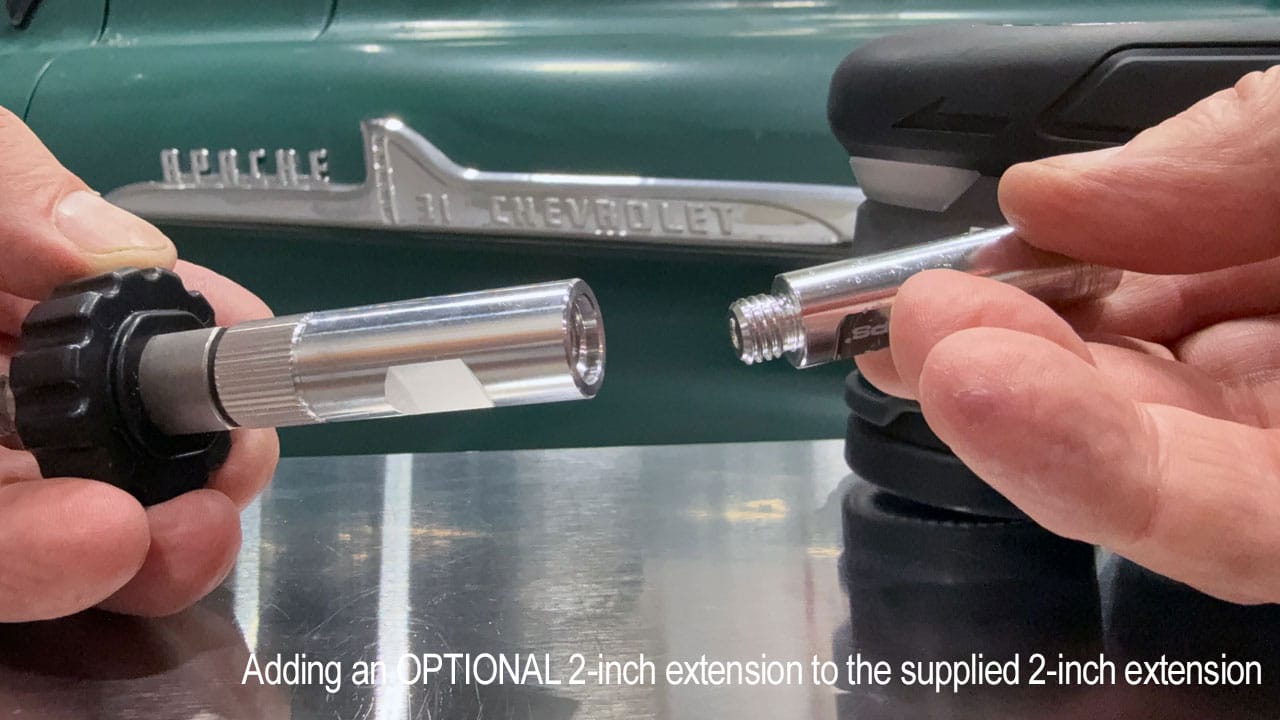
More rotary adapter and extension photos (7 photos)
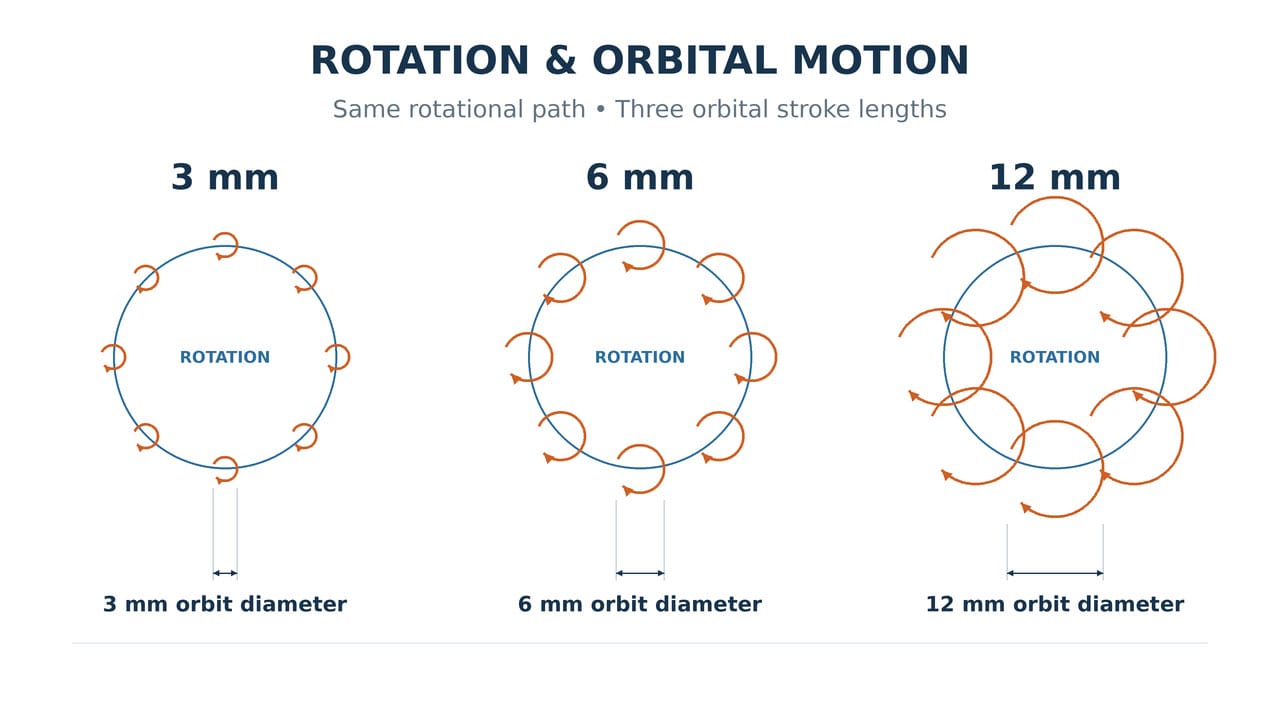
Understanding the 3mm, 6mm, and 12mm orbital strokes
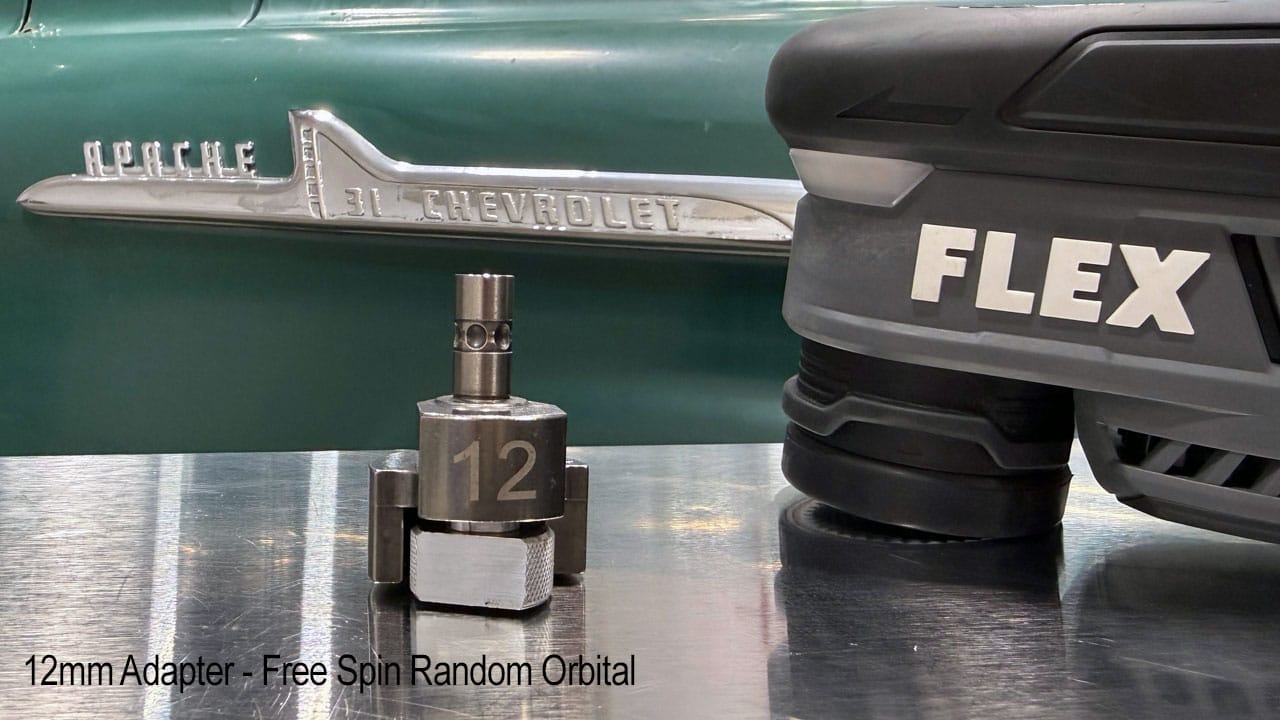
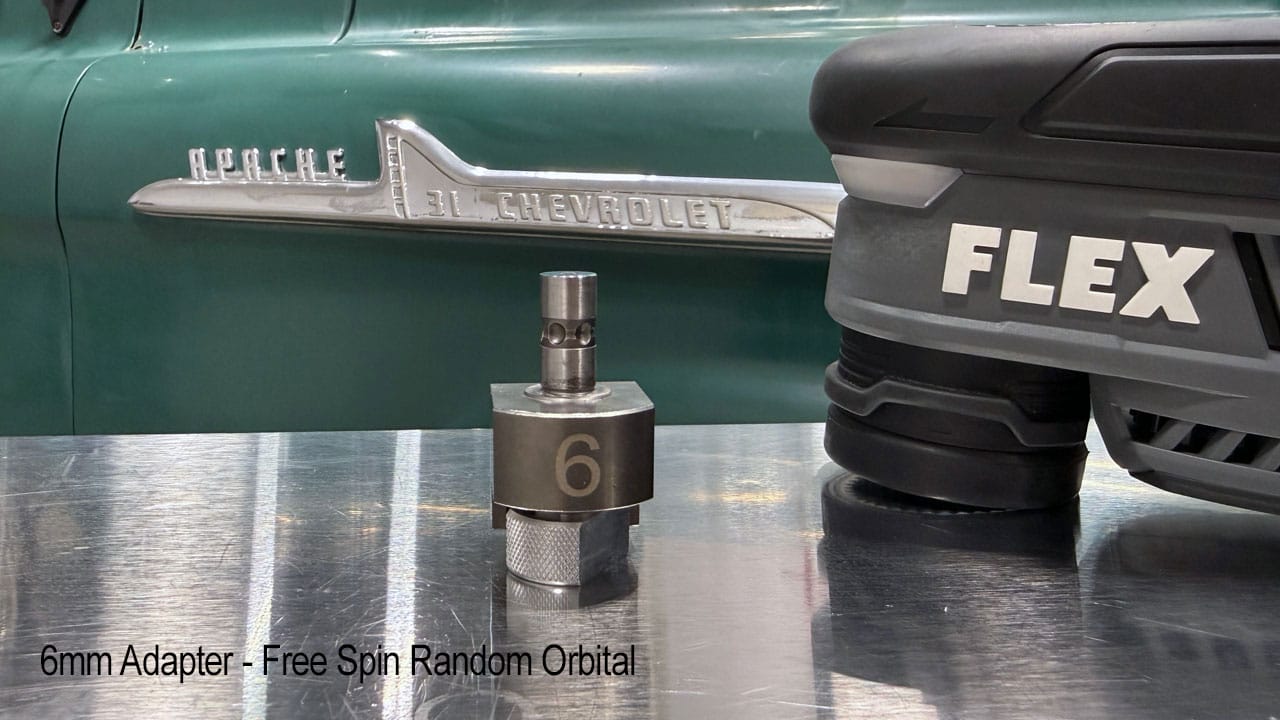
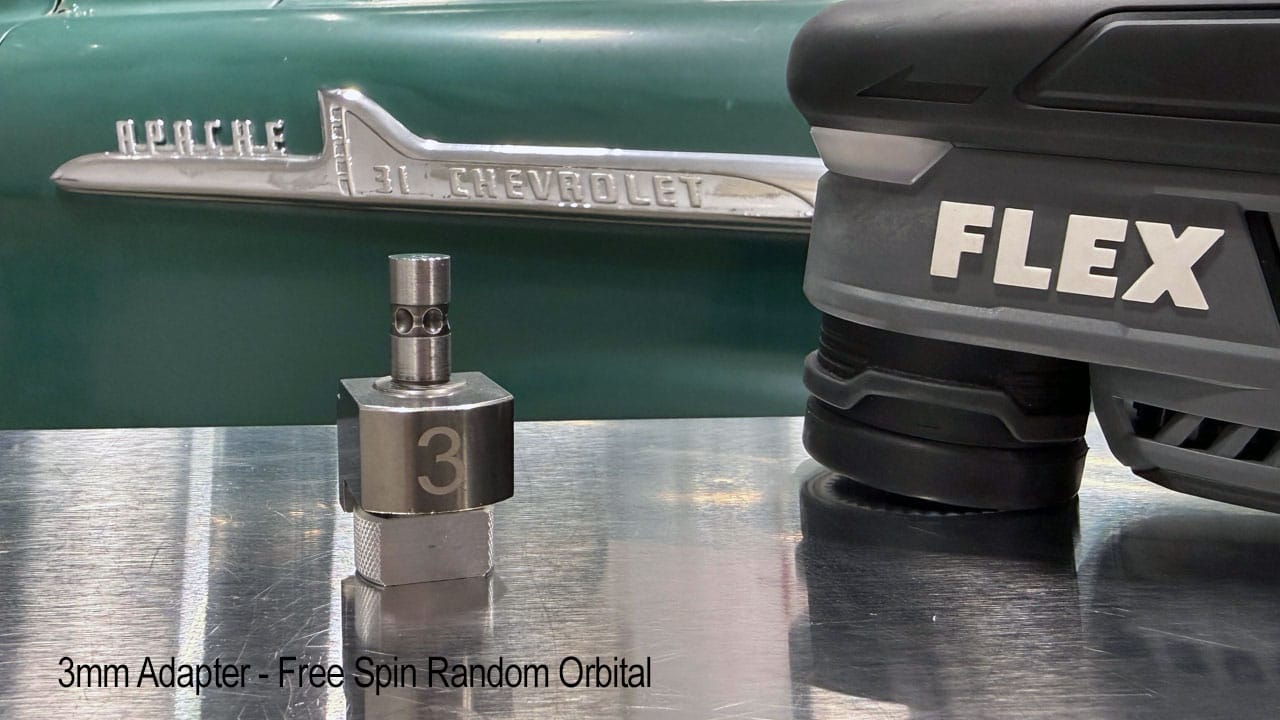
The FLEX Mini BEAST includes 3mm, 6mm, and 12mm free-spinning random orbital adapters. Each combines two pad movements:
- Rotation: The pad spins around its own center.
- Orbital motion: The center of the pad travels around a small circle as the pad spins.
Orbit stroke length describes the diameter—the distance straight across—of that small circle. The abbreviation mm stands for millimeters.
A 3mm adapter produces a small orbit, a 6mm adapter produces a larger orbit, and a 12mm adapter produces the largest of the three.
Think of drawing small circles with a pencil. Changing adapters changes the size of those circles.
In the illustration below, the orange loops represent the different orbit sizes. The measurement arrows beneath each example show the distance across an orbit: 3mm, 6mm, or 12mm.
See the three free-spinning orbital adapters (3 photos)
Why I like the 6mm free-spinning adapter for sanding
While I rarely choose the free-spinning adapters for paint correction, I do use the 6mm random orbital adapter for machine sanding.
There’s a story behind that adapter.
When the original PXE-80 arrived, I immediately tested it and then contacted Chris Metcalf at FLEX.
I explained that, for the sanding work I wanted to do, the 3mm adapter’s stroke felt too small. I wasn’t getting the sanding-disc action I wanted.
The 12mm adapter presented a different challenge. Its larger stroke made it easier for the sanding disc to travel onto an adjacent edge or raised body line. Sanding those areas can increase the risk of sanding through the paint or buffing through when removing the sanding marks.
I asked Chris to see whether the FLEX engineers could make a random orbital adapter with a stroke somewhere between 5mm and 8mm.
About a month later, FLEX sent me a prototype 6mm random orbital adapter.
I used it to sand the custom paint on a 1969 GTO, and it worked just as I had hoped. I sent Chris my feedback, and as the saying goes, the rest is history.
A few months later, the 6mm adapter became available as an optional accessory.
With the new Mini BEAST, the 6mm free-spinning random orbital adapter is included, along with the 3mm and 12mm adapters.
If you work in an auto body shop or sand custom paint jobs, you already know how useful a compact 3-inch sander can be.
Before the PXE-80, I hadn’t found a cordless option that worked as well for the sanding I wanted to do.
The PXE-80 became a useful mini sander, and the new Mini BEAST carries that versatility forward.
Because it’s cordless, there’s no stiff pneumatic hose or electrical cord to manage as you work around narrow panels and intricate areas.
The original PXE-80 uses FLEX’s 12-volt battery system. The U.S. Mini BEAST uses the FLEX 24-volt system, giving you access to compatible batteries in multiple capacities.
One backing plate with two thread types
In my opinion, this is engineering genius!
The new backing plates feature machined steel mounting inserts instead of an all-plastic mounting design. These steel inserts provide added strength to handle the demands of the 6mm gear-driven adapter.
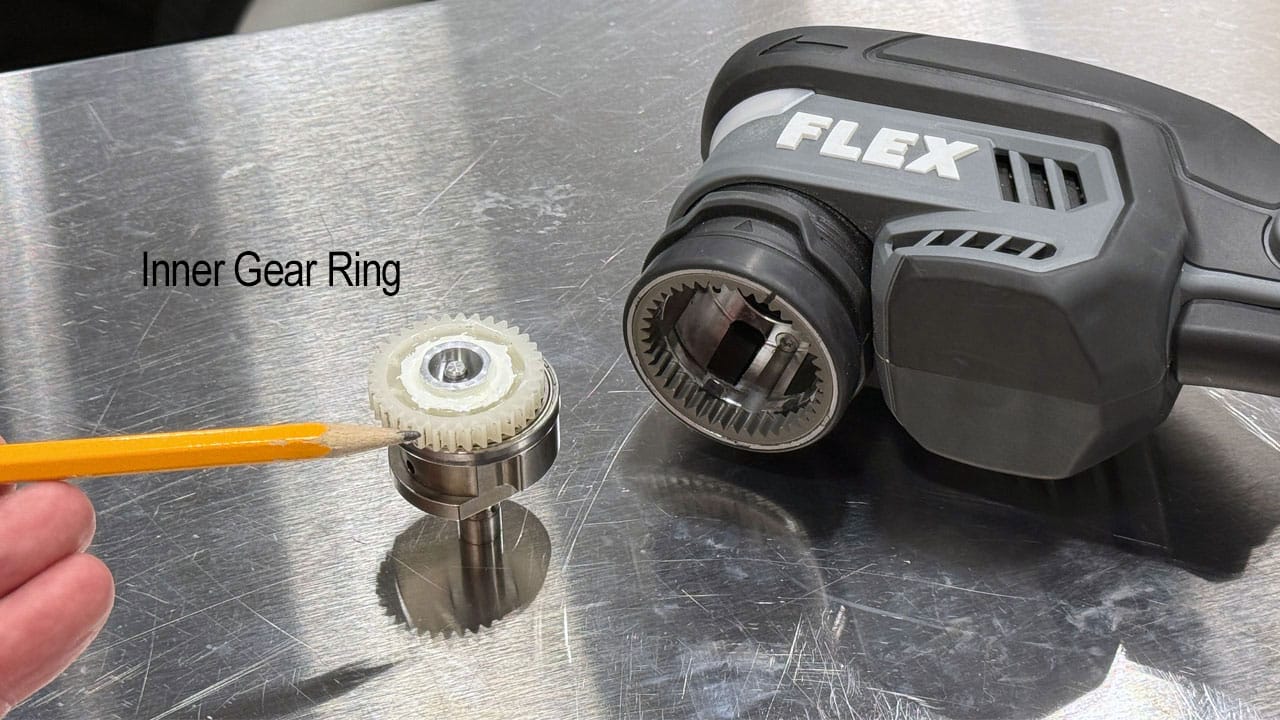
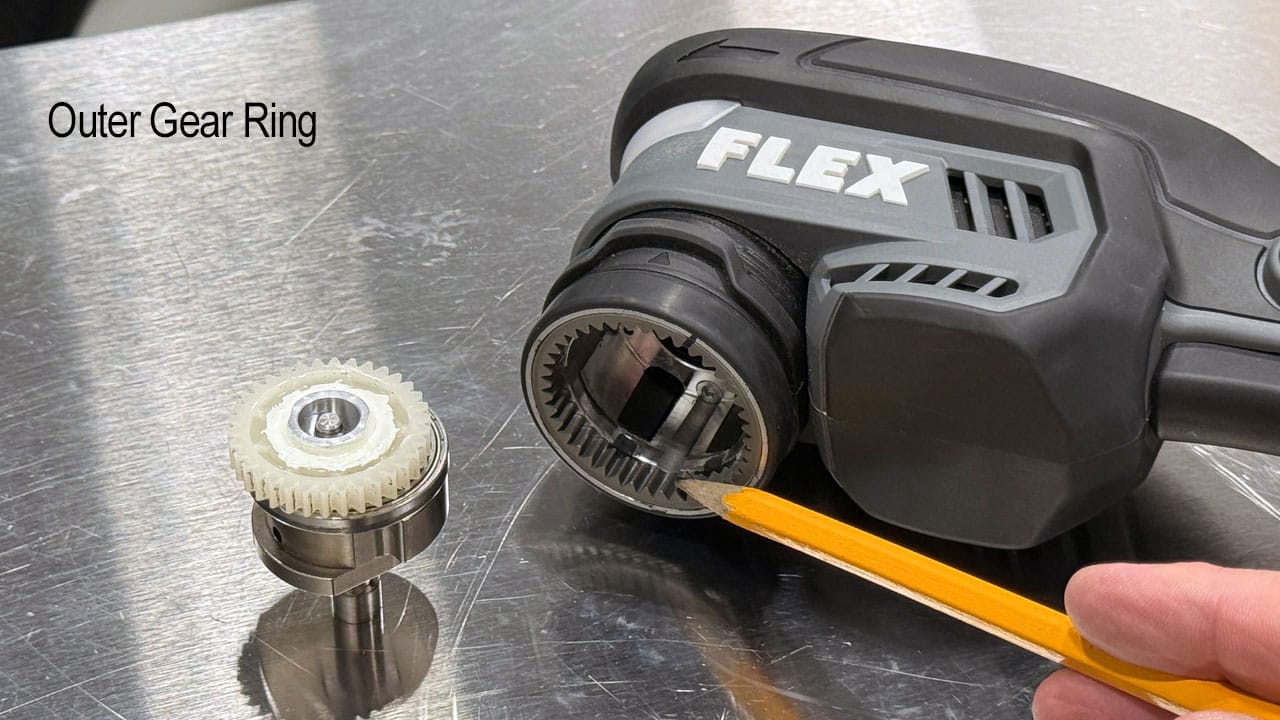
Here’s the clever part: each insert has two sets of threads, allowing the same backing plate to attach to the different adapter types.
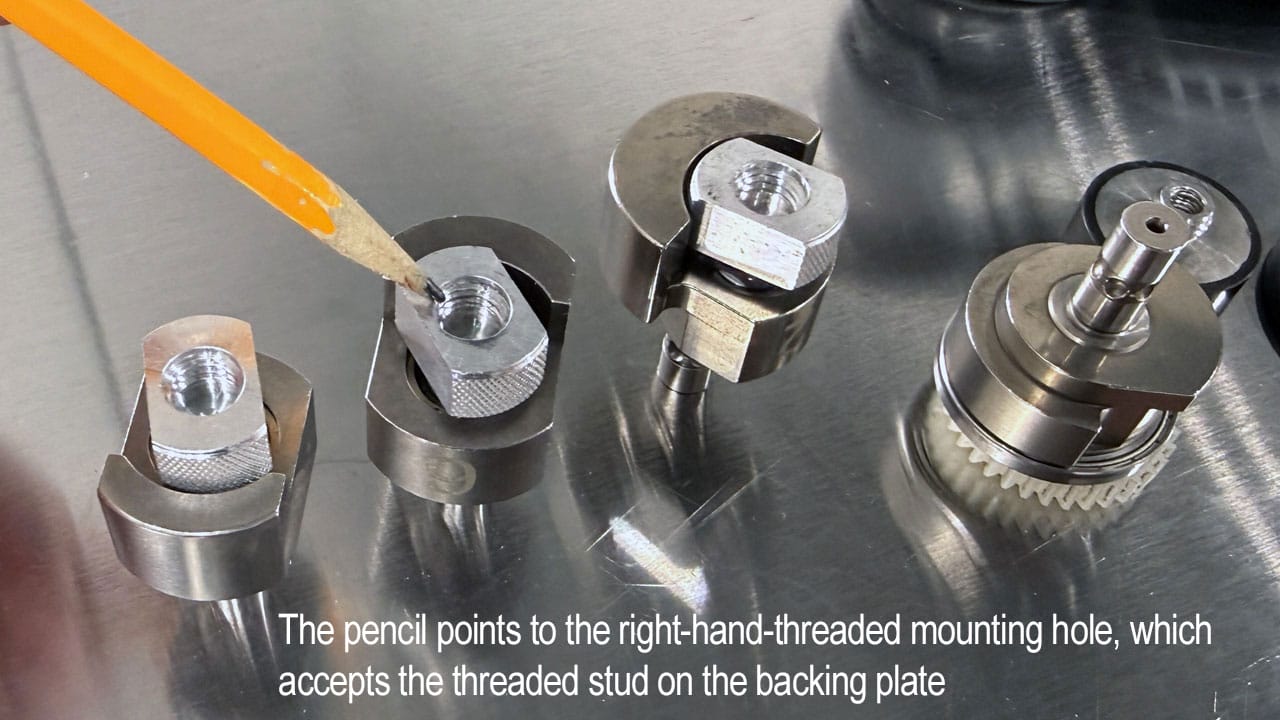
- External right-hand threads screw into the rotary and free-spinning random orbital adapters. Turn the backing plate clockwise to install and counterclockwise to remove.
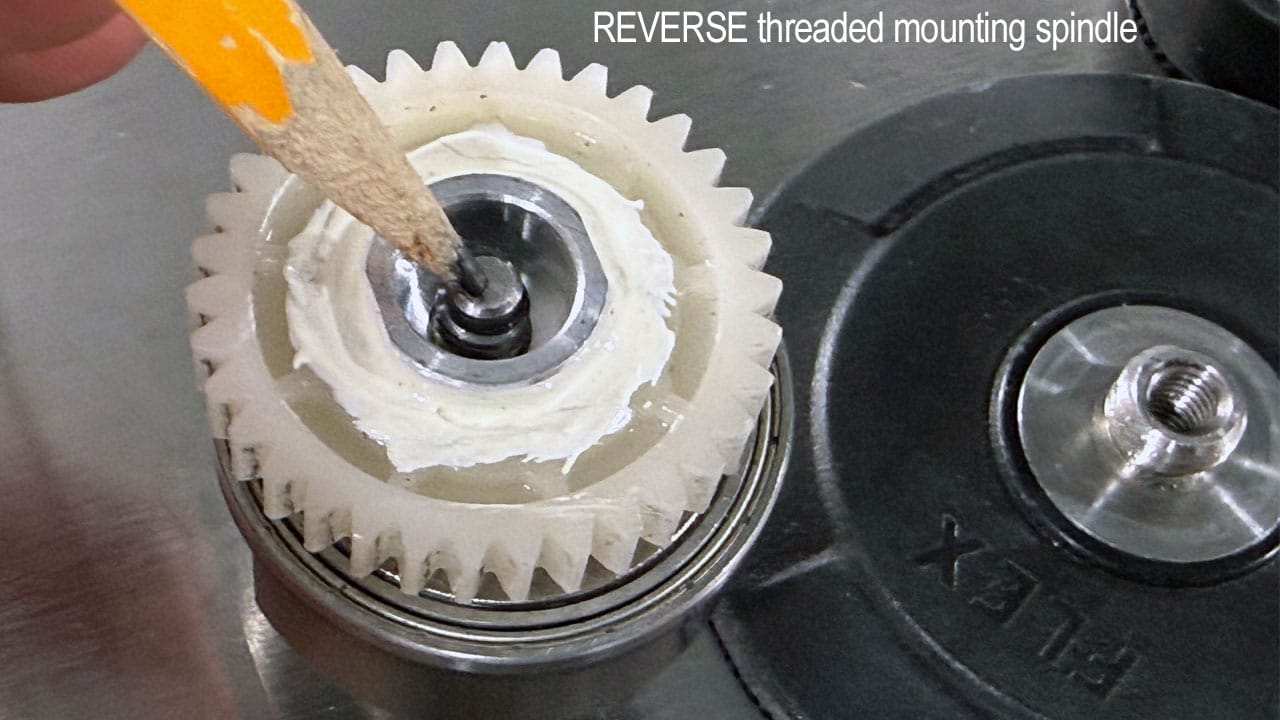
- Internal left-hand threads screw onto the spindle of the 6mm gear-driven adapter. Turn the backing plate counterclockwise to install and clockwise to remove.
Just remember: clockwise to install on the rotary and free-spinning adapters; counterclockwise to install on the gear-driven adapter.
One backing plate, two mounting options—a clever piece of engineering!
| Adapter | Install backing plate | Remove backing plate |
|---|---|---|
| Rotary or free-spinning random orbital External right-hand threads | Clockwise | Counterclockwise |
| 6mm gear-driven orbital Internal left-hand threads | Counterclockwise | Clockwise |
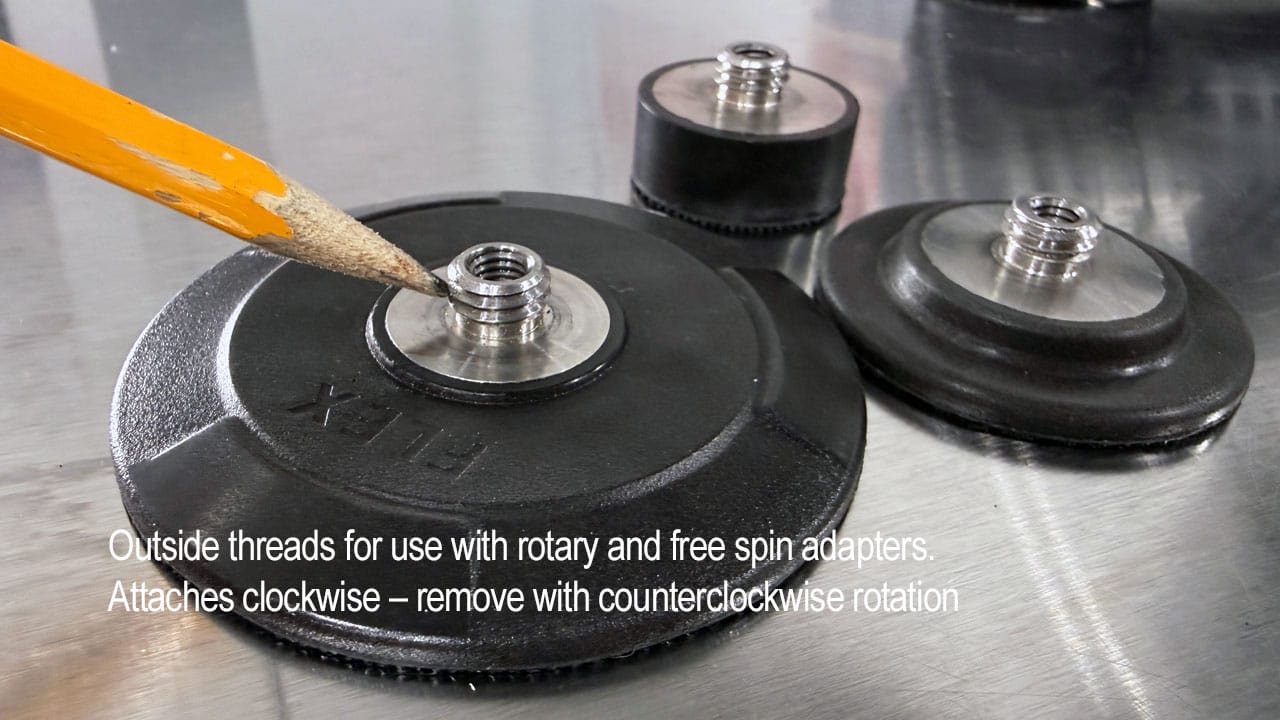
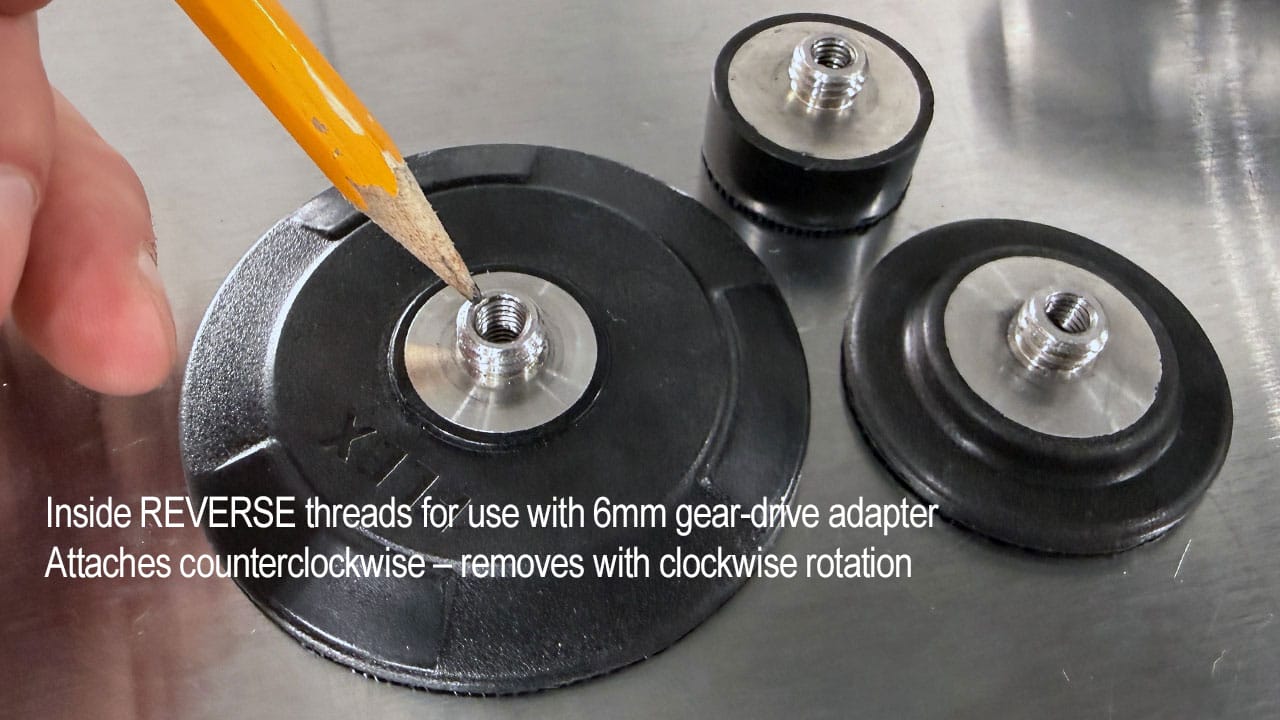
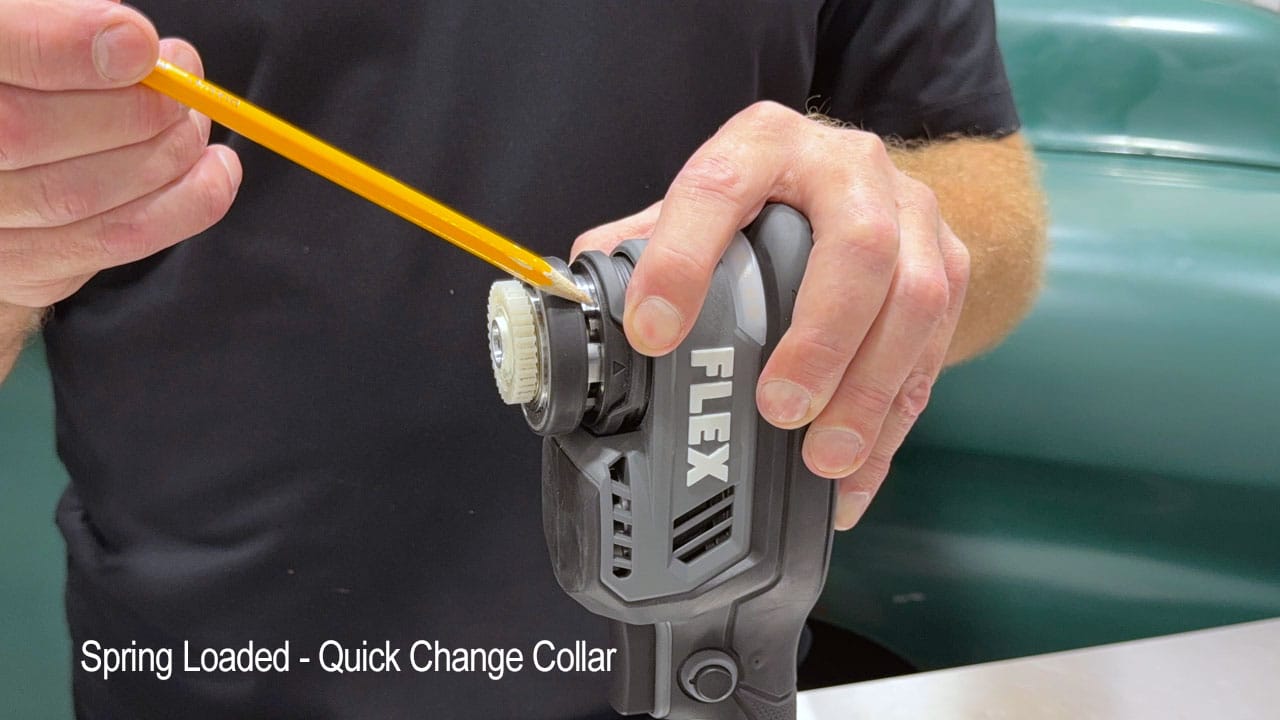
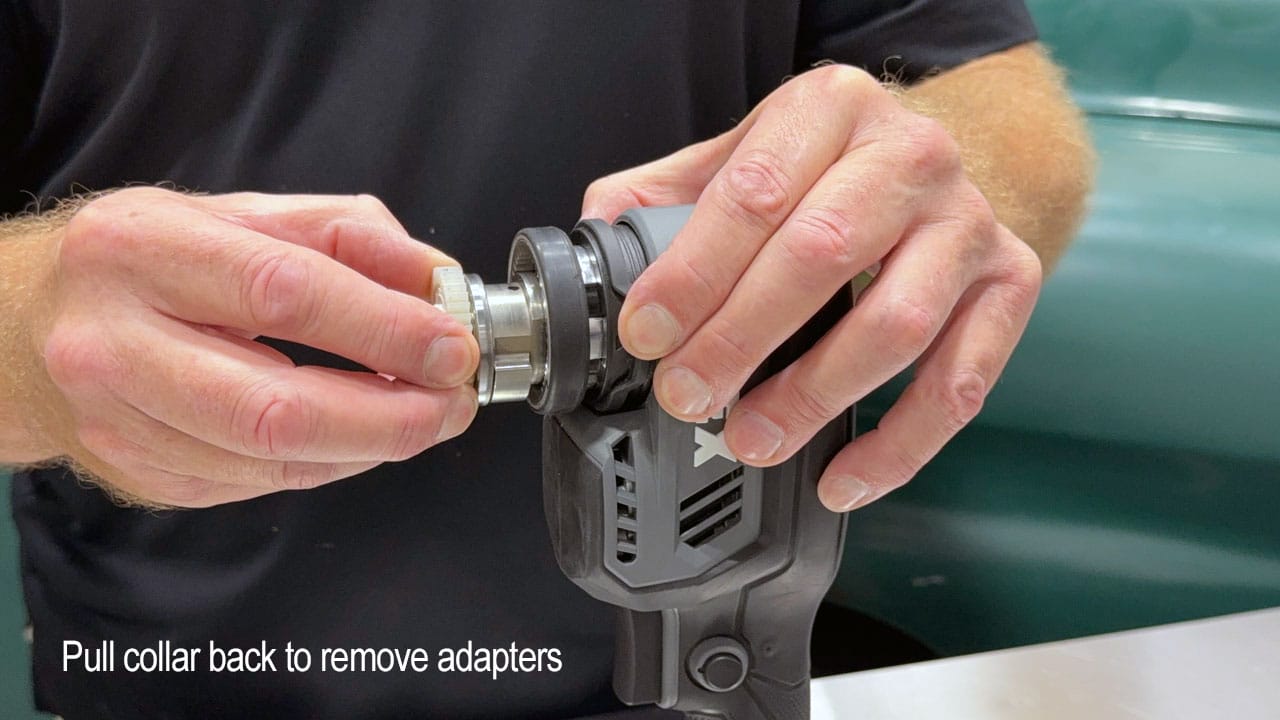
Although it’s a little difficult to see in the photo, the pencil points to the left-hand-threaded mounting spindle. Turn the backing plate counterclockwise to install and clockwise to remove.
The pencil points to the internal right-hand threads in the spindle of one of the free-spinning random orbital adapters. Turn the backing plate clockwise to install and counterclockwise to remove.
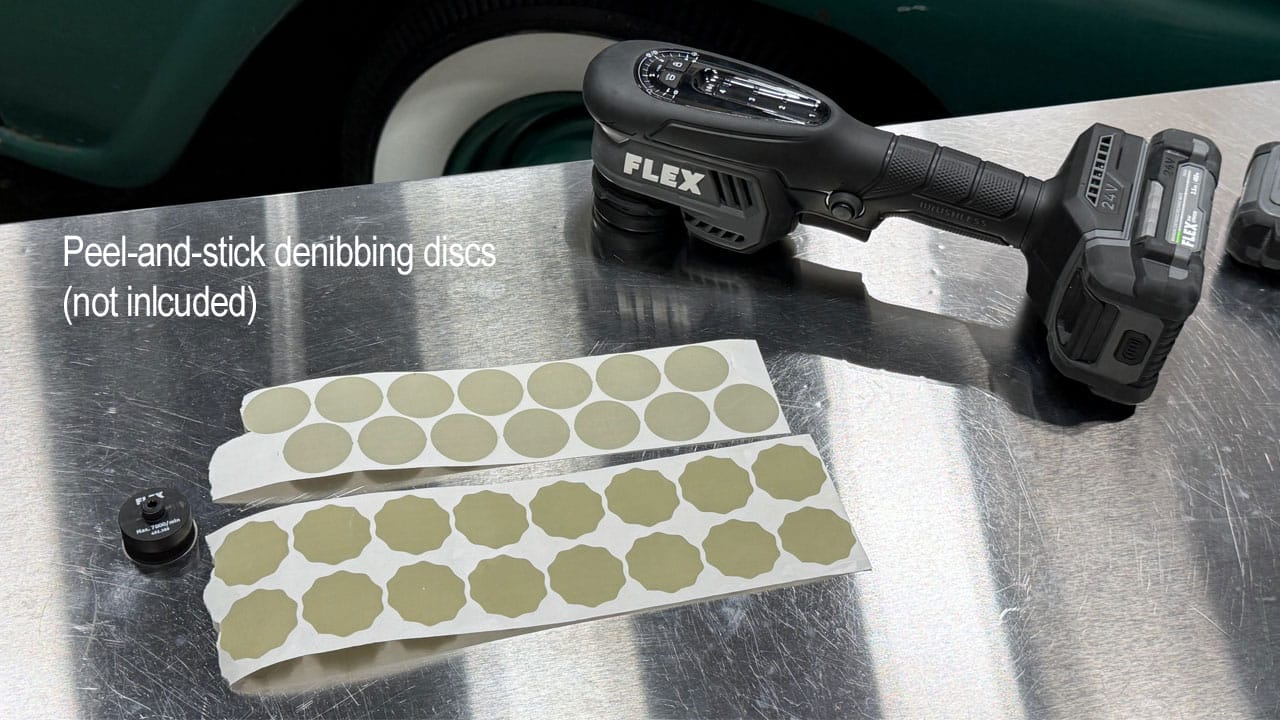
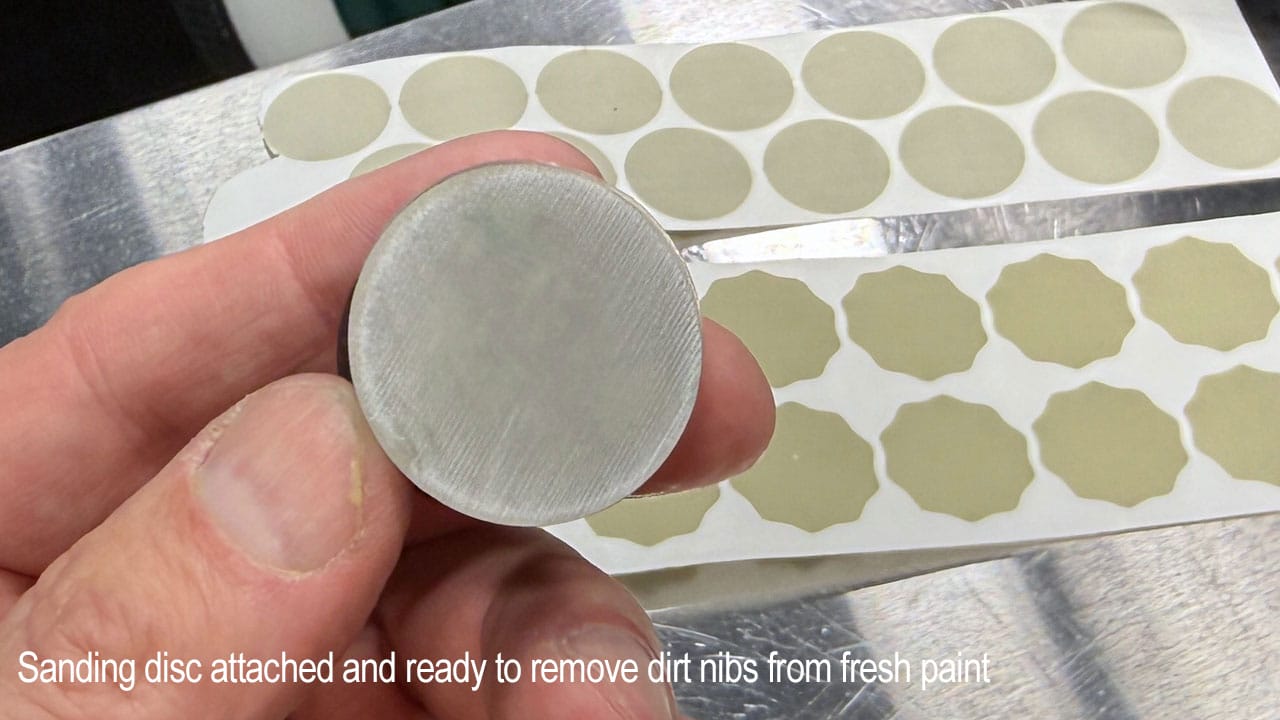
Denibbing with the 1-inch sanding pad
Denibbing means sanding away tiny bumps caused by dust or dirt that landed in fresh paint while it was being sprayed or drying.
This is commonly done in an auto body shop after a vehicle—or part of a vehicle—has been repainted.
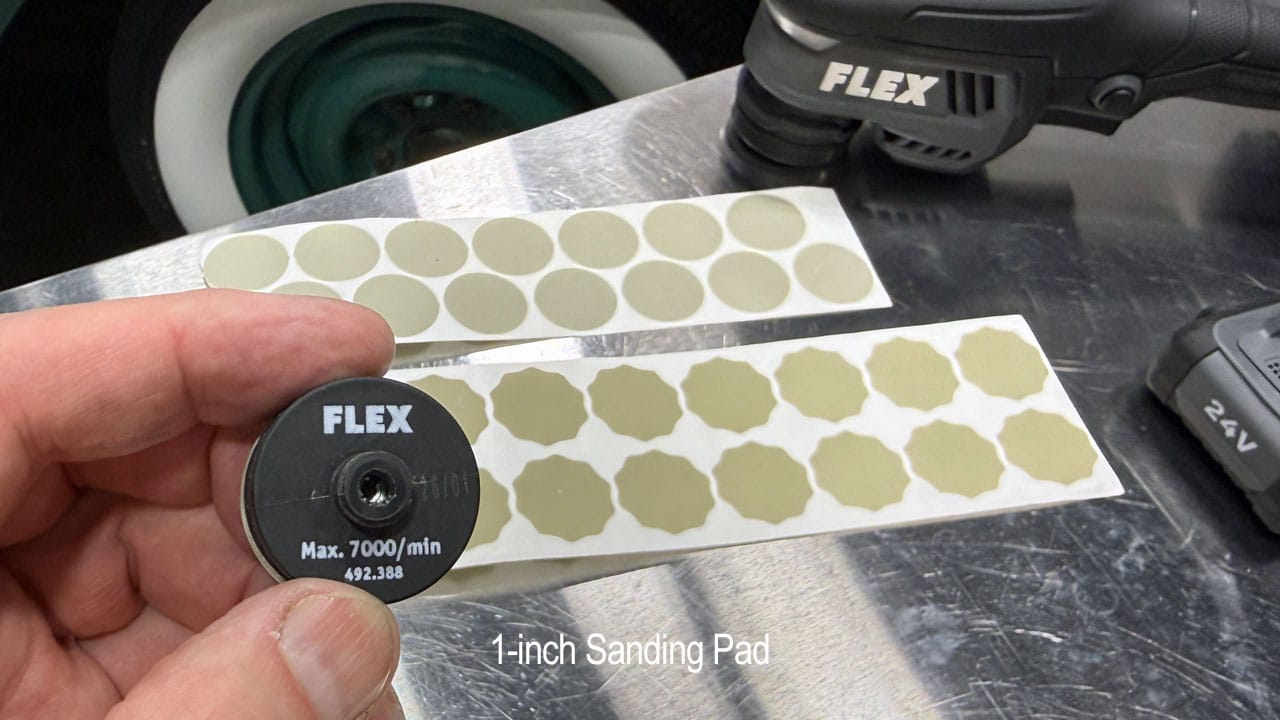
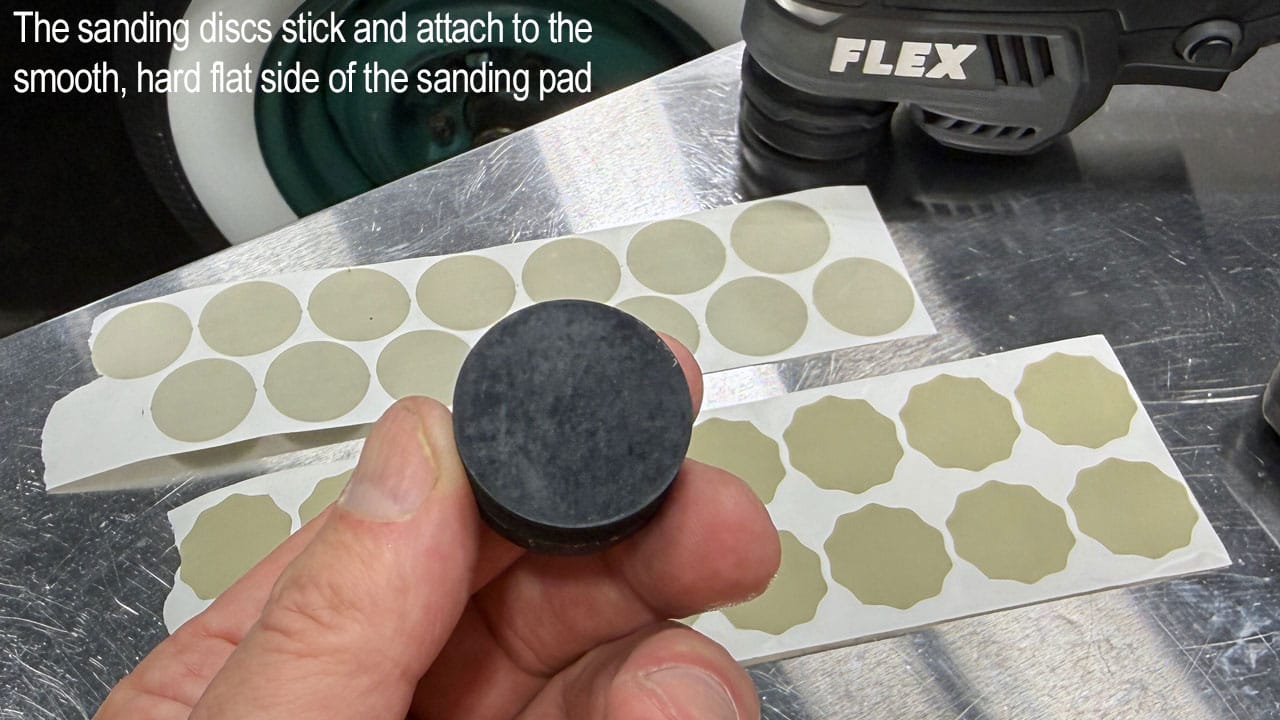
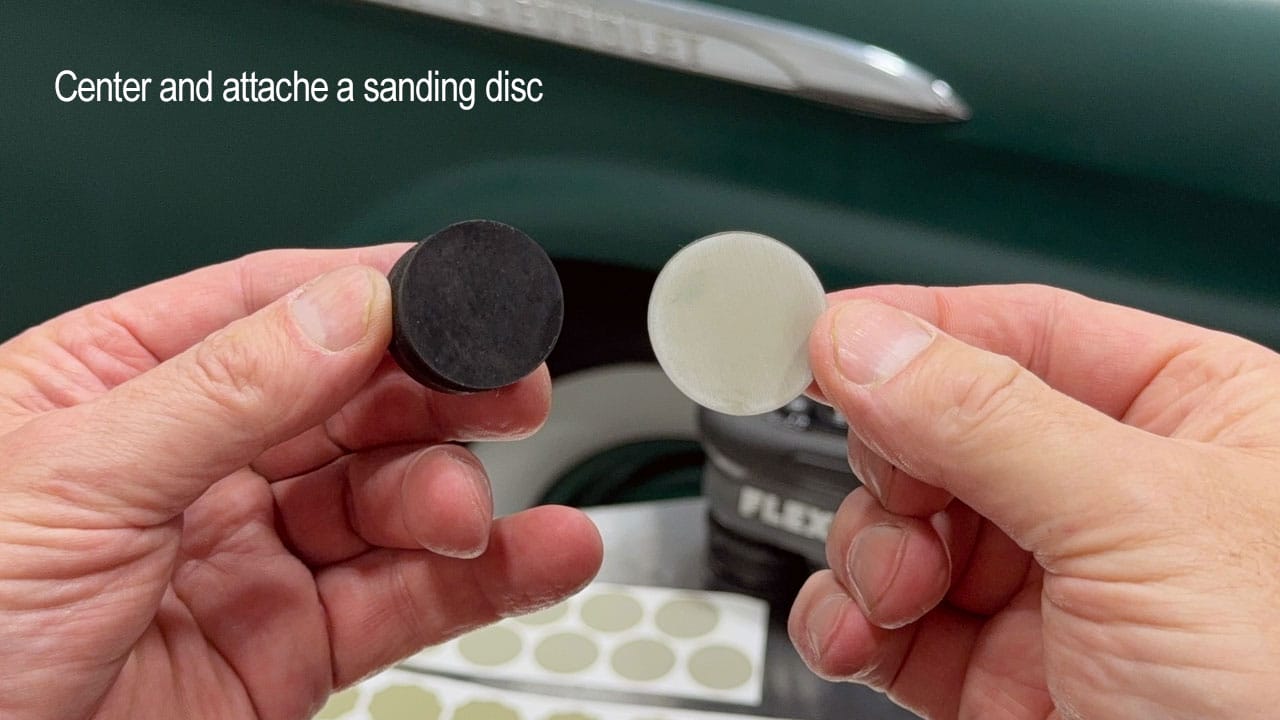
The included 1-inch adhesive sanding pad accepts peel-and-stick denibbing discs for working on these small defects.
Many detailers may never need this attachment, but it’s useful if you work in a body shop or offer this type of paint-finishing service.
More sanding-pad detail photos (3 photos)
Controls, handling, and batteries
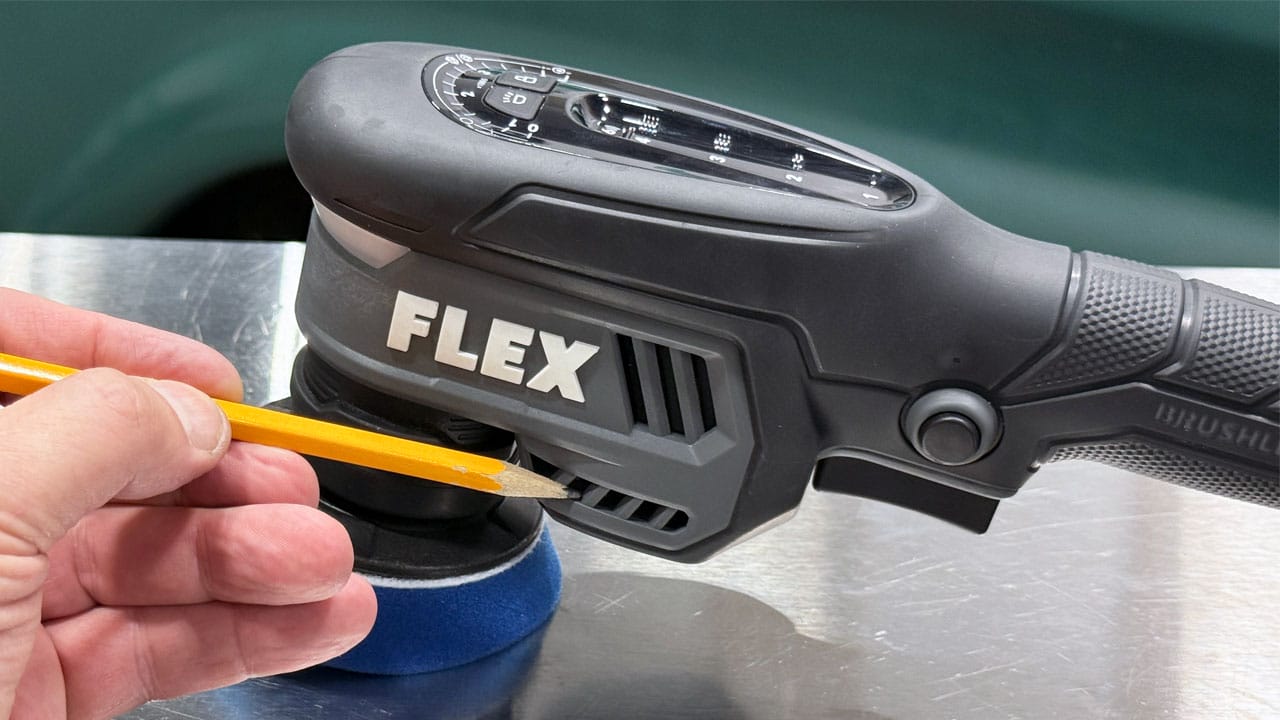
Touch sensor speed control and Speed Lock
I’ve never seen a speed control quite like this on a polisher!
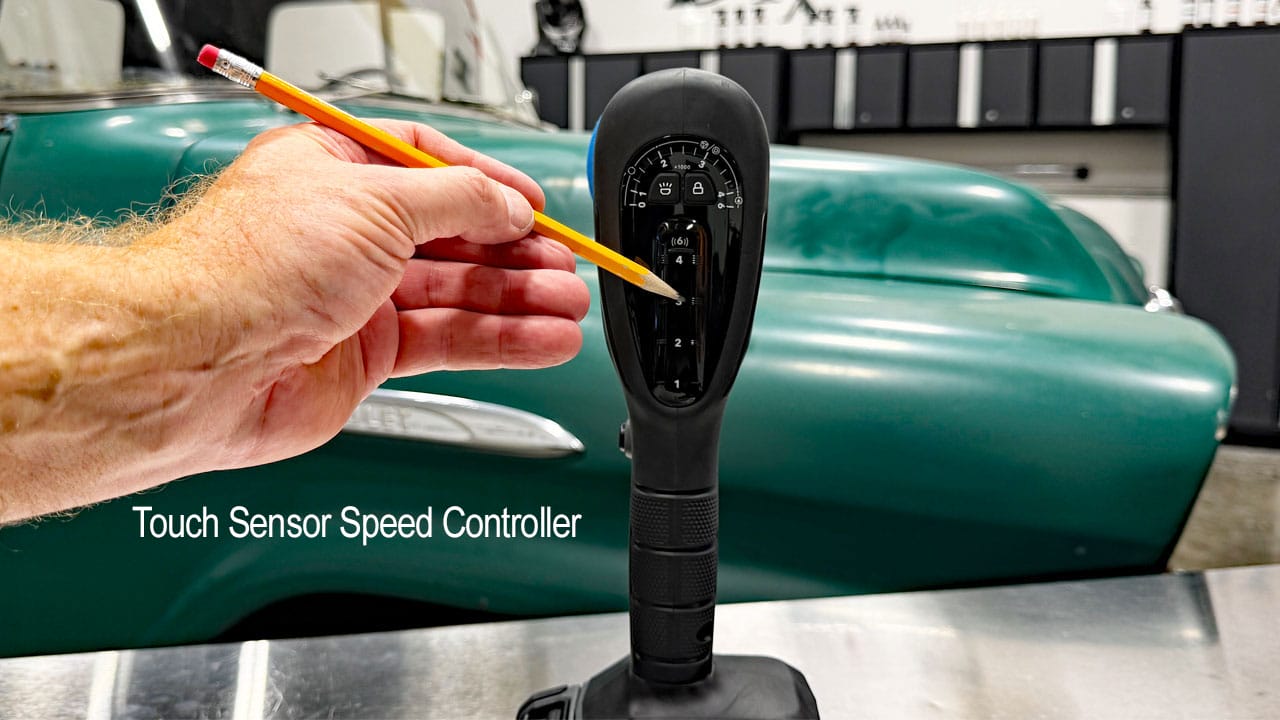
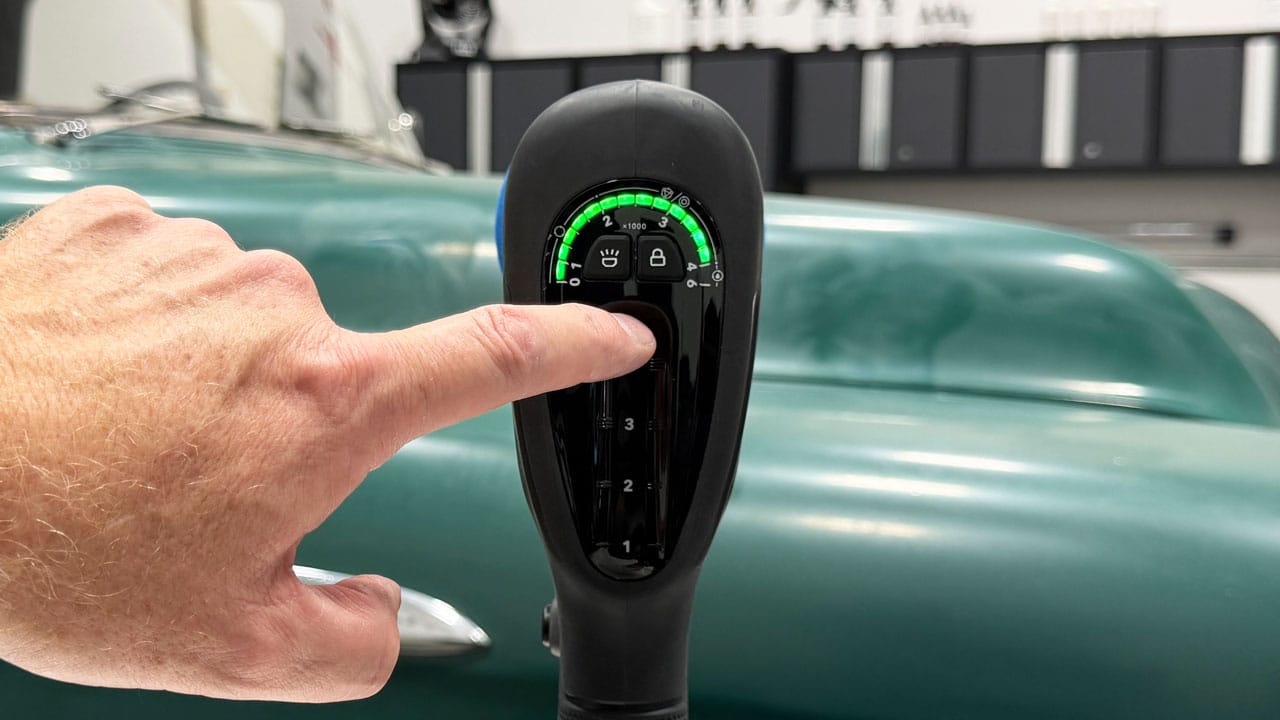
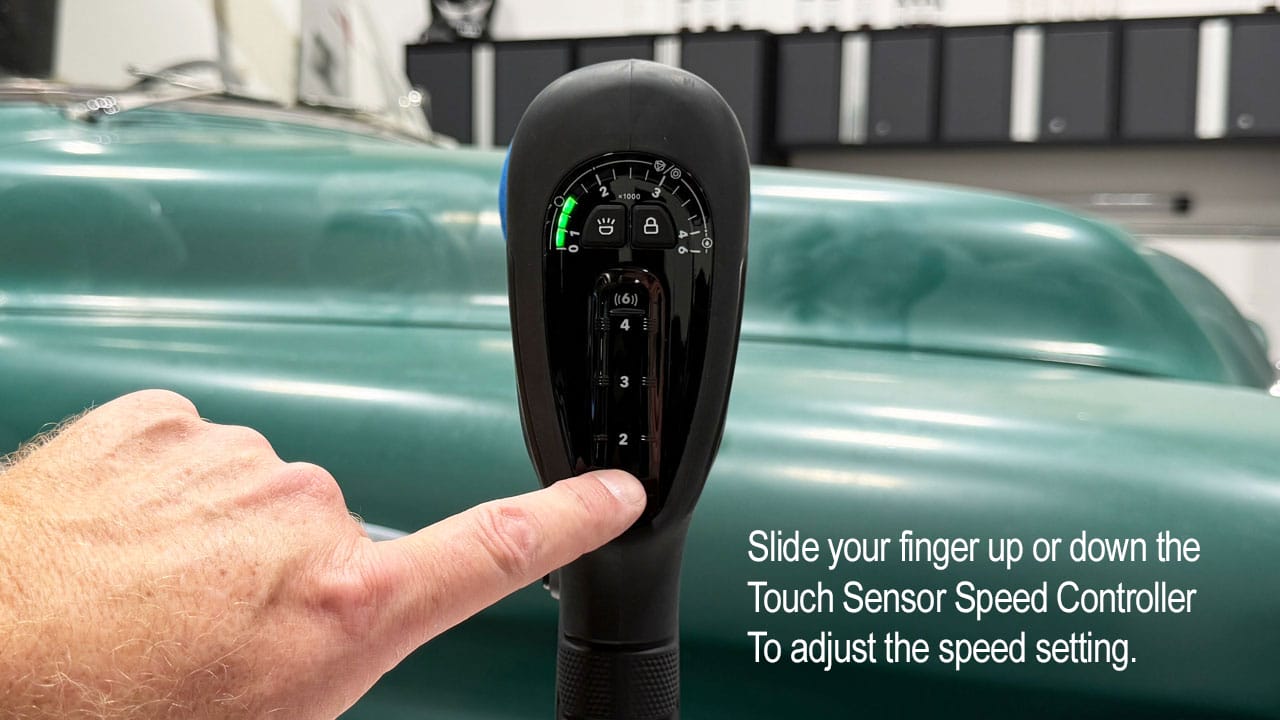
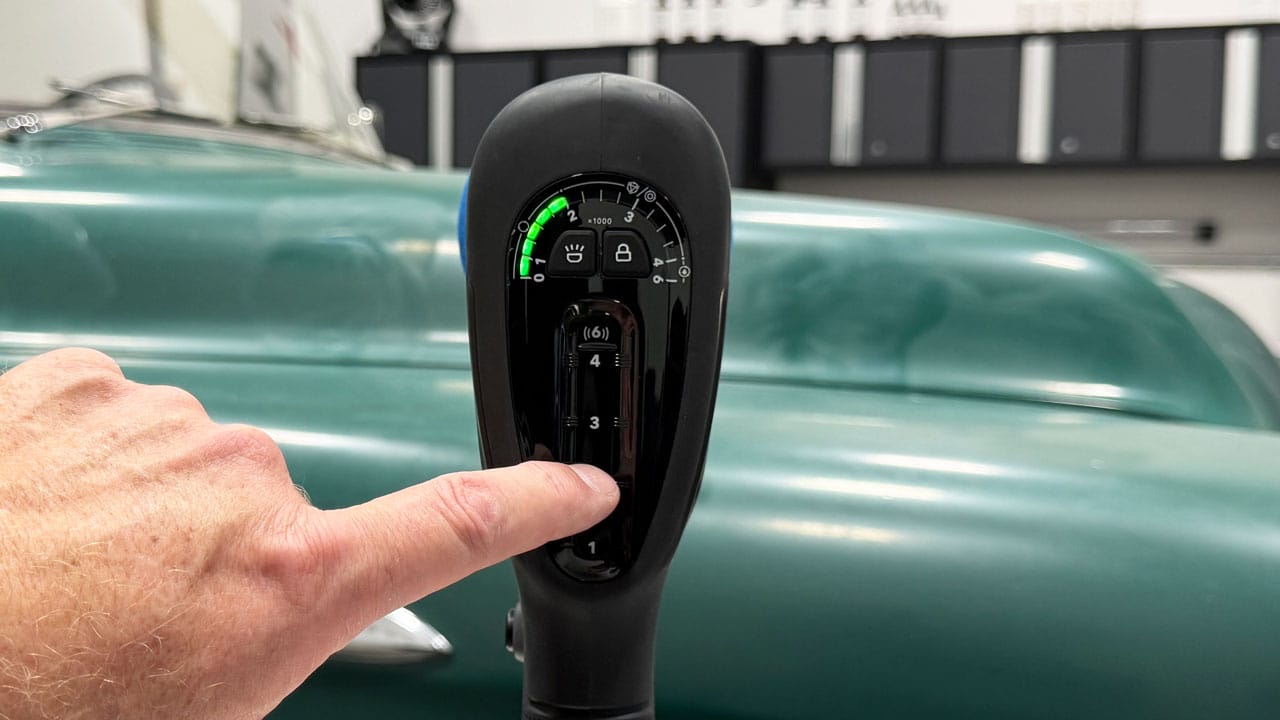
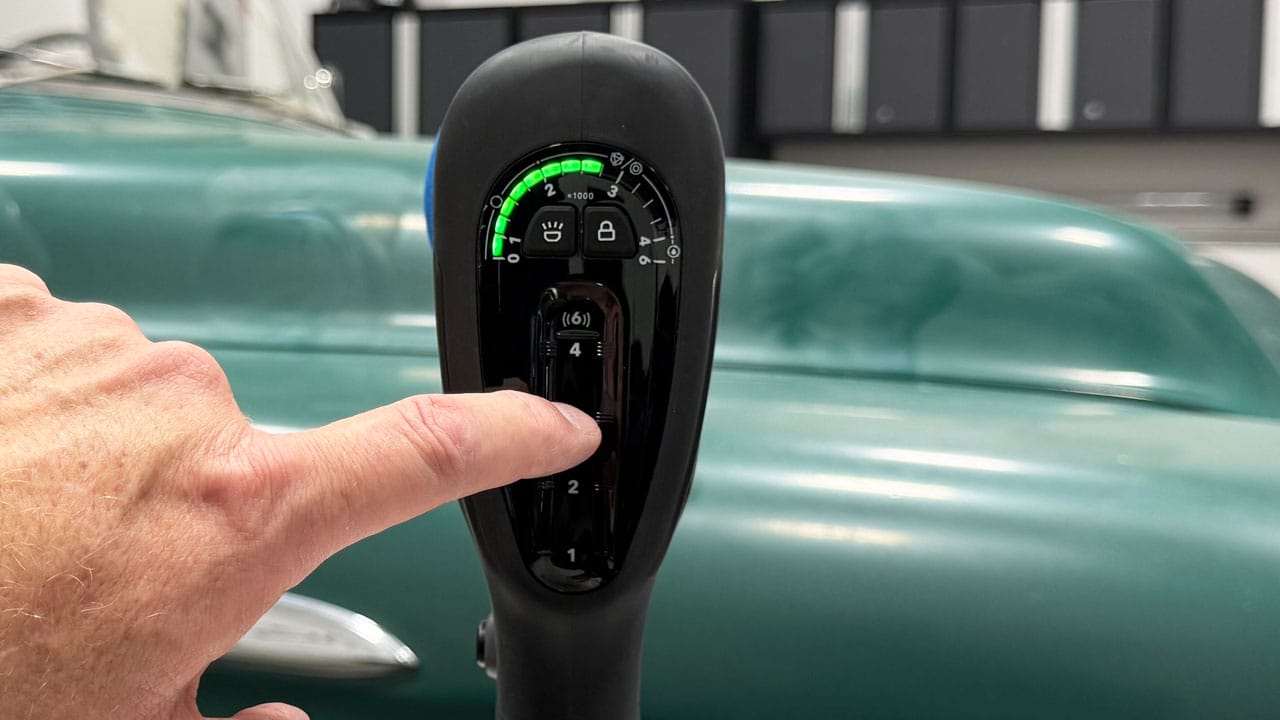
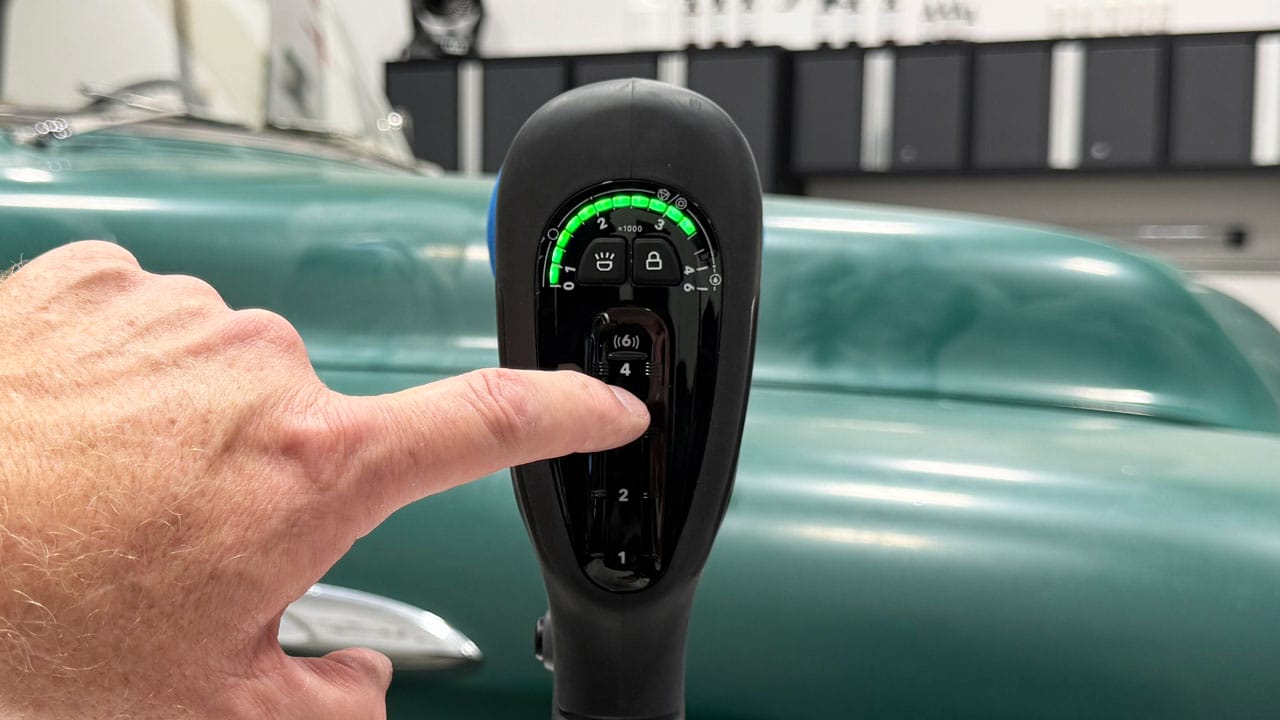
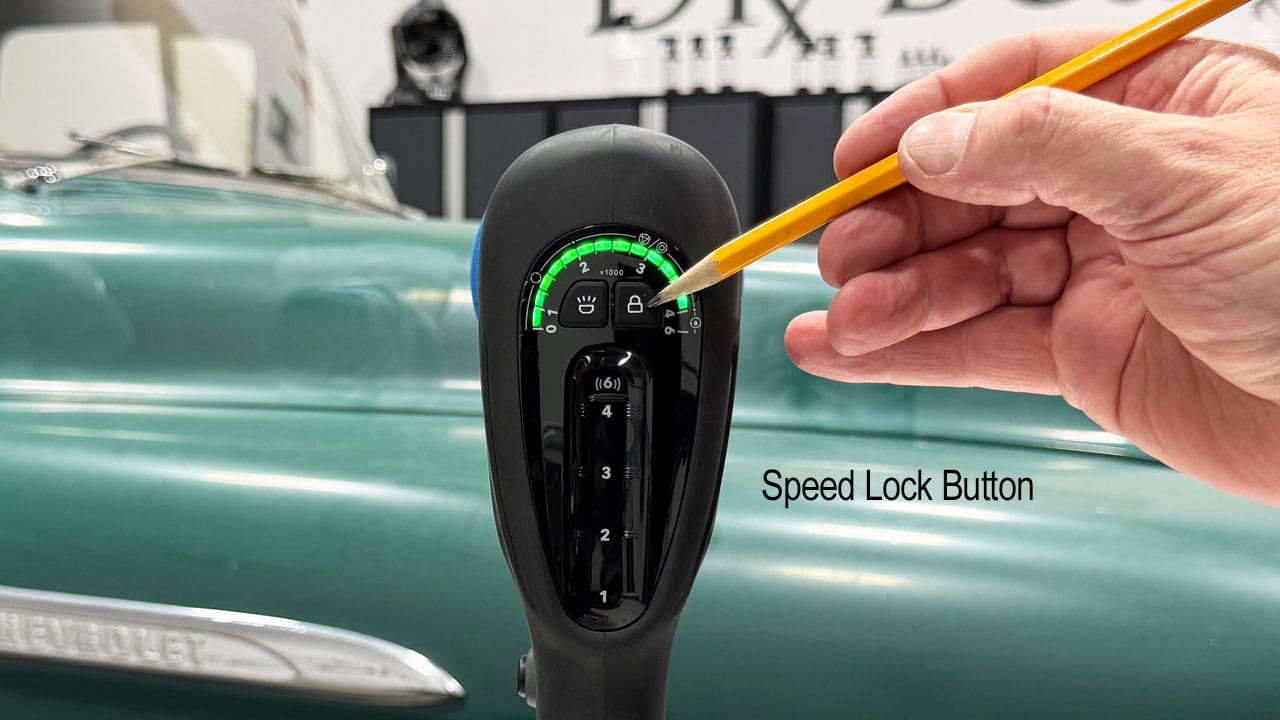
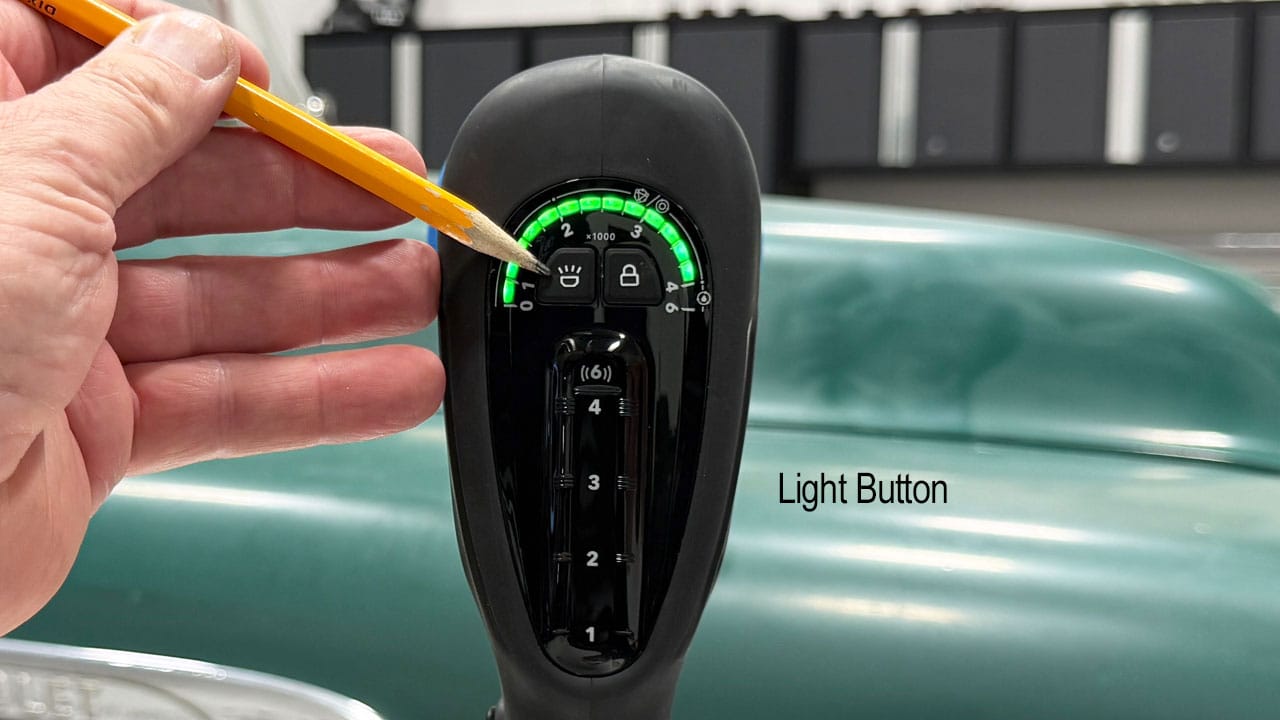
The FLEX Mini BEAST’s Touch Sensor Speed Controller works with a bare finger or while wearing nitrile gloves. Simply slide your finger up the touch-sensitive track to increase the speed or down to decrease it.
Once you’ve selected your speed, press the Speed Lock button to lock in the setting. This prevents accidental contact with the track from changing the speed while you’re polishing.
The touch sensor speed control is another feature that stands out.
I’ve used other tools with electronic speed controls that felt a little wonky. This one took only a few uses to get comfortable with.
See the speed-control sequence and Speed Lock (6 photos)
Turbo Mode and the number 6
When I first received the prototype, I did what plenty of people do: I skipped the instructions and took it for a test drive. I slid my finger along the speed control to what I thought was the highest setting and started polishing. At first, I didn’t think the tool had the performance I was hoping for.
Then I read the directions.
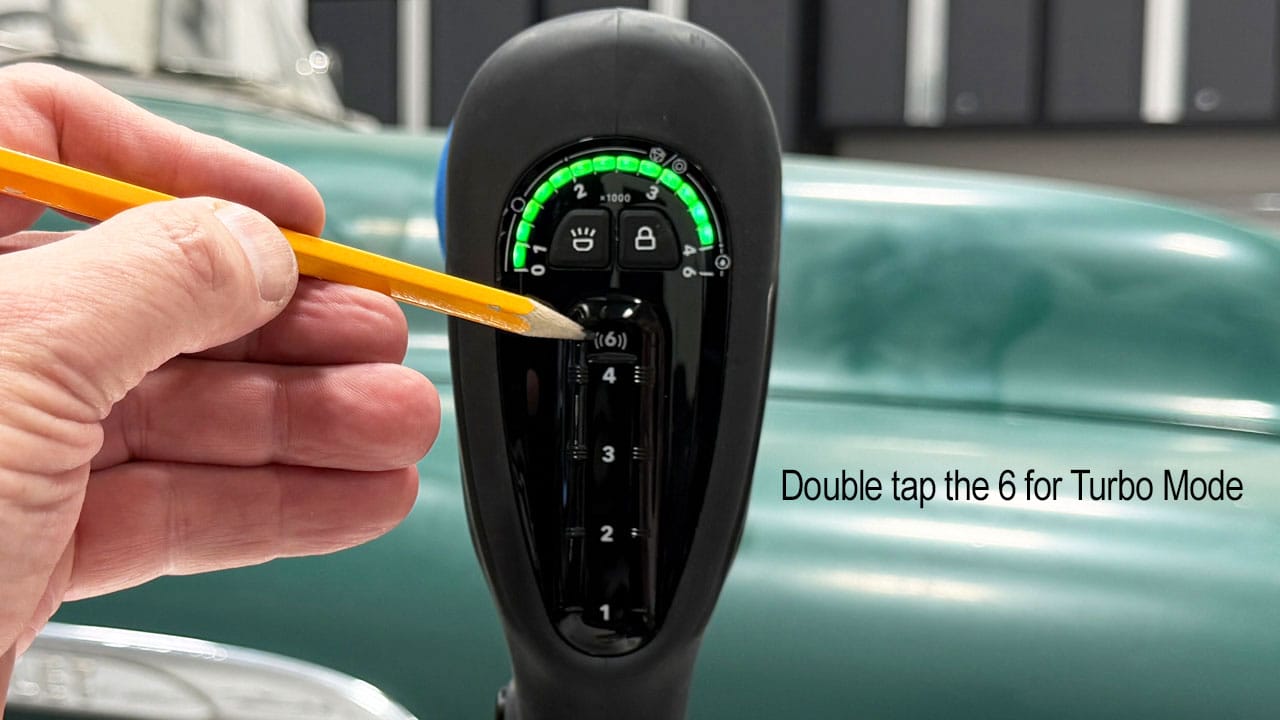
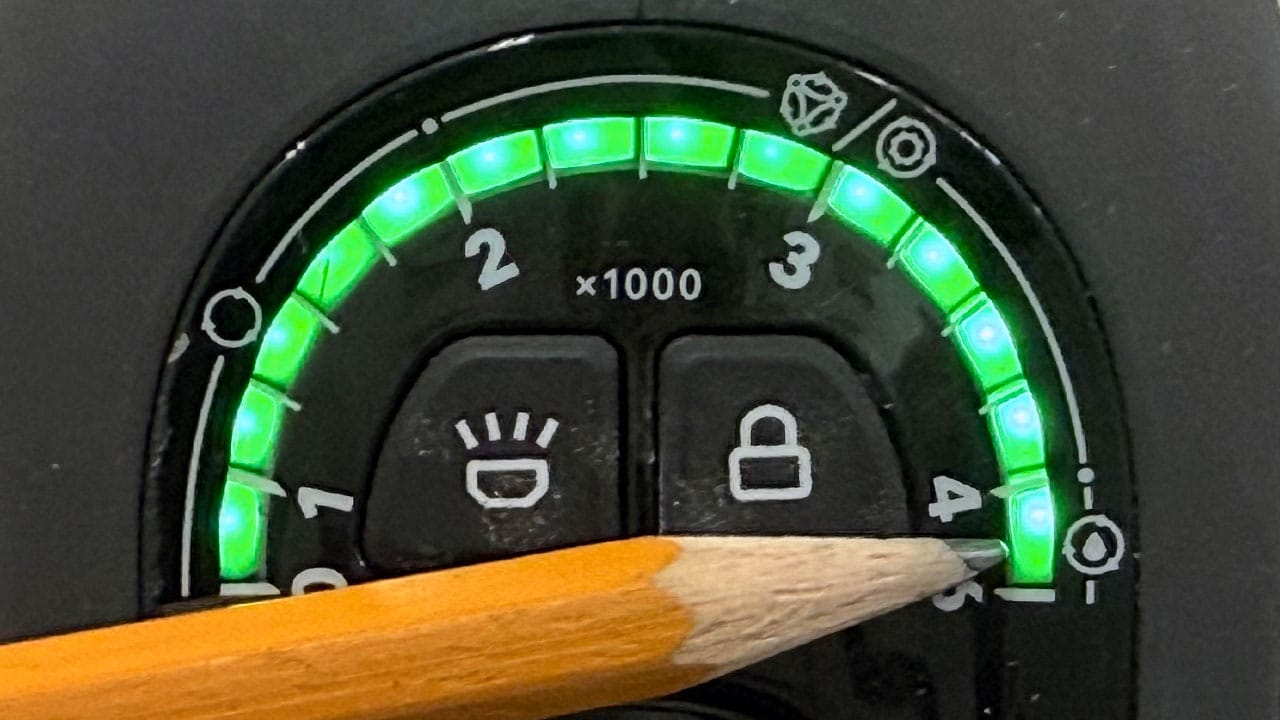
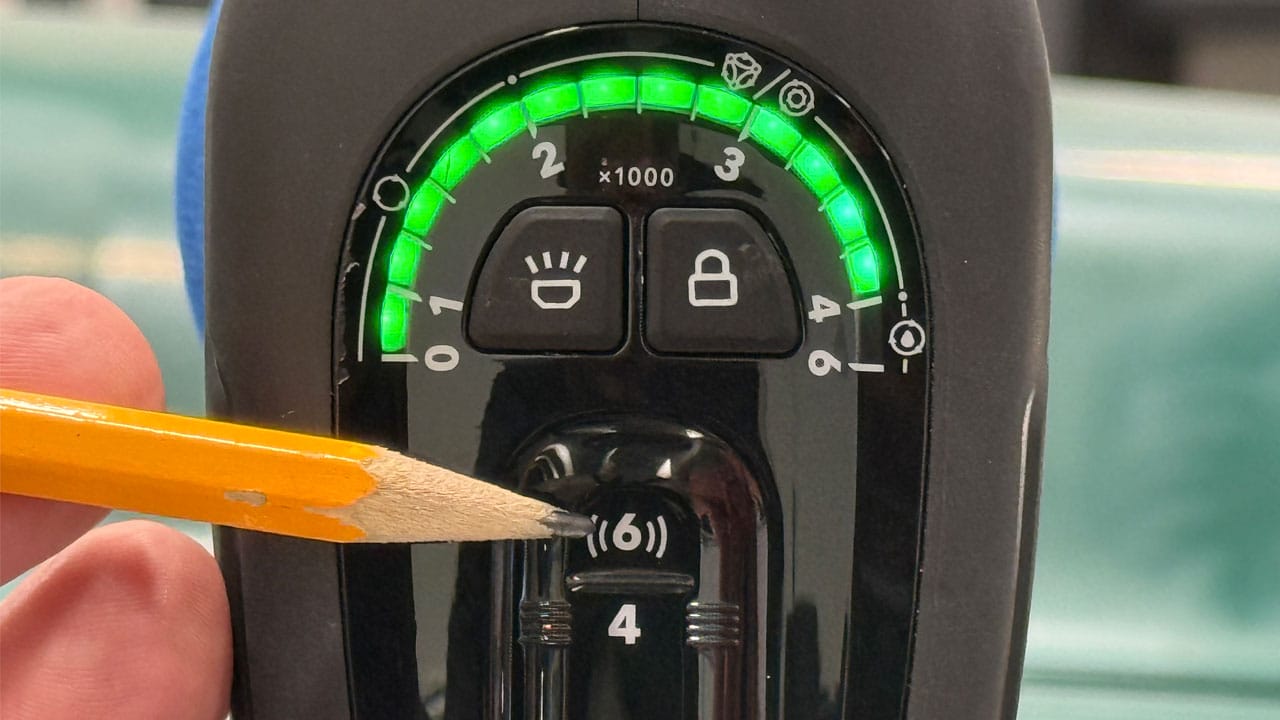
At the top of the touch sensor speed control is the number 6. Lightly tap the 6 twice and you will activate the Turbo Mode, raising the maximum no-load speed from 4,000 to 6,000 RPM.
BOOM! That’s the ticket!
With Turbo Mode activated, the tool delivered the performance I had been looking for. And because you’re reading this review—or watching the accompanying video—you now know about Turbo Mode before your first test drive.
More Turbo Mode reference photos (2 photos)
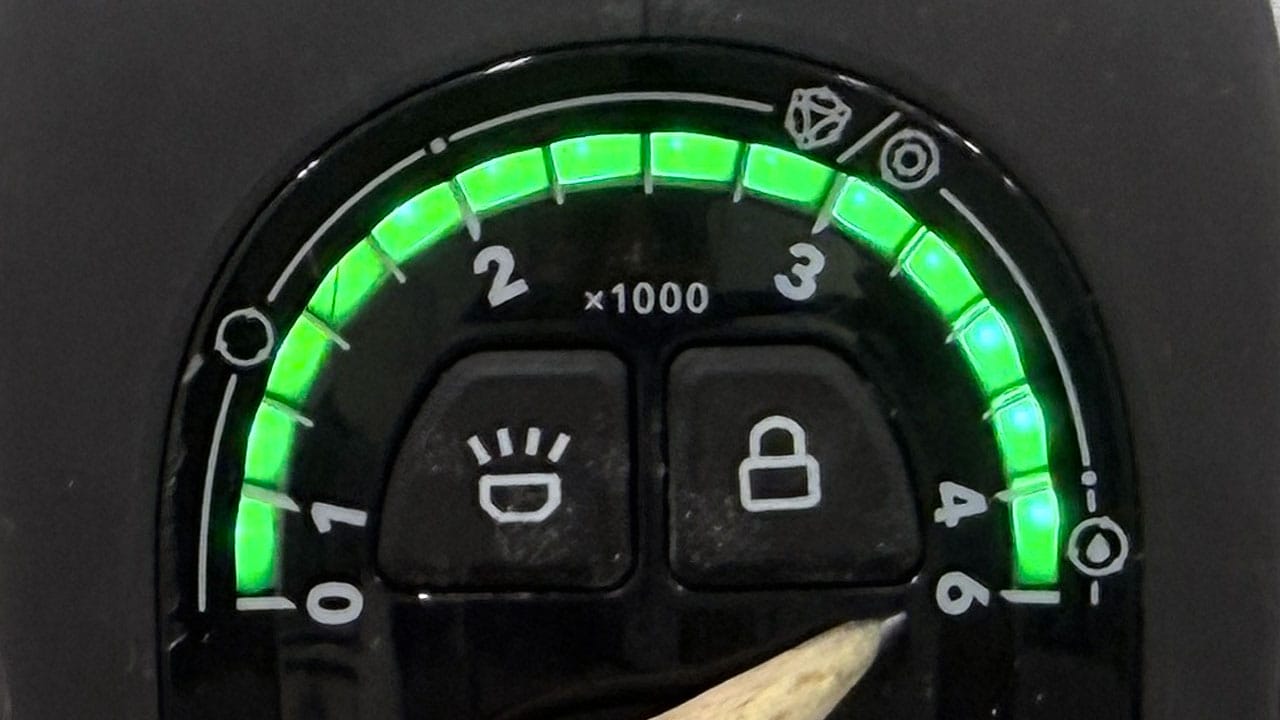
The built-in inspection light
The Mini BEAST has a built-in inspection light on the head of the polisher to help you inspect the paint as you work.
Press the light button to turn it on. Then briefly press and release the button to cycle through three color temperature settings. Stop pressing when you reach the setting you want.
- 2500 K — Warm yellow light
- 4500 K — Neutral white light
- 6500 K — Cool white light with a slight blue tint
The letter K stands for kelvin, the unit used to describe the light’s color temperature. Lower numbers mean warmer, yellower light. Higher numbers mean cooler, bluer light.
These settings change the color of the light, rather than its brightness.
Super smooth and super quiet
The Mini BEAST uses a belt-driven system to transfer power from the motor to the drive assembly. The gear-driven orbital adapter still uses gearing to produce its forced movement, but the belt-driven power transmission helps reduce operating noise and vibration.
In use, my prototype feels exceptionally smooth. I haven’t felt noticeable vibration, and it may be the quietest polisher I’ve ever used. That smooth, quiet operation makes it pleasant to work with, especially during longer detailing sessions.
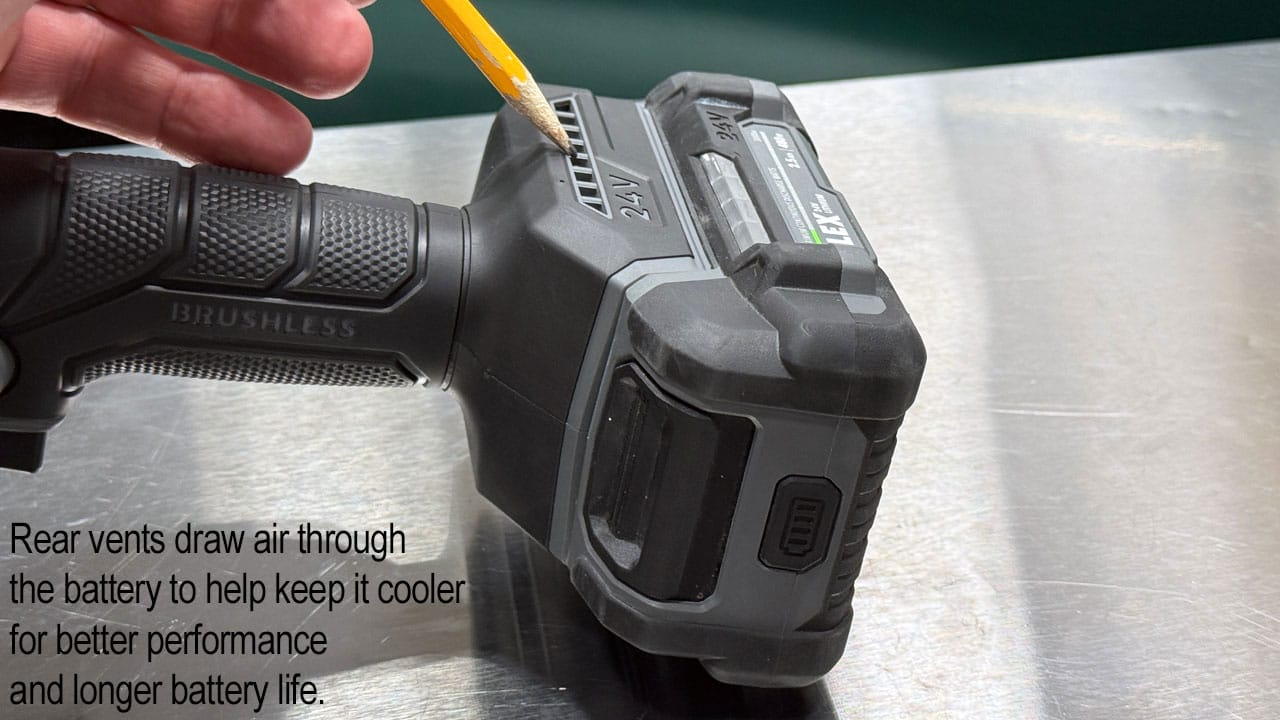
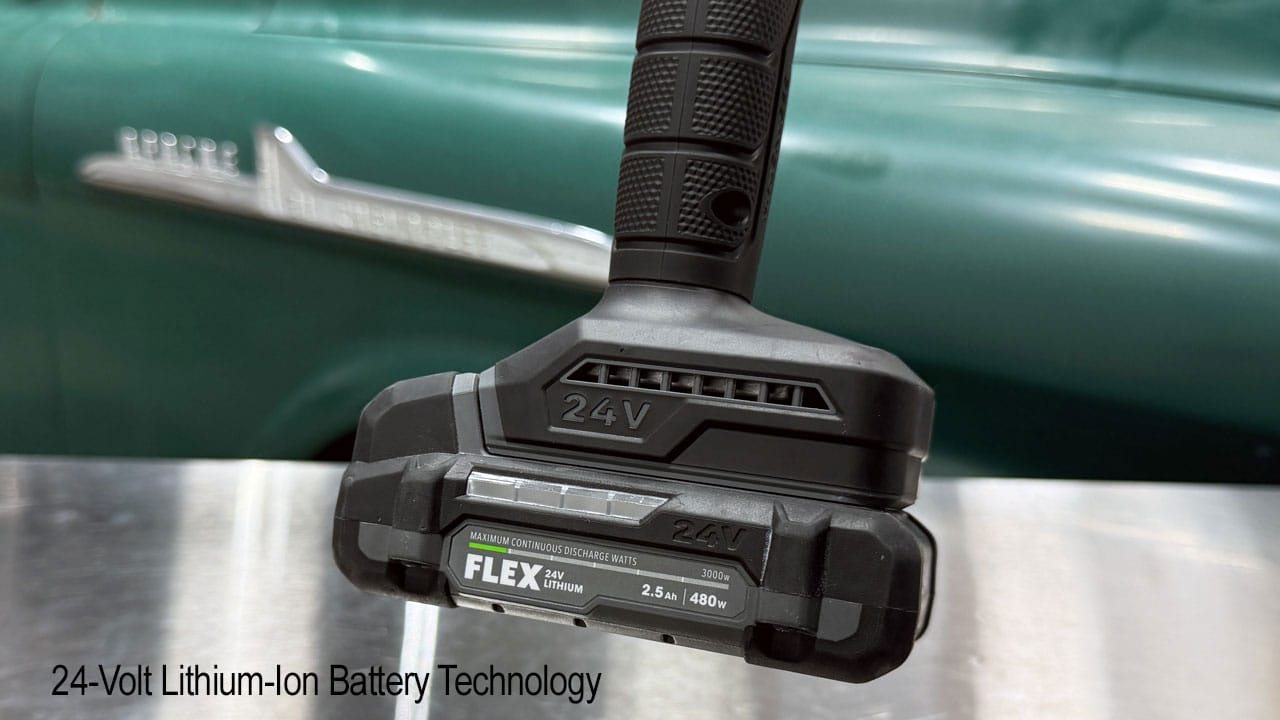
More tool, battery, and charger feature photos (11 photos)
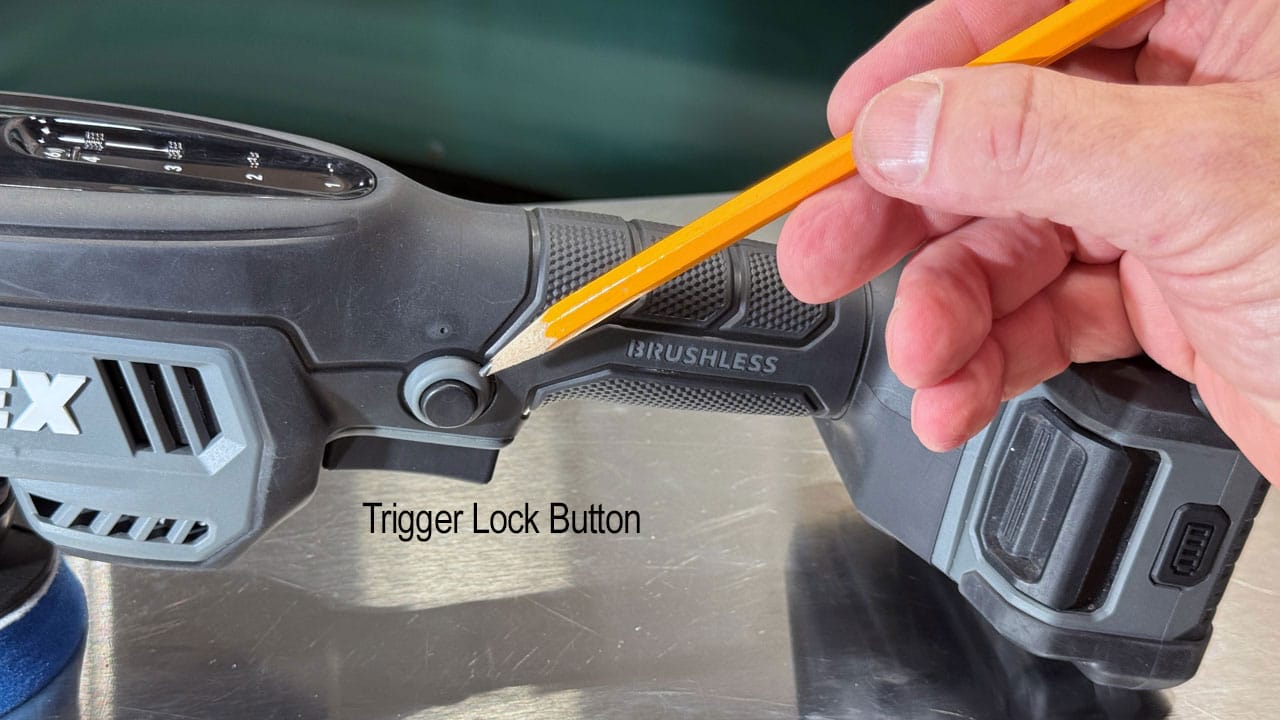
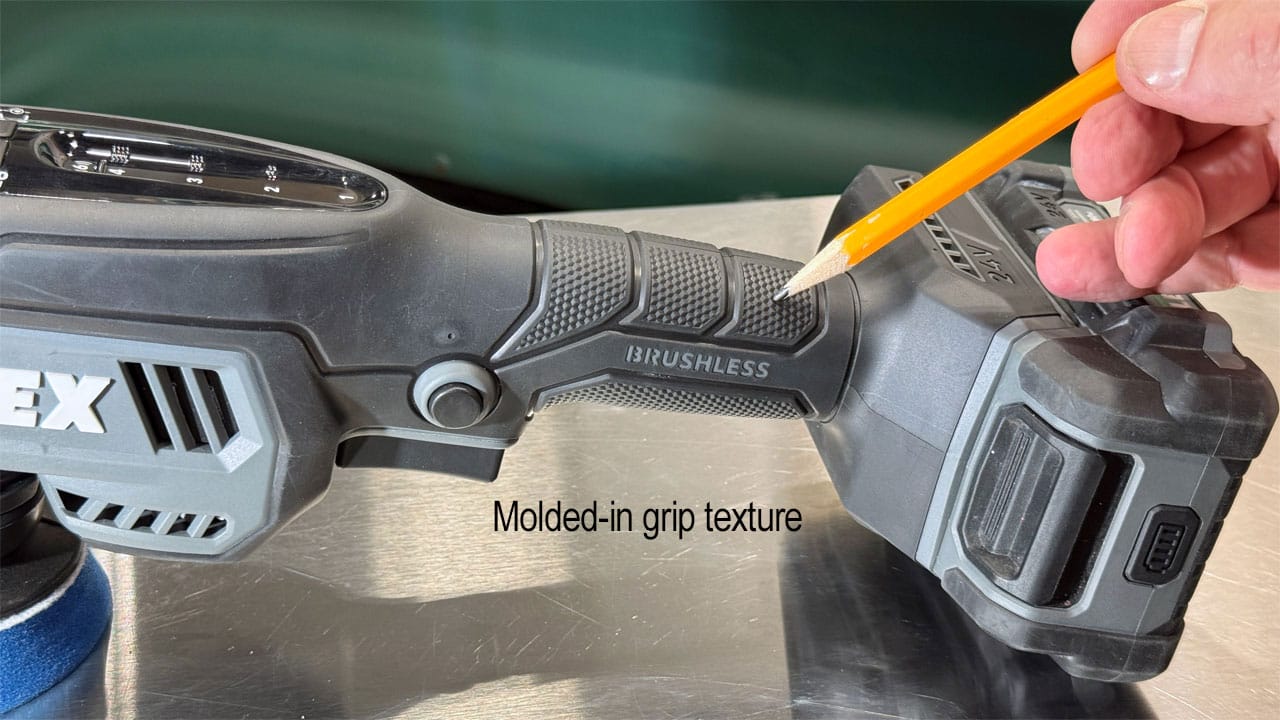
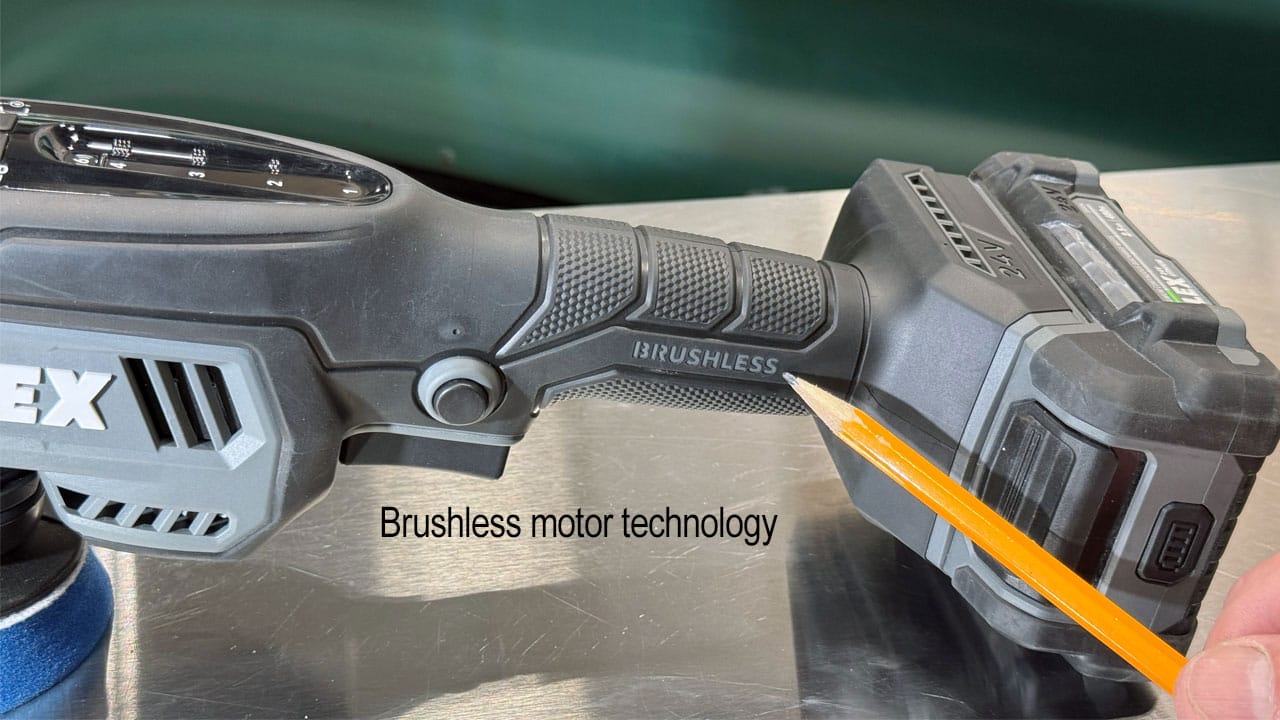
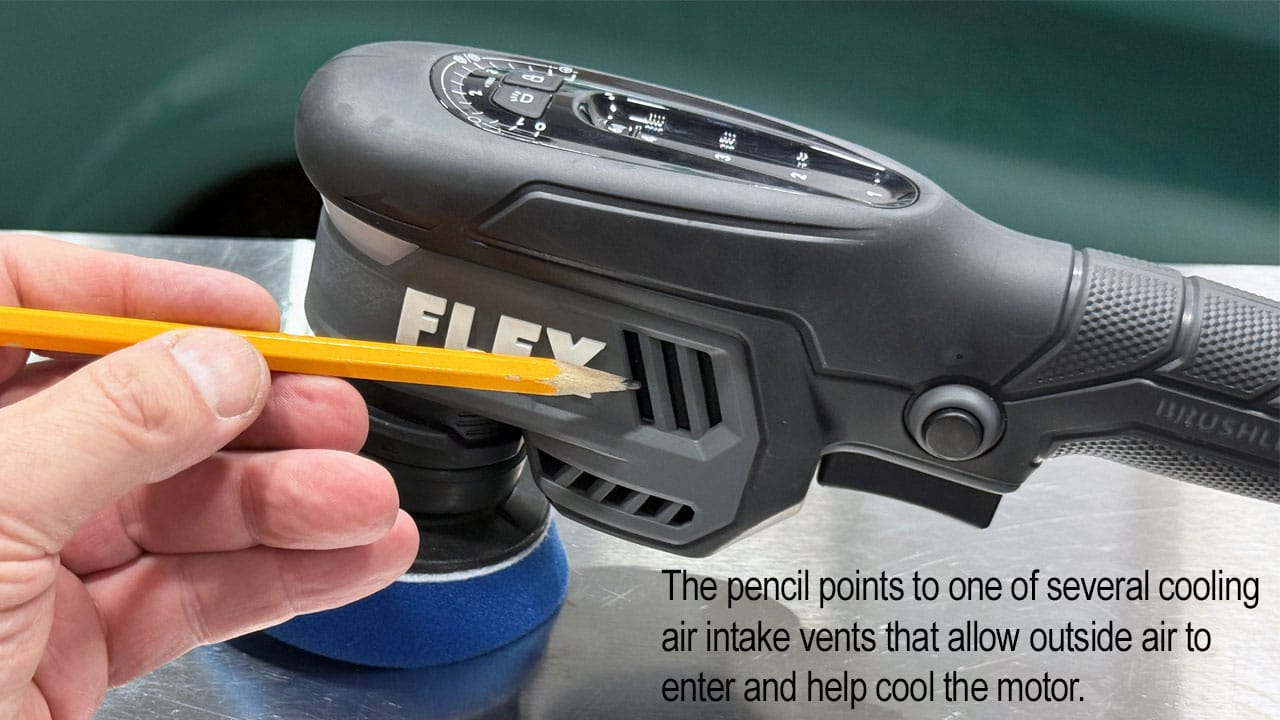
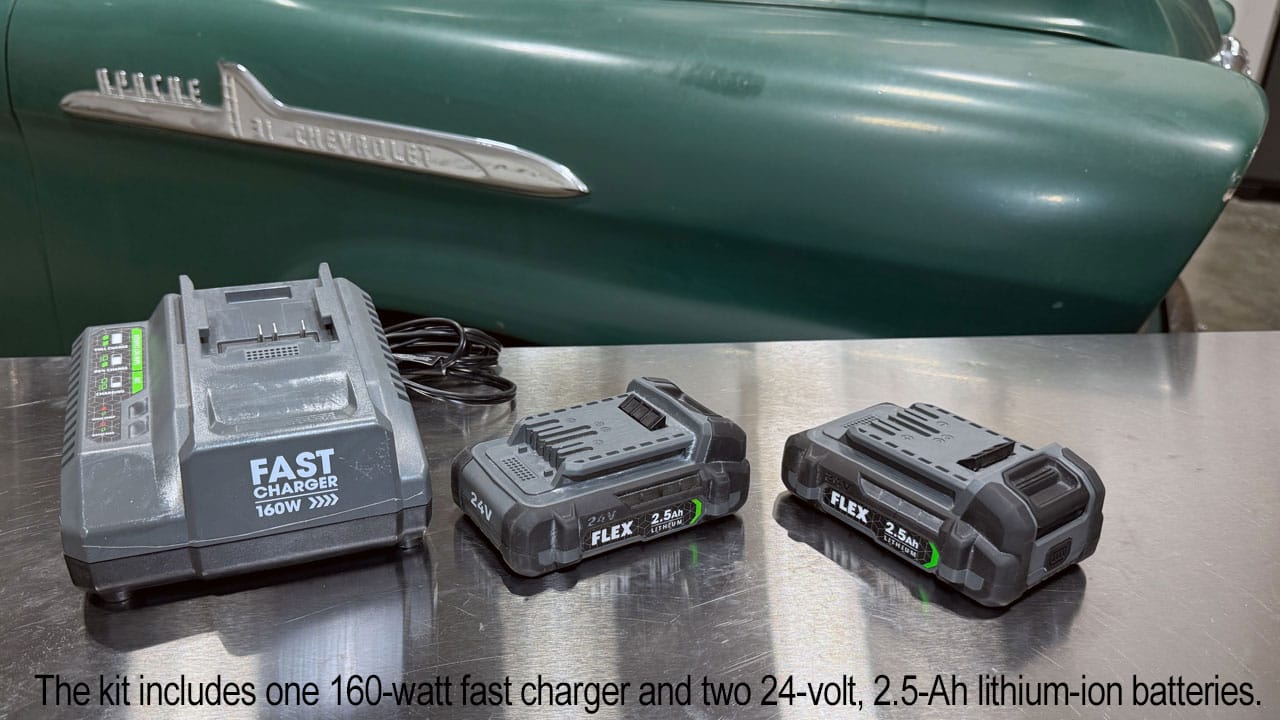
Two 2.5-Ah batteries and a 160-watt Fast Charger
One concern I hear about cordless polishers is whether they have enough power—and whether the batteries will last long enough to get useful work done.
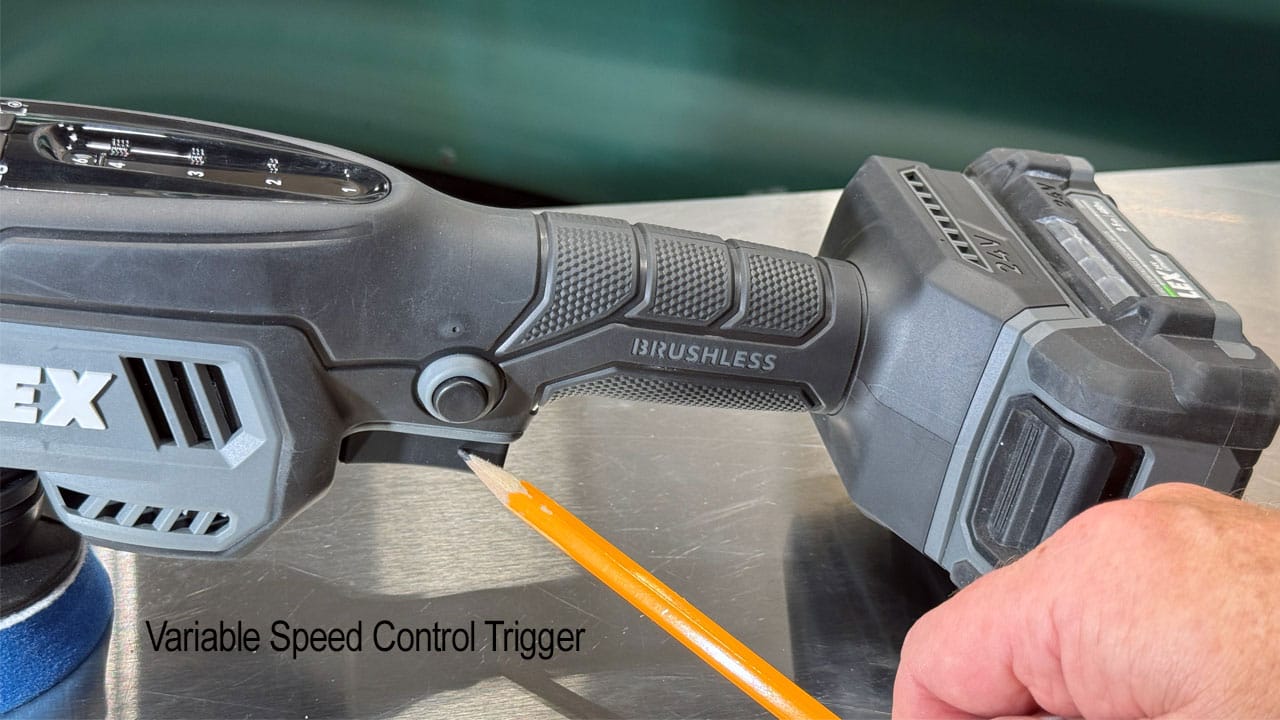
In my experience, the Mini BEAST’s compact 24-volt, 2.5-Ah lithium-ion batteries provide plenty of power for the work I’ve described in this review.
The kit includes two batteries and a 160-watt Fast Charger.
When one battery runs down, swap in the charged battery and put the depleted one on the charger. A full recharge takes approximately 30 minutes, depending on temperature and battery condition.
During my typical use, the battery on the charger has been ready before I’ve depleted the battery in the tool. Your results will depend on the adapter, speed, pressure, and how continuously you work.
If you want an additional reserve, purchasing a third battery is a simple option.
Paint correction test: 1958 Chevy Apache
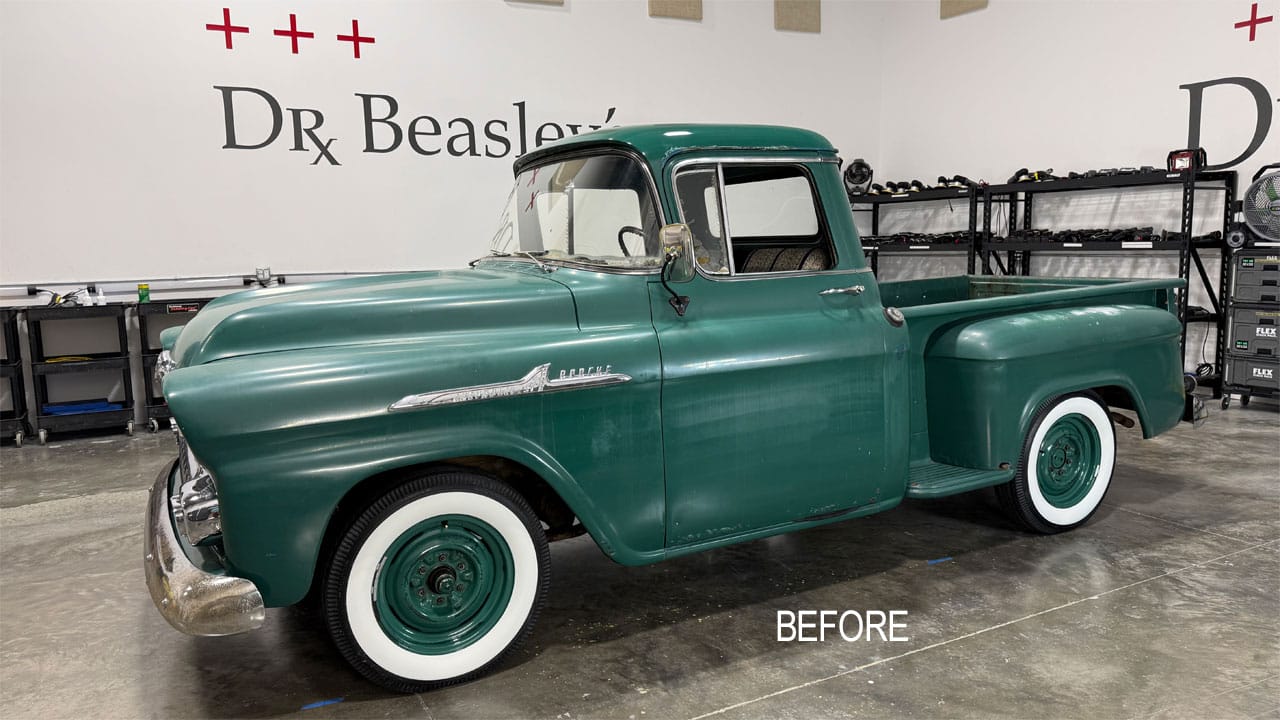
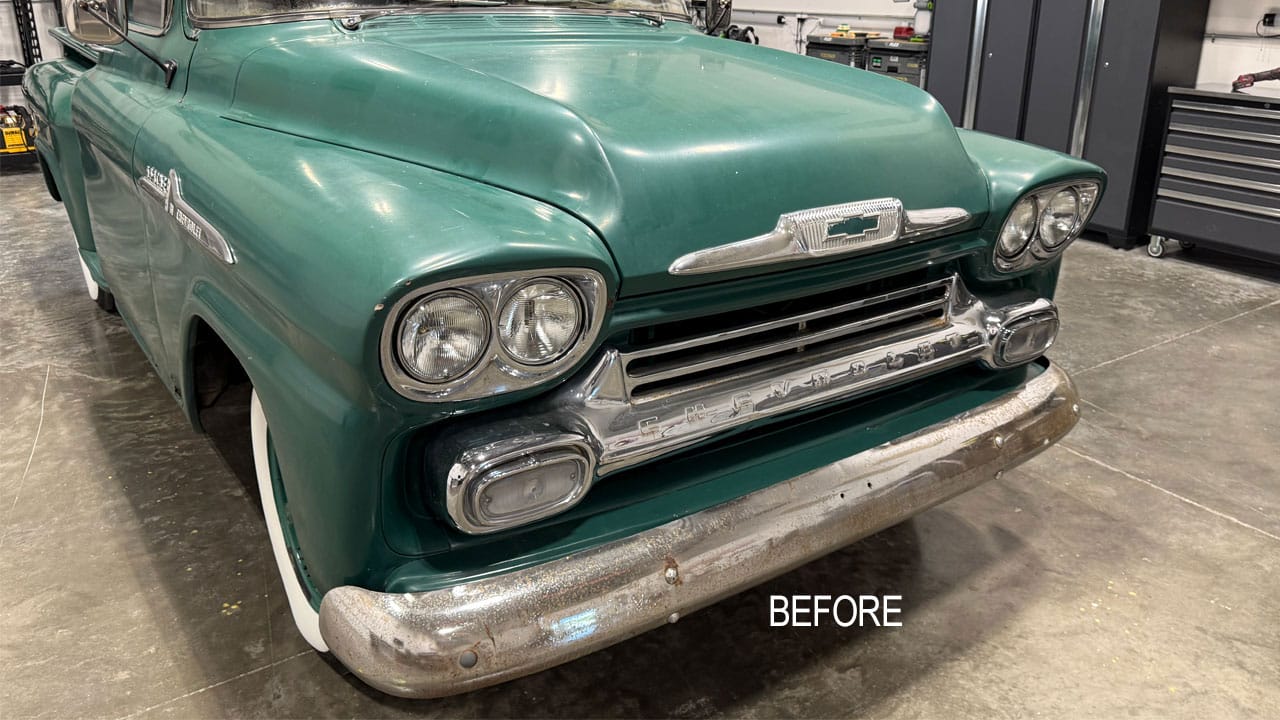
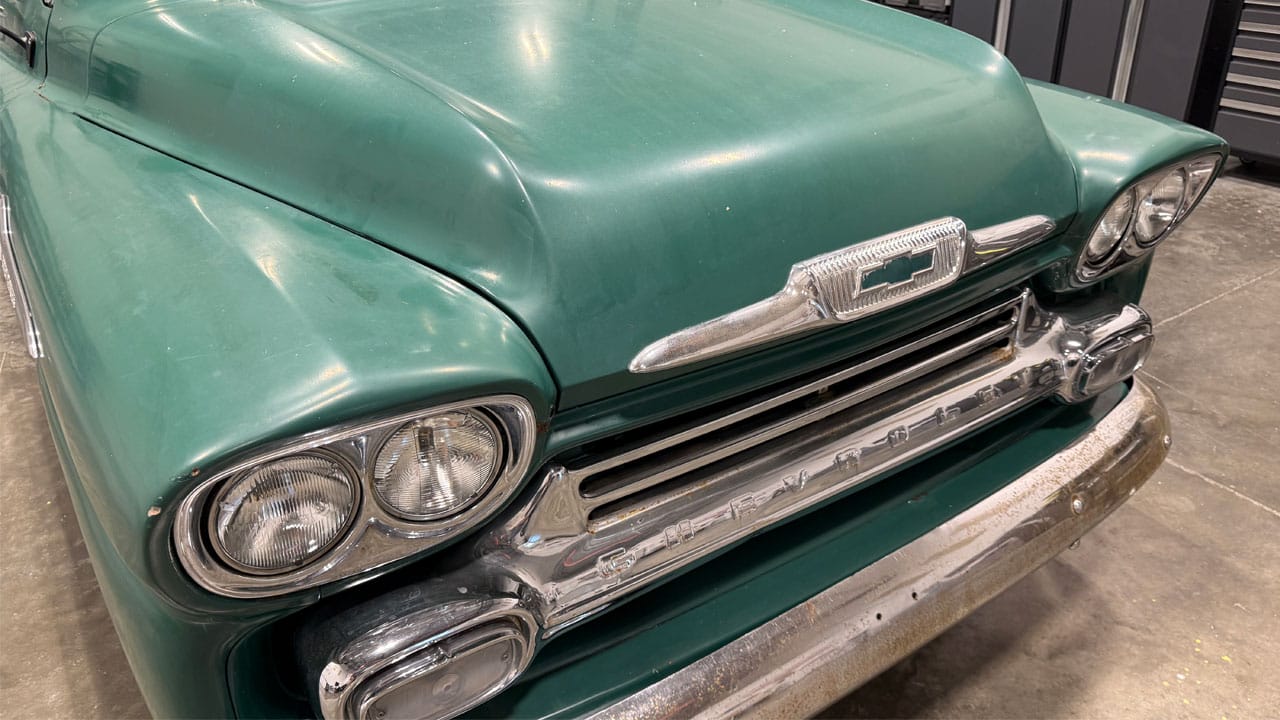
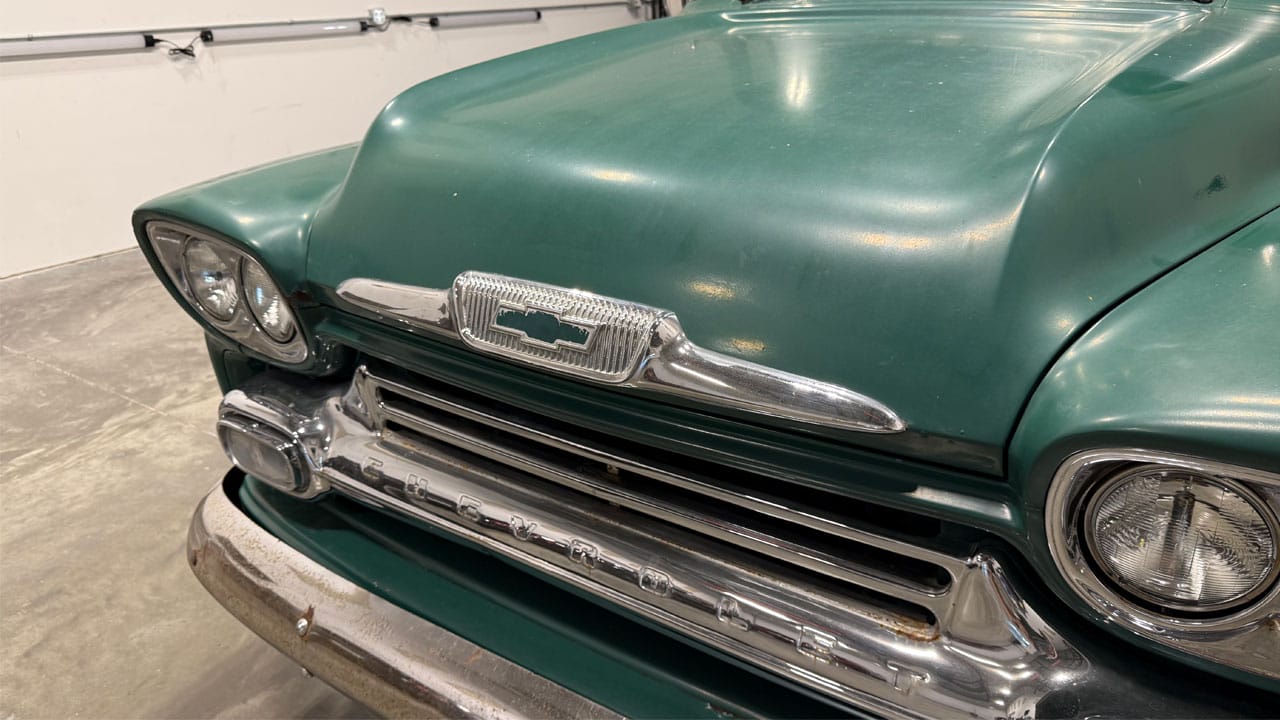
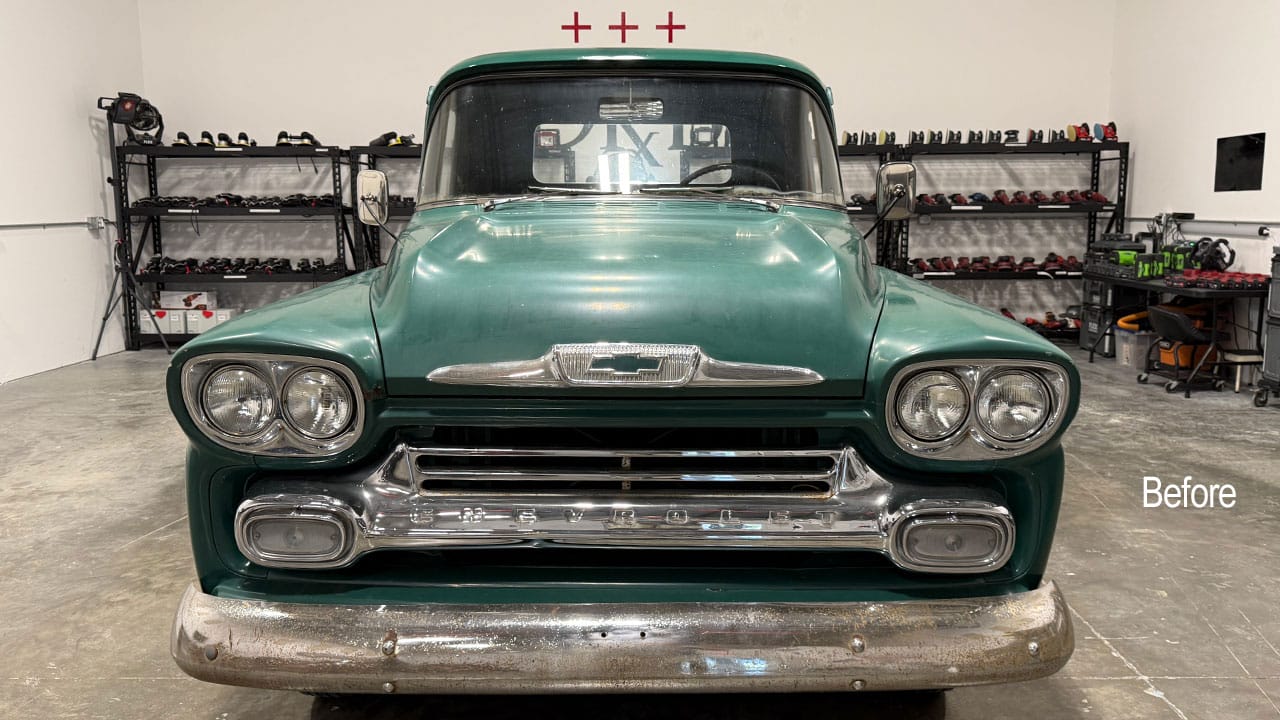
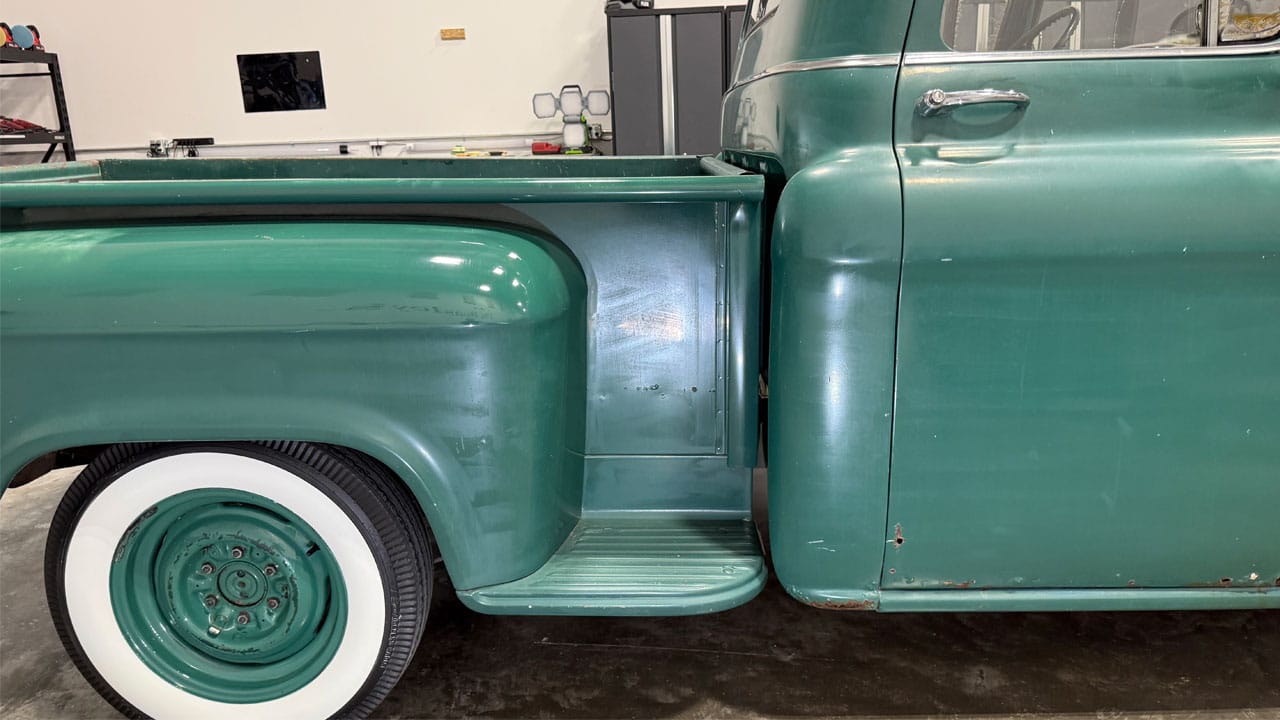
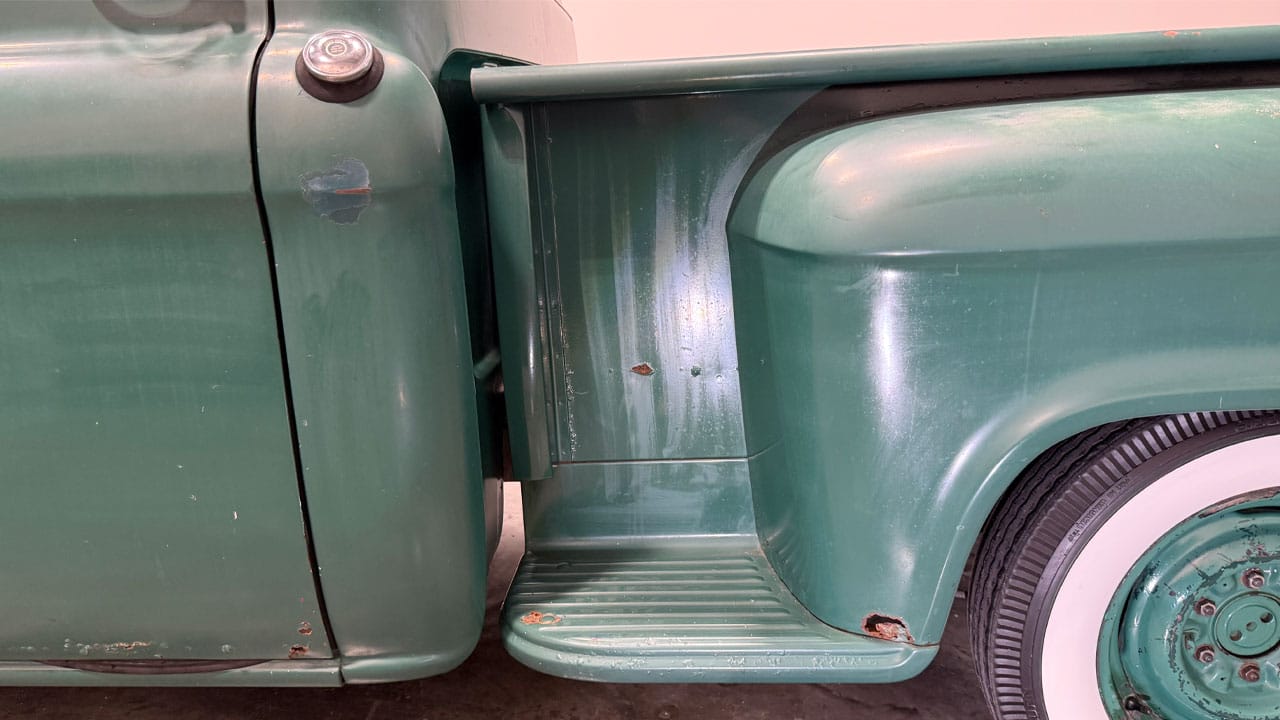
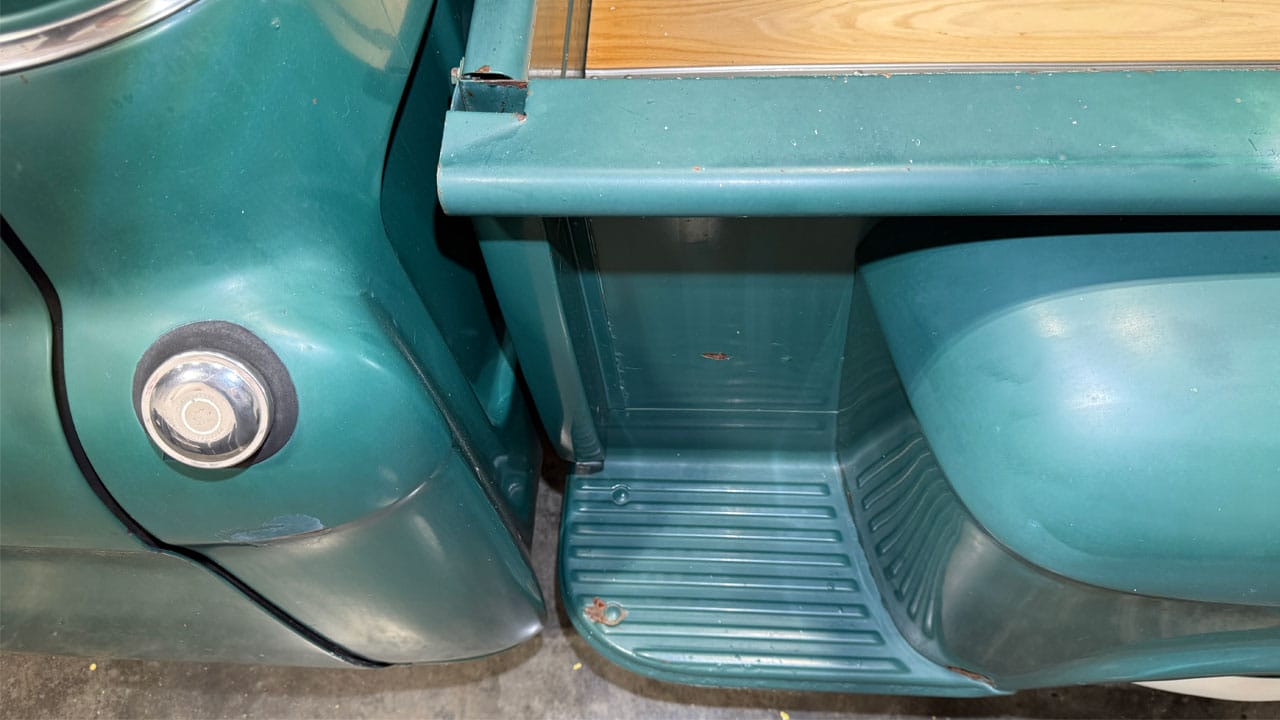
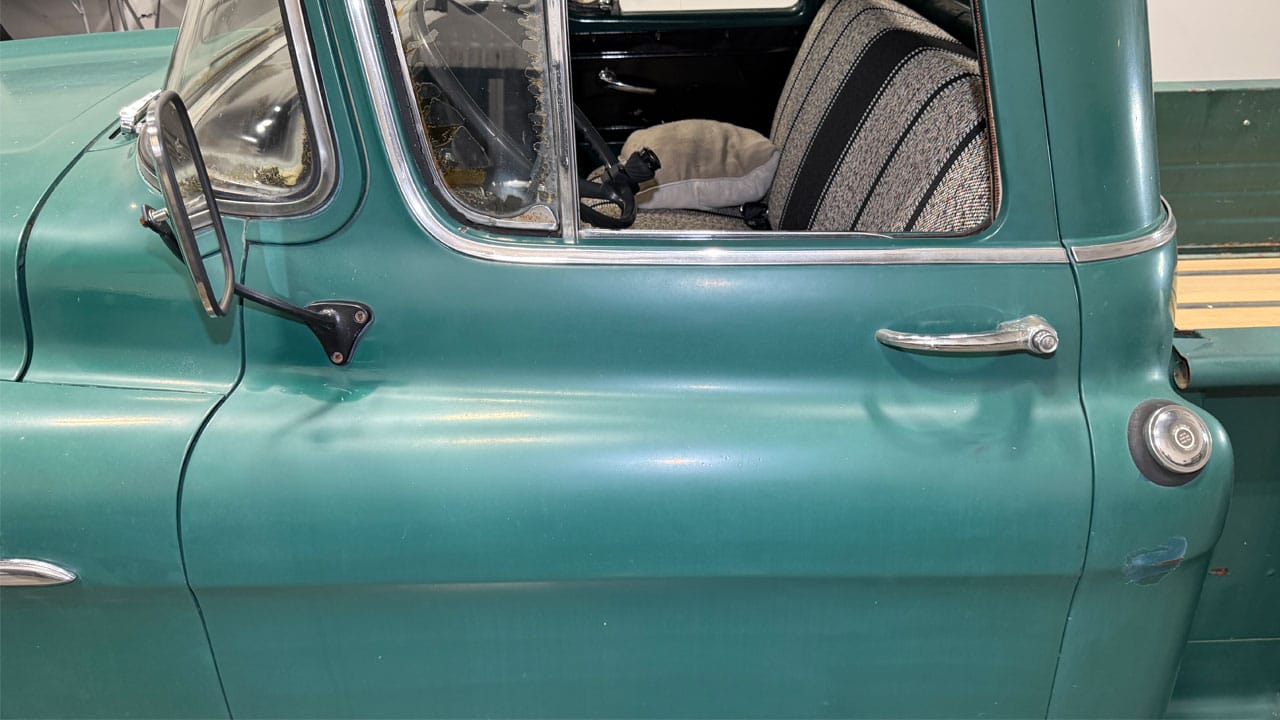
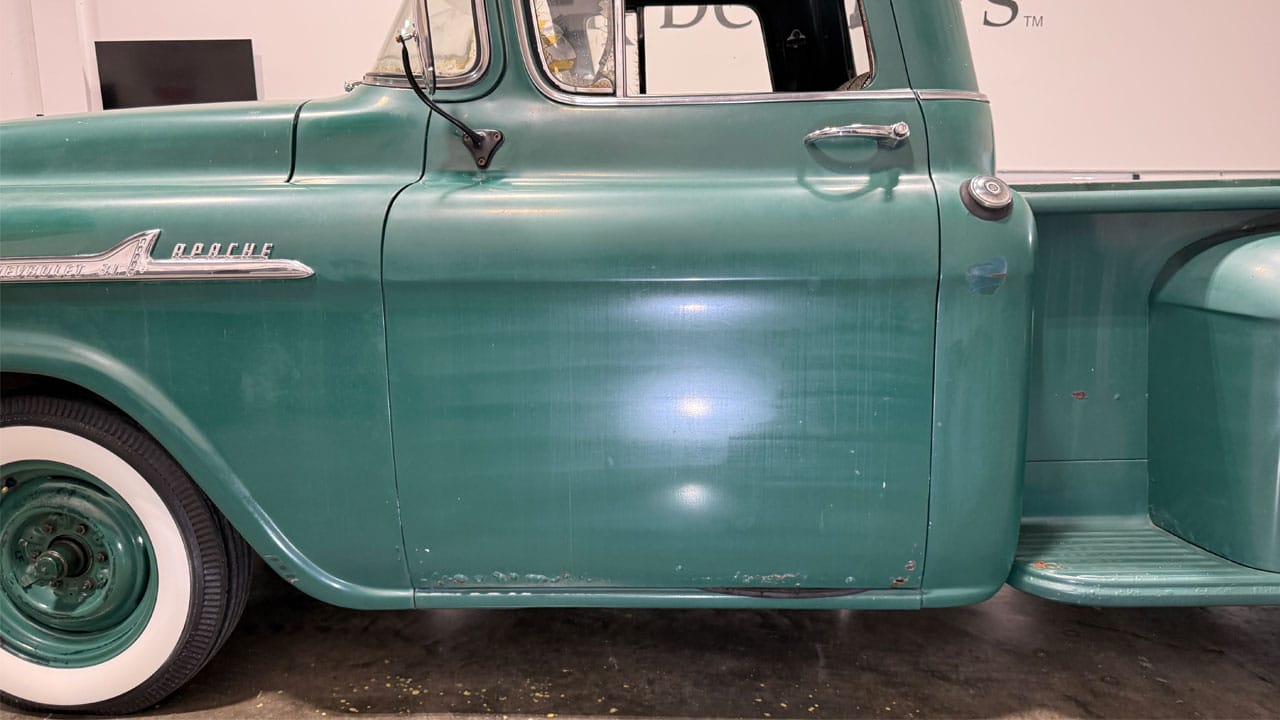
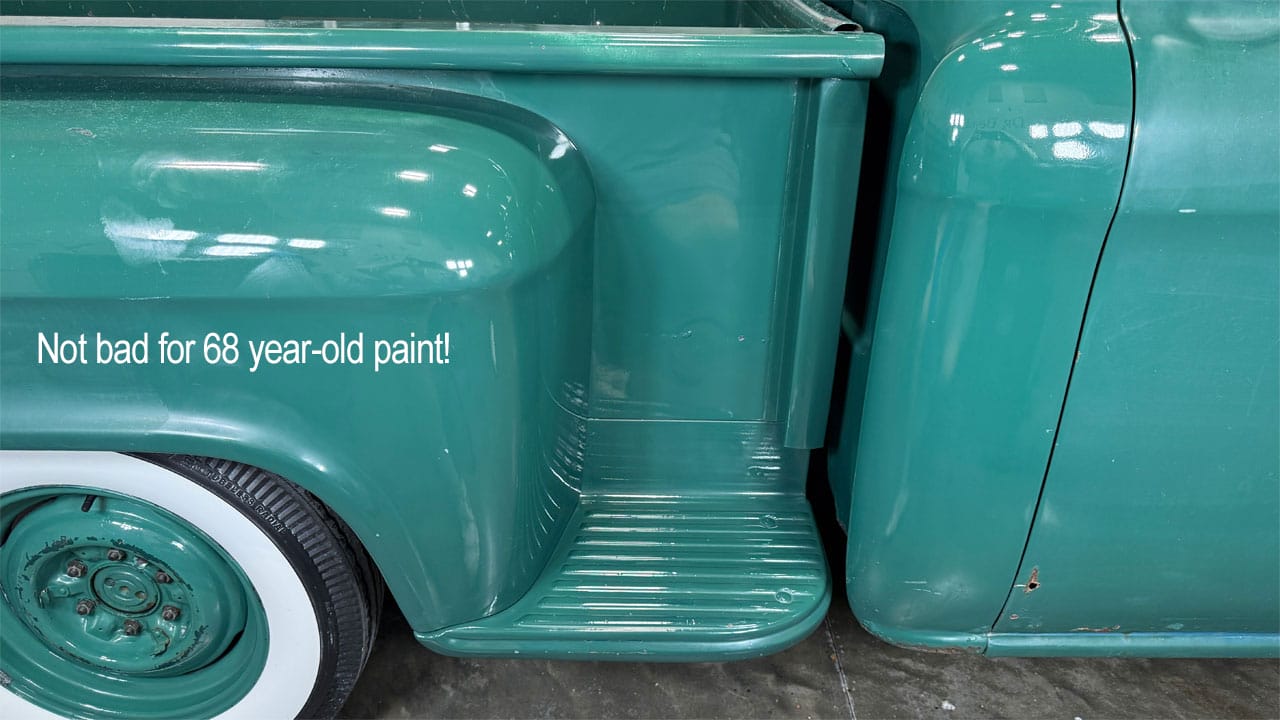
For this review, I used an all-original 1958 Chevy Apache pickup truck with DECADES of oxidation. But oxidation wasn’t the only challenge.
Someone had applied Poppy’s Patina, a wipe-on automotive clearcoat designed to preserve the weathered appearance of older vehicles. It’s an amazing product for owners who prefer the patina look over repainting. In this case, however, the person applying it didn’t mix in the catalyst, so the clearcoat never cured correctly.
I ordered the solvent Poppy’s Patina offers for removing its clearcoat. My concern was that the solvent might also remove the truck’s original paint underneath.
Before trying the solvent, I performed a machine-polishing test spot. I found I could remove both the improperly cured clearcoat and the decades of oxidation through polishing.
Based on those results, I chose to leave the solvent on the shelf and remove the Poppy’s Patina as part of the oxidation-removal process.
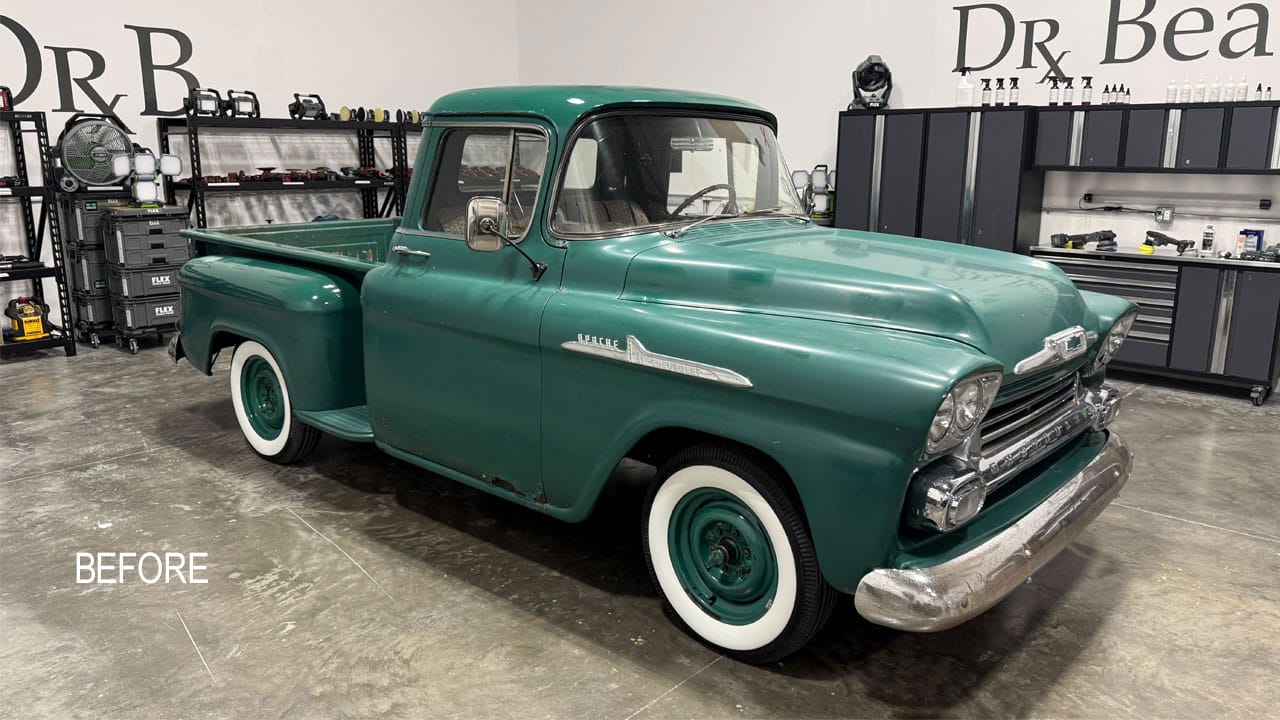
More before photos and coating-removal details (12 photos)
More about the uncured Poppy’s Patina and the test spot
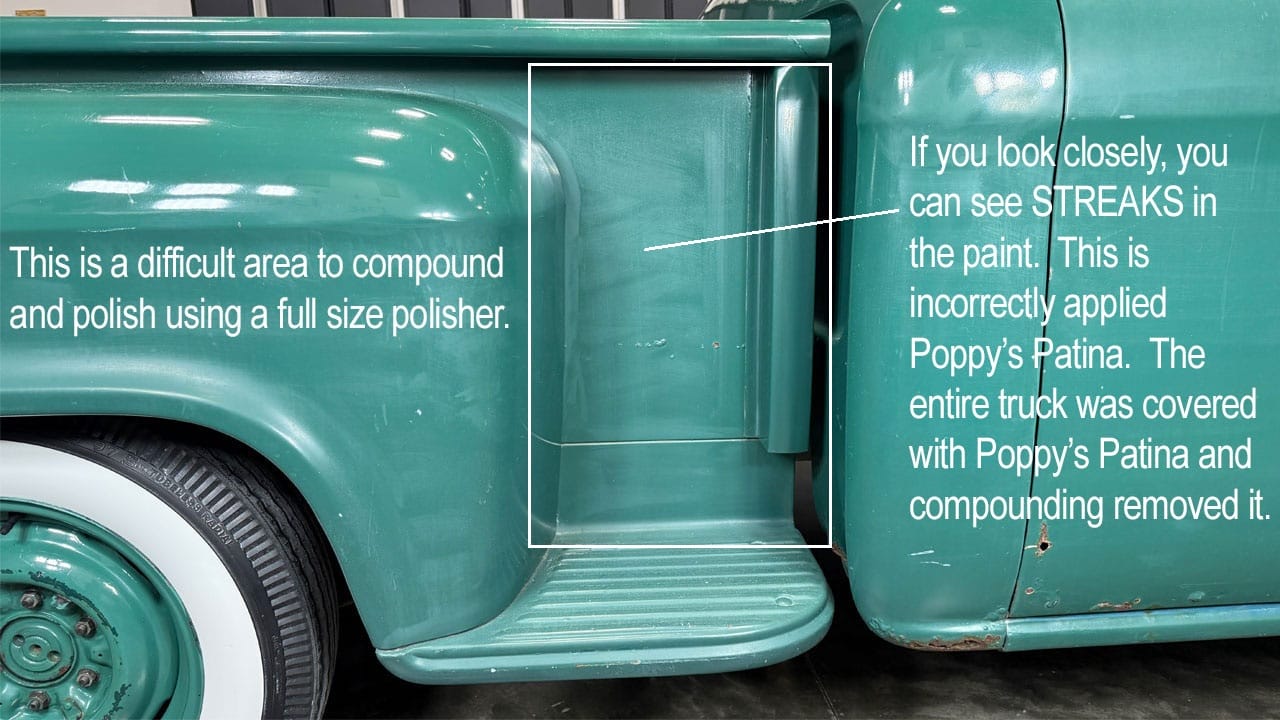
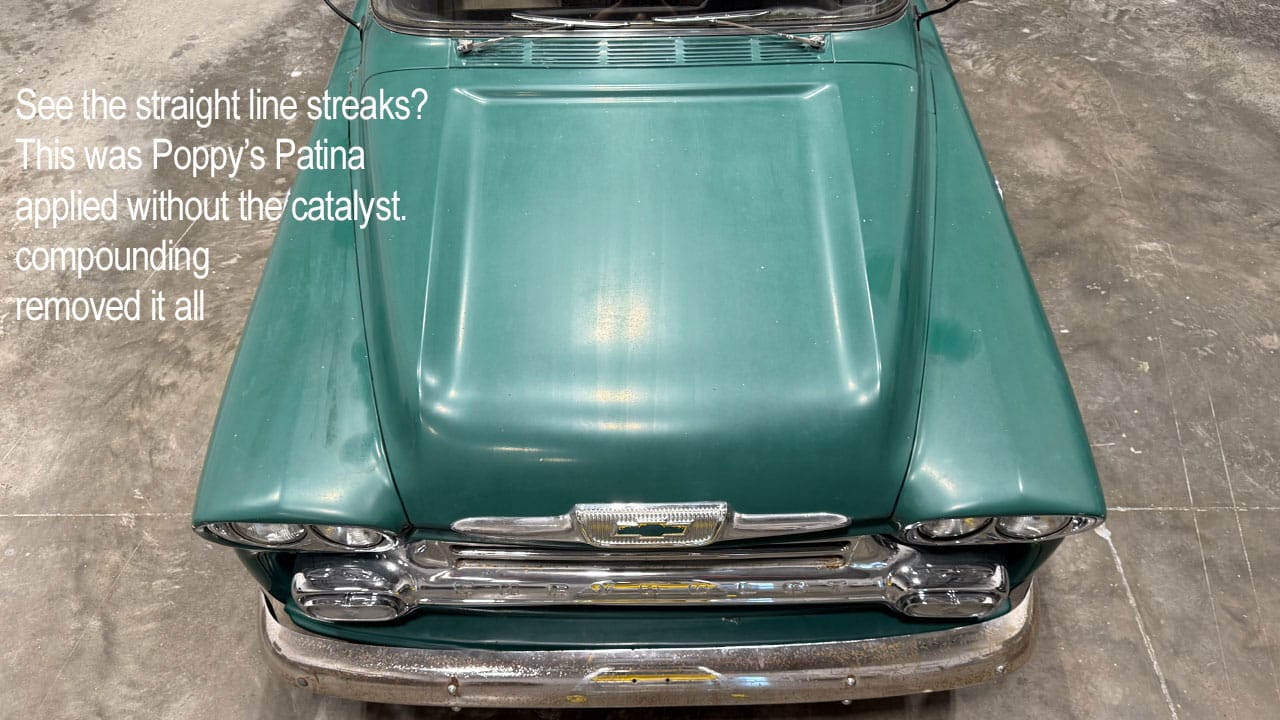
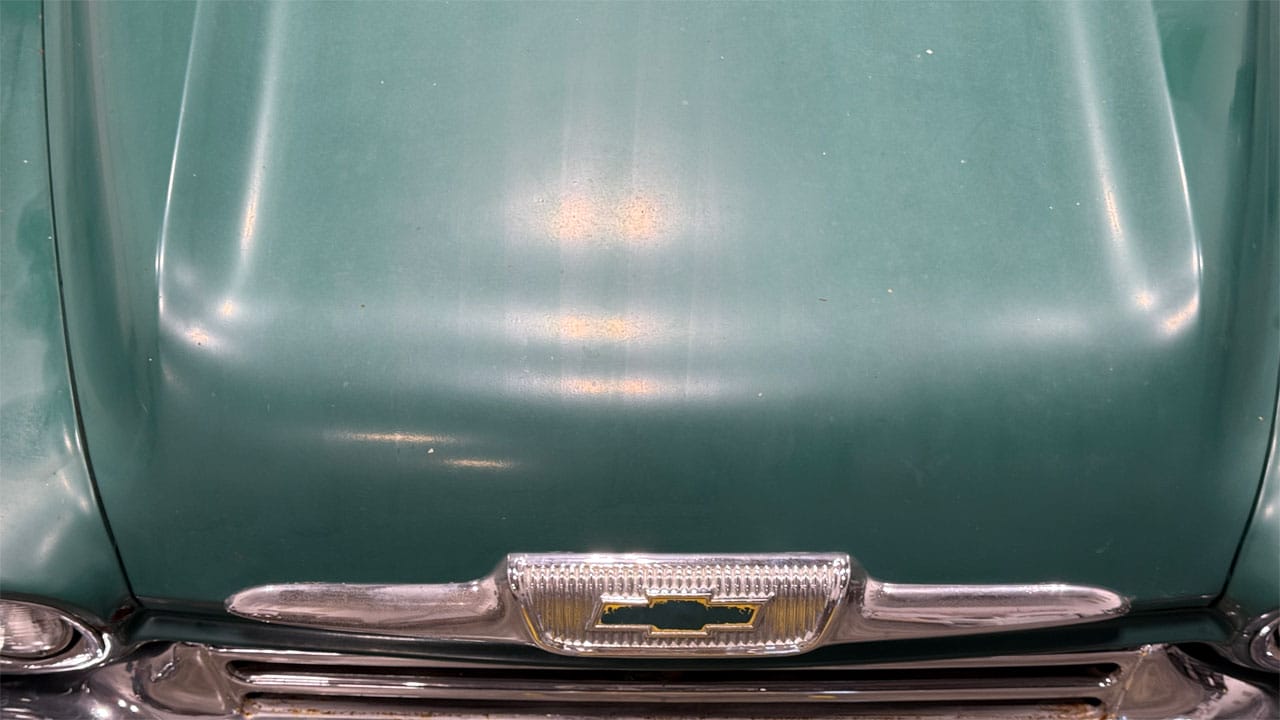
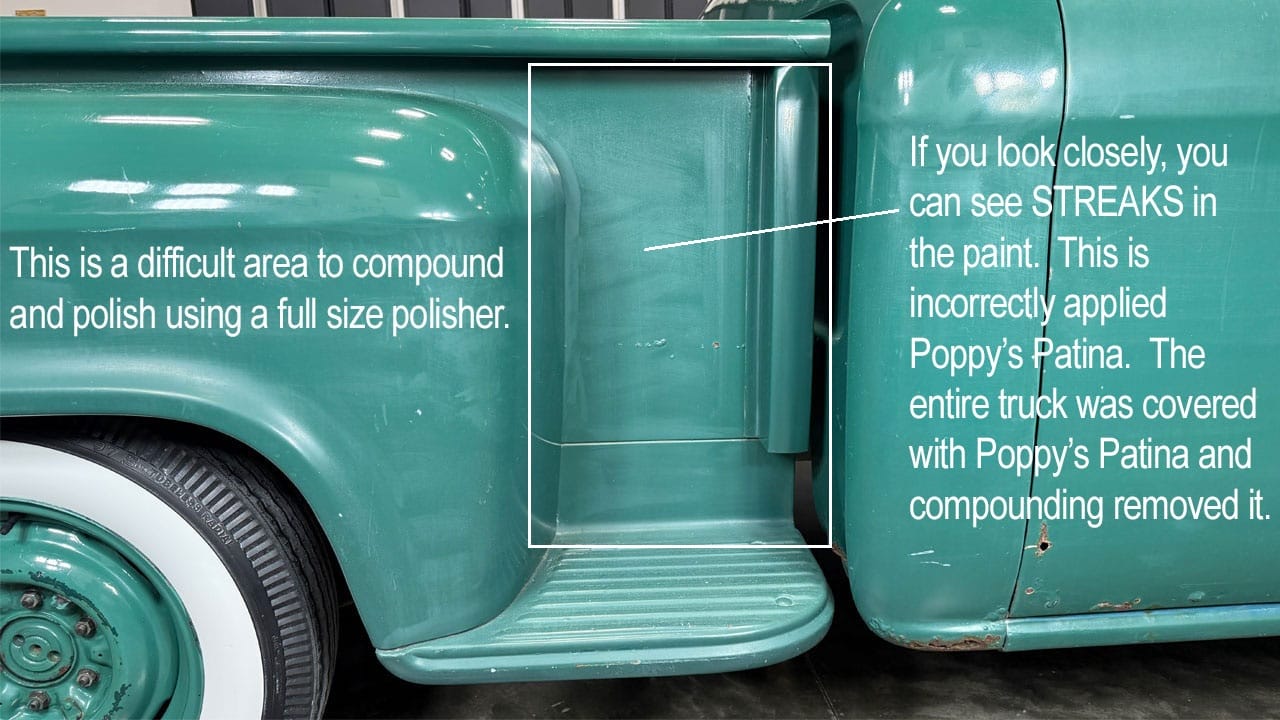
The straight-line streaks in the restoration photos are from an improperly applied coat of Poppy’s Patina.
Poppy’s Patina is a wipe-on, self-leveling automotive clearcoat designed to preserve the weathered appearance of vintage vehicles while creating a protective finish that’s easier to maintain.
The problem wasn’t the product—it was the application. The person who applied it to this 1958 Chevy Apache pickup truck didn’t mix in the catalyst needed for proper curing. This left a gooey coating over the entire truck, and the owner wanted to know whether I could remove it without damaging the original paint.
I contacted Poppy’s Patina customer service, and they were incredibly friendly and helpful. They had encountered this mistake before and sold me a specialty solvent called Uni-Solv to dissolve the uncured clearcoat. They also explained that the solvent could potentially remove the original paint underneath.
Preserving that original paint was my priority.
When the truck arrived, before trying the Uni-Solv, I performed a Test Spot to see whether machine compounding could remove the uncured Poppy’s Patina.
My thinking was simple: the truck also had decades of oxidation. Based on my experience restoring antique and original paint, I believed compounding might remove both the uncured clearcoat and the oxidation, revealing the rich color and shine beneath.
The Test Spot confirmed it.
I was able to remove the uncured coating and oxidation while restoring the appearance of the original paint. Based on those results, I chose to compound and polish the truck rather than chemically strip the coating.
To their credit, the team at Poppy’s Patina was happy to accept the unused Uni-Solv for return. Their customer service was excellent throughout the process.
The visible streaks follow the straight-line wiping motions used to apply the Poppy’s Patina clearcoat, which remained uncured because the catalyst wasn’t added.
Polishing tight areas a full-size polisher cannot easily reach
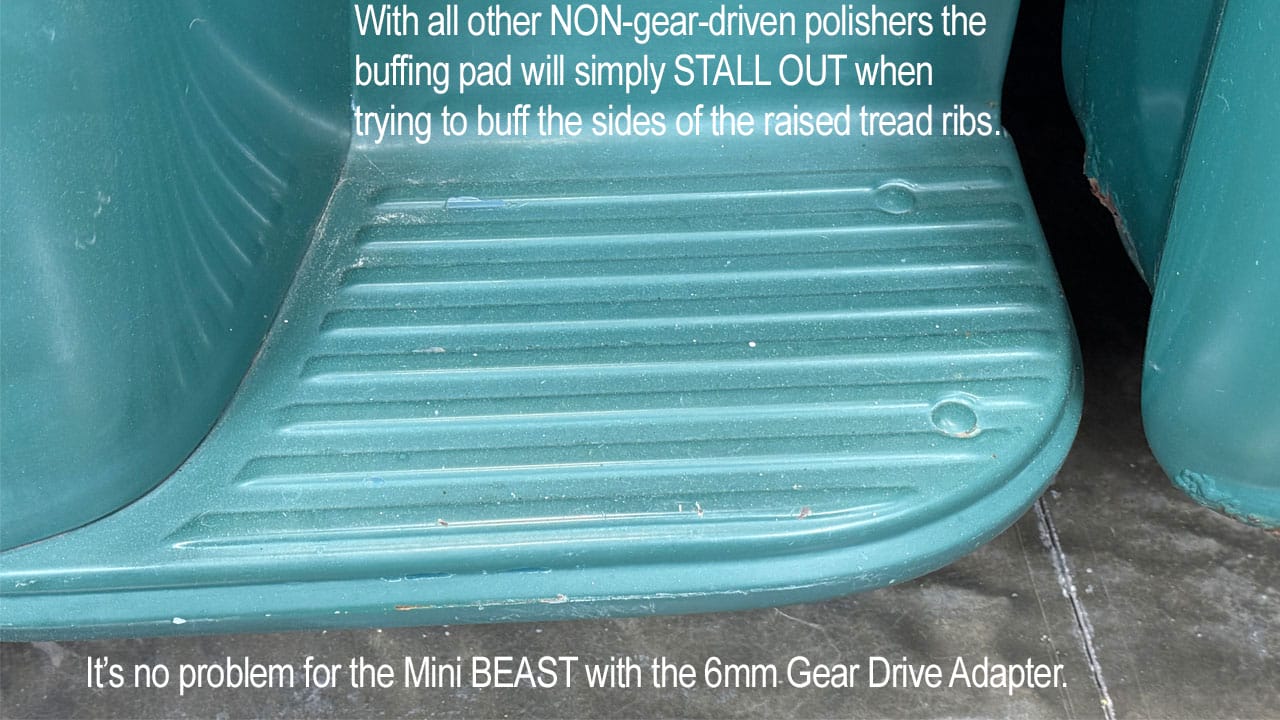
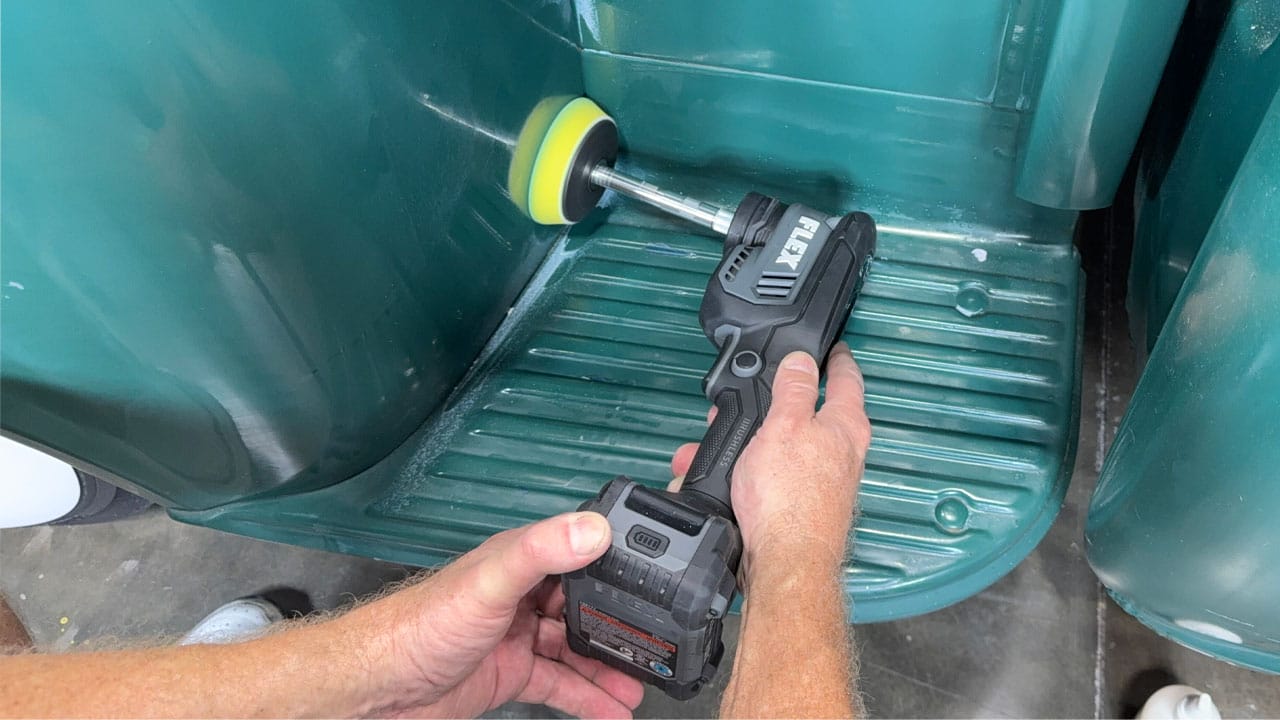
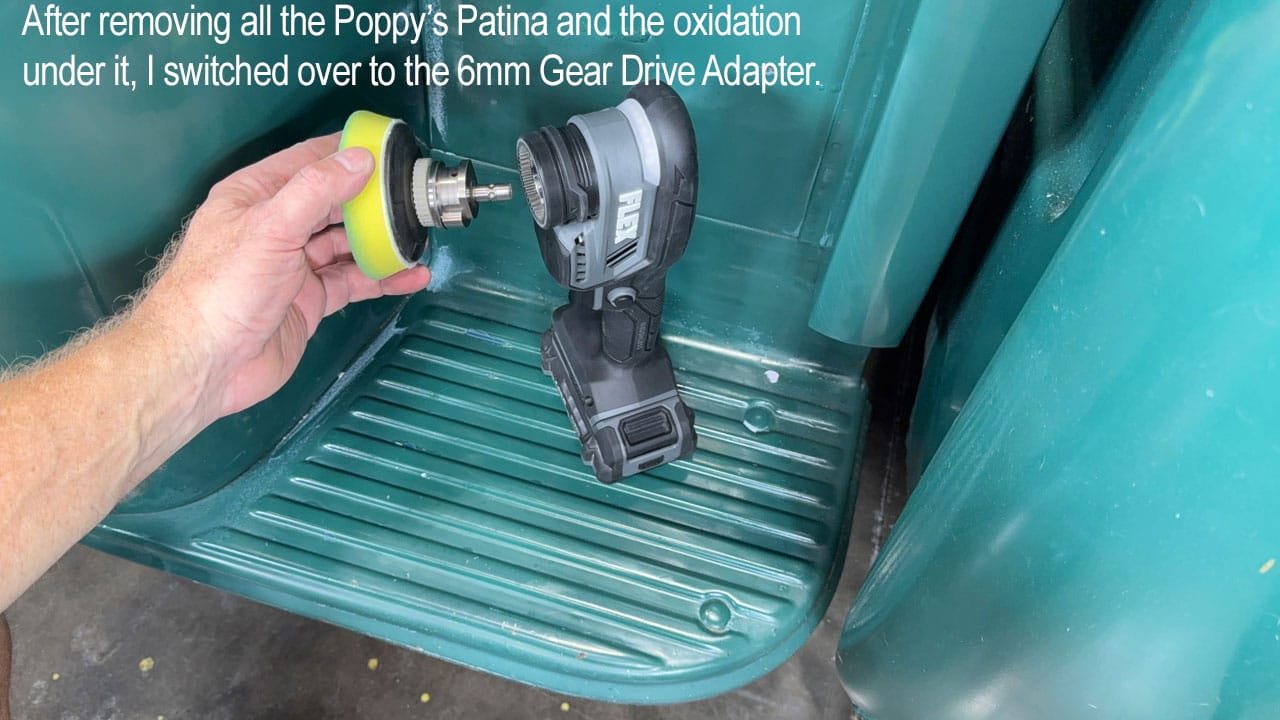
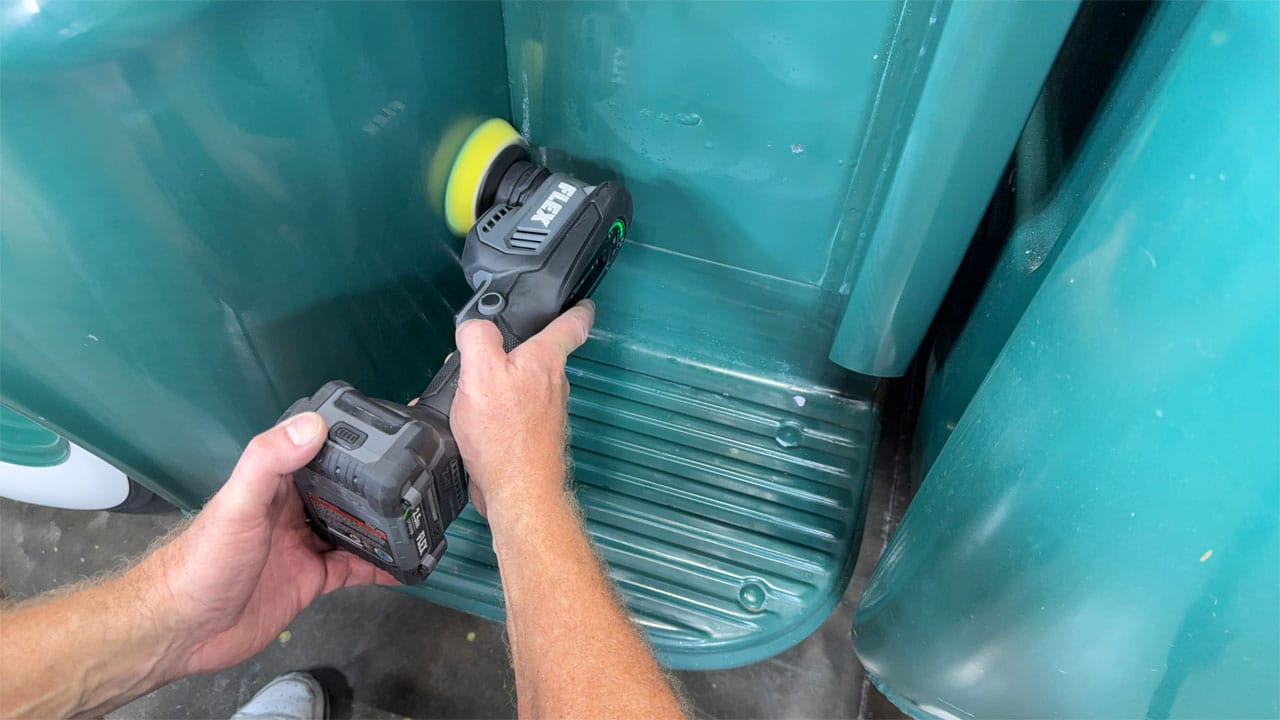
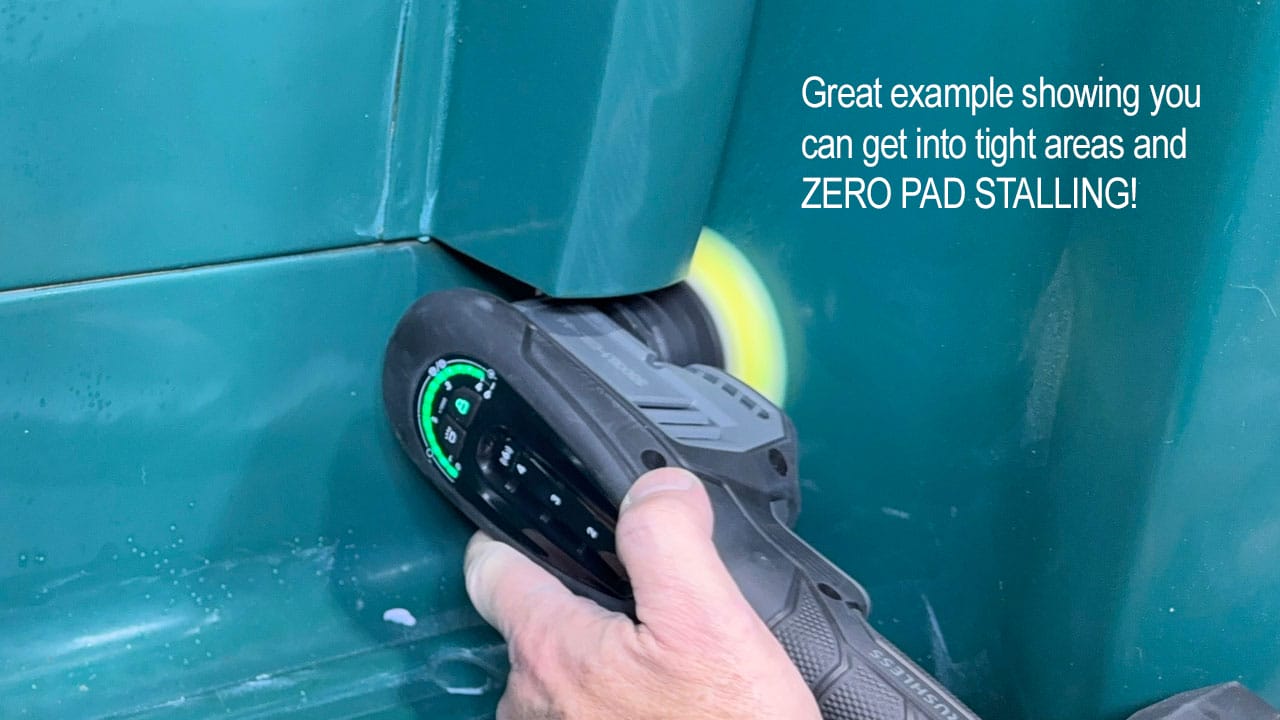
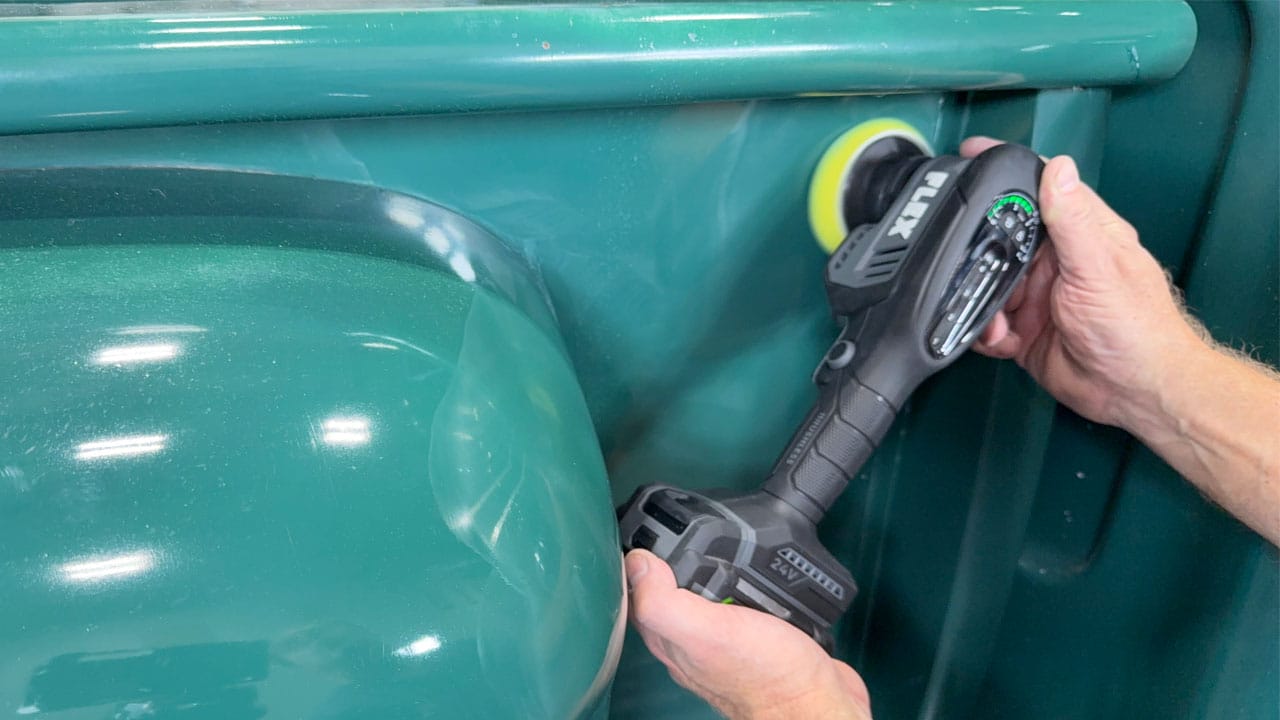
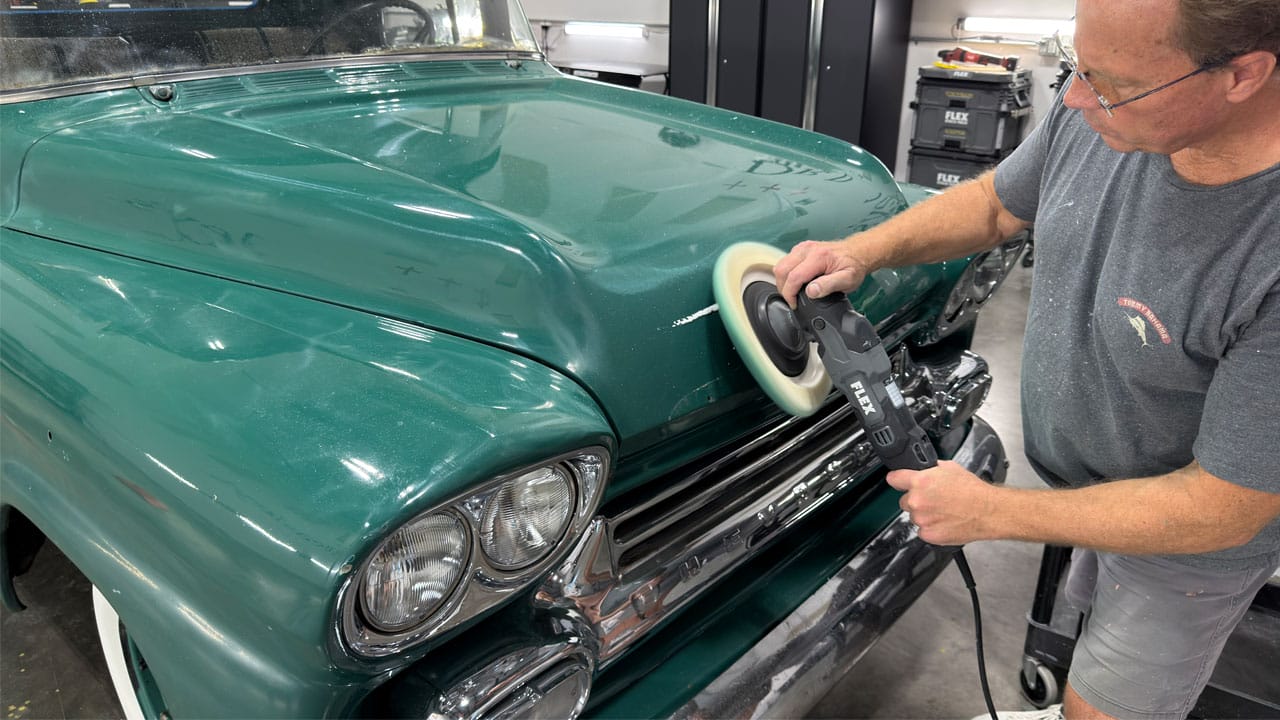
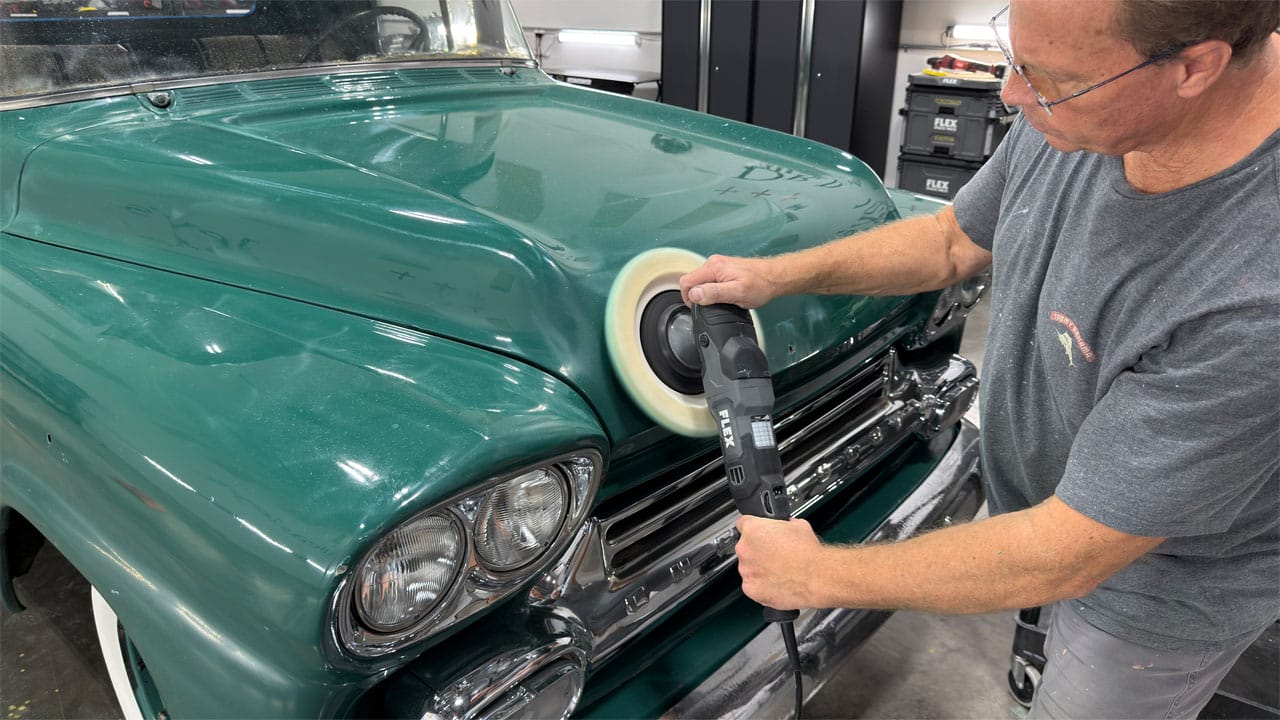
This area on a stepside shorty pickup is difficult for any free spinning, random orbital mini polisher to correct. So I chose this area to demonstrate the Mini BEAST.
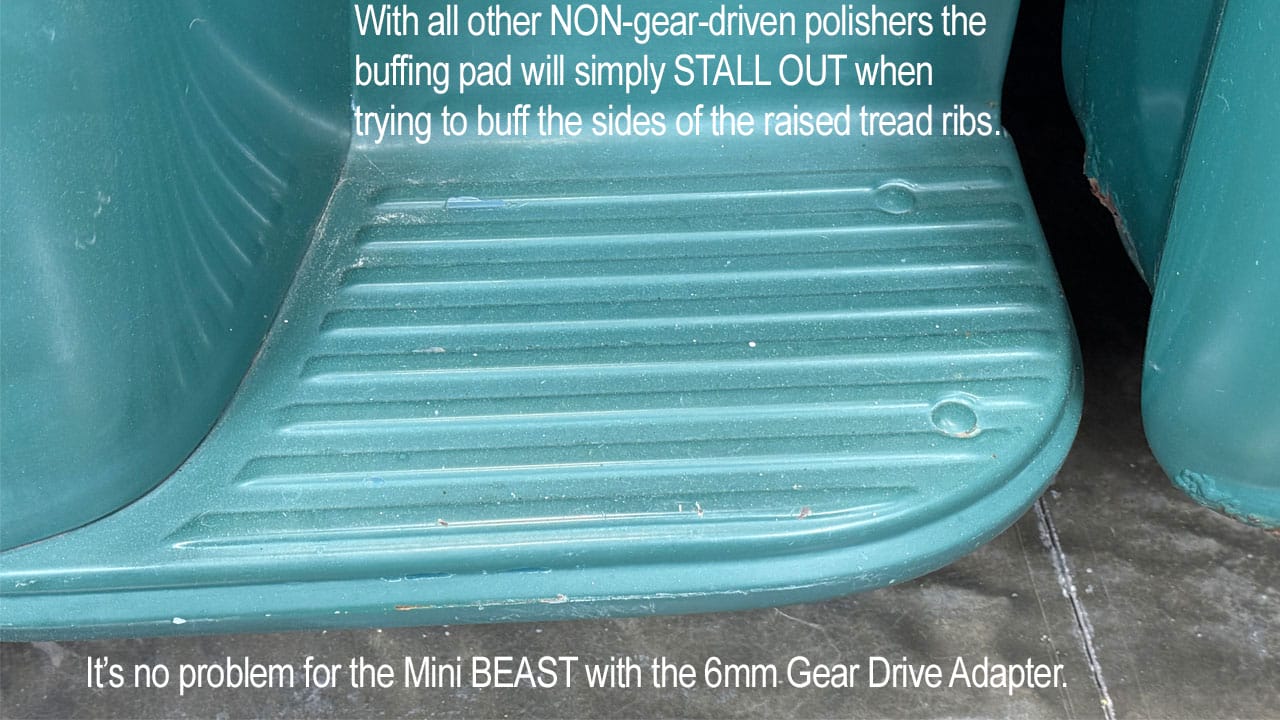
The raised tread ribs: ZERO pad stalling!
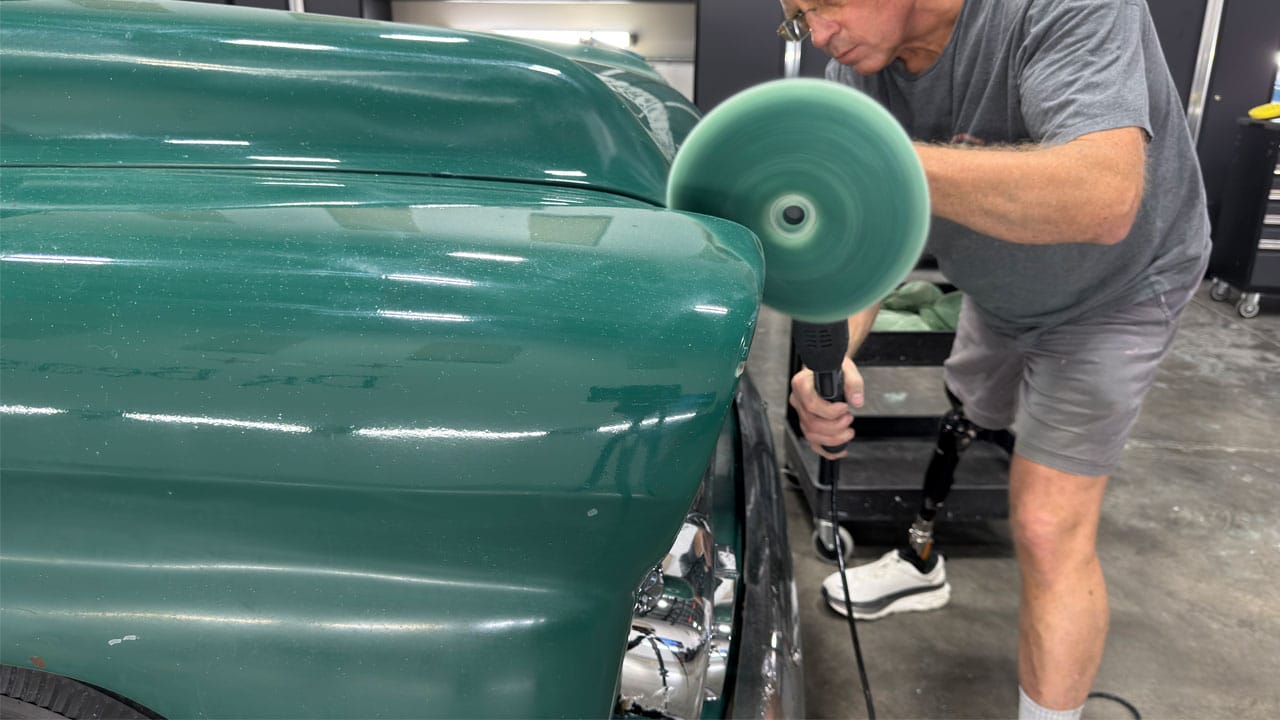
A free-spinning random orbital polisher can polish the TOPS of these ribs. The challenge comes when you tilt the pad to polish the sides: the reduced contact area and working angle can cause pad rotation to stall. With the Mini BEAST’s 6mm gear-driven adapter, the pad keeps rotating and oscillating as I work along these narrow surfaces.
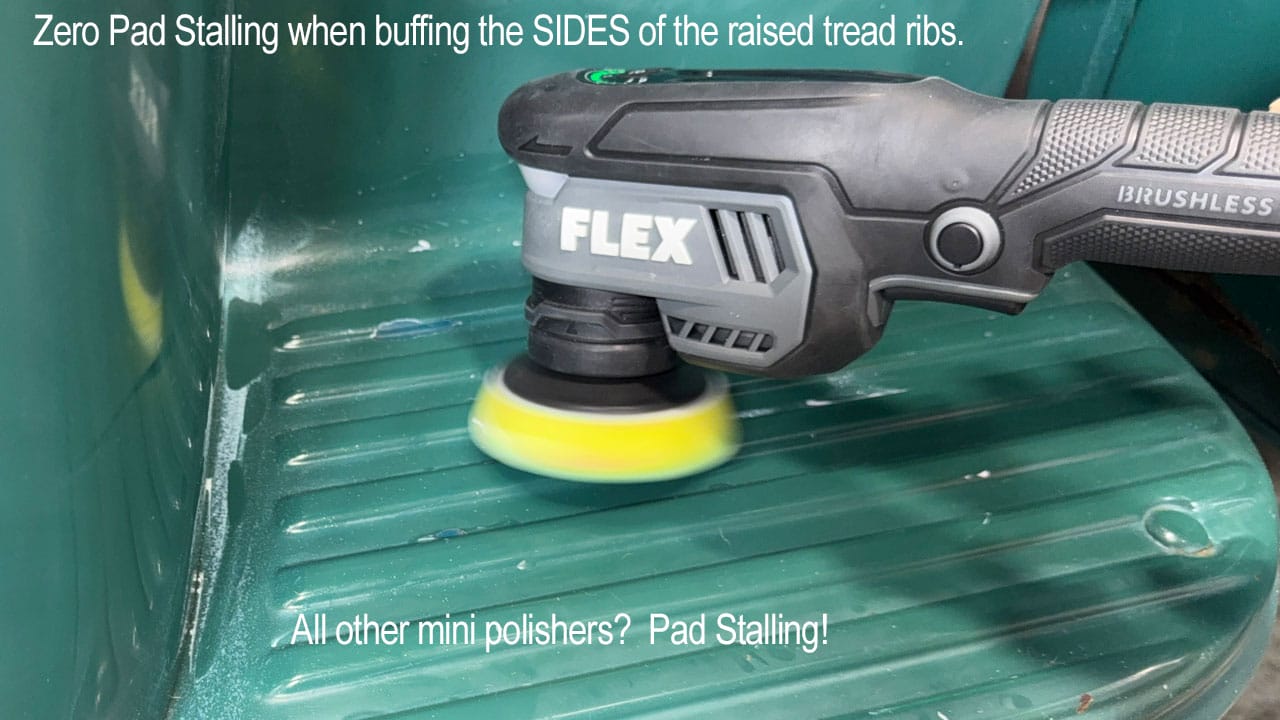
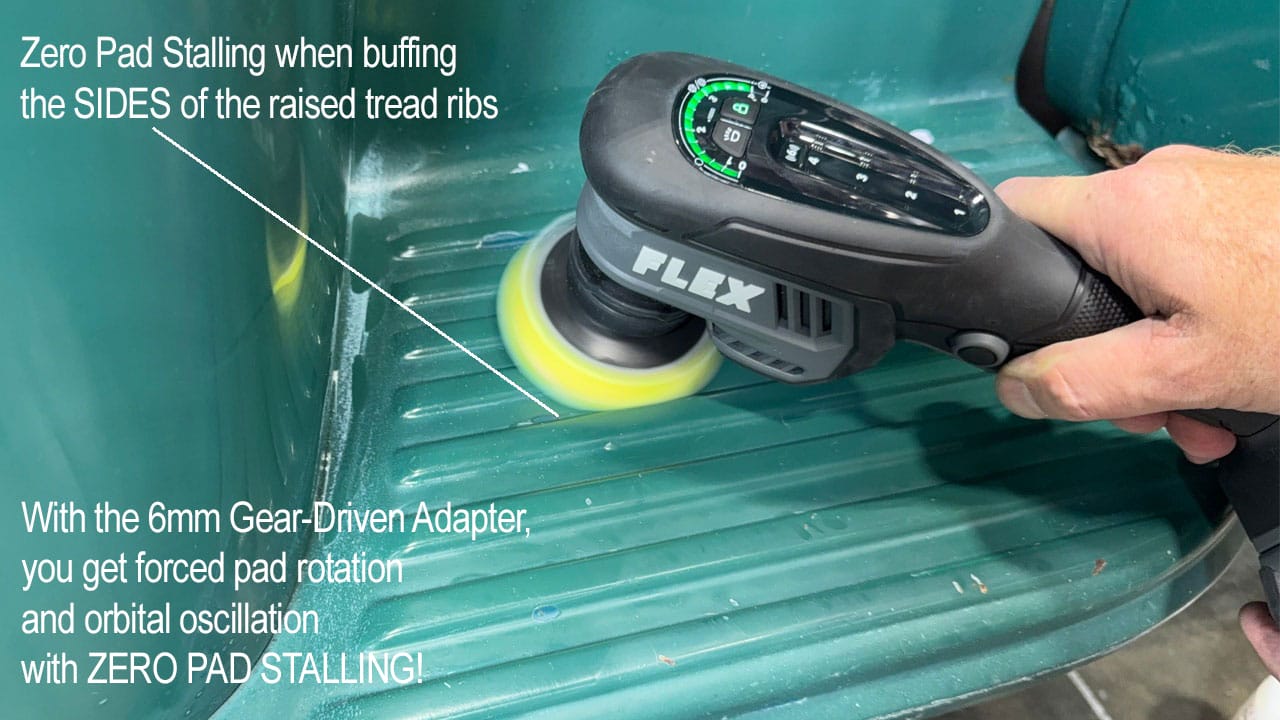
See the full tread-rib polishing sequence (8 photos)
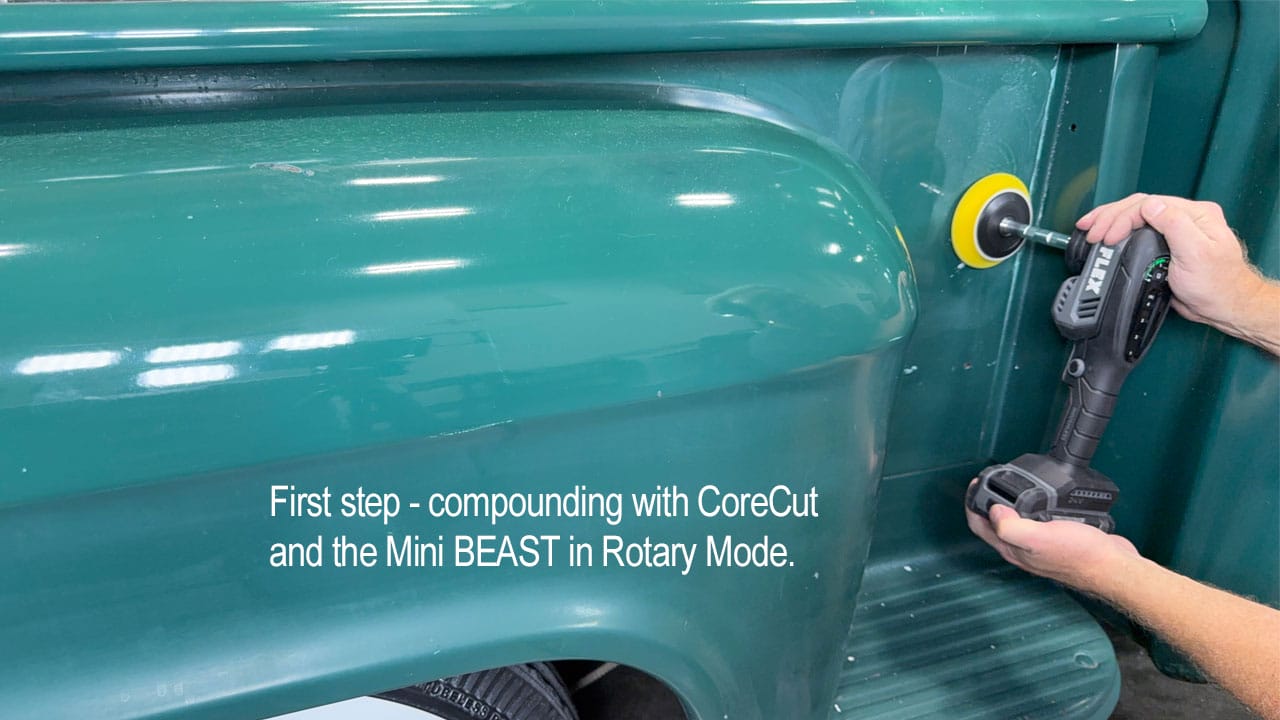
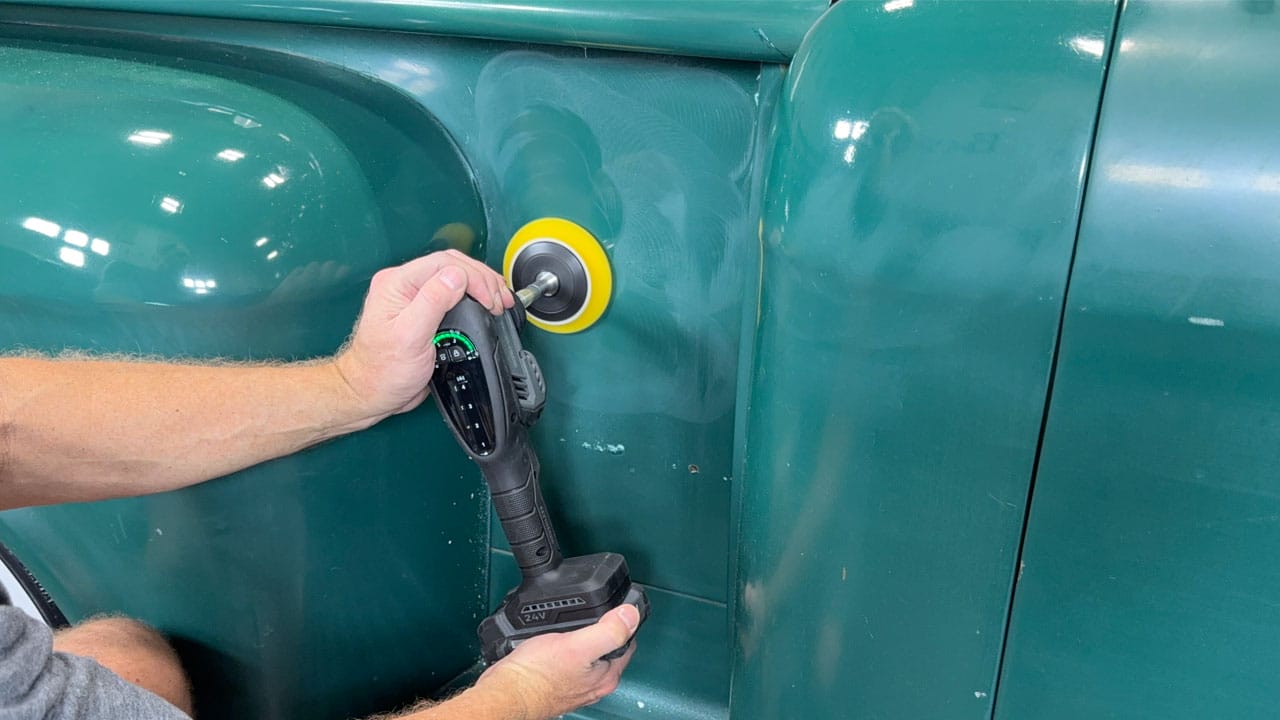
Mini BEAST paint correction results
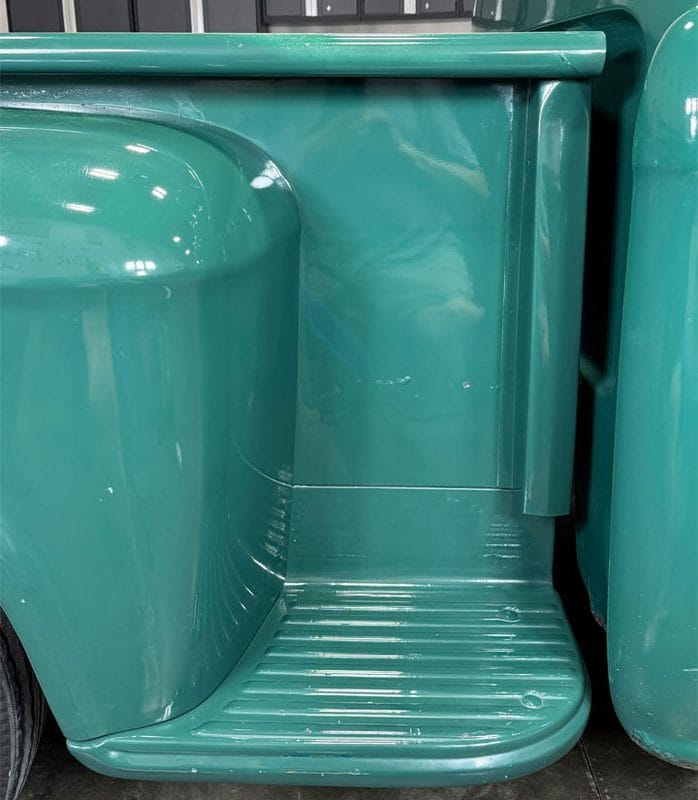
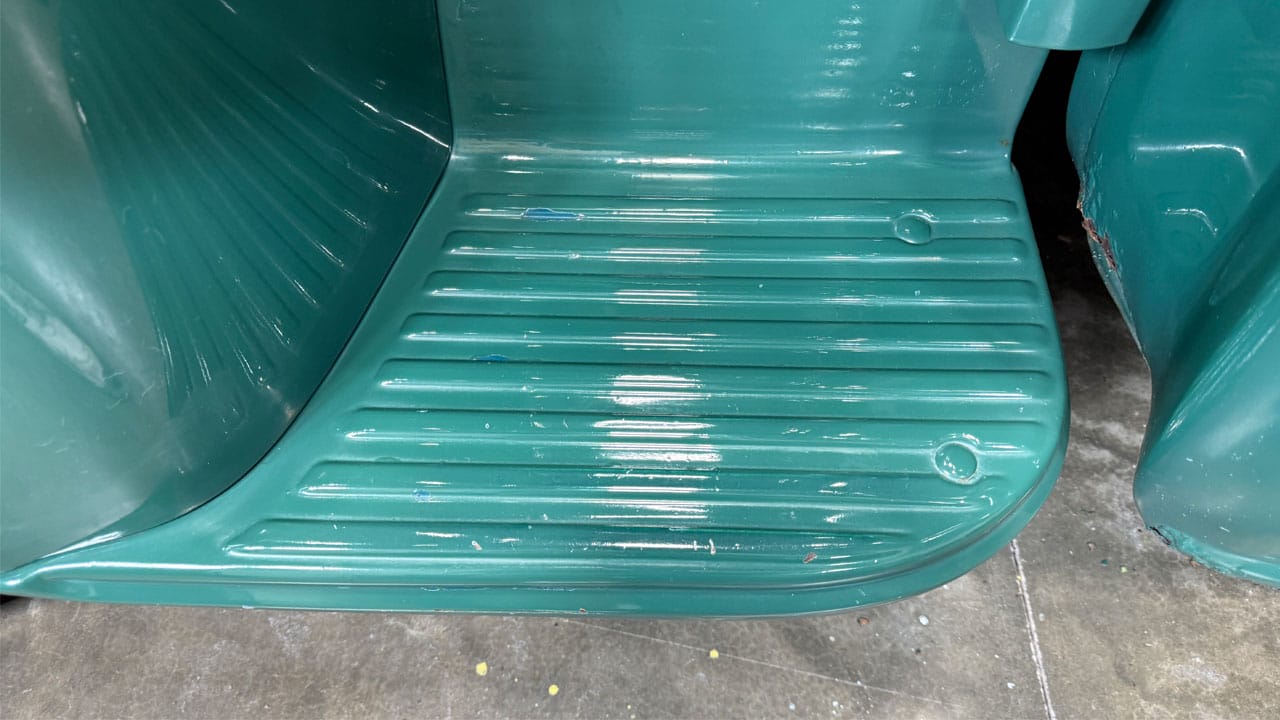
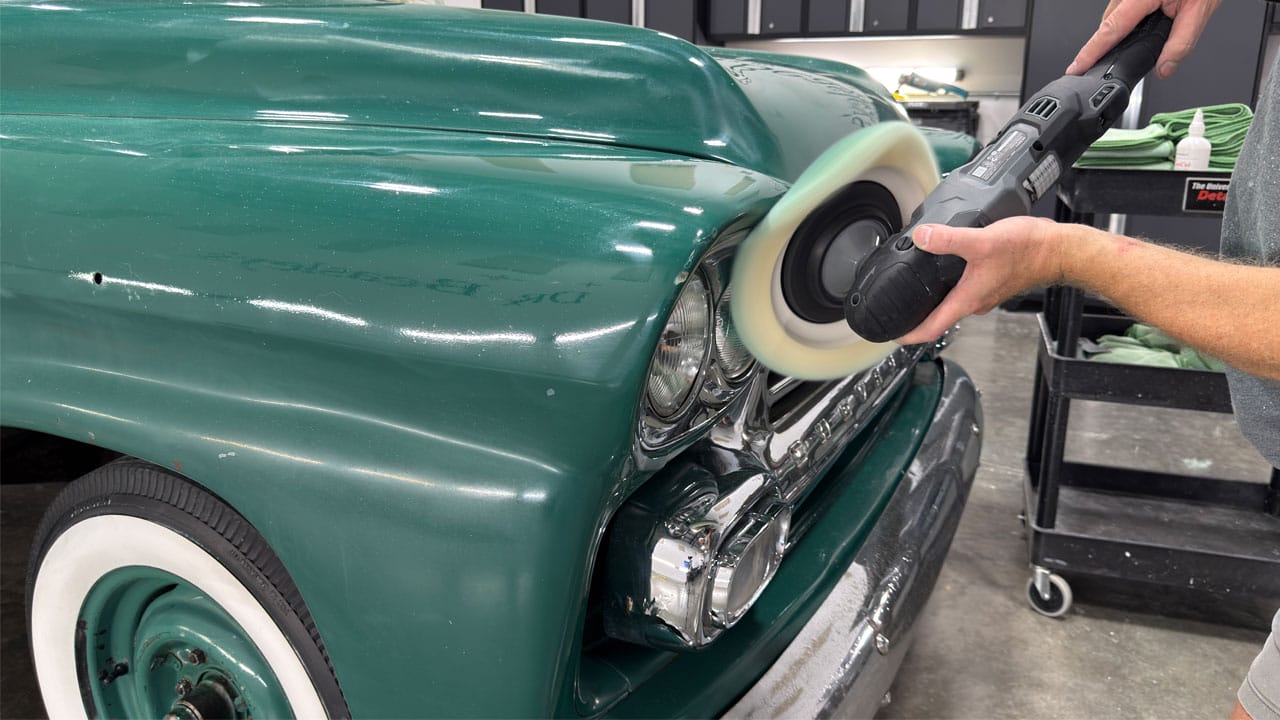
This is where the FLEX FX3361 Mini BEAST really shines: correcting paint in tight, intricate areas that are difficult to reach with a full-size polisher.
Switch from the rotary adapter for heavy compounding to the 6mm gear-driven adapter for hologram-free, swirl-free finishing—all with the same compact cordless tool.
And with the gear-driven adapter, you get forced pad rotation and orbital oscillation with ZERO PAD STALLING!
Another view of the Mini BEAST paint-correction work (1 photo)
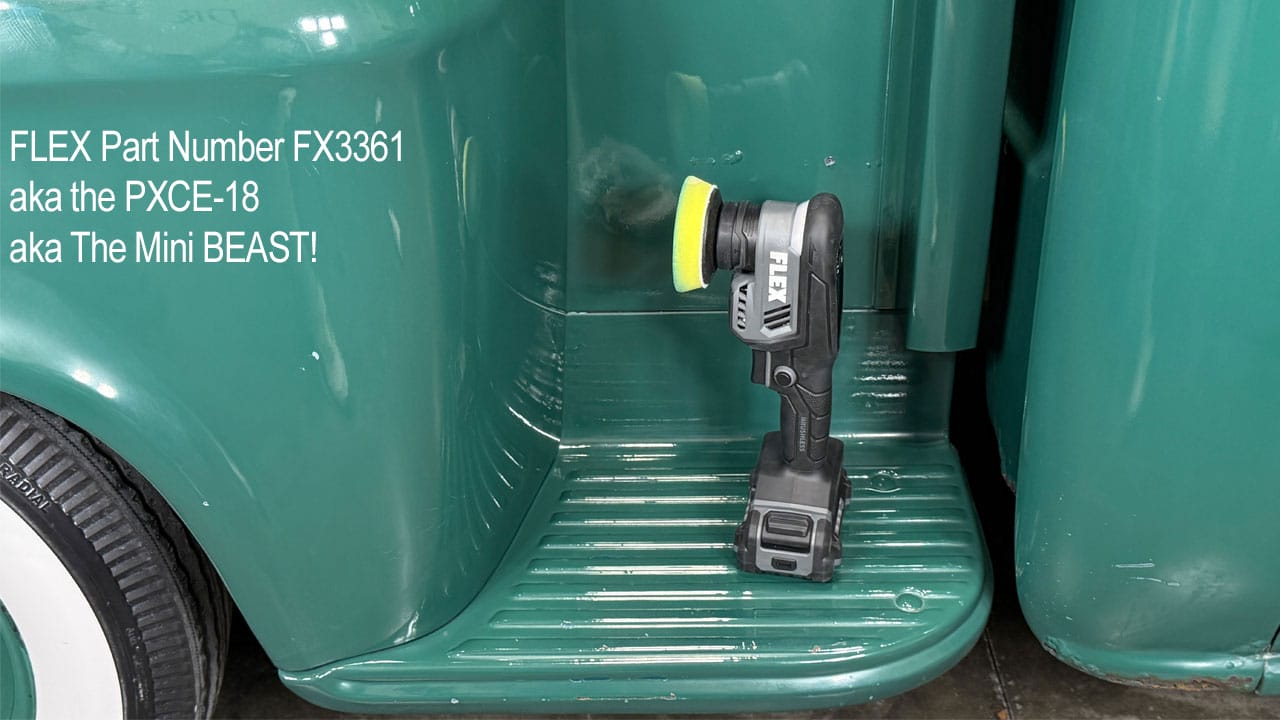
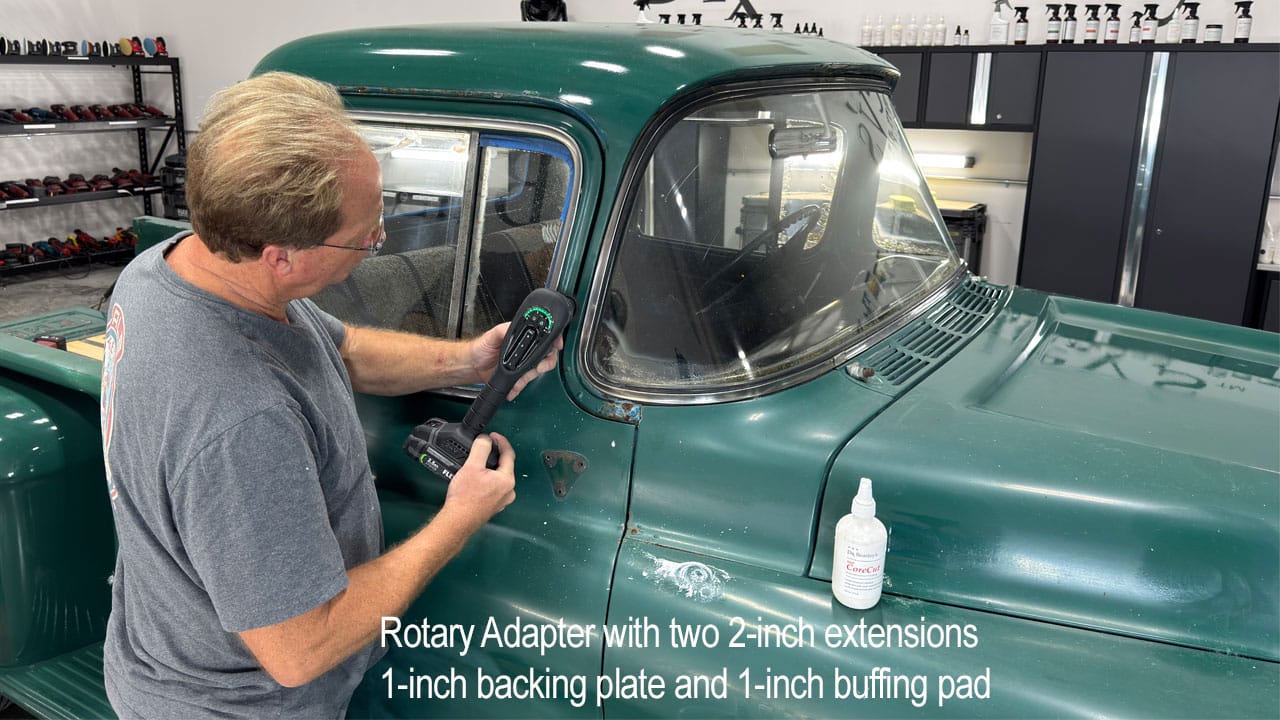
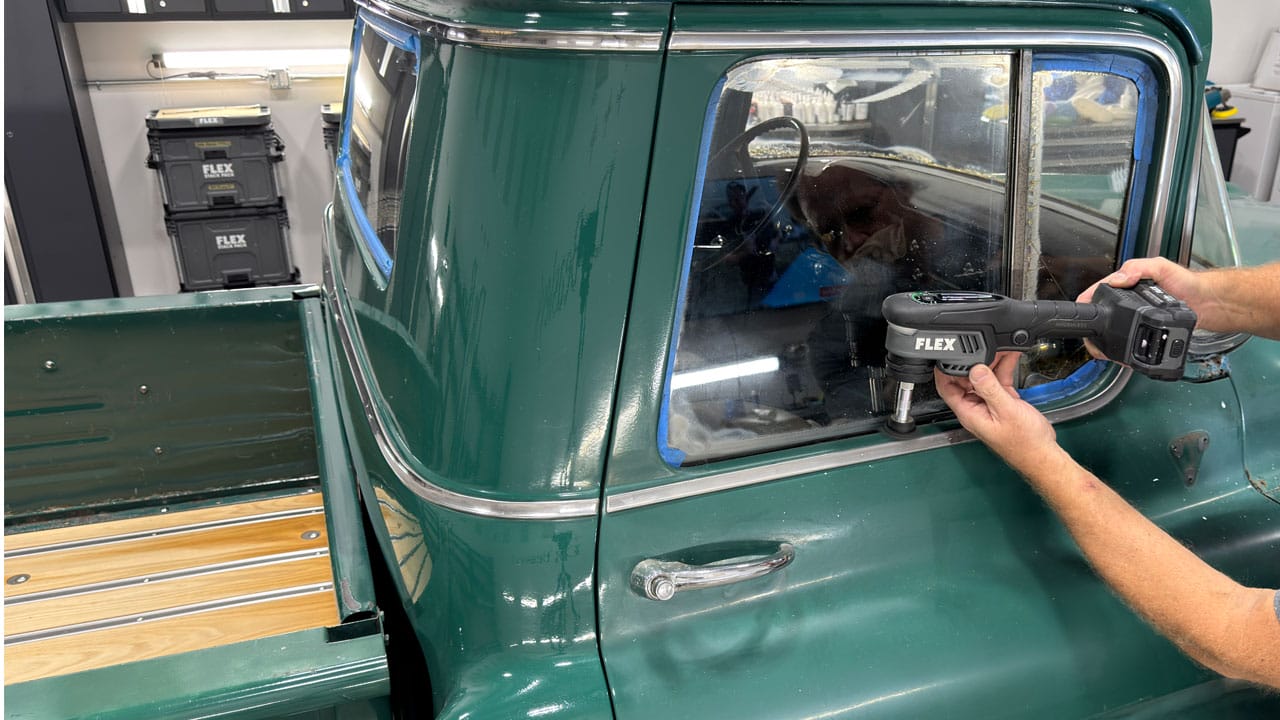
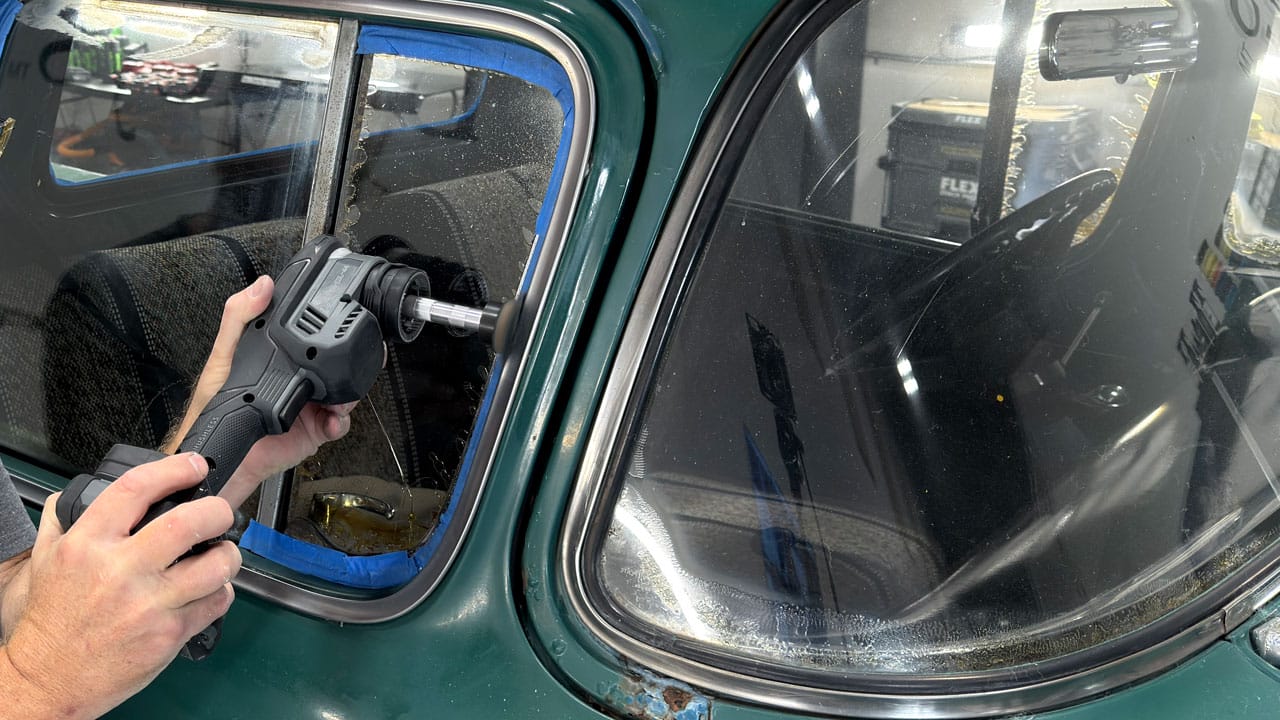
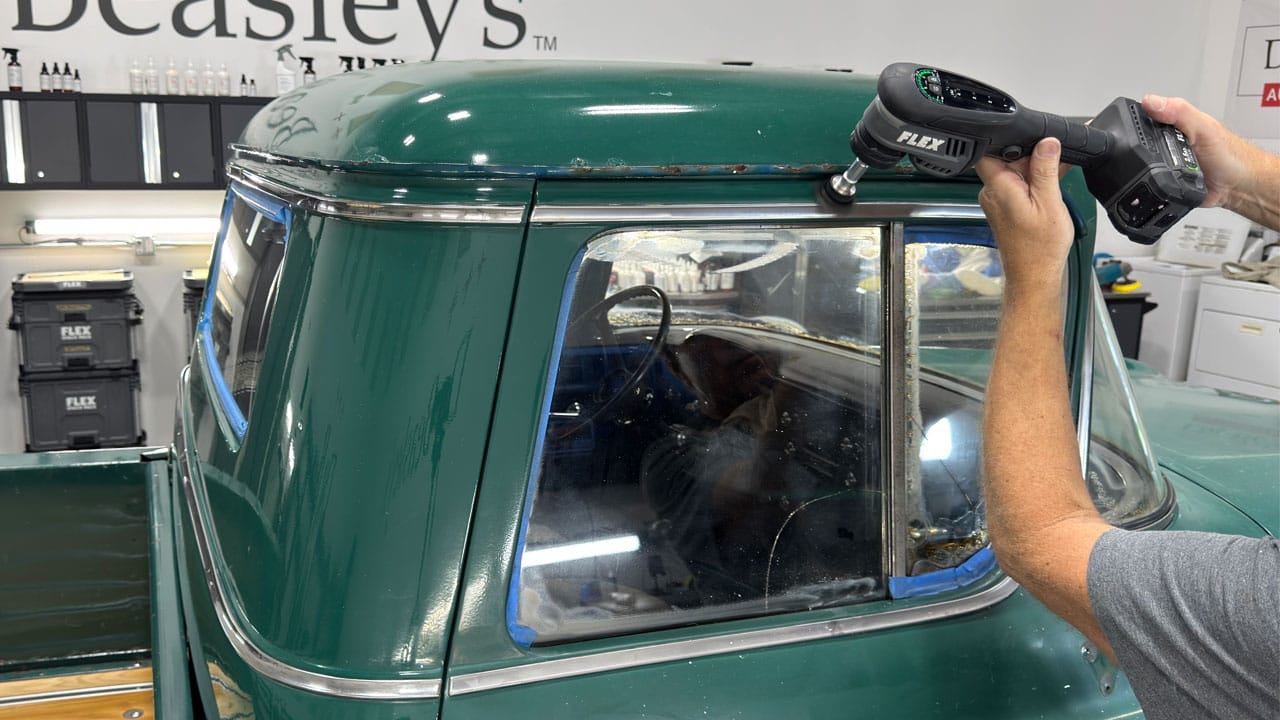
Surgical precision around the window trim
Equip the FLEX FX3361 Mini BEAST with the rotary adapter, a 1-inch backing plate, and a 1-inch buffing pad to remove swirls, scratches, oxidation, and water spots with surgical precision—even in narrow areas like the paint surrounding the truck’s window trim.
More precision-polishing views (2 photos)
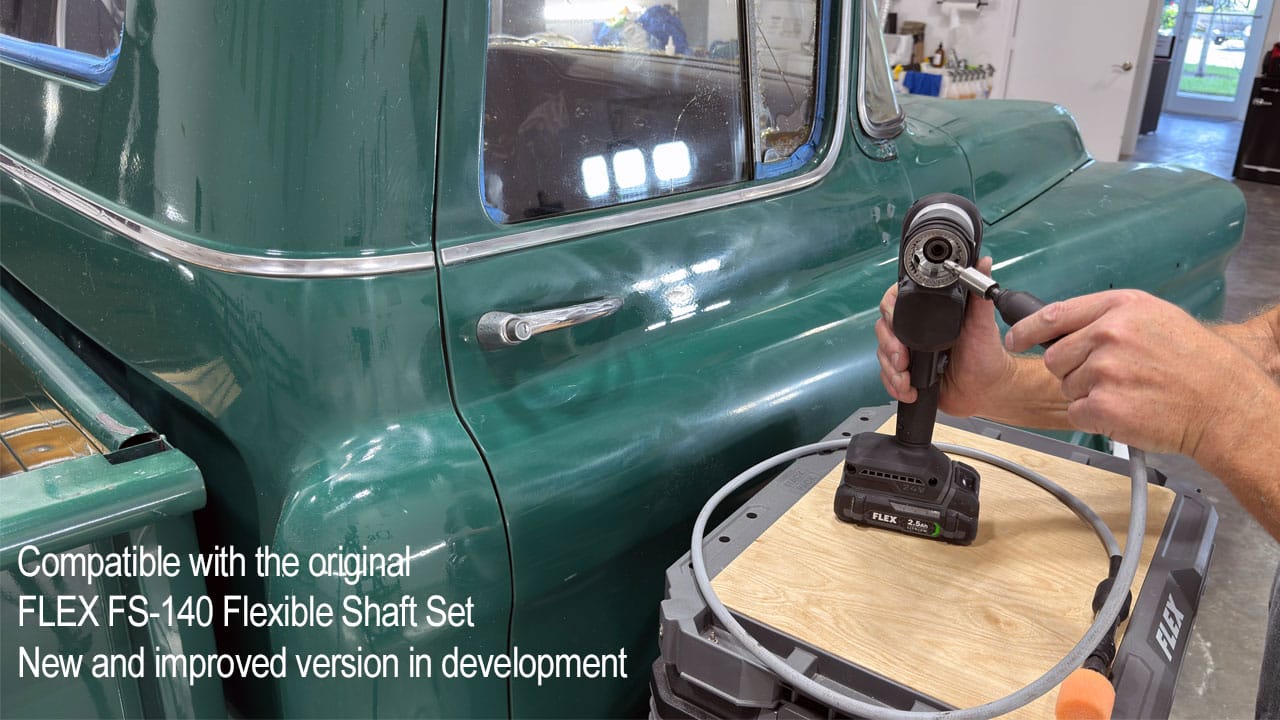
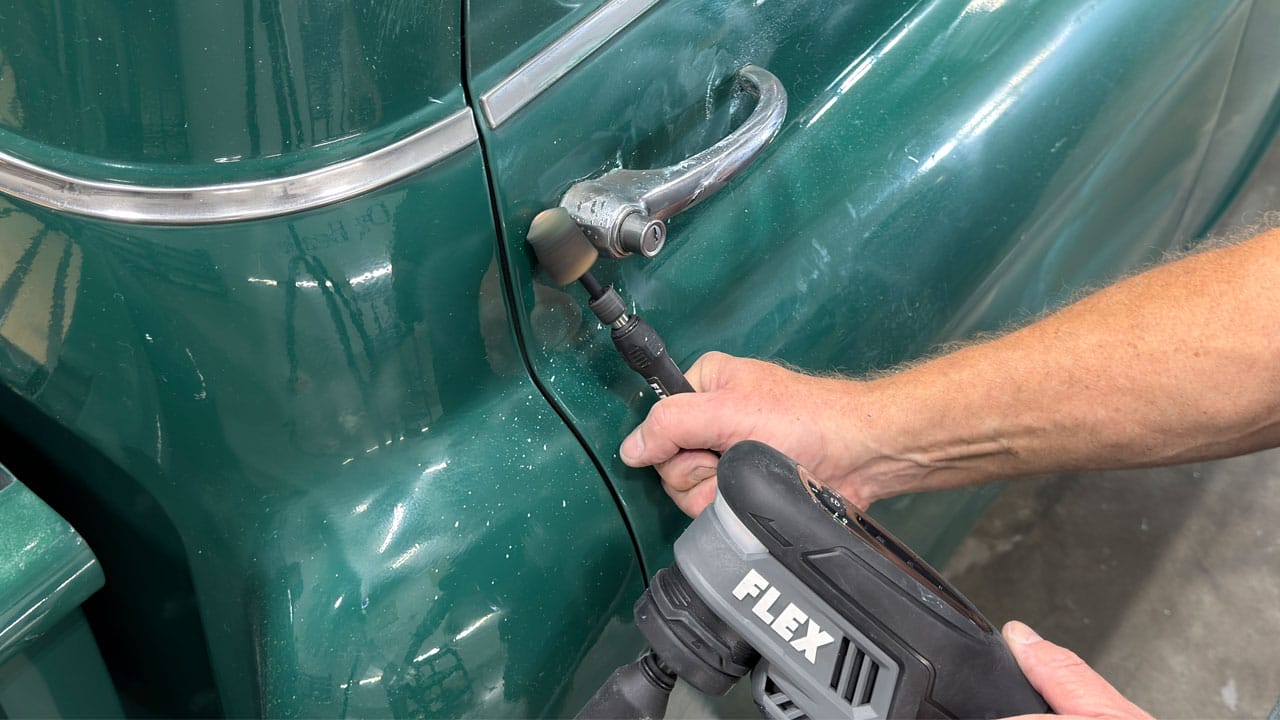
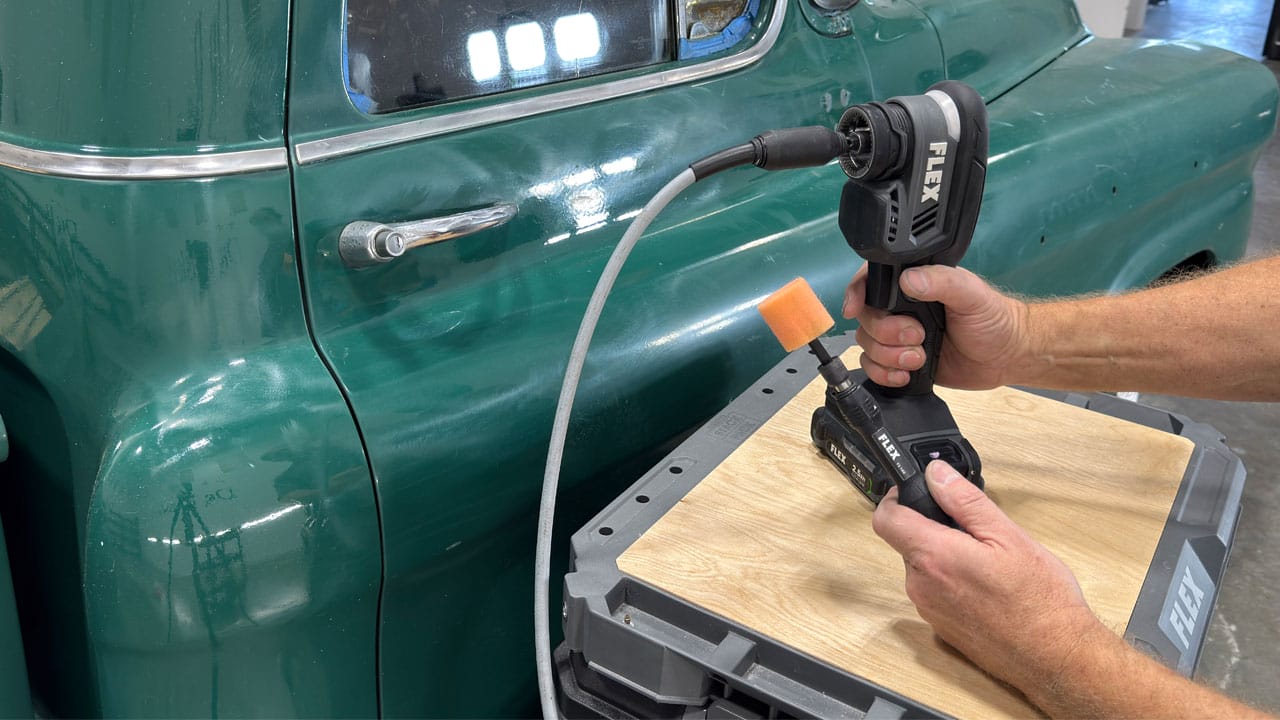
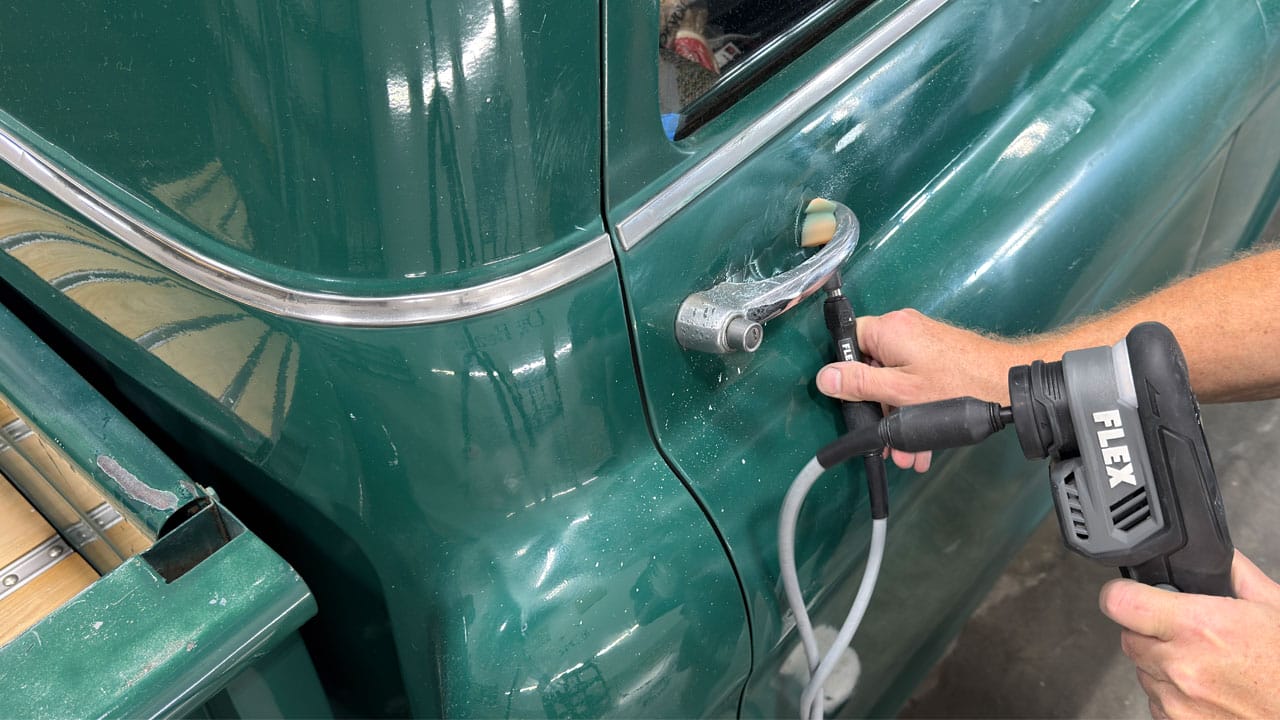
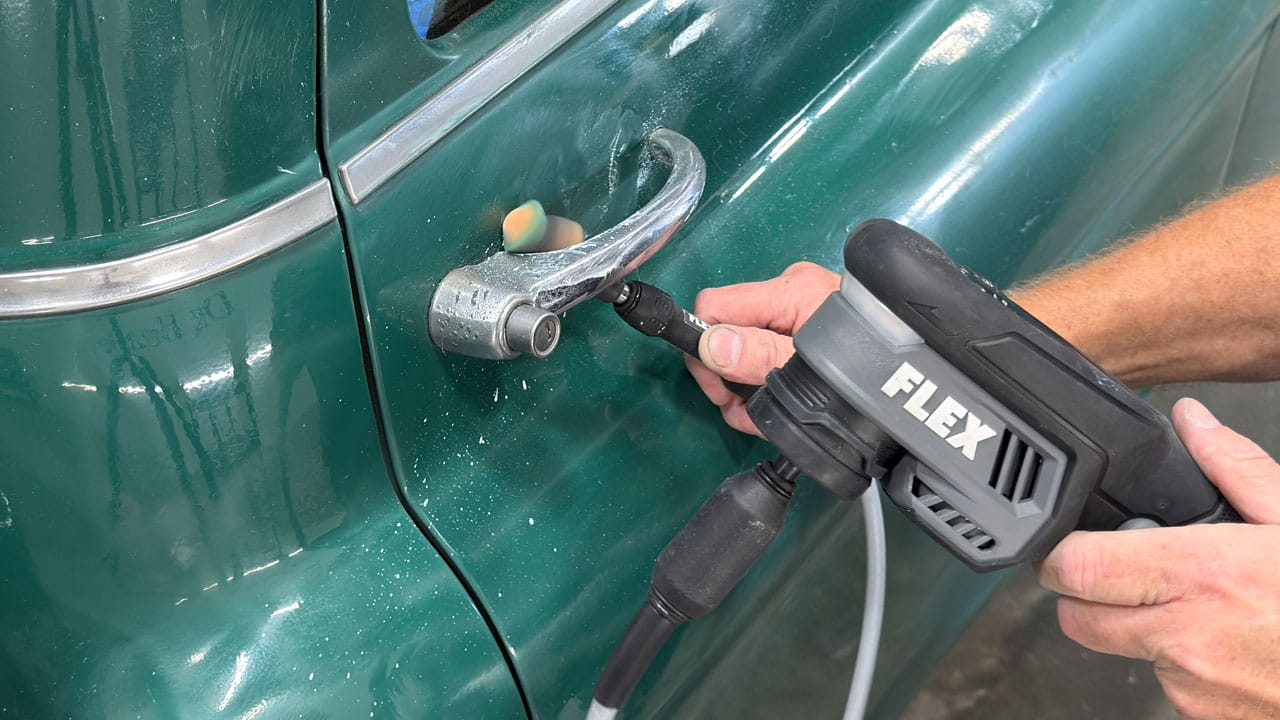
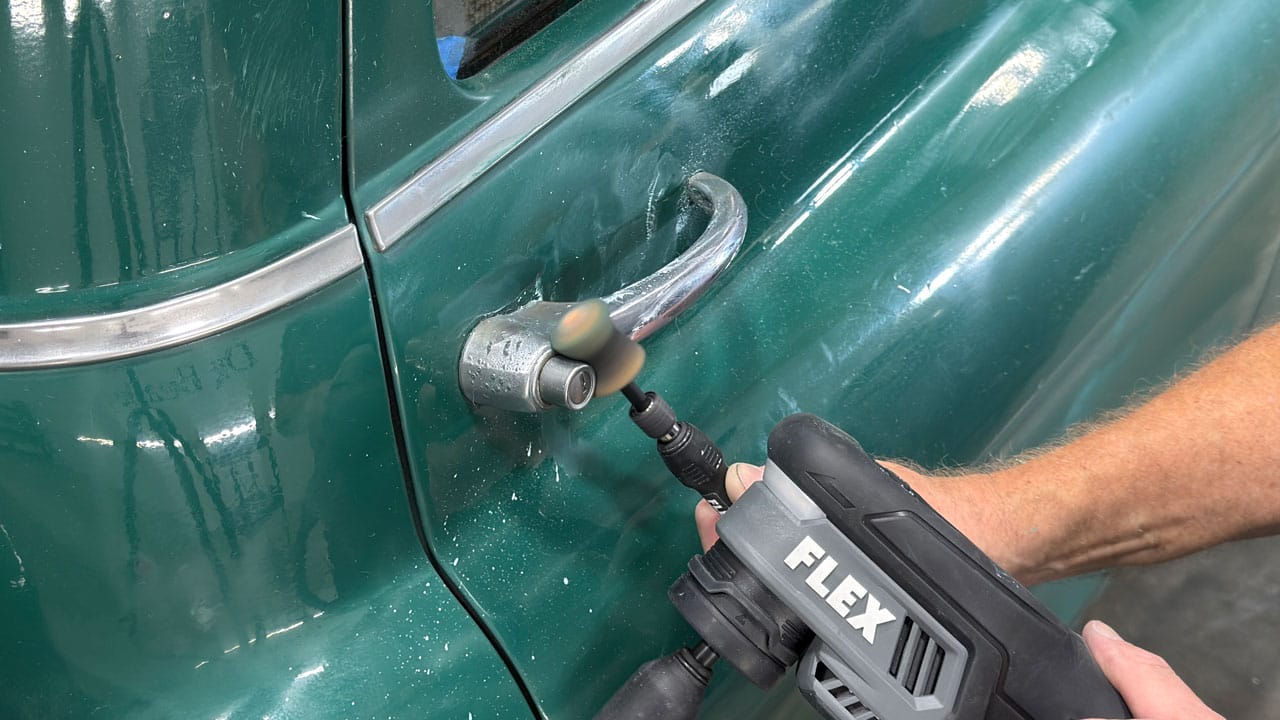
Reaching behind door handles with the flexible shaft
The optional FLEX FS-140 Flexible Shaft Set expands the tool’s reach into areas a conventional buffing pad cannot access.
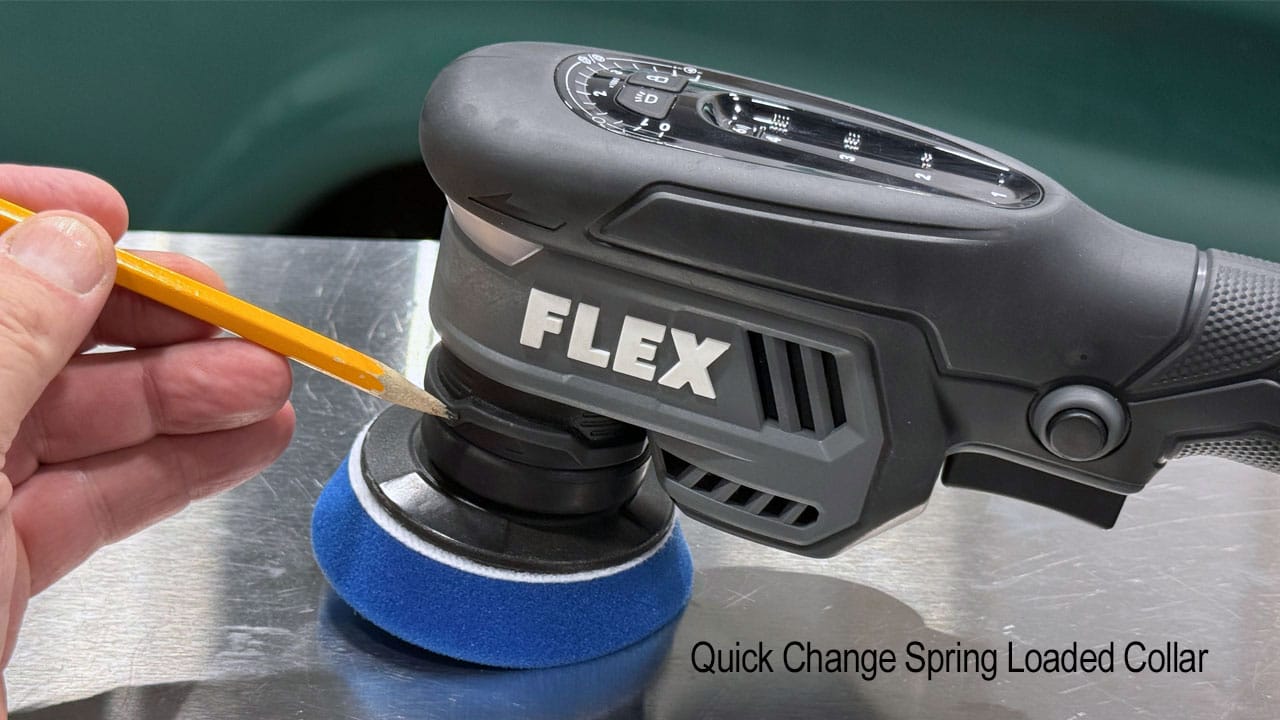
One end connects to the polisher through the quick-change mounting system. The other end has a slim handpiece that accepts small cone-shaped and cylindrical foam polishing accessories.
This allows you to polish in recesses, around intricate trim, and in other confined areas while guiding the handpiece instead of maneuvering the entire polisher.
The existing flexible shaft fits the new tool. FLEX has also advised me that an updated version is planned, with its release date still to be determined at the time of this review.
More flexible-shaft demonstration photos (4 photos)
Correcting the larger panels with full-size FLEX polishers
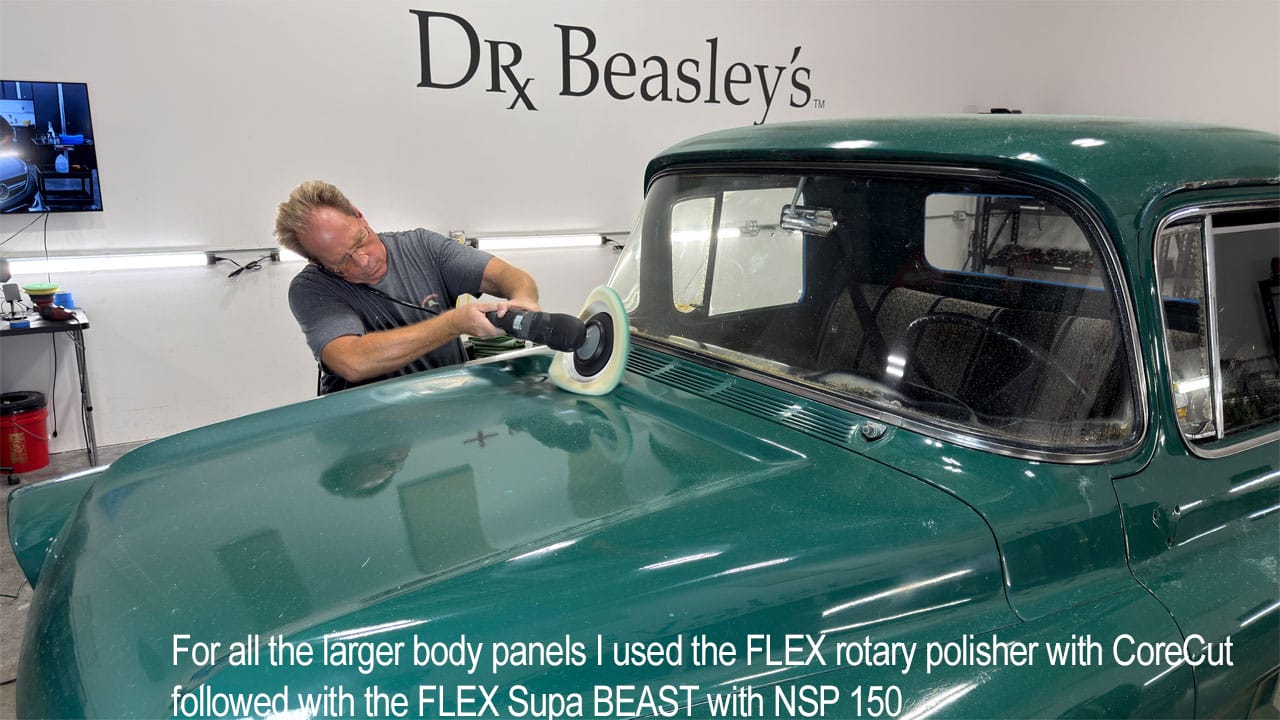
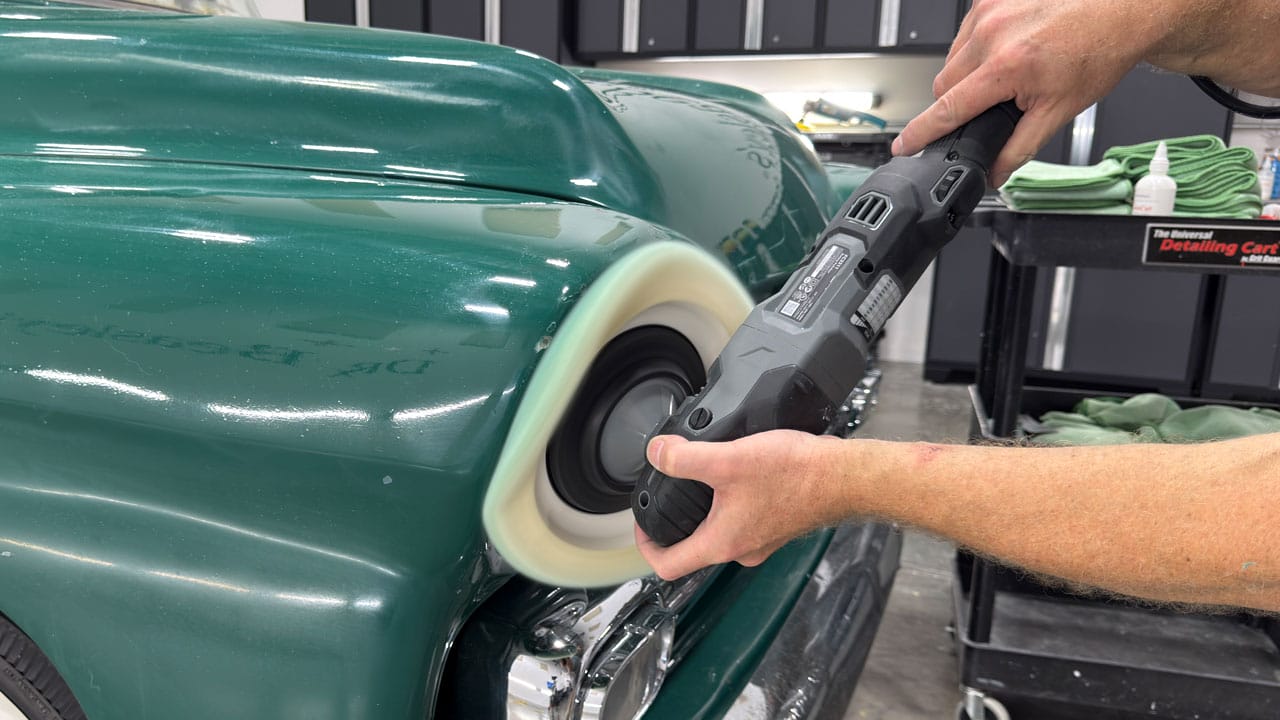
I always do the hardest work first—in this case, polishing the tight, intricate areas with the FLEX Mini BEAST. Once those areas were finished, I moved on to the larger body panels using full-size FLEX polishers.
For the cutting step, I used a FLEX rotary polisher with Lake Country wool pads and Dr. Beasley’s CoreCut compound to remove the oxidation and improperly cured Poppy’s Patina clearcoat.
Next, I refined the paint using the FLEX Supa BEAST with Buff and Shine EdgeGuard foam pads and Dr. Beasley’s NSP 150 polish.
After completing the paint correction, I protected the restored finish with Dr. Beasley’s Nano-Resin 2.0 Ceramic Coating.
More full-size polisher process photos (12 photos)
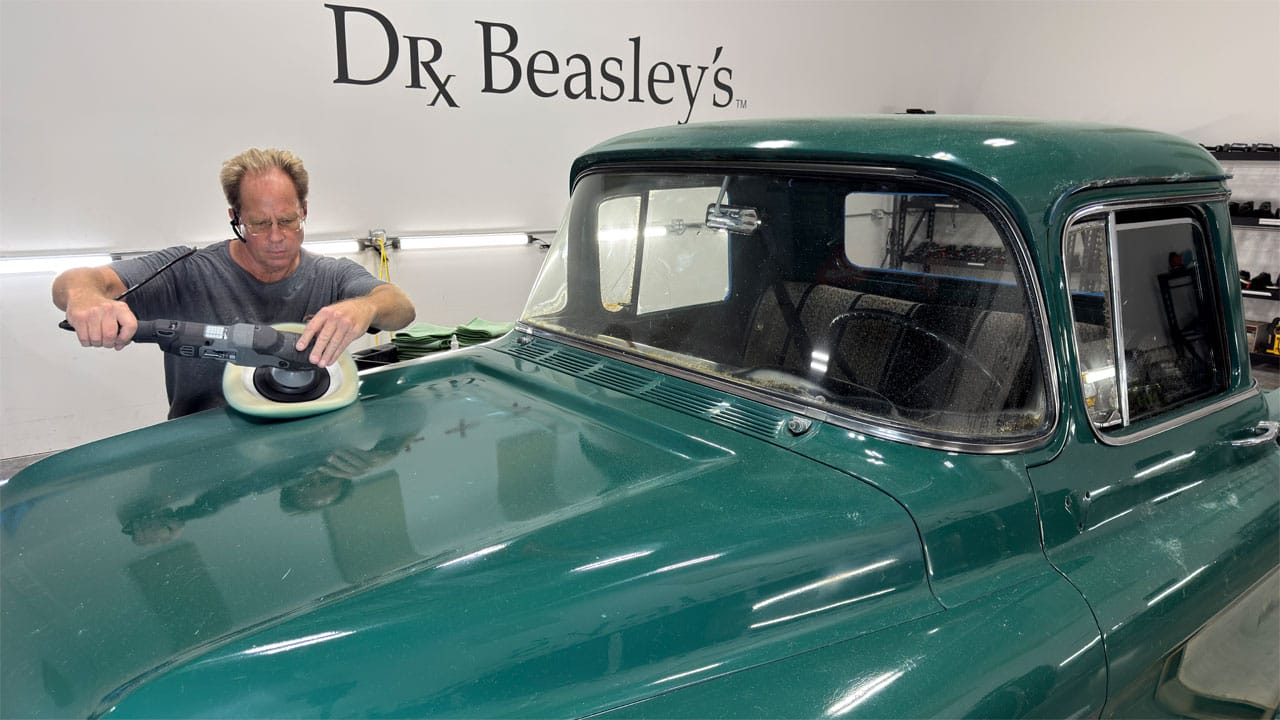
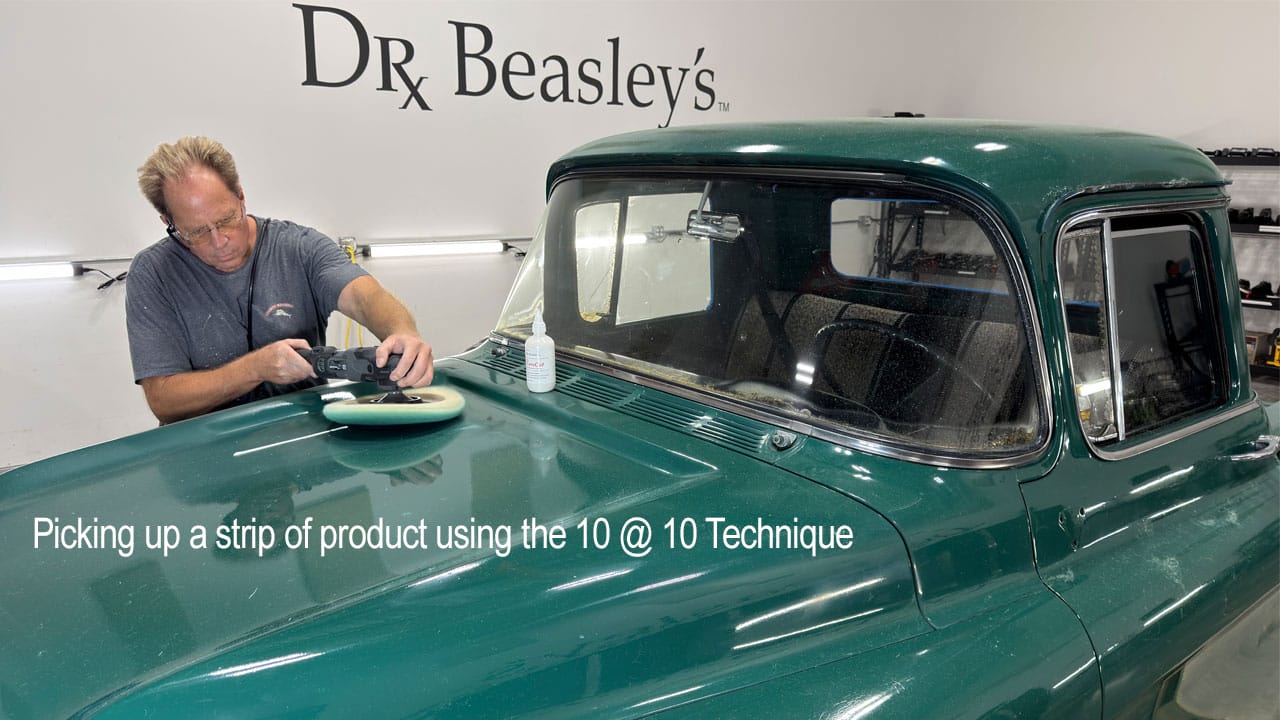
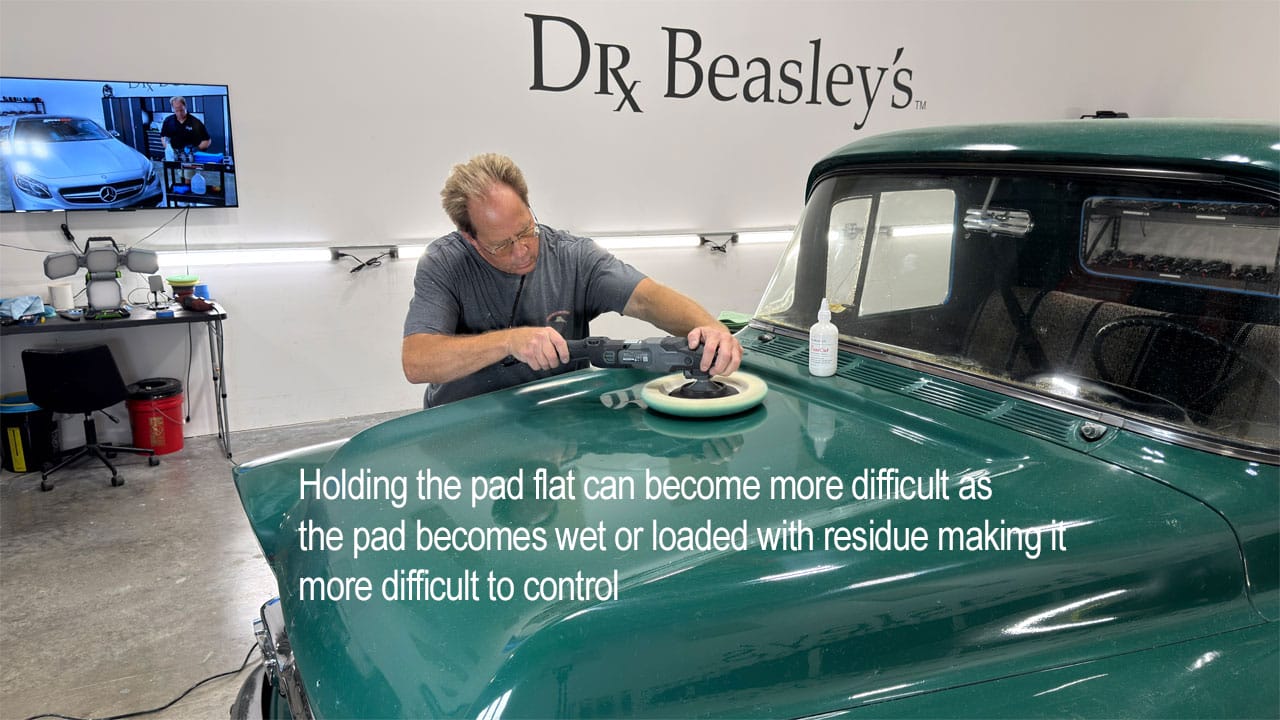
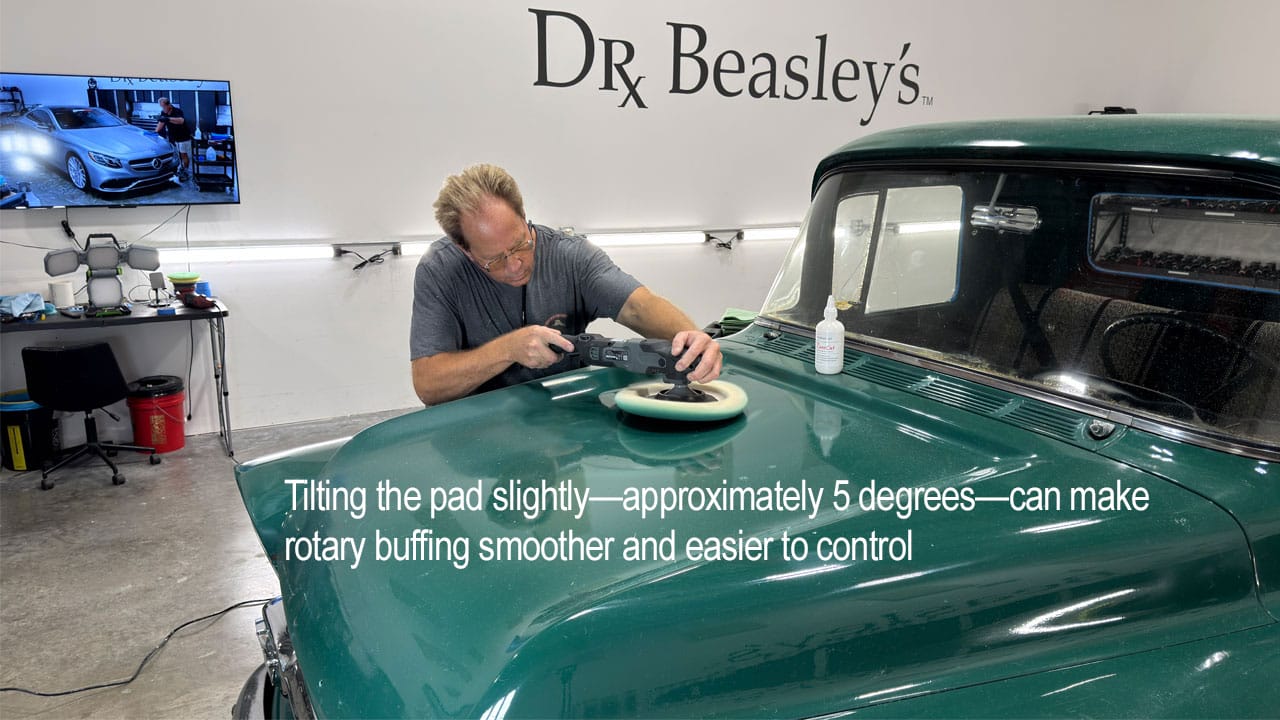
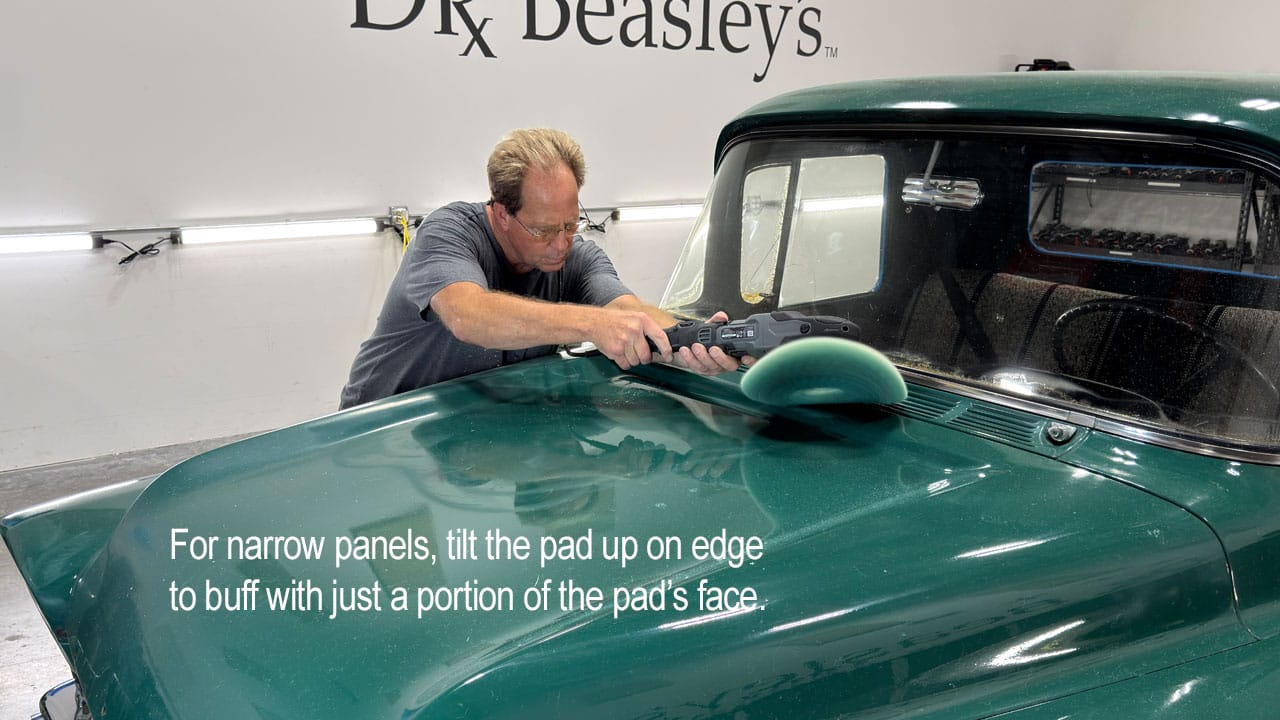
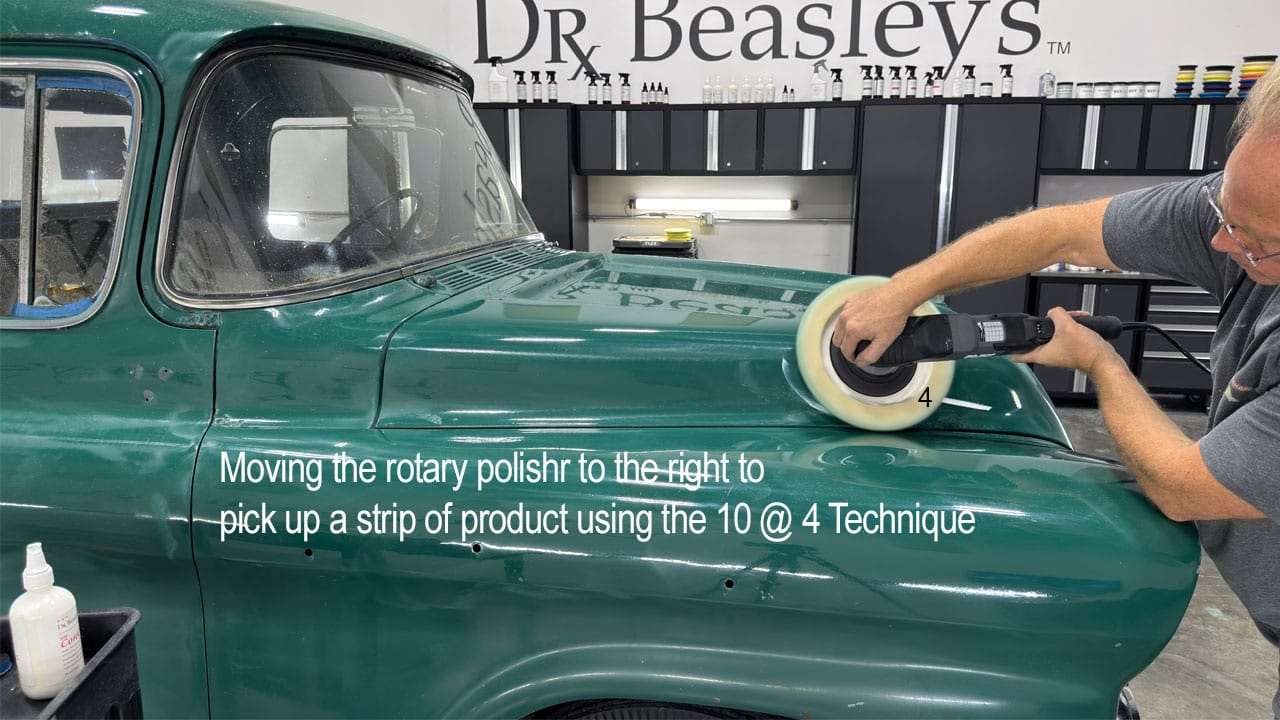
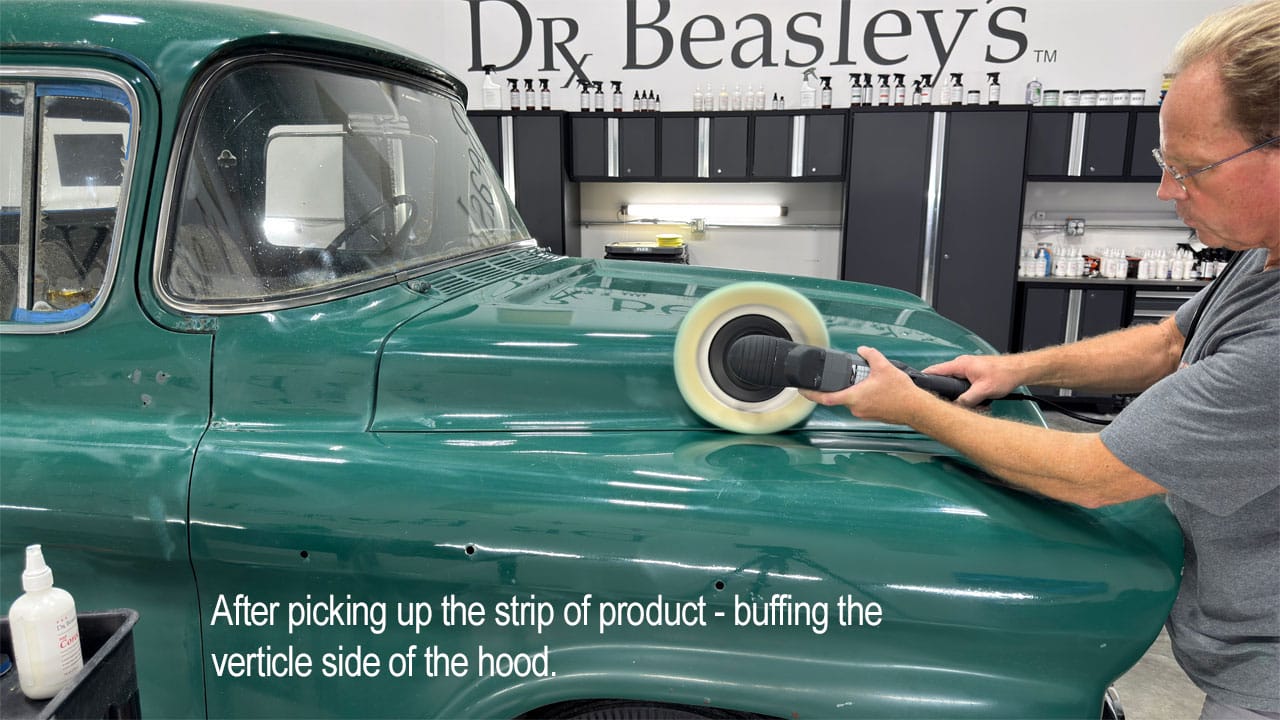
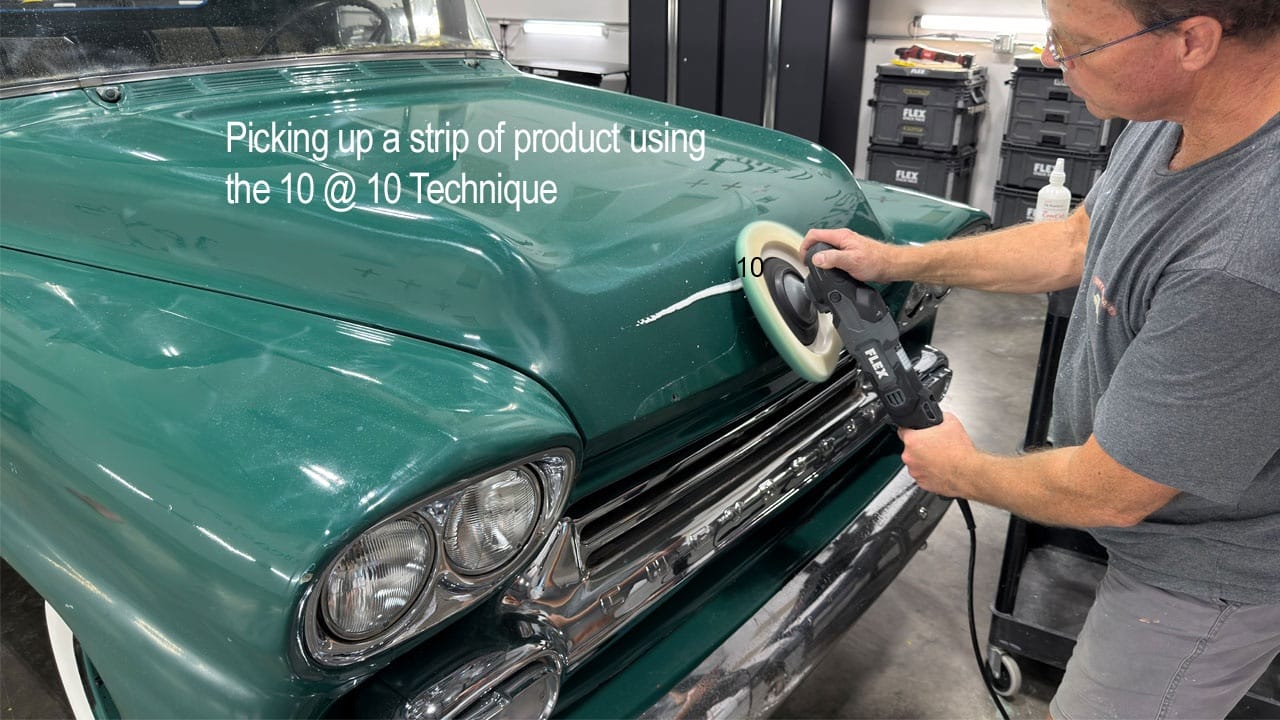
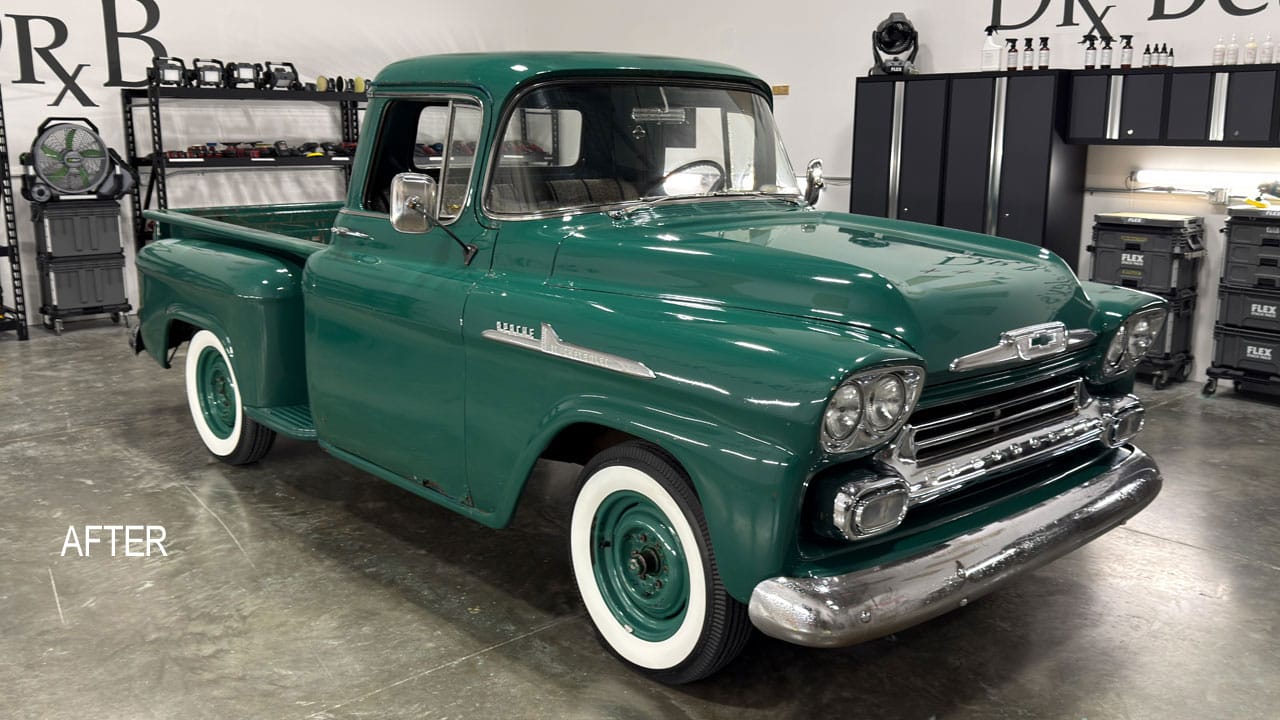
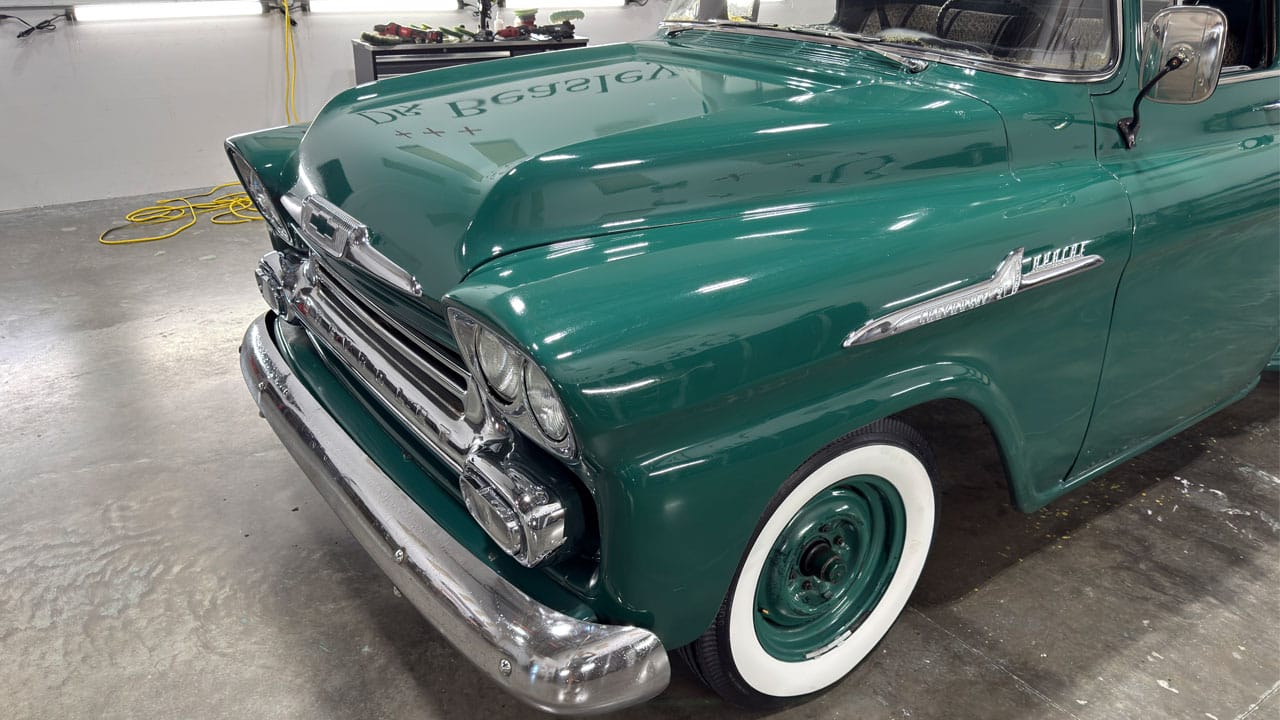
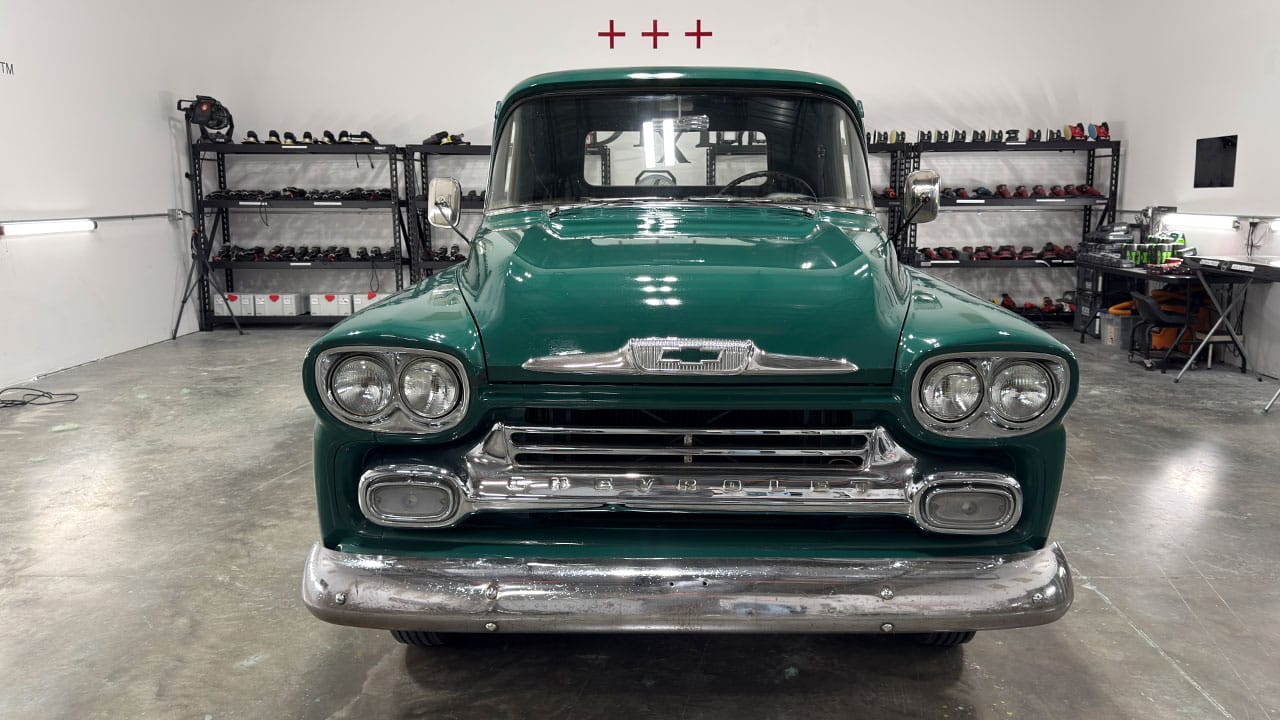
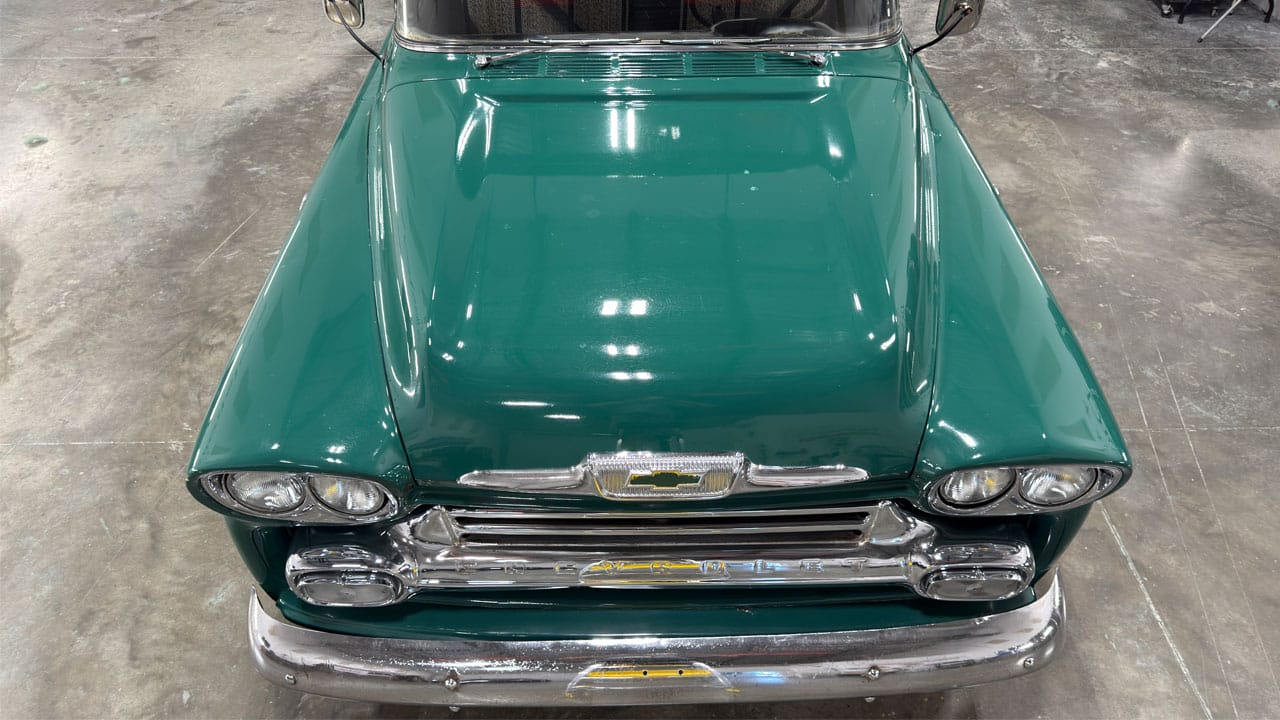
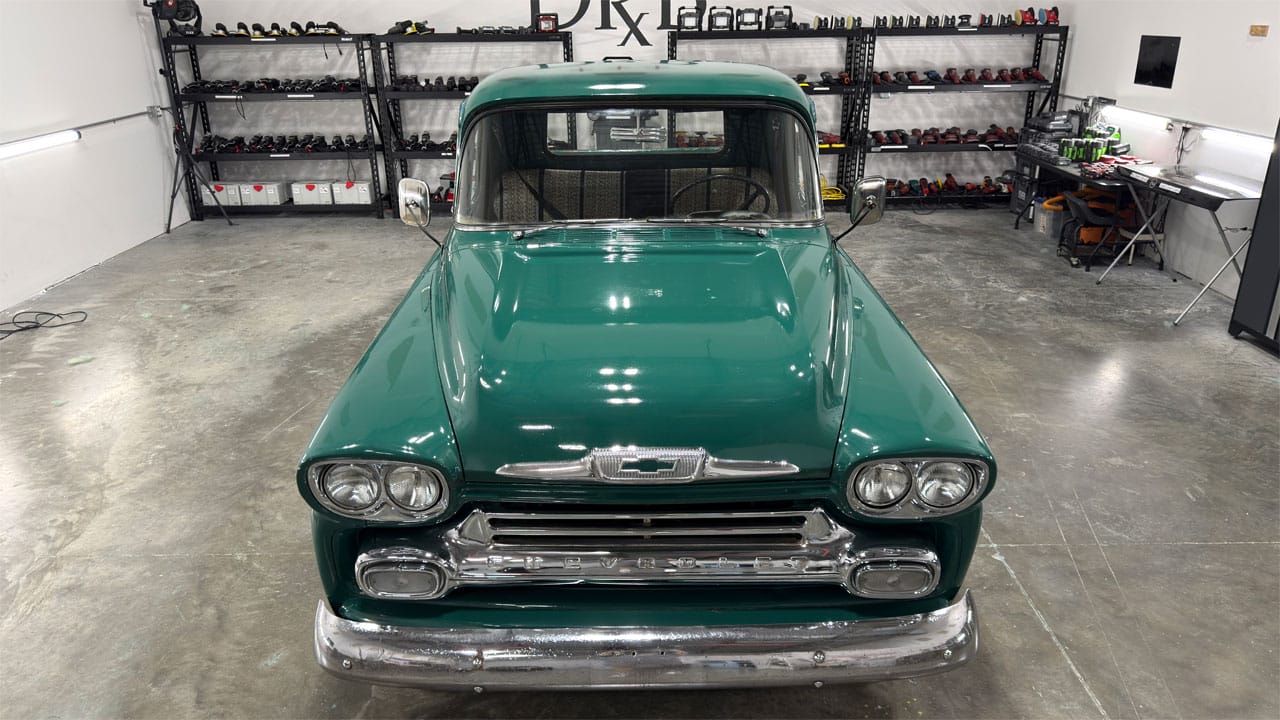
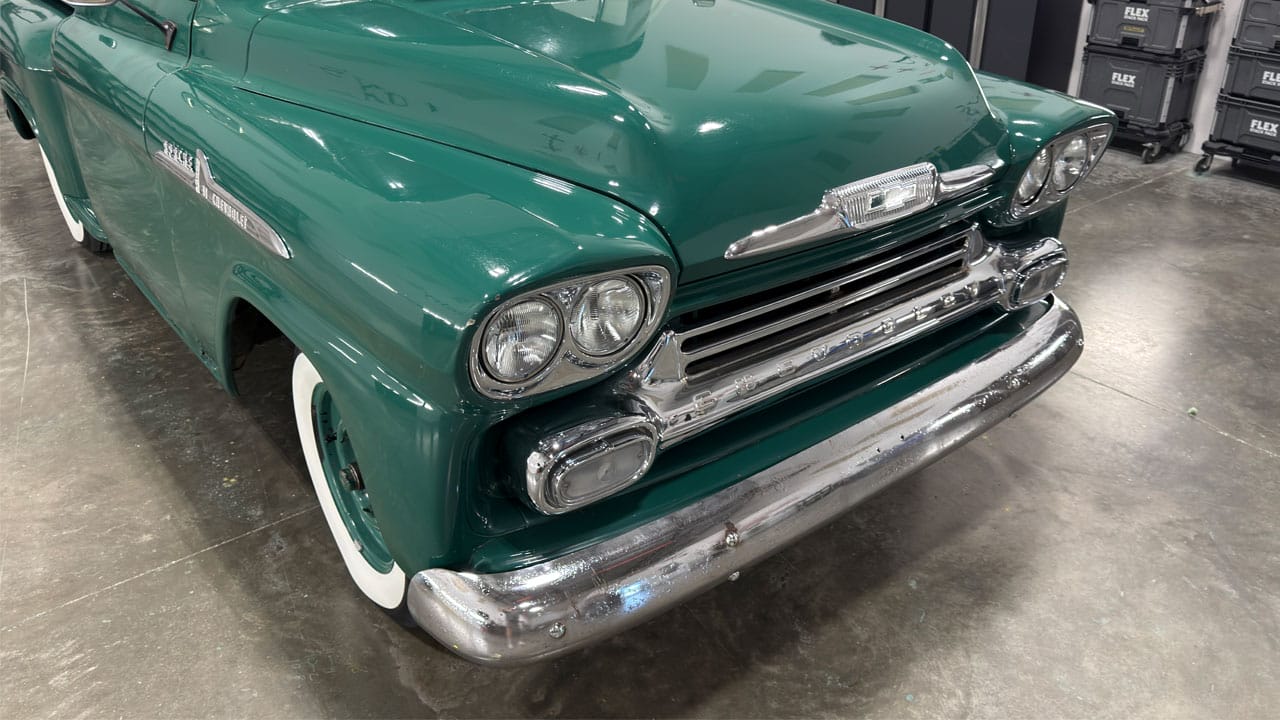
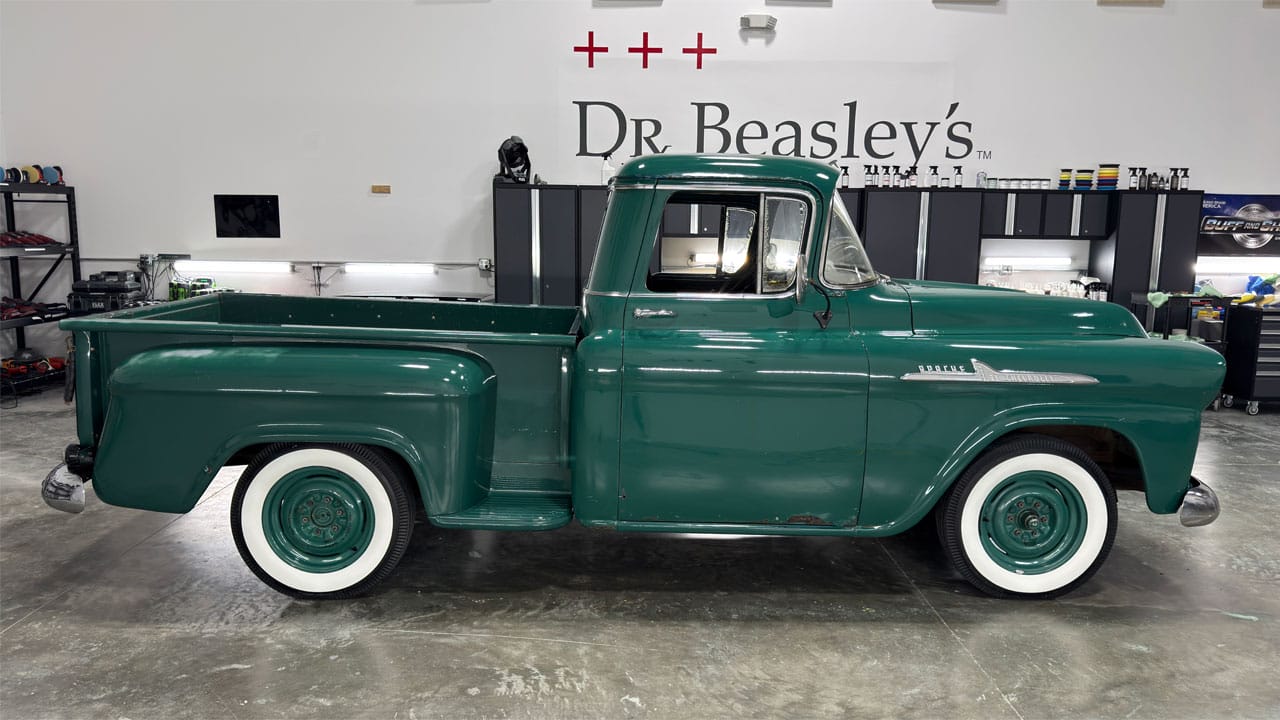
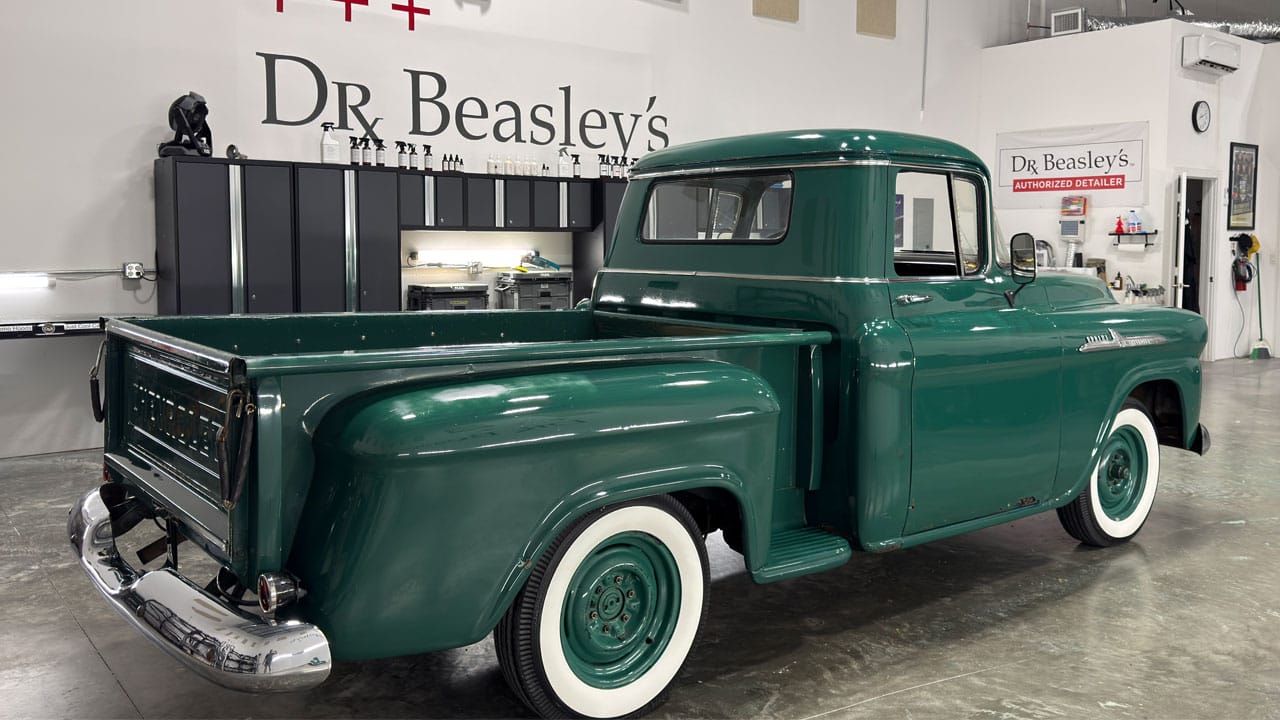
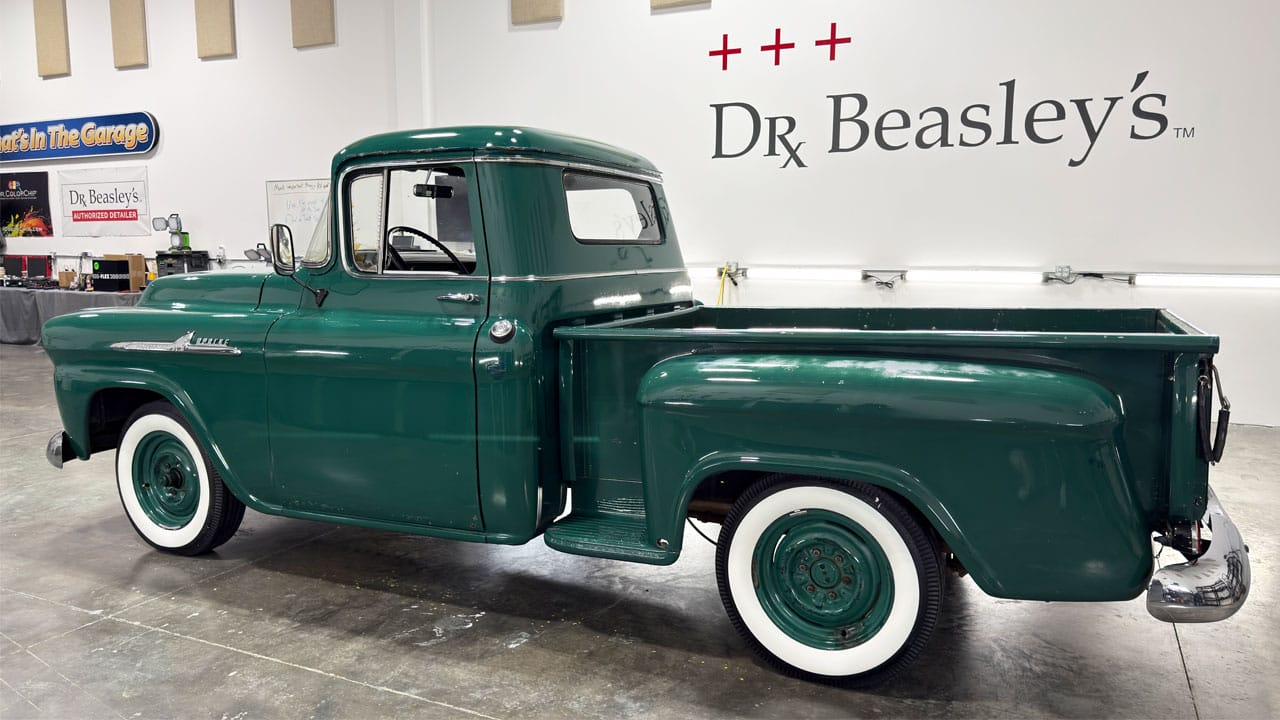
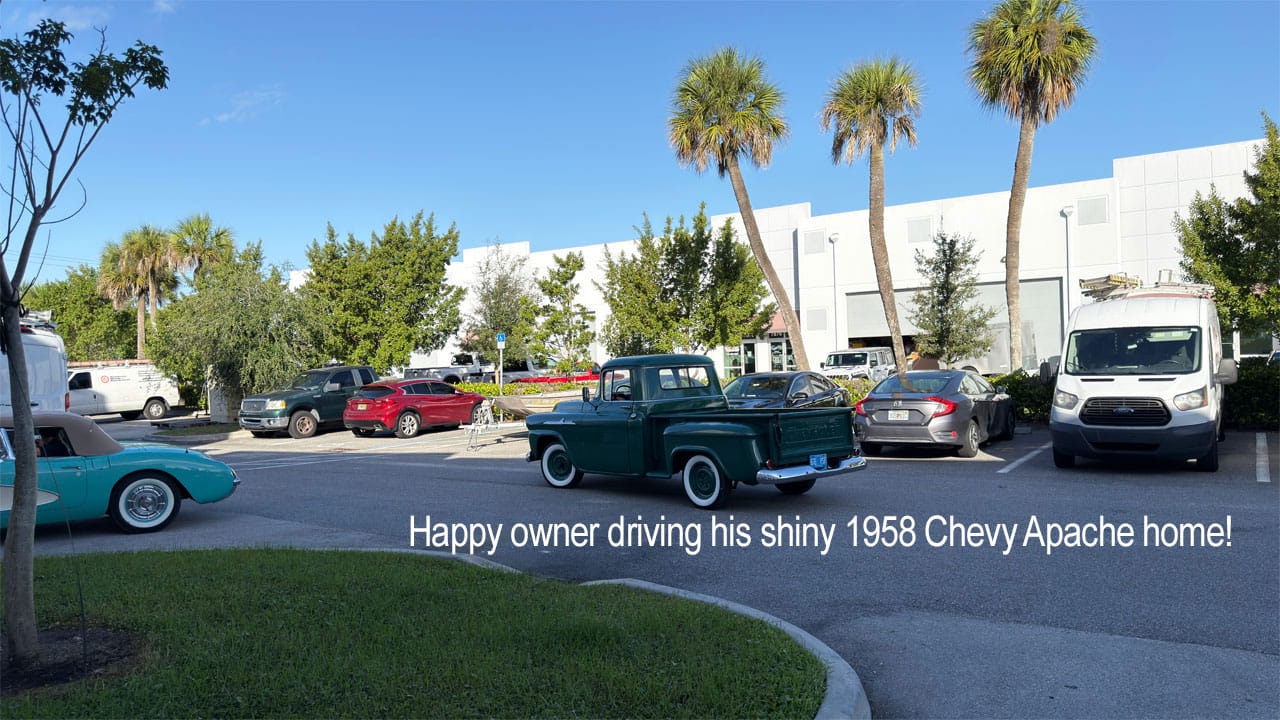
The restored Chevy Apache
The finished truck reflects the complete process described above: the Mini BEAST in tight areas, full-size polishers on the larger panels, and ceramic coating to protect the restored finish.
See the remaining finished-truck and departure photos (8 photos)
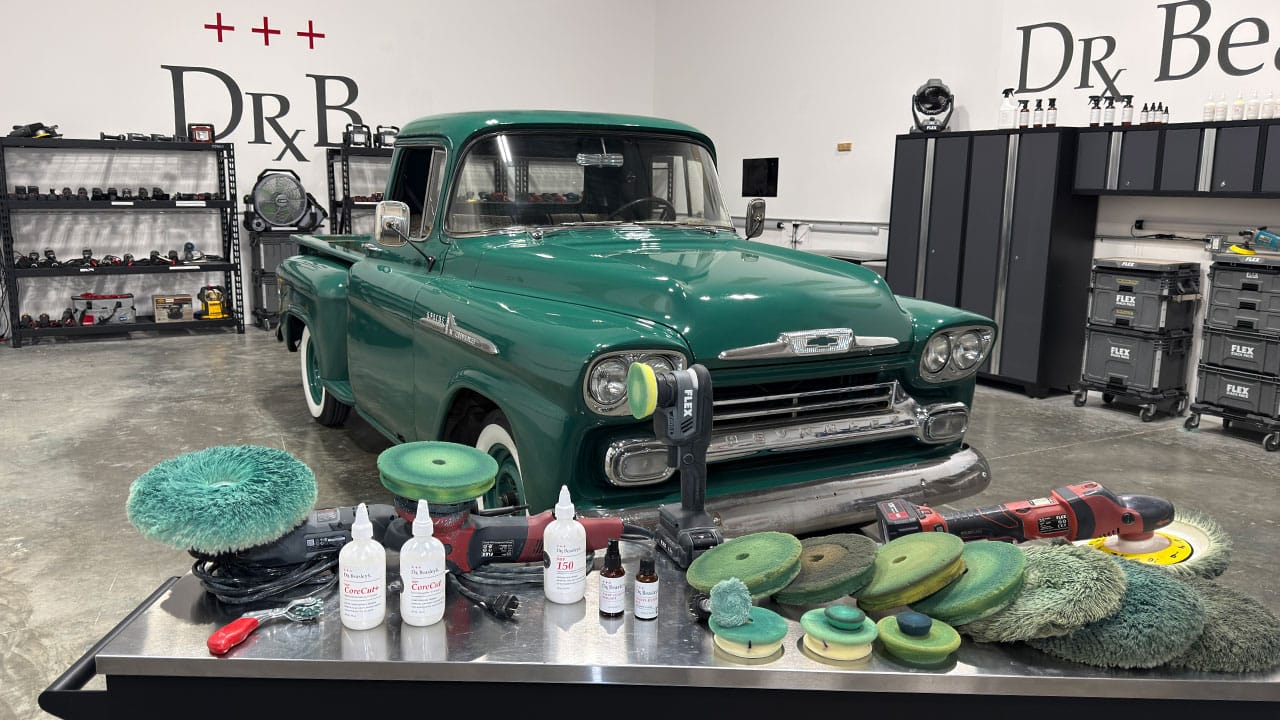
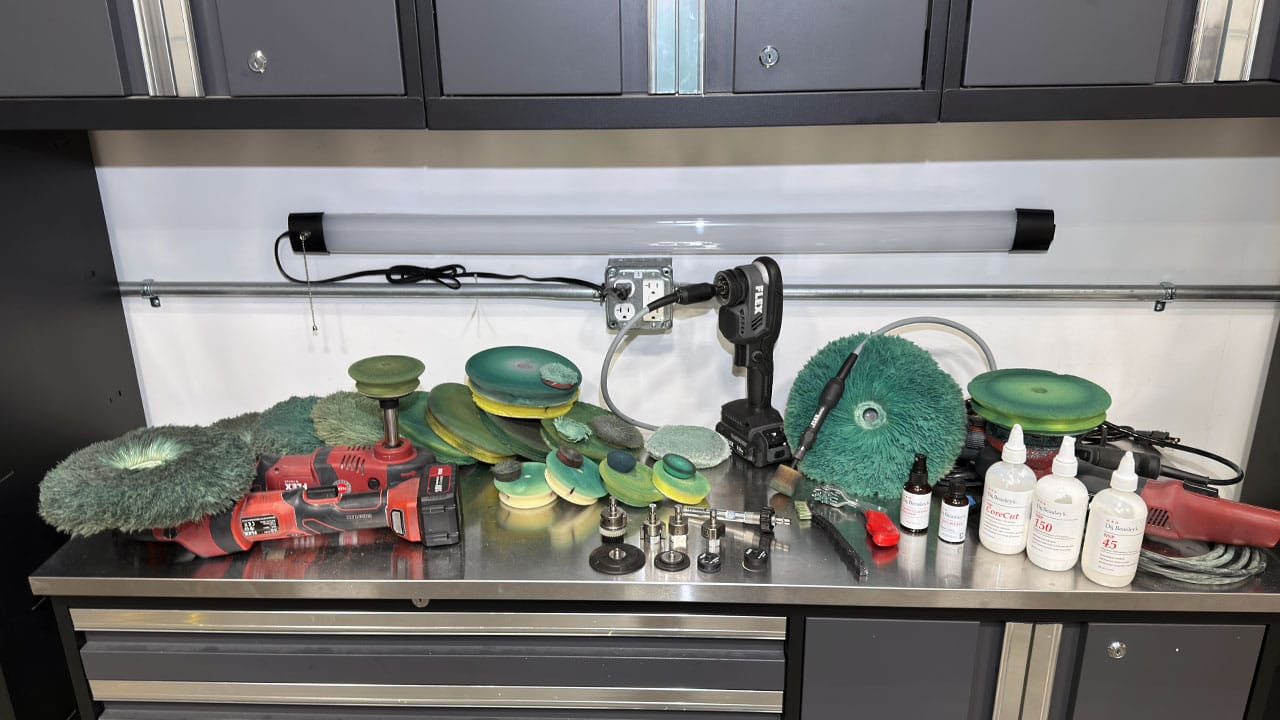
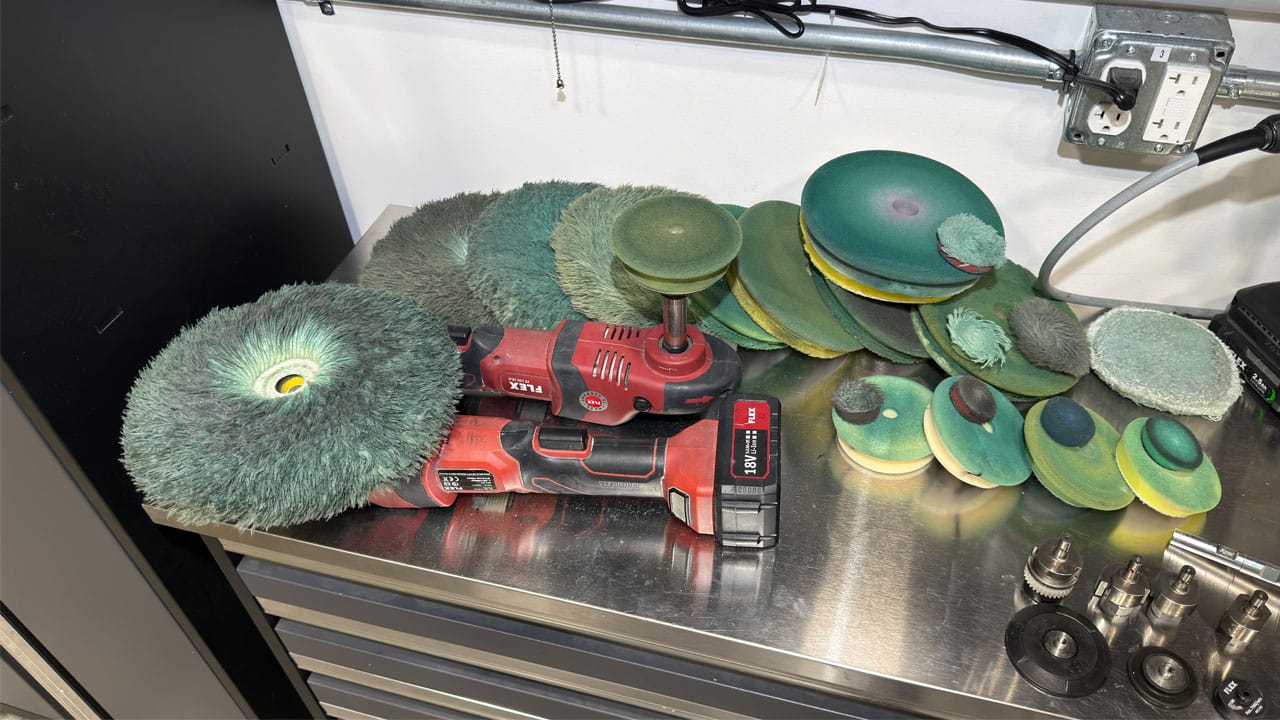
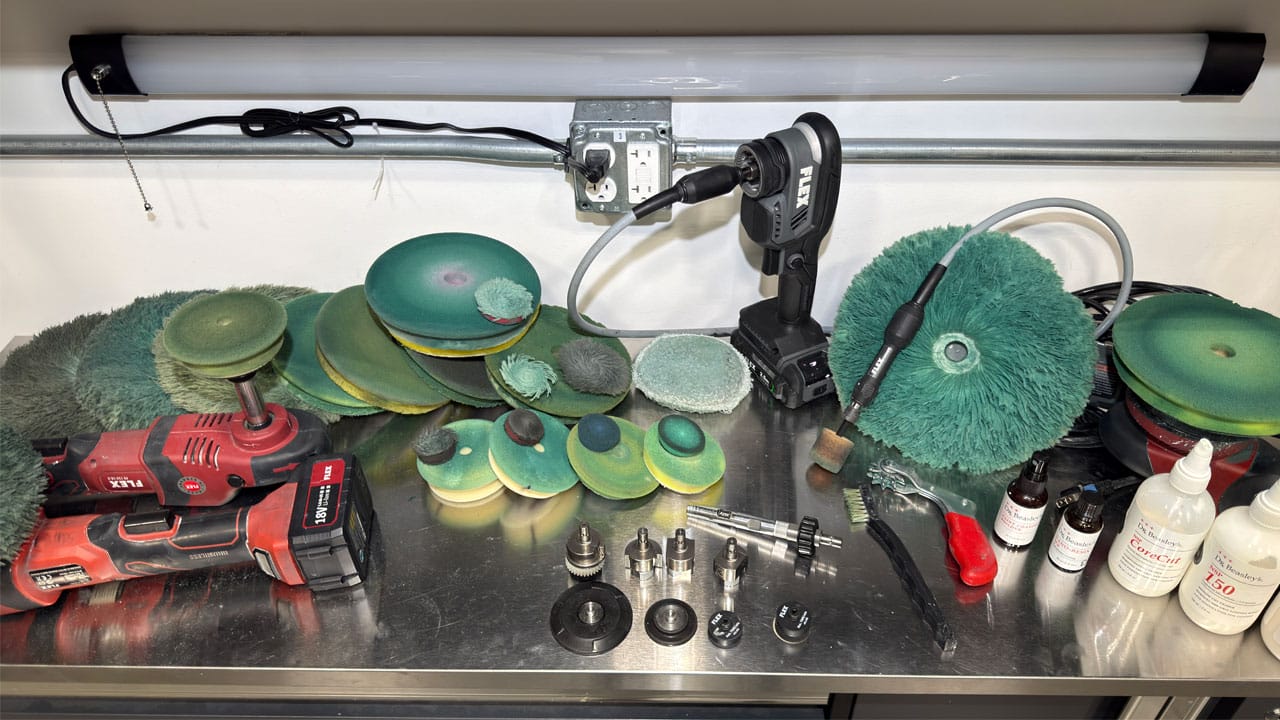
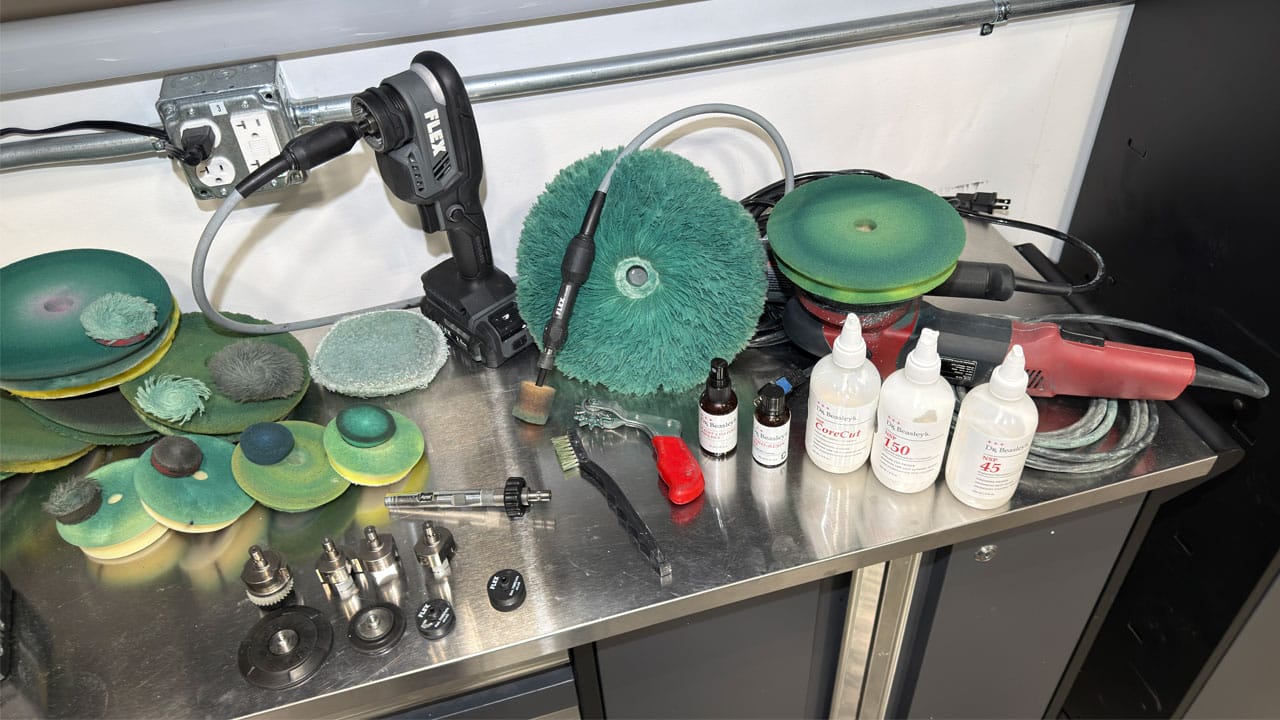
Polishers, pads, and products used
Even with all that documentation, one question always comes up:
“What did you use?”
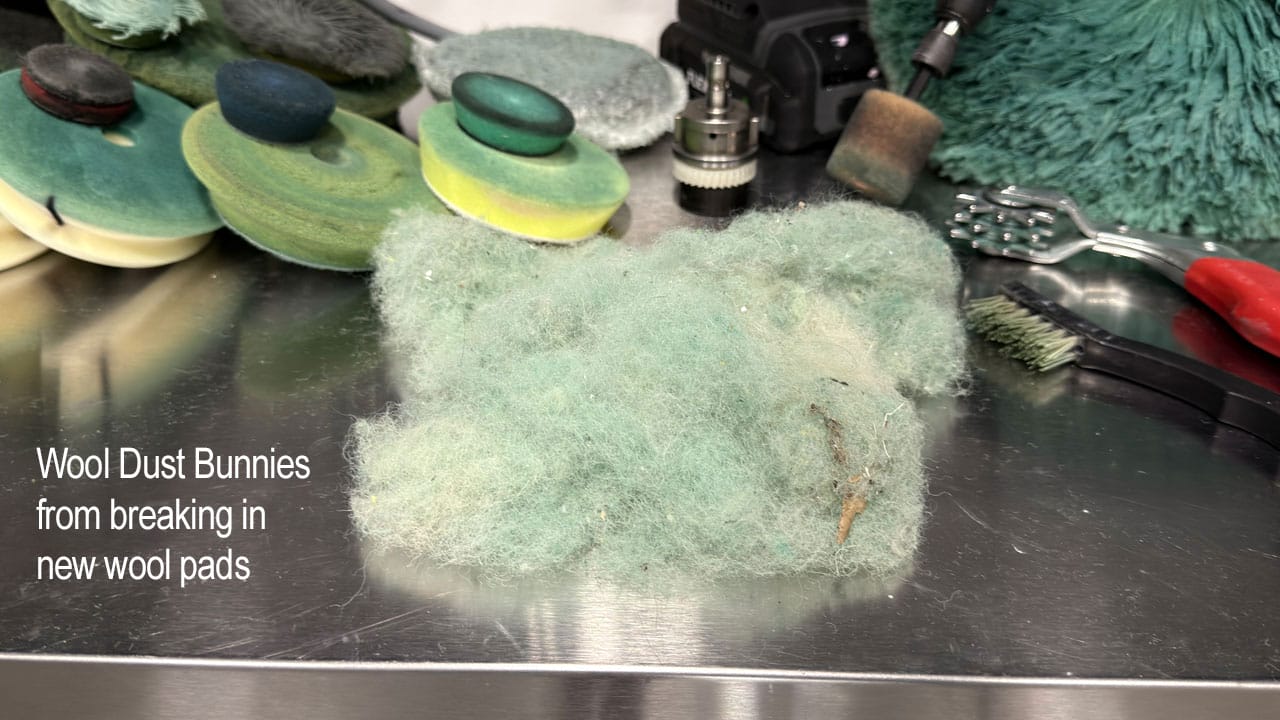
That’s why, at the end of a project, I gather the polishers, adapters, pads, and products for a group photo—including all the dirty pads I went through!
The photos below show the equipment and products behind this transformation, from the FLEX Mini BEAST used in tight areas to the full-size polishers used on the larger panels. Together with the explanations throughout this article, they document what went into restoring this truck’s original paint.
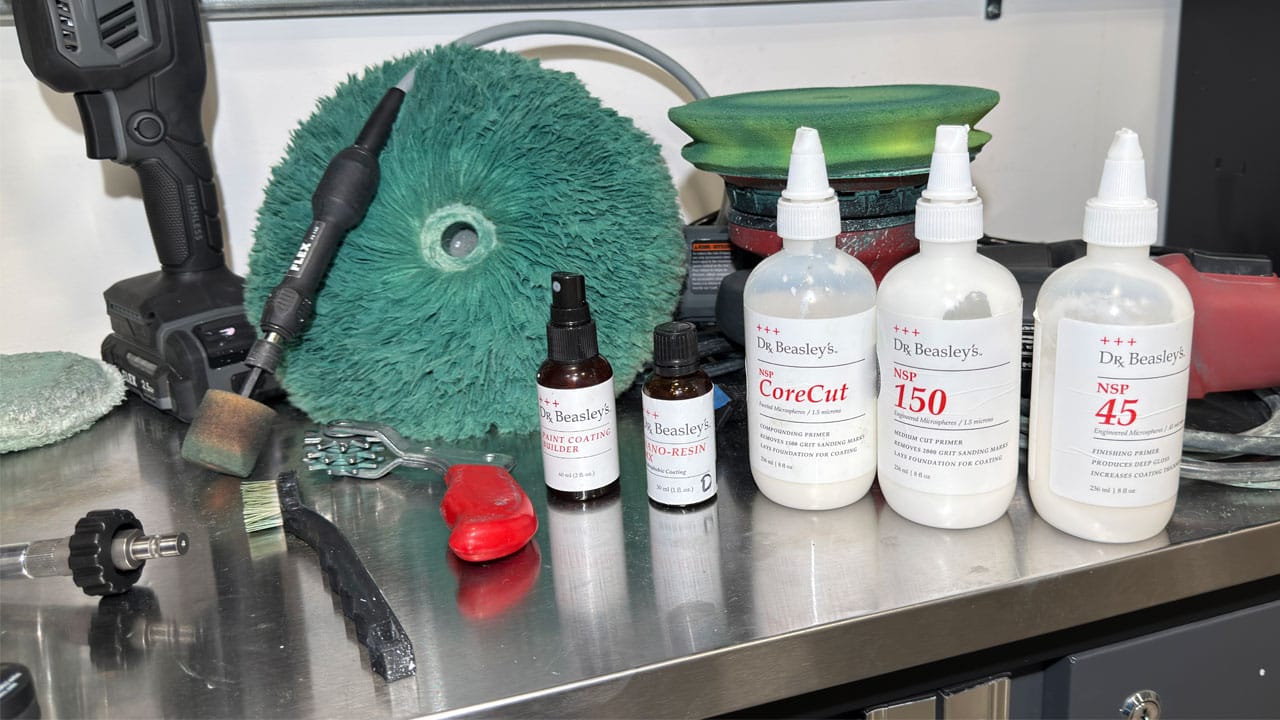
Corecut – Compound
NSP 150 – Polish
NSP 45 – Ultra Fine Cut Polish
Nano-Resin 2.0 Ceramic Coating
More equipment, used-pad, and cleanup photos (5 photos)
My final thoughts
I’ve wanted a compact gear-driven orbital polisher for years, and I know plenty of other detailers have wanted one too.
At last, we have it.
The Mini BEAST combines rotary, free-spinning random orbital, and gear-driven orbital operation in one compact cordless tool.
For me, the deciding feature is the 6mm gear-driven adapter.
If you’ve been frustrated by pad stalling while correcting paint with a mini random orbital polisher, you’re going to appreciate the ability to keep the pad rotating and oscillating as you work.
Add the sanding options, touch sensor speed control, Turbo Mode, smooth operation, and 24-volt battery system, and this becomes a very versatile tool.
But the feature that earns it the name Mini BEAST is simple:
Gear-driven paint correction with ZERO PAD STALLING!
Availability and SEMA introductory pricing
The new FLEX FX3361 Mini BEAST is expected to become available in 2027, with a manufacturer’s suggested retail price of $595.99.
Following its planned reveal at the SEMA Show in Las Vegas on November 3, 2026, Autogeek will offer a SEMA show special price of $549.99—a savings of $46.00 off MSRP.
You don’t have to attend SEMA to get the special price. The offer will also be available through Autogeek.com.
According to Autogeek, it has an exclusive U.S. launch arrangement, making it the first U.S. distributor to stock and sell the Mini BEAST ahead of other retailers.
Order Your FLEX Mini BEAST from Autogeek!
Check the product listing for current pricing, expected shipping dates, and preorder details.
About Mike Phillips and further instruction
Mike Phillips has been teaching car detailing since 1987. His career includes training and education roles with Meguiar’s, Autogeek, 3D Products International, and Dr. Beasley’s, where he currently serves as Chief Education Officer and Trainer.
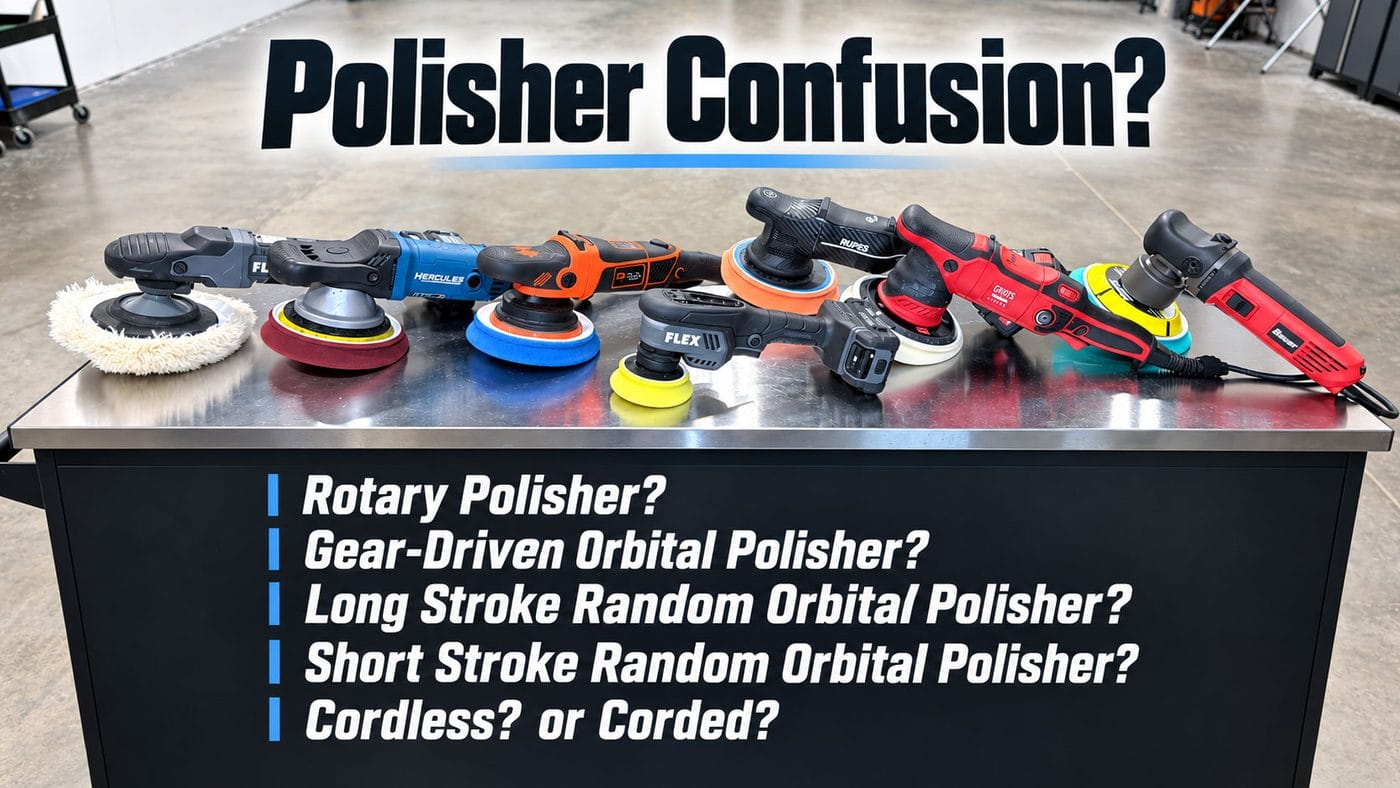
Not sure whether to choose a rotary, free-spinning random orbital, or gear-driven orbital polisher? Our Polisher Guide and PDF Checklist will help you cut through the confusion and choose the right type for your detailing needs.
Find the Right Polisher for You — Explore Our Polisher Guide
More about Mike’s books and television work
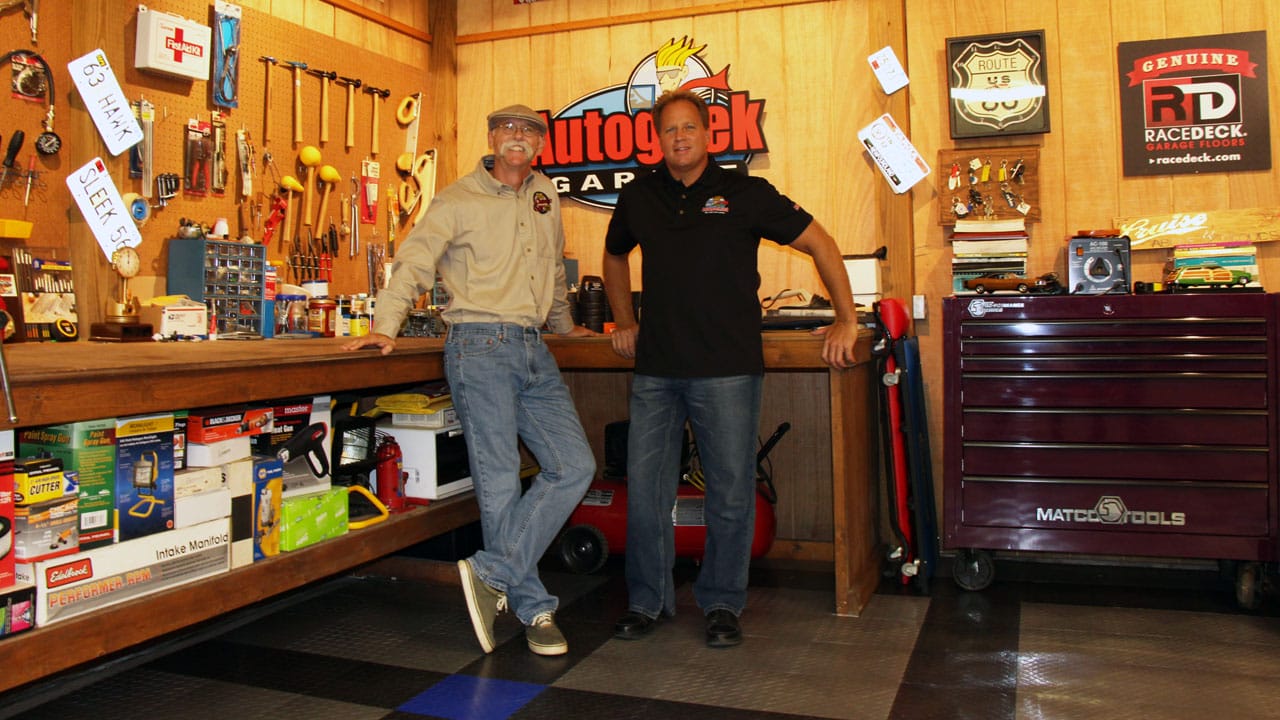
If you’ve watched My Classic Car with Dennis Gage, you may recognize Mike as a frequent guest detailing expert, demonstrating tools, pads, products, and techniques.
He also co-hosted Competition Ready with Adrienne “AJ” Janic on the Velocity Channel and hosted Autogeek’s What’s in the Garage.
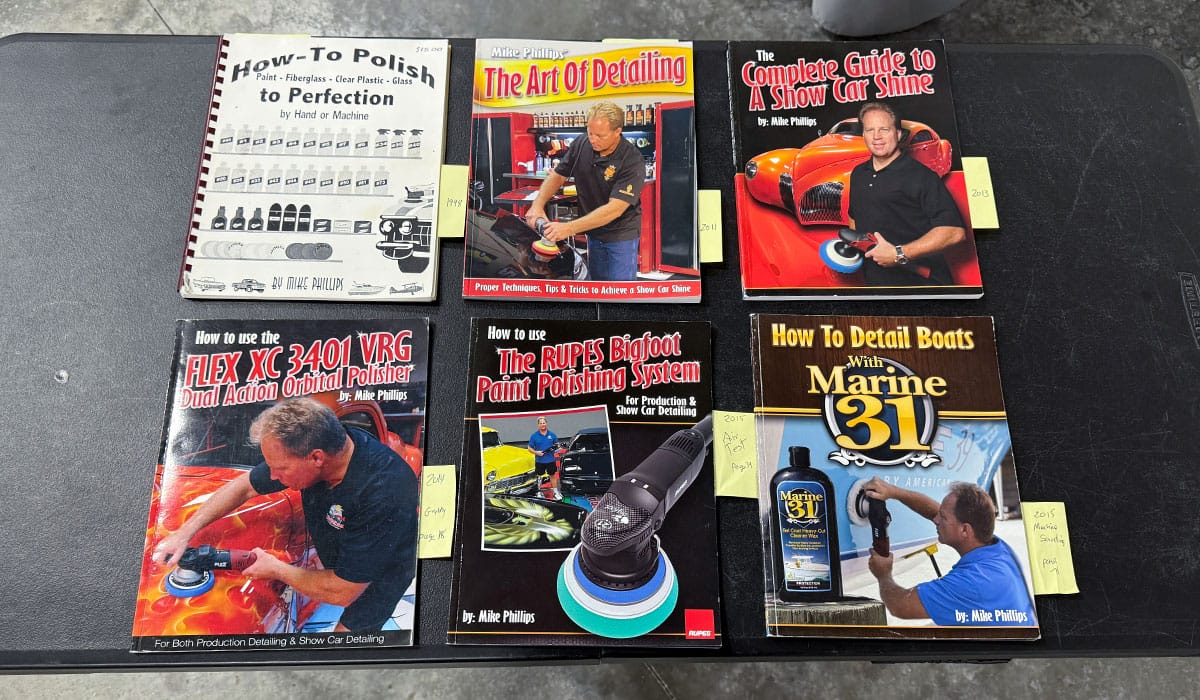
Mike is the author of five car detailing books and one boat detailing book:
- The Art of Polishing Paint
- The Art of Detailing
- Complete Guide to a Show Car Shine
- The RUPES BigFoot Paint Polishing System
- Flex XC 3401 VRG Dual Action Orbital Polisher
- How To Detail Boats with Marine 31
Another book is in the works, with publication planned for spring 2027.
His guest detailing appearances also include:
- Chasing Classic Cars with Wayne Carini
- Two Guys Garage with Bryan Fuller
- Truck U with Bruno Massel and Matt Steele
- Motorhead Garage with Sam Memolo and Dave Bowman
Mike has written more than 1,000 articles on automotive and marine detailing. He served as Director of Training for Autogeek from 2009 to 2021 and later as Global Director of Training for 3D International.
Throughout his online career, Mike has made his email address and cell phone number available to fellow detailing, car, and boat enthusiasts who have questions or need help with their projects.
Books and television photos (4 photos)


Learn hands-on with Mike
Would you like to take your detailing skills to a higher level?
Do you learn better by doing than by sitting in a chair watching a PowerPoint presentation?
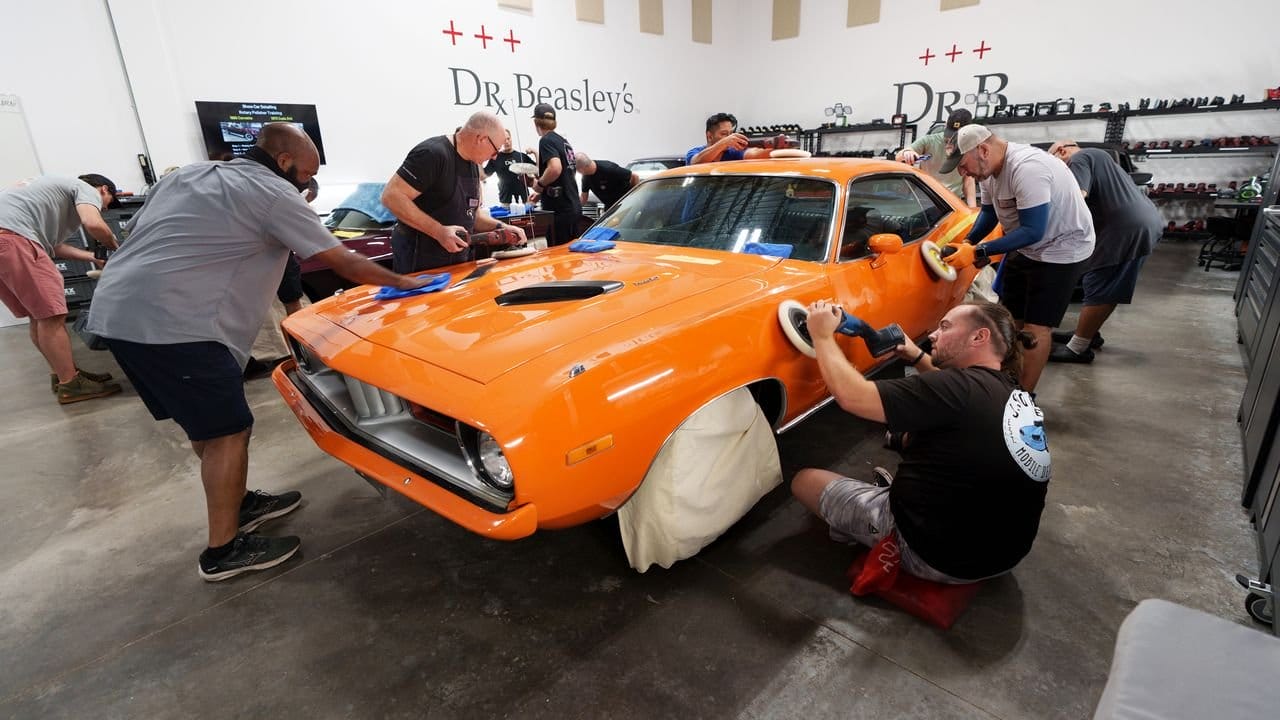
At Dr. Beasley’s Training Center in sunny Stuart, Florida, we teach hands-on car detailing classes.
No chairs. ZERO sitting.
You’ll work on real cars, use different types of polishers, and practice the techniques yourself.
Visit the Dr. Beasley’s Blog to see photo-documented class write-ups, the cars students train on, and just how hands-on these classes are.
For upcoming dates, locations, topics, and prices, see:
Upcoming Detailing Classes – Prices – Info – Topics – Locations
And if you ever have any questions, always feel free to reach out to me personally via text, phone call or email.
I hope to see you in a future detailing class!
Sincerely,
Mike Phillips
Chief Education Officer for Dr. Beasley’s
Mike@drbeasleys.com
Cell: 760-515-0444
Polishing guide and hands-on class photos (2 photos)
Questions? Comments?
Email Us