


Last Updated August 10, 2024

When it comes to entry level dual action (“DA”) random orbital polishers, Harbor Freight’s Bauer Short-Throw Random Orbit DA Polisher/Sander is one of the most popular thanks to its wide availability and low price point. But is this polisher actually worth the money? What should you know about this polisher before you buy? I’ll answer all that and more in this review.

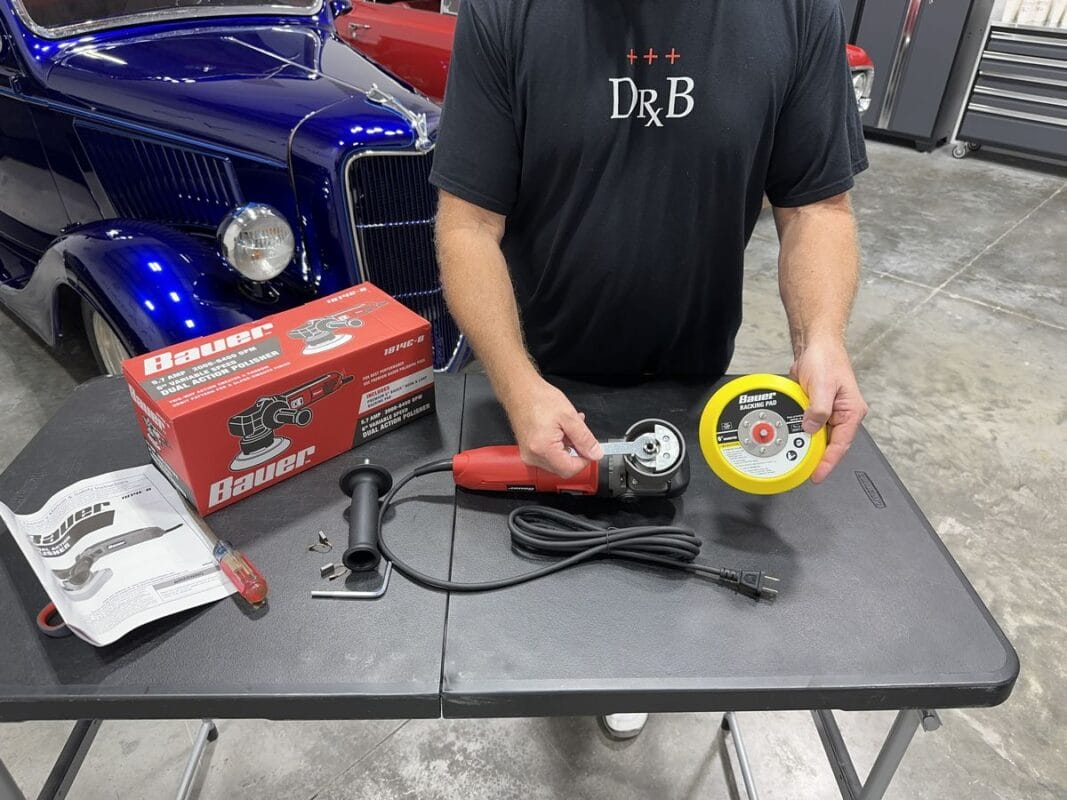
Unboxing the Harbor Freight DA Polisher
Upon opening the box, here’s what you’ll find:
- Polisher
- Side handle
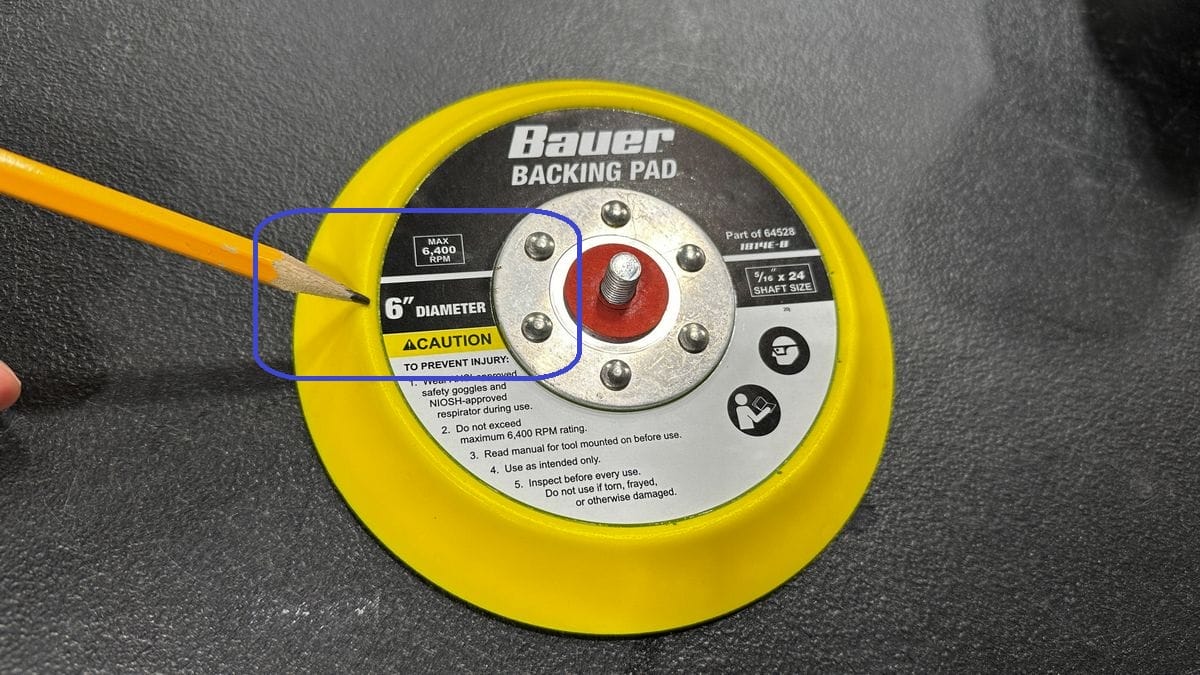
- 6” Backing plate – actual size measures 5 3/4”
- Spindle wrench
- Allen wrench
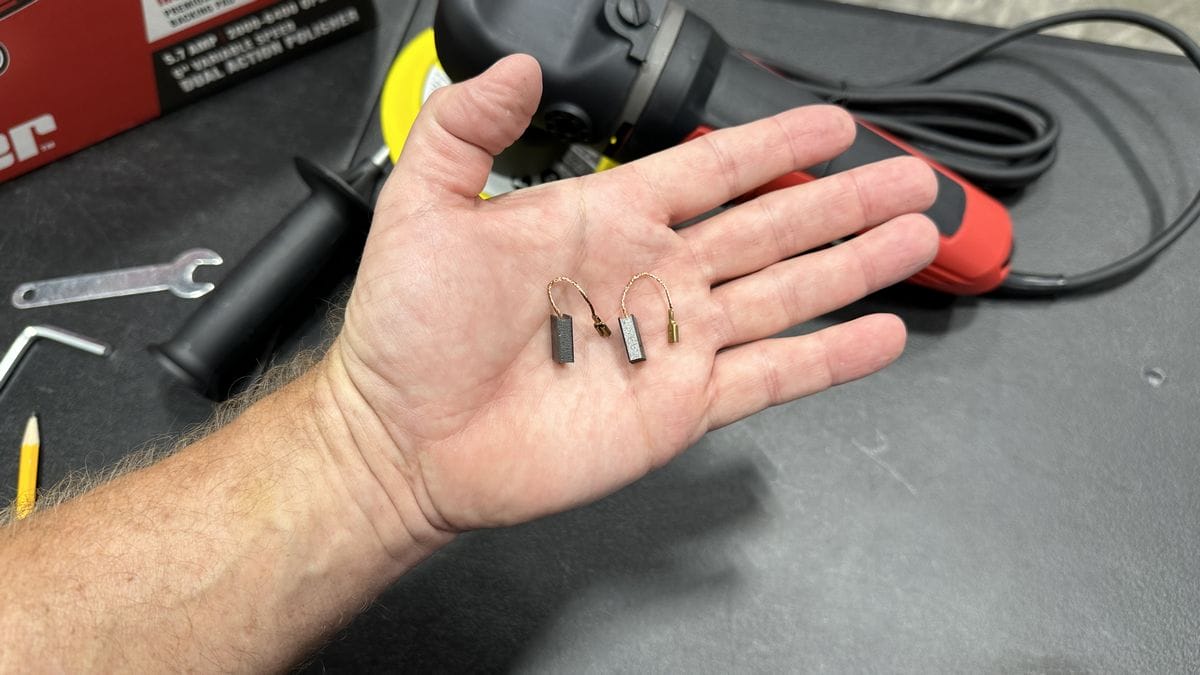
- Replacement brushes
- Owner’s manual
Harbor Freight DA Polisher Tool Overview

This is how the Harbor Freight DA Polisher looks fresh out of the plastic bag from inside the box.

Power Switch
Here’s the on/off power switch. This is what’s called a “Rocker Switch”. It’s called a rocker switch because you slide the switch forward and slightly tip it (or rock it) inward, locking the power switch in the “On” position. The idea behind using a rocker switch is to comply with European safety regulations. Supposedly, if you accidentally drop the tool, the rocker switch will turn to the off position.

Variable Speed Dial
Here’s the variable speed dial – it’s located at the very back of the tool body. The speed dial options go from 1 to the 6 speed setting.
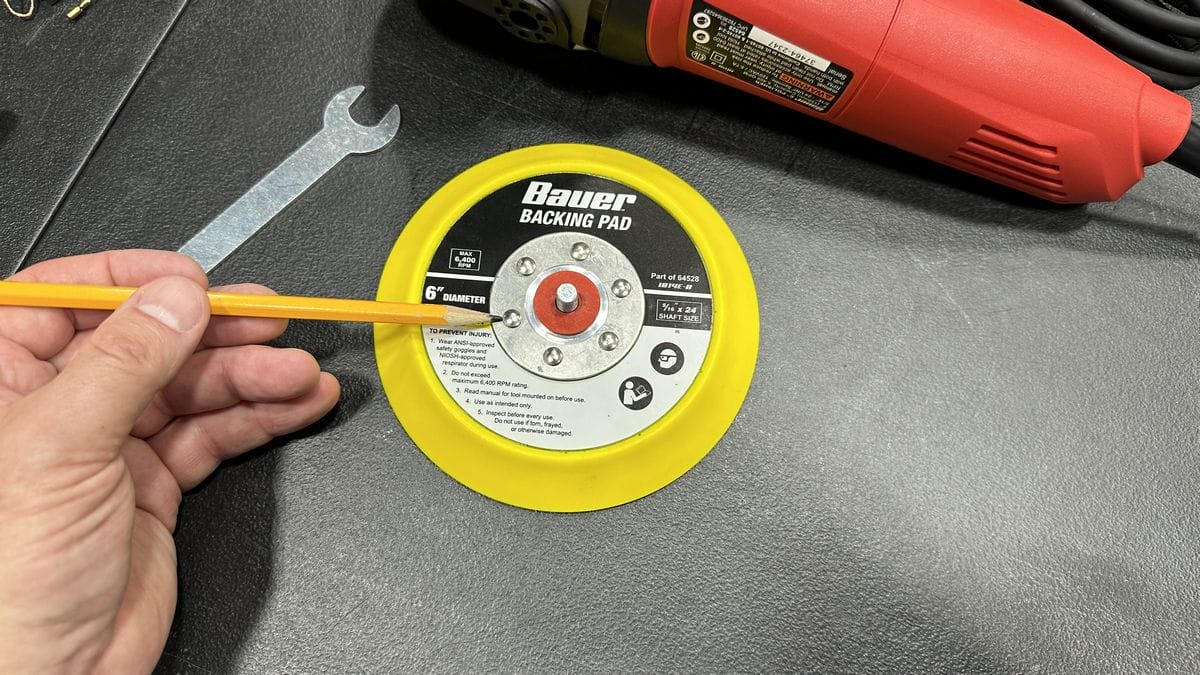
6″ Backing Plate
The polisher comes from the factory with a 6” backing plate. When I measure the diameter of the backing plate with a simple ruler, it measures approximately 5 11/16” – this is normal for any backing plate to be a tick smaller than its actual advertised diameter. The reason for this is to make it easier to center onto the velcro backing on the back of a buffing pad. If the backing plate is larger than the velcro on the back of a buffing pad, you cannot easily see how to center the backing plate.

10′ Power Cord
The polisher comes with a rubber-cased, 10’ power cord., which is much nicer than the cheaper vinyl-cased power cords. There’s less memory in the cord itself, so it lays out flat instead of kinking or remaining coiled-up after stretching it out. And while we’re all supposed to place the cord over our shoulder when buffing out a car, if you didn’t, a rubber-cased cord is less likely to mar the paint than a vinyl-cased cord.

Forward Grip/Handle
The forward tool grip or handle. Sold plastic, no texture and little ergonomic design but more than enough to enable you to grip the head of the tool. At the top of the polisher is a plastic bolt that holds the plastic head onto the tool chassis.
Rear Air Intake Grills for Temperature Control
Rear air intake grills on both sides of the back of the tool body. The fan towards the front of the inside of the tool pulls air through the body to help keep the tool running temperature lower.

Side Handle
The Harbor Freight DA comes with a side handle. As you can see, there are threaded handle slots on both sides of the tool for the side handle to plug into.
The handle is simply a basic plastic handle that mimics the handle that comes with the Porter Cable 7424XP. I recommend using the tool without the handle.
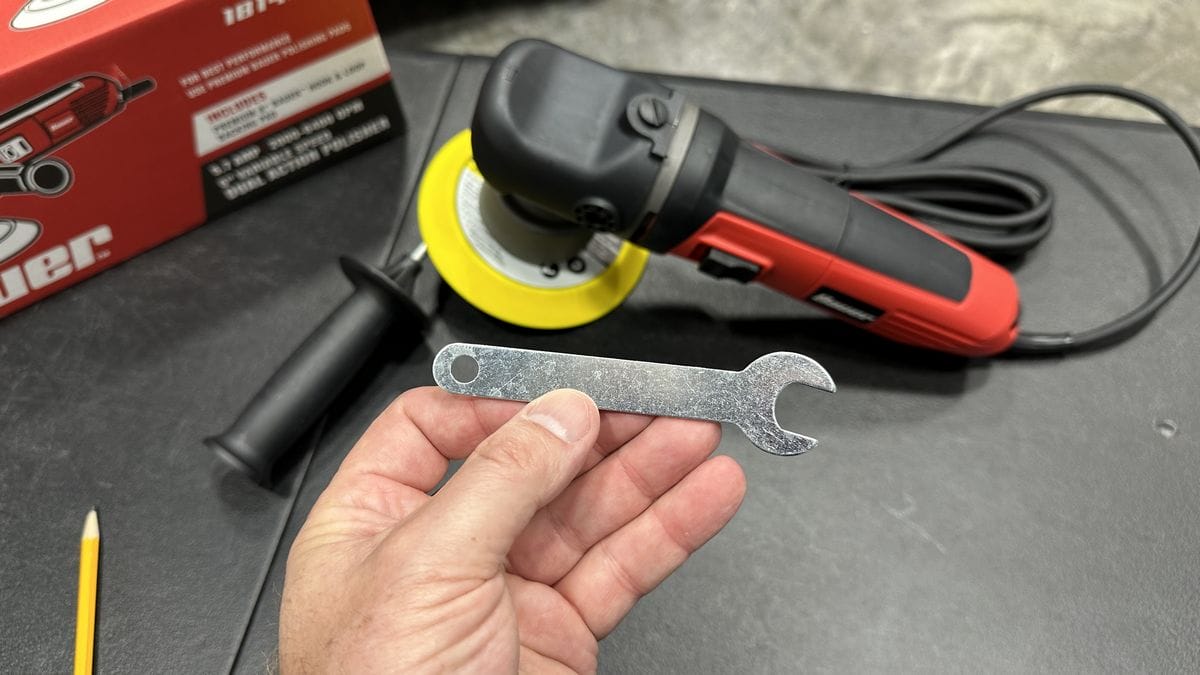
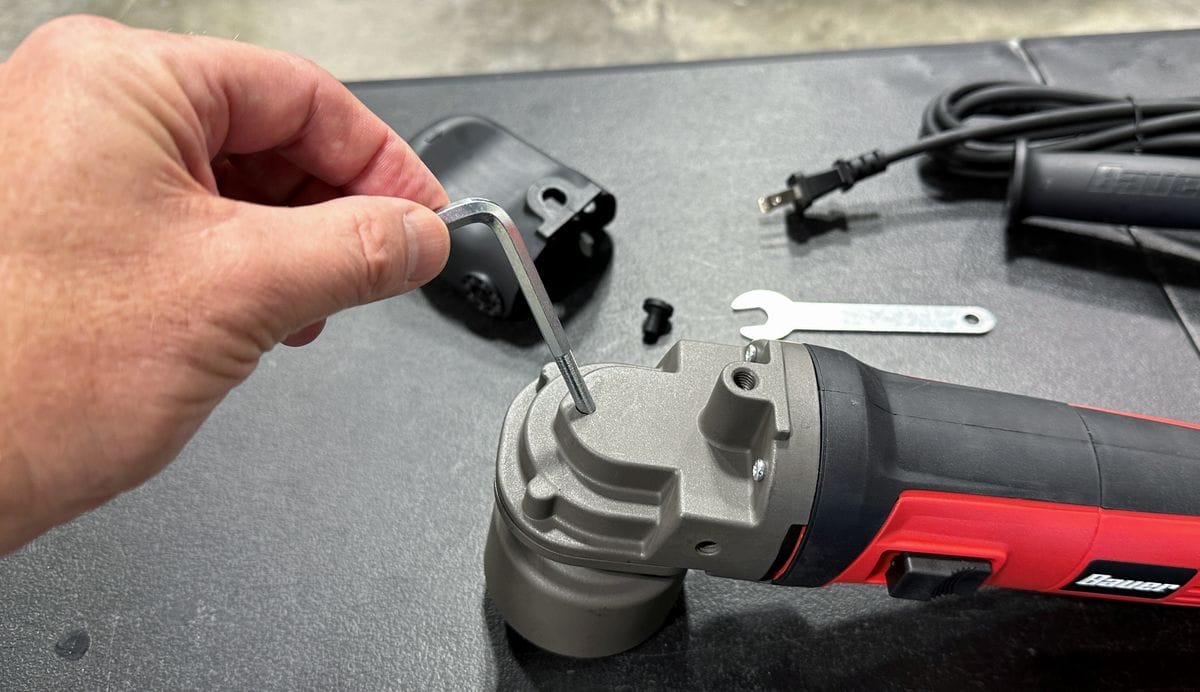
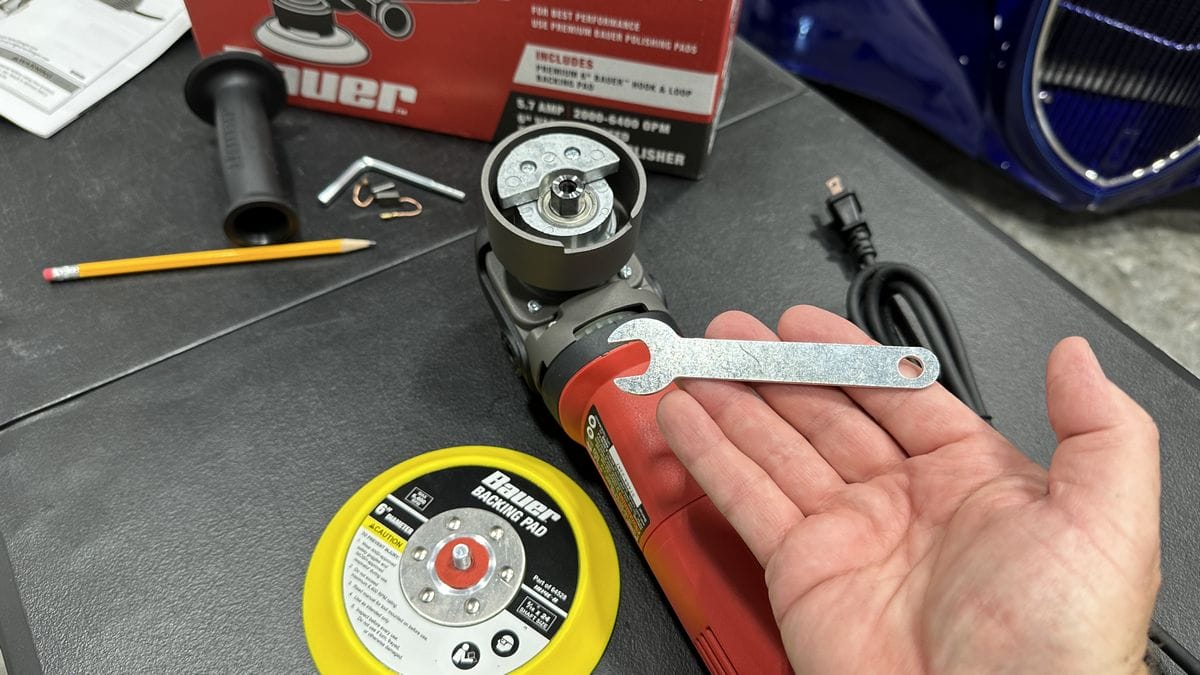
Spindle Wrench & Allen Wrench
This is the spindle wrench. The hex sided spindle measures around 14mm or a tight 9/16” Don’t lose the wrench because a normal 14mm or 9/16” wrench is too thick to fit into the slot on the housing to access the spindle.
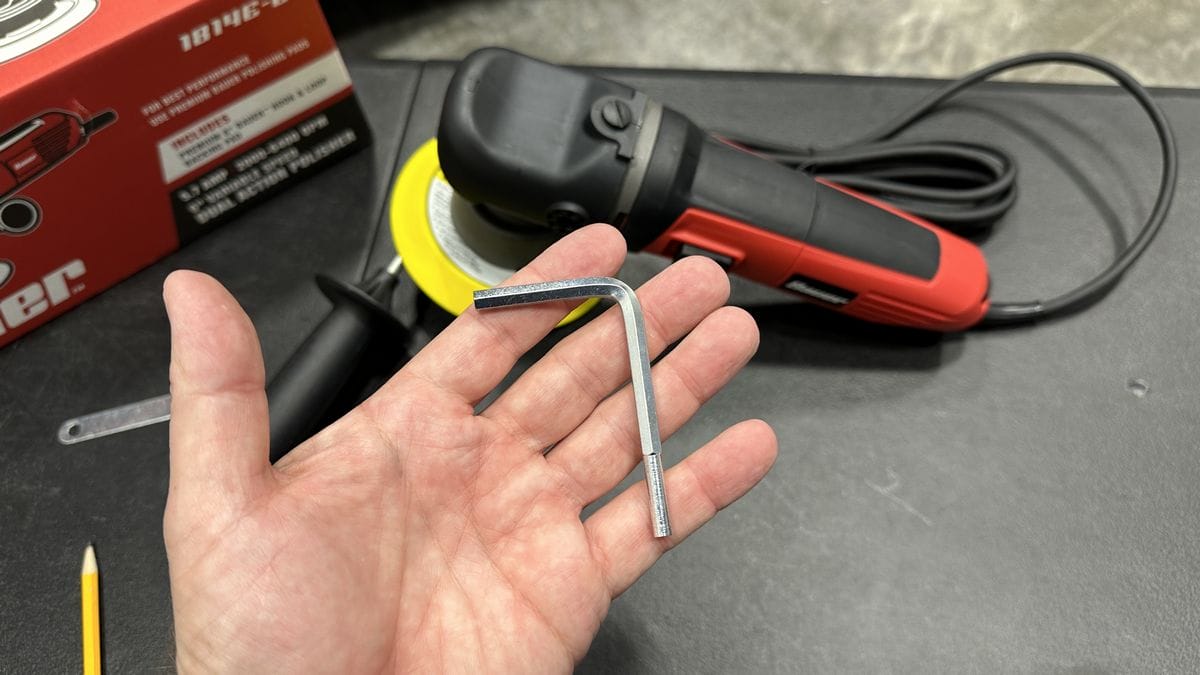
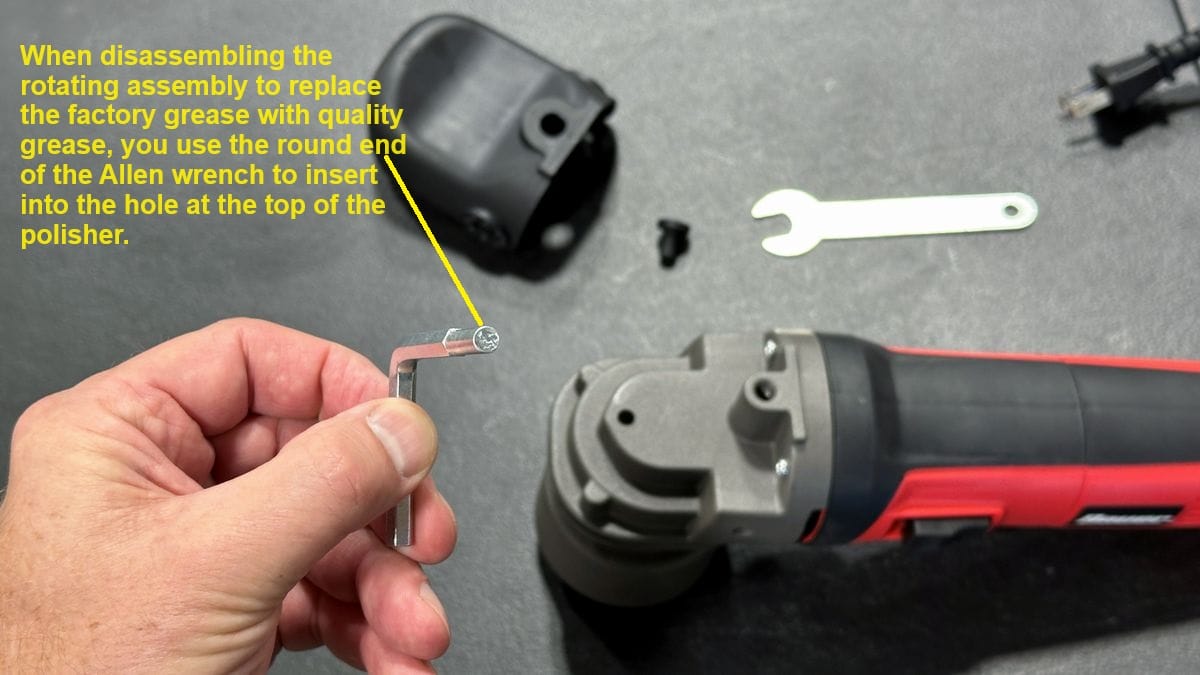
This is the Allen Wrench. One side is ROUND, and the other side is standard hex head shape. You insert the round side down, inside the hole at the top of the tool, (with the plastic housing removed), to lock up the rotating assembly. This allows you to then remove the rotating assembly. The purpose of this is so that you can replace the factory grease over time.
Internet wisdom has concluded the factory grease is sub-standard, so a lot of people take their brand-new polisher apart to remove the factory grease and replace it with a high quality lithium grease. Replacing the factory inexpensive grease with a premium quality lithium grease will dramatically reduce the noise level of the tool during operation as well as reduce the felt-vibration to your hand and arms. This is a win/win procedure especially when you consider doing the paint correction step to a neglected car usually means buffing for hours.
There are also a pair of brush replacements for the electric motor included.
My Key Takeaways
- This is the best DA polisher at this price point.
- DON’T use the handle (I’ll explain why).
- Replace the 6″ backing plate with a 5″ backing plate and use thin 5.5″ foam buffing pads.
- Mark your backing plates and pads to monitor pad rotation/oscillation.
- Use a QUALITY 12 gauge extension cord.
- Replace factory grease with premium lithium grease.
First off: For the purposes of this review, I’ll be referring to this tool as the Harbor Freight 6 inch DA Polisher, as this is what most people online call the tool. The technical name for this tool is the “Harbor Freight Bauer 5.7 amp 6″ Short-Throw Random Orbit DA Polisher/Sander”. This name, however, is misleading.
This tool is not a 6″ DA — it’s an 8mm Free Spinning Random Orbital Polisher. The 6″ refers to the backing plate size, but free spinning random orbitals should be referred to by their orbit stroke, not the backing plate size. For some reason, the marketing person at Harbor Freight decided to name the tool by its backing plate size instead.
No one at Harbor Freight should feel bad though, as other companies have also named their tool NOT by the action of the tool but by the diameter of the backing plate. Which is simply silly.
Why I Recommend the Harbor Freight 6″ DA Polisher
- LOW PRICE: Out of the polishers I reviewed in my “Best Car Polishers for Beginners” article, the Harbor Freight Bauer 6″ polisher is the least expensive at $65 MSRP. You could start a detailing business starting with this polisher, some pads, a good AIO and of course the normal supplies like wash bucket, wash mitt and a collection of microfiber towels.
If you charged a person $200.00 for a basic exterior detail using the nominal products listed above, you can recoup your entire investment with this single detail job. The tool will have paid for itself as well as the other times listed above assuming you were starting out from scratch.
Then each time you do another basic detail job, most of what you earn will be profit, excluding taxes and any overhead costs like liability insurance. There’s not too many legitimate businesses you can start and be your own boss with such a low investment price point.
If you’re purchasing this polisher for use at home, the low price is even more important. It can be tough to justify an expensive tool when you’re just polishing your pride and joy in the garage. A $65 polisher, on the other hand, is a lot easier to manage. - LOTS OF POWER: This polisher boasts a 5.7 AMP electric motor and an OPM or Orbits per Minute range of 2000 OPM on the low speed setting and 6400 OPM on the highest speed setting. These words and numbers don’t mean much until you hold one in your hand and then turn on the polisher and start removing swirls and scratches. The closest similar tools have less powerful motors, less OPM range and from a practical point of view based upon decades of experience, nowhere near the power this polisher offers
I’m a long-time Porter Cable 7424XP user and fan, and while the Porter Cable, or PC as it’s referred to in the car detailing industry does offer a high quality, lightweight, compact size polisher, compared to the Harbor Freight version of the PC, it struggles to maintain pad rotation as well as the Bauer 6” DA when both tools are used on the medium to highest speed settings. (all these tools struggle to maintain pad rotation at low speed settings, even the big boys)
What this means to you is the Bauer 6” DA will be faster and more effective at removing swirls, scratches, water spots and oxidation. When you consider the paint correction process requires the most amount of time needed to detail a car from start to finish – this little tidbit of reality is important. That is unless you want to work slowly.
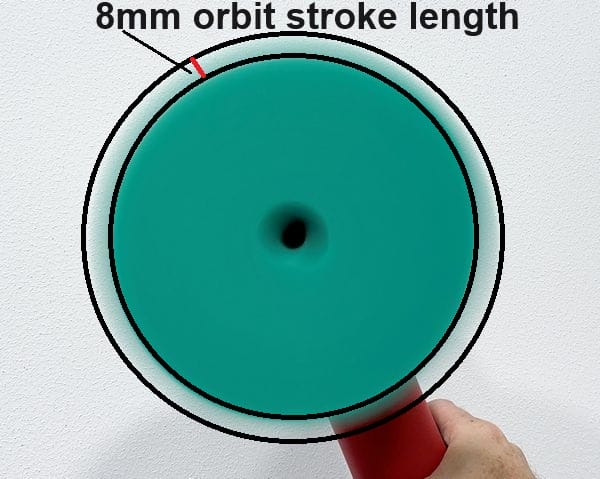
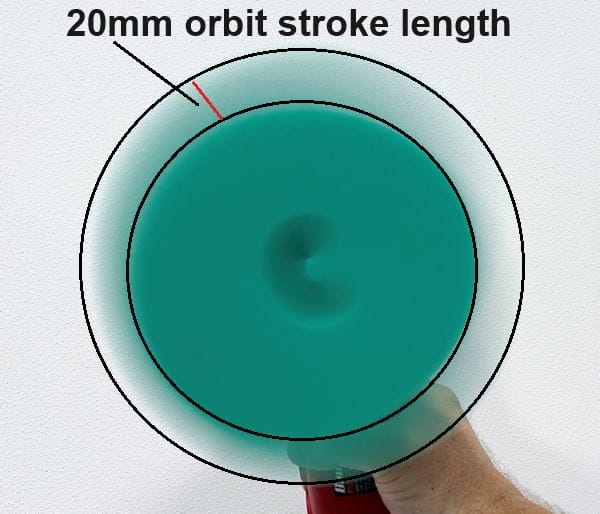
- SHORT STROKE > LONG STROKE: This free spinning random orbital DA has an 8mm orbit stroke, making it a “short throw” or “short stroke” action. This is actually better than a longer orbit stroke, and here’s why:
It’s much easier to maintain good pad rotation/oscillation with a short stroke polisher versus a long stroke polisher. It has to do with the dynamics of pads size and orbit stroke.
The outer edges of a spinning buffing pad have leverage over the spindle that spins the backing plate. The larger the stroke, the larger the pad, the more leverage the pad has over the spindle or driving force that rotates and oscillates the pad.
Just the opposite is true for free spinning, short stroke polishers. The shorter the stroke and the smaller the pad, the less leverage the outer edges of a spinning buffing pad has over the spindle. - LIGHTWEIGHT AND COMPACT IN SIZE: Another nice thing about this tool is that it’s only 5.6 pounds and relatively compact in size. Similar 8mm short stroke polishers have larger tool bodies that mimic popular long stroke polishers. In my opinion, that just makes the tool bulkier and harder to maneuver.
- ALSO GREAT FOR SANDING: Besides doing paint correction, you can use this tool with a variety of sanding discs to machine sand both car paint and gelcoat boats. The key thing with using this tool as a sander is to always use the appropriate interface pad between the backing plate and the sanding disc. I have used this took in our car and boat detailing classes for removing orange peel on custom paint jobs and removing deep oxidation and dock rash out of the hulls of gelcoat boats.
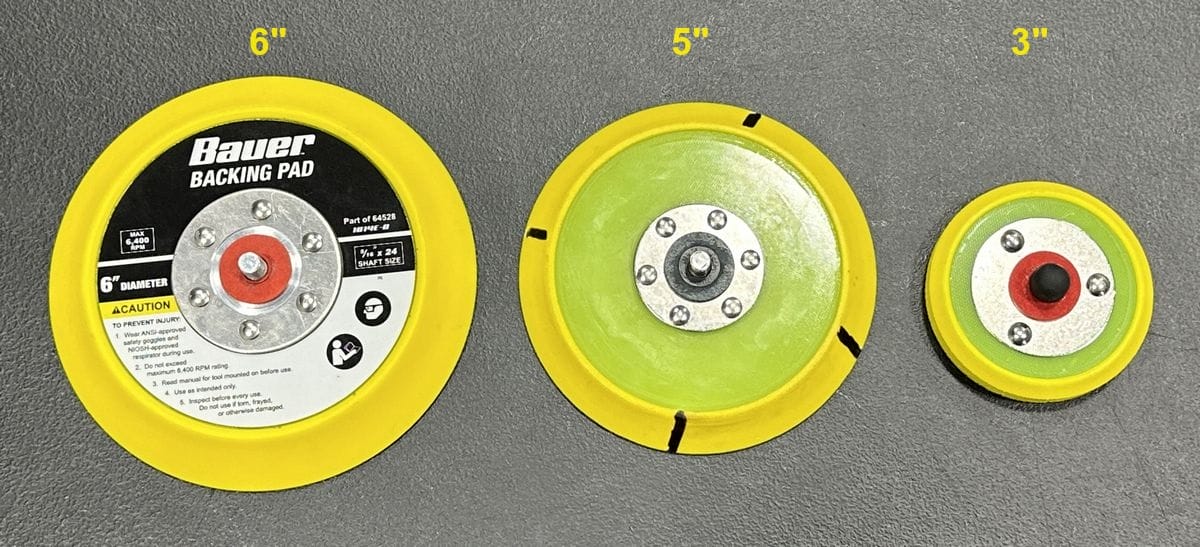
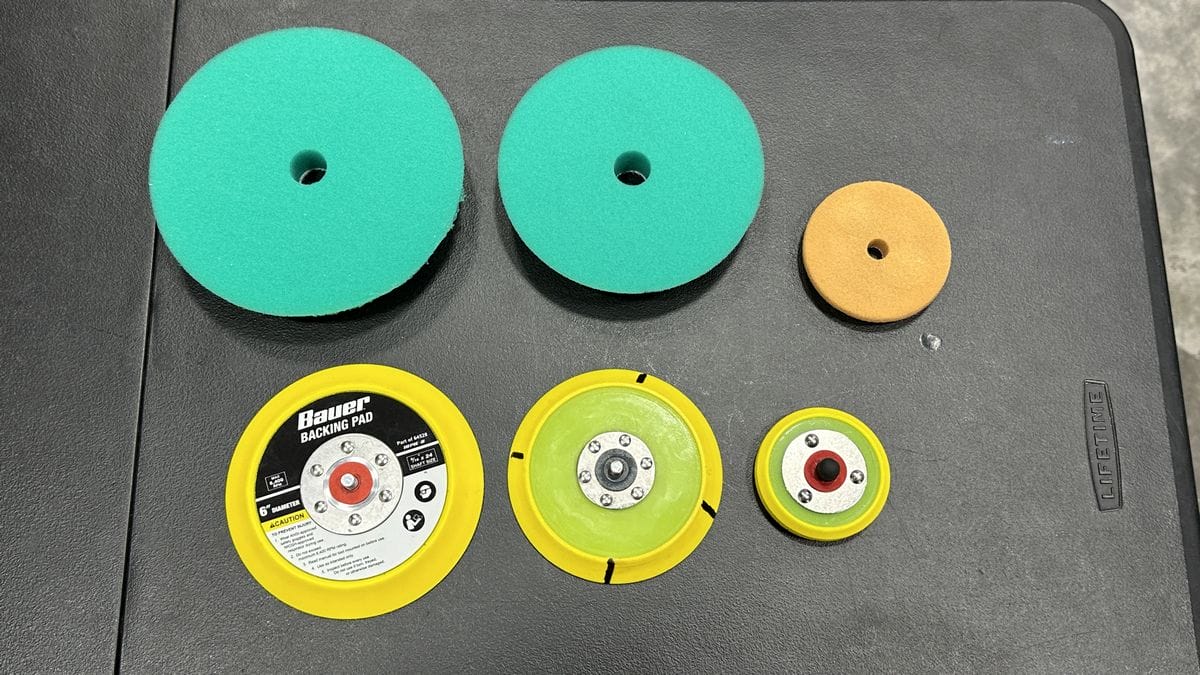
- INTERCHANGEABLE BACKING PLATE: This tool comes with a 6” backing plate and you can also find 5” and 3” backing plates that will fit onto the spindle. Most backing plates for tools like these have a 5/16” UNF Fine Thread stud on the back side of the backing plate and this will fit this Bauer polisher as well as the Porter Cable polisher and of course any copies of these tools.
If you decide to purchase this tool, my strong recommendation is to remove the 6” backing plate, head on up to Amazon and purchase a 5” backing plate and then invest your buffing pad money into smaller, thinner buffing pads. While this tool does have more power than the Porter Cable polisher, it will work much better if you use smaller diameter and thinner buffing pads. It’s simple physics, it will be easier for this tool to maintain pad rotation and pad oscillate if there’s LESS SURFACE AREA to the face of the pad.
Overall Paintwork Correction Performance
This little tool works really great for any paint correction procedure including,
- Heavy correction – removing serious or deep swirls and scratches
- Light correction or refining – removing light or shallow swirls and scratches or refining the results after any heavy correction steps.
- Machine applying waxes and sealants
The key thing for any of the above is to simply match the pad and the product to the task.
For removing deep swirls, scratches, water spots and oxidation, use a coarse foam cutting pad, microfiber pad or microwool pad with an aggressive compound.
For removing shallow swirls and scratches, or light oxidation and/or water spots, or refining the results from a heavy paint correction step to maximize gloss and clarity, use a foam polishing pad with a quality polish.
For show car work or when working on super soft paint, use a soft foam finishing pad and a fine or ultra fine cut polish or AIO.
Instead of hand applying a wax or sealant, let this polisher do the job for you. Not only is it faster and easier on you, the machine application of a quality wax or paint sealant, or even a quality AIO is always more thorough and it’s easier to lay down a thin layer of product.
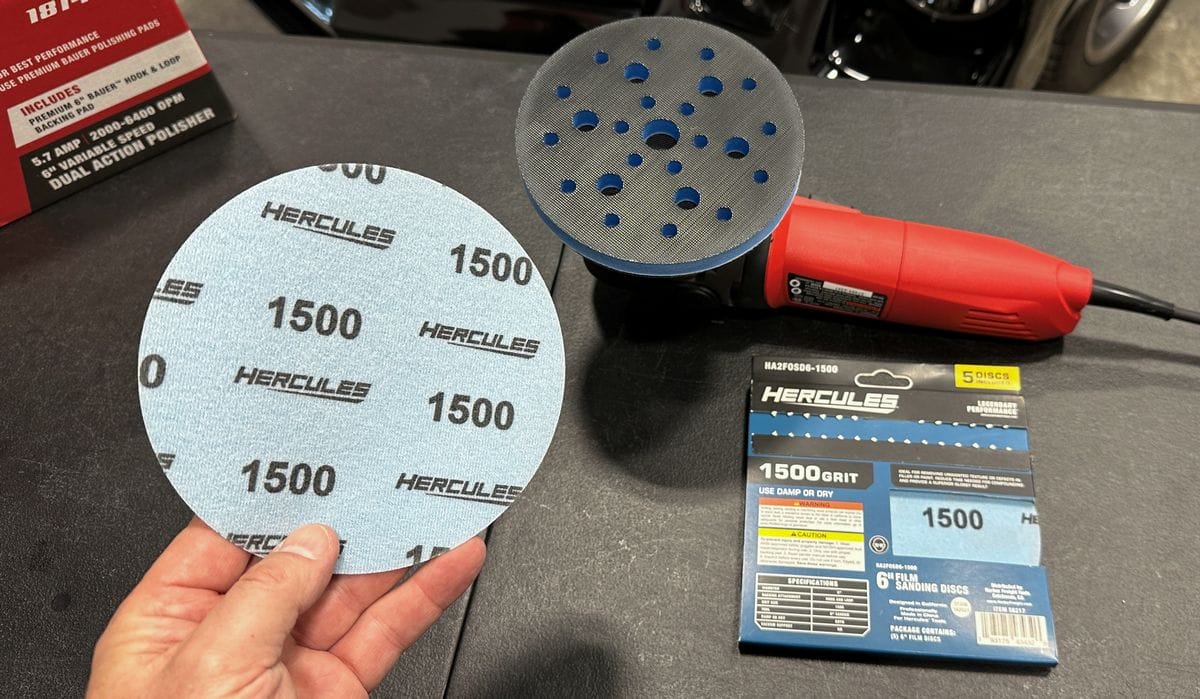
Bonus Feature: Machine Sanding
While the 8mm orbit stroke diameter is a tick on the aggressive side for sanding, it does work and in my experience, works very well and very fast. The key to machine sanding with an 8mm free spinning random orbital polisher is:
- If sanding on car paint, this should be a custom paint job with more paint to work with, not a factory finish.
- Use a foam interface pad between the backing plate and the sanding disc.
- Always use the least aggressive sanding disc to get the job done so you remove the least amount of paint.
I teach machine sanding in our car and boat detailing classes. For our car detailing classes we tend to use the cordless FLEX sanders, simply because my students have to sand and manage a cord at the same time. But, if I didn’t already have a nice collection of cordless FLEX sanders, I would have no problem using the Harbor Freight 6” DA Polisher as a sander.
For our boat classes, because I bring in LARGE center console boats for the class to train on, we used 8mm GEAR-DRIVEN orbital polishers simply because this is the fastest way to sand down a boat. That said, if I didn’t already have a nice collection of the FLEX BEASTS, Supa BEASTS and CBEASTS, plus I have the Harbor Freight version of the FLEX BEAST and it too is an 8m gear-driven orbital polisher. Because there’s ZERO pad stalling with this type of polisher, it’s the fastest way to sand neglected gelcoat to remove deep oxidation and dock rash.
BUT – if I didn’t have a nice collection of these tools for my class to use, we could certainly use the Harbor Freight 6” DA Polisher for sanding gelcoat.
Tips for Using and Maintaining Your Harbor Freight DA Polisher
What Pads Should I Use with the Harbor Freight DA Polisher?
Like I mentioned above, I recommend using THIN foam pads with the Harbor Freight DA Polisher instead of thick foam pads. This is because thin pads tend to rotate and oscillate better than thick pads. There are a number of companies, like Lake Country Pads, Buff and Shine Pads, Griot’s Garage and RUPES, that all make quality thin buffing pads.
Why I Don’t Recommend Harbor Freight Bauer Buffing Pads
While at Harbor Freight you’ll see the Bauer brand of buffing pads in both 6” and 7” sizes. The 6” Bauer foam buffing pads fit the factory installed 6” backing plate that comes with the Bauer 6” DA. Here’s why I DON’T recommend using these pads.
Yes, the Bauer 6” DA has enough power to rotate and oscillate the Bauer 6” foam buffing pads and will do so fairly well as long as you hold the tool so that the pad is flat to the surface. But these are very thick pads compared to the options I listed above, and the thicker the pad, the more the foam ABSORBS the power coming out of the tool and DISSIPATES it. This shows up to our eyes as weak or anemic pad rotation and pad oscillation. A thin pad will rotate and oscillate much more easily.
Wet pads, especially LARGE wet foam pads do NOT rotate or oscillate very well. Here’s the unique dynamic that takes place as you work around a car. Each time you add fresh product, for example a compound, polish, AIO or wax, to the face of the buffing pad. Then you place the face of the buffing pad against the paint, a portion of that product is absorbed into the foam pad. The longer you work with a pad, the more wet or saturated it becomes with product and the worse the pad rotation and oscillation becomes.
You’ll have this same dynamic taking place with smaller, thinner pads, but it will never be as pronounced as compared to using larger, thicker pads. This is why I strongly recommend getting a 5” backing plate from the get-go. Then instead of investing your pad money into large, thick pads you can instead invest your pad money into thinner, smaller diameter foam buffing pads.
And just to note, it takes more than one pad to buff out a car. A good rule of thumb when using foam pads for doing serious paint correction is one pad per panel. A 2-door passenger car has 9 panels. Hood, roof, trunk lid, fender, door fender on one side and then fender, door fender on the other side, this is 9 body panels.
So you need to invest some money into your buffing pads and again, I strongly recommend spending the money up front on a 5” backing plate and then get smaller thinner buffing pads – you can thank me later. Besides rotating and oscillating better, smaller diameter buffing pads will fit smaller thinner body panels better.
How to Remove the Backing Plate on Harbor Freight DA Polisher
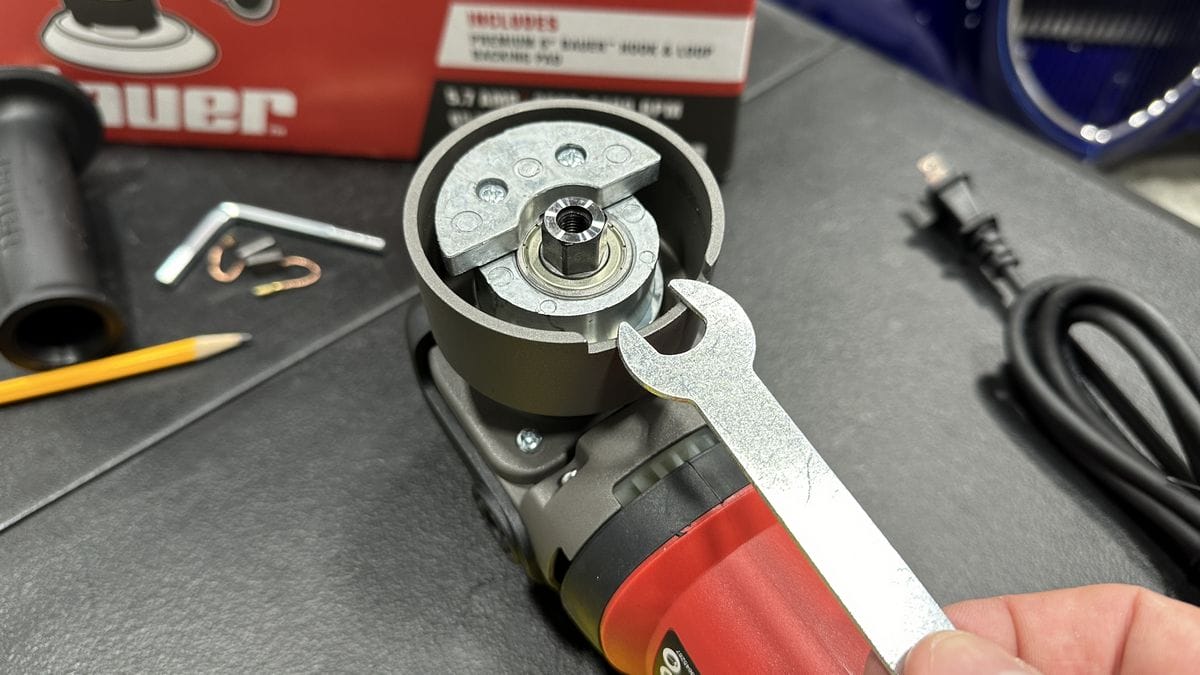
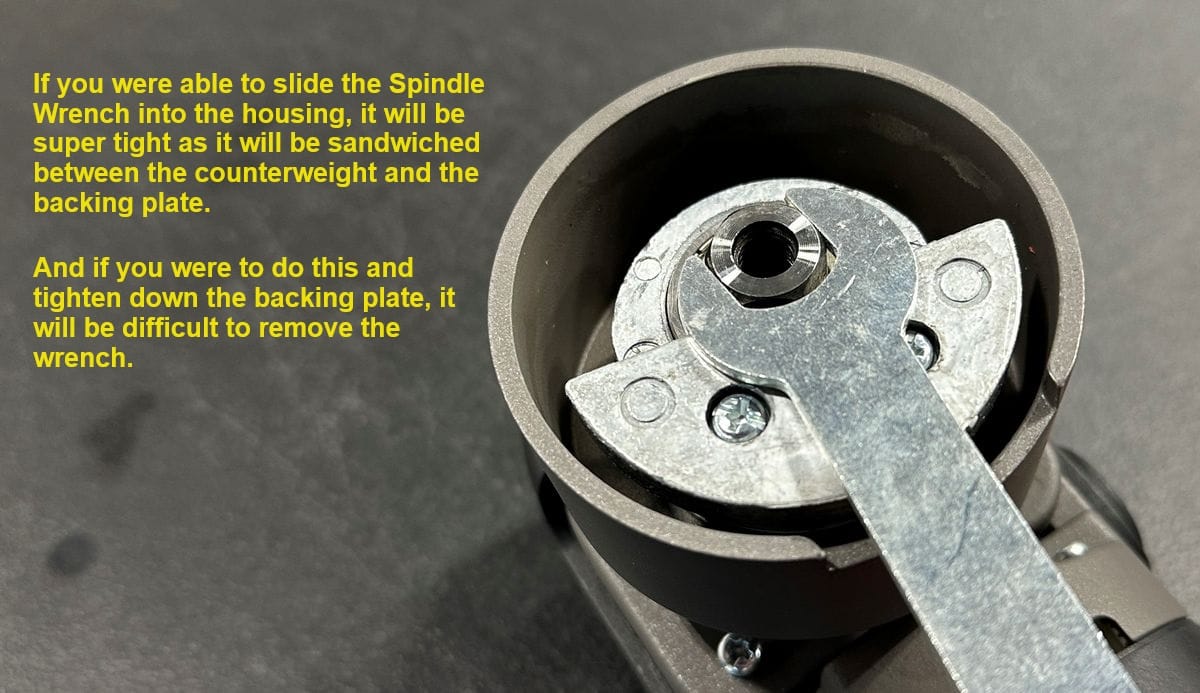
When servicing your Harbor Freight DA, you may need to remove the factory backing plate. This is kind of awkward in that there is a slot in the rear portion of the metal shroud or housing that surrounds the counterweight and the spindle. It’s a tick tricky to slide the wrench in through the slot, with the counterweight out of the way, so you can attach the spindle wrench to the spindle. But it’s doable.
After ensuring the counterweight is out of the way, slide the Spindle Wrench in through the slot and seat it on the spindle.
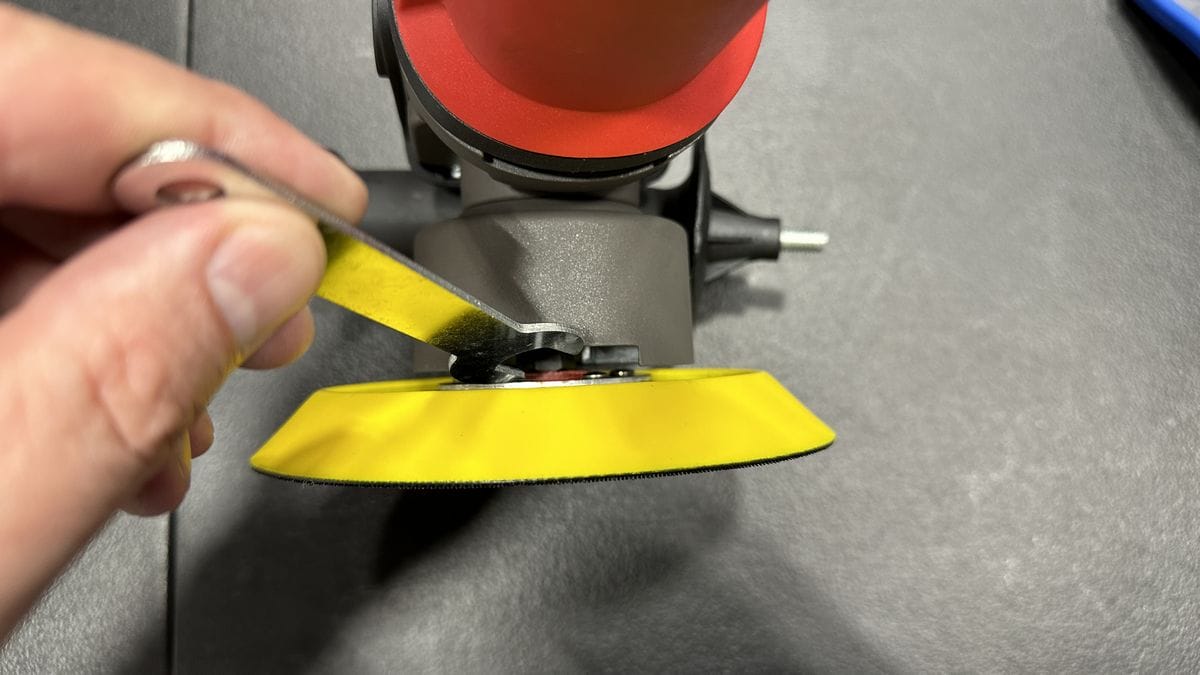
While holding the Spindle Wrench stationary, grab the face of the backing plate and twist counterclockwise to loosen and remove the backing plate.

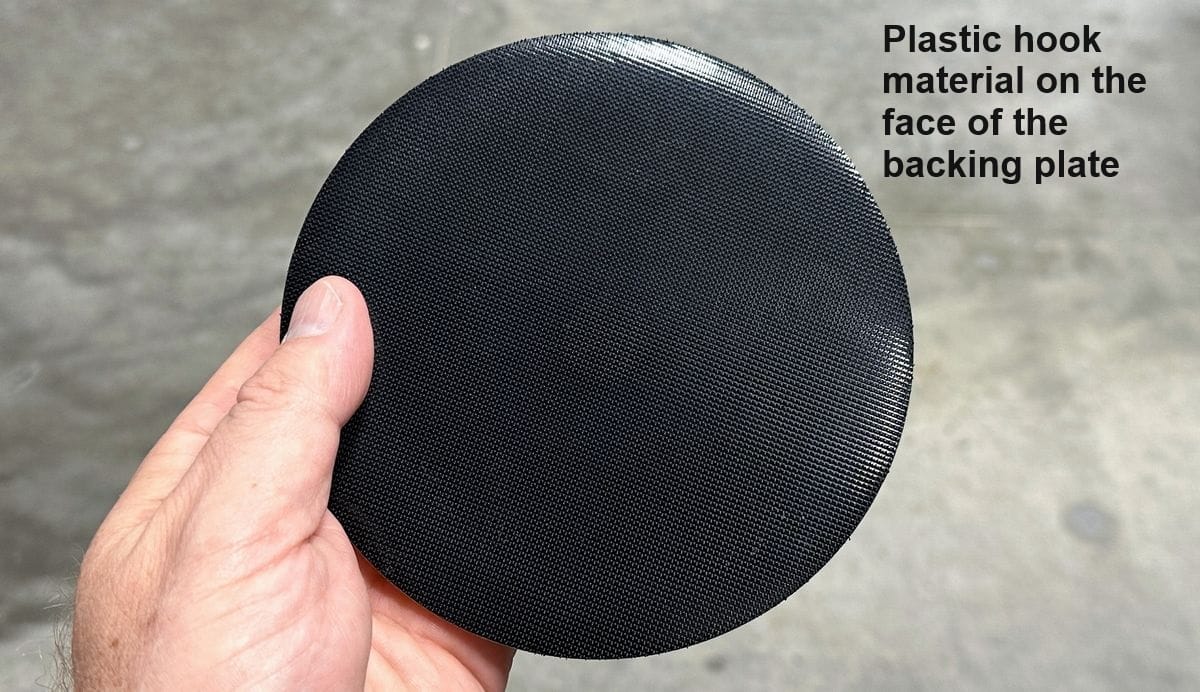
Let’s take a look at the backing plate. Most dual action backing plates with a 5/16” fine thread stud will look about the same.

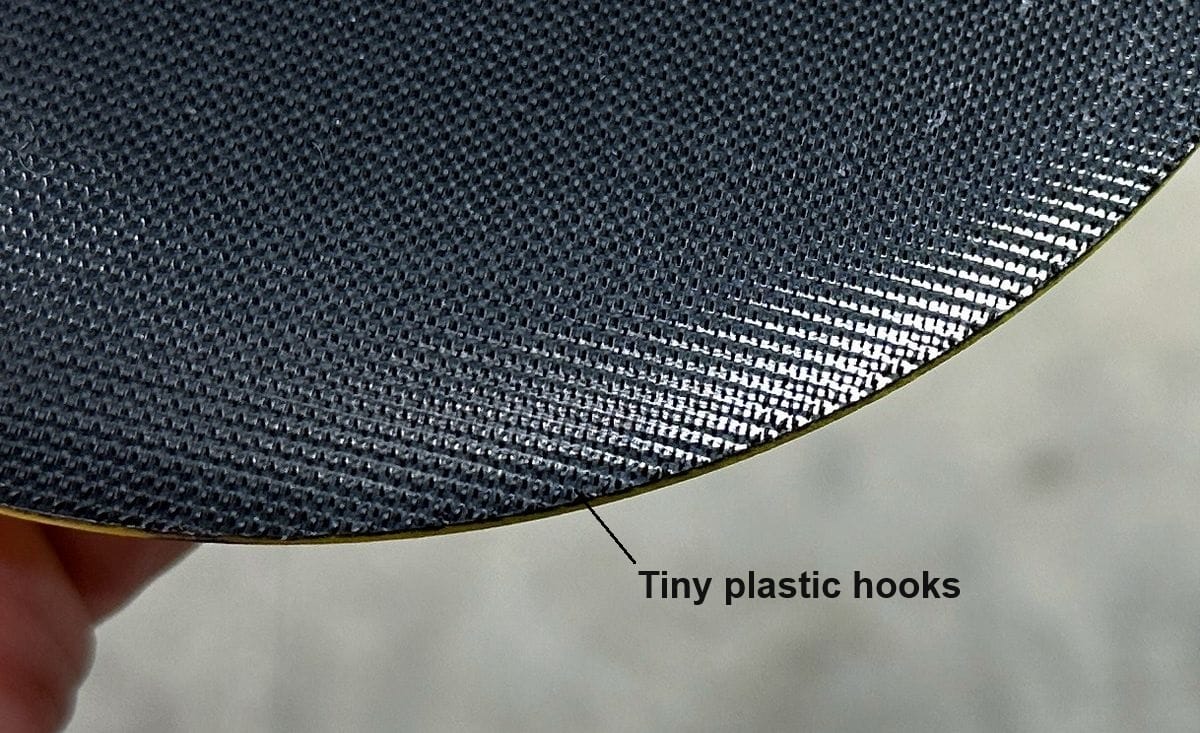
This is a multi-component backing plate, with rivets that hold the threaded stud plate to the actual backing plate material on one side, and velcro hook material on the other side.
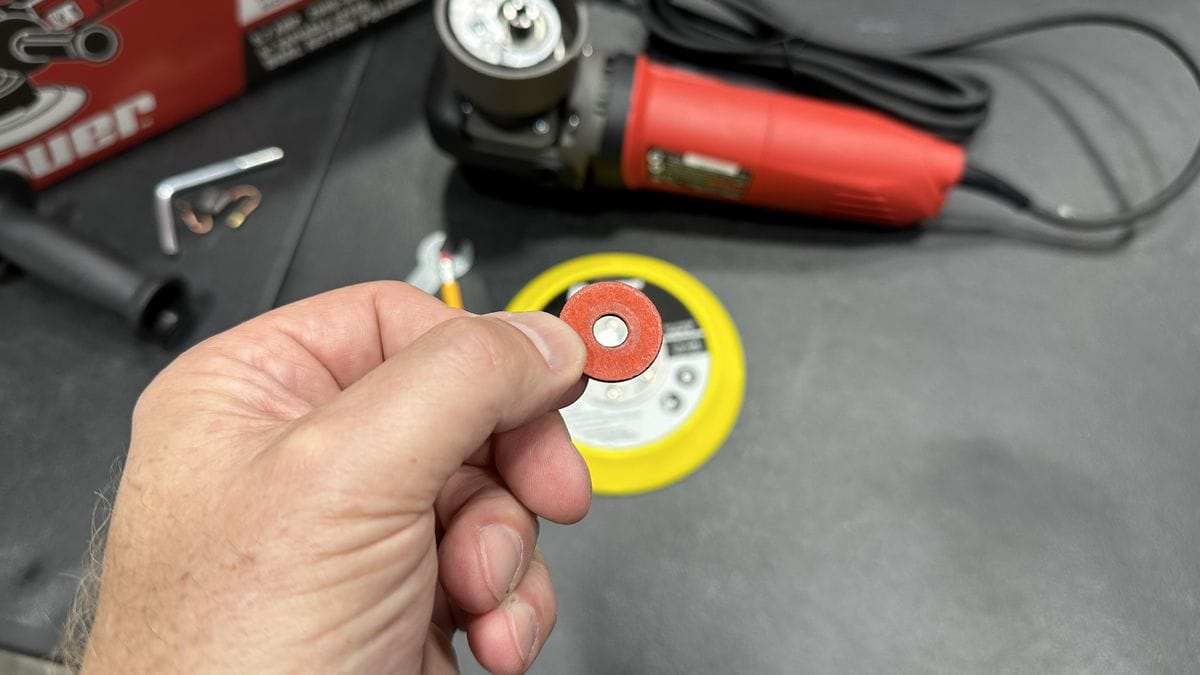
CAUTION: Don’t Lose the Compression Washer!
This is called a Compression Washer. Do NOT LOSE the compression washer. The compression washer is a crushable interface that is sandwiched between the backing plate and the spindle. Besides providing a compressible fastening between the backing plate and the spindle (a metal washer will not do this), it also prevents the rivets from making contact with the counterweight.
If you lose the compression washer—it can fall off during disassembly—and reattach the backing plate without it, there will be a loud noise from the backing plate rubbing against the rivets and you will also create a lot of heat, that can damage the backing plate by breaking down the adhesive that holds the velcro to the backing plate.

This is the 5/16” Fine Thread Stud that fits onto the spindle.

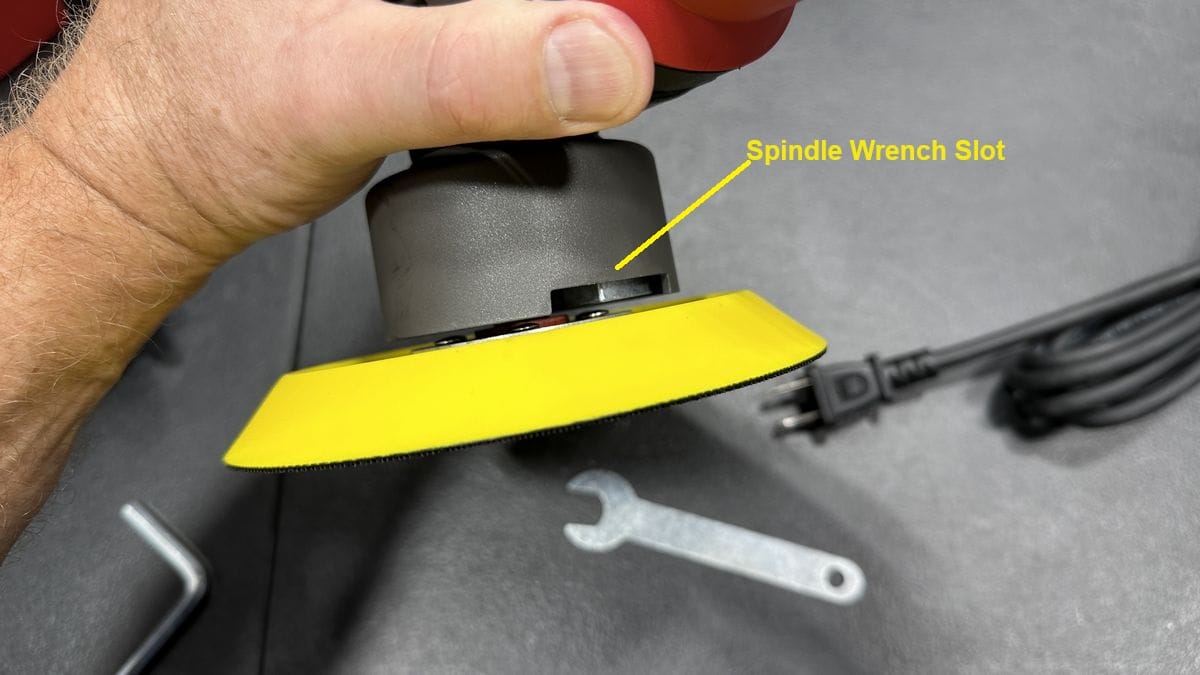
Spindle Wrench Slot
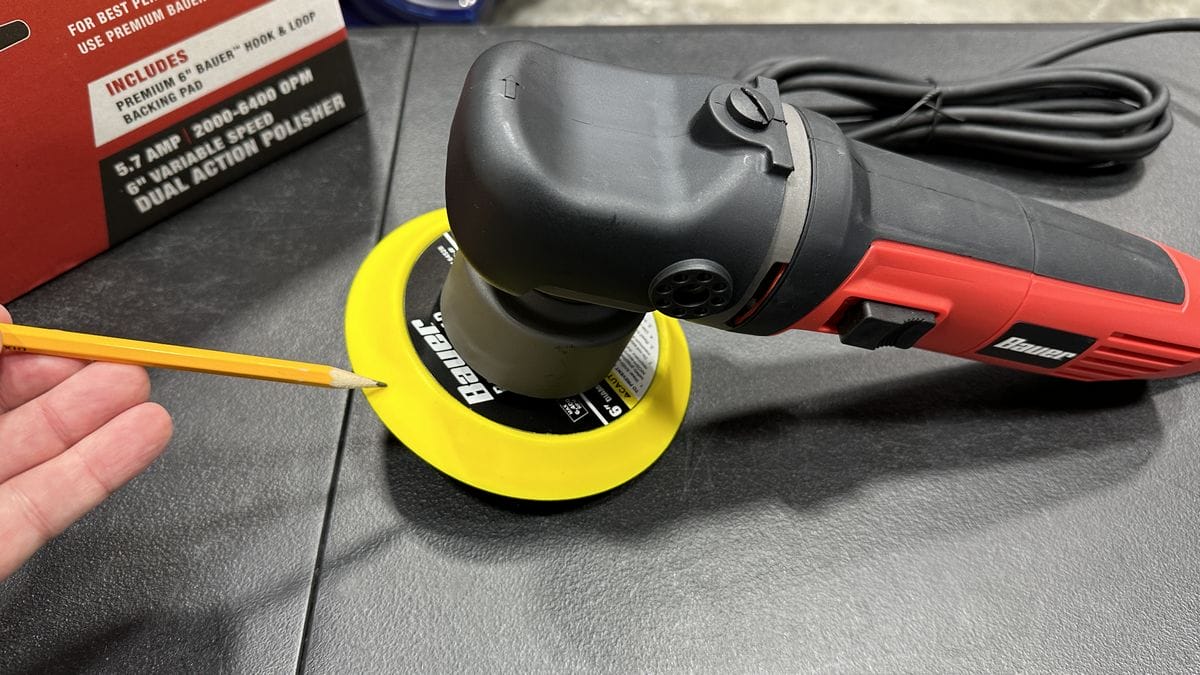
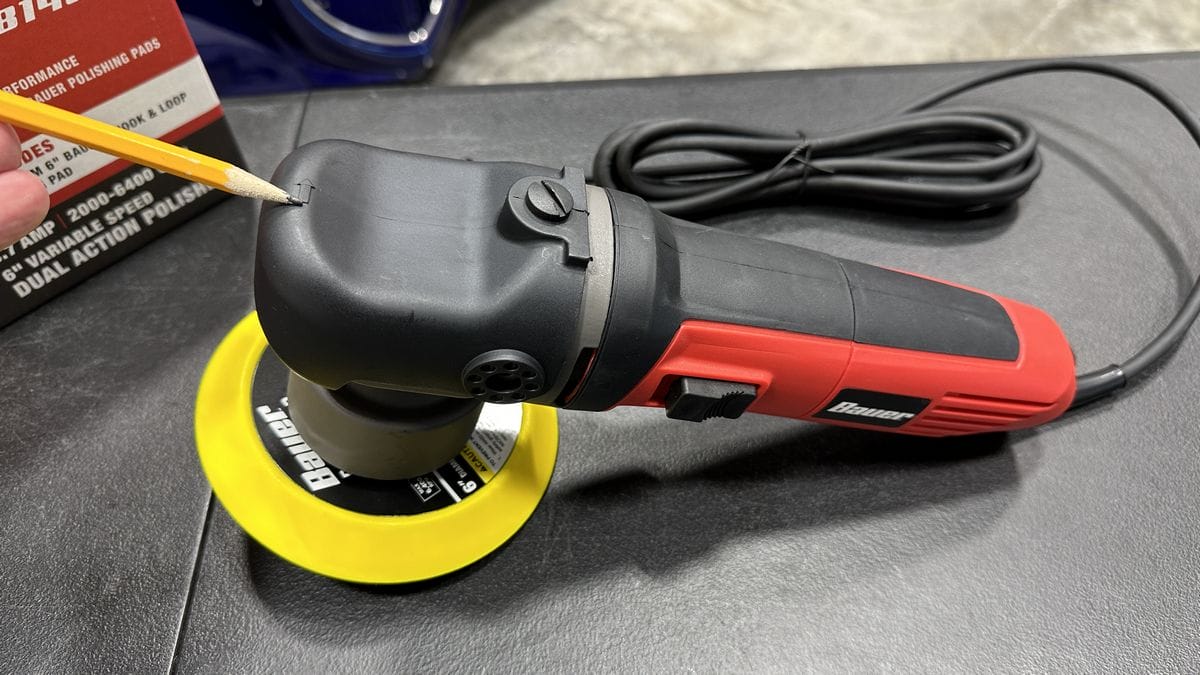
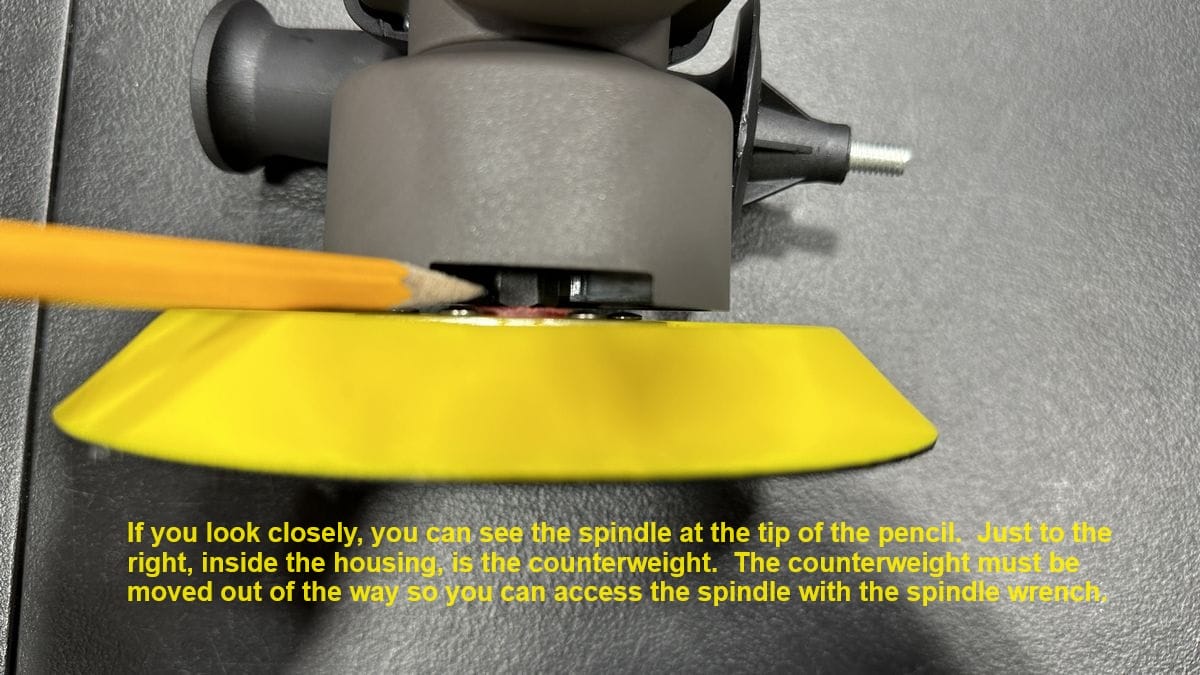
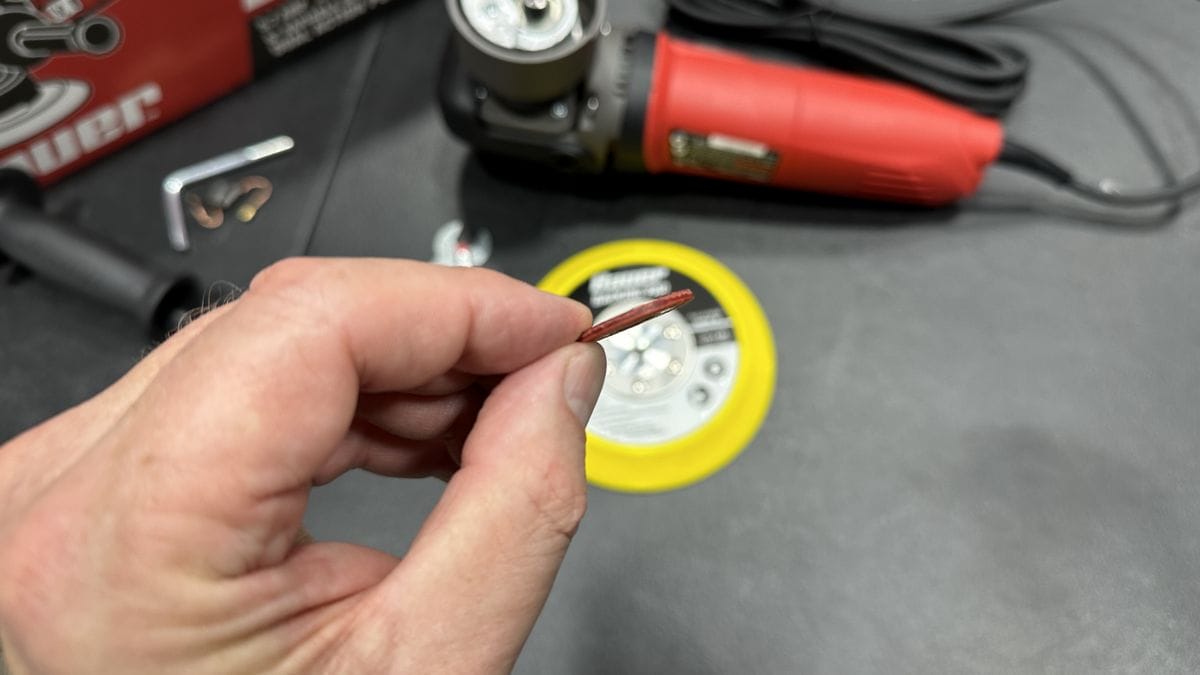
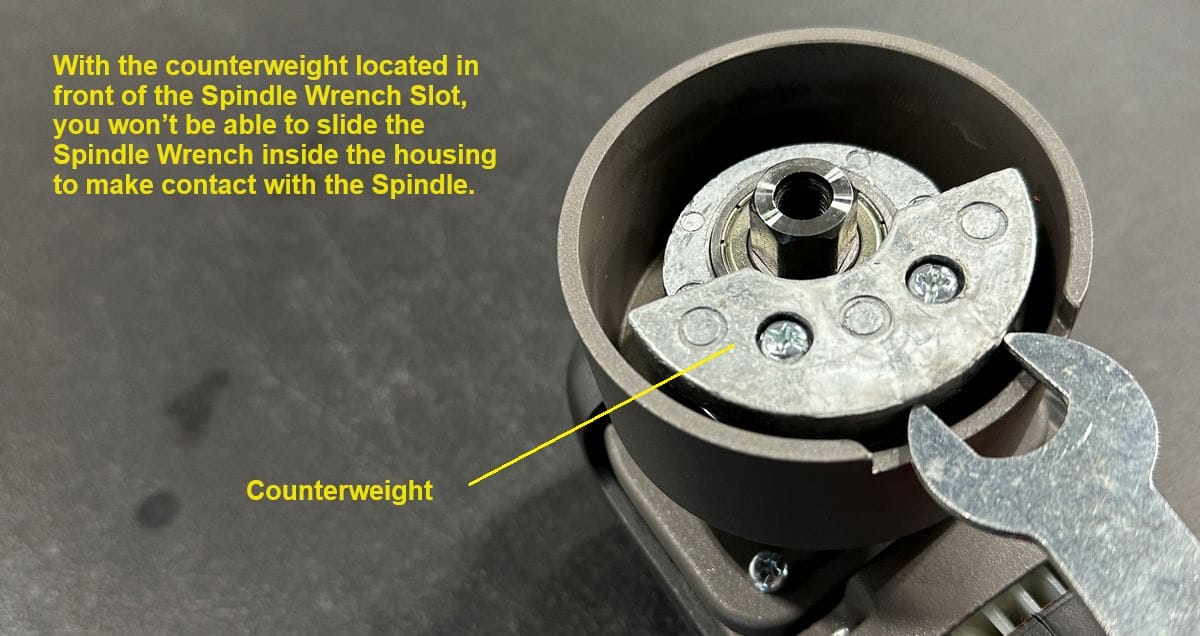
Now with the backing plate removed, it will be easier for you to see and understand what I meant when I said you need to make sure the counterweight is not blocking access to the spindle.
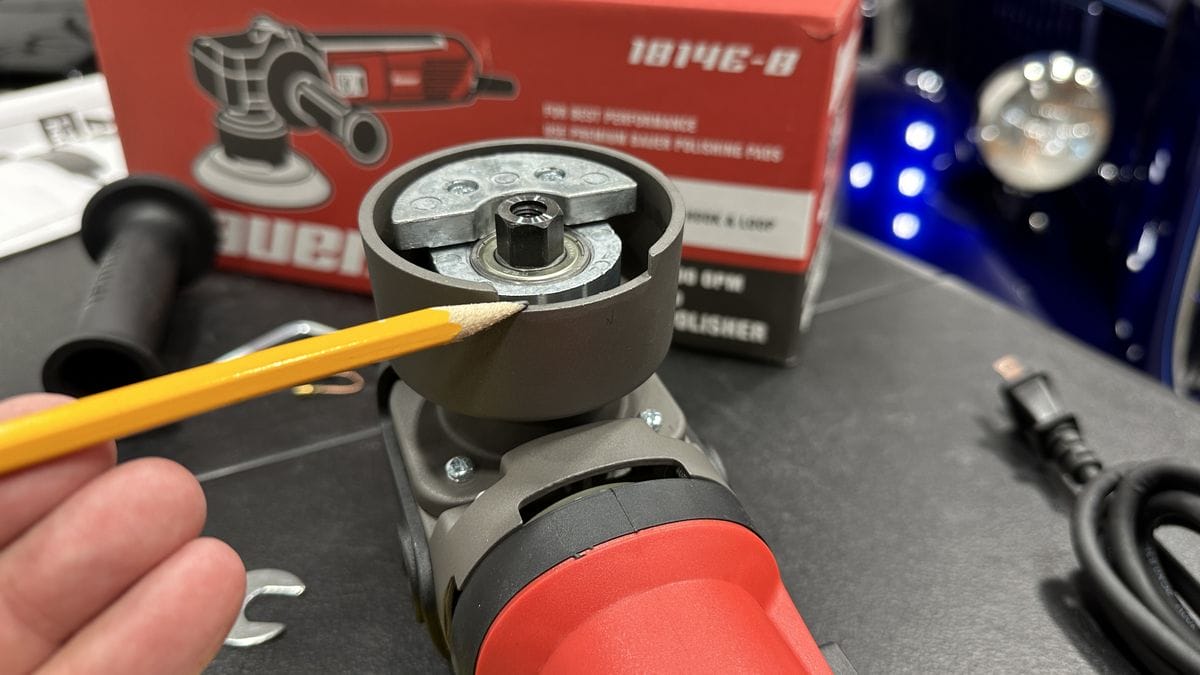
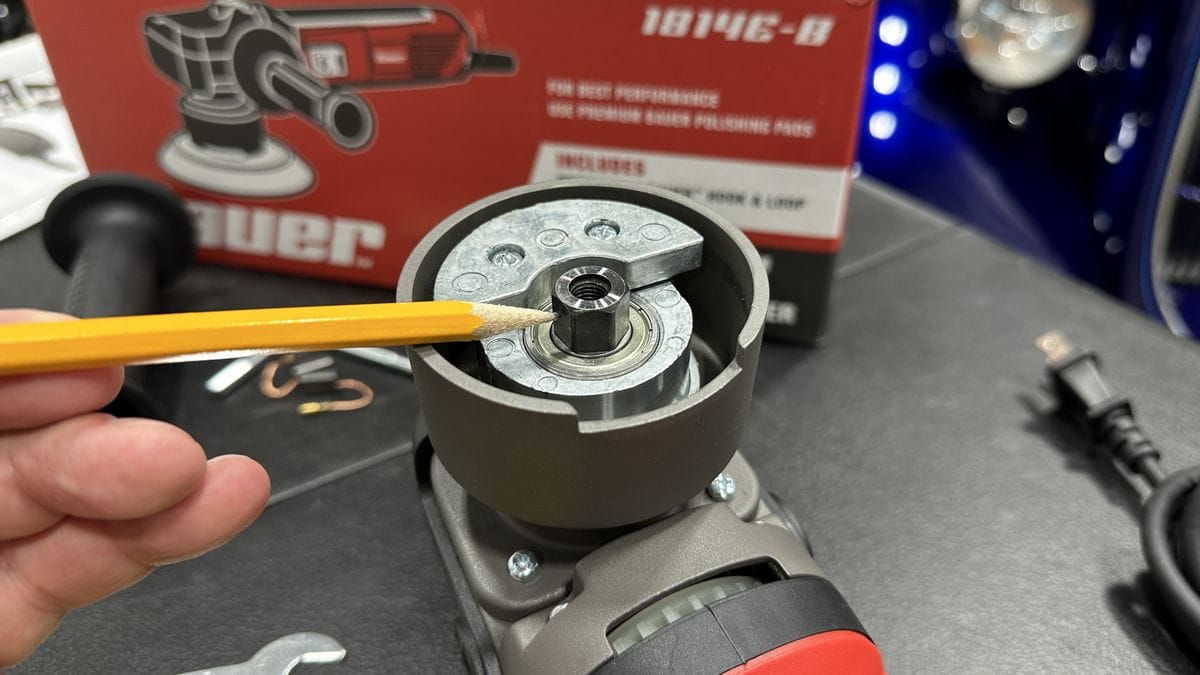
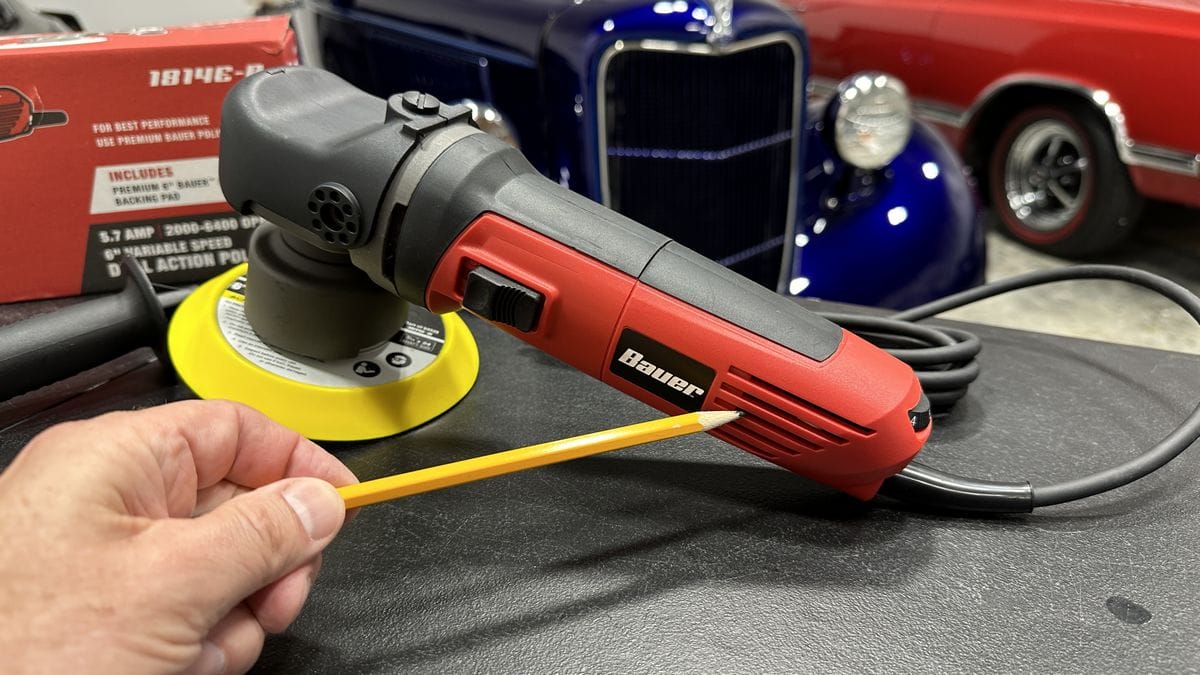
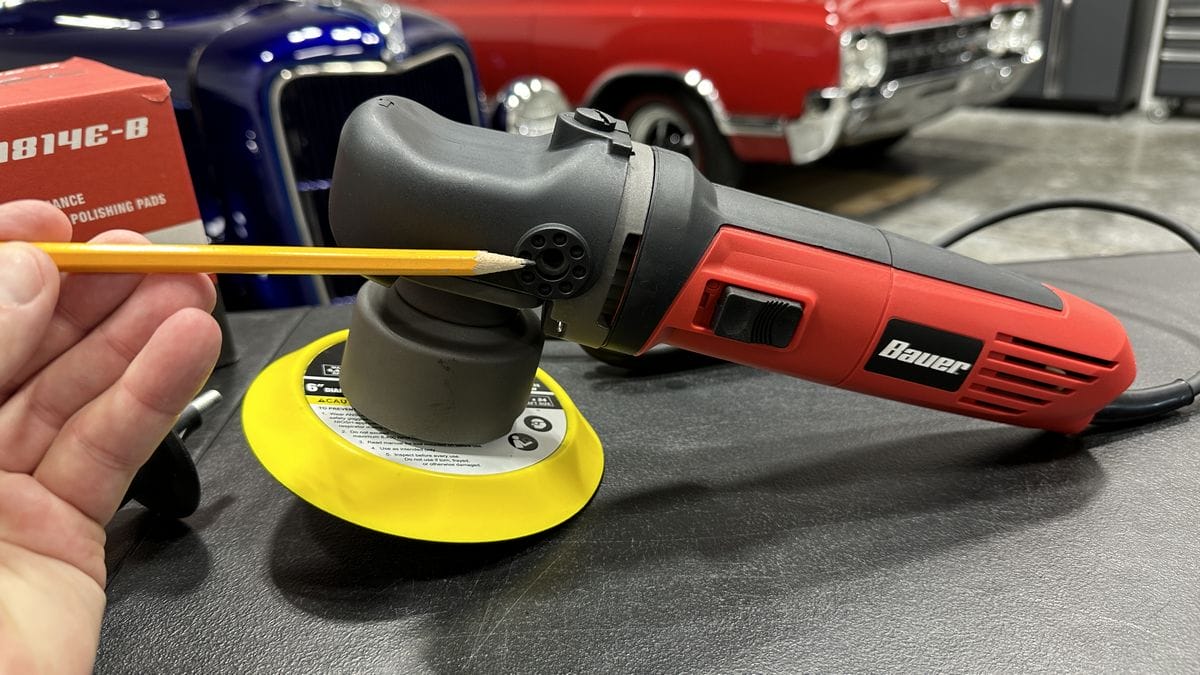
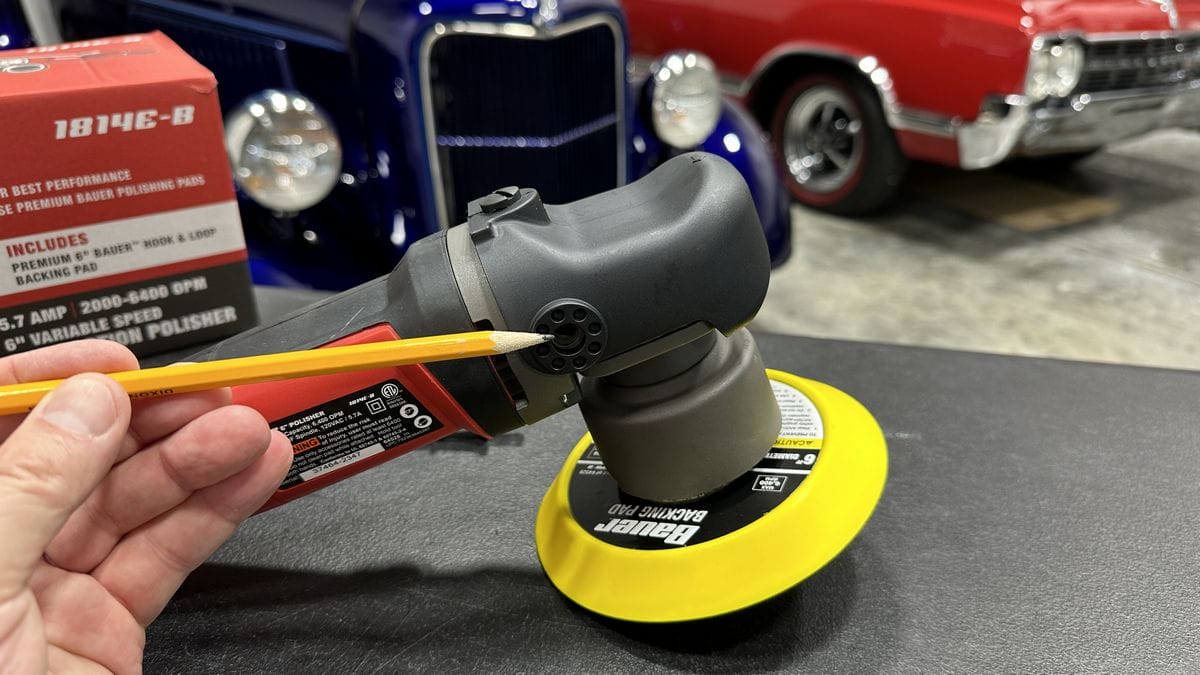
Because the counterweight spins around the spindle, it’s possible it will stop in such a way that it blocks your access with the wrench to the spindle. You can easily move it out of the way, when the backing plate is still installed, using a pencil, pen, or the Spindle Wrench.
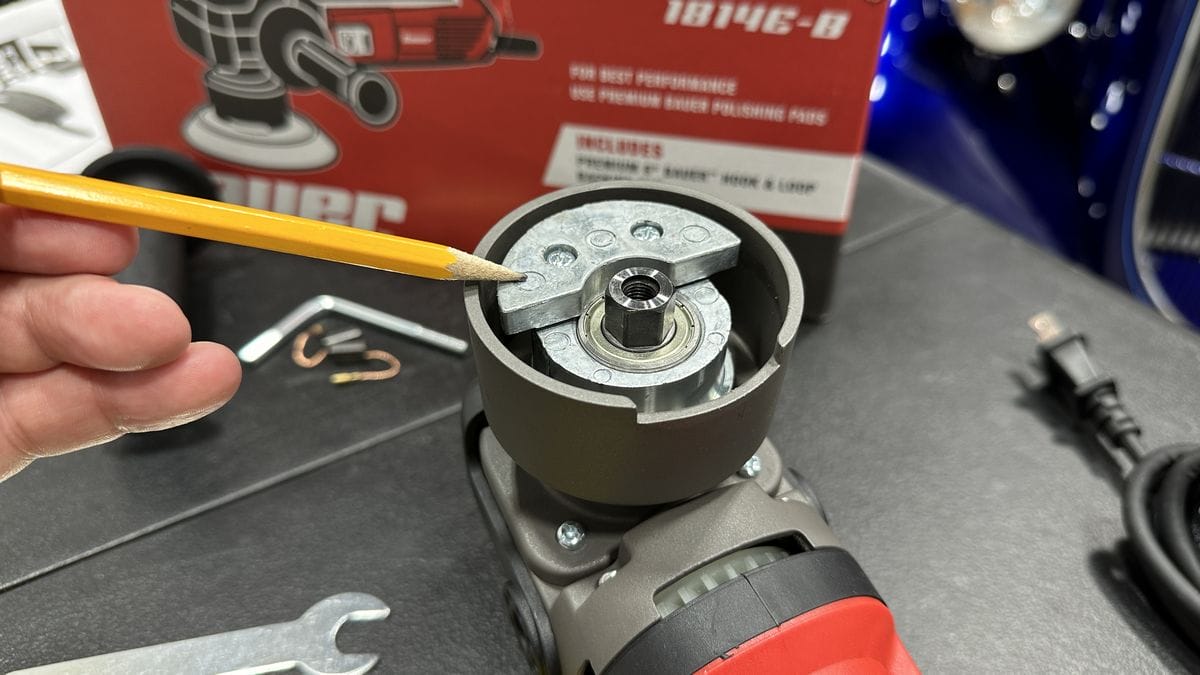
Here’s how the Spindle Wrench works.
Imagine the backing plate is still attached to the spindle. You need to have the counterweight on the opposite side of the slot in order for the Spindle Wrench can fit between the backing plate and the housing.
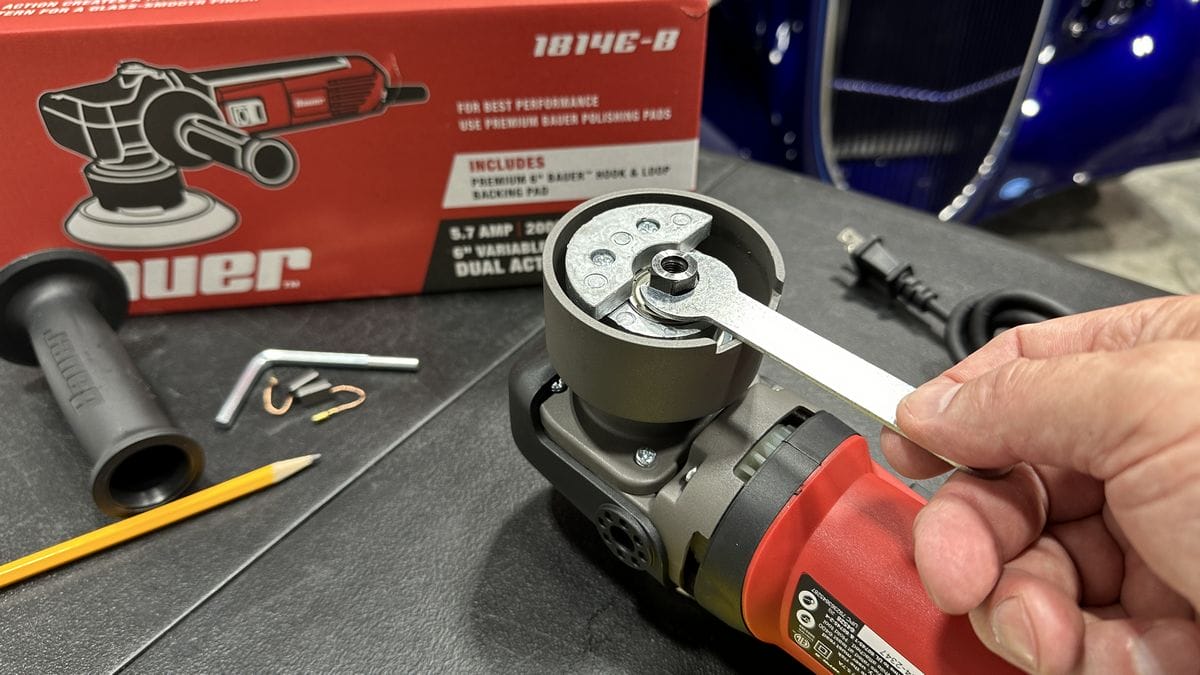
In the below pictures, you can see how the counterweight must be moved out of the way in order to access the Spindle with the Spindle Wrench.
AVOID: Using the Side Handle
Harbor Freight refers to this as the “Two Position Auxiliary Handle (left and right)”. My recommendation? Don’t use it. Here’s why.
It takes more technique to grip the handle and press down on it in a way that keeps the pad flat to the surface. Most people cannot do this so when they use the handle, on either side of the tool, they tend to buff with more pressure on the handle side and this causes you to buff crooked.
By buffing crooked, I mean there will be more pressure on the face of the pad for the side of the polisher with the handle and less pressure on the opposite side. In fact, oftentimes, the side of the buffing pad on the opposite side of the handle will be in the air.
Thus using the handle makes it harder for you to maintain good pad rotation and pad oscillation. Instead, throw the handle away and then use this tool like all the seasoned professional detailers do and that is to simply place your hand on the HEAD of the polisher. Now when you press down on the polisher, it’s a LOT easier to maintain the face of the pad so that it’s flat to the surface.
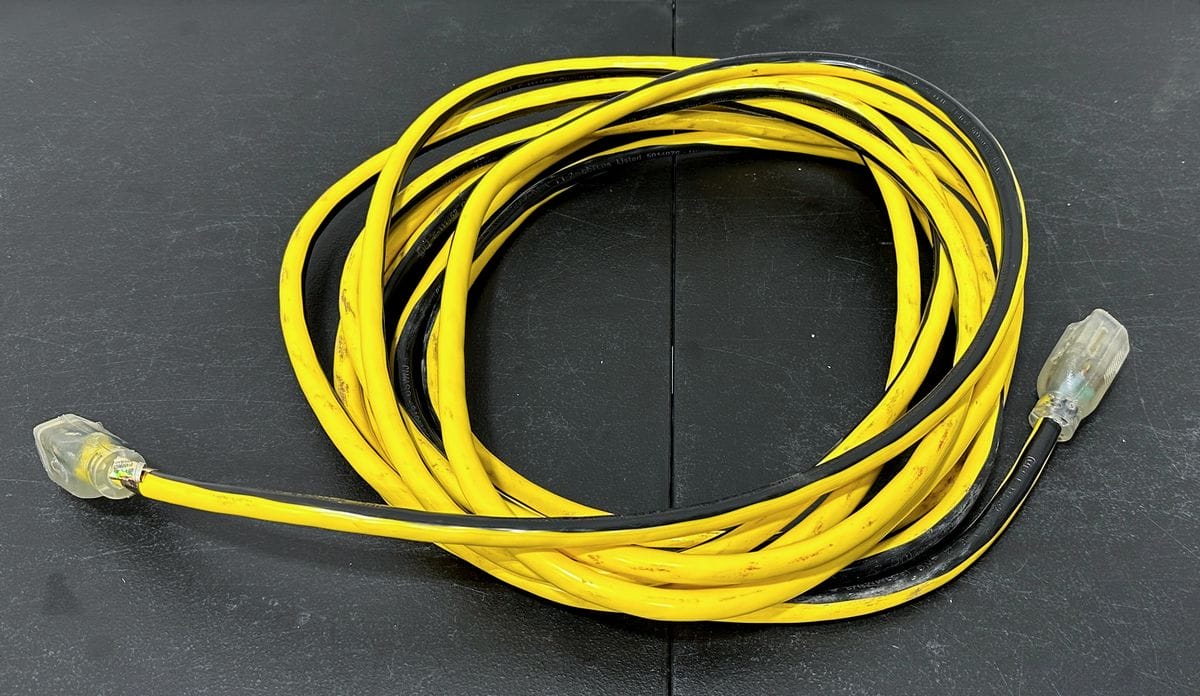

IMPORTANT: Use the Right Power Extension Cords
Using the right power extension cord is extremely important when using any machine polisher. Using an inexpensive power extension cord can risk damaging the electrical components in the tool, as light gauge or thin wire cords simply cannot provide the throughput of electricity as fast or efficiently as heavy gauge or thick wire cords. So don’t skimp out on power extension cords for ANY of your power tools! Always look for a 12 AWG, which stands for 12 American Wire Gauge. Using the correct gauge power extension cord will enable your tools to work at maximum performance as well as increase their work life expectancy.
RECOMMENDATION: Change the Grease Inside the Polisher
From the factory, the polisher comes packed with an inexpensive grease. Internet wisdom recommends removing the factory grease and replacing it with a premium lithium grease. Installing a premium lithium grease will reduce both the noise and vibration and probably also increase the tools work life expectancy. I will have a blog on this coming soon.
Final Thoughts
In the category of free spinning, random orbital polishers, this tool will get the job done. In the category of short stroke polishers, it’s the most powerful tool of this type I’ve used. In my opinion and experience, it’s also easier to maintain good pad rotation and pad oscillation with short stroke polishers like this as compared to long stroke polishers. Thus you spend more time removing paint defects and less time trying to maintain good pad rotation/oscillation.
If after using this tool to buff out a few cars and you find you like doing this type of work, you can always upgrade to a higher quality tool like the Griot’s Garage G9, which is a 9mm free spinning random orbital polisher, (similar in function to the polisher in this review), and/or the 8mm gear-driven Harbor Freight Forced Rotation DA Polisher. I share both of these tools in my article here:
Best Car Polishers for Beginners (2024)
Questions?
- Would you like to take your detailing skills to a higher level?
- Do you find you learn better by doing versus sitting in a chair looking at a PowerPoint presentation about car detailing?
Here at the Dr. Beasley’s O.R., (Operating Room), in sunny Stuart, Florida, we teach the most hands-on car and boat detailing classes on planet Earth. And we prove it too. You can find write-ups on the Dr. Beasley’s Blog that photo-documents just how hands-on our classes are plus you’ll see the kinds of cars and boats you’ll be training on.
Click the link below to find the dates, locations, topics, and prices for all upcoming detailing classes.
Upcoming Detailing Classes – Prices – Info – Topics – Locations
And if you ever have any questions, always feel free to reach out to me personally via text, phone call or email.
I hope to see you in a future detailing class!
Sincerely,
Mike Phillips
Chief Education Officer for Dr. Beasley’s
Mike@drbeasleys.com
760-515-0444
Questions? Comments?
Email Us