


We’re going to talk about tire cleaning. In a previous video, we covered wheel cleaning and I covered, I think, five different types of wheels. So, you can find that on our YouTube channel. But this is going to be really focused on tire cleaning, and I’m going to share with you a lot of cool tools and brushes for getting tires absolutely clean.
When you have paint that is perfectly polished and coated, dirty brown tires stick out like a sore thumb. So, what you want to do is get them clean so they match the rest of the beautiful wheels and the beautiful paint on your car. Now, they’re not just ugly, they’re also dangerous, too. Tires that are not regularly maintained with a quality tire conditioner can suffer from premature dry rot and cracking of the rubber sidewall.
And considering the only thing between you and the pavement are your tires, it’s just a good idea to keep those tires conditioned and healthy so you’re safe and anybody in your car is also safe and, of course, people around you.
Tools, Products, and a Handy Checklist
So, now I’m going to cover a lot of different products and tools. I’m going to go over them real quick, but you don’t have to remember these and you don’t got to take notes. In the description down below, you can actually click and download a downloadable PDF checklist that’ll have all the tools, supplies, and products I use and even step-by-step directions.
So, let’s go over some of the things to clean tires first. Now, most people are familiar with the tire cleaning brush. Here’s two examples. Actually, here’s three. I’ll talk about all three.
Short vs. Long Bristle Tire Brushes
So, what’s the difference between these brushes? If you look at this brush, it has a very short bristle length and they’re very stiff, and that actually makes for a really good tire scrubbing brush, and it’s not so hard on your muscles as you’re scrubbing. As soon as you start getting longer bristles like this, it actually takes more work to move those bristles over the tire. It’s actually going to tax these muscles.
So, the better tire brush is actually the stiff short bristles versus the long bristles, but they’ll both work. So, whatever you have.
These are real popular tire cleaning brushes. You can see one has black bristles, one has white. One of the things I like about the white bristle brush is I also use this for cleaning foam pads and sometimes scrubbing carpets and other things to get them clean. Because it’s white, if I come down here and I clean someone’s tire, my own tire, and it’s got dressing on it, it’ll turn this black and I can see it. And then I’ll know not to use it to clean like carpet or upholstery, you know, like get a stain out of a seat or something. If it’s black, I won’t see the goo. And then if I use this on anything else, I risk staining it.
So, if you have the option, try to look for the one with the white bristles. That way you know if they’re stained or clean and safe to use on other things besides the tires.
Power-Assisted Options: Drill Brushes
Okay. So, here’s two other popular ways to get your tires clean. This is called a drill brush, okay? And it’s on a cordless drill. You can pick these up at Harbor Freight. They come with, I think, let’s see, they come with one, two, three, four, five different drill brushes. Here, I got them right here.
Okay. So, there’s the stiff one. This is the red one. This is the white one. It’s a little softer for cleaning upholstery. And then the yellow one’s kind of a medium bristle. And I find the yellow one works pretty much the best for tires. There’s also some specialized brushes for getting in nooks and crannies and small brushes, but you don’t really need those for tires.
Safety First: Go Cordless Around Water
So, the idea behind this is you put your tire cleaner on and then instead of using your muscles to scrub the tire, you let the machine do all the work. And if you notice, this is cordless. So, whenever I’m doing wet work—so the ground is wet—I don’t want to have an extension cord out here and risk getting shocked, which has happened to me before cleaning tires before, all before these cordless tools were invented.
So, yes, I did have a plug-in dual action polisher with a brush on it and I was cleaning some tires and I felt a little shock. So, I immediately got up, went inside, unplugged the cord, came back outside, got it. And that’s why I always stress to people, try to use cordless tools, not corded tools. It’s no fun getting shocked.
My Preferred Tool: Cordless Rotary With Brush
Okay, so besides the drill, here’s actually my preferred way to clean tires. This is a cordless rotary. It has a 3-inch extension and what’s called a 5-inch rotary brush. And the benefit to this over this is because it’s got this long body on it. When you put your hand on one end and then the other end, the extreme ends of the tool, you’ve got great leverage, which means great control as you’re moving this around the tire. And again, being cordless, you cannot get shocked.
So, I will share all that with you when I get down on the ground.
Choosing a Tire Cleaner (and Why Foam Helps)
Now, besides great brushes to get your tires clean, you also need a really good tire cleaner. And there are a lot of tire cleaners on the market. You can also use an all-purpose cleaner and a degreaser. One thing I would just point out about this is this is our new foaming tire cleaner.
Now, when I say foaming, when you spray it on, you’re not going to see foam. The foam is created as you machine clean the tires. And the reason for the foam is if you’re trying to get your tires just surgically clean—and, for example, if you wanted to put on a tire coating, not a dressing, but a coating—you need clean rubber. And it can be really hard to tell if the rubber’s clean if you don’t have a foaming tire cleaner.
White Foam = Clean Rubber
So, what the foam does is the first time you make that pass around the tire, you’re not going to see a lot of foam. And any foam you do see is going to be brown or kind of grayish black. Then you rinse it. You rinse the brush. You spray the tire cleaner on there again. And you keep repeating that until you see white foam.
So, the visual indicator the tire’s clean is when the foam stays white when you’re machine cleaning the tire. And I’ve coated a lot of tires in my life, so I kind of know what I’m talking about when it comes to this.
When Tires Are Extremely Dirty (and Oily Dressings)
Okay. Now, for extremely dirty tires—and I’m talking about, I’ve had tires down here in my life that I’ve worked on that were stained with dirt. So, they were driven on a dirt road and whatever that dirt was, it was just impregnated into the rubber. And one of the worst things there is to clean are tires that have a greasy, oily tire dressing applied to them.
Now, there’s a huge market for tire dressings. A lot of people like that real shiny look. Me, I like a matte or satin finish. The problem with those shiny tire dressings is they’re gooey or oily. So they look cool ’cause your tire is really black, but they become dirt magnets. So they pull all the road debris or the road dirt, the traffic film and the brake dust onto them, trap it on the tire. Makes that hard to clean off.
But these products are very oily with silicone oils. And what that means is they’re really hard to get off.
“Old School” Assist: Comet or Soft Scrub
So one of the techniques I use if I’m trying to get somebody else’s tire dressing off is I actually go old school—use a little Comet or a little of the Soft Scrub. Soft Scrub is just a liquid version of Comet. And what I do is I pour some of that into a bowl. Then I can just put this brush on there, dip it in there, and hit the tire.
And the reason for this is because now you got three things cleaning the tire. You got the cleaning agents, and these products also have an abrasive. So you’re chemically cleaning the tire, you’re mechanically cleaning the tire, and then of course whatever your brush is. You got the physical agitation of the bristles against the tire. So three things cleaning that tire. And in most cases, they’ll clean anything.
Demo Setup and Safety Inspection
So, let me go ahead and set up down here and I’ll show you how to use all these tools and the foaming tire cleaner.
So, let me go over how to properly clean a tire and I will demonstrate all these different brushes for getting a tire absolutely clean. Now, something I just kind of want to point out: cleaning tires is also a good time to inspect the sidewall and even the tread to see if there’s any damage that you might not know about. I actually see a white line here, which usually is a sign that there was a nail out here. And then the tire repair shop, they marked it so they could find it. Then of course they removed the nail and the line’s left over. We’ll try to get that off.
Context: Gloss Black Wheels (from the Wheel Video)
What I’m going to do is—this is actually a vehicle that we used for our wheel cleaning video and this has the glossy black wheels. I shared a technique for cleaning these without scratching them. I talked about inspecting them before you start cleaning them, especially if you’re doing professional work and they belong to someone else, to document if there are scratches before you clean them, and then I shared a technique to clean them without scratching them.
But right now, we’re going to go over tire cleaning. And I’m just going to focus on this area here as I kind of run through the different brushes or show the benefits and drawbacks. Then I’m going to demonstrate how the foaming aspect of the tire cleaner works. And then I’ll do the whole tire.
Step 1: Apply Tire Cleaner
So, the first thing you want to do is you want to spray your tire cleaner on so it can get working. Again, I’m just going to stick with this one spot here. This is our new tire cleanser. It’s a foaming tire cleaner, but when you look at this, a little bit of foam comes out. But the idea is this is not a foaming sprayer. It doesn’t come out foamy. The idea is when it’s agitated with water, that’s when it creates the foam.
And when you first start out, you’ll usually see kind of a brown foam. And you want to scrub two or three times until you see nothing but white foam.
Hand Brushing: Long vs. Short Bristle in Practice
So in the first video, I talked about two different style brushes: short bristle, long bristle. And I said the short bristle is actually easier on you to mechanically rub against the brush. But let me demonstrate this first.
So you bring this in here like this. And this works. The problem is as these things are flexing, it’s causing a lot of torsion up in my wrist area. Not so big of a deal if you do one spot, but when you’re doing four tires, it can kind of tire you out. It does work. It’s just not the best brush in my opinion for cleaning tires.
Now, this is a short bristle brush. There’s less movement in the bristles, so they scrub better and it’s easier on your wrist. And then to use this, you would just—here’s another technique. Instead of holding the handle, hold the head. It’s a lot easier. You got a lot more leverage over the brush and it just enables you to do a better job of scrubbing the brush. And anytime you’re working on the tires around glossy black paint, you got to be careful you don’t run that brush into the paint or you will scratch it.
Rinse and Observe the Dirt
Okay, so there is one section washed. Let me go ahead and rinse that. I’ll get to these other things as we work around the tire.
Okay, you didn’t really see a lot of foaming there, but look how dirty this is. I also wanted—that’s the browning. Let me talk about browning real quick.
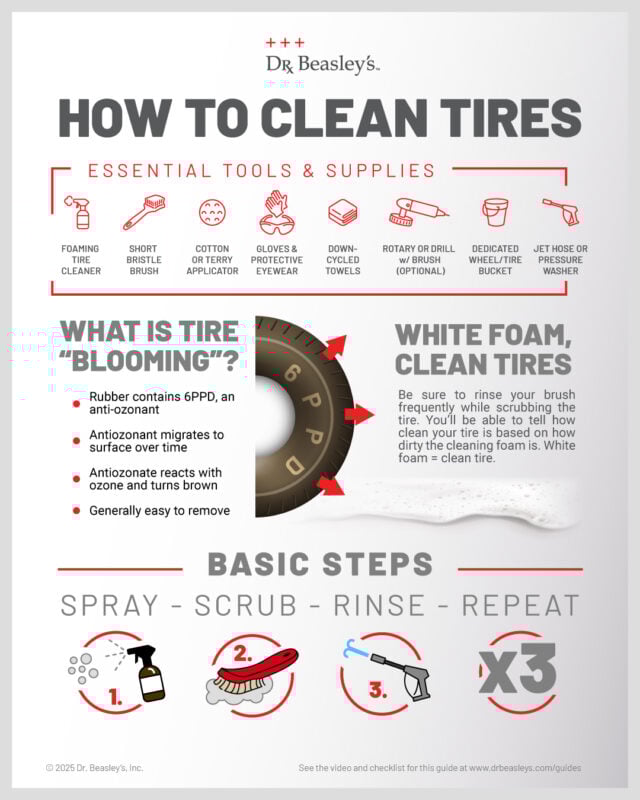
What Tire Browning/Blooming Really Is
You can see the browning in the tire. What the browning is is actually a good thing. I mean it looks ugly, but it’s a good thing. It tells you that your tires are working. By working, here’s what I mean. When tire manufacturers make tires, they put an ingredient in the rubber called antiozonant. And antiozonant migrates out of the tire when the tire’s spinning at speed, like highway speeds, and they refresh the rubber to prevent dry rot and cracking.
But when that antiozonant meets ozone in the air, it turns brown. So that’s where the browning—or what’s called tire blooming—comes from. It’s a chemical reaction taking place that’s supposed to take place. It’s just that as car enthusiasts, we don’t like the brown look, so we scrub it off. But that’s actually a good sign.
Getting to White Foam (Clean Brush Matters)
Okay, so I scrubbed that once. You didn’t really see a lot of foam. So, I’m going to do it again. But before I do it, I want to clean this brush ’cause if I bring up the dirty tire cleaner and the blooming that I brought off and I keep using the same brush, I’ll never see white foam. So, it’s important to clean the brush if you’re trying to get to white foam—say you want to put a tire coating on.
Spray some more tire cleaner on here. Now, we should see some foaming action. See that? And what you’re looking for is you want to get to the point where you see nothing but white foam. No more black, no more brown coming off. That’s a pretty good indicator that you’ve got everything off the tire sidewall.
Dealing with Tire Siping
Now, this tire has what’s called siping. That’s the lines you see. And personally, I hate tire siping. It’s ’cause it’s harder to clean and it’s harder to get dressing into for a uniform look. But because most tire manufacturers put siping on the sides of the tires, it’s something you just got to deal with.
Then we’ll rinse that. Then again, we’ll rinse the brush. And I’ll show you three times just to show you how clean you can get those tires.
Third Pass to Full White Foam
Okay. One spray. Now, watch the foaming. Okay, that is a nice bright white. And that’s why I like a foaming tire cleaner. I can tell when I’ve got everything off the tire ’cause I see white foam.
Okay, so that’s how you hand clean a tire. And that’s kind of the difference between long bristle and short bristle. Short bristle, in my opinion, a much better option. Plus, if you ever use these brushes like I do for other things—like I like to clean the face of a foam pad as I’m doing the paint correction—and I like to use this brush. So, I want to make sure it’s clean, not full of black dressing I pulled off, and I can visually see it’s clean because if I got a black one, then I can’t see it.
Drill Brush Demonstration
Okay, so we’re done with those. Okay, so the next thing I just want to show is I want to show using the drill brush. Now, this is just a little bit complicated because this is a shorter frame than the rotary polisher there. It’s a little harder to control. And the control is important because I don’t want to run those bristles over this black paint. So, I’m going to stay a little ways away from those. You could always come back with the brush and get a little closer carefully.
So, for this, we’ll go ahead and we’ll just stick with the top part here. Okay. Let me get a little closer. Let me cover this up. I have to polish this later. Okay.
Let the Machine Do the Work (Still Watch the Paint)
Okay. So, this absolutely takes all the work out of cleaning your tires. The brush kit isn’t very expensive and nowadays you can pick up a cordless drill. Again, cordless, so there’s no shock factor. We don’t want to get shocked from out here sitting on the wet ground.
We’ll give this one rinse and I’ll throw some more up there. And this is basically how you do it. There you can see the white foam showing up. So, by hand or machine, you want to get to the point where you see white foam. That’s the visual indicator everything is off the tire.
Okay. So, that’s how you use the drill brush. Let me set this aside.
Rotary Brush Demonstration and “Flat Spot” Tip
Then, here’s how you use the rotary. Now—and I show this in all my classes—we actually use this brush on a rotary to clean more than the tires. A lot of times, cars like this and trucks, they have a plastic-coated or plastic-covered running board and plastic around the bumpers. And you can machine scrub all that stuff with the rotary.
So again, we’ll go back to the tire cleaner on the tire. And something else I just want to point out, this has a 3-inch extension. And the reason for that—you could use it without the extension—but you always have what’s called the flat spot. So that’s where the tire meets the pavement and it’s hard to get down there. By putting this extension on, I move the body of the tool away from the brush. And that allows me to shove this in there and pretty much get all that lower flat spot.
Lock the Trigger and Control the Tool
And I’ll show you that like this. And here’s another technique. Whenever you’re using these, learn how to lock the power button. That way you can put your hand at the back to support the battery, the other hand at the front so you got good leverage and good control over the tool.
So this is what I mean. I shove that in there. You can see the white foam developing there. But the reason again for that is to get the flat spot. And that way—’cause, I mean, there is another option. You can clean the tire then get up and move the car forward or backward so the flat spot is where you can reach it and clean it. But you’re going to be getting up and down a whole bunch of times to do that. So I just like to do this. I just shove it in there.
Working Around the Rim Lip Without Touching It
Okay, so then the rest of the tire—let’s get the rest of the tire going here. I’ve already cleaned this top part, so we got white foam there. Let’s see what happens when we go over to this really brown area.
Okay, now you can see the foam is kind of brown looking. Now, I’m going to run this really carefully around the lip here. See if I can do it without hitting the lip.
Okay. I wanted to point this out because I’ve shown this a whole bunch of times in videos and I always have some social media expert telling me, “Hey, Mike, you’re going to scratch the rim.” Well, when I use a rotary and I got good leverage because of a long body tool length, I’m able to run that all the way around it without even touching the rim. Now, let me get the rest of the tire.
Rinse, Repeat, and Why Three Passes
Okay, there’s the initial scrubbing. Go ahead and give it a rinse. For a lot of people, that might be good enough. For me, I usually scrub my tires three times. And one of the reasons for that is how well your tire dressing performs—how well it penetrates and attaches to the rubber—all comes down to the prep work. The cleaner you get the tire, the better performance you’ll get out of your tire dressing.
Clean the Brush or You’ll Never See White Foam
Now, just like I showed you to clean the brush if you’re trying to get to white foam—if I don’t clean this brush and I come back up here, I’ll never see white foam because I’m taking the dirt I just removed off the tire and putting it back on the tire. So, here’s how I do this. Since it’s an electric tool, I make it clean itself. So, I just kind of do this. Boom. Brush is clean.
Come up here. Put our foaming tire cleaner back on. Now, we should see some pretty good white foam. Boom. Look at that.
Why Initial Passes Don’t Foam Much
You don’t see a lot of foaming with the initial cleaning because all your cleaner is mixing with the old tire dressing, brake dust, and oily traffic film that builds up on the sidewall of your tires. Look how I’m able to get right down there and get right next to the lip of the rim without actually hitting it. That’s one of the benefits to a rotary, unlike an orbital, is it spins that brush in a perfect circle.
“Lightbulb Moment” in Class
Okay. When I teach these classes here in sunny Stuart, Florida, and I show guys this, everybody’s going, “Wow.” It’s like a light bulb goes on. They go, “I never thought about that.” And a lot of guys are looking for a good reason to spend the money to buy a cordless rotary. Even though they might not use a rotary for paint correction too much, but I tell you, if you’re looking for another reason to buy a rotary besides paint correction, machine scrubbing tires is a great reason.
Final Pass to Bright White Foam
Okay, so now I’m going to clean this. We’ll do it one more time and I think we’ll see some really bright, bright foam. Oops. Hope I didn’t get the camera guy. But this is the key thing: you got to get the brush clean or you’ll never see white foam.
Okay. The way I found that out is ’cause I naturally clean my brush, but I made a video about this probably five years ago and some guy says, “I never saw the foam go white.” And I says, “Did you clean your brush?” He goes, “No.” So, you got to clean the brush.
Boom. Look at that. That is the sign of a clean tire sidewall—the white foam. Come down here and scrub real hard. Now I’m going to do the perimeter real quick. One more time around the perimeter. Oh. Got to admit I’m pretty good at this.
Rinse and Move to the Next Tire
Okay, now I’m going to clean my brush because I’m going to move on to the next tire. Look at that. Tire cleaner even cleans the brush bristles. Then final rinse. We’re going to pull this car inside because in the wheel cleaning video, I said I was going to share a technique to make cleaning your rims faster and easier and keep them cleaner longer. But I’m also going to show you a couple different ways to put a tire dressing on this tire now that we got the browning off.
Okay, but that’s how I would clean a tire. Let me share a couple more techniques.
When Tires Are Extra Nasty (Farm Dust, Gooey Aerosols)
Now, a lot of times when I’m teaching my classes down here, I bring in a lot of cars. Unlike all the other classes on the market, I bring in the real deal. Not only a lot of cars, but really cool cars. And sometimes the cars I get, you know, maybe the person lives on a farm. I mean, we’re talking about street rods, muscle cars—they got a dirt stain on them that just normal brushing won’t clean off.
Or the worst thing is when someone uses those oily, greasy, high-shine tire dressings, especially the aerosol kind. They’re so gooey. But the thing is, it’s really hard to get it off. And have you ever noticed if you hit your wash mitt, it turns your wash mitt black? If you brush up against the tire with your pants, now your pants are black. That’s why I don’t like those greasy ones. The one I’m going to show you dries to the touch and just leaves a satin finish.
Using a Dog Dish Bowl with Soft Scrub or Comet
But here’s how you could do this. This is a little stainless steel dog dish bowl I bought at the dollar store for about a buck thirty. And this is called Soft Scrub. It’s basically a liquid version of Comet. You could use both. I’ll tell you the liquid version does work better, but if you want to use the Comet, just put it in there and add a little bit of water.
So, I’m going to pour some of this in here. And then what I’m going to do—if you had really dirty tires—then you just go back. You could do it either way. You can grab your brush, okay, dip it in here, come up here, and now you got two things cleaning. You got a mechanical abrasive because these have abrasives in them—both the Soft Scrub and the Comet. They got cleaning agents. And they even got a little bleach in there to brighten things up. Not that that would be important on a tire, but just to add that it does disinfect.
Power-Assist with Cleaner/Abrasive Mix
So that—that’s how you can do it by hand or dip your brush—either the drill or the rotary. Here, let me just show both while I’m out here and everything’s set up.
But that is a way to really get those tires clean, especially if you got some kind of old dressing on there or a dirt stain or just any kind of contamination. And this would also help if you’re trying to get white walls white again or white lettering white. And I’ll show you some tips and techniques for getting white lettering clean.
Transition to White Lettering/Whitewall Cleaning
Anyway, that’s how I would machine clean a tire, hand scrub a tire, use a variety of different cleaners, and really get those rubber tires or sidewalls clean so they can absorb and hold on to the dressing so the dressing can last as long as possible and also look good as long as possible.
Okay, I got to bring a Jeep over here. I’m going to flip this thing around and we’re going to look at the back tire that’s mounted on the Jeep ’cause it’s got white lettering and I’ll go over some tips and techniques to restore a bright white look to white lettering. And the same thing would apply to a white wall.
Multiple Ways to Restore White Letters/Whitewalls
So, I’m going to do a brain dump on all the different ways to get either white sidewalls, including gangster white walls, and also the white lettering. Now, these aren’t too bad. So, sometimes when I make a video, it’s more about the technique than the before and after results just because of what I have to work with.
But most of you know that a lot of times the lettering on the side of a sidewall on a tire or the white sidewall becomes stained with tire browning and also just a blackness that kind of creeps into the rubber itself. And so let me just kind of do a brain dump. I’ll show you multiple ways to get these things clean.
Start Simple: Tire Cleaner + Brush on a Rotary
But the first way of course would be just to use your basic tire cleaner and see how that does. Okay. So here’s our foaming tire cleaner. My favorite way is always using a brush on a rotary.
And you can see now these letters—you can see all the brown coming off the tires, coating them. So then you just rinse it. So that’s the simplest approach—just use your normal tire cleaner. A lot of times that’ll get it.
If That’s Not Enough: Bleche-Wite, Brass/Nylon Brushes
But let me show some ways in case that doesn’t get them white—how you can bring up your level of aggressiveness to really restore that bright white look to it. So I’ll show you my favorite way last. I’ll show you some of the more common ways.
So anytime I’ve made a wheel and tire cleaning video, down in the comments, people tell me all the different things that they use to get white walls and white lettering clean. One of them is an old school product called Black Magic Bleche-Wite. It looks like “black white,” but it’s, I think, Bleche-Wite. And this is famous for restoring a bright look to the tires.
And of course, you could—you could use the machine like I did or, you know, just use your normal tire brush or—I don’t have one here—a brass brush. Brass brushes are really popular. The only thing I’d caution about using a wire brush to clean tires is a lot of times you’ll scratch the tire sidewall. So, you’re safer just to stick with a nylon bristle brush. Okay? And that’ll usually restore a fairly white look. Look at that nice bright white. Okay?
Scotch-Brite + Cleaner, Then SOS Pads
But again, if that didn’t fix it, let me show you some other things you can use. This is your basic Scotch-Brite pad—very, very scratchy. And here’s what I would do. I’d put a little Comet or a little Soft Scrub into a bowl, take and dip this in here. Then just come back and scrub those white letters or the white sidewalls. And because this is pretty nasty—it’s a pretty aggressive Scotch-Brite pad—this will usually fix black or brown looking white letters. So just scrub them with a Scotch-Brite pad and you can rinse.
So there’s three ways I’ve shown you to clean white letters and white walls. Let’s see if I can remember all the different ways.
Okay, next up, SOS pads. Things have been around over 100 years. These are a steel wool pad with water or soap in them, so you want to get it wet first. Whoops. There we go. By the way, the pavement out here is incredibly clean. When I drop something, it doesn’t get dirty ’cause we wash so many cars here. Everything is flushed away.
So, here’s your SOS pad. Same thing. Just want to come down here and just basically scrub the lettering or the white wall. And a lot of times this will get them back to that bright shiny white that you like. That actually tore up pretty good. So, in the future when someone tells me, “Mike, I use an SOS pad,” I’ll say, “Yeah, that works pretty good.” But the problem with that is the SOS pad just kind of tears up. And I always appreciate everybody’s comments when we make a video here.
Magic Eraser for Light Soil, Then Hand Sanding
So, there’s four ways to clean. Now, let’s see the next. This is another method that people always mention to me when I make a video on cleaning tires and cleaning tire sidewalls and white lettering. They say to use a Mr. Clean Magic Eraser. For this here, I’m going to go ahead and get this wet, but the same idea. This is—I think it’s called melamine, a melamine foam—and it’s actually abrasive. So, this would really only be good for very lightly soiled white sidewalls or white lettering. I don’t think it’d do a good job for anything that was really bad. But a lot of people have these in their house. And if you’re out in your driveway some Saturday trying to clean the white letters and your brushing, your tire cleaner isn’t getting it, then here’s another option: Mr. Clean Magic Eraser.
Okay, so here is another old school way. This is a piece of 1,000-grit sandpaper. Let me go ahead and get this wet. This is a paint stick. I got this at Ace Hardware—yeah, they give them away for free. So, take and wrap the sandpaper around the paint stick. You can take and break this in half or cut it in half just so it’s a little bit shorter. That would actually help.
Okay. Then you’re just going to take this and come in here—a little bit of soapy water, it’s already wet—and you’re just going to sand these. This is a 1,000 grit. It’ll do a good job of really getting down to some nice bright white rubber. And if you didn’t have a paint stick, you could just hold this in your hand like this and do it this way also. And this is how you would tackle a white wall. You wouldn’t use the paint stick. You just wrap this up into a bundle and then just start sanding.
My Favorite: Machine Sanding With Interface Pads
So that’s another way you can clean white walls and white lettering—by sanding them by hand. Then let me show you my favorite way. Back to the cordless rotary. Okay, so I’m working in the water. I don’t want to get shocked. So that’s cordless. And this is really the key. I use this to sand down gangster white walls, thin white walls, and white lettering. But you need to do this: these are called interface pads, okay? They provide a little bit of cushion. You want to use two or three of these on your backing plate. And then you need to order some Mirka Abralon 500 and even 1,000-grit sanding discs.
These come in 3-inch and 6-inch. You see, you get the 3-inch. If you had the 6-inch, you could cut 3-inch out of them—3-inch circles out of them. Put that on the interface pad. And then I’d put a little soapy water, even maybe a little bit of tire cleaner up here for a lube. Then you just bring this up here and you machine sand. And this always gets them back to perfect.
Keep the Sanding on the Raised Letters
The thing you want to be careful of is you just want to keep that sanding action on the raised portion. Otherwise, you will scratch the sidewall. But if you’re careful, it’s usually never a problem. Boom. Look at that. I would say sanding—machine sanding—did work the best. In fact, it works so good, I better get the rest of these real quick, too. So, the owner doesn’t know—I’m happy with me. Okay.
Quick Recap of Whitewall/Lettering Methods
And so that was—what was that? We showed Comet and Abralon. We showed SOS. We showed Bleche-Wite. We saw Mr. Clean. We showed normal tire cleaner. We showed hand sanding, machine sanding. I think that was six different ways to get white letters and white wall tires bright white again.
So, there you go. Now, we’re going to go inside and we’ll finish out this tire cleaning video. I’ll show you how to apply a tire dressing.
Coat Wheels First, Then Dress Tires
So, we’ve moved the Jeep inside after cleaning all the rims and tires and of course washing the Jeep. And now I’m going to show you my favorite way to put a tire dressing on. But first, I’m going to cover how the conventional method is to put a tire dressing on.
I also want to just share there’s a matching video to this where we showed how to clean the wheels. And at the end of that video, I showed how to put a ceramic coating on the rim to not only make it look beautiful, but to seal that paint and make it a hydrophobic surface that’ll wash and clean easier and faster moving forward.
And the thing I just want to share about that is, in my opinion, it’s a better idea to put the coating on first, then the tire dressing. Then if you get any tire dressing on the coated surface, it’s easy to wipe off. If you do the tire dressing first and then put the coating on, now you got to kind of clean and re-prep that wheel surface so the coating can actually make a bond. So do the coating first, then the tire.
Conventional Dressing Application (Applicator Pad)
So let me jump down there. I’m going to show you the conventional way to put it on. Something else I just wanted to share. We were using this out in the garage. You know, we don’t sell these. There are some copies of this on the market, but this, in my opinion, is the best one. I’ve got a whole bunch here for my classes, but it just makes it nice when you got to sit down on the ground—you got something comfortable to sit on—and we’ll put the link to these on Amazon down in the description.
Okay, let me go ahead and set up. Okay, let me show you how to put a tire dressing on. The conventional way is you use some type of applicator. A lot of times there’s these foam tire swipes, is what they’re called. And sometimes they’re curved, sometimes they’re just like a square block. To me those things—they’re just a waste of money because you can’t really wash them out and reuse them.
Pad Choice and Personal Finish Preference
This is just a simple cotton-covered wax applicator pad. I tend to like these. You can see it’s been used. Then I take it to the slop sink and wash it over and over again.
When it comes to tire dressing, I find tire dressings are very much a personal preference. Some people really like that dripping wet look. Some people, like me, like that satin matte finish. So I’m not really the hardcore sales guy when I make videos. You know, we make a great tire conditioner. You’re welcome to try it. Use whatever you like, but just let me show you how to put the dressing on and then how to avoid tire sling.
Avoiding Tire Sling (The Real Cause)
I’ve always wondered why people have so much problem with tire sling, and I’m going to show you how to avoid it. Okay, so this is the Dr. Beasley’s tire conditioner and this will leave a nice matte or satin finish. So, usually what I do is I put a gob of it on here and then I just start applying it to the middle of the sidewall. And I’m kind of bending this as I go around to get the dressing kind of spread out instead of just one big glob on there.
Okay. And then you notice I got a little brush out here. Okay. So, going back to what I mentioned earlier, this tire has siping. And the hardest thing about siping is getting the tire dressing into the little lines, the ridges, and then getting it out of the ridges. So, let me share a technique with that.
Using a Brush to Work Dressing Into Sipes
But anyway, then you just—kind of like polishing a shoe, you know, shoe polish—you just start polishing this or rubbing, massaging this in. Try to avoid getting anything on the ceramic coated rim. And this is the conventional way to put a tire dressing on.
Now, the problem a lot of people have is what’s called—it’s called tire sling, but the tire isn’t slinging. It’s actually the dressing that’s slinging. So, it’s tire dressing sling. And the reason you got tire dressing sling problems is because you’re not getting all the tire dressing off the tire.
Wipe Off the Excess With “Tatty Towels”
Okay. So, I’ve evenly applied that. Now, what I’m going to do is I’m going to come back with this brush and I can just kind of massage this into all those lines, the siping. Otherwise, you know, it’s just really hard to push it in with any kind of applicator pad. So, the brush does a better job of that. My personal preference, of course, would be to never own tires with siping. Then you don’t got to mess with it. But sometimes you don’t have a choice.
Okay, so I’ve worked that into it. And then here’s the way you avoid tire dressing sling. I always like to keep just what I call my tatty towels. These are actually cheap washcloths I buy at Walmart. I think they’re like 80 cents a piece. And then I’m just going to come back and start wiping all the excess off. If there’s no excess on the exterior of the tire, when you start driving, there’s nothing to sling off via centrifugal force. So, that’s really the secret—is wipe the tire dressing off.
Press Into the Sipes; Let It Dry to the Touch
That means having some tatty towels around, you know, so you don’t ruin your good microfiber towels. Then, because this has a nap, I’m just coming back and I’m actually pushing kind of hard into those siping lines. And yes, this is tedious. That’s what you get when you got tires with siping. And just try to get as much of that out as you can.
Now, this will dry to the touch and, as you can see, it does leave a nice deep dark black look. It also moisturizes the tire and prevents fading from UV rays from the sun. So, it’s a really good product. It is a product that you’d want to use, you know, every other time you wash the car. We want to always keep reapplying it—reintroduce those tire conditioners to keep this tire from dry rotting, getting cracks and basically failing, plus make it look really good.
Machine-Applying Dressing (Rotary or Drill)
Now, that’s how you do a conventional application with some kind of applicator. But years and years and years ago, after I discovered machine cleaning my tires with Mr. Rotary here, one day I thought to myself, what if I use the same thing to dress the tire? And I absolutely love this way of putting tire dressing on. It works so much better than the human hand pushing a tire dressing on.
So you do it kind of the same way. Usually I have a dog dish bowl over here. Let me go grab it real quick.
Okay. So I went and grabbed this—I keep these around for all kinds of things. What I’m going to do is I’m just going to pour some of this in there. And remember I got all four tires to clean. So I’m going to use this up anyway.
Load the Brush, Feather the Trigger, Then Wipe Excess
Then I’m going to take my rotary brush, put some of that dressing on here. And then this is kind of key—just like a lot of times you do this when you’re polishing paint—you kind of smoosh the product around because you don’t want it just flying off. I’m going to just feather this trigger, bring it up at low speed, and then let the machine apply the dressing.
Okay, now I’ve got it spread around, and it just does a much better job than the human hand and any kind of applicator pad. You could also use your cordless drill. If you don’t own a cordless rotary, you could use a corded in here. We’re not working or sitting in the water.
I have taken the liberty to go ahead—this is the Harbor Freight drill brush kit. I’ve put the white bristle brush on here, which is usually reserved for things like doing interior cleaning, but it also works good for this type of application. And same idea. That’s why you want to let that kind of spread it out before you go full speed.
And I know not everybody owns a rotary polisher ’cause someone made a comment in one of my other videos. So, look, you know, this is probably a $600 tool, but you can find cheaper versions of it. And, of course, electric drills are all over the place. Then again, come back and just wipe off any excess.
Let It Flash, Move On, and Recap
Okay. Then after you feel like you’ve got as much of the excess dressing off, you can just let this dry, move on to the next tire. So, let me jump up here and we’ll kind of recap everything we covered over this tire cleaning video.
Just to recap, when we were outside, I showed you three great ways to get your tires clean. I was working by hand with a short bristle brush, using a cordless drill so you don’t get shocked and some drill brush attachments, also via rotary with a 5-inch rotary brush. We also sell these on our website ’cause I know a lot of people have a hard time finding these things.
White Letters/Whitewalls Recap and Sanding Options
Then when it came to cleaning the white lettering or white walls, I showed you eight different ways to tackle that, including my favorite way, which is machine sanding on a rotary with interface pads using the Mirka Abralon sanding discs. But you could also hand sand either just by taking something like some 1,000-grit and folding it and then applying it like that, or wrapping it around an old-school paint mixing stick to give you some stability and something to hold on to. This doesn’t really work good for the white walls, but it does work good for the tires. You can get in there and just sand them to get rid of that browning or any black discoloring to the white to expose a fresh piece of white rubber so they look good, especially after you put the dressing on.
Dressing Application Recap and Sling Prevention
Then we brought it in here and I showed you how to apply a dressing by hand, how to apply a dressing by machine—again, using the same machines that you machine clean the tires. You could also use them to work that dressing into the siping. I also showed using a brush to work the dressing into the siping and then coming back with just what I call a tatty towel and wiping off the excess to avoid any tire dressing sling down the side of your car.
I think that pretty much covers most of it. Oh, sometimes it’s helpful just to have a bowl—down here we got the Comet and the Soft Scrub—if you got some really dirty tires you’re trying to get somebody’s greasy tire dressing off. Sometimes a mechanical abrasive and a chemical cleaner mixed into one—so that’s Comet or Soft Scrub, machine or hand applied—will really do a good job. And one of my favorite tools, you know, the knee and back cushion just so you got something to sit on so you’re comfortable and your pants don’t get all wet.
Final Look and Class Information
Anyway, this is what we call a nice dark satin finish. It’s a beautiful-looking finish. It’s water-based. It’s also going to condition that rubber to keep it flexible and protect against UV rays. So, it’s really a good overall tire dressing. And besides that, you can always pick whatever—however you like—any tire dressing that gives you the look that you’re looking for.
Besides that, I just like to say you don’t have to remember all this stuff. You can click on the downloadable PDF checklist down in the description. The link to the wheel cleaning video that matches this one is also in the description. And, of course, if anything in here helped you, I want you to do me a favor—help me. Share this with a friend. Like and subscribe so that way you’re notified next time we bring out a really cool video like this one.
Besides that, thank you for watching. And don’t forget, I teach the most hands-on car detailing classes on planet Earth here in sunny Stuart, Florida. To get more information on those, go to Dr. Beasley’s website, look for a text link that says “Classes,” scroll down, find a date that works for you. And remember, if you decide to travel out here to take one of these hands-on classes, I will email you an article that lists all the airports, the hotels, and my favorite places to eat. So, I make it easy for you to travel here and I make it easy for you to stay here.
Besides that, thank you for watching and I hope to see you at a future detailing class.
Questions? Comments?
Email Us