


As I showed in my previous article and video, working by hand to sand off years of oxidation, yellowing and cloudiness from headlights works perfectly fine. I also shared how to remove the sanding marks by hand in that video and article for those that simply have no other alternative.
But for those of you interested in how to restore headlights more quickly, this article and video will show you how to machine sand down headlights and then machine polish to perfect clarity.
Which Tool Should I Use for Sanding Headlights — Free-Spinning, Gear-Driven, or Rotary Polisher?
There are 3 general options for the type of machine you could use to machine sand the plastic polycarbonate that headlight lenses are made from: free-spinning random orbital, gear-driven random orbital or rotary polishers.
Why Headlight Sanding Requires a 3” Backing Plate
Whichever you choose, because most headlights are fairly small or compact in size, the real key to picking the right machine is finding one that can use a 3” backing plate to hold 3” sanding discs.
While some headlights are large enough that a person could use a machine with a 5” or 6” backing plate and the matching 5” and/or 6” size sanding disc, my years of experience have shown discs larger than 3” are simply too big to safely and effectively use to machine sand headlights. This means for most of us, we need a polisher that offers the ability to use a 3” backing plate.
Can I Use a Free-Spinning Random Orbital to Machine Sand Headlights?
Generally speaking I recommend using a rotary polisher for sanding headlights. Rotary polishers work faster and more effectively than random orbital free-spinning tools. That being said, it’s still possible to use a free-spinning random orbital to sand headlights and I even show a few in my video. Here’s a little more information on choosing a random orbital polisher if you choose to go that route.
List Free-Spinning Orbital Polishers with 3” Backing Plate Compatibility
Here’s a short list of tools that can be used with a 3” backing plate. Note these are all FREE SPINNING random orbital polishers. My favorites are bolded.
- FLEX PXE-80 – this tool comes with 3 different drive units and 1 optional 6mm drive unit.
- FLEX XFE 7-12 3″ Mini Polisher – 12mm orbit stroke dual action polisher.
- Griot’s Garage G9 – this is a 9mm orbit stroke dual action polisher.
- Adam’s 12mm Mini – as the name implies, this is a 12mm orbit stroke dual action polisher.
- RUPES LHR75E Mini Random Orbital Polisher – 12mm orbit stroke dual action polisher.
- MaxShine M312 – 12mm Orbital Polisher – 12mm orbit stroke dual action polisher.
- MaxShine M0312 Cordless Hybrid Rotary & DA – 3mm, 12mm and rotary drive units.
- Shine Mate EB351 – 12mm orbit stroke dual action polisher.
- ShineMate EB350
- Porter Cable 7424XP – 8mm orbit stroke length
- Harbor Freight Bauer 6 inch Random Orbital Polisher – 8mm orbit stroke.
- SPTA Mini Orbital Polisher – 10mm orbit stroke
- ZOTA Orbital Polisher – 8mm orbit stroke
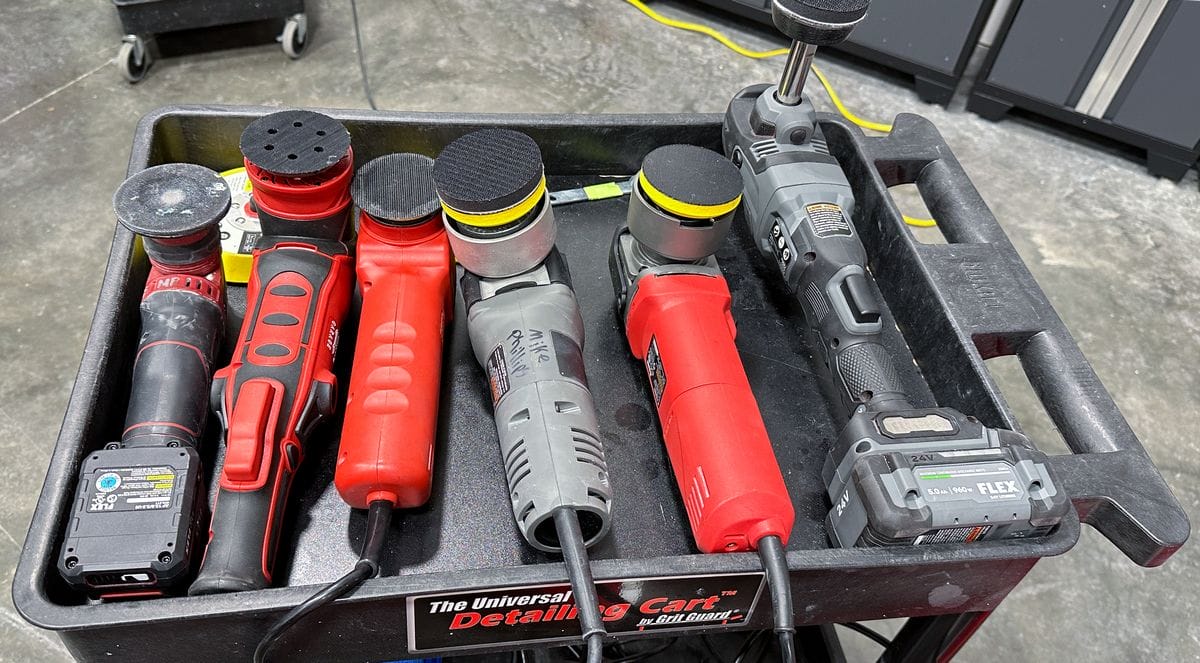
While I don’t have all of the above listed machines, I did showcase a few free spinning, random orbital polishers in the video, that are completely capable of sanding down neglected headlights.
Advantages & Disadvantages of Free Spinning Random Orbital Polishers for Sanding Headlights
PROS: The free-spinning random orbital polishers I listed above are for the most part low-cost and affordable for the average DIYer, plus you can use them for paint correction.
CONS: Free-spinning tools take longer to sand headlights because of something called pad stalling. These tools are not gear-driven, which means there’s nothing forcing them to rotate. Instead, they spin freely using the momentum of counterweights. If you press too hard, the momentum stops and the pad stalls or stops spinning. This slows down the sanding process simply because the sanding disc isn’t constantly rotating and abrading the headlight.
How Do I Avoid Pad Stalling?
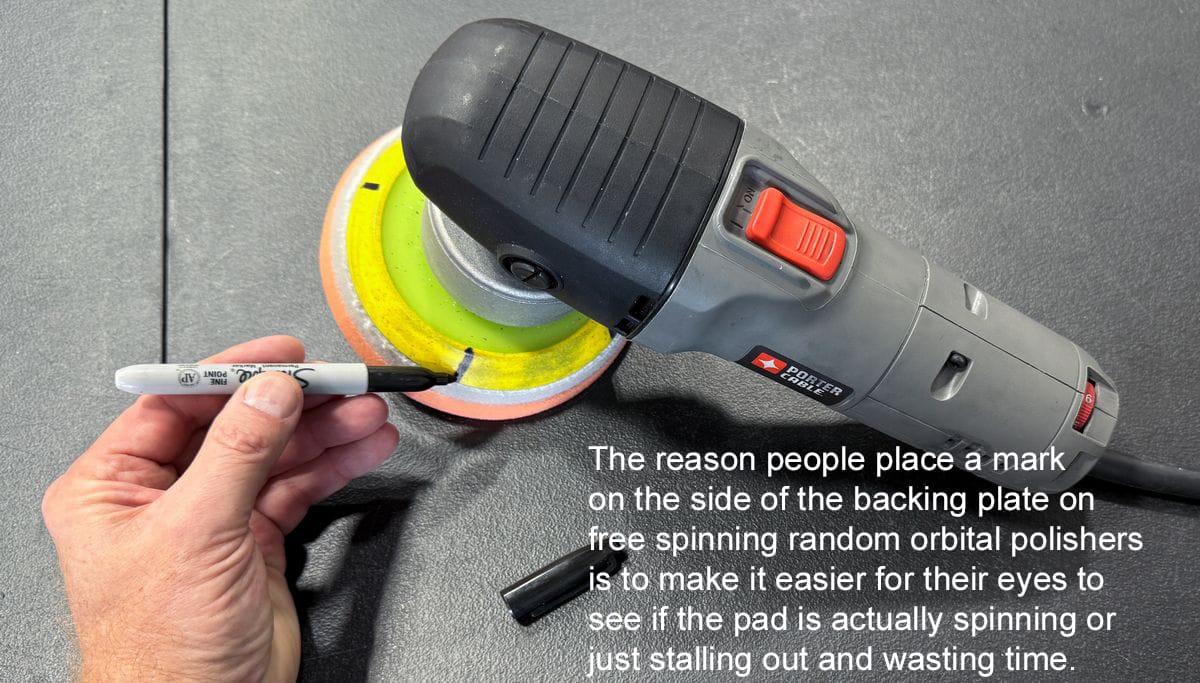
The problem with pad stalling is that it’s hard to tell when it’s happening. A stalled pad or sanding disc will vibrate, which can look like rotation at a glance. That’s why I recommend drawing a line in permanent marker on your backing plate so you can better see the rotating action. If the line doesn’t move, the pad isn’t rotating.
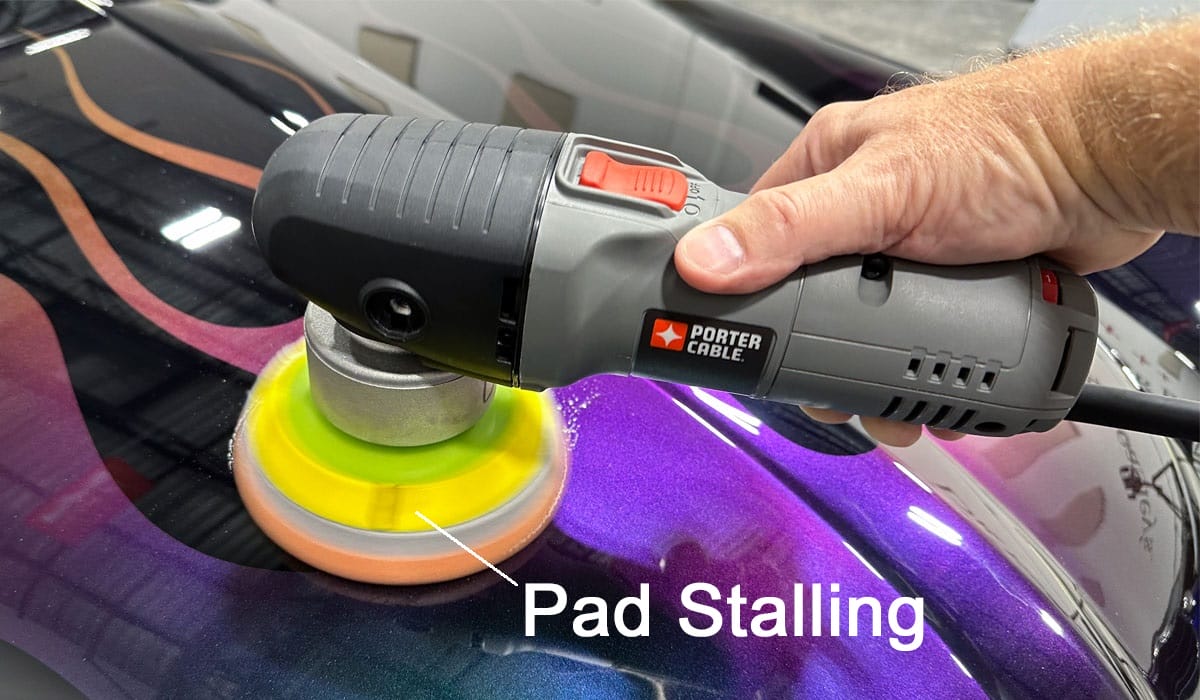
If you see your sanding disc start to stall, you can increase the speed and/or change the way you’re holding the tool against the headlight in order to restore the sanding disc rotation and oscillation.
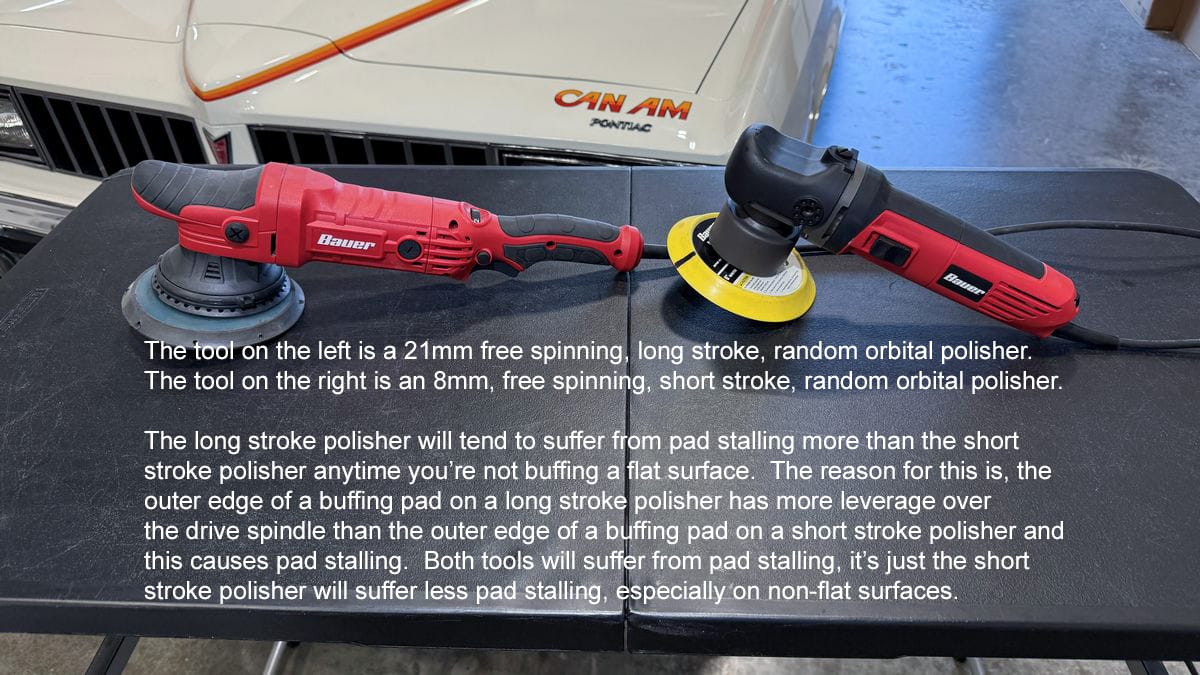
Avoid Long Stroke Random Orbital Polishers
All the polishers I listed above are short stroke polishers — 8mm, 9mm and/or 10mm orbit stroke length. These work better for maintaining sanding disc rotation than long stroke polishers.
The longer the orbit stroke for the polisher, the more the outer edges of the sanding disc (or buffing pad if polishing paint) will have more leverage over the spindle and cause sanding disc stalling.
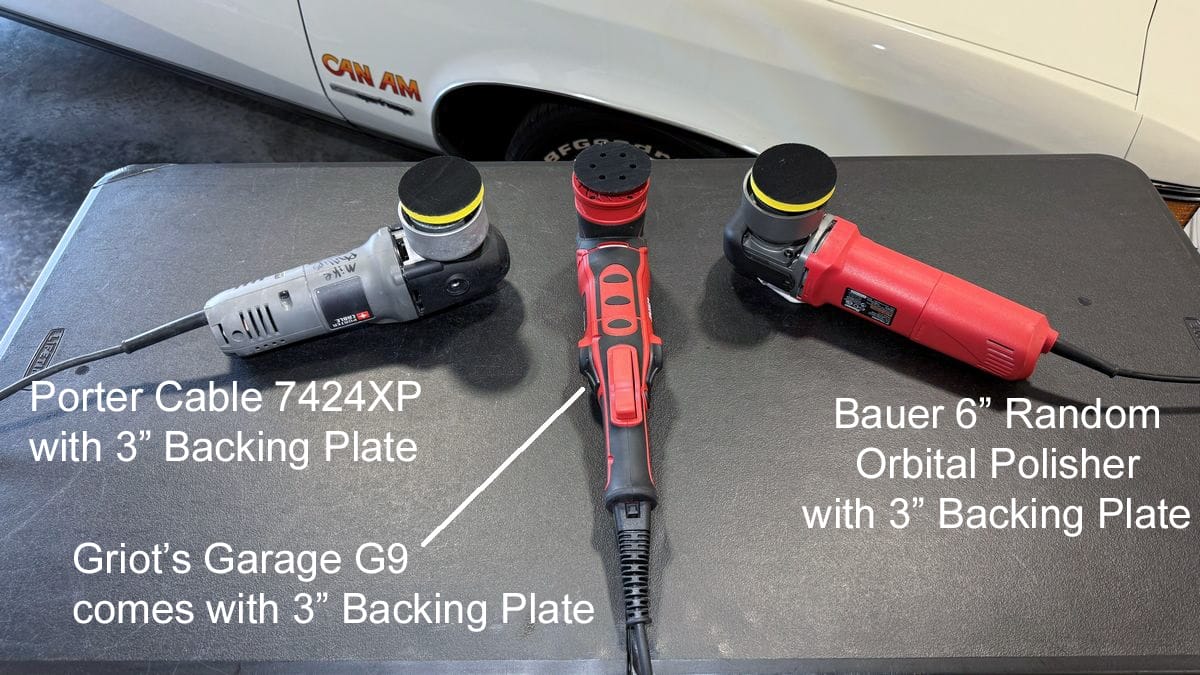
My Top Recommendations for Free-Spinning Random Orbital Polishers: Porter Cable 7424XP, Griot’s Garage G9, Bauer 6” Random Orbital Polisher
All three of these tools are short stroke, free spinning random orbital polishers and while the G9 comes from the factory with a 3” backing plate, you’ll need to purchase a 3” backing plate separately for the Porter Cable 7424XP and the Bauer 6” Random Orbital Polisher.
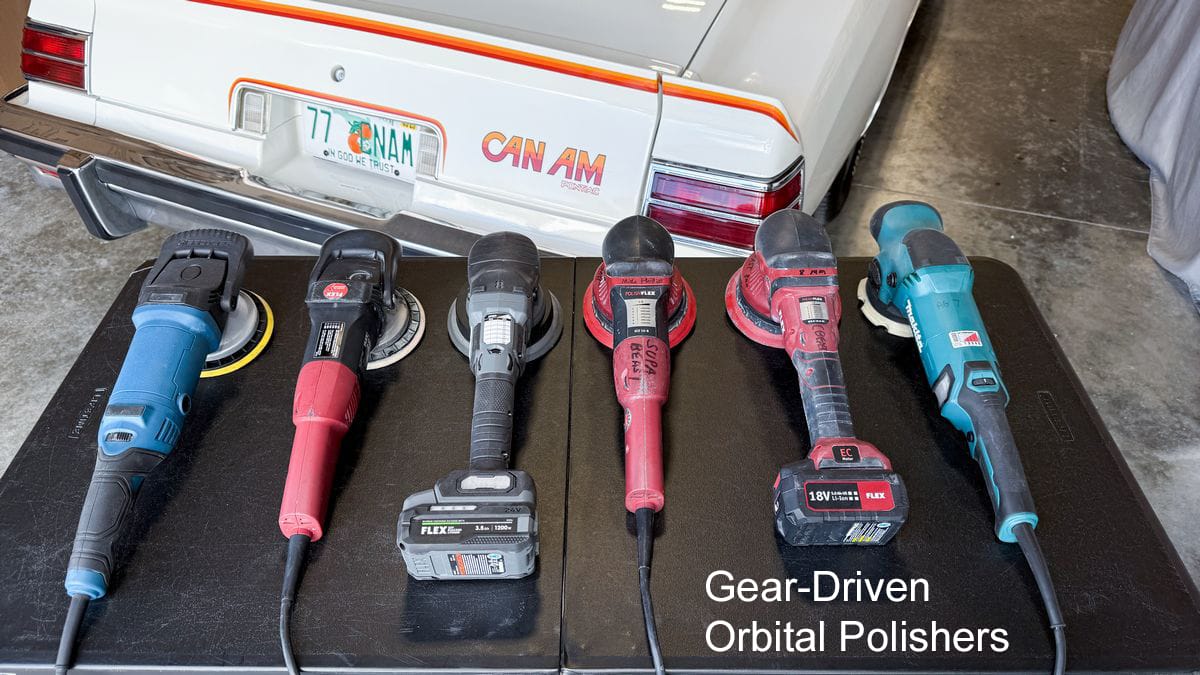
Can I Use a Gear-Driven Random Orbital to Machine Sand Headlights?
Unfortunately, no. Gear-driven random orbital polishers would, in theory, be perfect to machine sand headlights — they bring together the dual orbit action of the random orbital polisher with the constant spinning of the rotary polisher.
However, there are no gear-driven polishers I know of that are compatible with a 3” backing plate. All the gear-driven orbital polishers I have at my shop (which are most of what’s available on the market) use 5” or larger backing plates with no option to swap out a 3” backing plate.
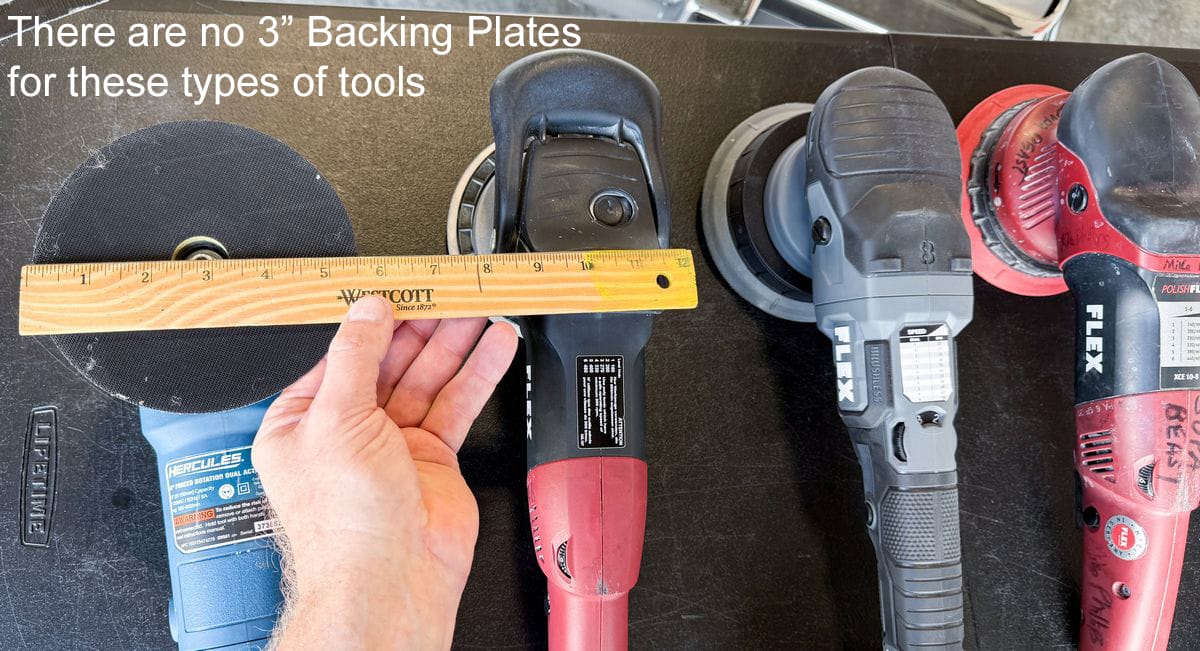
Like I said above, 5” or larger is simply too large for most headlights. For this reason, I don’t recommend machine sanding headlights with a gear-driven polisher.
My Recommendation? Use a Rotary Polisher to Machine Sand Headlights
Rotary polishers are my preferred tool for doing headlight correction because it’s the fastest way to machine sand headlights.
Like I explained earlier, because a rotary polisher is gear-driven—there’s an actual GEAR rotating the backing plate—there’s ZERO chance for buffing pad or sanding disc stalling and this is why the rotary polisher is the fastest and most effective tool to use to machine sand headlights.
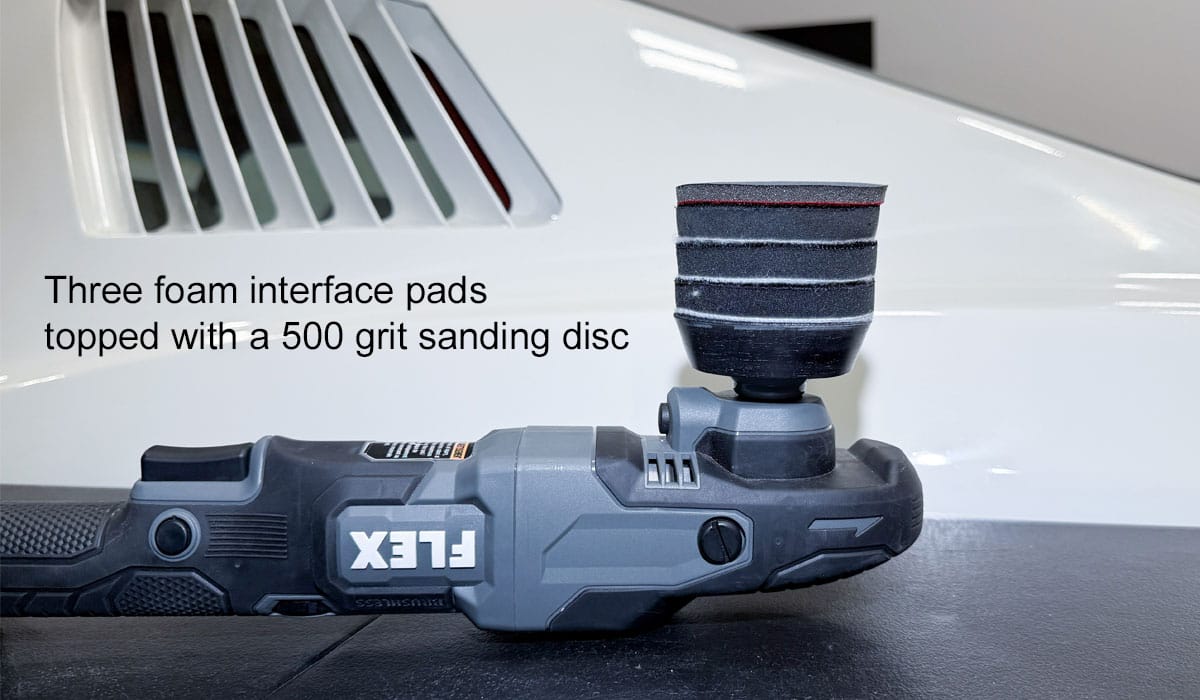
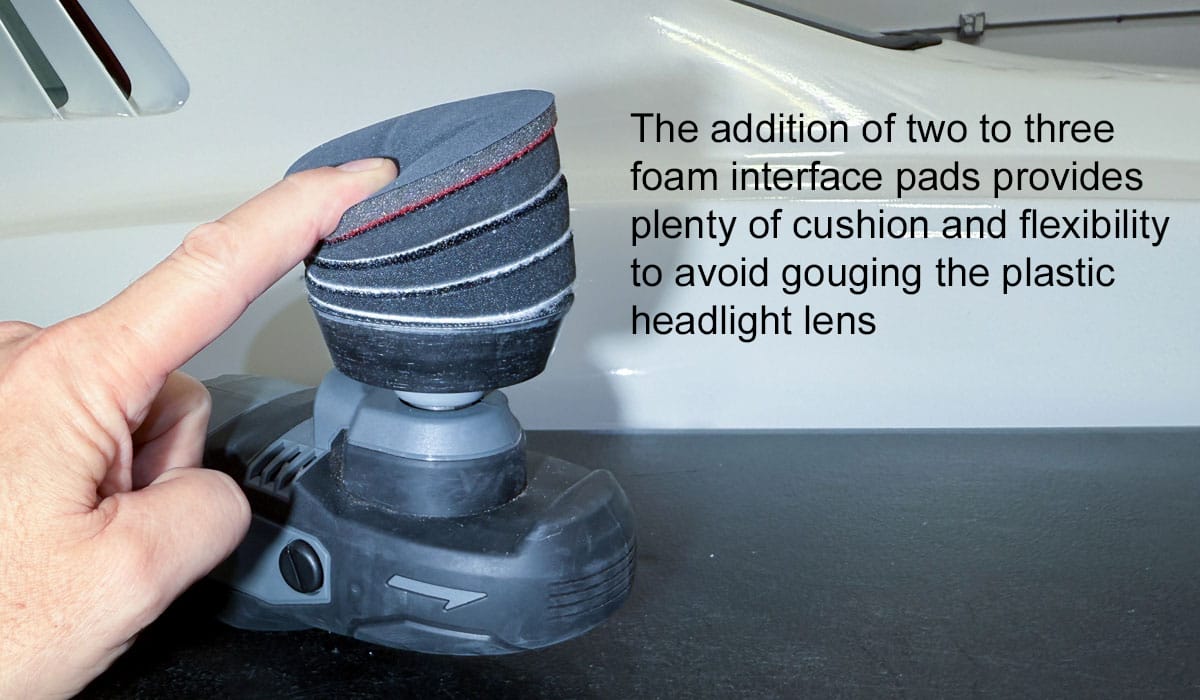
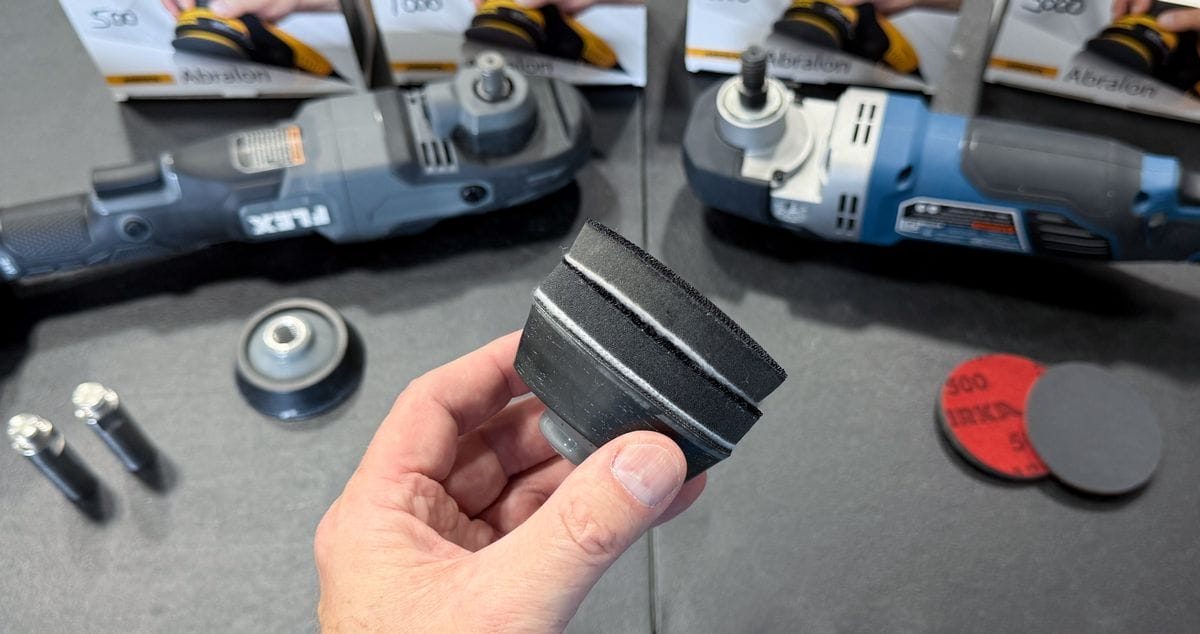
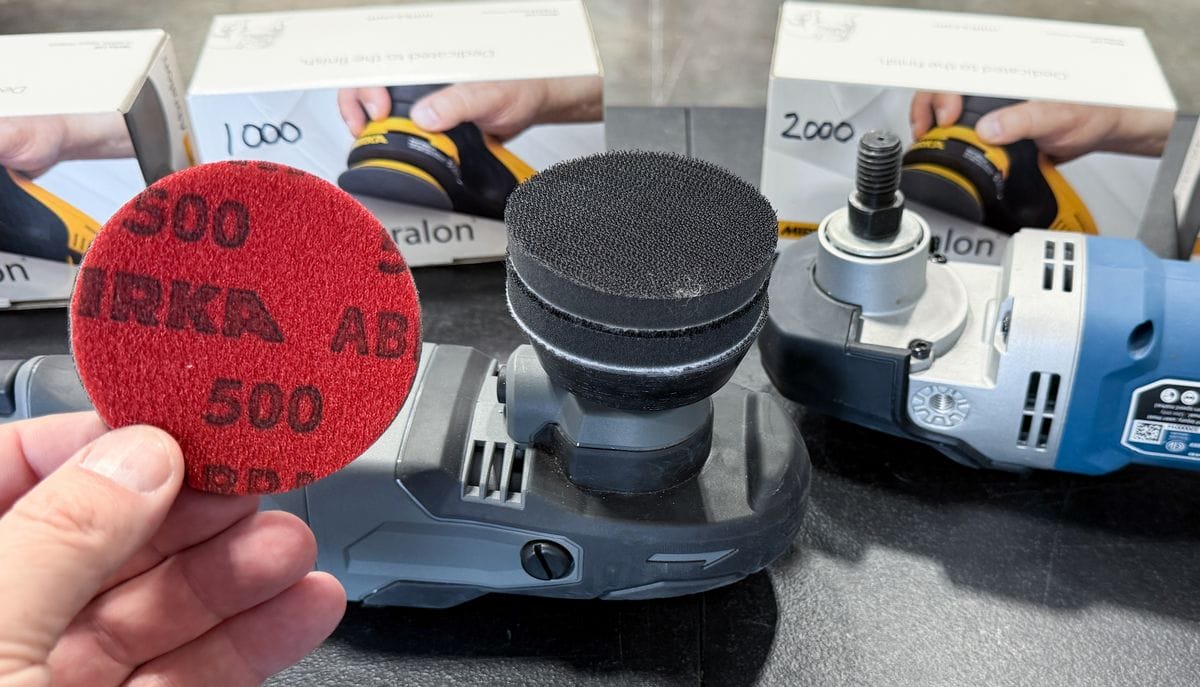
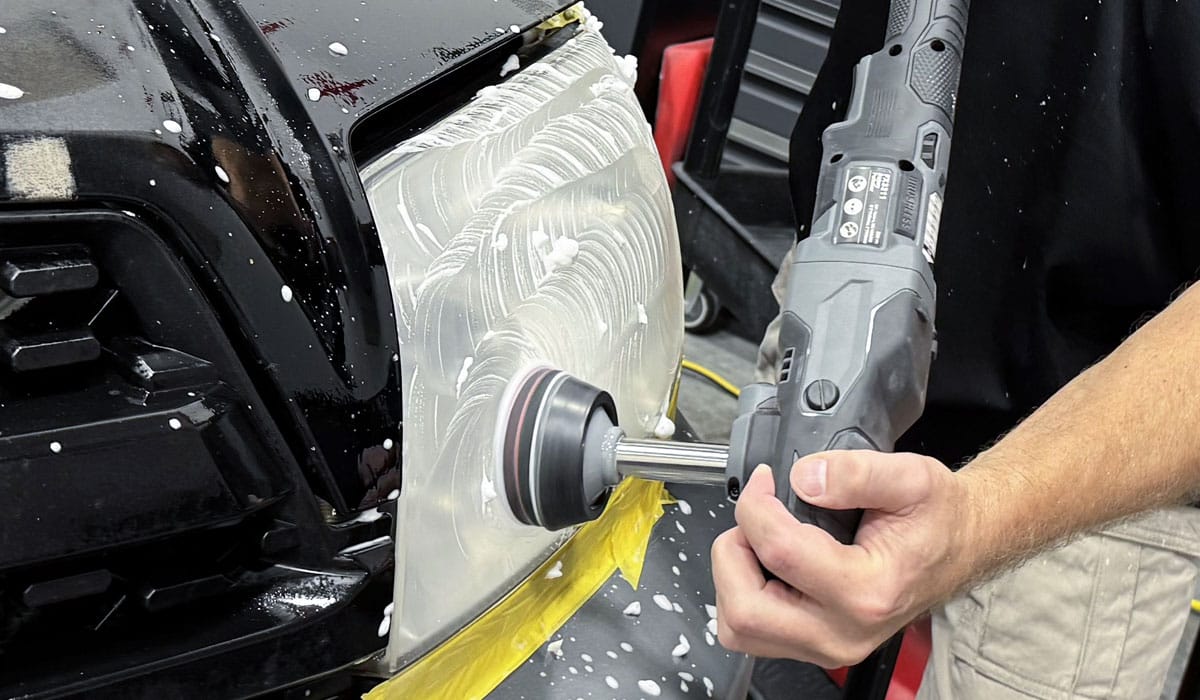
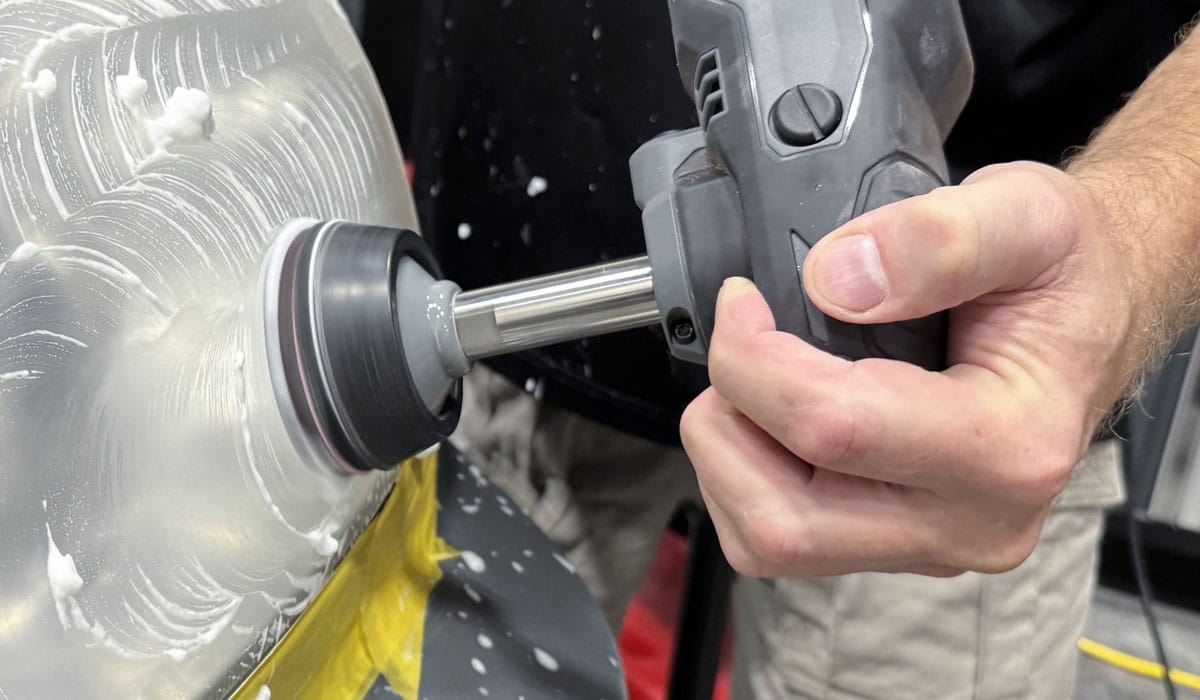
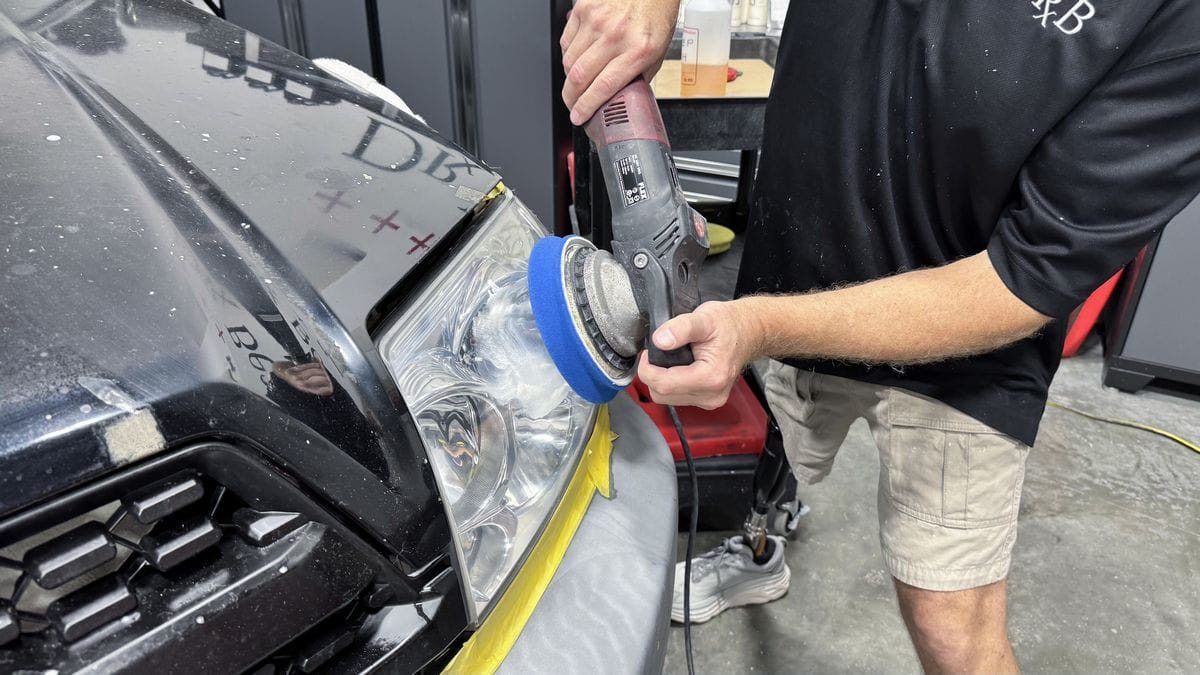
IMPORTANT FOR ROTARY POLISHERS: Use MULTIPLE Foam Interface Pads to Avoid Damaging Headlights
This is extremely important if you’re using a rotary polisher to machine sand headlights. Always use 2-3 foam interface pads between the backing plate and the sanding disc whenever you sand headlights with a rotary polisher. If you don’t have this cushion, the sanding disc may GOUGE the headlight.
Here’s why:
Headlights are made out of HARD polycarbonate plastic. Most 3” rotary backing plates are also hard. If you place an aggressive sanding disc (180, 360 or 500 grit) on just the backing plate and accidentally hold the tool in such a way that only an edge or portion of the sanding disc makes contact with the headlight, chances are you’ll GOUGE the plastic.
This can be repaired, but you’ll have to HAND BLOCK SAND the headlight to flatten the outer surface to the depth of the gouge and thus restore a smooth, even surface.
How do I know this? After explaining this to a class years ago, one of the students didn’t believe me and tried sanding headlights using a rotary polisher with no interface pad. Guess what happened? He gouged the headlight with deep sanding scratches, creating a V-cut into the polycarbonate.
As the instructor responsible for the cars in the class, it was yours truly that had to spend 45 minutes hand blocking the headlight to remove the gouge. Don’t end up like my student—use foam interface pads.
The foam interface pads, especially if you double up to 2-3 pads, provide plenty of CUSHION for the sanding disc to FLEX or CONFORM to the shape of the headlight instead of gouging the plastic.
There is NO downside to using foam interface pads. Because the rotary polisher is a gear-driven tool, there’s ZERO sanding disc stalling, so multiple interface pads will not slow down the rotation of the tool. Thus by adding a few foam interface pads onto the face of the backing plate first, and then attaching the sanding disc, you are safe to machine sand headlights the fastest and most effective way possible.
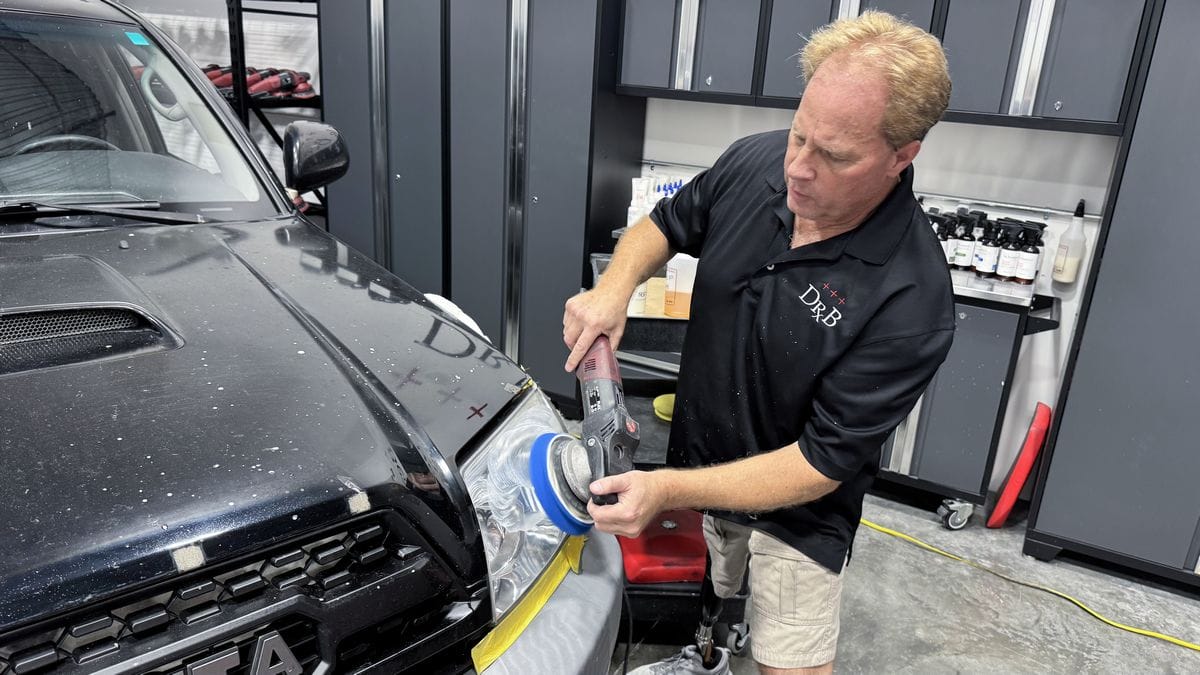
My Recommended Tool for Machine Sanding Headlights: Flex 24V Cordless Rotary Polisher
For this video and article, we will be using the FLEX 24 Volt Cordless Rotary Polisher with a 3” backing plate. This cordless rotary polisher is at the high-end of the available rotary polishers on the market and costs around $700.00 for the polisher, two each, 5 Amp lithium-ion rechargeable batteries, battery charger and a 5” and 6” backing plate.
Affordable Alternative: Harbor Freight Hercules Rotary Polishers (Corded and Cordless)
You can source a corded rotary polisher at your local Harbor Freight for around $100.00 and you can get the Harbor Freight cordless rotary polisher for around $90.00 plus you’ll need to purchase batteries and a battery charger separately. We have a YouTube video here that discusses the Harbor Freight cordless rotary polisher.
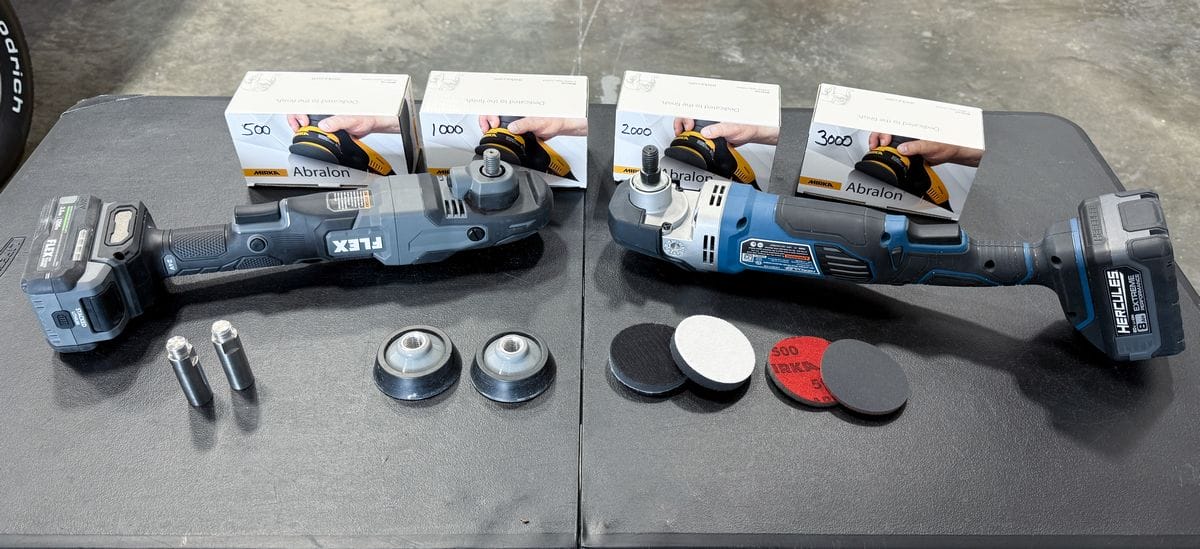
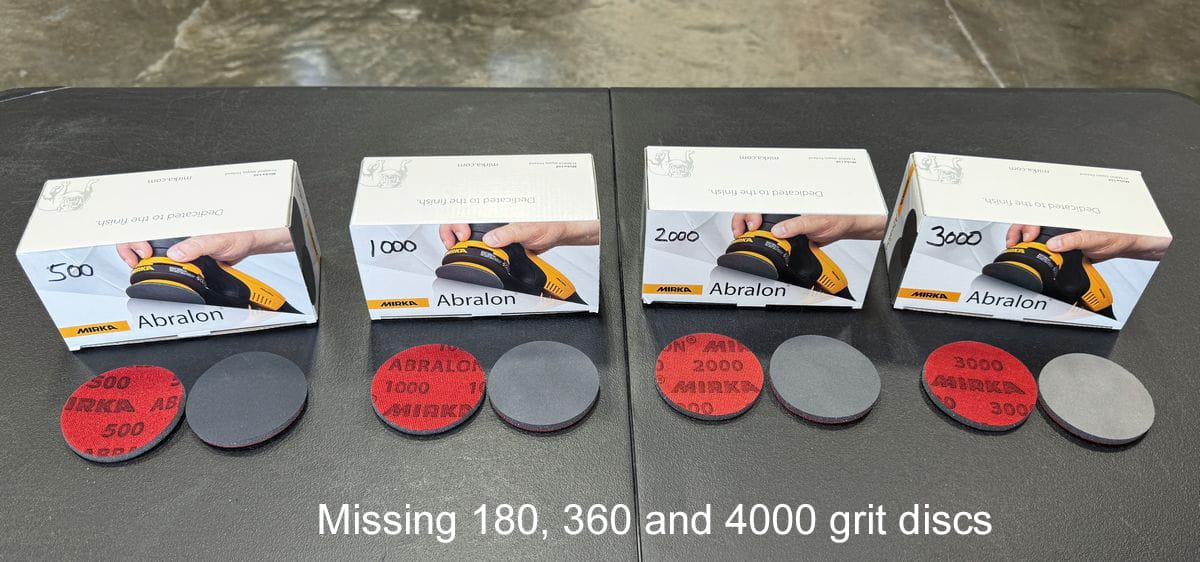
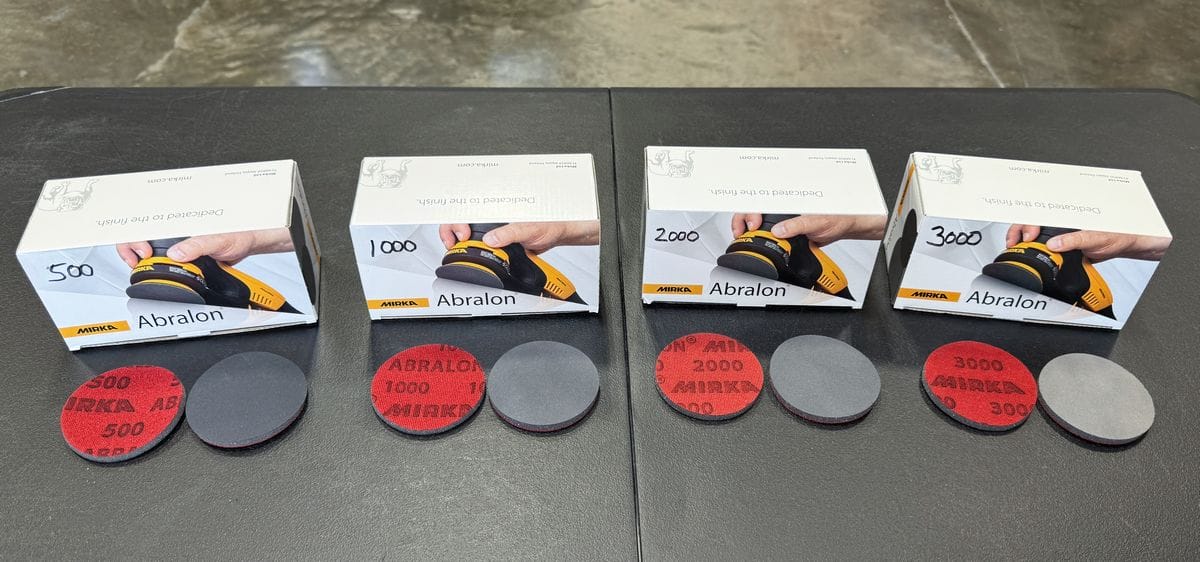
My Recommended Sanding Discs for Machine Sanding Headlights: Mirka Abralon 3” Sanding Discs
I like to use the Mirka Abralon sanding discs for machine sanding headlights. I find them to be high quality, but there are other similar options on the market if you want to use something else. Just be sure to do your own research before making a purchase.
Mirka’s Abralon 3” sanding discs are available in a wide range of grits, including 180, 360, 500, 1000, 2000, 3000 and 4000 grit discs.
Full Supply List for Machine Sanding Headlights
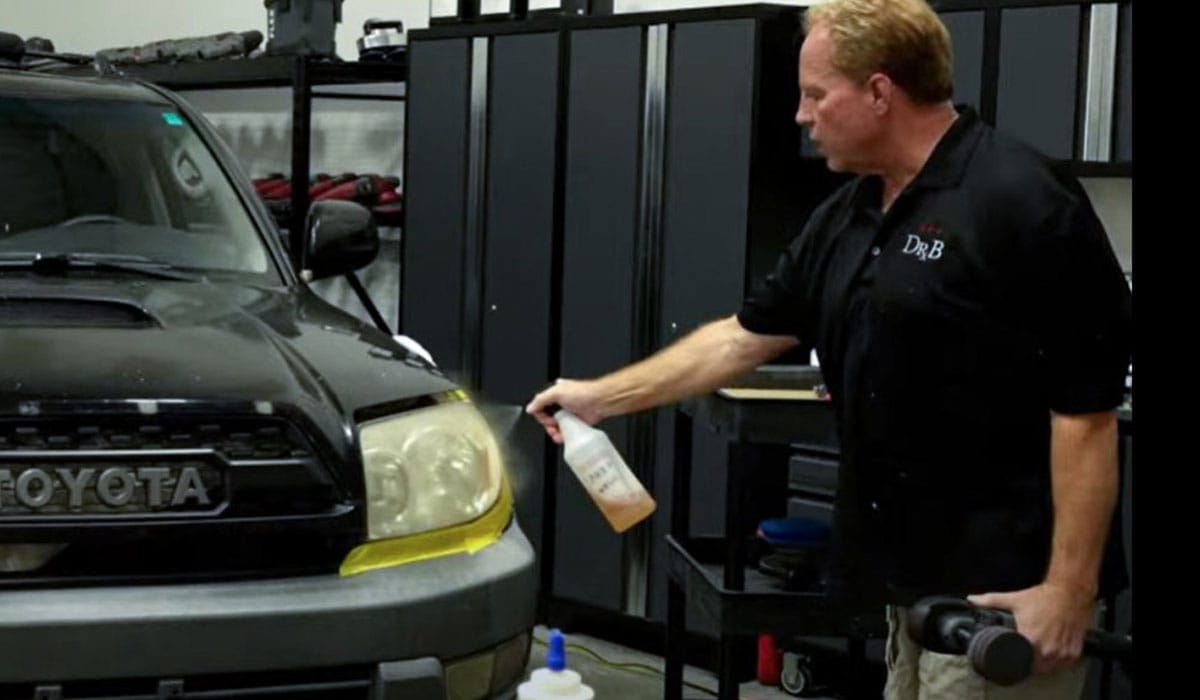
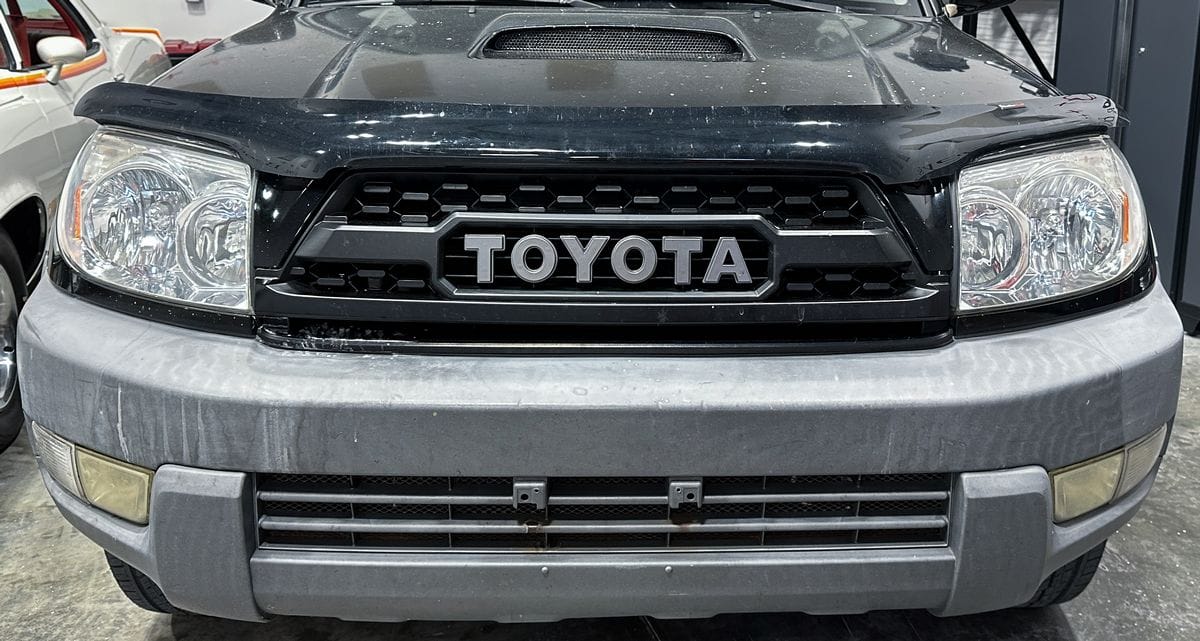
Before you start, it’s a good idea to gather all the supplies you’ll need in order to complete the job from start to finish. Below is a list of the tools and supplies I used for the driver’s side headlight on this 2003 Toyota 4Runner with 300,000 miles on the odometer and still running strong.
Note: These supplies are just an example, you can swap out other brands that can do the same thing.
- Rotary Polisher with 3” and 5″ Backing Plate
- 3” sanding discs in variety of grits
- 3” foam interface pads (available on Amazon)
- 5″ wool pad
- 5″ foam pad
- Compound
- Polish
- Orbital (gear-driven or free-spinning) polisher with 5″ backing plate
- WIDE painter’s or masking tape
- Spray bottle filled with water
- Car wash soap or dish detergent
- Plenty of microfiber towels
- Ceramic coating for headlights
3” Sanding Discs in a Variety of Grits
Instead of sheets of sand paper, like you would if you were hand sanding, when machine sanding, you use round sanding discs. There are three basic types of round sanding discs, there are thick foam backed, thin foam backed, and super thin, non-foam backed film discs.
I use the Mirka Abralon brand, but any 3 inch round sanding discs will work as long as they are available in the right grit options for this type of work.
What Level of Sanding Paper Grit Should I Use?
What grit numbers you should use depends on the type of headlight you’re restoring. Some headlights have an OEM clearcoat while others are uncoated. The difference in hardness calls for different levels of grit.
Without OEM Clearcoat: Headlights without an OEM clear coating are softer, so they don’t require extremely coarse sanding discs to restore. Generally speaking you can remove 100% of the oxidation, yellowing and cloudiness starting with the 1000 grit sanding disc.
For extremely neglected, weathered headlights without OEM clearcoat, 500 grit is a faster and more efficient grit to start with before re-sanding to refine the sanding marks with 1000 -> 2000 grit sanding discs before you start buffing.
There’s a kit from Mirka called the Mirka Assortment Pak (part no. 8A-203-AP) that includes 2 each of 500, 1000, 2000, 3000 and 4000 grit sanding discs, making it perfect for uncoated headlights.
With this kit, you have the very fast cutting 500 grit sanding discs to start with, and if you want to make buffing out the sanding marks fast and easy, you can sand all the way out to 4000 grit. By the time you re-sand with 1000, 2000, and 3000 followed by 4000 grit sanding discs, buffing out this shallow of sanding marks can be done by hand or any type of machine.
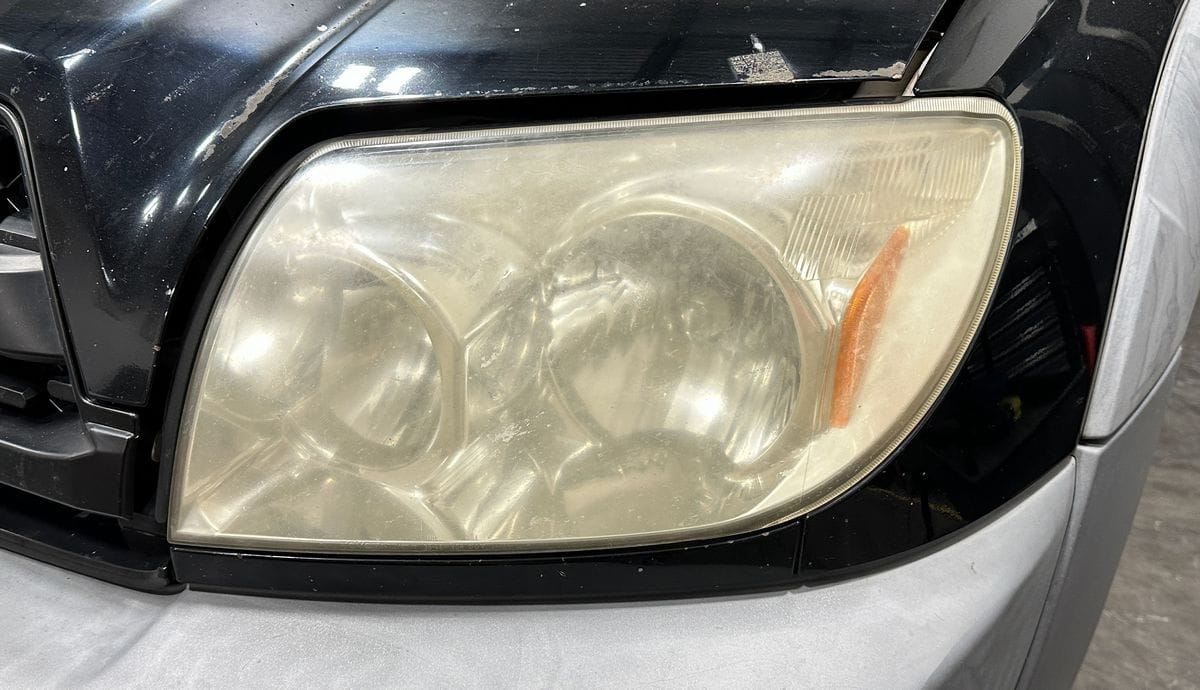
With OEM ClearCoat: Generally speaking, OEM clearcoated headlights are found on more expensive, upscale vehicles. This type of headlight comes from the manufacturer with a clear, protective, and very hard coating over the outside of the plastic. This extra layer of protection dramatically resists oxidation, fading and yellowing. That said, over time and with repeated exposure to the sun and elements, the coating breaks down and disintegrates. This disintegration looks very much like clearcoat failure on the horizontal panels of cars, trucks and suvs.
Here’s a neglected headlight on an older Ford F150 Pickup that is suffering from OEM Clearcoat Failure.

Here’s a close-up to make it easier to see what you’re looking for are irregular, jagged edges that separate the underlying base plastic from the OEM Clearcoating.

The extreme hardness of OEM clear coat combined with the super strong adhesion of the coating to the polycarbonate means you’ll need more aggressive sanding disc grits to remove the oxidation and yellowing.
You’ll want to start with 360 grit at minimum — you may even need to start with 180 grit on more neglected headlights. If you do start with 180 grit, you’ll need to refine in this order:
180 → 360 → 500 → 1000 → 2000 → 3000 → 4000 and then start buffing.
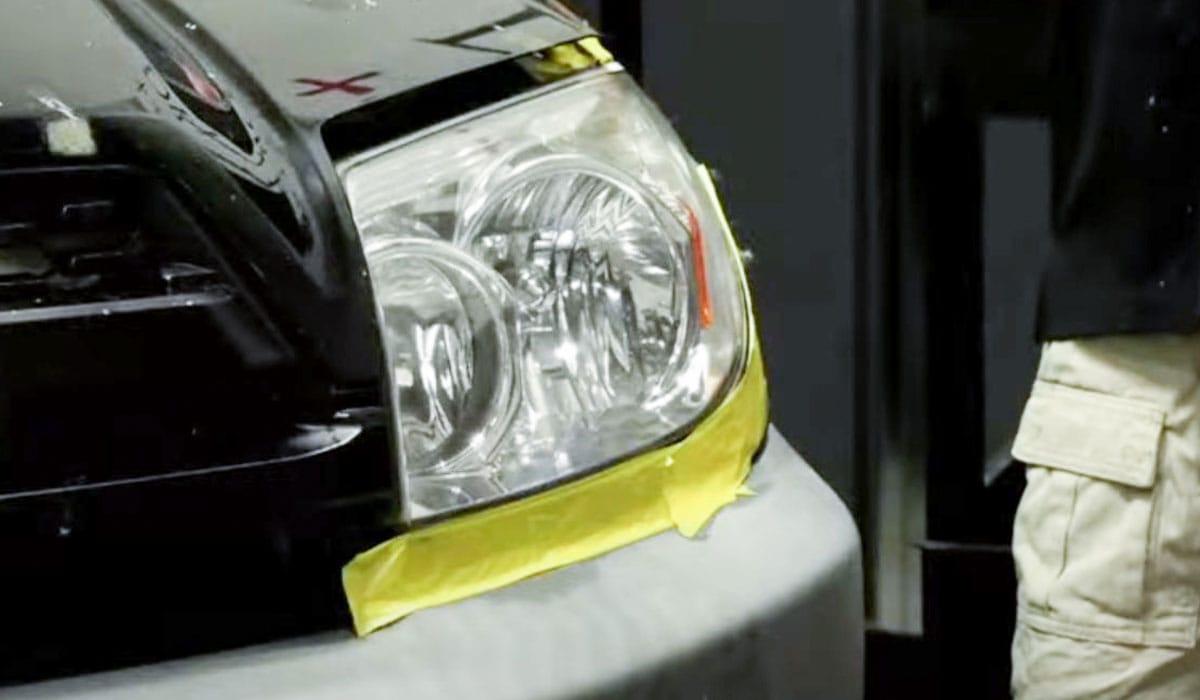
Wide Painter’s Tape
Before doing any sanding, you want to place at least 2 layers of wide painter’s tap onto any painted, plastic or chrome surfaces adjacent to the headlight. This is to protect the surface in case you accidentally run the spinning sanding disc over any of these surfaces.
While it’s not a huge problem if you do this with higher grits, if you do this using more aggressive lower grit discs, you risk sanding and/or buffing through the top clearcoat layer of paint (on body panels) and then you’ll need to repaint the area or the entire panel.
If you accidentally run the spinning sanding disc over any plastic trim or chrome (like the grill) there’s no easy way to undo the damage. This is true for both hand and machine sanding. Keep in mind the factory clearcoat on modern vehicles is less than 2 mils thin. Always take the time to tape-off surrounding surfaces.
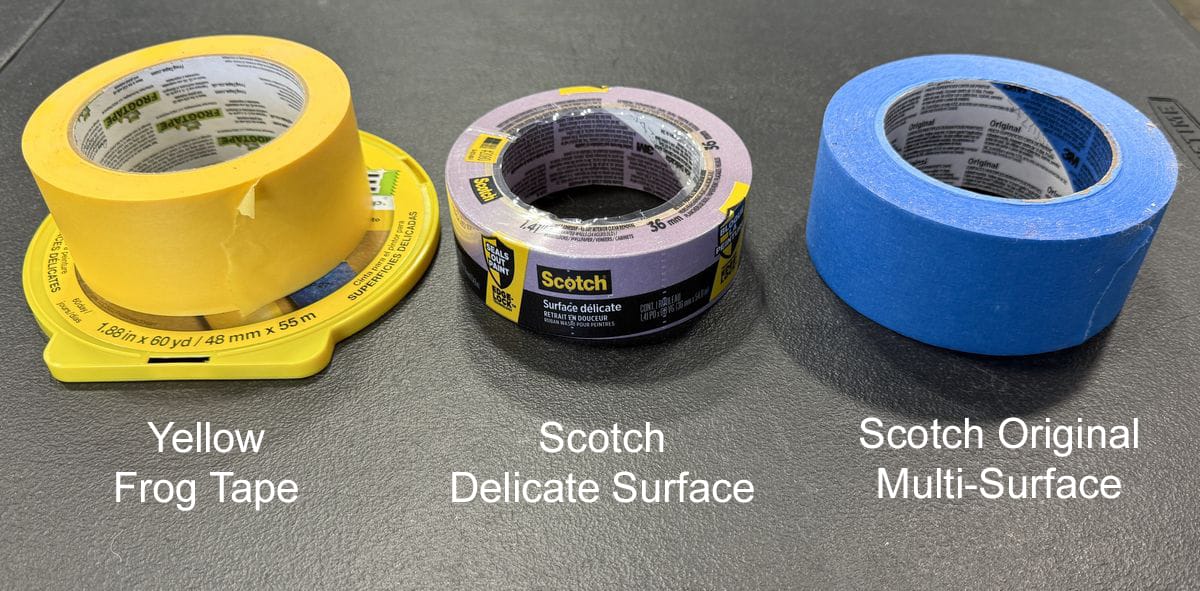
My Recommendation? Use a Sensitive Surface Tape
If you want to be SUPER careful, I strongly recommend getting a sensitive surface tape like the Scotch Delicate Surface tape or the Frog Yellow Tape. Why? Most conventional masking tapes have such a strong adhesion to the surface they are applied to that you risk accidentally pulling off car paint, especially if there’s poor paint adhesion to the car body panel.
In the article and video, you’ll see me using the yellow 1.88 inch Frog tape, which is also available in 1.41 niche widths. Tapes like these offer less adhesion than other tapes so they reduce the risk of accidentally pulling any paint off the car when removing the tape.
That’s not always a problem on factory paint necessarily, but if you’re working on a car that’s been re-painted there’s always the risk of poor adhesion between the paint and the primer. You don’t know if there’s an adhesion problem until you remove the paint, and by that time it’s too late. If that happens, you’ll need to repaint the affected area.
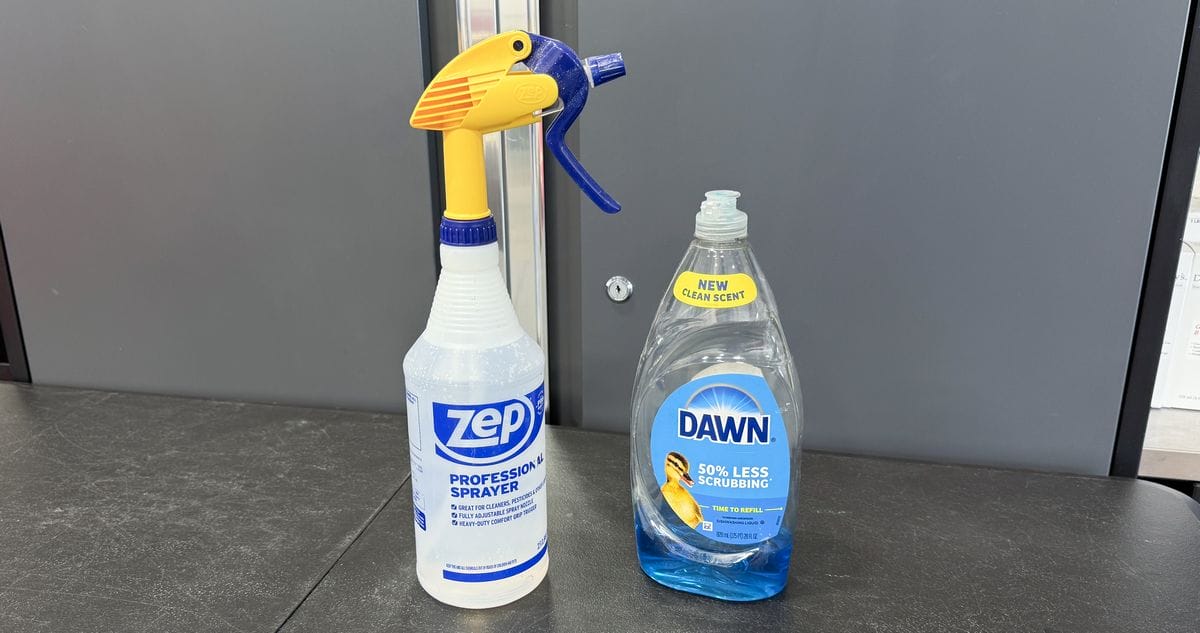
Spray Bottled Filled with Water + Soap
With the Mirka Abralon sanding discs, you can use them either wet or dry. The primary advantage to wet sanding is the water—with a few drops of soap—lubricates the sanding action and makes it easier to move the sanding disc over the headlight.
Sanding wet also helps to prevent the face of the sanding disc from loading or clogging with the plastic particles being removed as you sand. The only downside is it tends to be messy.
The sanding water, called slurry, will tend to drip, and run down the car, sometimes into cracks and crevices where it can be difficult to remove. This tends to be more of a problem when wet sanding an entire car and thus your sanding on higher body panels.
To make a lubrication solution for wet sanding, take your spray bottle filled with water and add a few drops of soap. Any car wash soap or dish detergent will work fine. Don’t add too much soap — you just need a little to lubricate the surface.
Microfiber Towels
Kind of goes without saying that you’re going to need some towels to wipe the headlights clean in-between steps.
My advice? Don’t use your best towels — use your tatty microfiber towels. Using high quality towels is important when you’re trying to avoid scratching the paint, but for this type of work it’s not necessary. Save your good towels for the paint.
How to Machine Sand Headlights: A Step-by-Step Guide
Before starting, ensure the vehicle is clean and parked in a shaded area like your garage, shop, or carport.
Part 1 – Sanding
The machine sanding process begins with sanding at multiple grit levels to remove the oxidation and yellowing. This is then followed by a buffing step to remove the sanding marks inflicted by the first part.
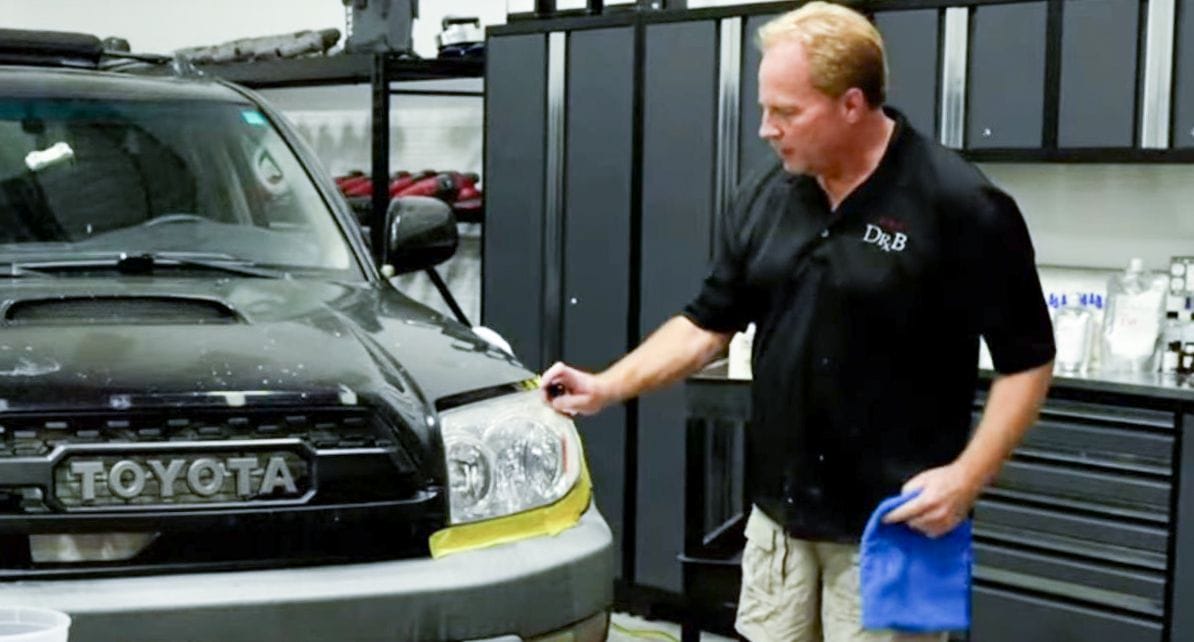
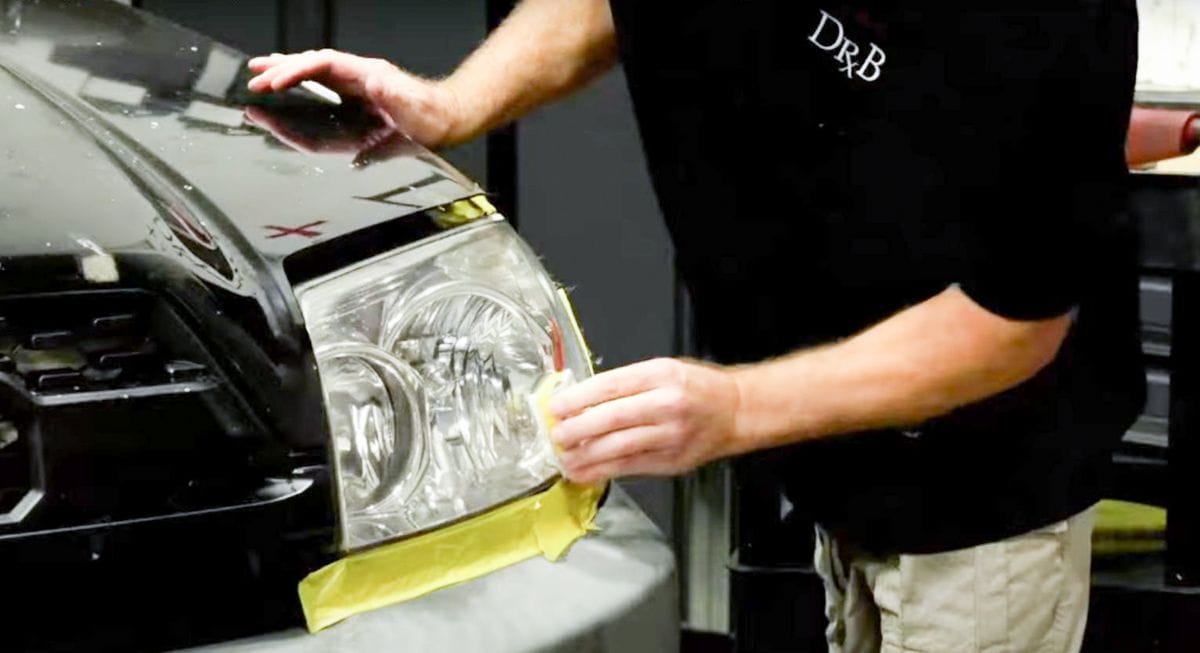
Step 1: Tape-Off Adjacent Surfaces
Place at least 2 layers of tape around all adjacent surfaces to protect them from any accidental sanding. For some vehicles, you can pop the hood open—just a few inches—to move the hood paint completely away from the sanding process.
Step 2: Attach Interface Pad + Sanding Disc
Place 2-3 foam interface pads onto the face of a 3” rotary backing plate.
Next, center and attach the first sanding disc. For our project, we’re starting with 500 grit.

What grit you start with, however, will depend on what kind of headlights you have.
For bare plastic headlights, you can start by testing with 1000 grit. If this is too slow or not efficient enough to fully remove the oxidation, you can drop down to 500 grit.
For OEM clearcoated headlights, you can start by testing with 500 grit, but in my experience you’ll need to start with 360 grit to actually cut through the OEM clearcoat in a time-efficient manner.
Once the foam interface pads and sanding disc are attached, we’re ready to start machine sanding.
Step 3: Apply Lubricant to Headlight Surface
Mist a little soapy water lubrication onto the face of the sanding disk and a few mists of water onto the headlight.
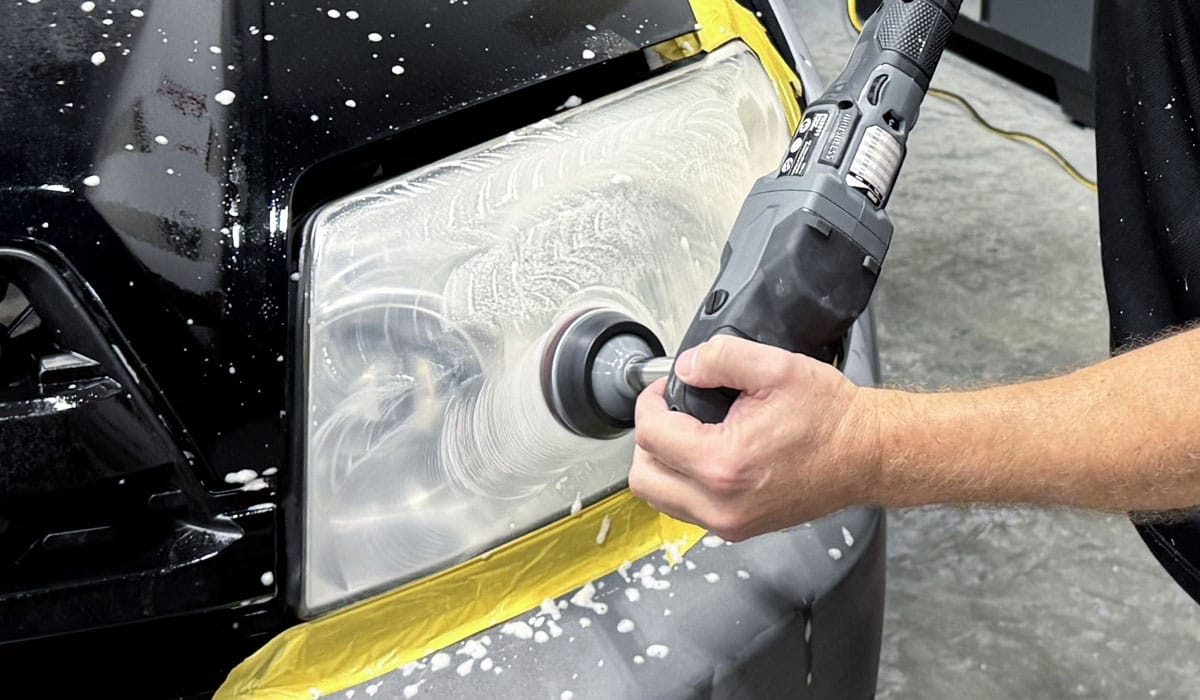
Step 4: Make Your First Sanding Step
Place the face of the sanding disc against the headlight to be sanded, turn the polisher to a low speed setting then depress the speed trigger and lock the speed lock button into place.
Begin making slow, overlapping passes in a crosshatch pattern. Be careful when sanding next to the outer edges that you don’t accidentally move the spinning sanding disc off the headlight and onto the surrounding protective tape.
Make 4 to 8 section passes over the entire headlight and stop sanding, wipe the headlight clean using a microfiber towel and inspect the results.
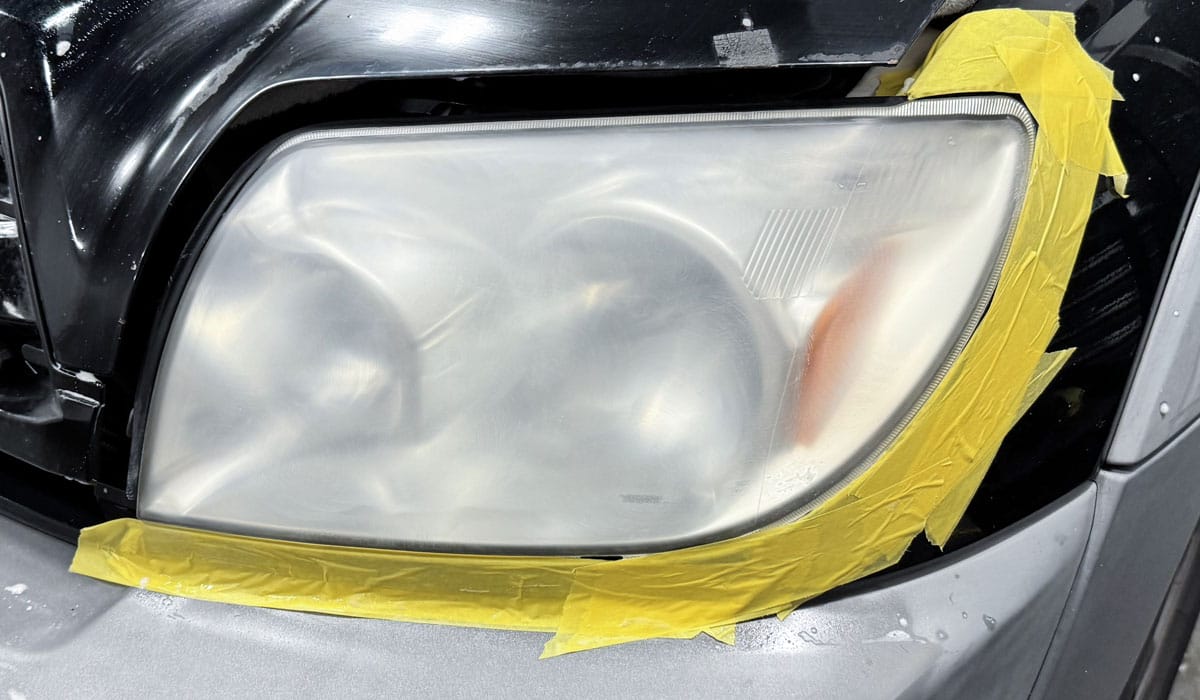
Step 5: Inspect Results
Inspecting the results can be a tick elusive as you’re looking at millions of scratches in a plastic surface and besides seeing dull plastic, you need to look carefully to make sure all the worst oxidation, yellowing and cloudiness is fully removed. If in doubt, re-sand.
The 3” sanding disc should still have life in it to do any follow-up sanding, but if the face of the sanding disc no longer feels sharp and grainy, swap to a fresh sanding disc and repeat the wetting and sanding process until 100% of any oxidation, yellowing and cloudiness is completely removed.
Step 6: Make Your Second Sanding Step
Switch to the next highest grit sanding disc and repeat the sanding process. For most plastic headlights, making an average of 8 section passes over the entire headlight will be enough sanding to level and refine the sanding scratches from the first sanding disc grit level to the next sanding disc grit level.
Step 7: Repeat Across Rest of Grit Levels
Continue re-sanding the headlight until you’ve worked through all of the different levels of sanding disc grits ending with the highest grit disc in your arsenal.
PRO TIP: Look for Uniform Dull Appearance
After each sanding step, the appearance of the headlight should look uniformly dull. It takes a little practice plus close inspection of the results to confirm the first sanding scratches are removed and replaced with the next level of sanding scratches.
Part 2 – Buffing to Remove Sanding Scratches
After all sanding is completed, the next step is to remove 100% of the sanding marks to restore crystal clear plastic.
What Type of Buffer Should I Use?
For this video and article, I’m using a cordless FLEX rotary polisher with a traditional wool cutting pad. Below are your options listed in order of best option to least best option.
BEST OPTION – Rotary Polisher: The fastest and most effective way to do this is by using a compound with a wool cutting pad on a rotary polisher.
Second Best – Gear-Driven Orbital Polisher: Because there’s ZERO pad stalling when using a gear-driven orbital polisher, this type of tool together with a fiber or foam cutting pad will work better for removing 100% of the sanding marks out of any curved headlights, as well as around the edges.
Third Best – Free-Spinning Random Orbital Polisher: You can use a free spinning random orbital polisher with some type of cutting pad, but you’ll want to use a black sharpie marker to mark the side of the backing plate and pad (if possible), to make it easier for your eyes to see and monitor pad rotation.
The problem with trying to remove sanding scratches using a free spinning, random orbital polisher like a Porter Cable 7424XP or a Harbor Freight 6” Dual Action Polisher, (same types of tool), is it can be difficult to maintain good pad rotation and pad oscillation anytime you’re buffing a curved headlight and/or when trying to remove any sanding scratches around the outer edges of the headlight.
Step 1: Apply Compound to Face of Headlight
Apply some compound to the face of the headlight and use the Finger Painting Technique to spread a thin layer of compound onto the headlight. If you know how to use the 10@10 Technique of picking up a strip of compound, then this is the technique you see me using.
Step 2: Buff Headlight with Compound & Wool Pad
Place the face of the buffing pad against the headlight to be buffed, turn the polisher to a low speed setting then depress the speed trigger and lock the speed lock button into place.
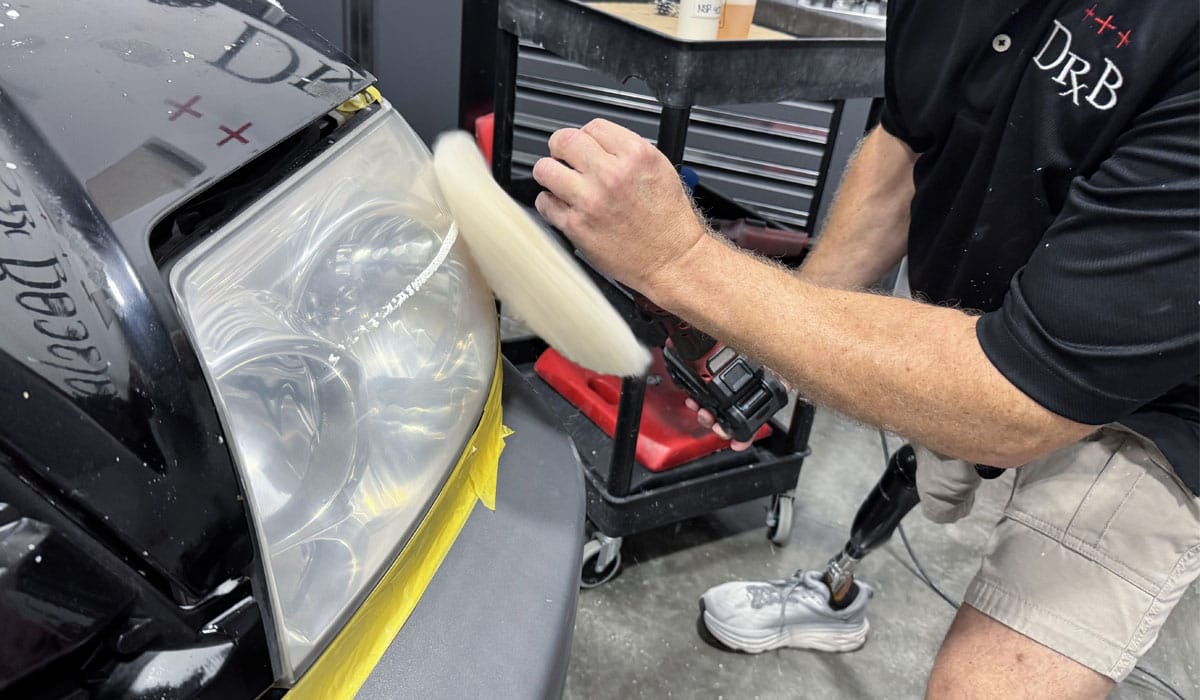
Begin making slow, overlapping passes in a crosshatch pattern. For this initial buffing step, be sure to press the spinning wool pad against the headlight with around 10 to 15 pounds of pressure. The idea is to push the abrasives, plus the spinning pad against the plastic headlight to force the abrasives to cut the surface. This is how you remove the sanding scratches from the last sanding step and restore clarity to the plastic headlight.
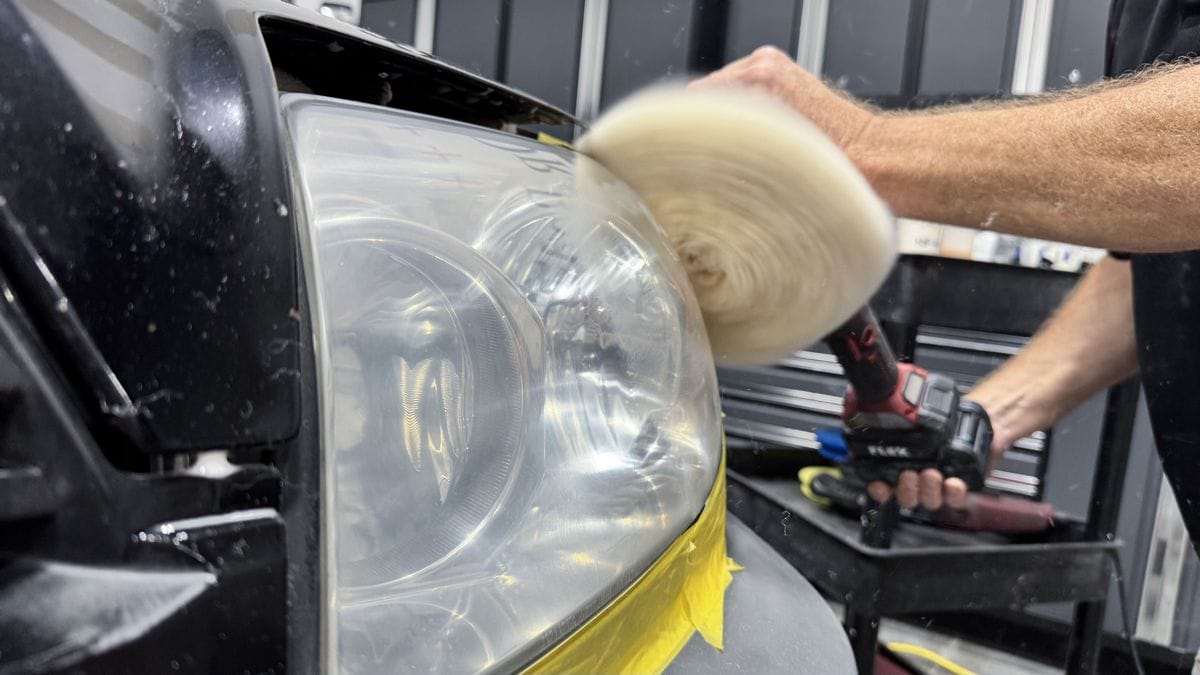
Make 4 to 8 section passes over the entire headlight and be sure to focus on buffing around the outer edges of the headlight as these are the most difficult areas to buff out the sanding marks.
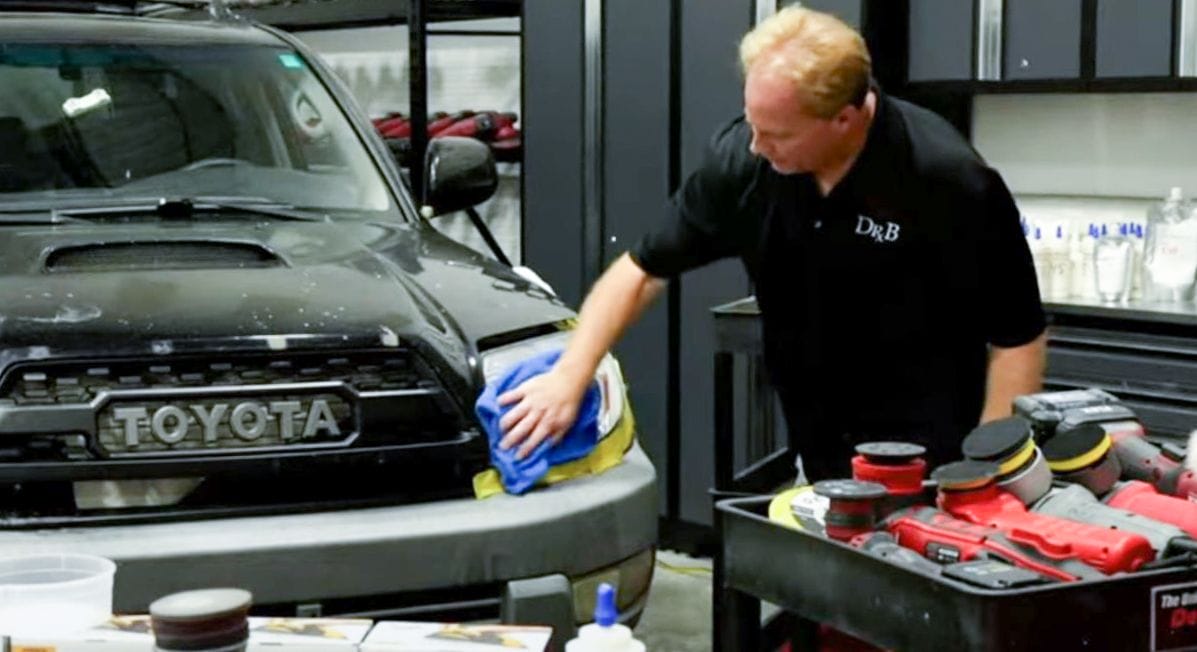
Step 3: Wipe to Remove Compound Residue
After buffing, use a clean, dry microfiber towel to wipe-off and remove any compound residues and inspect the headlight lens.
What Should I Be Looking For in My Results?
For this first machine buffing step, you want to see 100% of any sanding scratches fully removed. The plastic lens should look clear, but a little cloudy. This cloudiness is simply micro-marring from the fibers of the cutting pad and compound. This cloudiness will be removed in the next step. Once you’re satisfied 100% of the sanding marks are removed, move onto the next step.
Step 4: Polish Headlight with Polish & Foam Pad
Repolish the headlight using any orbital polisher with a foam pad and a polish. Wool fiber pads always leave holograms in the surface being buffed. Holograms are a shallow scratch pattern caused by the individual fibers that make up the wool buffing pad.
Because a foam buffing pad has a UNIFORM SURFACE TEXTURE – (no individual fibers), together with a quality polish and the oscillating action provided by an orbital polisher, these three things will work to remove the holograms, which in turn removes any remaining dullness from the cutting step.
For this final machine polishing step, normally you want to make 6-8 overlapping, section passes in a crosshatch pattern. This will ensure a uniform finish and thus uniform results. After polishing, remove any excess polish residue using a clean microfiber towel. When satisfied with the results, remove any painter’s tape, and give the headlight a final wipe to remove any residue tape lines where the tape edge made contact with any portion of the plastic headlight lens.
Part 3 – Protecting Headlight with Ceramic Coating
Sanding headlight polycarbonate to remove oxidation removes whatever UV protection the headlight still had. This UV protection is what helps inhibit oxidation so headlights don’t get cloudy as quickly.
So once you’re done sanding the headlight, you need to replace the UV protection with a ceramic coating designed to protect headlight polycarbonate. For the purposes of this demonstration, we’ll be applying 1-2 layers of Dr. Beasley’s Headlight Coating.

Step 1: Prep Headlight Surface for Coating
First wipe the headlight surface using the Headlight Coating Prep and a clean, dry microfiber towel.
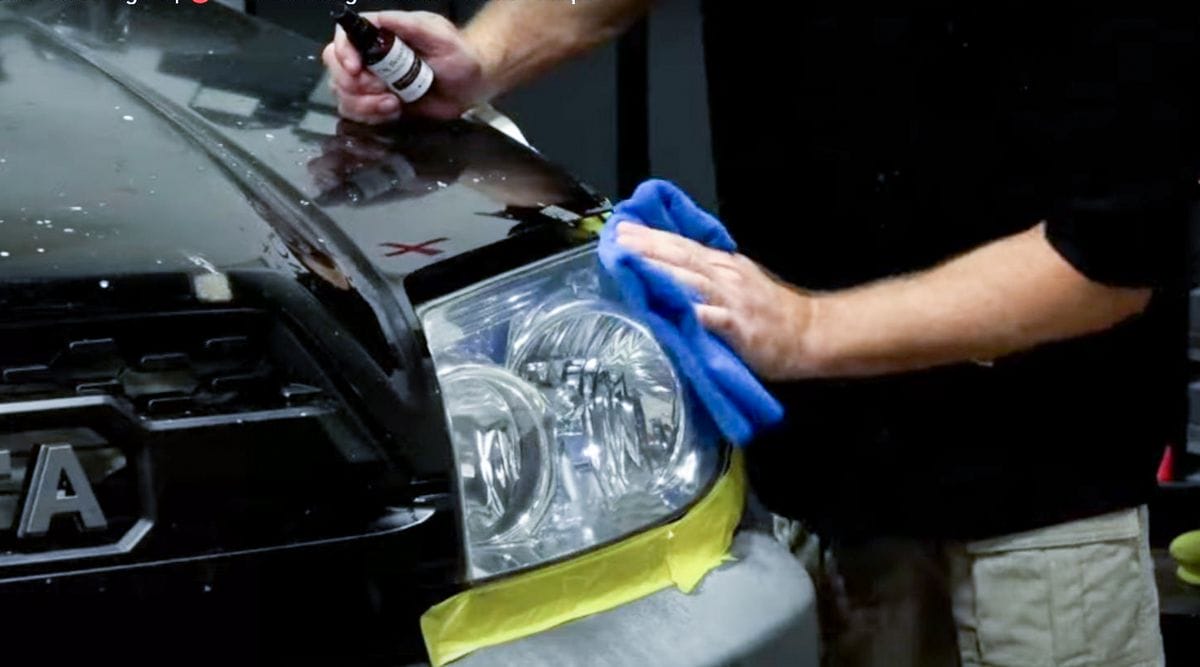
Step 2: Apply Headlight Coating
Next, apply a few drops of coating onto the provided coating applicator block.
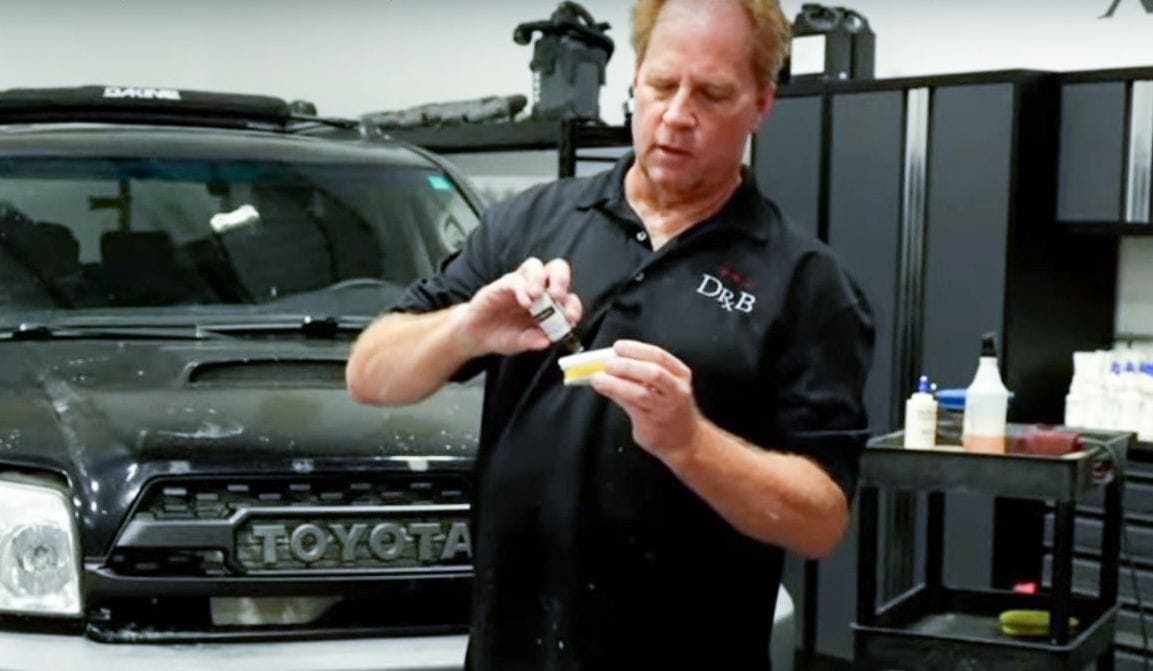
Apply the coating to the headlight lens using an overlapping, crosshatch pattern to ensure full coverage.
Step 3: Level Coating & Remove Excess
Wait for a few minutes and then level the coating and remove any excess using a separate, clean dry microfiber towel.
Step 4: Allow Coating to Cure
Allow the headlight coating to cure for at least 30 minutes to 1 hour before putting the vehicle back into service. If you’d like to add an additional layer, wait at least an hour before applying. This product is designed to be hydrophilic rather than hydrophobic, so water will sheet off the surface instead of beading up. Avoid washing the vehicle for 7 days after application.
Final Results After Machine Sanding
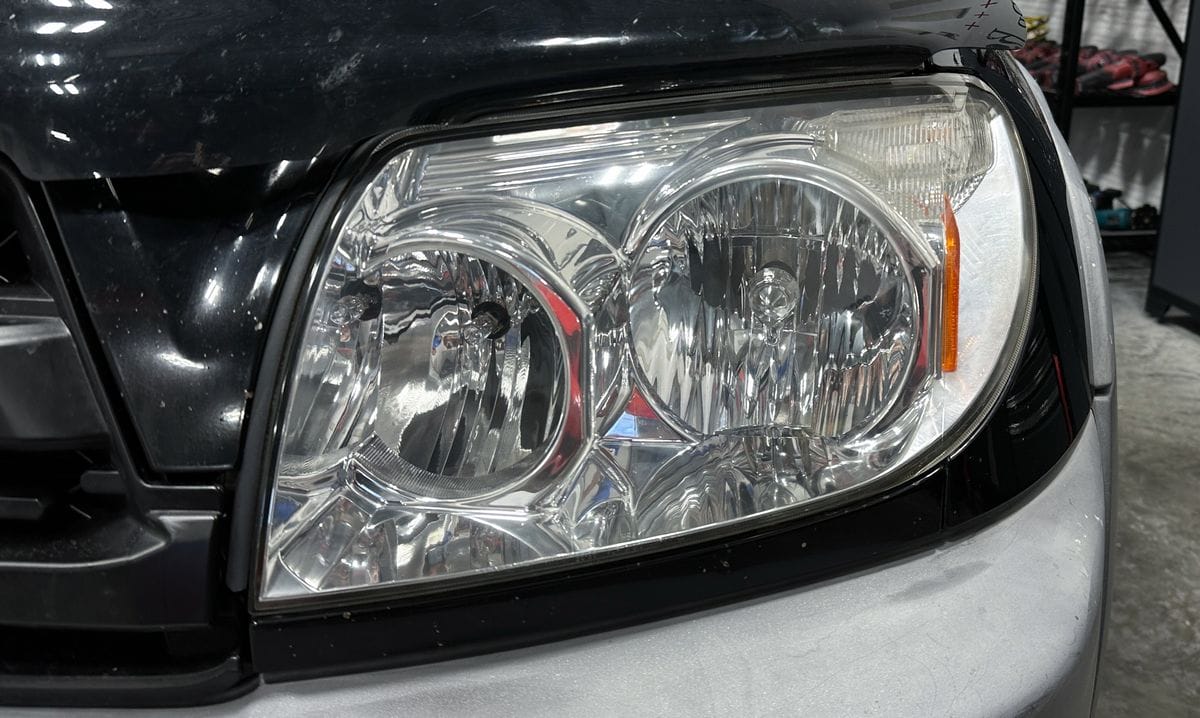
My previous article showed how to hand wet sand headlights to remove oxidation. As you can see from the photos below, you can achieve the same high quality results via hand sanding or machine sanding with a rotary polisher.

How Long Will My Headlight Stay Clear After Sanding?
The most common question I get about headlight correction is,
How long will the results last?
That’s a great question and when I answer it, I start by saying,
When the vehicle was brand new until today, the new headlights did not hold up over time from the factory. Nothing you or I do will change this because repeated exposure to UV rays from the sun, plus exposure to the elements will tend to wear down the results just like these things wore down the factory new plastic.
For most cars, you can expect at least a year and usually longer, it just depends on how the car is exposed to the world. If you park your car in a garage or under a carport anytime the car is not being used, the results will last longer. If your vehicle is always parked outside, exposed to the sun and the elements, the results will not last as long as a garage-kept car.
Geographical location is also a contributing factor to how long the results from this process will last. Generally speaking, the closer you live to the equator, the more intense the exposure to UV rays from the sun and accordingly, the shorter the lifespan for the results. The exact opposite is also true, the further you live away from the equator, the less intense the UV ray exposure from the sun will be and the results will tend to last longer.
How to Maintain Your Headlights’ Appearance
The best way to maximize the performance and longevity for the results is to wash and dry carefully. Keep the surface of the coating clean. And whenever possible, park the vehicle in a garage, shop, or carport.
You can also use a spray-on ceramic coating like Dr. Beasley’s Bead Hero in-between normal washing and drying to provide additional protection.
Further Resources
Extreme Headlight Restoration Via Hand Sanding
If after watching the video and reading this article and you’re interested in how to hand sand headlights instead of machine sanding headlights, click the above link to go to that video and article.
My Personal Offer to Help
I’ve been answering car detailing questions professionally since 2002 and moving forward, if after reading this article you have any questions about polishing and waxing, or how to use an AIO, my contact information is below, reach out to me, I’m always happy to help.
Would You Like to Learn How to Machine Polish Like a Pro?
- Would you like to take your detailing skills to a higher level?
- Do you find you learn better by doing versus sitting in a chair looking at a PowerPoint presentation about car detailing?
Here at Dr. Beasley’s O.R., (Operating Room), in sunny Stuart, Florida, we teach the most hands-on car and boat detailing classes on planet Earth. And we prove it too. You can find write-ups on the Dr. Beasley’s Blog that photo-documents just how hands-on our classes are plus you’ll see the kinds of cars and boats you’ll be training on.
Click the link below to find the dates, locations, topics, and prices for all upcoming detailing classes.
Upcoming Detailing Classes – Prices – Info – Topics – Locations
And if you ever have any questions, always feel free to reach out to me personally via text, phone call or email.
I hope to see you in a future detailing class!
Sincerely,
Mike Phillips
Chief Education Officer for Dr. Beasley’s
760-515-0444
Hi there good article. I’m retired body man with 46 years experience plus and headlight oxidation easy to remove but when you have stress cracks you can send all day long and clear the headlights but it’s not going to rectify the problem if the headlights are that old. You might get a year out of them if you clear them. But the bottom line aftermarket headlights are very inexpensive these days so I would suggest just putting a set of aftermarket lights in. And the main culprit by the way is not UV and the sun rays it is due to most cars today have running lights which means whether they’re LED or halogen they’re running now on a hot summer day that generates heat so turn your daytime running lights off and park your car where the sun is not hitting your headlights. Another good tip when you get the oxidation off and you buff them but two or three coats of carnauba wax on them even if you install aftermarket ones at least once a month wax your headlights. I hope this was informative just trying to save people money and the waste of time. And with YouTube the average person could change their headlights.
Thanks for reading the article and watching the video.
To me the take-away topic was how to SAFELY MACINE SAND using a ROTARY POLISHER and doing it in a way that a person won’t GOUGE the plastic surface.
Until I started showing others the trick is to use multiple interface pads so the sanding disc will flex backwards instead of gouging the plastics. Maybe someone else figured this out too, but I’ve never seen a video or how-to article showing and explaining the process.
Most people I’ve known over the last few decades that do headlight correction use some brand of random orbital polisher and while these work, because they are FREE SPINNING – it’s a slower process. With a rotary, because it’s gear-driven, it’s a FAST process.
But however you get to clear headlights, that’s all that’s important.
-Mike Phillips