


Choosing the right machine to polish a car’s paint is essential to getting the best results. Yet there are so many different machines on the market — random orbital, forced rotation, rotary — it can be hard to know what to use and when.
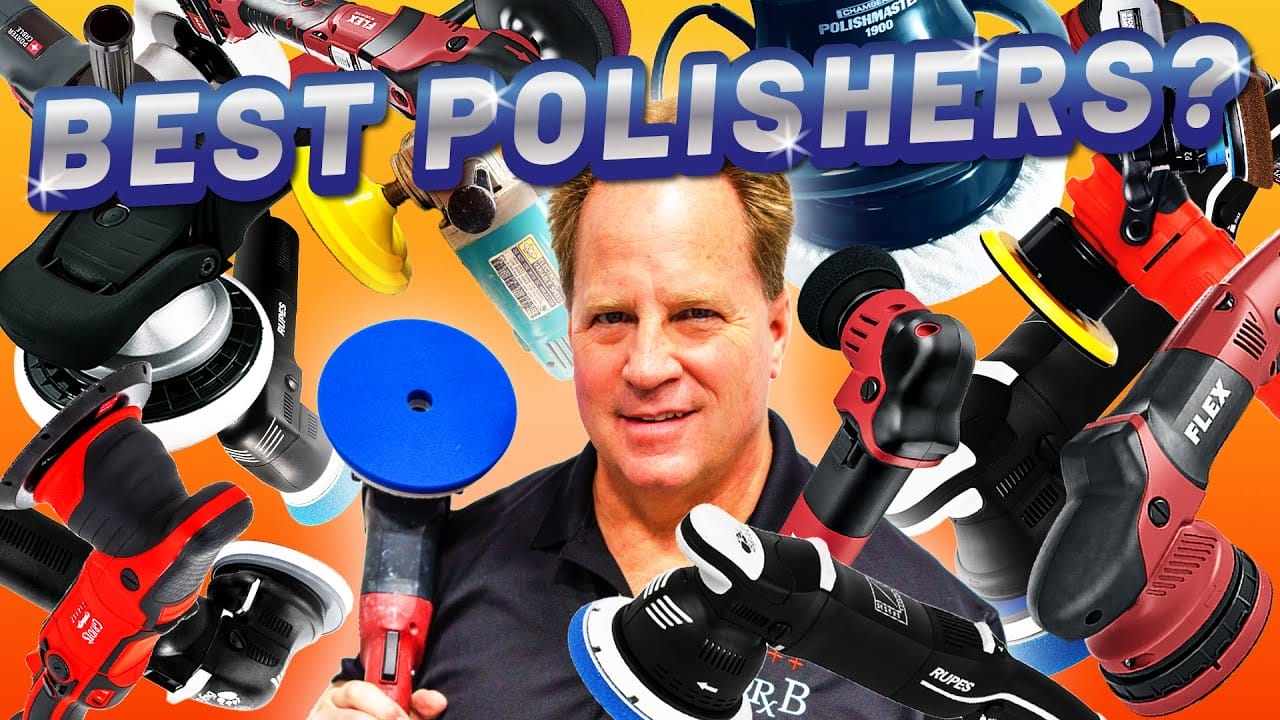
Our Chief Education Officer Mike Phillips recently covered this topic in a livestream on our YouTube, Facebook and Instagram pages, breaking down the different types of polishers and the brands that make them so you can make an informed decision when polishing a vehicle’s paint.
Check out the video below and follow along with the transcript included.

Today’s kind of a fun topic. We’re going to be talking about tools. So when we talk about all these tools, all these tools will get the job done.
What it really comes down to is something that we talked about on one of the Facebook groups. I think it was Detailing for Money. And a longtime good friend of mine, Barry Theal, mentioned my name in a discussion about rotary polishers. And people were talking about which polisher was the best. And I came up and just said, it’s not which polisher is the best. It’s using the right tool for the job.
Okay, now you add personal preference. You can choose the right tool for the job or you can use the wrong tool for the job because it’s your personal preference. But I always believe in using the right tool for the job.
So let’s just talk about the rotary polisher. This is the Flex cordless PE-150. This If you look carefully, you can see there’s two different colors of red here. This is kind of a light red. This is a more of a maroon red. It’s got a funny looking red sticker. This is a prototype. It doesn’t even have a serial number. So before they launched this tool in production and introduced to the world, about a year before that, they sent me this and I can’t even count how many cars I’ve buffed out with this rotary.
And the thing about the rotary is because it spins a pad in a circle, especially like a wool pad or a fiber pad, it is the most aggressive, thus the most powerful tool when it comes to removing deeper defects fast. Or also if you sand down a car, like the entire car, and you’ve got to pull out all your sanding marks, sure you can do it with an orbital, but I guarantee you, you’re going to get the job done much faster and more effective using a rotary.
Now, a lot of people over the years have seen, there’s a lot of times there’s a hole in in the center of the backing plates for these things. And I just want to show you what that’s for. This is a brand new wool pad. And this wool pad came with this little cardboard tube. And what you do with that tube, let me show you this, it’s kind of a snug fit, is you’re supposed to put that tube inside that hole, and that’s an alignment dowel, kind of like if you’re putting a bell housing on the back of an engine, if you’ve ever done that before. Then you just take simply and line up the hole here, slide that on, and you just centered… just centered your pad.
And probably the most important thing you can do when you’re using a wool pad on a rotary polisher is to center that pad and make sure it’s true. If it’s not, it’s kind of like, I’ll show you. It’s kind of like a big orbital. But it’d be like going down the road in a car with a flat tire. Womp, womp, womp. It won’t buff smooth. It won’t buff easy. It’s going to wear you out. It’s not going to remove defects in a very uniform way because only portions of the pad are touching at one time.
So take all the time it takes to center that up. And then a little tip I show is once you got it. Look, I just did that without the tube. So I’ve been doing this for a while. Take a Sharpie marker and just… Mark the back. And then when you take this off, see the circle? That’ll make it faster to reinstall this and get it centered up. Anyway, that’s one of my tips for that.
And then when you’re cleaning these, I see a lot of guys use a screwdriver. Don’t be that guy. Get a get a spur. Then usually what you do is you kind of lock this against your leg and then run that in and out. And that’s how you clean that pads with the spur. What happens if you use a screwdriver is it’ll find a sweet spot where it likes to kind of hang out and you start digging a trough in there. You will shine up your screwdriver, but it’s not the right way to do it.
Anyway, rotary polisher. I also show a lot of people how to attach a brush like this and use it to machine scrub tires, body cladding, non-skid in boats, about anything that you can scrub with the hand brush you can machine scrub. I did a set of spoke wheels the other day ago.
Nowadays, I show people how to apply a tire dressing with the same brush. Clean the brush first, put the dressing on with like a paintbrush, and then work it in. It really does a good job of working the dressing into all the nooks and crannies, all the lettering, and what’s called siping. Siping are the lines sometimes you see on the sidewall of a tire.
So rotary polisher, super effective tool. I post a lot of pictures of the cars I buff out, and a lot of times you see me using rotary. It’s because so many of the cars that come in here are so… jacked up. They look like they’ve been used as a hockey puck that sure I could fix it with an orbital. It’s just going to take longer. So I just nail, I just get in and get out. So I use a wool pad on rotary.
And then the key about that is as long as you’re using good abrasive technology, what that means is the holograms you’re going to leave behind because you are going to leave holograms, but they’re only going to be the thickness or the the depth of the fibers cutting the paint, okay?
So it’s not like they’re real deep holograms because if you use good abrasive technology. If you use bad abrasive technology, what we call rocks in a bottle, now you’ve got the fibers putting a scratch in and you’ve also got the abrasives putting a scratch in. So now you do have a deep hologram. Now it will be a lot of work to take it out using an orbital polisher in a second step.
Okay, so that’s the rotary. Now the next tool I’m going to talk about here is the beast. Okay, so I have one of the original beast tools here. This is called the Flex XC 3401. Craig, could you go grab, I got two books in there. One’s on the Flex, one’s on the Rupes. Anyway, this tool is easily identifiable because it’s got this exposed aluminum head. And if you’ve ever used one of these a lot, you notice if you touch it after you’ve been buffing for about an hour, it gets kind of hot. So don’t touch it.
But the thing I want to show people about this is first of all, thank you. First of all, when we talk about orbit stroke length, and here’s a chance for you might be able to zoom in. I’m going to bring this thing up to speed. And if you look carefully, you’re going to see two perimeter circles, an outer perimeter and an inner perimeter. And the distance between them is eight millimeters. That’s the orbit stroke length.
Does that show up, Craig? zoomed in okay so there’s the outer perimeter inner perimeter and it’s kind of hard to see because it’s not very big eight millimeters is not very big but when we talk about overstroke length and when I get over here to the big foot 21 you’re going to see that grow and you’ll see what I mean but that’s how I teach people in our classes What’s meant when someone says orbit stroke? It’s got an eight millimeter. It’s got a nine millimeter. It’s got a 15 millimeter. That’s what that means.
Okay, now when you first buy one of these, here’s my advice. And I did include this in my book. I wrote a book for the Flex Power Tools. I forget what page it’s on. But when you buy it brand new out of the box, take it apart and take some air tool oil or some 3M oil.
And this is a little felt ring in here. and you want to take and lubricate the ring now flex says you don’t need to do this but I mean i’m not going to go against anything they say but let me show you what happens if you don’t do it here is a brand new backing plate and if you look right here this is what rides on that felt ring it’s shiny plastic okay here’s one that i’ve used before I lubricated the felt and it is It is completely dulled and marred up.
And as I was pushing down, little pieces of plastic were flying out. So if you lubricate it, you won’t scar it and you won’t have pieces of plastic flying out. If you don’t lube it, you’re gonna wear out your backing plate and have little plastic pieces flying out on the paint as you’re trying to buff it. So take my word for it or not, but that’s how it works.
And just make sure that anytime you dismantle one of these things, do not lose the bolt and do not lose the washer. The washer is extra thick so it won’t cave in like a normal washer. And the bolt is precisely long enough to give good attachment strength to the backing plate, but not so loose that these exposed gears could back out and strip. So you don’t want to use an oversized bolt. You don’t want to use an undersized bolt. So don’t lose the factory bolt and the factory washer.
Okay, that’s what I got for a flex. so this is the cordless version. And I nicknamed it the C Beast because I type a lot of articles and I didn’t want to type out cordless beast, cordless beast. So I just shortened it and I added the letter C to beast. That’s where it got the name C Beast. So then they brought out, this came out after the original beast. Then they brought out the Super Beast.
So let me tell you the difference between the beast, the super beast, and the C Beast. It has to do with the OPM and the RPM. I’m going to look over here because I got it written down. The beast is 480 RPM and 9,600 OPM. The super beast is 430 RPM and 8,600 OPM. And the cordless beast is the least powerful of all.
It’s 380 RPM. and 7600 rpm okay so and the flex engineers they knew that if they made this the same gear ratio as the corded beast it would just run the battery down so I always run into people that want to know why are the other tools less powerful well sometimes just give the engineer credit maybe actually know what they’re doing okay so It has less OPM and less RPM, so the battery runs longer. It’s not as powerful tool. If you need a more powerful tool, get one of the corded tools. It’s still a great tool.
Now, the thing about the OPM, and it has less RPM and less OPM than the original, and the reason why is because a lot of people complained that the Beast, well, it was the Beast. So it’s lighter, quieter, cooler, smoother. Repeat after me. Four things, lighter, quieter, cooler, smoother.
Four new improvements besides the overmolded head and now the aluminum head is still there but it’s covered up by plastic so you don’t burn yourself but lighter quieter cooler smoother part of that comes from lower rpm lower opm so you know pick your poison if for me I usually grab the beast because I want to go as fast as I can and I like the 480 rpm and the 9600 opm I want to plow through a car but keep my quality high.
And one of the things that’s nice about a gear-driven tool, whether it’s the Rupes Miele, the Makita PO5000C, any of the Flex Beast tools or the new Harbor Freight Hercules, any gear-driven tool you have is one of the things that makes it faster than a free-spinning tool is if you want to, after you put your abrasive technology down, you can push on it and the pad will install it so you can push harder, move the tool faster, and buff out a car faster. Been doing this for a long time, so I’m pretty confident in what I’m saying here.
With free-spinning tools, even if we’re talking about the Porter cable, As soon as you push down on it hard, the paddle stall out. So you can’t push down on it hard. So you can’t engage the abrasive. So you can’t go faster. So just a little bit of difference there. Anyway, so there’s rotary. There’s the three beast tools.
Now down here, this, I always forget the name of this because I always tell tool companies to give things a name, a nickname, like Rupes gave their tools Bigfoot or the Miele or the Duetto. It’s named after an Italian sports car, Alfa Romeo. So give it a name. And they brought this out. I forget what it is. But both these companies jumped on these micro tools. Here’s the Rupes version.
By the way, notice the white plastic caps. These are both prototypes that these companies sent me to test out. You turn this one on. This is a 12-millimeter free-spinning random orbital tool. Let me turn the speed down on this, and let me show you what 12-millimeter looks like. Okay, see the inner perimeter and the outer perimeter? That’s 12 millimeters, okay? Okay, and Flex did the same thing.
This is… There’s the outer perimeter, the inner perimeter. That distance there is 12 millimeters. And I’ve been told I think this is going to be discontinued. One of the reasons it’s going to be, if it is, if that’s true, it’s just simply because it’s a tool that’s hard to maintain pad rotations for effective and speedy defect removal.
And one of the things that I shared in my Rupes book, I’m not sure which page it was on, but I talked about the cause of pad stalling. And there you go, Rupes. And notice when I wrote this, it’s not how to use Rupes polishers. It’s how to use the Rupes Bigfoot paint polishing system because they actually made a system.
This book was never about tools, about their system, which is a great system. But here’s what I told people. When it comes to free spinning tools, and here’s the Bigfoot 21. Let me turn this on and you can check out the orbit stroke length. So here’s the outer perimeter. Here’s the inner perimeter. Look how big that stroke is. But that’s what they mean when they say orbit stroke length. It’s that length.
It’s the length of the orbit, the diameter of the orbit. But as soon as you go with a large stroke tool and the pad, what happens is the outer edge of the pad has leverage over the reciprocating drive unit in the center. Bigger the pad, think of like a stick and a fulcrum. You’re trying to lift the log up. If you got a long stick going to a rock, you put that over a log and then you got a tiny little stub there to try to push on.
You’re not gonna be able to lift the rock up. But if you have the lever close to the rock and a big old long chunk of handle coming out their side, you can easily push down on it, leverage it and move that rock. So this leverage, same kind of idea applies here. The larger the stroke, usually the larger the backing plate the tool comes with, which means you can turn and turn a larger pad.
But now the outer edge of that pad has leverage over the reciprocating component of the tool. Um, anyway, so just real quickly, this is a 12 millimeter and, um, I’ve, I’ve never really used this tool that much, mostly because I just, I don’t like struggling to maintain pad rotation. Um, and if you want one, you better get one. Cause I heard we’re going to discontinue it.
Okay. Now we’re going to jump over here to the Rupes 15 and 21. So these are what are called free spinning random orbital polishers. Now notice when I talked about the beast tools, I never used the word random, um, This is an 8-millimeter gear-driven orbital polisher.
There’s no randomness in there because there’s a set of gears that are going to exactly cause that pad to oscillate in the same pattern no matter why. When you go to a free spinning tool, because of the way you hold it or the speed you’re on, or the shape of the panel, the oscillating pattern can change. So it’s random. It’s a random orbital because it’s a free spinning tool.
So there’s the difference between gear driven and free spinning is that random aspect. Okay, so when they brought these out, and I think it’s Kevin Brown that gives credit for it, kind of introducing these in American. He’s been doing this a lot longer than me, so he should know.
But the whole theory was is when you have a long stroke orbital polisher is what’s happening is the pad movement is moving your braces over a larger area at the same amount of time as a short stroke. So it’s doing more work. Therefore, it’s faster.
And with that kind of philosophy going taking place, you don’t have to push down. You’re counting on the long stroke. travel motion of the long stroke orbit tools to move the abrasives to do the defect removal quickly. So that’s what it’s all about. And apparently it does seem to work. I’ve used these since they were introduced to America.
This, by the way, is… Let me look on here. This is the number 16, mark two, given to me by Rupes at SEMA. And this is the number six, number 15, given to me at SEMA by Rupes. So I’ve had these for a long time and they still go strong. The blue tape is actually, when I used to be at AutoGeek, we had so many tools there that I just identified this as mine. So if I saw somebody walking out of the building with it, I’d say, hey, enjoy my personal Rupes.
Okay, so those are long stroke, free spinning tools. Over here is the Rupes Duetto. And this again is a prototype Rupes sent to me. And all my tools still work. This is 12 millimeters. So let’s look at the orbit stroke length. Here’s the inner perimeter. Here’s the outer perimeter. That’s 12 millimeters. And when this tool came out, I really wanted to like it because, look, it looks a lot like the Porter Cable, which, you know, millions, if not billions of cars have been de-swirled with this simple wood sander.
But I just struggled, you know, to maintain pad rotation. So I haven’t tried one of the newest ones for a long time. I’m sure with everything Rupes makes, it’s improved. I’m sure it’s a better tool nowadays. I kind of wish they would have just brought out like an eight millimeter, nine millimeter, and it probably would have had better pad rotation because of the leverage factor of the outer edge of the pad.
This is the Rupes Mini, which I kind of already showed you. Again, another free spinning tool. This is also, I think, 12 millimeter. Okay, now we’re going to jump over here. Griots, for years, Griots and Meguiars actually both introduced the Porter Cable sometime back in the 1980s. And I’ve got this article that’s been around for about 15 years that talks about the Porter Cable. And what it was is a wood sander.
It came with a vacuum attachment here, and you could hook it up to a vacuum. And as you’re sanding wood, you could extract the dust and make it really safe for breathing. And it was a wood sander. And then somebody at Meguiar’s and somebody at Griot’s, they happened to find out that they could put a, instead of a sanding disc, they could put a buffing pad on there. and you could buff out paint.
And kind of the primary difference that a lot of people don’t understand is when it comes to wood sanders, most of them are pneumatic. They’re air powered. Well, and I’ve been asked this question a lot. People go, well, hey, Mike, I don’t got a Porter Cable or any of these other things, but I’ve got this DA sander. Can’t I use it to polish up the car? No, because it won’t maintain pad rotation.
So this was the only wood sander at the time that you could also sand wood with, but once you put a foam pad on there, it would maintain pad rotation. So that’s why Meguiar’s and Griot’s Garage introduced it to the paint polishing world. But the other key thing about that is, is even if you can understand the concept of having a pneumatic or air-powered DA sander, a lot of people don’t have a big air compressor, but anybody can plug this into the wall.
So it opened up paint polishing to the world, at least the United States world that runs on 110 volts. Anyway, so Griot’s Garage, they had a copy of this, and everybody called it the GG6, the Griot’s Garage 6. And this is kind of funny. The reason they called it a 6 is because it came with, one second, it came with a 6-inch backing plate.
Let me grab one to show you the difference here. Okay, here is a six inch backing plate. So everybody called it the GG6, which meant Griot’s Garage six inch. But they should have never named it like that. Just like a lot of companies named their tools wrong. Here’s a five inch, here’s a six inch. You can see the huge difference in it. But this is the Griot’s Garage GG6 was an 8-millimeter free-spinning random orbital polisher, just like the Porter Cable.
So they should have called it the GG8, okay, for 8 millimeters, because the backing plates you can change. I could put a 3-inch, I could put a 5-inch, I could put a 6-inch on there. So it’s a relative number, but, you know, that’s all history, but they did that. So… going back to the GG6. So after a few years, they wanted to upgrade.
So they brought out the Griot’s Garage G9. So this is a nine millimeter orbit stroke length. And if I come in here and let’s see, there we go. Here’s a perimeter. There’s a perimeter. And that’s about nine millimeters. That’s the orbit stroke length. And this is kind of a unique tool when they brought it out. One of the things that made it unique is you could unplug the power cord for storage. It’s very versatile, smooth, lightweight.
But you’re back to another free spinning. That’s how I show people free spinning. It’s a free spinning random orbital polisher. And I’ll talk about this in a second, but that’s one of the things about a free-spinning random orbital polisher, unlike a gear-driven orbital polisher, is there’s always that chance for the pad to not oscillate or rotate or both. Most people call that pad stalling. So you always got to look at it.
Okay, then over here, I forgot this one, but this is the Flex “Finisher”. So this is a 15-millimeter. 15-millimeter, and here you can see the outer perimeter, inner perimeter. 15 millimeter free spinning random orbital polisher and I just want to throw something your way they call this tool officially the finisher okay now let’s compare and contrast that they don’t call it the heavy duty oxidation remover or the heavy duty swirl remover it’s the finisher.
So it’s a 15 millimeter free spinning tool that they decided to call The Finisheer, because its primary purpose is more for finishing, not doing heavy-duty correction work, okay? That would be another tool. Okay, so that kind of goes over here with the flex collection. This is also a prototype, too.
It might be hard to see, but it’s two different colors of red. I got this as a prototype. I got a lot of prototypes up here. Okay, so we talked about the G9. So let’s go down here to the lowly porter cable. And I kind of talked about it already. It started out its life as a wood sander. Someone found out it could maintain pad rotation. And I just want to show you something that here’s what most people do when they’re using the porter cable or any free spinning type tool. You take and you attach your pad.
And the method I use is take your thumb and bring your thumb in contact with the backing plate as you start to lower this down because I’m old and shaky. I’m not that shaky. Okay, but at least if I’m shaking and once my thumb’s attached here, they’re shaking in unison. But you’re trying to bring this down and guide it and center it, because no matter what kind of tool you’re using, it’s just so important to perfectly align that pad to the backing plate for maximum efficiency, maximum performance, least amount of vibration. But here’s what most people do, is they take a Sharpie marker, which I know I have one up here somewhere, amongst all my stuff. Where is my sharp, oh here it is.
Take a Sharpie marker and you mark the side of your pad or you mark this back of the backing plate. And the reason for that is so your eyes can more easily monitor pad rotation or pad stalling. And the way that works is if I didn’t mark this, it’d just be a, when it’s spinning or jiggling, it’s just a yellow blur. It’s hard to tell, is it rotating or is it stalling out? Once you put the mark on there, Now you can easily see, you know, is it rotating or is it stalling out? Okay. So, and then when you see if it’s stalling out, then that tells you there’s a couple of things you can do. You can bring your speed up.
You can try holding it at a different angle. Maybe you don’t have the pad flat to the surface. More pressure on one side of the pad will cause the pad to stall out. And also as pads become wet, so think about it. Say I’m compounding this beautiful 1970 Charger back here. Say I add three peanut-sized drops of compound.
I put it down in buff. I come back and put three pea-sized drops of polish and come back and buff. And pretty soon, at that moment, when you put the pea-sized drop on there and put it against the paint, foam does what it naturally does. It absorbs some of it, plus that violent oscillating action causes the liquids to migrate into the pad. Pretty soon, you do a fender or two, and this pad is saturated, becomes wet. And all these free spinning tools will maintain pad rotation better if it’s a clean dry pad versus a wet saturated pad. So one of the things you can do if you start to see your pad rotation, pad oscillation fall off on a free spinning tool, no matter what the brand, switch to a dry pad.
Okay, let’s see. This, I just wanted to bring this up. This is, they call this the GG3, because it takes, it has a three inch backing play, but it’s a five millimeter, so they should have called it the GG5. But for years when this thing was still available, I told people to buy one, and people would always come back and say, well, Mike, it’s not very good at paint correction, because it won’t maintain pad rotation, pad oscillation very well.
And I says, well, don’t buy it for that. I use it as a sander, okay, as a micro sander. Here’s a three inch interface pad. Here’s a piece of 2,500 grit sanding disc. Now you’ve got a great compact sander. And then they took this thing off the market. The last time I saw one of these for sale was up on eBay for 165 bucks new in box. So you can still find them, but they do get your premium price. And it’s a handy little tool. Just don’t use it for paint correction, use it for, I mean, if you don’t do sanding then, but I show people how to use this for headlights. sanding down headlights.
Now, Flex introduced this, it’s called the PXC80. And this is what I show now for machine dry sanding or machine wet sanding, if you’re doing boats or cars. And what made this unique was when they first brought this out, it came with three drive units. It came with the rotary, three millimeter and 12 millimeter. So rotary would be direct drive, three millimeter and 12 millimeter would be free spinning random orbital, just like these other random orbital polishers here. And I looked at this and everybody goes, wow, that’s a great idea. And I go, that’s a great idea. That’s my new sander.
You know, the first thing I thought about, but the problem was, is you can’t stand in rotary mode because that’s called grinding. And if you tried to maintain pad or sanding disc rotation with the three millimeter, it just didn’t have the power because… There’s these things have a counterweight. What the counterweight does is builds up inertia and inertia helps to maintain pad rotation.
But the three millimeter just didn’t develop enough inertia because the counterweight is so small. The 12 millimeter was better at maintaining pad rotation because the larger counterweight does better inertia. But now you’ve got something with this huge orbit stroke and you can’t send next to a raised body line or an edge without hitting the raised body line or hitting the edge. And then you come back. But if that’s your standing marker, it should burn through the edge.
So I contacted Chris Metcalf and said, hey, could you have your engineer buddies make me a six millimeter? This is the original one. You can see I just wrote six on there with the Sharpie marker because the new ones here, I’ll show these both up. The ones that are, oh, these are both. But the new ones, the ones that they’re making nowadays, it’s actually imprinted onto the housing.
These are both prototypes they sent me. I can’t believe I still got two of them. People always want to borrow them from me and never give them back. But the 6mm enabled you to stand close to an edge without standing on the edge, and it had enough counterweight to maintain standing rotation.
So just a couple of things to keep in mind, but that is the Pixie. And of course, the Pixie also has this cool little tool here. It’s called the Flexi, the Flexi shaft. And of course, with this, now you can take and… get into tight areas like underneath the door handles and remove fingernail marks.
Okay, so moving right along, I think we’ve covered all these tools. We get down here, there’s the Udos. This is the Udos 5-in-1, okay? And what this does is it offers rotary mode, 8mm for sanding, 12mm, 15mm, and 21mm for paint correction. And it’s an actual, an engineering marvel how they designed this So you just adjust the collar to change the different actions. At the same time, it’s completely balanced.
And so hats off to Lake Country. You know, a lot of people talk about doing something. They put their money where their mouth is, and they actually brought it out. And now they’ve got the new UDOS 3-in-1, which is rotary. I think it’s rotary 8 millimeter and 15 millimeter. I could be wrong on the 15. I’m not sure. Someone with Lake Country, please correct me if I’m wrong. And I’ve used that tool at SEMA. I thought it was a much improved version of this. You get three tools in one.
And then if we look down here, this is something nobody’s probably ever seen before. Bob Eichelberg gave me this to test for Flex. And it looks like something like a cyclo. Let me turn it on here. and uh I tested it and I just thought you know um i’m probably one of the only guys in modern history that have taught full-on classes with cyclo tools when I was back at the geek I had 24 of them and I would bring in big cars like this two sometimes three at a time put a cyclo into everybody’s hands and teach them how to use the cycle a real cyclo class.
And even back then, when I hold the cyclo, because of the way the pads are oriented, there’s a couple dynamics going on here that, for me, it just didn’t work. One, instead of monitoring one pad, or let me get a bigger one, instead of monitoring one pad, now you’ve got to monitor two pads. And And when you’re going side to side, you got good coverage because both pads are affecting the paint. But as soon as you start going up and down, now you got this space in the center that’s not getting buffed at all.
So then you have to cant it, you know, or tilt it. It just was too much work for me to use the cyclo and also to use this tool. So after I reviewed it, I kind of gave it a thumbs down. And I think they may actually sell this in Europe or the UK. I’m not sure, but it never made it to the U.S. market. And then I wanted to bring this out.
Because this is what’s called a TOB, traditional orbital buffer. Or some people call it the steering wheel buffer, because it’s like a steering wheel. And these things basically have one speed. And what you do is you change bonnets out. You can get different bonnets like a wool bonnet, microfiber bonnet, cotton bonnet. And you change the bonnet depending on what you want to do. They’re one speed, so there’s nothing to adjust there.
And let me tell you, these were popular back in the 1940s, the 1950s, even the 1960s. because back then the paint we had was single stage and single stage would oxidize so it’d get chalky looking and you could take a tool like this and think about how big those cars were big old 1949 dodge wafer big old rounded fenders but you could throw a compound on here turn this on it would chew that compound right off switch a different bonnet throw some wax now you can wax it so on the old single stage paints they actually were pretty good as soon as we went to modern clear coats because the paints generally speaking get harder.
And the pad’s so big and the OPMs are so slow, they really become what we call wax spreaders. They’re just really good for spreading wax. And I’ve been packing this around for probably 20 years because when I used to teach all these classes at Meguiar’s, you know, you bring everybody in, you go through a PowerPoint. I call those academic classes. You go through a PowerPoint, you talk about the credibility of the family business and all that some good stuff. But at some time, You start talking about the tool they sold, which originally was a Porter Cable.
Then they renamed it with the sticker and called it the G100. Then they redesigned it and brought it out as the MT300, which is still an 8-millimeter free-spinning random orbital polisher. But you don’t want to get this tool in there. But somebody in the class, and I taught hundreds of classes in Irvine, California, for all the car clubs. But inevitably, someone would always say, hey, Mike, I don’t got that Meguiar’s polisher, but I got one of these. Can’t I use this?
And the answer is always a very polite, No, you can spread a coat of wax out with it. I’m trying to protect these. I only got a few of these left. But they’re pretty much useless as far as taking swirls and scratches out of modern clear coats. So thus, the traditional orbital buffer, the TOB, is a wax spreader or a door block. Keep the door open. Anyway, that’s kind of what I got. These are the tools. Let me talk about short.
I did talk about short stroke and long stroke and also hard paint and soft paint. I think this is my own experience. If you’re working on a show car, a black show car, and you want to give the ultimate finish for the finishing step, nothing beats a 21 millimeter free spinning random orbital polisher with great abrasive technology. And of course, matching the pad to the process that you’re doing. If you’re trying to look for speed, then a gear-driven tool, you’re not going to have to monitor pad rotation.
But the short stroke, the thing I like about short stroke is a lot of times I will grab the porter cable just because it’s got the 8mm short stroke and it has a smaller pad. There’s less leverage of the outer edge over the reciprocating component. It’s just easier to maintain pad rotation without thinking about it. And that kind of brings me to something that I teach in all my classes. And that’s when you’re using a free spinning tool versus a gear driven tool. Let me hold up the cordless beast here.
So listen to this. You can hear the gears. Okay, so gear driven. There’s no black mark on the backing plate and you don’t need to mark the pad. And here’s the difference between using this and a free spinning tool. I’ll pick on the Porter Cable. With the Porter Cable or any free spinning tool, what most people do is they mark the side of the backing plate or the pad So their eyes can see if the pad’s actually rotating and oscillating. And if not, then they can change what they’re doing.
But doesn’t that mean, say, if it’s going to take me four hours to compound this car, doesn’t that mean for four hours I got to look down and go, is the pad rotating? Is the pad rotating? Is the pad rotating? Is the pad rotating? For four hours, okay? You grab a gear-driven tool. You don’t got to do that. Turn it on and go. You don’t got to look. It’s going to rotate no matter what because it’s gear driven. So for me, you know, a lot of people think I’m a big flex fan and I like flex tools.
I’m not saying I’m not, but I’m an eight millimeter gear driven orbital fan. You know, if other companies would have brought out eight millimeter instead of four millimeter, five millimeter, I’d probably use and love their tools, but they didn’t. They brought out shorter stroke Gear driven orbitals and I just find they yank me around too much. So I stick with the eight millimeter I have not tried the Harbor Freight Hercules, which is a exact knockoff of the Rupes 3401 you know, so
All the reviews I’ve seen are good for to cost a lot less but you know It is German is the Mercedes-Benz of polishers Harbor Freight is the is usually the lower end, but hey if it works it works I think that’s all I got for you So, oh, hard paint, soft paint. Someone had asked about this in the comments. When would you choose one tool over the other? Great question. You know, years ago, I was asked to detail a museum car. It was sold. It was sat in a museum for 20 years. It was a Ferrari.
I think it was a P3 or P4. I can’t remember. But it was one of three built. Very, very rare. Very swoopy, very beautiful, single-stage red paint. Of course, when I got there, it completely scratched up. And I compounded it with the Beast, and then I polished it with the Meguiar’s MT300, which is a…
Or actually, it was the G100, which is… their version of the porter cable so free spinning eight millimeter and someone in this thread in the comments said mike we noticed you started with the beast but you finished out with the porter cable why did you do that and the answer is is because when it comes to softer paints generic you know just uh generally speaking a free spinning random orbital polisher will finish out nicer more consistently on softer paints than any gear driven tool.
So there is a time to go to soft paints. A couple of weeks ago, we had a 1969 GTO in here and I finished it out with the Beast, but that’s because I’m using great abrasive technology. The Dr. Beasley’s NSP45 worked great on that. But if I ran into any kind of troubles, I would have switched over to a free spinning tool and it would have helped with that problem of micromarring on soft paint. Not because the products I was using are bad, but because the paint is soft, very delicate. That’s all I got.
Questions? Comments?
Email Us