


Last Updated March 20, 2026
Awesome People – Amazing Results!
All 3 cars came out phenomenal, and I’ll be sharing the before, during and after shots below. But first, here are the 7 people that took this 1-day class.
Nelson – Bogota, Columbia

Nicolas – Buenos Aires, Argentina

Doug – South Carolina

Walter – Florida

Eugene – Florida

Juan – Kentucky

Mark – Florida

Thank You!
Thank you to everyone for putting your trust in the good name of Dr.. Beasley’s as well as my own. I hope the class was everything you hoped for and expected.
I truly appreciate that each one of you were focused on the task at hand as we worked through the three primary topics and the matching car for each topic. I feel confident that are all SUPER COMFORTABLE using all the popular types of polishers including, Rotary Polisher, Gear-Driven Orbital Polisher and Free Spinning, Random Orbital Polisher.

Before Condition – Documented – 1991 Dodge Stealth R/T Twin Turbo AWD – Barn Find!


Detailometer Before Readings


Ouch! Not looking good…


More Ouch! – Not looking any gooder!

Extreme Prep Wash
First thing was to wash away years of dirt build-up and even what looked like green mold.

Thank you, EGO, for sponsoring our car and boat detailing classes!


Test Spot
First thing after washing, decontaminating, machine polishing the glass, machine scrubbing the tires, then rinsing and drying off, it’s time to dial-in our Show Car Detailing Process by doing a Test Spot.

Test Spot is successful, next the class takes over and I walk around and watch and when needed, tweak technique.
At 7:30am it’s GO TIME!
1991 Dodge Stealth R/T Twin Turbo AWD – Barn Find!
First up is this 1991 Dodge Stealth that has been sitting under a tree for years!


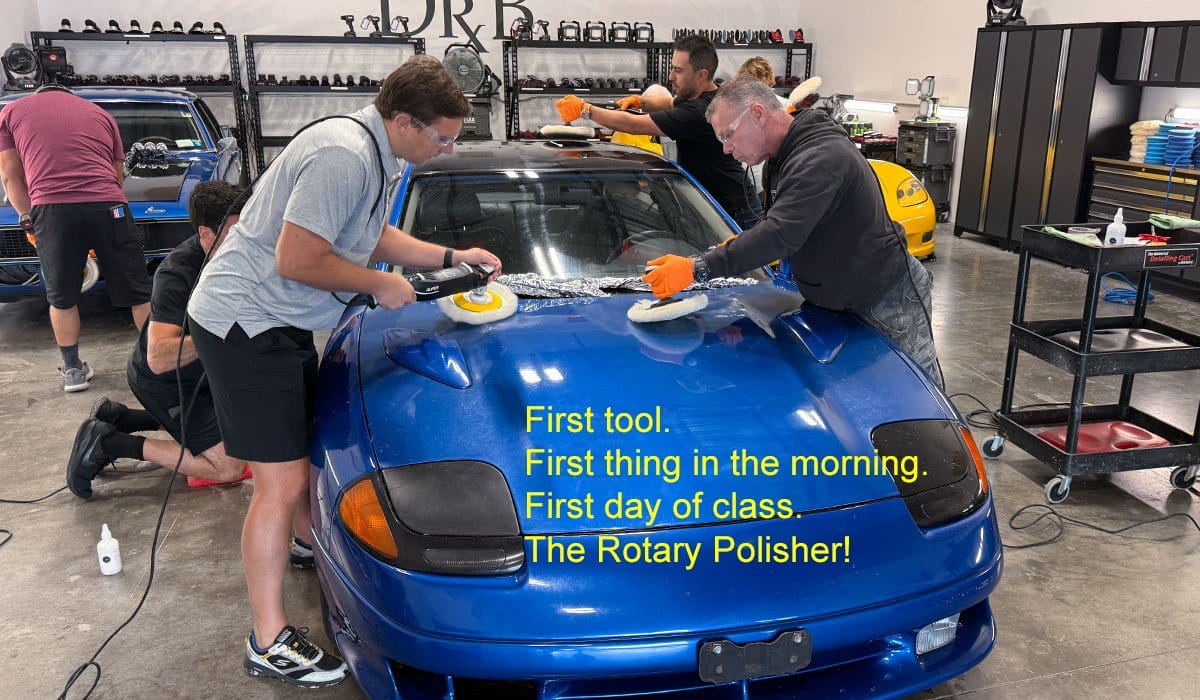
The first tool my classes learn to use is the rotary polisher. Why? Because of the old saying,
“Use the right tool for the job”
Well… sometimes the rotary polisher is the right tool for the job and when anyone leaves one of our classes we want you to,
- Know how to use a rotary polisher.
- Know when to use a rotary polisher.
- Most important – feel comfortable using a rotary polisher.
And of course, we follow all our rotary work with orbital work to ensure 100% there will be no holograms left in the paint.
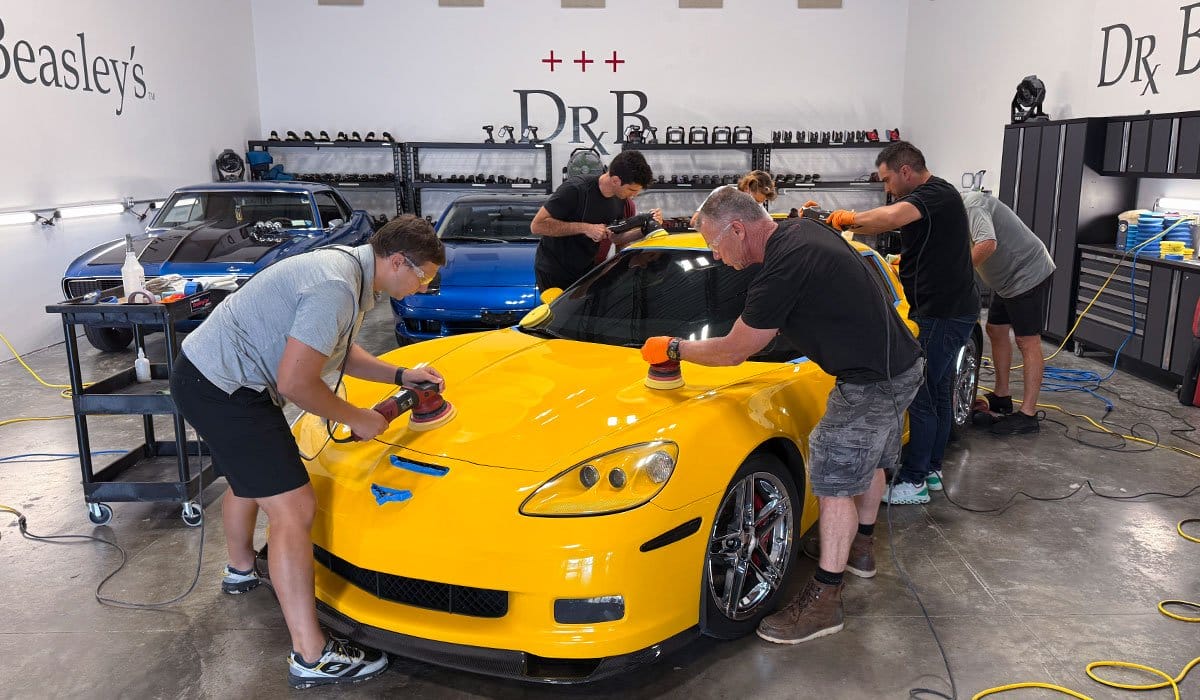
Rotary Polisher Training – First Tool – First Day – First Thing in the Morning

Eugene working on the passenger side hood.

Mark working on the driver’s side hood.

Here’s Nelson tackling the driver’s side roof.

Here’s Juan working on the passenger side rear of the car.

Removing Swirls and Scratches out of the 34 year-old plastic taillights.


Here’s Doug doing some Topical Glass Polishing on the back window.

After knocking out all the higher horizontal panels, the class moves downward to the vertical panels.

Here’s Nicolas working on the passenger side door.


Here’s Nicolas working the rotary like a BOSS to remove years of neglect from the side mirror!

And here’s Nelson working the rotary polisher like a BOSS on the driver’s side mirror.


Here’s Eugene doing some Topical Glass Polishing to the passenger side windshield.

Nice work everyone, the decades of neglect have been removed using a wool pad on rotary polishers using Dr. Beasley’s CoreCut.
Next up… switching over to gear-driven orbital polishers.
Step 2 – Machine Polishing to Remove any Holograms and Perfect the Finish
After cutting he paint HARD using wool pads on rotary polishers, next up the class uses THEIR CHOICE – Gear-Driven Orbital Polishes with Buff and Shine EdgeGuard Yellow Foam Polishing Pads and Dr. Beasley’s NSP 150.
Eugene and Mark have chosen the RUPES Mille – which is a 5mm gear-driven orbital polisher.


Nicolas has chosen the FLEX Supa BEAST, which is an 8mm gear-driven orbital polisher.

Doug has chosen the FLEX Supa BEAST

On the driver’s side is Nelson using the FLEX Supa BEAST – 8mm gear-driven orbital


Looks like Juan has also chose the FLEX Supa BEAST


Here’s Walter tackling the rear of the car and he’s using the FLEX Supa BEAST

Why do you like the 6″ Buff and Shine EdgeGuard buffing pads on the OPTIONAL 6″ Backing Plate for the FLEX Supa BEAST?
Because the larger footprint of the larger pad gives you MORE REACH with a tool that has ZERO PAD STALLING – when buffing into tight areas.

See what I mean? With the larger buffing pad on the larger backing plate, Juan can easily knock out all the paint correction in the hard to reach tight areas.

Next up… time to install the ceramic coating using the Buddy System.
Time to Seal the Paint
To seal the paint, the class will be using the Dr. Beasley’s Nano-Resin 2.0 Ceramic Coating. This is an easy to use, even for first-timers, ceramic coating that maximizes gloss and shine while leaving behind a hydrophobic surface that beads water to help the car self-clean anytime it rains hard plus faster to wash and dry moving forward.
Paint Coating Builder
The first step is to treat all the paint with Paint Coating Builder. This will maximize clarity of the clearcoat while creating anchor points for the ceramic coating to form a stronger bond to.


Nano-Resin 2.0 Ceramic Coating
Next the class will install the Dr. Beasley’s Nano-Resin 2.0 Ceramic Coating.

Besides learning a lot, you make new lifelong friends. Here’s Nicolas and Juan installing the ceramic coating to the passenger side of the car.

Here’s Walter installing the coating to the driver’s side


Up front, Nelson coats the driver’s side of hood and front clip.


The Buddy System
Walter and Doug using the Buddy System to install the ceramic coating. The Buddy System is where one person installs the coating while the other person levels the coating and then removes any excess. The Buddy System is a fast way to get an entire car coated. If you work alone, you can always ask your wife, girlfriend, etc., to be your Buddy!


Here’s before and after
Before Condition – Documented
Here’s the Final Results!


Here’ the Team that made the Magic Happen!
From left to right – Eugene, Nelson, Juan, Mark, Walter, Doug and Nicolas

Before the class started, there was ZERO reflections in the paint – now you can see the student’s reflection in the hood.

Here’s the Detailometer BEFORE Readings for the CENTER of the hood.
The general idea for taking before and after readings is to try to take these reading in the same place for some level of control to show real-world results.

Ouch! Not looking good…

Here’s the Detailometer AFTER Readings for the CENTER of the hood.


Huge Difference!
Right below the Detailometer is a small piece of detailing clay and this is to keep the Detailometer from sliding off the hood and breaking.

For quick and easy reference, here’s the before and after stats

Here’s the Detailometer BEFORE Readings for the section of paint just above the
I measured this area on the hood because the Hood Blister will keep the Detailometer from sliding off the hood.
Here’s CONTEXT shot – so you can easily see the section of paint we’re going to measure both before and after readings.
This is what the paint often looks like for a Barn Find. Look how dull, lifeless and stained the paint is after years of neglect.
Measuring
More Ouch! – Not looking any gooder!
Here’s the Detailometer AFTER Readings for the section of paint above the Hood Blister.


Dramatic before and after difference!

For quick and easy reference, here’s the before and after stats

The Human Aspect
And of course, your eyes are also a great tool for measuring.
BEFORE
AFTER
And keep in mind, for the majority of people taking this class, this is their first time to use any type of polisher, so not bad.
Here’s a Quick Refence Guide to Understand the Results

Next up, the second training car, a 2007 Corvette ZO6
Next up, Car Number 2 and Topic Number 2
The first car was all about doing show car style detailing, which besides being a multiple-step process is also when you’re doing your best work ever to take the paint on the car to it’s maximum potential.
Mid-Range – 2-Step Paint Correction and Ceramic Coatings
For this next car, the class will focus on starting with gear-driven orbital polishers like the FLEX family of 8mm gear-driven polishers as well as the 5mm RUPES Mille and the 8mm Harbor Freight Hercules Forced Rotation Dual Action Polisher. After the first major paint correction step, they will do a second finish polishing step and for this it’s YOUR CHOICE for orbital polishers. The class can pick any of the orbital polishers off the tool racks and even test/use multiple tools – it’s all up to you.
For this topic and car, the class will start with the Dr. Beasley’s NSP 150 and finish with the Dr. Beasley’s NSP 95 and then seal the paint using the Dr. Beasley’s Nano-Resin 2.0 Kit.

Detailometer BEFORE Readings
Note the paint on this Corvette while neglected and with swirls and scratches, it’s not horrible. This is why I brought this car in for this topic. I match the condition of the car for the topic being taught. Yes, there’s a method to my madness.


Not too bad, but there’s plenty of room for improvement, so let’s see what the class can do.

It’s GO TIME! – Not sit in a chair time!

5″ Factory Installed Backing Plate versus 6″ Optional Backing Plate
Here’s Mark using the FLEX Supa BEAST with the factory 5″ backing plate. I keep ONE FLEX Supa BEAST in the shop with the facotry 5″ backing plate so the students can compare the same tool using the optional 6″ backing plate and of course, for each size backing plate – the matching size buffing pad. What I know and others can determine for themselves, is this tool has plenty of power to turn and churn larger pads and by using larger pads you can go faster because you’re abrasing/polising with a larger footprint. It also helps to stablize the tool and make buffing easier on you. And one more thing, the larger 7″ Buff and Shine EdgeGuard yellow foam buffing pad you see the students using because it’s larger – it has MORE REACH.
See my article for more info
Supa BEAST and CBEAST Backing Plate Swap by Mike Phillips

Here’s Eugene using the FLEX Supa BEAST with the optional 6″ backing plate and larger buffing pad.
Note the PowerPoint slide in the background shows the car the class is working on. This is the extent of my PowerPoints nowadays. More hands-on time, zero sitting time.

Here’s Nelson using the RUPES Mille, which is a 5mm gear-driven orbital polisher
Because it’s gear-driven, like the FLEX BEAST polishers, there’s’ ZERO PAD STALLING. Not sure why you never see much online talk about this tool.

Here’s Doug out back using the 8mm gear-driven FLEX Supa BEAST.

Here’s Walter using the FLEX Supa BEAST
Check out the reflection of the Dr. Beasley’s logo on the wall reflecting in the paint on the hood of the Dodge Stealth. When the Dodge Stealth first arrived, there was ZERO reflection. That was a GREAT WARM UP training car.


Harbor Freight Hercules Forced Rotation Dual Action Polisher
Mark started with the FLEX Supa BEAST and because this is how our classes roll, on the same car, for the same topic, he’s also testing out the Harbor Freight copy of the FLEX XC 3401 VRG aka the BEAST.


Here’s Nicolas using the RUPES Mille


Topical Glass Polishing
Another topic we cover in our classes is Topical Glass Polishing. Topical glass polishing is removing water spots, traffic film and drizzle stains off the glass while doing the paint correction step. In this case, Doug and the rest of the class use the SAME product for the first paint correction step for the glass. If the compound or polish is clearcoat safe, it’s glass safe. Note Topical Glass Polishing is ONLY removing gunk off the SURFACE of the glass. I do teach Sub-Surface Glass Polishing, which is removing scratches out of the glass, but that’s a FREE BONUS CLASS that takes place the day BEFORE the class for those that are interested enough to get to our shop the day before. There’ simply not enough time to included this during the Saturday class as you can see by the pictures, there’s simply too many topics we already cover during the actual class.

Tape-off and Protect Exterior Black Plastic Trim
Notice there’s not much blue masking tape on this car because there’s not much exterior black plastic trim. But what there is, we always tape-off and protect. It’s faster overall to tape-off and protect exterior plastic trim than it is to try to remove any accidental staining after the fact. Don’t learn this lesson the hard way.

Getting Glossy!
This is just after the Dr. Beasley’s NSP 150, but the paint is already looking super glossy!

Next up…
Step 2 – Finish Polishing with Dr. Beasley’s NSP 95 and students’ choice of orbital polisher.
Building on the results from the first step while maximizing gloss, clarity and shine
Next up, the class is switching over to Dr. Beasley’s NSP 95, which is similar to a FINE CUT POLISH with a soft white Buff and Shine foam polishing/finishing pad on their choice of orbital polisher.
Here’s Eugene and Mark tackling the hood

Here’s Eugene is testing out the CORDLESS RUPES BigFoot 21mm Free Spinning, Random Orbital Polishers

Here’s Mark using the Griot’s Garage G9 Free Spinning, Random Orbital Polisher. This has a 9mm orbit stroke.

Check out the spinning pad next to the Carbon Fiber Spoiler
Here’s Walter working on the rear deck with the FLEX Supa BEAST and here’s just ONE thing I like about the Buff and Shine EdgeGuard Pads

The outer edge of the foam pad is recessed, and this protects the paint from the backing plate and enables you to buff or REACH further into difficult areas to buff. Genius pad design.

Here’s Nicolas using the Porter Cable 7424XP Free Spinning, Random Orbital Polisher, which has an 8mm orbit stroke.

No chairs!
I love these pictures because besides showing the type of cool cars we bring in for you to train on, all you see are people on their feet with tools-in-hand, learning and training by doing – not sitting around watching a PowerPoint presentation. Nothing wrong with PowerPoint Car Detailing Classes as I use to teach using a PowerPoint presentation, but I cover too many tools, techniques and topics that I completely stopped using PowerPoint presentations to teach people how to detail cars. But… if you learn better by taking information in via your eyes, ears and taking notes, by all means, get signed up for some other company’s academic class.

Here’s Nelson using the CORDLESS RUPES BigFoot 21mm free spinning, random orbital polisher.


Wow! Look at the difference from a 2-step paint correction process!

Next up, the class will seal the paint using the Dr. Beasley’s Nano-Resin 2.0 Ceramic Coating.
Time to Seal the Deal
Next up, the class installs the Dr. Beasley’s Nano-Resin 2.0 Ceramic Coating. This is a hydrophobic coating that creates a high surface tension finish that beads water like crazy!

The Buddy System
In my classes, we use the Buddy System for a lot of techniques like installing the coating. One buddy applies the ceramic coating and then after waiting the the coating to flash, (about 45 seconds), the other buddy LEVELS the coating and then removes any excess. When we move onto the next car, the buddies switch roles so everyone gets plenty of practice installing a ceramic coating while speeding up the process so we can move onto the next topic and the next car.

If you’re going to install ceramic coatings, you need a great hand-held inspection light
The light helps your eyes to locate and identify any high spots. This is important because if you DON’T remove 100% of the coating, it will dry and harden and then the only way to remove it will be to machine polish the affected area. Dried, hardened ceramic coating that is not fully removed is called a High Spot.


Here’s Doug and Walter using the Buddy System to Install the Ceramic Coating

Here’s Juan working with his buddy, Nicolas to install, level and remove the ceramic coating.

Here’s Nelson installing the ceramic coating to the driver’s side roof.

And here’s Eugene leveling the coating, removing any excess and using a Swirl Finder Light to check for High Spots

Here’s the Final Results!


Final Touches
When this car arrived, the tires were dull with tire browning, also called tire blooming. Yours truly washed this car the week before the class because the focus of our one-day classes is paint correction, not washing cars. I used Dr. Beasley’s Intensive Wheel Cleaner to clean the wheels and brake calipers, (non-acid), I machine scrubbed the tires using Dr. Beasley’s new, yet to be released Foaming Tire Cleaner. And the class dressed the tires on this Corvette and all the tires on all the cars with our new, yet to be released Tire Coating.

Here’s the team that made the magic happen!
Amazing work everyone!


I’m pretty sure if you find Nicolas’s Instagram and Facebook pages, you’ll see this picture.
Thank you for travelling all the way from Bogota, Colombia to take this class Nicoloas.

My comments…
When you look at the before readings from the Detailometer and compared to the after readings, you can see NUMBERS that don’t show a lot of difference. But when you look at the pictures above, it’s pretty easy to see, this car did NOT look this good when it arrived. A Mid-Range, 2-Step Paint Correction Process can work miracles as long as you’re using great abrasive technology, the right pad and tool for the job and of course – great technique.
Detailometer BEFORE and AFTER Readings
BEFORE
AFTER
I had moved the Corvette outside for the owner to pick up after hours and before I left, I took the after readings i the same place that I took the before readings.


Where’s the class pictures?
And this is what I mean when I say our classes are the MOST documented out of any other car detailing class anywhere else on planet Earth. No other company goes to this extent to show you what their classes look like or what you’ll get to do when you take their class. Sure, you can find the AD PICTURE – this is the ad that targets people wanting to take a detailing class but it’s like the only picture you can go by and it’s usually some person holding a buffer on the hood of a car. The problem is, the actual class doesn’t reflect this ad. What you discover when you take the class is you’re going to sit in a chair, watch a PowerPoint presentation and then if you’re lucky, after the lunch break you’ll get to work on a demo hood, or a test panel or if you’re really lucky, a rental car or some car that was in the parking lot. So do your research, don’t disappoint yourself by taking an academic class.
So do your research and if after looking at the pictures you discover this is the type of class you want to take, then clear your schedule and get signed up for a future class.
Click here to get signed up for a future class
Corvette Tinted Clearcoats
When the team switched over to WHITE foam polishing pads and because the Dr. Beasley’s Primers are all WHITE – after the team did some buffing, I saw a YELLOW color on the face of the pads?
My FEAR is they had buffed through the clearcoat and exposed the yellow basecoat. But I did a quick search on the Interweb and found that the 2007 Corvette came with a TINTED CLEARCOAT and this was the yellow color we were seeing on the face of the buffing pads. COMPLETELY NORMAL – NO PROBLEMS.

Anytime you’re buffing on a tinted clearcoat, you’ll see the color of the tint on the face of the buffing pad. What they do when they paint the car, to give the paint a special-effects appearance, they put a little color from the basecoat into the clearcoat paint – thus tinted clearcoat.

See this thread on CorvetteForum.com
Topic 3 – Car Number 3 – Budget 1-Step Ceramic AIO Paint Correction

At this point in the class, these folks have already learned,
1: Show Car Detailing – Multiple-Step Process & Ceramic Coating
2: 2-Step Paint Correction & Ceramic Coatings
Now it’s time to learn a faster way to detail a car by using a one-step ceramic AIO. For this the students will be using the Dr. Beasley’s Z1 and their choice of orbital polisher with Buff and Shine EdgeGuard white foam polishing/finishing pads.
The Biggest Problem for Anyone NEW to Detailing for Dollars
The biggest problem I see in the professional car detailing industry is people new to the business don’t understand the concept or business model of having multiple menu items, also called packages at different price points. The different price points reflect the amount of time needed to perform the paint correction and ceramic coating process.
The problem most people have when starting out is becuase they don’t have or understand the concept of offering different packages for their customrs, they tend to do show car detailing, that is the MOST steps they can do for EVERY car. And this means they’re making about $1.00 an hour. You’ll get burnt out and quit using this business model. A part of having at least 3 different levels of paint correction service is when selling the budget package, you don’t educate the customer that this budget package will NOT remove all the deeper scratches. It will remove millions of shallow scratches, but the deeper scratches will remain and after removing the millions of shallow scratches, the deeper scratches that remain will stand out like a Sore Thumb. If you didn’t educate the customer about this reality, when they pick up the car, and see deeper scratches still remaining, they may not be happy and even feel ripped off. This is your fault. You must educate your customers and set real-world expectations.
Also let all your potential customers know if they want ALL of the swirls and scratches removed, even the deeper defects, you’re more than happy to do this for them, but it’s at a HIGHER PRICE POINT. Once your potential customer understands this, they can choose the package that best fits their budget and if they pick an entry level package, they will understand this will not remove 100% of the defects – BUT – also let them know the paint will still look freaking amazing after you work your magic.
The 3 Minimum Packages or Approaches
For professionals, I use the term packages, as these should be your offerings for paying customers depending upon their car, their wants/needs and their budget. For Do-it-Yourselfers, then I use the word approaches. There’s no difference between packages and approaches, the big picture idea is because a do-it-yourselfer isn’t doing this for money, it’s not really a package. BUT a lot of do-it-yourselfers have multiple cars and for some cars they want to do the show car detailing APPROACH and for other cars, they may want to do the 2-Step Paint Correction and Ceramic Coating APPROACH and for their mundane daily driver, they many want to use a Budge or one-step APPROACH. So, packages for pros and approaches for DIYers.
For this next and last car, the class will be using the budget or 1-step approach to detail this Camaro. This means the class is NOT going to remove the deeper swirls and scratches and it’s also not going to remove the Orange Peel in the custom paint job on this Camaro. But it’s still going to look amazing.
More…
1968 Camaro Rally Sport
Here’s the training car. This is a 1968 Camaro race car with a custom basecoat/clearcoat paint job. The owner told me when he and his father painted this Camaro, they did NOT spray a lot of clearcoat paint. Thus, I chose this car to teach how to use a 1-Step Ceramic AIO to buff out the car. If you read through this article, you’ll see that I chose the Dodge Stealth for the first car because the paint was in horrible condition. Then we used a 2007 Corvette for the second topic, because the paint wasn’t too bad.
I get cars that are in different conditions of paint quality to MATCH the topic being taught. There is a method to the madness.
")
Here’s our victim over here in the corner, just waiting for her turn at the dance.

BEFORE PICTURES – Photo documentation
Here’s BEFORE pictures taken both outside under bright sunlight as well as inside the shop using bright overhead LED lights.
Outside Pictures showing HOLOGRAMS caused by finishing with a rotary polisher


Inside Pictures


Detailometer BEFORE Readings


Ouch! There’s lots of room for improvement, even though all we’re doing is a SINGLE paint correction step.

It’s Go TIME!
No chairs. Zero sitting. No PowerPoint. If you want a comfy chair, please take some other car detailing class.

Dr. Beasley’s One-Step Ceramic AIO

Here’s Eugene and Mark tackling the front clip. Looks like both gentlemen have chosen the FLEX Supa BEAST as their tool of choice.

Technique Tip – When buffing out large panels – start in the MIDDLE and work your way outwards. Don’t start at the outer edges and work you way to the middle. You can see Eugene, Nelson and even Doug all the way at the back of the driver’s side of the car – ALL starting in the middle of the panels and working their way outward.

Why I like Buff and Shine EdgeGuard Foam Buffing Pads
Look carefully at Eugene as he tackles the vertical side of the air induction scoop on the hood. Look where the edge of the buffing pad is meeting the horizontal portion of the hood where it meets the air scoop.


See it?
See where the edge of the pad is making contact with both the vertical portion and also the horizontal portion of the paint?

EdgeGuard – Safer Buffing of Complex Body Panels
Not only can Eugene buff out the vertical surface but he’s also able to buff out the concave portion where the vertical side meets the horizontal portion of the hood. More paint correction and you’re SAFE. (you still need to focus on the task at hand when buffing these areas)

Butt Time
Thank you, Nicoloas, for always getting the lower body panels, less fun than STANDING but vitally important. I call this Butt Time. I hate Butt Time, but it’s part of the job. And of course, it helps to have a cushion to sit on instead of sitting on hard concrete.

Looks like Doug has chosen the FLEX Supa BEAST for the roof.


All cars in our classes get Topical Glass Polishing
I do teach Sub-Surface Glass Polishing for these classes, but this is a FREE, BONUS class that takes place the day BEFORE the actual class. And the reason why is because, as you can see by these pictures, there’s ZERO extra time to cover a time-intensive topic like Sub-Surface Glass Polishing.

Looks like Walter has chosen the FLEX Supa BEAST. Nelson has chose the RUPES Mille and Juan has chosen the FLEX Supa BEAST. I care not what polisher you like; my job is to simply get the polishers into your hands so you can get real-world experience with the tools so you can have an authentic, real-world opinion on the different tools, not just conjecture.

Here’s the Final Results!
Not bad at all for a simple, one-step process.


And here’s the tired team that performed the one-step paint correction and ceramic coating process.

They’re smiling, but I can guarantee you – they are tired!
We started at 7:30am SHARP and outside of a short lunch break, there’s zero downtime.

Here’s the Detailometer BEFORE readings
Here’s the Detailometer AFTER readings


Not bad for a simple, one-step process or a Quicky Detail.


Awesome work everyone!
Sub-Surface Glass Polishing
Removing Wiper Scratches out of the Windshield on a 1964 Corvette
Besides the action-packed day of detailing, we also offer a free/bonus class on sub-surface glass polishing. We do this at our Stuart, Florida location and it takes place the day BEFORE the actual class. The reason why the glass polishing class takes place before the actual class is because this type of glass polishing is time-intensive. We cover so many tools, topics and techniques during the class, there’s simply no time to also cover this topic.
Because the majority of people that take our Stuart, Florida class are travelling here from other states and other countries, this means these people are often in town, (Stuart, Florida), a day or two before the class, thus if it works for their travel schedule then they are invited and encouraged to take this free/bonus class.
Before & After Pictures
Below are the before and after pictures from this glass polishing class here at Dr. Beasley’s in Stuart, Florida. This is a FREE/BONUS class that takes place the day BEFORE the actual class. There’s simply not enough time to ADD this topic to the full schedule of topics we already cover in our classes. I hold these the day before the for anyone that wants to attend and because MOST of the people that historically taking a class I teach are flying here from other states, or other countries.
For example, in this class, Nelson flew here from Bogota, Columbia and Nicolas flew here from Buenos Airs Argentina. I get the car, I get her prepped, if anyone taking the actual class would like to learn how to take scratches out of glass, then it’s up to them to figure out their travel schedule and get here.
Here’s the victim – an all original 1964 Covette

BEFORE PICTURES
In the picture below, you can EASILY see the wiper scratches as they form an ARC pattern that mimic the way the wiper blades move over the glass. As I type, this car, and thus this original glass windshield are 62 years old. At some point over the last 62 years, the wipers either became worn-out enough to cause scratching, or some kind of airborne debris, like beach sand, (common to coastal towns and the desert), is blown onto the car. This contamination will land on the top portion of the rubber blade and the next time the wipers are turned on, it rubs any dirt or sand over the glass and overtime, you end up with some pretty bad wiper scratches in the glass of the windshield.


Not only are their wiper scratches in an arc pattern, there’s also random scratches throughout the windshield.


Passenger Side
The passenger side actually had some scratches that are deep enough, if you drag your fingernail over the scratch, your fingernail will drop INTO the scratch. If this happens, the scratch is deep enough that the only time-efficient method to remove the scratch 100% is to machine sand the entire windshield and then buff out your sanding scratches. I do NOT recommend this for 99.9% of Earth’s population. Too risky.

A better plan
When you have deeper scratches in a classic car windshield or even side or back glass, a safer approach is to lower your expectations, decide you’ll LIVE with the deeper scratches and then do you best work to machine polish the glass. A thorough machine polishing using a dedicated glass polish with a rayon pad on a rotary polisher will easily remove the millions of shallow scratches and will clear-up the deeper scratches that polishing along will not remove.

How to Prep a Car for Glass Polishing
Here’s what I do, you can borrow this approach if you like or skip it and pay the price later.
Step 1: Use painter’s tape and tape around the trim on the windshield.
Step 2: Cover the car in a plastic car cover or drop cloth.
Step 3: Cut out the plastic around the windshield and then tape the plastic to the tape frame you’ve already applied to the outside of the windshield. It’s faster and easier to tape the plastic to tape already applied to the window frame than it is to try to tape the edge of the plastic to the actual window frame.


It’s Go TIME!
Up first are Eugene and Doug. Eugene is using the RUPES rotary polisher while Gene is using the FLEX rotary polisher.


See the Nr. 00002 on the sticker?
This is the Number #2 FLEX PE-150 corded rotary polisher given to me by Bob Eichelberg, formerly with FLEX, retired now. Thanks Bob!

What Kind of Polish?
In order to remove scratches out of glass you need a dedicated glass polish. A dedicated glass polish is a polish specifically formulated to abrade or chemically melt glass. There are two types of glass polishes that I’ve used that actually work. There are cerium oxide glass polishes and there’s Dr. Beasley’s GL Glass Polish that does NOT use cerium oxide but instead uses a unique ultra-hard nanoparticle abrasive technology.
From the Dr. Beasley’s website
NSP GL Glass Polish
PATENTED NANOPARTICLE ABRASIVES FOR A FASTER, MORE EFFICIENT CUT
After rigorously testing multiple abrasive types, Jim sourced a unique, ultra-hard nanoparticle abrasive with diverse applications. This patented technology is used by the Air Force to polish F-35 fighter jet canopies for crystal clear in-flight visibility. Through careful engineering, Jim adapted the technology for automotive glass. Testing the technologies side-by-side, he found the patented nanoparticle abrasive to be superior to cerium oxide in speed, efficiency and clarity.

Urban Legends
I’ve been doing sub-surface and topical glass polishing for DECADES. Anytime I share any glass polishing project on any social media platforms, like Facebook, Instagram and YouTube, there’s always an expert that states
Any compound will work
Of course, this is NOT true and of course, the expert NEVER backs up what they state by showing their process in any way, shape or form. It’s always the same thing, lots of talk, no walk.
Lead by example
I never aske my class to do anything I’m not willing to do myself. Sub-surface glass polishing requires some muscle, tenacity and time. I’m willing to take on these types of projects and after taking this class, I’m confident the students taking our classes will know what to do and how to do and just as important, they’ll know how much time is involved as well as physical work.

Here’s Eugene, still working on the passenger side, while Nelson, who travelled all the way from Bogota, Columbia to take this class has now joined us and is working on the driver’s side.


Switch Sides
You can see Nelson and Eugene have switched sides. Running a rotary polisher on an glass windshield at an ANGLE – stresses your deltoid muscles as you use your arm to press the rotary against the glass. A trick I use and teach is to switch sides and use the other arm for a while and if you feel your muscles getting tired, switch again. When I work by myself, I do this same thing with two workstations set up on each side. This way I can simply move from side-to-side without having to drag my tools, pads and towels from side to side.

Juan has joined us next. Juan came all the way from Kentucky to take this class.


Time to de-tape and check out the results
It’s now late in the afternoon and time to wrap-up the glass polishing class.

Here are the final results!


Accurate Photography
Here’s before and after with the car parked in the exact same spot so the overhead LED light shines onto the windshield in the exact same spot.
Before

After


Here’s the supplies you’ll need…
- Dr. Beasley’s NSP GL
- Rotary polisher
- Foam interface pad
- Rayon glass polishing discs
- Glass cleaner and lots of microfiber towels

My comments
First, let’s put this project in context. I think it’s accurate to say, this is the first time for all of these people to do Sub-Surface Glass Polishing. Polishing scratches out of glass is nothing like polishing scratches out of car paint. Glass is super hard, and it doesn’t abrade or polish like car paint. Due to the hardness of the glass, polishing a windshield out in the condition this windshield was in before we started will take both time and perspirations. But with enough time, you can remove the bulk of the swirls and scratches. The only defects left behind are the deeper scratches and this should be expected.
My opinion is, knowing this was each person’s first time doing this type of work, they did GREAT! And more important, when they leave this class, they’ll possess a brand-new skill that can help them moving forward anytime they are asked if they can remove scratches out of the glass on classic cars, muscle cars and streetrods.
Thanks everyone!
Great class! Awesome people! Thank you for your trust in Dr. Beasley’s name as well as myself.
Would you like to take one of our classes?
If what you’ve seen in the pictures from this class represent the type of class you want to take, then click the link below for a schedule for all future classes.
Future Car & Boat Detailing Classes
Dr. Beasley’s Social Media Links
Be sure to check out the Dr. Beasley’s YouTube Channel – we make some pretty good, content-rich educational how-to videos.
Dr. Beasley’s LIVE Detailing Classes
Questions? Shoot me a text or give me a call: 760-515-0444
I hope to see you in a future detailing class!
Sincerely,
Mike Phillips
Chief Education Officer for Dr. Beasley’s
Mike@drbeasleys.com
Dr. Beasley’s Contact Information
Questions via Email: MyTeam@DrBeasleys.com
Customer Care Hotline: 773-404-1600
Questions? Comments?
Email Us