


Last Updated October 7, 2024

Transcript
So what we’re going to do today is we’re going to show hand wet sanding to remove orange peel, surface texture, and then this car actually has fish eyes and DIP, which stands for dirt in paint.
A lot of times, you know, if you’ve got a shoddy paint booth or a contaminated shop, after the car is painted, if there’s any kind of dirt or dust floating around there and it lands on the car, of course, it sticks. And you see a little tiny clump in the paint. And that’s called DIP.
So this car is actually here for our upcoming class in May. So I have four cars here for sanding. I got a 1941 Graham Hollywood street rod. I got a 1987 Chevy Silverado square body. I have a 1931 Model A that is in the paint booth today, and we have this Corvette, and this Corvette has a custom paint job, but it is horrible.
I bring that up because one of the first things I want to talk about is you should not be sanding factory paint.
Sanding Factory Paint
Yes, I know it can be done. Yes, I’ve done it myself. But the thing you got to remember about sanding factory paint is in most cases, the factory paint on a modern car is thinner than a post-it note. So it’s thinner than 3 mils, oftentimes thinner than 2 mils.
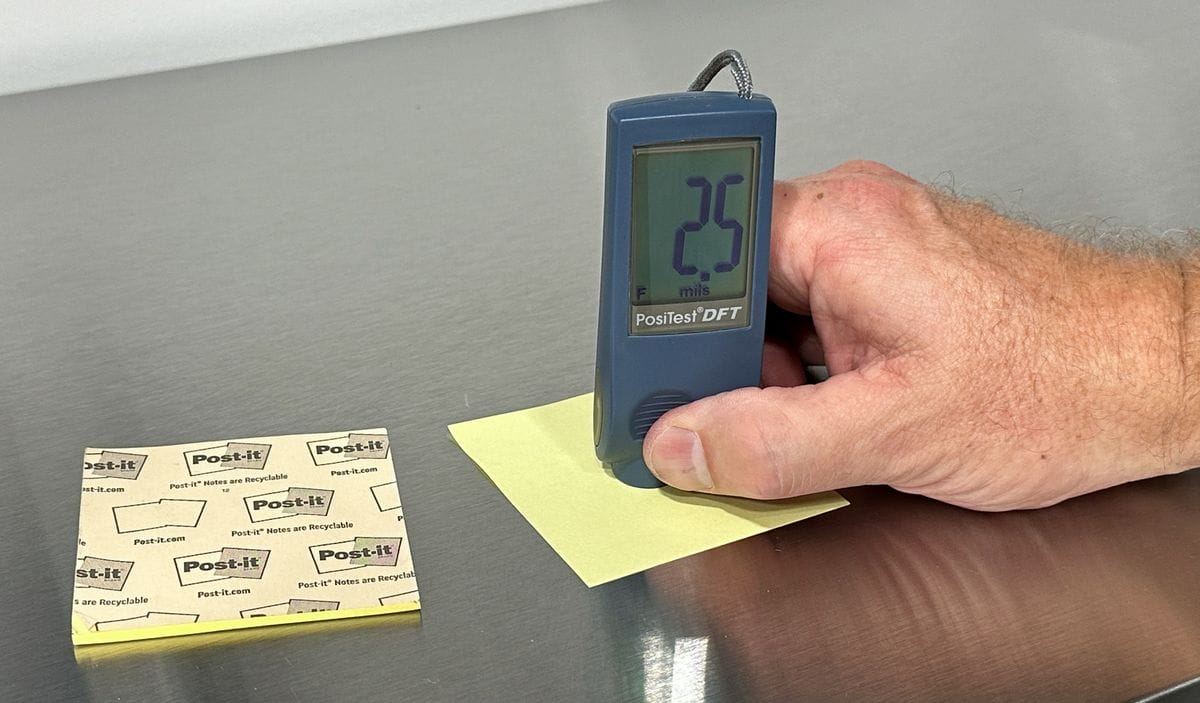
So even if you’re so talented that you’re able to sand down the factory paint and buff it out without ever burning through, you have just left that clear coat just whisper thin. And now it may suffer premature clear coat failure.
So it’s just not a good idea. It can be done, sure it can be done, but probably not a good idea. But this makes for a great training car because A, it’s black, so the students are going to be able to see their sanding marks if they got them out or if they missed them.
Of course, they’re going to be able to see if they truly got a swirl-free and a hologram-free finish by the time we’re done sanding it, cutting it, buffing it, and then ceramic coating it. So great demonstration car.
Working on the Corvette
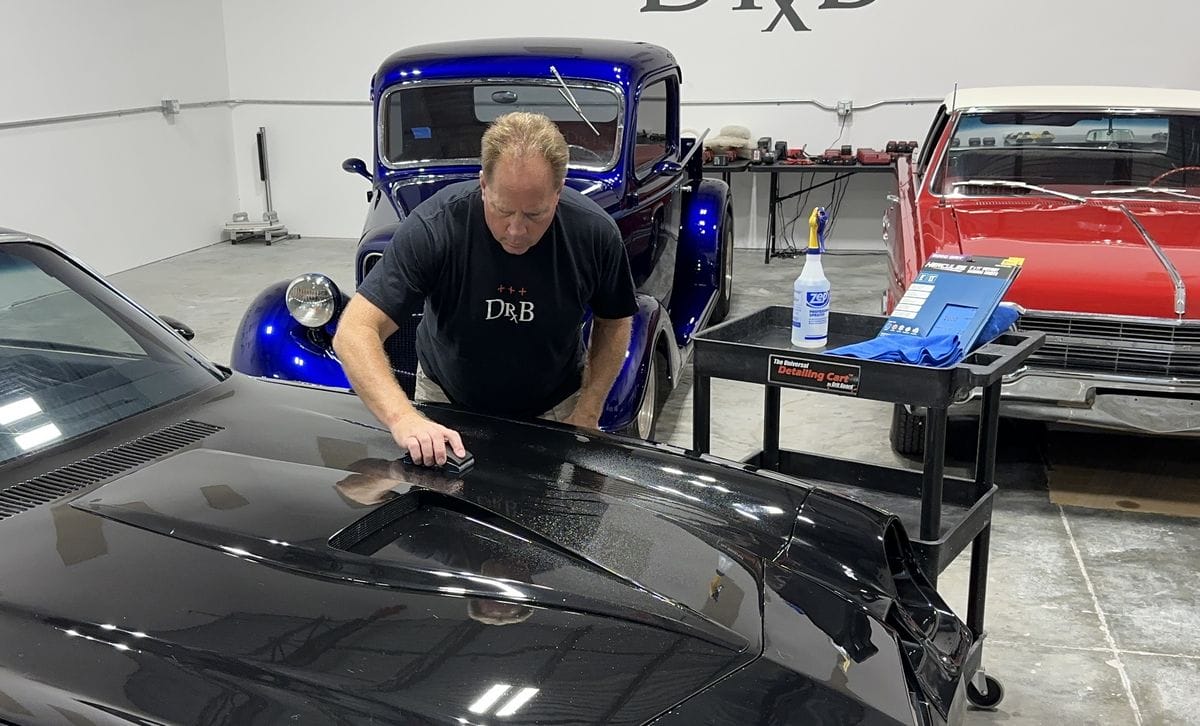
And also for that reason, I’m just going to work a section out in here because I want to save the mass of the car for the class.
Anyway, so that’s what’s going on with this car, a 1981 Corvette four-speed car, a really nice muscle car but kind of a shoddy paint job, but that’s okay. It gives us something to perfect.
Harbor Freight Sanding Sheets
Now, this is something a lot of people have been interested in. Harbor Freight has actually introduced sanding sheets or sanding papers and sanding discs.
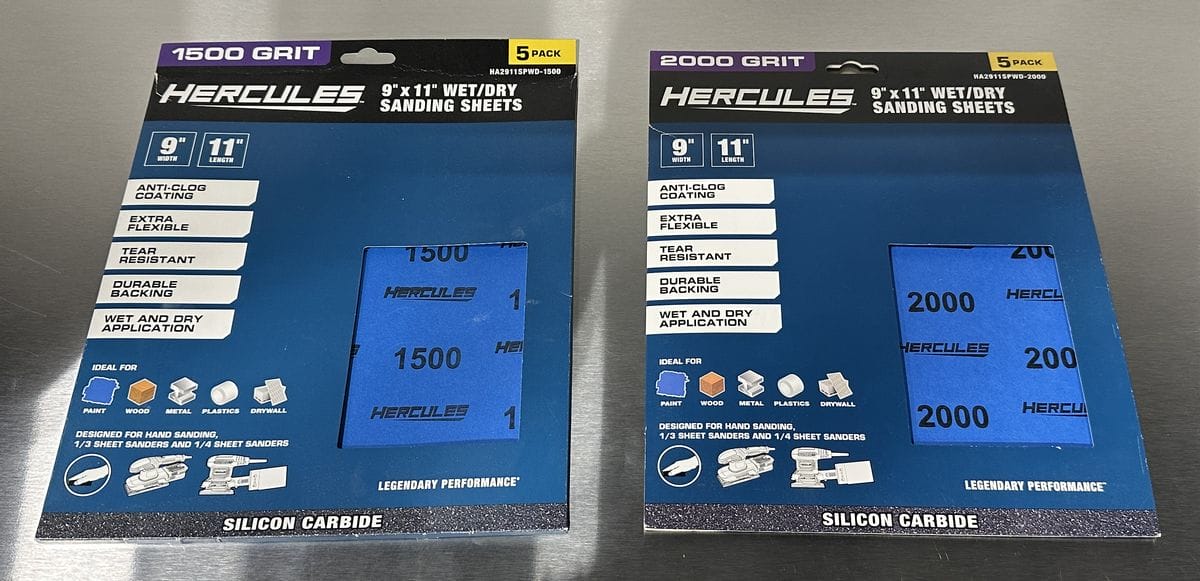
So this week we’re going to go over the Harbor Freight sanding sheets. These come in 9″x11″. I think they have, they start at like 180 grit and go up to like 3000 or 4000. 180? There’s a wide variety of grits, you know, for doing prep work but also for the finishing side.
And they actually, I was kind of looking at this, they actually have a really nice graph back here that kind of shows what the different grits are, and if you finally get over here to the 1500 and 2000, it says finishing and defect removal.
So they have their own sanding papers, and on the box, it says it’s good for wet or dry, and usually, most wet papers can be used for dry, but the thing about it is some papers, some discs, offer anti-clogging characteristics to help them from getting loaded up with paint as you’re sanding dry.
Using Sanding Paper with Wet Sanding
With wet, as I’m going to show you, you’ve got a lubricant in there that helps the paper from getting clogged up. Now, they also have their own sanding block.
I just wanted to share this and talk about this. This is a copy of the 3M. The 3M is a rubber block. And normally, the way you do this is you take your full sheet of sandpaper, 9″x11″, and then you’re going to cut out. You can actually get four strips out of it. So I cut three here. I still got one that’s already on the paper.
Sanding Block Comparison
I never liked the 3M blocks because A, the bottom is never flat. So if the whole idea is to flatten out the paint, you need something that you’re sanding with that’s absolutely flat. And the 3M, they were never flat. They’re warbled. They’ve got little imperfections in them.
This one is actually pretty flat. But when I went to use this, I’m just going to show you. Normally what you do with one of these blocks is you pull up on one of the ends and there’s these little three steel teeth in there. Then you pull your paper around, attach it, push it down, it clamps that paper into place. You pull to the backside, stick it in there, clamp it down, and now it’s secured in place, and you’re ready to start sanding.
So what I did is, what I did normally with the 3M, is I pulled this thing back, and it broke. So I would describe this material as rubber-like. So rubber hyphen like. It’s like rubber, but it’s not rubber.
If Harbor Freight’s watching this, you got a good first start. It’s not a bad block, but you need to make this actually more flexible because the hardest thing about putting these disks on is pulling this thing back all with two hands and getting this thing put together. So that’s one option.
But it’s nice that they have a complete system. So you can go to Harbor Freight, get your sanding papers, get a sanding block, and you’re ready to start sanding.
Meguiar’s Backing Pad and Dura Block
Now, I went and borrowed this. Usually, I recommend and use the Meguiar’s. The part number is E7200. It’s a flexible, rigid, flexible backing pad and is by far my favorite. But all of mine, I got a dozen of these from my classes, all of mine are in a box coming from Chicago back here because we use them on the AC Cobra.
So I borrowed this from my good friend, Robert DiCiolesi, and this is actually a Dura Block, and they make all kinds of different blocks, different shapes, different sizes for sanding application. But anyway, this one here is just your basic. It’s actually fairly rigid, which is good because the harder the block is, the smoother the surface.
When you’re sanding, it keeps all the sanding action on the very high points, which is what you’re trying to remove, the high points, and then you sand until you get it completely flattened out or leveled, and then you stop and move on to a new area.
So you want a rigid block that’s about this size. And then the way you use this is you take your nine and a half by eleven paper, and what you’re going to do is you’re going to fold this thing in half. Let me just do this live here. And then either you know crease it a couple times and tear it or I’ve actually got a pair of scissors that I prefer to use.
Dedicated Scissors for Sandpaper
And one thing, a little tip I want to share here, I don’t know if you can zoom in on this. But I actually wrote, I got a bunch of these scissors around here, but this one actually says sandpaper.
Okay, and the reason I do this is because when you cut sanding discs, because I oftentimes make my own three inch, two inch, and one inch sanding disc, or you cut sanding paper, you’re cutting something with the braces and it dulls your scissors down. So I write sanding paper on this one, and I reserve it only for sandpaper, and it keeps my other scissors for cutting paper sharp.
Preparing Sanding Paper with Soapy Water
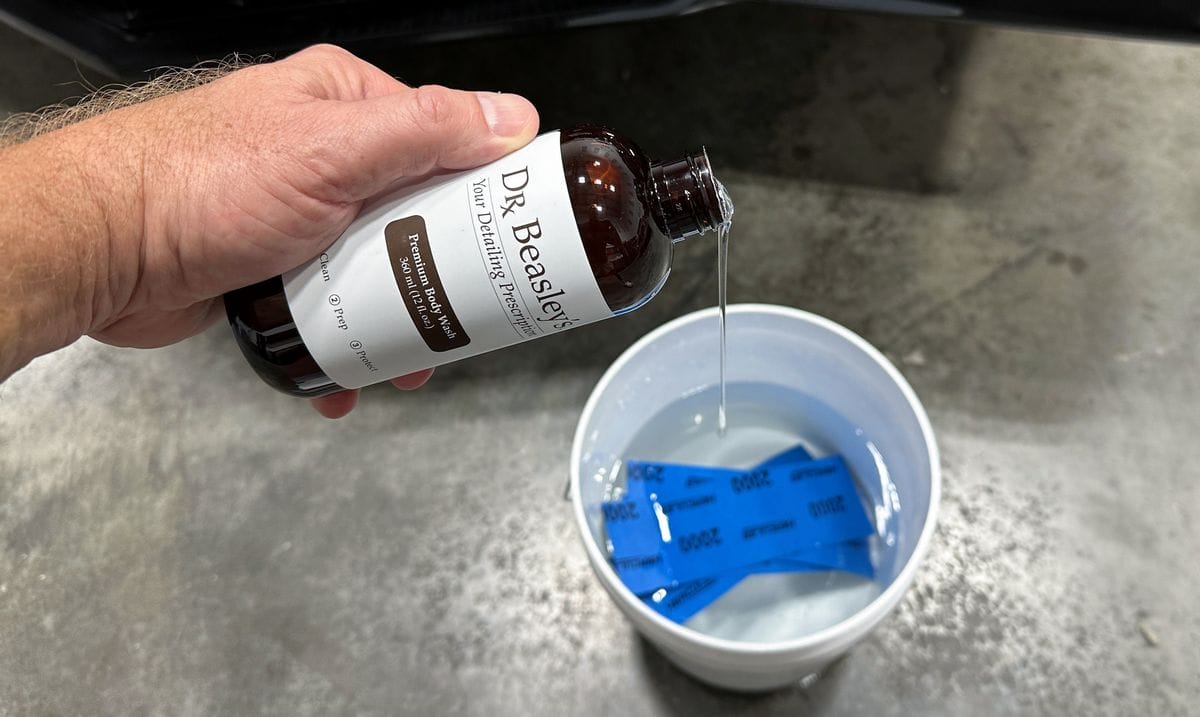
So that’s how that works. Let me fold this again. And then what you want to do, and I’ve already done this, is I’ve got a bucket of water here.
You want to take and put a few drops of dishwashing soap, or in this case, I used the Dr. Beasley’s Ceramic Body Wash, a little bit of lubricant. And then I got a spray bottle, same thing. You can see the bubbles are in there. This is a little bit of soap in there. And you want to take and put a little soap in there.
And here’s the reason why. The soap does two things. It lubricates the surface to make the sanding action smoother. And then it also helps to keep the sanding paper or if you’re machine sanding the sanding disc from loading up with the removed material, the paint you’re taking off and sanding because you know the sandpaper is very grippy this is two thousand grit it’s going to want to grip the paint so have a little bit of lubrication there helps you with inertia to keep your hand movement going to sand the paint in a smooth pattern so you have an even sandy mark pattern.
Cutting and Applying Sandpaper
Now, once you’ve got your 9″x11″ cut, the next thing you want to do is there’s two ways. There’s two ways to put this on the block. And everybody has their own preference. I was just with my good friend Rod Kraft. Rod likes to fold. I’m a wrapper.
But if you want to fold, that would look like this. You would take your sanding paper, your half sleeve or half sheet, and you would fold it in half. Then you’d basically just take and wrap this around your block like that. And then everybody’s got to kind of figure out how to hold it. I take my thumb and my finger, put it on the side of the block.
That gives me three fingers to kind of push down on the face of the block. So when I’m sanding, I can distribute the pressure of my hand equally. Okay. And then, that’s folding, then I like to wrap. So wrapping is when you just actually take the paper and you wrap it around. And basically when you’re using a sanding block, that’s like this, so that’s wrap.
But basically, you’re going to get to use basically two sides of a half sheet, you know. And you can cut them up and use them for smaller sanding blocks and things like that, but that’s how you use it. Then normally you want to take and soak these for about thirty minutes in some water before you use them.
Now I didn’t soak these, this is going to be a fairly quick demonstration, but you do want to soak them. You want to be careful you don’t soak them too long because some of the cheaper papers will actually fall apart in the water.
Sanding Techniques and Proper Stance
Okay, so there we go soaked. Now I got my soapy water, and we’re going to come over here, and Yancy, if you want to maybe come in and see if you can show me where you can pick up the lettering behind me to show before and after.
Okay, let me grab this, and I have already taken and clayed this. You know, years ago I wrote this article, it’s got a really long title, but it goes like this: the most common place to get over spray paint is a body shop.
And the reason why is because say your Corvette goes in, it’s in the paint booth, it’s getting a paint job, it comes out, and you’re thinking well there’s no chance to get over spray now it’s out of the paint booth. But that’s not true.
You got, you know, people in the body shop workshop there spray things called guide coats or maybe putting some primer on a part before it goes into the paint booth and all this stuff floats around and lands on your freshly painted car on the glass, on the wheels, on the paint, everything.
So the most common place to get over spray paint is at a body shop, even though you think it’d be a kind of a safe place it’s not like that.
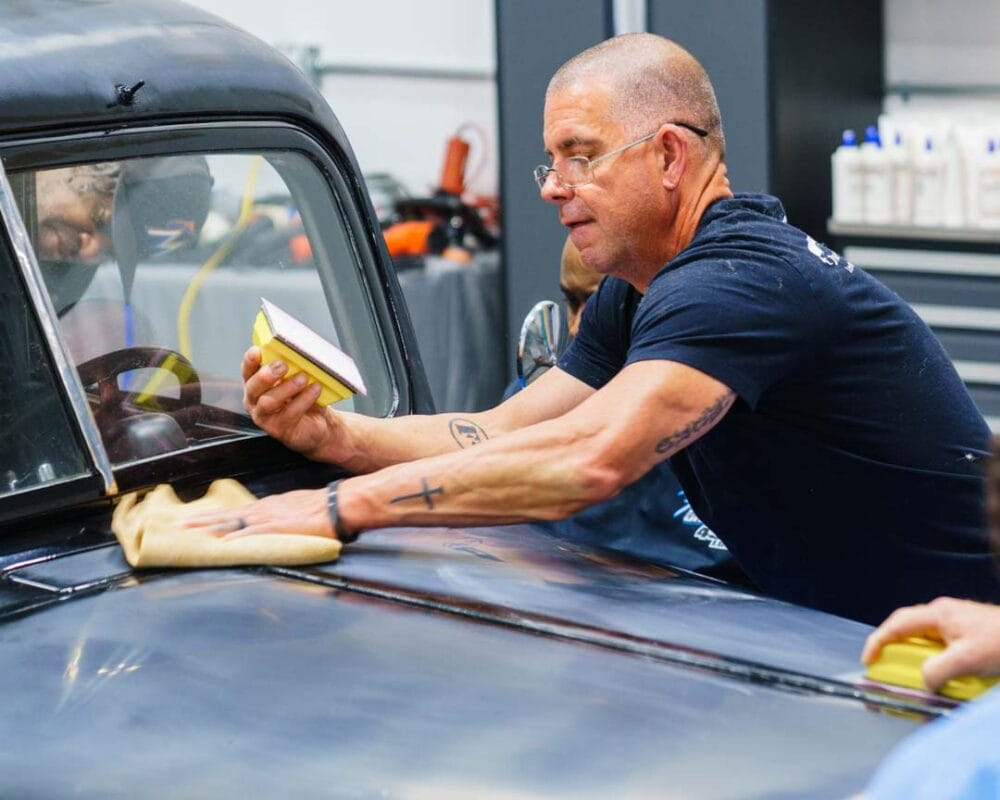
Okay, so I’m going to put down some soapy water right here. Let me get rid of this. And then I’m going to cover a couple of basic techniques now.
Whenever you’re sanding with a block like this, you don’t actually want to sand perpendicular because you’ll put ruts in where the edges are. So you want to turn it, or the word is cant. You want to cant it or tilt it a little bit and then sand like that.
Inertia and Work Size
When you’re starting out, you can go slow, but I’m going to tell you, there’s something to be said for inertia. Getting your hand moving helps you to keep it moving, because again, this paper is going to want to grab and stop on you, so you want to get your hand moving.
As far as the work size, I always teach people, especially when you’re starting out, you want to tackle small sections at a time, about the size of a microfiber towel, something that you can manage with equal pressure of your hand.
You know, when I’m sanding right here, it’s easy for me to push down. The further my arm leaves my body, I got to focus more on keeping the same pressure throughout my entire arm. And it’s a little more difficult, a little more tiring.
Tight Pattern Sanding
Okay, so here we go. And then as you’re moving this sandpaper over the surface, you want to do what’s called make a tight pattern. And what that means is you want to move the sandpaper over just a little bit, like an eighth or three-eighths of an inch at a time.

So you’re going like this, real tight as you move across the panel. You don’t want to make M’s or W’s, you know, this huge pattern. It’s going to leave a horrible looking sanding mark pattern, and you’re not really leveling the paint in the best way possible.
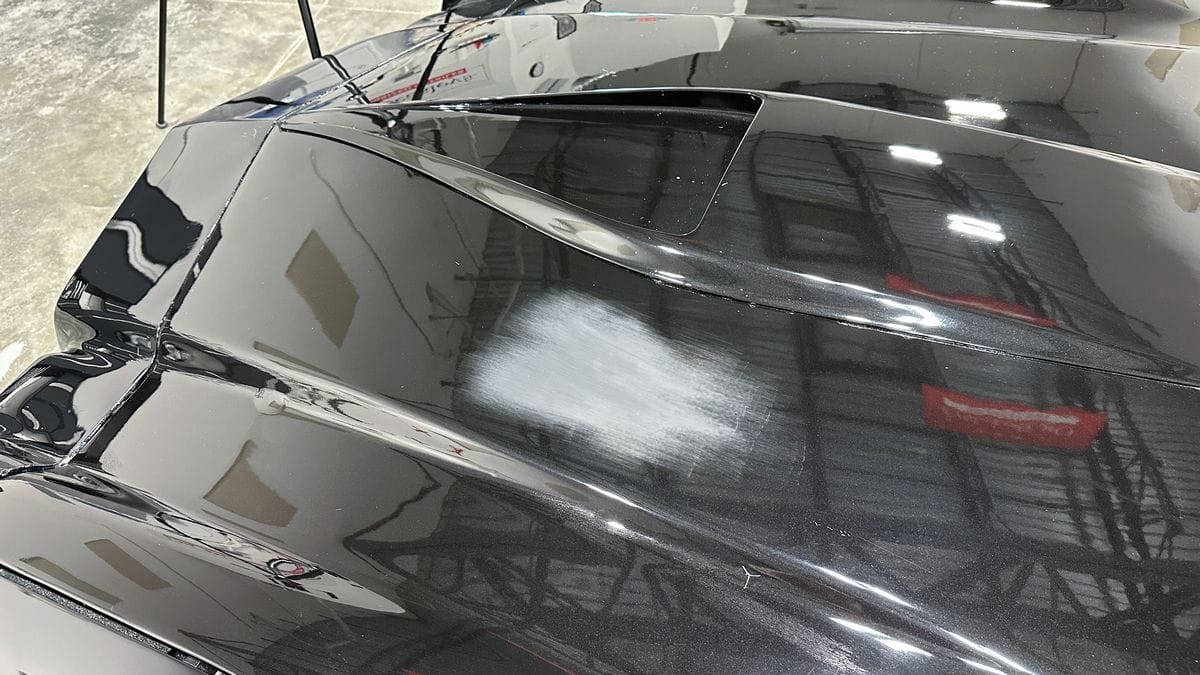
Understanding Slurry and Old Sanding Techniques
So then if you look down here, you can actually see where the paint, the water is turning white. So this is called your slurry, and this, whenever you abrade something clear, it turns opaque, so that’s why you see this is white.
Now in the old days, they called this color sanding. But that’s before base coat clear coat technology was introduced. So when you’d sand on the paint, you were actually sanding on pigmented paint. So the slurry would be the color of the paint. Blue paint would have a blue slurry. So they called that color sanding.
But it’s the same kind of thing. We’re sanding with some paper to level and flatten down the orange peel.
Staying Away from Raised Body Lines
And then another thing I like to do is there’s a raised body line right here, and I can feel that with my thumb. So I know as I get closer, I want to kind of stay away. In my classes, I teach what I call the rule of thumb. Some guys like it, some guys don’t.
What that means is wherever you’ve got a raised body line, like the top of this fender or an edge where the hood meets the fender, I stay about a thumbnail distance away. And the reason why is because you don’t want to sand right on the edges because it’s going to be really hard to bring a spinning wheel pad down and buff the sand works out and not burn through the edge.
Now, there is a way to skin that cat, and that’s by using a tool like the Rupez Nano with the one-inch pad, or the Flex Pixie with the one-inch pad, both of these in rotary mode. And basically, you’re just taking this very small rotary and you’re going along all the edges that you sanded and pulling out your sand marks very safely instead of a big eight-inch pad spinning on a big rotary.
Managing Time and Customer Expectations
The problem with that is, and most of you experienced guys will understand this, the problem with this is, think how long that would take you to take a little one-inch pad around every raised body line and edge on this car.
So what I teach is big picture. Guys like Jason Kilmer, think of the big bucks for doing show car sanding. They could spend a month on a car. But in the real world, if you’re talented enough that someone’s going to bring you a car like this and say, hey, would you sand it down, the normal price range for something like this is around 3,000 bucks. That’s enough money to cover your sanding tools and make a pretty good profit.
But you’re not going to make any money if you spend two weeks on the car pulling sanding marks out by the edge. So what I do is I lower my customer’s expectations by telling them about the rule of thumb. Explain I don’t want to burn through all their edges. They appreciate that, and the car’s still going to look great. So it’s called the rule of thumb.
You could type that into Google and probably pull up my article on that. And, of course, that does mean that if you stand back and look real closely, you’ll see no orange peel, no orange peel, and then you start to get to the edges, a little bit of orange peel kicks back in.
But it doesn’t really distract from the beauty of the car, and it’s back to making a profit, not working on some other dude’s street rod for free.
Understanding Top Coat Hardness
So that’s basically how you do it. One of the things, I love Jason Rose, he’s got this saying that goes like this: top coat hardness is an unknown factor. God, I love that statement. And he’s absolutely correct. I don’t know if this paint is hard or, well, I do, because I already did a test pop. But a lot of times when you’re buffing out a car, you don’t know if it’s hard or soft until you go to buff it and also to sand it.
The harder the paint is, the harder it’s going to abrade. And I thought this paint’s kind of in that medium range, right where you want it. It sanded easy, it buffed easy.
Sanding Strategy for the Whole Car
Okay. Anyway, so the next thing you want to do is you would actually sand down this entire car. If it were me, of course, I would start on the roof, work my way down. When it comes to large panels, I start in the middle and work my way out.
I don’t start here and work my way in. You just need to have a method for the madness. So every time you go out in the garage, you’re not going, “Hmm, how should I do it this time?” It shouldn’t be different. You should have a method to your madness.
But on these large panels, you want to start in the center, work your way out. And I would sand this whole thing down with my first grit. And then I would either follow that with a second or follow up step with a less aggressive sandpaper. The purpose of this would be to refine the sanding marks to make the buffing easier.
It’s always better to spend more time sanding so you spend less time buffing. Plus, the buffing generates heat. Sanding is very cool. But in this case, 2000 is as far as I’m going to go with this.
Class Learning Process: Dry Sanding
The class is actually going to learn dry sanding on this car. And when they do the dry sanding, we’re going to start out with 1500 by Eagle Abrasives. And then we’re going to go to 2500, all hand sanding dry, and then we’ll start buffing it out. So it’s kind of a similar process here.
Buffing Techniques and Tools
Just got done teaching a class in Chicago, and of course, one of the topics was sanding and buffing, and then how do you use a wool pad on a rotary. And I get asked this all the time, “Well, Mike, can’t you use an orbital?” Sure, if an orbital will take scratches out of paint, it’ll take sanding marks out.
The difference is the speed and the effectiveness. It’s gonna be faster to use a fiber, a wool pad on a rotary. Not so much for the big flat areas, but everywhere you gotta get up on edge to get into tight areas, thin panels around raised body lines and edges. Free spinning tools are just gonna tend to stall out when you’re trying to do that work, so it’s gonna add more time to the process overall.
Avoiding Gear-Driven Tools for Sanding
And you should never sand clear coat with a gear-driven tool like the Rupes Melee, the Flex Beast, the Harbor Freight forced rotation orbital polisher. They work great for boats with the gel coats thicker, but on car paint, actually what it does is it takes too much paint off too fast.
It does scalloping. I got an article on that somewhere too, scalloping. So you don’t want to use a gear-driven orbital for sanding, but any free spinning sanding polish will work.
Upcoming Demonstration on Machine Sanding
And by the way, next week, this car is going to be here all the way to May. Next week, I’m going to show how to use the Harbor Freight Bauer. They call this a six-inch DA, but that’s because it has a six-inch backing plate, which doesn’t even make sense. It’s an eight-millimeter free spinning random orbital polisher because the stroke is eight millimeters. So that’s what they should call it, an eight-millimeter.
But for some reason, everybody out there in the world always names their tool after the backing plate size. But I’m going to show how to use that with the Harbor Freight sanding discs. And they just introduced foam-backed and sanding films and their own interface pad. So next week, we’ll probably flip the car, and I’ll show you how to use the machine sanding system on the other side of the hood here.
Removing Sanding Marks
Okay, so pulling the sanding marks out. So I put a strip of product down there, and I always teach guys, you know, you want to get a good foot stance, brace yourself. And in the beginning, you’re usually going to, for the parts that are way out in the middle, you’re going to be leaning on the car. So that’s why you never want to buff the sides out first, because then you lean on them, you could scratch them back up.
So knock out all the horizontal surfaces first. Okay, so what you want to do is called pick up your bead using the ten at ten technique. Once you pick it up, lay the pad down flat, spread your product out. I always try to make this look like it’s really hard.
Buffing with the Right Pressure
Okay, now I got it spread out. I’m going to push. I’m going to push down. You always say, “How hard are you pushing?” I go, oh, right now I’d say I’m about 15 pounds. You can hear the motor bog down. But what I want to do right now is I want to cut the paint. I want to cut it with these fibers and the abrasive technology.
I’m using the Dr. Beasley’s NSP 150, and everywhere that abrasive particle is on the surface, it’s always cutting evenly. So that’s kind of something different about our products than everybody else’s.
Checking for Paint and Sanding Marks
No black paint. So far, that’s a good sign. By the way, if you’re buffing on a base coat clear coat paint job and you turn your polisher over to see the color of the base coat, it’s a really bad sign.
I want to make sure I got them all out before Yancy comes in here. A lot of times when I shoot these videos, I got my contacts in, so I can’t see as well. But it’s okay, it’s not my car. It’s okay, so there we go. You can see, using a wool pad, kind of dusty there. That one’s been used a lot, and it’s been washed, but sometimes when you go to clean it, some of the previous dust that didn’t get washed out comes flying out of there.
Inspecting for Remaining Marks
Okay, so then inspect, and as far as I can tell, I have all my… oh, there’s some right there. Let me get those out, and this is where it’s nice to have good lighting in your shop—good overhead lights, good handheld lights.
I want to pull these out because if I don’t, I know Yancy will focus. And usually what I do, as you see me moving this thing back and forth, so I move it, I cut, and I’m coming back and looking to see if the marks are gone. As soon as they’re gone, I move on to new territory. I don’t keep polishing the same place needlessly.
Cutting with Wool Pads
Okay, so then after cutting with the wool pad, and always remember, anytime you’re cutting with wool, you’ve got two things working for you. You’ve got the fibers. Each one of these zillions of fibers is cutting, and you have the abrasive technology, so you have two things cutting.
And that’s why a fiber pad is more aggressive than a foam pad, because a foam pad has a uniform surface texture. It doesn’t have all those individual fibers, so it is never going to be as aggressive. But that’s why you use a foam pad to come back and pull out your holograms.
Switching to Foam Pads
OK, so this is the beast. Let’s switch over to a foam pad. With this stuff, you really only need pea-sized or dime-sized drops, but when I’m starting with a fresh, dry pad, I like to put four drops on there.
Okay, I’m gonna warm it up a little bit. Watch this. I always try to remember to show that technique, and I always forget. So I got it today. I’ll explain what it is in a second. Then just a little white pressure.
Polishing Techniques: Art vs. Grinding
And the reason I like to reduce my pressure to make a few more passes is just because, as I always like to tell people, polishing paint is an art form. It’s not a grinding process. We bring the human elements of care and passion to the process, and that’s where the beauty comes from.
Wow, that came out amazing. And of course, then after that, if this was true show car detailing, I would actually probably do a third polishing step with the super soft foam finishing pad like this Lake Country black foam. Every foam company has their own color code. And I would drop down to the NSP-45 and then put the ceramic coating on this car.
Deciding the Final Polish Steps
And that’s probably what the class will do. It just depends on the paint hardness, you know. What I just saw here is this foam polishing pad finished out just beautiful. So, you wouldn’t have to go any further. It just depends on what you’re trying to do. Some customers want everything you can give them. Some people, their budget says no. Two buffing processes is more than enough.
Anyway, that’s how you take and remove orange peel by wet sanding by hand using the Harbor Freight system.
Testing Sanding Papers
And I haven’t… this is the first time I’ve ever used this, so, you know, people always say, “How long does the paper last, you know, for sanding? How many pounds can you get out of a sheet?” So I haven’t used it enough to be able to give you that answer, but moving forward as I sand down more cars, I will definitely be trying this paper out, and I can give you some feedback at that point.
Upcoming Machine Sanding System Demo
And it will be interesting, next week, to go over their new machine sanding system with a foam back disc, kind of like the 3M Trizact on the foam, because it’s kind of thin, but it has the mesh interface or top here, kind of like Mirka Abralon.
And their sanding disc, this is 1500. And I tell you, that feels like a piece of fine paper. I don’t feel nothing there at all. So this will be interesting to test out on the other side of the hood next week.
Final Thoughts
That’s all I got, Yancy. That’s all you got? That’s a cool car, and I’m sure you picked this up, but that finish is freaking amazing. We could go a little bit further and flat it out even more. The flatter you get the paint, the more you increase what’s called DOI.
So DOI stands for distinction of image. So always think of it like this. A mirror is 100% DOI. Before we started buffing or sanding on this, this paint has orange peel, so it has a very low DOI. It might be like the… it might be very low because it doesn’t have a perfect reflection when you look into it.
Goal of Sanding: Creating a Mirror Finish
So the goal of sanding and to create a show car finish is you’re sanding that paint flat, then restoring the gloss and clarity so when you look at it, it has a mirror finish.
Questions? Comments?
Email Us