


Teaching others any skill or trade—like auto detailing for example—is incredibly rewarding.
Anyone that wants to be a teacher needs empathy. That is, they need to be able to put themselves in other’s shoes and remember what it was like when they first started out.
With this mindset, you can share your knowledge with others in a way that eliminates all the frustration in the process of learning something new. You completely flatten out the learning curve.
I’ve been detailing cars and boats for over 40 years. I’ve been teaching detailing for over 30. Over the years, I’ve trained thousands of students in the art of detailing for multiple companies and training programs.
Now, all these years later, I want to teach YOU how to teach a car detailing class.
Let’s face it — the car detailing industry will always need trainers, and folks like Jason Rose, Renny Doyle and myself won’t be around forever. The next generation of detailing educators are starting now.
Will you be one of them?
How I Got Started Teaching Detailing
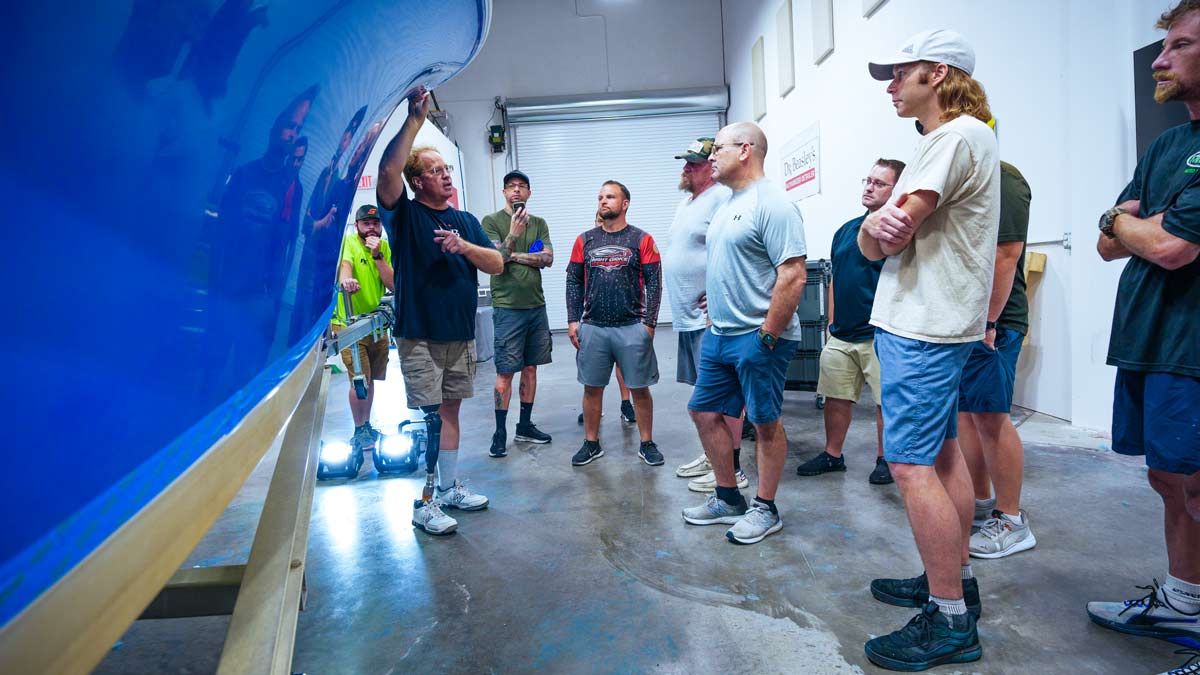
I taught what I would consider my first formal detailing class—that is we advertised and held a car detailing class—in Seaside, Oregon under the leadership of Jack Birkby, then-owner of the Northwest Meguiar’s Distributorship.
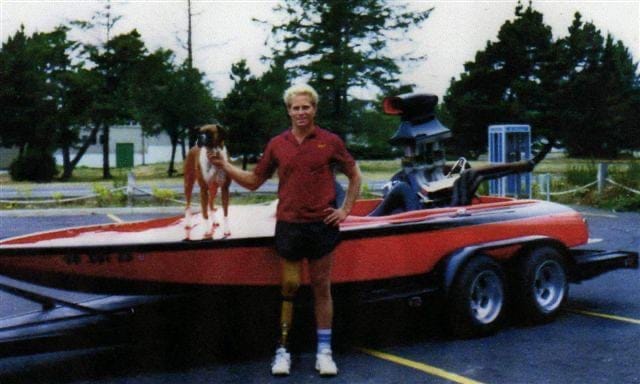
I used my Sanger Drag Boat as a demonstration panel because the front of the hull was large and flat and there was plenty of room for people to stand around it as I led them through a multiple-step paint correction process using a rotary polisher, foam pads and Meguiar’s products.
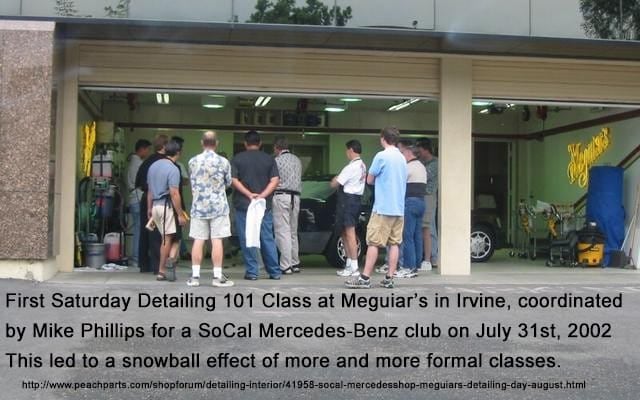
Without knowing at that time, this first detailing class was the start of a journey that has not let up since this first class. I continued teaching detailing classes all over the Pacific Northwest including Oregon, Washington and Northern Idaho. Later in life, after accepting a job as the Corporate Writer for Meguiar’s in Irvine, California, I brought up the formal detailing classes at Meguiar’s starting in 2002. Here’s a picture from outside the training garage of this first class for the SoCal Mercedes-Benz Club on Saturday, July 31st, 2002.
That class was successful enough that I moved from my writing position to a full-time teaching position, as well as administering the Meguiar’s forum. Eventually I left Meguiar’s and started teaching classes at Autogeek in Florida.
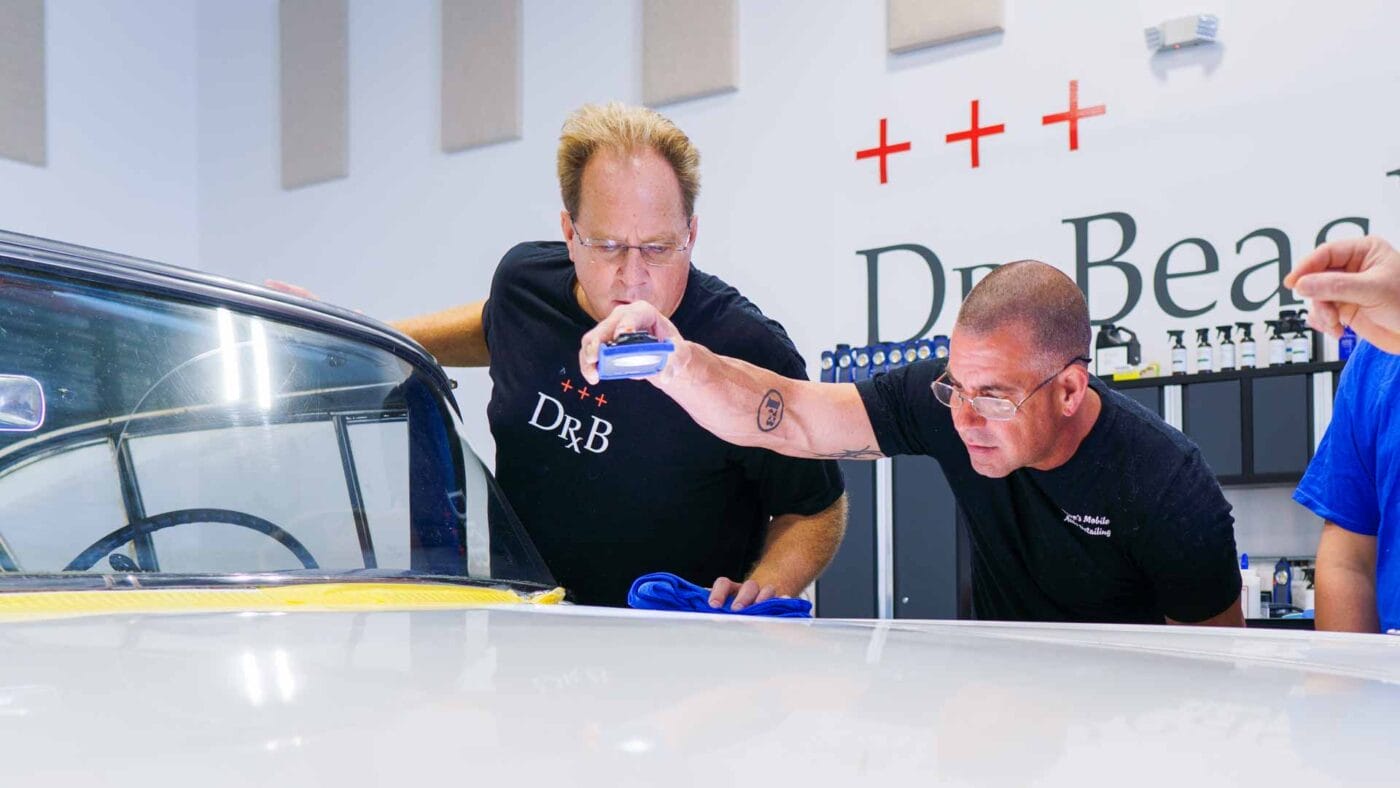
Now, after about a decade at Autogeek, I’ve set up shop at Dr. Beasley’s, taking over their education program as their “Chief Education Officer”. I’ve got my own training center for Dr. Beasley’s down in Stuart, Florida that we affectionately call the “Operating Room” or “O.R.”.

At some point, I’ll probably hold my last class. I’m not sure when this will be because I truly love what I do and as I type this on Wednesday, September 11, 2024, I’m in excellent physical and mental condition with a class coming up in 2 weeks! So as long as I can, I believe I will continue to teach my style of hands-on detailing classes but I’m hoping for others to rise-up through the ranks and emulate what I do now while adding their own unique personality and style to their classes.
So it is my hope that anyone wanting to follow in my footsteps and take on the responsibility as well as the passion for teaching fun and educational detailing classes will read the below article, take from it what you will and perfect your craft at teaching the art of detailing. I would of course also recommend actually taking one of my classes as there’s no substitute for a real-world, hands-on training experience.
Do I Need to Be an Expert to Teach Car Detailing?
You don’t need to be an expert, but you do need to have some level of mastery in the topic you want to teach.
Like the quote above, the best way to learn is by teaching others, the only requirement is you need to accept that you don’t know everything and always be open to learning new ideas.
This is especially true for the car detailing industry, where you need to be open to learning about new products, tools, pads, towels, machines, and most importantly, new techniques.
8 Tips for Teaching a Successful Auto Detailing Class
After teaching car detailing classes for decades now and from my own experience taking other classes, here’s what I’ve learned that may help you:
1. Be Animated!
Simply put, you want to be animated or excited about the topics and the class tackling the topics. You need to be high-energy and positive. People can perceive if you’re into it or just showing up for a paycheck. If you’re not truly excited and passionate about teaching—which is at its core helping—then it will show. You cannot be the monotone, slow talking, quiet person or you’ll put your class to sleep.
2. Don’t Be Afraid To Take Control
Being a teacher is being a leader. YOU have to initiate everything. You must be confident and strong when addressing the class in order to get everyone working under your direction and as a team. You cannot be a pushover when it comes to leading a class.
3. Inject Comedy Into Your Class!
I’m no comedian, but I always try to make the class fun by being funny. I never mind doing anything that’s self-deprecating because making mistakes is part of life and when I share a mistake I’ve personally made and make fun of myself, it puts others at ease while at the same time, teaches them the mistake and of course, how to avoid it. You need to find ways to share your personal experiences in a way that brings comedy or levity to the class environment.
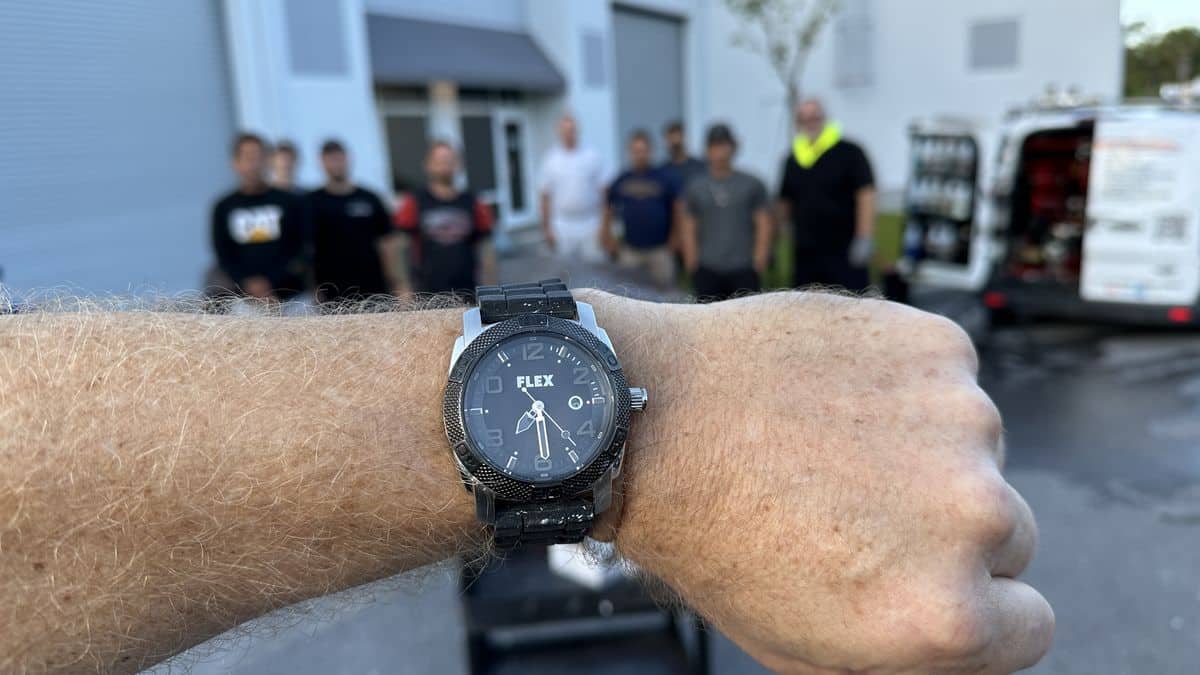
4. Start Your Class on Time
Years ago, at the end of a class, a student who worked as a paramedic stood up and said:
“I take a lot of classes in my line of work. Your class is the first class that ever started on time.”
This had a strong impact on me. Ever since then, I always start my classes on time and document it for my write-ups.
After all, people are paying good money to attend your class. They’ve scheduled their work and family lives around being with you. It’s your job to monitor the clock and not only start your classes on time but keep the class moving along in a timely manner in order to accomplish all the topics for that day.
5. Teach and Lead By Example — Show, Don’t Tell
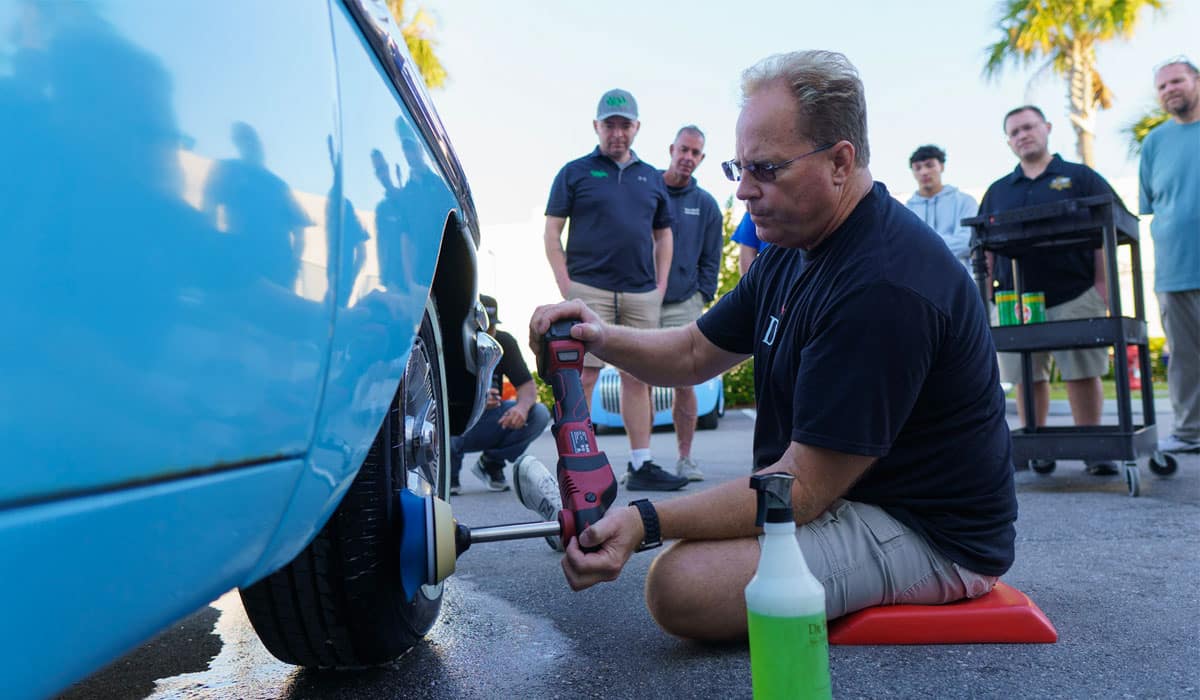
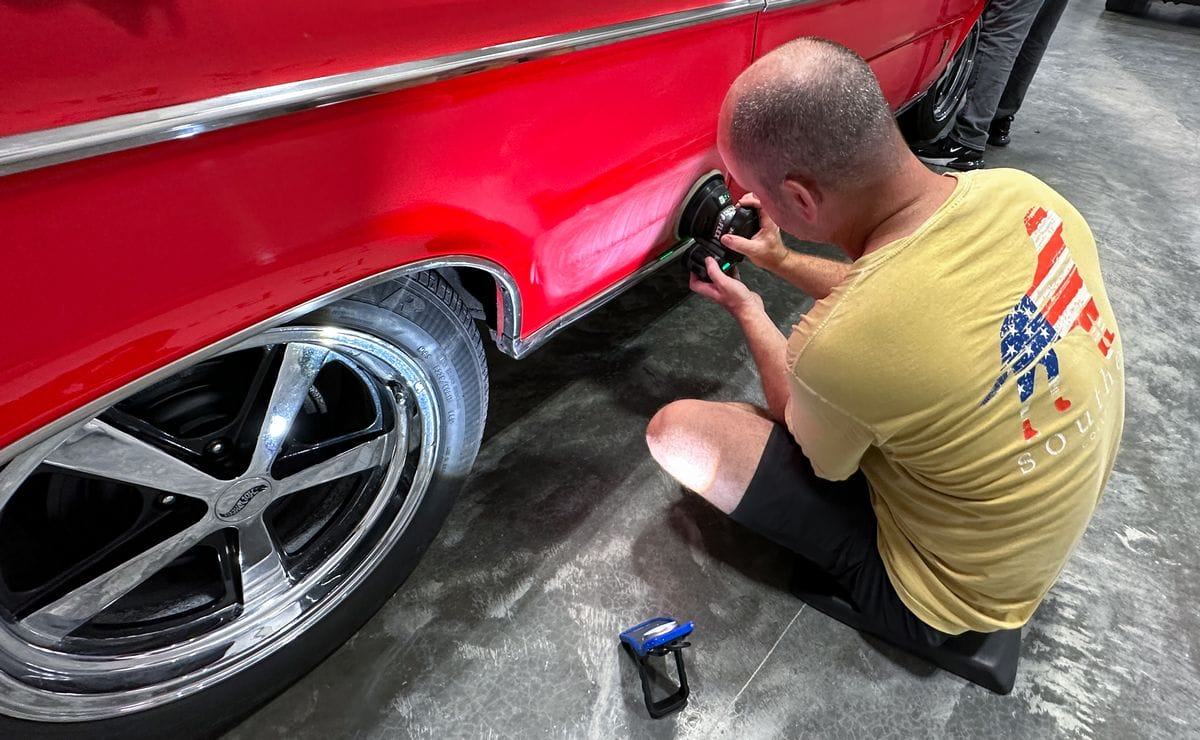
When I teach a class, I will never ask someone to do something I would not do.
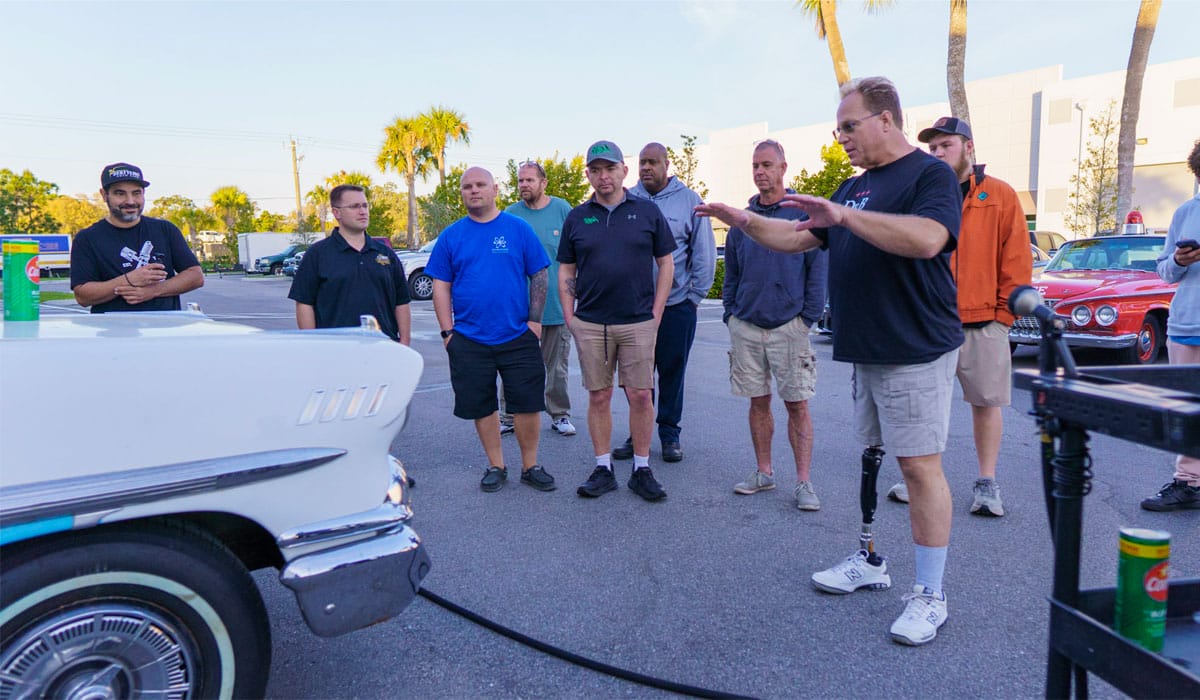
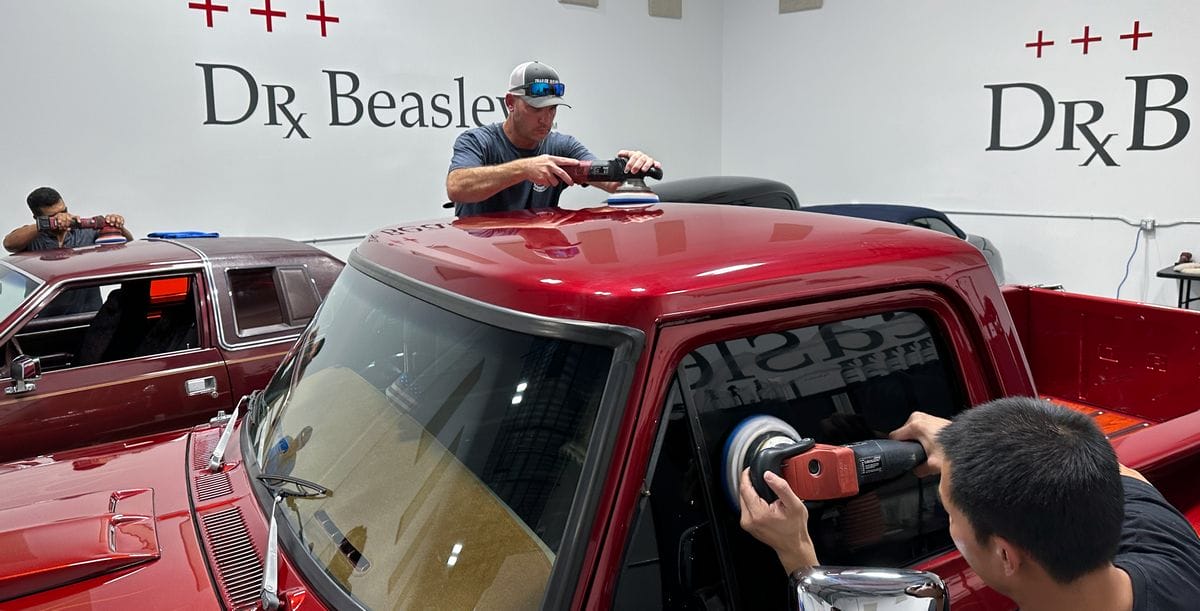
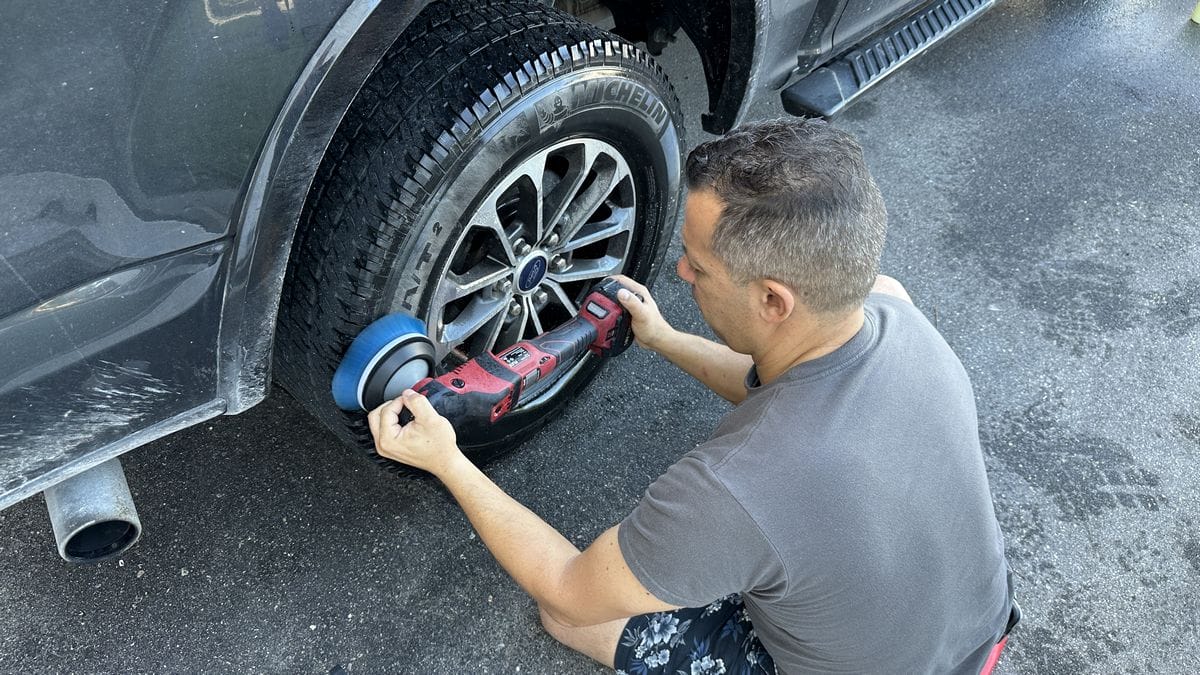
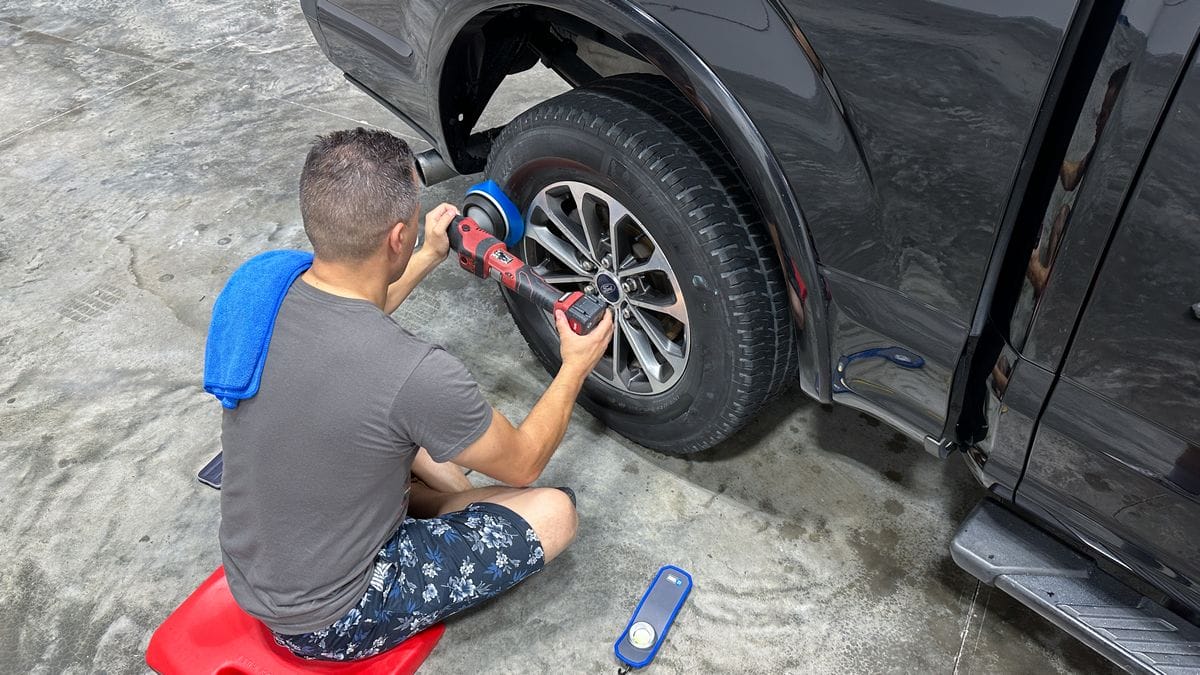
For example, when we do the wheel cleaning portion of the “Extreme Prep Wash” segment, I lead by example and sit in front of one of the wheels and tires to be cleaned and physically demonstrate my techniques. You must be the same way; you need to lead by example throughout the entire day.
6. Get Great Training Cars
Historically I’ve brought in a lot of muscle cars, classics, streetrods, exotics, etc. I also bring in mundane, normal daily drivers or grocery getters. I think having a good assortment of cool cars and new cars makes for a well-rounded class experience. Plus, the students tend to get more excited to take and share pictures of the cool cars they were able to train on to their social media pages.
7. Give Your Students the VIP Treatment
Whether you’re teaching classes for your own business or another company, you need to treat each person like a King or Queen, that is, treat them with respect.
“You never get a second chance to make a great first impression.” – Will Rogers
This holds true as you greet each person the first day of class and all the way through the entire day of the class. You are the face of the business – put on a great face. Be friendly. Be helpful. Be professional. Be courteous. Practice MORE than the Golden Rule.

8. Most Important: BE PATIENT!
It’s all too easy if you know how to do something, to lose patience when trying to teach others what you already know. You MUST be patient. Each student in your class will learn at a different pace. You need to pay attention to what each person is saying, or their body language and cater your teaching style to their learning style and this requires patience. Above all else, NEVER lose your temper.
Why I Don’t Use PowerPoint Presentations in My Car Detailing Classes
My goal with any of my classes is to get to the hands-on action as FAST as possible. I used to teach academic classes, these are the types of classes with lots of chairs, tables, and a PowerPoint presentation. I taught these types of classes at Meguiar’s, in Irvine, California from 2002 to 2009, and then again at Autogeek from 2009 to 2021. At some point the classroom session is over, and we move onto the hands-on portion, which by then is usually after lunch!
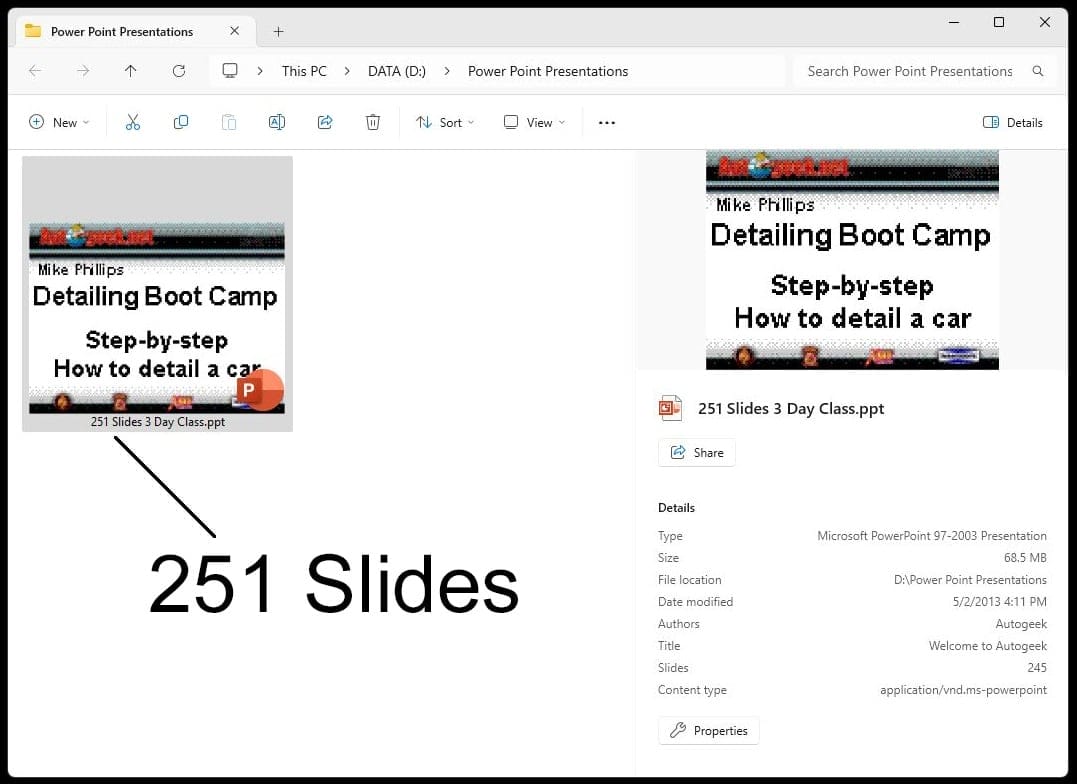
Over the years, my classes went through an evolution. Each time a new tool, product, pad, or technique was introduced to the detailing world, I would add this to the class. My last Autogeek PowerPoint had 256 slides for my 3 day class. That’s 85 slides to drudge through while people eager to be on their feet training with tools in hand try to either capture the information or try not to fall asleep.
It was during a 2-day Roadshow Class at Lake Country Pads in Oconomowoc, Wisconsin, in 2017, that while setting up a projector in their breakroom to share the PowerPoint presentation I literally said:
“Screw it. Let’s just work on cars.”
I had 8 super training cars lined up for this 2-day class and here’s what I thought…
Instead of showing the class slides of the various tools and products and then teaching the correct technique to use them, how about instead, I just put the tools and products into their hands, demonstrate the correct technique and turn them loose.
Not only was this approach successful, but this is also what people wanted to do. When people sign-up for a car detailing class they don’t want to sit in a chair and look at pictures of car detailing while I drone on and on and on, they want to get a buffer in their hands and buff on a car!
Ever since that class in Oconomowoc, Wisconsin, I simply quit using PowerPoints. Instead, I do a demo, usually how to do a Test Spot plus how to properly use the polisher and then turn the student loose to work on the cars.
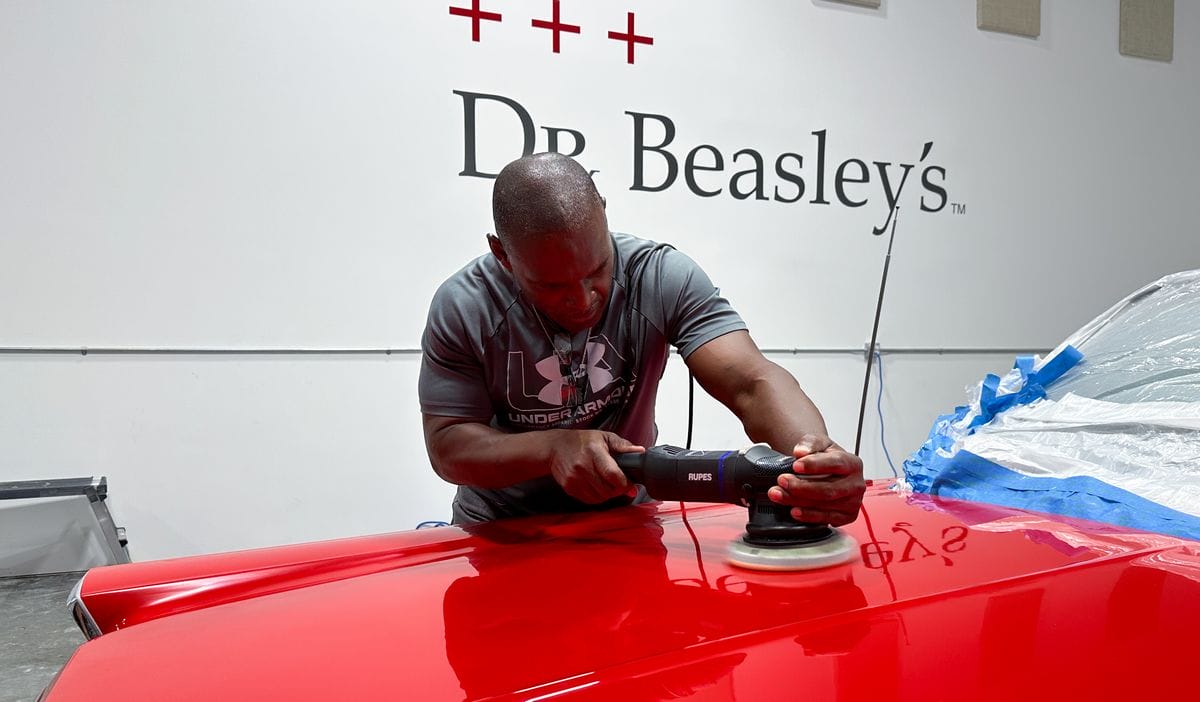
And yes, for the entire time for all my classes, I walk around and monitor the students. If someone is doing it right – I let them know, I assure them to build their confidence. If I see someone that’s close, but needs a little help, I gently stop them and show them how to tweak their technique to get better results faster. Again, assuring them they’re doing good and building their confidence.
I know some may disagree with this approach, but here’s what I know from decades of teaching car detailing classes:
The type of people drawn towards car detailing tend to be the type of people that learn better by doing, versus sitting in a chair.
So you all can teach your classes however you see fit. I have my way; you can have your way. Now let’s take a look at how a Mike Phillips class unfolds.
The goal is to get the people working as fast as possible, that said it’s also important to start out with the basics of a good class.
How to Build a Curriculum for an Auto Detailing Class
There are a lot of different ways you can teach a detailing class. For the purposes of this article, I’ll share a sample curriculum for my 1 and 2-Day Auto Detailing Classes.
There’s a lot of topics here, but you can pick and choose everything or just a few of the topics.
My brain thinks like this:
I have these people for a limited time – I’m going to do a Brain Dump and do my best to teach them as many topics and techniques as possible.
Thus the reason I start my classes early and there’s only a short lunch break.
Day 1 — The 3 Basic Paint Correction/Ceramic Coating Packages/Approaches
Whether you’re a Do-it-Yourselfer or a Professional Detailer, there are 3 basic, minimal packages or approaches you need to know for your own cars or to offer your customers.
Package/Approach 1: Your Top Level Approach or Package – Multiple-Step or Show Car Detailing – Paint Correction & Ceramic Coating.
Package/Approach 2: Mid-Range Approach or Package – One-Step Paint Correction and Ceramic Coating
Package/Approach 3: Budget Package – 1-Step Ceramic AIO Paint Correction. You can also use a wax-based AIO.
For each of the above packages or approaches, I bring in 1-3 cars, depending upon how many people are in the class. I only bring in large cars to ensure everyone has tons of hands-on time with the various tools, products, pads, and processes.
Sample Itinerary (Approx.)
Student Arrival – 6:30am to 7:30am
- Greet each student personally, lock-in their first name.
- Have each student fill out the release of liability form.
- Show students where the coffee, donuts and bagels are located.
- Point out where the bathrooms are located.
Class Starts Sharp at 7:30am
- Introduce myself and my assistants if any.
- Briefly share the topics for the day.
- Point out where the First Aid Kit is located.
- Show where the bottles of water are located and teach people how to drink water.
- Take a tour of the shop and show where the tools, batteries, pads, products etc. are located.
- Point out how the power cords are coiled properly for the polishers and request everyone to put their tools back on the shelf where they obtained them and coil the power cords accordingly.
- Point out where dirty towels and pads go. Ask everyone to do their best to keep towels off the floor.
IMPORTANT: Take Student Goals Inventory!
Ask each person the most important things they want to get out of the class whether they are detailing for fun or profit. This is one of the MOST IMPORTANT first steps for a successful class. This ensures you cover every topic each person is expecting to learn during the class.
9:00am – Start First Class Session – Show Car Detailing
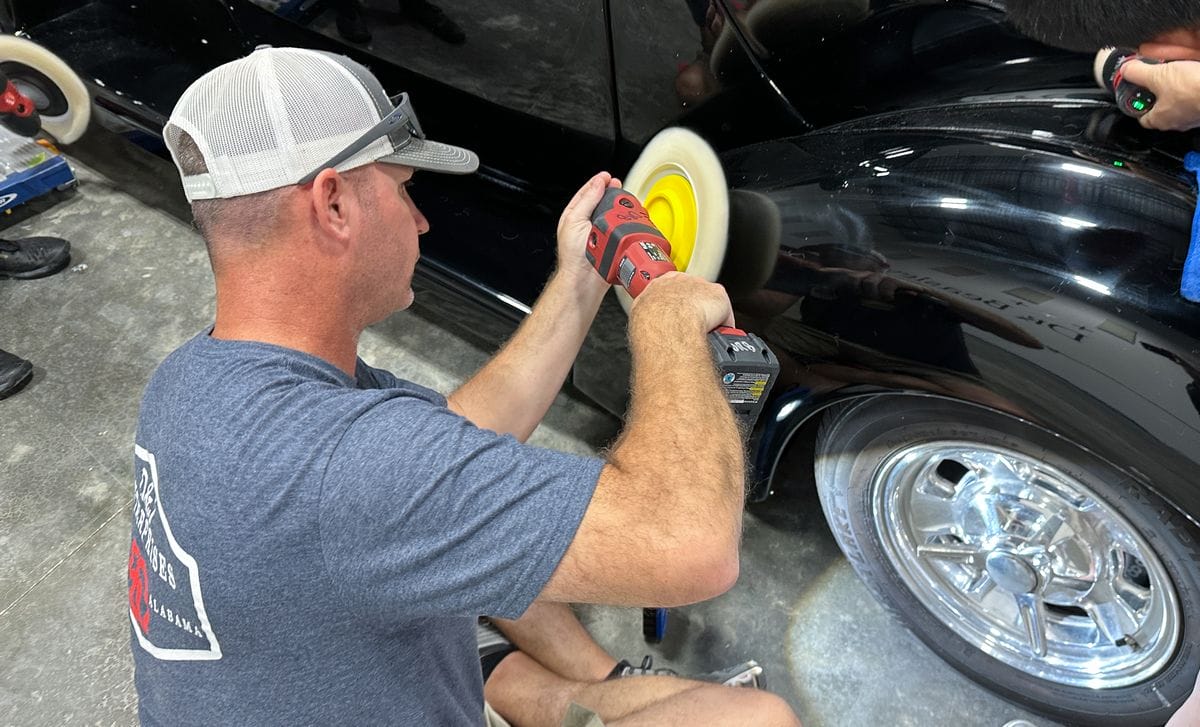
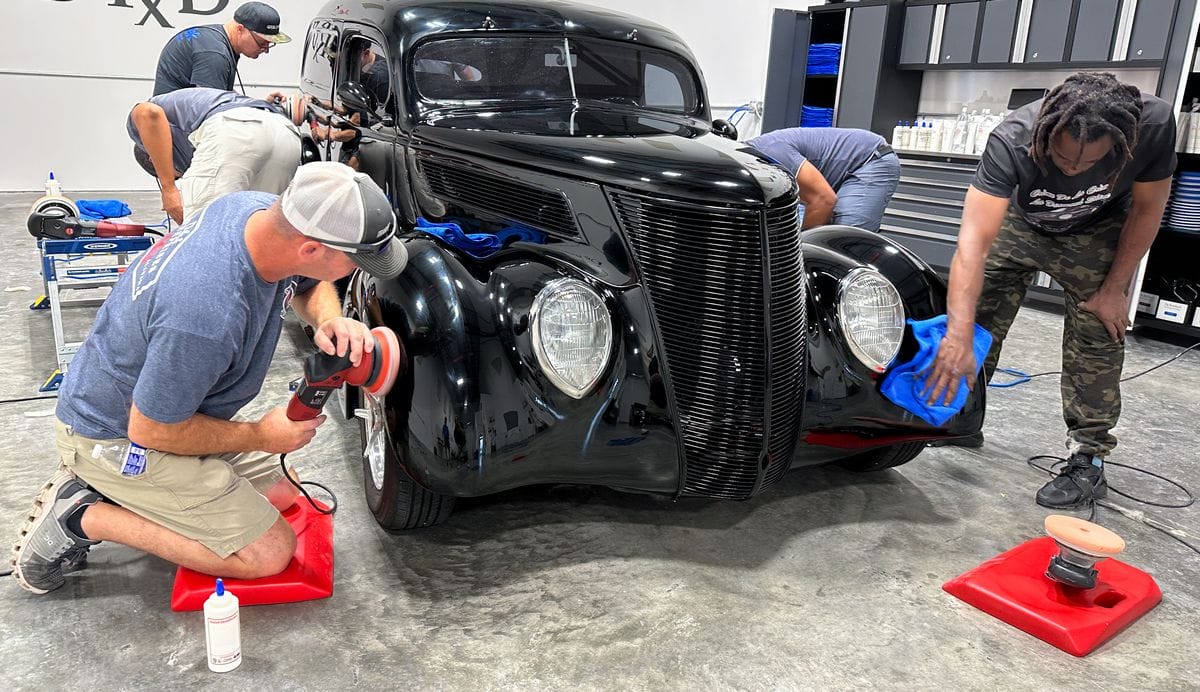
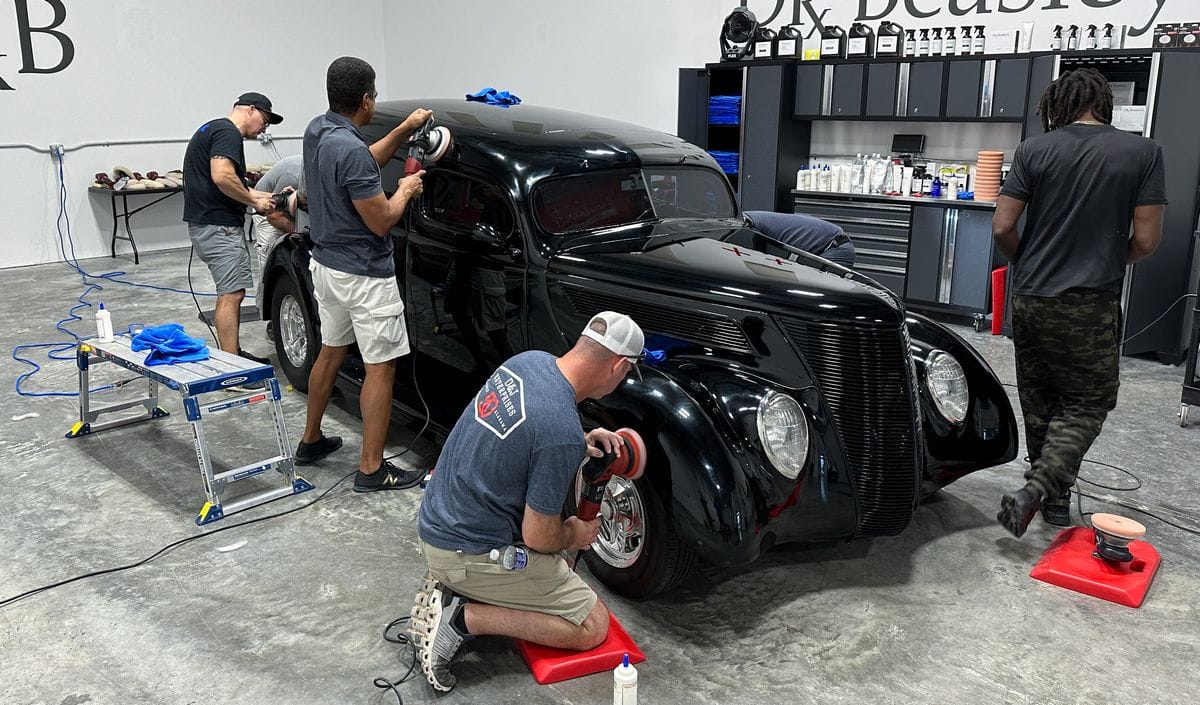
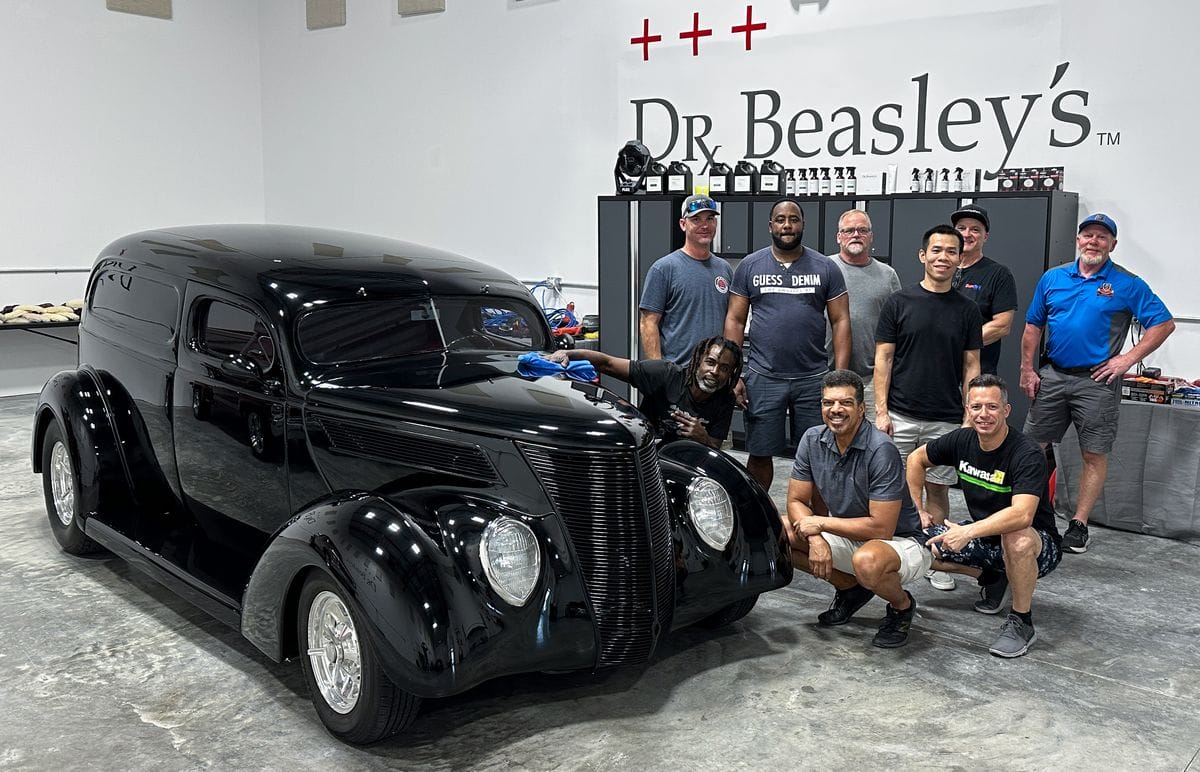
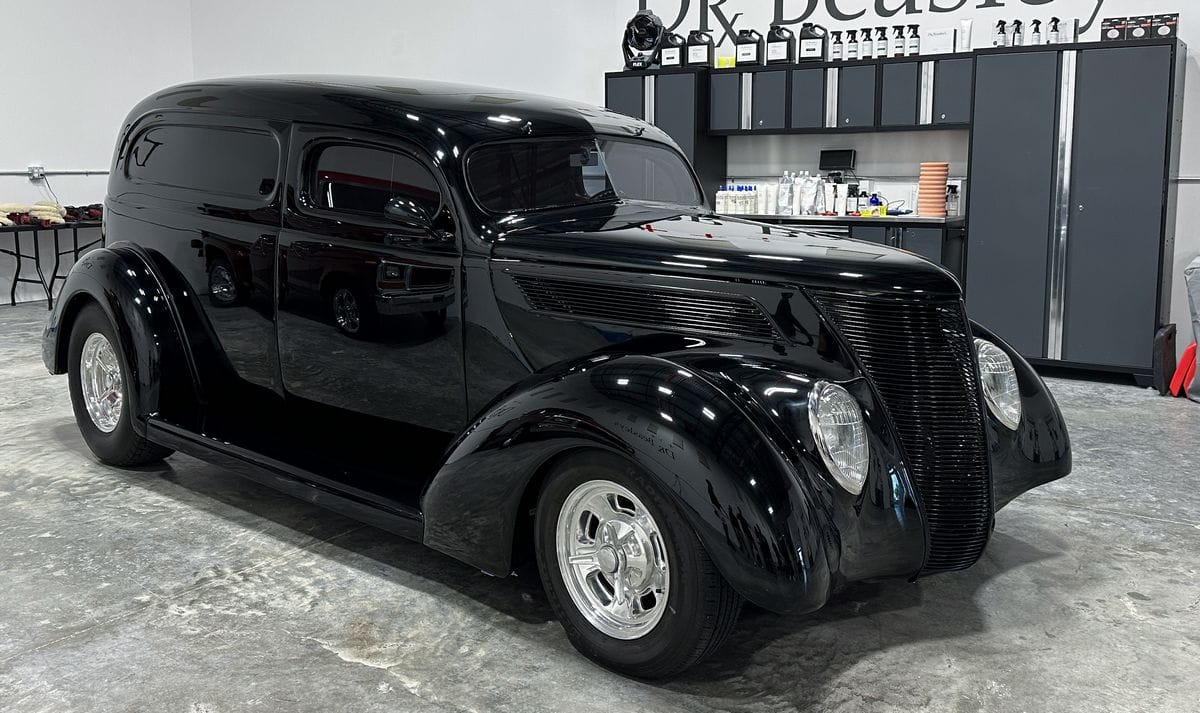
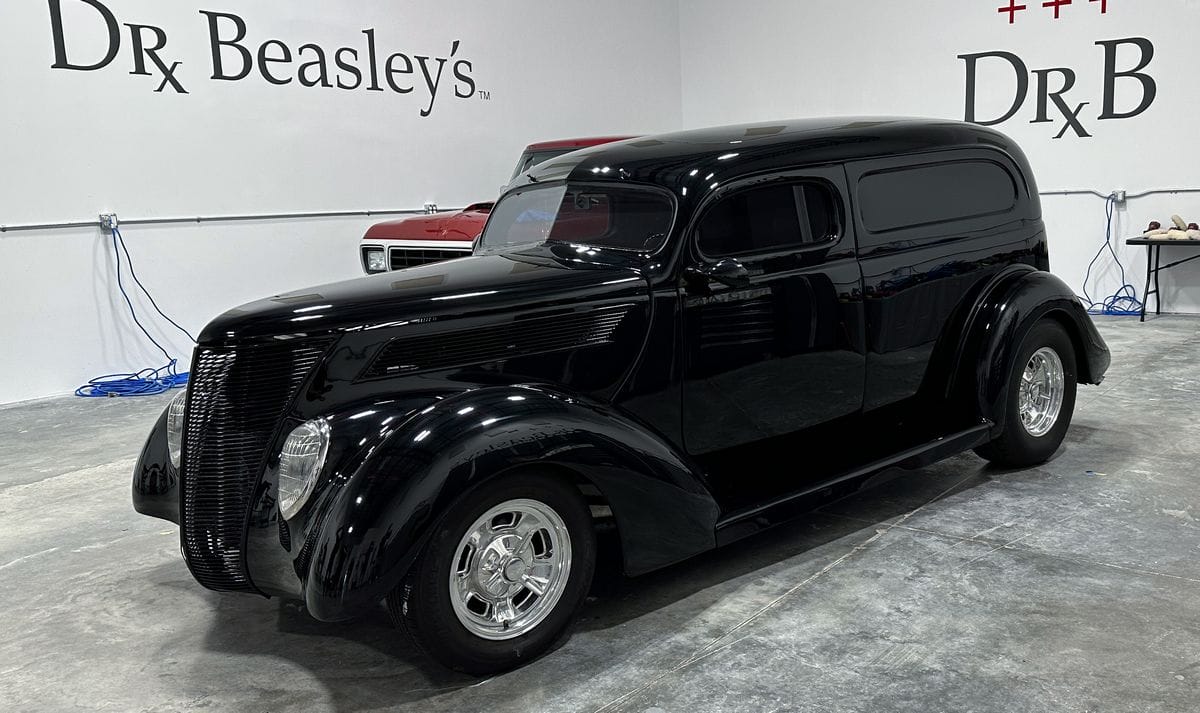
For my classes, I start with show car detailing, also called multiple-step paint correction. As a group we take inventory of the current condition of the paint on the training cars. For this first class I have a 1937 Ford 2-Door Sedan Streetrod.
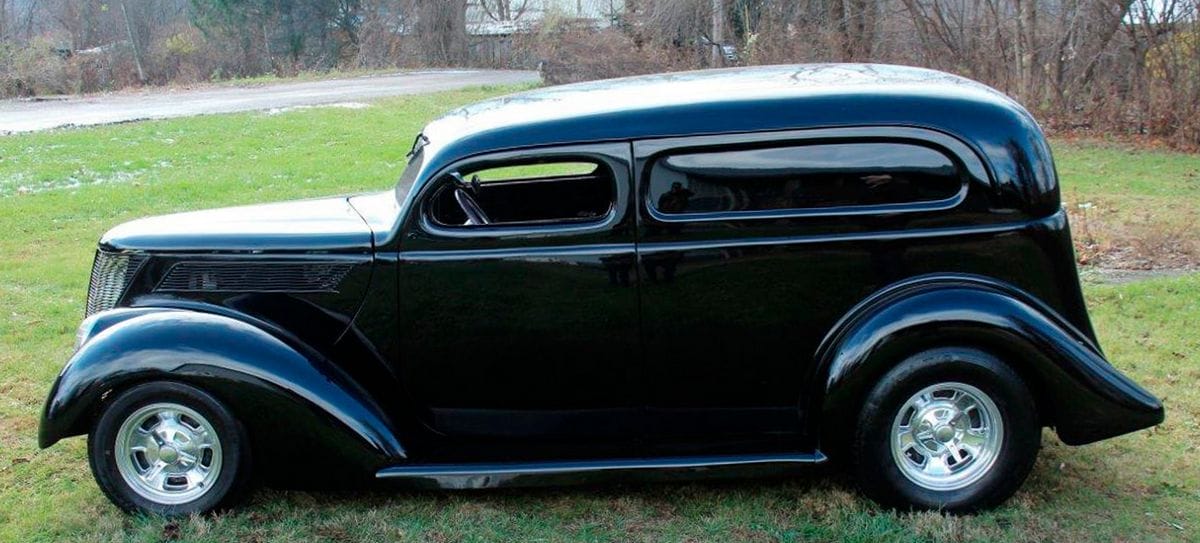
It’s a super high-end build except the paint is completely swirled out and there are both hand and machine DA sanding marks EVERYWHERE in the paint. The perfect training car for a rotary polisher, plus black paint!
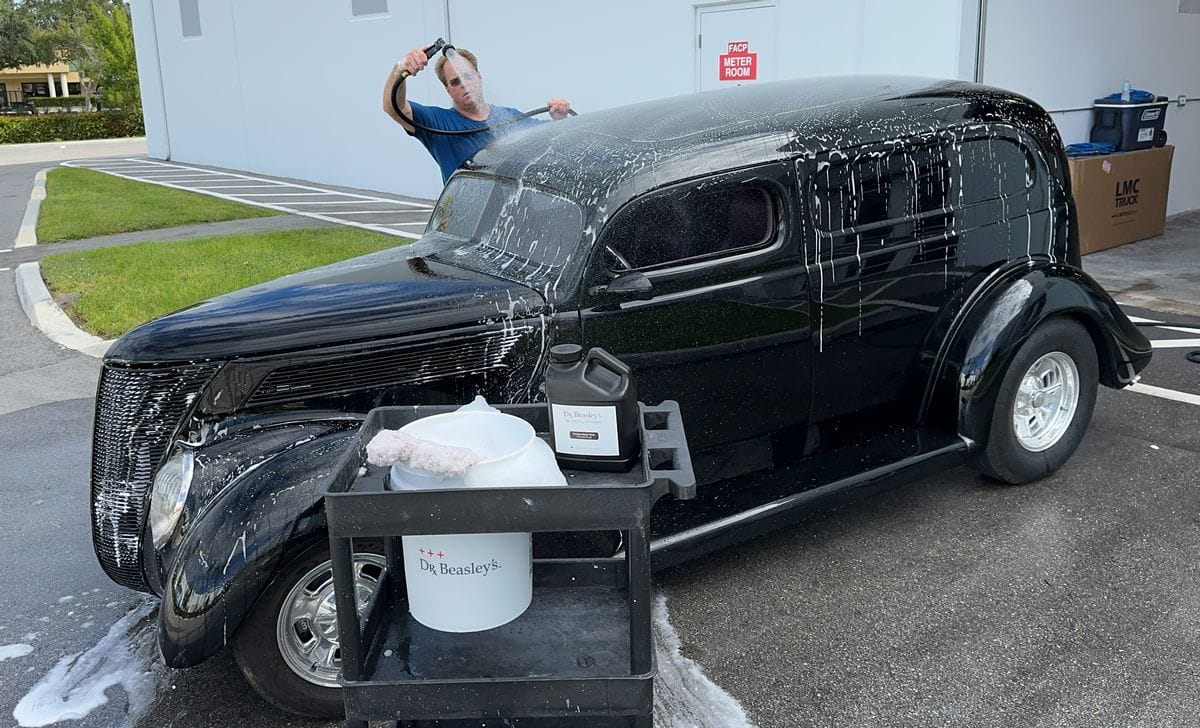
Extreme Prep Wash – Wet Wash Engine Detail – Topical Glass Polishing – Machine scrubbing tires
For this car, I did the Extreme Prep Wash a few days before the class started. This includes, machine scrubbing tires, cleaning wheels, topical glass polishing, washing all body panels followed by mechanical decontamination. Usually, however, I’ll teach students all these topics as part of the lesson.
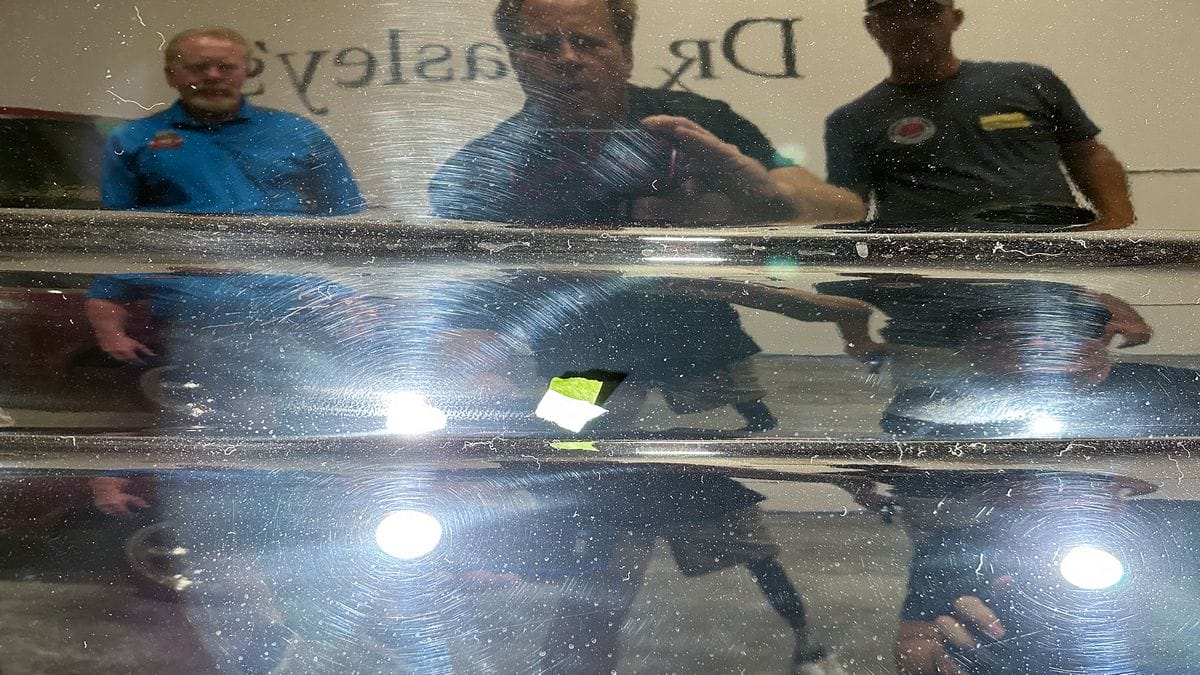
Inspect Paint
For this, we take inventory of paint defects and the level of swirls, oxidation, water spots and oxidation. We also perform the Baggie Test. This car was totally swirled out plus there are D.A. machine sanding marks and hand sanding marks throughout the paint. We also use a paint thickness gauge (PTG) to measure paint thickness.
Tape-off and Cover Up
If the cars have any exterior pebble textured black plastic trim, we use high adhesion painter’s tape to tape-off these areas and/or components. A little time upfront taping off plastic saves hours of time trying to remove compound and polish splatter.
Perform the Test Spot for Each Car
Most of my classes have 2-3 cars for each topic. Because paint is different in soft/hard scale, it’s important to explain this and then perform the Test Spot. (Fun fact: I coined the term test spot back in 1998!)
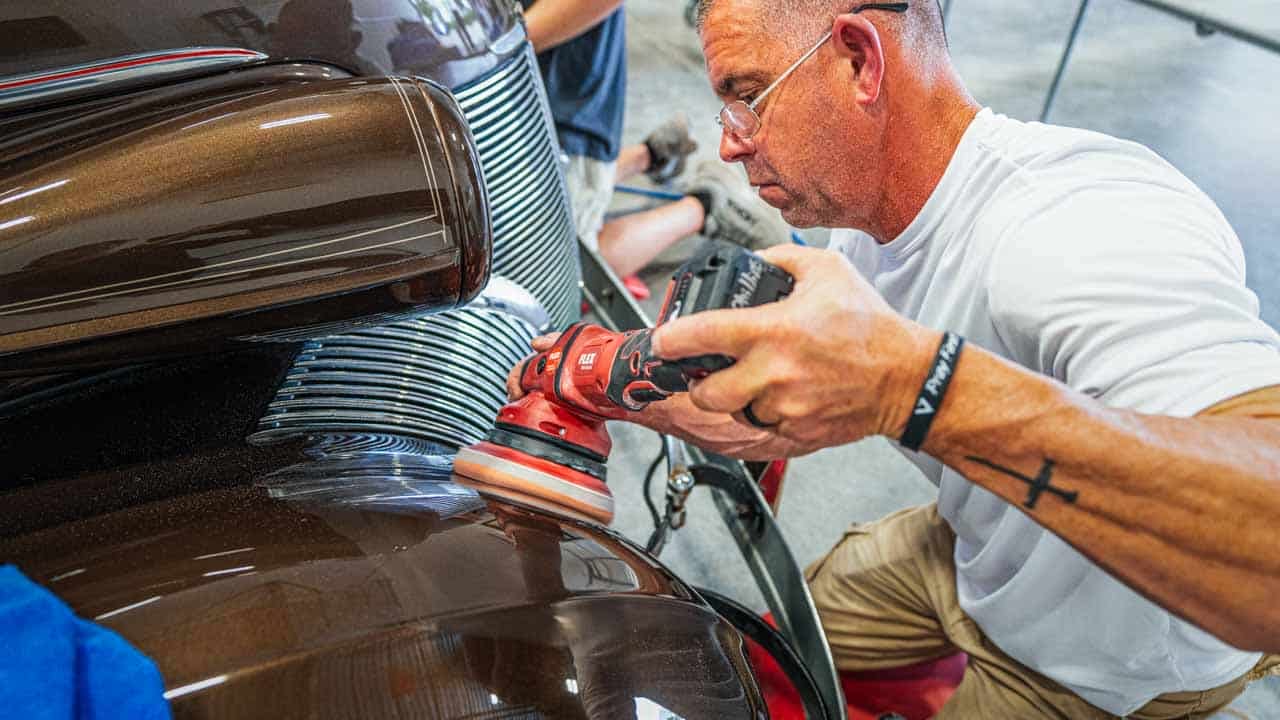
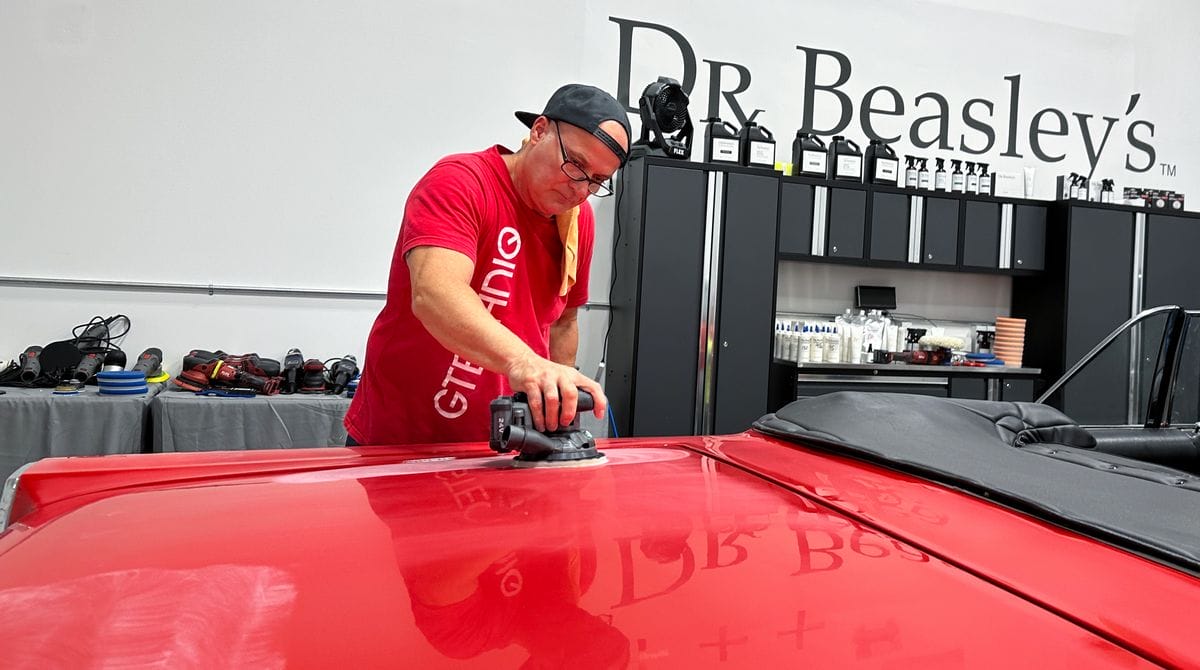
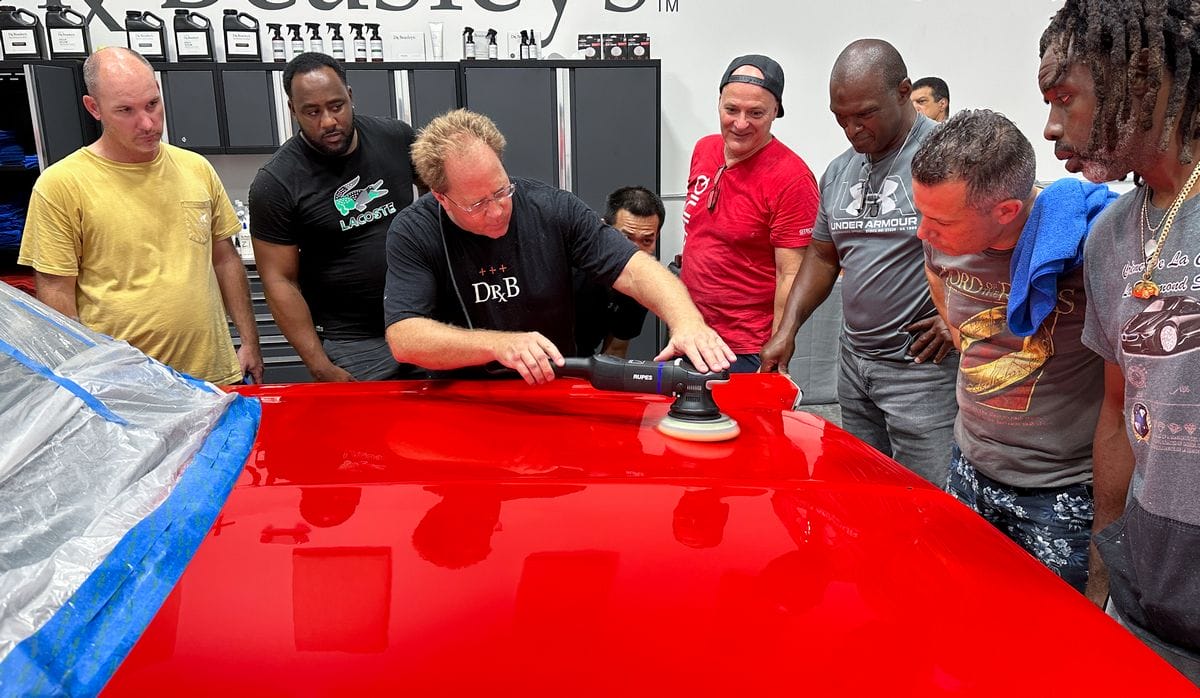
Perform First Paint Correction Step with Rotary Polishers
Most people would agree that the rotary polisher is the most difficult tool to learn and master. In my classes, you start with this tool and continue to use it over the course of the class.

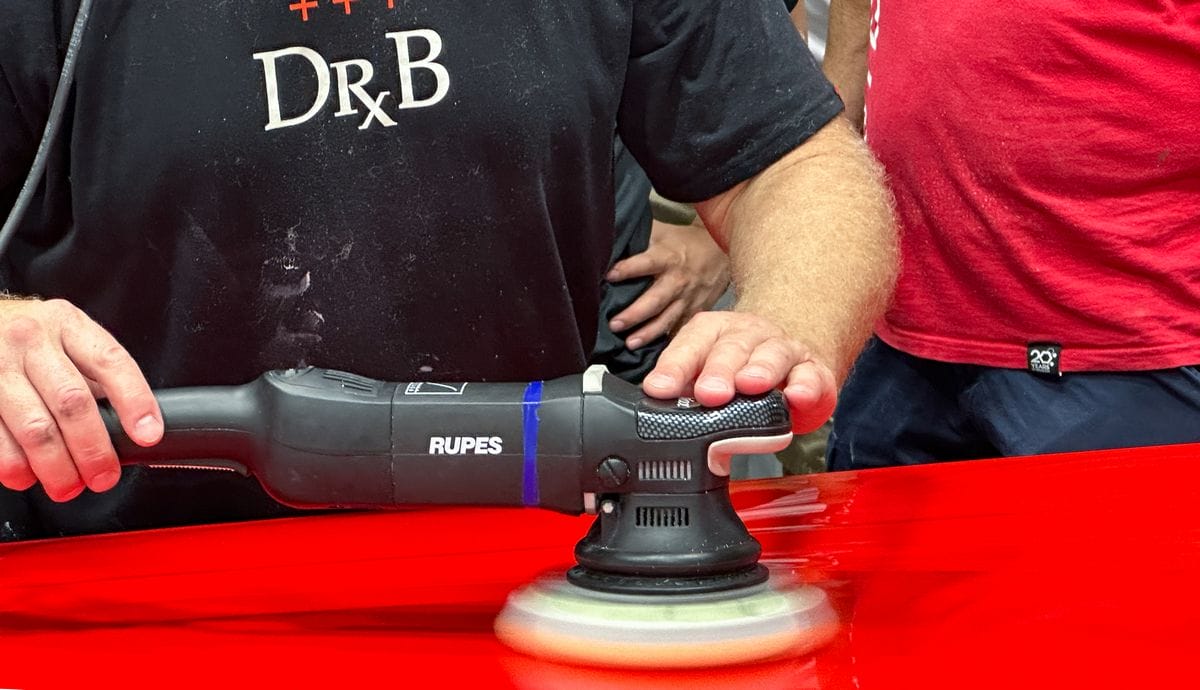
Perform the second paint correction step using orbital polishers
For this we use gear-driven orbitals because generally speaking, they are faster overall and don’t stall.
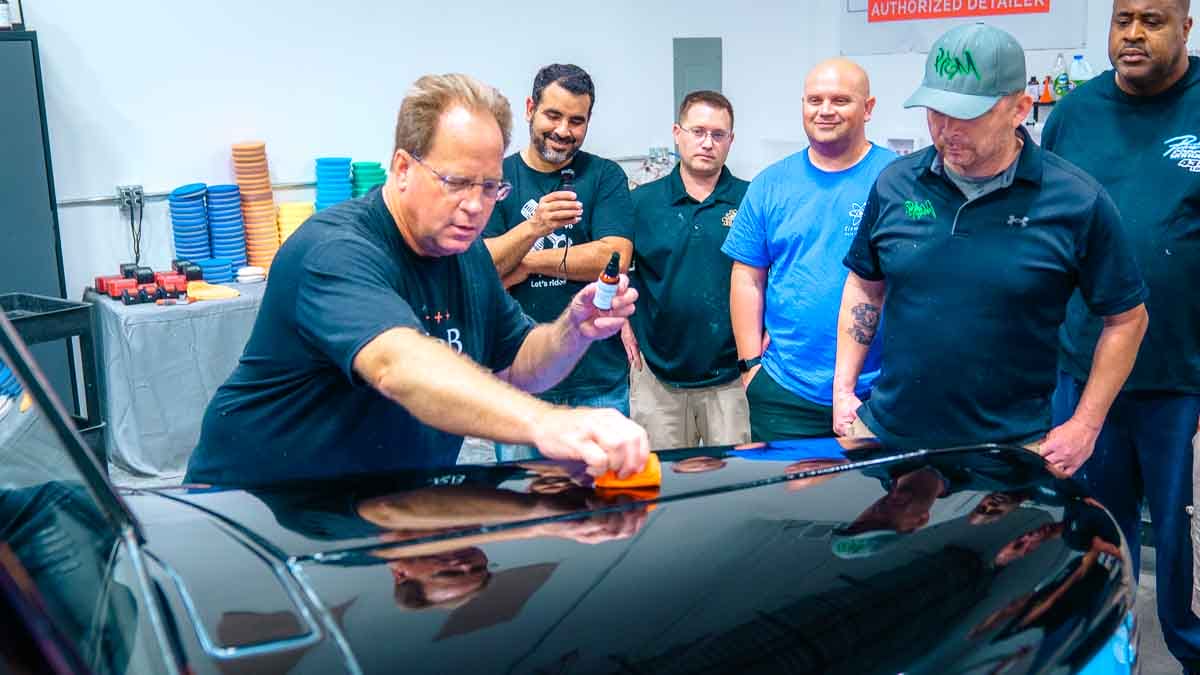
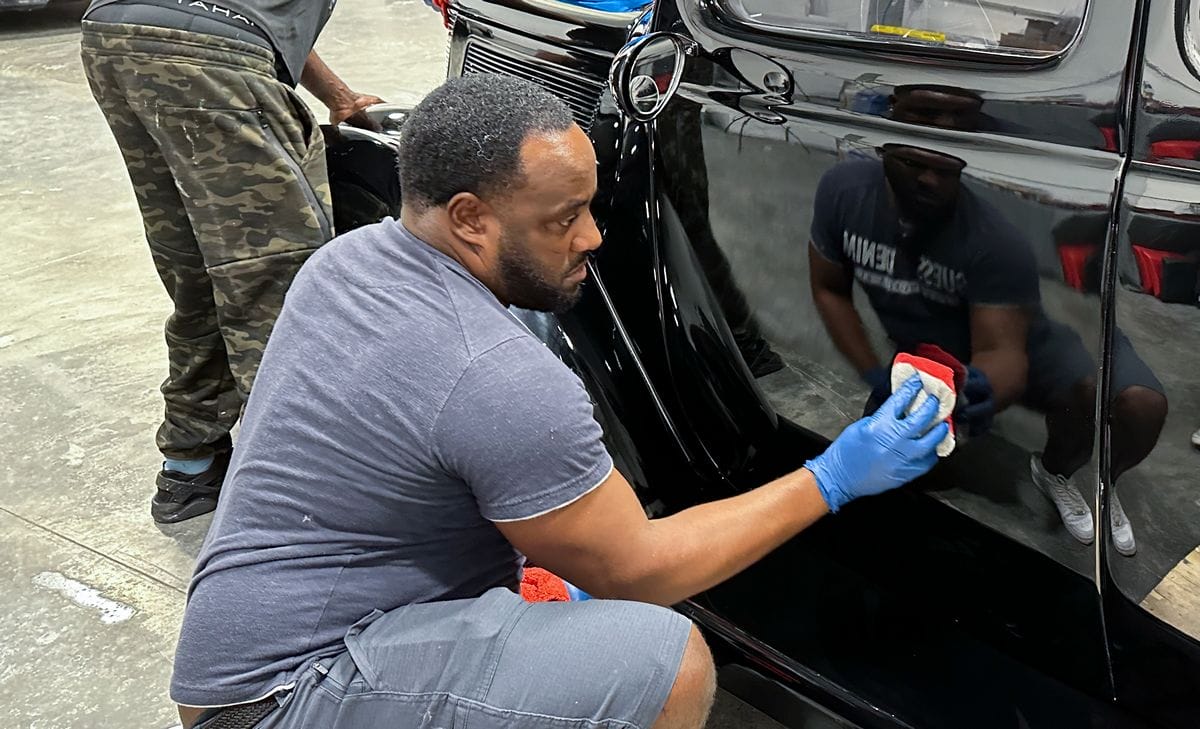
Install the Ceramic Coating
Each car detailed gets a ceramic coating and we use multiple types of coatings to provide a better overall learning experience.

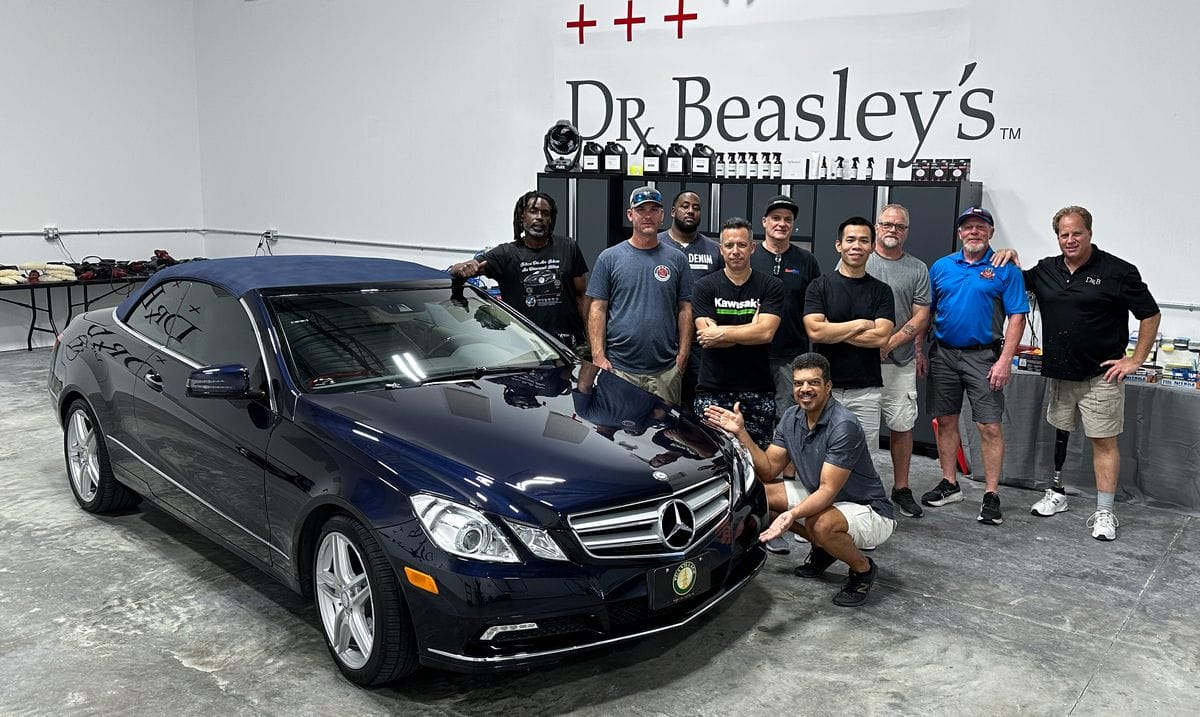
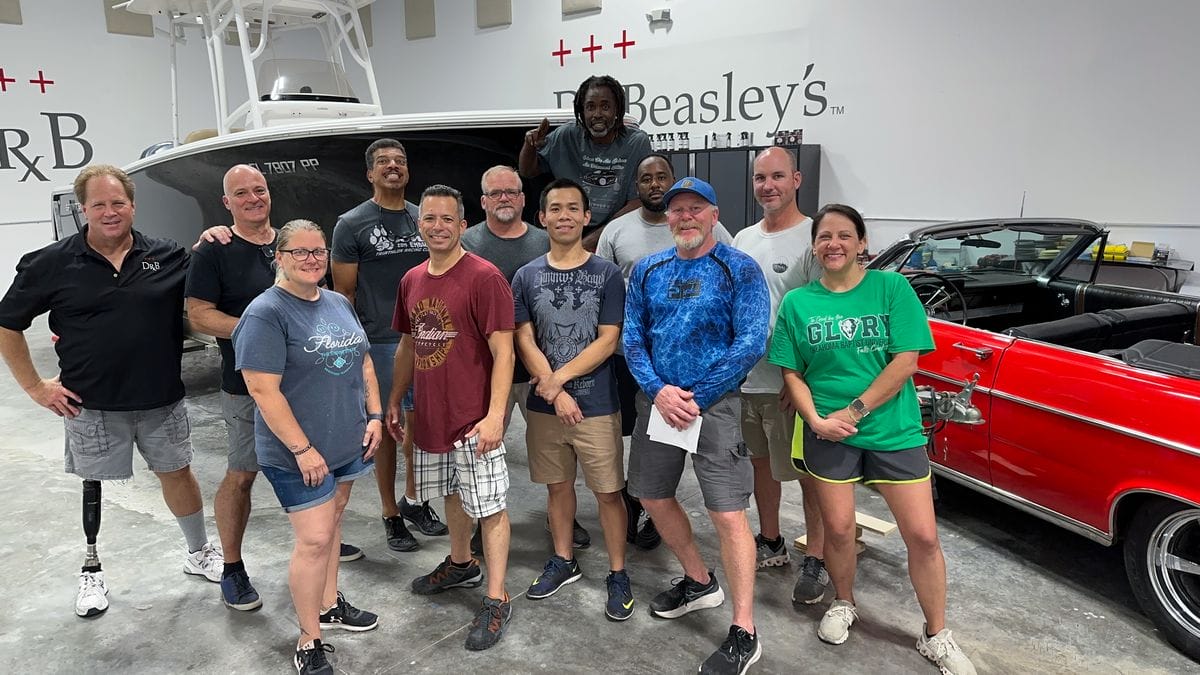
Capture a Group Shot with the Cars Just Detailed
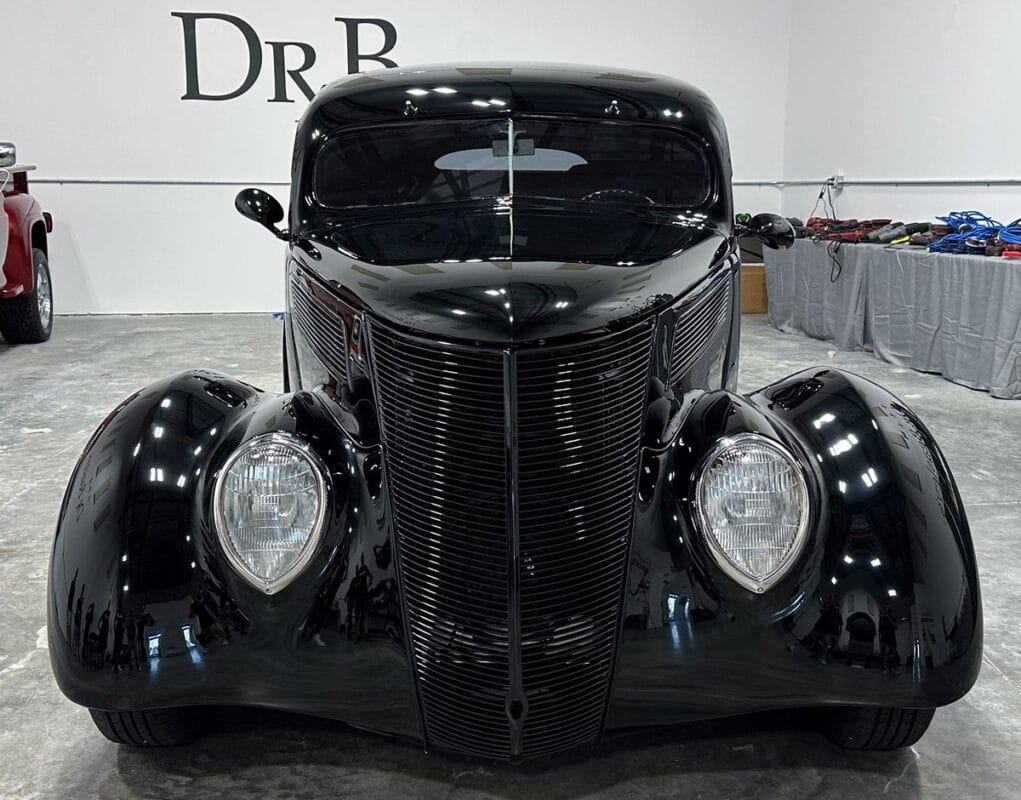
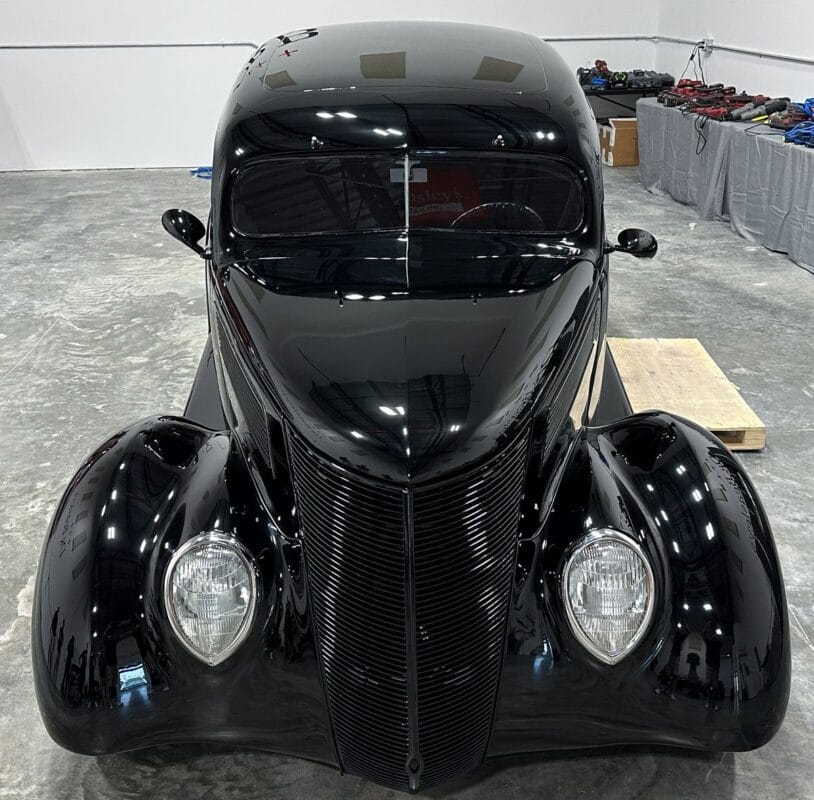
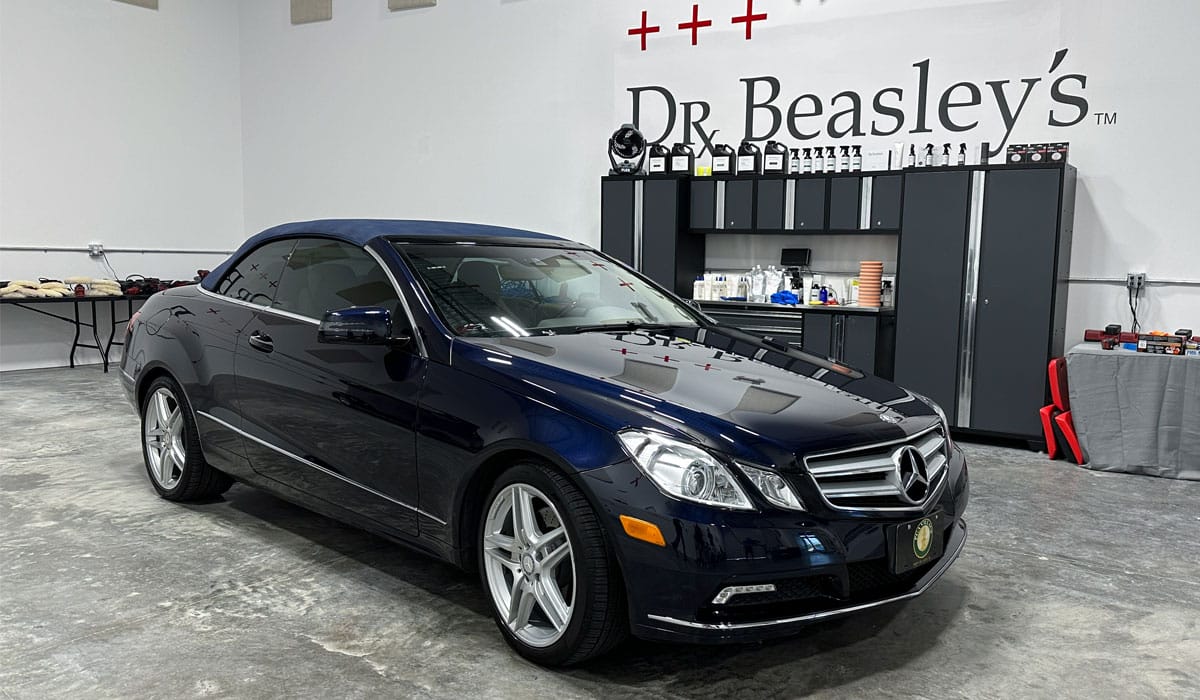
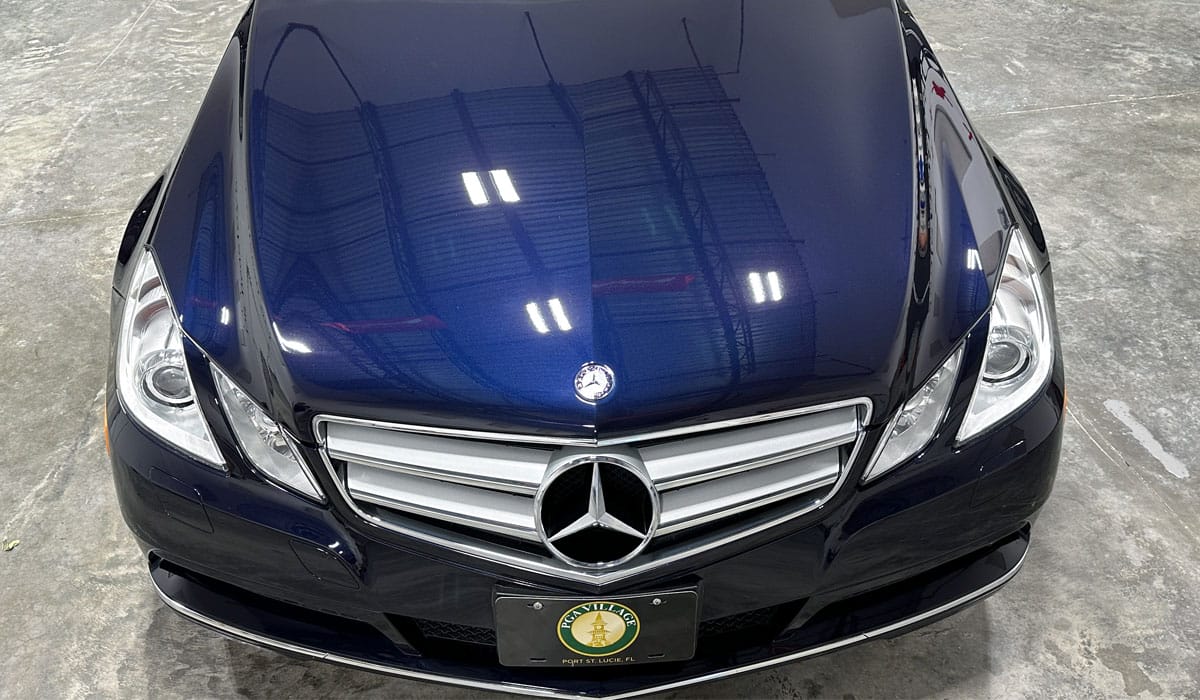
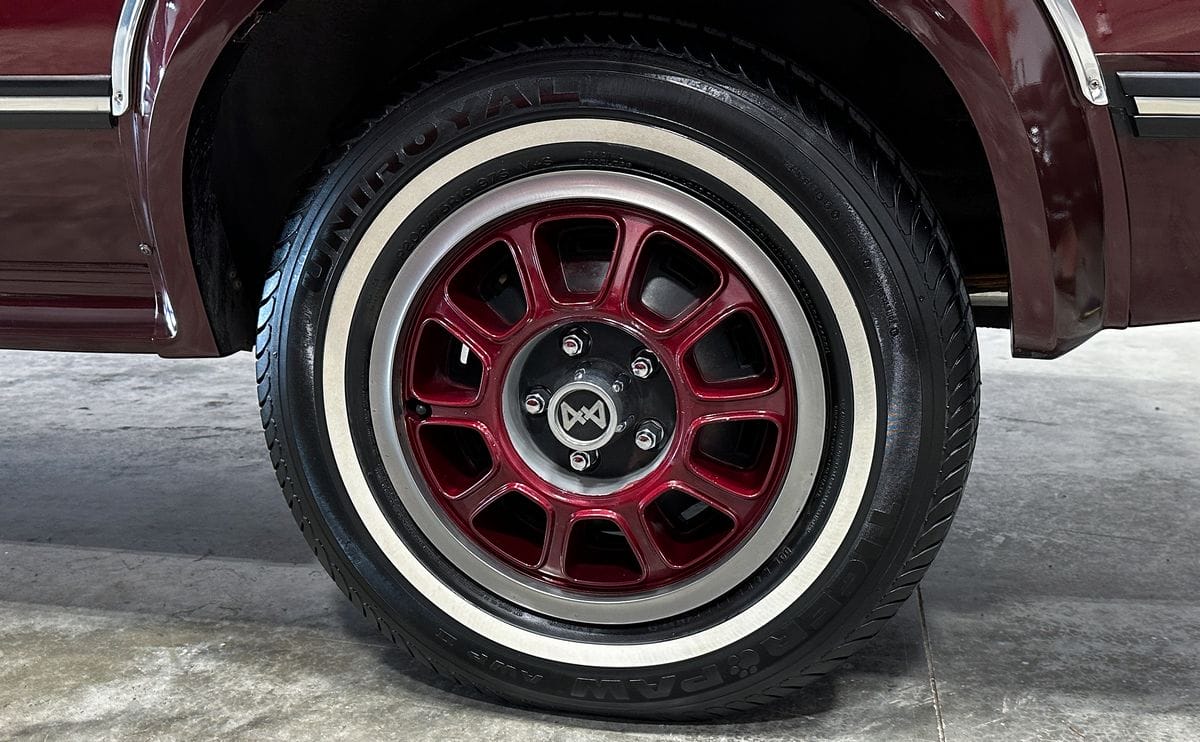
Capture the Beauty Shots
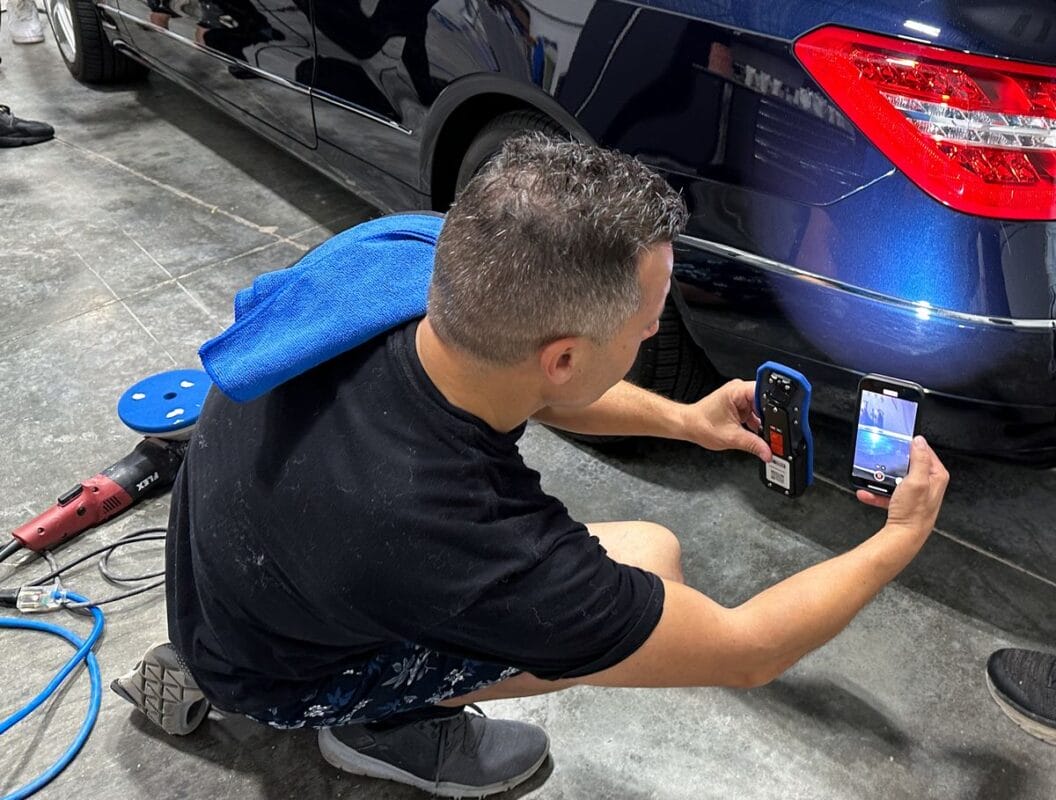
I practice and preach to always get the final results, pictures, or beauty shots. Be sure to always get great before shots too.
12:30pm – Start Second Class Session – One-Step Paint Correction & Ceramic Coatings
For the first car, we learned a 2-step paint correction process. Had the paint on the 1937 Ford been on the soft side, we would have done a 3-sep paint correction process. For this next class topic, we’re going to learn how to do a one-step paint correction followed by installing a ceramic coating. I tend to bring in cars that are neglected, but never as bad as the 1937 Ford.
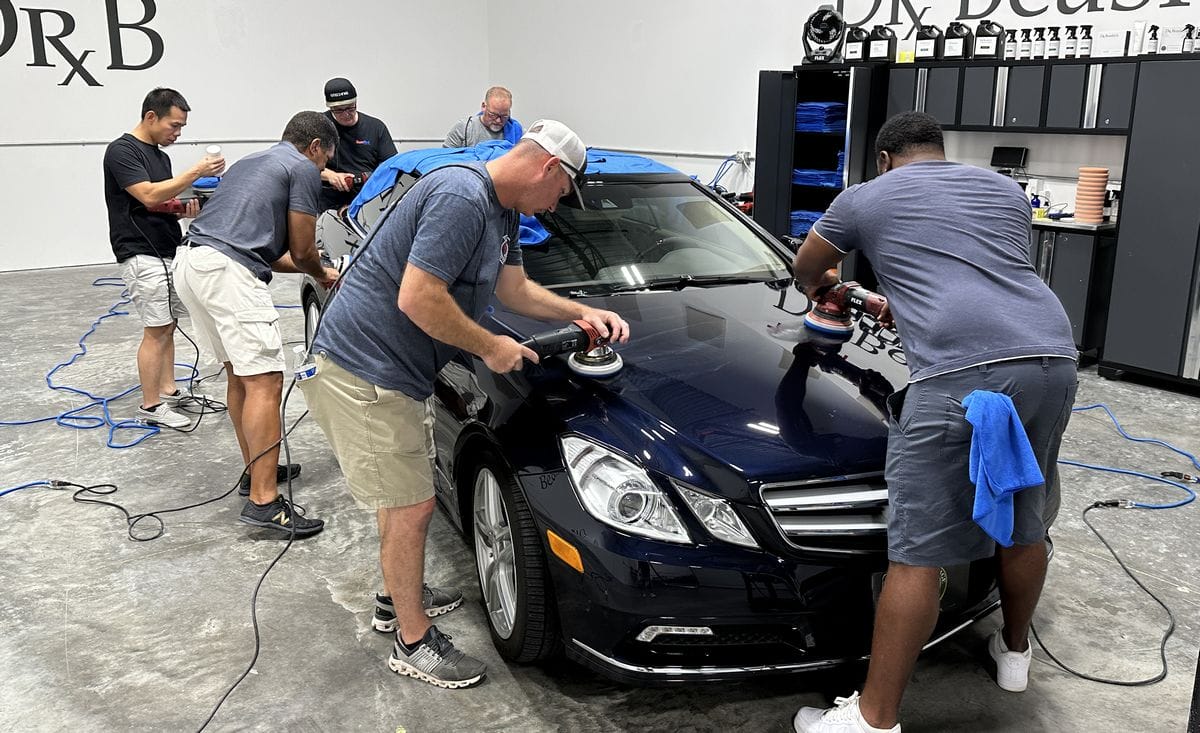
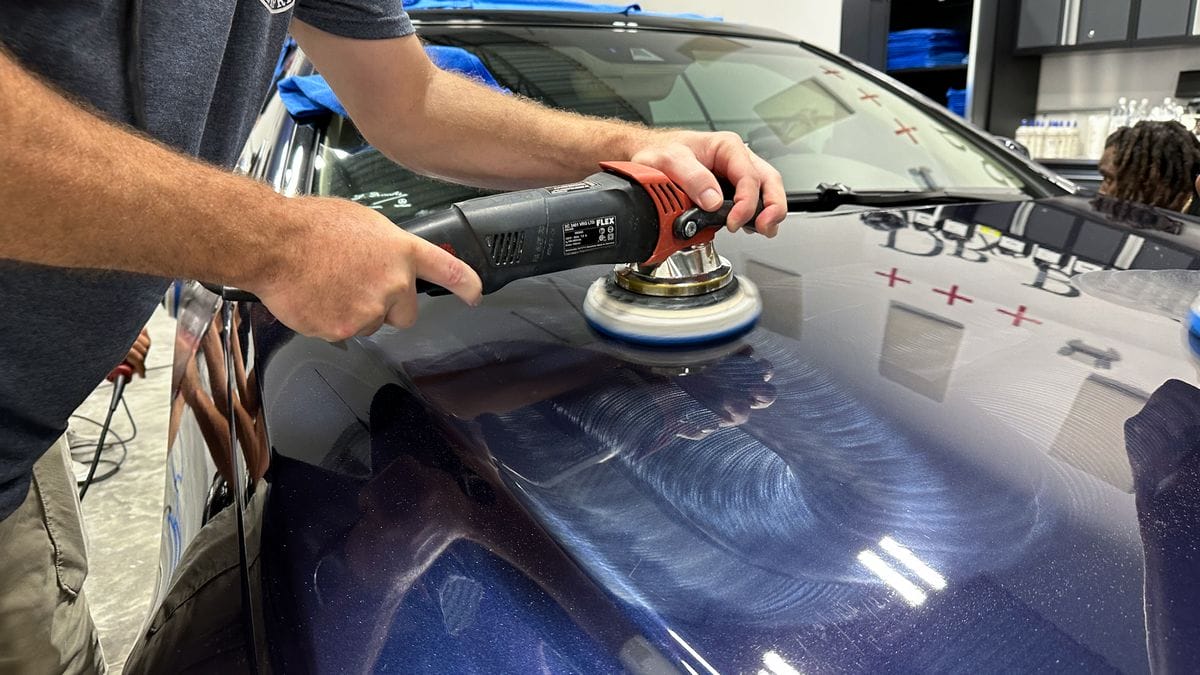
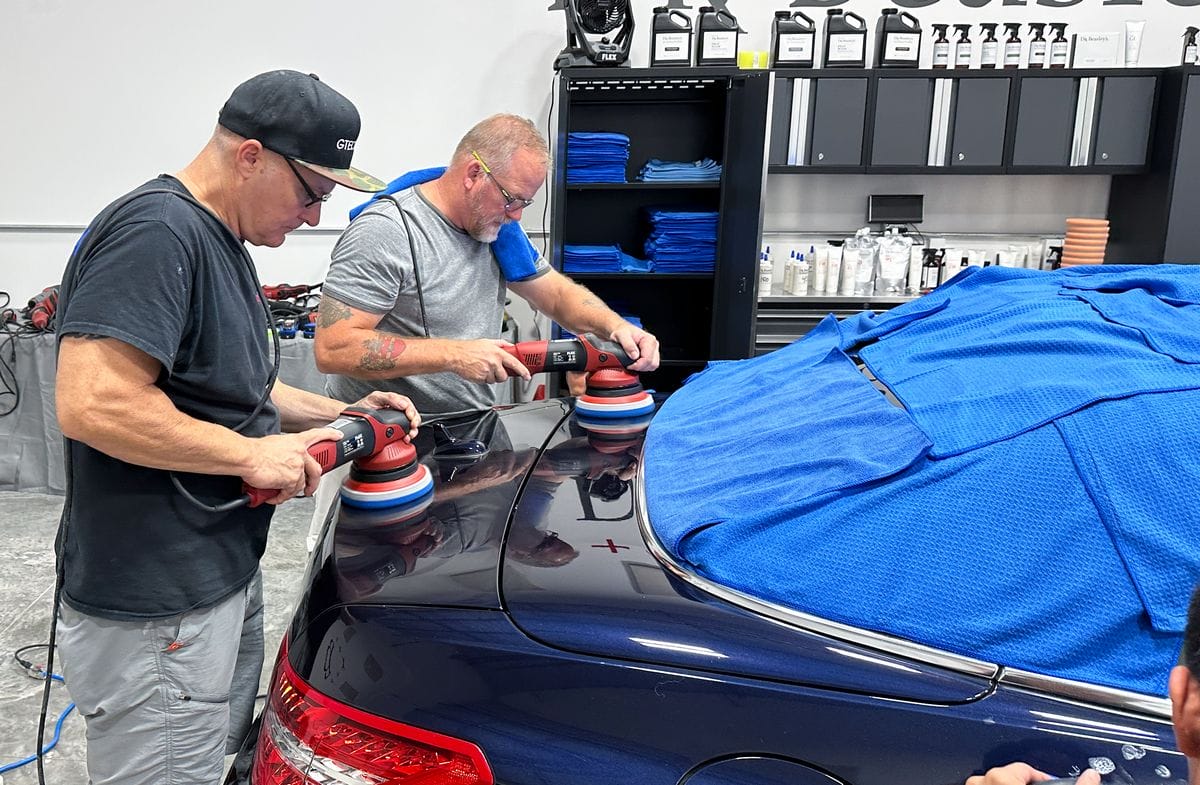
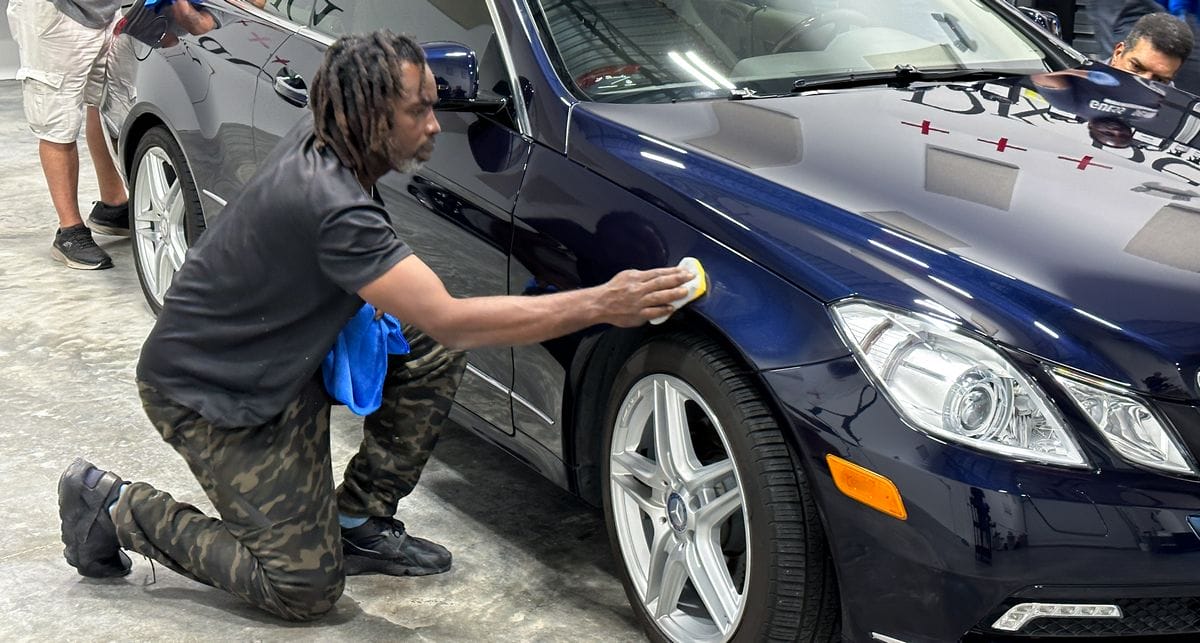
2011 Mercedes-Benz E350 Cabriolet
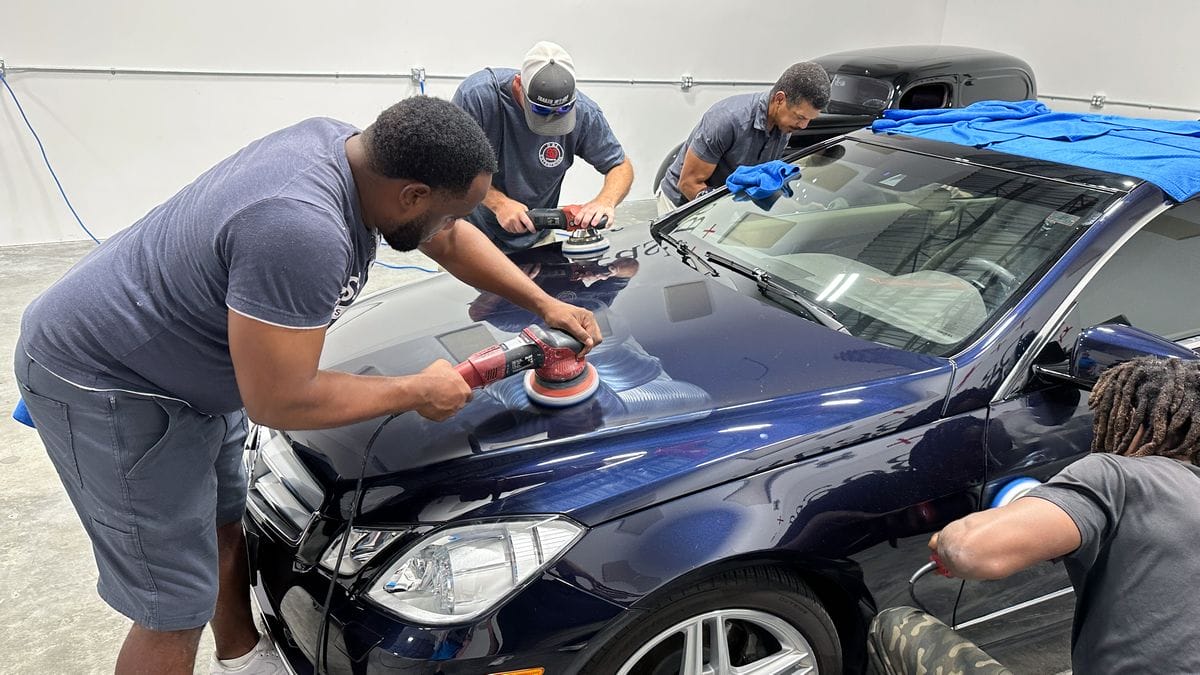
This Mercedes had normal wear-n-tear swirls and scratches being 12 years old at the time of the class. The procedure follows the same structure as the first session:
- Tape-off and Cover Up
- Perform the Test Spot for Each Car
- Perform the single paint correction step using orbital polishers
- Install the ceramic coating
- Capture a Group Shot with the Cars Just Detailed
- Capture the Beauty Shots

3:30pm – Start Third Class Session – 1-Step Ceramic AIO Paint Correction
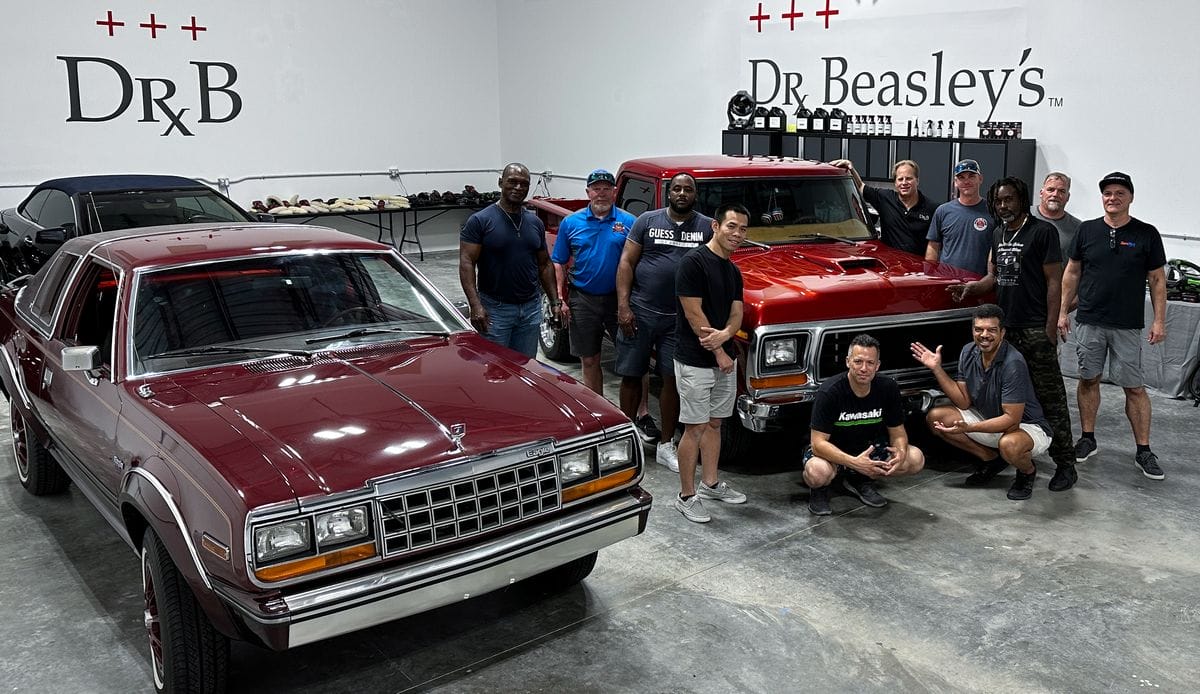
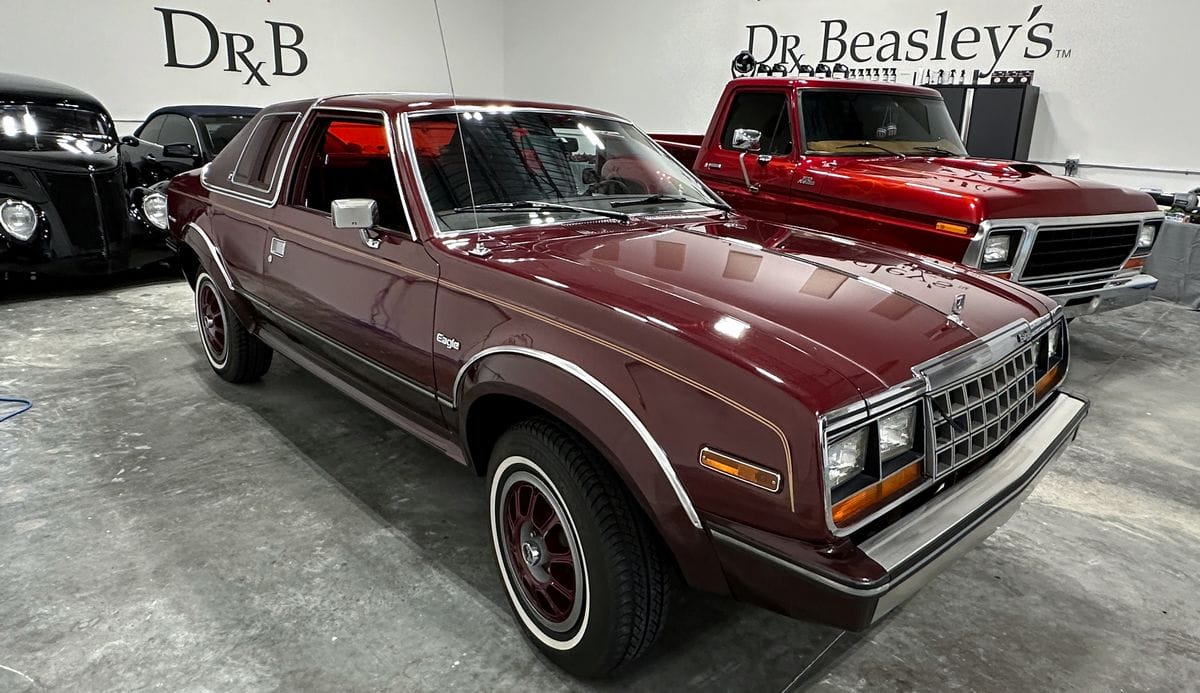
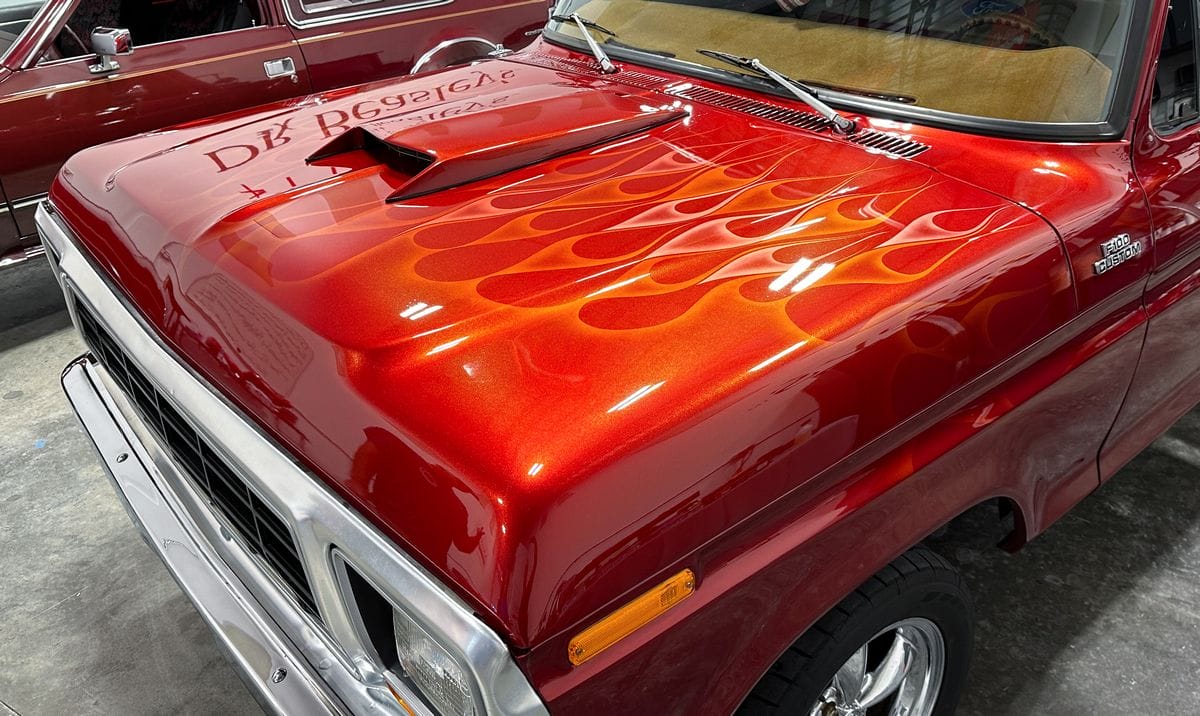
To save time, I have already machine scrubbed tires, cleaned wheels, and washed each vehicle. I mechanically decontaminated the paint for the AMC Eagle but saved the Ford F150 for the class. I also saved the topical glass polishing for the class to see how to do it if NOT washing the car afterwards.
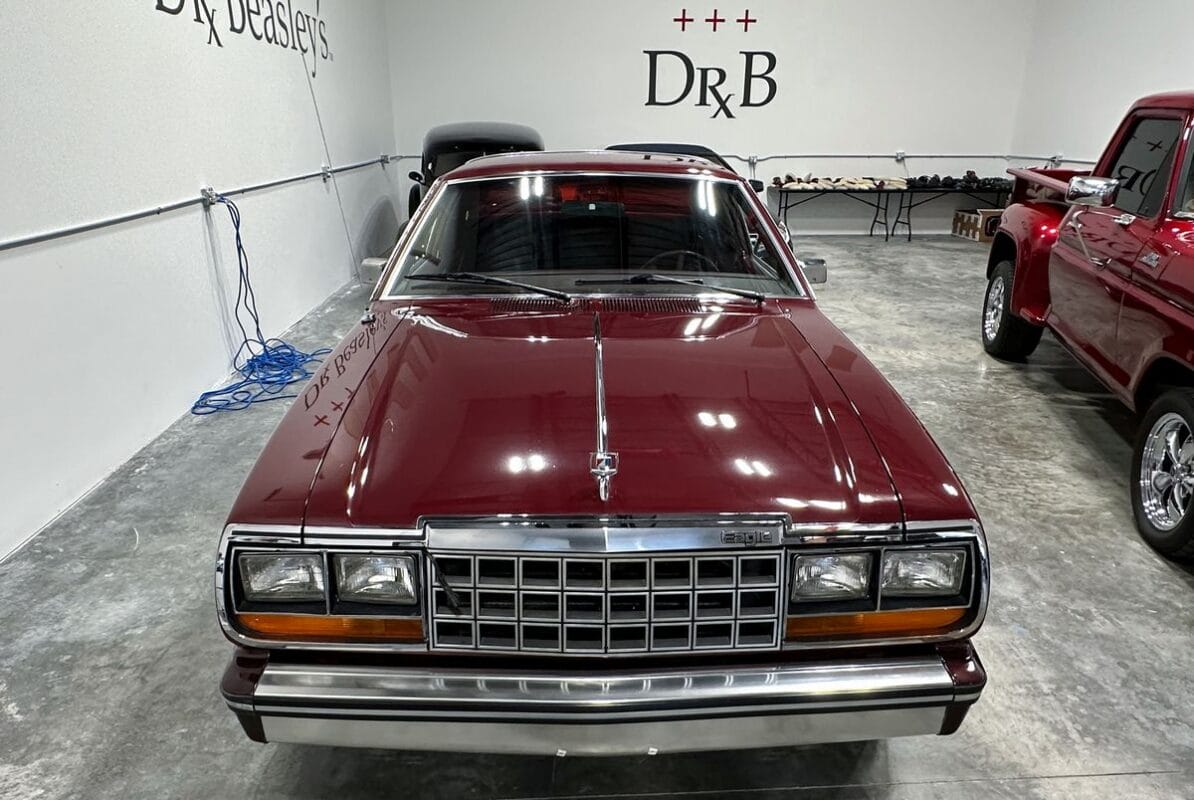
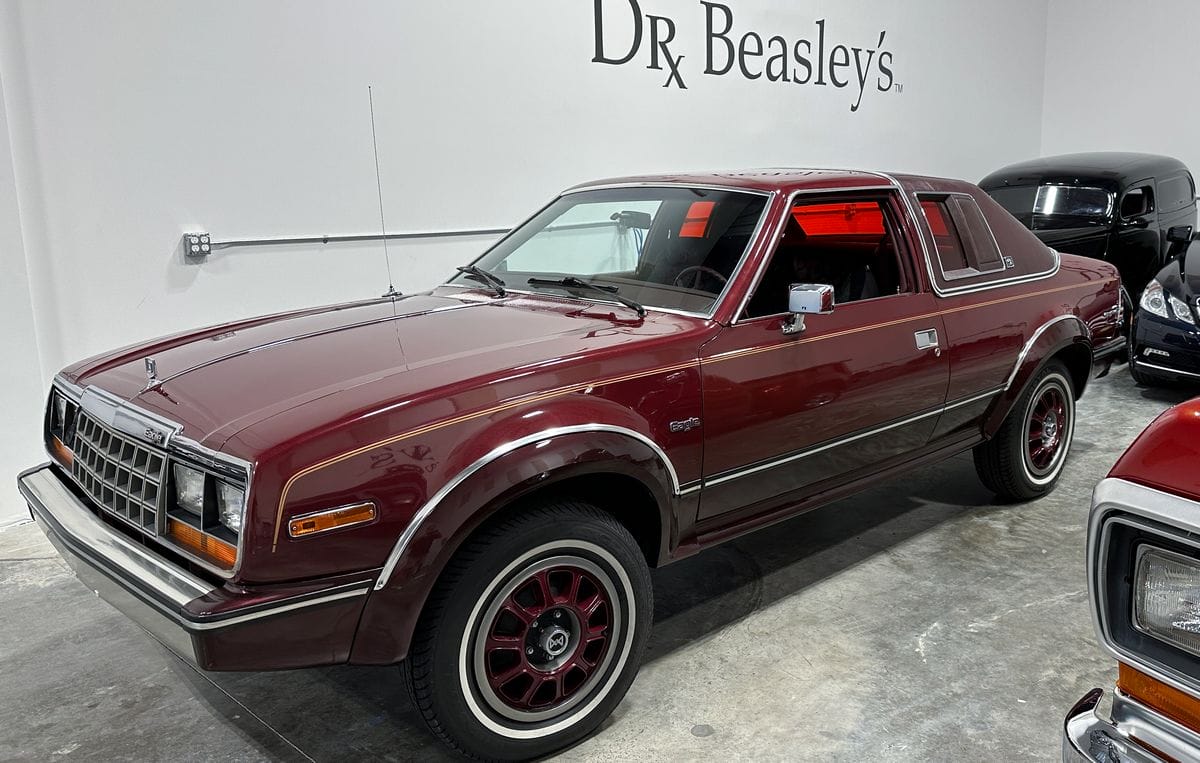
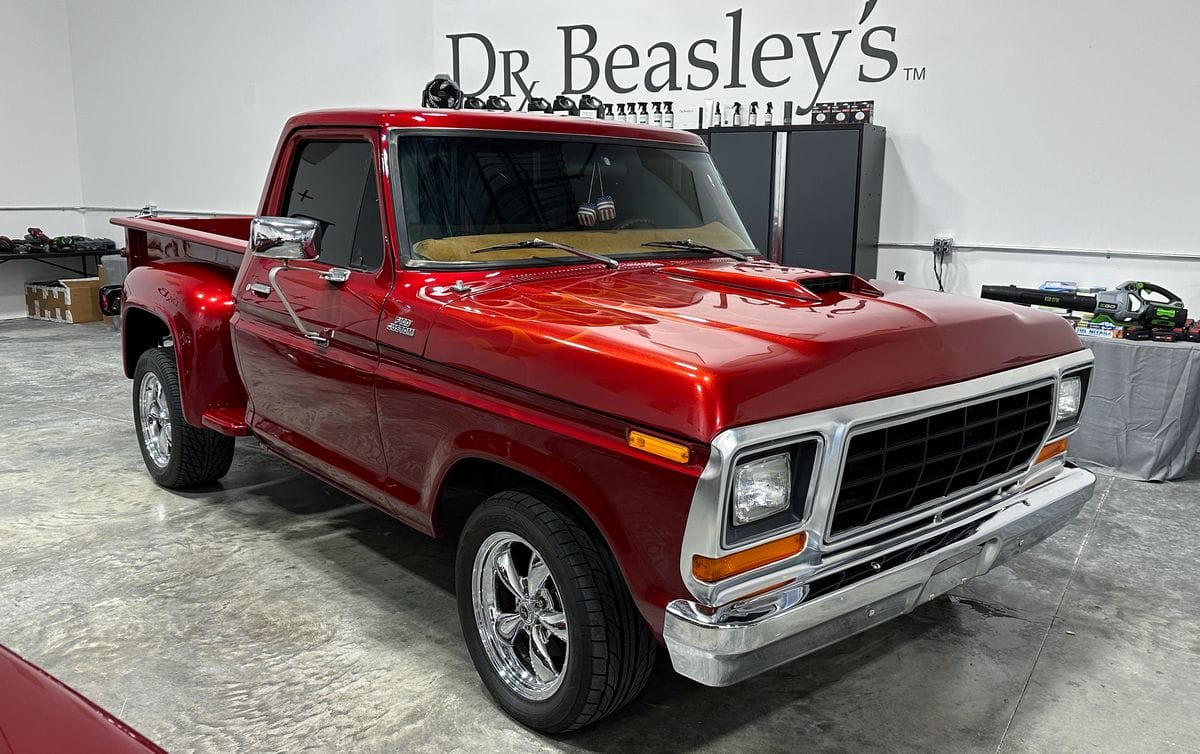
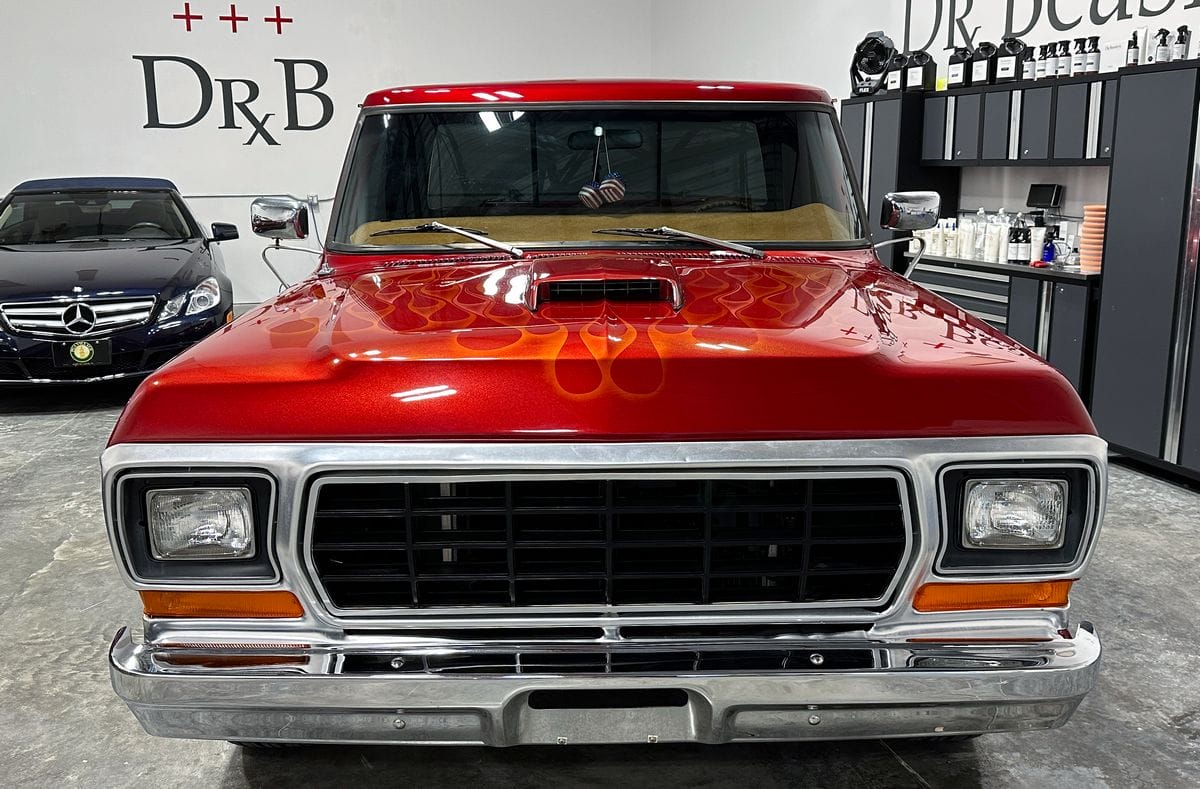
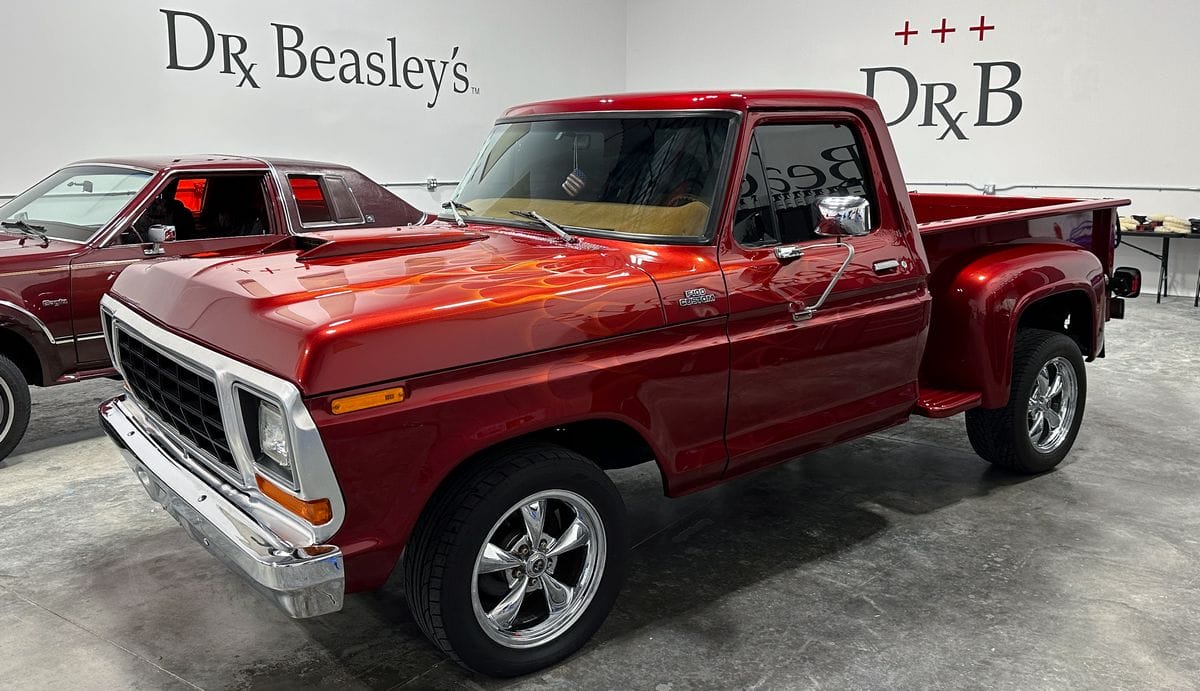
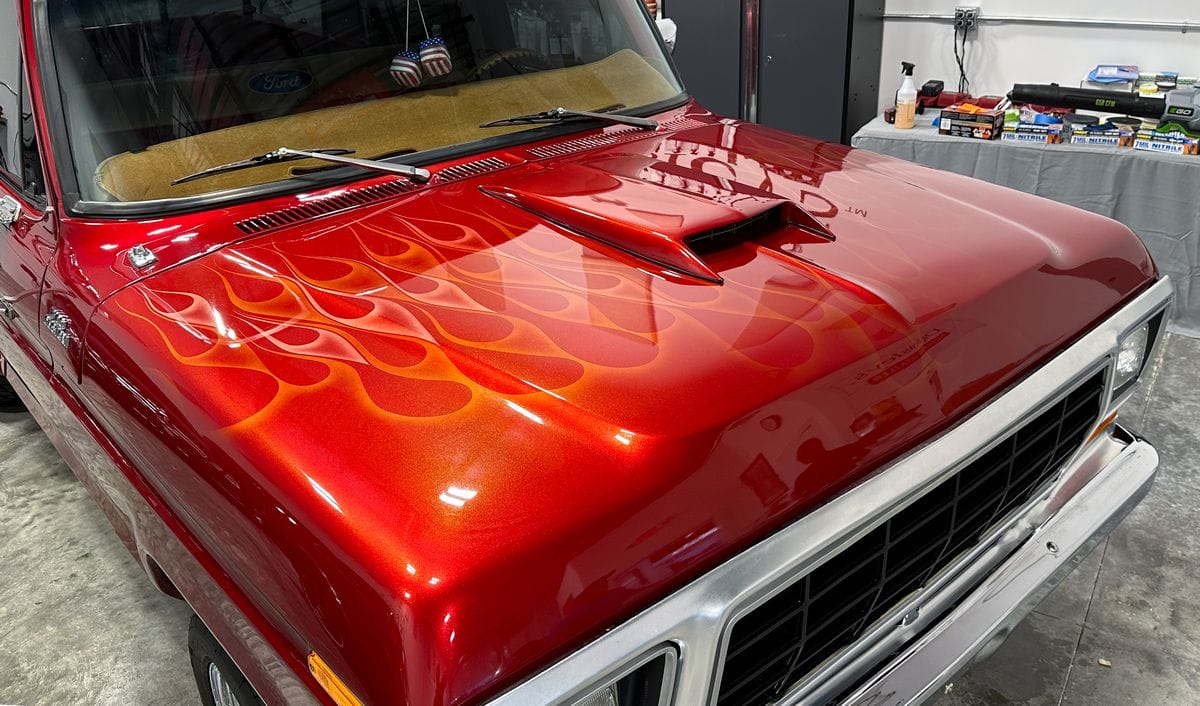
1982 AMC Eagle 4×4 & 1979 Ford F150 Stepside Shorty – Custom Paint Job
For learning how to do a high quality, budget detail, I teach how to use a 1-Step Ceramic AIO. When doing a budget detail, it starts with setting your customer’s expectations. This type of process will not remove the deeper defects, so explain this ahead of time. If the owner says this is not acceptable, then move them up to your higher-end packages. In most cases, someone on a budget will figure it out, time is money.
For these cars, we did the following,
- Students use clay mitts and towels to mechanically decontaminate the paint on the 1979 Ford.
- There was nothing to Tape-off and Cover Up – older cars like these have chrome trim, not plastic trim.
- Perform the Test Spot for Each Car using Dr. Beasley’s Z1 – this is to determine which pad to use.
- Perform the single paint correction step using orbital polishers.
- Capture a Group Shot with the Cars Just Detailed.
- Capture the Beauty Shots.


EOD – End of Day Wrap Up
At the end of the day, I like to have a question and answer session. At this point, everything the students have done is fresh in their minds and if they have any questions or confusion about all the topics and techniques covered, this is the best time to address them.
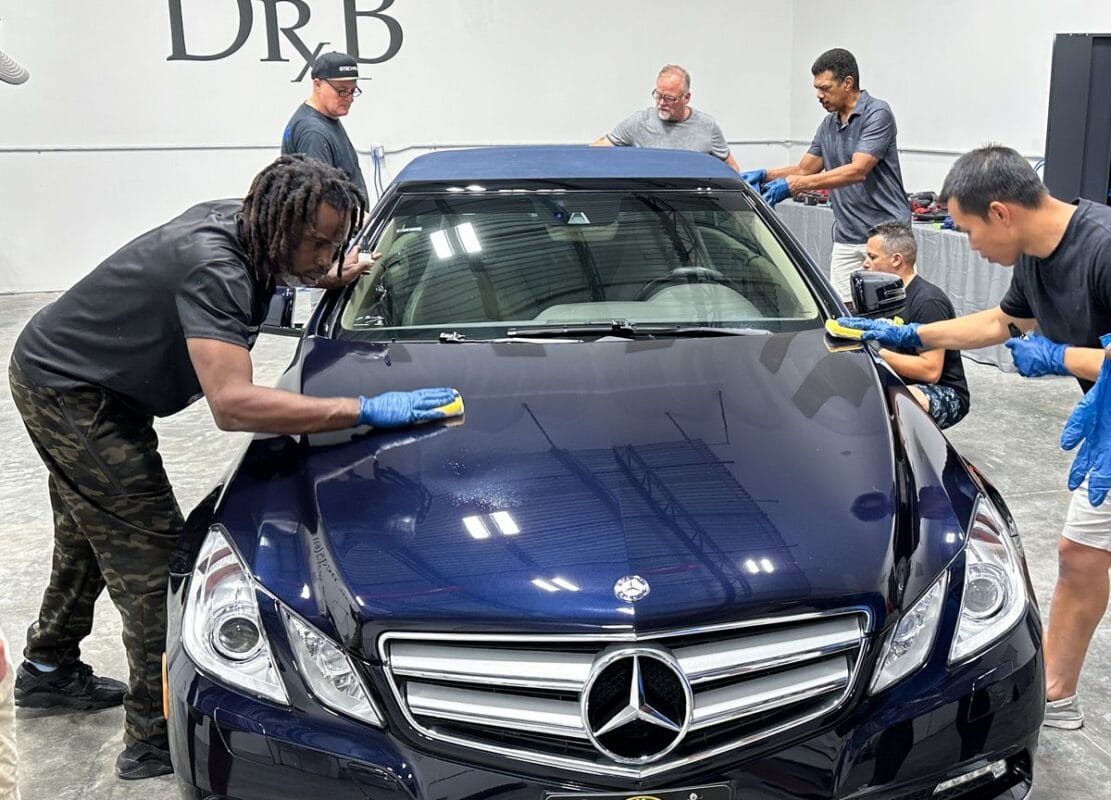
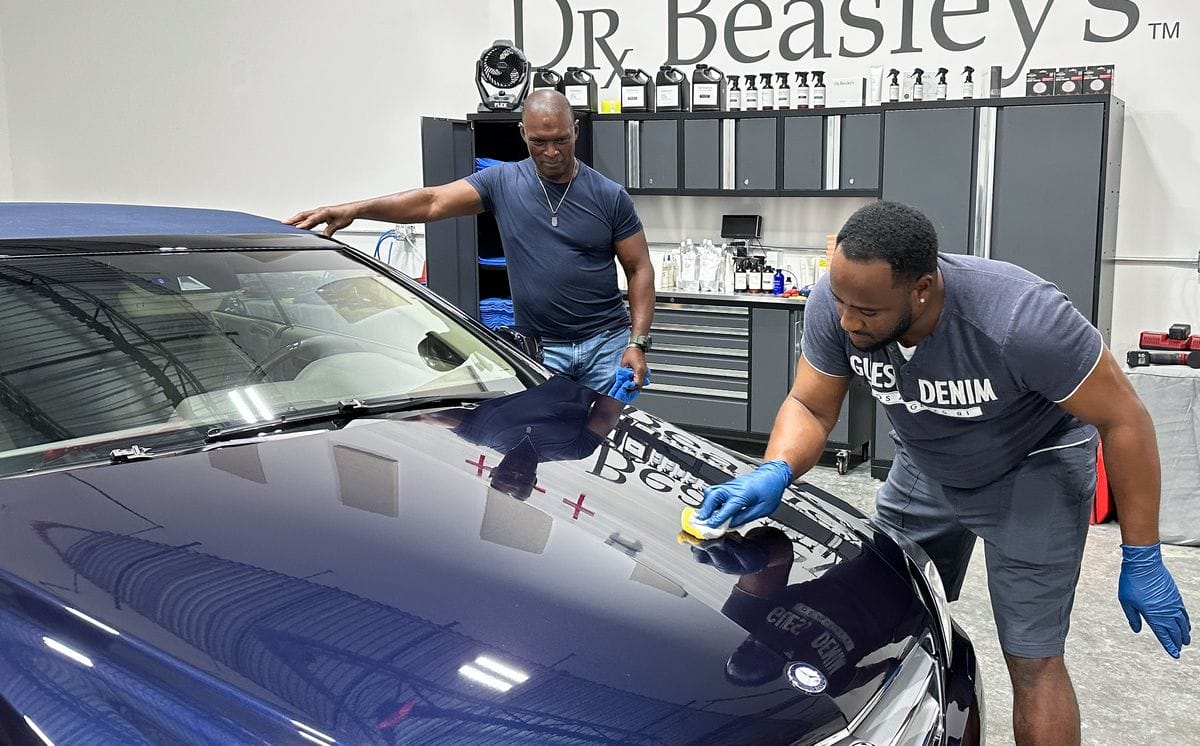
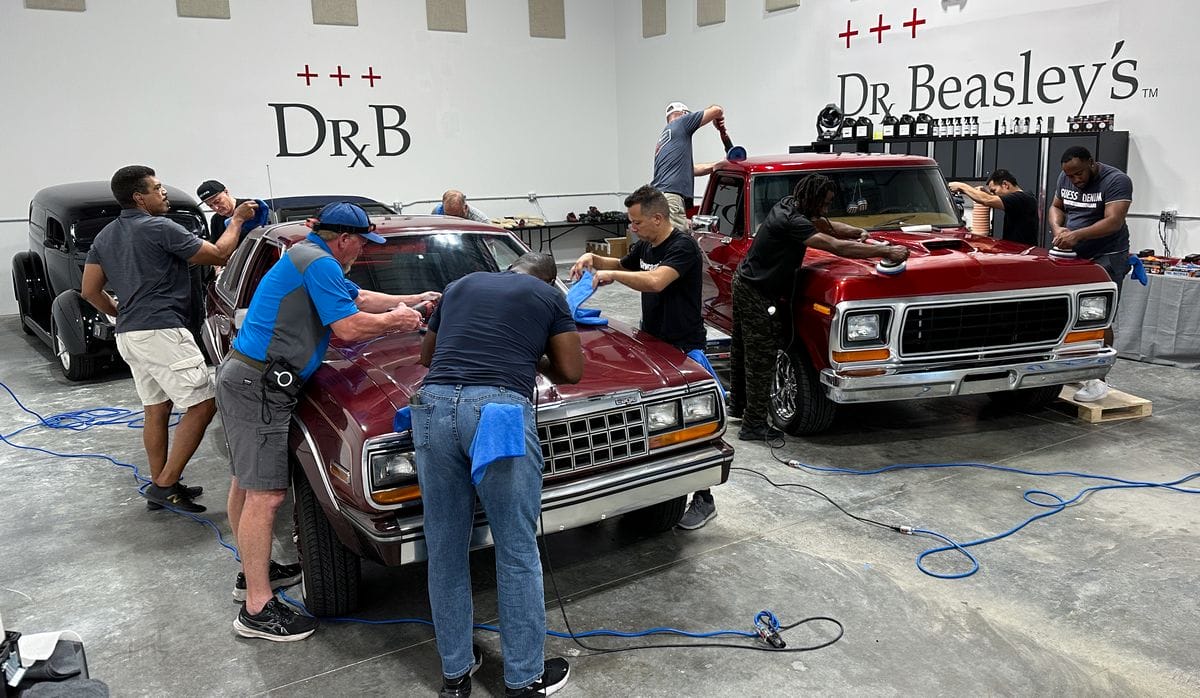
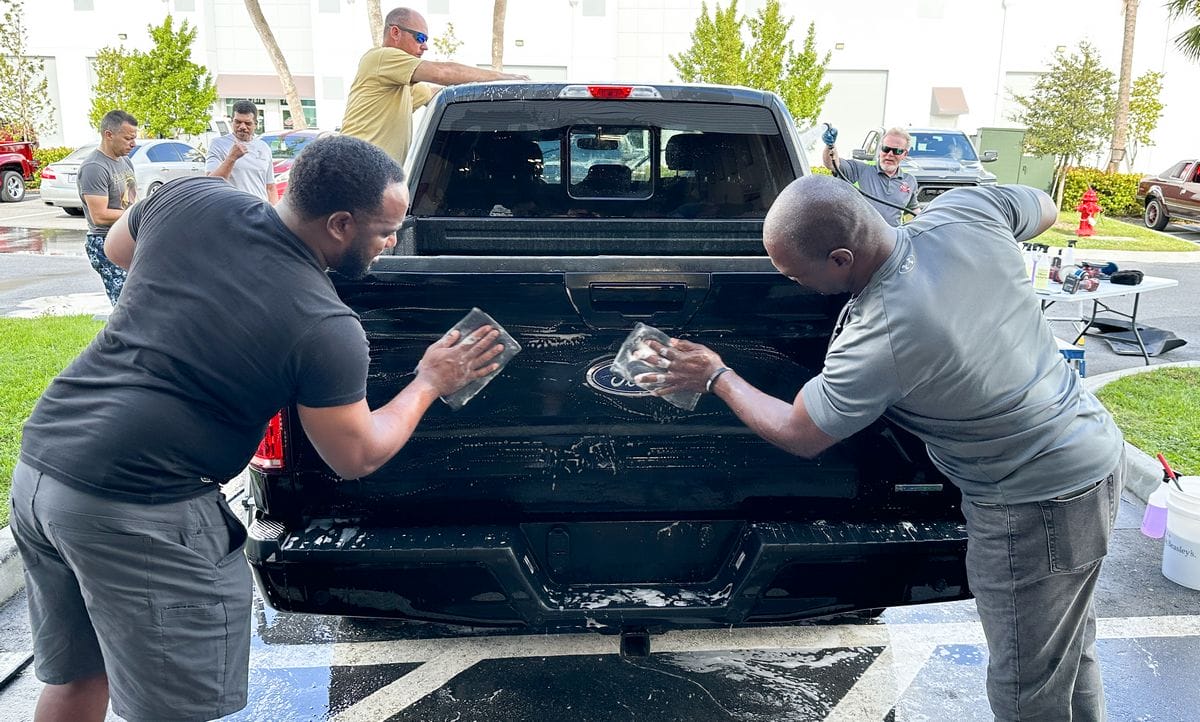
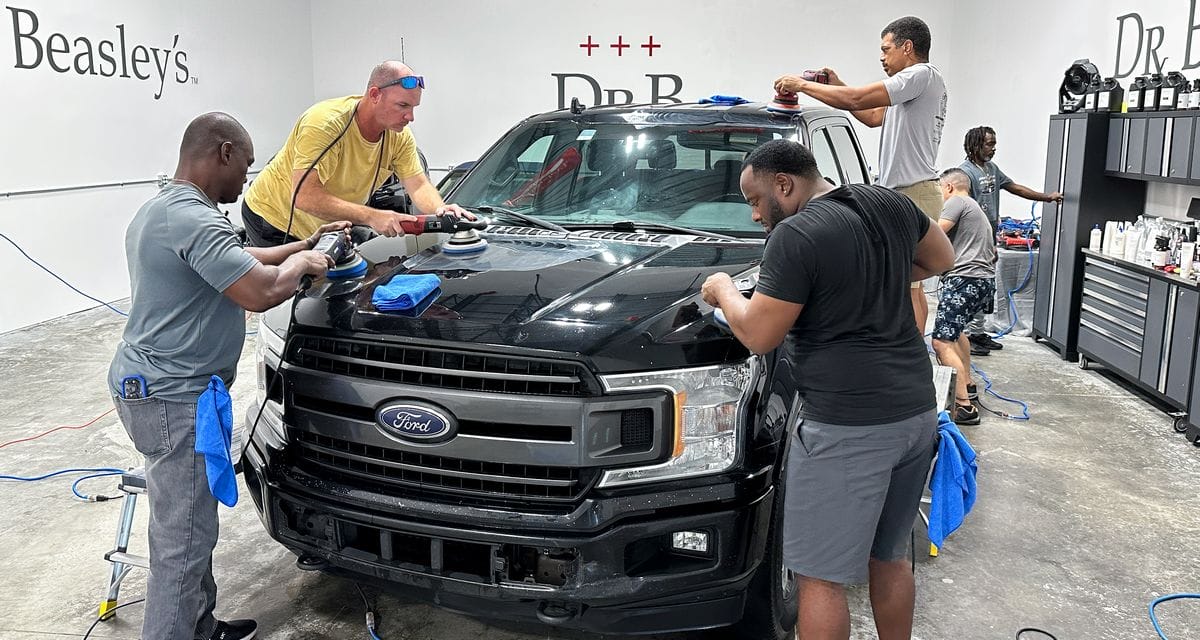
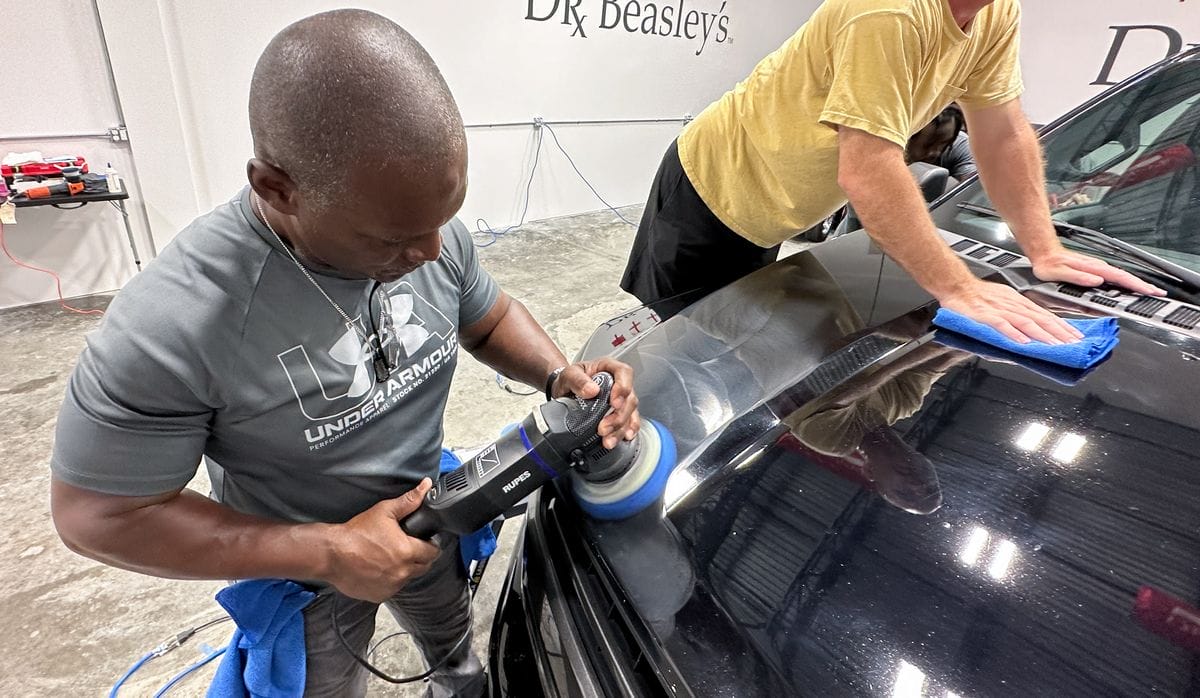
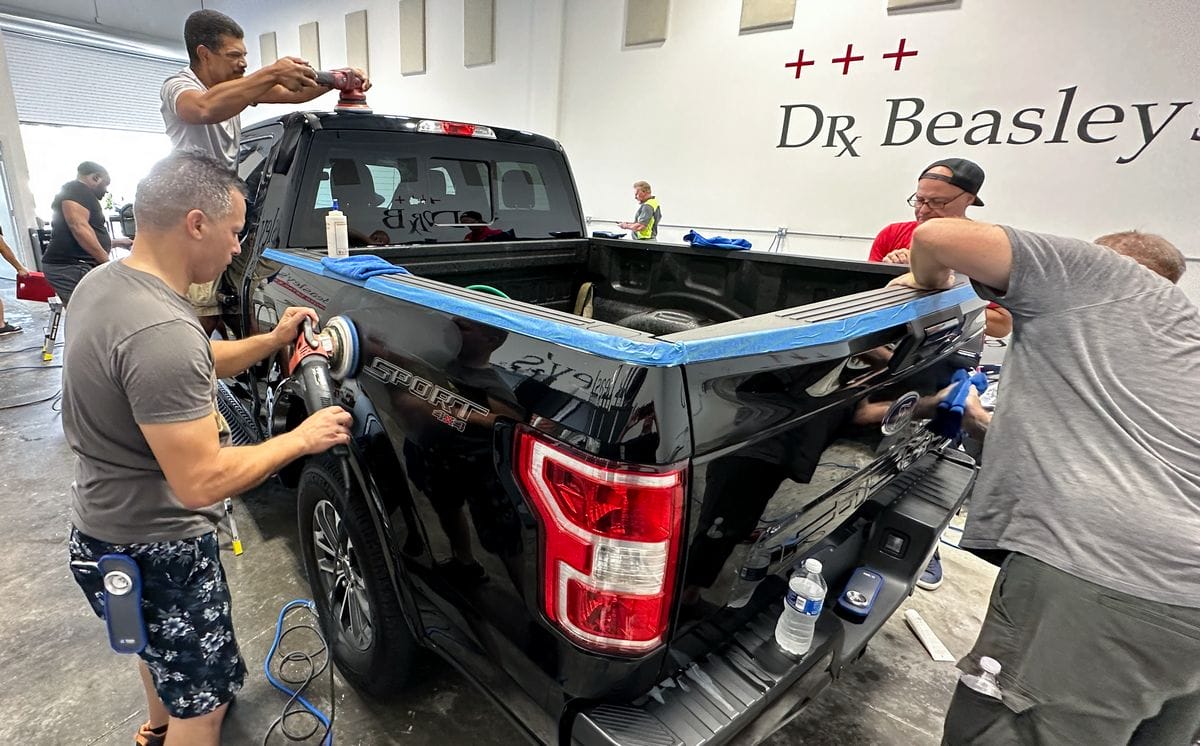
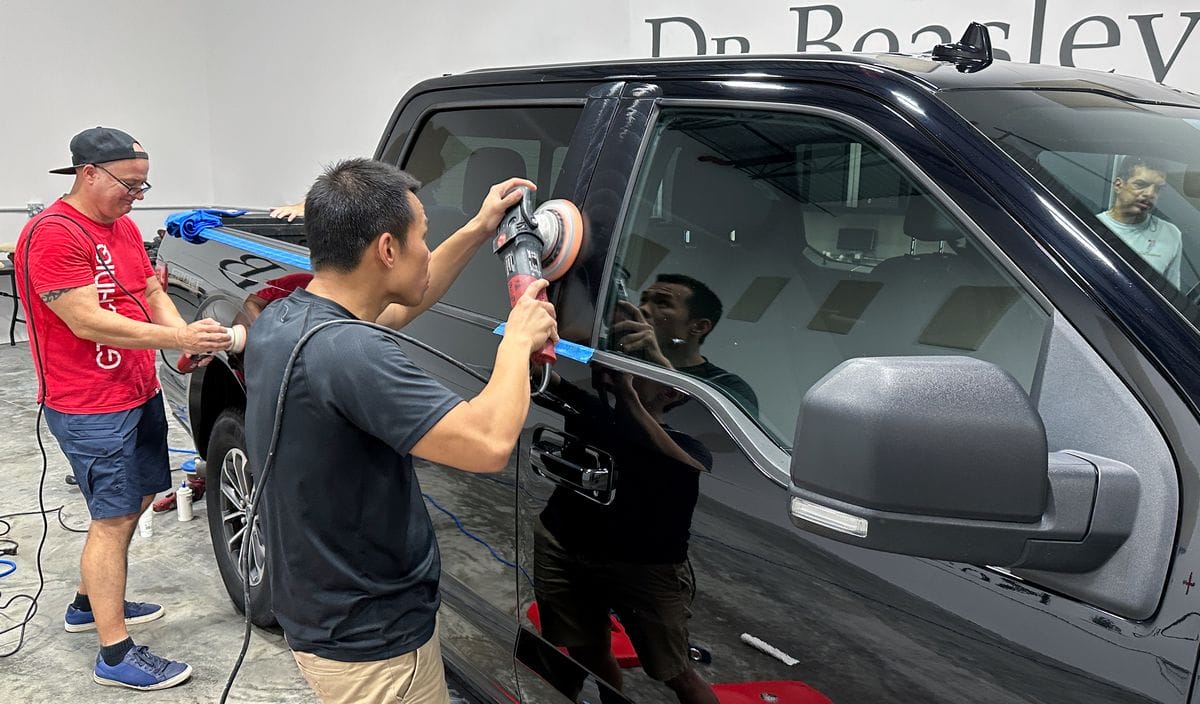
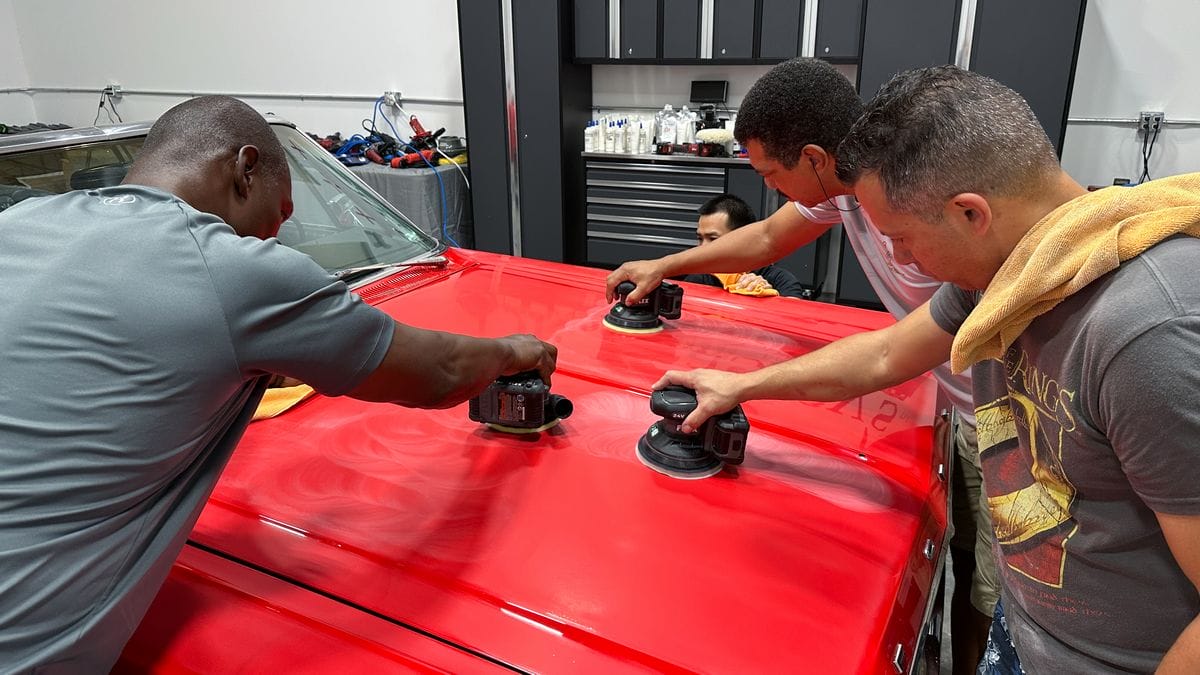
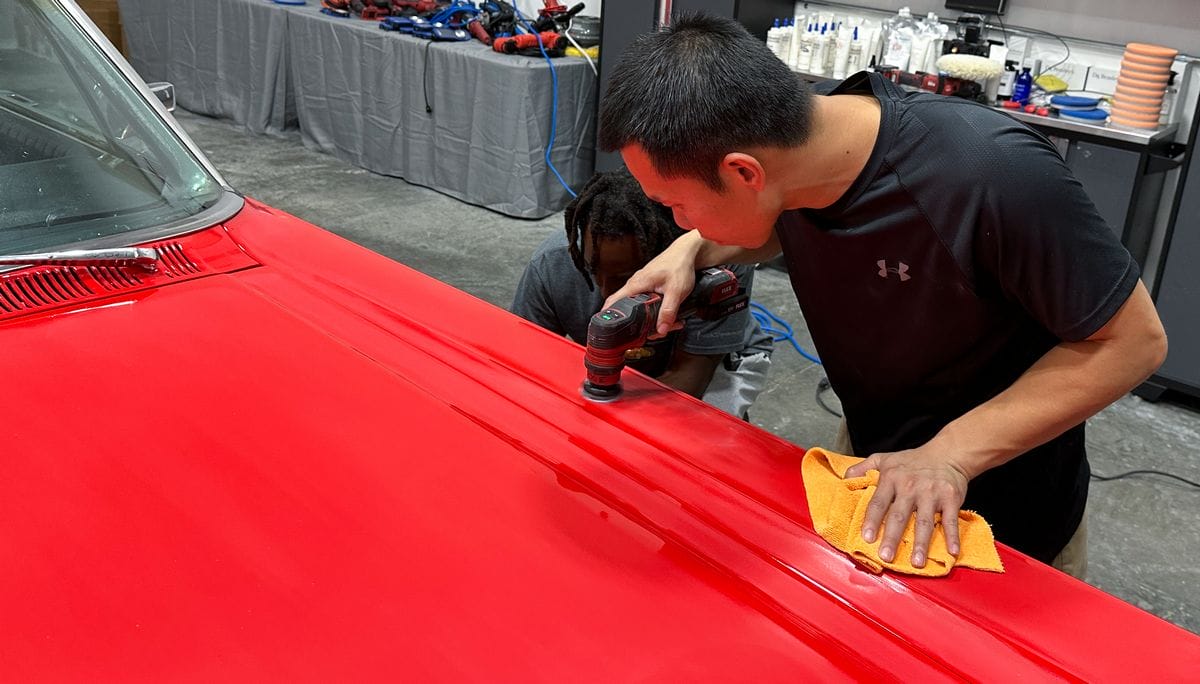
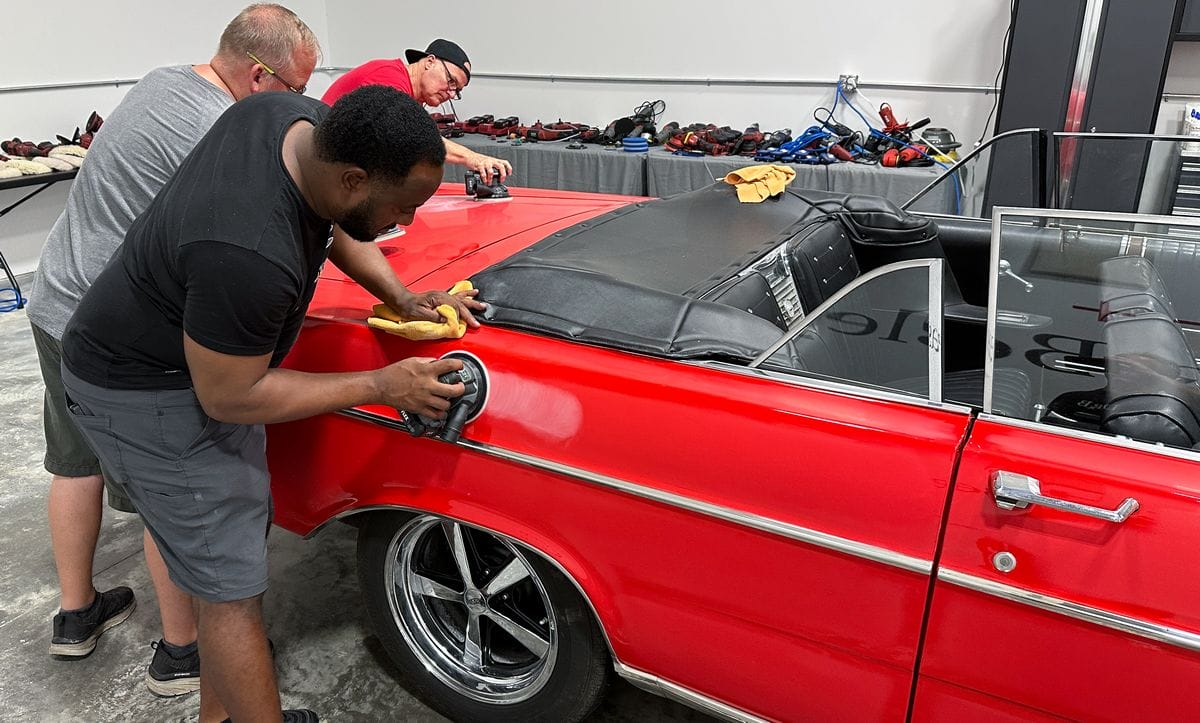
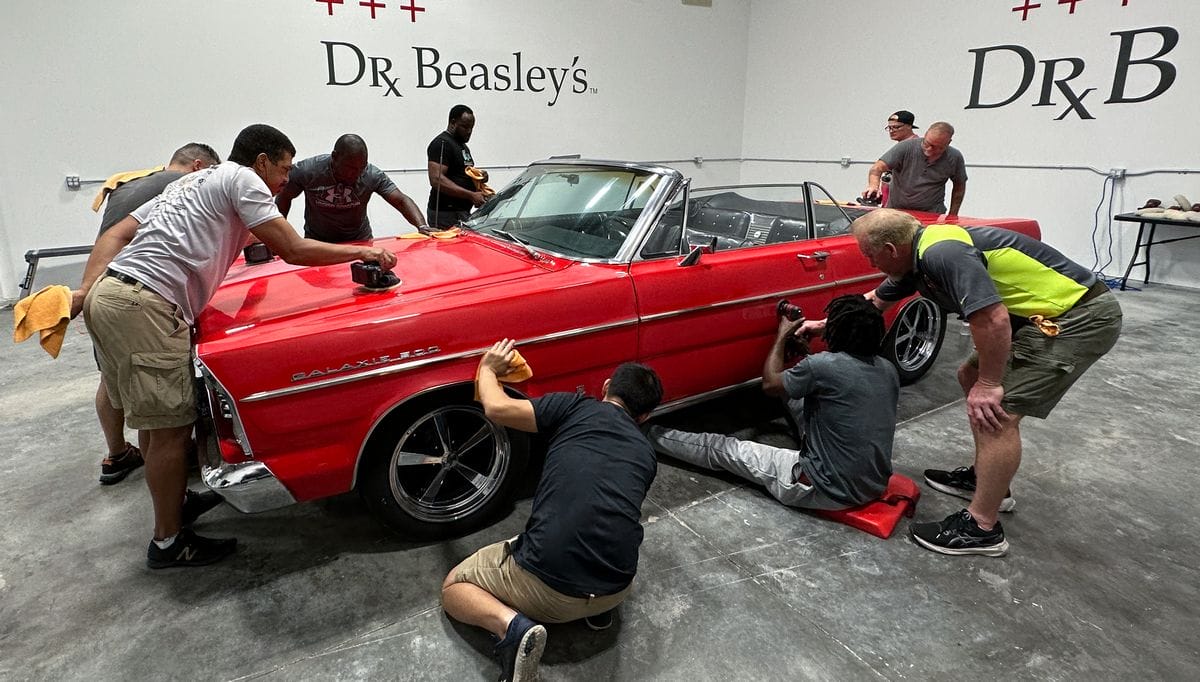
As you can see by the pictures, these are intensely hands-on. There were no chairs, thus zero sitting and no PowerPoint. I guarantee you, the people that took this class got more out of the class and will retain more of what they learned versus if we sat through an educational PowerPoint presentation.
Both styles of classes, academic and hands-on work. I just find the kind of people that want to take my classes are also the kind of people that learn better by doing, versus looking at pictures on the wall while I talk and talk and talk.
If you’re reading this and you’re the kind of person that learns better in a structured academic class, by all means, please do not take my class. There are plenty of other classes to choose from.
Day 2 — 1-Step Ceramic AIO + Sanding to Remove Orange Peel
Here’s what the second day of my 2-day class looks like:
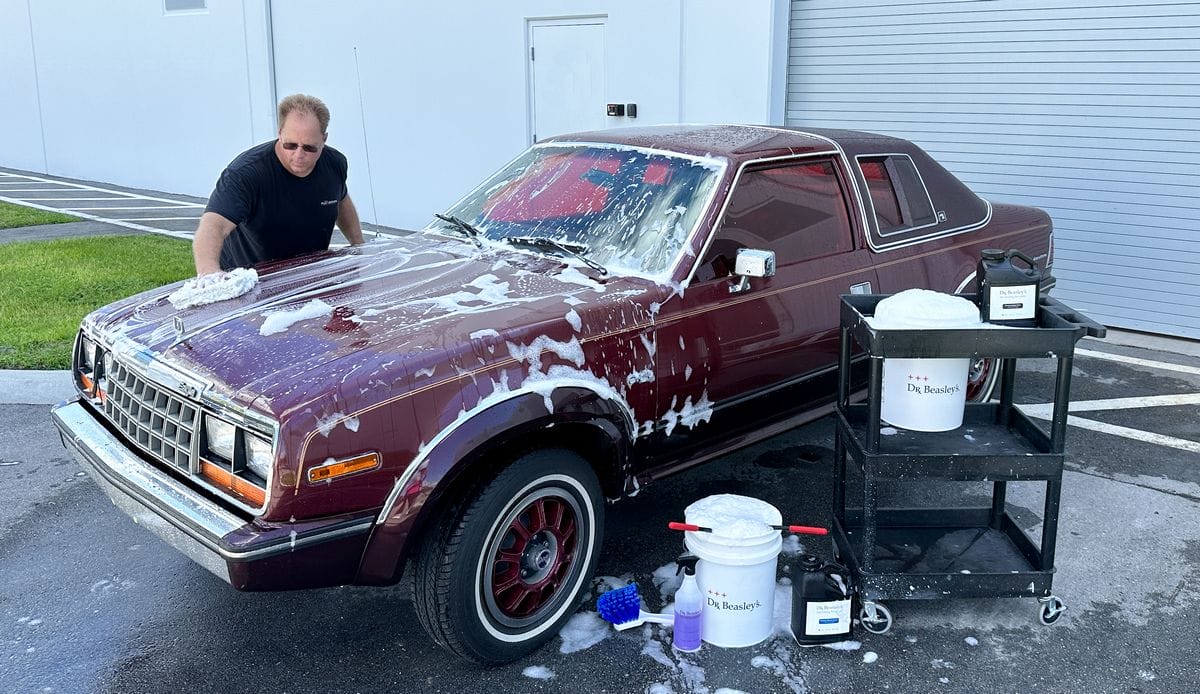
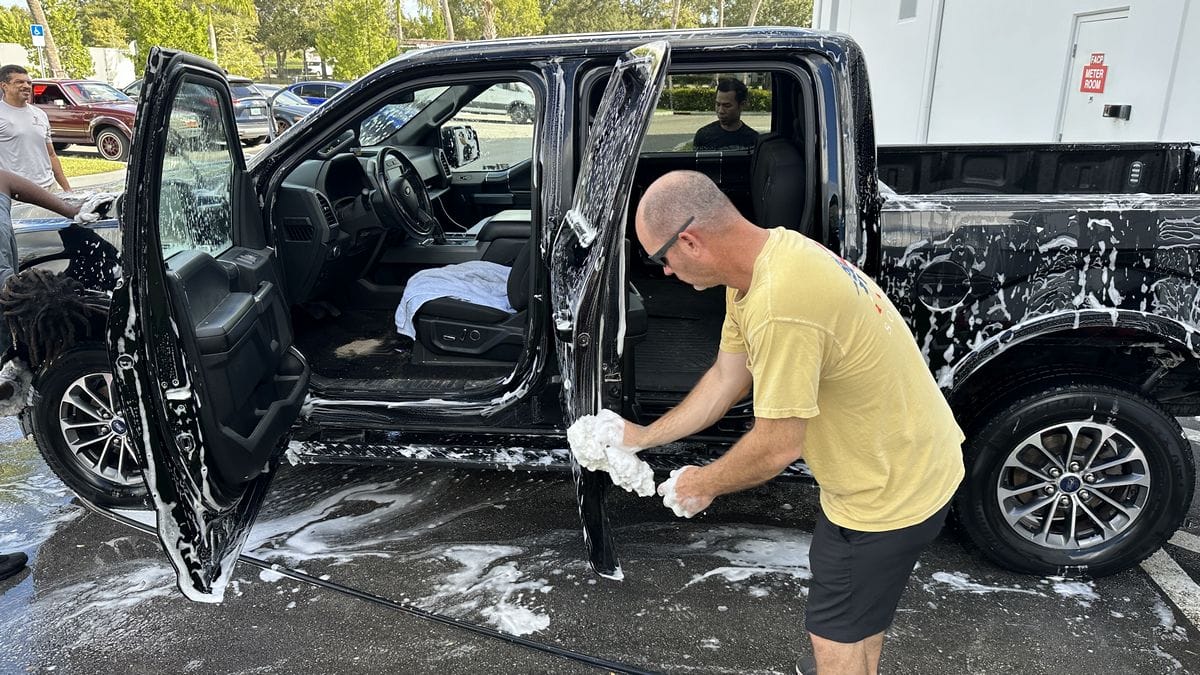
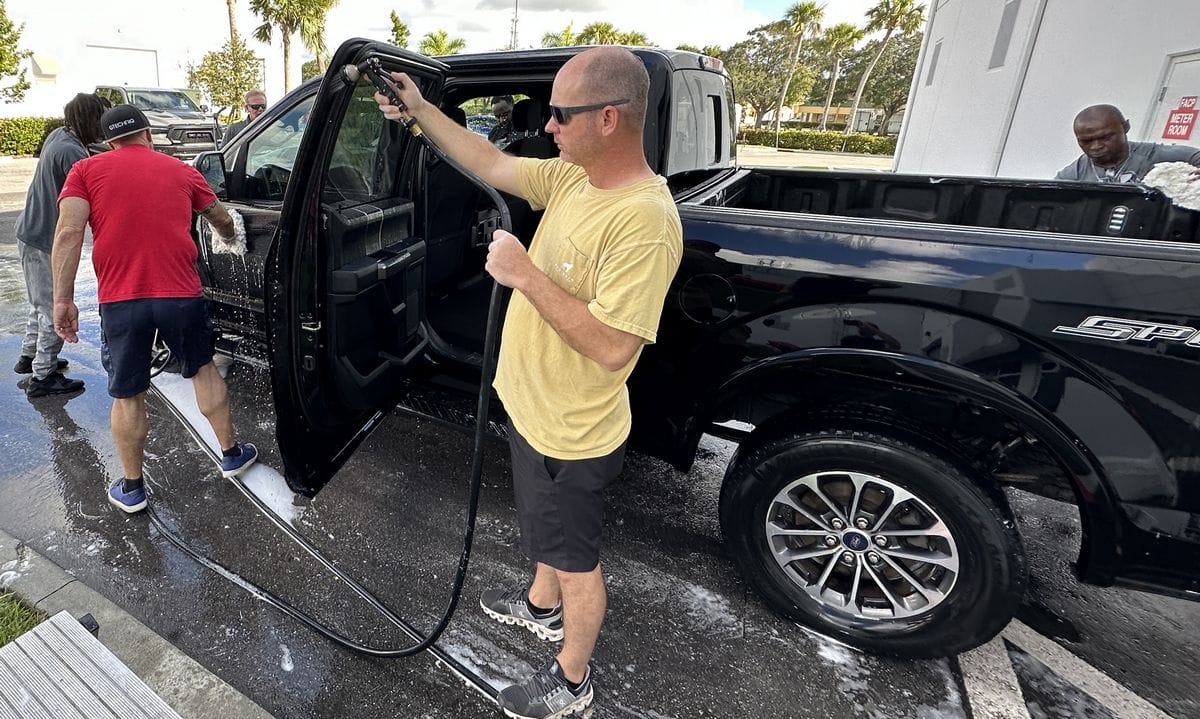
7:30am – Extreme Prep Wash – 1-Step Ceramic AIO Paint Correction
I normally only do one Extreme Prep Wash, and we do this early in the morning while temperatures are lower here in sunny, hot South Florida!
The below list and pictures will really show what an EXTREME PREP WASH can include. Feel free to modify to fit the vehicle and/or your detailing style or environment.
- Inspect for tar, sap, dead bugs, and bug splatter.
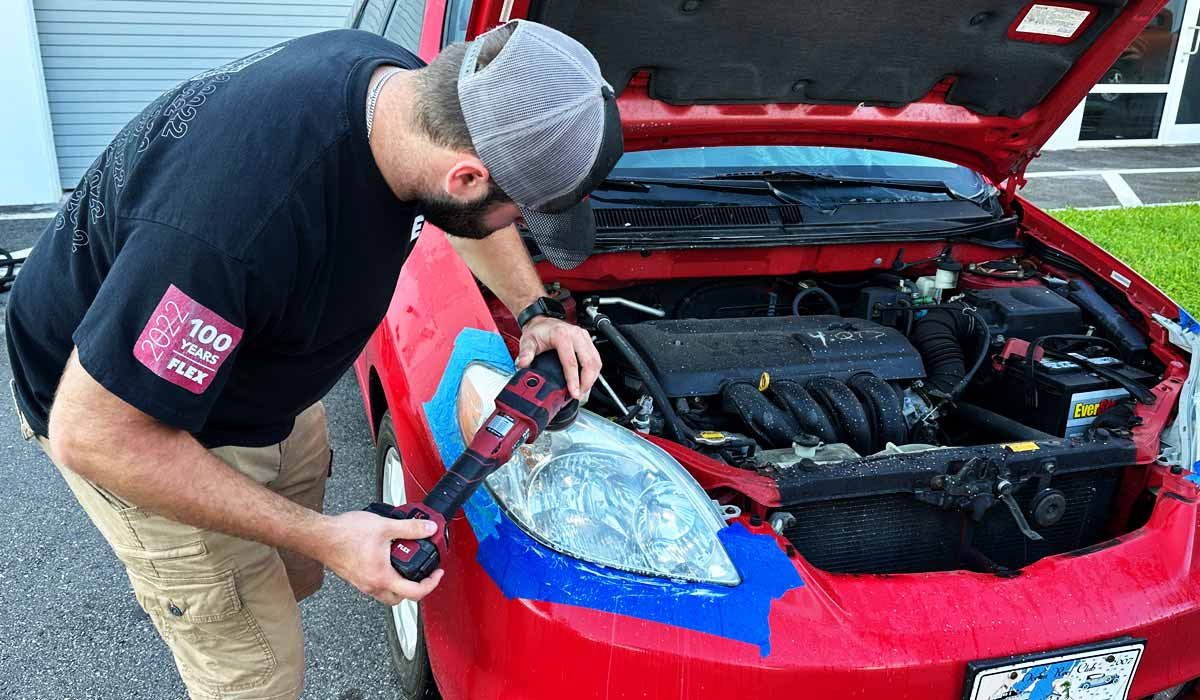
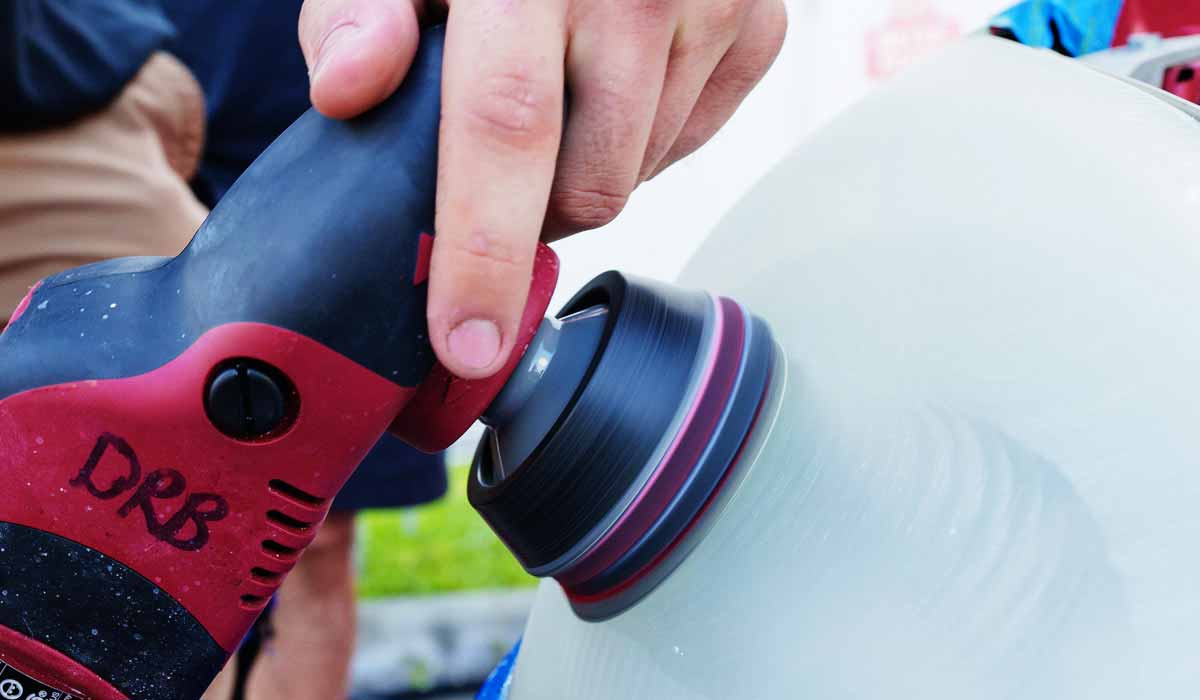
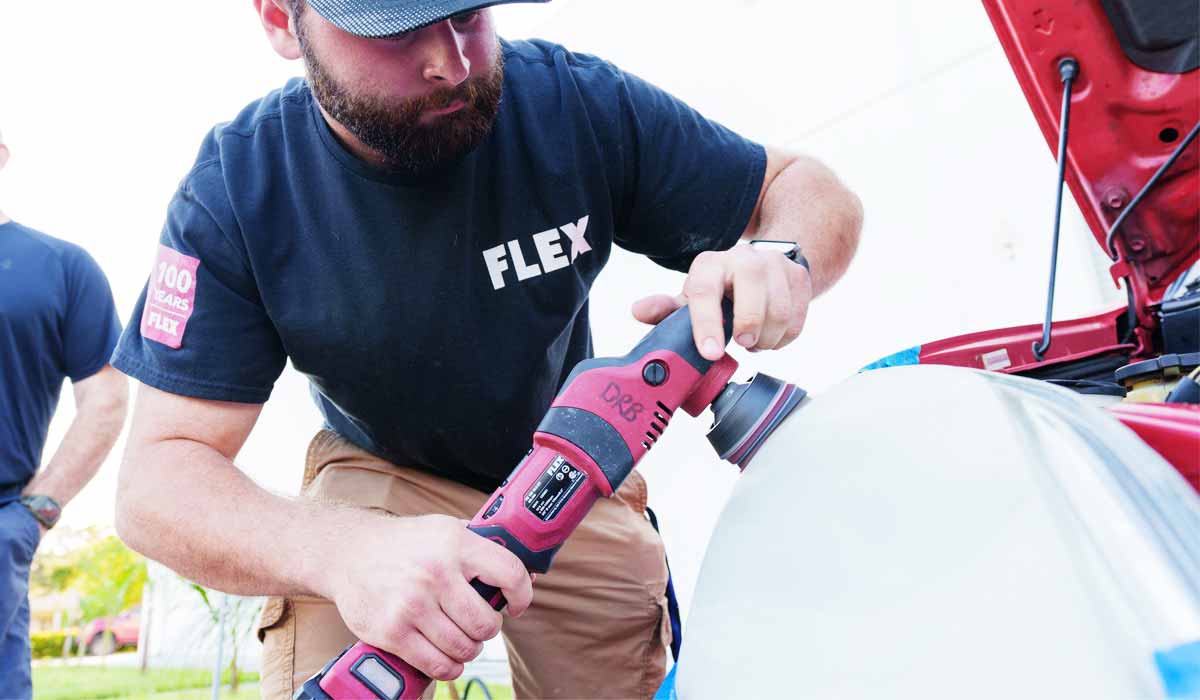
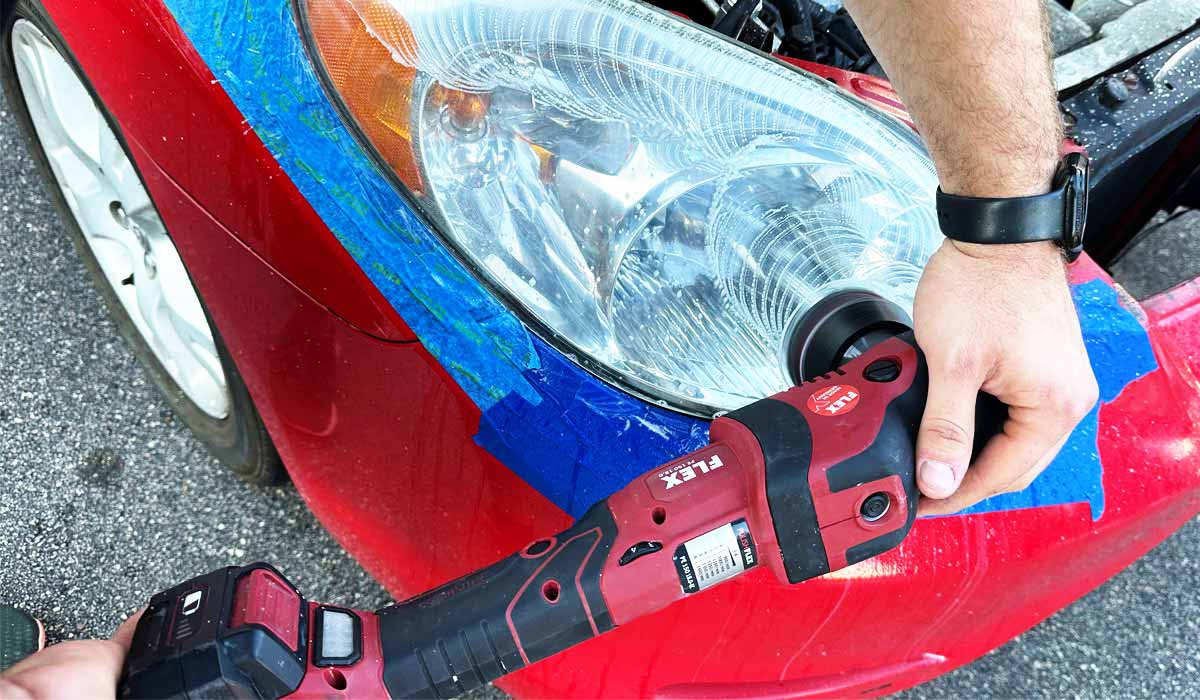
- Headlight correction.
- Wet wash engine detailing.
- Topical and/or Sub-surface glass polishing.
- Wheel area – Rims, Tires & Wheel Wheels.
- Cleaning canvas cloth tops.
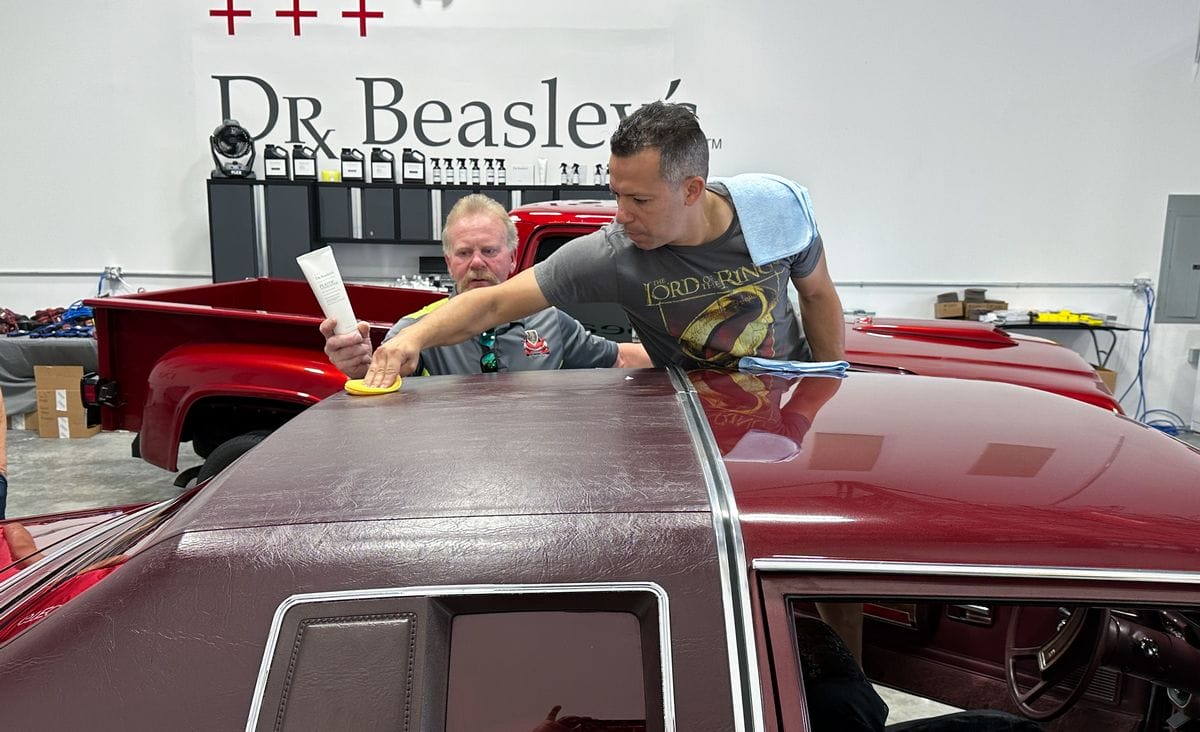
- Cleaning vinyl tops.
- Chemical decontamination.
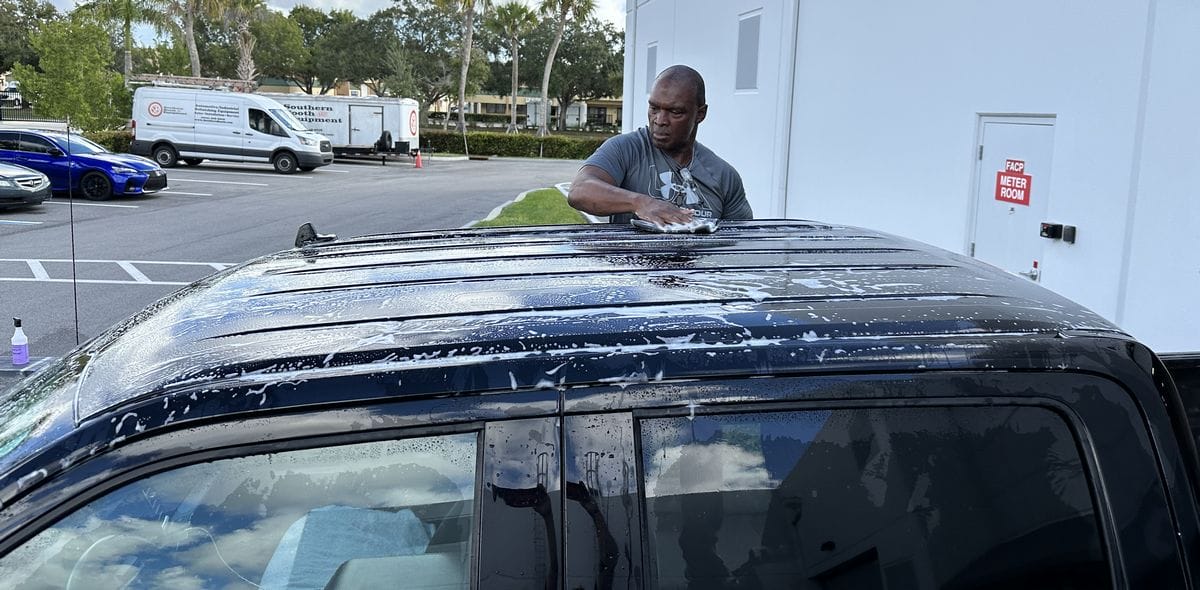
- Wash the car from the top down.
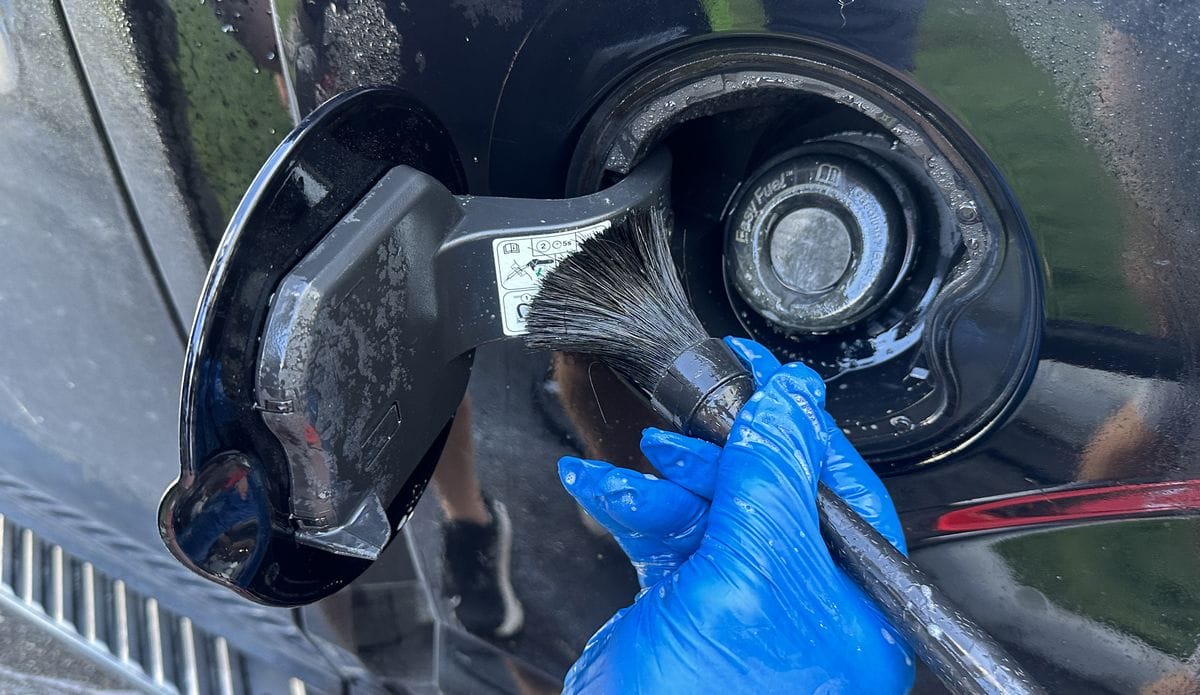
- Forgotten areas – fuel doors, fender lips, lower body panels, license plates, wiper arm facia, grills, emblems, badging.
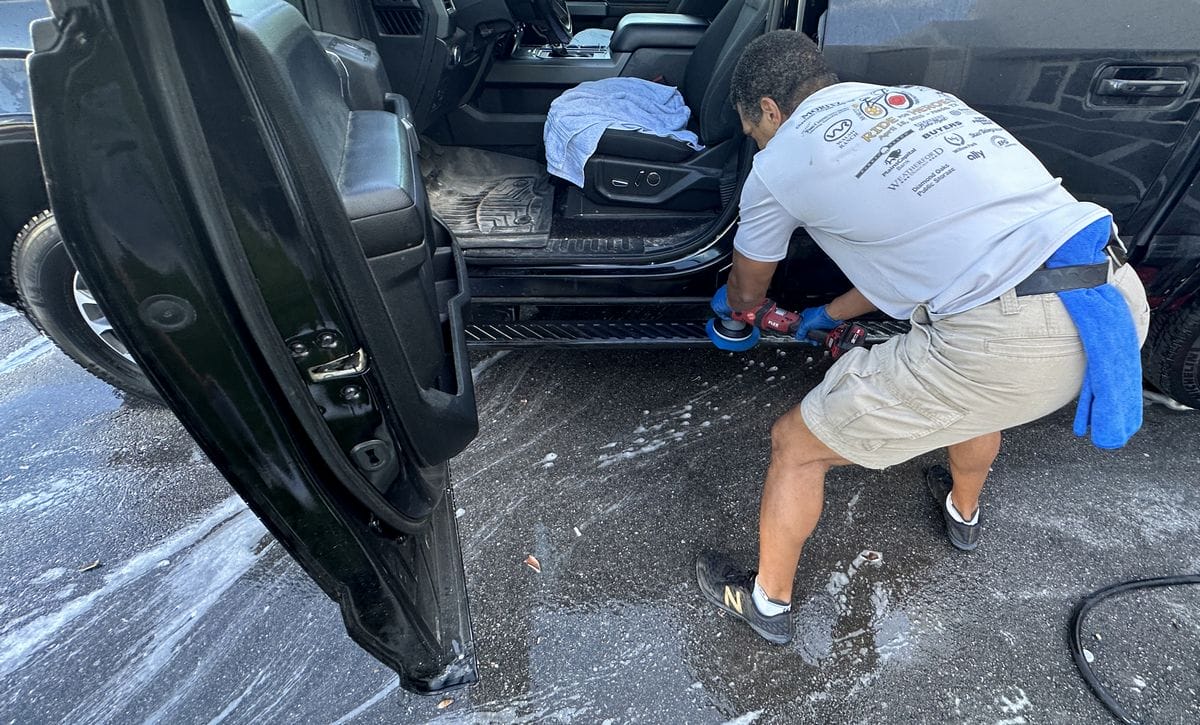
- Hand or machine scrub neglected plastic – fender flares, running boards, body cladding.
- Thorough rinse.
- Mechanical decontamination.
- Final rinse.
- Dry the car.
- Open all doors, trunk lid and hood, this is called stretching – wipe down all jambs.
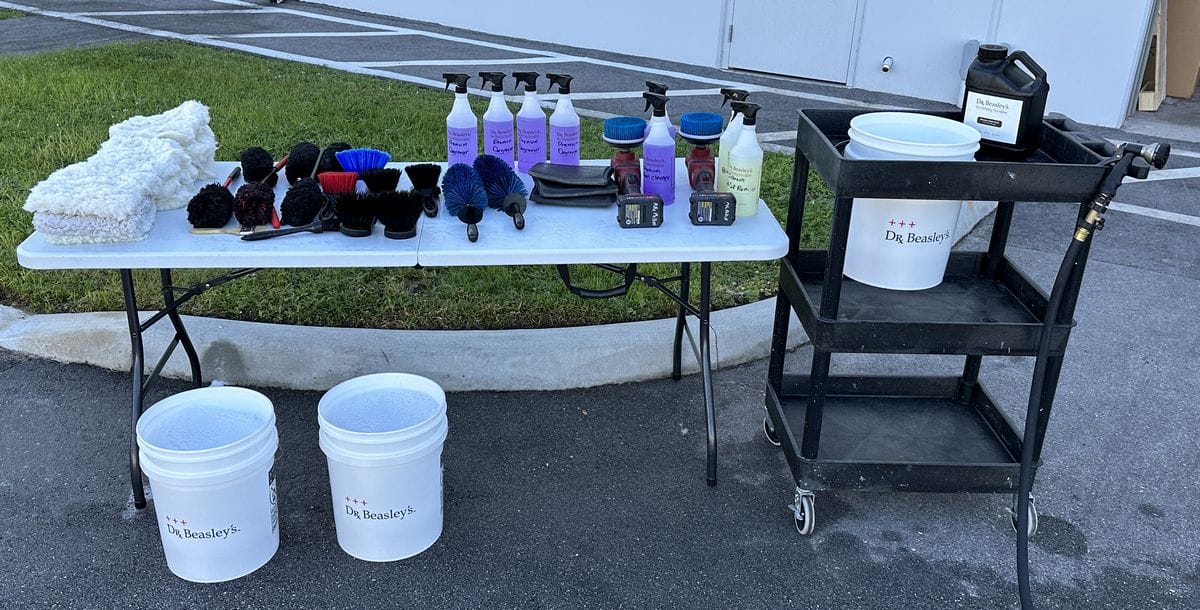
Doing a proper extreme Prep Wash requires a lot of tools and supplies including a wide variety of brushes for not only getting the wheels clean but also for cleaning the engine and engine compartment.
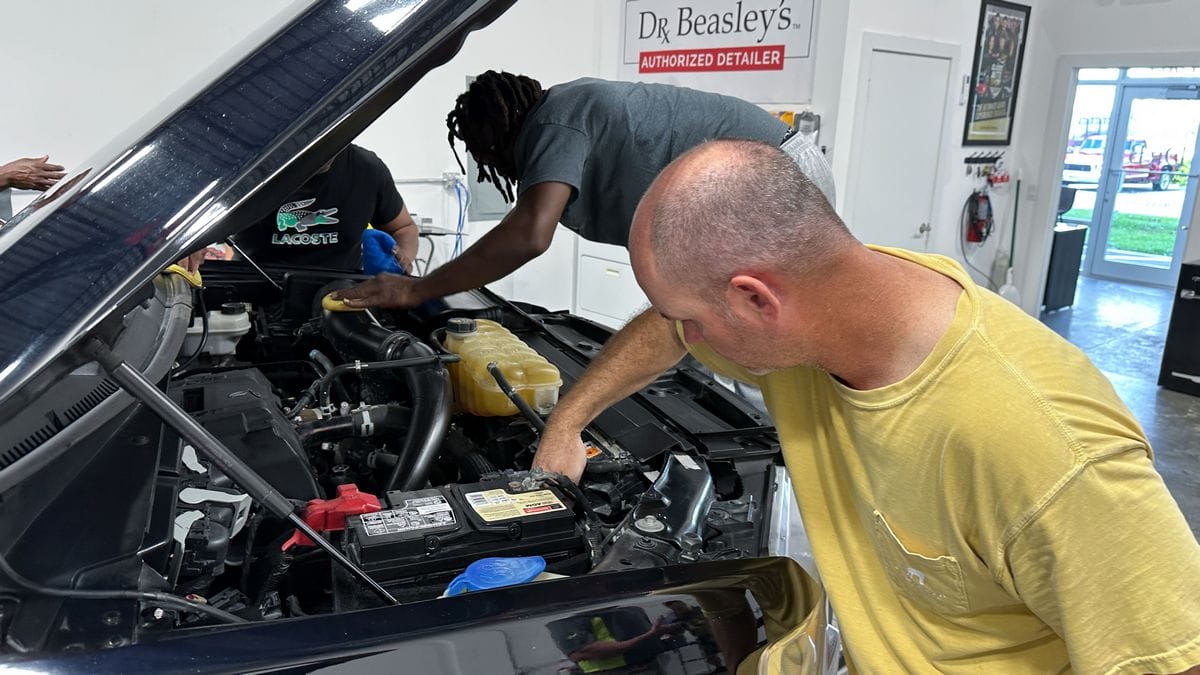
First Up – Wet Wash Engine Detail
Normally, my Extreme Prep Wash starts with Headlight Correction. The reason for this is because if you get any sanding slurry splatter or compound splatter into the engine compartment, no worries because the Wet Wash Engine Detail will fix that. This Ford F150 Truck didn’t need headlight correction, so we skipped this step and went right to the engine cleaning step.
Headlight Correction — Mike Phillips Style!
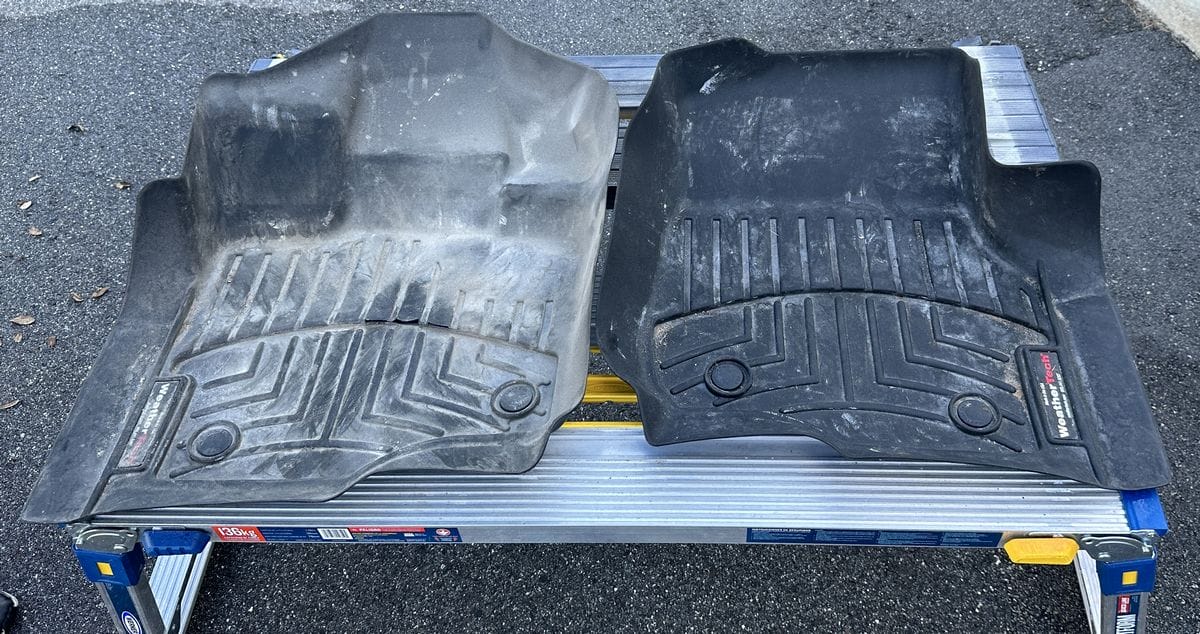
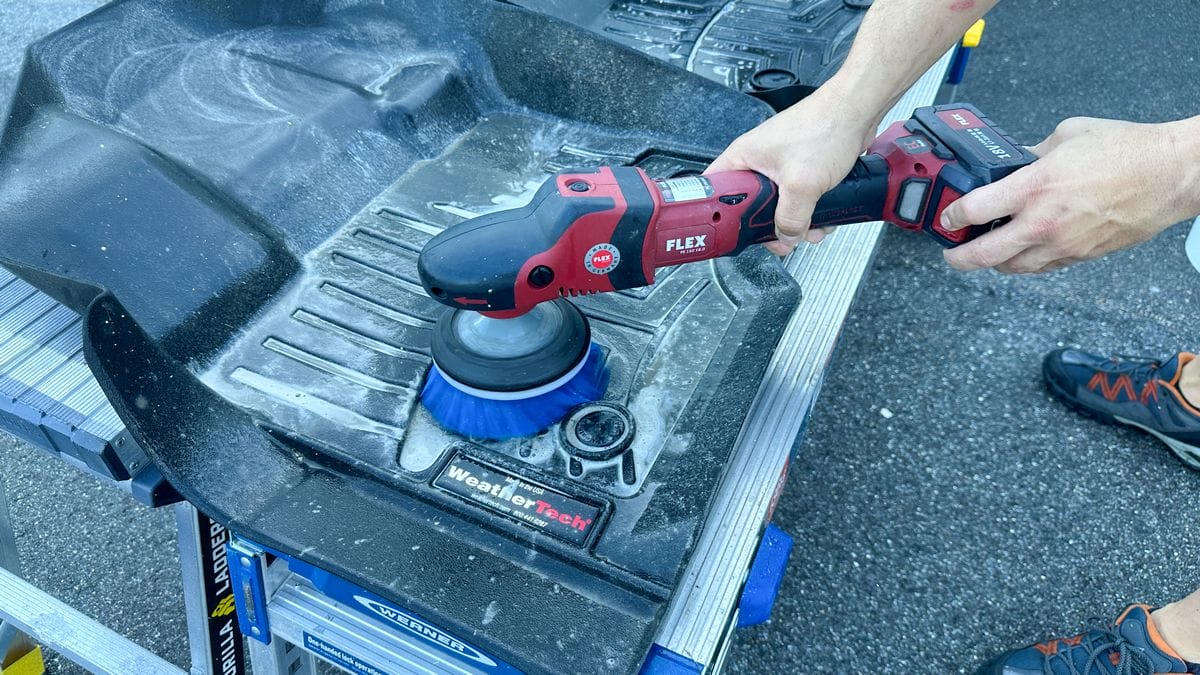
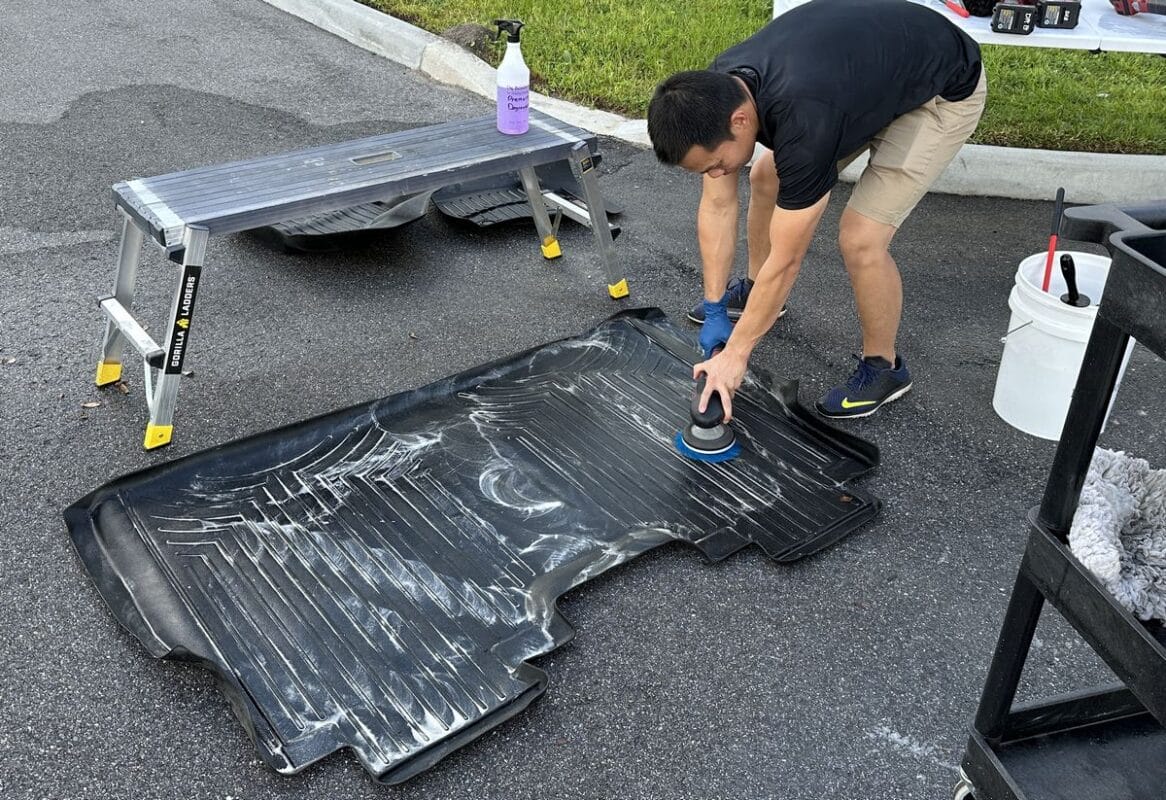
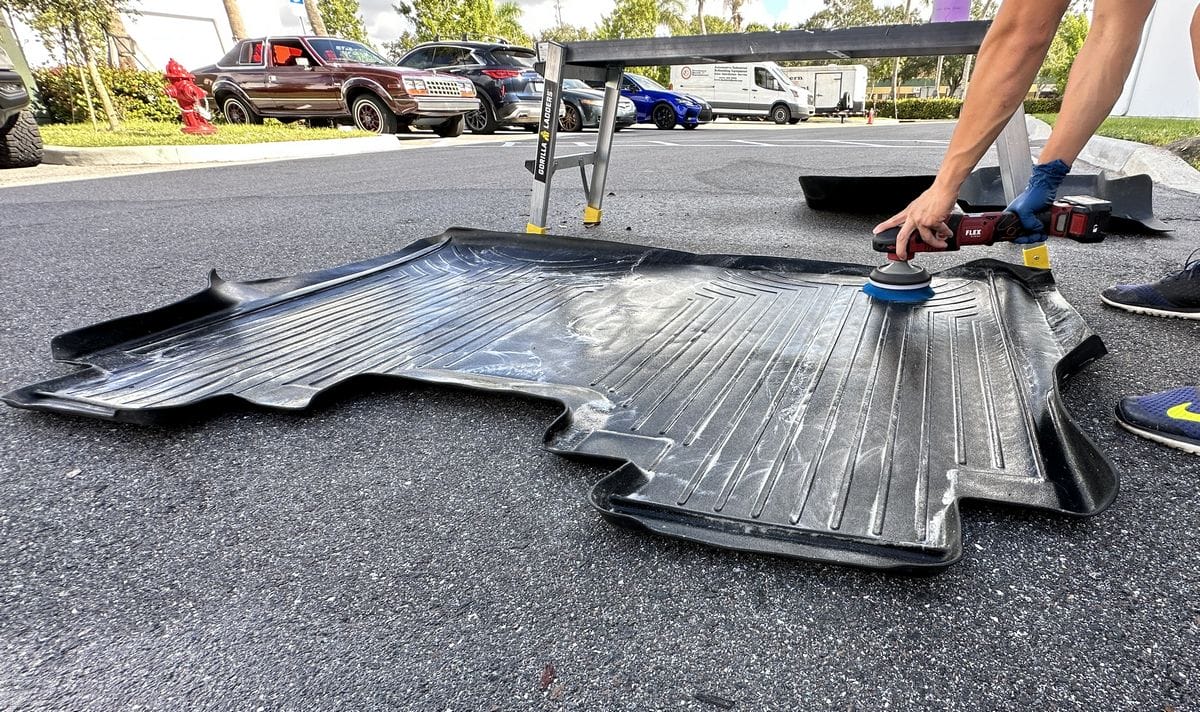
Remove Floor Mats and Wash
Cleaning rubber floor mats is pretty straightforward, spray on an APC or degreaser and scrub followed by rinsing. For carpet floor mats, inspect and determine the best approach. Sometimes all they need is dry extraction. Sometimes they are so worn, it’s better to recommend to the owner to replace them.
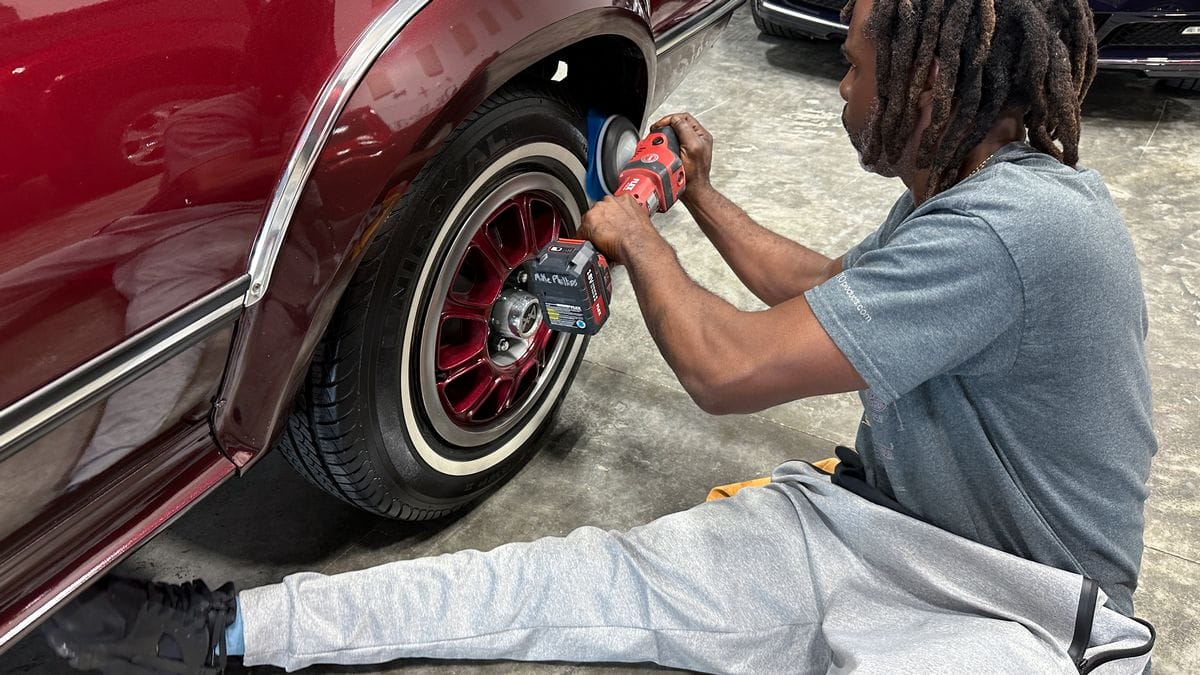
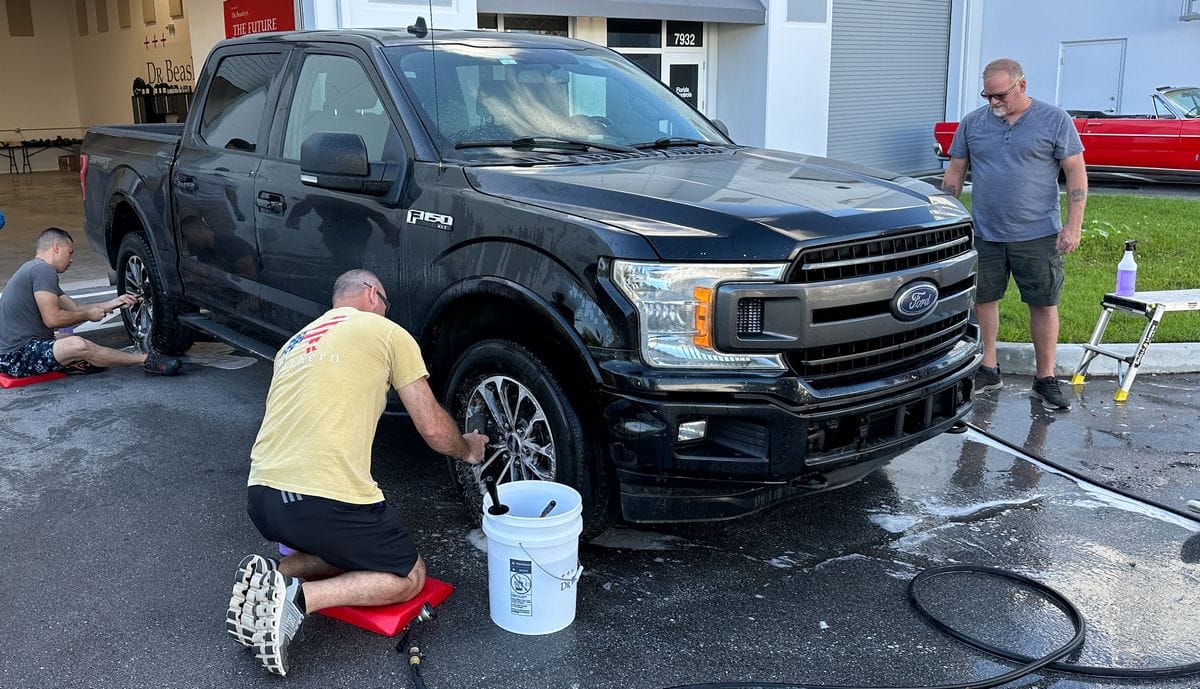
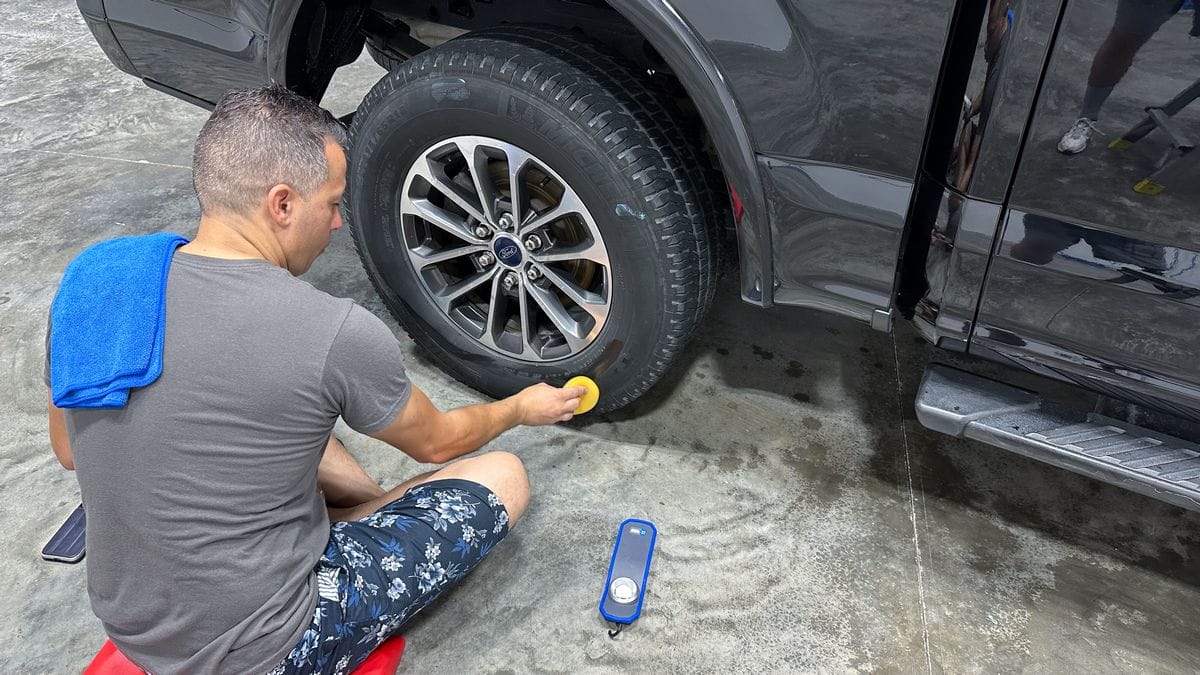
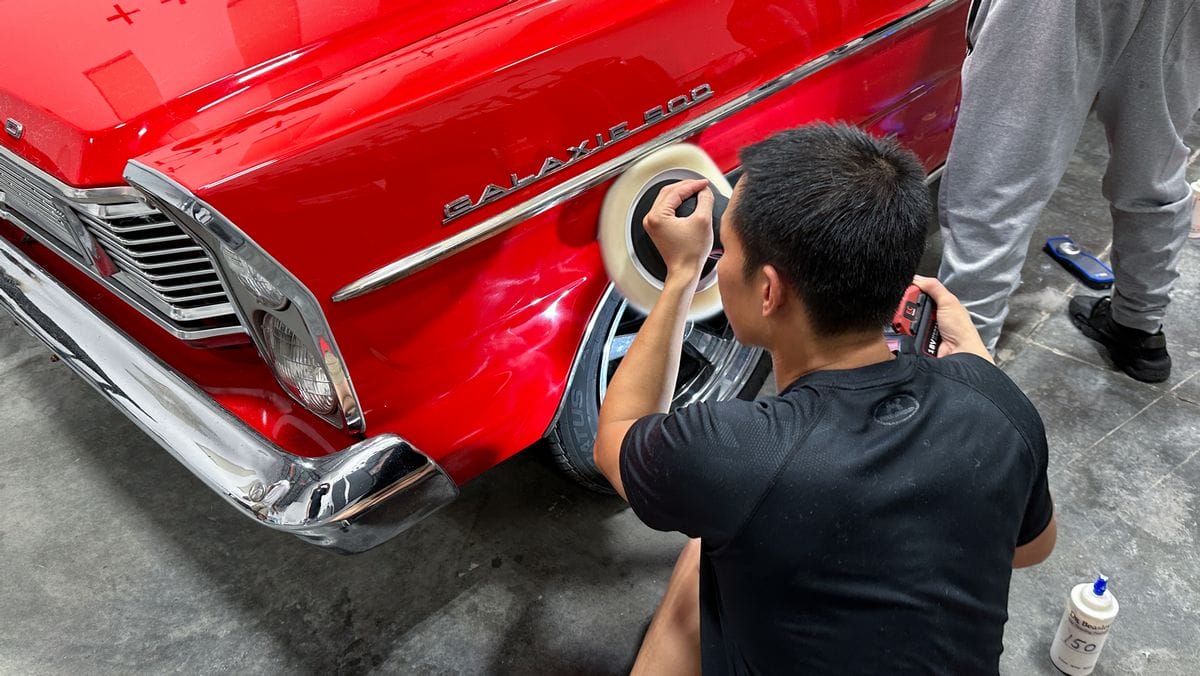
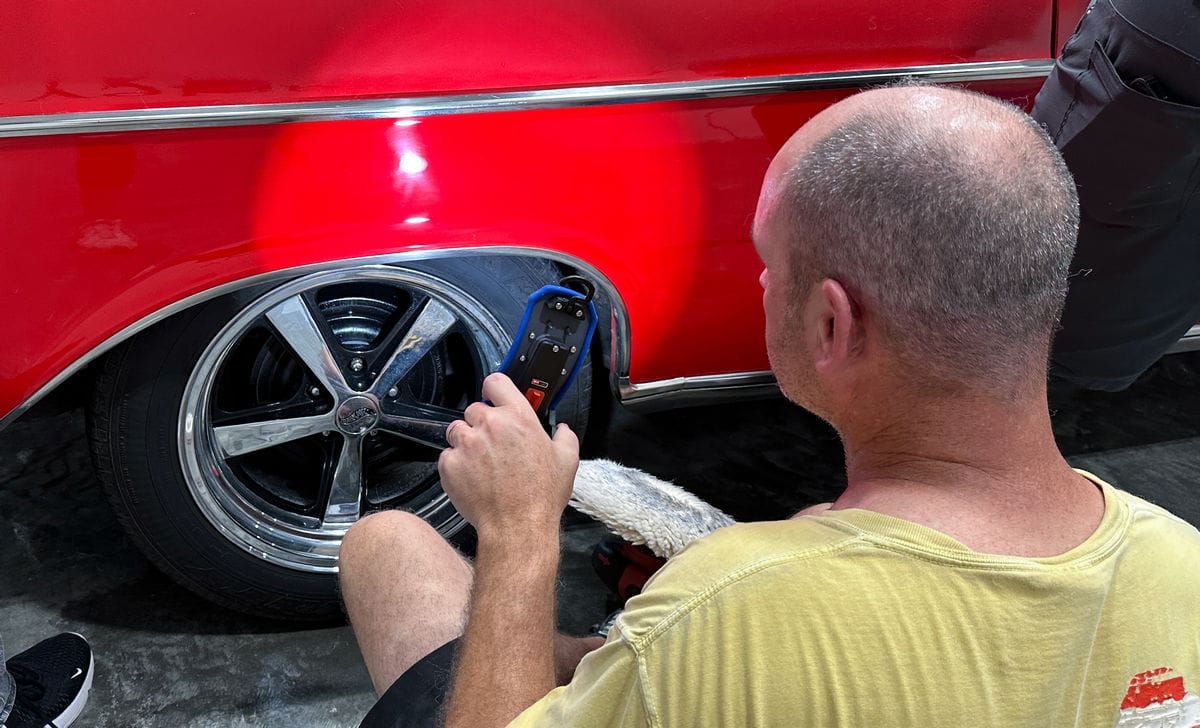
Clean Wheels and Tires
Clean wheels and tires before washing the car. This helps to avoid standing rinse water on paint causing water spots and if you don’t have Knee & Back Cushions to sit on, it keeps you dry.
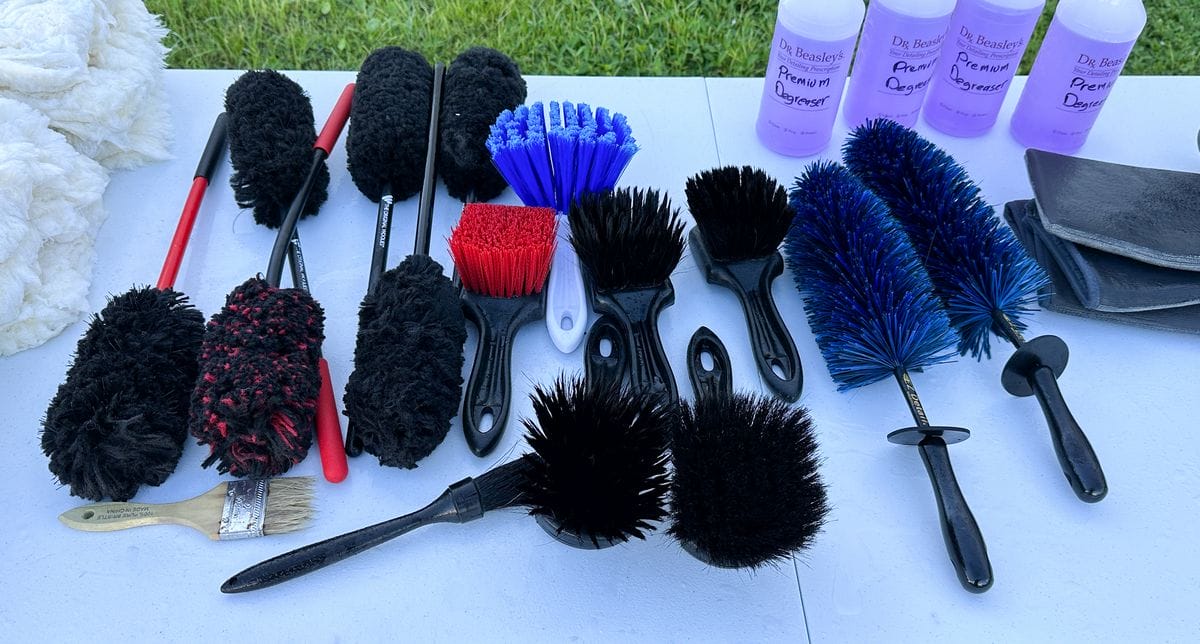
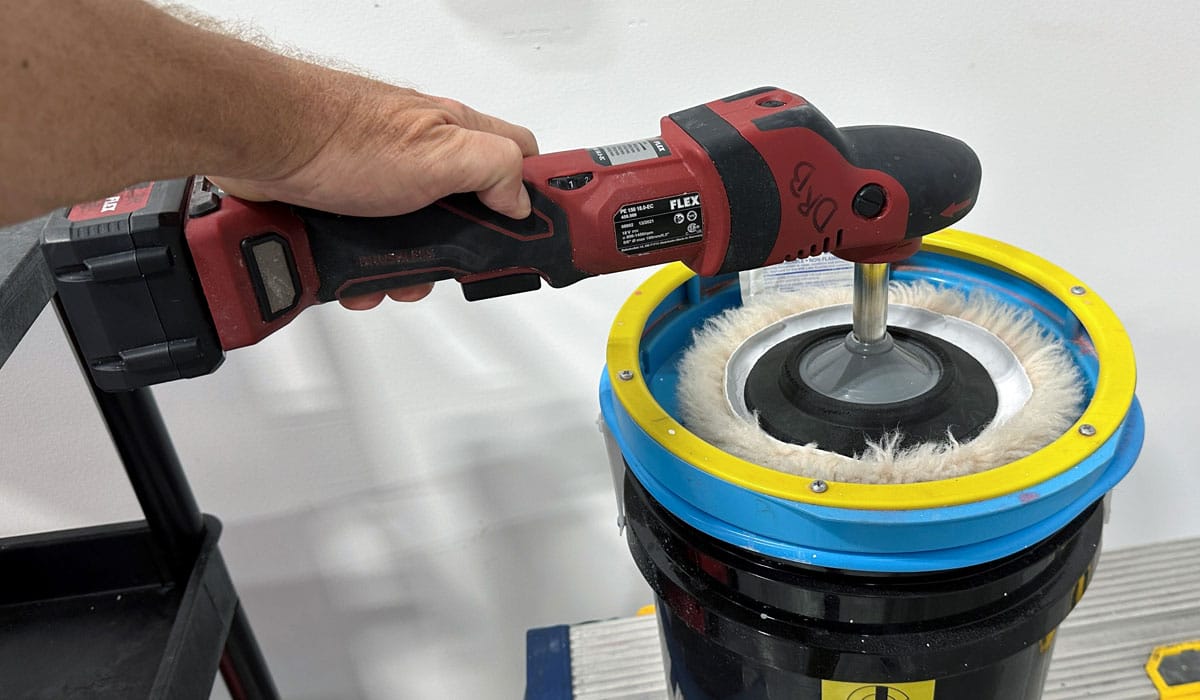
In my classes we teach machine scrubbing tires using cordless rotary polishers. It’s faster and a LOT more effective than your hand and tire brush. We also have quality wheel cleaning brushes from Braun Brush and EX Detail. With this collection of brushes you can easily clean any shape or design wheel.
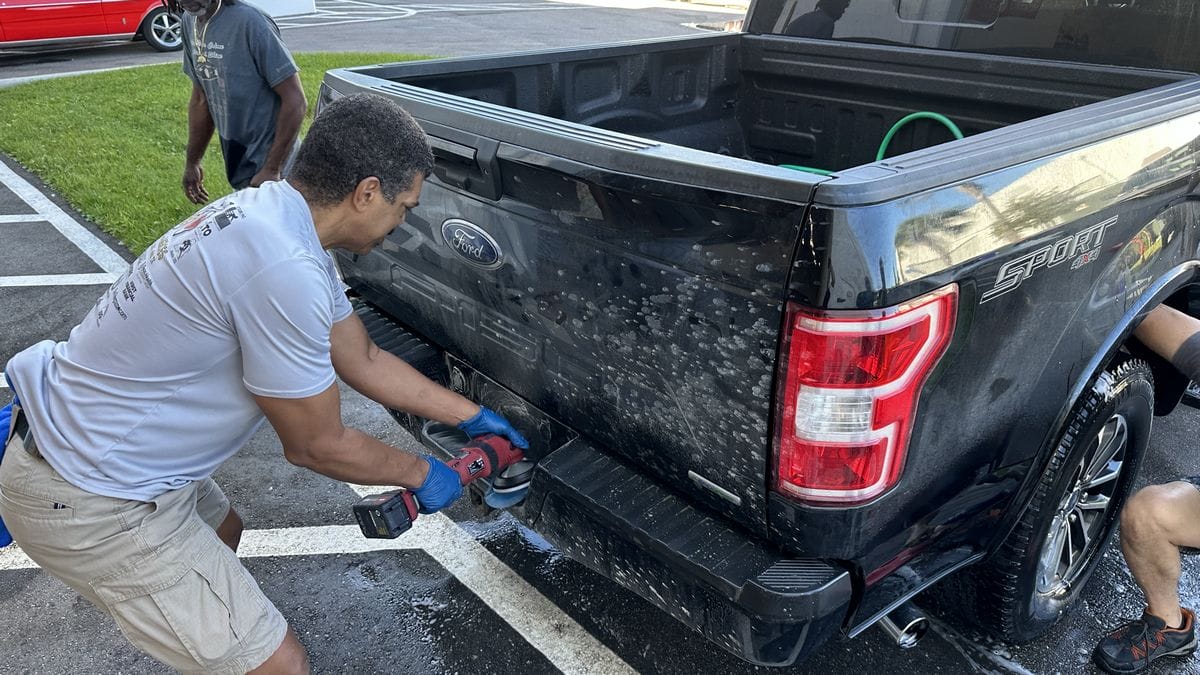
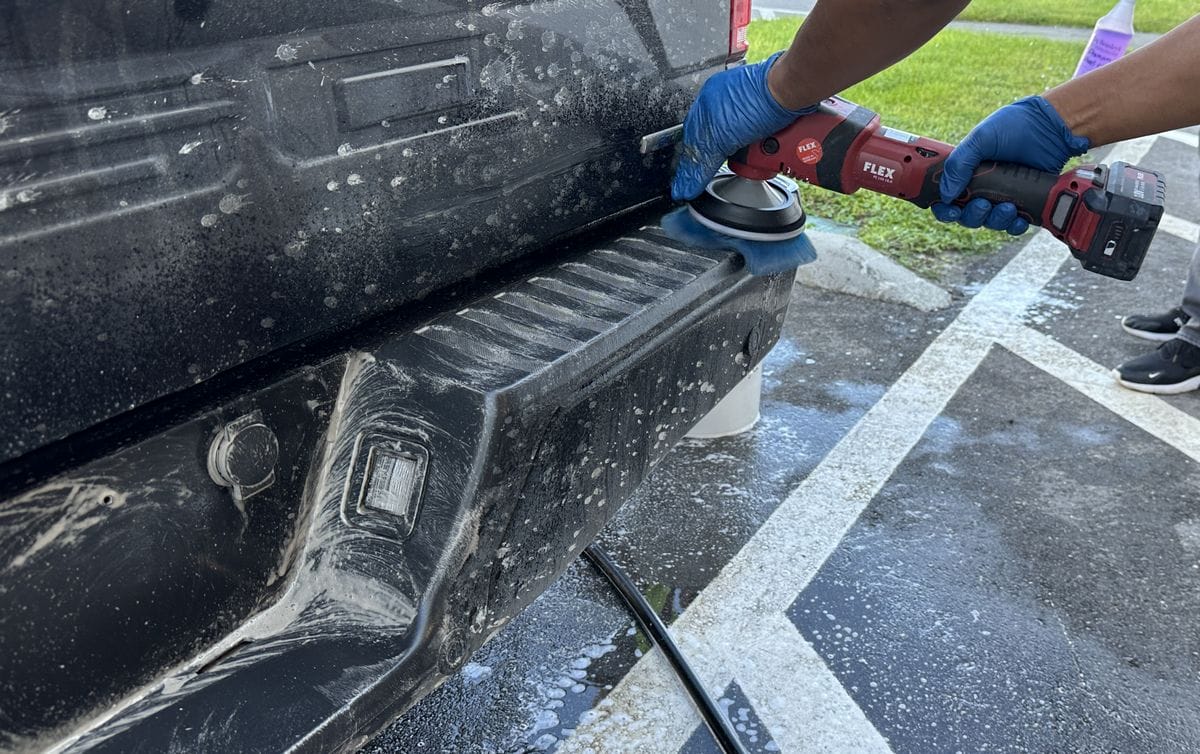
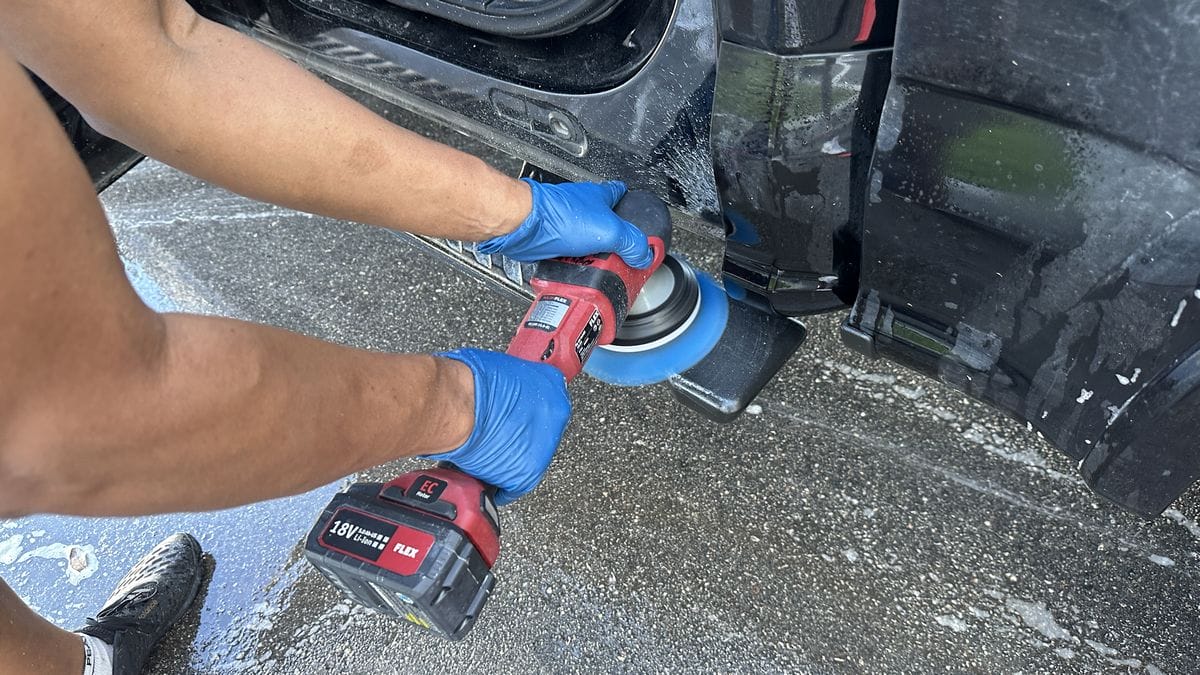
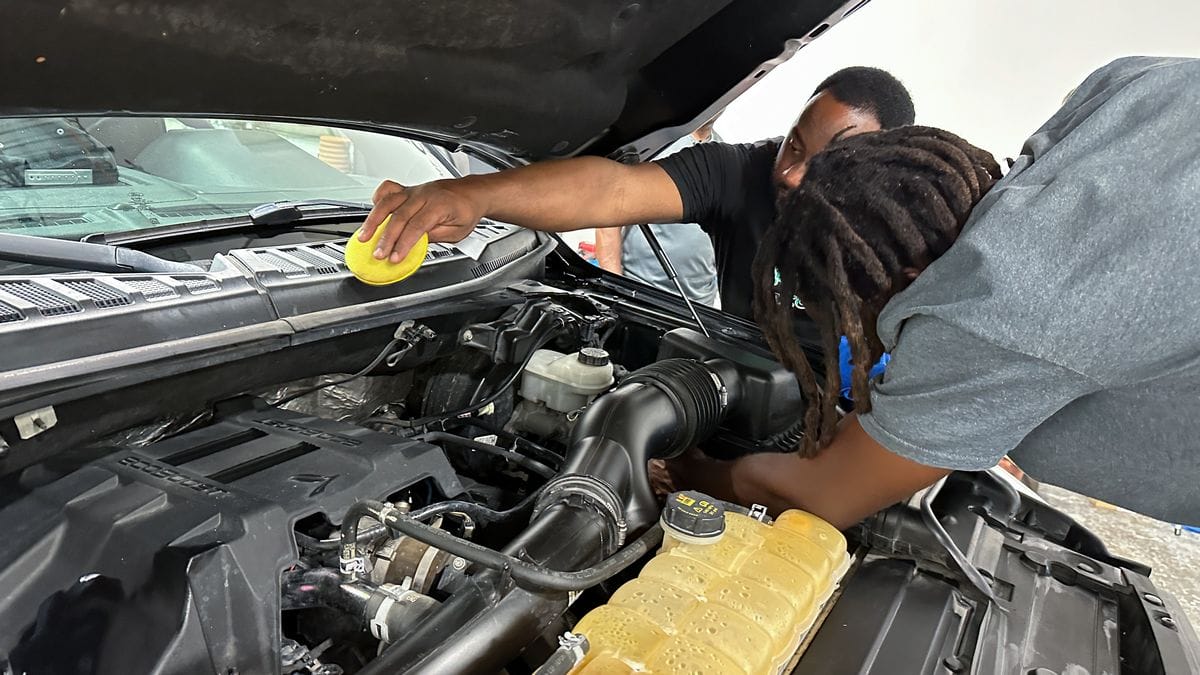
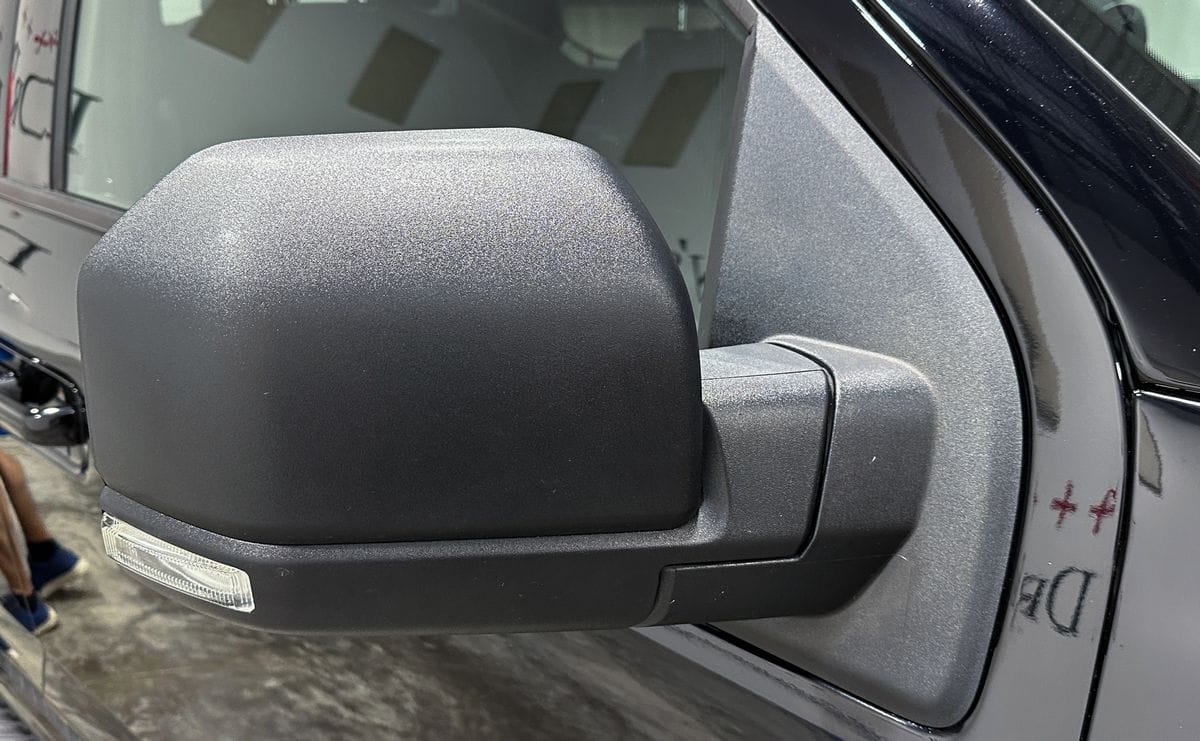
Machine Scrub Plastic Cladding
A lot of new cars have exterior plastic cladding, bumper covers, fender flares. Here’s another example for machine scrubbing using a cordless rotary polisher. Cordless because it reduces any electrical shop hazard.
Topical Glass Polishing
Most cars, over time, will get a build-up of water spots, drizzle stains, road grime and traffic film. These types of contamination will tend to be bonded onto the glass that merely washing with a wash mitt and car wash soap will not remove. For this we show using cordless rotary polishers with either a dedicated glass polish or a clearcoat-safe compound or polish, both will work.
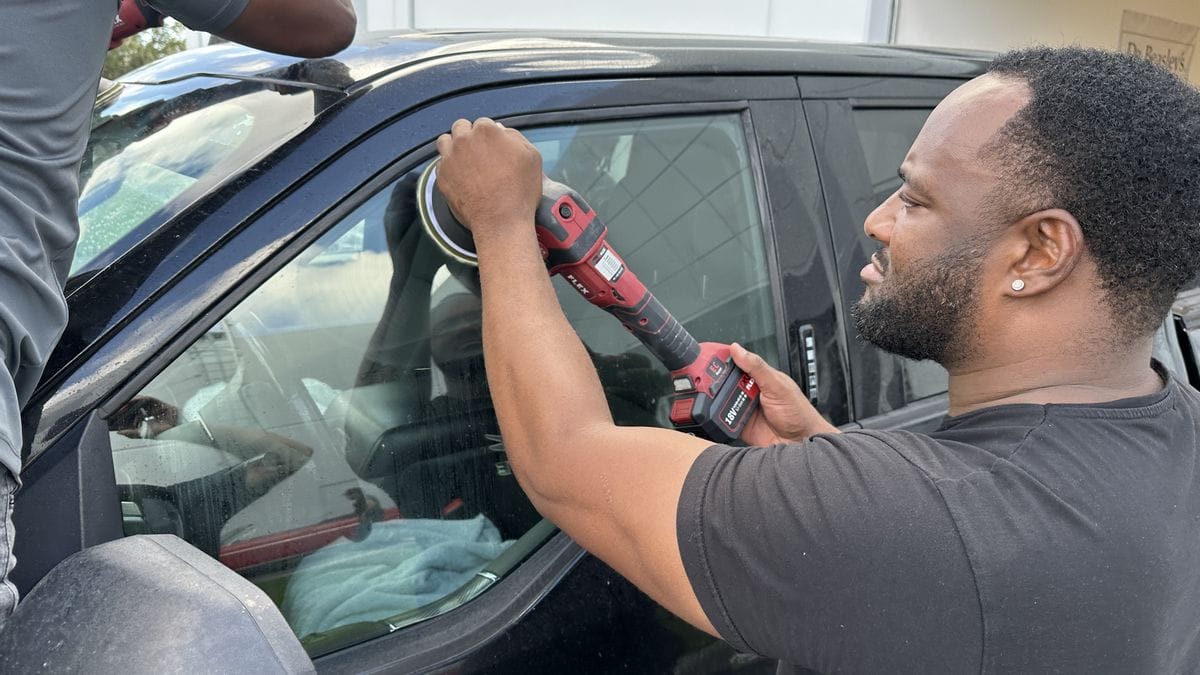
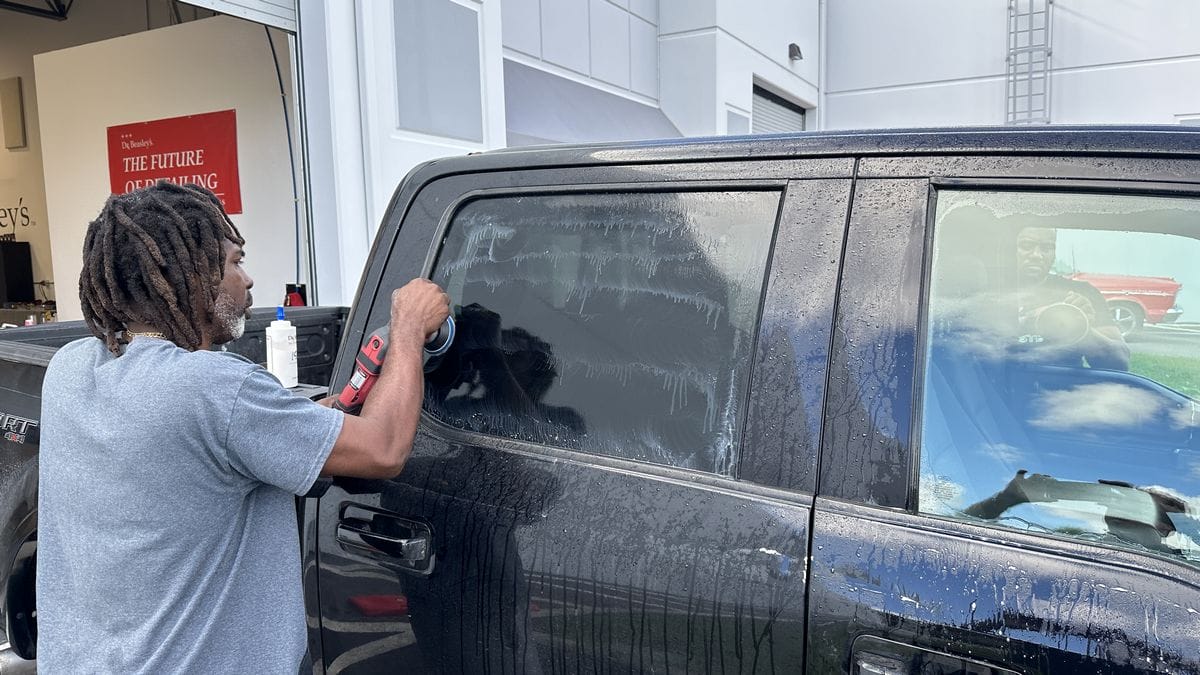
For pads we tend to use either foam cutting pads or microfiber pads. The benefit to topical glass polishing before washing the car is that any splatter slung outward and onto the inner portions of the window frame will be removed when you wash the windows. You can also leave the polish residue on the glass (don’t wipe off), as this will be removed when you wash the car.
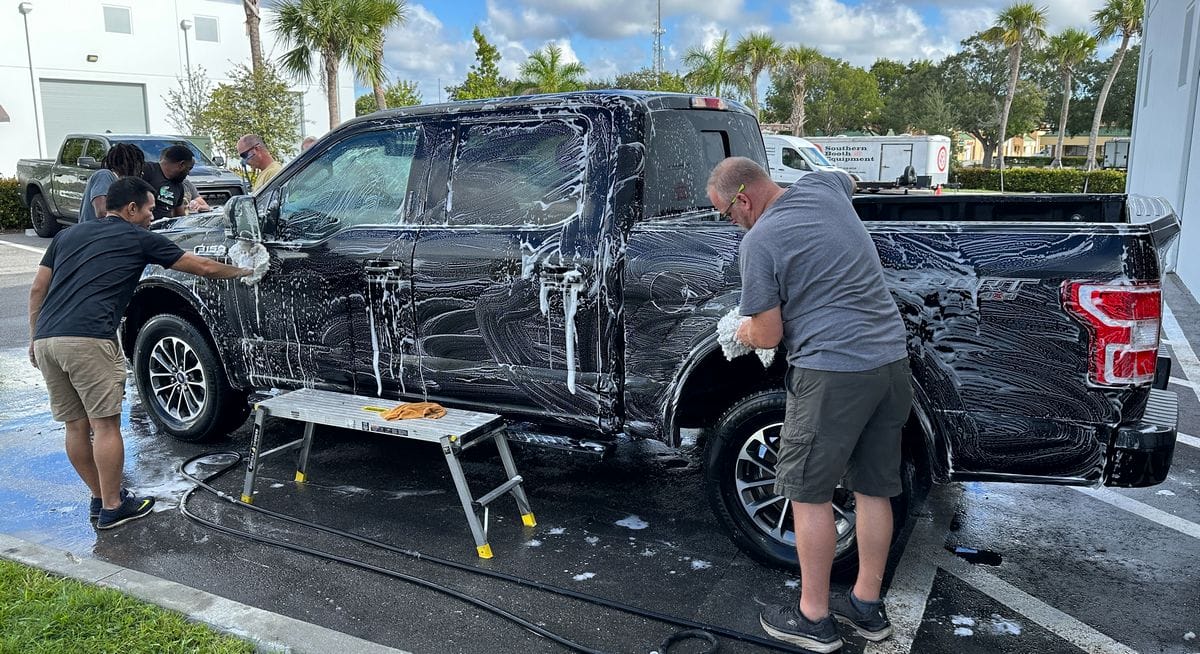
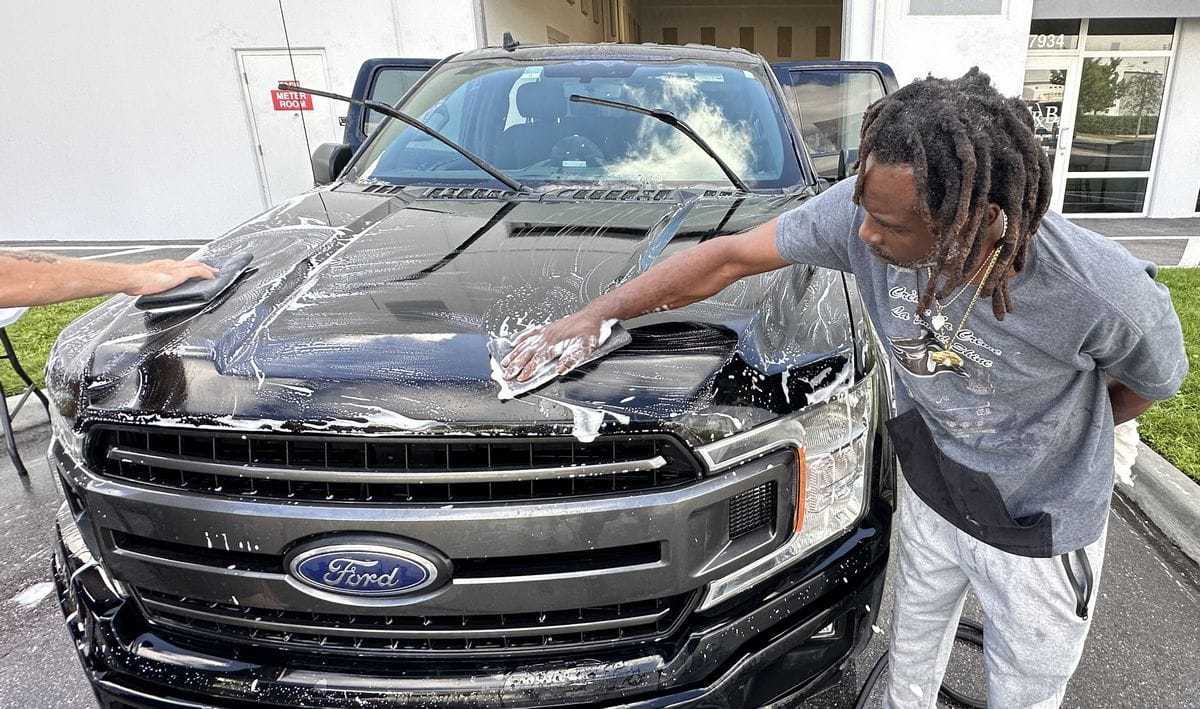
Contact Body Wash
Next, using clean, uncontaminated wash mitts and a pH balanced car wash soap, wash the entire vehicle starting at the top and working your way down and around the vehicle. Don’t forget the fuel door compartment and if needed, wash and rinse the door jambs at this time. Be cautious to avoid getting water inside the vehicle. After washing, give the vehicle a thorough rinse.
Mechanical Decontamination
Keeping in the theme of saving steps and saving time, after rinsing, but while the vehicle is still wet, go ahead and mechanically decontaminate the paint using clay towels or clay mitts then give the vehicle a final rinse. Follow rinsing with removing any standing water using compressed air and drying towels.
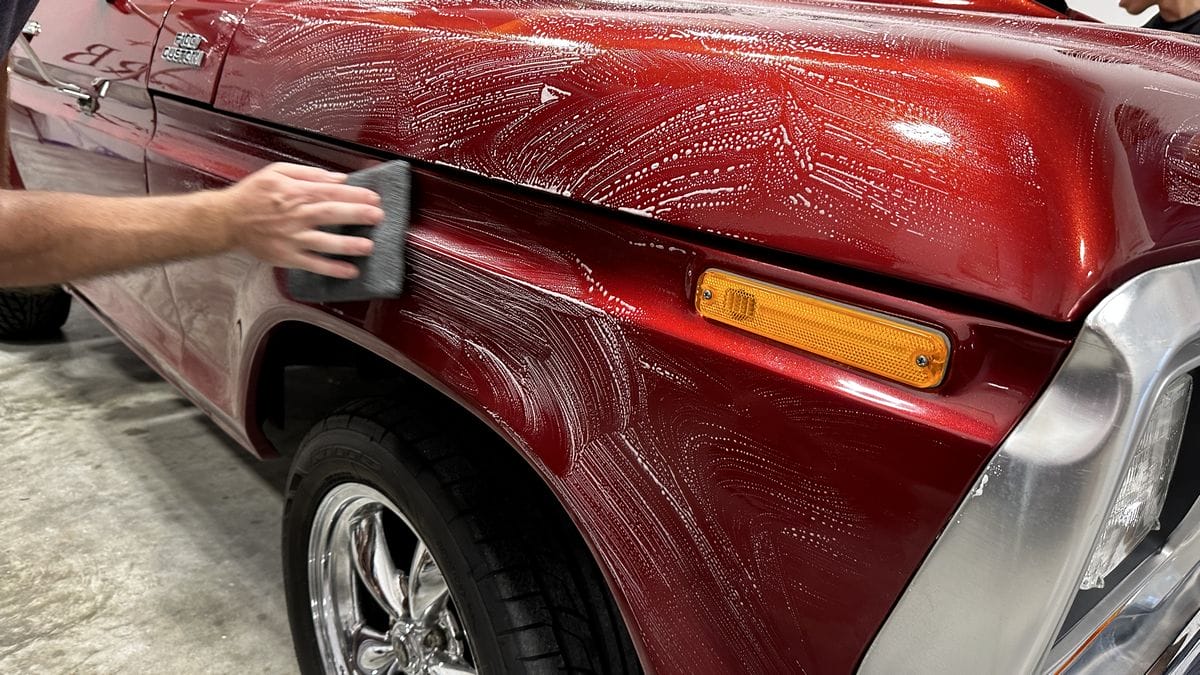
Production Detailing – 1-Step Ceramic AIO Paint Correction
This is a one-step approach for primarily daily drivers and customers that simply want a budget detail. Start by doing a Test Spot with your choice of polisher and AIO and dial-in the best pad. The best pad for doing one-step paint corrections is a pad that offers good defect removal but doesn’t leave pad-marring or micro-marring due to the pad being too aggressive and/or if the paint is on the soft side. Adjust the pad accordingly.
Free For All – Your Choice for Polishers
For this session, I let the students use any orbital tool they want to test out, revisit or spend more time with.
Dress Tires
Here’s another place where I teach machine-applying tire dressings. The spinning bristles on a 5” rotary brush works great for working the dressing into the letter, surface irregularities and sidewall siping.

Dress Engine and Engine Compartment
Using your favorite dressing, apply and dress all plastic, rubber, and vinyl surfaces inside the engine compartment. For some cars, you may want to use a metal polish for brightwork and/or a cleaner/wax for painted surfaces.
Dress all Exterior Black Plastic Trim
Capture a Group Shot with the Cars Just Detailed
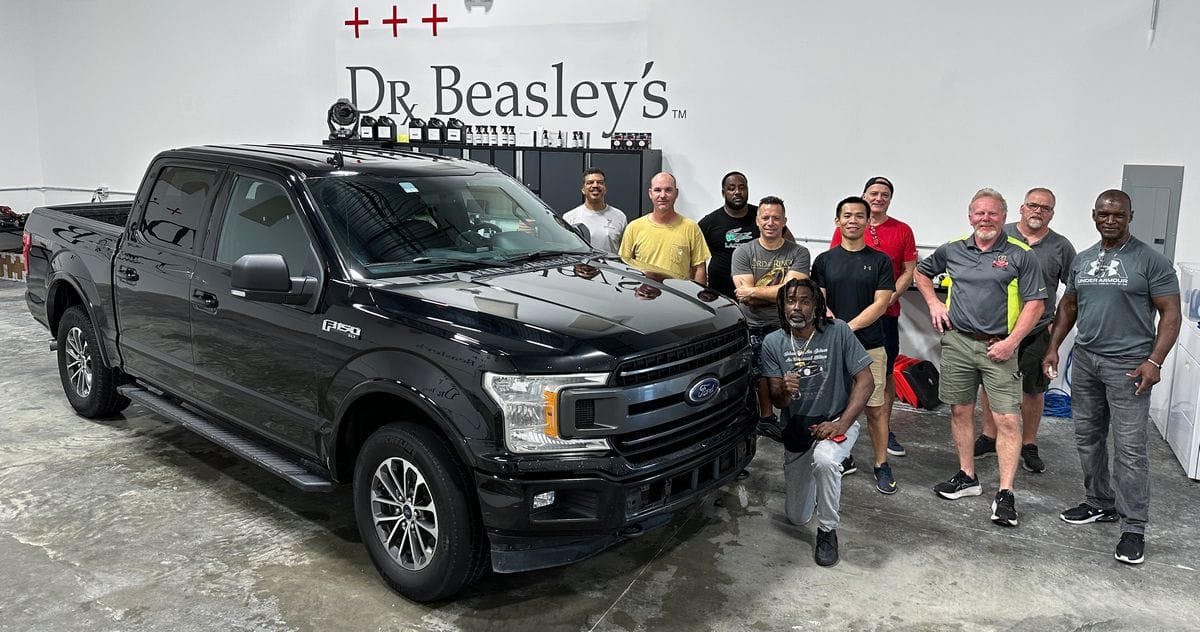
Capture the Beauty Shots
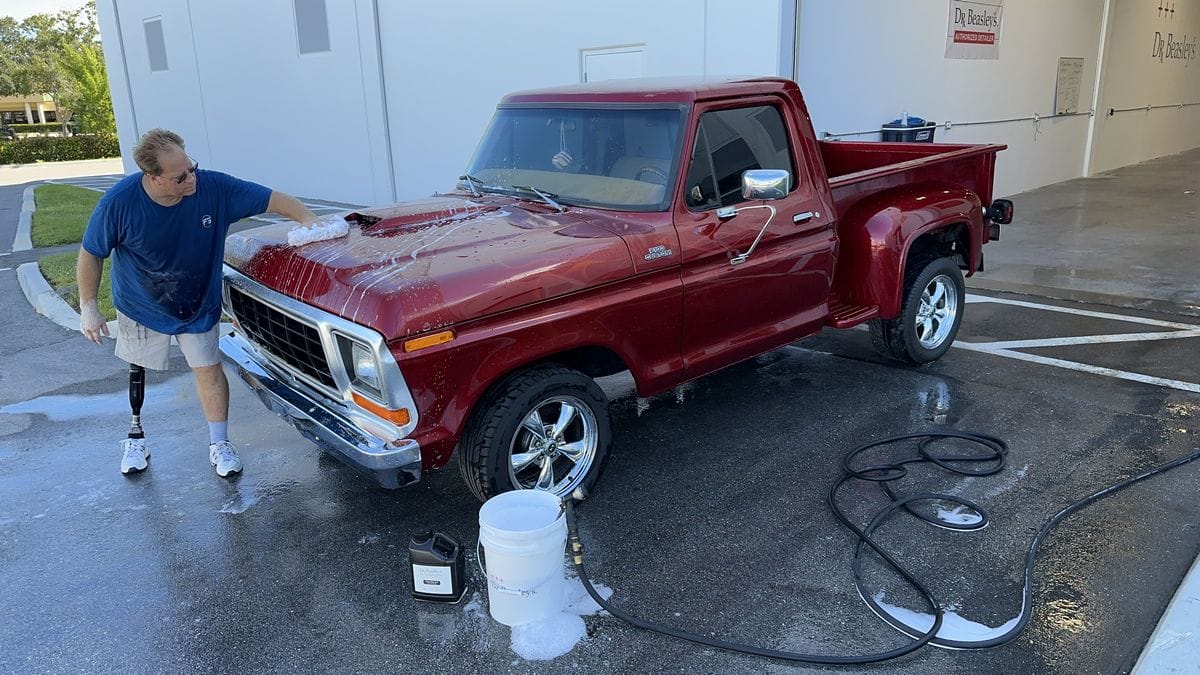
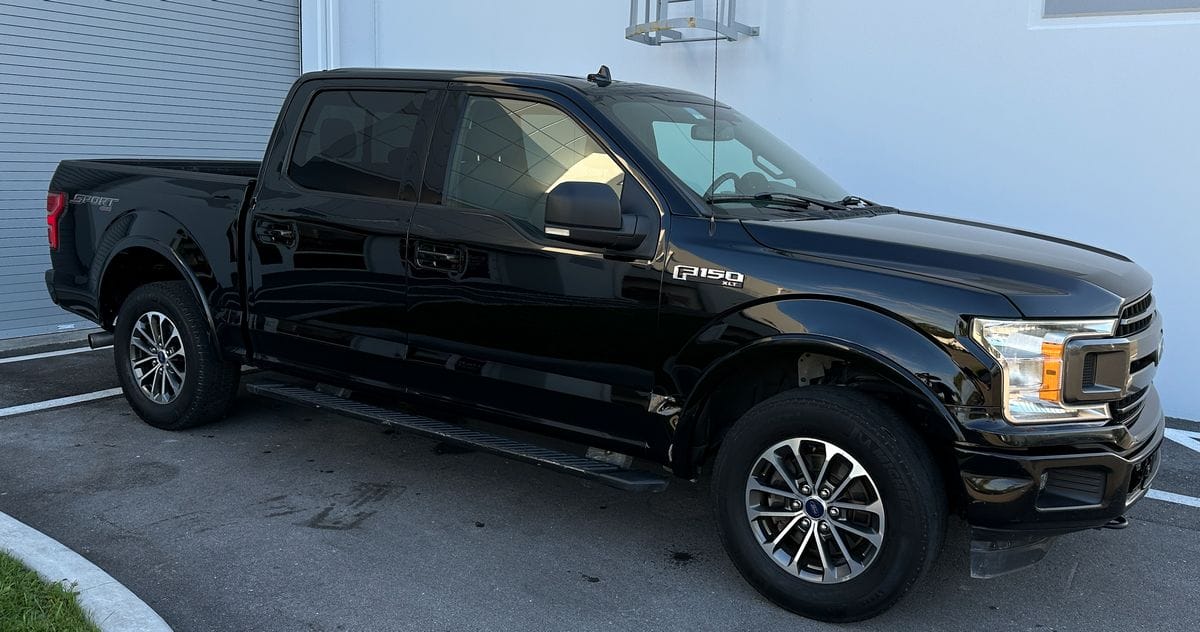
Here’s an example of me getting in a hurry and moving the truck out of the shop without getting great after shots. I did take this single photo of the truck after parking it.
11:00am – Removing Orange Peel – Hand Sanding – Machine Sanding – Rotary Polishers
The fun really kicks in now. Like most classes, I used to use demo hoods to teach orange peel removal and sanding techniques. About 6-7 years ago, I switched over to using the real-deal. In the real-world, no one should be sanding the factory paint on modern vehicles. The factory clearcoat layer of paint is thinner than a Post-It Note. Most Post-it Notes are around 2-3 mils, same for a $1.00 dollar bill and a common sheet of printer paper.
Keep in mind,
- Sanding removes paint
- Compounding removes paint
- Polishing removes a little paint
Sooner or later, you’re going to turn your buffing pad over and see the color of the basecoat. This is a really bad sign. This means you either sanded or buffed through the clearcoat and now the panel in question will need to be repainted.
The Real Deal – Real Cars with CUSTOM Paint Jobs
In the real-world, the types of cars that get sanded are cars that someone has taken the time and financial investment to restore and or hotrod. After all the mechanicals are restored or upgraded, at some point the car goes into the paint booth and gets a custom paint job. The painter, knowing the paint job is going to be sanded, sprays EXTRA paint onto the car. This provides plenty of paint to both sand, buff and still have plenty left over to last over the service life of the car.
This is a tick tricky to pull off because you have to have very good relationships with your local car guys. Not only are they trusting in your good name, but they also understand they are turning their special project over to complete strangers, some of whom have NEVER sanded custom paint.
A Comment About Training Hoods and Test Panels
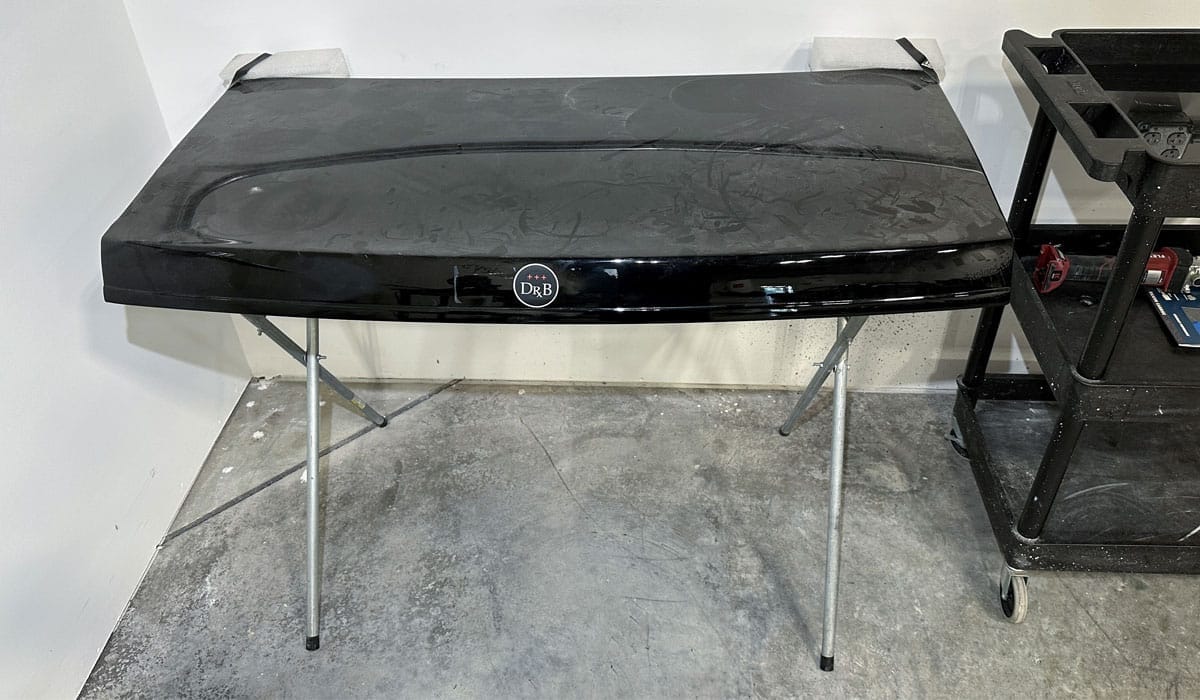
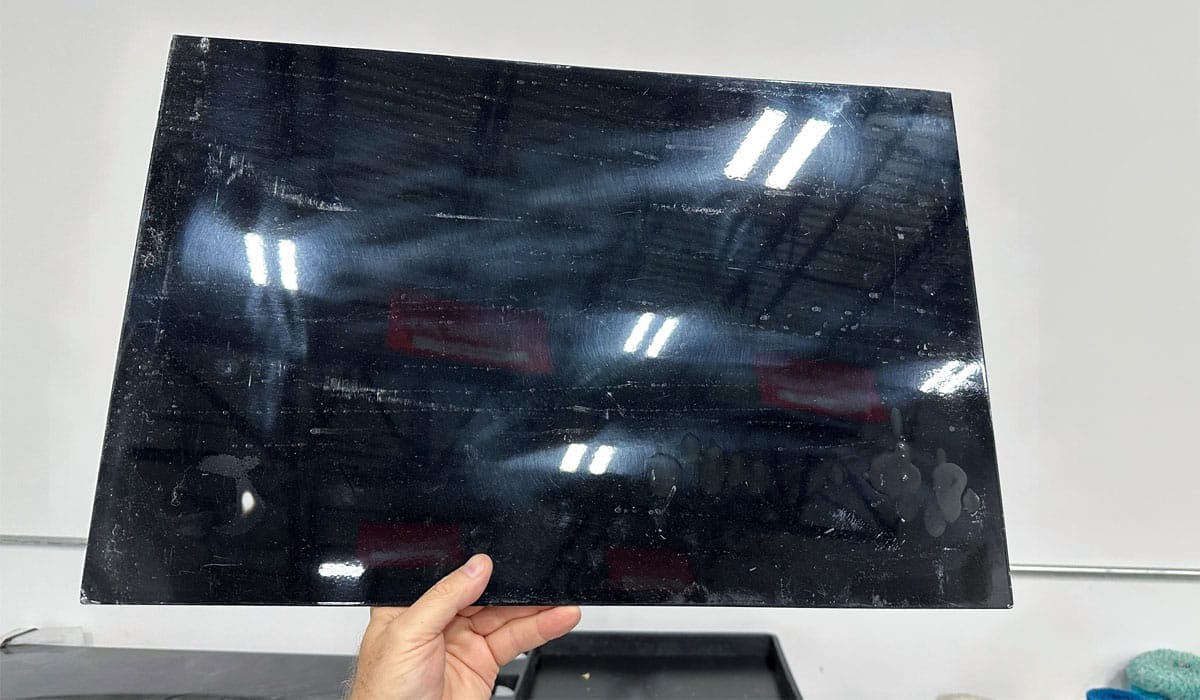
Nothing wrong with using hoods, fenders, doors, or pre-cut panels, or even cookie sheets for teaching sanding techniques. My thoughts are, something is better than nothing. Here’s the deal though, these types of things are usually stationed on an X-stand, or a table about waist high and they tend to be large, flattish surfaces.
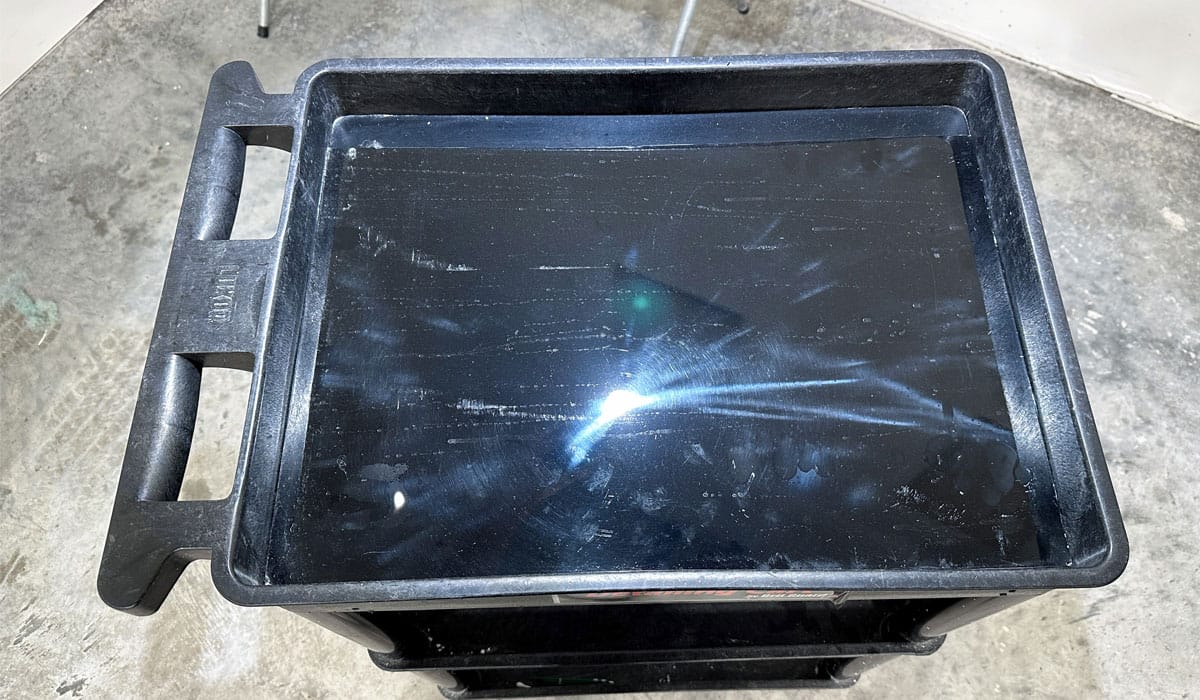
I have ONE demo trunk lid in our shop and ONE training panel. The training panel is sized to fit inside the Grit Guard Detailing Cart so If I don’t have the option to use an actual car and/or shipping a hood or trunk lid is logistically a nightmare or not cost-effective, I can use the test panel inside the Grit Guard Cart which not only holds it perfectly, but prevent any splatter from sanding or buffing from getting all over anyone standing nearby watching the demo.
The Big and Important Differences Between Training on Demo Hoods Versus Real Cars
The big and important differences between training on demo hoods or test panels versus working on the real-deal is there’s no impact. At least there’s not as much impact as working on a real car.
What Do I Mean by Impact?
When sanding and buffing on a demo hood or test panel, both of which will be about waist high, compared to tackling an actual car, it’s super easy. Sand a little, buff a little and you’re done.
With a real car, it has IMPACT because NOW you have to be aware of and learn how to sand and buff around,
- Edges – door, hood, fender edges
- Raised body lines – style designs in various body panels – Never sand on top of raised body lines
- Door handles
- Antennas
- Side mirrors
- Door locks
- Fresh air grills
- Emblems
- Chrome, stainless or nickel trim
- Plastic trim
- Vinyl graphics or decals
- Hood ornaments
- Bumpers
- Cowl Vents
- Wiper arm and/or the indent around the Pivot Shaft
- Taillight housing/trim
- Headlight bezels
- Turn signal lights
- Side markers
- Gas caps
- Fuel lid doors
It’s simply a LOT more complicated and it forces the students to LEARN more. So it has more IMPACT. After sanding down a car in a classroom environment, the most important thing some people will learn is, they never want to sand down an entire car. It’s a HUGE undertaking. If it’s someone else’s cool project, it’s also a LOT of responsibility.
Here’s How I Teach This Class.
- Prep car for sanding – claying, taping-off sensitive areas.
- Hand block sanding to level and flatten orange peel.
- Machine sanding to refine hand sanding marks for faster, easier, and cooler buffing.
- Rotary polishers with wool cutting pads to remove 100% of the sanding marks.
- Gear-driven Orbital Polishers to remove all holograms and create a swirl-free finish.
- Installing a Ceramic Coating.
- Dressing tires and finishing touches.
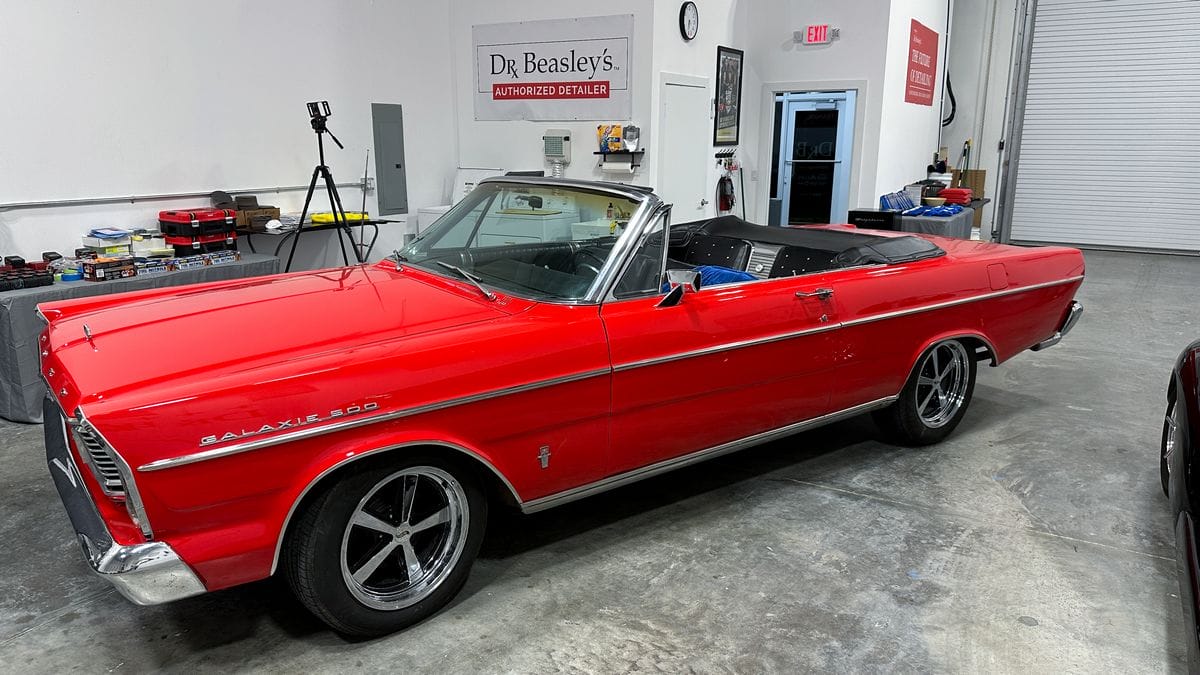
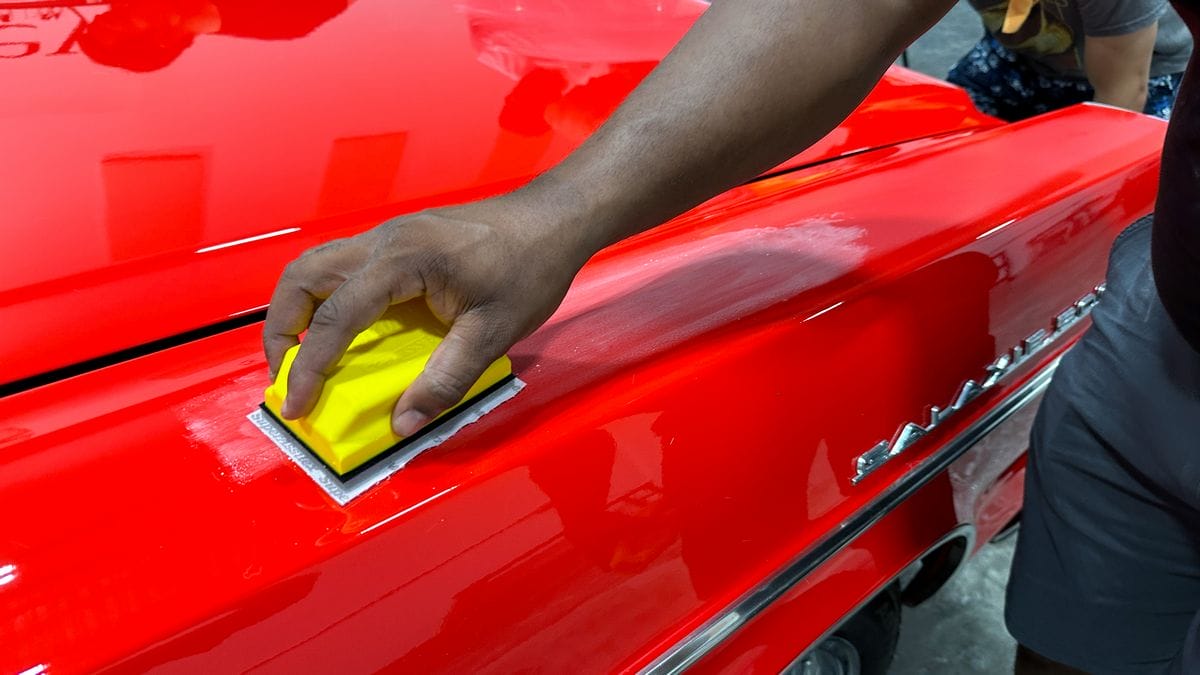
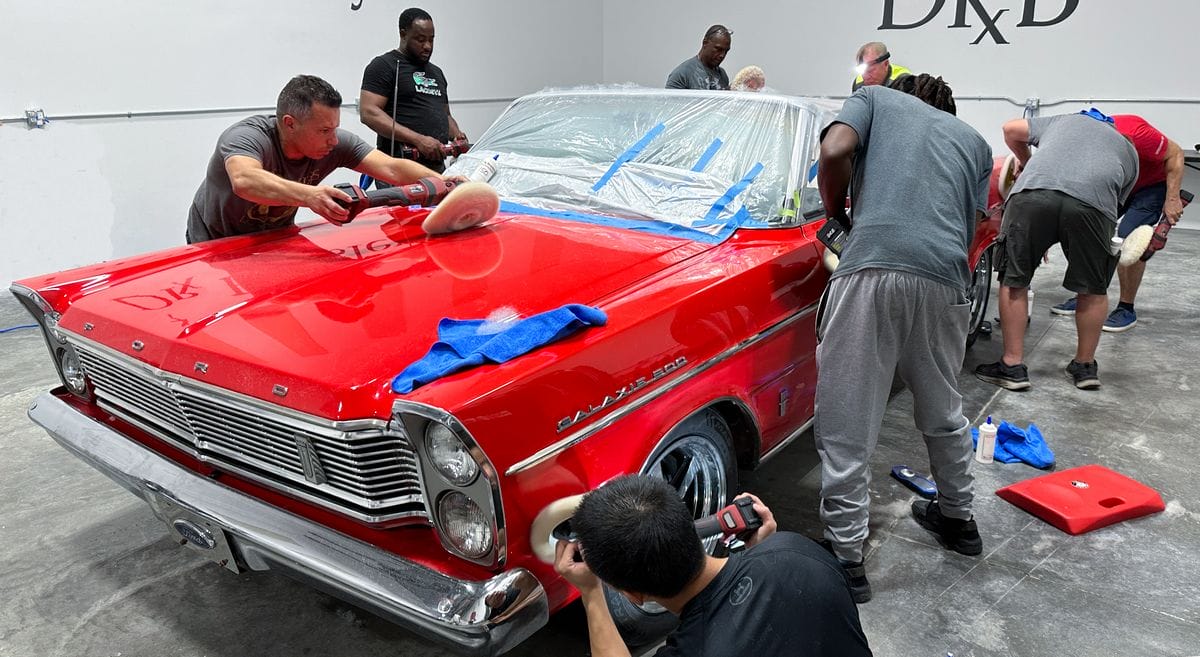
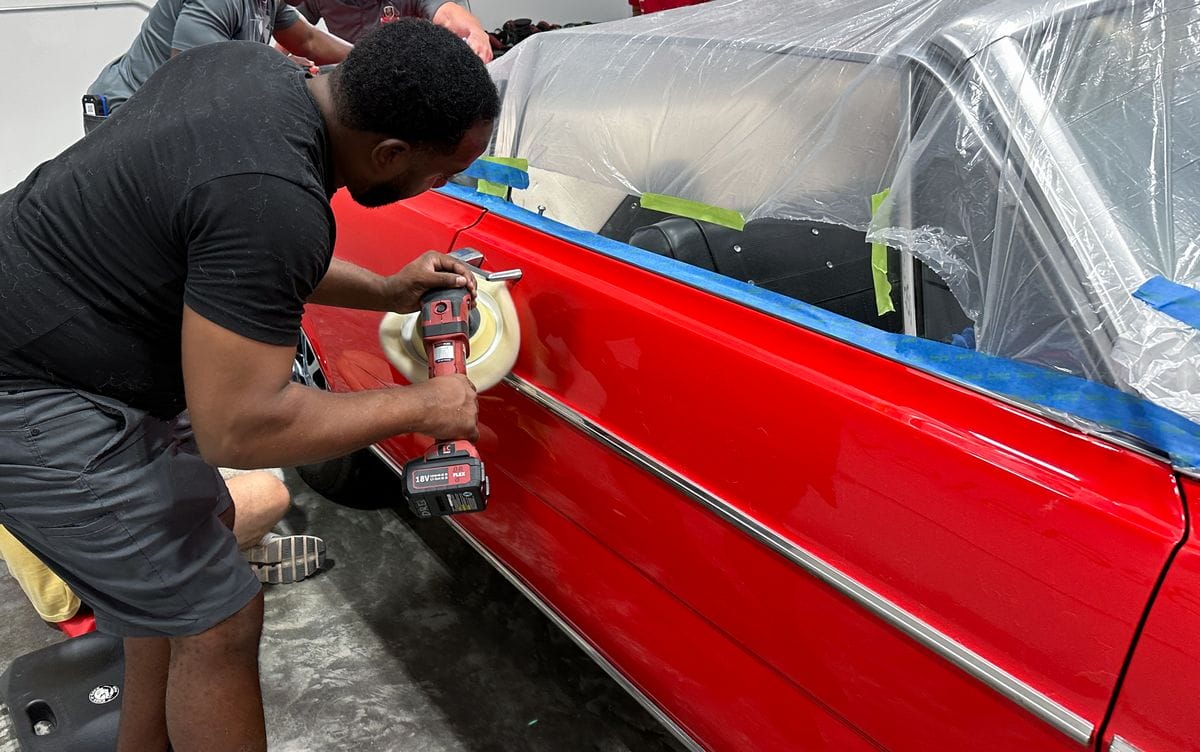
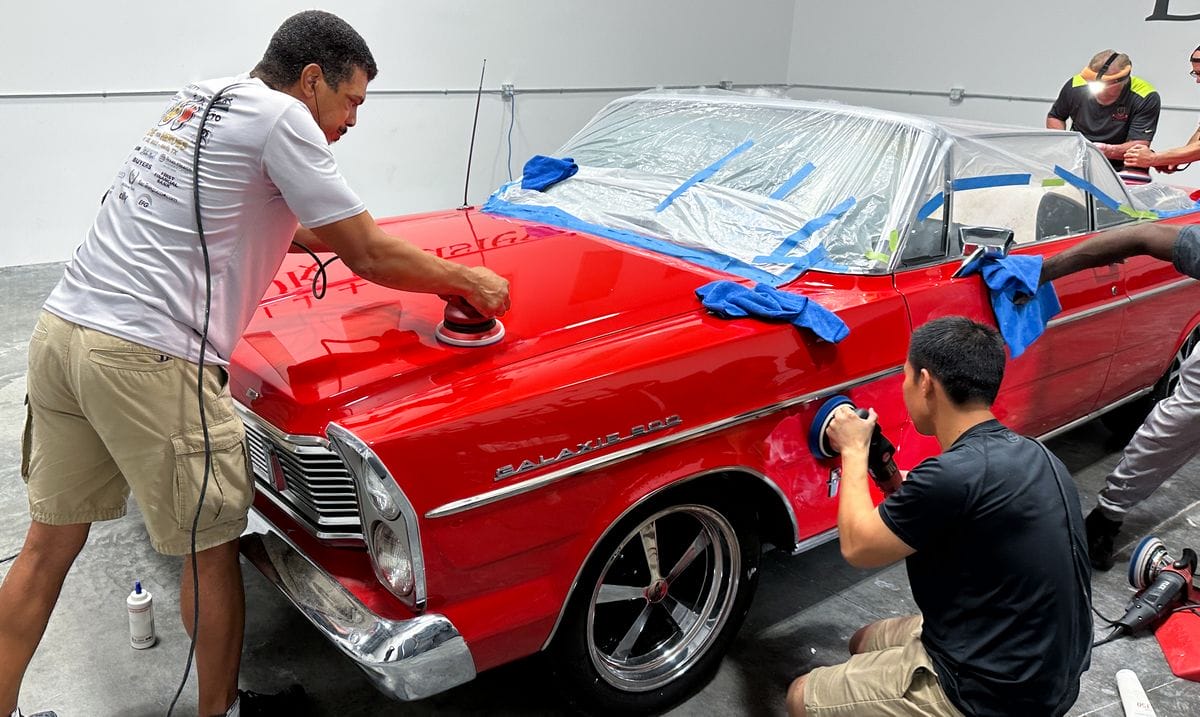
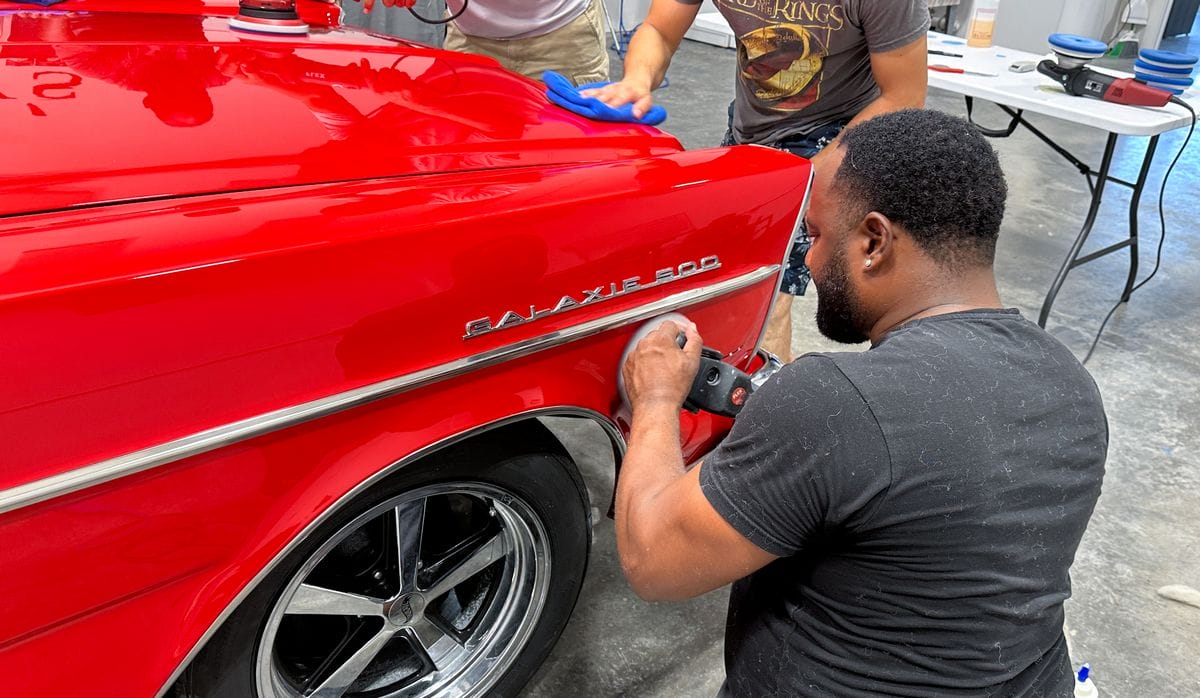
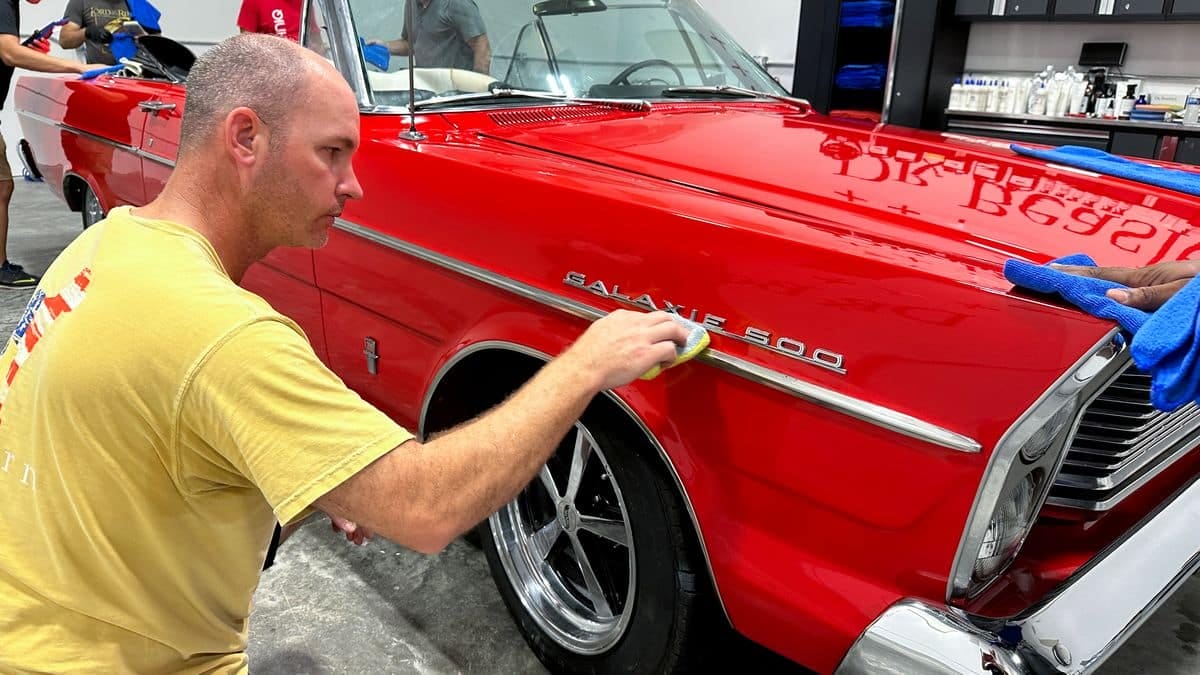
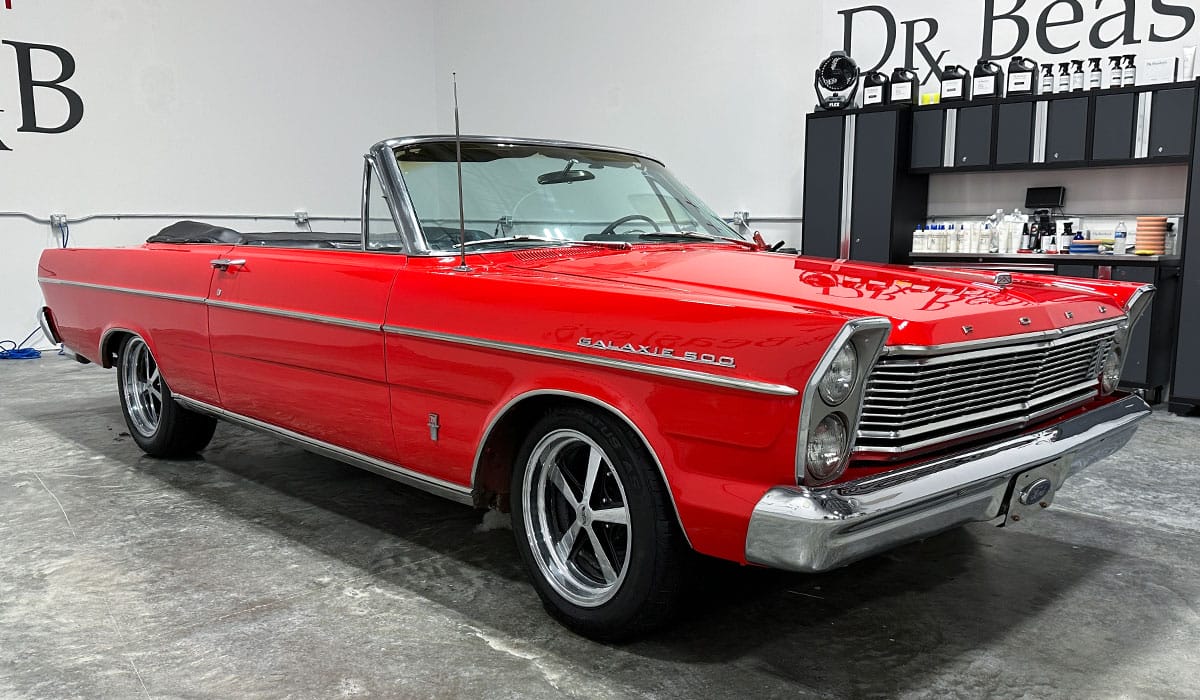
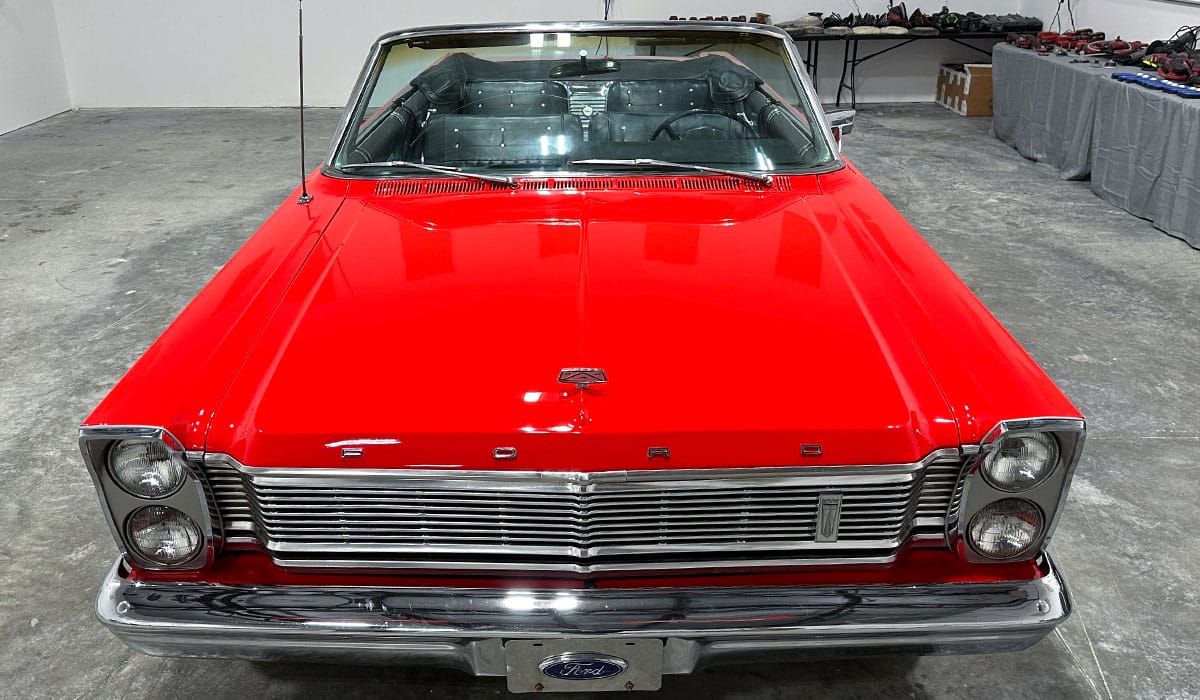
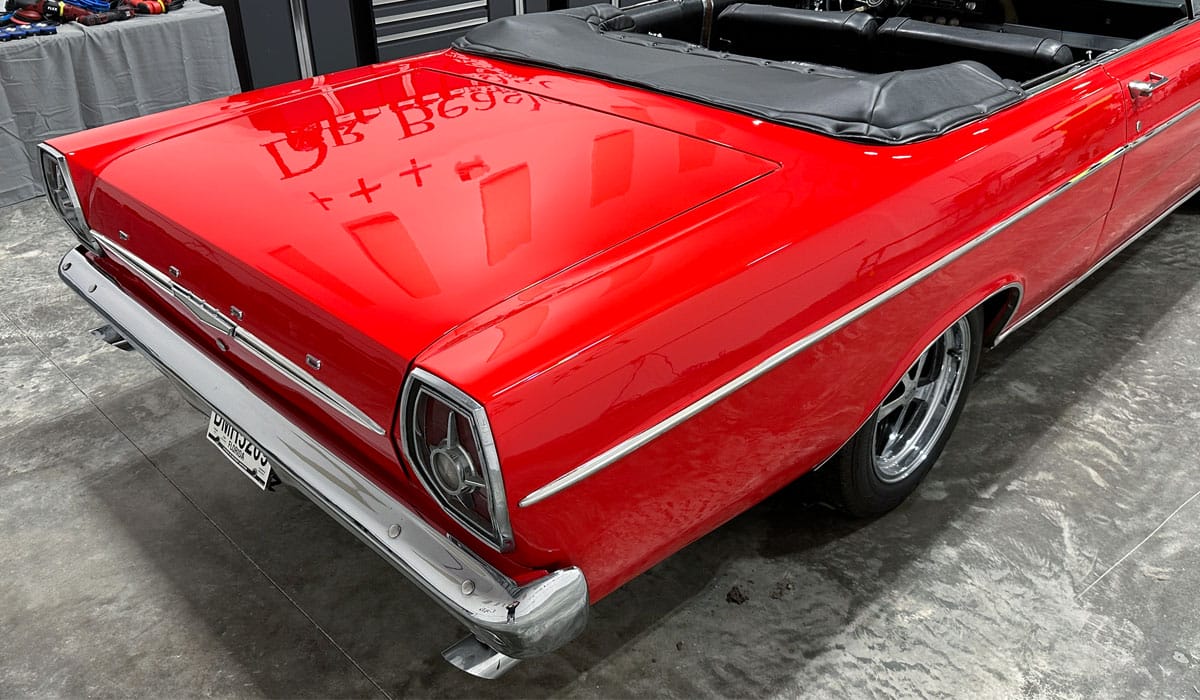
Here’s the pictures from this same class you’ve seen in all the other pictures. For this particular class, we have a 1965 Ford Galaxie 500 Convertible provided by my longtime and good friend, Russel Stender of Perfect Shine in Jax. This Ford Galaxie has been restored and has a custom basecoat/clearcoat paint system.
Setting Expectations
I’m not here to make you an expert on how to sand the paint flat and buff it out to perfection in a single day. I’m here to give you a FOUNDATION that you can build on for the rest of your life.
No one becomes an expert at sanding car paint in a single day or single multi-day class. It takes practice and I’m sorry to say, practice sometimes includes making mistakes. That’s how you learn what to do and just as importantly what not to do.
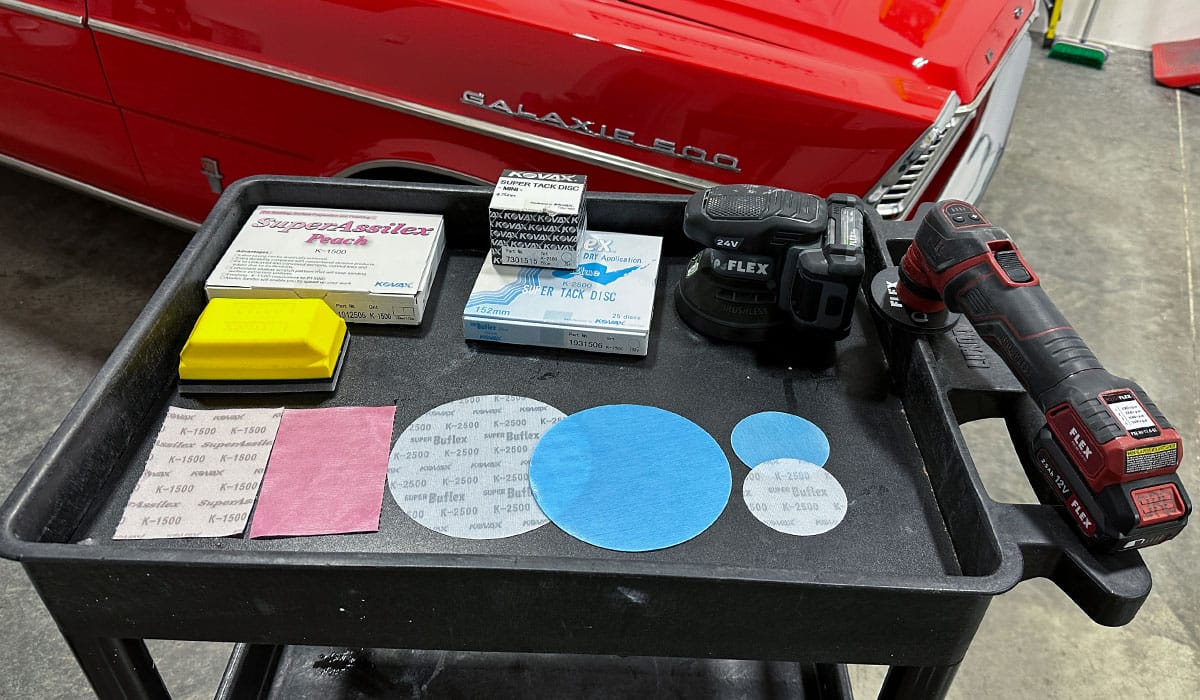
Eagle Abrasives by KOVAX
I taught wet sanding by hand for decades and in my opinion, the best way to remove orange peel and turn out a flat-as-glass finish is to use rigid, hard blocks and start with 600 grit wet sanding by hand. That’s how the pros do it. The class I teach is a tick more tame. The thing is, I have to balance a great learning experience without buying someone else a paint job. For this we stick with hand blocking using anywhere from 1000 grit to 1500 grit. It all depends on how much information I can find out about the paint job in front of us.
The BIG PICTURE idea is to teach the basic fundamentals of hand sanding followed by machine sanding followed by how to use rotary polisher to remove 100% of the sanding marks. Down the road, anyone that wants to learn more or get deeper than what I teach should consider getting a job at a custom body shop where you’ll get tons of hands-on experience block sanding.
My experience is most people learn more than enough about how to sand and the different options to enable them to tackle any sanding jobs that come their way – or to know enough to turn the job down.
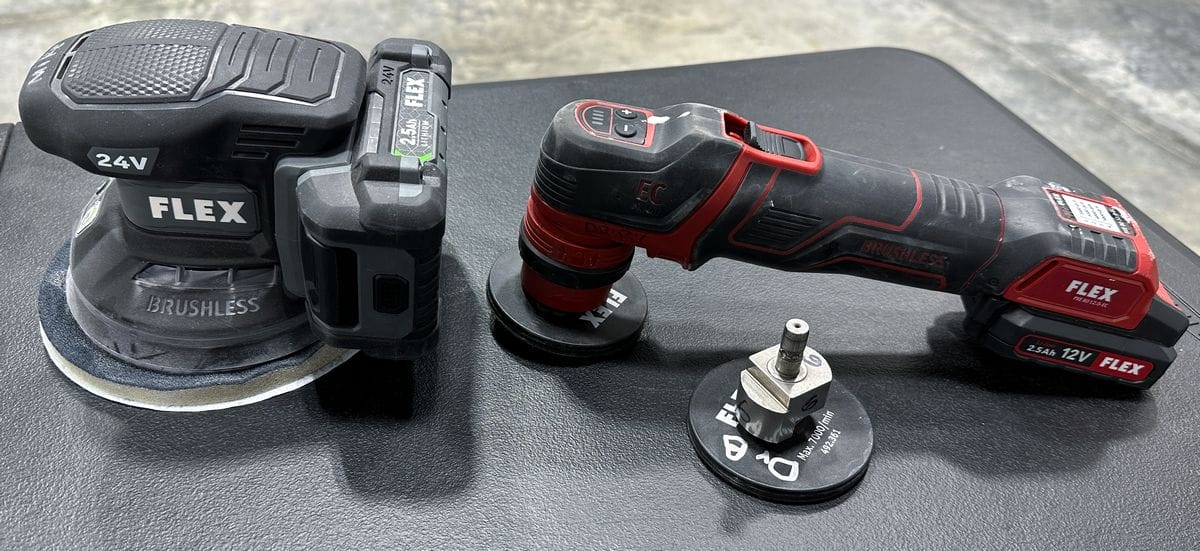
For our classes, we use the Eagle Abrasives dry sanding tools. Compared to wet sanding, dry sanding is faster, cleaner and for our purposes, just as effective. Currently we use the Eagle Abrasive ergo hand block and interface pads for both hand and machine sanding. For machine sanding, we use the FLEX FX3411 cordless 1.6mm DA Sander and the FLEX PiXiE with the 6mm drive unit.
3M Trizact and Hand sanding using Nikken Finishing Papers
Depending upon the training cars, I will also teach how to use the 3M Trizact damp sanding system as well as hand wet sanding using Nikken Finishing Papers.
Prep Car for Sanding – This Includes Claying, Taping-off Sensitive Areas
As a group, we look the car over and take inventory of anything we need to remove or tape-off and cover over to protect the surface from accidentally being sanded and thus scratched.
Block Sanding by Hand
After explaining the different options for interface pads, rigid, medium, or soft, the class attaches the interface pad to the hand sanding block and then centers the sanding sheet to the interface pad.
Technique Demonstrations
Probably the most difficult part for first-timers to learn is how-to sand next to edges, body lines and anything else they need to be careful around. I share the technique I use as well as how and why to edge a panel via hand sanding. Next a demonstration on how to sand larger, flatter sections of a body panel. And lastly, how to sand curved body panels. Then I turn the class loose and constantly walk around and monitor the action.
Machine Dry Sanding
After the class has blocked-out all the various body panels, next up we switch over to machine dry sanding to refine the hand sanding marks to further refine the finish and make the cutting step faster, easier and cooler to the paint. For these steps we use the cordless FLEX FX3411 and FLEX PXE-80 with the optional 6mm drive unit.
Technique Demonstration and Tips
After demonstrating how to center and attach the interface pads and the sanding discs, I cover tips and techniques for machine dry sanding to refine hand sanding marks to be more shallow. Refining is more important and also more difficult than the initial sanding step, so it requires intense focus and concentration.
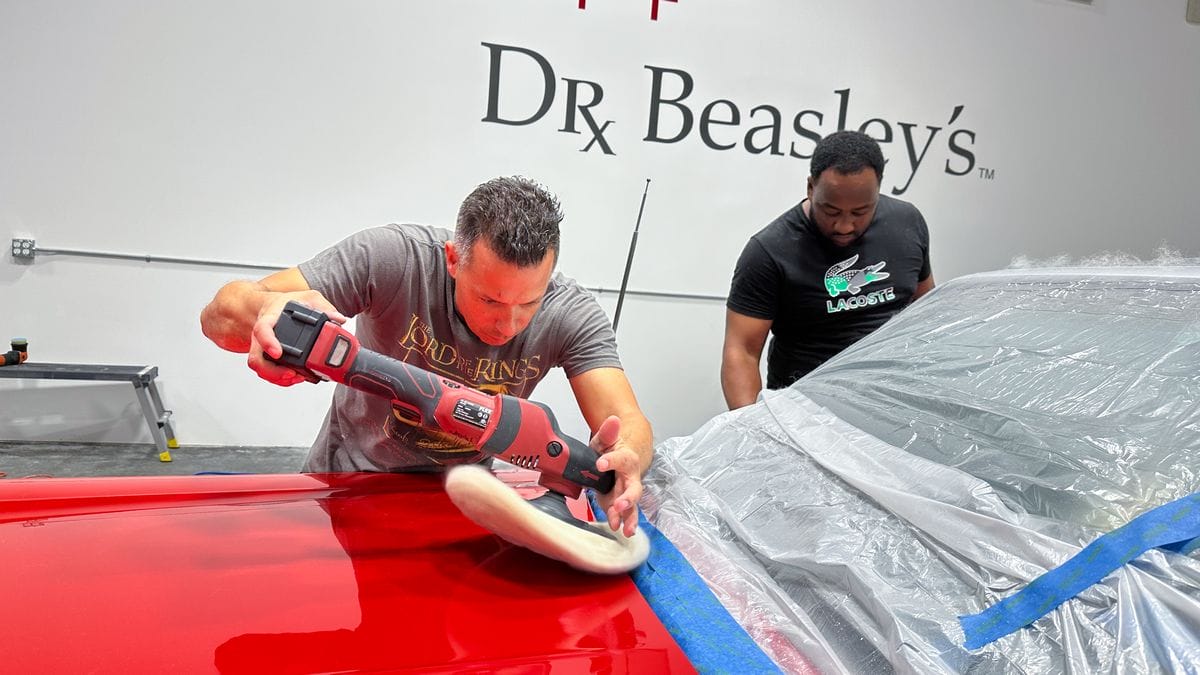
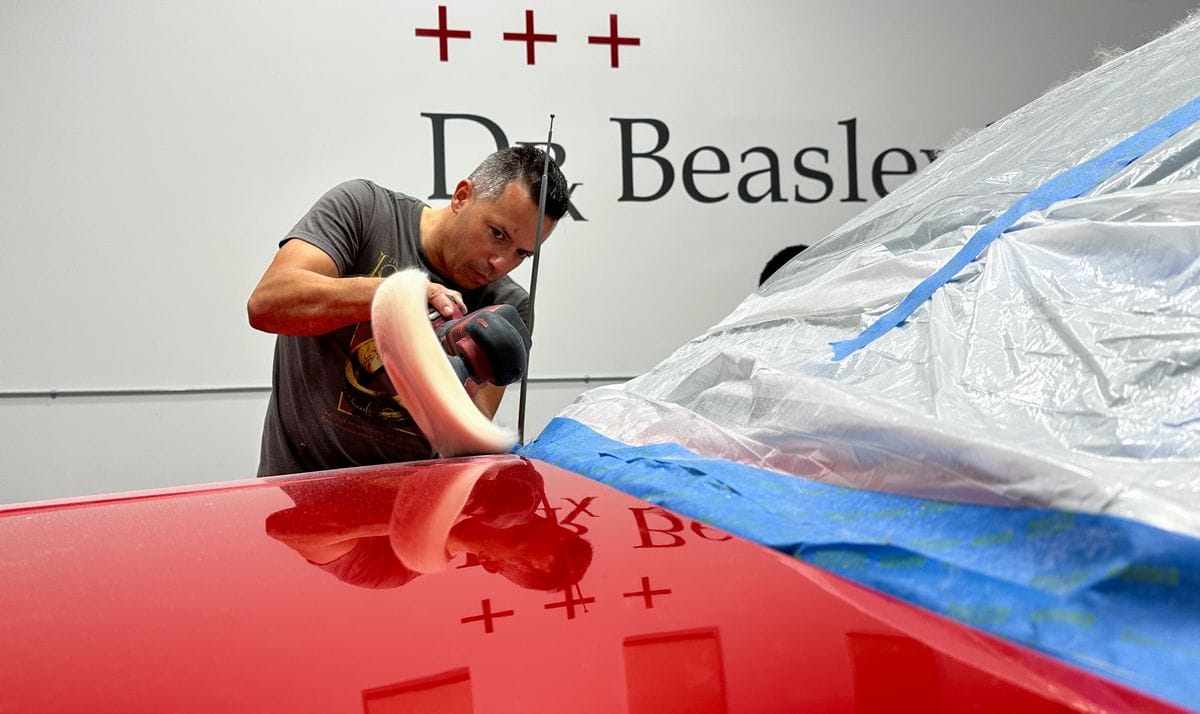
The Cutting Step
After sanding, the next step is to remove 100% of the sanding marks. For this we use rotary polishers with wool cutting pads to remove 100% of the sanding marks. Some people say this can be done with an orbital and I agree it can, it’s just a more time consuming process.
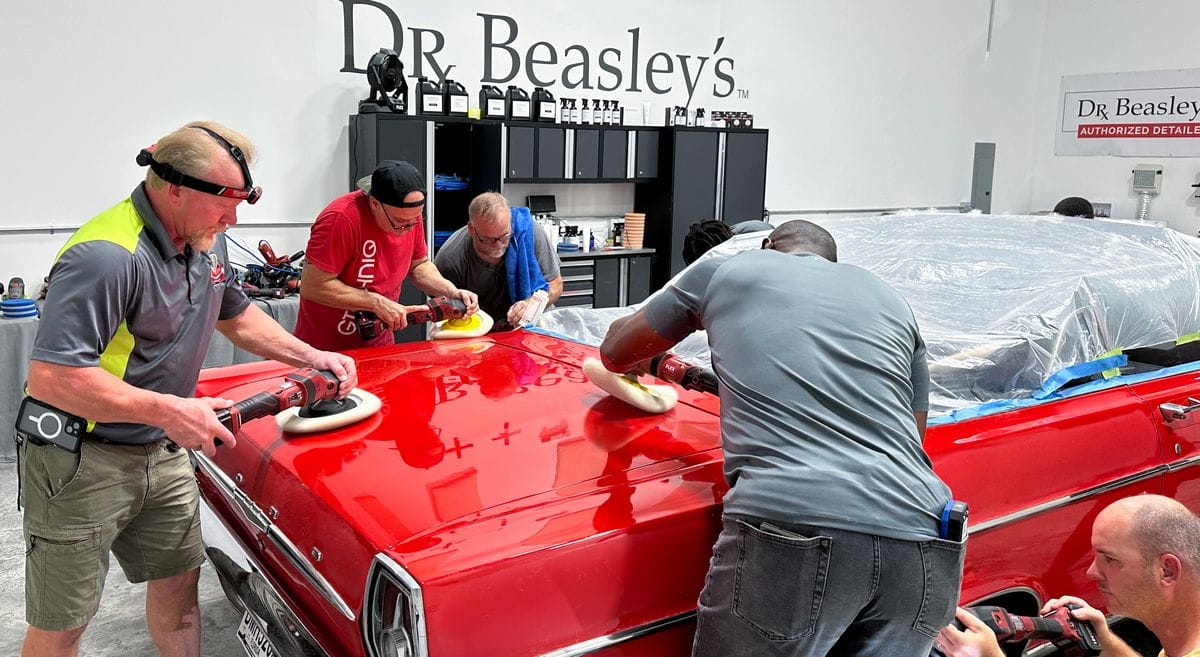
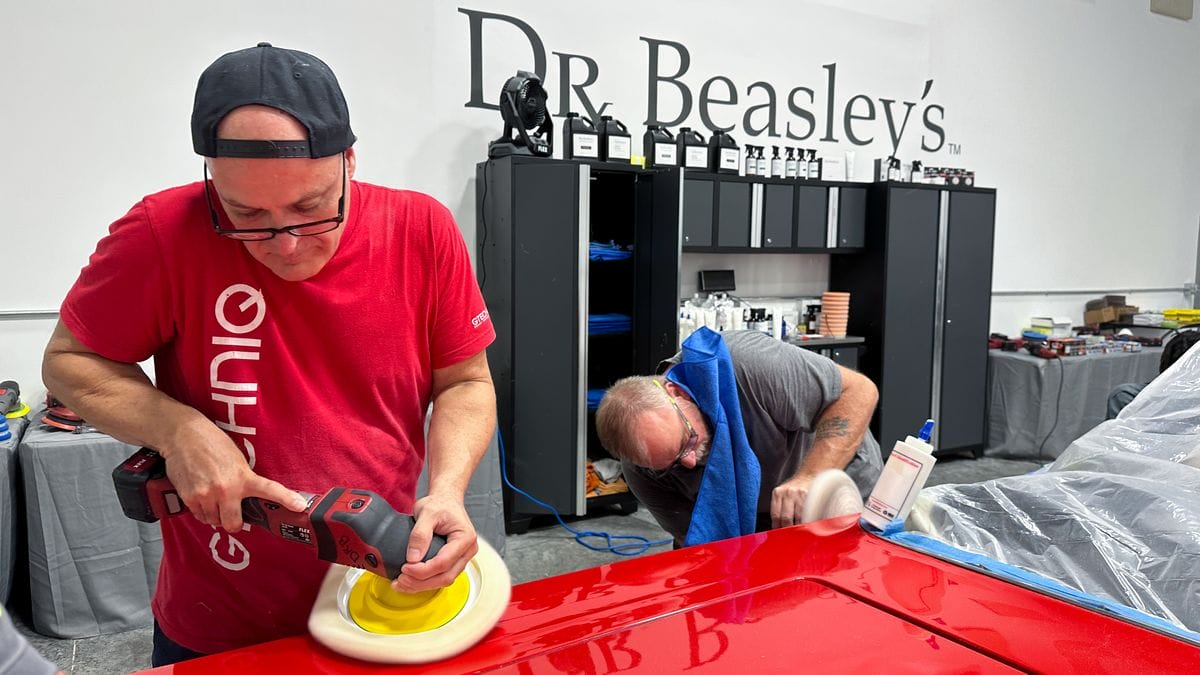
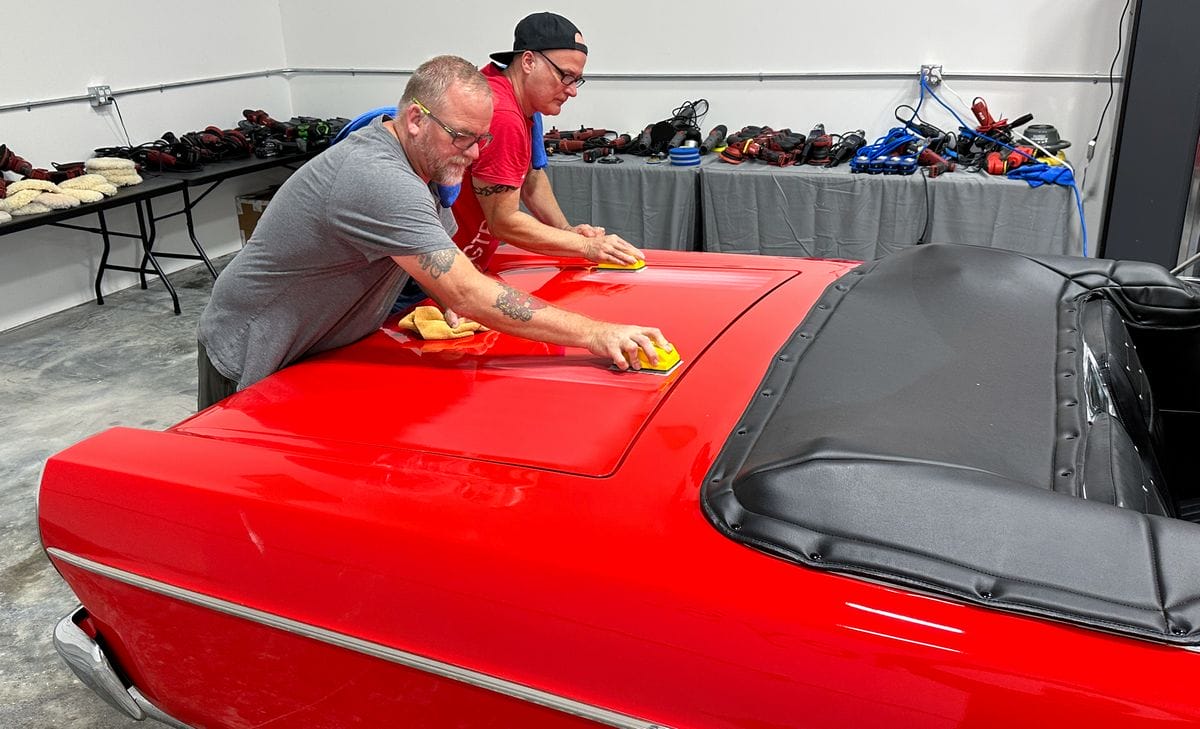
Finishing Out Using Orbital Polishers
After the cutting step using rotary polishers, the next step is to remove any holograms and further maximize gloss and clarity. For this I let the class choose which type, style, or brand of polisher they want to spend more time with or revisit.
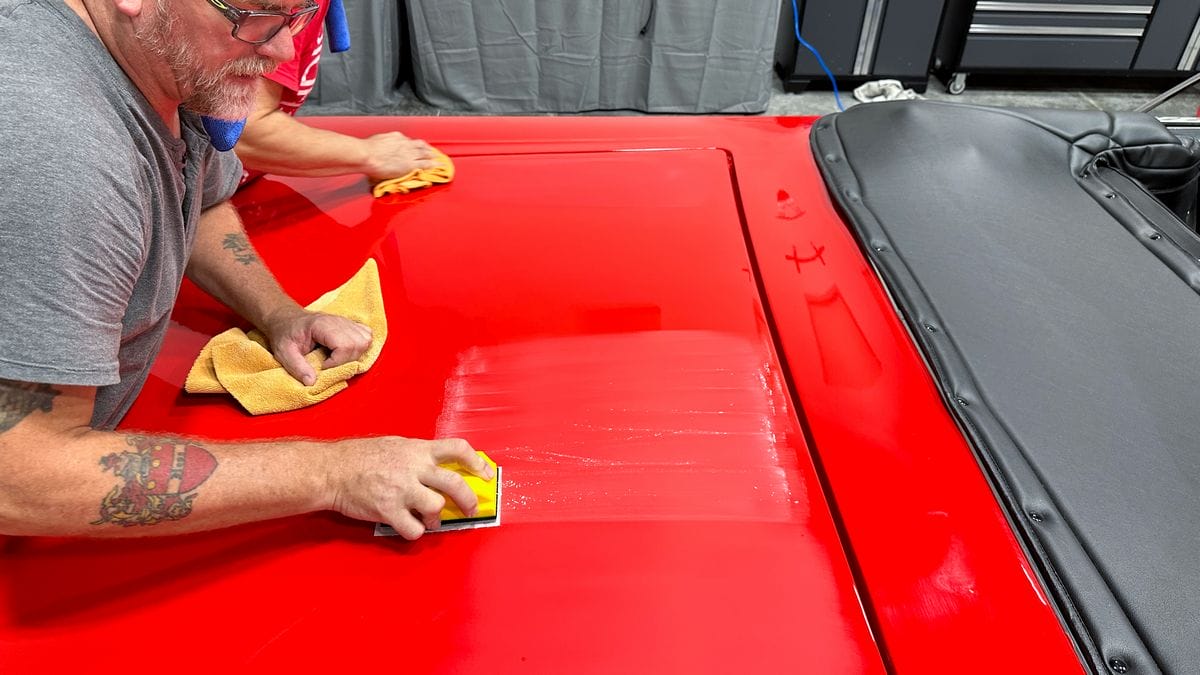
Installing a Ceramic Coating
After the polishing step, it’s time to install a ceramic coating to seal the paint, lock in the shine and provide a long lasting durable layer of protection.
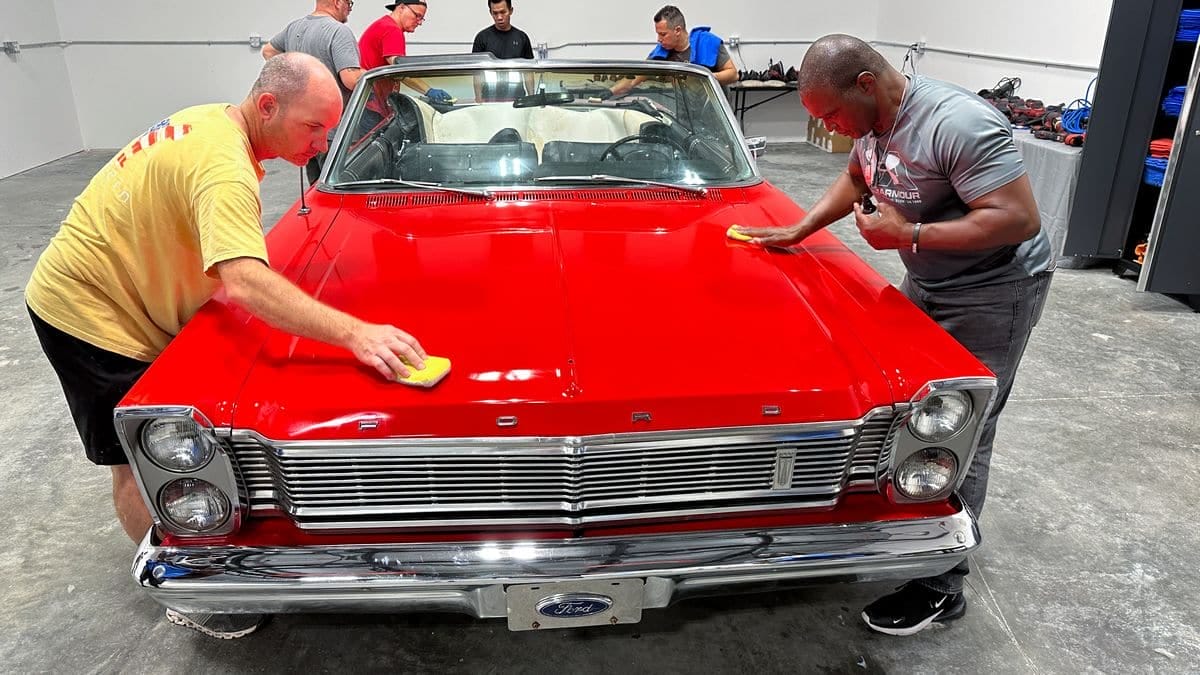
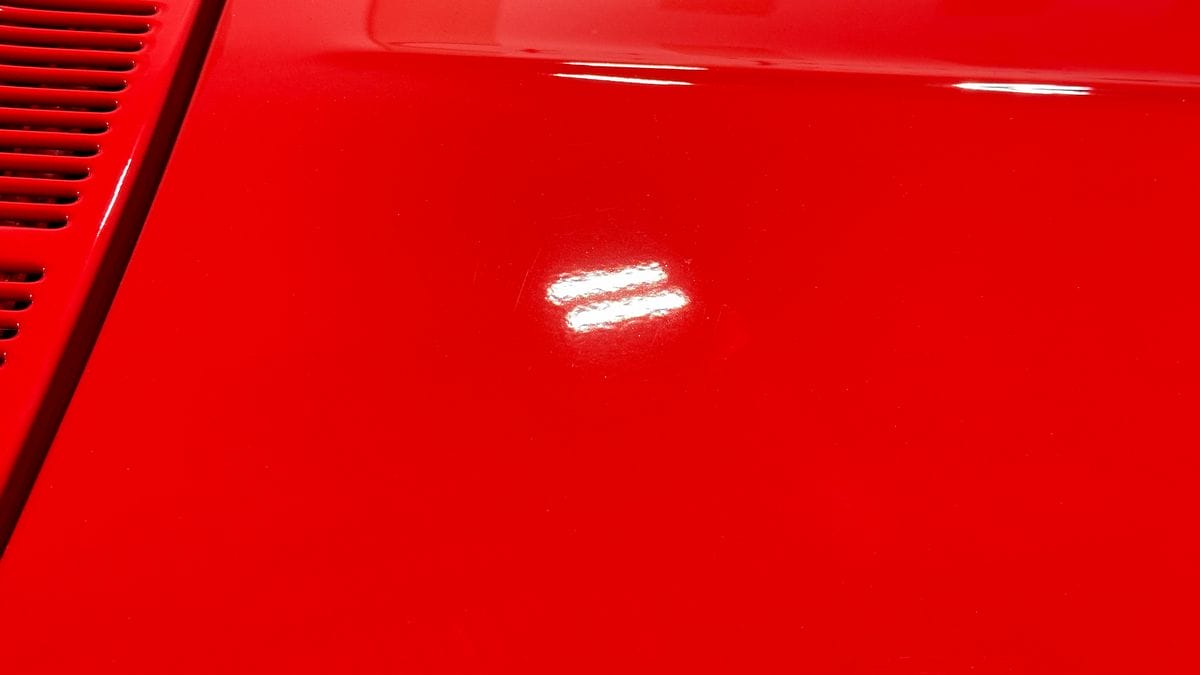
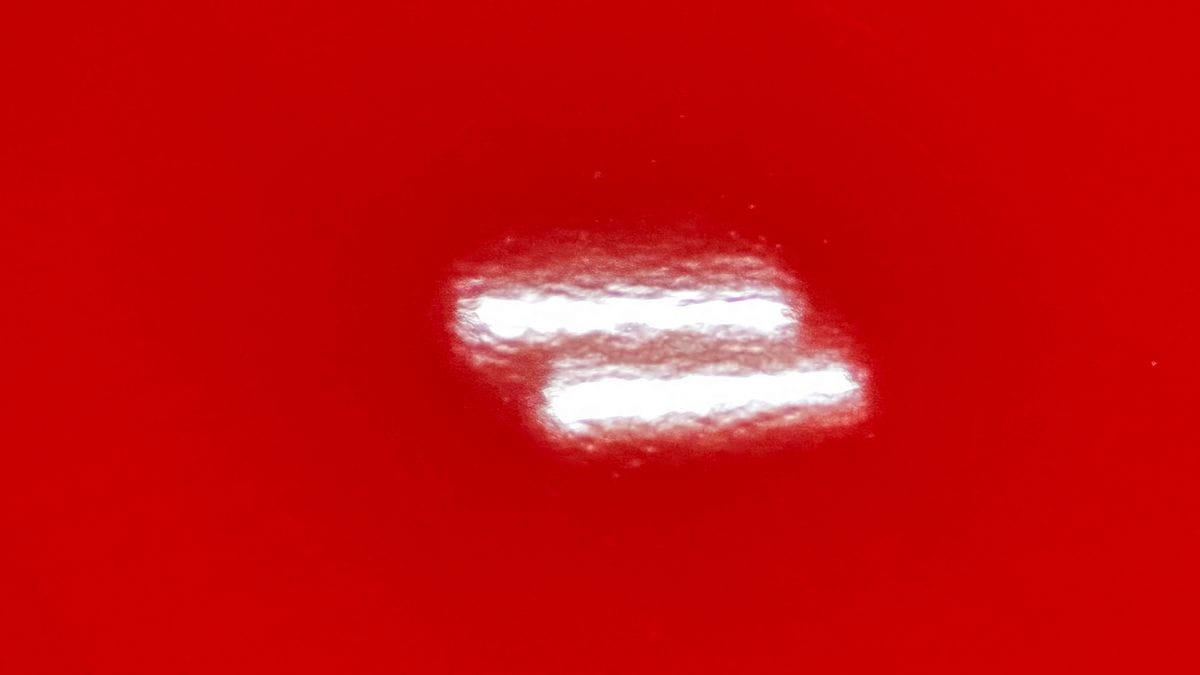
Look at the light reflecting on the paint – zero sanding marks, zero holograms and zero swirls. Success.

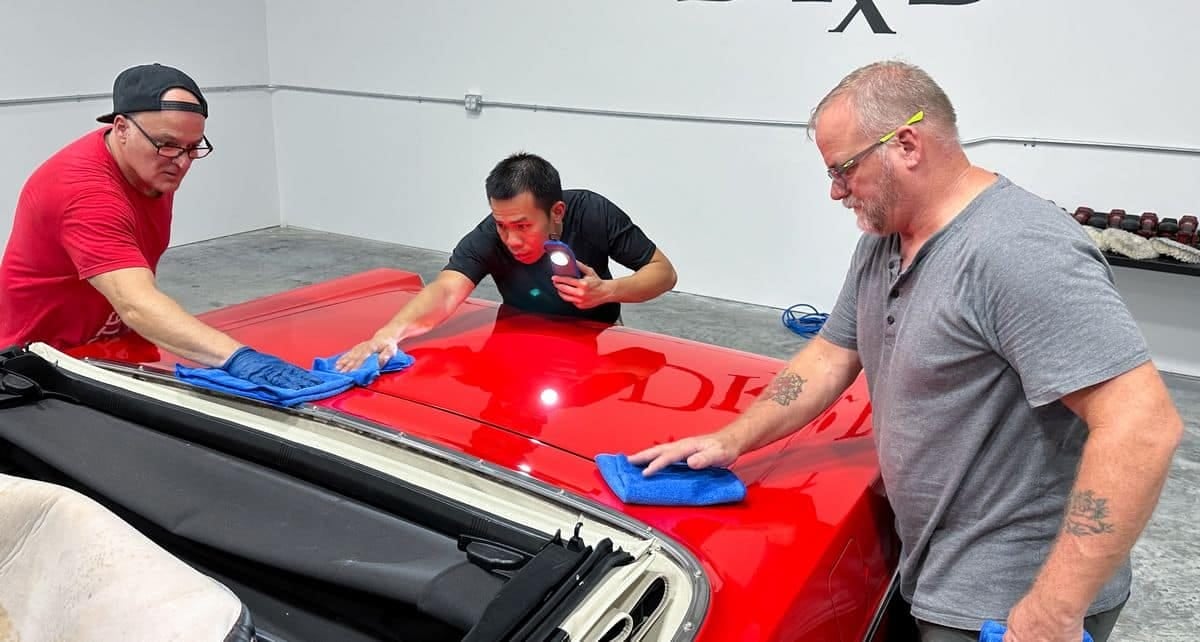
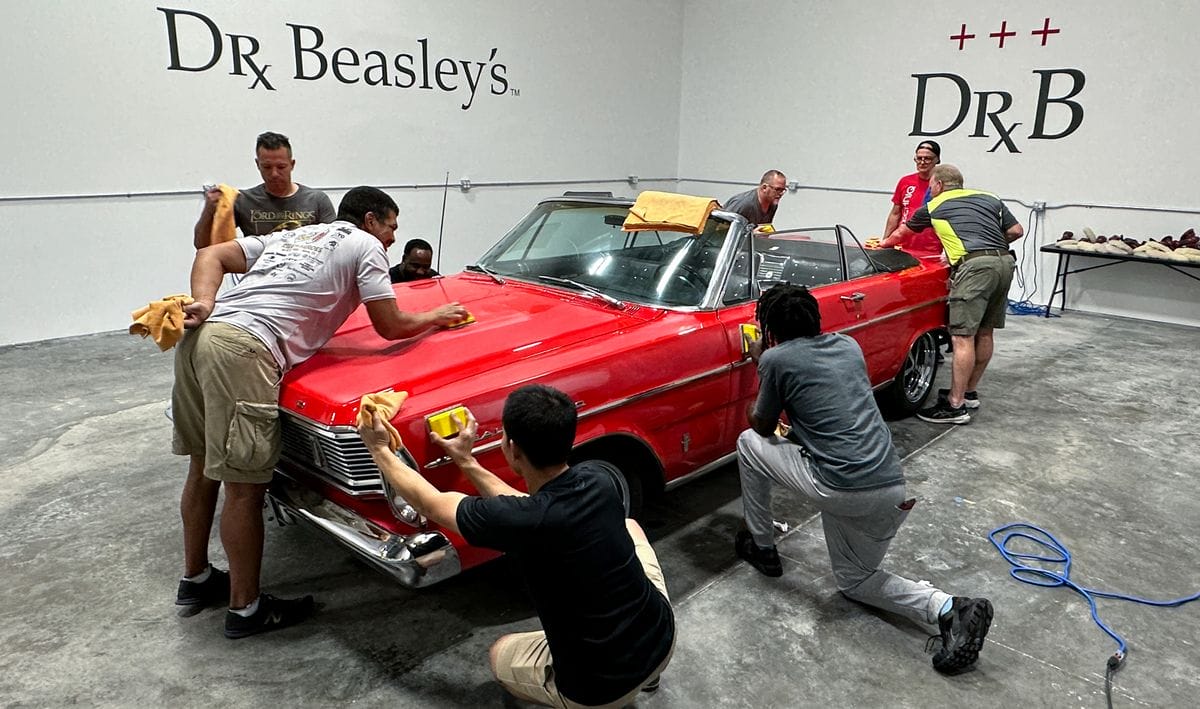
Capture a Group Shot with the Cars Just Sanded and Buffed
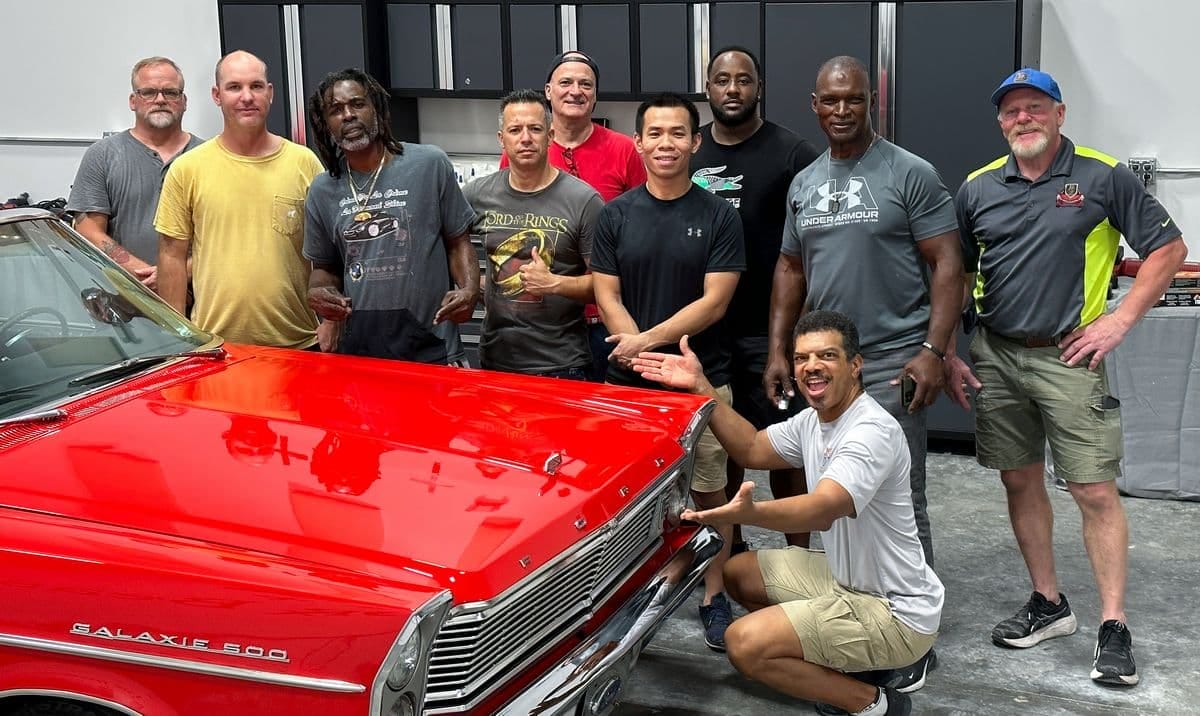
Capture the Beauty Shots


Optional – Meet & Greet
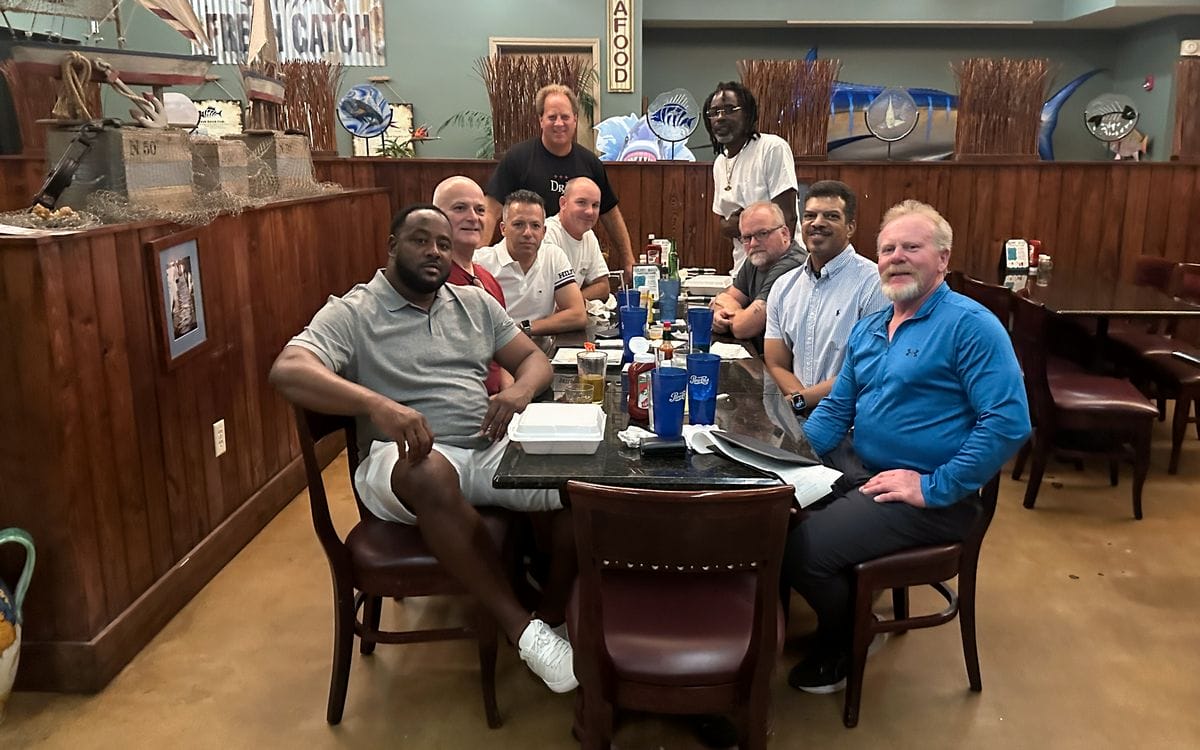
Anytime we hold a multi-day class, we include a Meet & Greet at one of our local restaurants. I’ve been doing this since 2009 and find it’s not only educational, but also a lot of fun. This is normally held on Saturday evening, so by now everyone has had LOTS of hands-on time with multiple tools, products, pads, and techniques. They have also worked on a LOT of different and unique cars.
After everyone has enjoyed their dinner, I like to go around the group and ask a number of questions and it’s always very interesting to hear the answers.
- What is the primary reason for taking the class? For fun or profit?
- How far did you travel?
- What was your favorite tool?
- What was your favorite product?
- Was there ever an aha moment when something that was confusing or challenging before now makes sense?
- What was your favorite car to work on?
- Do you have anything cool at home in the garage?
My good friends at Fresh Catch don’t take reservations as a rule, but they always take our reservation.
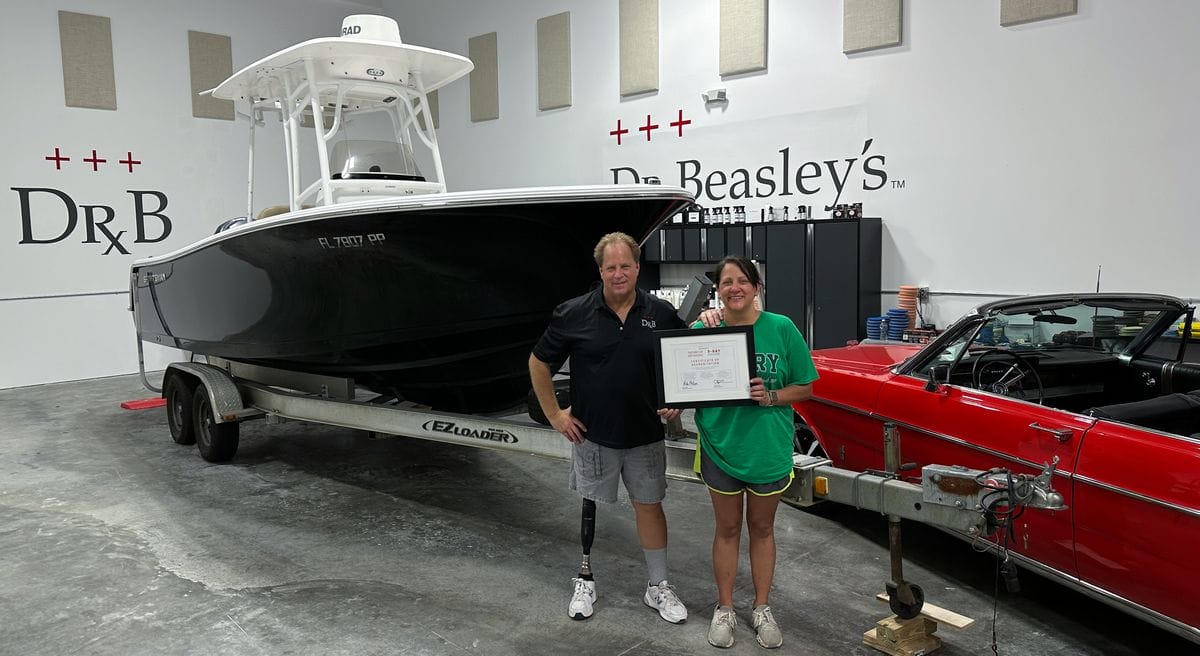
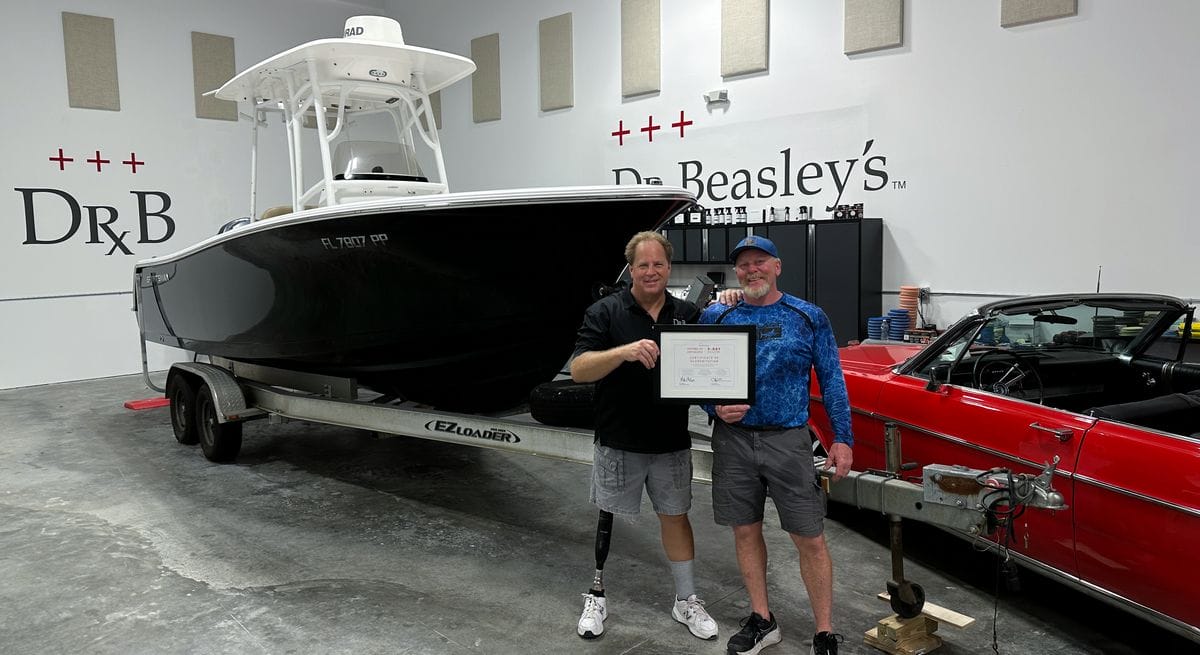
Certificate Awards Ceremony
At the end of the class, we finish with the certificate award ceremony. I personally like to get my picture with each person that takes the class, and I also like to share this in the recap articles I write for all my classes.
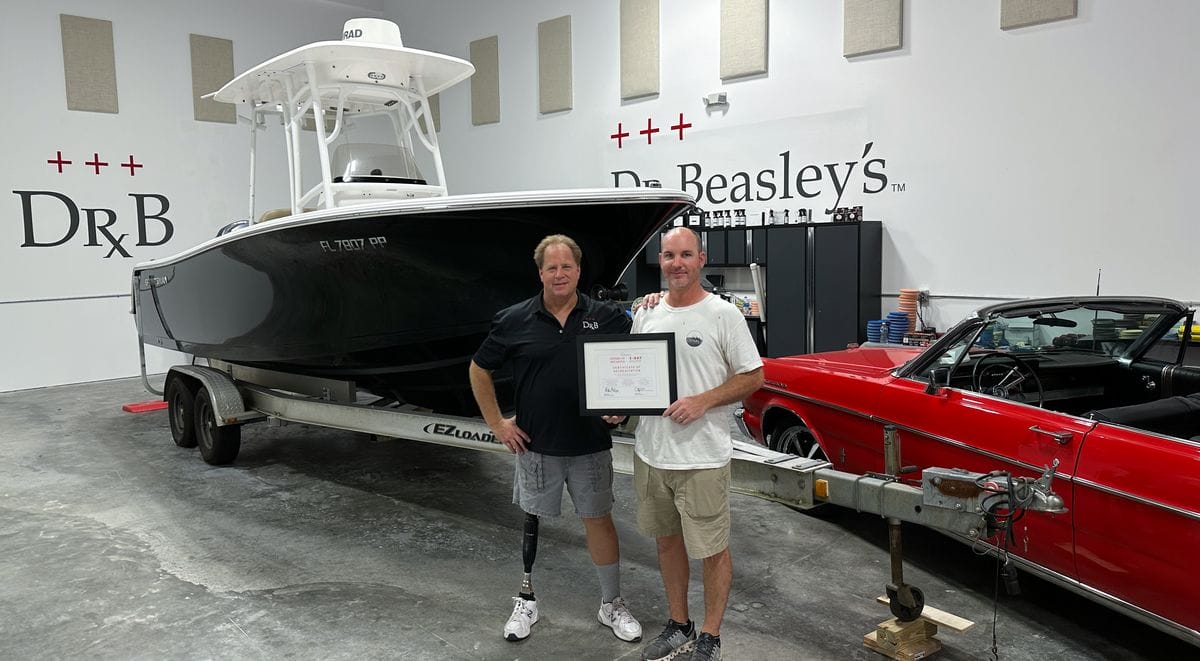
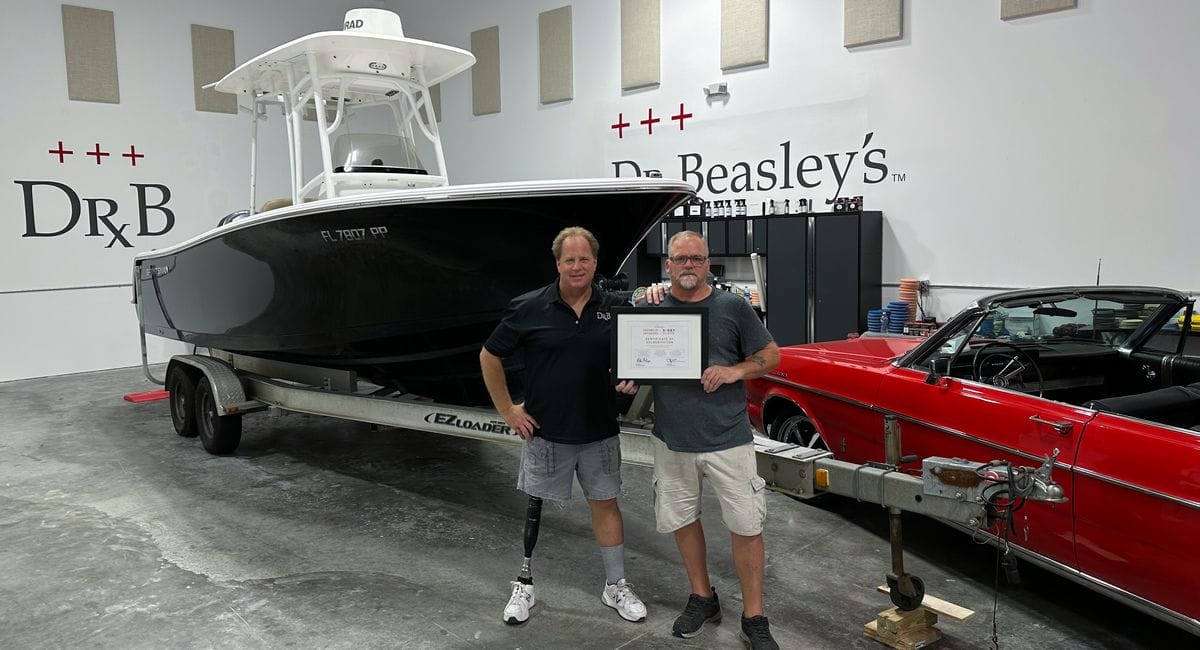
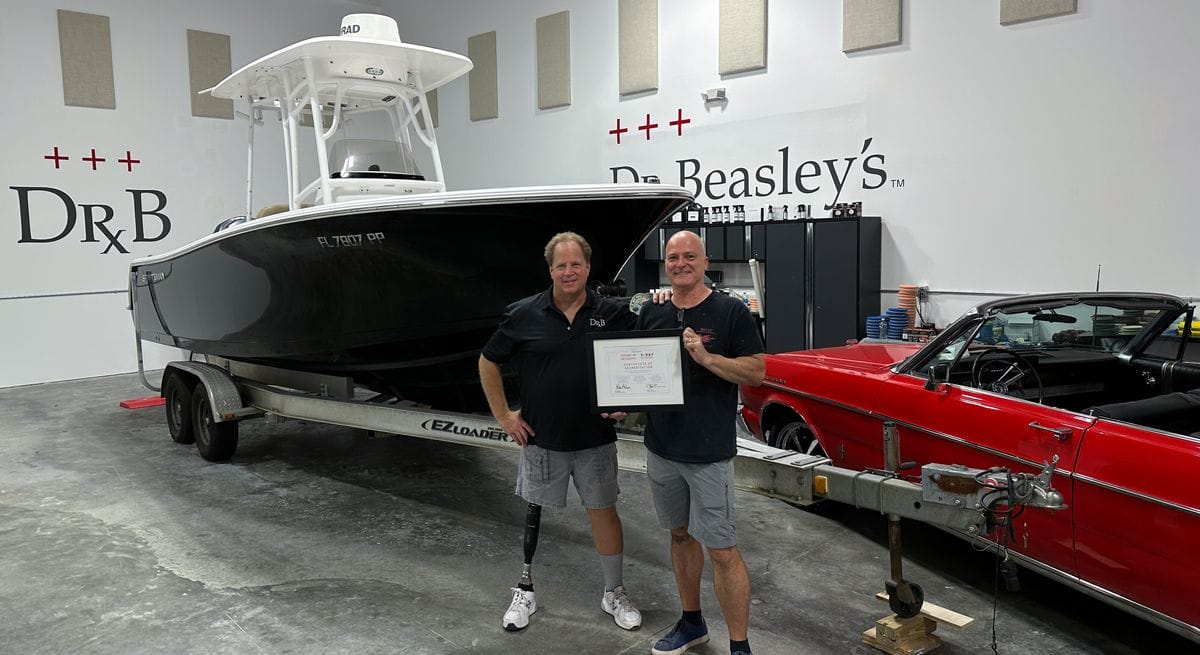
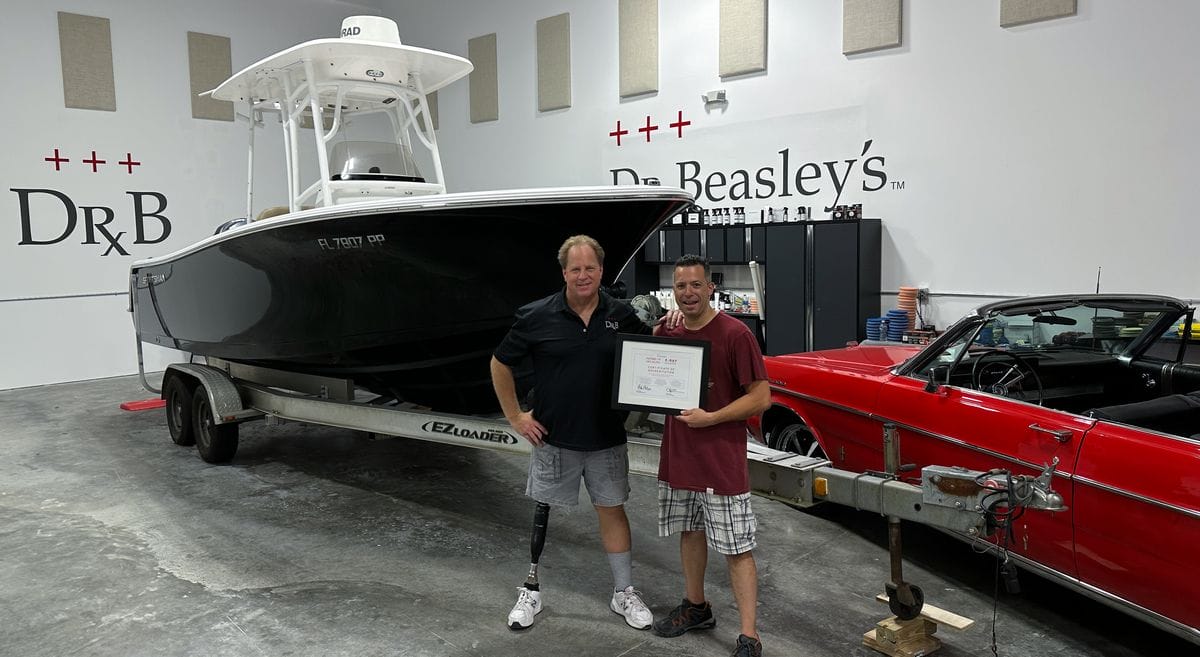
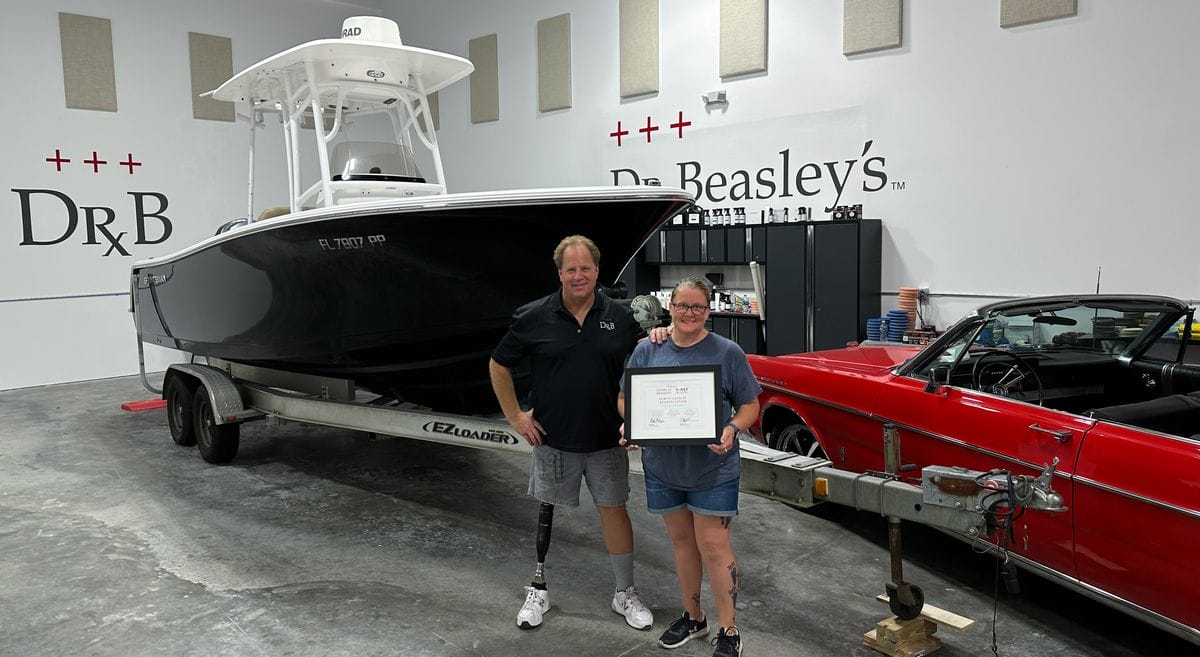
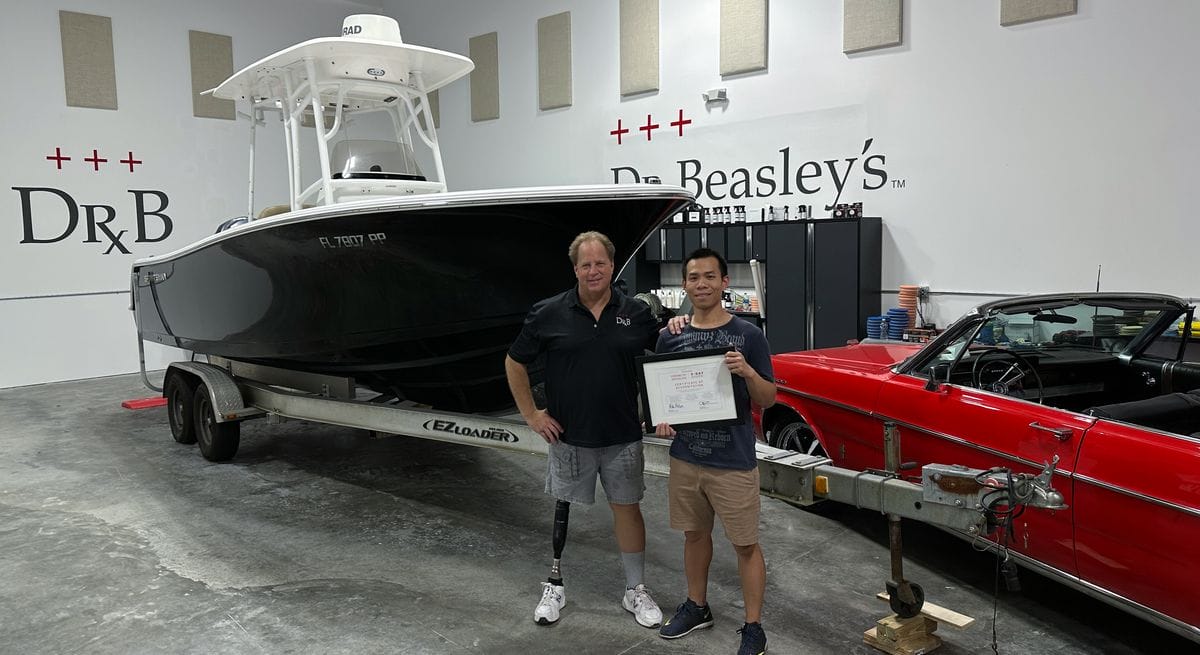
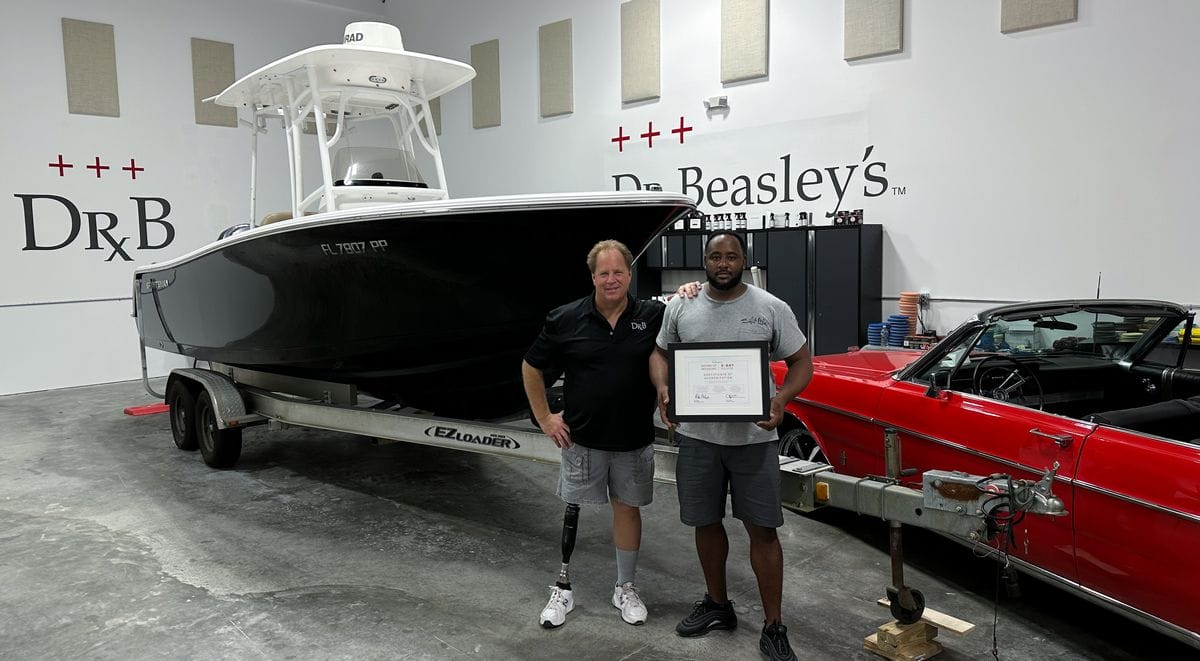
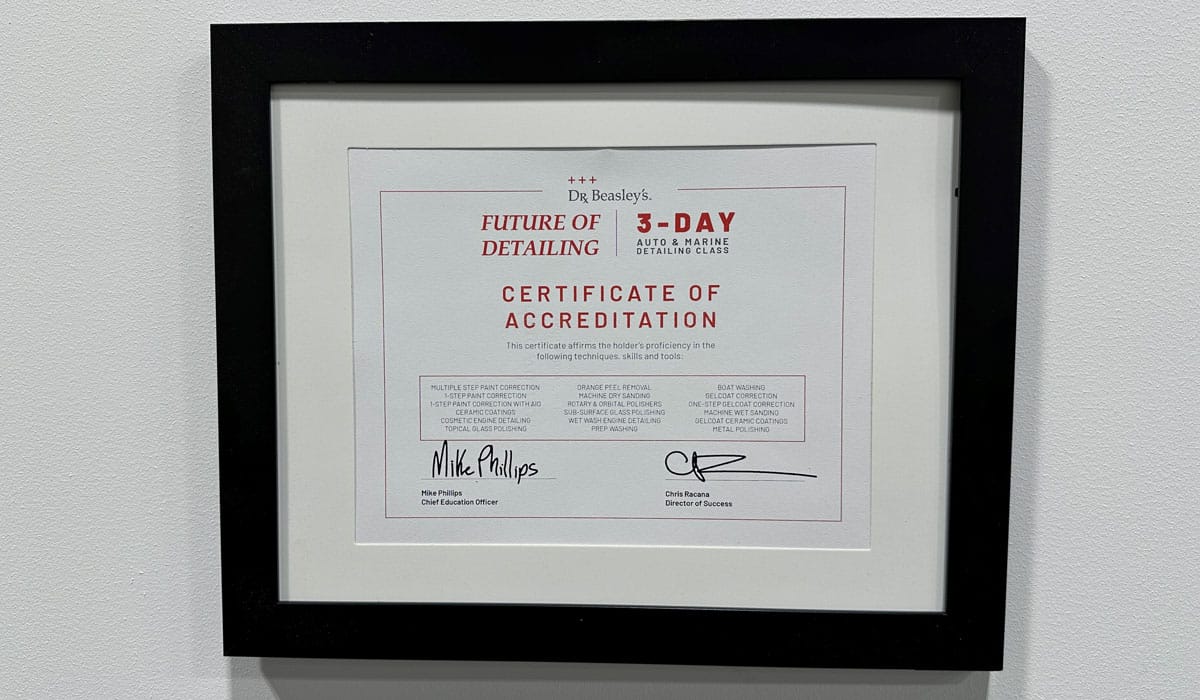
The Dr. Beasley’s Future of Detailing – Certificate of Accreditation
I’m very proud of our certificate. First the people that get this have earned it from a LOT of hard work and long hours. What I also like about it is it lists all the major topics they learned each day over the course of the class.
That’s how I teach classes. Feel free to borrow all of it or just parts of it.
Mike’s Car Detailing Class Checklist
Besides some level of knowledge, experience, and mastery of a topic plus patience, what else is required to teach a car detailing class?
Great question — here’s my checklist of the things you need to teach a top notch, hands-on car detailing class:
- Indoor space for at least one car and a group of people to work comfortably
- Powerful lighting – overhead and vertical wall lights
- Power – LOTS of power
- Tables – LOTS of Tables, Counter Space, or Detailing Carts
- Storage Cabinets
- Lots of and Tool Storage Racks
- Heavy Duty 12 Gauge Power Cords
- Sound Deadening Boards or Insulation
- Washer and Dryer Station
- Microfiber Towel Inspection and Folding Station
- Pads – LOTS of pads
- PPE – Personal Protection Equipment
- Microfiber towels – LOTS of microfiber towels
- Refrigerator or Ice Chest for bottled water
- SMALL Bottles of Water
- Big Screen TV – For a PowerPoint Presentation and/or Internet Access
- Cordless Battery Charging Station
- Lots of Painter’s Tape or Masking Tape
- Swirl Finder Lights and LOTS of Them!
- Paint Thickness Gage
- Detailing Brushes
- Pad Cleaning Spurs
- Proper Canvas Cloth Top Cleaning Brushes
- Wheel Cleaning Brushes
- White Board on the Wall and Plenty of Dry Erase Markers
- Coffee Station
- Wall Clock
- Facilities for Men and Women
- Quality Work Platforms
- Pad Washers
- Wet/Dry Vacuum
- Car Dryer or Leaf Blower
- Knee & Back Cushion – or – Butt Cushion
- Car Key Holder
- Slop Sink
- Rolling Car Wash Carts
- Quality Water/Garden Hose
- Quality Water Sprayers and Quick Disconnects
- Quality Wash Mitts and Premium Quality Drying Towels
- Clay Substitutes – Clay Towels
- Pressure Washer
- Foam Cannon
- First Aid Kit
- Class Food
- Misc Supplies

1. Indoor space for at least one car and a group of people to work comfortably
It kind of goes without saying that trying to teach a car detailing class outside can be done but it makes everyone more complicated. When teaching outside, you must deal with ambient and traffic noise, direct sunlight, exposure to weather, airborne dirt, and dust, etc. I’ve taught classes outside so it can be done, but the scope of this article will focus on teaching a class indoors, under cover.
My own personal practice for teaching car detailing classes are to keep them focused as hands-on training with very little to no sitting. I’ve taught academic classes for years, this is the type of class where you start out in a classroom, usually going through a PowerPoint presentation and/or watching videos about detailing.
Nothing wrong with academic classes, been there done that. But what I’ve found is that the type of people interested in detailing cars are also the type of people that learn better by doing versus sitting in a chair. Thus over the years my classes went through an evolution to the point that there are now PowerPoint presentations, no chairs, and no sitting.
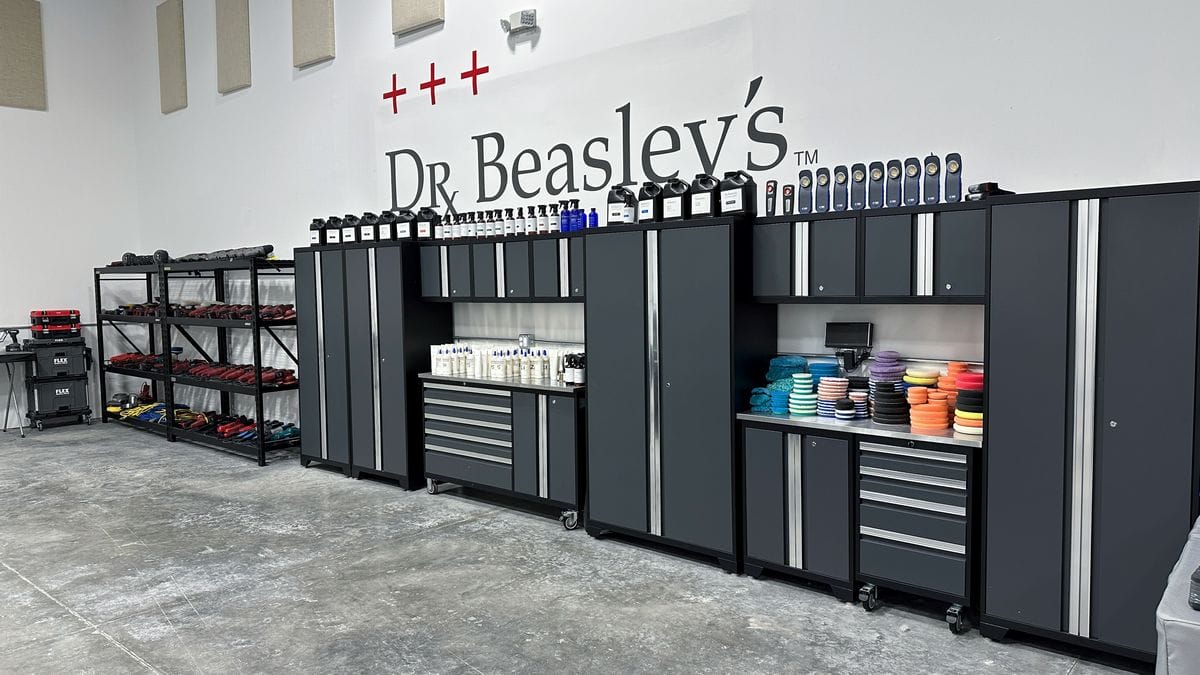
Thus for the type of classes I teach, I need room for at least one car and up to 3 cars and 2 boats is optimum. In this context, if you want to duplicate my teaching style, you’ll need some form of shop or garage large enough to hold at least one car with room for a group of people to stand and work around the car.
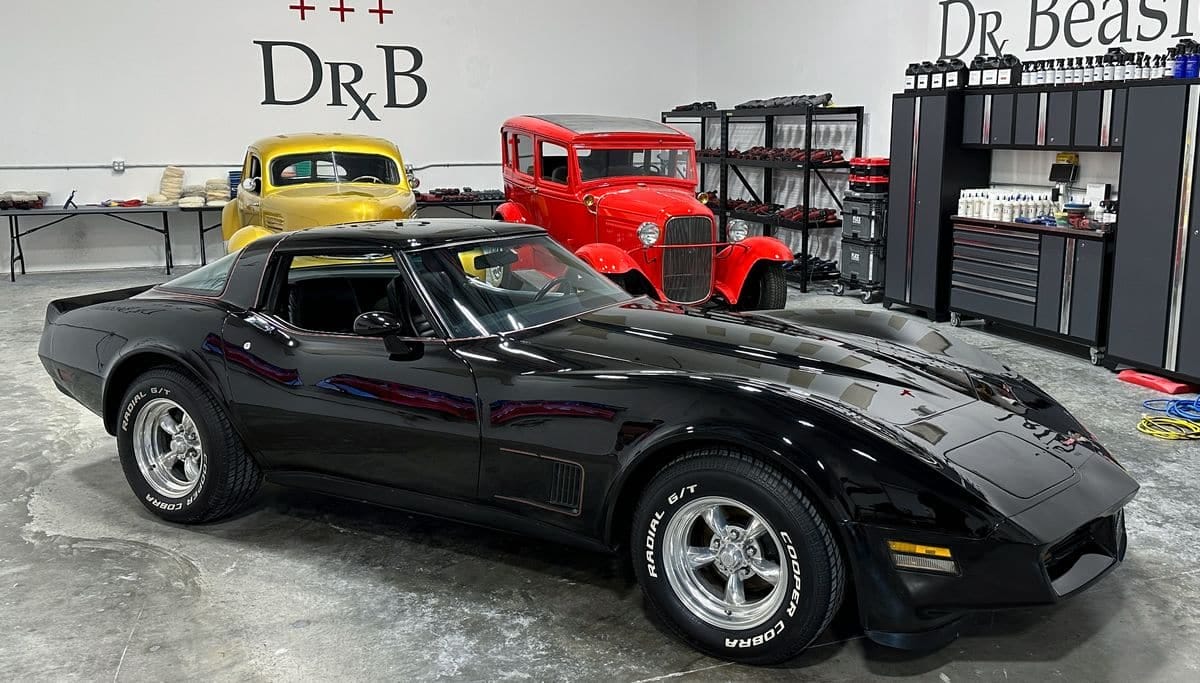
Here’s the Dr. Beasley’s O.R. in Stuart, Florida as you can see by the picture, there are two cars with ample room for students to stand around and work on the car. Also note in the background on the wall, all the electrical outlets – more on this later.
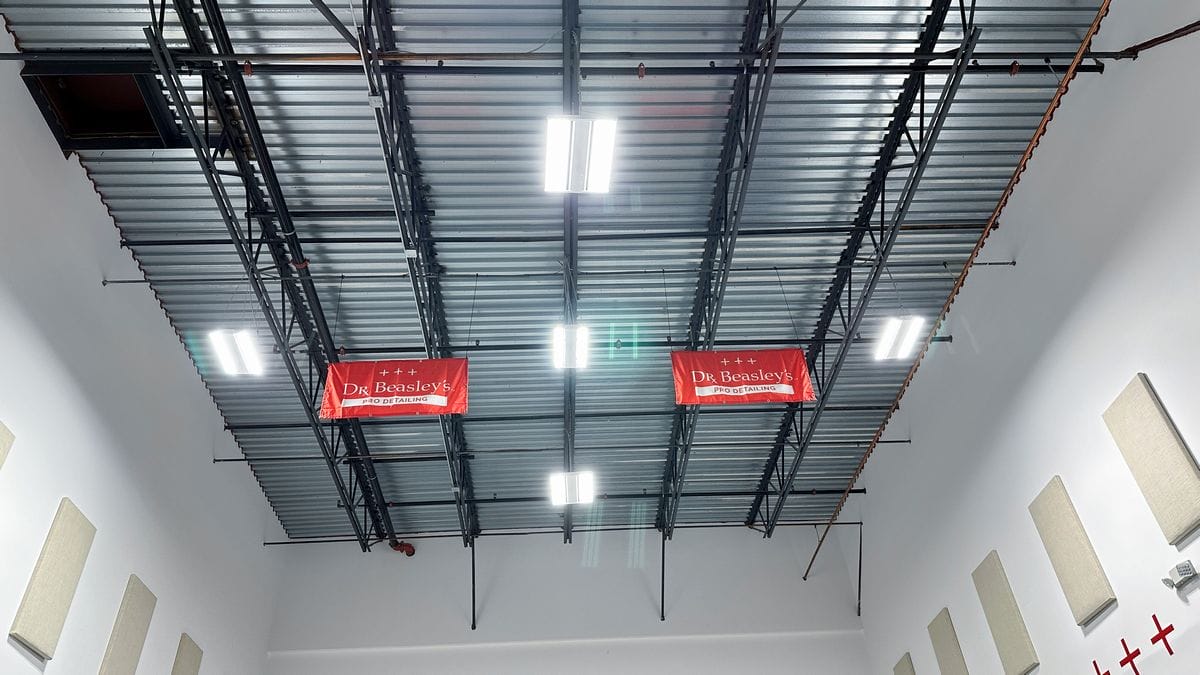
2. Powerful lighting – overhead and vertical wall lights
You cannot work safely or effectively if you cannot see what you’re working on. Most shops have good overhead lighting but not all shops have good vertical wall lighting. Without good lighting, your students cannot easily see the current paint defects as well as their progress as they do any type of paint correction to remove the paint defects in the vertical panels.
Sure you can have plenty of hand-held lights and light stands, and while these are better than nothing, they are not as efficient as good vertical wall lighting. If at all possible, try to install quality shop lights on the vertical walls in your shop around 2 to 3 feet off the ground.
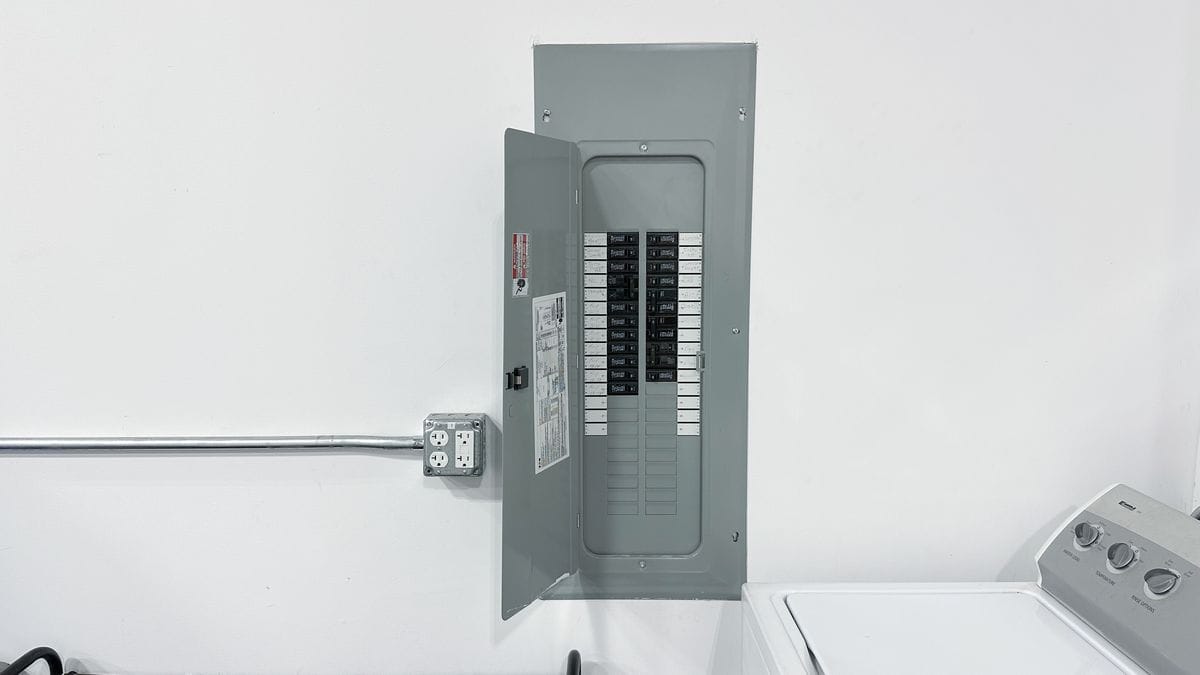
3. Power — LOTS of Power
If you’re going to teach a hands-on class like the type of classes I teach, you’re going to need lots of power. Of course this is in the context of holding a large class. Some of my largest classes had 26 people in them, and this means at some point, 26 people will be running 26 car polishers. For smaller classes, power isn’t normally an issue.
Our shop in Stuart, Florida has a 200 AMP Electric Panel. We have the ability to EASILY power-up 20 rotary polishers, pushing hard, all at the same time and never blow a breaker.

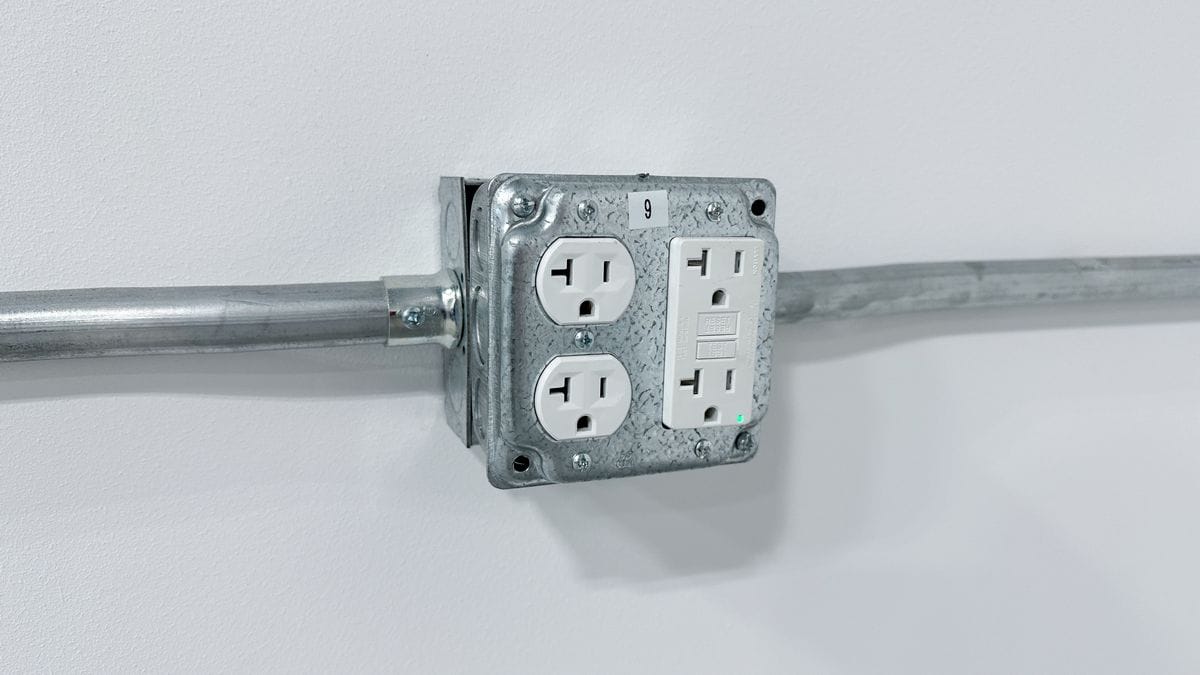
We have 16 Quad or 4-in-1 Grounded Electrical Outlets, for a total of 64 – 110 Volt electrical plug-ins for tools!
I’ve conducted a LOT of roadshow detailing classes, both in the U.S. and in other countries and the first thing I look for when I get to an offsite shop is to start looking for electrical outlets. Sad to say, most shops don’t have the necessary power supply, and no shop ever has enough electrical outlets.
Example
I taught a 2-day Roadshow Car Detailing class with our host, Rahul Dahiya the owner of Shield and Sheen Detail Shop in Windsor, New Jersey back in June of 2018. Rahul had a 2-car garage with just enough room to park two cars and still have room for people to be stationed around the cars to do the training.
In order to power up this class, we went to Lowe’s Hardware Store and rented TWO 650 Watt Honda Generators, plus purchased a gas can and gas to keep them chugging along.
Here’s a picture showing the first two cars this class detailed, which also gives you an idea of the shop size. This roadshow class had 23 students; this means running 23 polishers at the same time. How about the first two cars this class was able to train on?

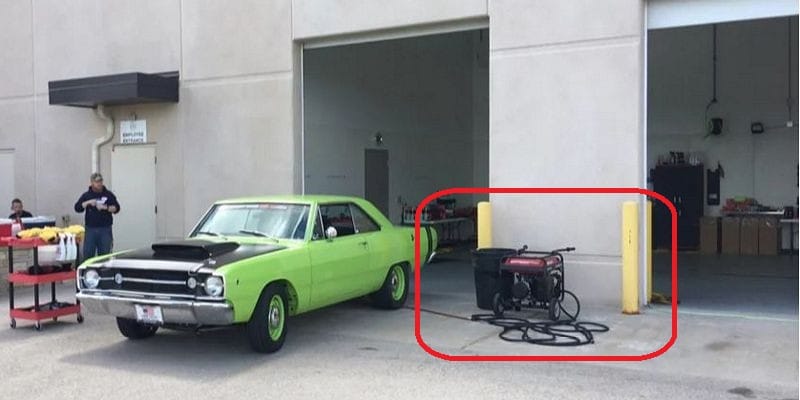
At the first Roadshow class I taught at Lake Country Pad Manufacturing in Oconomowoc, Wisconsin, the training garage was plenty big and easily held two cars with plenty of space for the students to work around the cars, but this was a big class, and we needed more power. We went to Lowe’s and rented just one Honda 650 Watt Power Generator. You can see it here as one of the training cars was driving out of the training garage. Cool car for training huh?
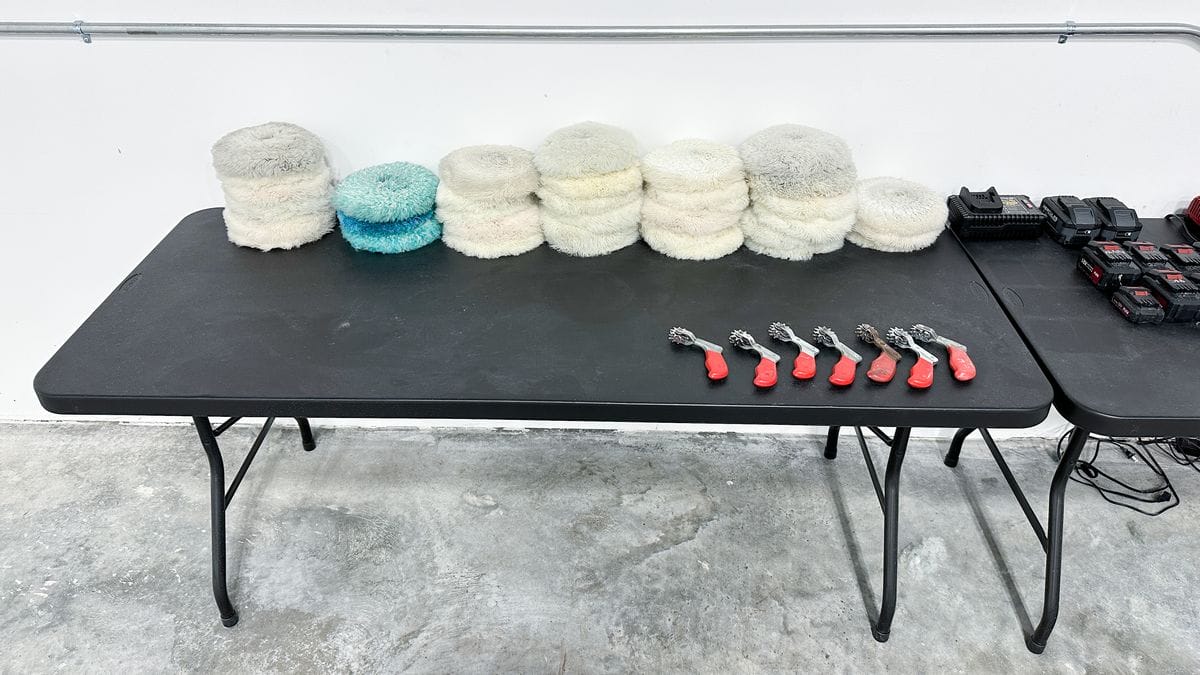
4. Tables — Lots of Tables, Counter Space or Detailing Carts
It seems like a topic you wouldn’t have to think about, but when YOU start setting up a shop for a hands-on car detailing class, you’re going to need a LOT of tables, counter space, or detailing carts.
Assuming you have a lot of tools, products, buffing pads, microfiber towels, and supplies, you’re going to need a clean place to set up all these things. You can’t set this stuff on the ground and then make all the students bend over to pick up what they need.
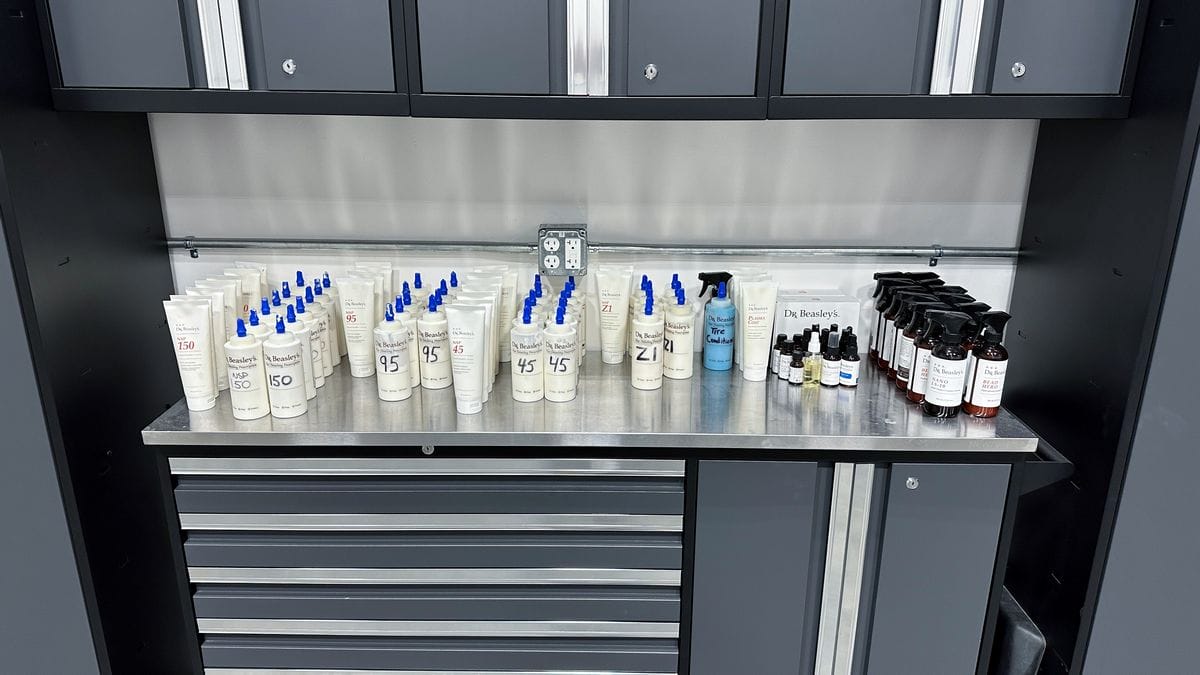
5. Storage Cabinets
Detailing is about getting things clean and shiny. You must have storage for various things that you need to both store as well as keep clean. For the Stuart shop, we purchased cabinets from NewAgeProducts.com.
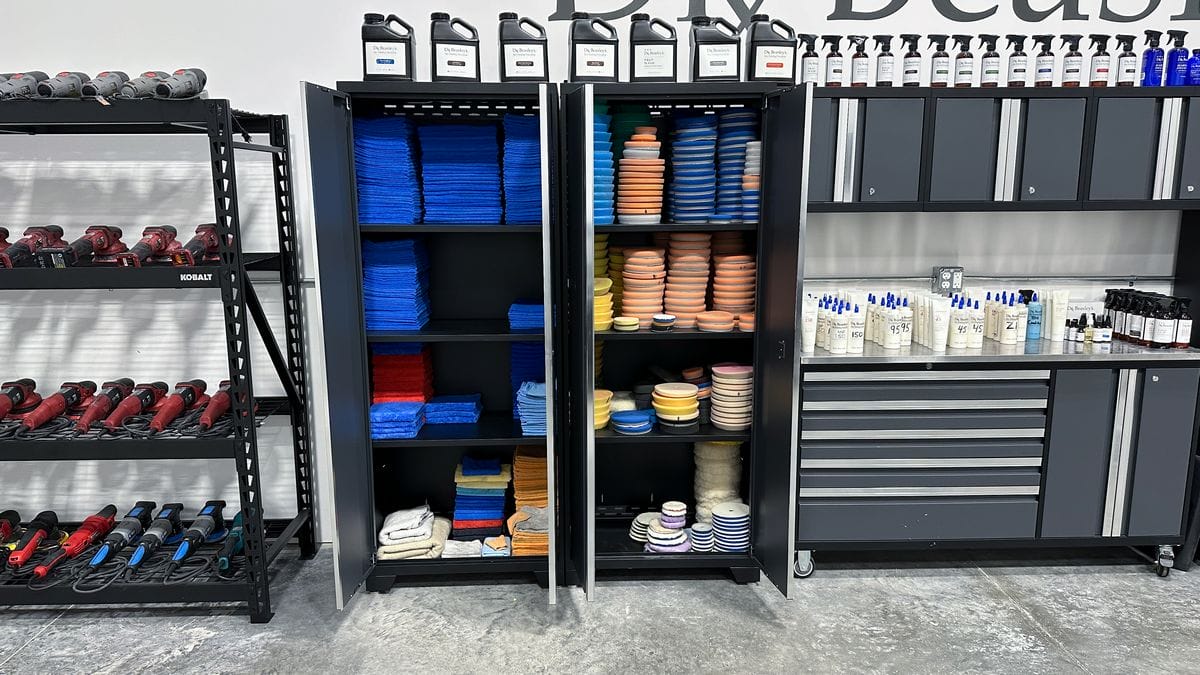
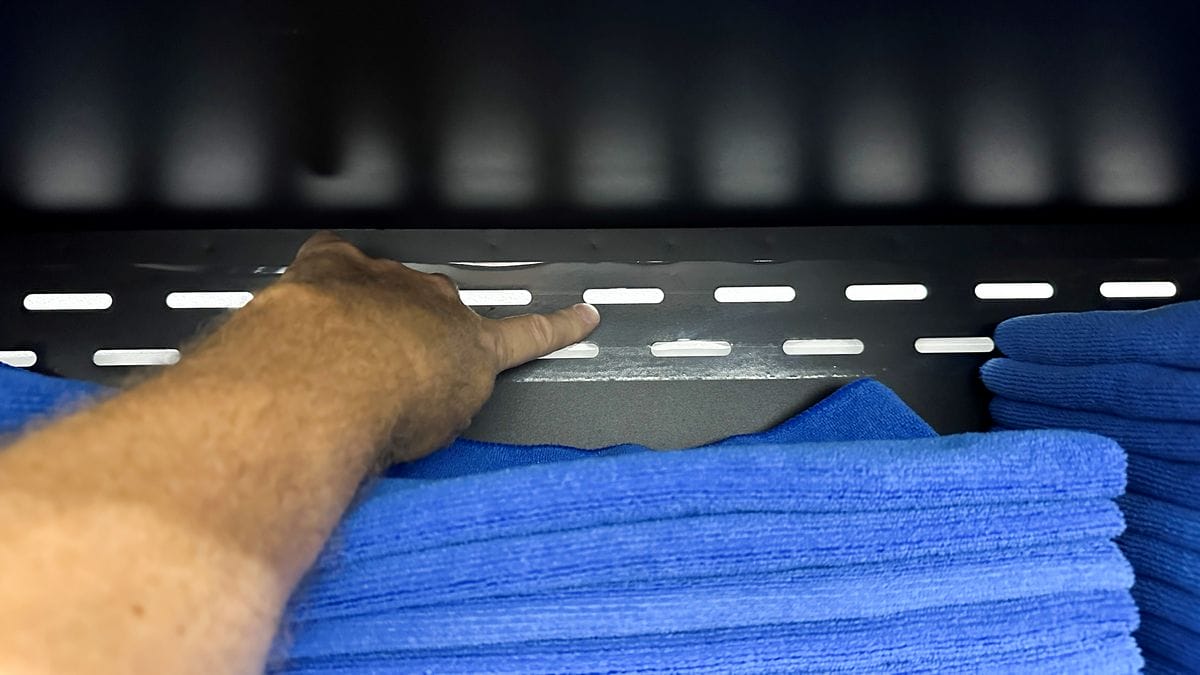
Here’s a tip, use some tape to seal the vent holes on the back of the cabinets before placing them against the wall. This will prevent airborne dirt and dust from getting into your cabinets contaminating your supplies like microfiber towels and buffing pads.
6. Lots of Tools (Plus Tool Racks & Storage)
In my classes, whatever the topic is, each student gets the specific tool we’re learning for that particular class session and topic. 12 students means 12 rotary polishers if we’re learning rotary polisher techniques. 20 students means 20 gear-driven orbital polishers if we’re learning gear-driven orbital polisher techniques.
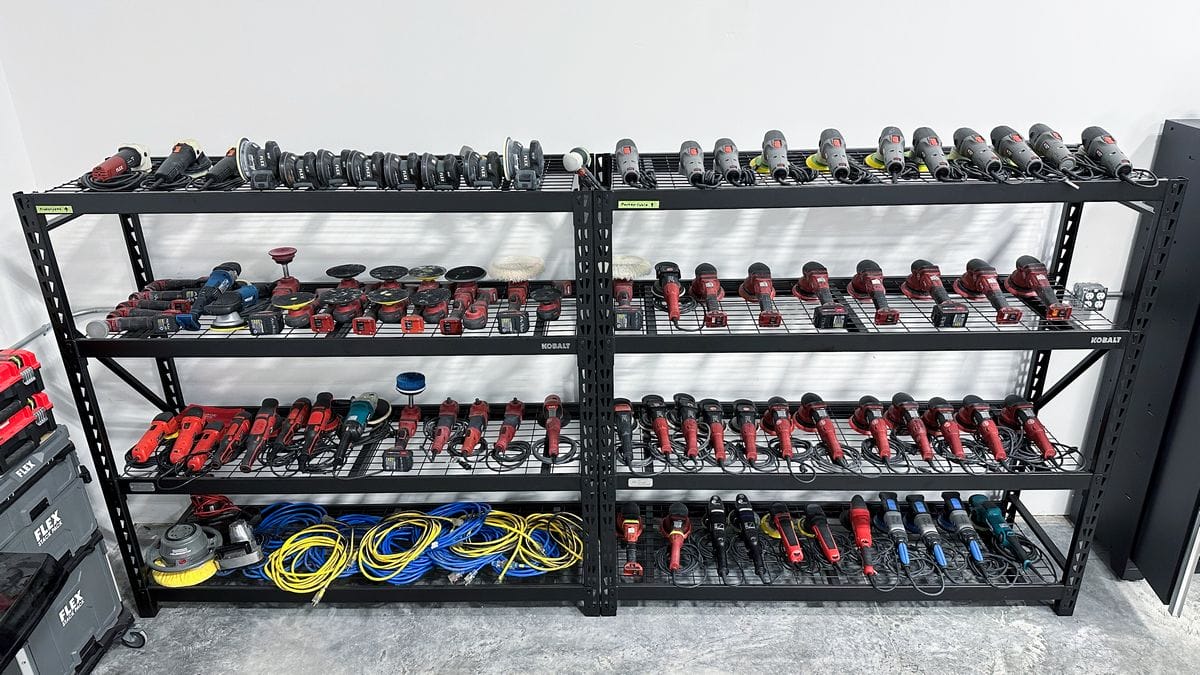
I know tool holders are popular but for the volume of tools I use for my classes, attaching all this weight to the plaster walls common to most shops would cause the wall to collapse and fall down. I much prefer simple racks like these Kobalt Steel Heavy Duty 4-Tier Utility Shelving Unit you can find at Lowe’s for a tick over $300.00 apiece.
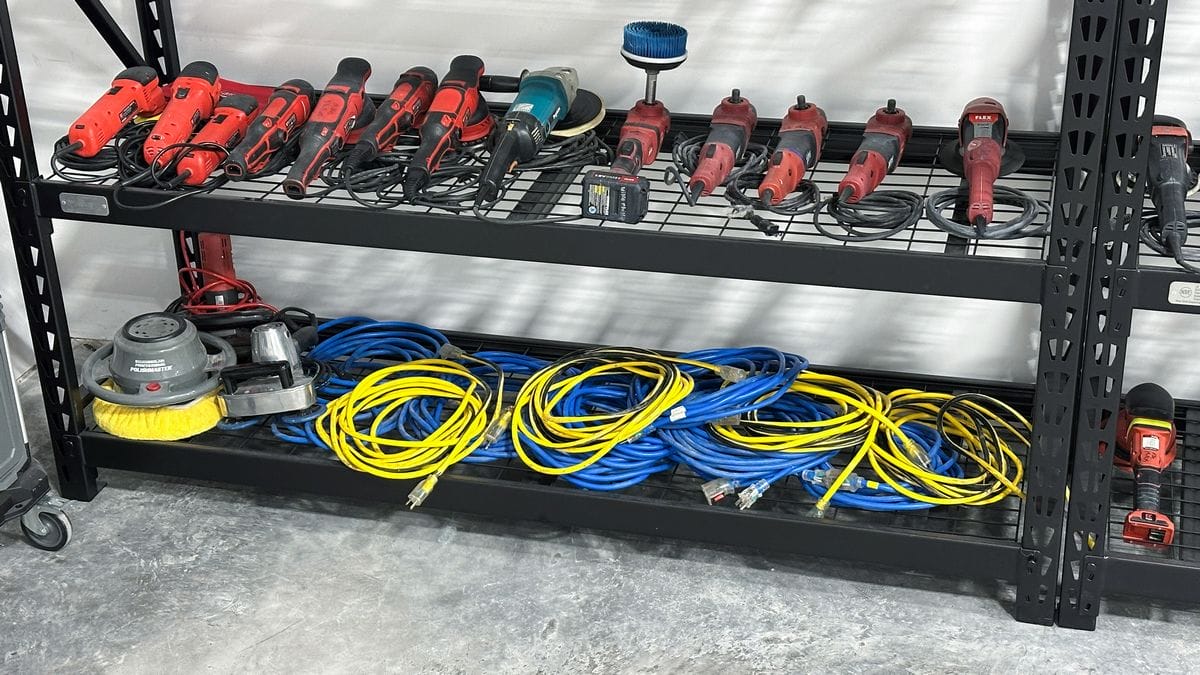
7. Heavy Duty 12 Gauge Power Cords
In order to protect your polishers and maximize their performance plus longevity, you need large gauge power cords to flow plenty of amps to the tools. 12 gauge power cords are the norm and the minimum. Never use 14, 16 gauge or smaller wire power cords as this will cause the tool to overheat and possibly harm internal electronics.
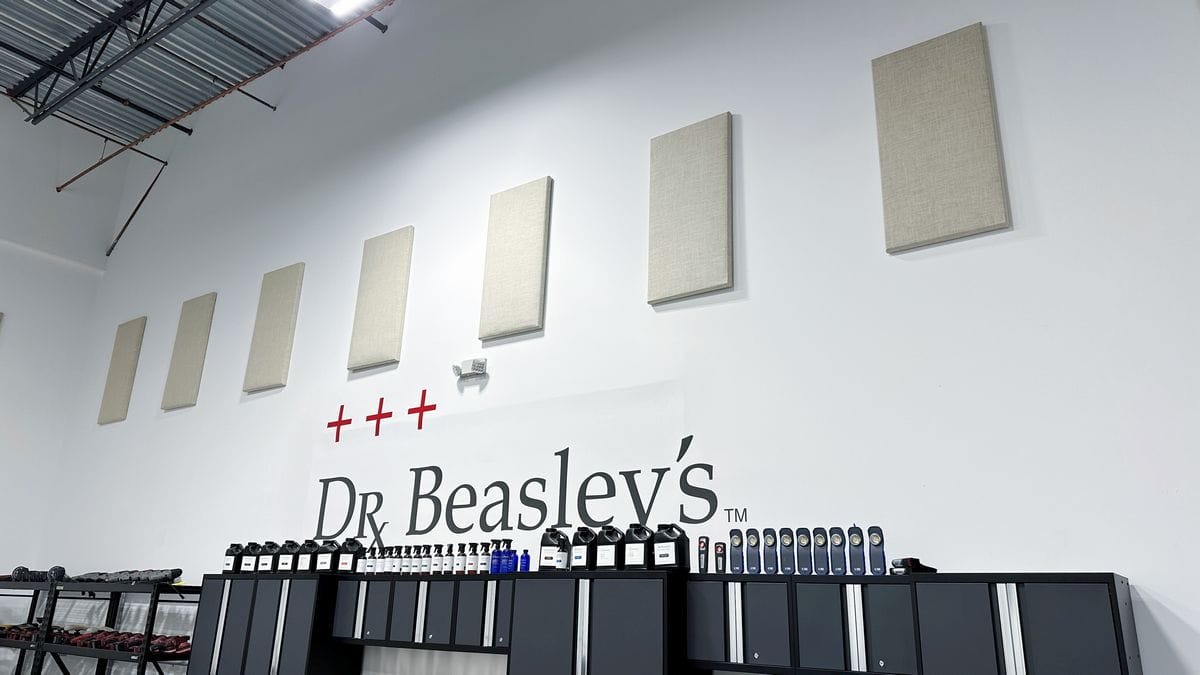
8. Sound Deadening Boards or Insulation
Power tools make noise! It’s one thing if you’re in the garage by yourself running a Porter Cable 7424XP, it’s another thing if you have 20 people running FLEX BEASTS. There are a number of different sound absorbing options available, and you need to do your own research to see what will best fit your needs. At the O.R. in Stuart, Florida, we use ATS Acoustics Panels – 24x48x2 Inches with Beveled Edges in Ivory. These run around $70.00 apiece.
9. Washer and Dryer Station
Teaching a car detailing class means going through a LOT of microfiber towels. You need a system in place to keep them clean after use and a protocol for washing, drying, inspecting, and then storing the towels.
We used a corner of our shop where we had both power and access to water to set up our washing and drying machines. We also have a multi-chamber laundry hamper to hold dirty towels until we’re ready to make a wash load.
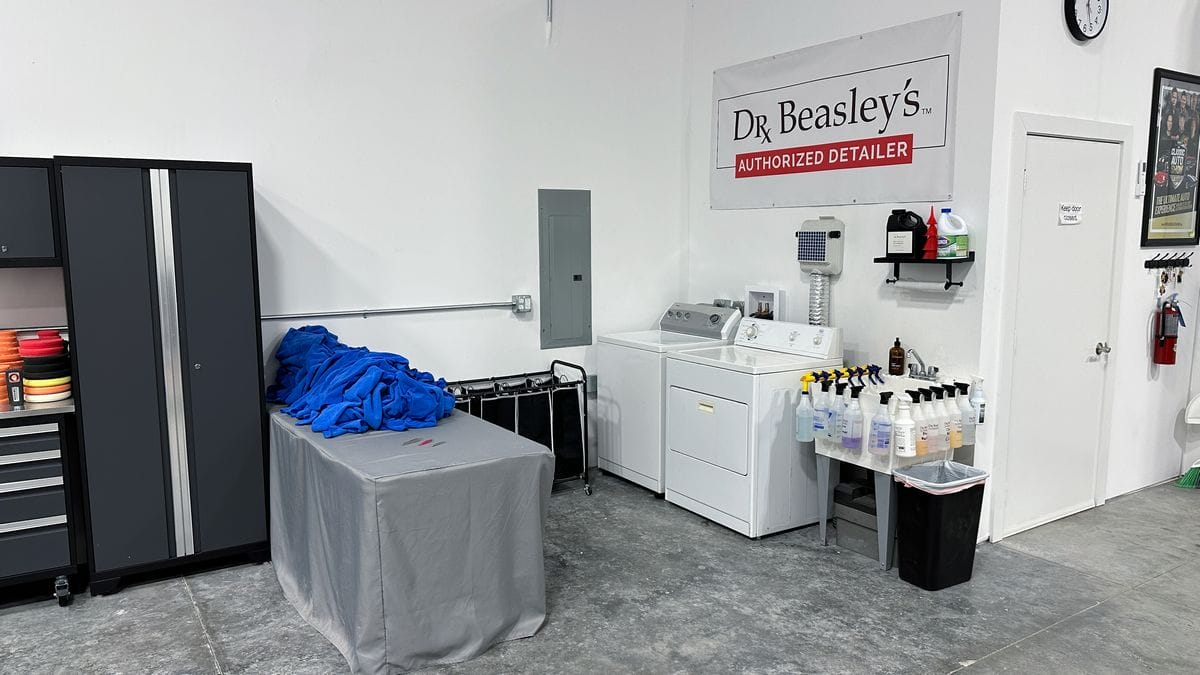
We placed a table near the washing and drying machines, so we have a clean place to place dry laundry for inspection and folding. The cabinet next to the laundry table is also for holding microfiber towels. By keeping everything in the same localized area, there’s a lot less walking and thus wasted time.
10. Microfiber Towel Inspection and Folding Station
I’ve been teaching classes for a long time and if you’re serious about teaching your own class, you need to have protocols in place to keep your microfiber tools clean and uncontaminated.
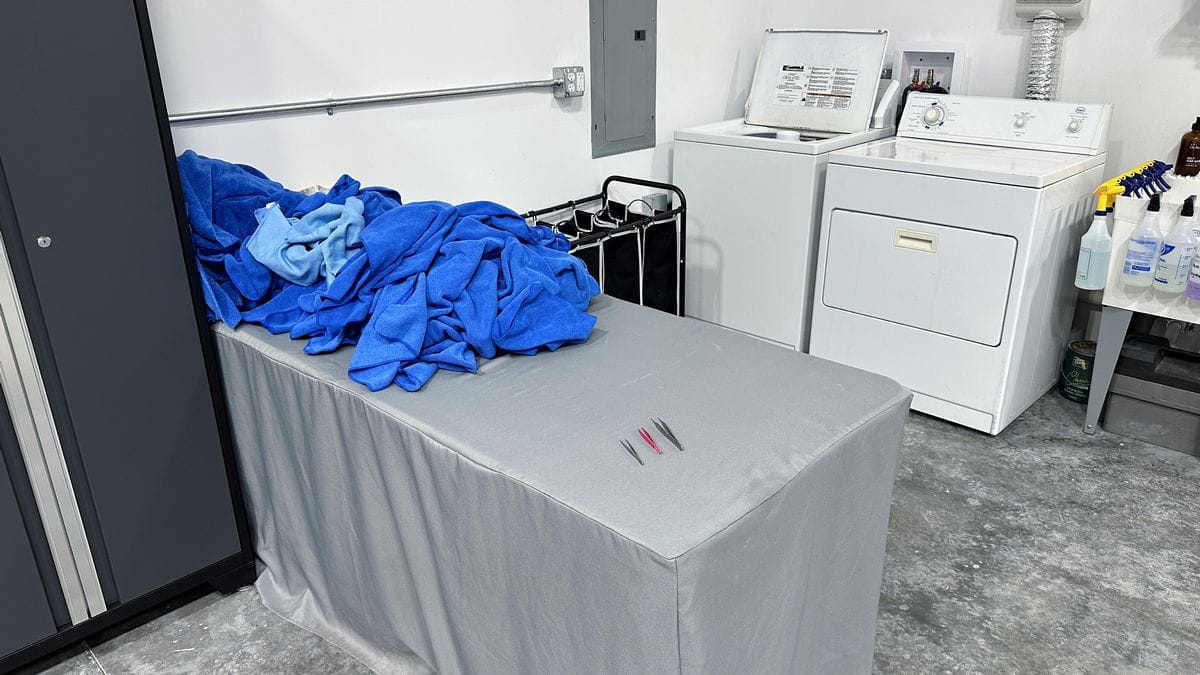
We keep a table near the dryer to make it easy to move dry towels to the table where we can then inspect visually and also with our sense of touch. We keep tweezers handy to enable us to pick out any foreign contaminants to ensure our towels are safe for wiping after polishing. The cabinet next to the table is for storing clean, inspected, and folded towels.
11. Pads – LOTS of Pads
Kind of goes without saying, but if you’re going to teach a paint correction class you need a LOT of pads and a lot of different types of pads depending upon the tools you’re going to teach and the topics you’re going to teach.
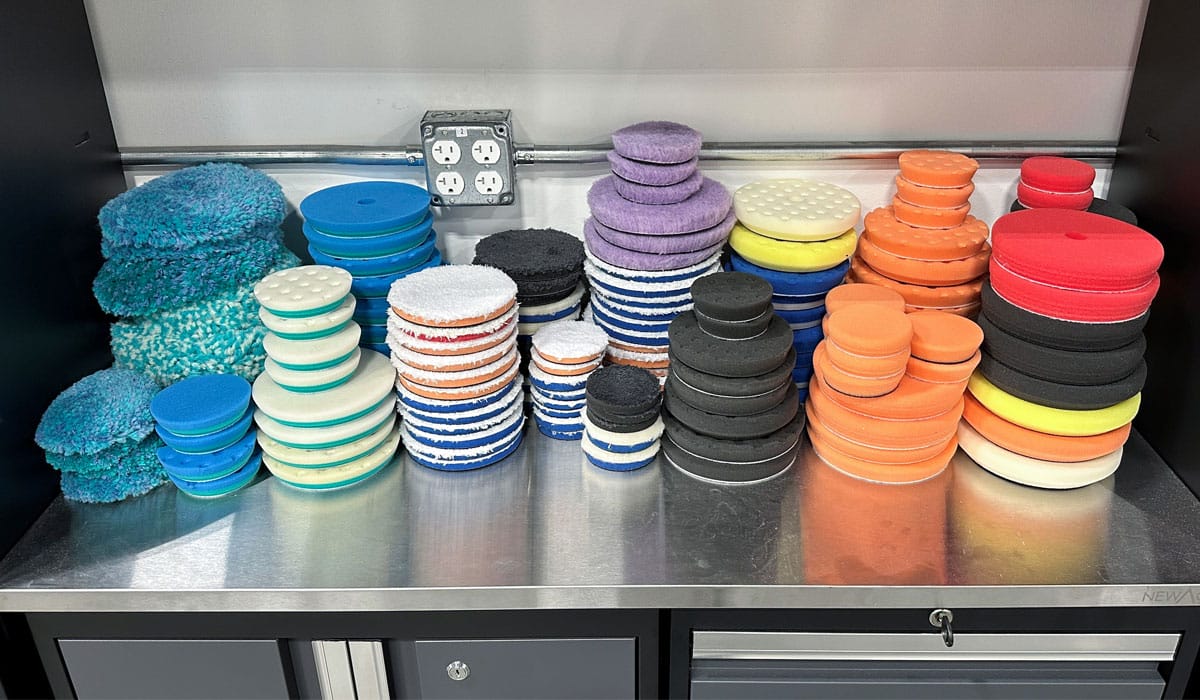
We teach the rotary polisher with a wool cutting pad as the FIRST tool you will learn to use in our Stuart, Florida classes. If I have 12 students, this means I need 12 rotary polishers and 12 wool cutting pad – MINIMUM.
Also important: Backing Plate Sizes
Also keep in mind, if you’re going to teach different types of the same tool, for example RUPES BigFoot 15mm and 21mm – these tools have different size backing plates and thus will require their own collection of pads in order for you to teach both tools and multiple processes.
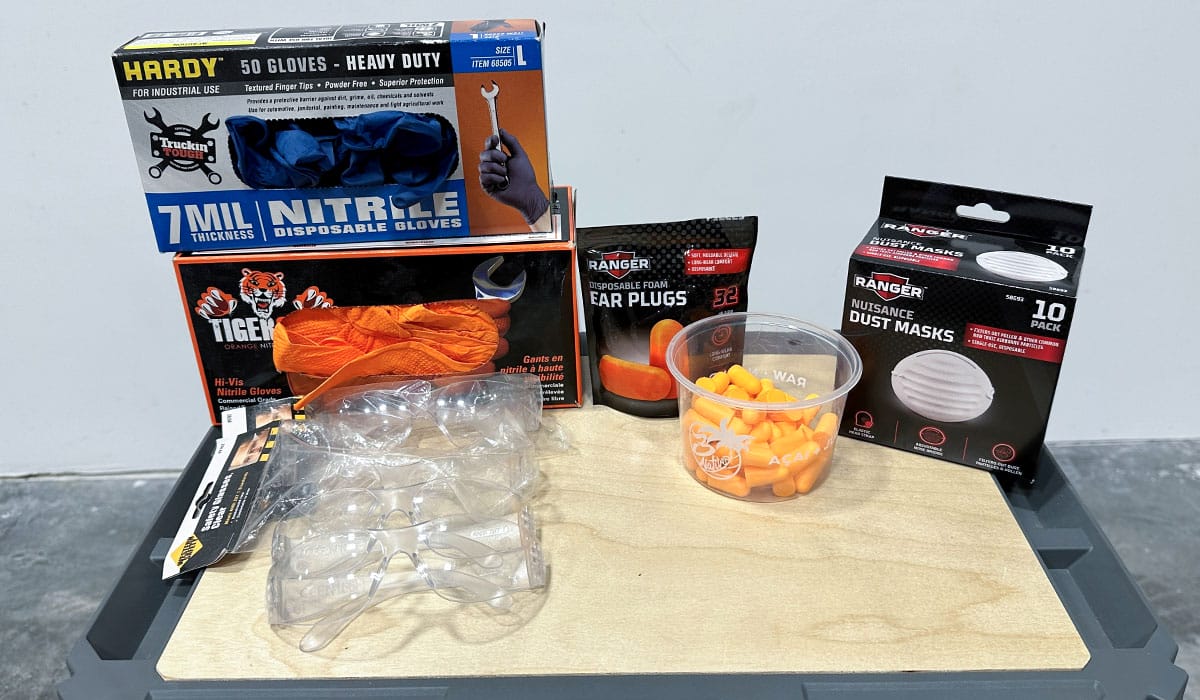
12. PPE – Personal Protection Equipment
The most important aspect for any class you teach is to keep your students safe. Nothing is worse than someone getting hurt. You should have and offer the most commonly used Personal Protection Equipment and of course, feel free to go to extremes.
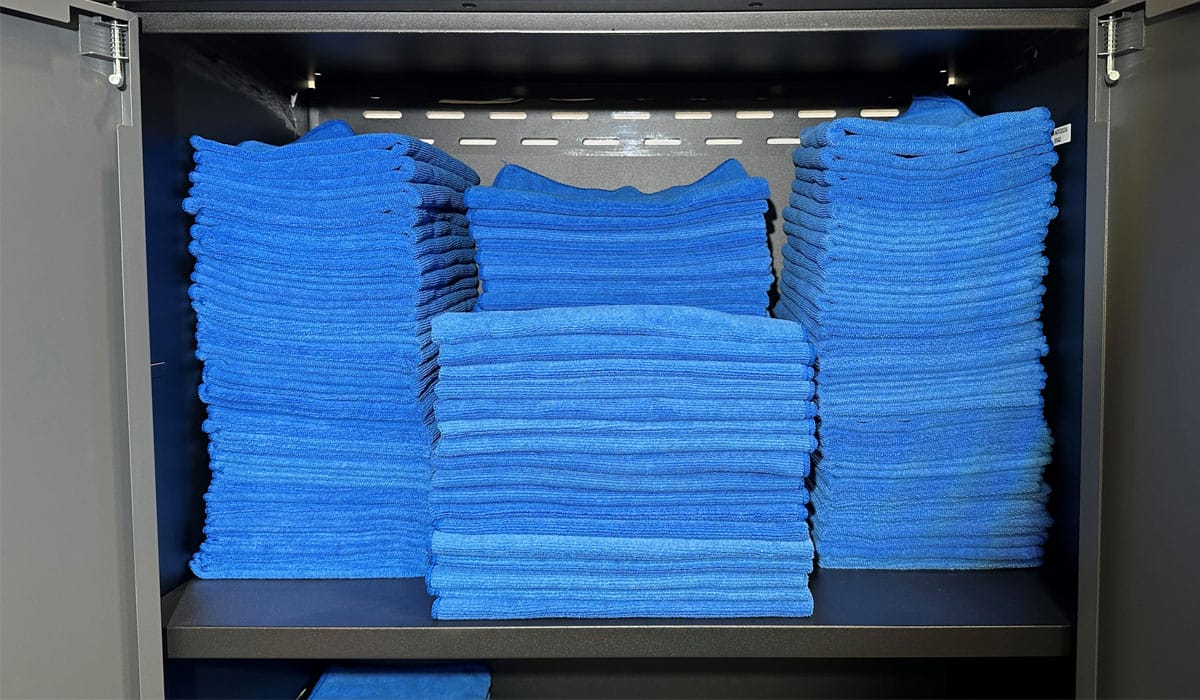
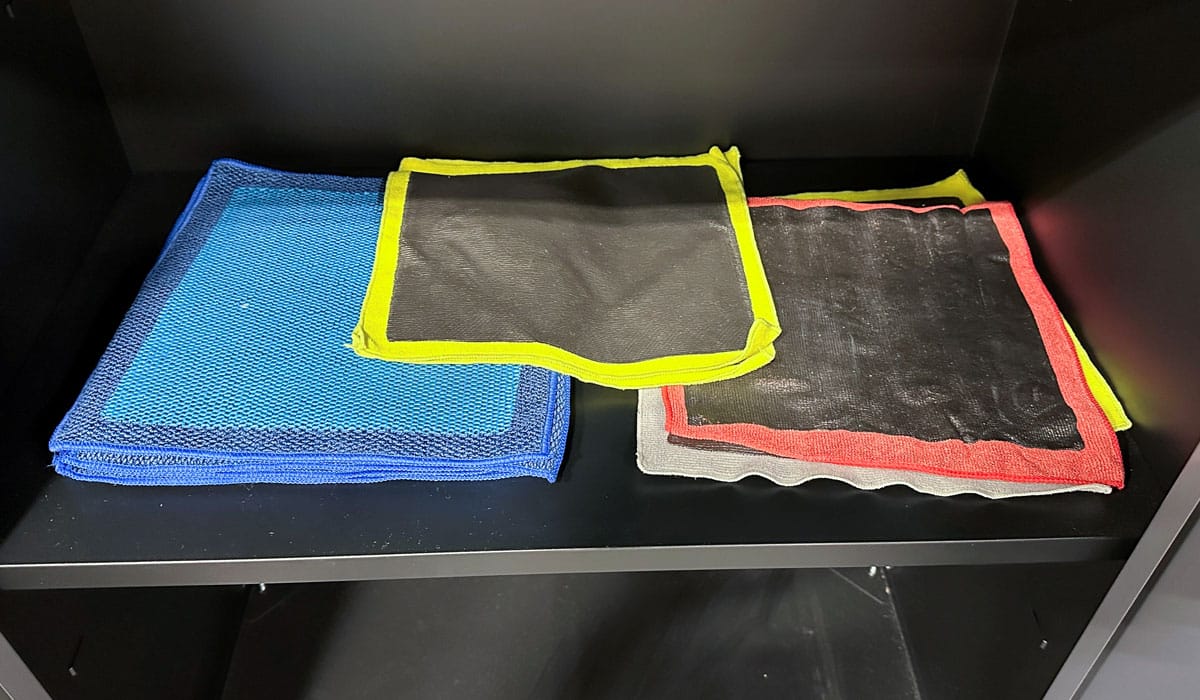
13. Microfiber Towels – LOTS of Microfiber Towels
The most important part of avoiding scratches on car paint is making sure everything you’re touching the car with is completely clean, including towels. An easy way to do that is to have lots and lots of clean and inspected microfiber towels ready to go. That way a clean towel can always be accessed by your students.
14. Refrigerator or Cooler for Bottled Water
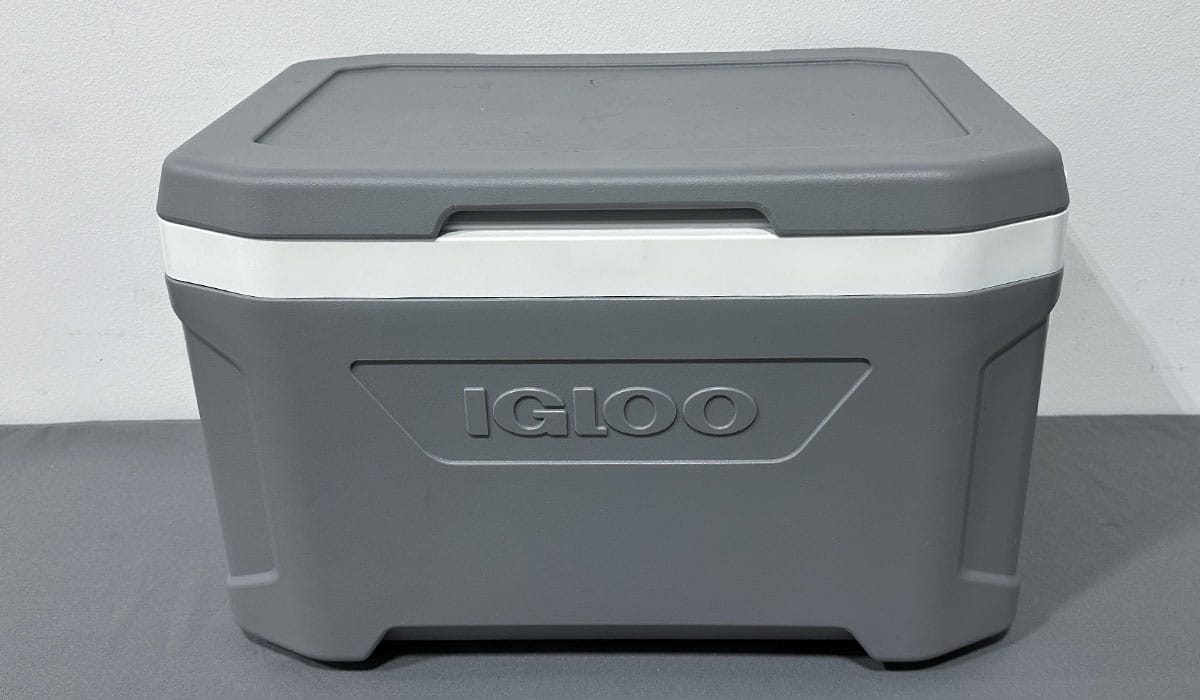
Of course a nice big, beautiful refrigerator in your shop is a blessing. But if you don’t have room or the budget to start out with a refrigerator, a large cooler will work just fine. Just be sure to purchase fresh ice each morning to cool down the bottles of water.
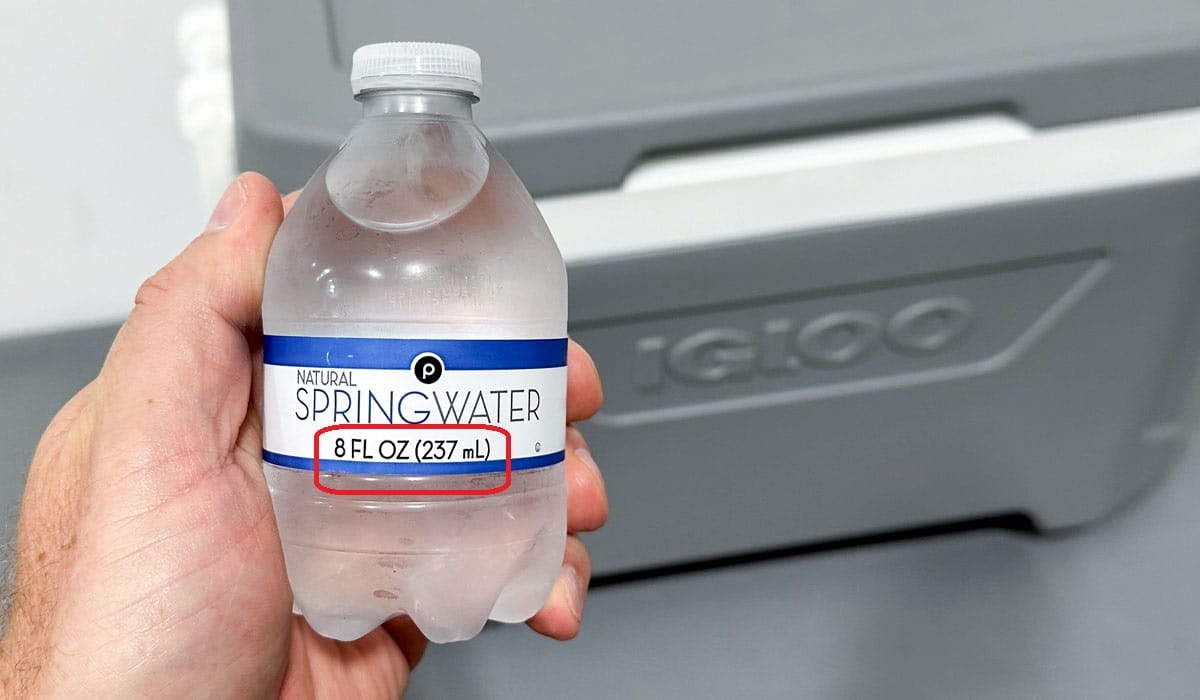
15. SMALL Bottles of Water
Do not purchase normal size, like 16 ounce bottles of water. Instead, purchase small bottles of water like the 8 ounce size.
Why?
Because TOO many people will open a bottle of water, take a few sips, put the lid back on and set it down somewhere. After this, you’ll end up throwing it away because whoever opened it will have lost track of where they set it down and now NO ONE will drink it. No one will put their lips on an unknown bottle of water.
DON’T Buy Soft Drinks!
First, do not buy any soda pops. I used to do this, and it simply makes things more complicated. There’s also the sticky sugar problem. If anyone spills a can of Coke, or anything that’s not a diet drink, you now have a sticky, sugary spill to clean up. If you don’t clean it up ASAP – people will track it all over your shop. So avoid any and all soft drinks for your class.
16. Big Screen TV – For a PowerPoint Presentation and/or Internet Access
This can be as simple as a dedicated table for your laptop hooked to the TV.
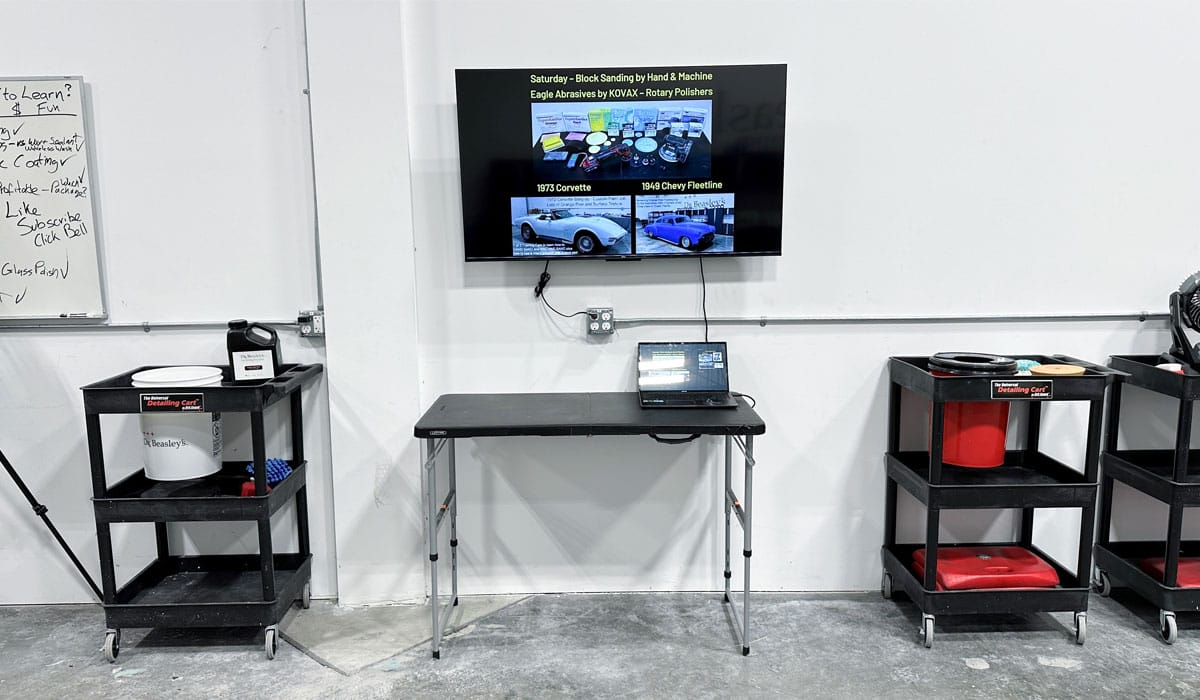
But Mike, I thought you said you never use PowerPoint Presentations?
This is accurate, I don’t use traditional format PowerPoint Presentations. Meaning, I’m not using the PowerPoint to teach, but instead as a visual aid.
What I create is a simple set of slides that show,
- The training cars and the tools, products and pads used for these cars.
- The training boat and the tools, products and pads used for the boats.
This is helpful for students for two reasons:
1: The slide being displayed on the big screen TV looks good in pictures and videos taken at the class because it shows the cars and/or boats shown in the slide match what’s actually in the garage.
2: Students will take pictures of the slides to help them remember the tools, products and pads used for each set of cars or the boats instead of writing this information down in a notebook or trying to remember this information. The pictures they take on their phone or tablet become their notes.
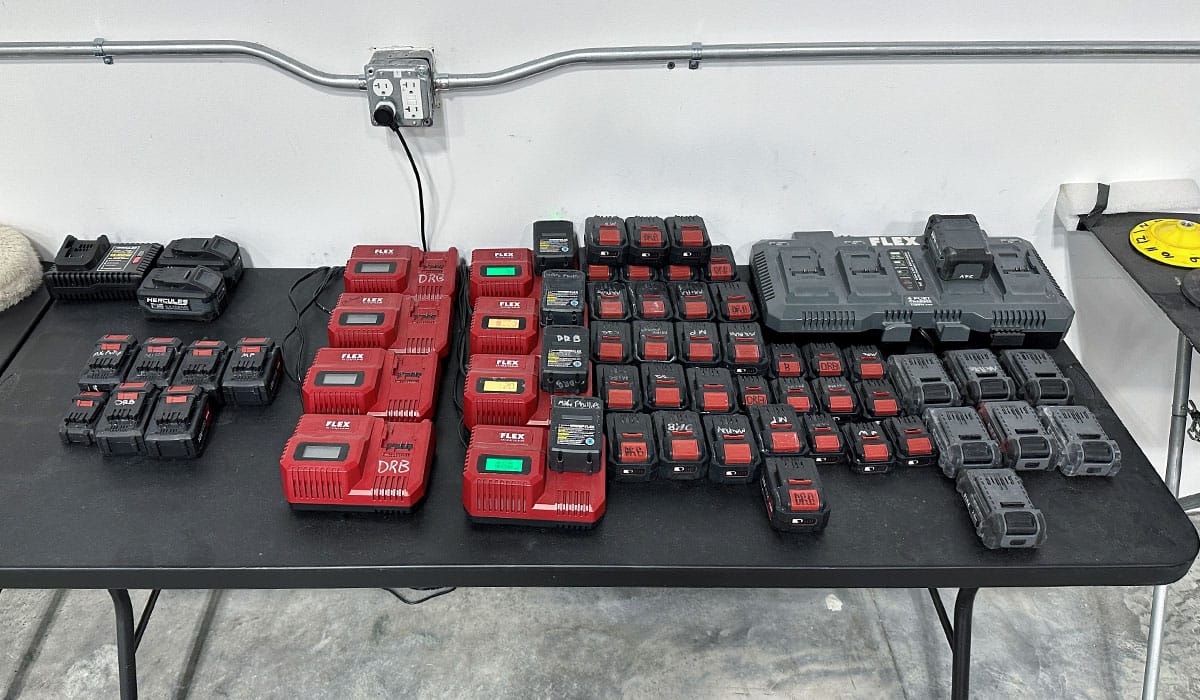
17. Cordless Battery Charging Station
I use a lot of cordless rotary polishers and orbital polishers in our classes. When you have anywhere from 12 to 20 people using cordless tools – you’re going to drain a lot of batteries very fast. If you plan to use cordless polishers, you need a bank of battery chargers, plugged-in and ready to go.
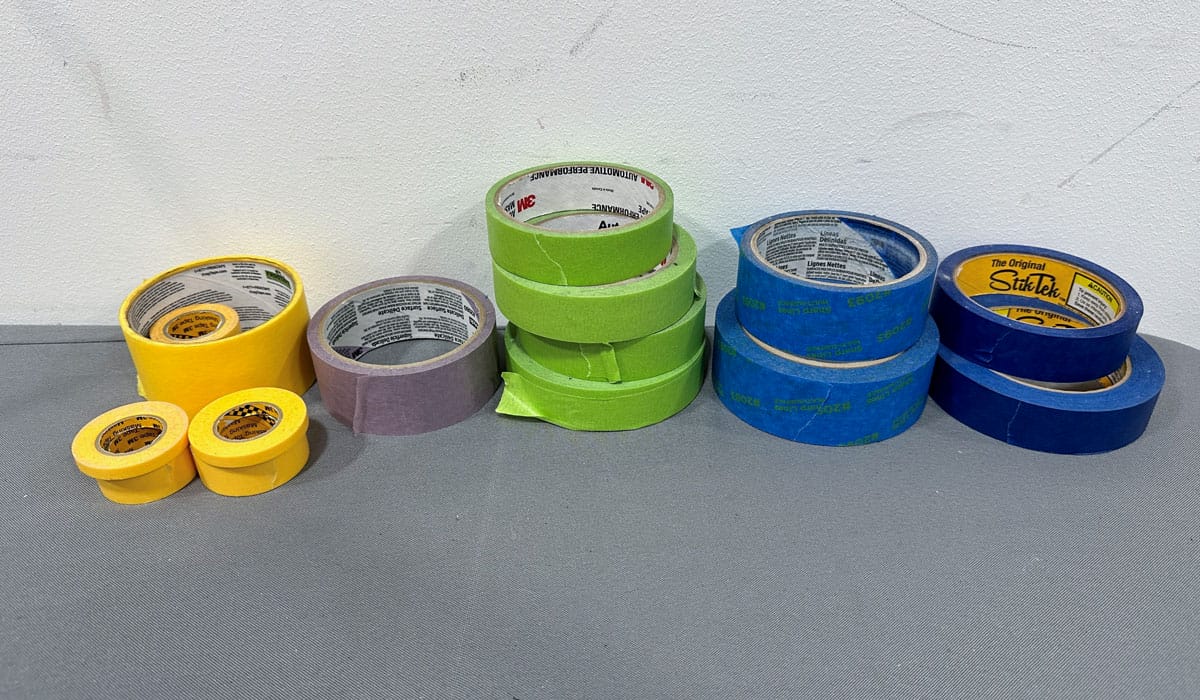
18. Lots of Painter’s Tape or Masking Tape
Painter’s tape is important because it covers and protects sensitive surfaces or materials and saves a boatload of time on the backend because you won’t need to clean compound or polish splatter off trim and other components and surfaces.
It’s a good idea to have multiple types of tape. You want normal tape with good adhesion to hold-up while detailing the car. You also want low-adhesion tape for taping off and covering over sensitive materials or surfaces, so you don’t cause damage when removing the tape.
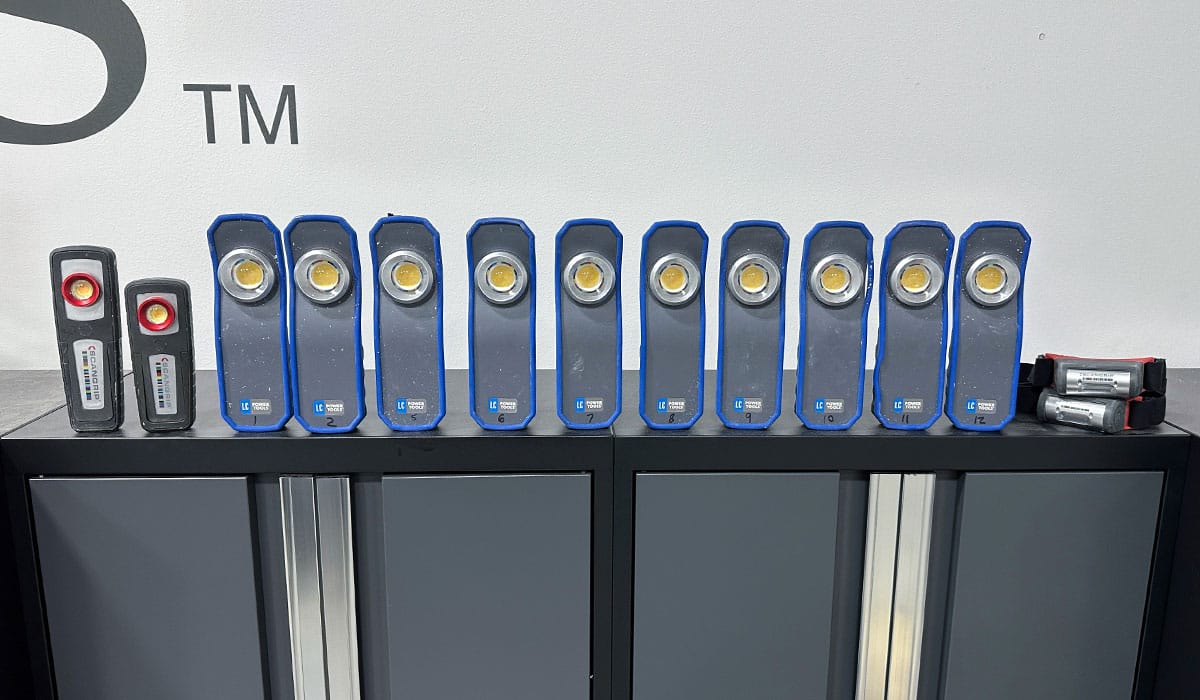
19. Swirl Finder Lights and LOTS of Them!
The Swirl Finder Light is an essential tool for teaching car and boat detailing classes. The students MUST be able to see defects before a process and then monitor their progress during a process and then again for final inspection to make sure they removed them 100% or to the expectations of the class session. You’ll also need a charging station for lights.
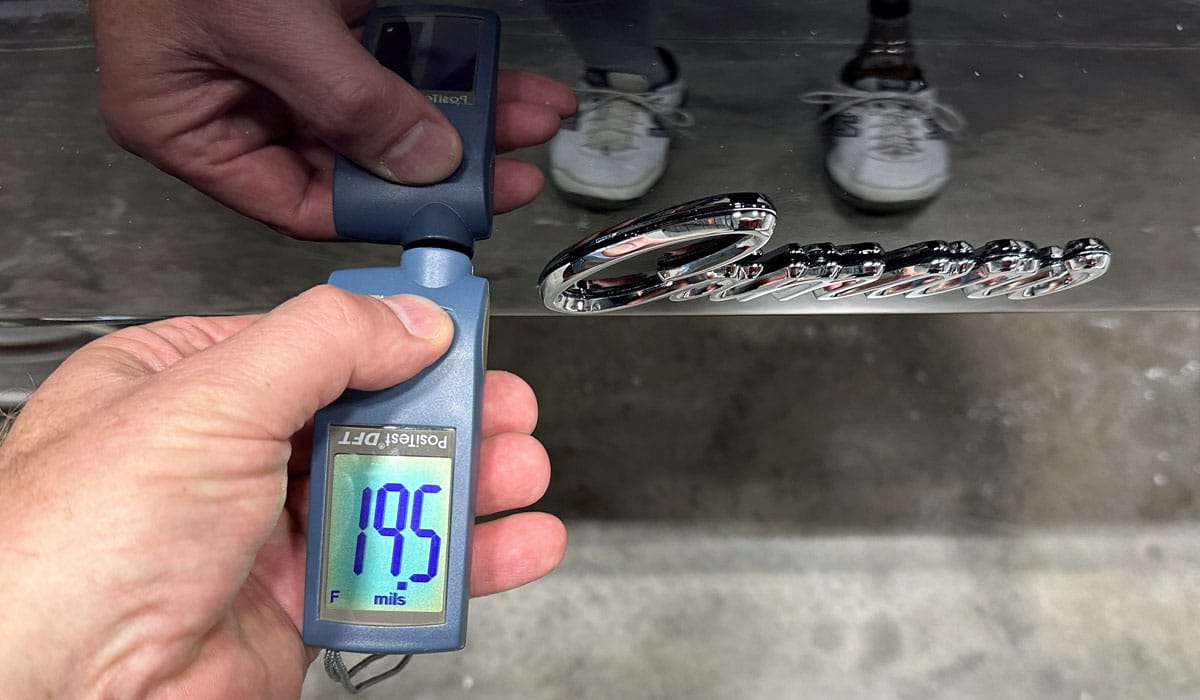
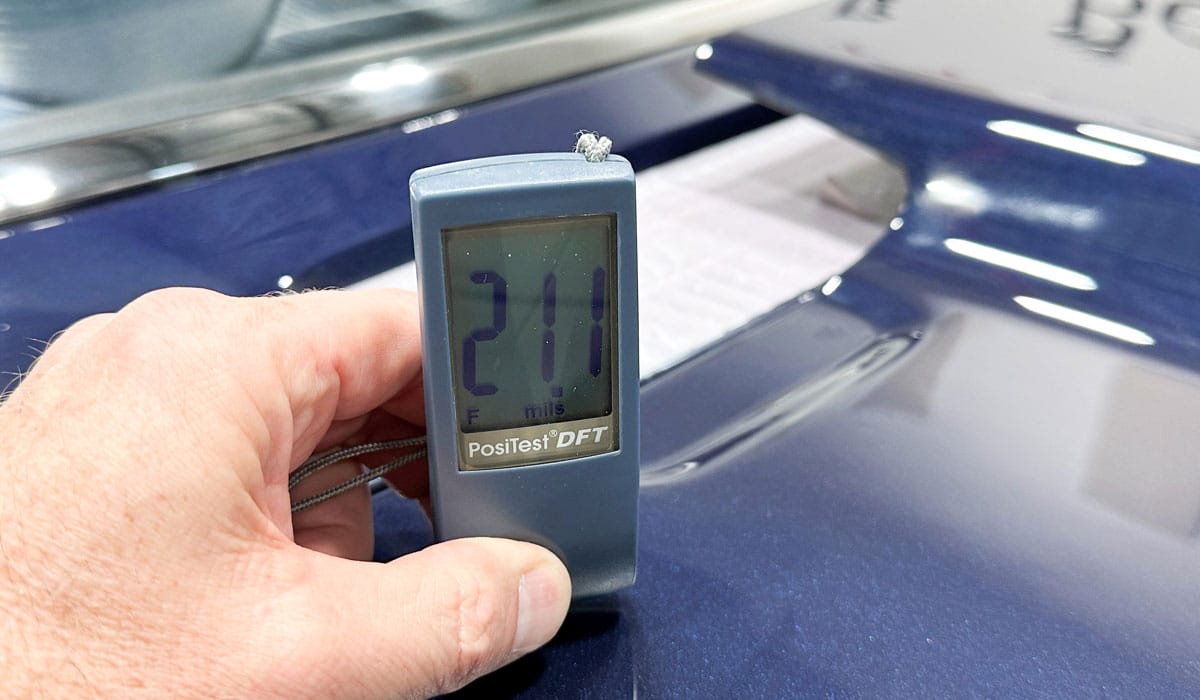
20. Paint Thickness Gage
Whenever you do paintwork correction, whether it’s polishing or sanding, you need to know how thick the paint you’re working with is. Otherwise you risk burning the clearcoat. We use Paint Thickness Gauges (PTG) in my classes whenever we do a test spot to determine whether the paint is thick enough. I call that “Go” or “No Go”.
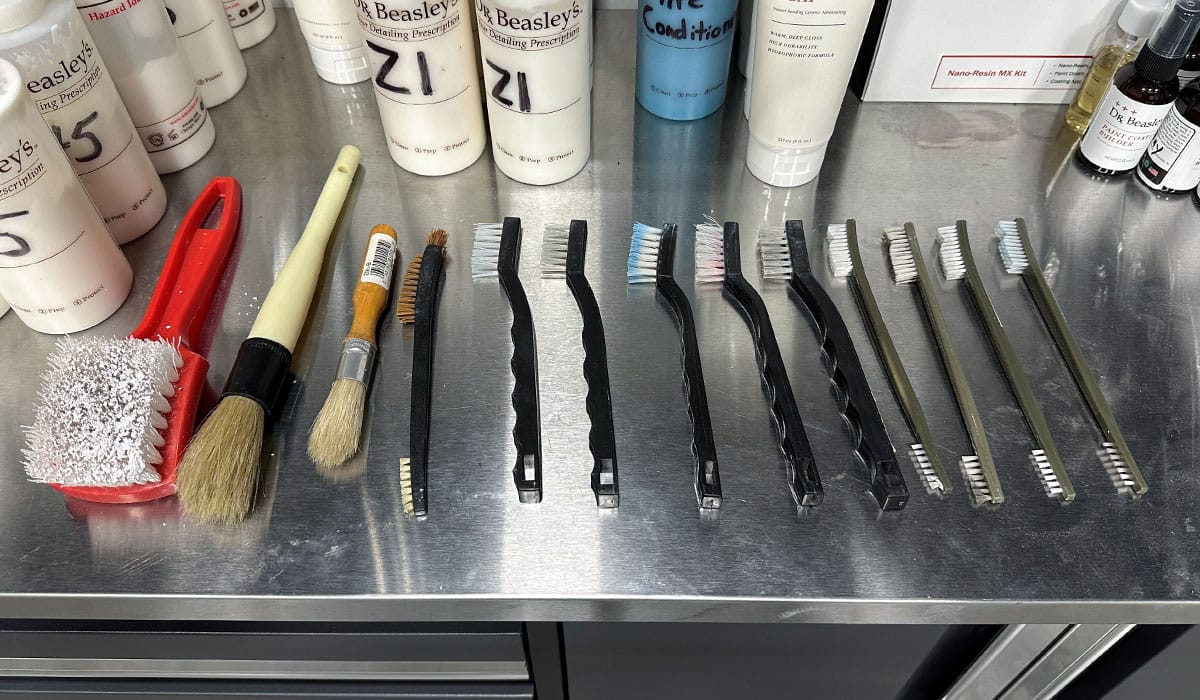
21. Detailing Brushes
A proper detail is not done correctly until all the compound and polish residues are removed from all the cracks and crevices. These types of brush can also be used to clean the face of foam and microfiber pads on-the-fly.
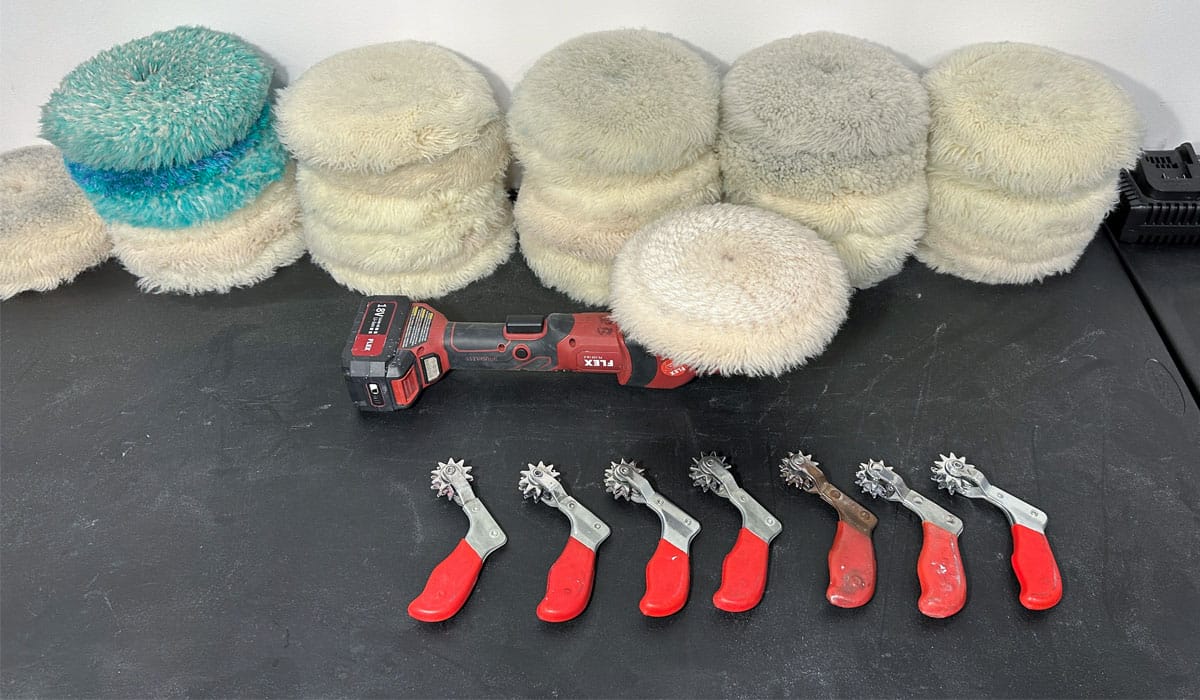
22. Pad Cleaning Spurs
If you’re going to teach how to use wool pads on rotary polishers, you’re going to need ample Pad Cleaning Spurs.
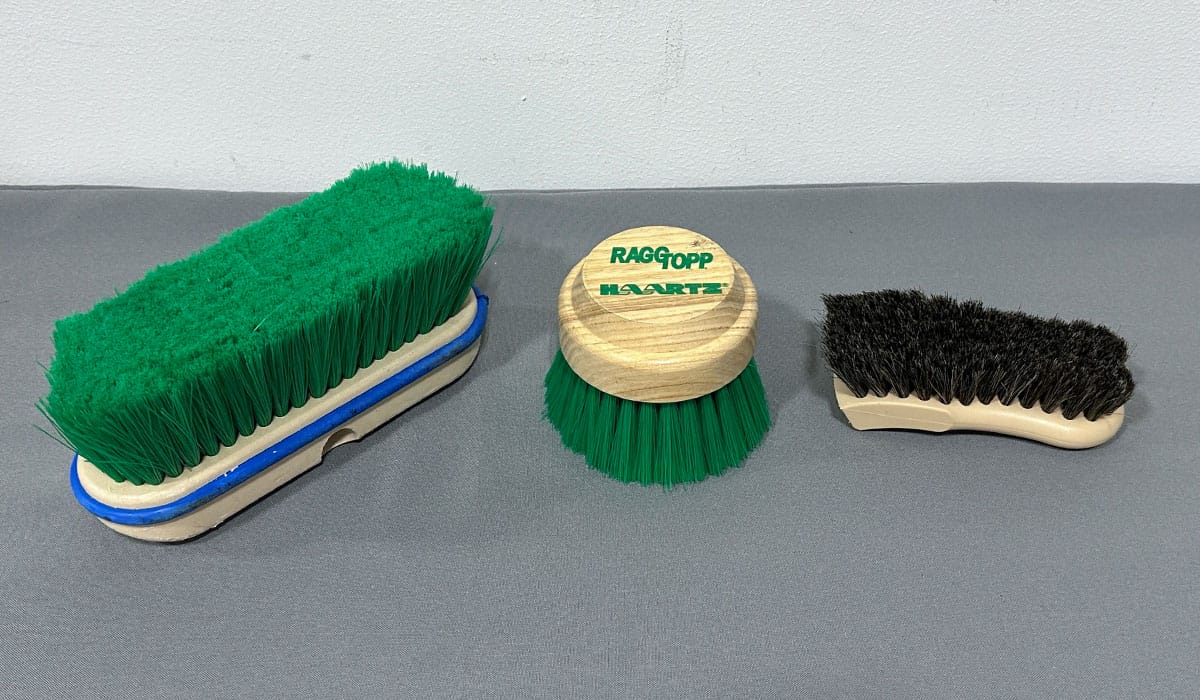
23. Proper Canvas Cloth Top Cleaning Brushes
I cover how to correctly and safely clean and protect canvas, cloth convertible tops. In order to teach this you must have the correct brushes for cleaning cloth tops without tearing up the fibers.
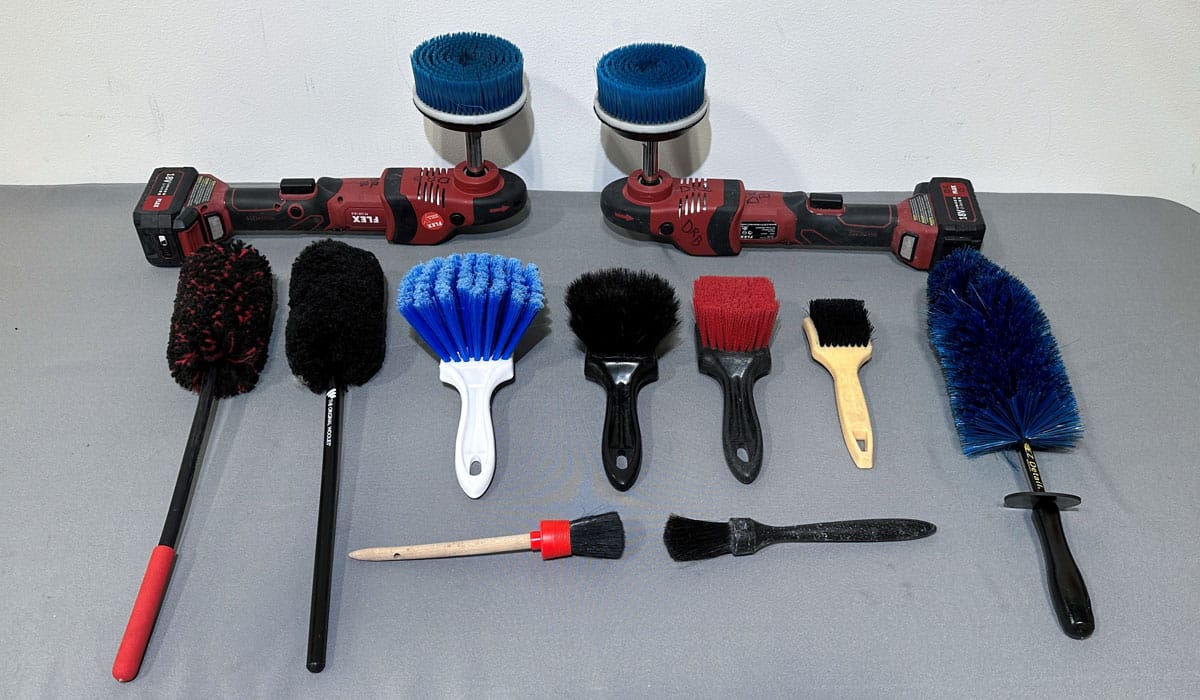
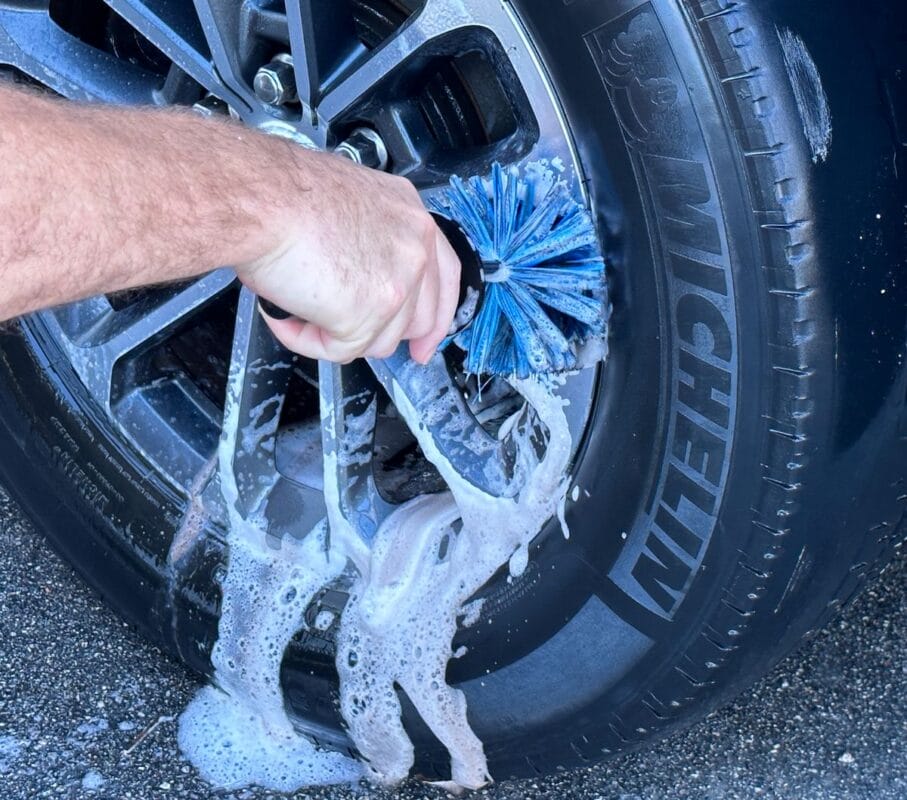
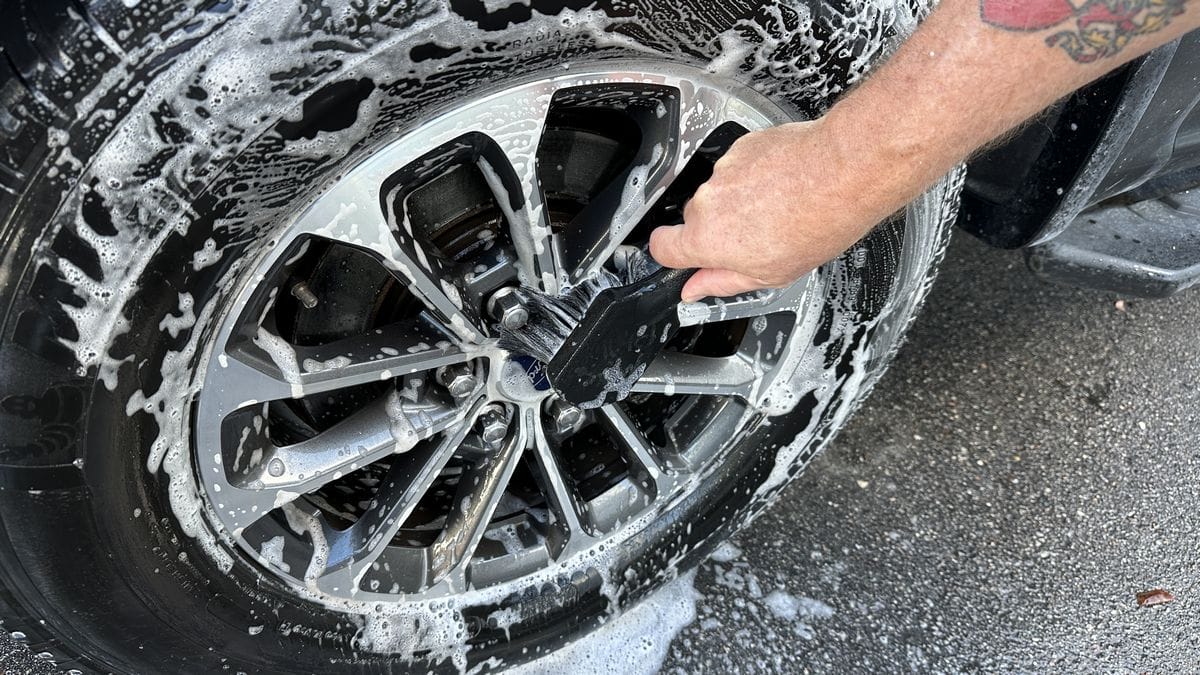
24. Wheel Cleaning Brushes
I teach Extreme Prep Wash in our classes. This includes a LOT of wet work such as cleaning wheels and tires. In order to tackle any design wheel, you need a wide variety of brushes.
25. White Board and Plenty of Dry Erase Markers
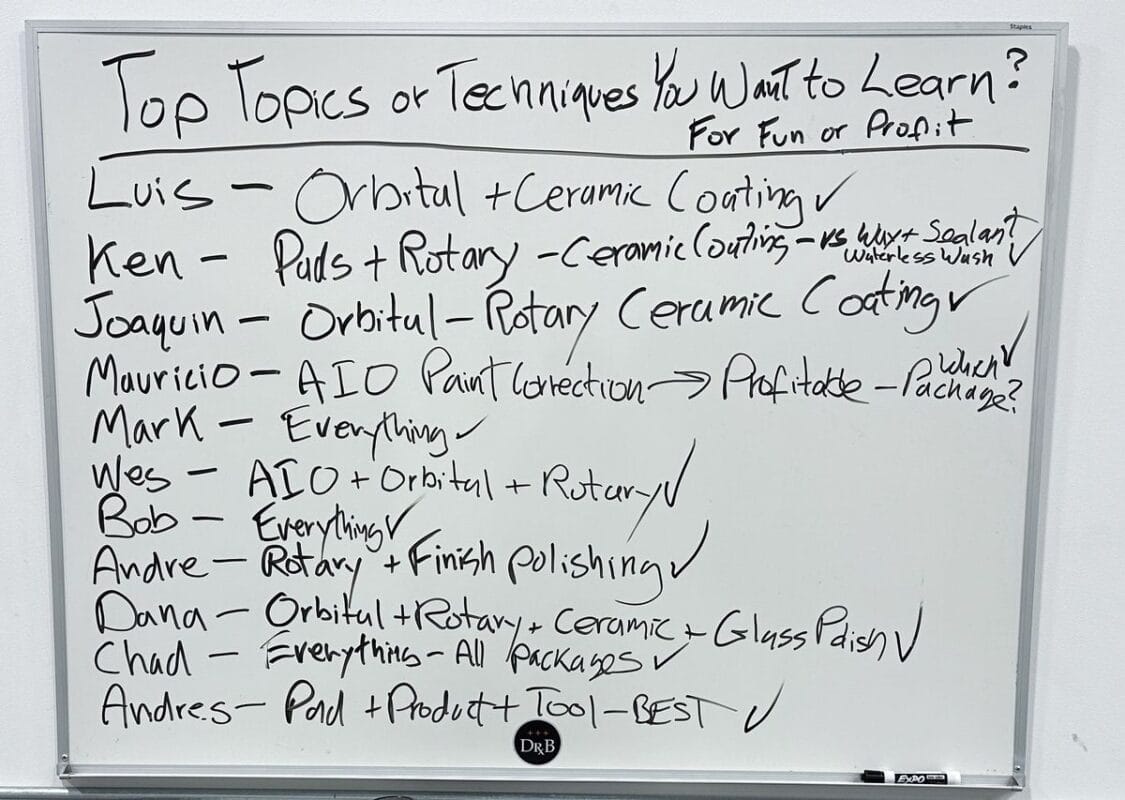
Back in 2028, when teaching a 2-day boat detailing class, I borrowed a technique shared with me by Jason Rose. Jason told me this is something he does in all his classes. I loved the idea and incorporated it into my classes:
At the start of the class, ask each person if there are any specific topics, techniques, tools, or products they want to learn in the class. Then write their name on the board and what they share.
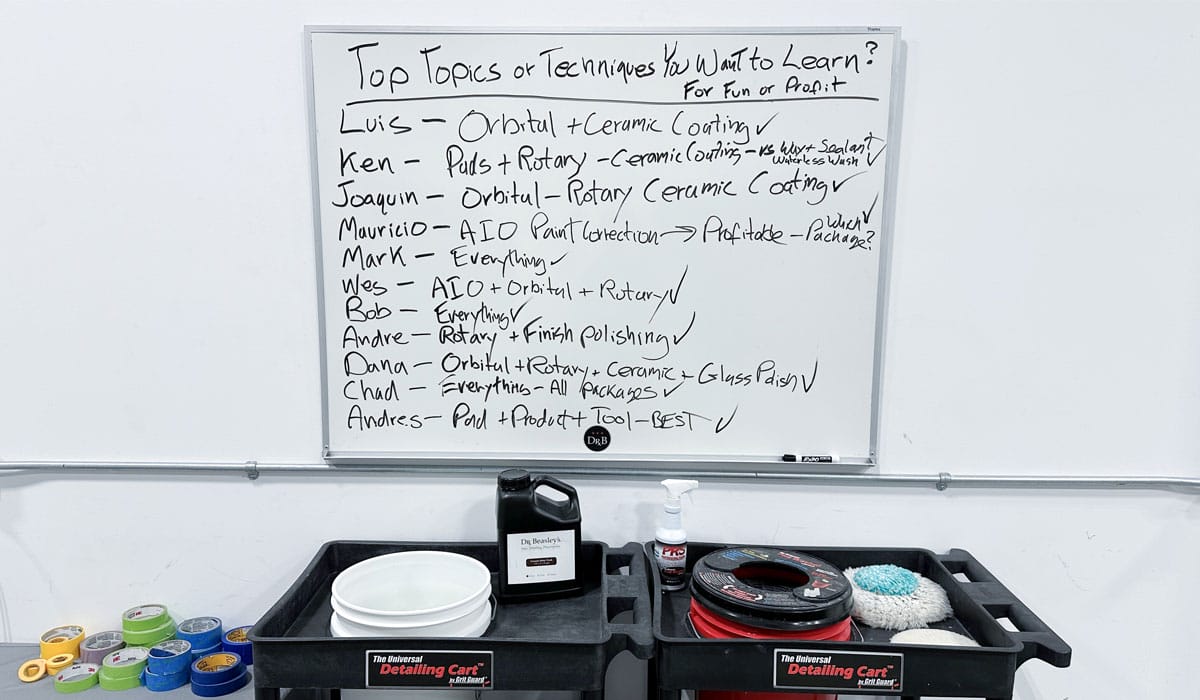
Using this technique enables you to make sure you give each student exactly what is most important to them. Of course there’s tons of other topics and techniques each student will learn, but by documenting the most important things for each student, you give yourself the best chance for the most success. Plus people are paying to be in the class – it’s your job to deliver on your promises. I promise the most hands-on classes on planet Earth, and this includes giving everyone what they want – at least to the best of my abilities.
Plus, if someone is there to learn something your class does NOT cover, now you know at the get-go and you can address this first thing in the morning. For example, if someone is erroneously in my class to learn how to use a hot water extractor, I let them know they signed-up for a paint correction class and this class will not be covering this tool or the techniques that go with it.
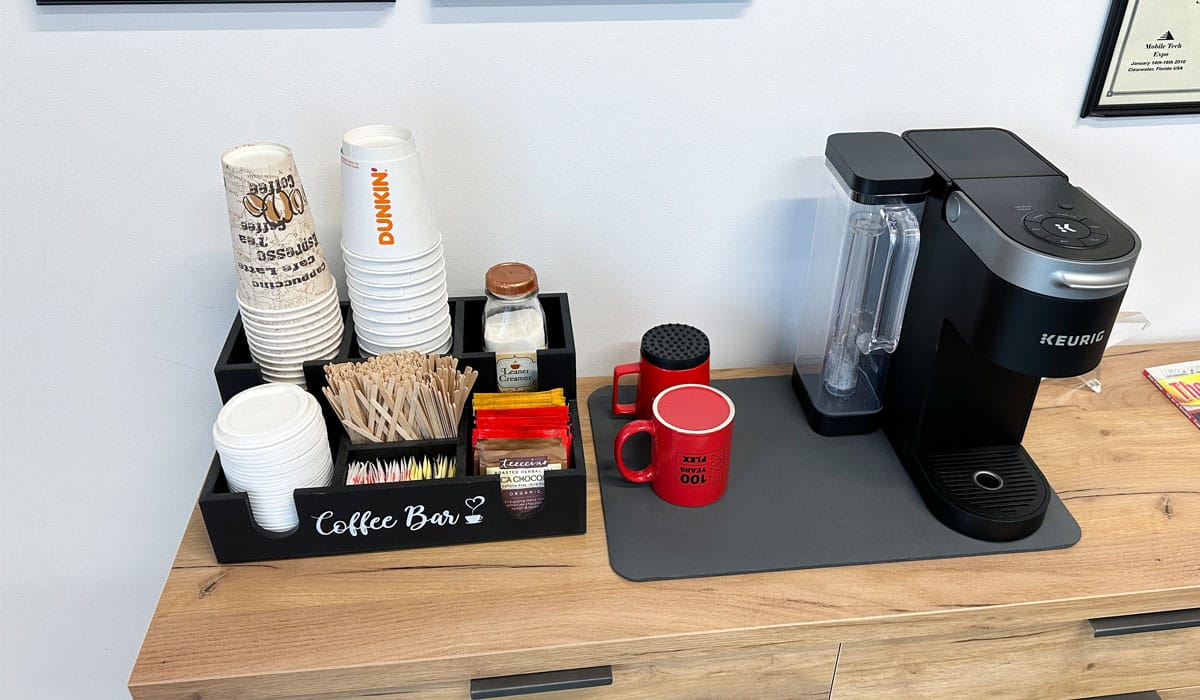
26. Coffee Station
I’m a coffee drinker, I like a quality cup of hot coffee in the morning. Some of your students are also coffee drinkers. So if you have a place, set-up a coffee machine with cups, sugar, sugar substitutes and creamer.
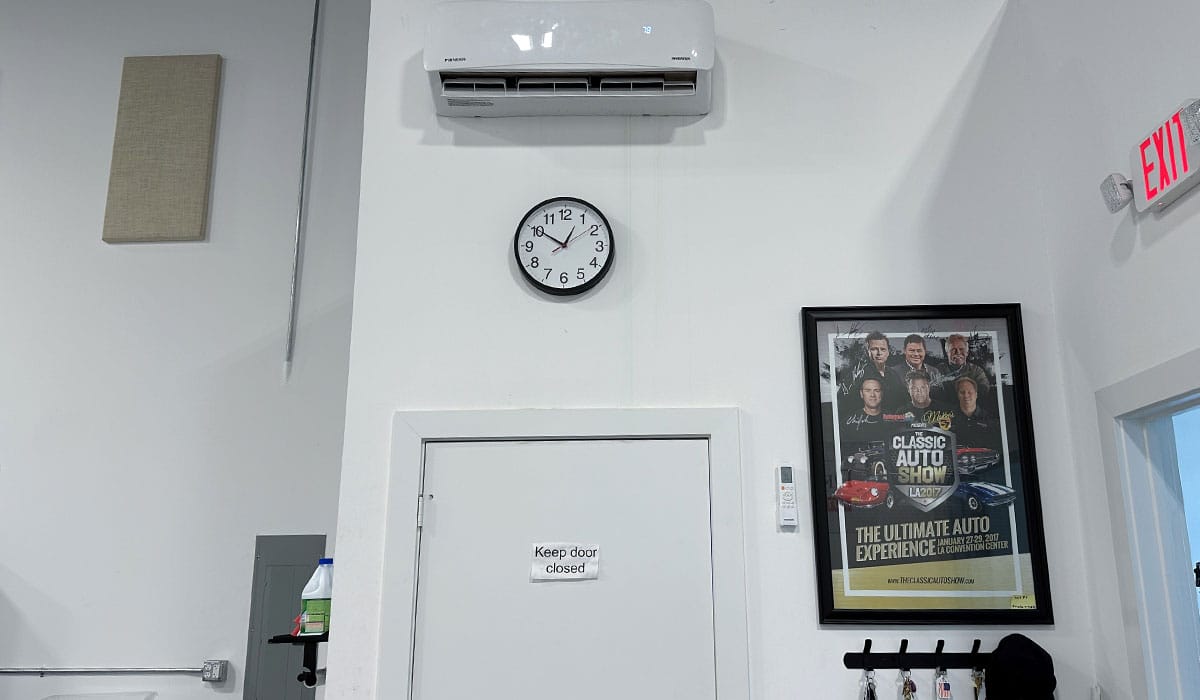
27. Wall Clock
As an instructor, you need to monitor the time so if needed you can be proactive in finishing whatever the current process or class session is being conducted. This also helps your students, so they know what time it is throughout the day.
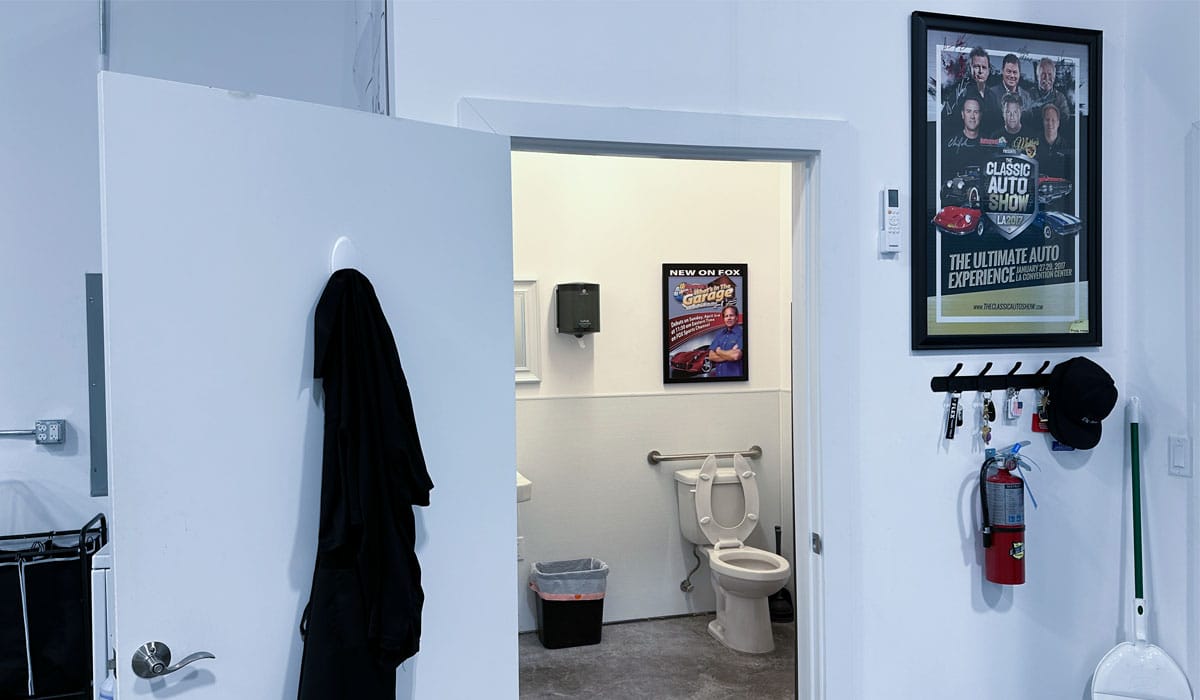
28. Bathroom Facilities for Men and Women
Kind of goes without saying. Keep it stocked up with all the necessary supplies and check and monitor throughout the day to fix any problems ASAP.
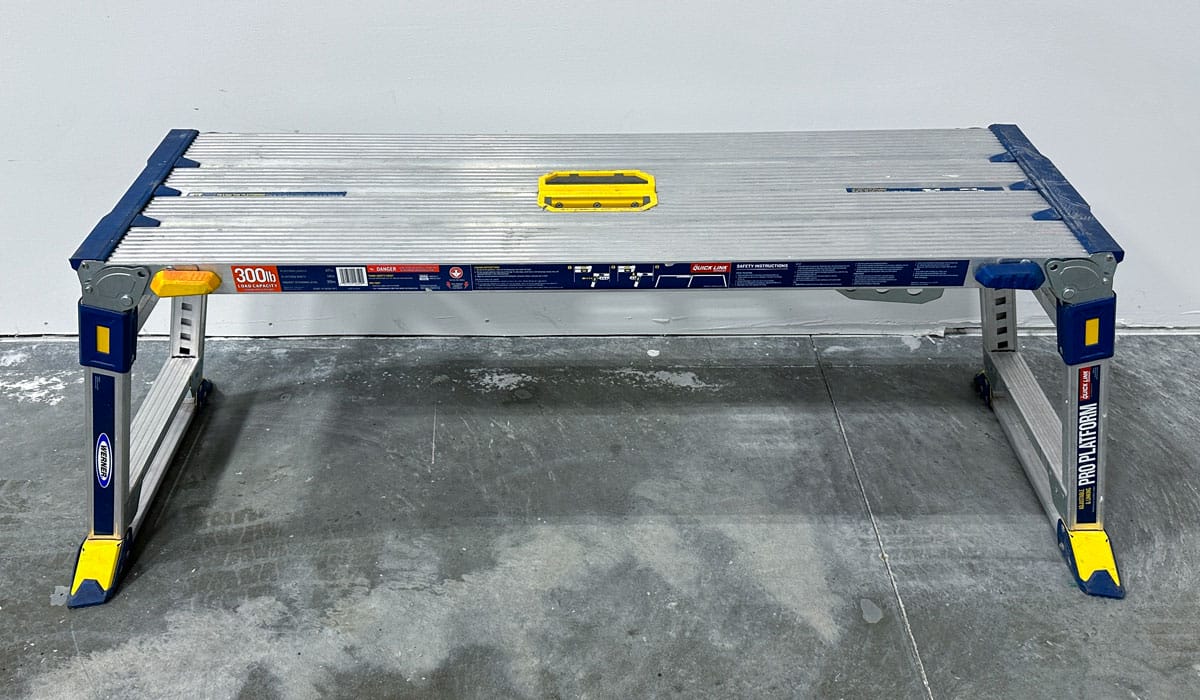
29. Quality Work Platforms
Fact of the matter is, there’s a lot of tall SUVs and trucks on the road today and in order to safely reach and work on the roofs of these types of vehicles, you need safe, solid work platforms. The one in the picture below is the Werner Aluminum Pro Linking Platform 300 Pounds – approximately $170.00 at the time I created this article.
30. Pad Washers
You’re going to go through a lot of buffing pads, if you’re teaching a hands-on car detailing class. Your students are going to need a way to clean their pads to get them clean after use. Also to get the most life out of their pad investment. The two popular options on the market today are the Grit Guard Universal Pad Washer and the Lake Country System 4000 Pad Washer.
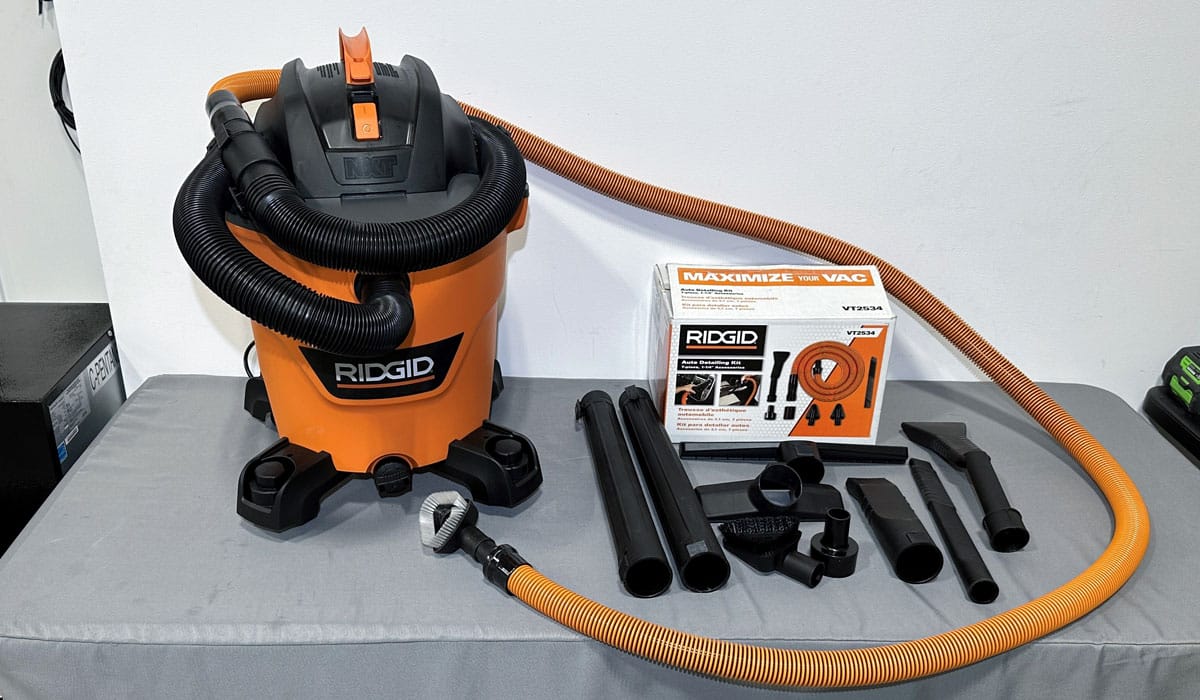
31. Wet/Dry Vacuum
Cleaning the inside of the car means at some point vacuuming the inside of the car. There are a lot of great vacuum options on the market today, the one we use in our shop is the RIGID Model HD1200 – 12 Gallon unit. It’s also a great idea to get the companion RIGID Model VT2534 Auto Detailing Kit and this way you’ll have all the attachments you need to work fast and efficiently.
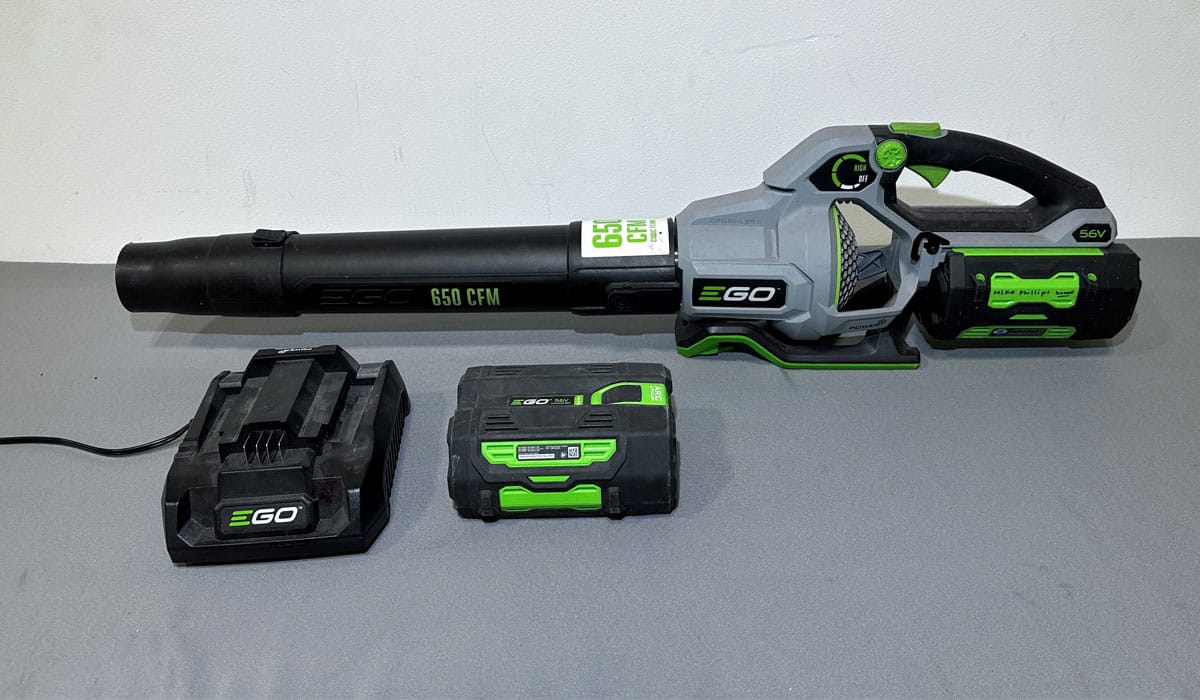
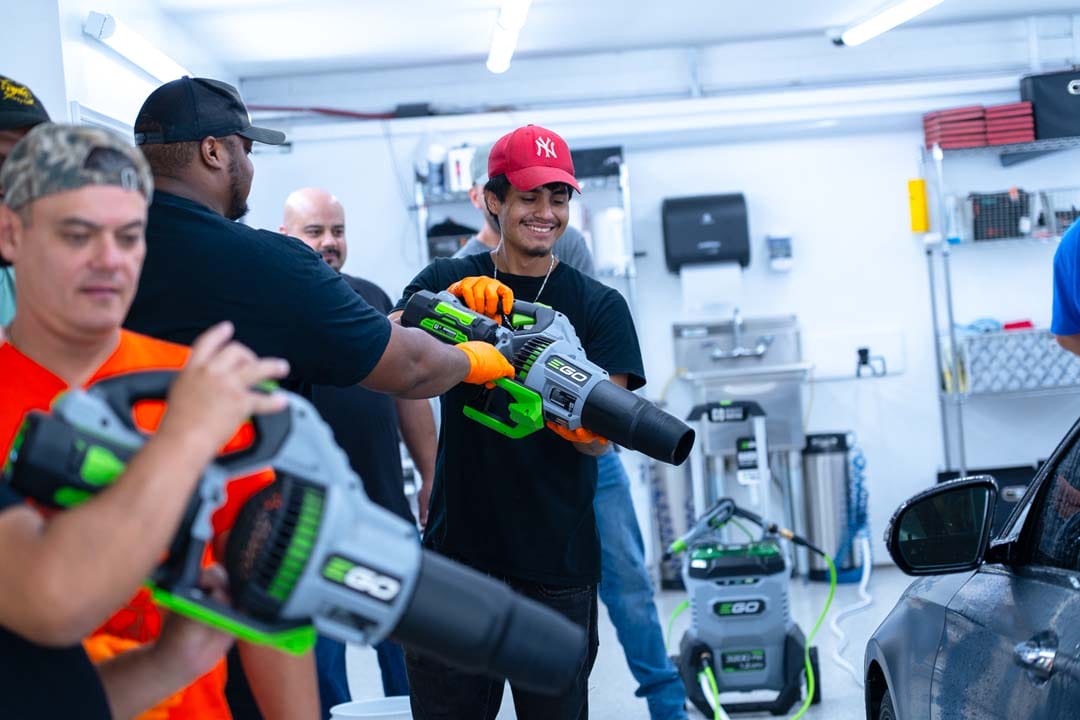
32. Car Dryer or Leaf Blower
While these only work great at blowing water off cars that are regularly maintained with a ceramic coating, car wax or synthetic paint sealant, (something that makes water bead-up), they are also great for other uses.
Blowing water out of wheels, door handles, emblems, tail lights, grills, roof racks, fuel doors, etc. They also work great for blowing out cars before vacuuming.
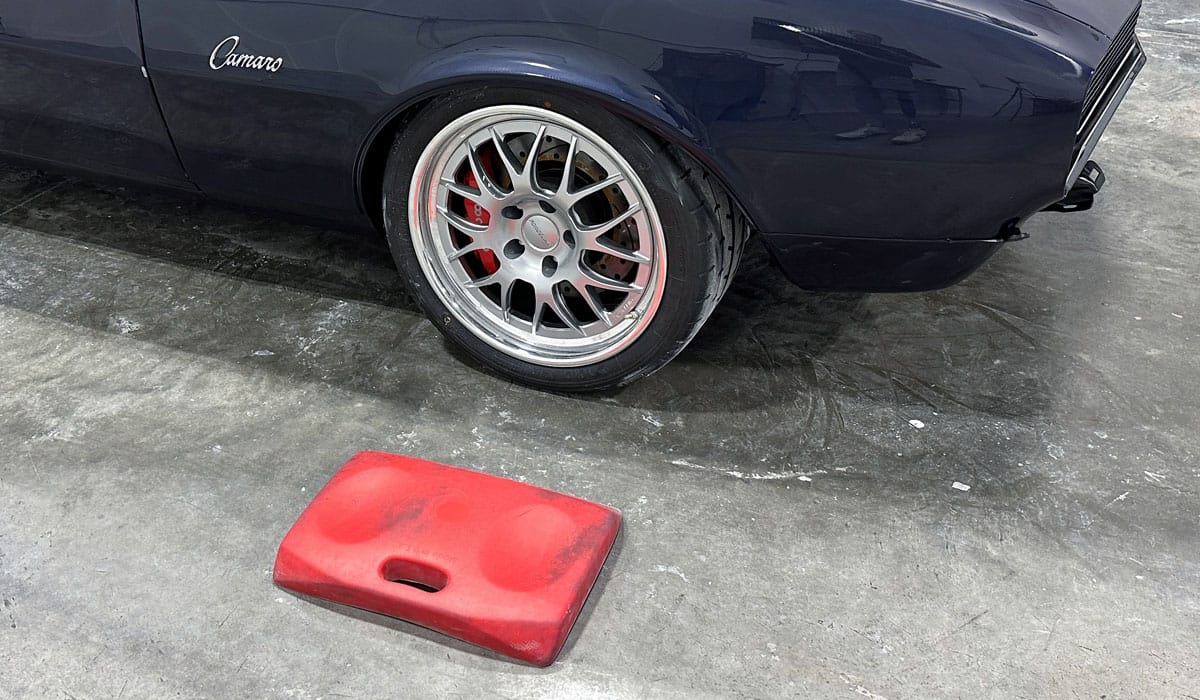
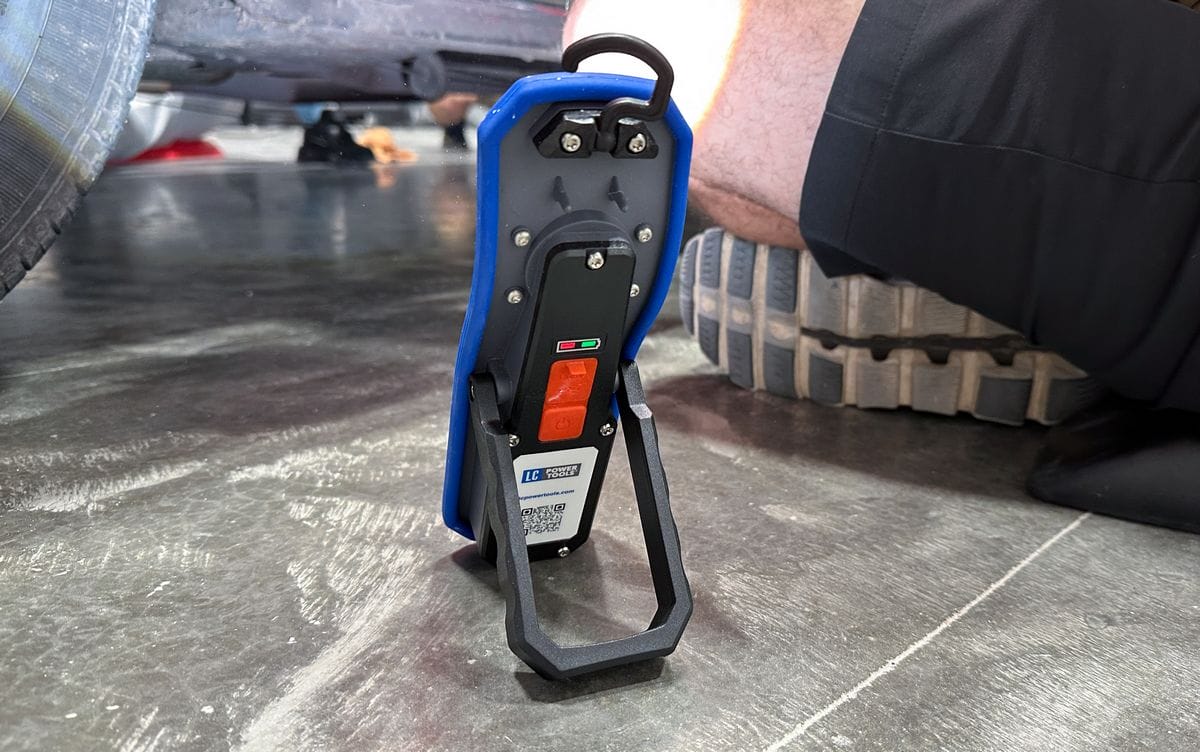
33. Knee & Back Cushion – or – Butt Cushion
It’s never fun or comfortable sitting on a hard surface while doing work to the lower portions of the cars, like wheels and tires. We use these for the washing process when cleaning the wheels and tires and not only do they provide plenty of cushion, but they also keep your pants from getting wet. The Knee & Back Cushion I show in the picture are a tick on the spendy side at $60.00 a piece but they are the best in my opinion and they don’t soak up water. Check out Knee N’ Back Pad by Bennette Design Group on Amazon.
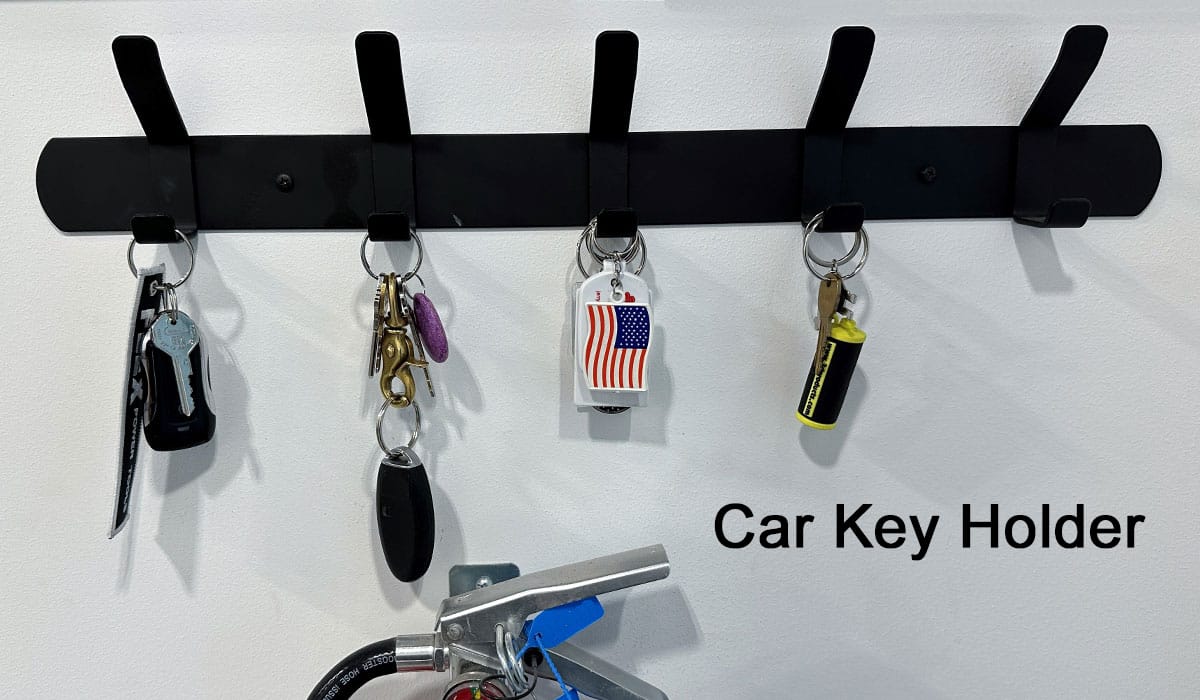
34. Car Key Holder
Might not be the most important thing for some classes, but for my classes, I tend to bring in a LOT of cars and I NEED a method to the madness to organize and hold all the various car keys. Nothing slows a class down like a set of missing car keys when you need to move the car out in order to bring the next car in.
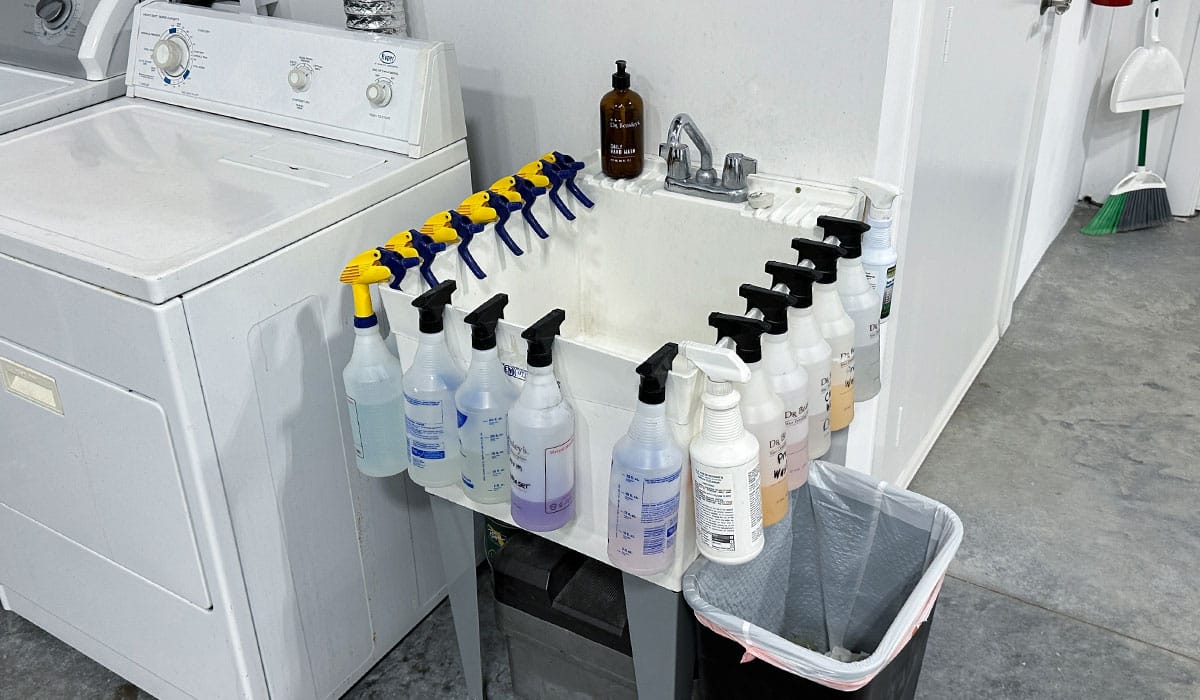
35. Slop Sink
Not a deal breaker, but certainly comes in handy for cleaning pads and clay bars while doing paintwork correction. Also a good place to wash your hands besides the bathroom, in case you get any product, grease or grime on your hands.
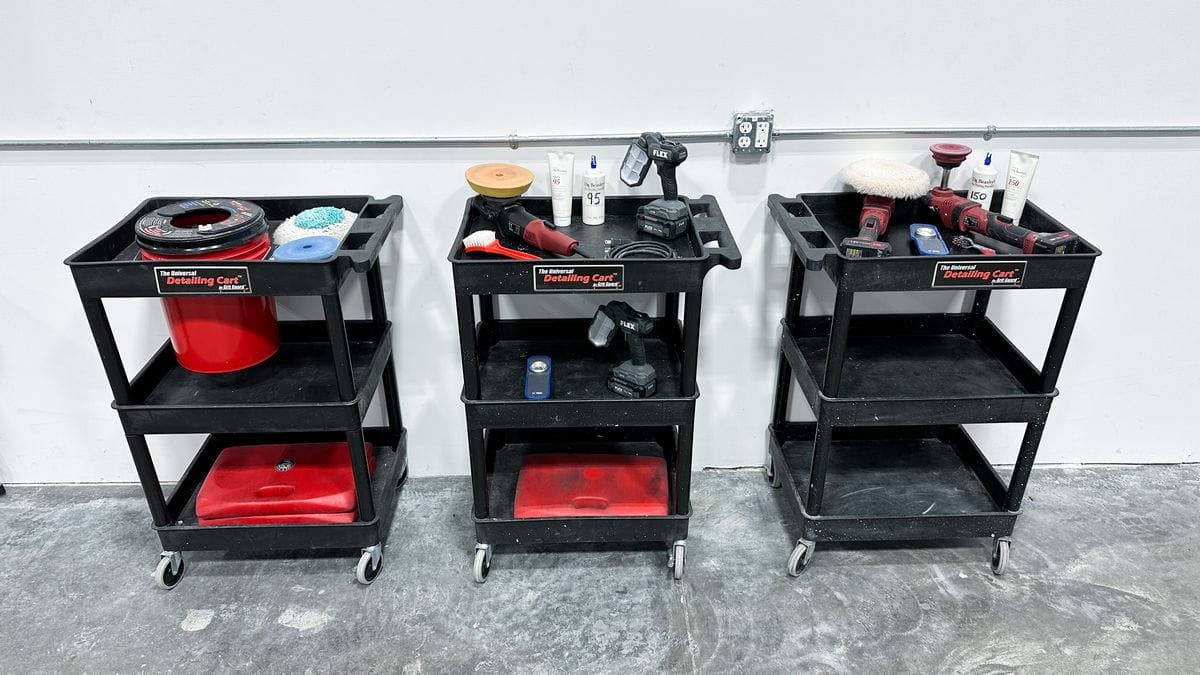
36. Rolling Car Wash Carts
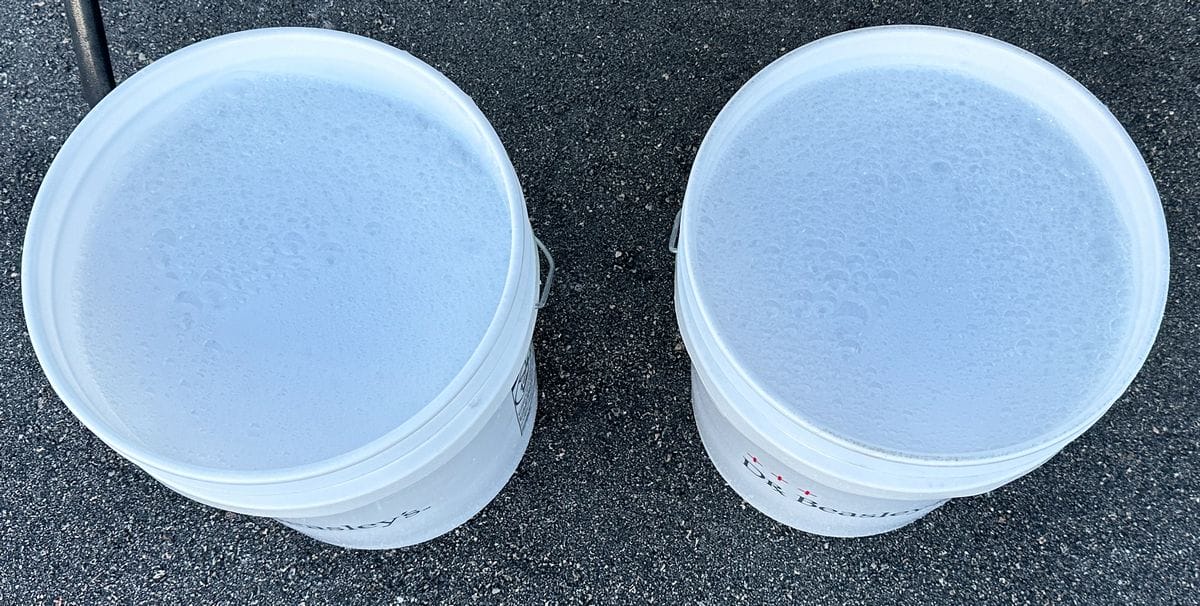
Personally, I always use the Grit Guard Universal Detailing Cart to hold my car wash buckets off the ground as this way neither my students nor myself have to bend over each time we need to dunk our wash mitt in the soapy car wash solution. Plus you can push it around the car as needed and it also works great for holding tools and products.
37. Quality Water/Garden Hose
Like the old saying goes, buy once, cry once. For locally sourced water or garden hoses, I like the Continental 25’ water hoses, usually available at Home Depot or Amazon. I like the 25’ hose because they are easier to handle and roll-up and then store. If I need a 50’ or longer I can always connect multiple hoses.
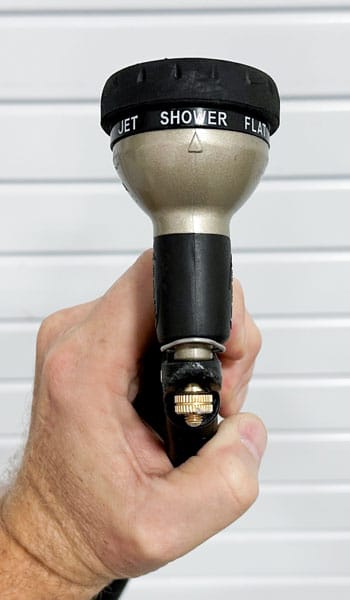
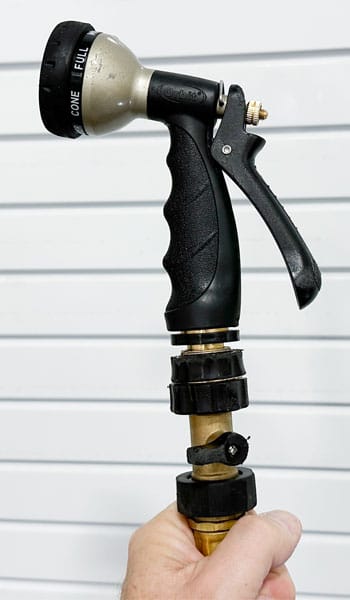
38. Quality Water Sprayers and Quick Disconnects
These types of accessories make washing and wet wash engine detailing much easier. At most of your local hardware stores, in the garden section, you can find the water connectors, shut-off valve and Orbit Brand Water Sprayer. What I like about the water sprayer you see in the picture is it offers me the two most important spray settings, Jet, and Shower. When not using a pressure washer for engine cleaning, I teach the class how to use degreasers and brushes with some elbow grease to first scrub the engine and engine compartment and then use the SHOWER setting to gently rinse down the engine compartment. I don’t teach BLASTING possibly sensitive electronics or sensors in the engine compartment using the JET setting. I do like the Jet setting blasting various areas on a car both pre-wash and for rinsing.
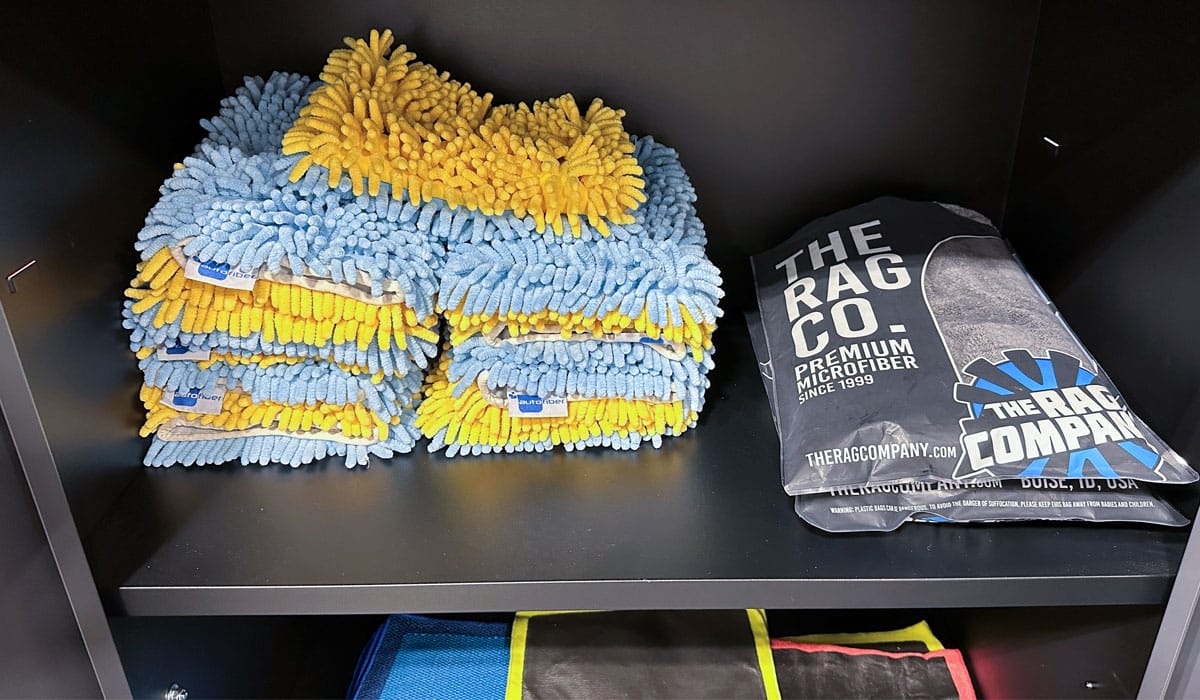
39. Quality Wash Mitts and Premium Quality Drying Towels
I’m kind of picky about my wash mitts. I prefer the Chenille Microfiber Wash Mitts not so much for how they wash the car but because when I wash them in my top loading, old school washing machine, I can trust the agitator that goes nuts and the loose design of the hundreds of microfiber fingers will come out clean and uncontaminated. There are a lot of great options for drying towels and chamois, I like the Gauntlet from The Rag Company but find what works for you.
40. Clay Substitutes – Clay Towels
I believe from experience, the most effective way to mechanically decontaminate car paint is to use an aggressive clay bar like the options sold by Meguiar’s and 3M. That said, I also like to knock-out the mechanical decontamination step during the wet work, in other words, when I’m or my class is washing a car.
There are a lot of great options, but I recommend picking clay towels from respected and established brands.
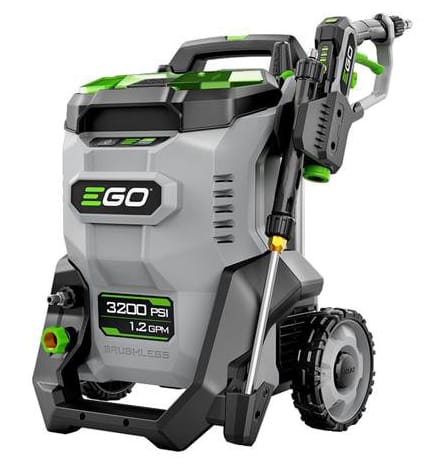
41. Pressure Washer
Once you use a pressure washer to wash a car, clean the wheels, clean the engine compartment, you’ll never want to be without one.
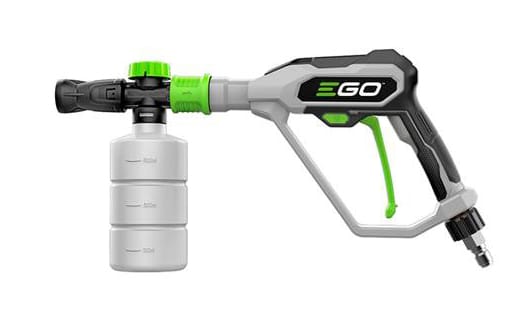
42. Foam Cannon
Besides that cool look when you see a car completely covered in a thick layer of foam, the real benefits are more dwell time for the cleaning agents and more lubrication when moving a wash mitt over scratch-sensitive paint.
43. First Aid Kit
Hope for the best but expect the worst. Having a good general purpose First Aid Kit ensures you have the basics in case of any accidents. It’s also a good idea to have the phone numbers for the Fire Department, Sheriff, and City Police
44. Class Food
While I like to provide some food for breakfast and lunch, my priority is not to feed people but teach people. So I keep the food SIMPLE. First rule – all food must be hand-held. No food that requires forks, spoons, or knives. Use your hand to pick up the food and push it into your mouth. Chew chew chew, drink some water, done.
45. Misc Supplies
Besides all of the above, here’s some other items you’ll want to make sure you have plenty of stock on hand.
Paper towels
Paper plates
Garbage cans and trash bags
Keurig Coffee Pods
I’m sure I’m forgetting a few things, but the above is a good basic inventory for teaching a quality, 5-Star hands-on car detailing class.
Final Thoughts
Taking on the responsibility to teach a car detailing class is admirable. It’s also a lot of hard work and responsibility.
Besides all of the above, the most important thing you need to teach a quality class is patience. When holding a class, you’ll get a lot of different personality types. Some people are quick learners and have lots of experience. Others attending your class may be just starting out and have virtually zero experience. Some people tend to be slow learners and require extra attention and hand-holding as you work through the various tools and techniques.
Most of us don’t have a lot of patience naturally, we, including me, have to learn to have patience via practice. Always remember, when teaching a car detailing class, you’re not only representing your company or the company you work for, but you’re also representing yourself and the professional detailing industry in general.
Be slow to anger. Always smile when talking and/or answering questions. If you don’t have the answer, admit it but also say you’ll do your best to get the answer. Always be on the lookout for other’s safety. And learn to read the room, monitor, and cater to your students’ needs. If you see a person holding a polisher and looking confused, help them find a place on one of the cars to work, get them anything they need, like the right products, pads, power cord, swirl finder light, personal protective equipment. Be proactive from the start of day to the end of the day.
After a few classes, everything will start to fall into place and flow when teaching future classes. One of the best things about teaching car detailing classes is the rewarding experience of knowing your helping others to take care of their own cars while helping others to work more efficiently while increasing their profits.
Need Help? Get In Touch With Me!
I’ve been answering car detailing questions professionally since 2002 and moving forward, if after reading this article you have any questions about polishing and waxing, or how to use an AIO, my contact information is below, reach out to me, I’m always happy to help.
Would You Like to Learn How to Machine Polish Like a Pro?
- Would you like to take your detailing skills to a higher level?
- Do you find you learn better by doing versus sitting in a chair looking at a PowerPoint presentation about car detailing?
Here at Dr. Beasley’s O.R., (Operating Room), in sunny Stuart, Florida, we teach the most hands-on car and boat detailing classes on planet Earth. And we prove it too. You can find write-ups on the Dr. Beasley’s Blog that photo-documents just how hands-on our classes are plus you’ll see the kinds of cars and boats you’ll be training on.
Click the link below to find the dates, locations, topics, and prices for all upcoming detailing classes.
Upcoming Detailing Classes – Prices – Info – Topics – Locations
And if you ever have any questions, always feel free to reach out to me personally via text, phone call or email.
I hope to see you in a future detailing class!
Sincerely,
Mike Phillips
Chief Education Officer for Dr. Beasley’s
Mike@drbeasleys.com
760-515-0444
Questions? Comments?
Email Us