


Last year I wrote a detailed guide on how to teach a car detailing class. You may think teaching a boat detailing class would be the same, just with boats. In fact, teaching others how to detail a boat is very different than teaching others how to detail a car.
In this article I’ll teach you how to teach a boat detailing class by showing you what a Mike Phillips Extreme Boat Detailing Class looks like. As we walk through the process, I’ll share how I teach each topic or technique.
Choosing the Right Boat for Training
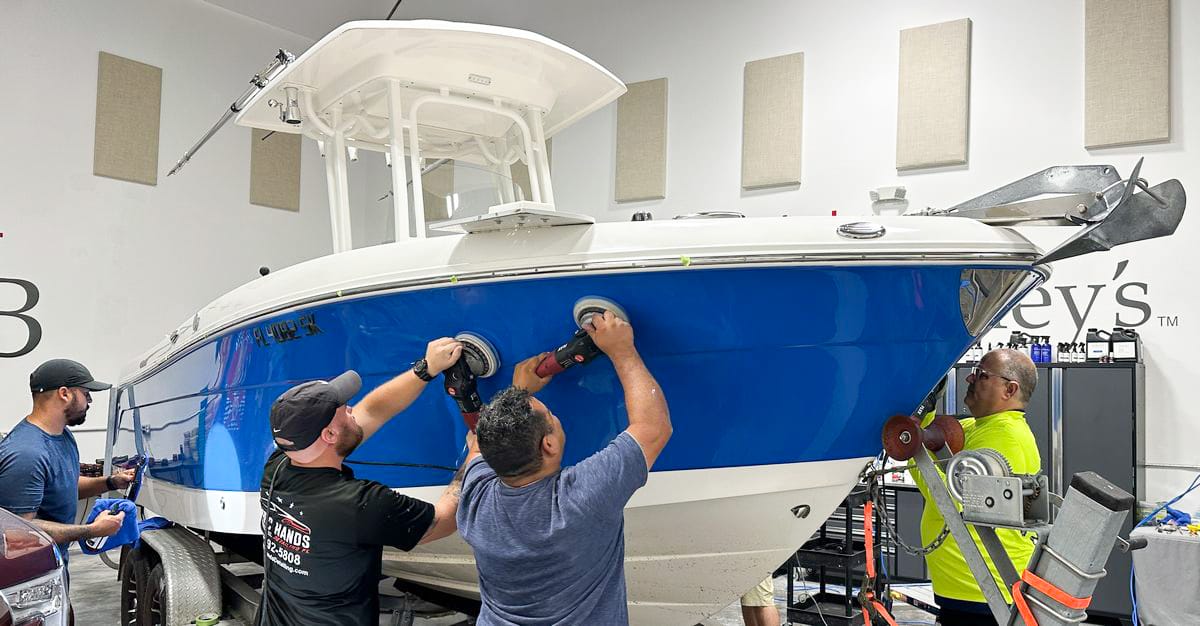
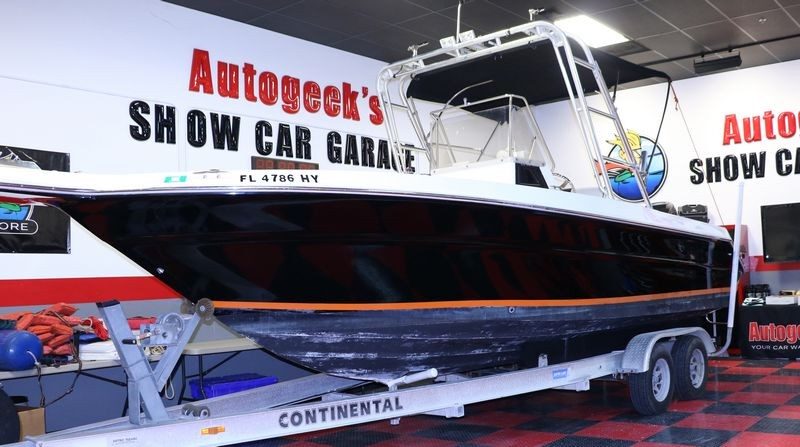
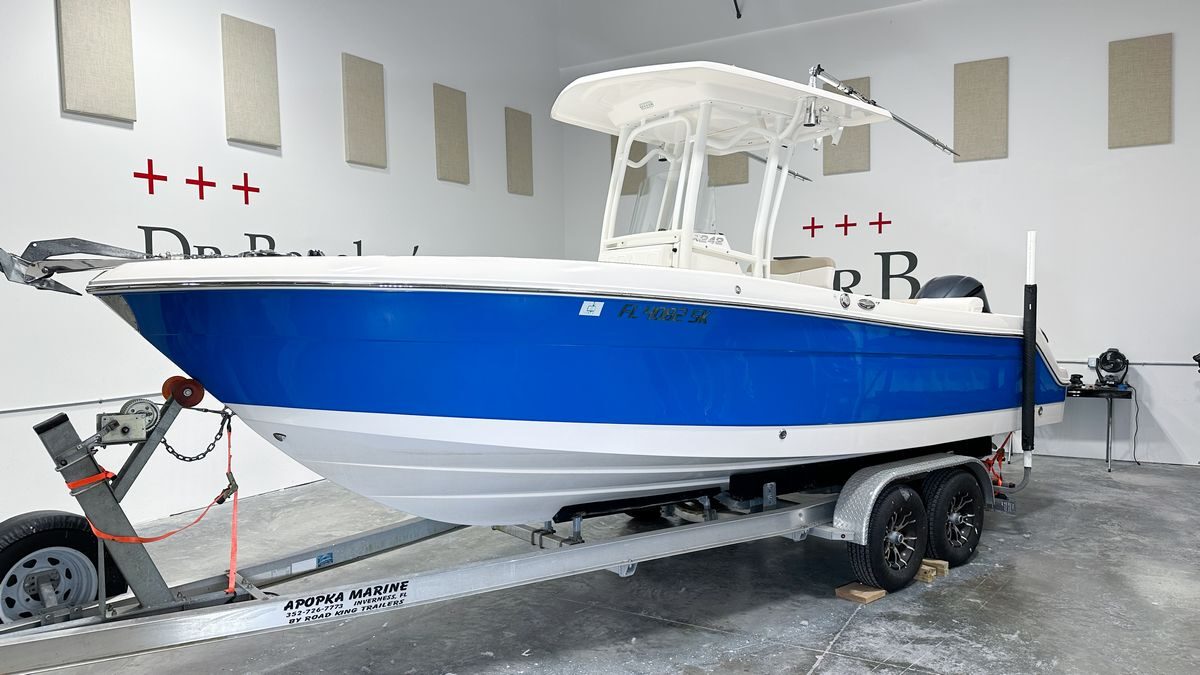
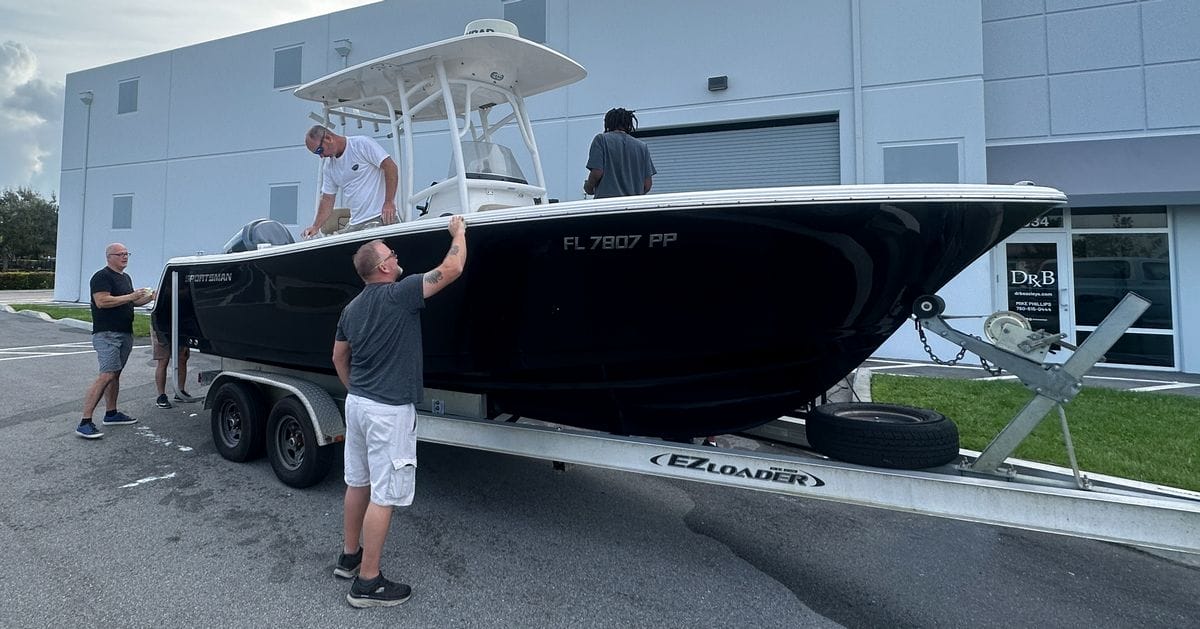
For my classes, here’s what I’m looking for in a boat in order to teach the MOST techniques: a large, center console boat with tall hull sides.
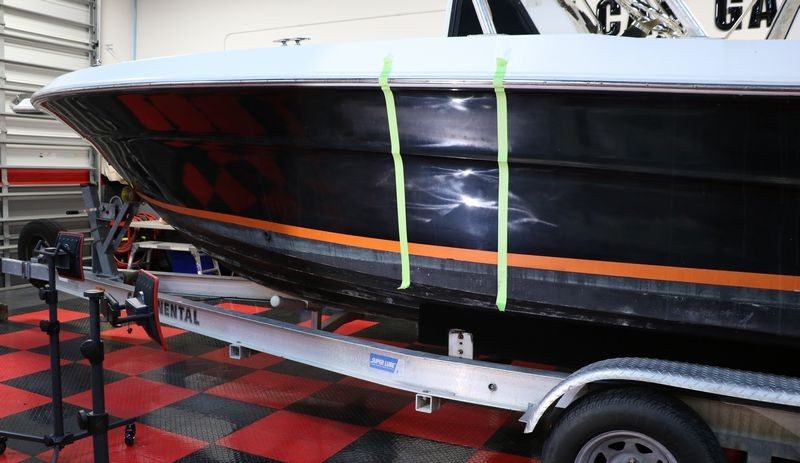
The gelcoat MUST be a black or dark in color and the boat needs to be neglected to the point the gelcoat has turned white with oxidation.
Why?
Great question. The goal of any boat training class is to teach others how to go from neglected to respected using the most efficient tools, products, and pads. It’s important that the students get plenty of hands-on time working through the process to build confidence in their knowledge base and skill set so when they leave the class, they know what to do and what not to do.
The color and condition of the hull is important for 3 reasons.
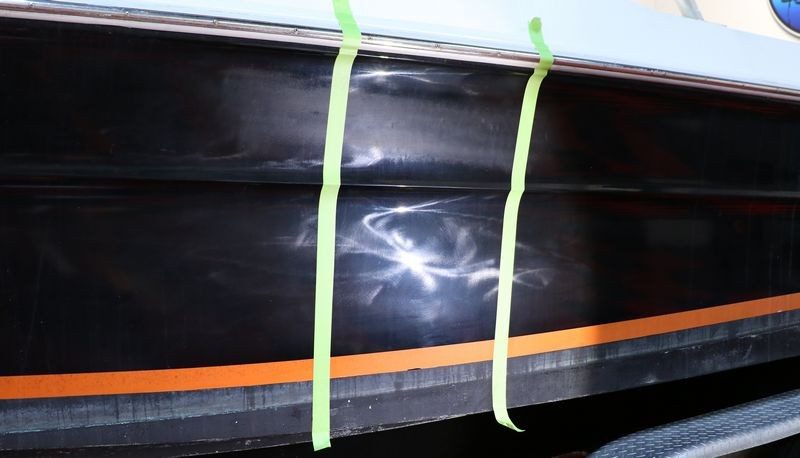
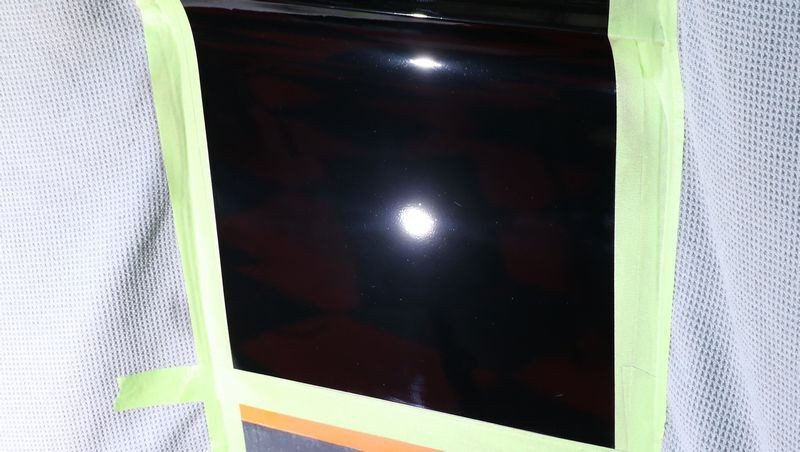
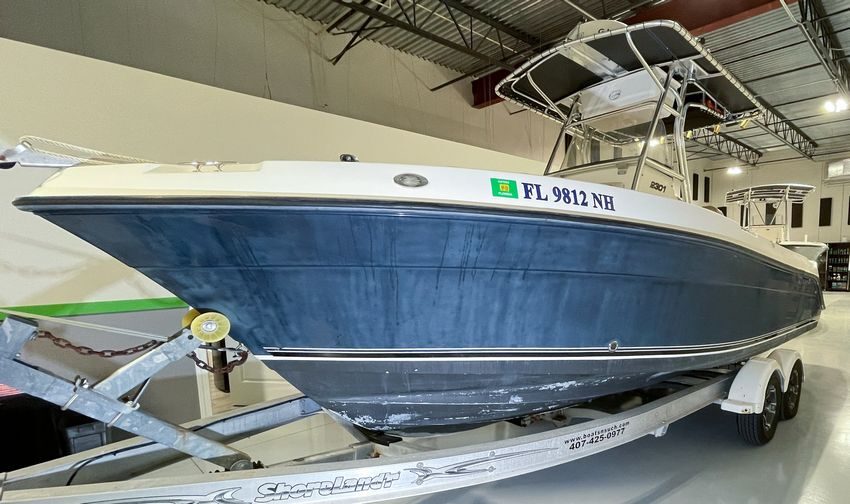
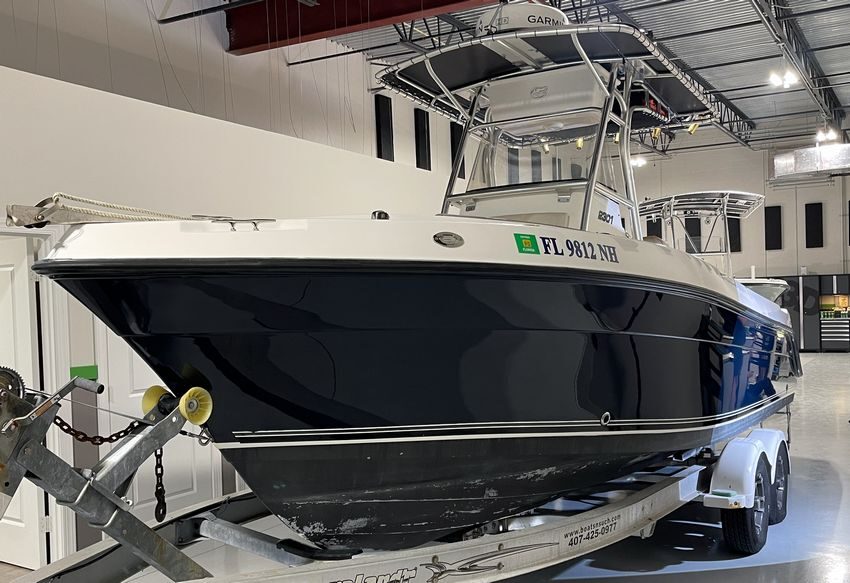
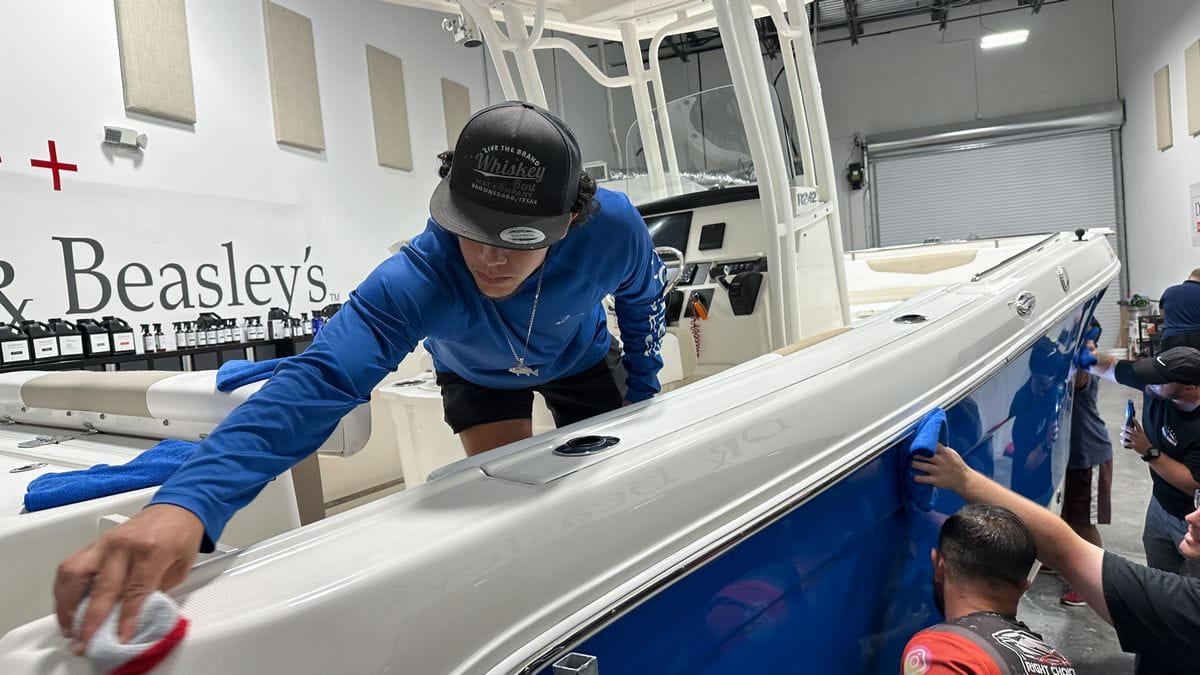
1. Impact on the Students: A dark colored hull in horrible condition makes for a very dramatic VISUAL before and after difference. This has what I call IMPACT on each person. Simply meaning, they can SEE the before and after difference from the work they performed. With a white or light colored boat hull, sure the students can see the before and after difference, it’s just that there is a LOT less dramatic before and after difference and thus LESS IMPACT on the student.
2. Impact via Before and After Pictures: With a severely neglected dark-colored hull, it’s a lot easier to capture before and after differences with pictures. This is important for a number of reasons.
- Dramatic before and after pictures document the performance of any products, tools or pads you’re showcasing.
- Dramatic before and after pictures document the quality and caliber of the class you teach.
- Dramatic before and after pictures will help you to promote future classes, and/or your own boat detailing business.
3. Impact via Before and After Videos: A severely oxidized and neglected dark-colored hull works dramatically better to capture before and after differences via video. And of course, the same three reasons listed above for capturing before and after differences with pictures applies to capturing before and after differences via video.
With a white or light colored gelcoat boat, sure there’s a dramatic difference in the before and after results but in order to see it visually, you must LOOK HARDER than if training on a dark colored hull. And capturing the before and after difference with pictures and videos can be done, it’s just more difficult to capture and there’s a LOT less impact for everyone that sees the pictures of videos.
Because restoring a factory-new finish to a large, neglected center console boat is a LOT of work, you as the instructor and also the marketing person to promote future classes, you need to get the best bang for your buck and white and light colored hulls simply don’t come close compared to working on dark colored hulls.
Boats I’ve Used in Past Boat Detailing Classes
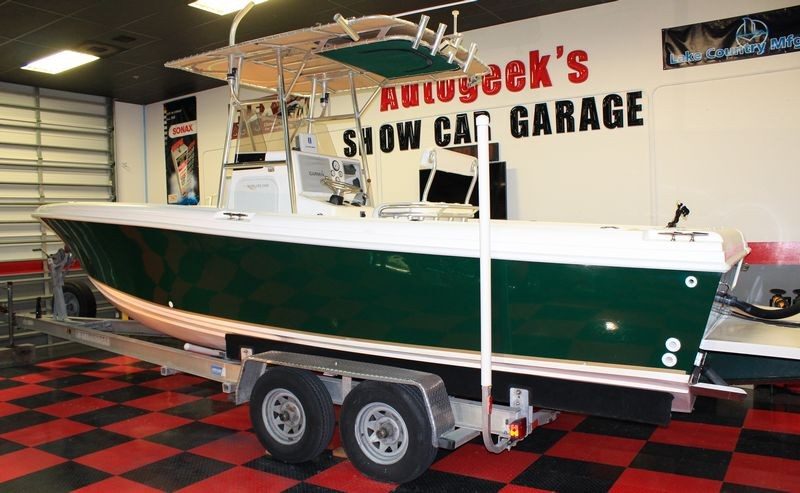
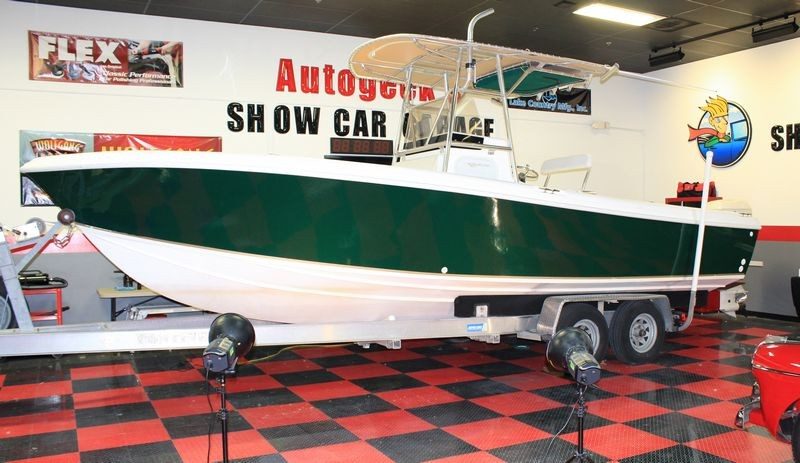
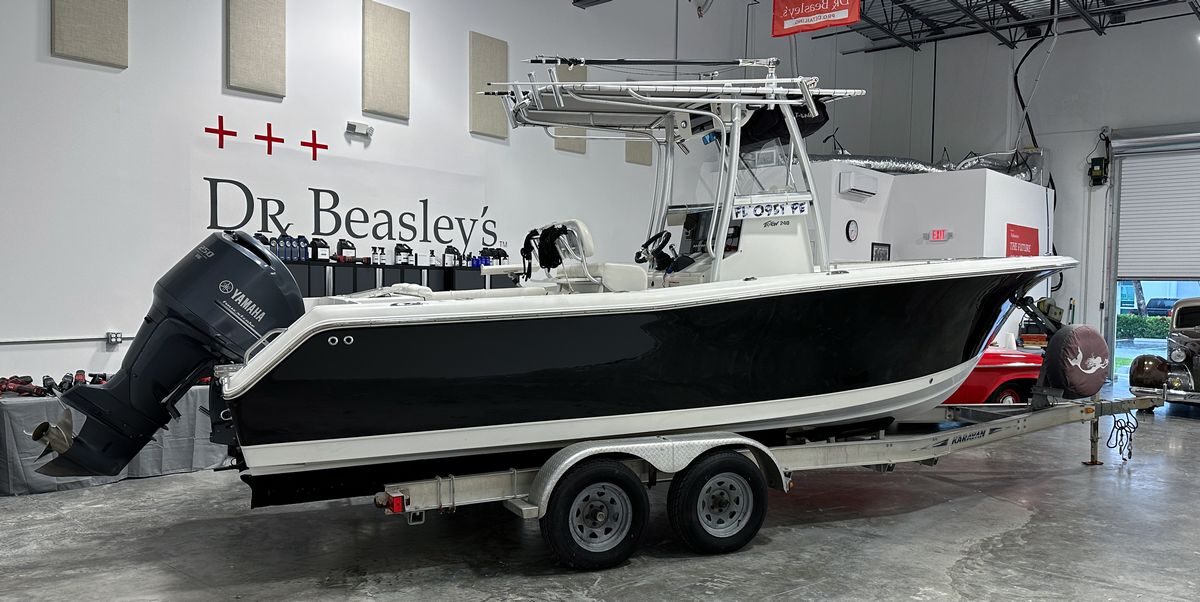
Here’s examples of the boats I have used for past classes since 2013 to the present. I’m sharing this because I want you to know and trust the person teaching the class. When researching any other boat detailing class, look to see if the person or company can photo-document their boat detailing class history.
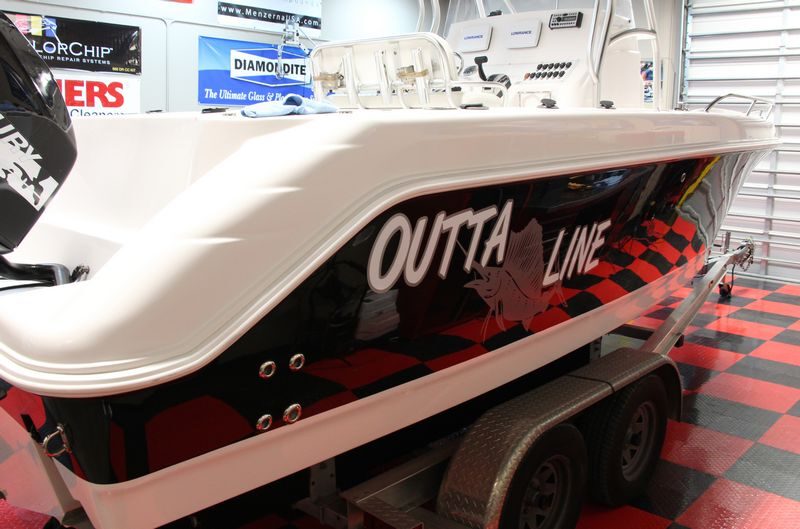
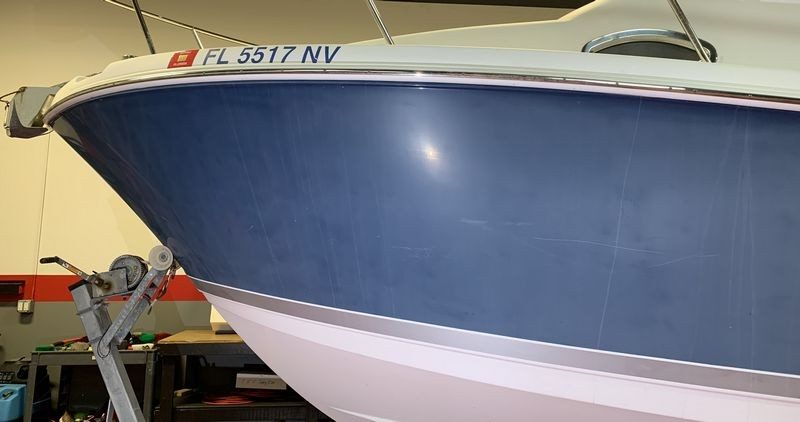
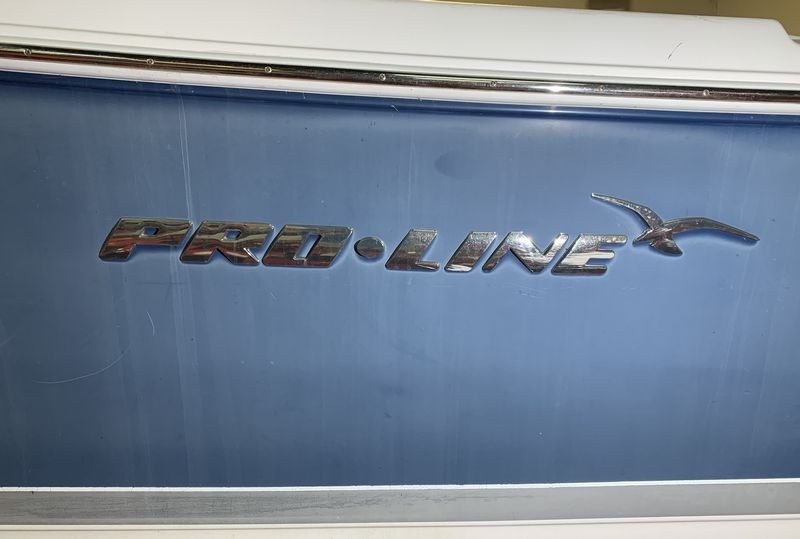
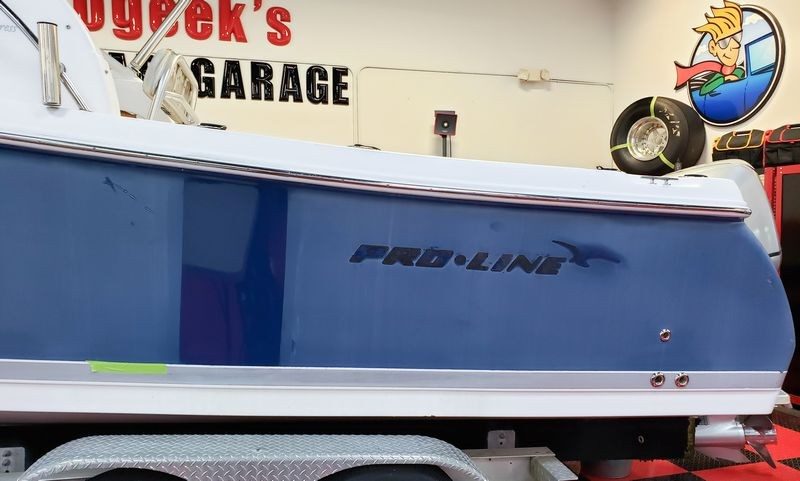
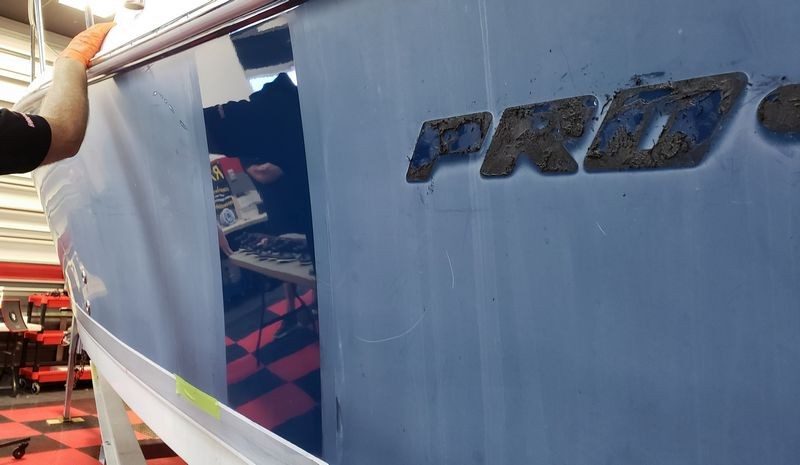
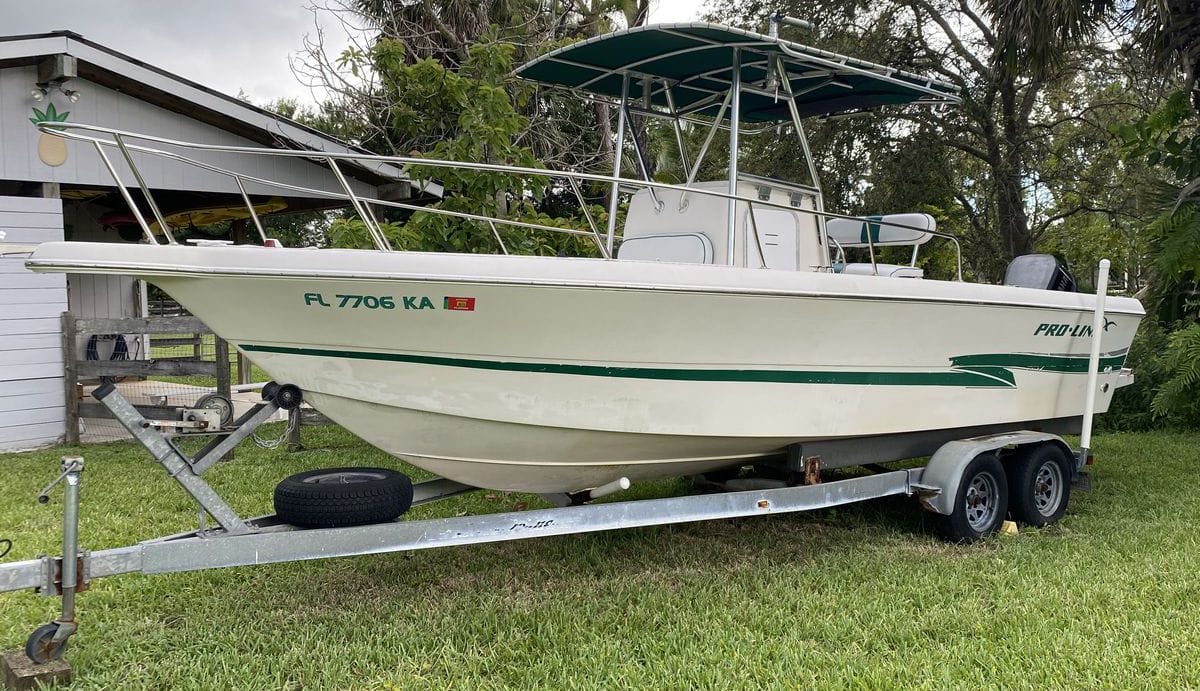
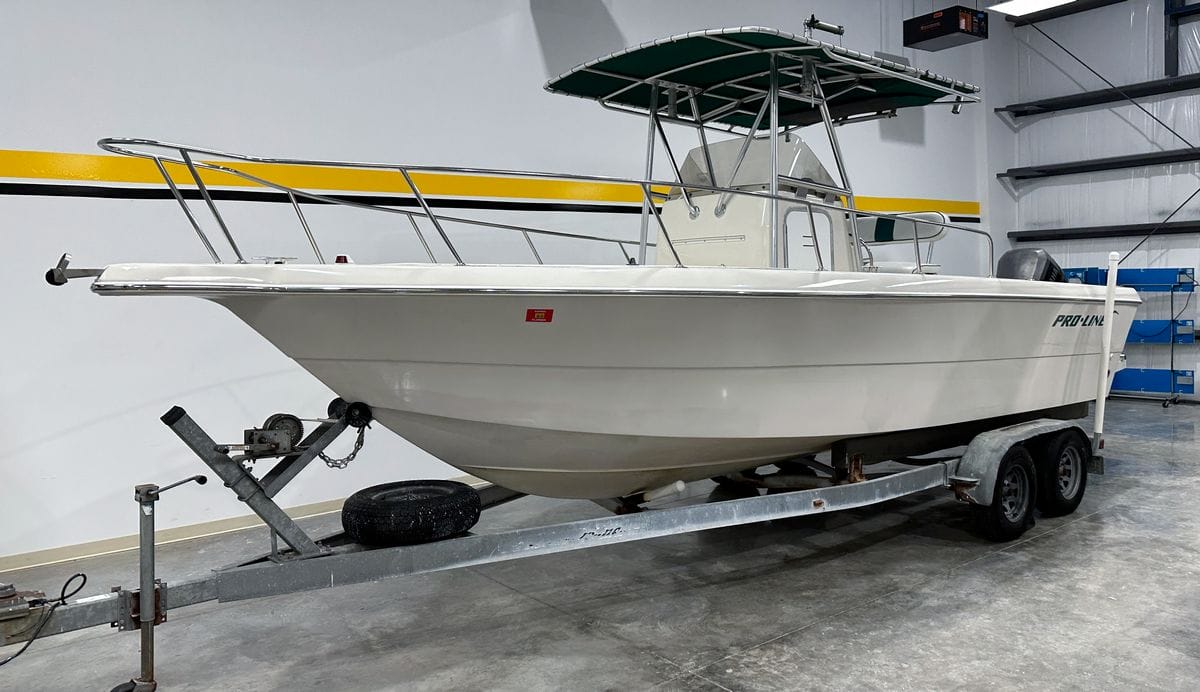
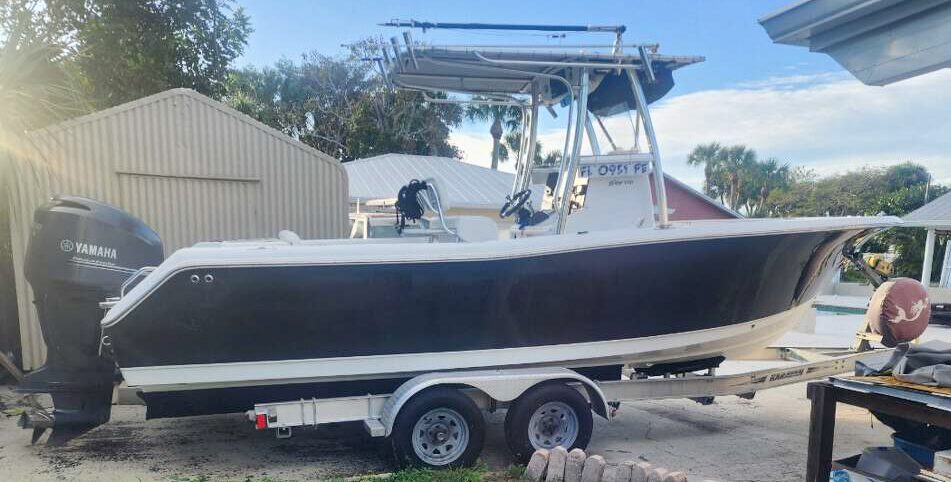
August 2013 Extreme Boat Detailing Class – 24’ Pro-Line Center Console
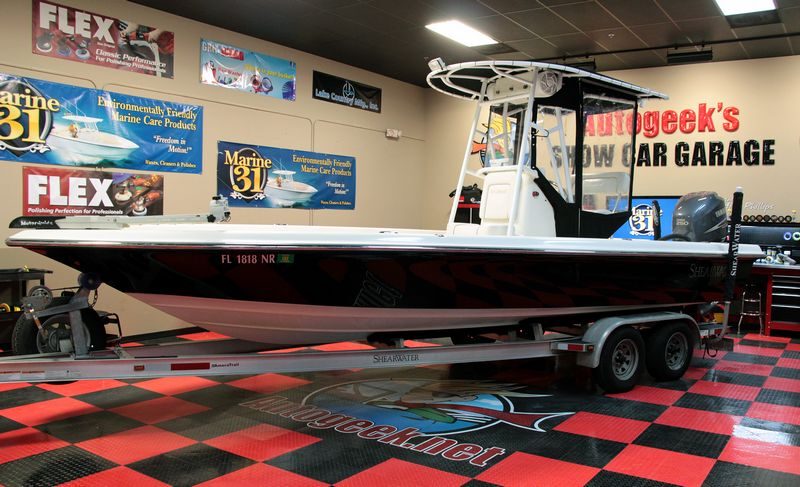
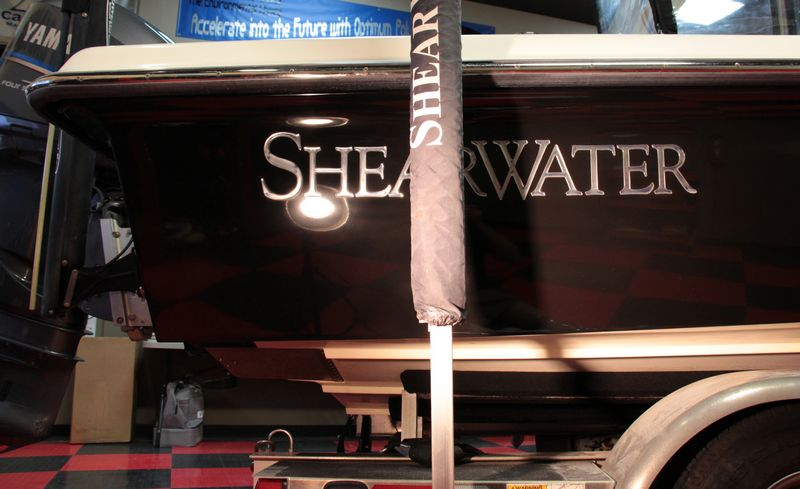
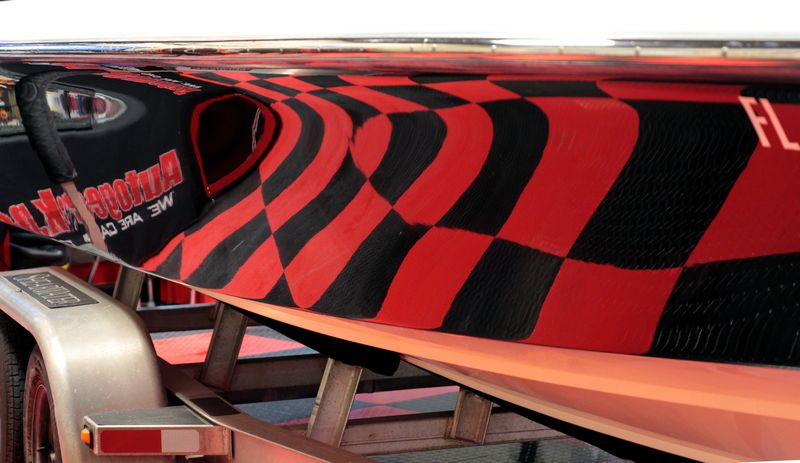
May 2014 Extreme Boat Detailing Class – 25′ ShearWater Center Console
This was the last class I taught where there was no sanding. All gelcoat restoration was performed using rotary and orbital polishers.
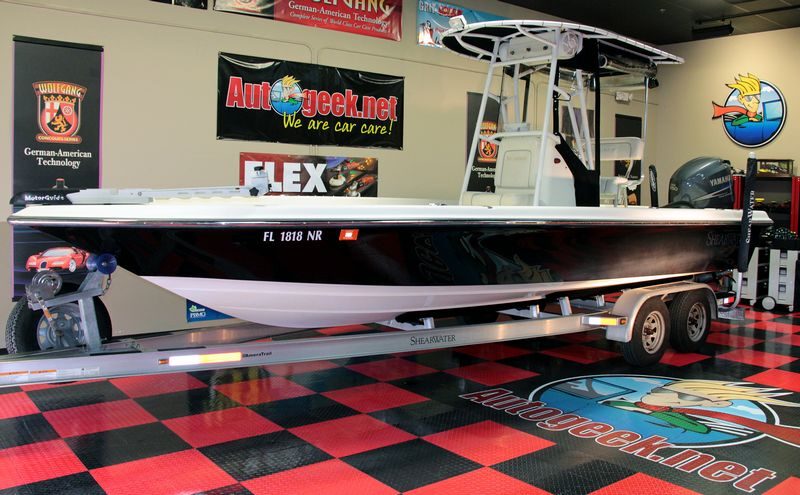
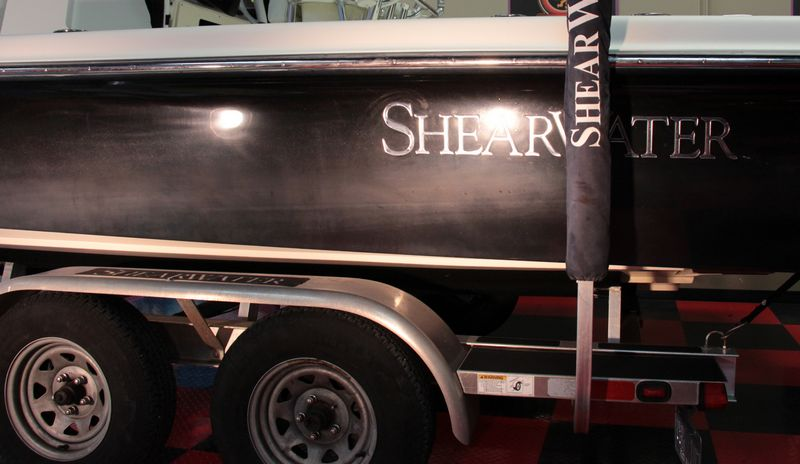
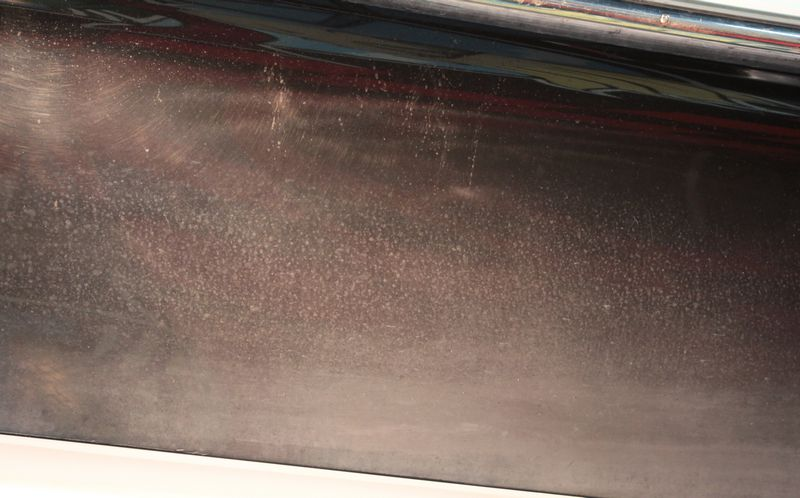
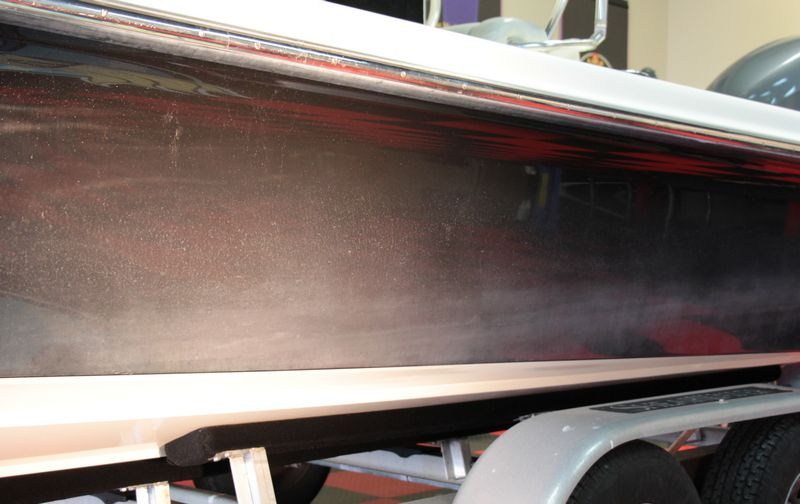
BEFORE

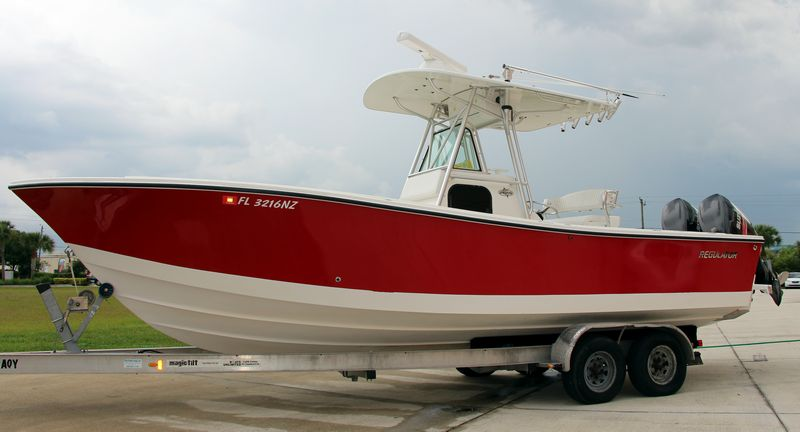
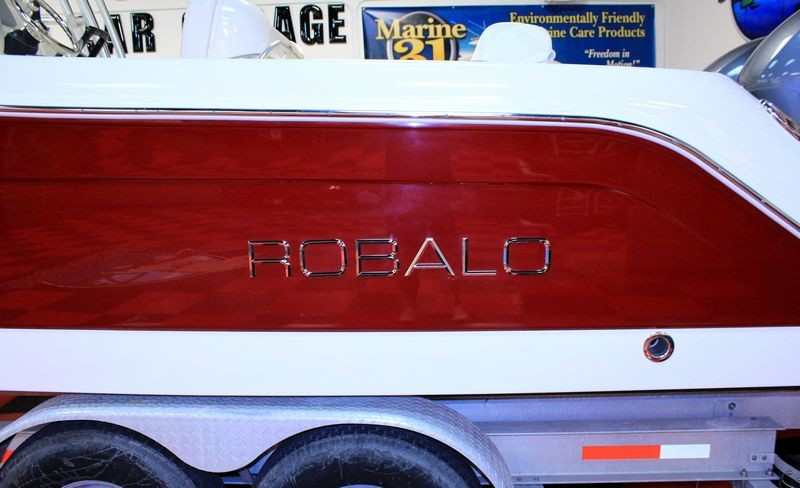
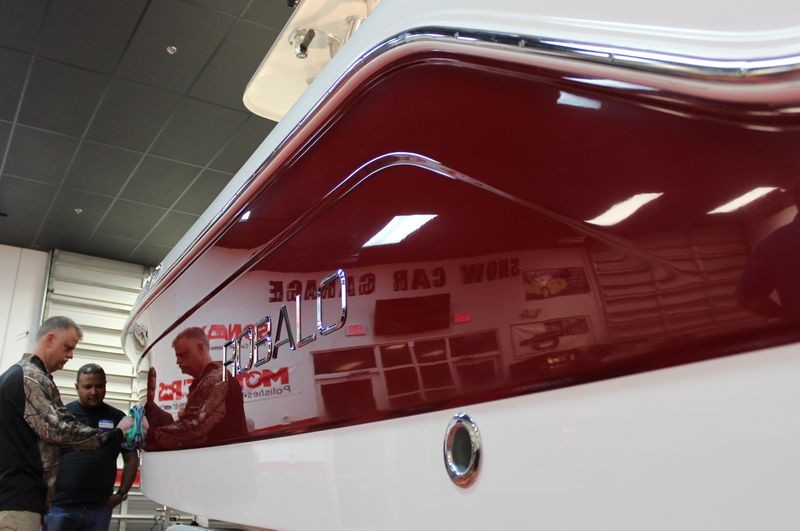
April 2015 – 2011 – 25′ Robalo Center Console

February 2017 – 25′ Bluewater Center Console
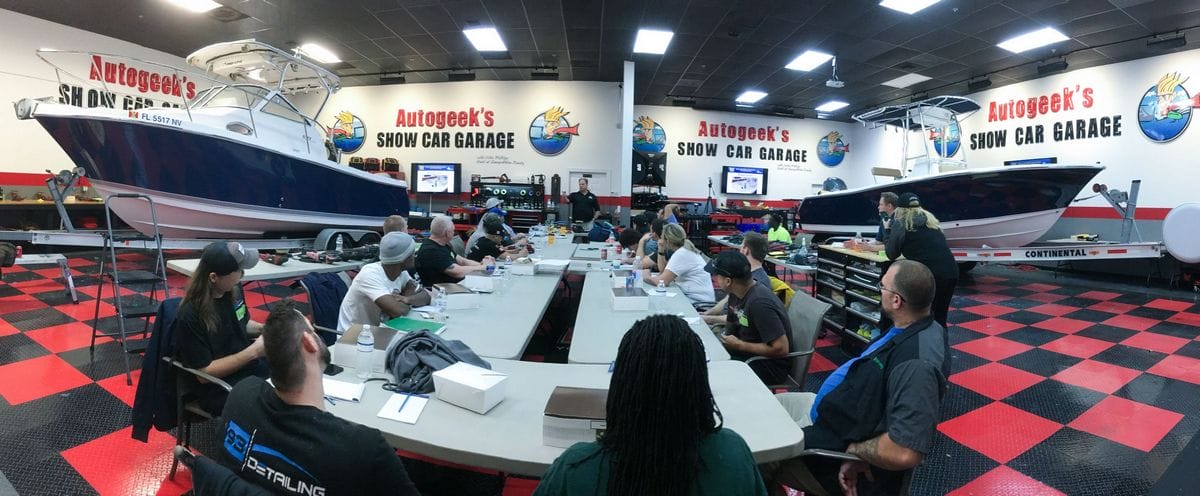
Chairs – Tables – PowerPoint
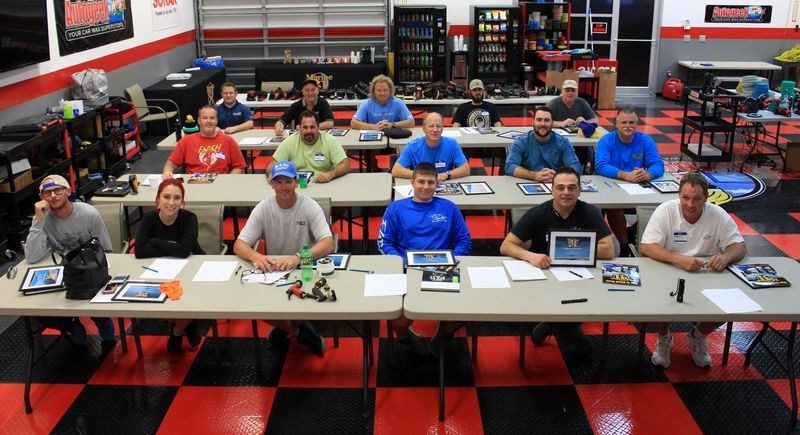
I used to teach classes that included comfy chairs, a table to rest your elbows on while we go through an exhaustive PowerPoint presentation. Since those days, I’ve quit using chairs, tables and PowerPoint presentations because I find the kind of people that are interested in learning both car and boat detailing learn by doing, versus sitting in a chair. Besides that, there’s too many techniques to cover during these classes and sitting around in chairs ends up wasting valuable hands-on training time.
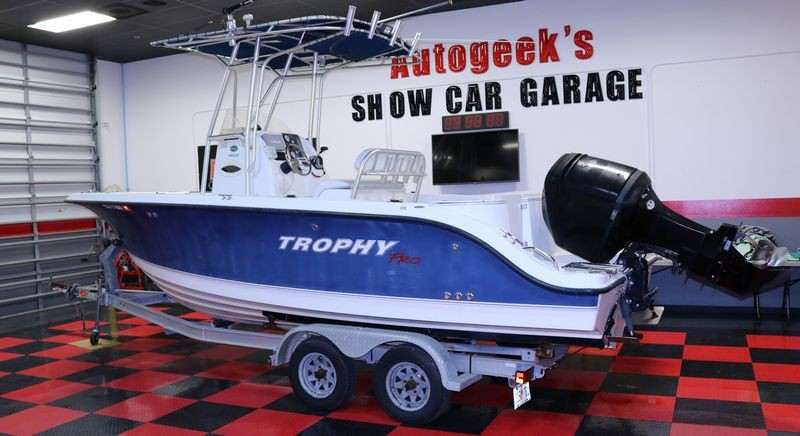
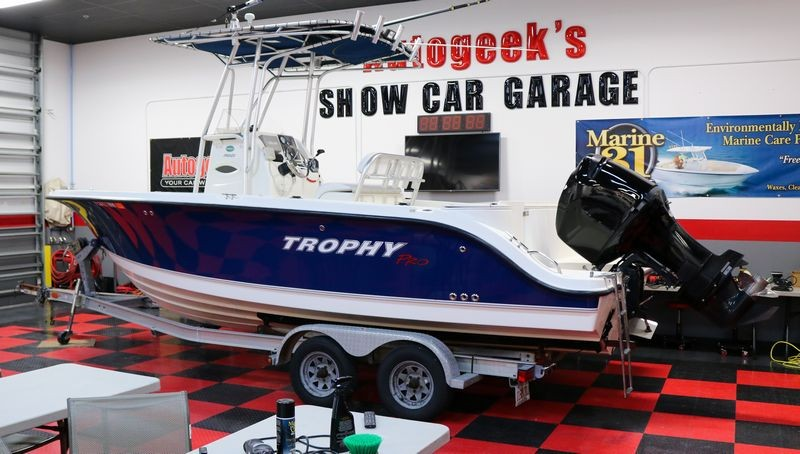
February 2018 – 21′ Trophy Center Console

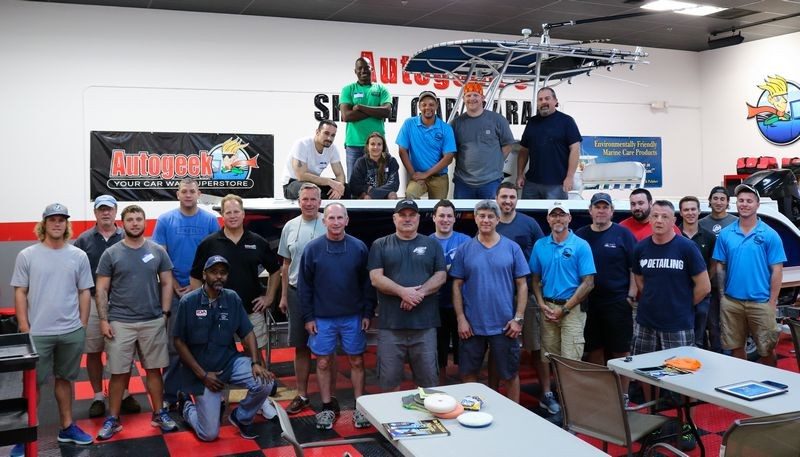
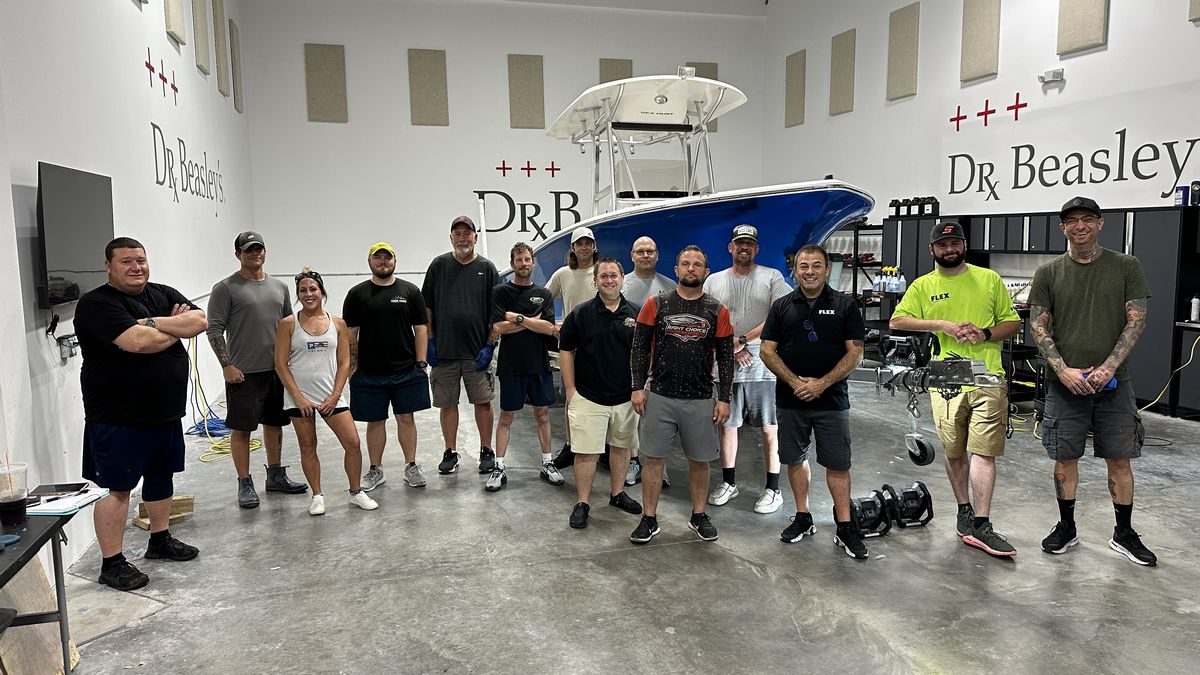
24 Students – 2 Boats – 2 Days
Just to note, when I have large classes, I simply bring in more boats. This way EVERYONE has plenty of real estate for hands-on training with all the tools and techniques.
February 2019 – 2 Boat Class – 26′ SeaRay and 24′ Edgewater Center Console


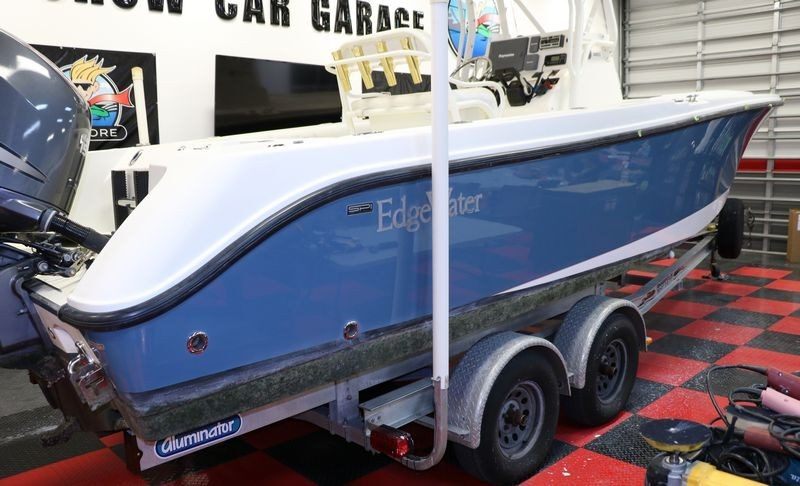
18 Students – 2- Boats – 2 Days
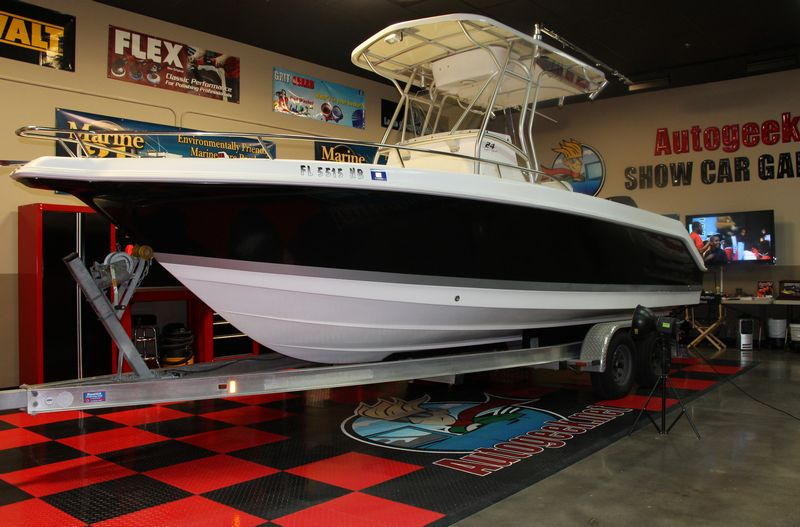
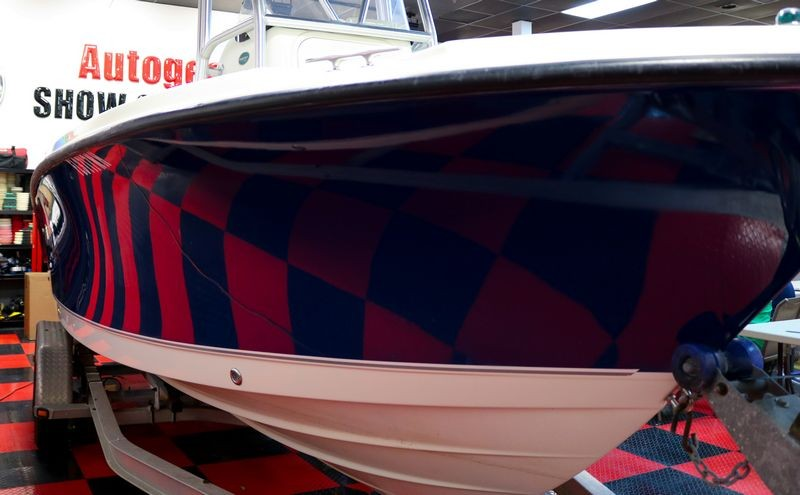
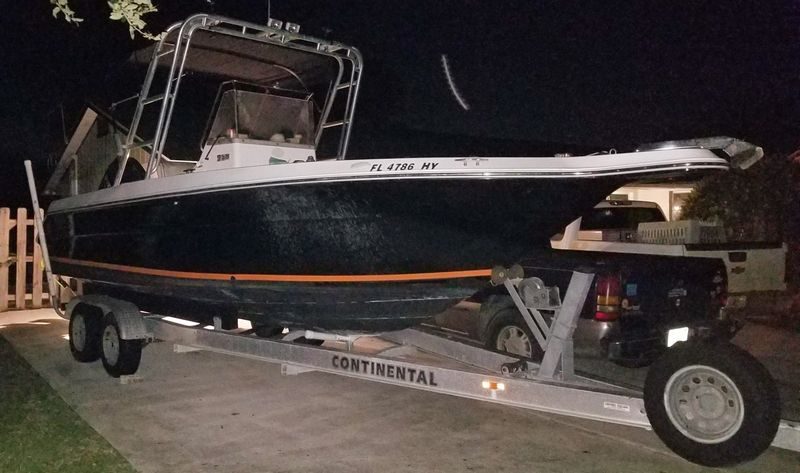
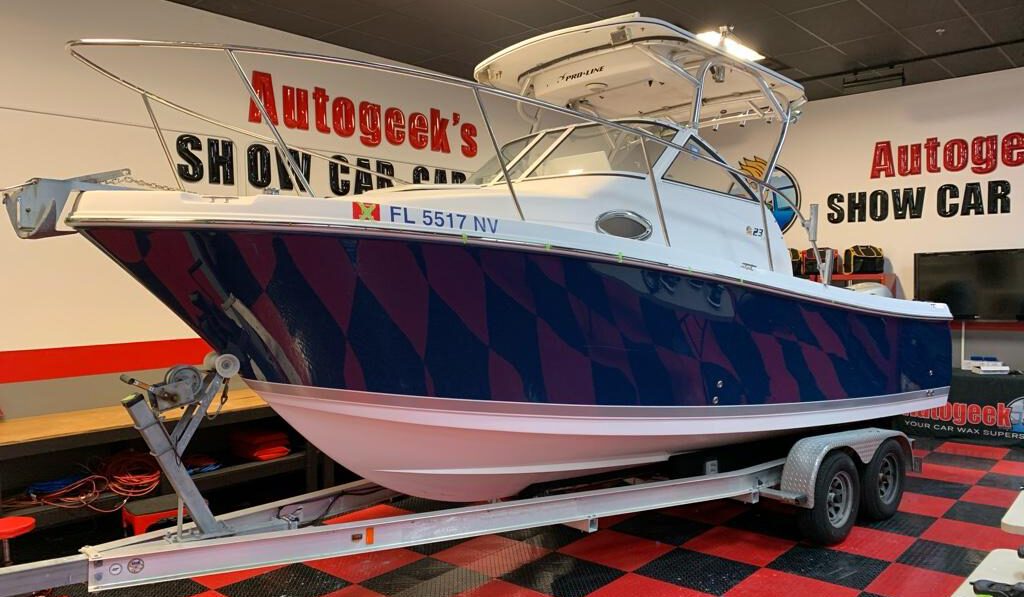
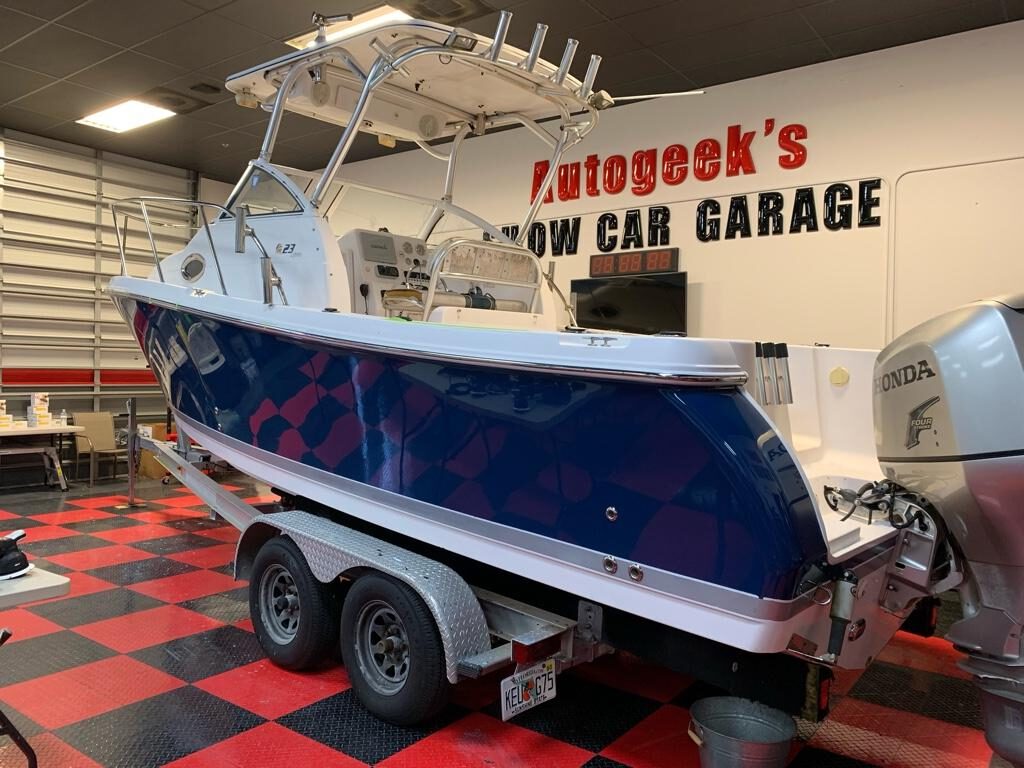
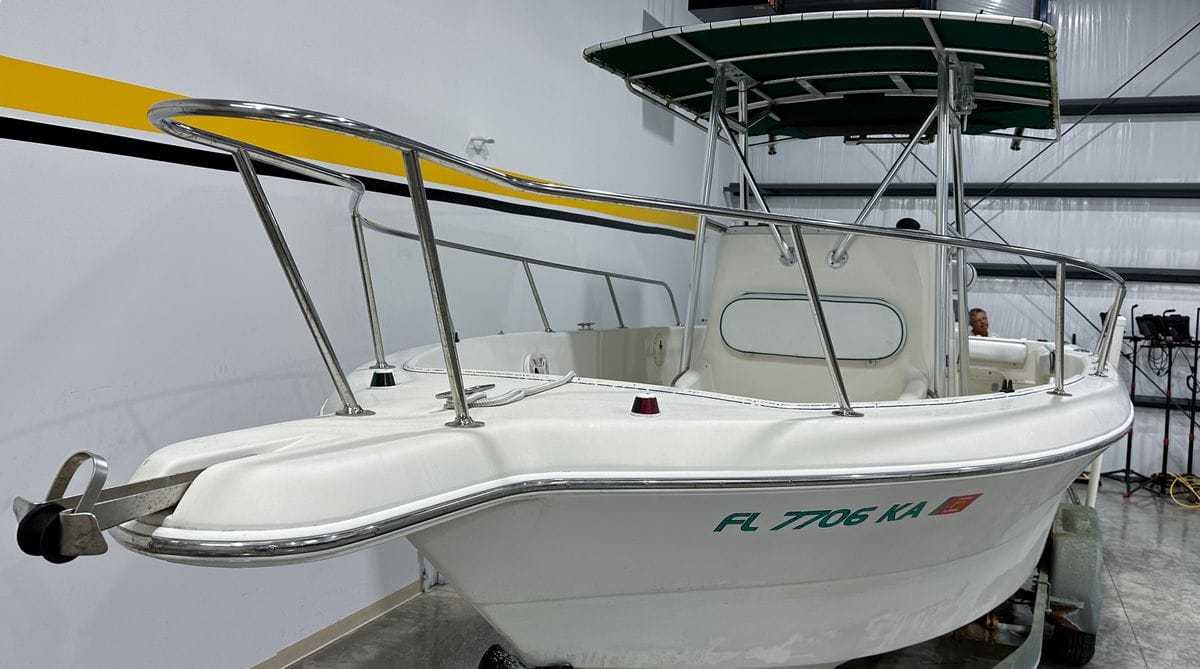
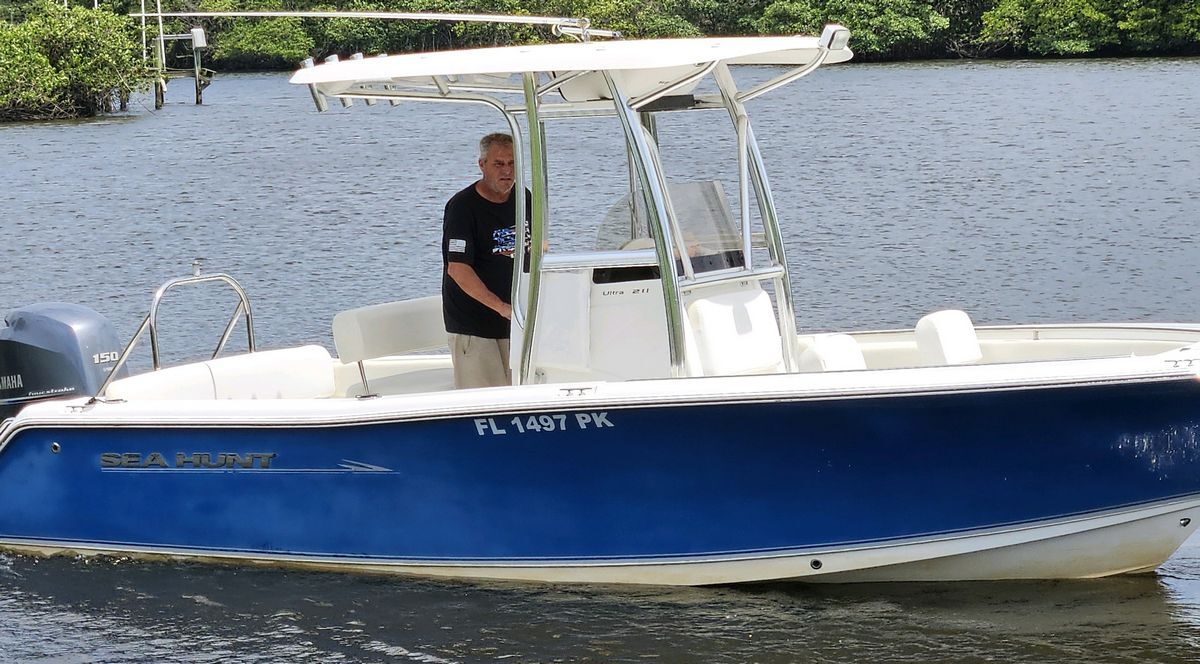
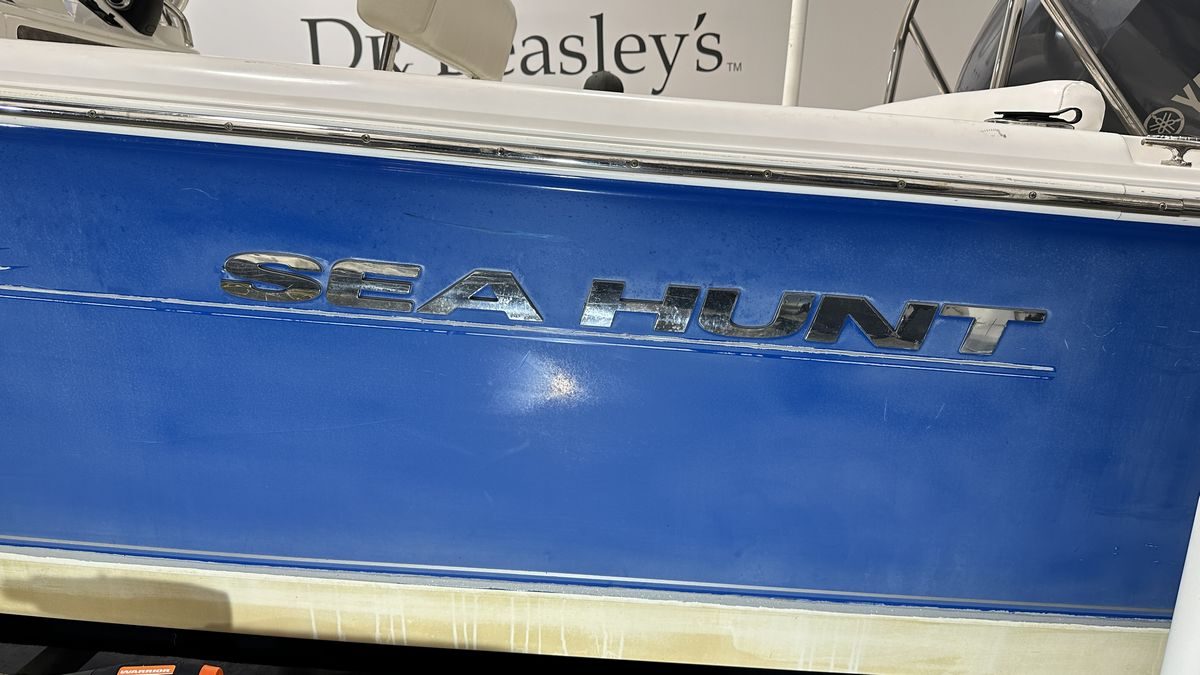
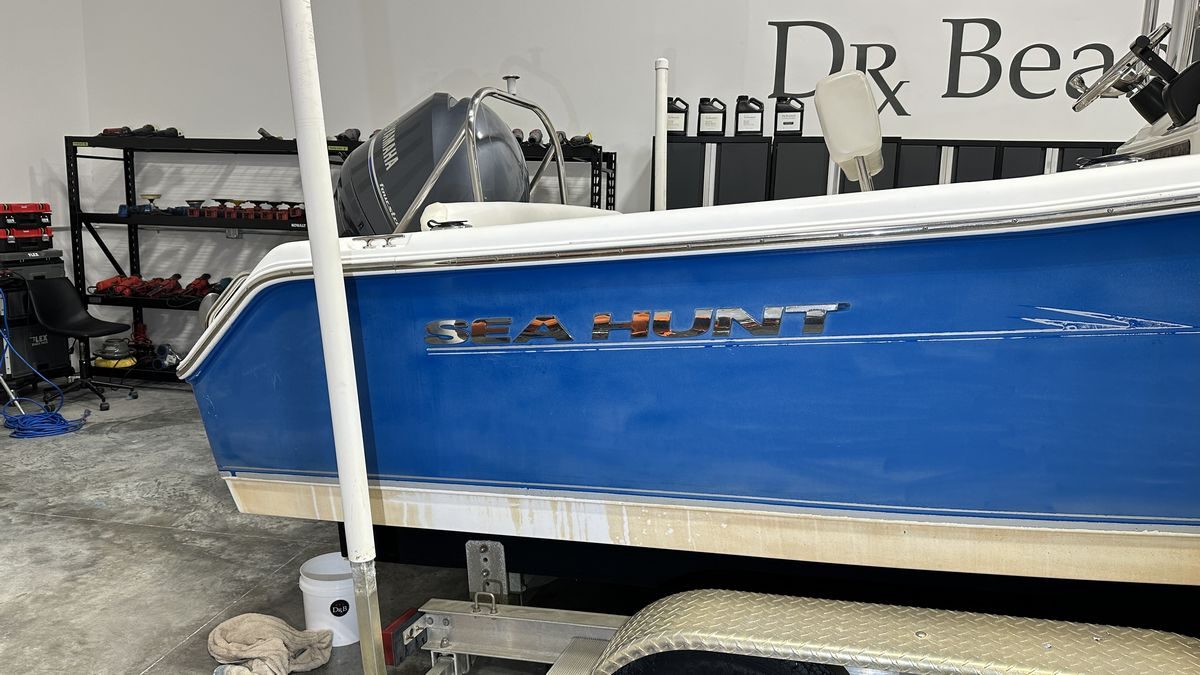
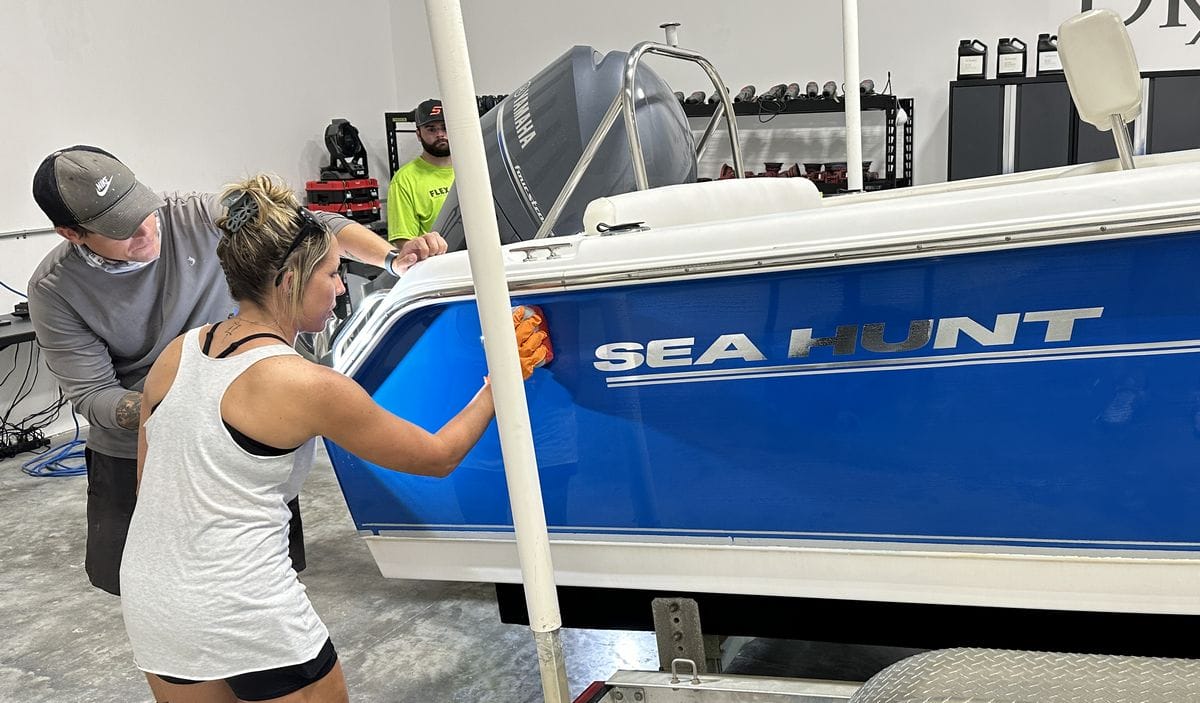
February 2020 – 2 Boat Class – 23′ Pro Line Walk Around & 21′ Sea Hunt Center Console
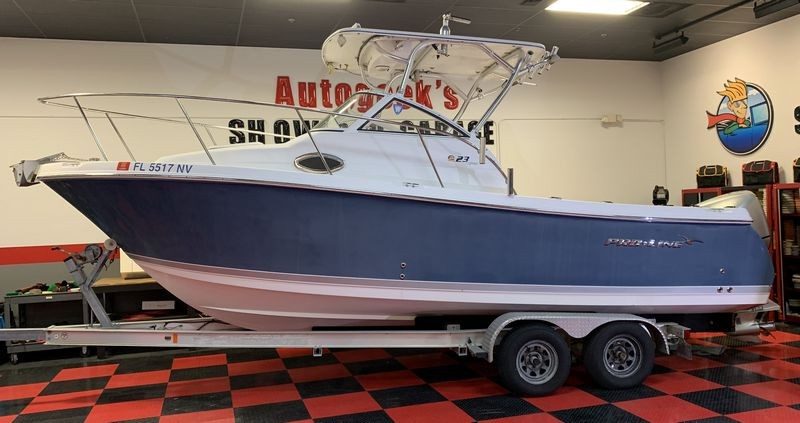
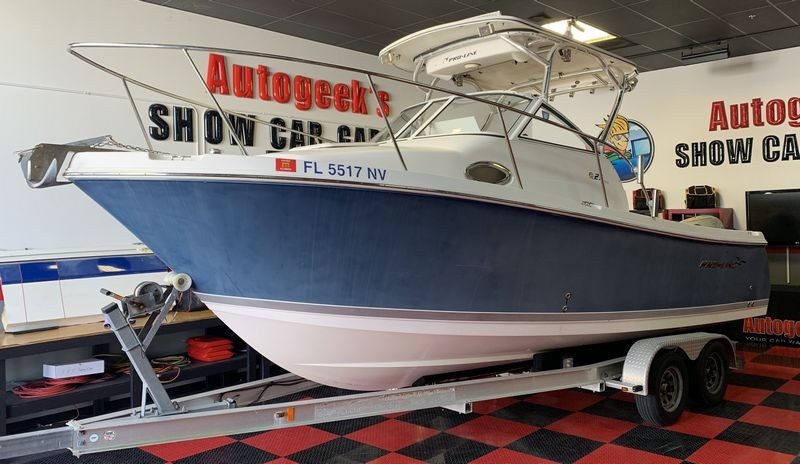
21′ Sea Hunt Center Console
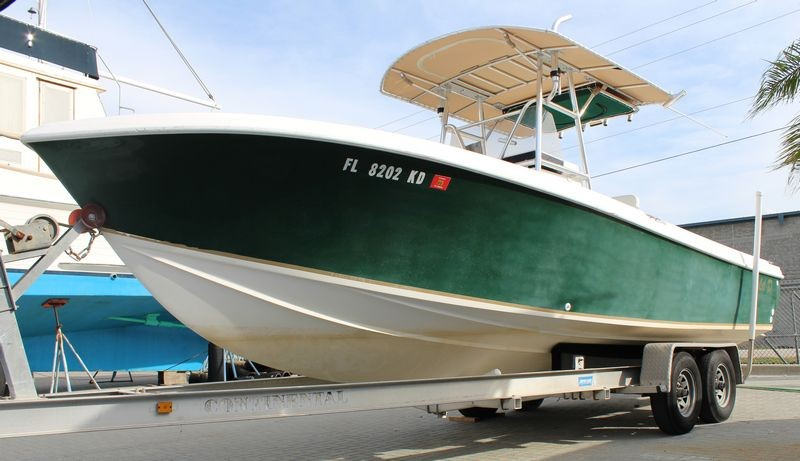
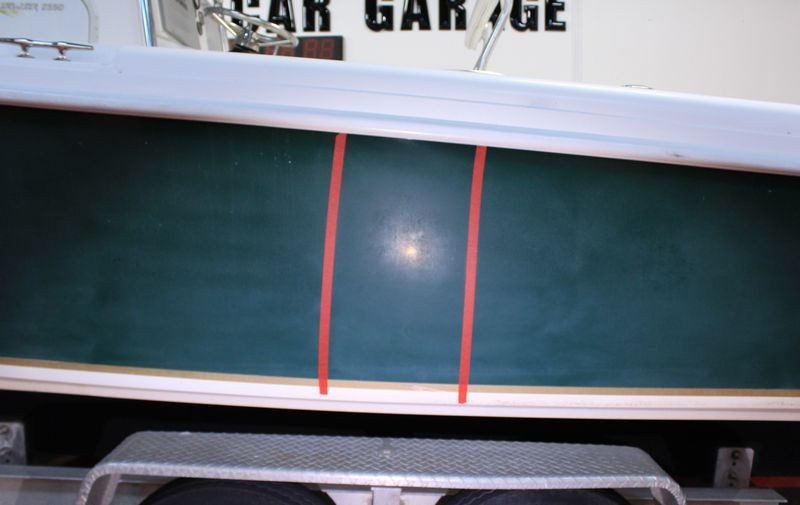
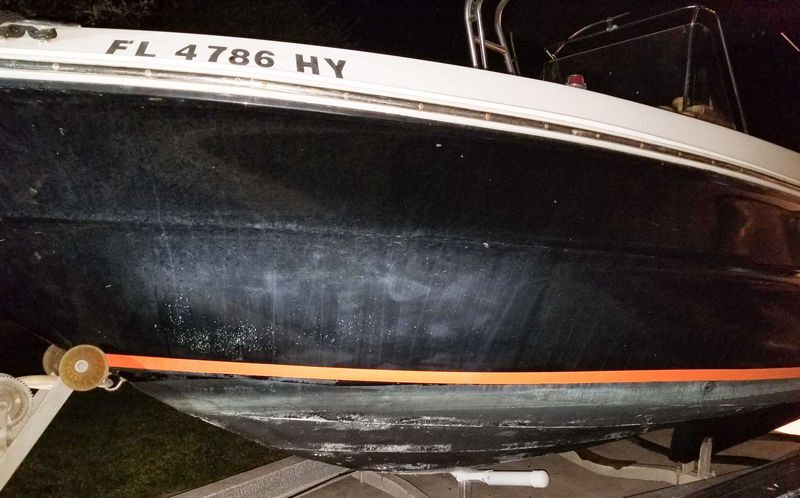
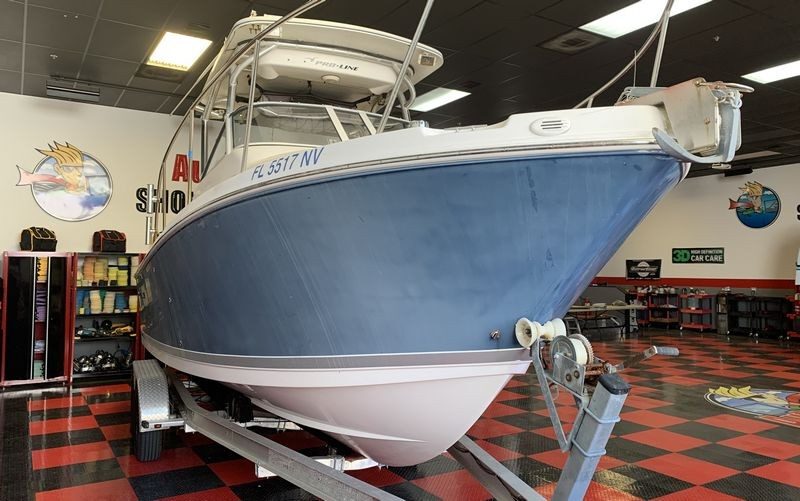
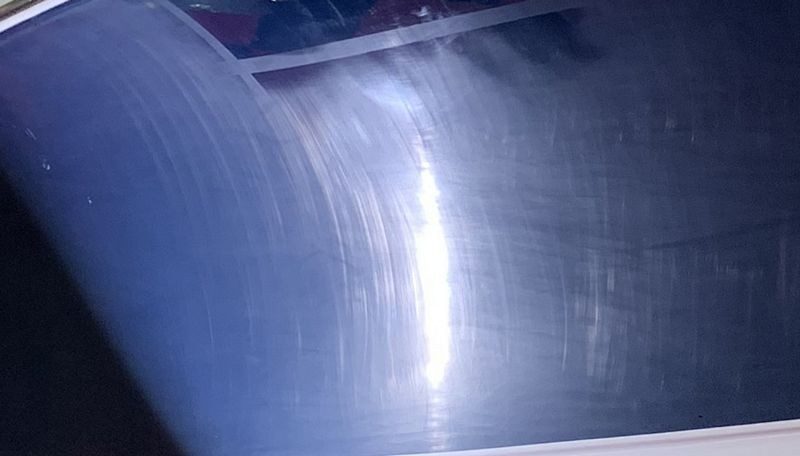
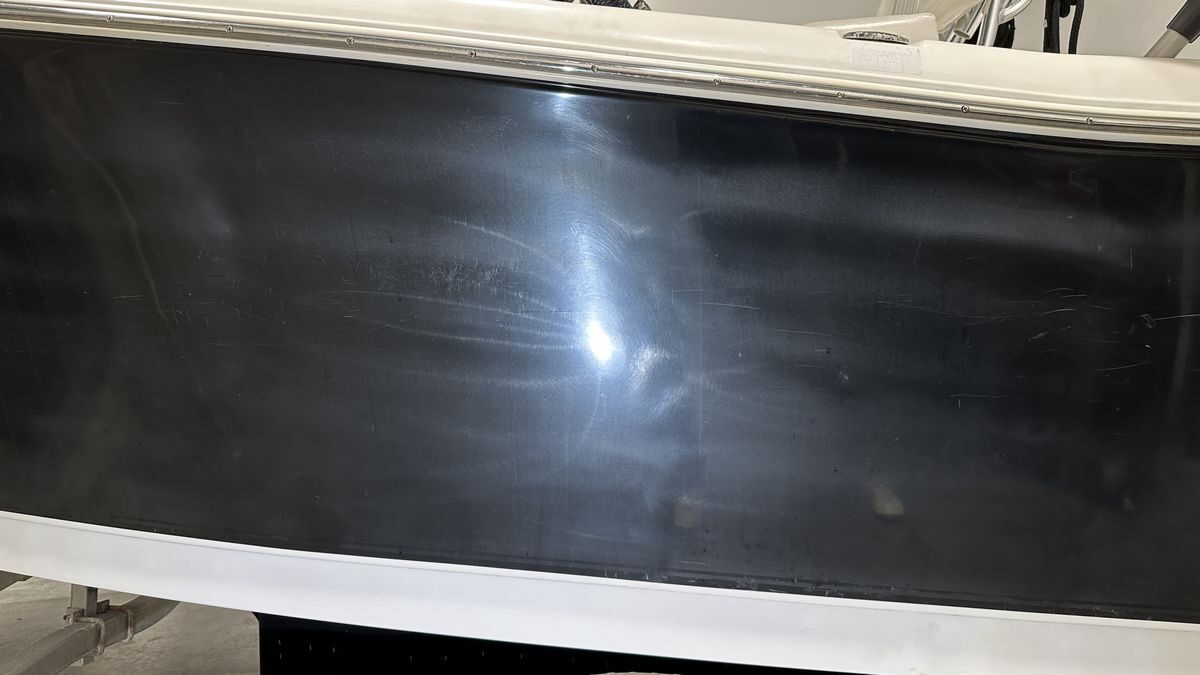
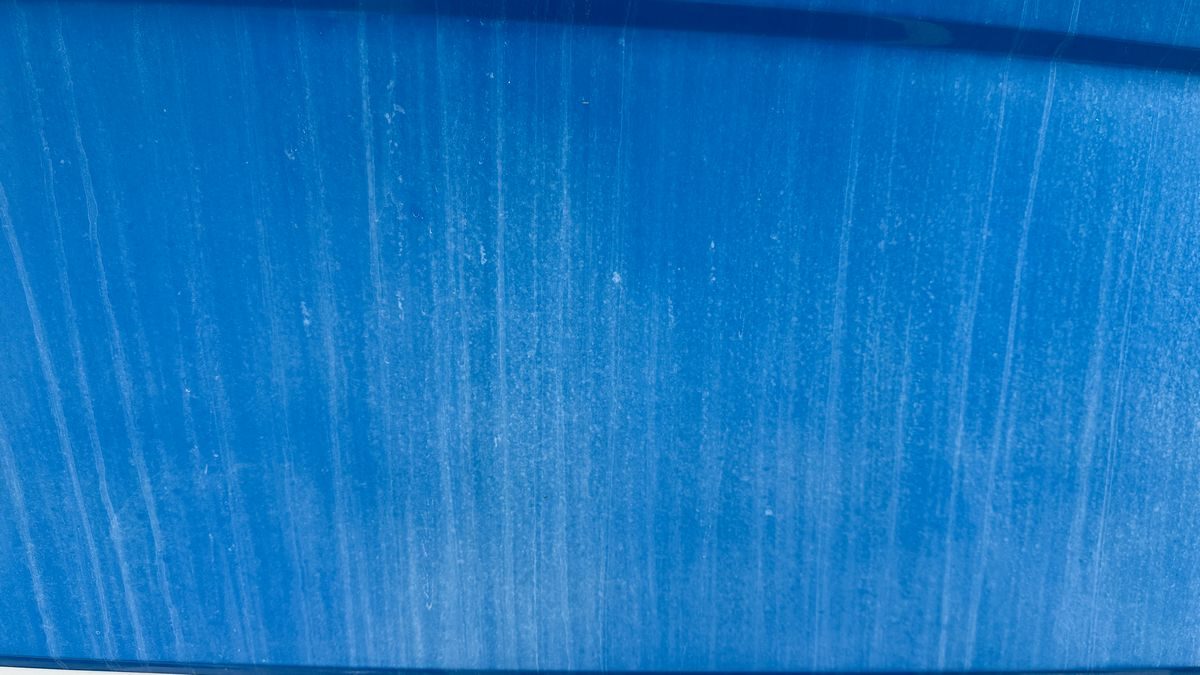
The outside hull was filled with straight line sanding scratches from the owner trying to sand the boat himself using #220 and #320 grit sandpaper! In case you don’t know, this is way too aggressive of a sandpaper for this type of work. In the real world, the lowest most people would go is 600 grit and even then, you better know how to recover, or you and your boat are going to be in a world of hurt!
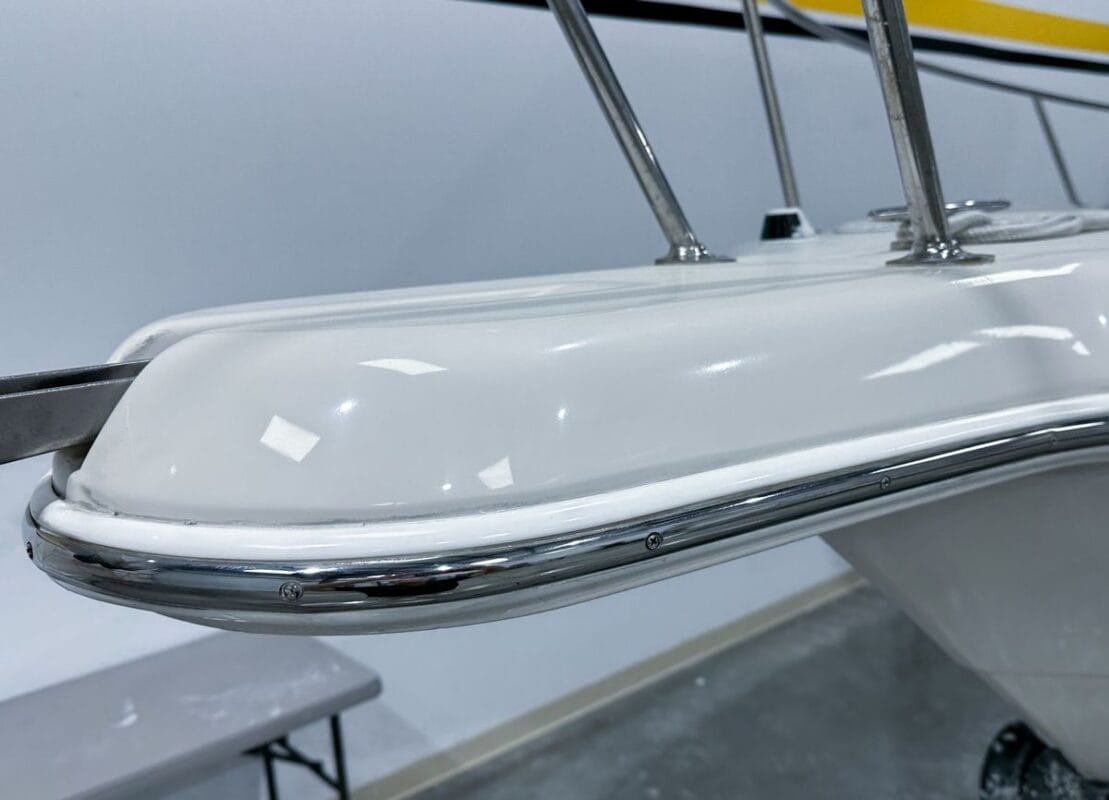
What looks like up and down lines in the hull in the pictures below are actually deep scratches from hand sanding in straight lines.
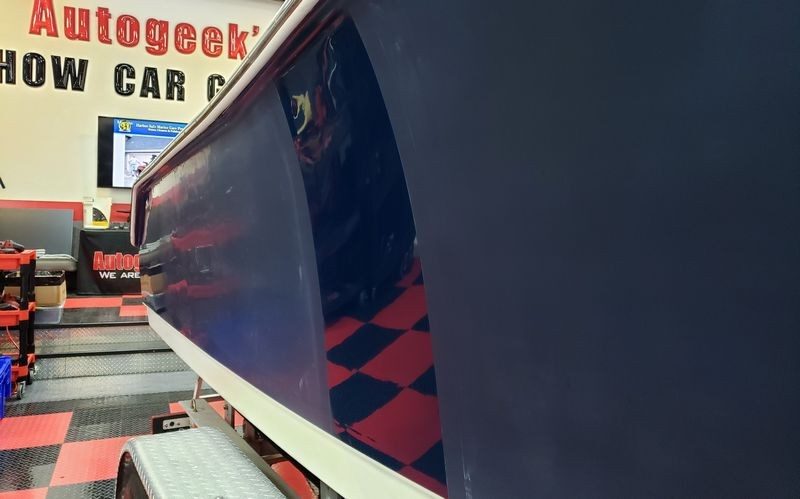
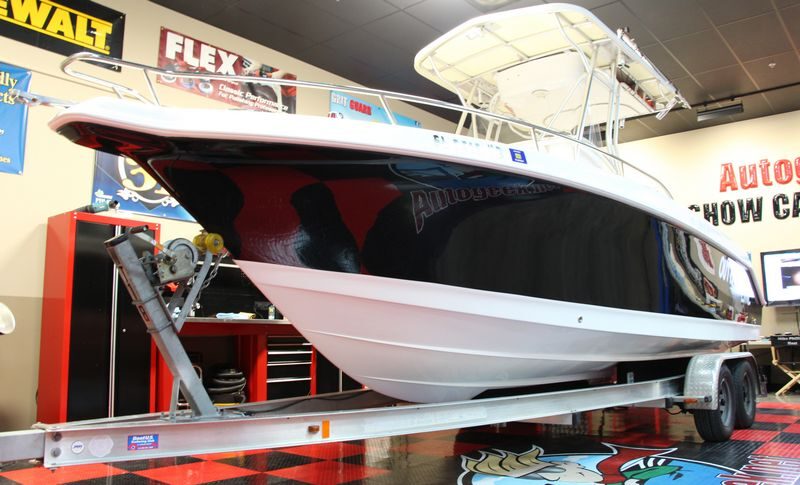
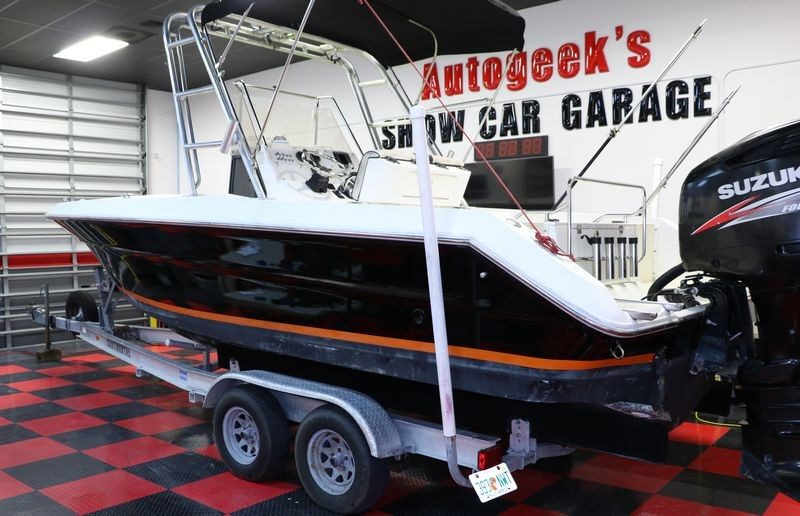
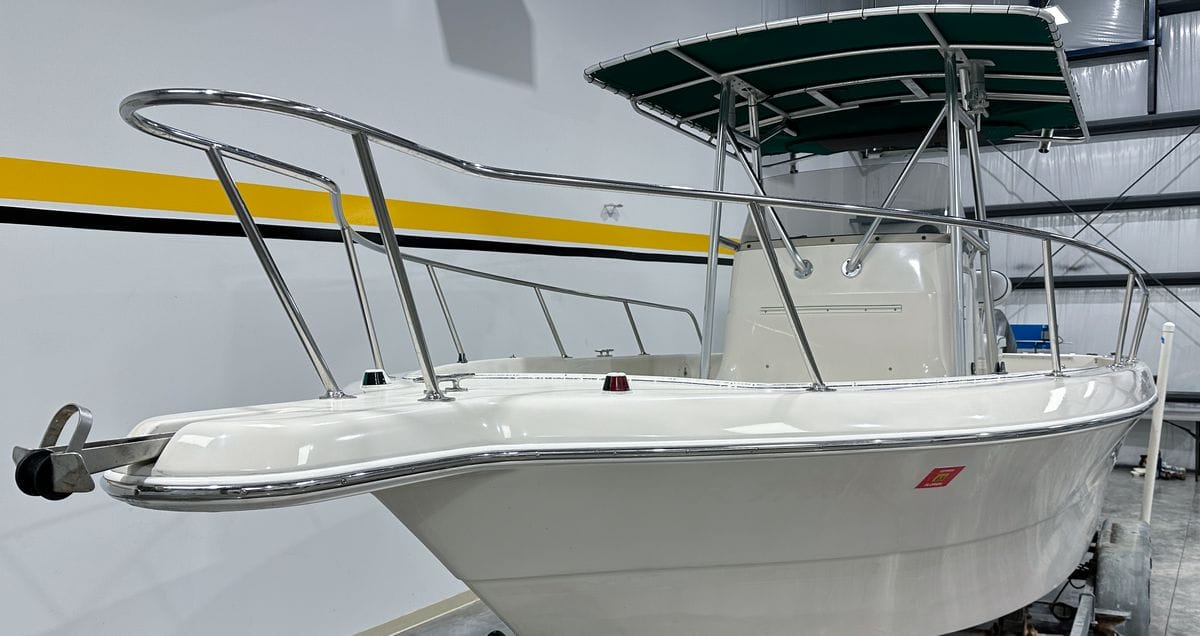
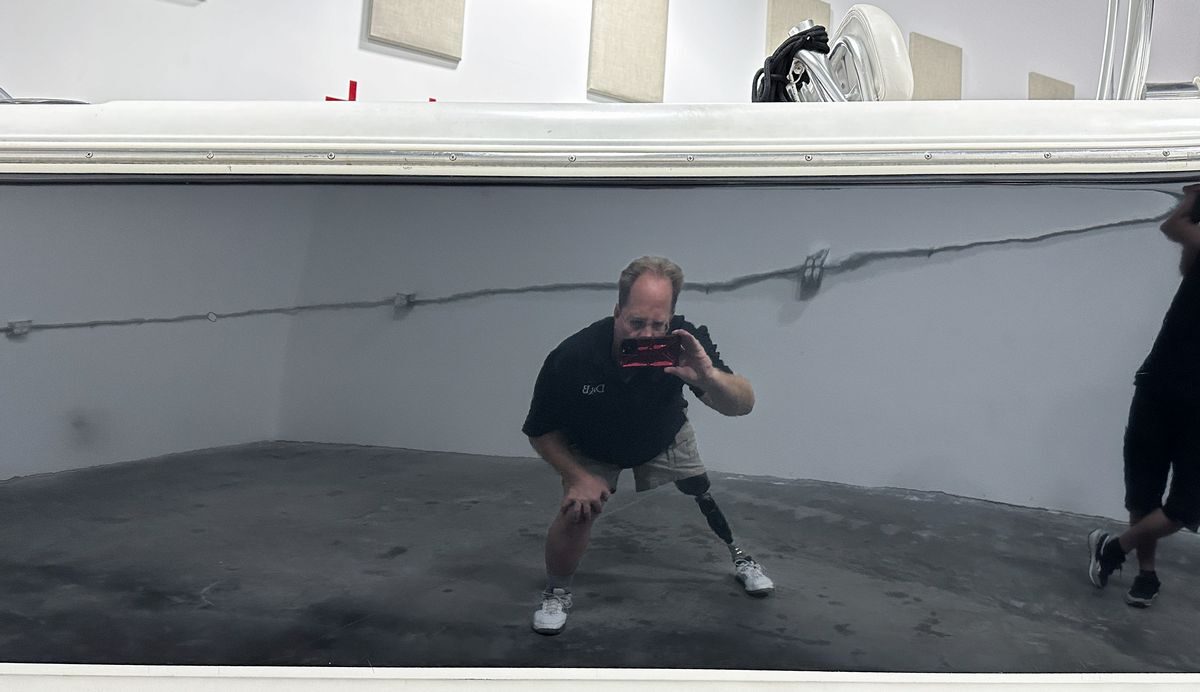
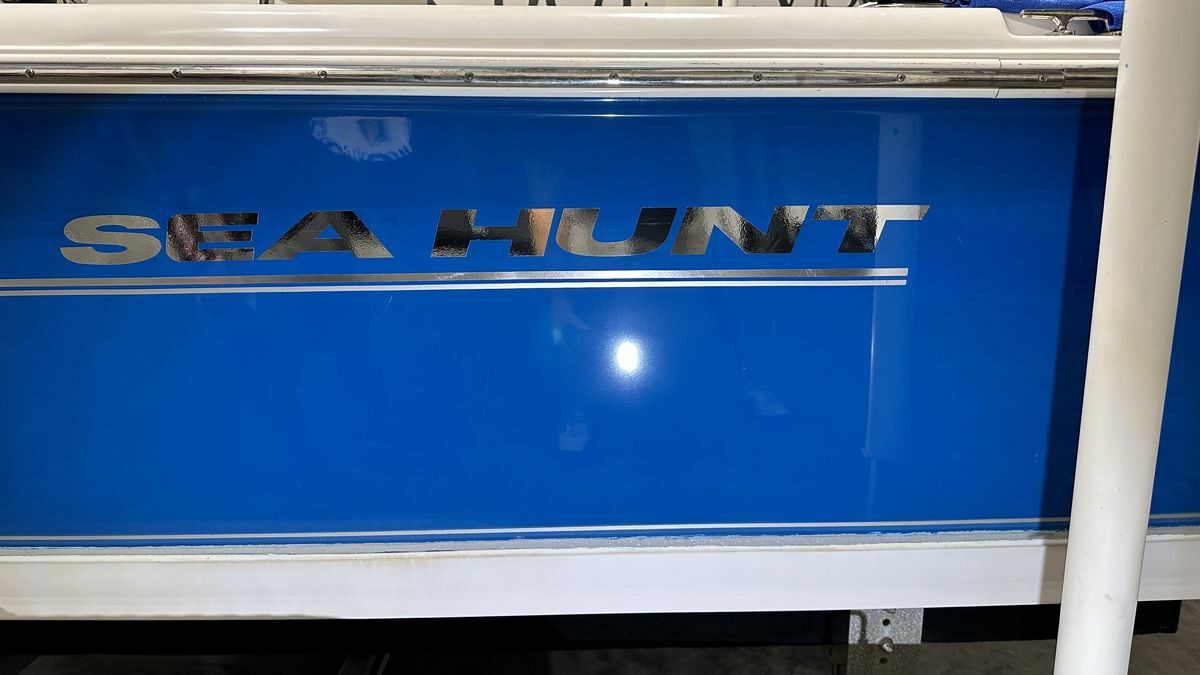
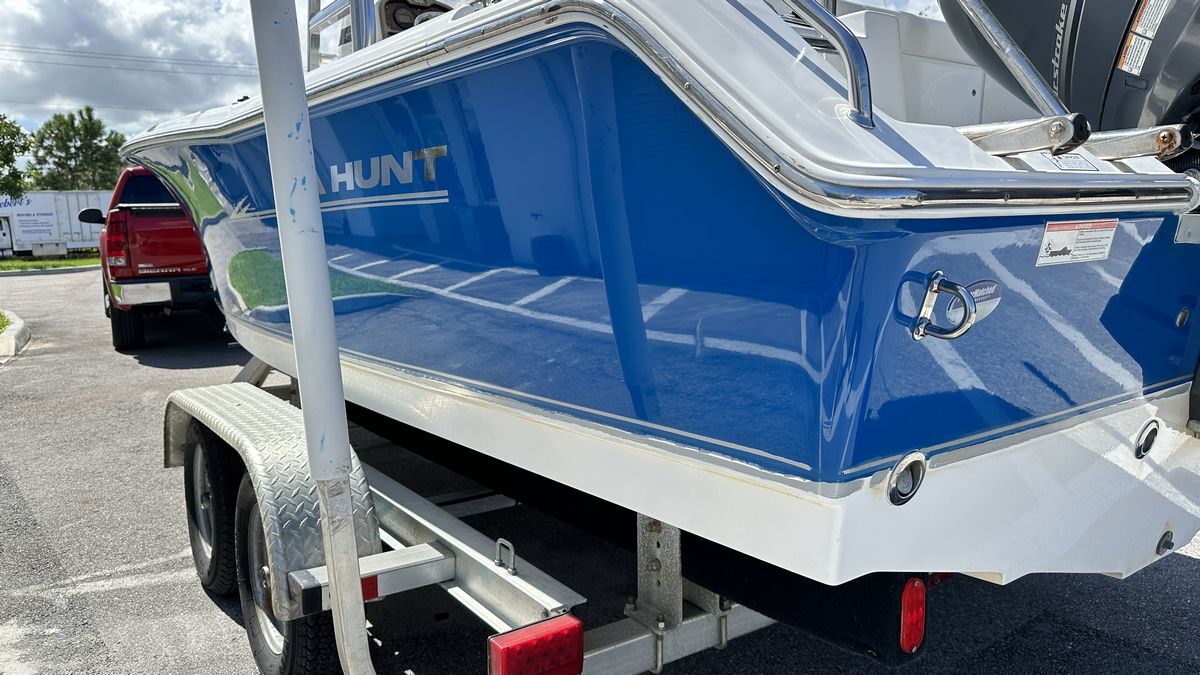
The only AFTER picture – We used this boat for the background for the certificate ceremony. If you look at the boat, it’s easy to see reflections in the hull after the class worked their magic.
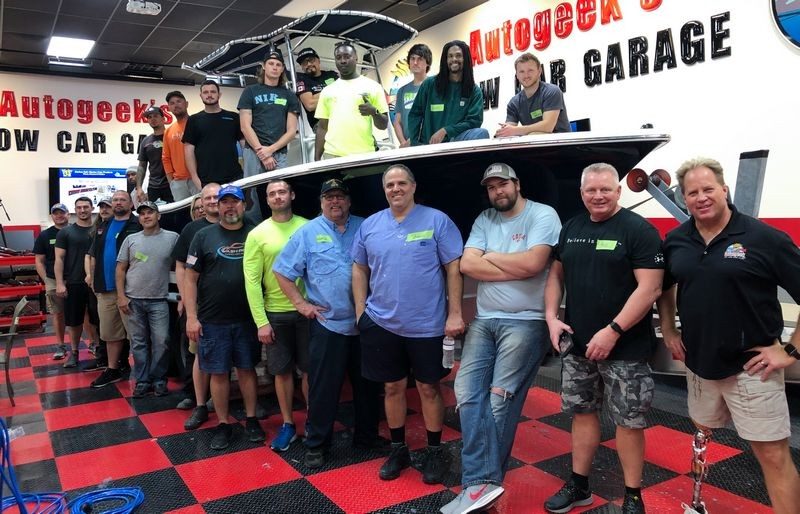
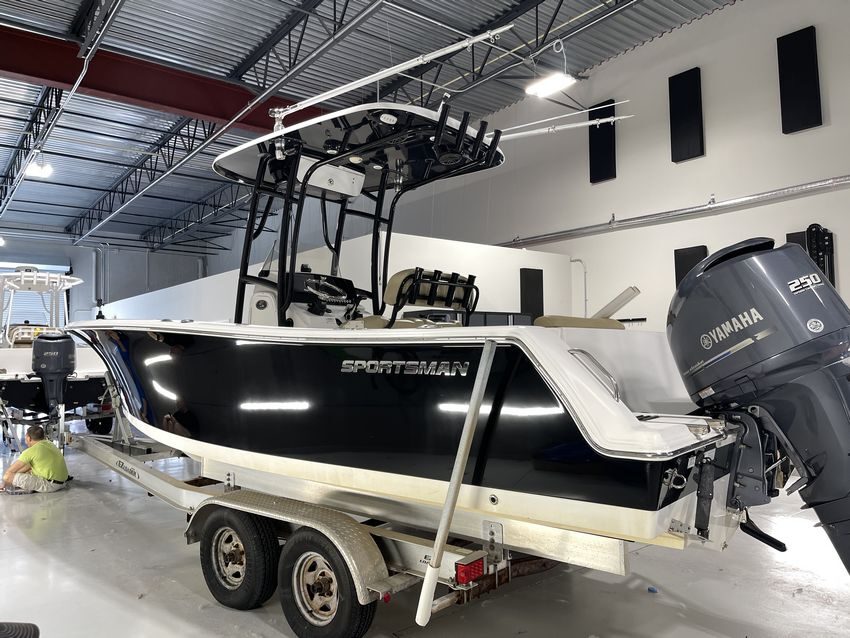
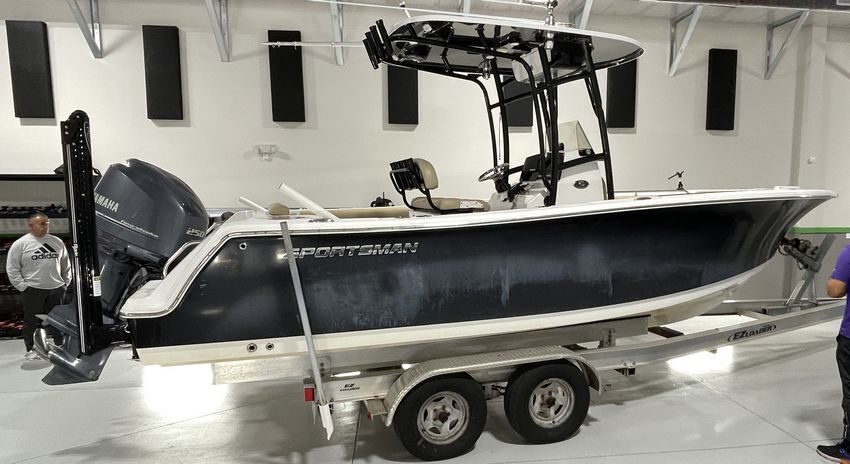
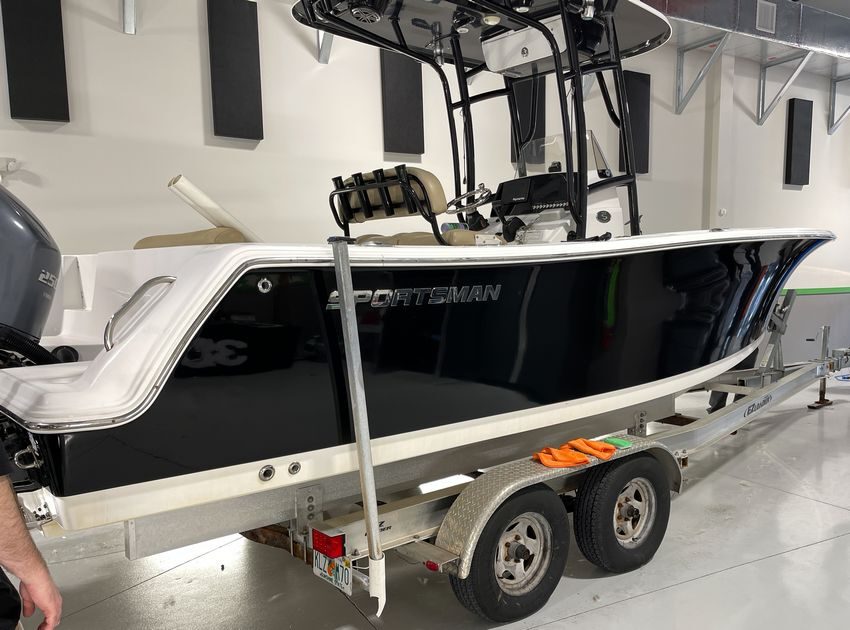
February 2021 – 23′ Sportsman Center Consoles
BEFORE & AFTER Shots

February 2022 – 26′ Regulator Center Console
September 2022 – 21’ Trophy Center Console
February 2023 – 25′ NauticStar Center Console
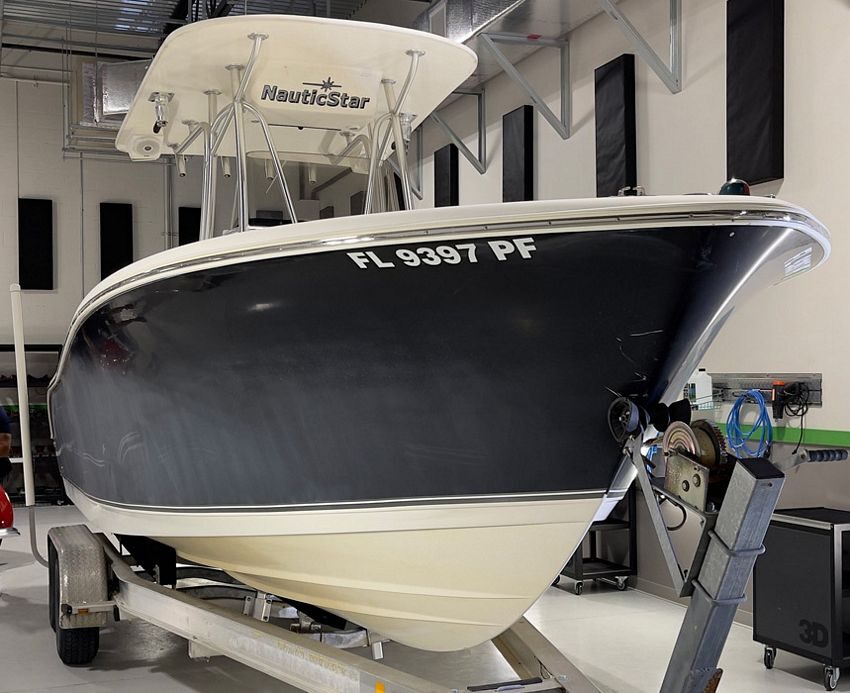
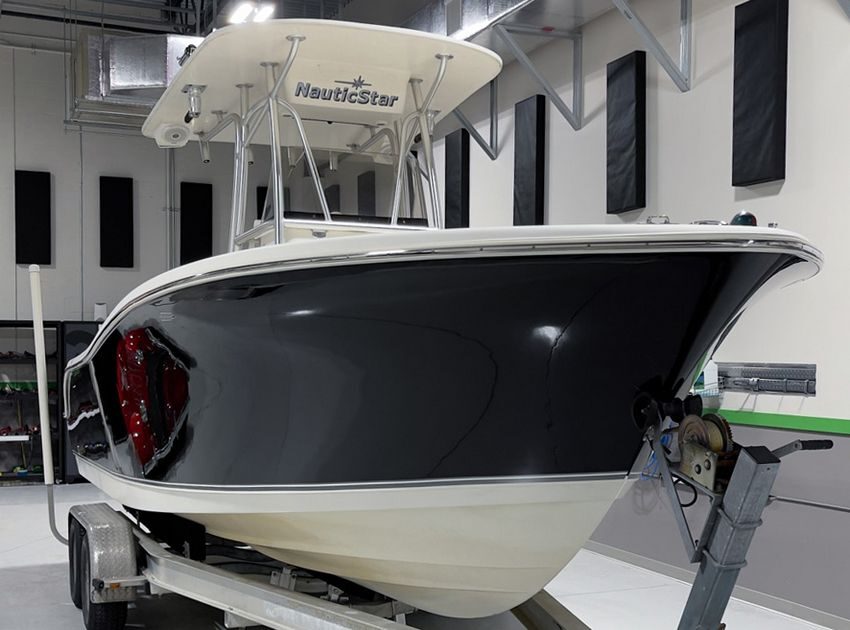
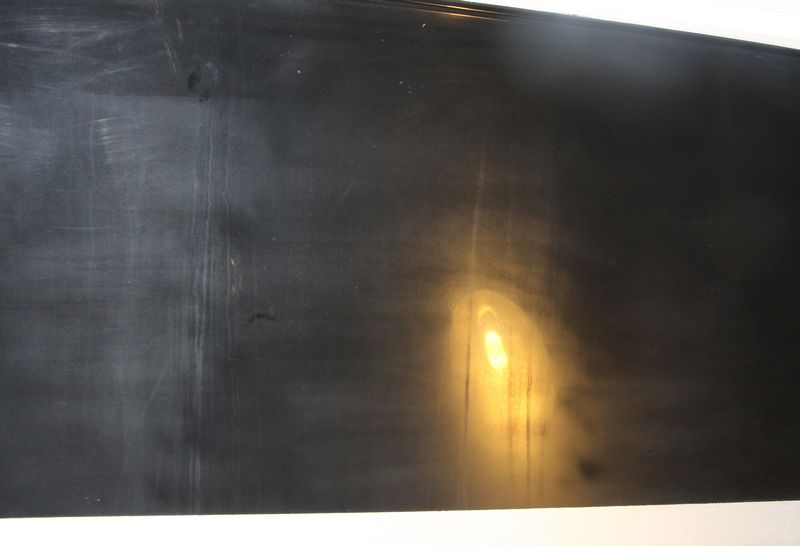
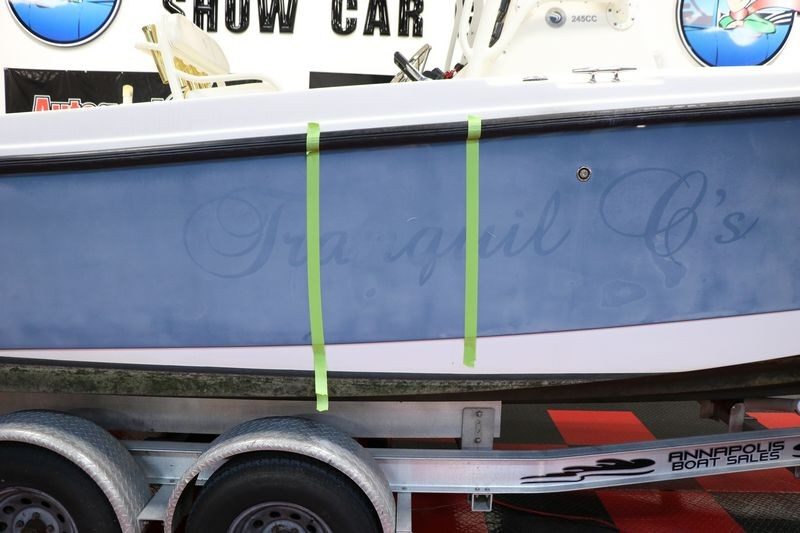
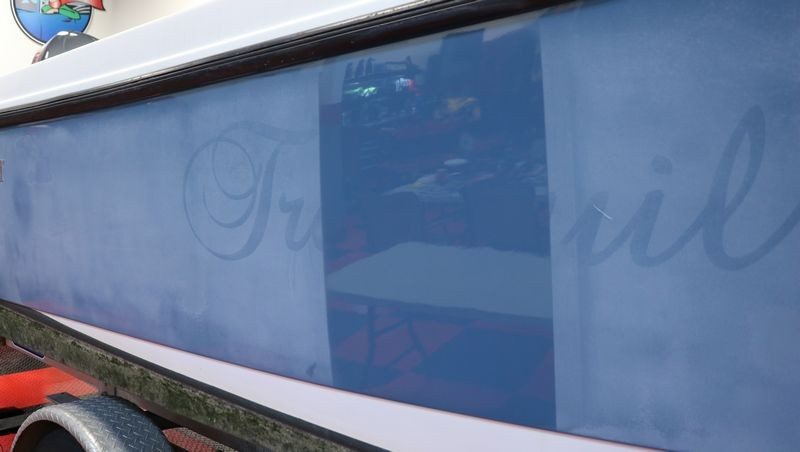
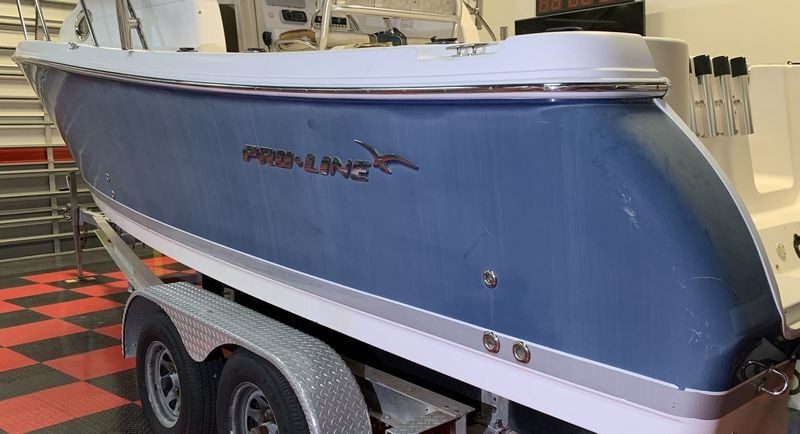
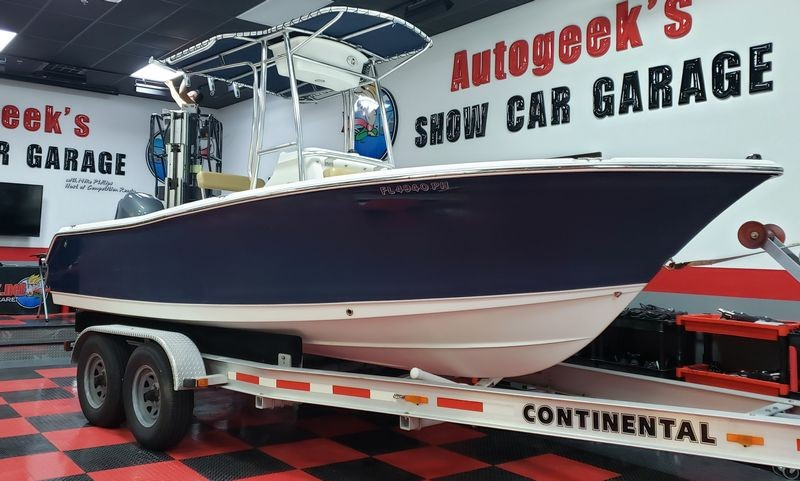
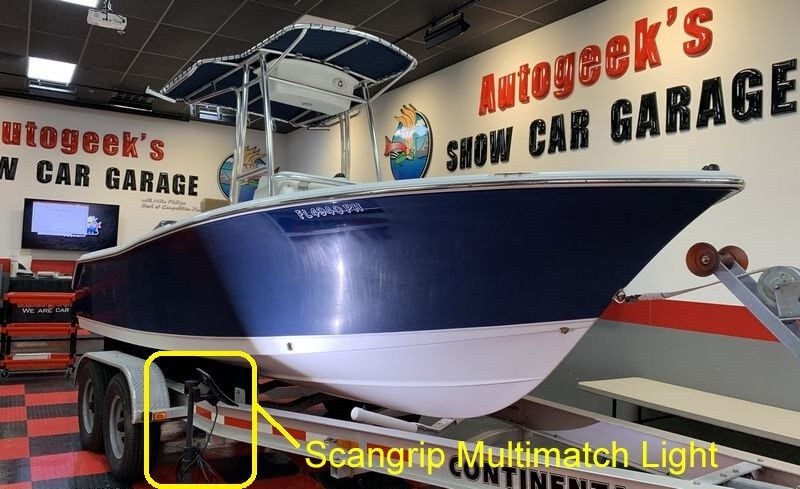
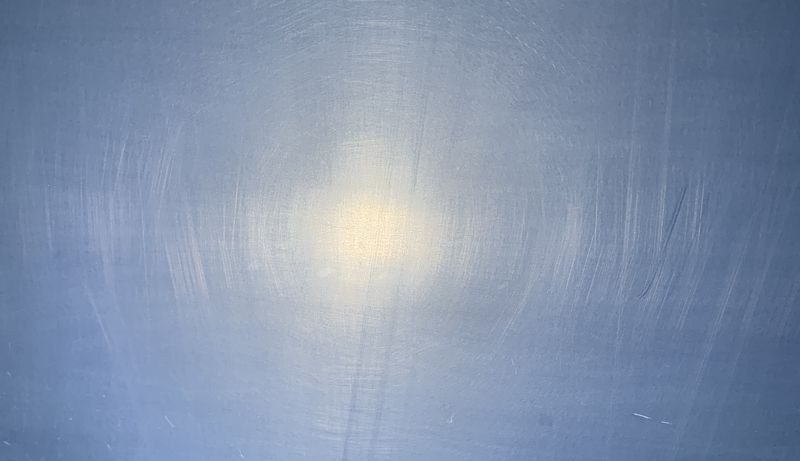
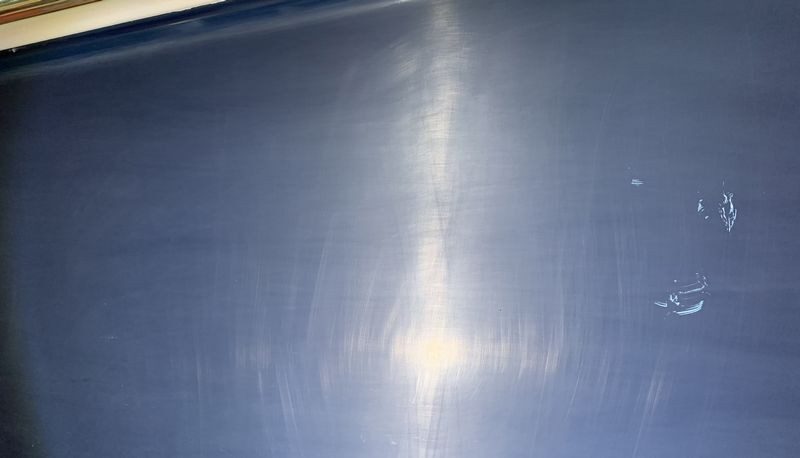
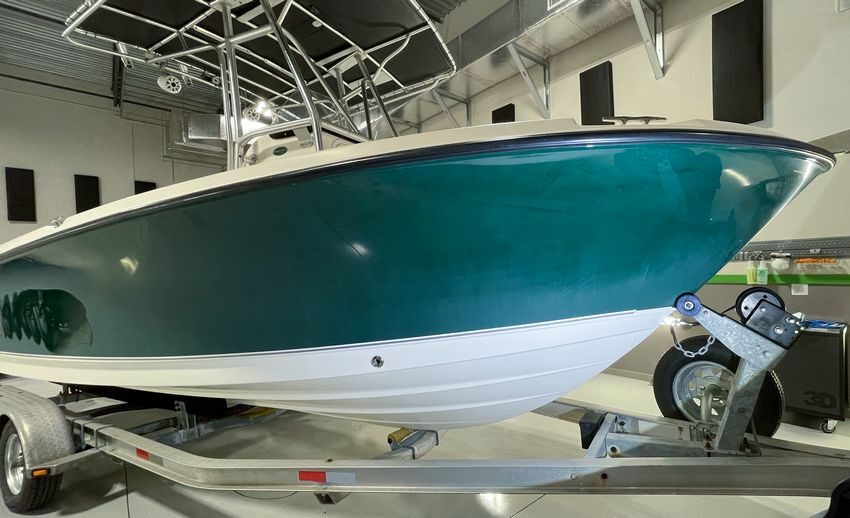
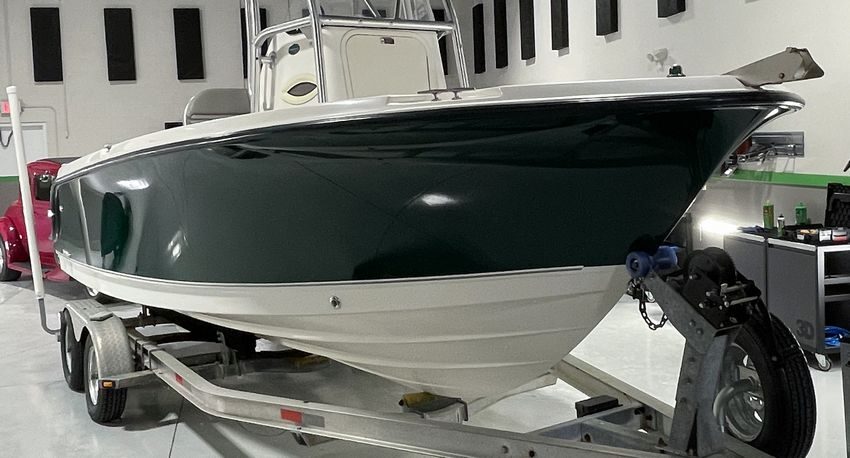
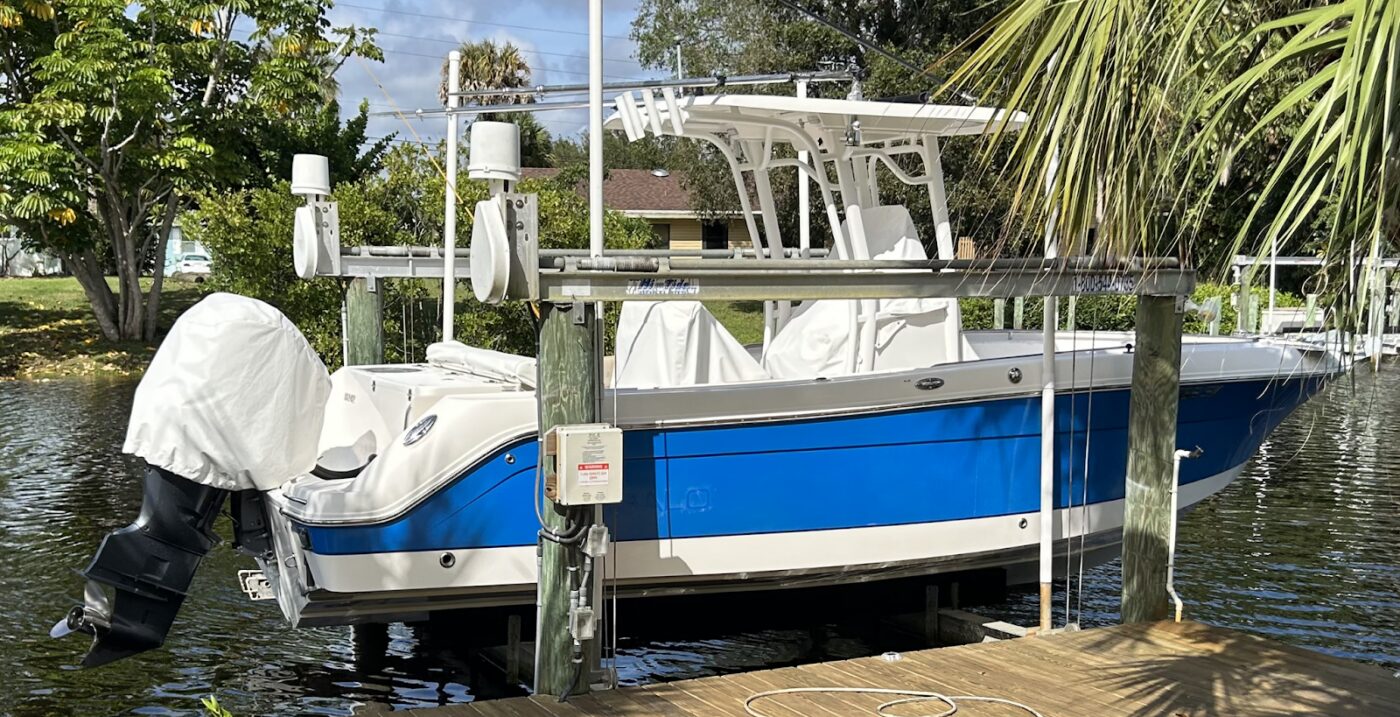
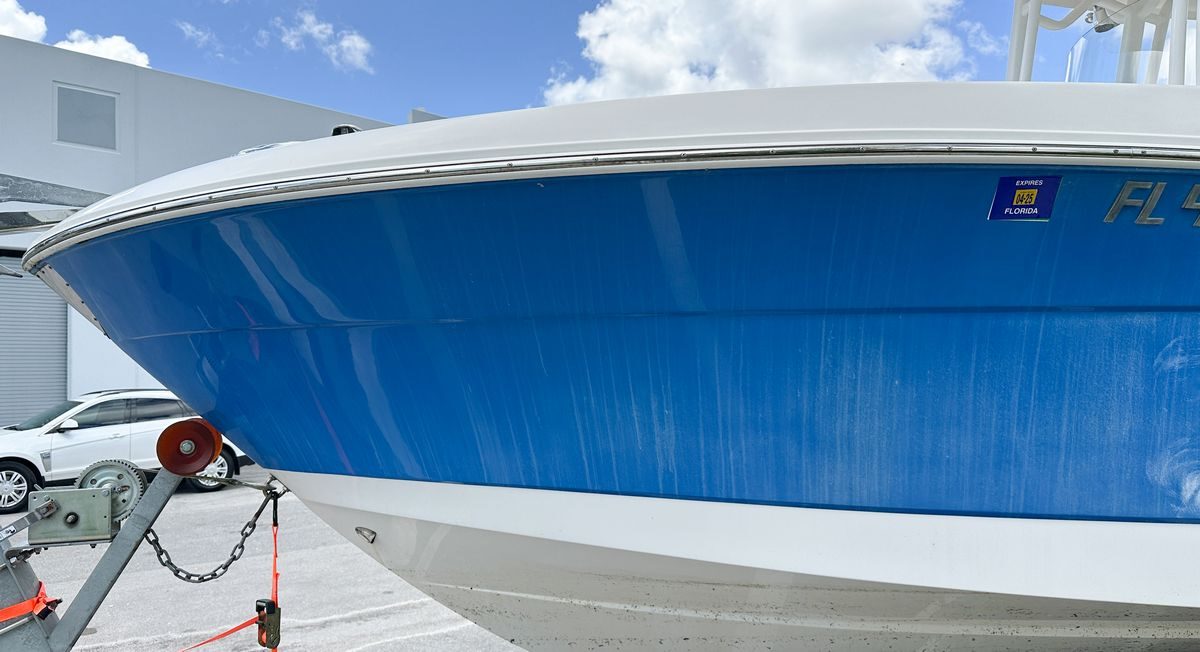
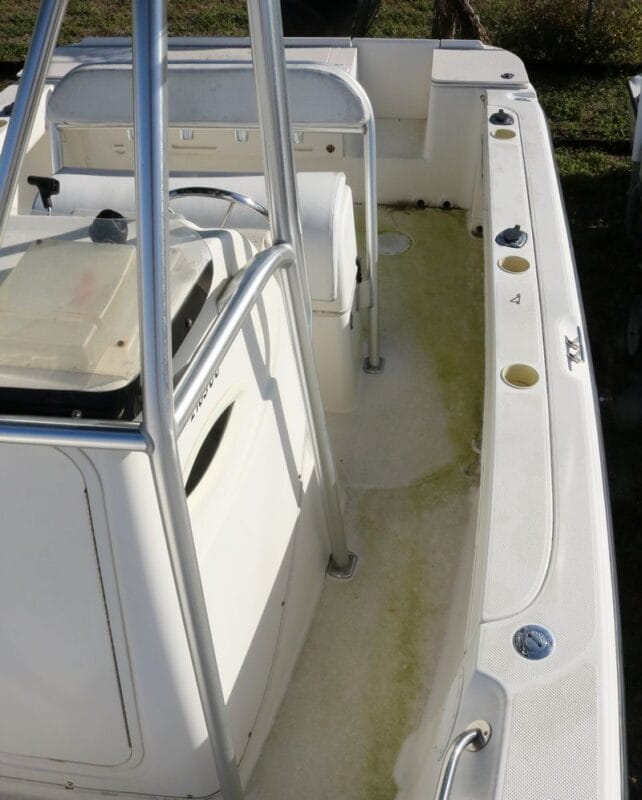
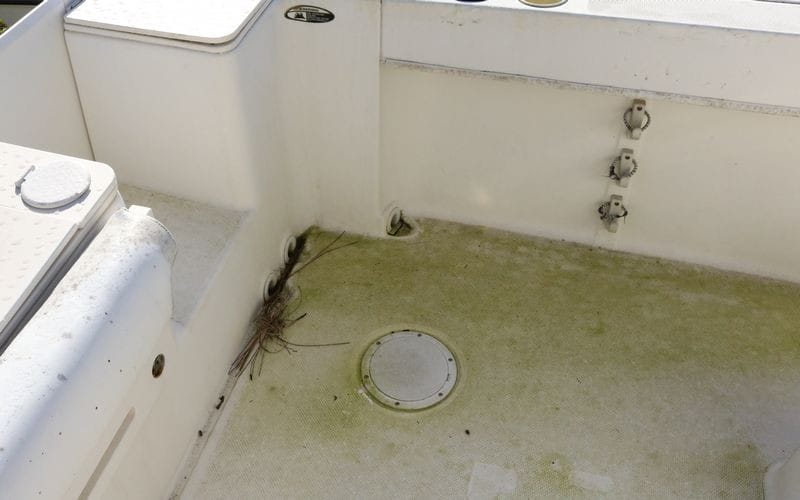
Before & After on White Boats: No Dramatic Difference
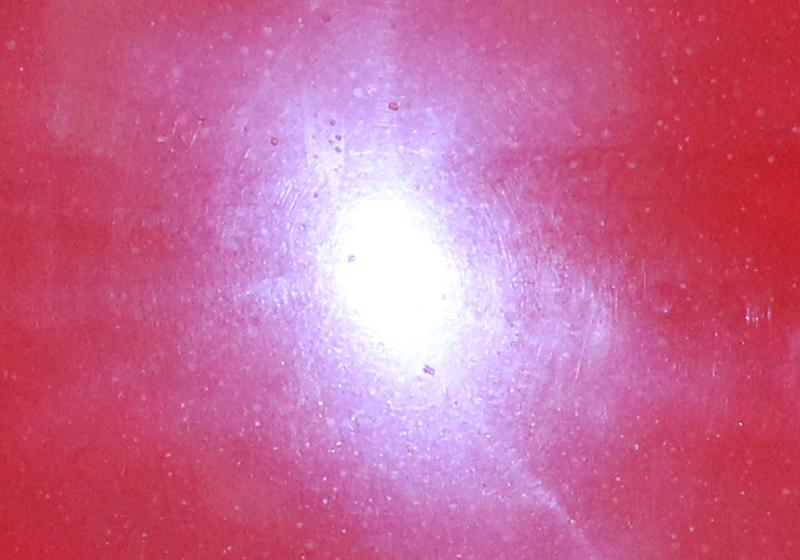
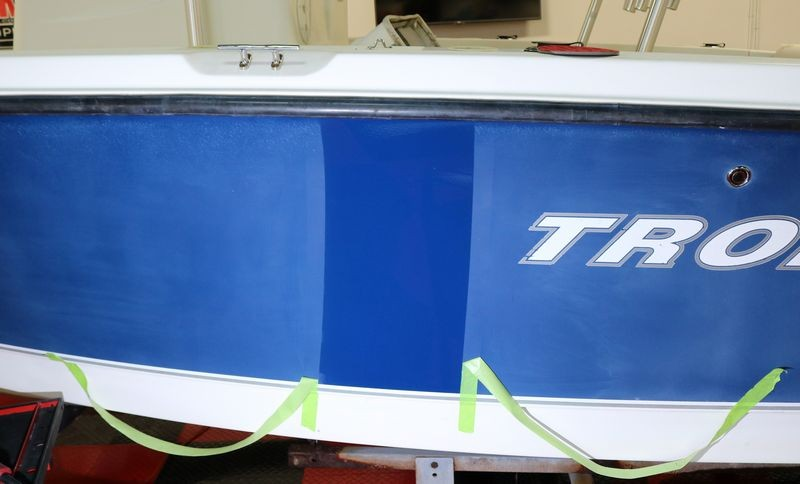
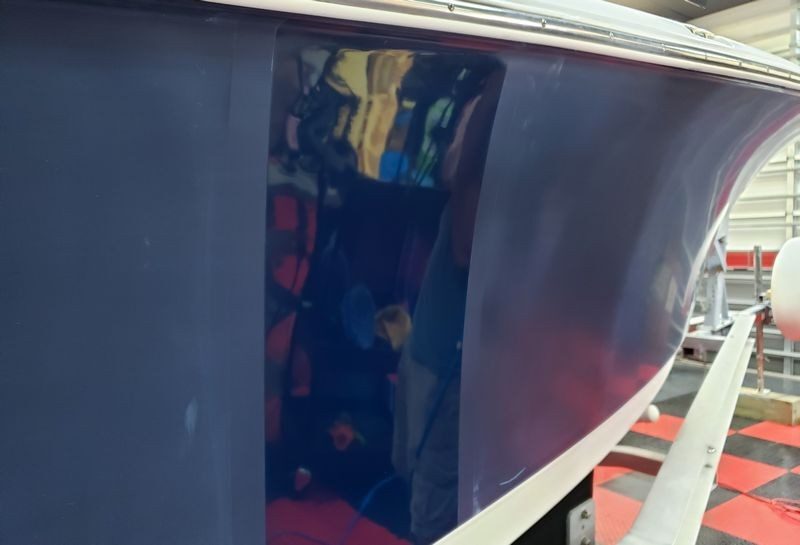
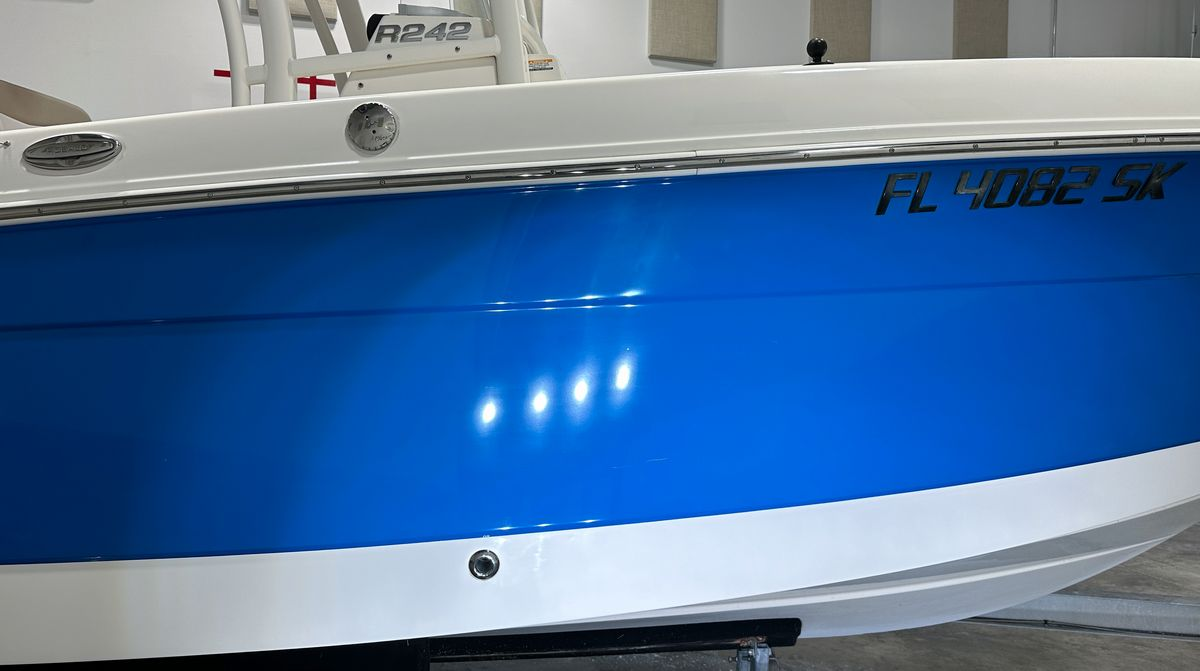
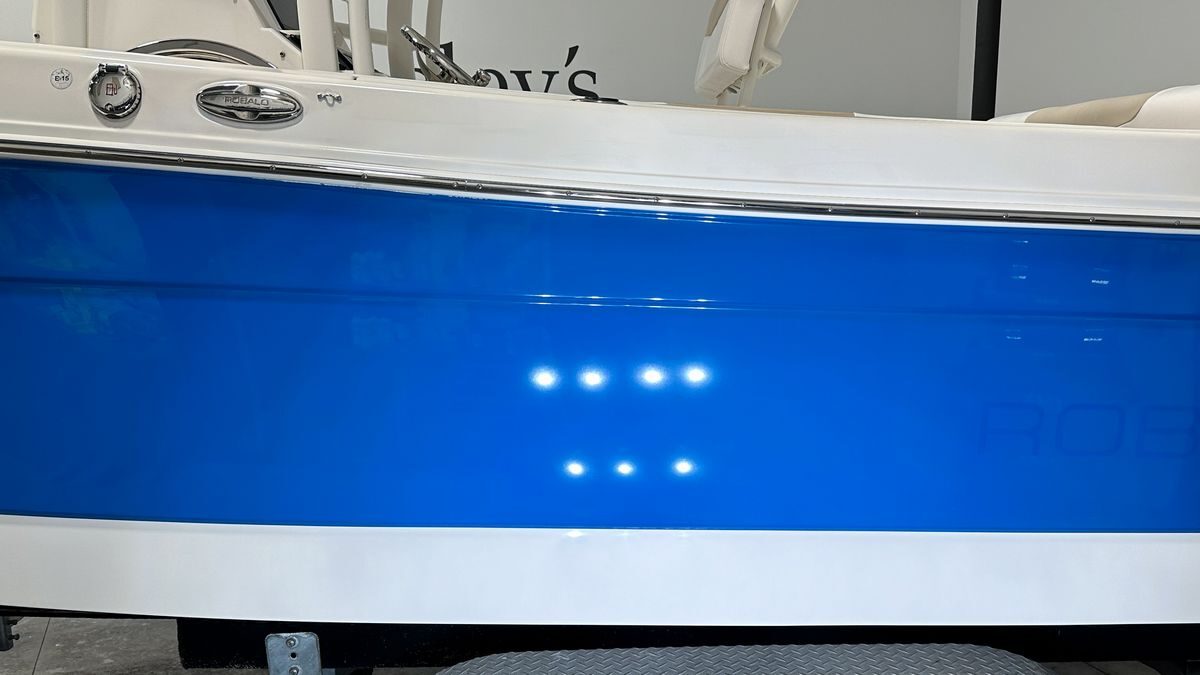
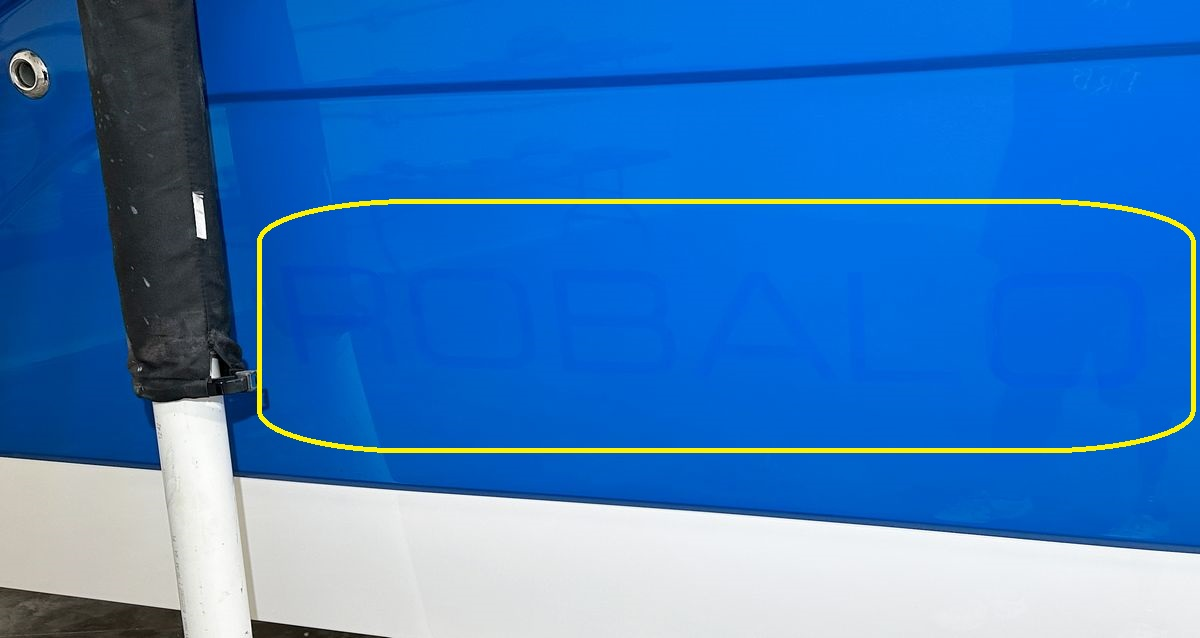
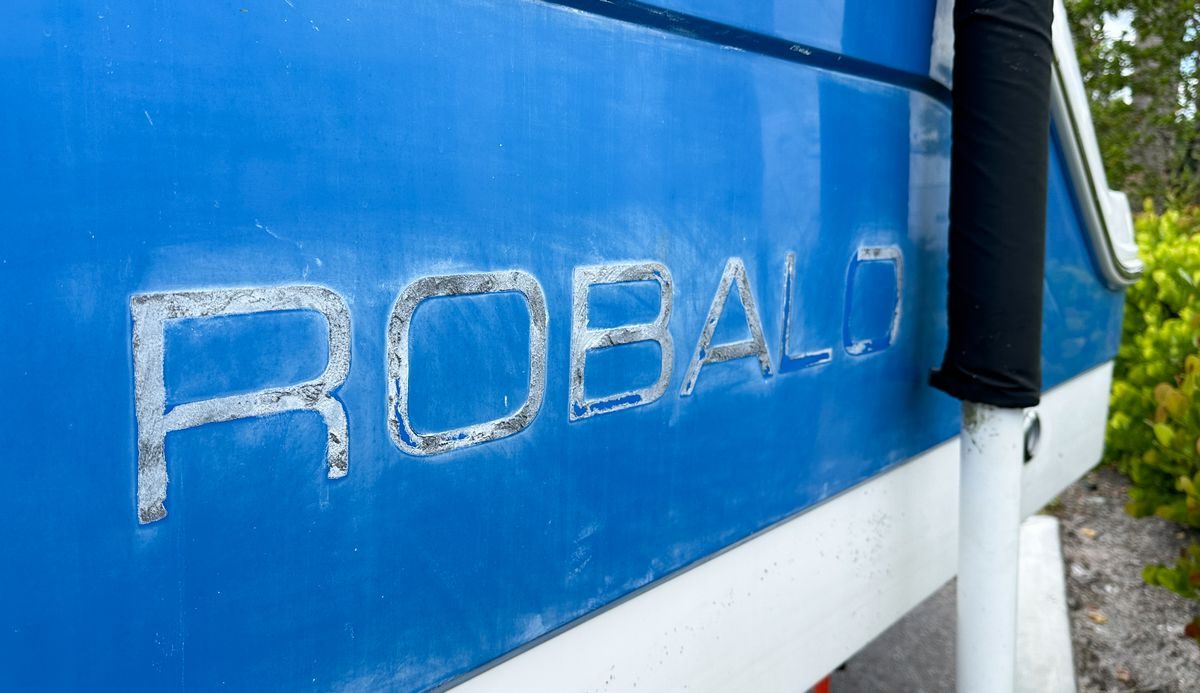
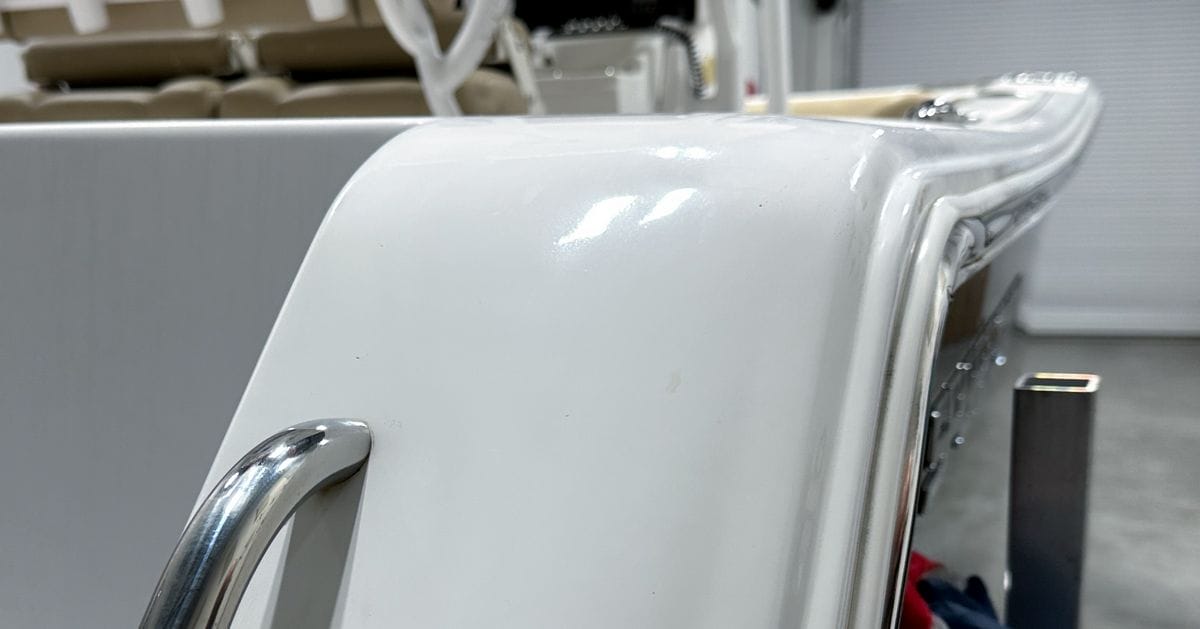
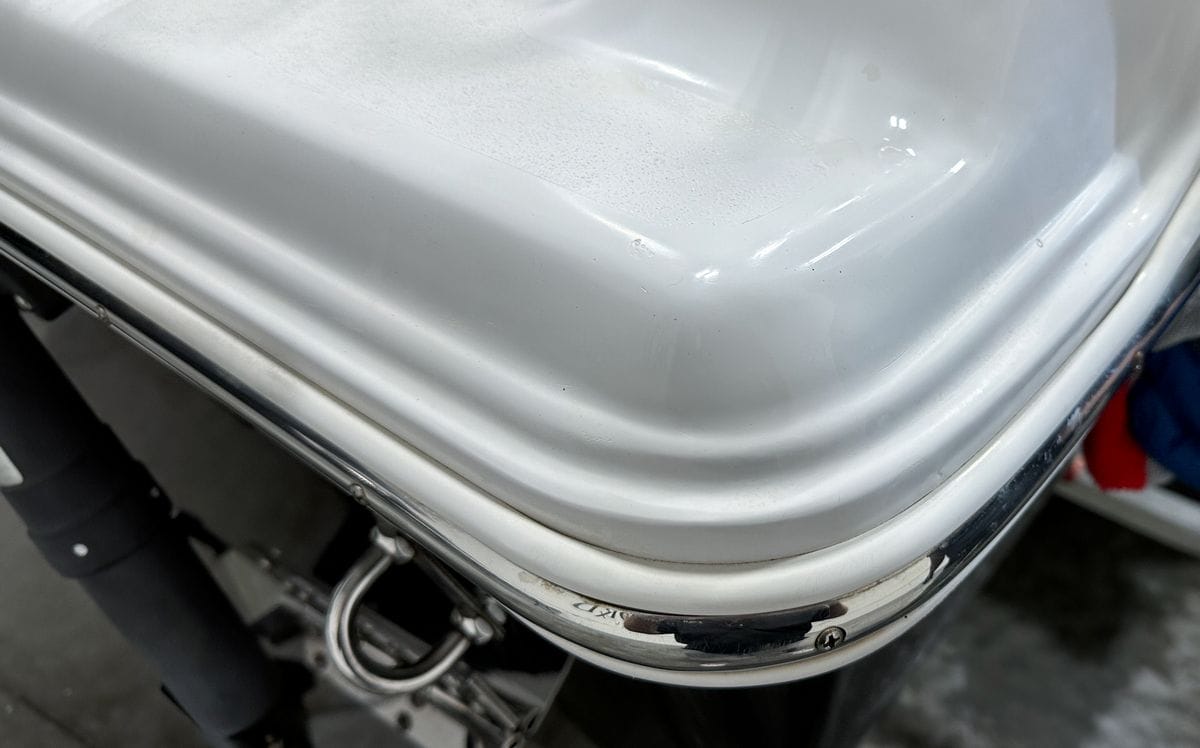
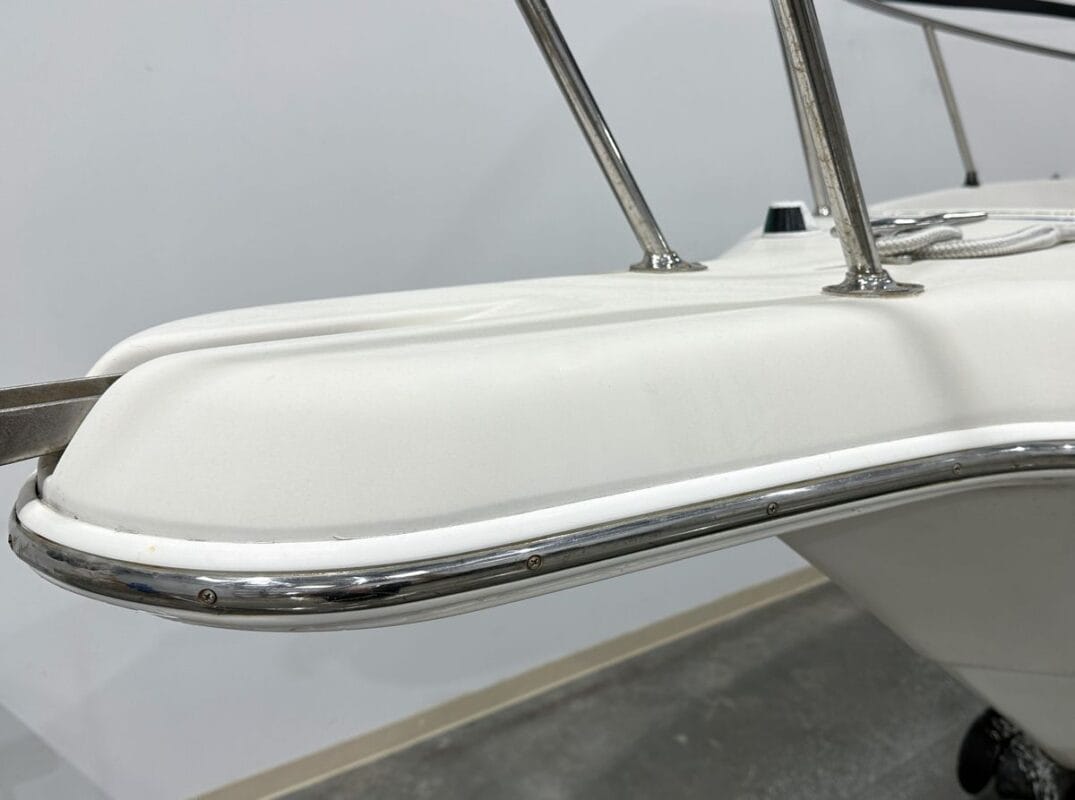
Below are before and after examples from using a WHITE colored gelcoat boat for a class. Can you see the difference? The answer is yes, it’s simply not as dramatic of a before and after difference as you get with dark colored gelcoat boats.
This is why I don’t like to use white boats. Hard to see the before and after differences with the human eyes and a lot more difficult to capture and showcase via photography and video – at least compared to dark colored hulls. And just to note, the before and after results you see in the white gelcoat below were created using a 1-Step AIO.
February 2024 – 24’ Century Center Console
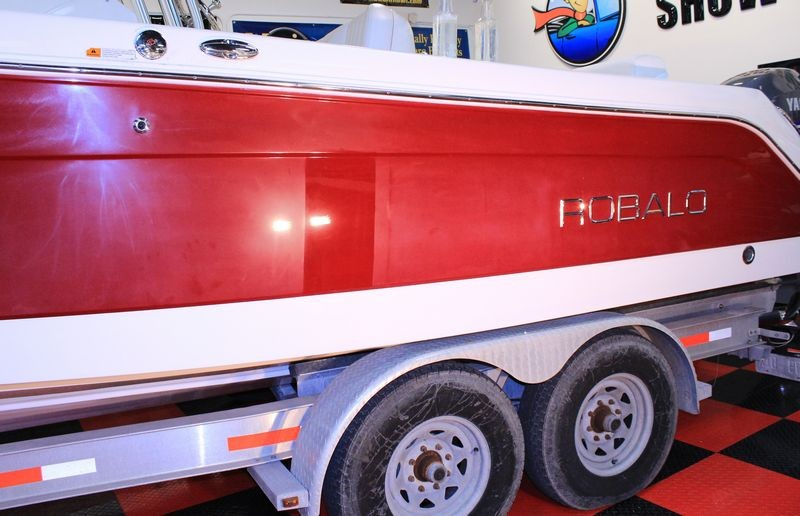
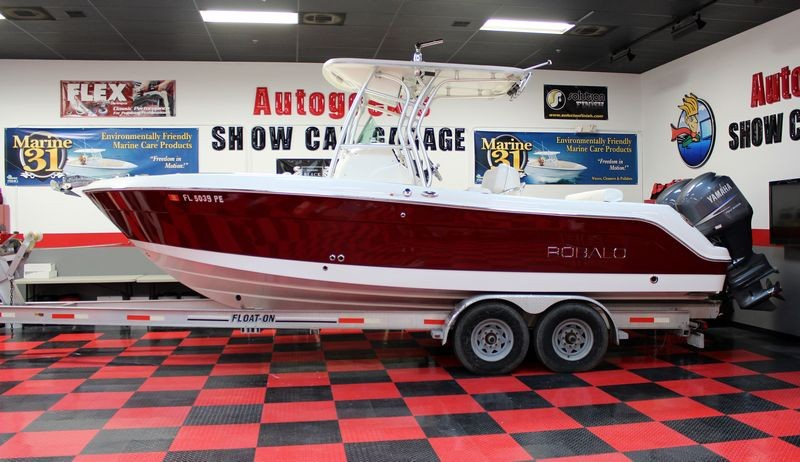
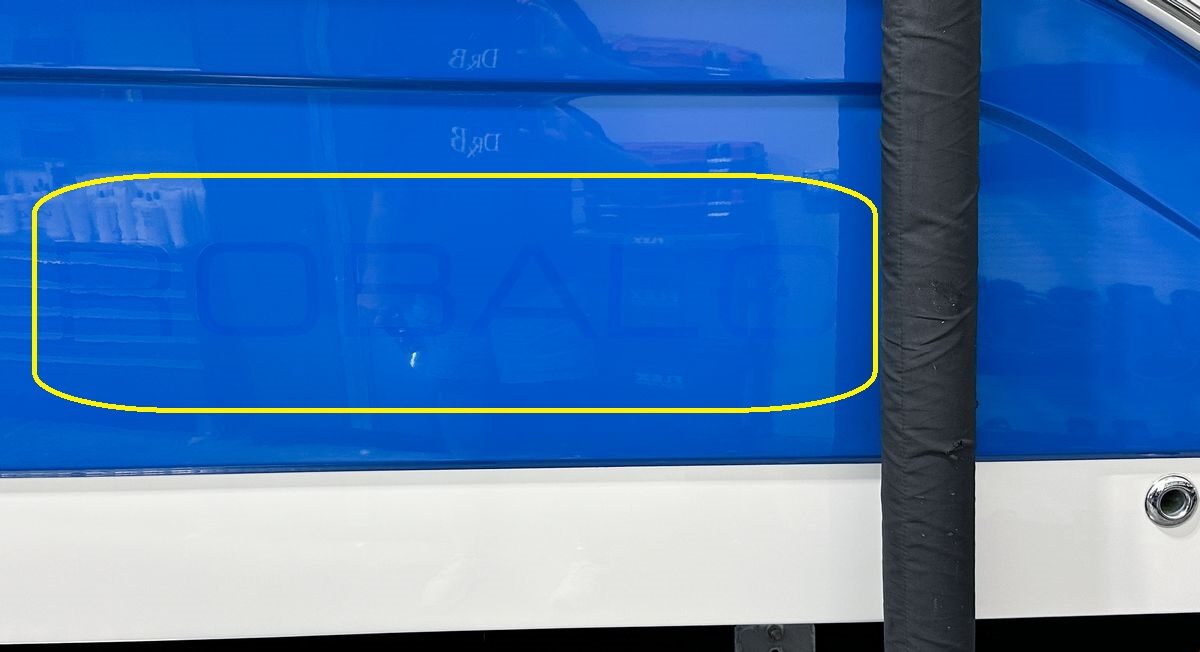
May 2024 – 24′ Robalo Center Console


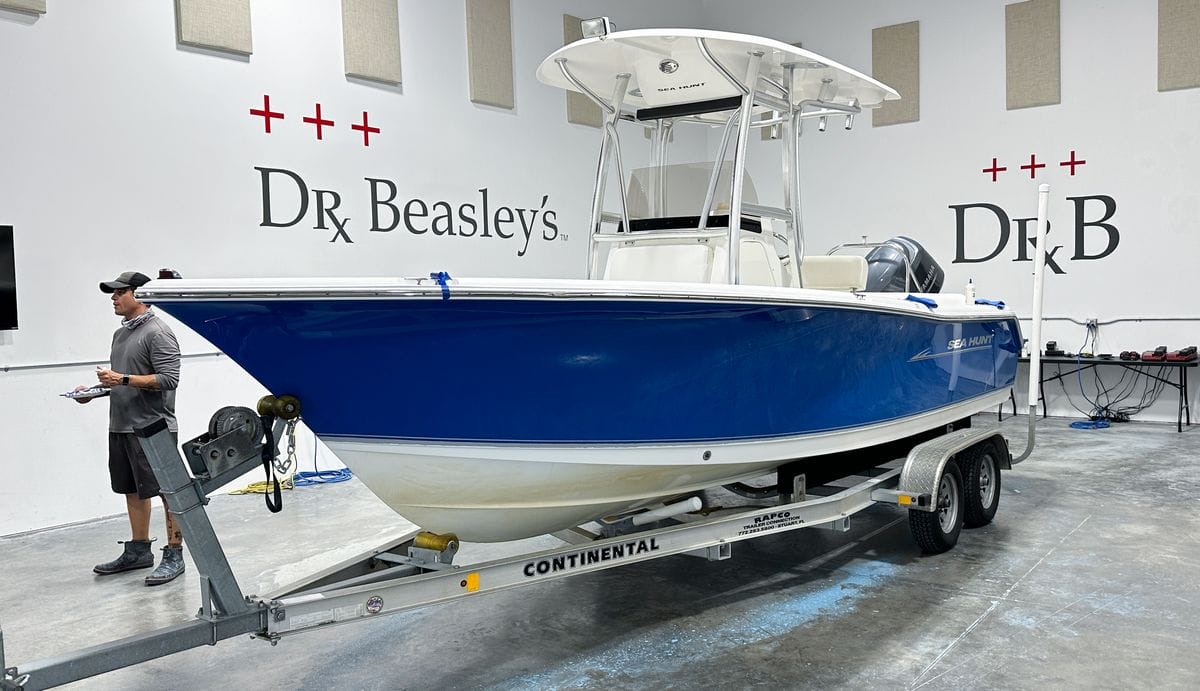
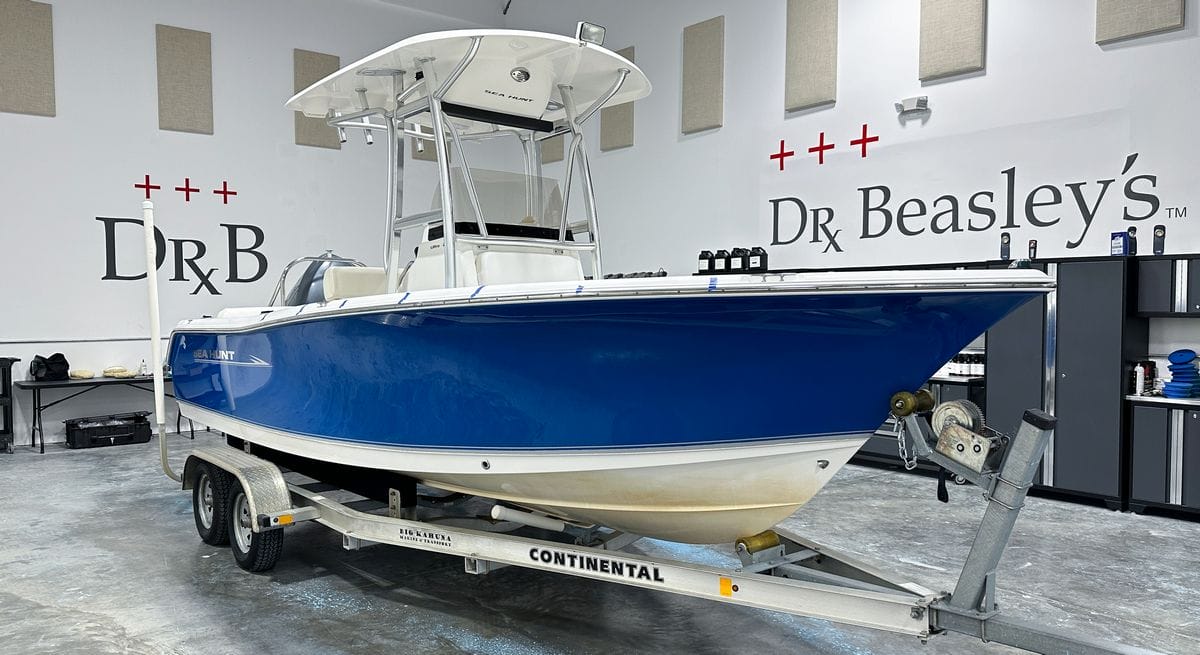
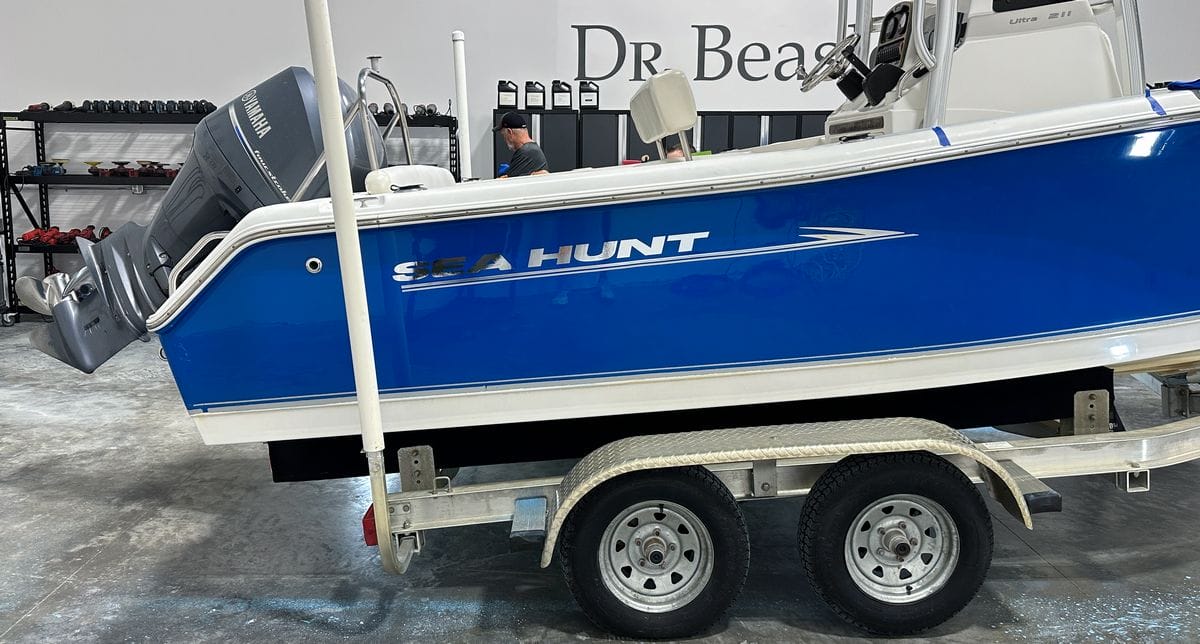
September 2024 – 24’ Sea Hunt Center Console


A Picture Tells a Thousand Words
I hope the collection of boats used over the years and the before and after pictures shows why you want to try to get dark colored gelcoat boats for any classes you will teach. Will white and light-colored boats work? You bet. Are they the best teaching canvas? No. I also hope you can see that our boat detailing training classes are the real deal. We bring in large boats in HORRIBLE condition so we can teach the most techniques.
How to Teach a Hands-on Boat Detailing Class for Profit
Here’s what I’ve learned after teaching boat detailing classes since 2013, which is 12 years as I type. The below curriculum is for a 2-day class focusing first on the outside on the first day and then on the inside the second day.
Why You Should Have Separate Days for Interior & Exterior Detailing
Why teach detailing the OUTSIDE first?
Great question. Once I explain, it should make sense.
First – Like with car detailing, the majority of people interested in learning how to detail boats are predominantly interested in learning how to use tools to restore the gelcoat outer hull. In the car detailing world, the most popular topics are paint correction and ceramic coatings. Wet sanding or any type of sanding is also high on the priority list. This translates to boat detailing. The most popular topics are gelcoat correction and ceramic coatings and of course, with severely neglected boats, sanding is an important aspect.
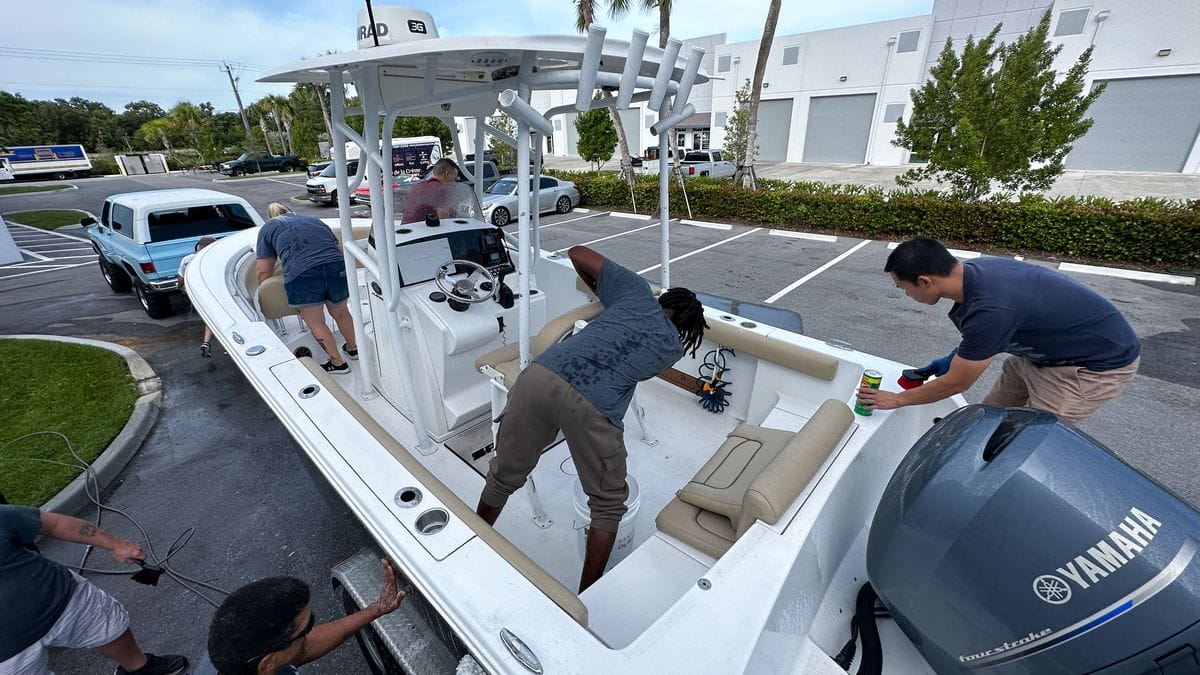
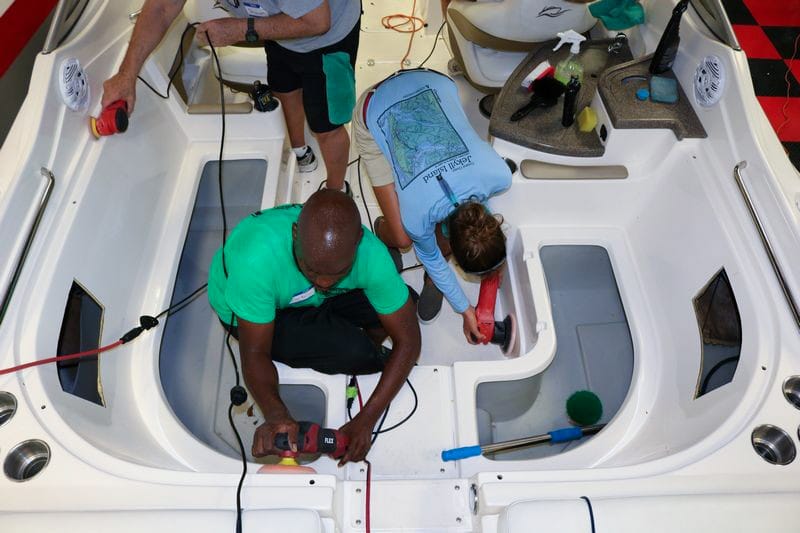
Second – In some of the pictures above, I had over 20 people in a class and when I have large classes like this, I bring in 2 boats. Now follow me, I can easily put 12 people on the outside of a large center console boat. This would be 6 people to a side, and this provides each person with PLENTY of boat real-estate to train with all the various tools, products, and techniques.
I cannot put these same 12 people on the INSIDE of the boat to learn boat interior detailing. It’s the logistics of the number of people I can provide a first class experience to for a single boat. The last thing you want to do is to have 12 people trying to get into the boat to learn how to machine scrub non-skid surfaces. Too many people means no room to work.
Give People the Option to Learn Just Exterior Boat Detailing
By teaching an exterior boat detailing the first day, and by allowing people to sign-up for only the topics they want to learn, normally what happens is I have full classes for the first day and half-full classes for the second day.
Of course when I have a full class for the second day, it’s completely doable, it just means cycling small groups through the different topics until each person has had a chance to get inside the boat and learn whatever the topic is for the current portion of the class.
Day 1: Extreme Exterior Boat Detailing
Students will start with a pre-prepped boat to provide maximum time for gelcoat correction and ceramic coating protection. I do not cover washing or decontaminating the boat on this day.
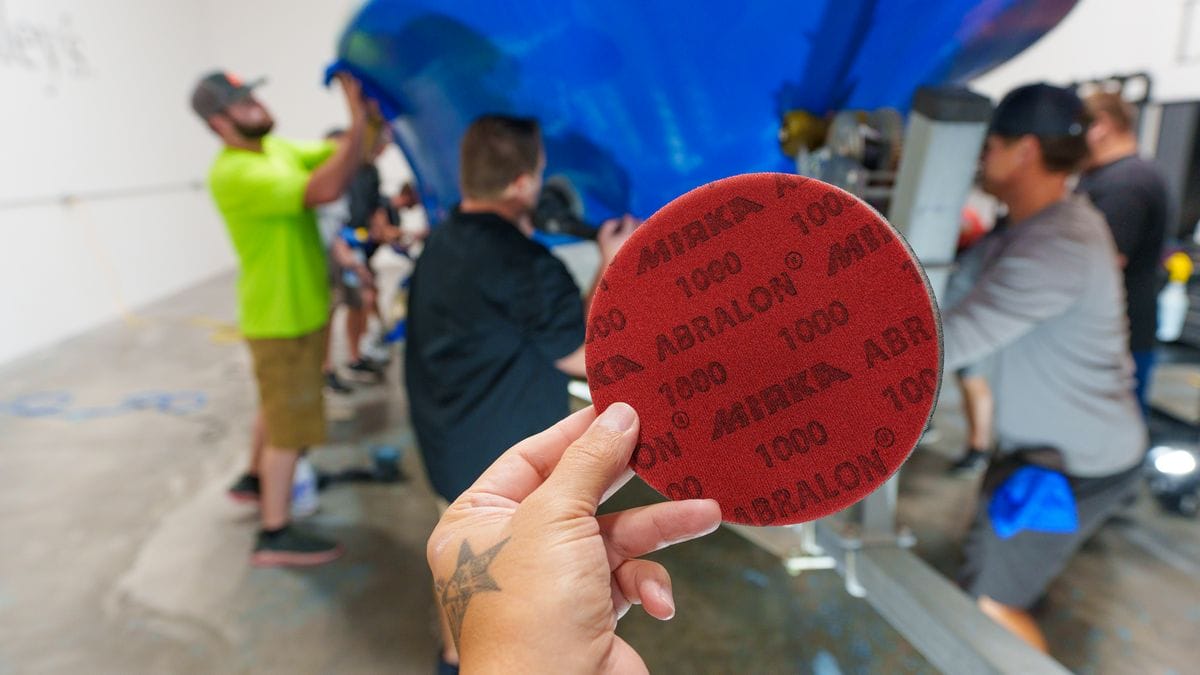
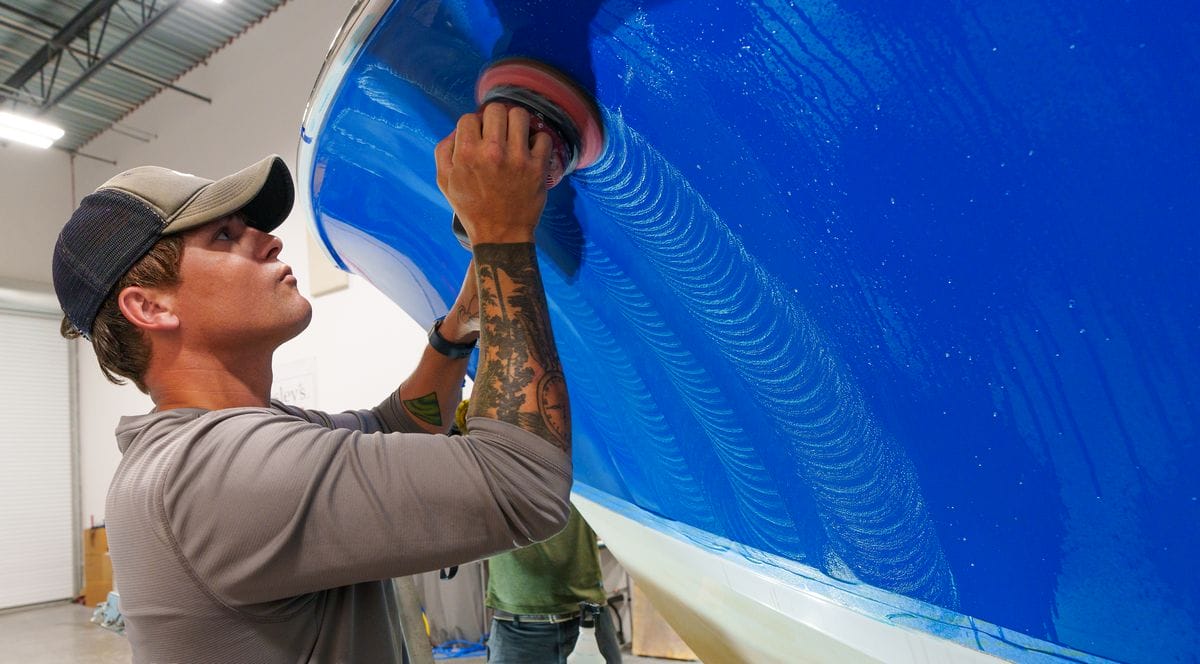
Topic 1: Machine Wet Sanding
Using gear-driven orbital sanders with the Mirka Abralon Sanding System, students will learn how to machine wet sand the hull to remove deep oxidation, water stains and dock rash.
Why teach wet sanding first? The surface of neglected gelcoat is going to be rough with a lot of different types of surface textures caused by salt stains, oxidation, dock rash, age, and wear-n-tear. The foam backed, abrasive mesh surface of the Mirka Abralon sanding discs excels at making the initial cut to mow-down any and all surface irregularities while flattening out the gelcoat surface.
You can do this via dry sanding, but you’ll waste the disc incredibly fast. The abrasive mesh face of the Mirka Abralon sanding discs are a lot more forgiving and thus will do a better job with better longevity as compared to dry sanding discs.
First Sanding Step Using 1000 Grit Mirka Abralon via Machine Wet Sanding
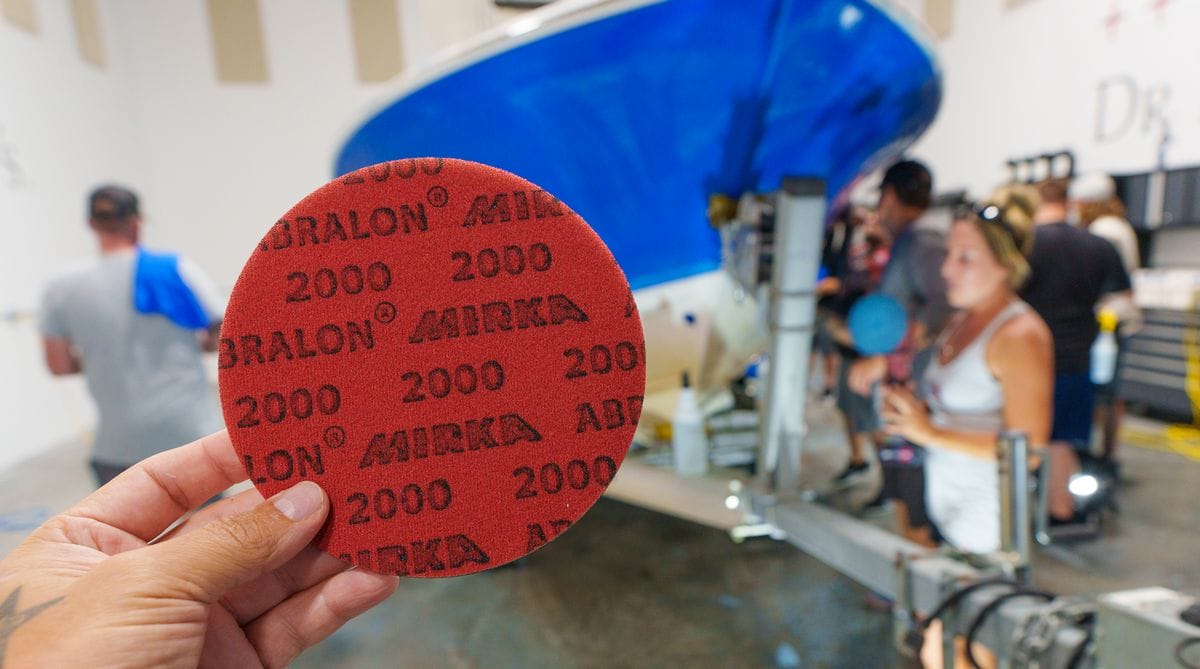
Refining 1000 Grit to 2000 Grit
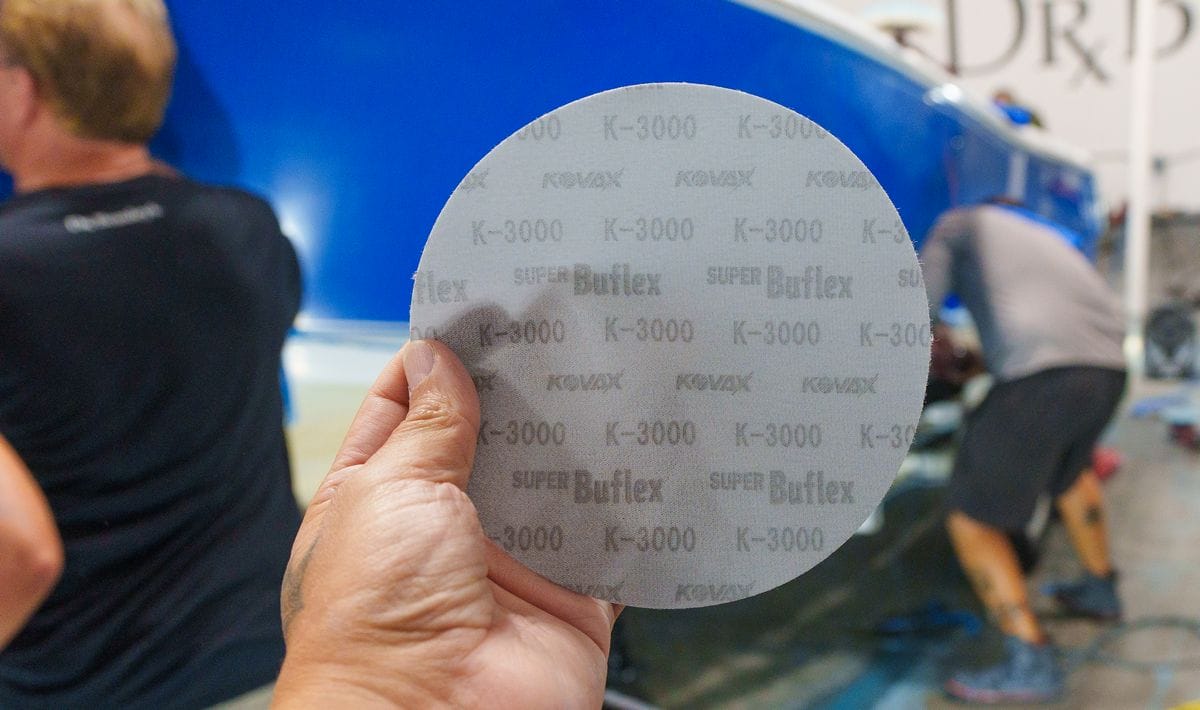
Topic 2: Machine Dry Sanding
After the machine wet landing step, students will learn how to machine dry sand using the Eagle Abrasives by KOVAX system. The machine dry sanding step is used to refine the deeper wet sanding scratches to create more shallow sanding marks to make the rotary step faster and easier.
Machine dry sanding is also the best approach for anyone wanting to create a show car finish on a boat. The reason why has to do with the design of the sanding discs and more importantly, the micro-hook interface pads.
Start with 2000 Grit
We start with 2000 grit to ensure all previous 1000 grit and 2000 grit WET sanding marks are fined to a more uniform 2000 grit via dry sanding.
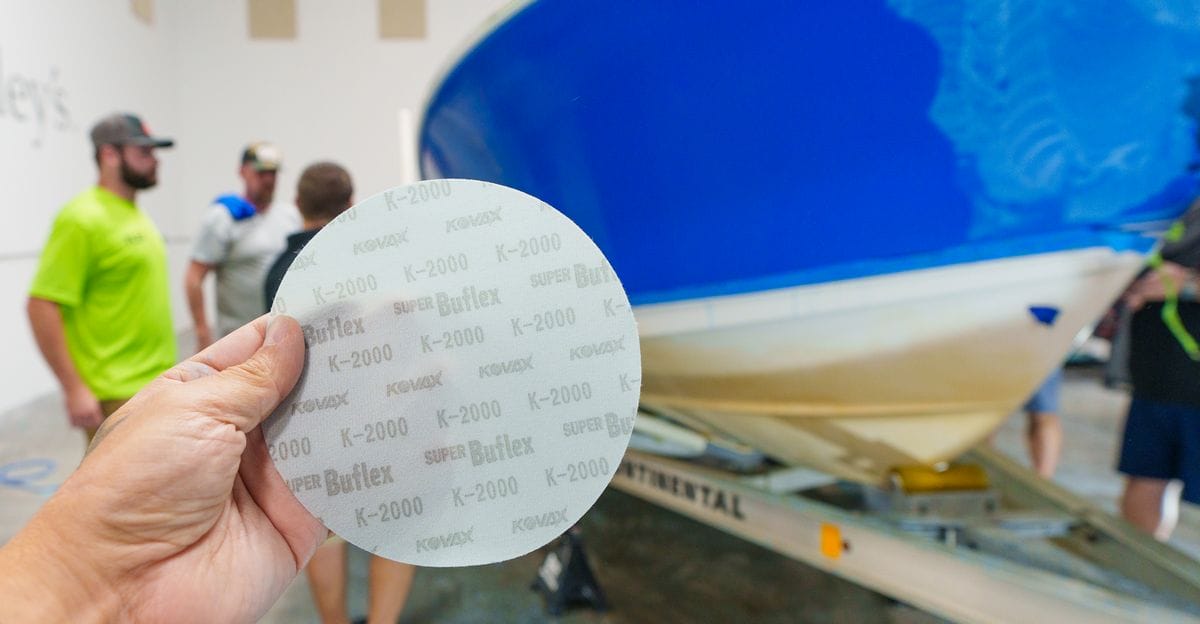
2500 Grit
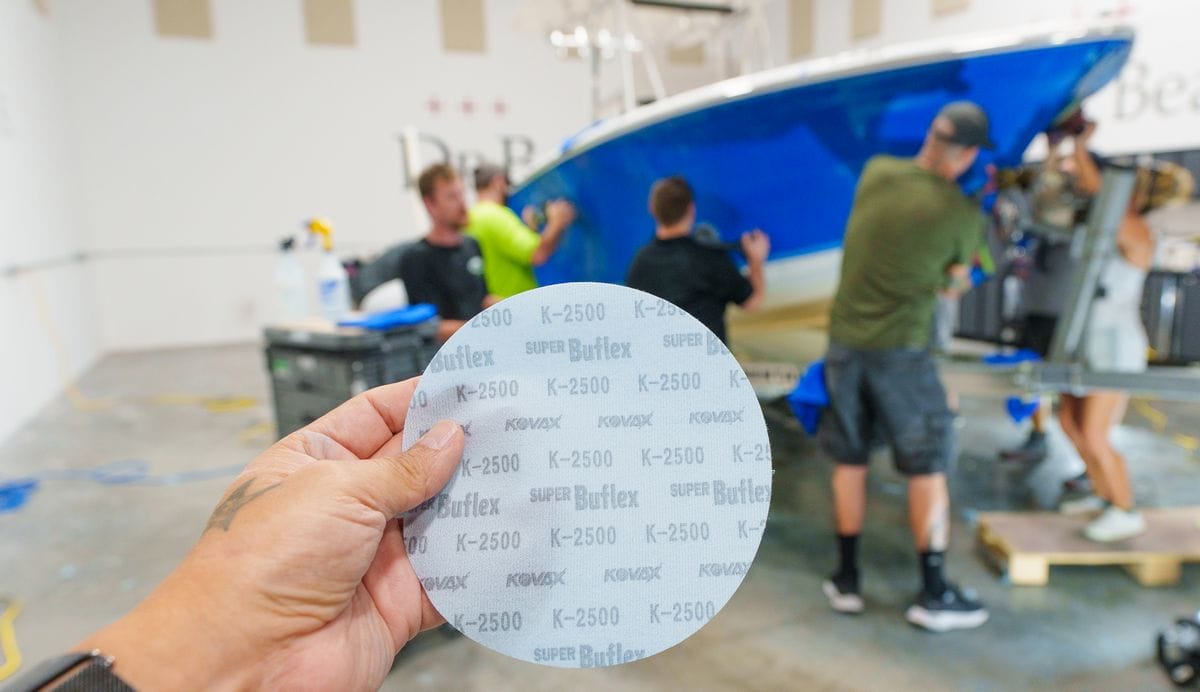
Optional: 3000 Grit
The choice is yours; you can spend more time sanding or more time buffing. Sanding tends to be easier and faster than trying to buff out deep scratches. In our classes, I teach how to sand-out to a higher grit sanding disc as this will make buffing with a rotary buffer to remove the sanding marks faster and easier. Seasoned professionals will tend to finish out at 2000 grit and then buff hard for hours, and this is an option.
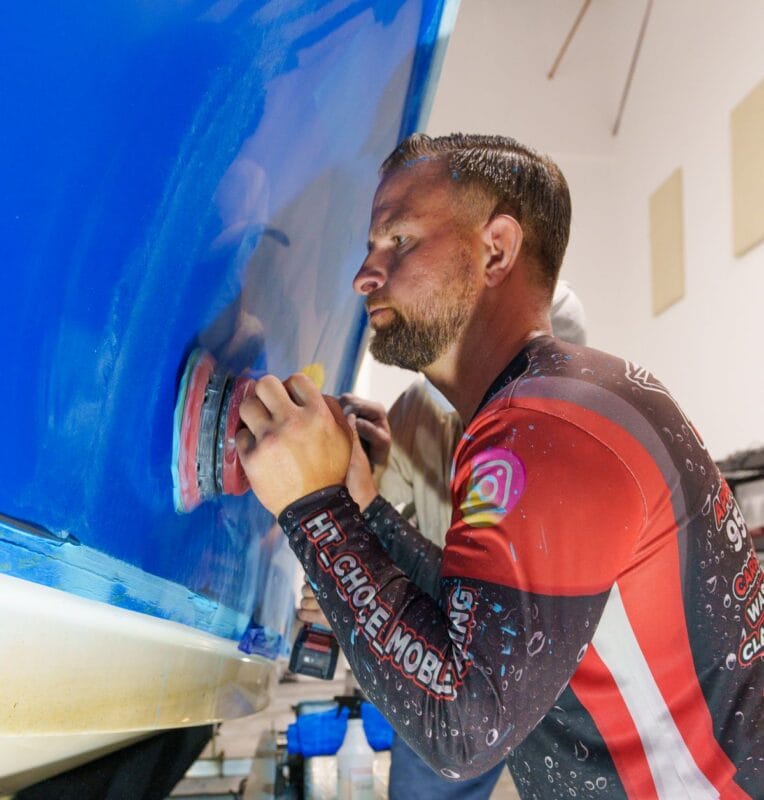
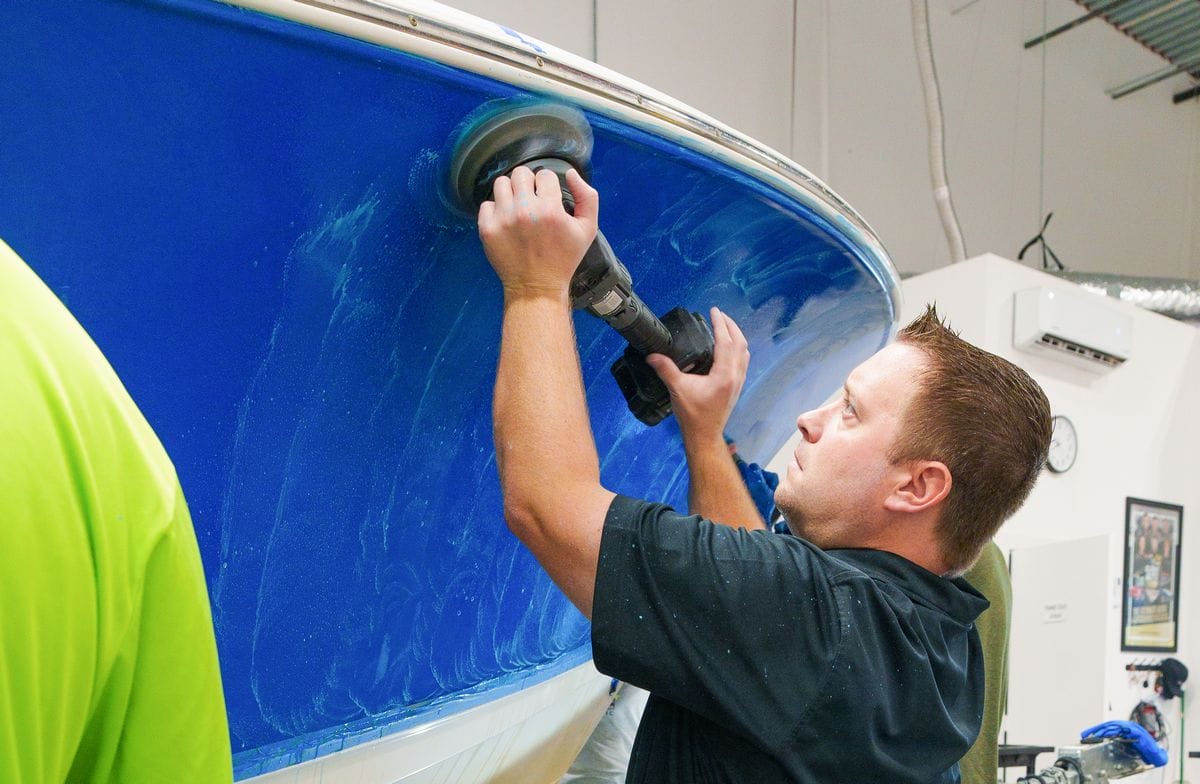
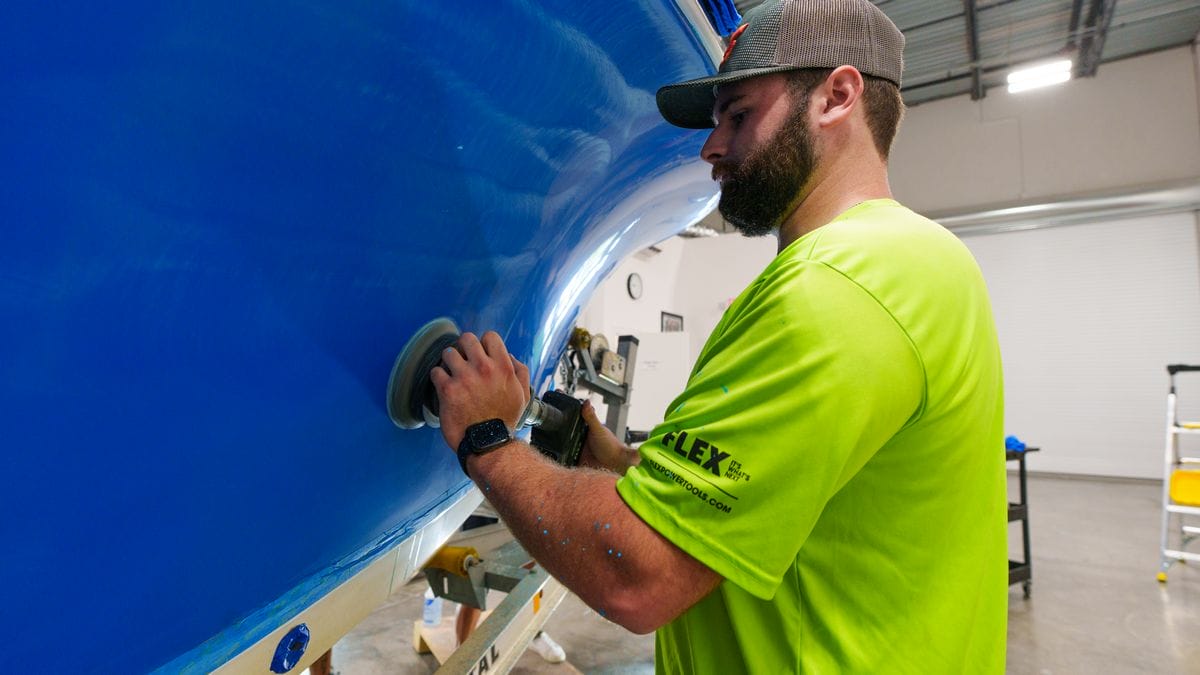
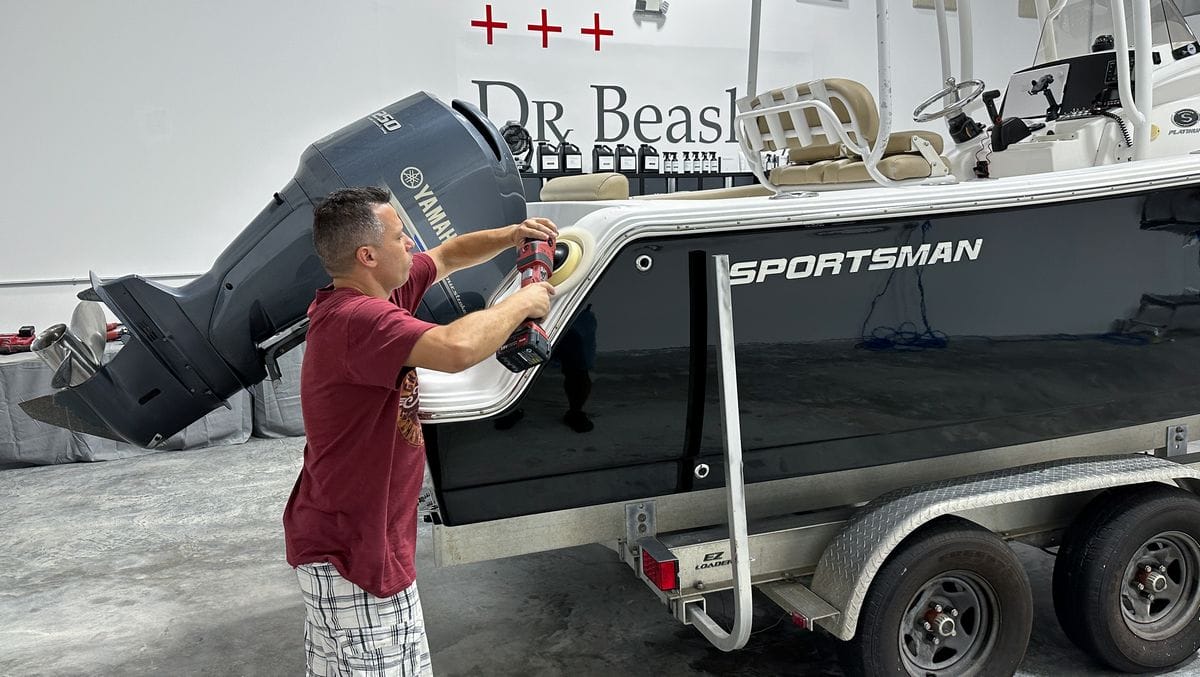
Topic 3: Sanding Mark Removal from Gelcoat with Rotary Polishers & Wool Pads
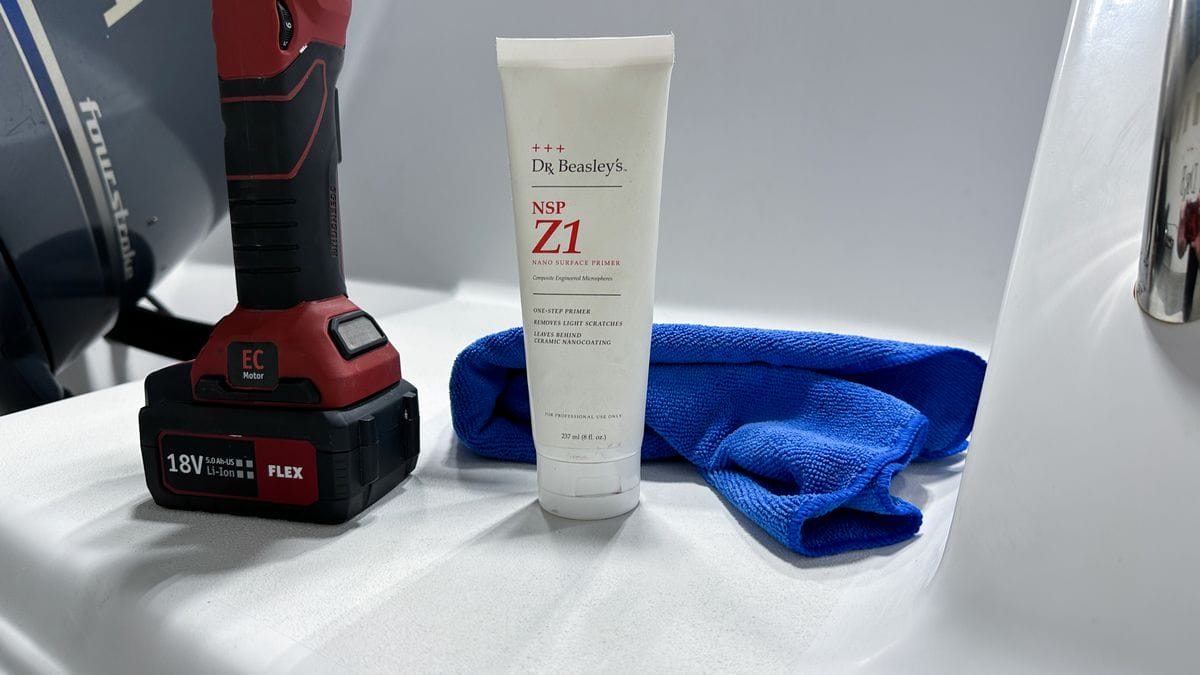
Following the machine dry sanding step, the sanding marks instilled in the gelcoat must be removed as the next step towards a show boat finish. To do so, students will use rotary polishers with wool pads and a Dr. Beasley’s Nano Surface Primers.
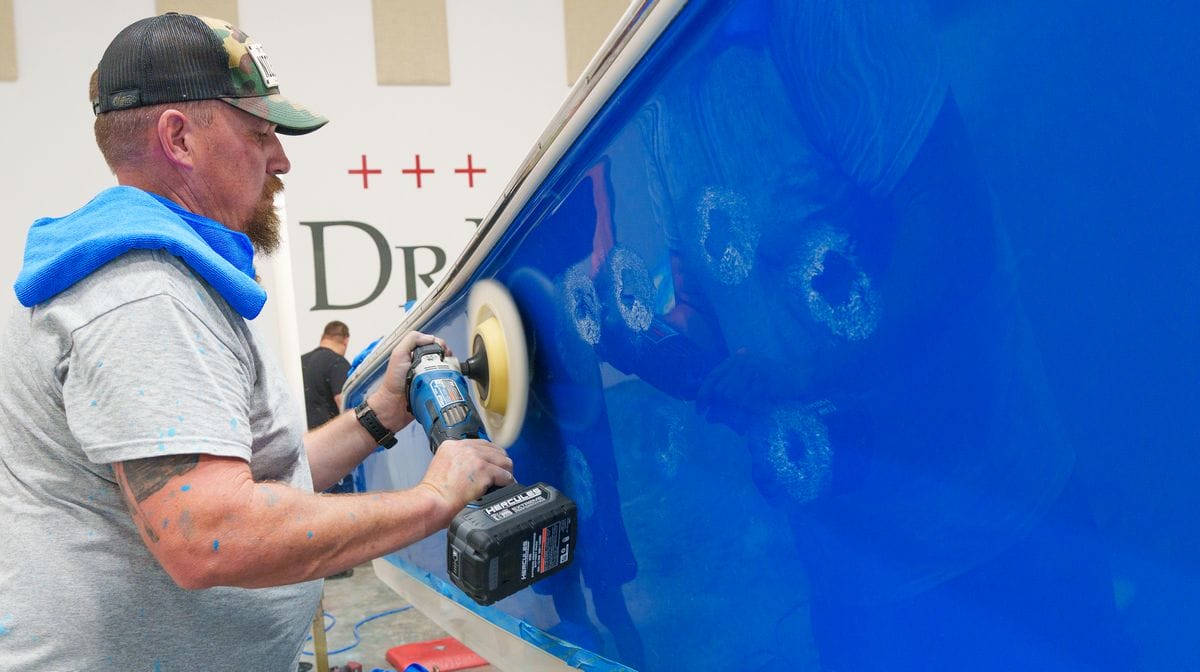

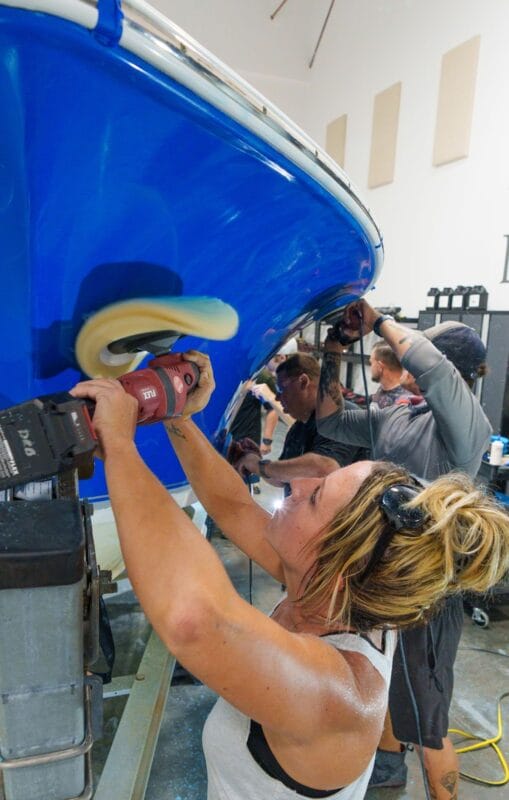
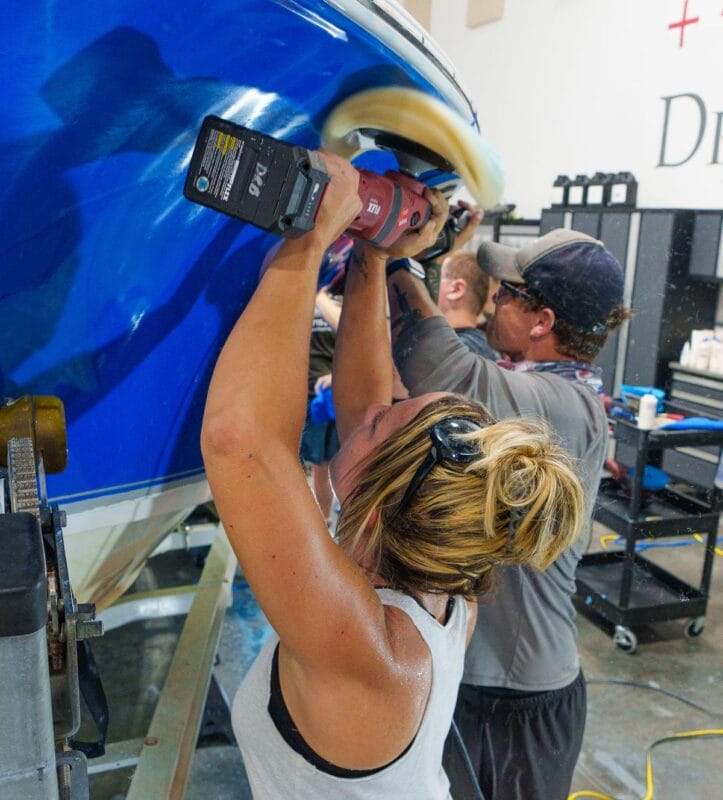
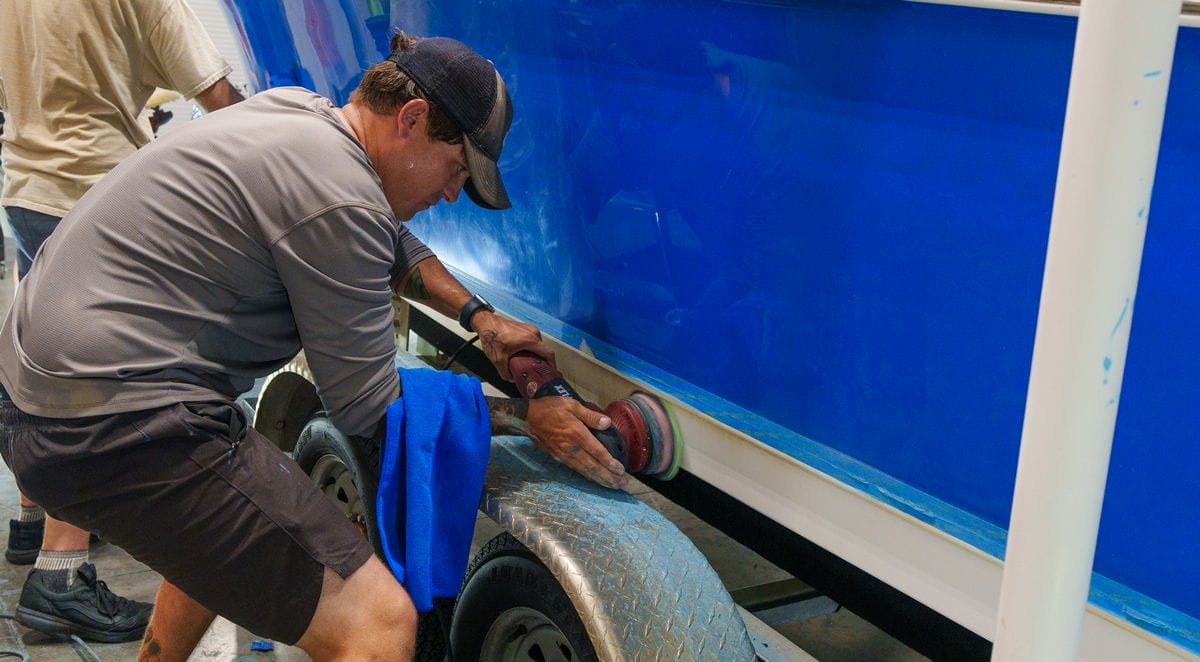
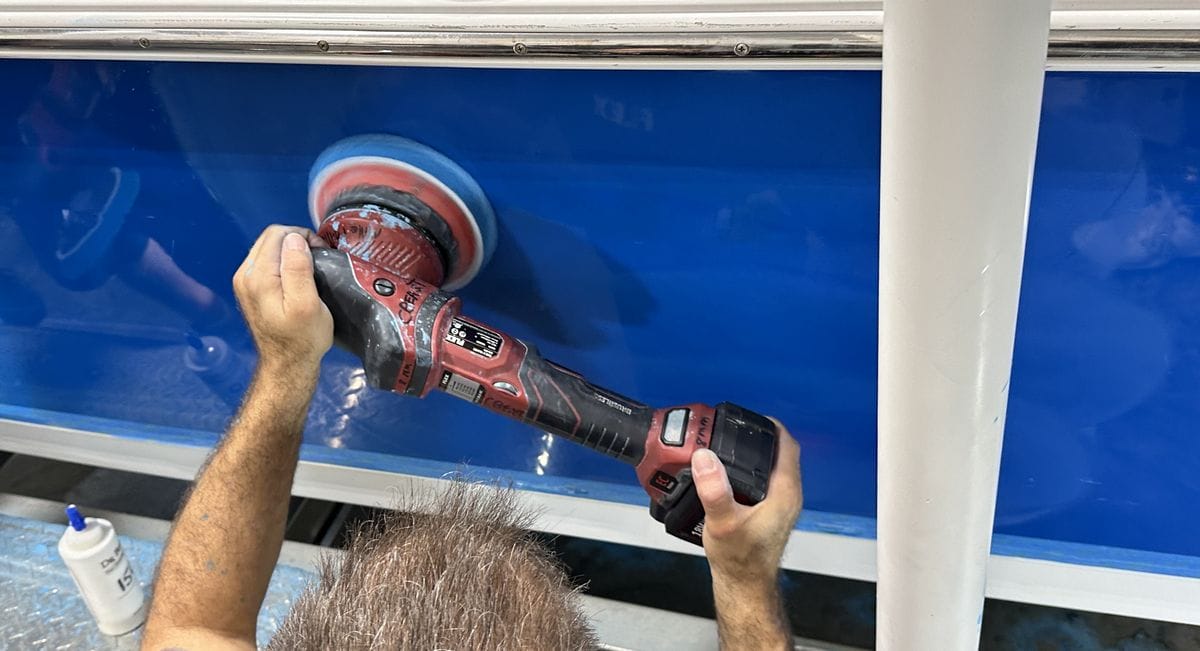
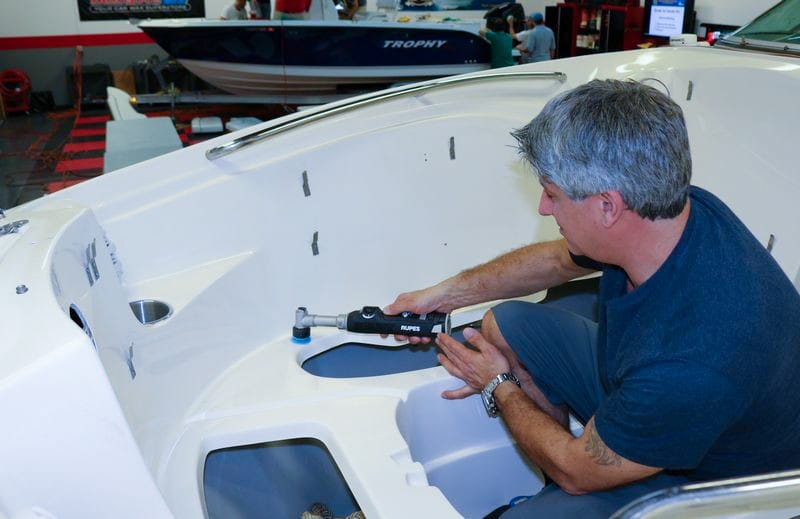
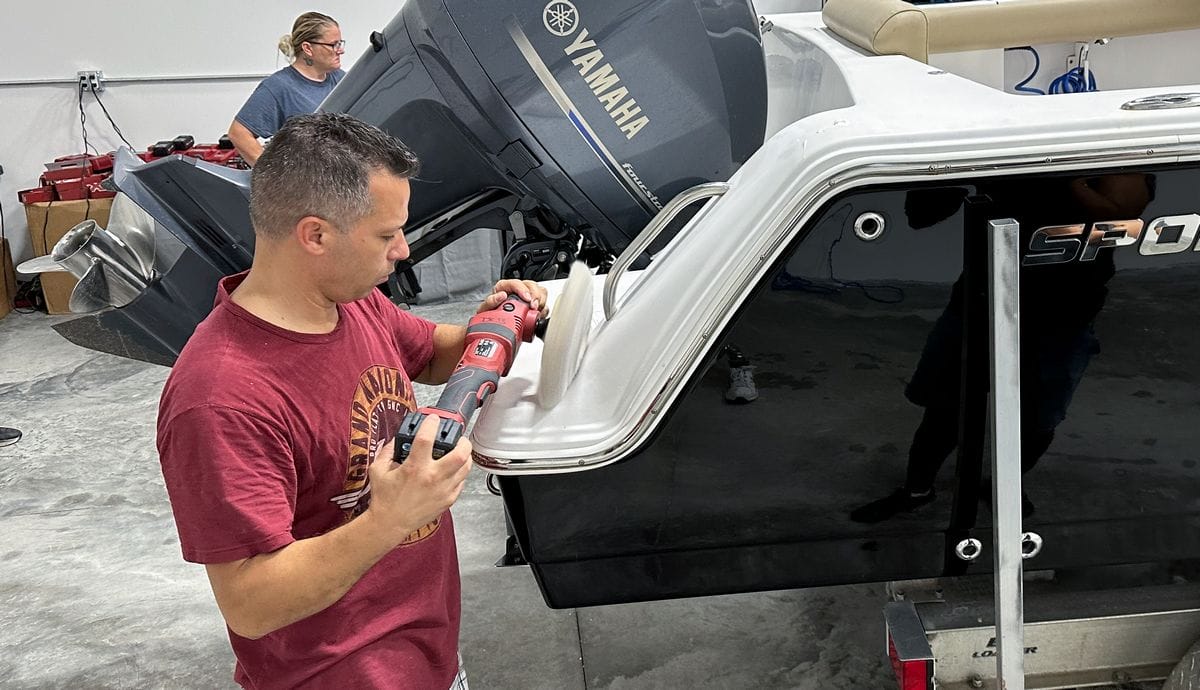
Topic 3: Hologram Removal from Gelcoat with Orbital Polishers & Foam Pads
Once the sanding marks have been removed, the holograms instilled by the rotary polisher/wool pad combo must be polished out to leave a defect-free gel coat finish. Students will use orbital polishers with foam CUTTING pads to complete this step.
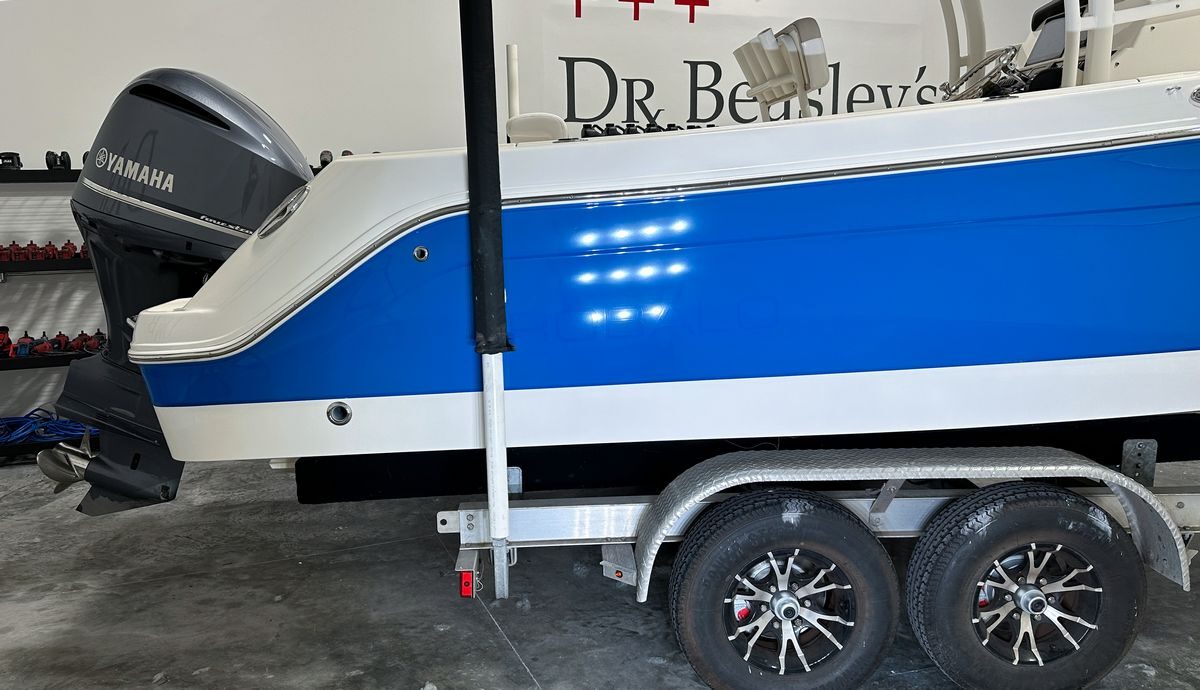
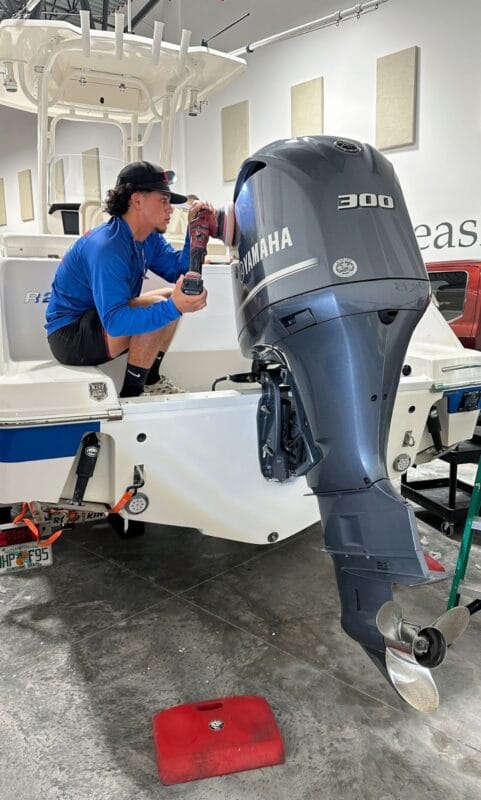
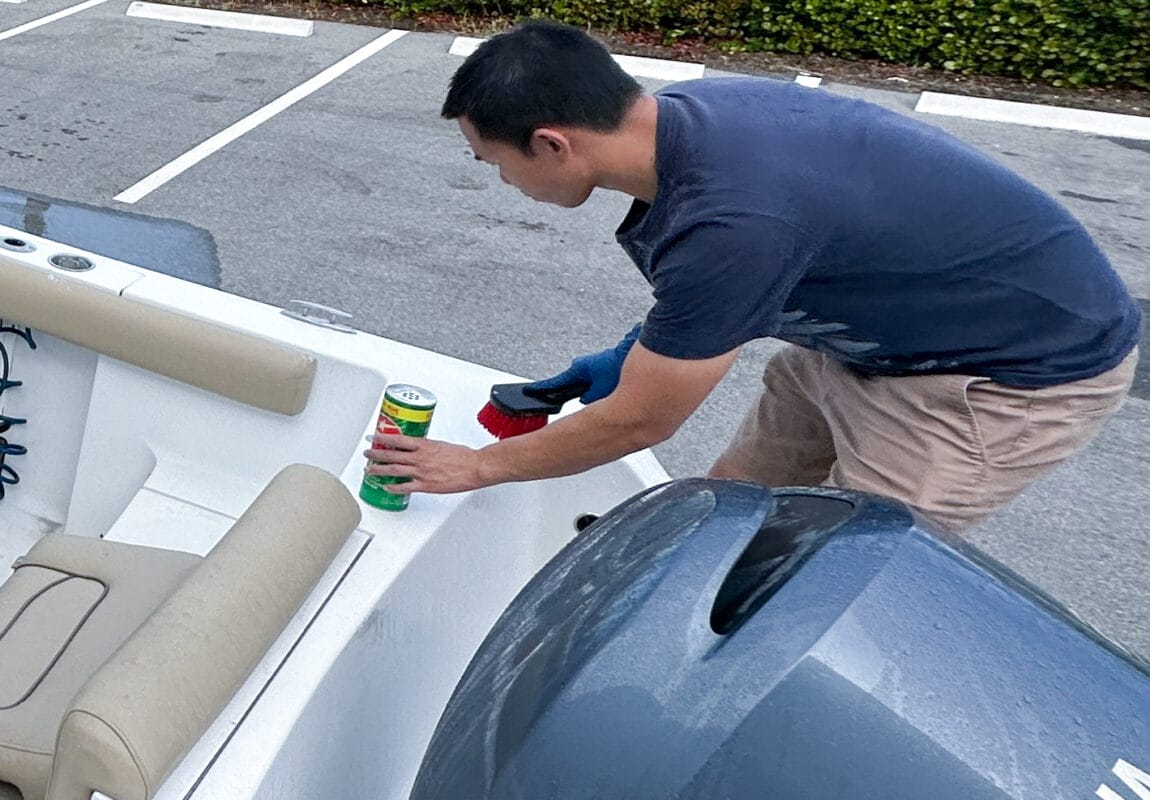
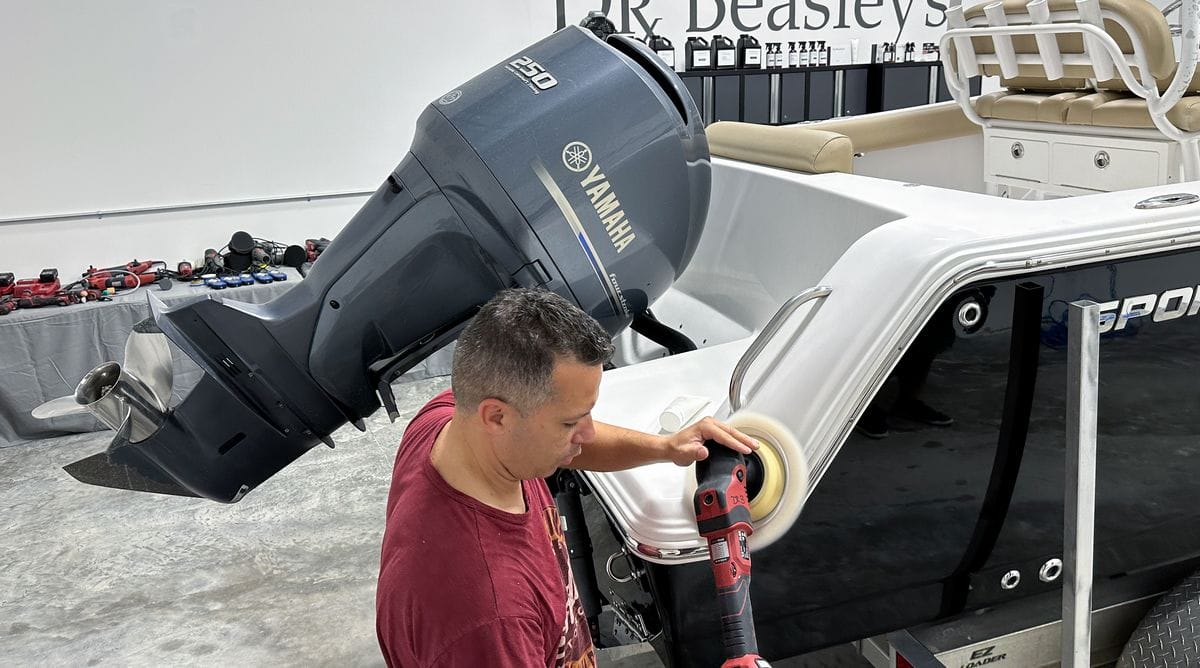
Outboard Engine Detailing
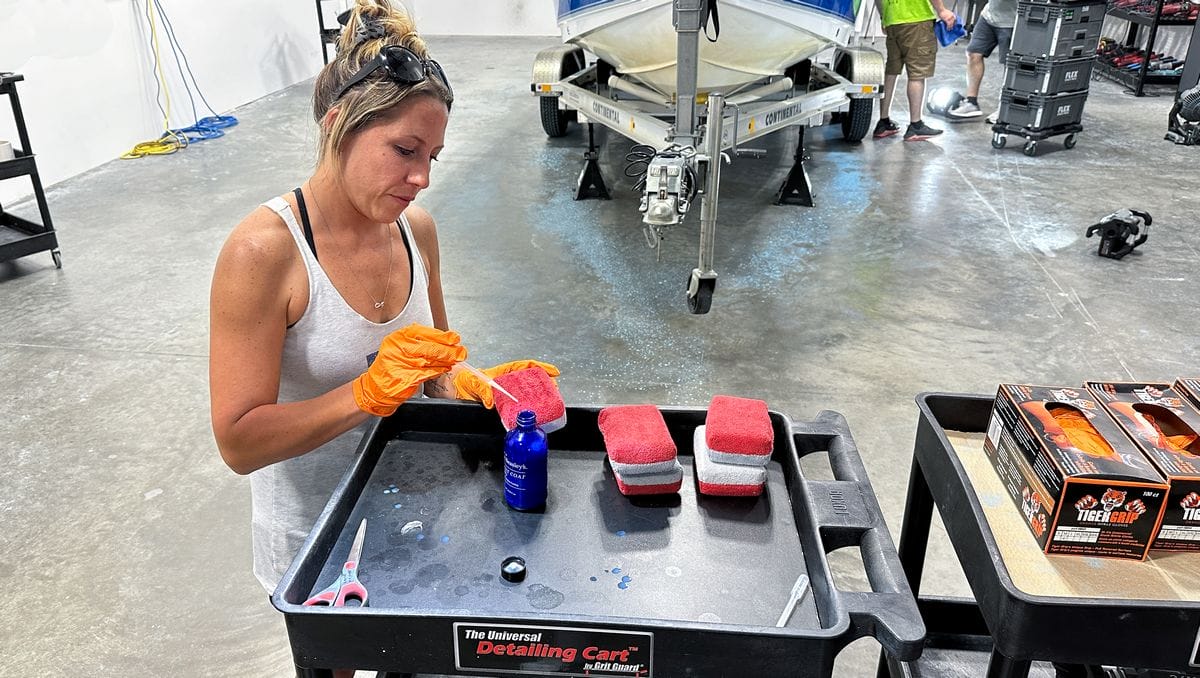
Topic 4: Gelcoat Protection with Marine Ceramic Coating
Finally, the newly restored gelcoat must be protected with a durable marine ceramic coating — in this case Dr. Beasley’s Boat Coat Pro. Students will apply this coating to the entire hull, learning step-by-step how to properly install a marine ceramic coating.
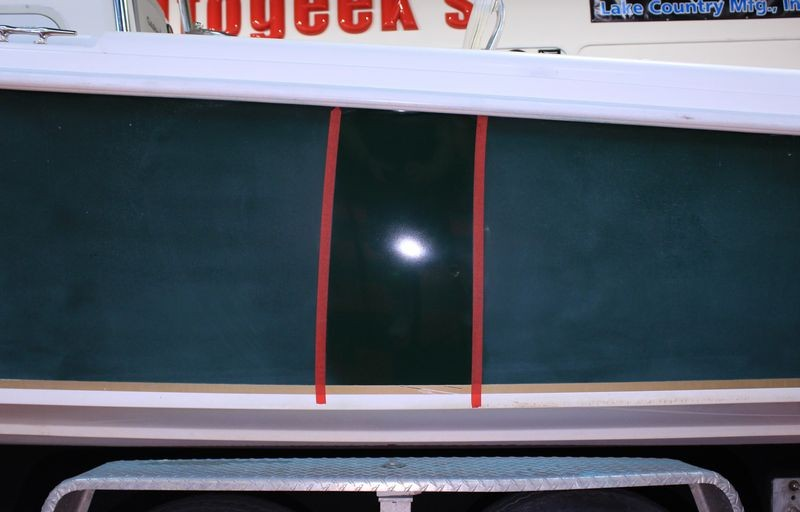
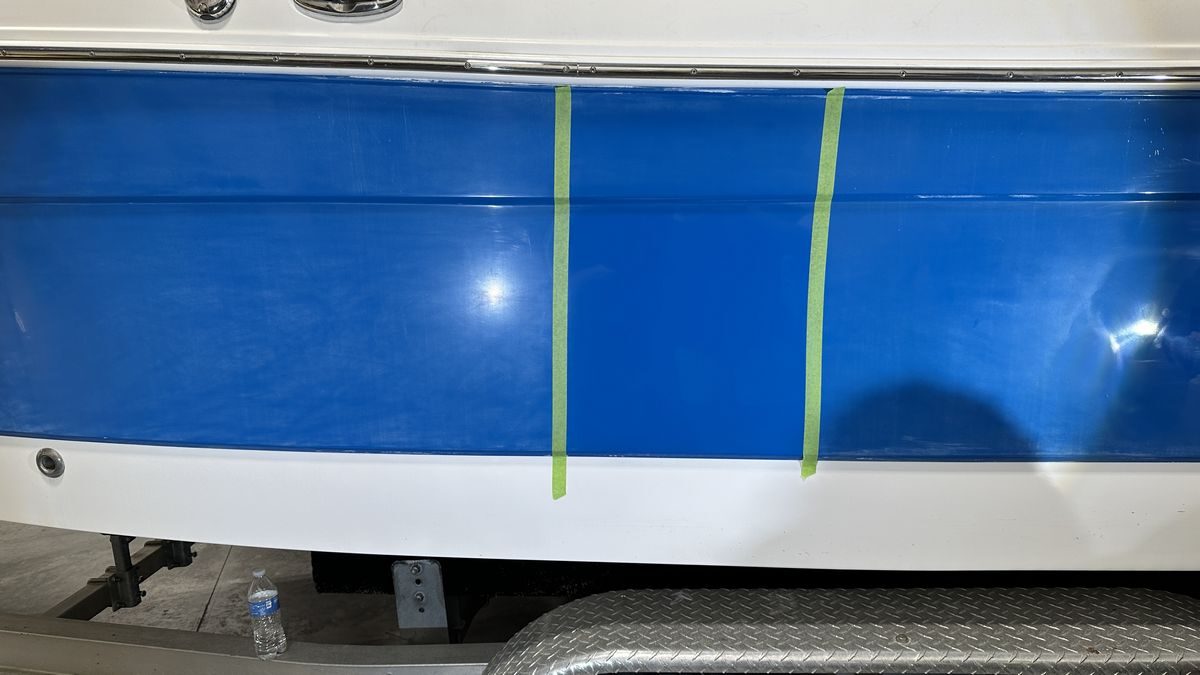
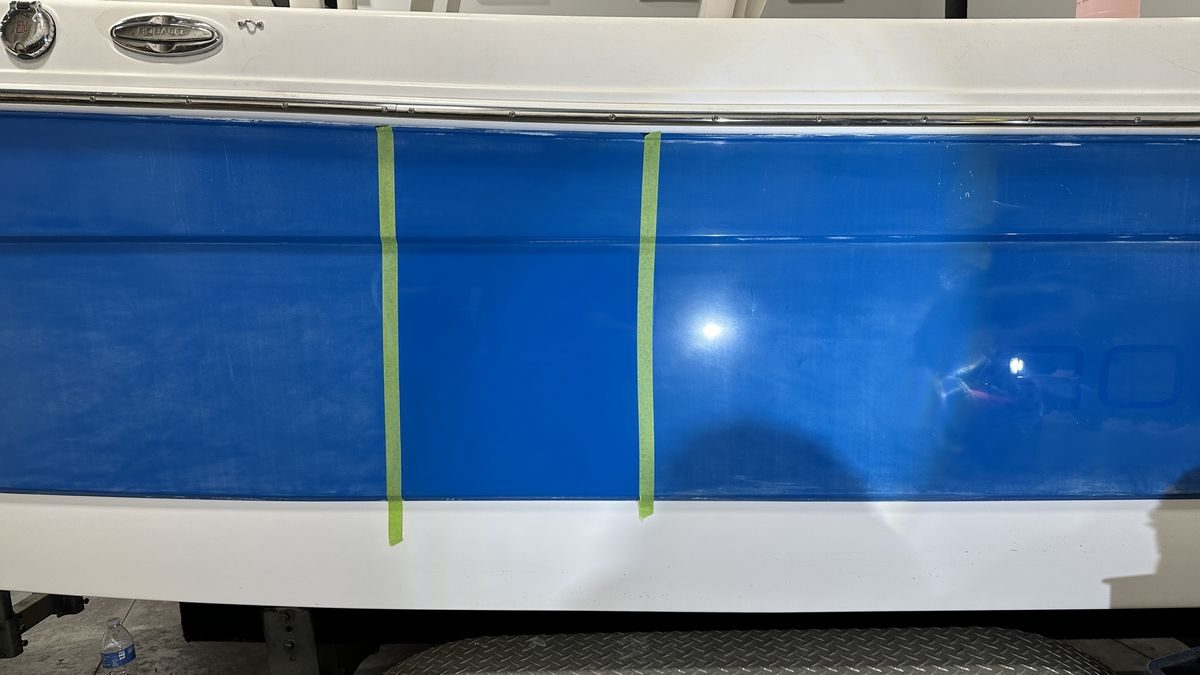
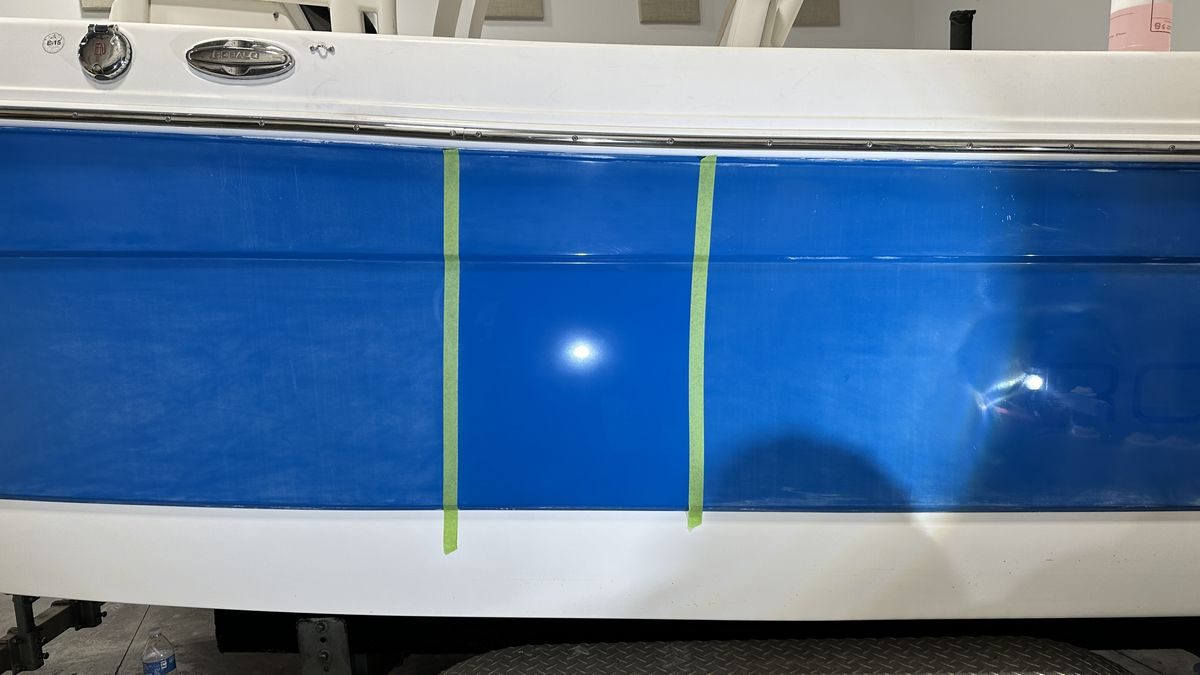
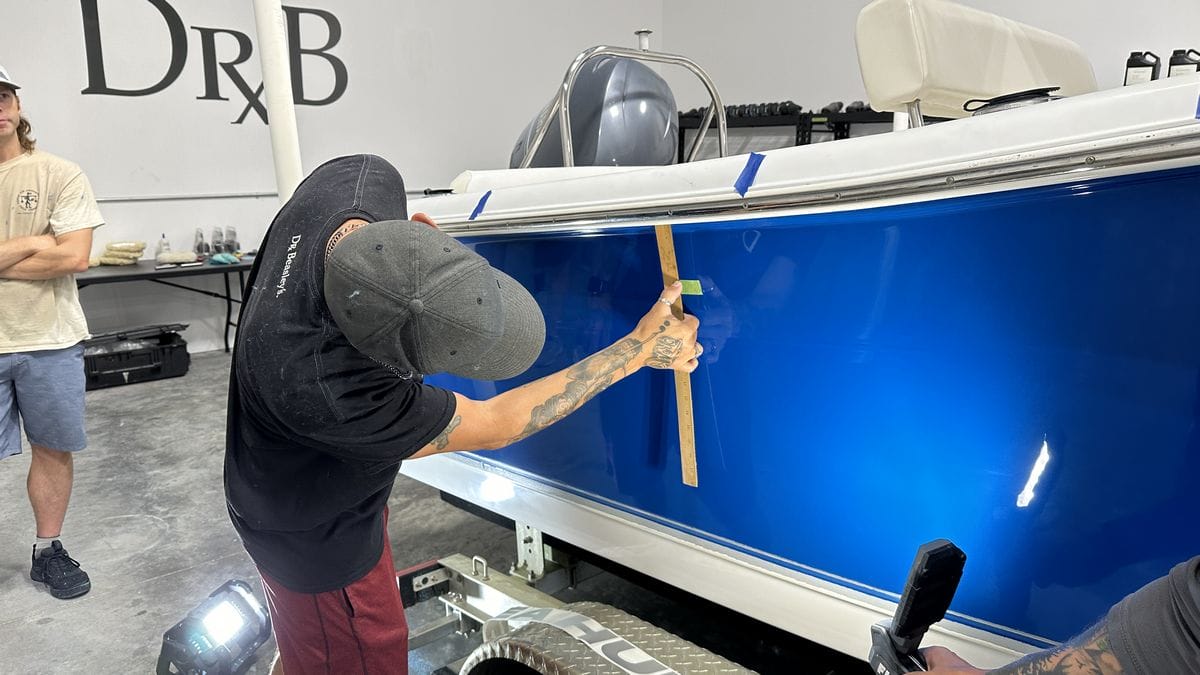
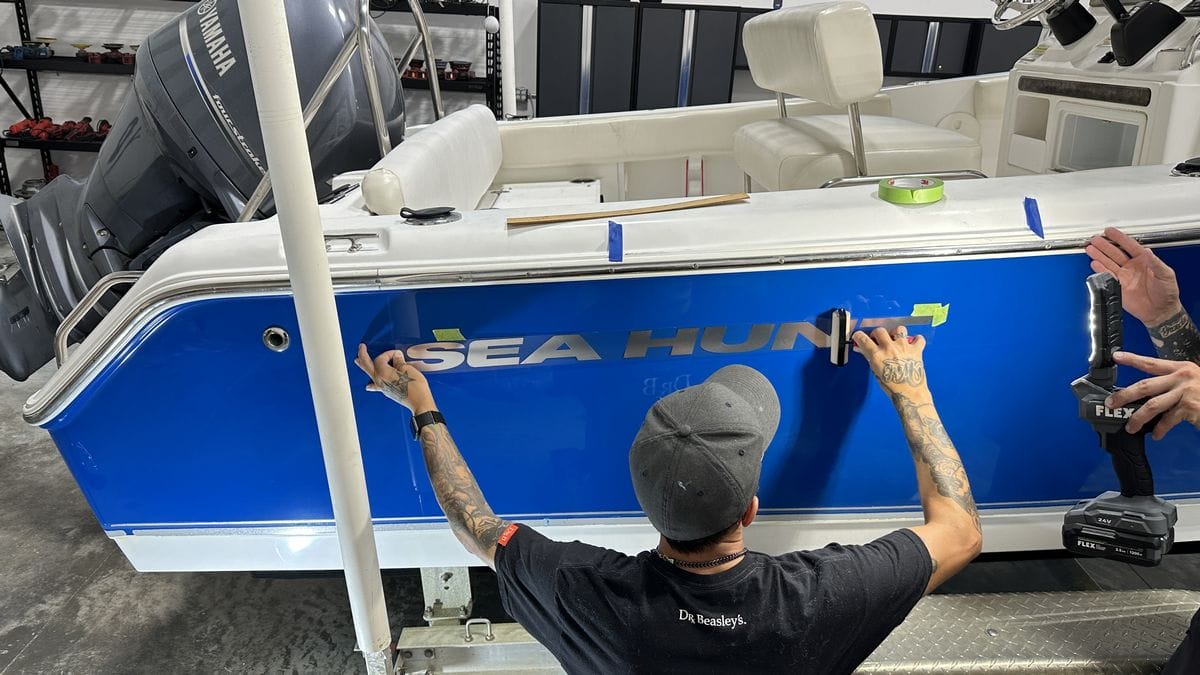
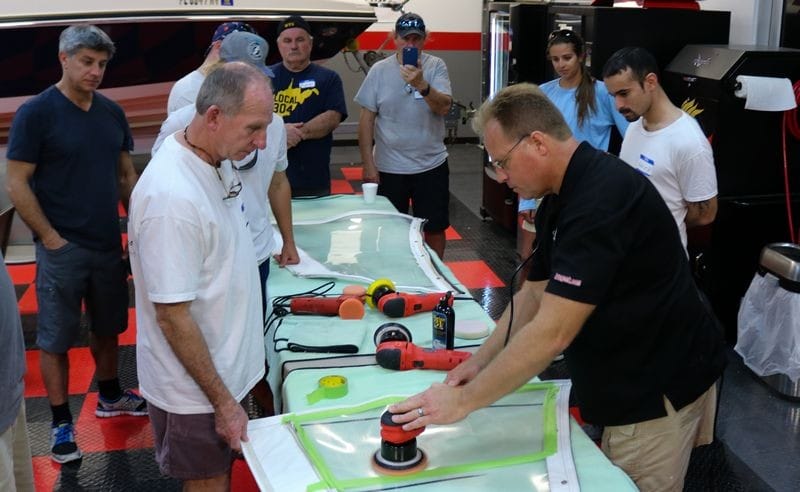
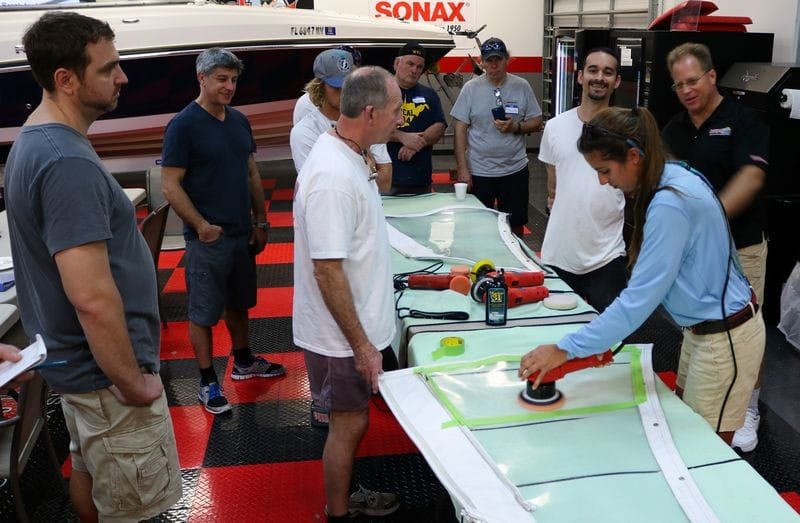
Important: Make Tape Markers
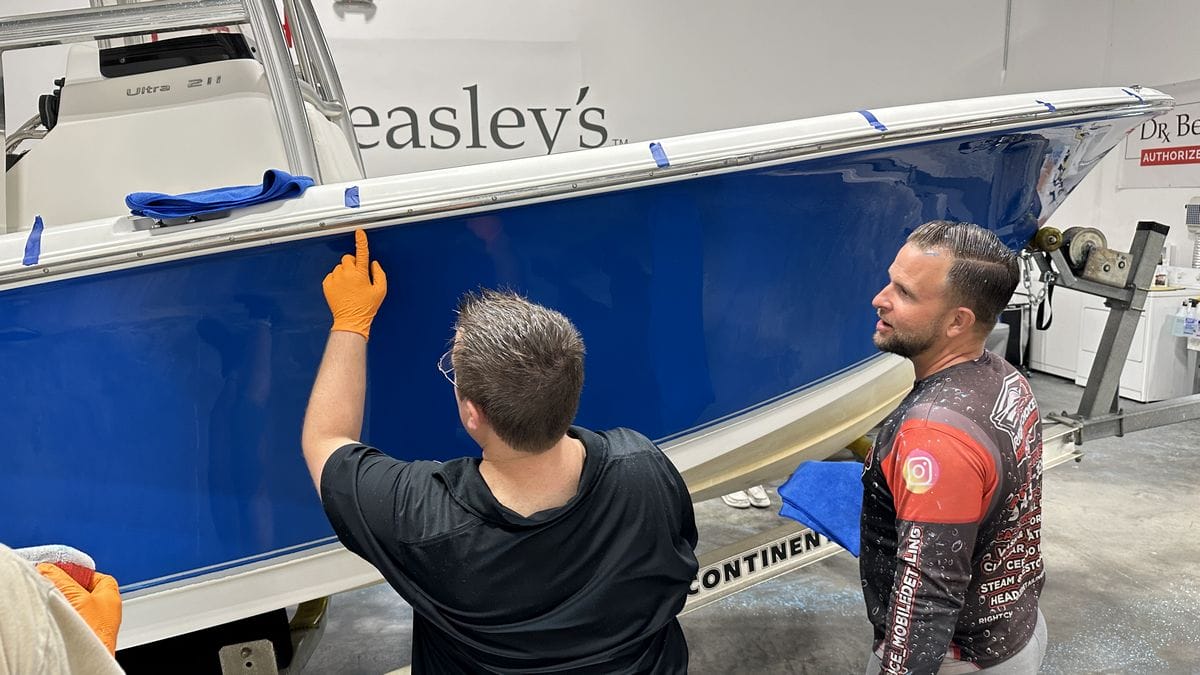
At the start of the process, I recommend having students place strips of tape about every 2 feet (shoulder width), along the topcap. This is to give the students a visual reference point so they know where one section ends, and another section starts. This is MOST important when refining sanding marks otherwise, it can be hard to tell where you left off and where to begin for the next sanding section. And of course, this is also important when installing multiple layers of a gelcoat ceramic coating.
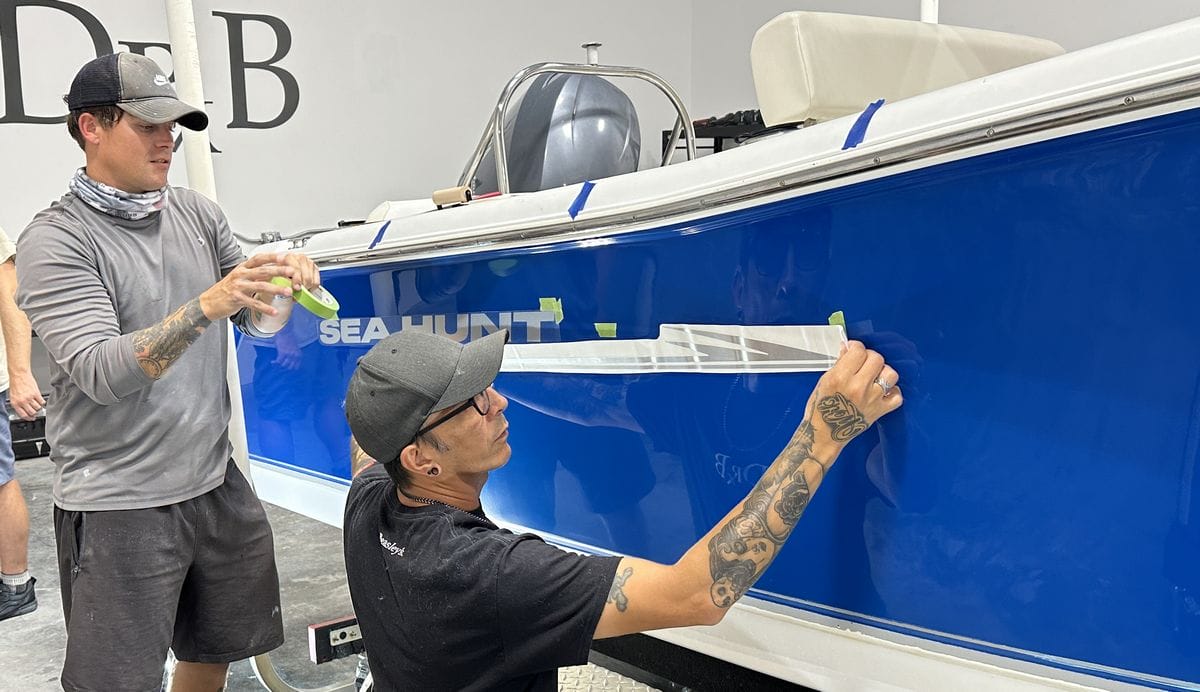
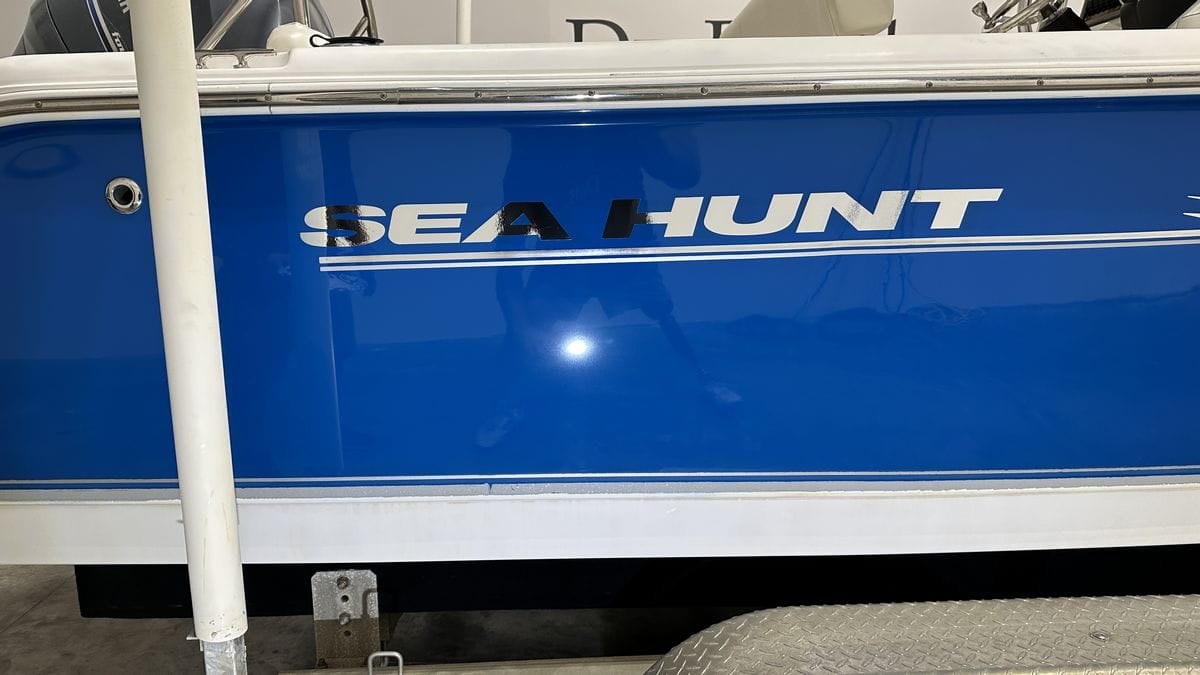
Optional: Vinyl Graphics Installation
Depending upon the owner and the needs of the boat, sometimes students will get a first class lesson on how to install vinyl graphics from Yancy Martinez.

Day 2: Interior Boat Detailing
Students will learn the correct sequence of steps to efficiently clean and protect the various surfaces and materials inside a boat. The goal is to work smarter, not harder, ensuring a thorough yet time-efficient process.
Part of that means completing all cleaning tasks before machine-scrubbing the non-skid surfaces so when you wash the interior, the residue from cleaning will be rinsed away.
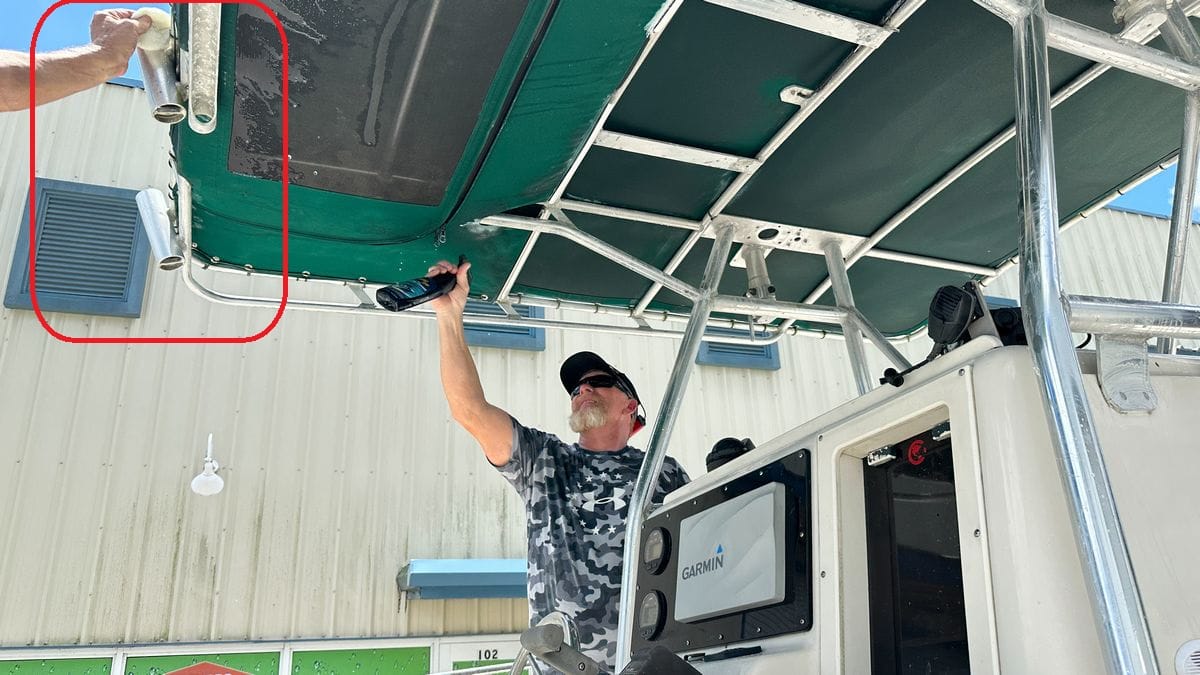
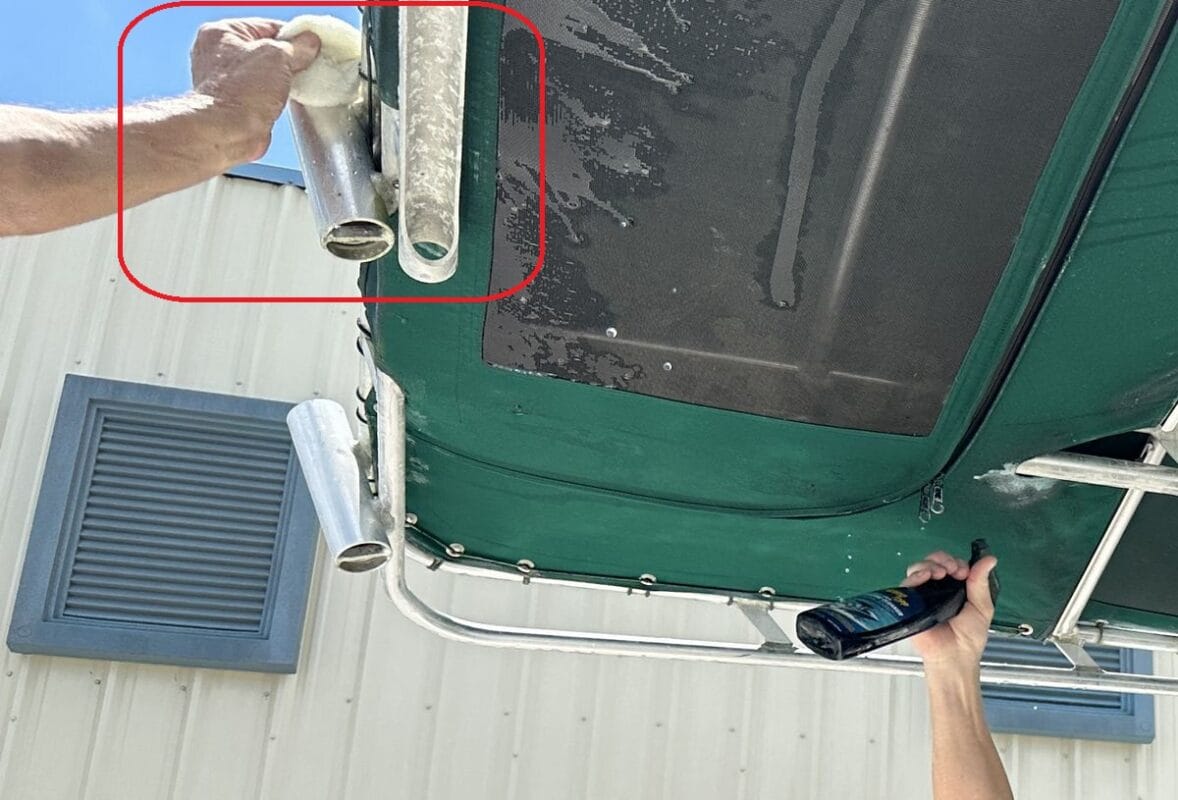
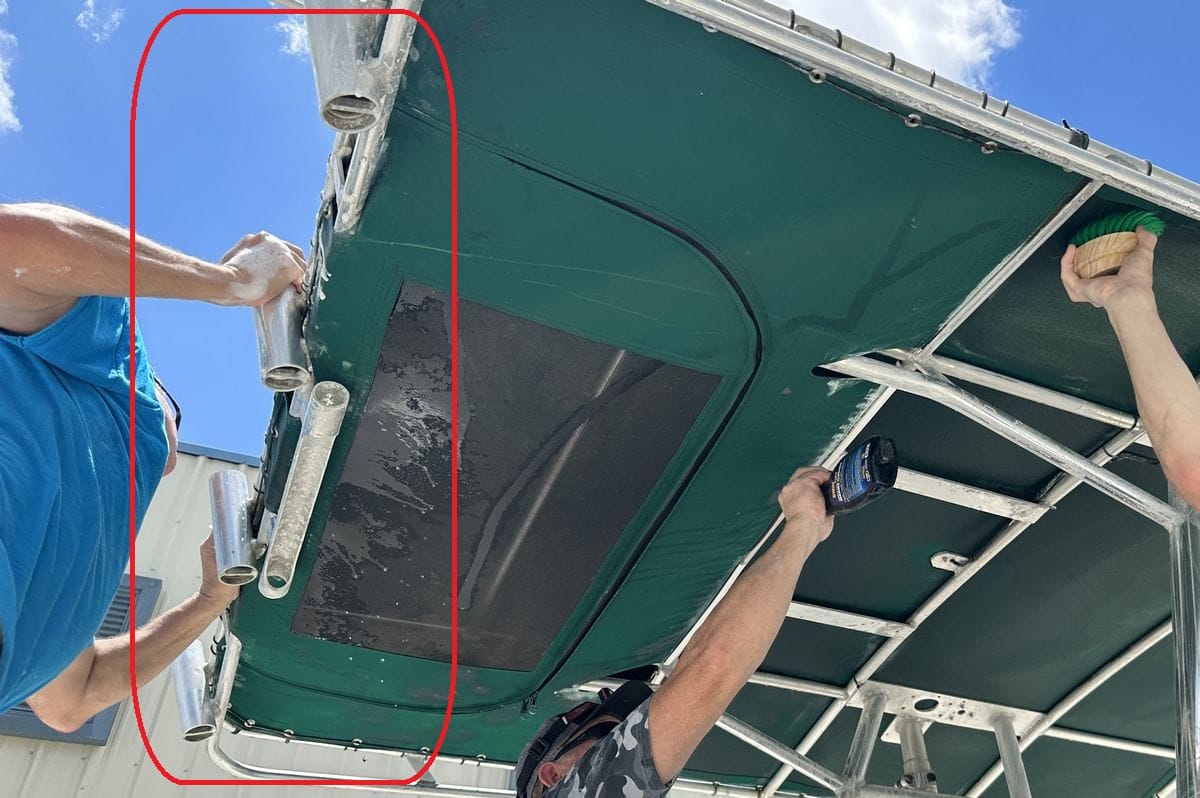
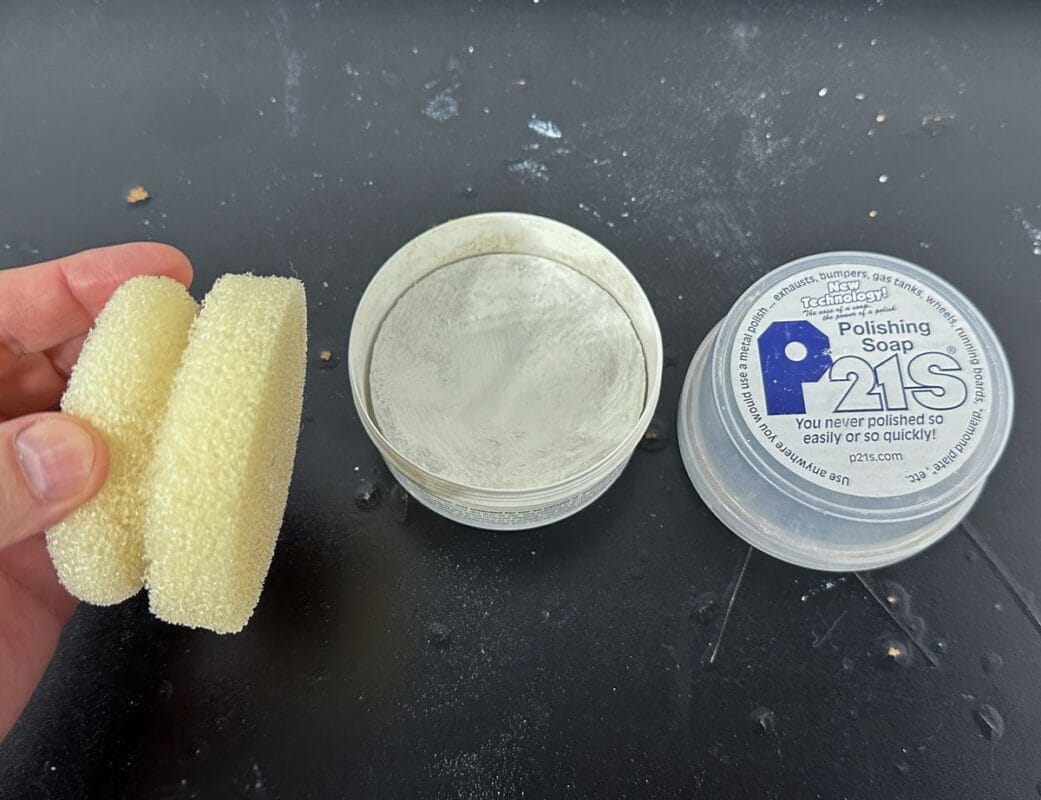
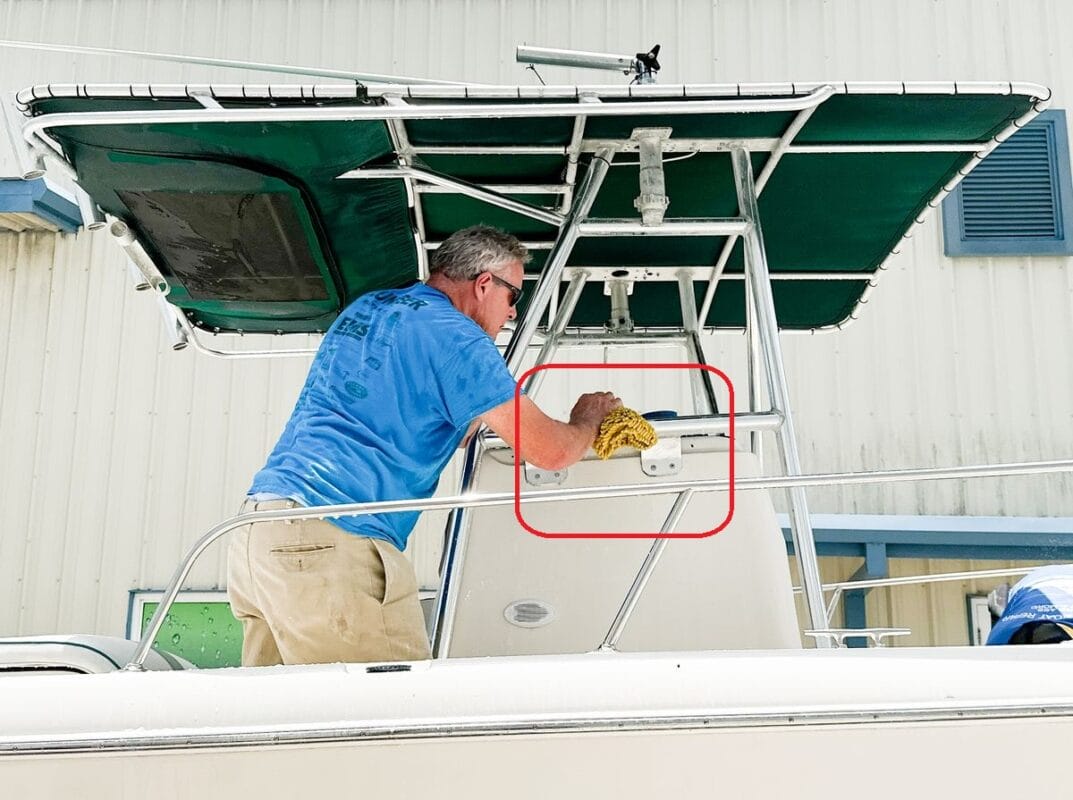
Topic 1: Metal Polishing to Remove Oxidation
Students will learn to remove oxidation and restore the shine to polished metal surfaces. Like I mentioned earlier, the brightwork will be polished before washing the boat so any polish residues will be rinsed away during the wash.
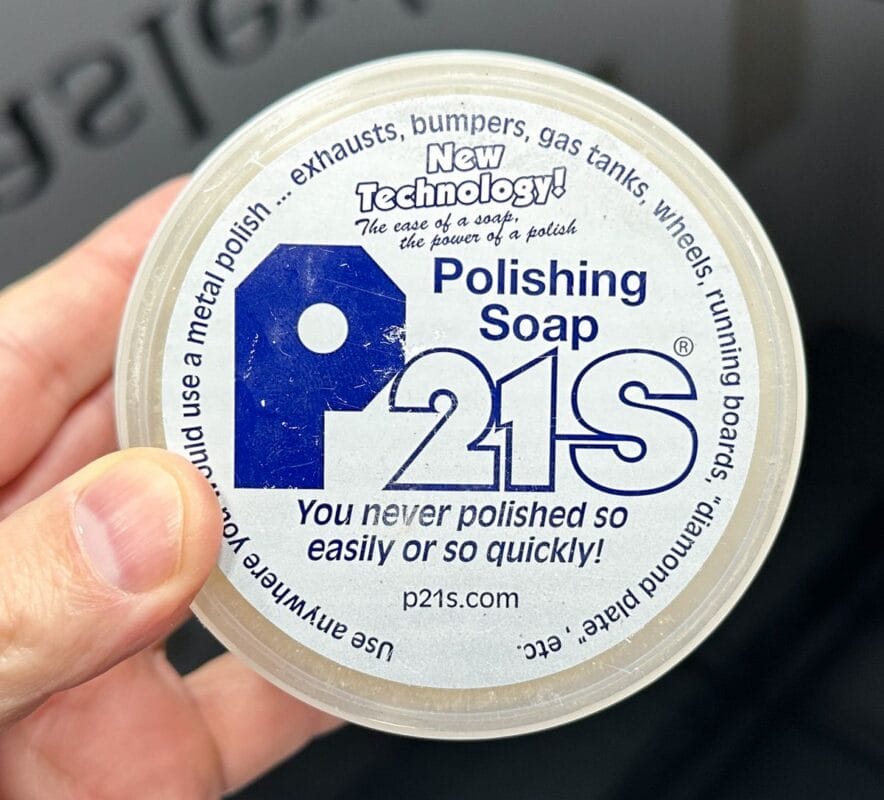
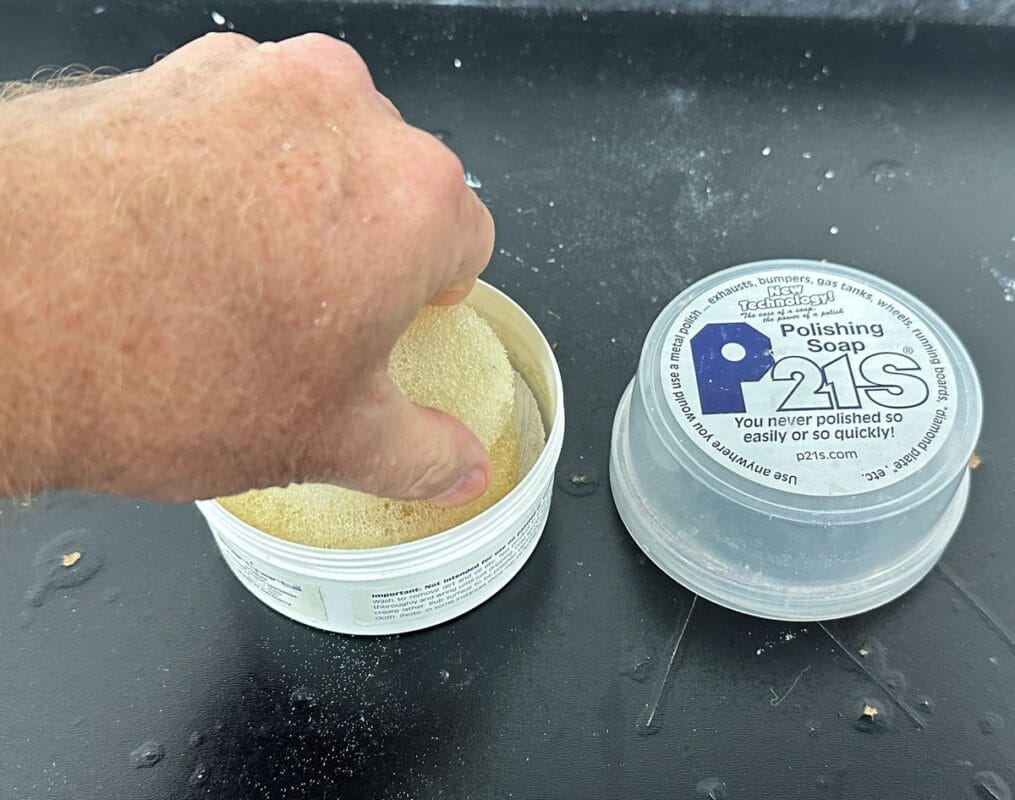
For this I like to show the P21S Polishing Soap. The reason to do this first is because this is a wet application of the polishing soap and thus it is messy. Instead of wiping the surface dry after using the polishing soap, we just leave the soap film on the metal surfaces as it will wash off when we wash the boat. You save time, steps, energy, and microfiber towels.


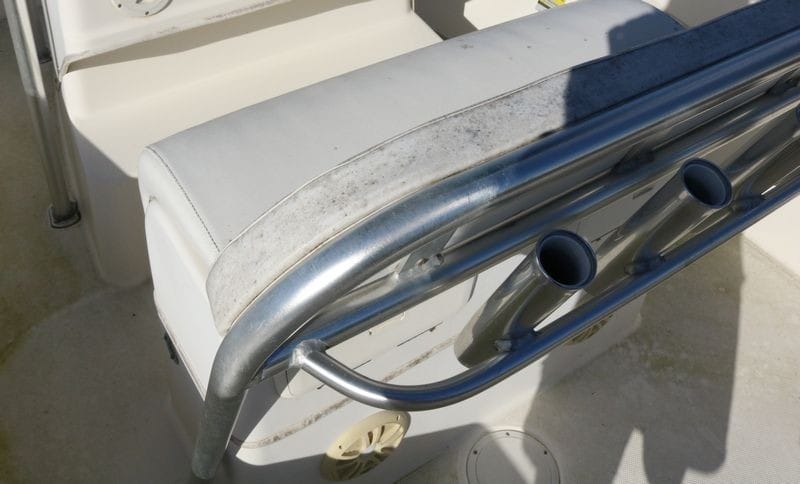
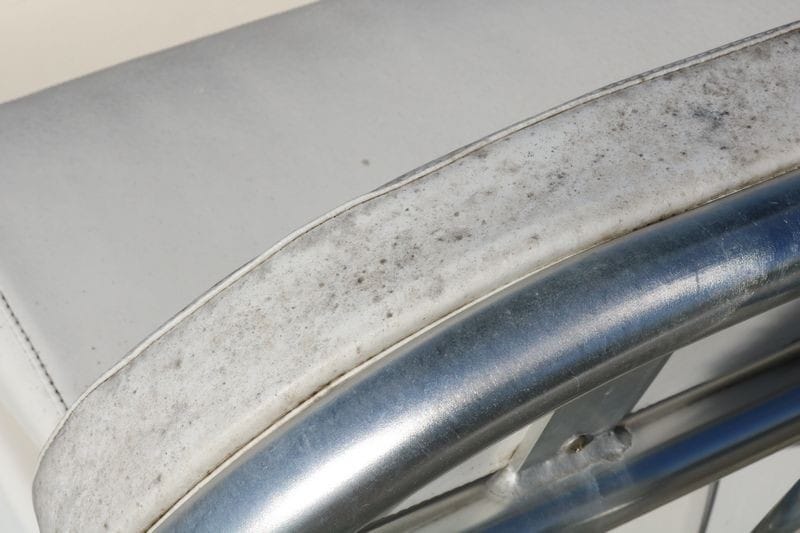
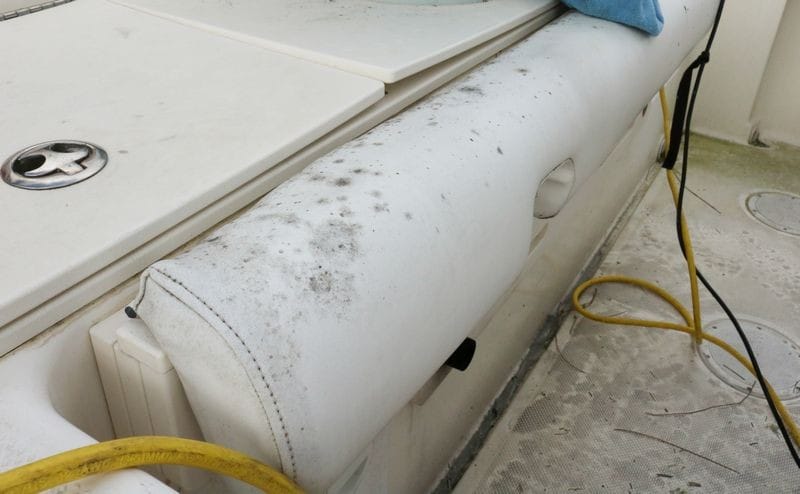
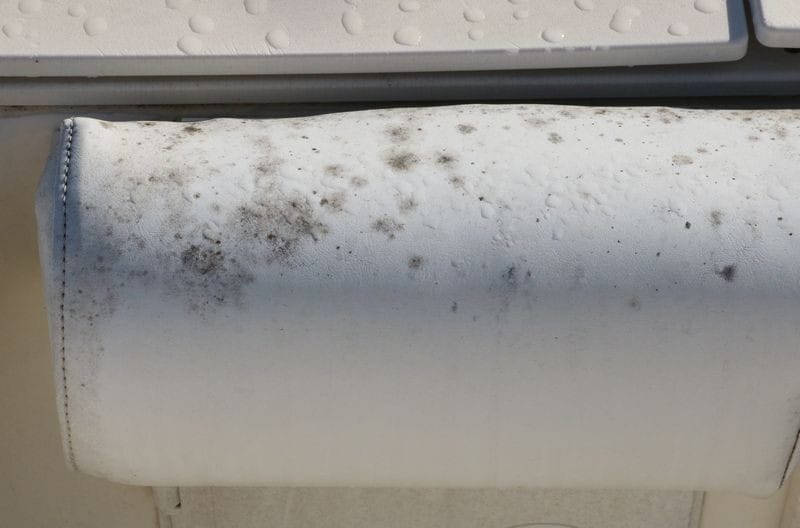
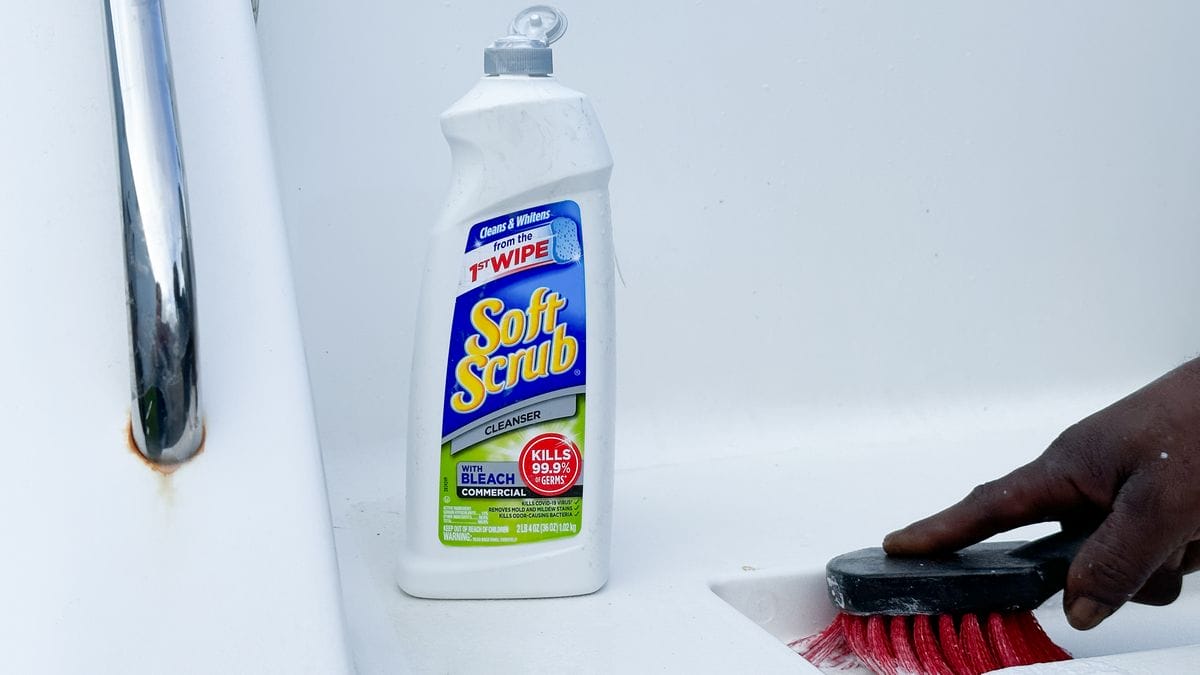
Topic 2: Removing Mold & Mildew from Vinyl
Mold remediation is both an art and a science. Students will use specialized products designed to eliminate mold and mildew and keep it from growing back. These specialized products are both effective and safe for humans and the marine environment.
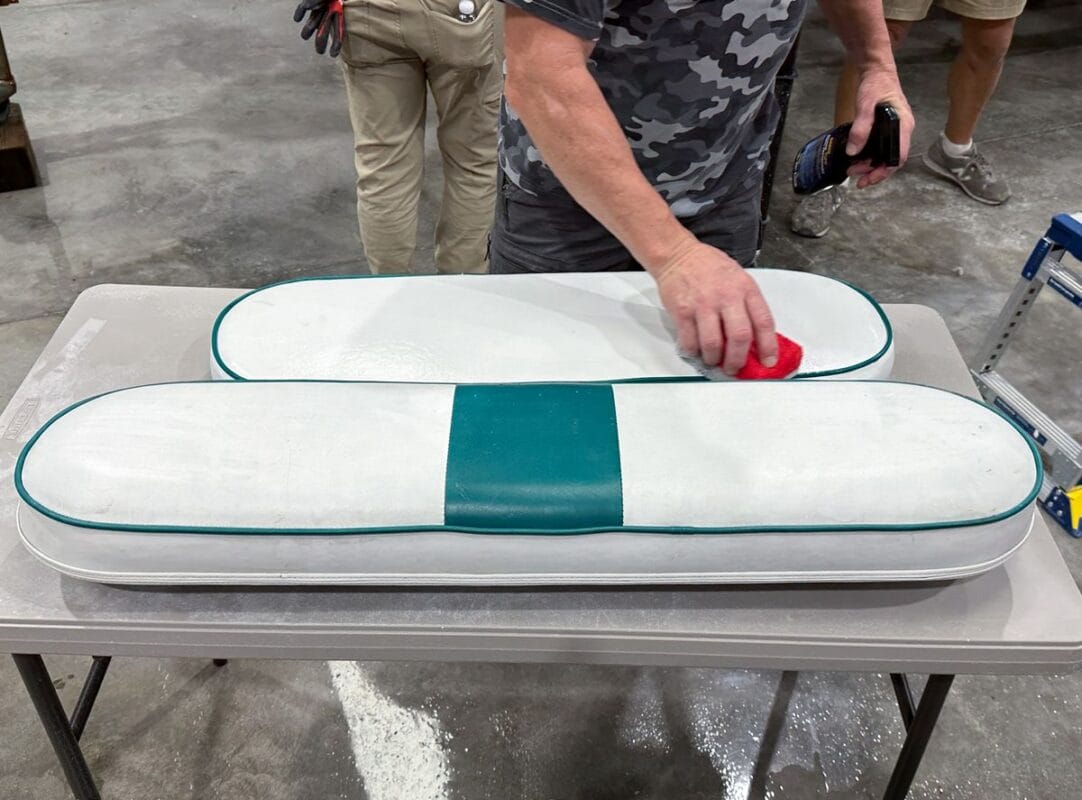
Topic 3: Cleaning and Protecting Vinyl Surfaces
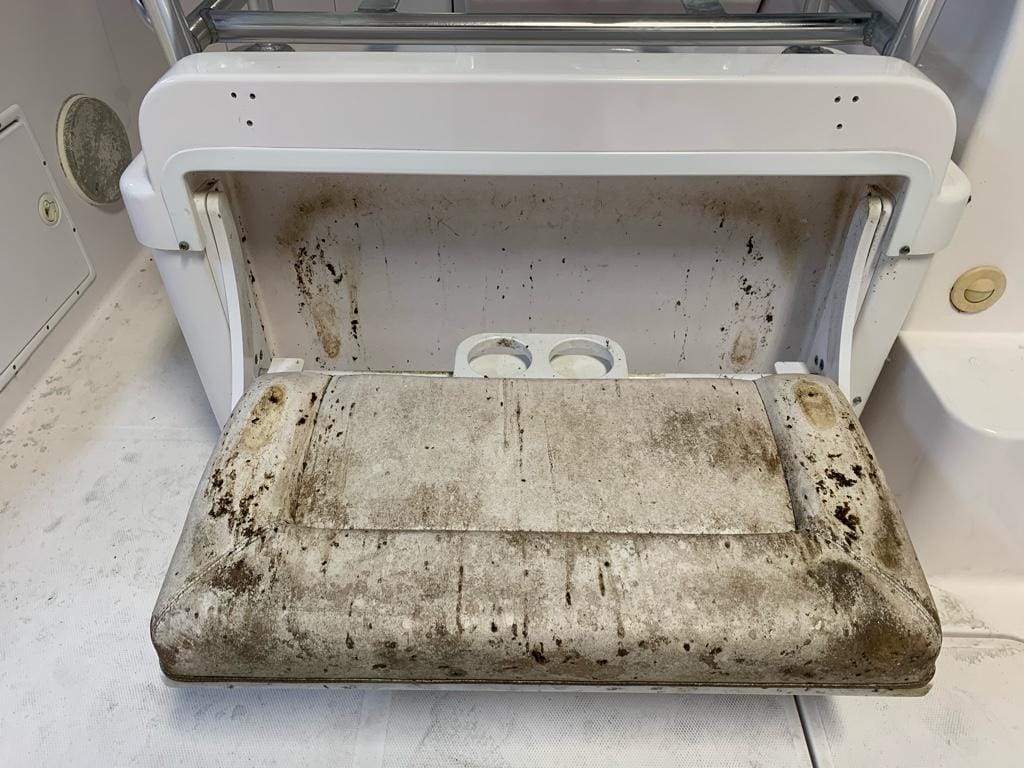
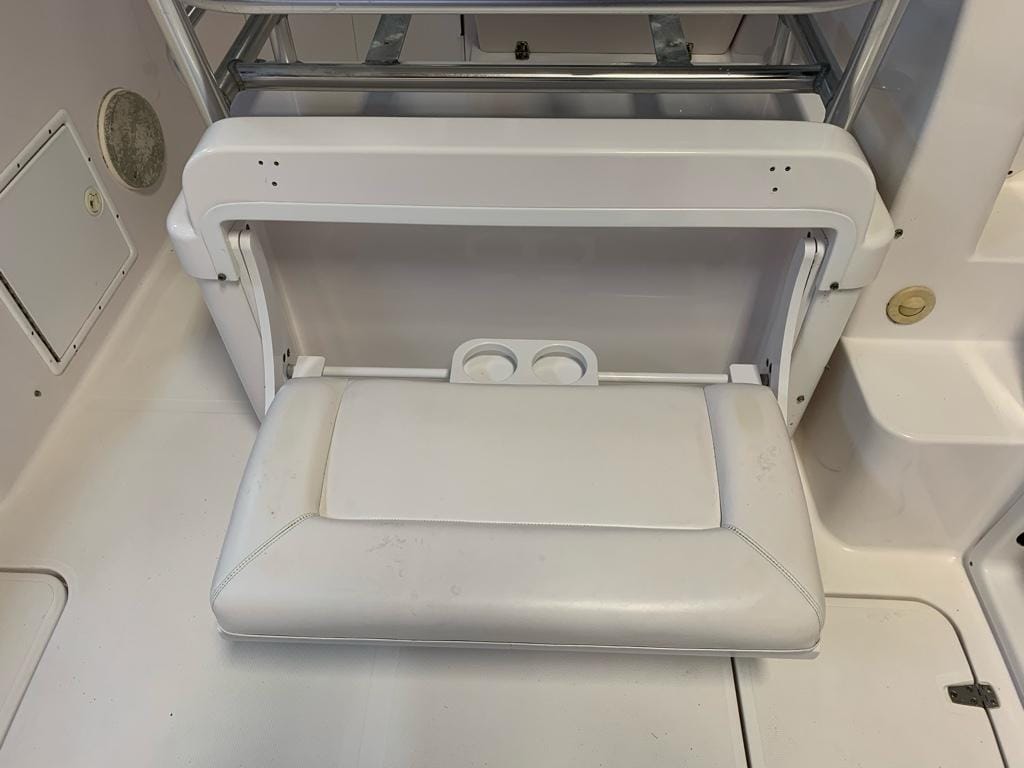
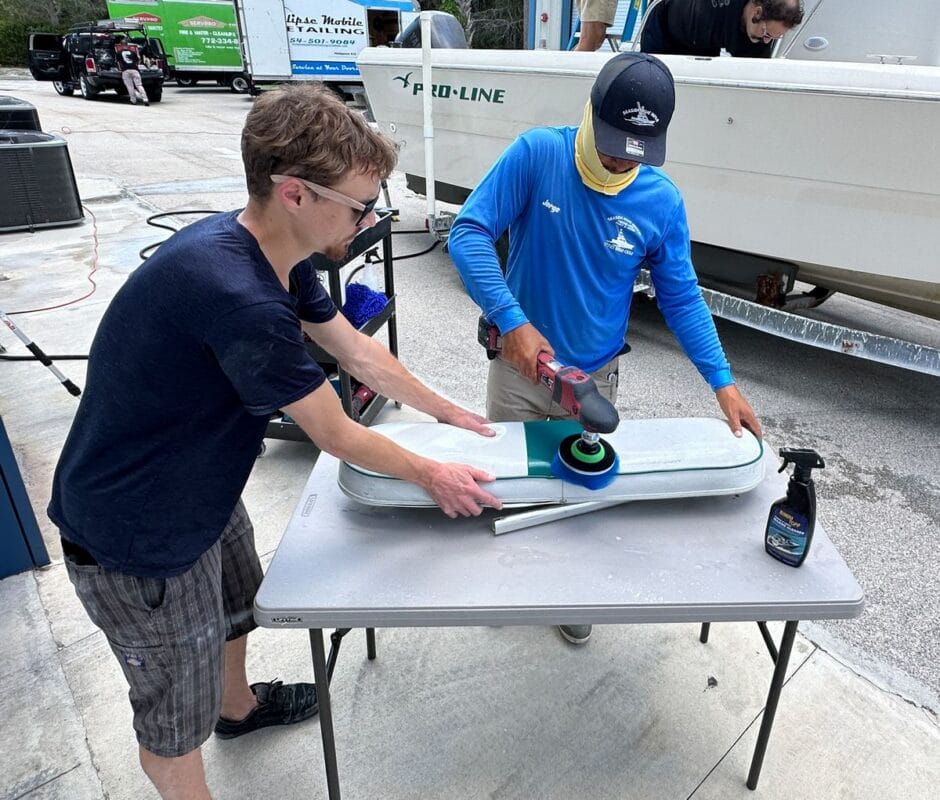
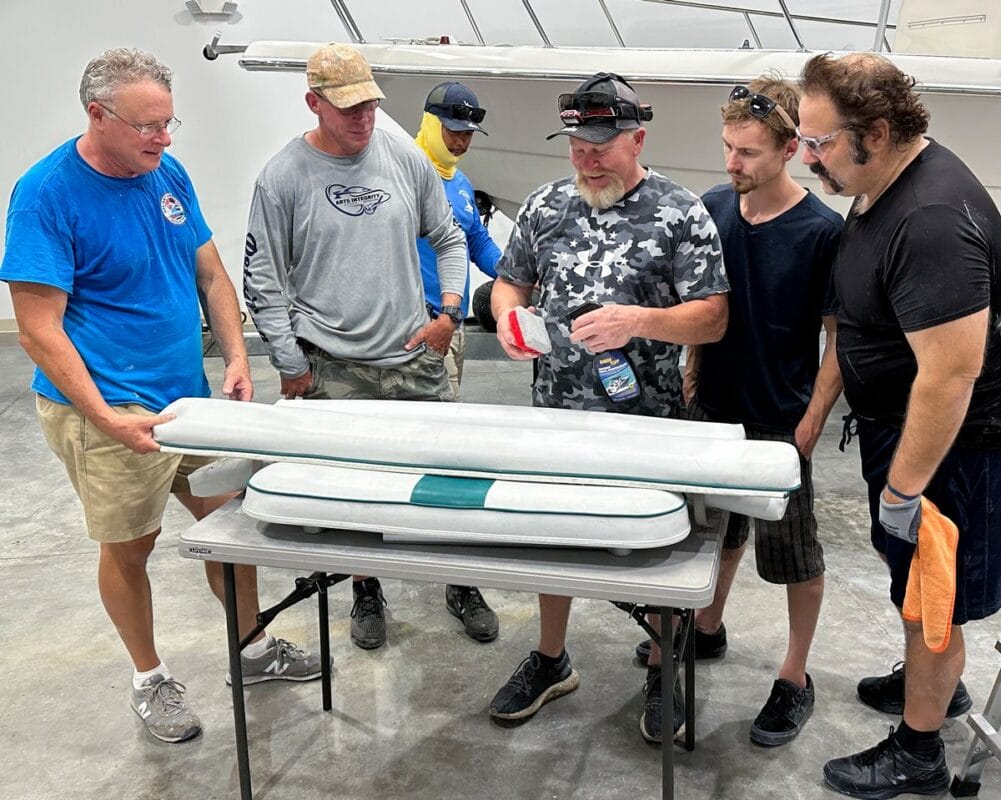
Boats often feature extensive vinyl surfaces, such as seats, leaning posts (also known as rocket launchers), and interior bolsters. Students will learn how to clean vinyl by machine and protect the surface after.
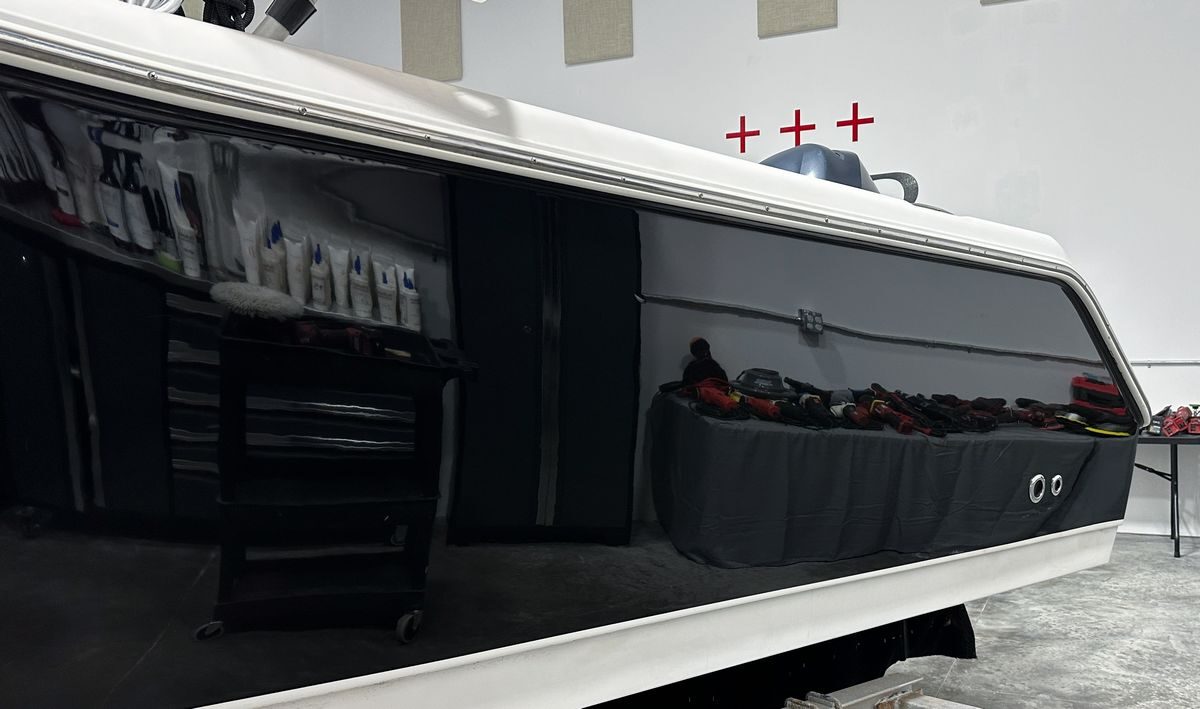
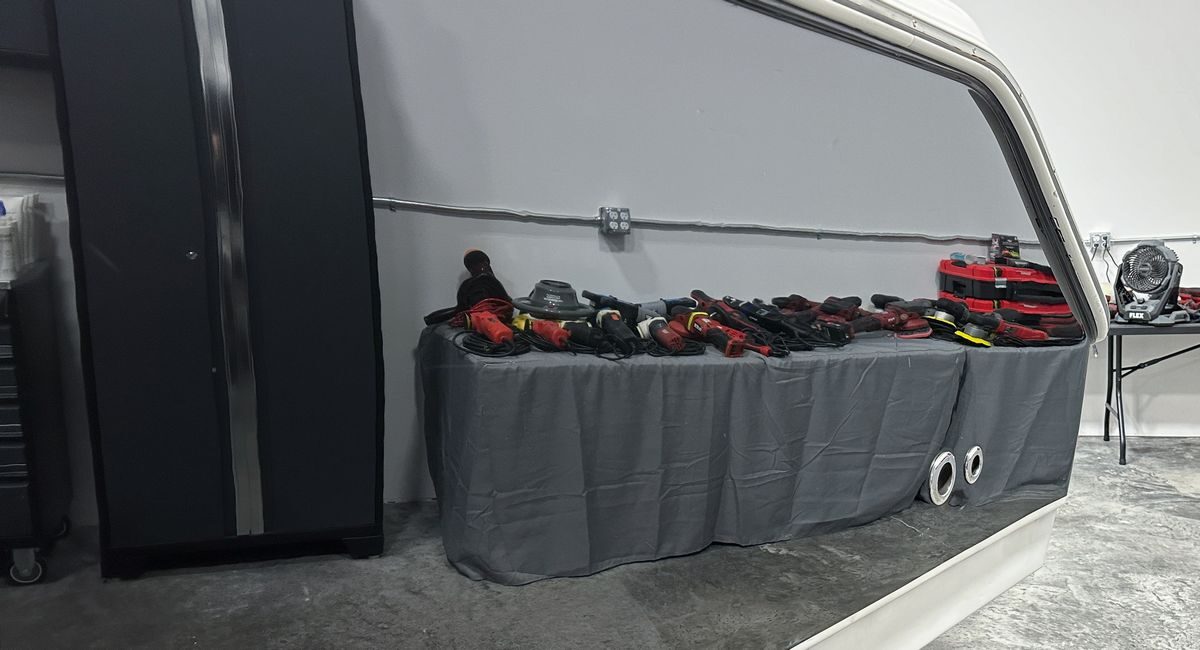
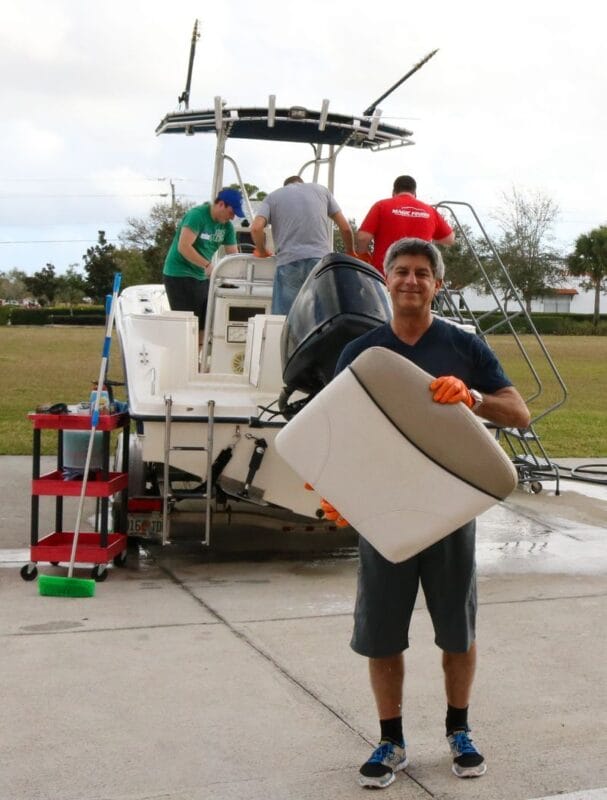
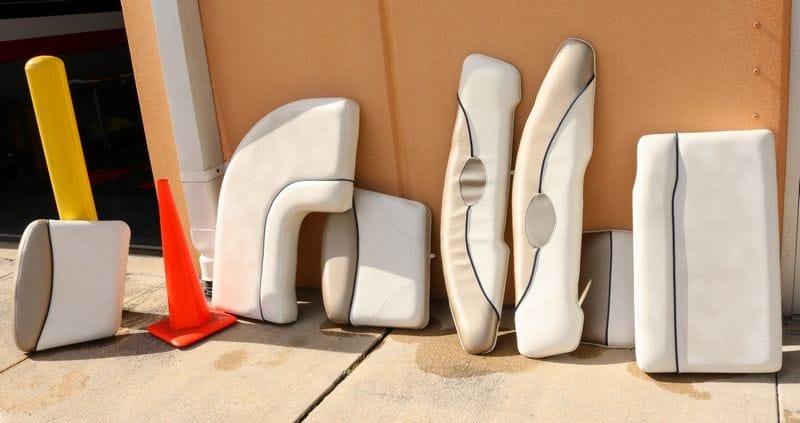
TIP: Remove Vinyl Cushions to Make Cleaning Easier
When possible, remove as much of the contaminated vinyl cushions as possible. Place them on tables to make cleaning the various shapes and designs easier on you and more efficient to the vinyl.
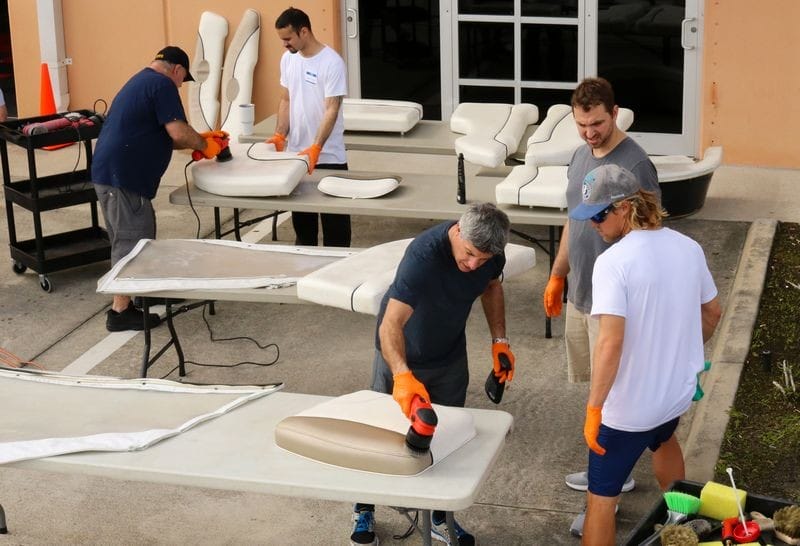
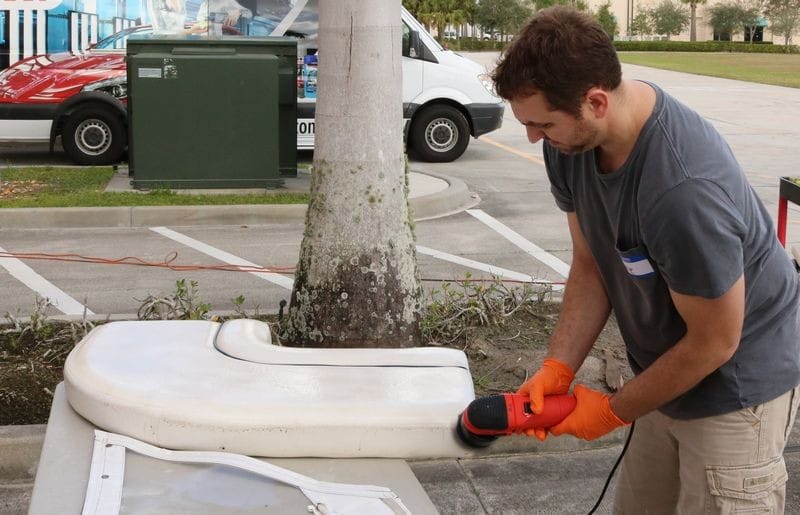
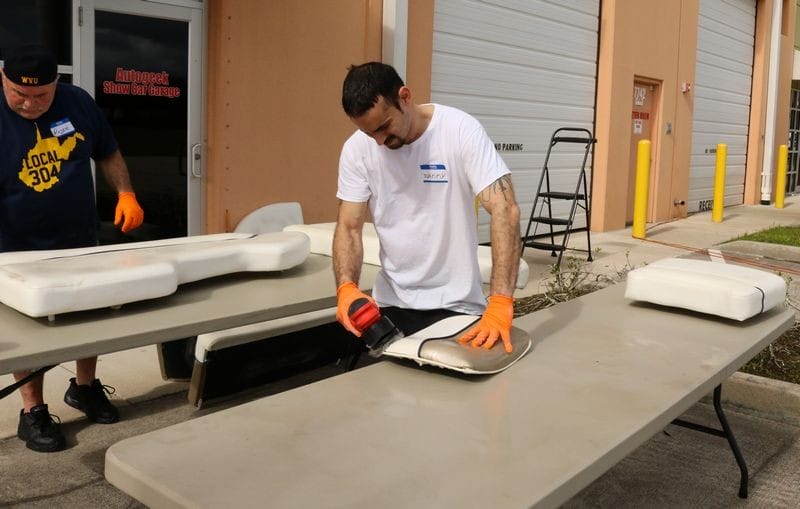
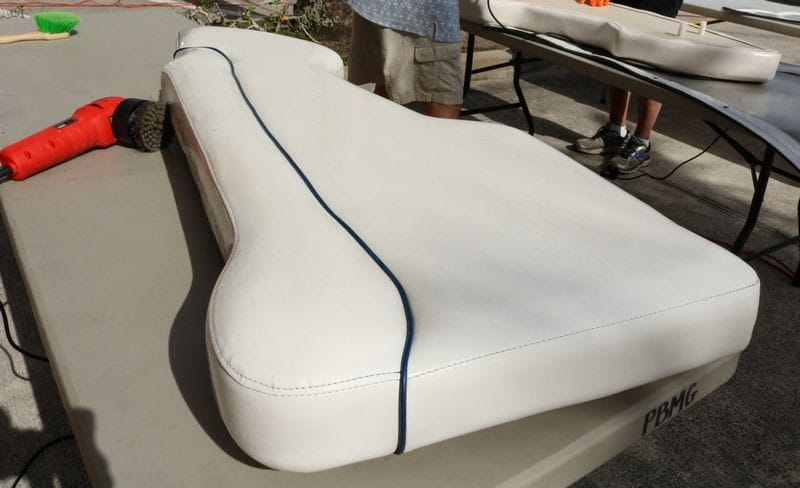
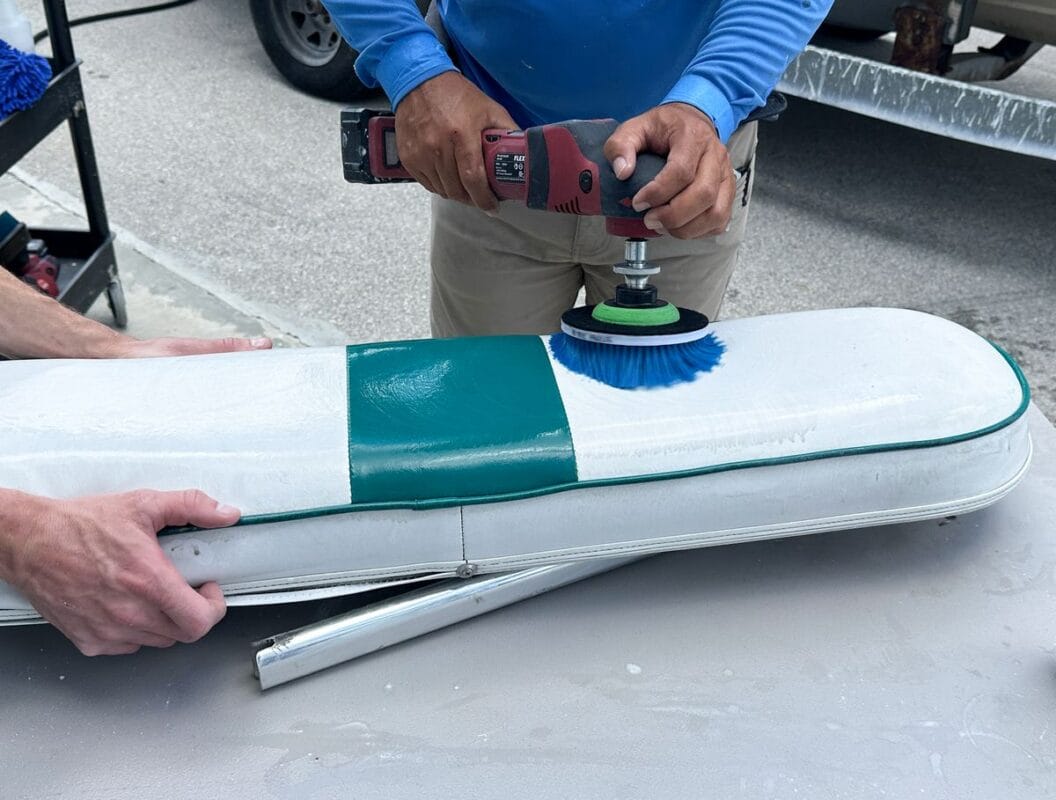
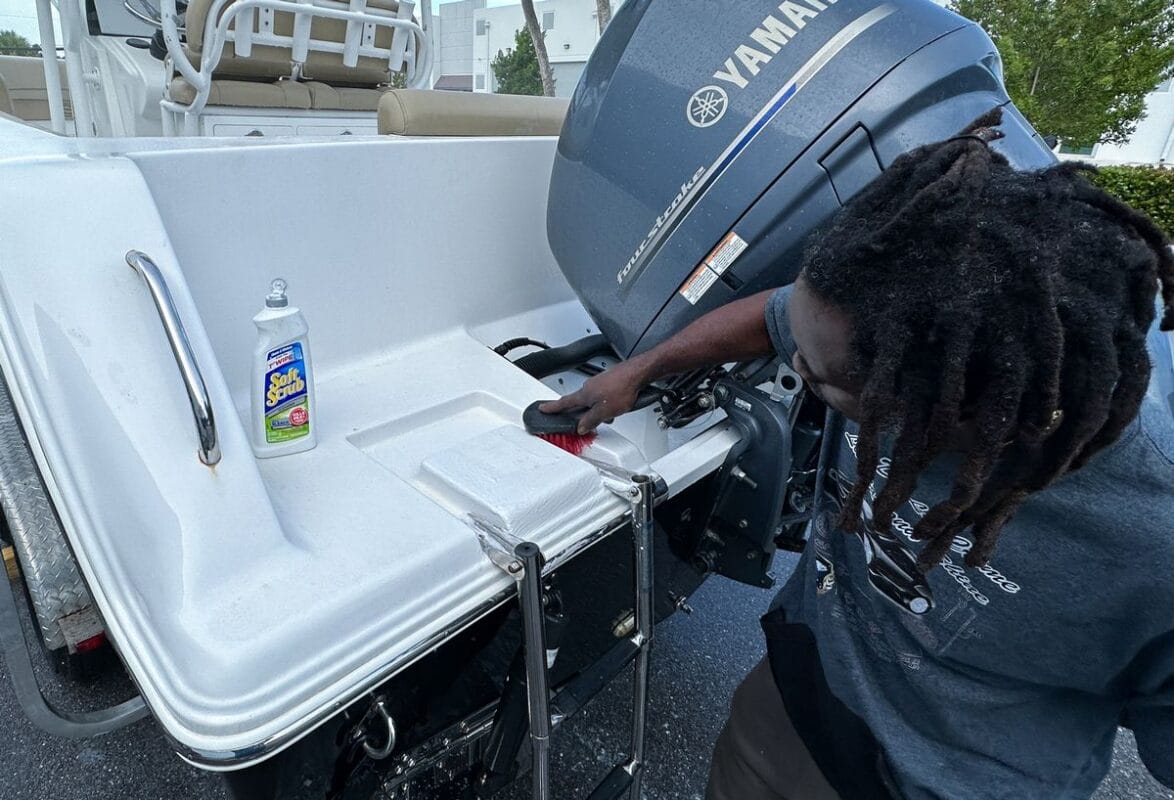
TIP: Machine Scrub Vinyl to Work Faster and More Effectively
Machine scrubbing vinyl will speed up the process and give your students a uniquely effective way to expedite the interior detailing workflow.


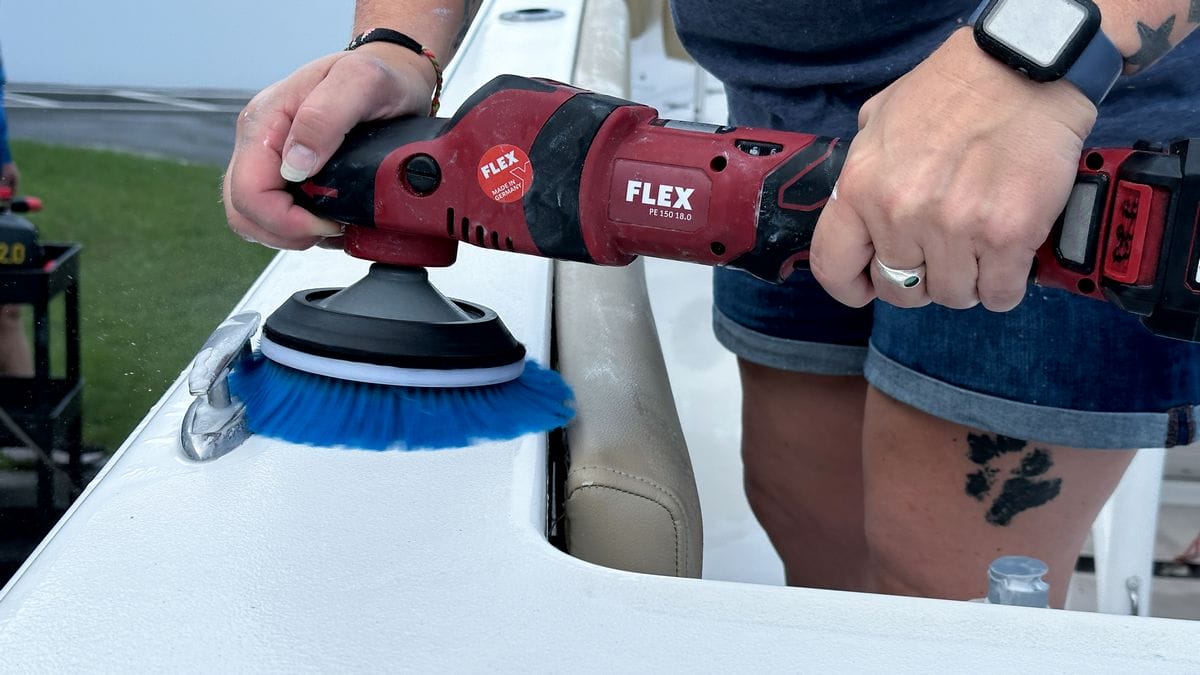
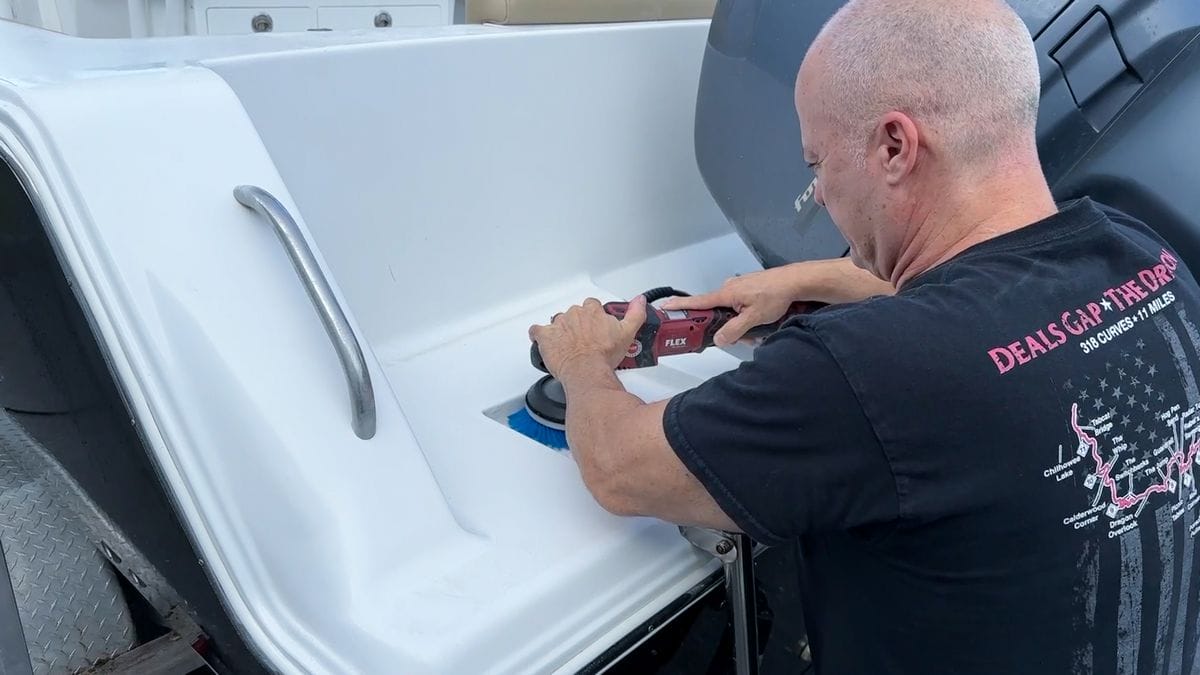
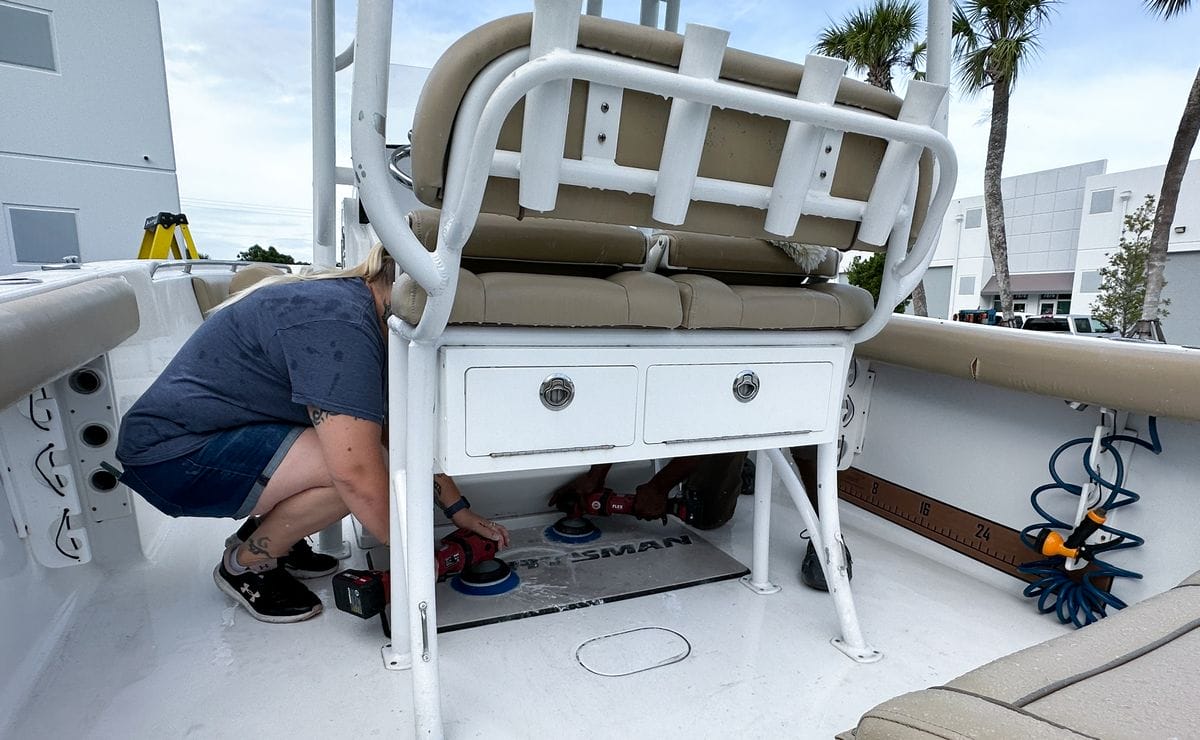
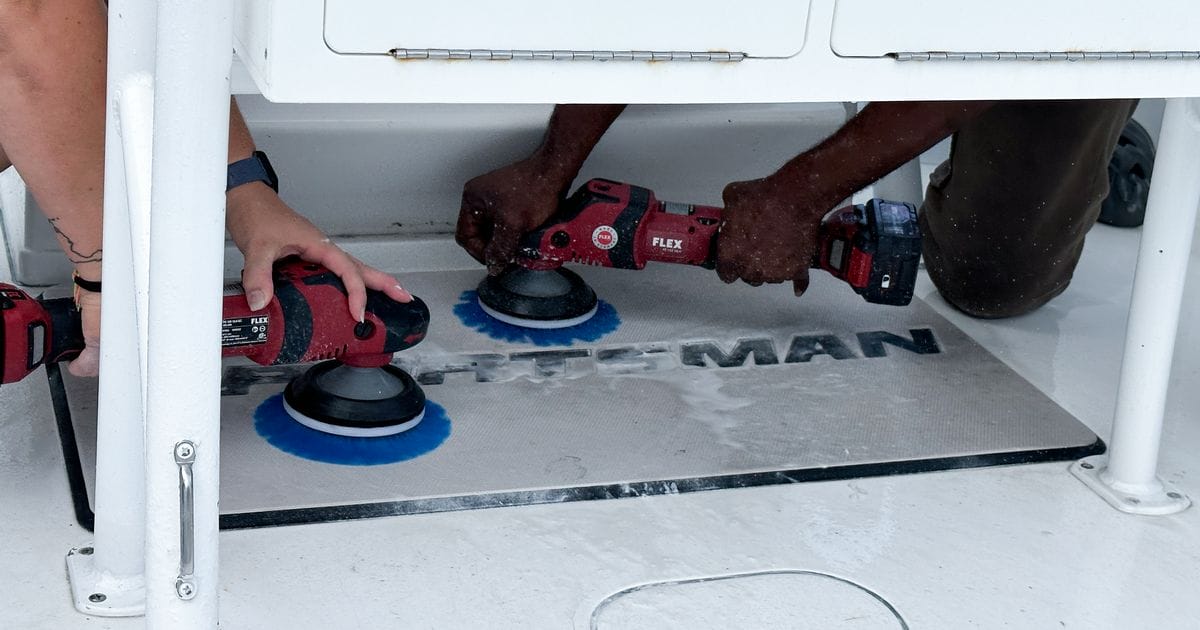
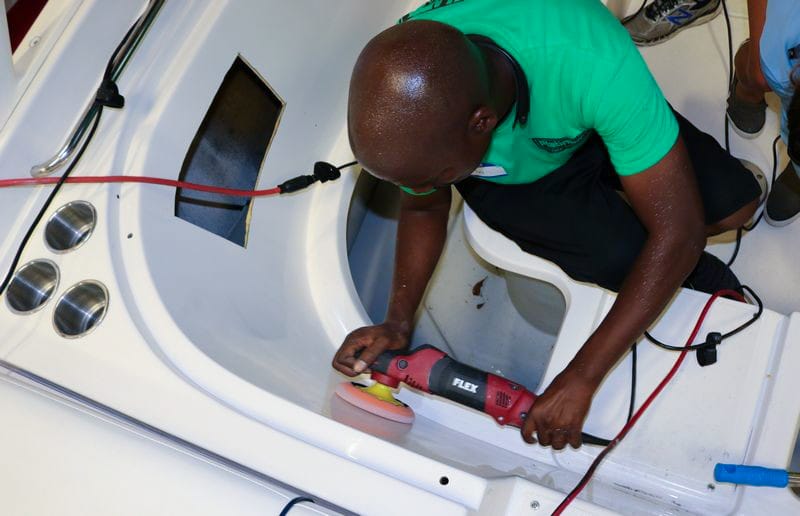
Topic 4: Removing Oxidation, Mold, Stains & Mildew from Non-Skid
Students will learn how to machine scrub molded-in non-skid surfaces, which are among the most challenging areas to maintain. Scrubbing by machine effectively removes oxidation, stains, mold, and mildew while brightening and sanitizing the surface.
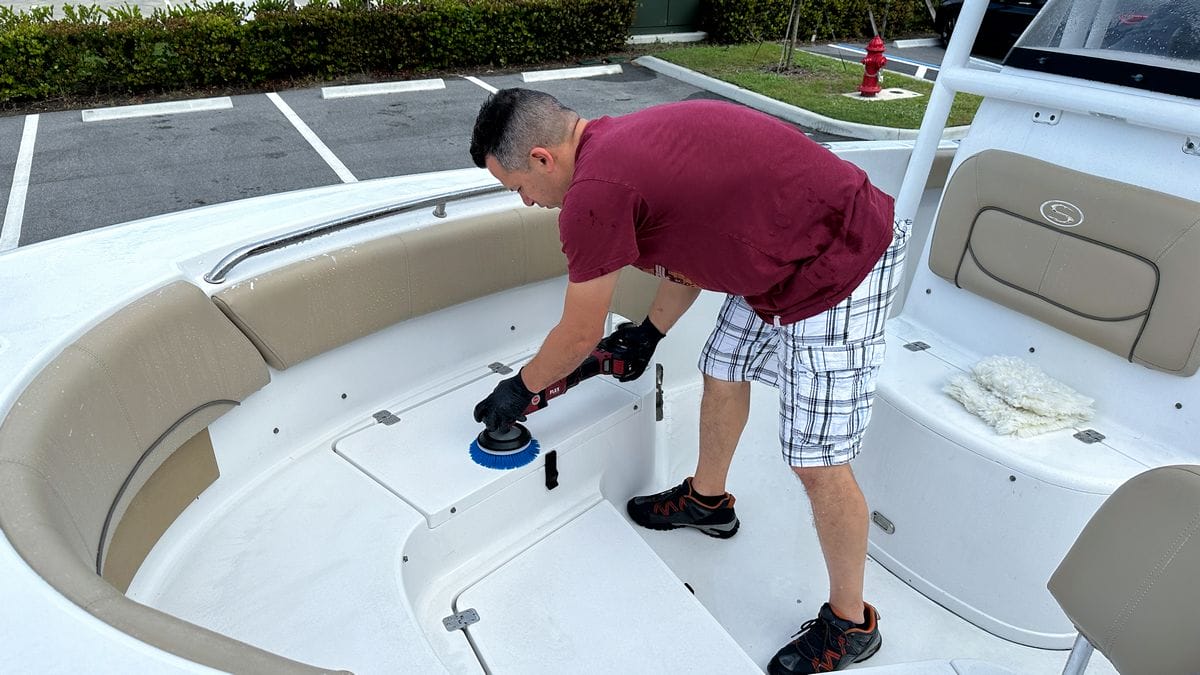
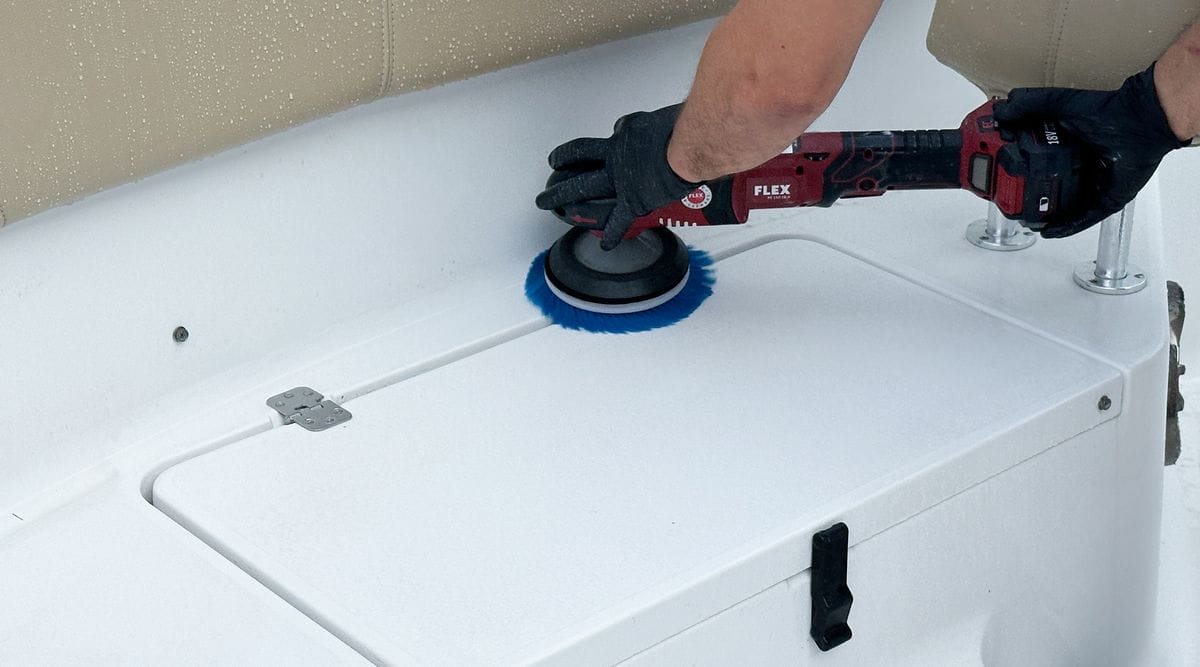

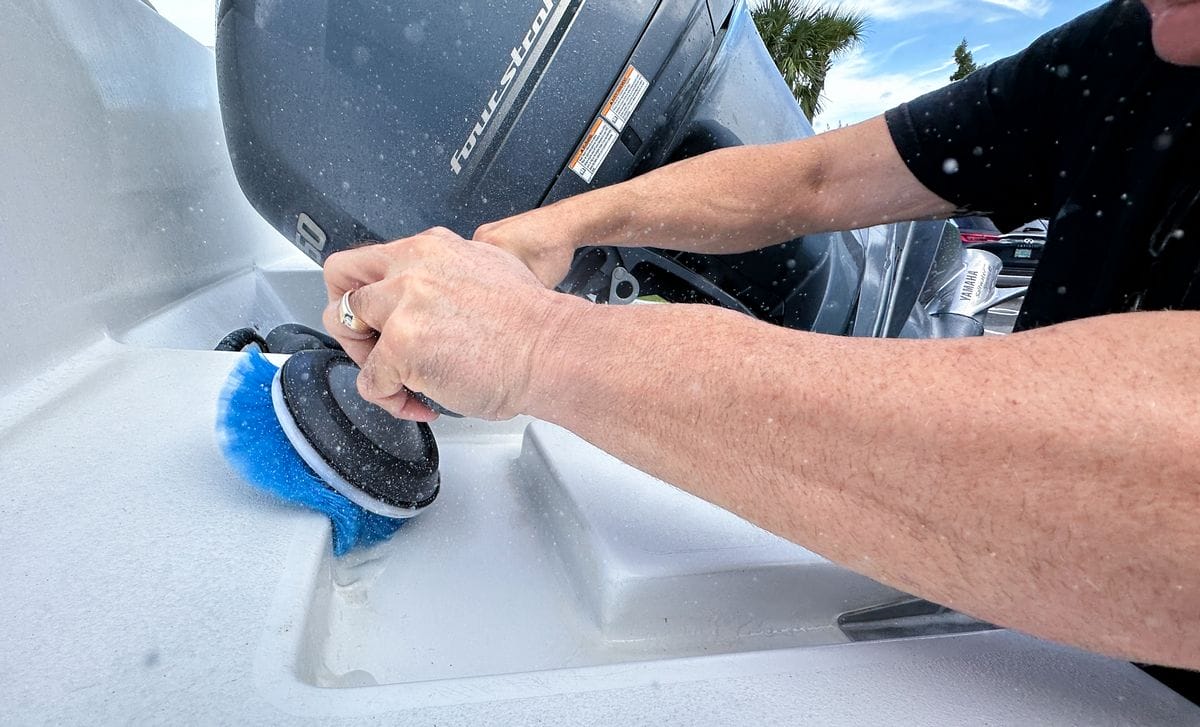
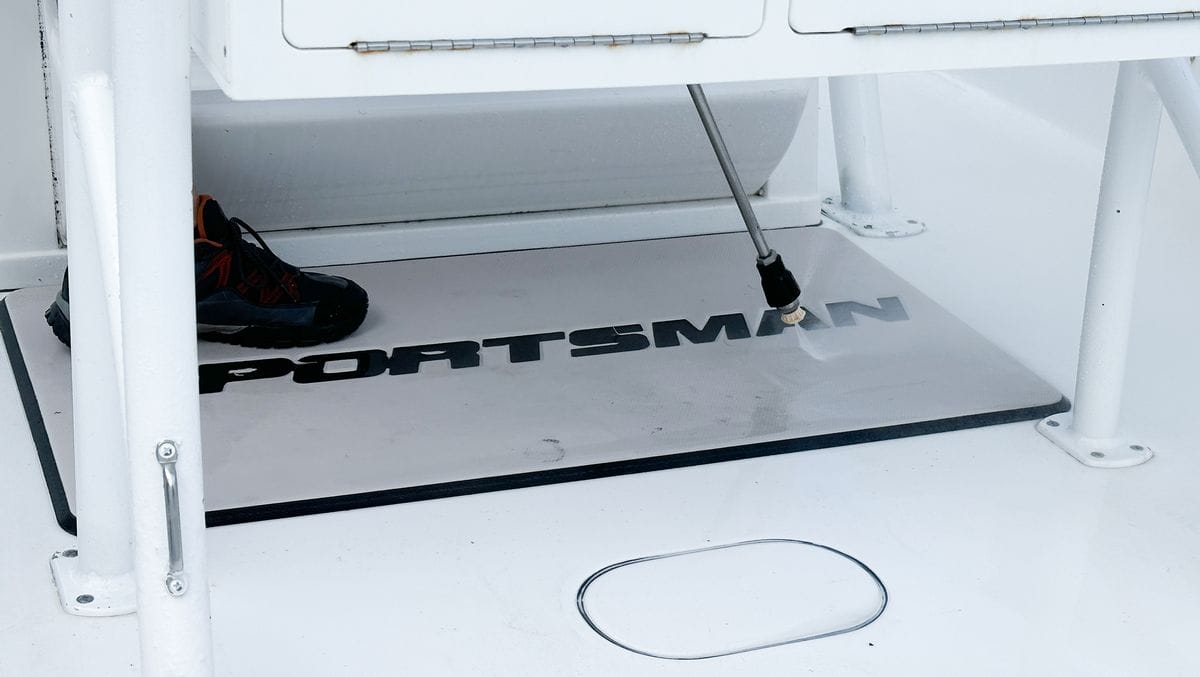
SeaDek is a popular addition for creating non-slip surfaces as well as adding custom styling to any boat. But like everything else, the soft, spongy SeaDek material gets dirty and stained over time.
We machine scrub SeaDek using 5” Rotary Brushes on Cordless FLEX Rotary Polishers. After machine scrubbing, we flushed off the surface using a pressure washer. The end-results looked brand new.

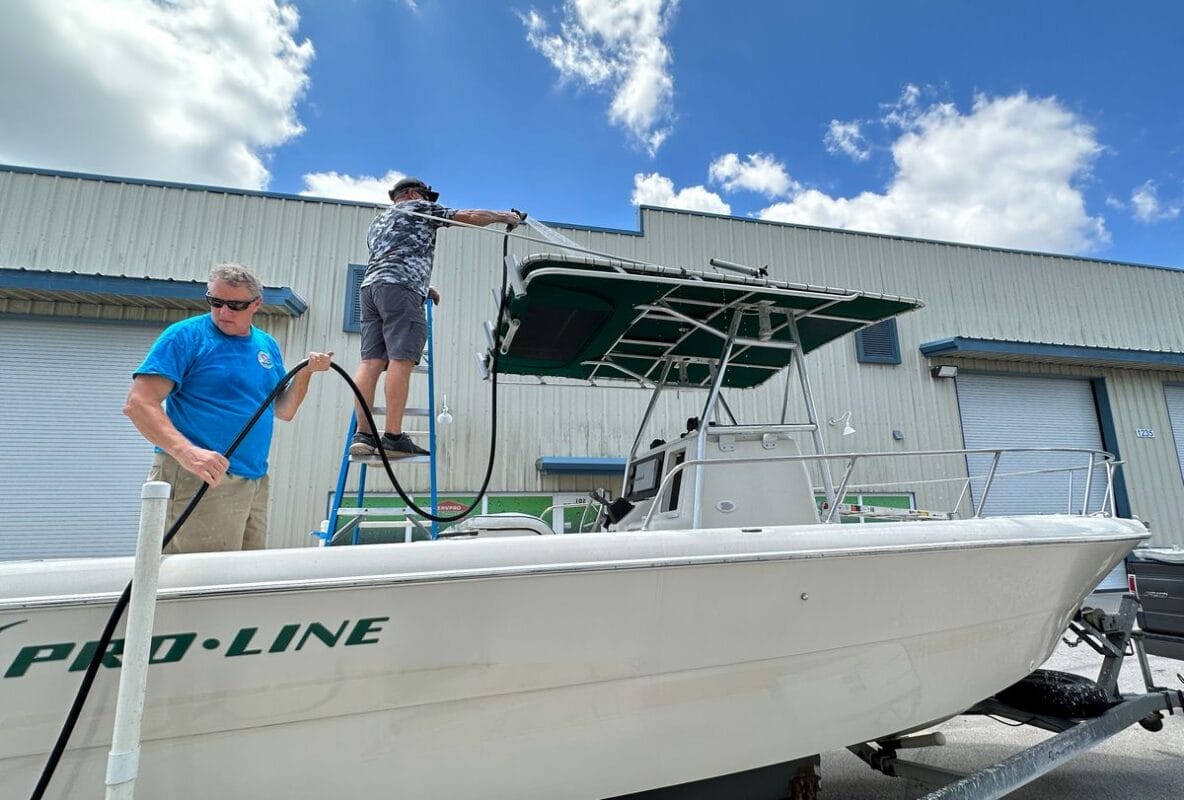
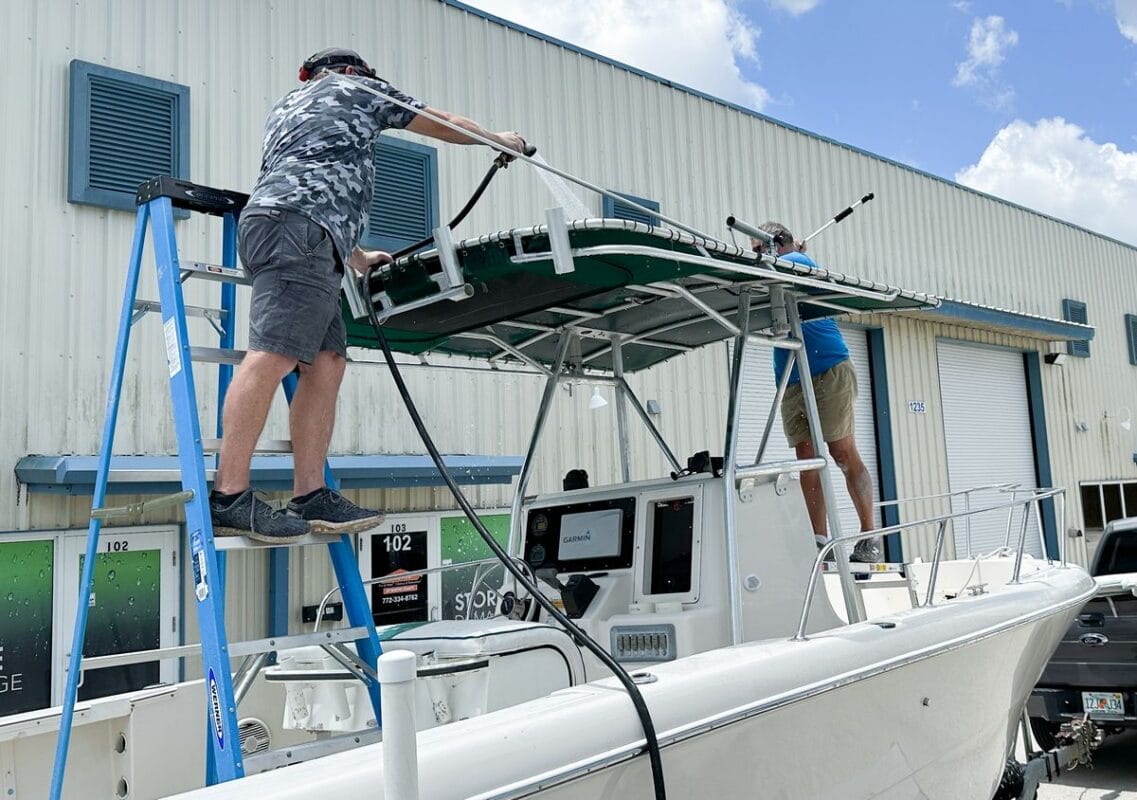
Topic 5: Boat Interior Washing
After cleaning individual surfaces, students will wash the entire interior from the highest point and work down. Techniques include the use of a pressure washer for all hard surfaces to ensure a thorough clean. Note: Never use a Pressure Washer on canvas, cloth tops…
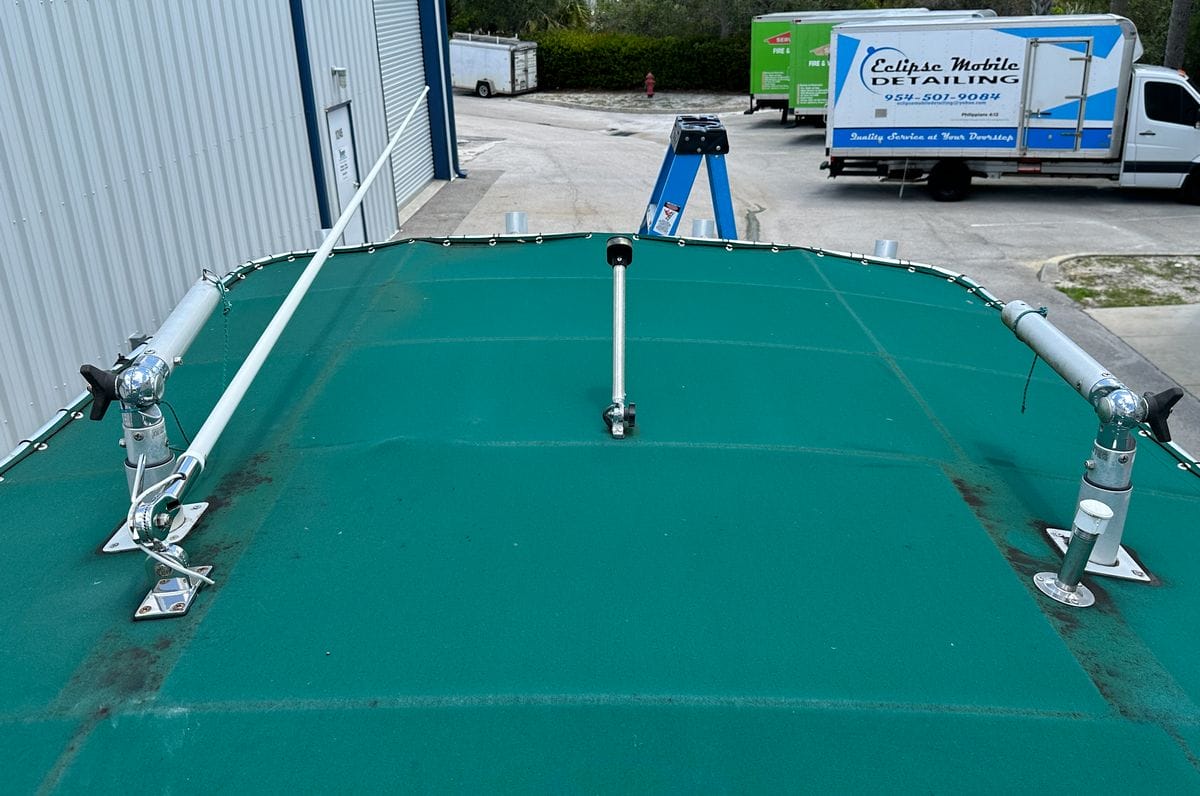
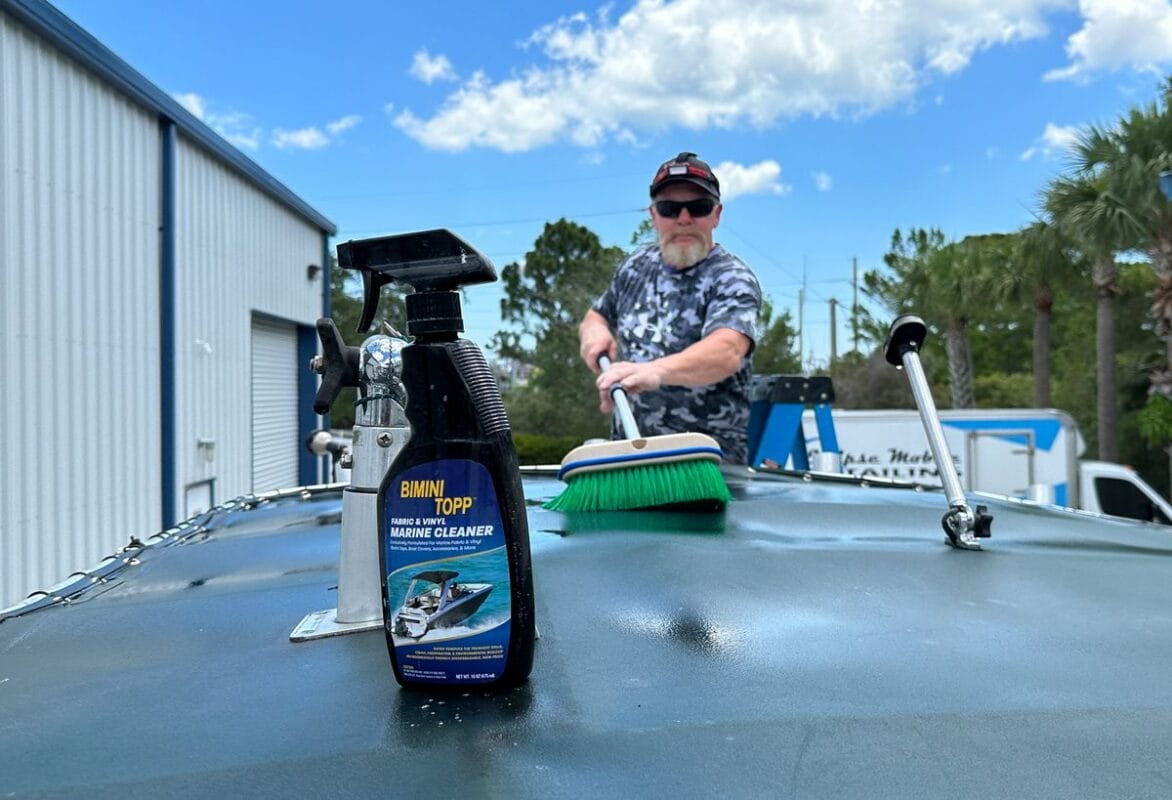
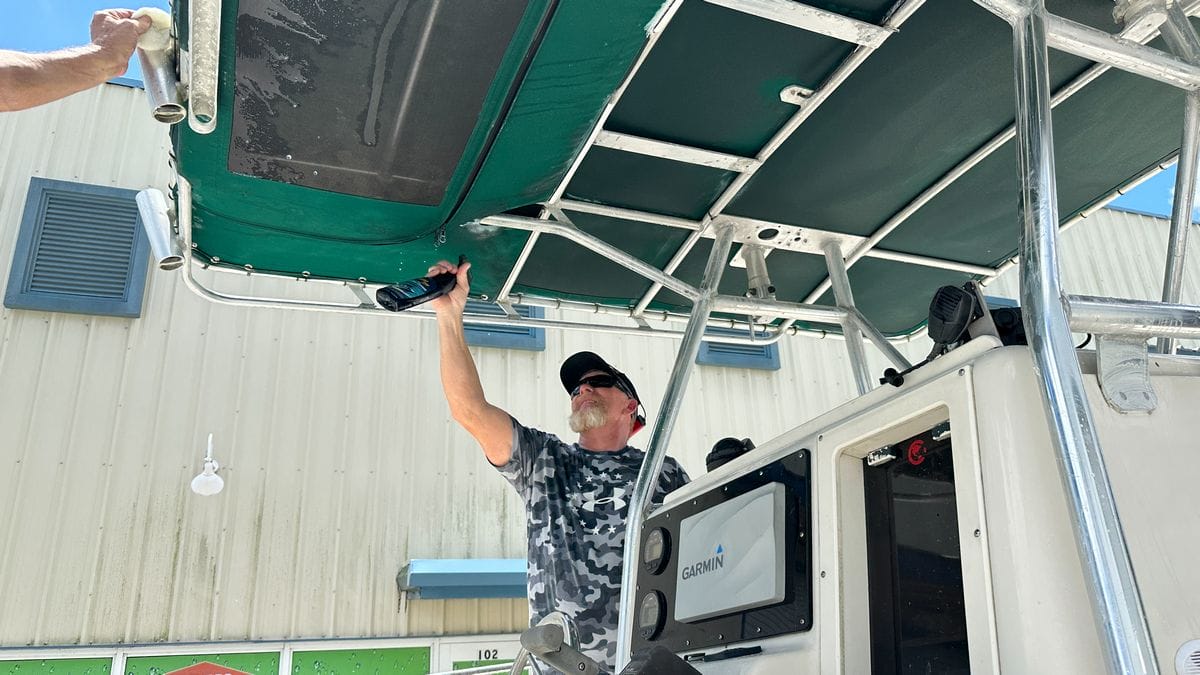
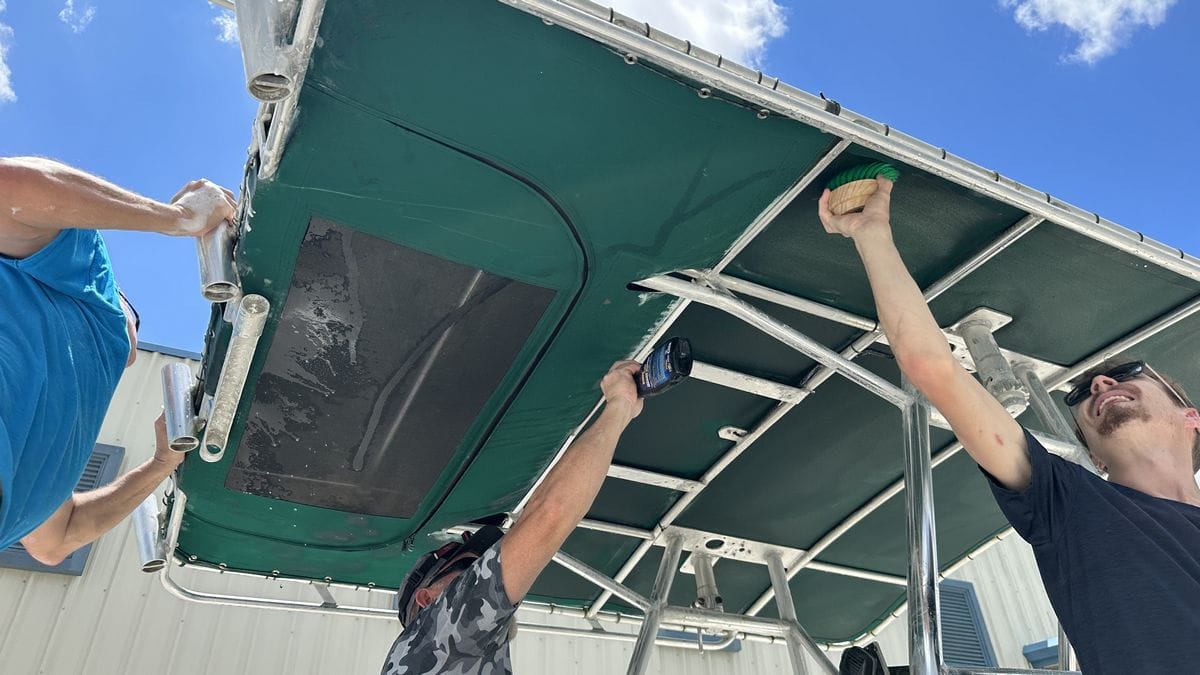
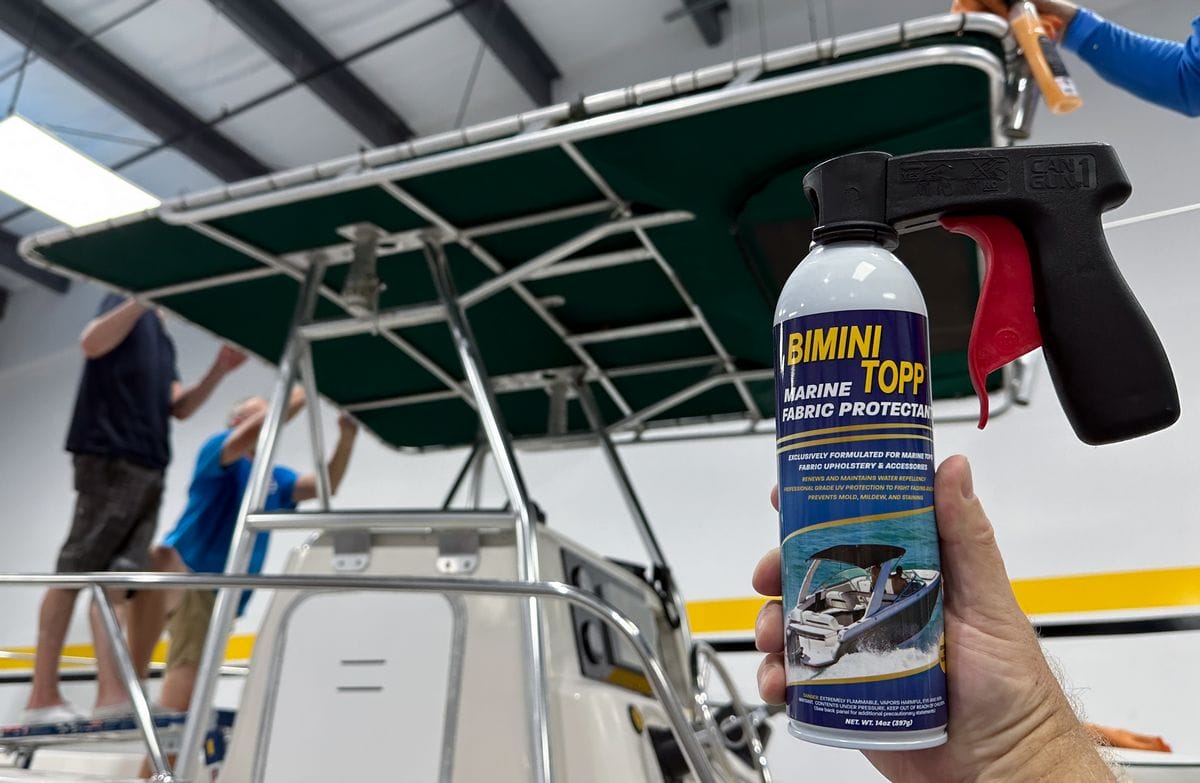
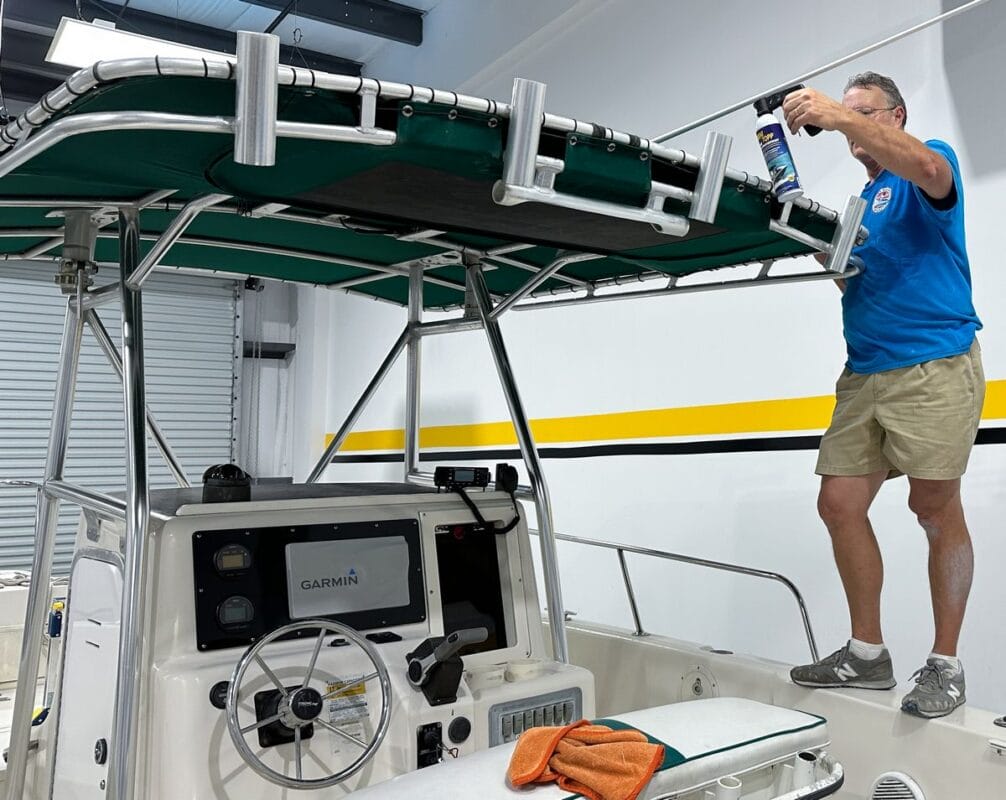
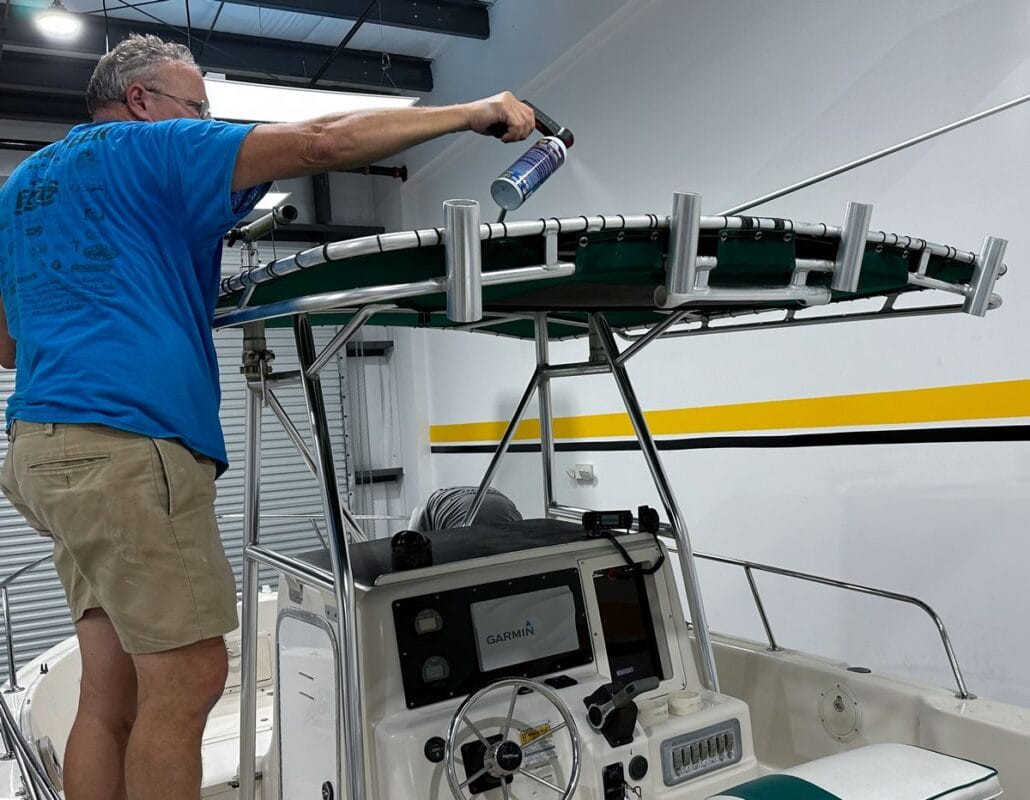
Topic 6: Restore Water Proofing and UV Protection
After cleaning any type of canvas or cloth material, it’s important to apply some type of UV protection as well as waterproofing. My recommendation is to pick a reputable brand that offers an aerosol version of their fabric protectant as this will make it much easier to apply.

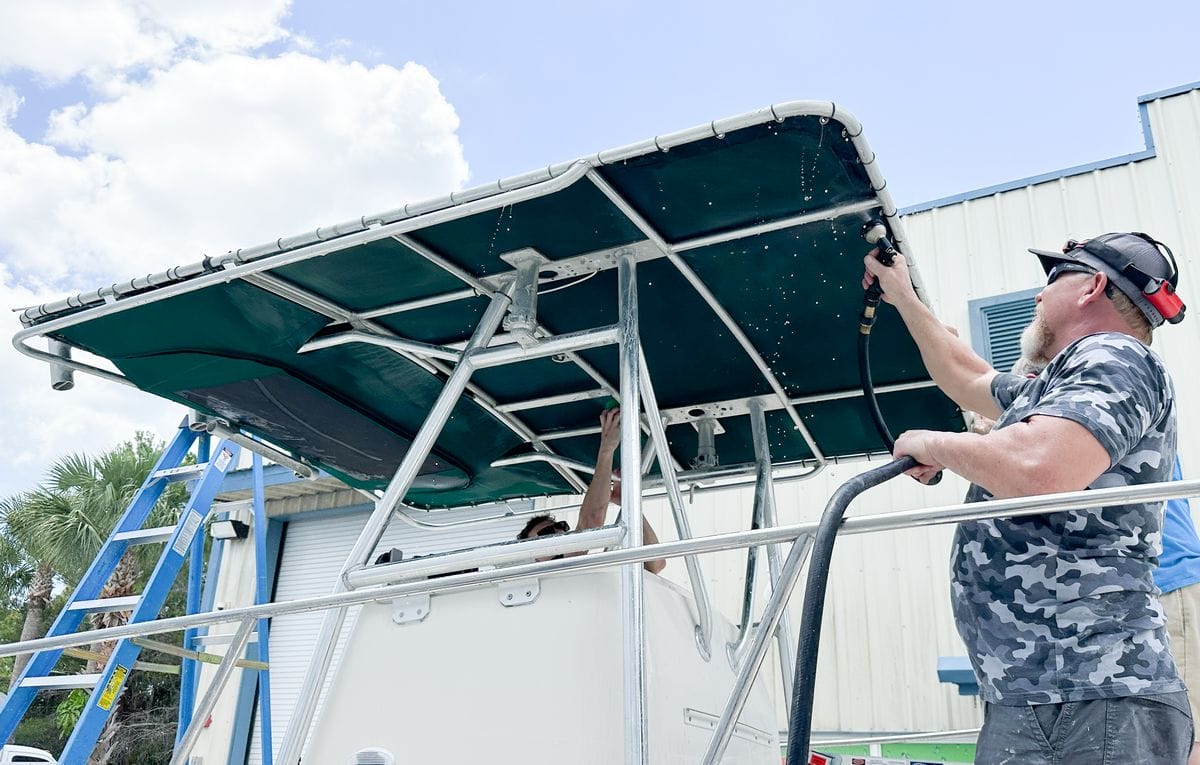
Topic 7: Hardtop Cleaning and Protecting
Hardtop cleaning can be done using brushes and a pressure washer and/or a water hose and sprayer.
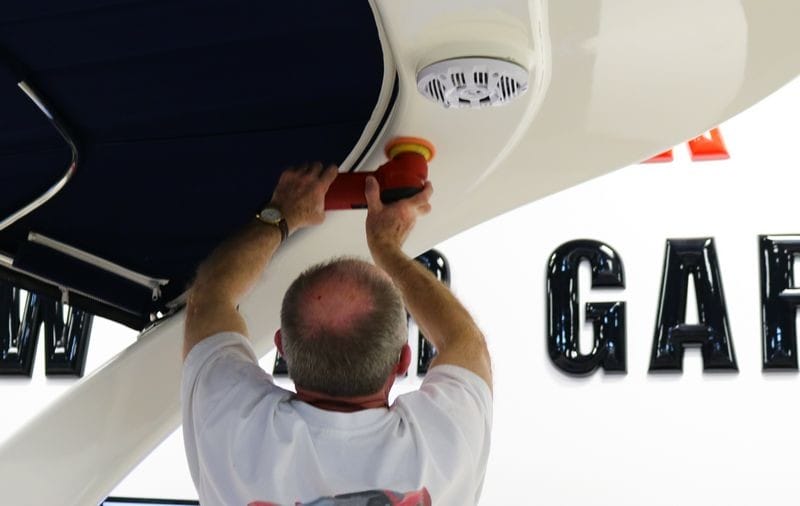
Topic 8: Multiple-Step Machine Polishing & Protecting Interior Gelcoat Surfaces
Hard, glossy gelcoat surfaces inside the boat have less oxidation than the exterior but still require polishing and protection. Students will use various tools, pads, and products to achieve a finish that surpasses the factory-new appearance.
Topic 9: 1-Step Machine Gelcoat Restoration with an AIO
Students will learn how to use a Ceramic All-In-One (AIO) product to remove oxidation and restore a glossy, protected surface in a single step. This method offers an alternative to multi-step processes, and students will learn when to apply each approach.
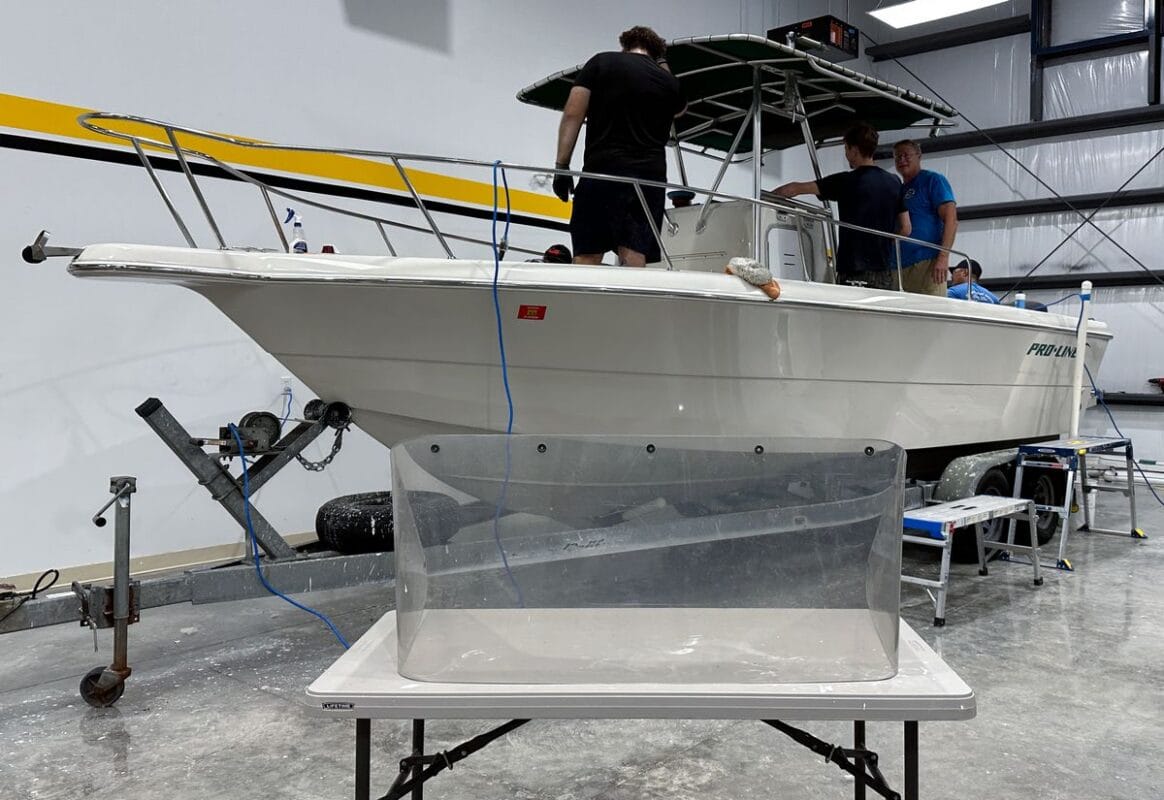
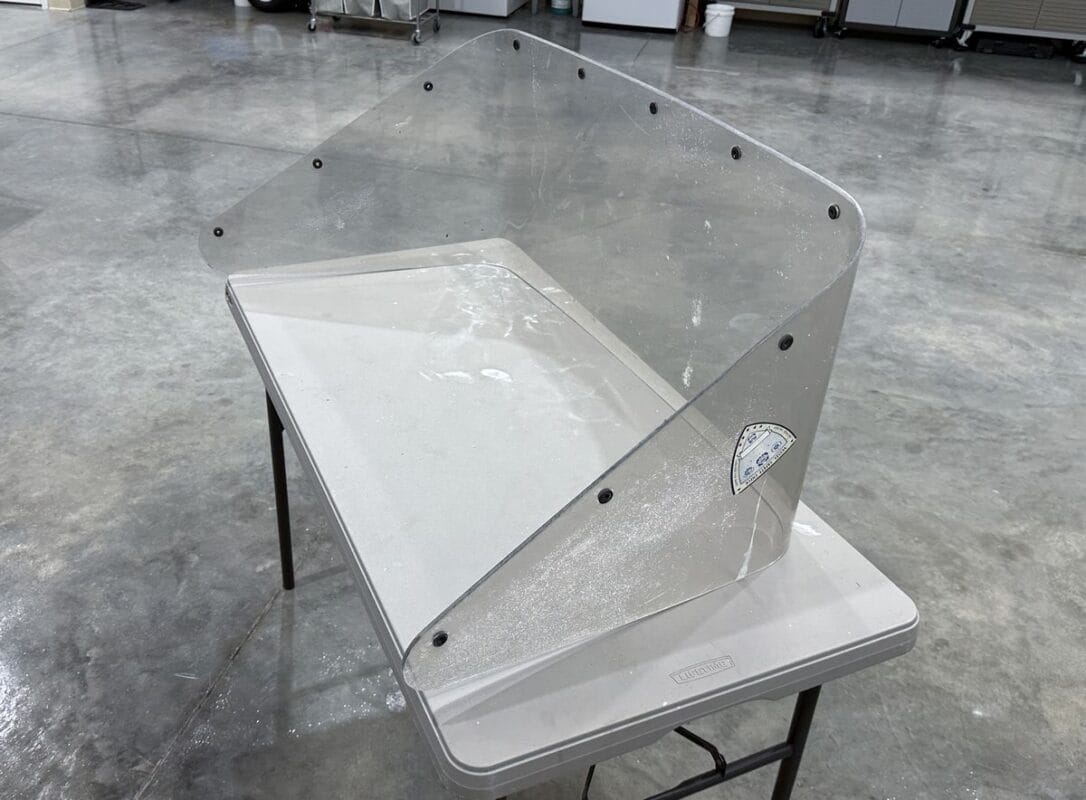
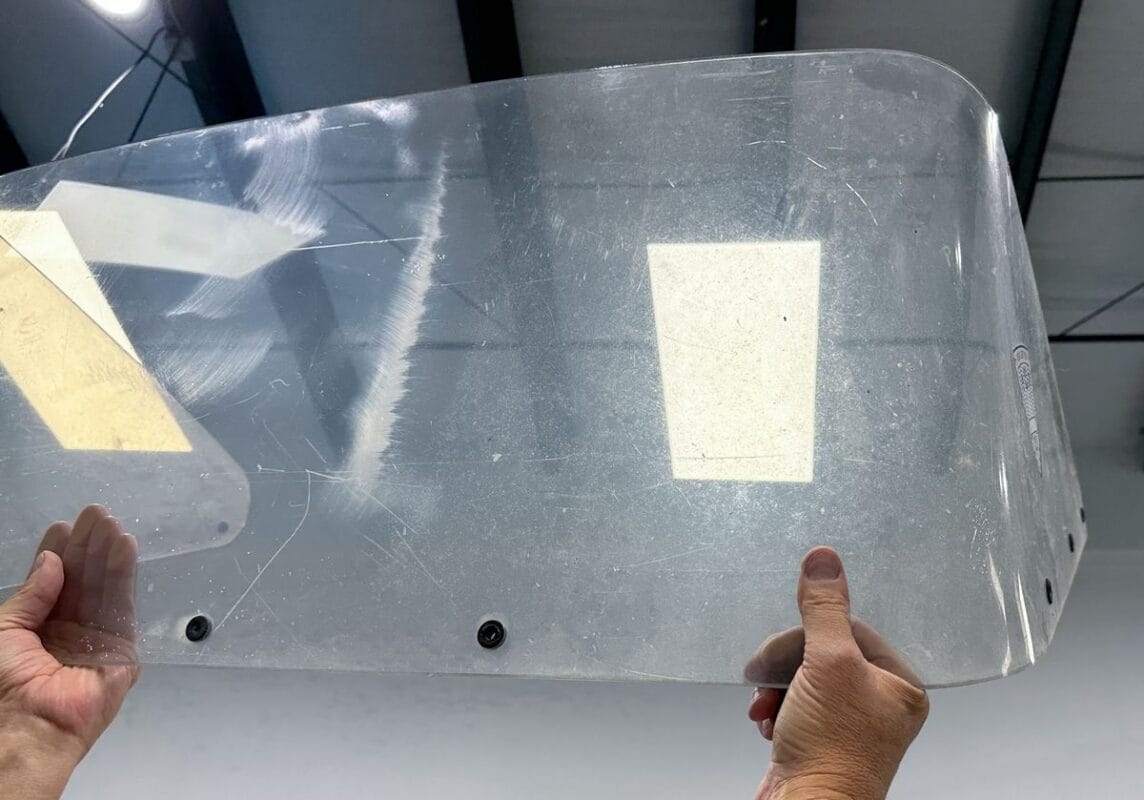
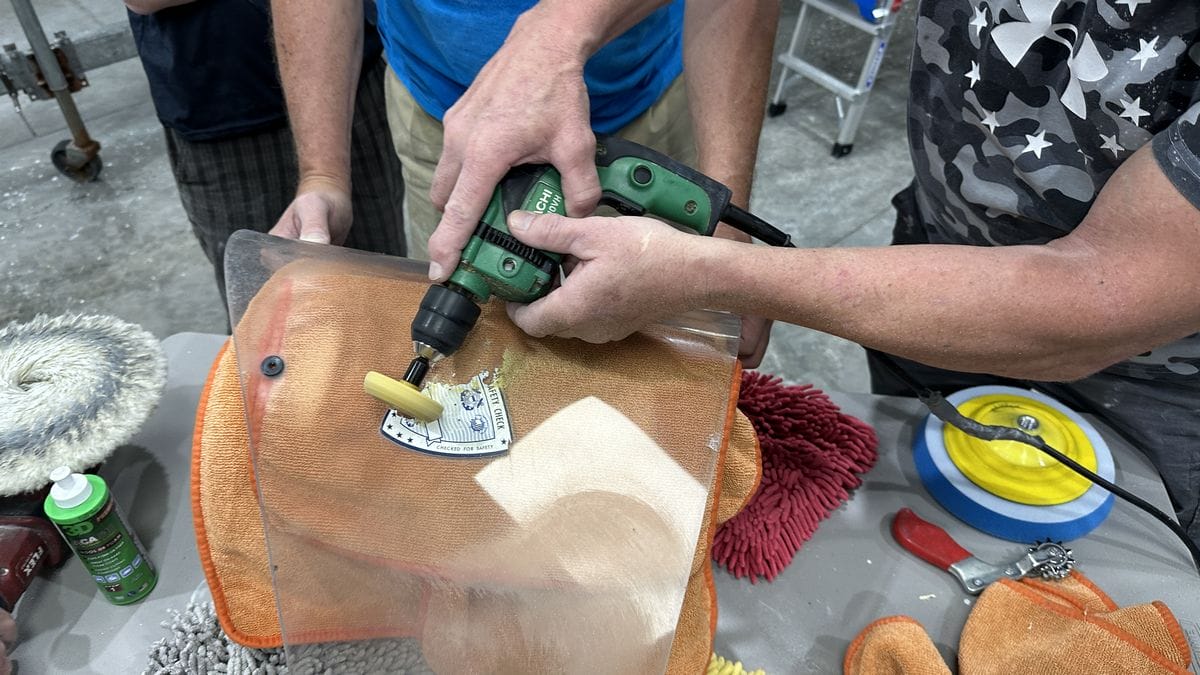
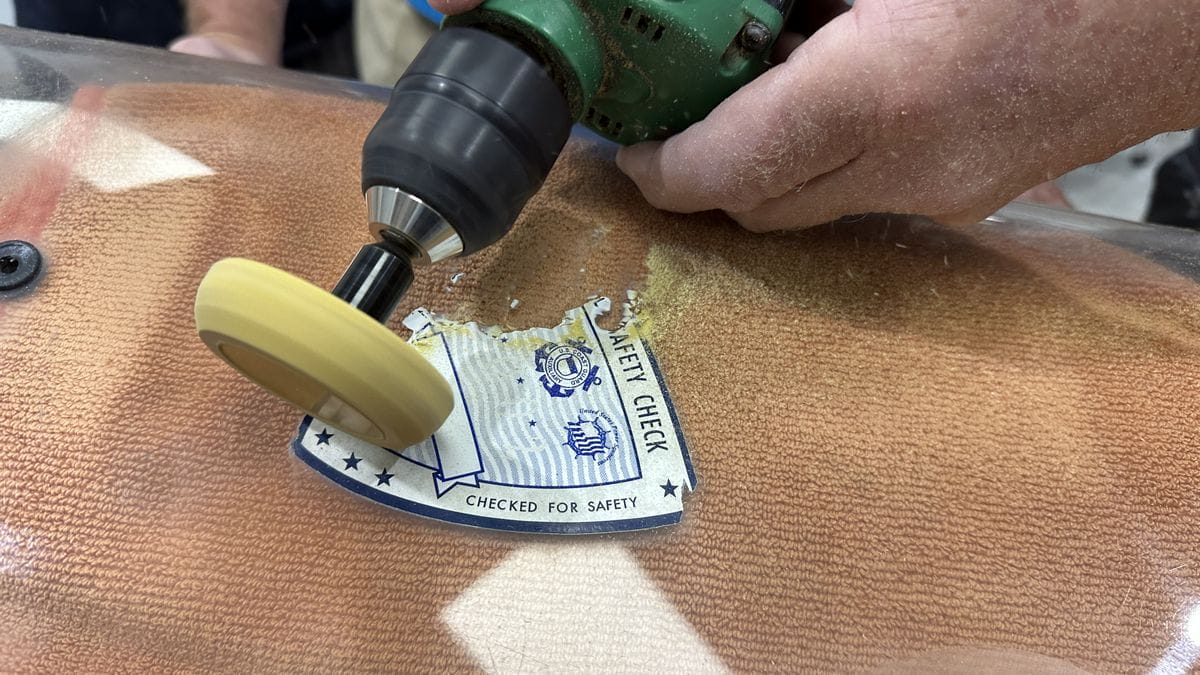
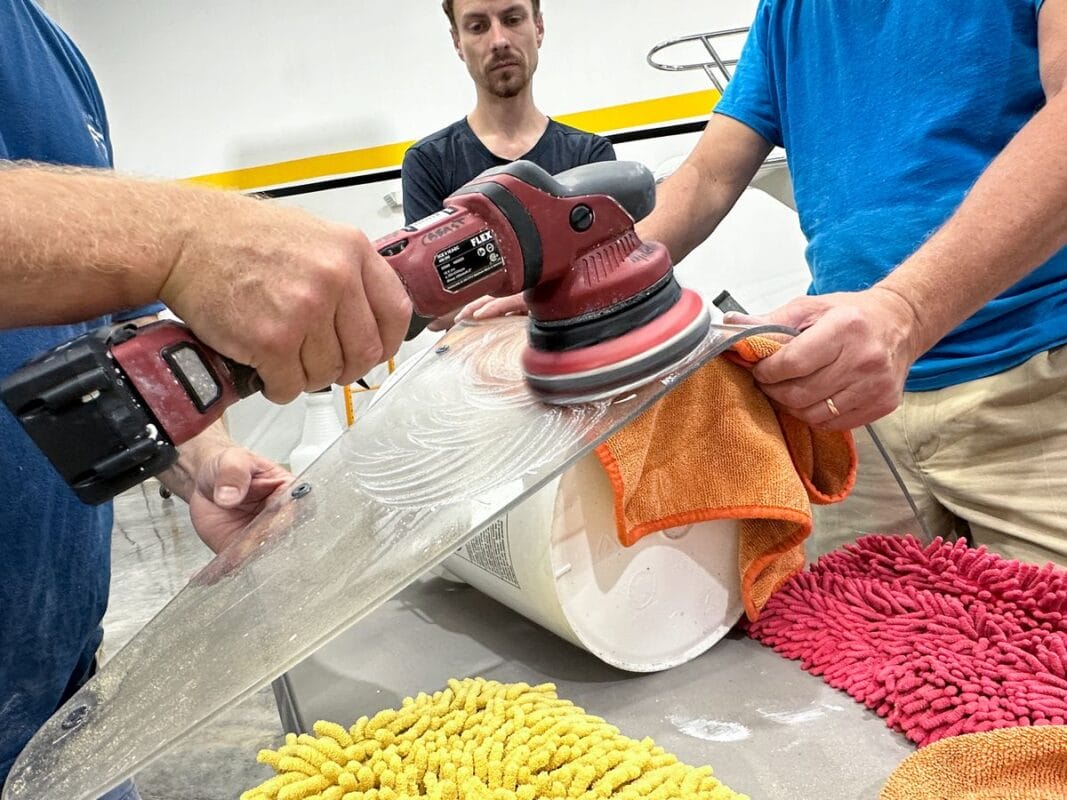
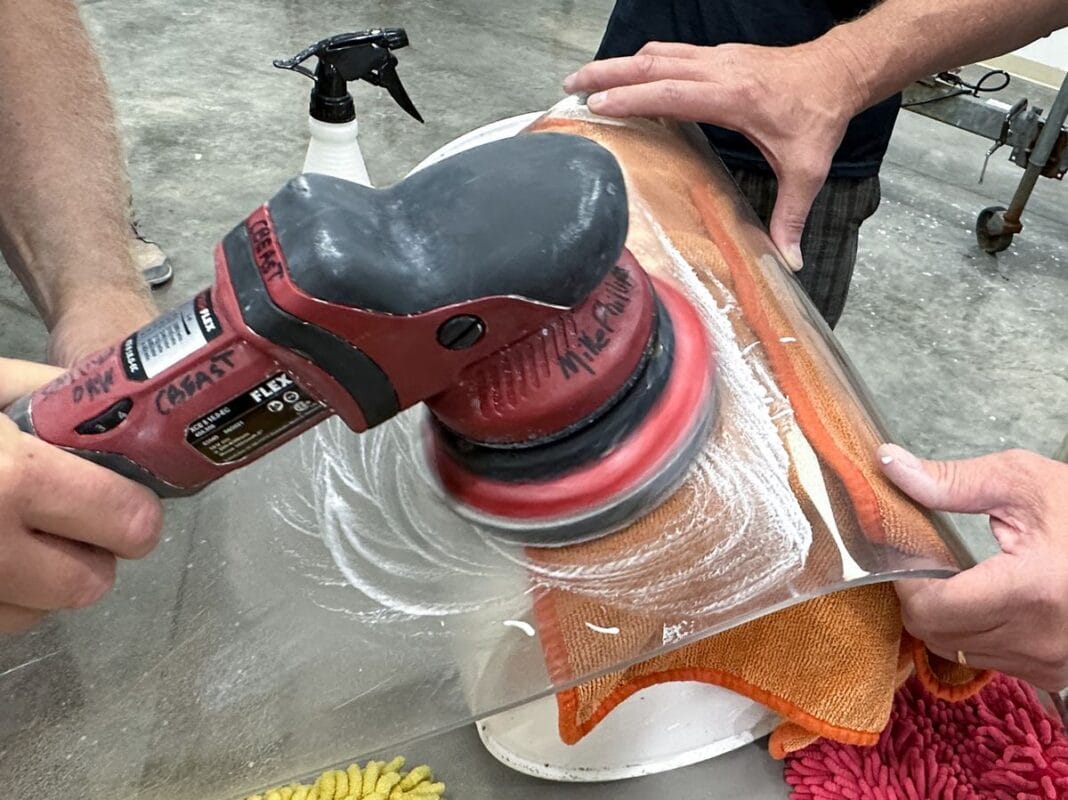
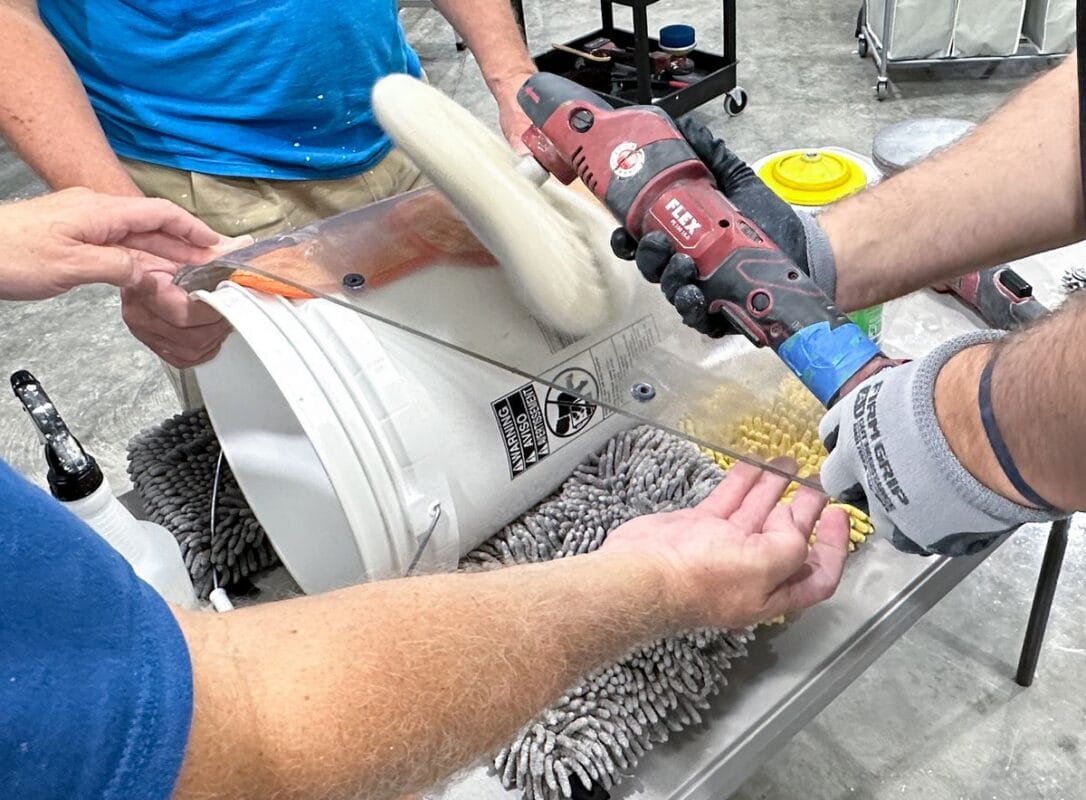
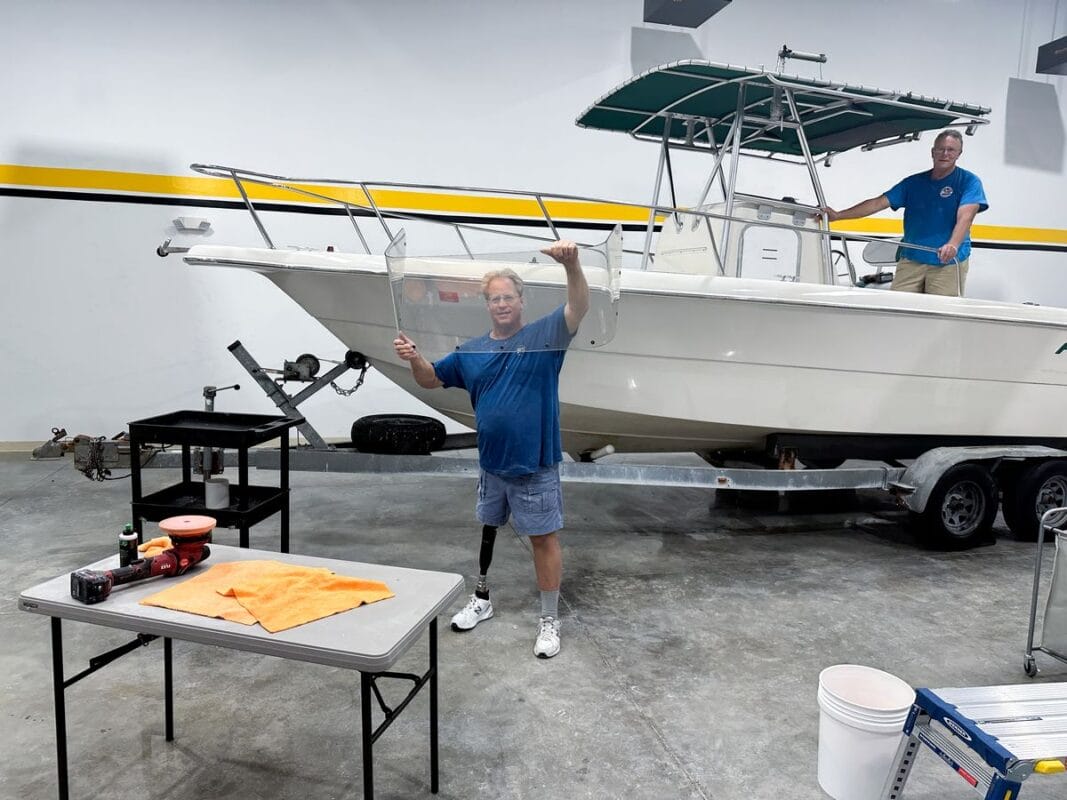
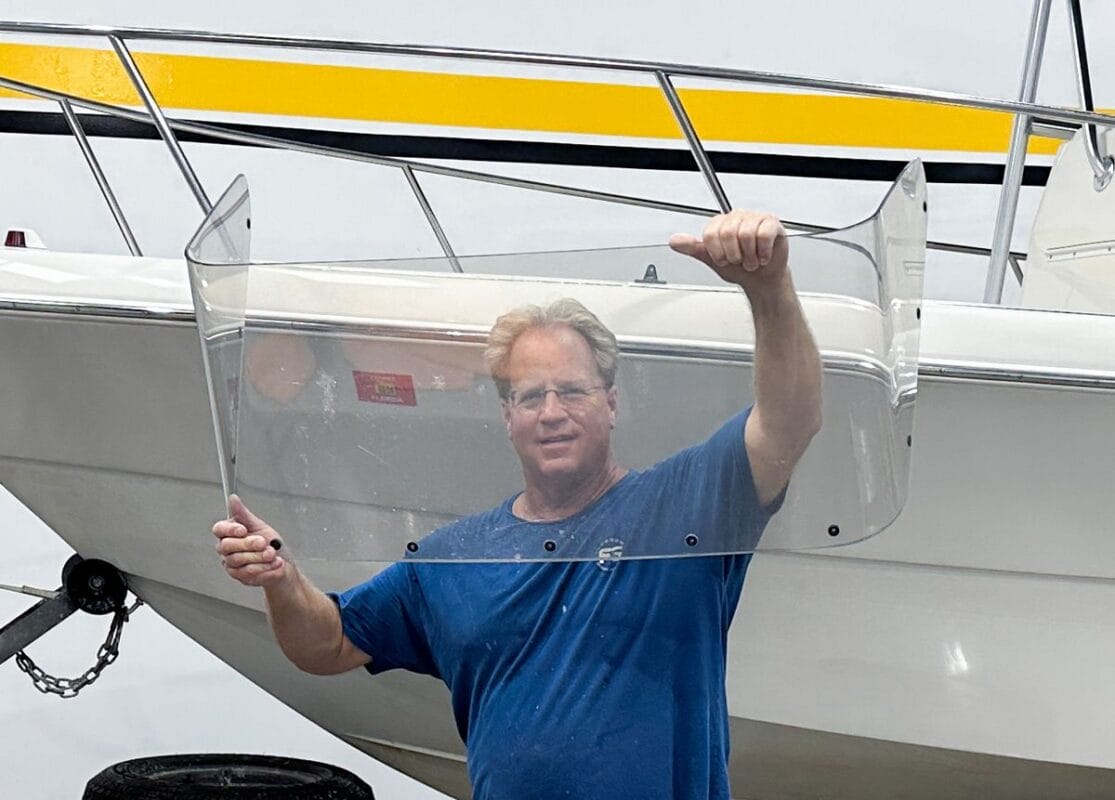
Topic 10: Plastic Windscreen & Isinglass Polishing
Many boats have plastic windscreens and Isinglass windows that accumulate swirls, scratches, and water spots. Students will learn how to machine polish these surfaces to remove defects and restore optical clarity.
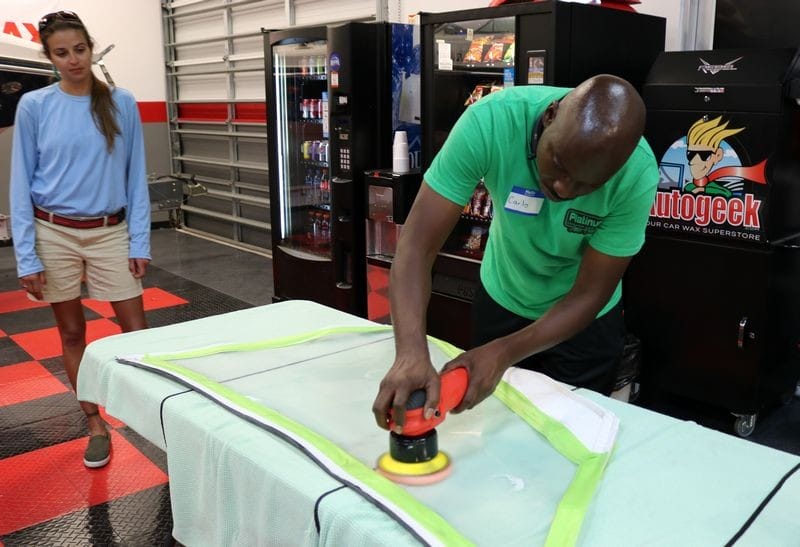

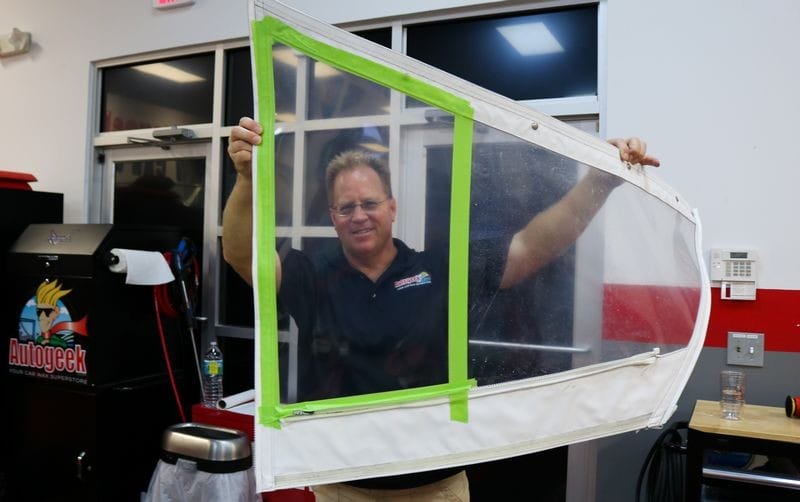
IMPORTANT: Not All Plastic Windscreens Can Be Polished — Test In a Small Area First!
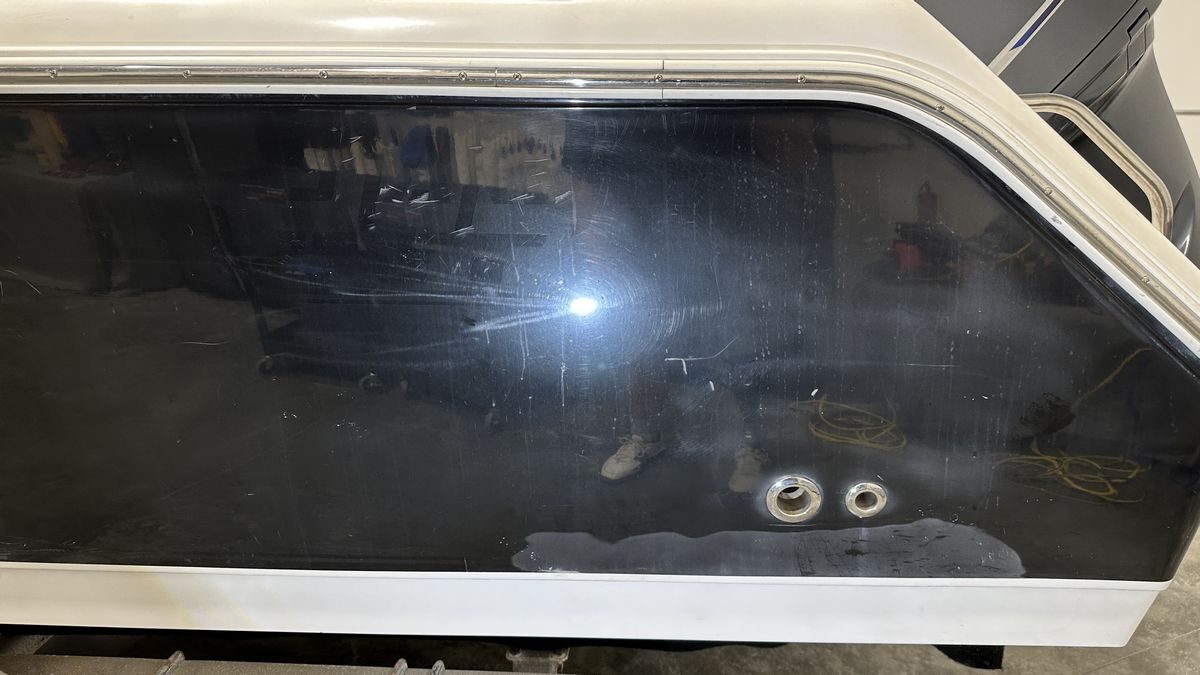
It’s vitally important to be very careful when working on any flexible or rigid clear plastic windows. Some plastics are so hard or have a proprietary coating bonded to the plastic, that they are impossible to fix. So before doing any sanding and buffing like you’ll see in the below pictures, it’s best to test any product or procedure to a small area and MAKE SURE you can improve the plastic before tackling the entire window.
For the windscreen in the pictures below, we first removed aged vinyl stickers. We followed this with some testing and found we could machine sand the plastic and easily buff out our sanding marks and the results from this process didn’t restore the window to new condition, but it dramatically improved the clarity and appearance. Outside of replacing with a new windscreen, this was completely satisfactory to the owner.

And that’s how I teach a boat detailing class. Feel free to borrow all of it, or just parts of it.
Mike’s Boat Detailing Class Checklist
Besides some level of knowledge, experience, and mastery of a topic plus patience, what else is required to teach a top notch boat detailing class?
Great question, so let me go straight to the nuts and bolts of what it takes to teach a quality boat detailing class. Here’s my checklist of the things you need to teach a top notch, hands-on boat detailing class.
- Mirka Abralon Sanding Discs for Machine Wet Sanding
- Eagle Abrasives by KOVAX Sanding Discs for Machine Dry Sanding
- 8mm Gear-Driven Orbital Polishers
- 3” Mini Sanders for Narrow or Tight Areas
- 6mm Drive Units
- Clean Water Source for Machine Wet Sanding
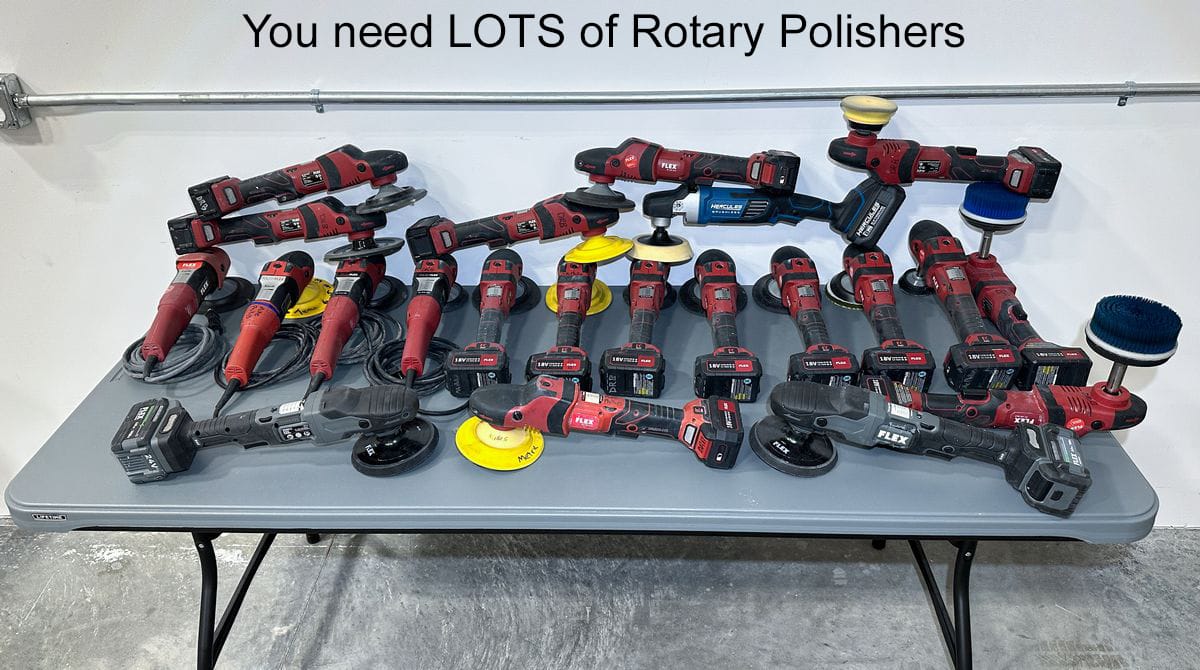
- Rotary Polishers
- Cordless & Corded Rotary Polishers
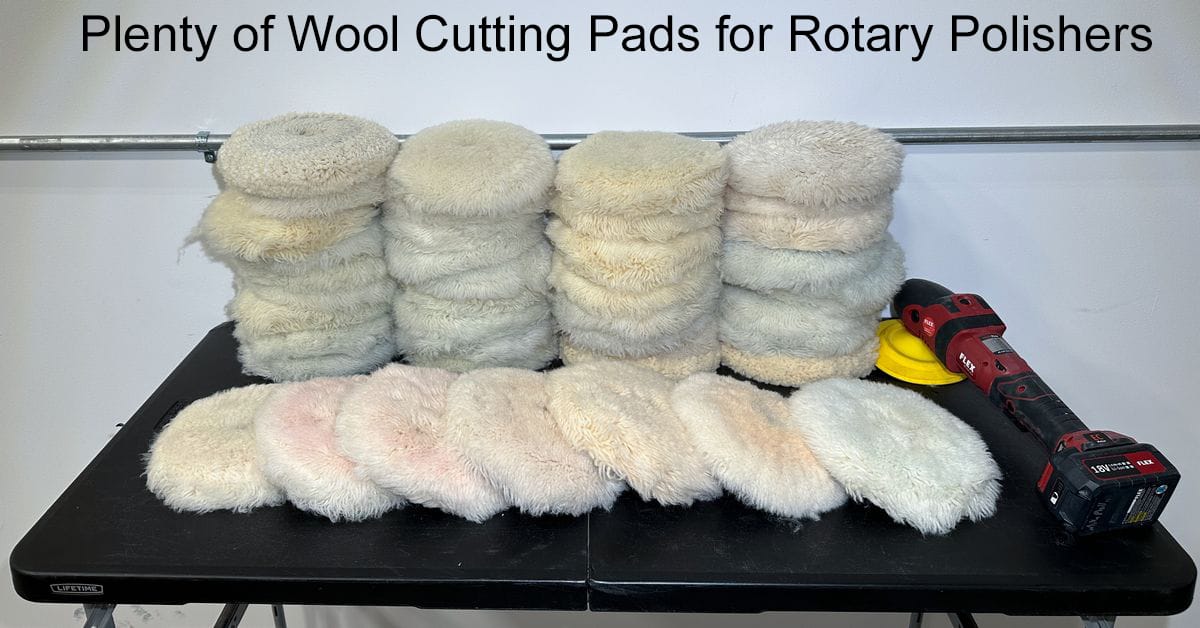
- 4-Ply, Twisted 100% Wool Cutting Pads
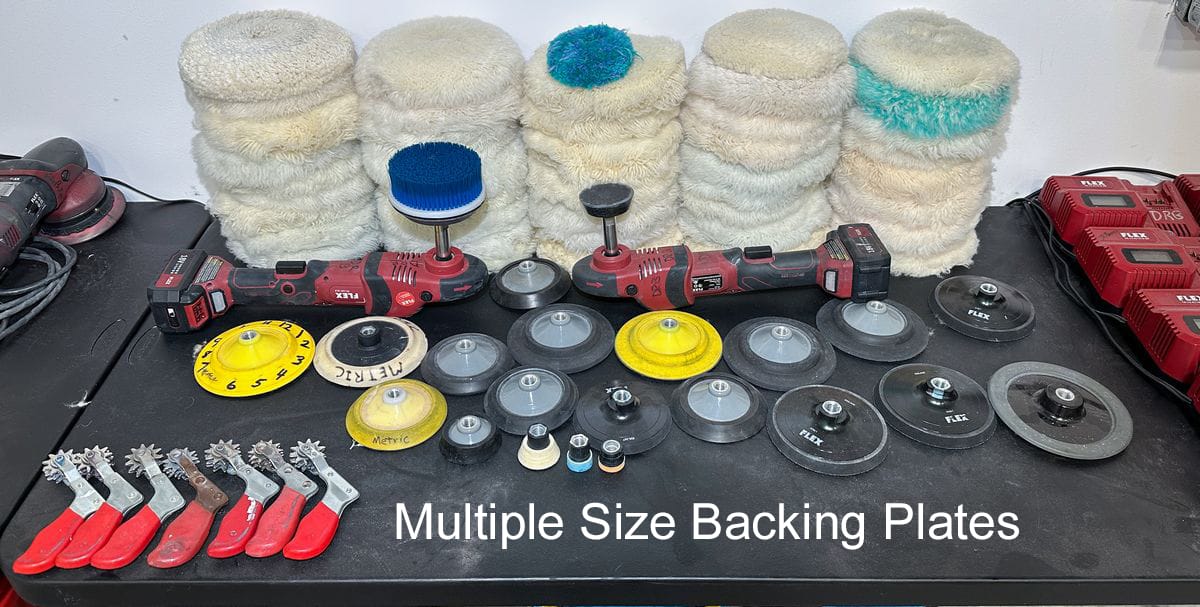
- Multiple Size Backing Plates
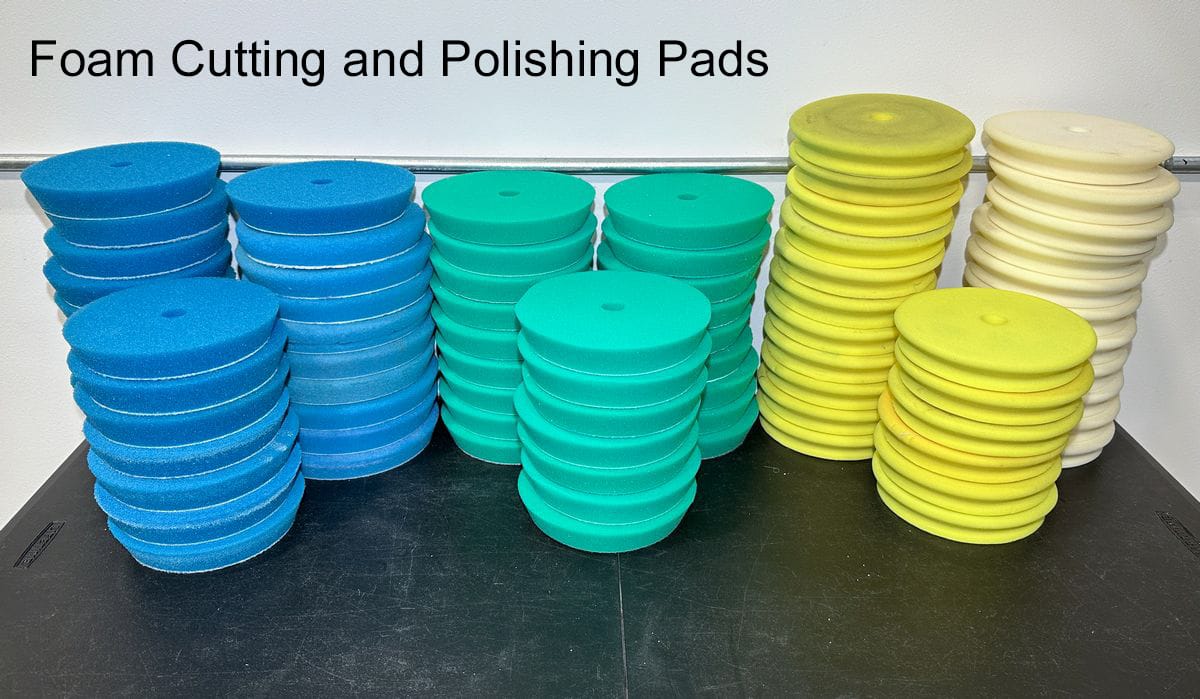
- Foam Cutting and Polishing Pads
- 8mm Gear-Driven Orbital Polishers
- Heavy Duty 12 Gauge Power Cords
- Optional: Lots of Free Spinning Random Orbital Polishers for Show Boat Work
- Power – LOTS of Power
- Pad Washers
- PPE – Personal Protection Equipment
- Microfiber Towels – LOTS of Microfiber Towels
- Cordless Battery Charging Station
- Lots of Painter’s Tape or Masking Tape
- Swirl Finder Lights and LOTS of Them!
- Detailometer
- Detailing Brushes
- Pad Cleaning Spurs
- Proper Canvas Cloth Top Cleaning Brushes
- Quality Work Platforms and/or Scaffolding
- Leaf Blower
- Wet/Dry Vacuum
- Knee & Back Cushion – or – Butt Cushion
- Indoor Space, Large Enough for at Least One Boat and a Group of People to Comfortably Work
- Great Lighting – Overhead and Vertical Wall Lights
- Tables – LOTS of Tables, Counter Space, or Detailing Carts
- Storage Cabinets
- Sound Deadening Boards or Insulation
- Washer and Dryer Station
- Microfiber Towel Inspection and Folding Station
- Refrigerator or Ice Chest for Bottled Water
- SMALL Bottles of Water
- Big Screen TV – For a PowerPoint Presentation and/or Internet Access
- Internet Access
- White Board on the Wall and Plenty of Dry Erase Markers
- Coffee Station
- Wall Clock
- Facilities for Men and Women
- Slop Sink
- Rolling Wash Carts
- Quality Water/Garden Hose
- Quality Water Sprayers and Quick Disconnects
- Quality Wash Mitts and Premium Quality Drying Towels
- Pressure Washer
- First Aid Kit
- Class Food
- Misc Supplies
Let me provide some insight for each of the above listed items.
1. Mirka Abralon Sanding Discs for Machine Wet Sanding
For machine wet sanding, we show the Mirka Abralon mesh faced sanding discs. These sanding discs offer a crosshatch mesh of abrasive particles on the face of the paint that provides very uniform cutting action. These discs also have a foam backing, unlike the Eagle Abrasives by KOVAX sanding discs. This foam backing, together with a foam interface pads allow the face of the sanding disc to conform to curved panels while maintaining 100% sanding disc contact to the surface being sanded for uniform material removal or UMR.
The upside of the foam backing is that this type of sanding disc tends to remove material uniformly across the surface, which is great for removing deep oxidation, water stains and dock rash. The downside is they are not good at leveling surface texture to create a more flat surface. This isn’t super important for restoring gelcoat boats but will be a factor if you were trying to create a show car finish on a boat. The flatter you can sand the surface, the greater the D.O.I. or Distinction of Image for reflections off the surface. So, for most people, these would be the correct type of sanding disc for doing gelcoat correction.
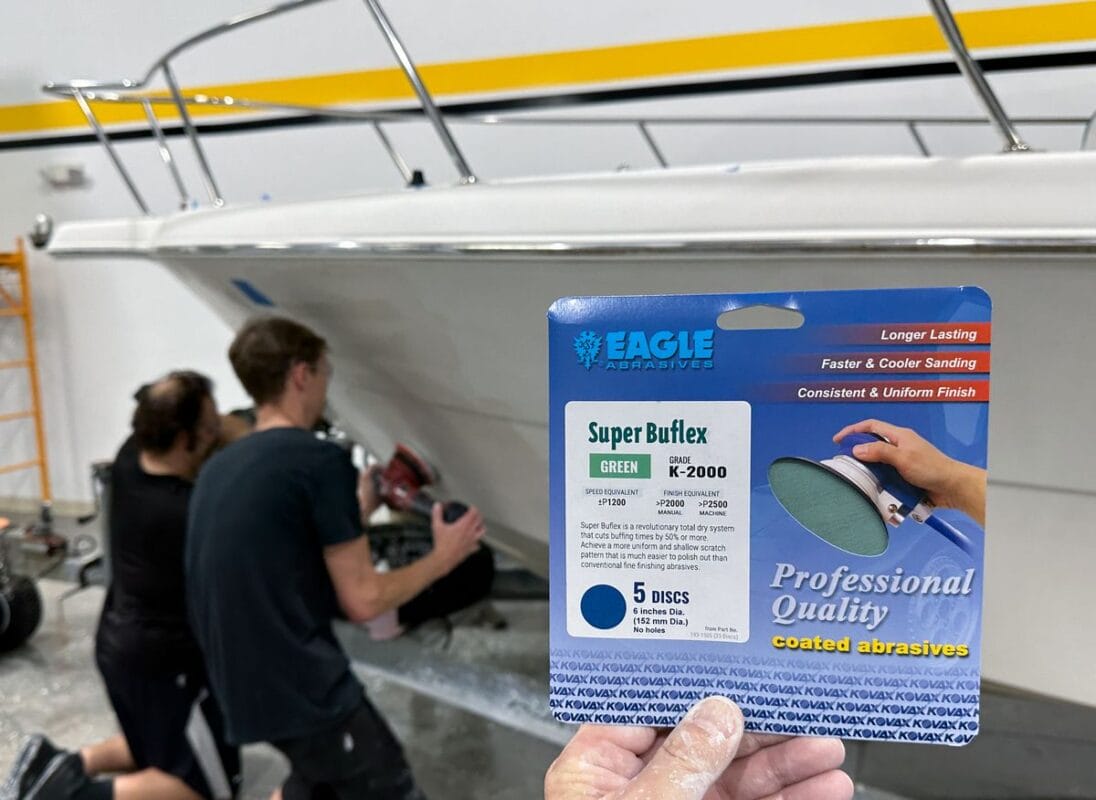
2. Eagle Abrasives by KOVAX Sanding Discs for Machine Dry Sanding
There are a number of brands for dry sanding discs, I show the Eagle Abrasives by KOVAX brand because they make such a complete line of different sanding grits. They also offer their dry sanding discs in, 6 inch, 5 inch and 3 inch. I wish they offered 1 inch and 2 inch but so far these sizes are not available, so I cut my own. The key for machine dry sanding with the Eagle Abrasives by KOVAX sanding system is in both the sanding discs but just as important, the interface pads.
The Eagle Abrasives by KOVAX interface pads use a microscopic size hook. This keeps the sanding action as flat as possible. While this is mostly important when sanding automotive finishes for show car results, this same flat sanding action also helps to create a show car finish on a boat. So, it’s kind of up to each person to decide if dry sanding is right for their watercraft. I would guess most people don’t care but anyone with some type of super cool boat, especially a dark color, would be the type of person that is looking for the ultimate finish. Thus, in our classes, I teach both techniques, dry and wet sanding in order to teach the class 2 techniques. Each person can then decide which technique is best when they return to their world and their boat detailing projects.
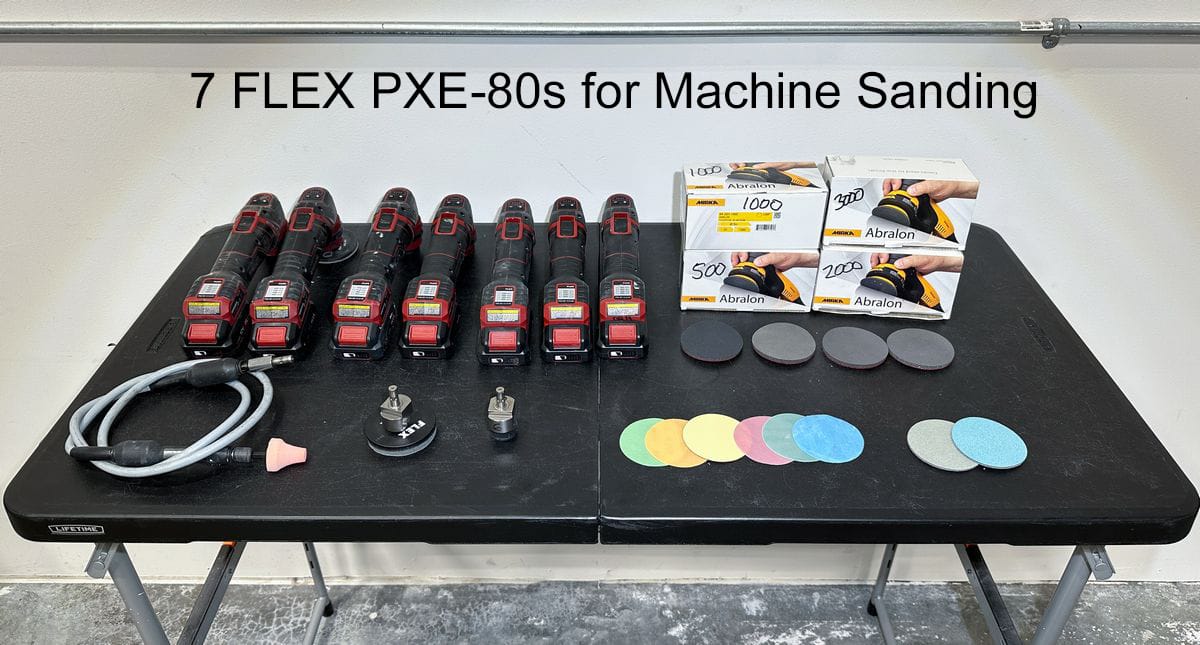
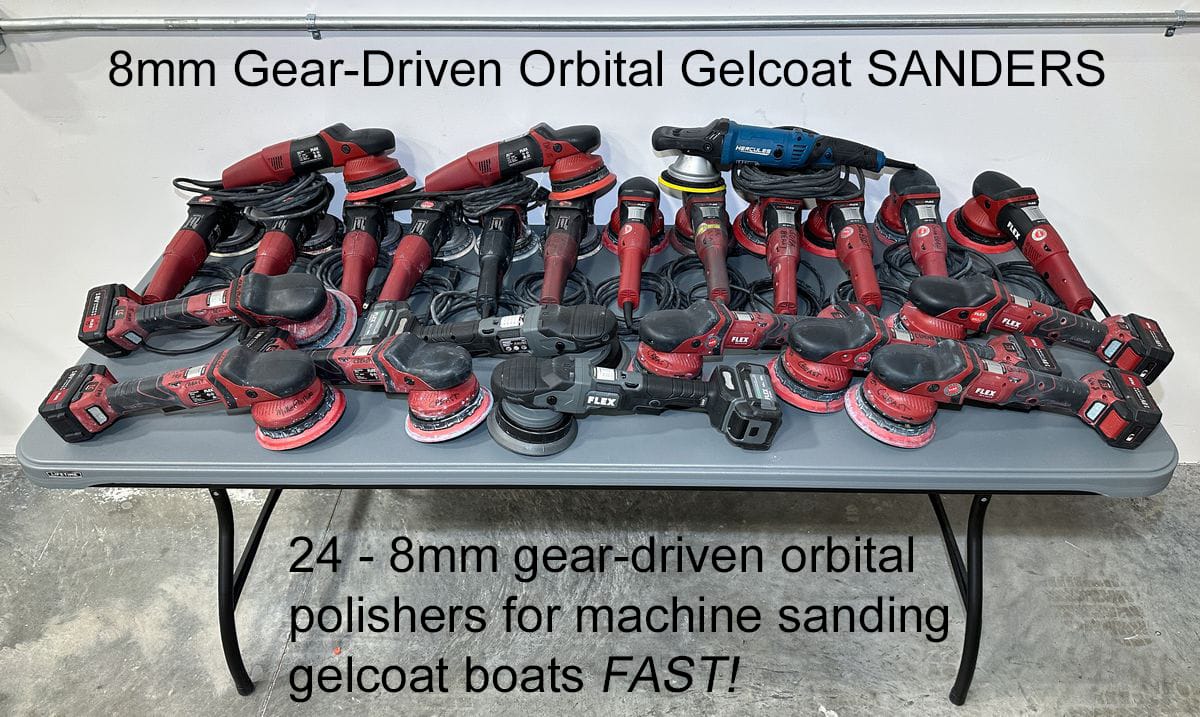
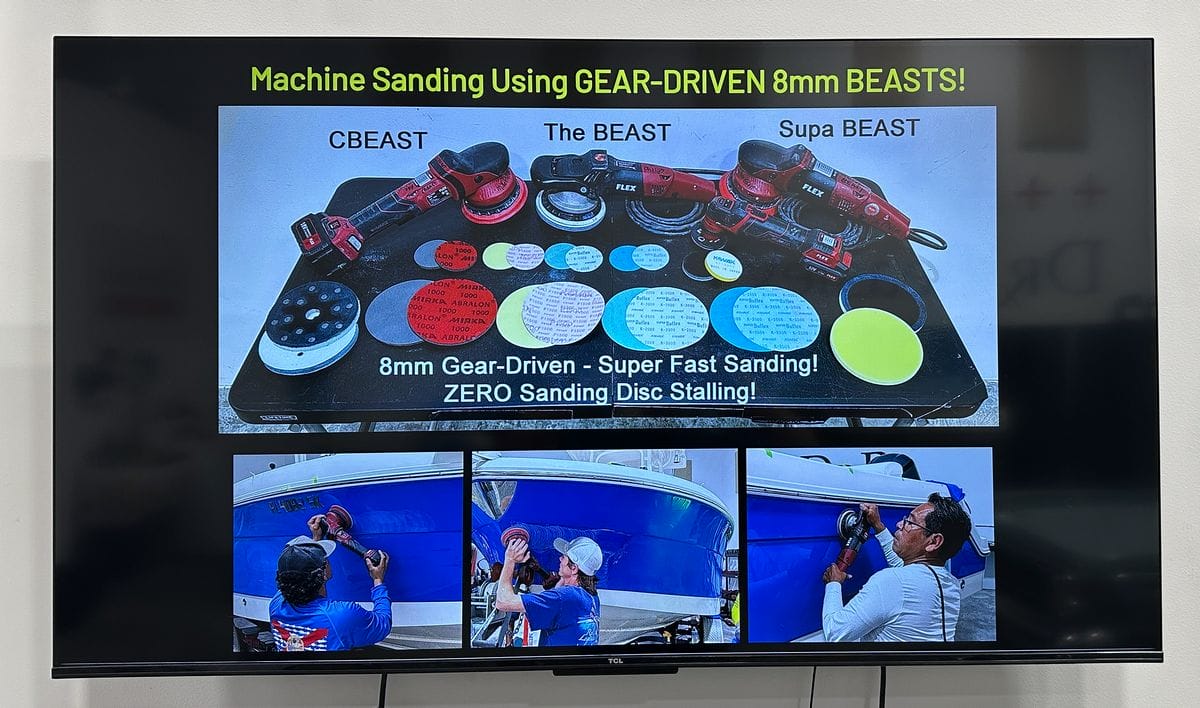
3. 8mm Gear-Driven Orbital Polishers
Historically, most people would use or show FREE SPINNING DA Sanders, or FREE SPINNING DA Polishers for sanding down a gelcoat hull. Do these types of tools work? The answer is YES. Is there a faster way? Yes. Instead of showing free spinning random orbital sanders and polishers, I switched my classes over to 8mm gear-driven orbital polishers.
The Problem with DA Sanders and Gelcoat Boats
Just like with paint correction, free spinning random orbital polishers suffer from what is called pad stalling. Pad stalling is when for a number of reasons, the spinning buffing pad slows down and even stops rotating and oscillating and basically just vibrates or jiggles against the paint. This same thing happens when you machine wet sand or machine dry sand gelcoat boats.
If the sanding disc isn’t both rotating and oscillating at the same time, sanding will take place, it will just be slower. The way my brain thinks is like this:
It already takes a LONG time to sand down a large boat, buff it out and ceramic coat it. Why would I choose to do it in any way that takes longer? The answer is, I don’t, and I won’t. So, I’ve switched all my boat detailing classes over to gear-driven orbital polishers to be used as 8mm gear-driven orbital SANDERS. Because these are gear-driven orbital polishers there is ZERO sanding disc stalling. This means you can sand down a gelcoat boat as fast as humanly possible while still keeping your quality high.

4. 3” Mini Sanders for Narrow or Tight Areas
This is where the old saying, “use the right tool for the job,” comes into play. Some boats have this section of gelcoat, for example between the bottom of the rub rail and chrome trim like water exhaust ports, etc., and for these areas, a smaller 3” sanding disc fits the area better. And of course, you can cut your own 2 inch and 1-inch discs if needed. At this time, we use the FLEX PXE-80 polisher as a 3″ Sander.
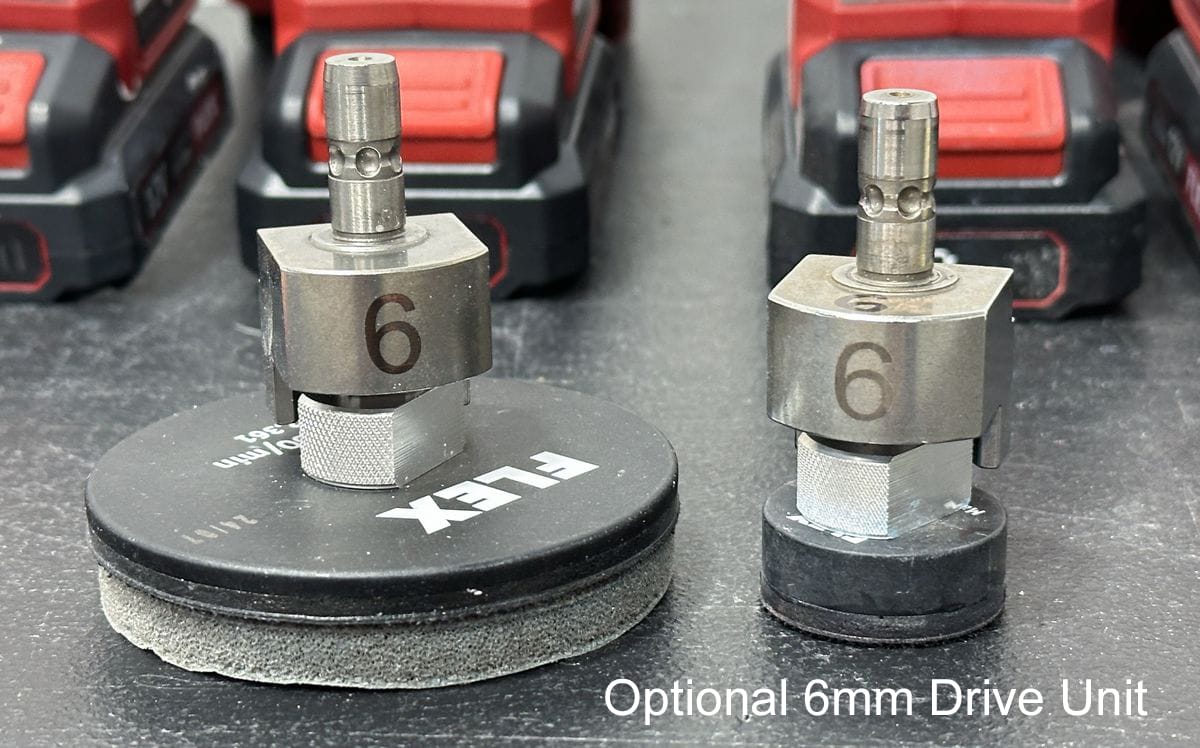
5. 6mm Drive Units
Long story short, when FLEX introduced the FLEX PXE-80, I did two things.
- Submitted to FLEX Corporate to nickname this tool the PiXiE – which is simply saying the letters for the part number as a word. I looked up the definition for Pixie and it reads:
A small fairy-like creature.
FLEX, in their wisdom, decided to NOT nickname this tool the Pixie, but this is what I call it. And when I type it out, (which I do a LOT), I type it with the part number letters CAPITALIZED and the additional letters in lower case. Like this: PiXiE.
- Sent a very kind email to FLEX Corporate asking them to custom-make me an orbital drive unit in-between the 3mm and the 12mm that comes with the PiXiE from the factory.
FLEX introduced the PiXiE as a paint correction tool. When I first saw it, my first thoughts were,
This is going to make a GREAT 3″ orbital SANDER
After Griot’s Garage discontinued their 3″ Mini Polisher, (5mm orbit stroke), there was a vacuum in the marketplace for a good small or micro-sander. The FLEX PiXiE filled this void except, it came from the factory with 3 drive units,
1: Rotary Drive Unit
2: 3mm Random Orbit Drive Unit
3: 12mm Random Orbit Drive Unit
I explained with my comments and pictures, that
3mm Too Small
The 3mm orbital drive unit is too small to maintain sanding disc rotation for a 3″ backing plate and sanding disc. The 3mm does work for what it was intended to do and that’s using a 1″ backing plate with 1″ sanding discs for dirt nib removal. The thing about this is I rarely do this type of sanding while I do a LOT of sanding with all the common 3″ sanding discs on the market.
12mm Too Large
The 12mm was too LARGE to use this tool as a sander because the long orbit stroke prevents you from sanding next to raised body lines or edges without the RISK of actually sanding ON the raised body line or edge.
In my email, I kindly and politely asked if FLEX could make me any of these, the BIG PICTURE being something in-between 3mm and 12mm
5mm
6mm
7mm
8mm
My preference is the 6mm. To my excitement, a few months later, FLEX sent me a prototype of a 6mm random orbit drive unit. I immediately tested and approved it for my style of machine wet and machine dry sanding.
As the saying goes, the rest is history.
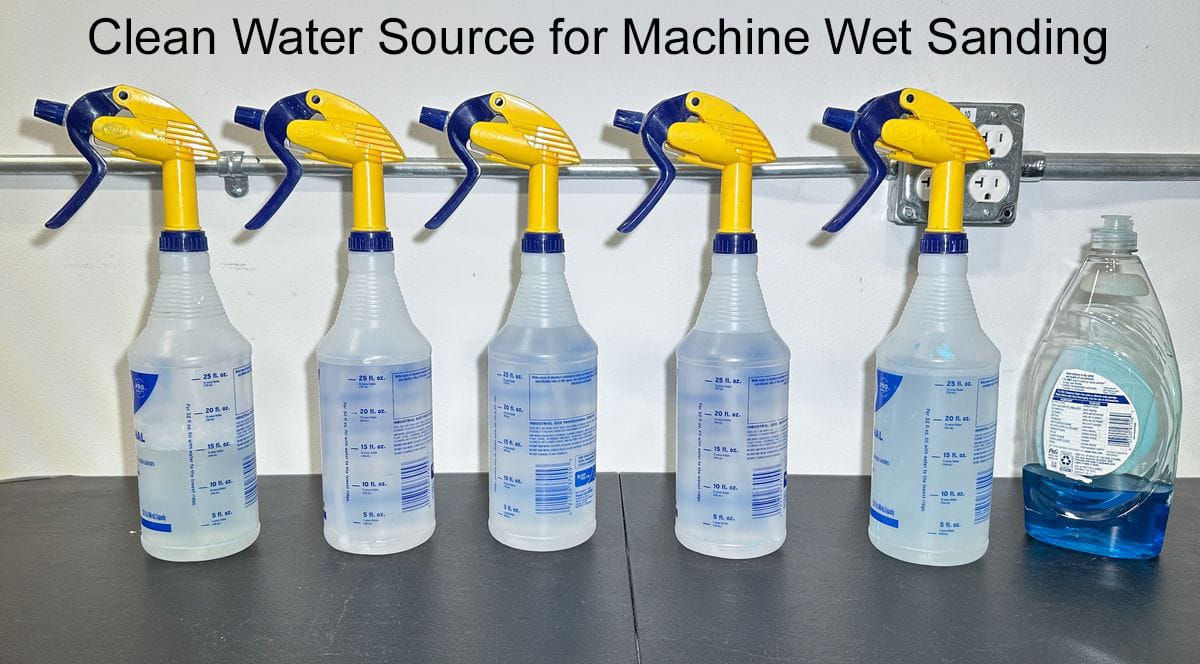
6. Clean Water Source for Machine Wet Sanding
When machine wet sanding, you need to start with clean water and then add more water as you’re sanding. The fastest and easiest way to do this is by putting some clean water into some spray bottles. It’s also a good idea to add a little soap to the water, like a few drops for 32 ounces. The soap lubricates the sanding action to make it smoother and thus create a more uniform sanding mark pattern. The soap also helps to prevent the face of the sanding disc from loading up with removed gelcoat.
7. Rotary Polishers
As all you seasoned and/or experienced boat detailers know, when it comes to removing deep oxidation, water stains, dock rash, and sanding marks, nothing beats the power and speed of the rotary polisher. Can these various gelcoat correction processes be done with an orbital polisher? You bet. Will it be slower and less effective? You bet. Thus, the fastest way to buff out a neglected boat, or the fastest way to remove 100% of the sanding marks (if you sanded down the boat), would be to use a rotary polisher with a wool cutting pad and a great compound.
8. Cordless & Corded Rotary Polishers
I know a lot of expert boat detailers will say that a cordless rotary polisher, regardless of the brand, doesn’t have the same power as a corded rotary polisher for buffing out boats, and for the most part, these people are correct.
That said, in our classes, I PURPOSEFULLY teach sanding out to very fine grits like 2500, 3000, and even 4000 grit. This makes it easier for the class to buff out 100% of the sanding marks, and in our classes, that is the criteria—nothing less. For our classes, cordless rotary polishers work fine, and the students don’t have to manage a power cord during the buffing process.
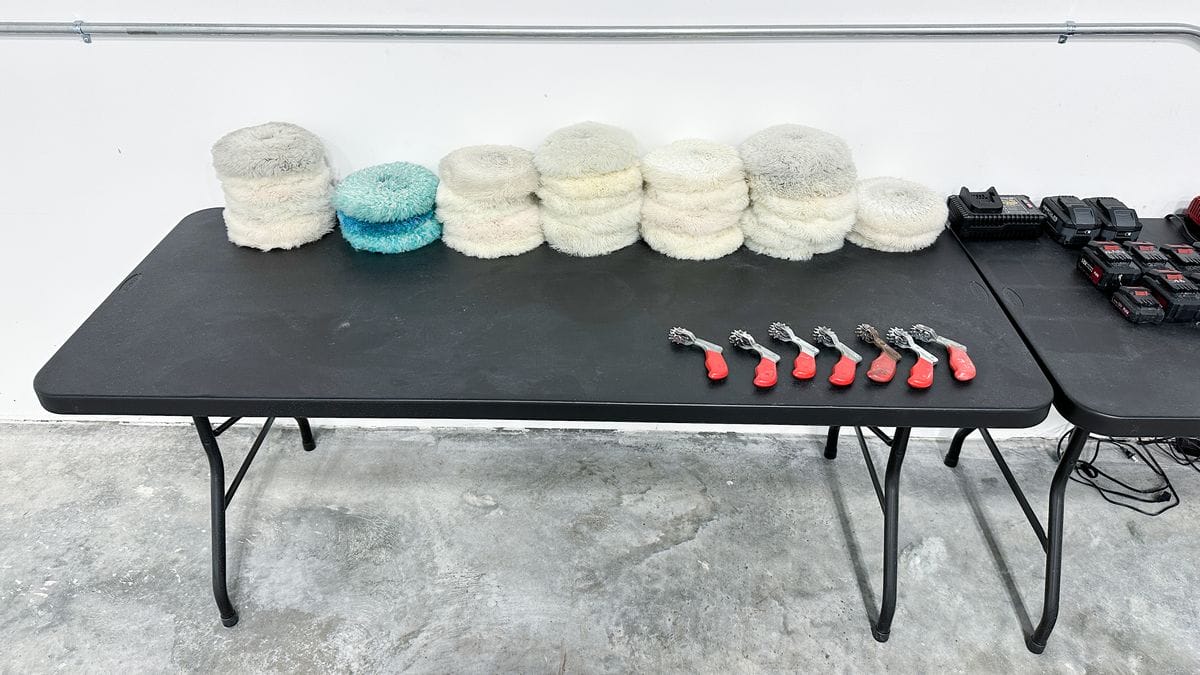
9. 4-Ply, Twisted 100% Wool Cutting Pads
When you need to cut hard and speed is king, nothing beats a quality, 4-ply, twisted 100% wool cutting pad for use with rotary polishers. The upside is fast cutting action. The downside is ANY time you use any type of fiber pad on any type of polisher, the FIBERS each INDIVIDUALLY CUT THE SURFACE. In the context of boat detailing, this means when using a wool pad on a rotary buffer, you’re putting HOLOGRAMS into the gelcoat finish. The thing is, after cutting with wool pads on rotary polishers, we switch over to foam cutting pads on orbital polishers, and this step removes the holograms.
10. Multiple Size Backing Plates
It’s a good idea to have different size buffing pads for tackling thin areas, tight areas, or intricate areas, and in order to do this, you also need a variety of different size backing plates. Normally 1”, 2”, 3”, 5”, 6”, and 7” will take care of any size buffing pad.
11. Foam Cutting and Polishing Pads
In my first boat detailing book, published in 2013, I included a section that states that, when it comes to POLISHING gelcoats, what I have experienced first-hand is foam CUTTING pads finish out nicer on factory gelcoats while softer foam polishing pads finish out nicer on gelcoat resprays. I’ve never met anyone on Earth that can explain any specific or technical reason as to why.
My guess is it has to do with both the resin and the boat hull manufacturing process, which is very different than respraying the outside of a boat like you would respray a car, only for the boat you would respray with gelcoat (polyester resin with pigment) instead of car paint. For this reason, it’s a good idea to have plenty of all styles of foam buffing pads so after doing a Gelcoat Test Spot, and dialing-in which pads work best, you’ll have plenty of whichever type of pads work best for all your students.
12. 8mm Gear-Driven Orbital Polishers
For the same reason I teach 8mm gear-driven orbital polishers for use as DA Sanders, which is ZERO SANDING DISC STALLING, I also show these same polishers for the first machine polishing step to remove the holograms. With a gear-driven orbital polisher, there is ZERO BUFFING PAD STALLING, and thus this type of tool works best for speed and efficiency.
13. Heavy Duty 12 Gauge Power Cords
In order to protect your polishers and maximize their performance plus longevity, you need large gauge power cords to flow plenty of amps to the tools. 12-gauge power cords are the norm and the minimum. Never use 14, 16 gauge, or smaller wire power cords, as this will cause the tool to overheat and possibly harm internal electronics.

14. Optional: Lots of Free Spinning Random Orbital Polishers for Show Boat Work
As stated previously, I don’t use or show how to sand or polish gelcoats with any brand of free spinning, random orbital polishers because it’s too slow and inefficient as compared to using gear-driven tools to do the same procedures.
15. Power – LOTS of Power
If you’re going to teach a hands-on class like the type of classes I teach, you’re going to need lots of power. Of course, this is in the context of holding a large class. Some of my largest classes had 26 people in them, and this means at some point, 26 people will be running 26 polishers. For smaller classes, power isn’t normally an issue.
Our shop in Stuart, Florida, has a 200 AMP Electric Panel. We have the ability to easily power up 20 rotary polishers, pushing hard, all at the same time and never blow a breaker.
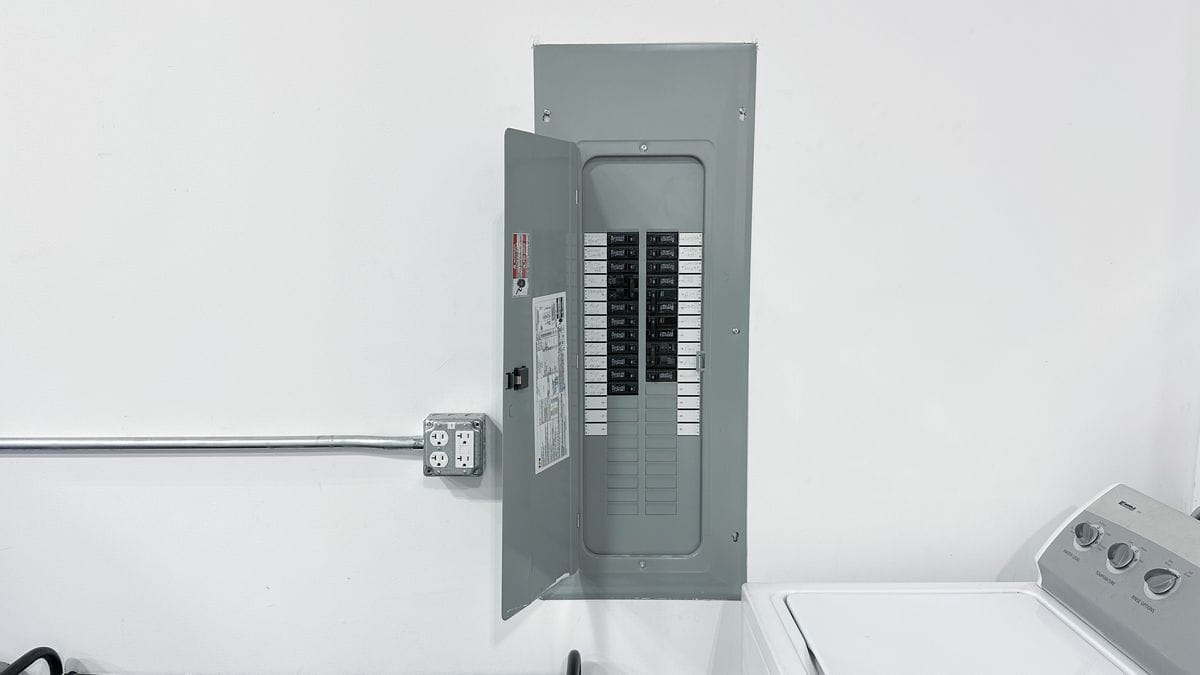
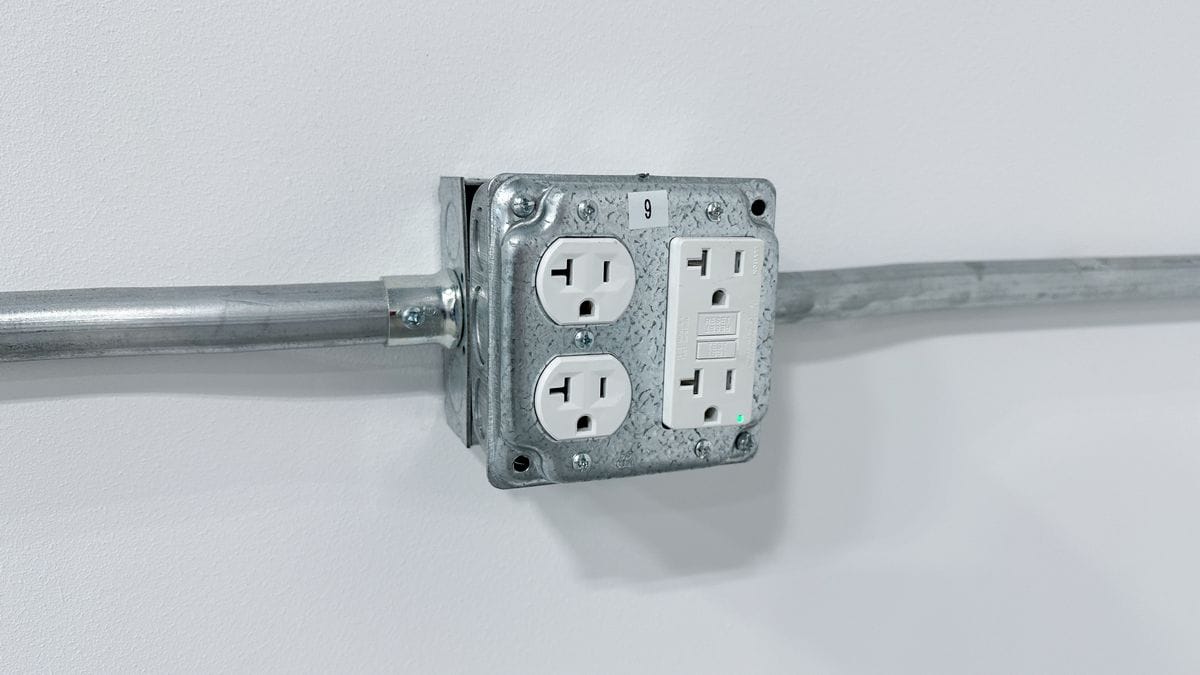
We have 16 Quad or 4-in-1 Grounded Electrical Outlets, for a total of 64 – 110 Volt electrical plug-ins for tools!
I’ve conducted a LOT of roadshow detailing classes, both in the U.S. and in other countries, and the first thing I look for when I get to an offsite shop is to start looking for electrical outlets. Sad to say, most shops don’t have the necessary power supply, and no shop ever has enough electrical outlets.
16. Pad Washers
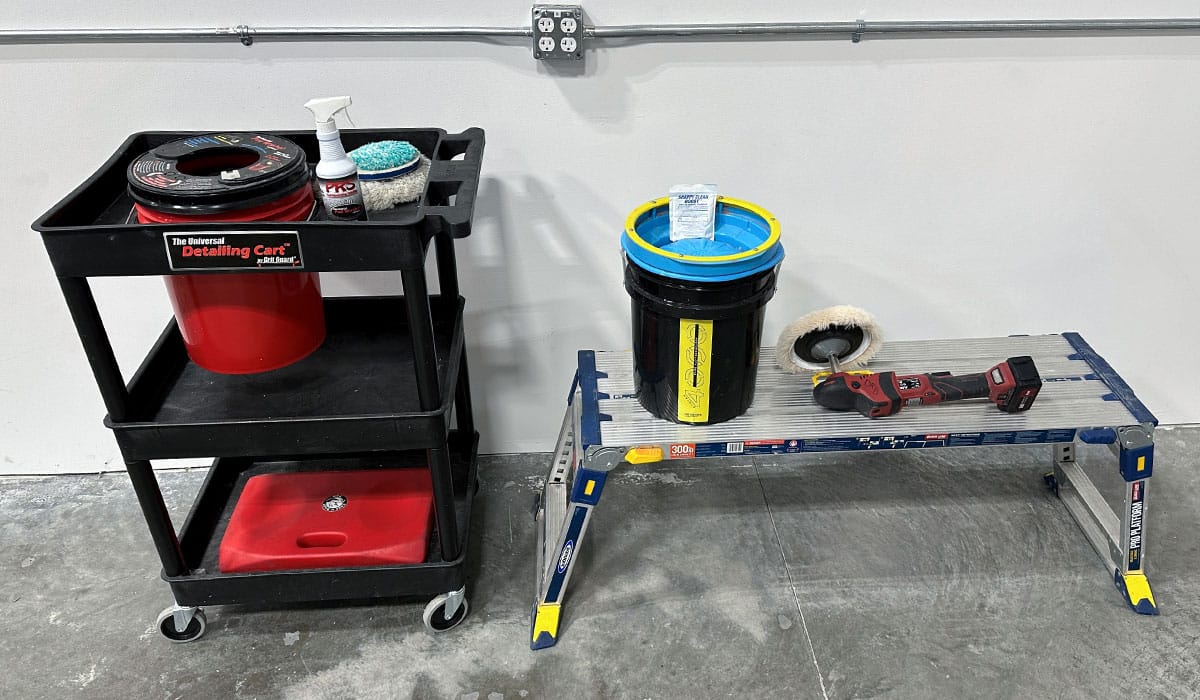
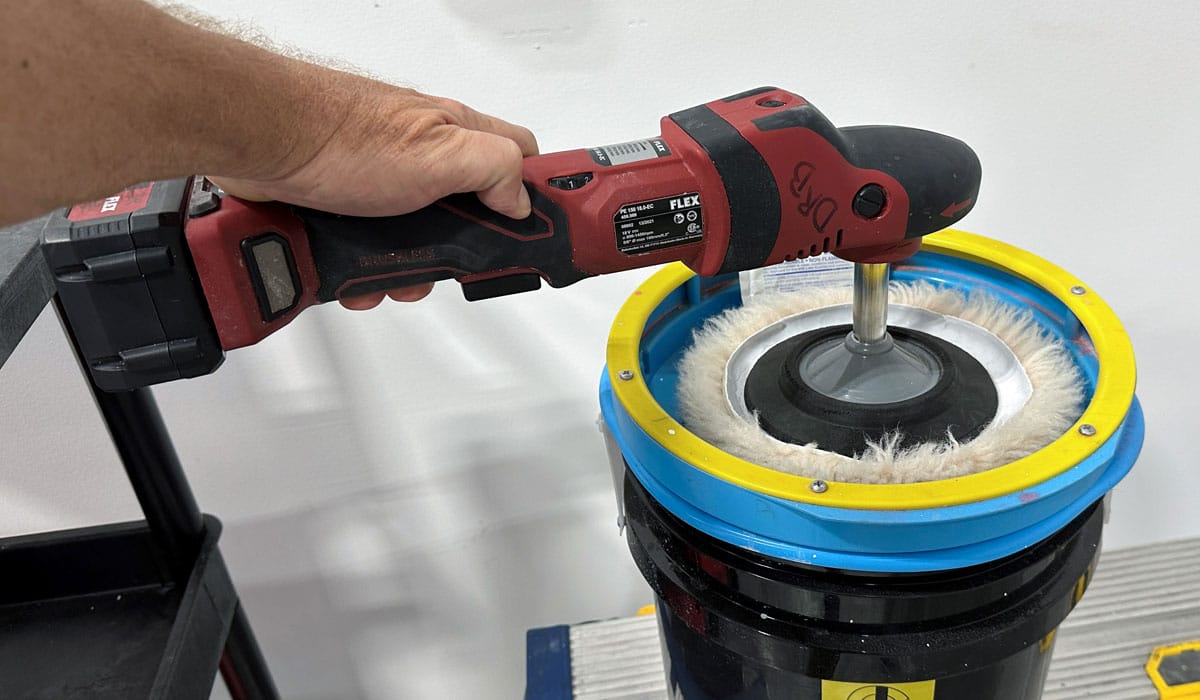
You’re going to go through a lot of buffing pads if you’re teaching a hands-on boat detailing class. Your students are going to need a way to clean their pads to get them clean after use and a protocol to get the most life out of their pad investment. The two popular options on the market today are the Grit Guard Universal Pad Washer and the Lake Country System 4000 Pad Washer.
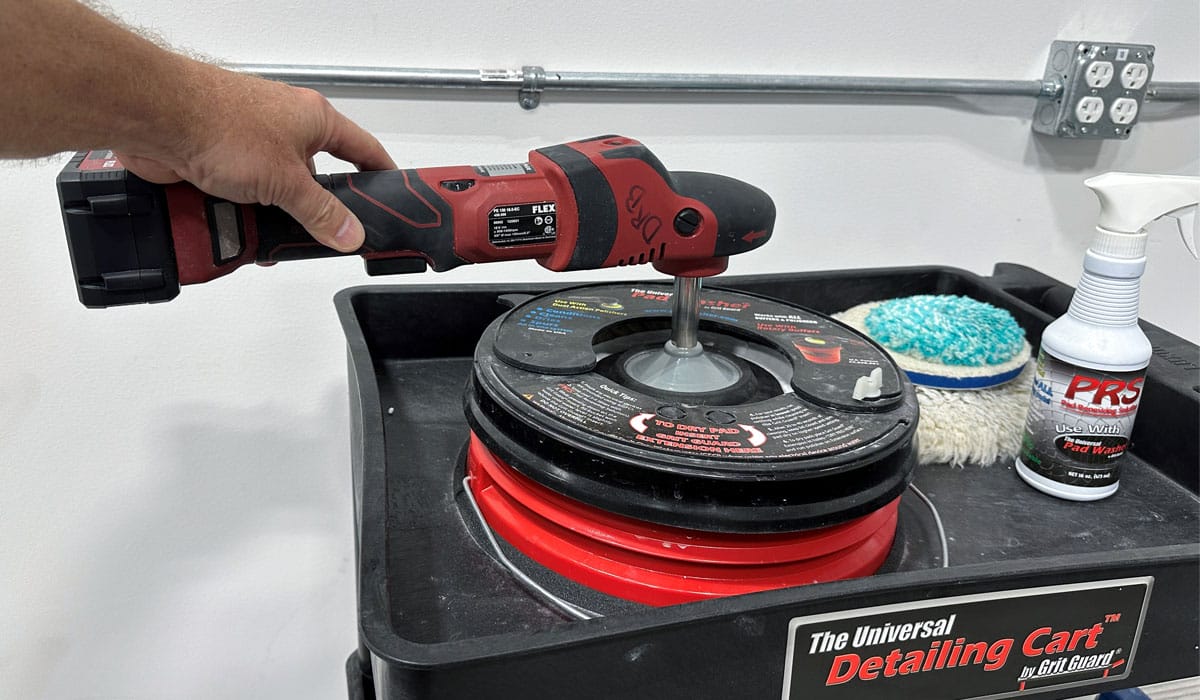
Professional Technique Tip – Use a Rotary Polisher with a Spindle Extension
With both types of pad washers, you need to pump or move the polisher up and down as you press and spin the buffing pad against the cleaning component of each pad washer. With the Grit Guard unit, it helps a LOT to have a small spindle extension attached to the spindle. This extra few inches allows you to pump the polisher up and down against the internal Grit Guard Insert without the body of the polisher hitting the Splash Guard Lid.
The spindle extension is less important with the Lake Country System 4000 Pad Washer, but it still helps in my opinion and experience.
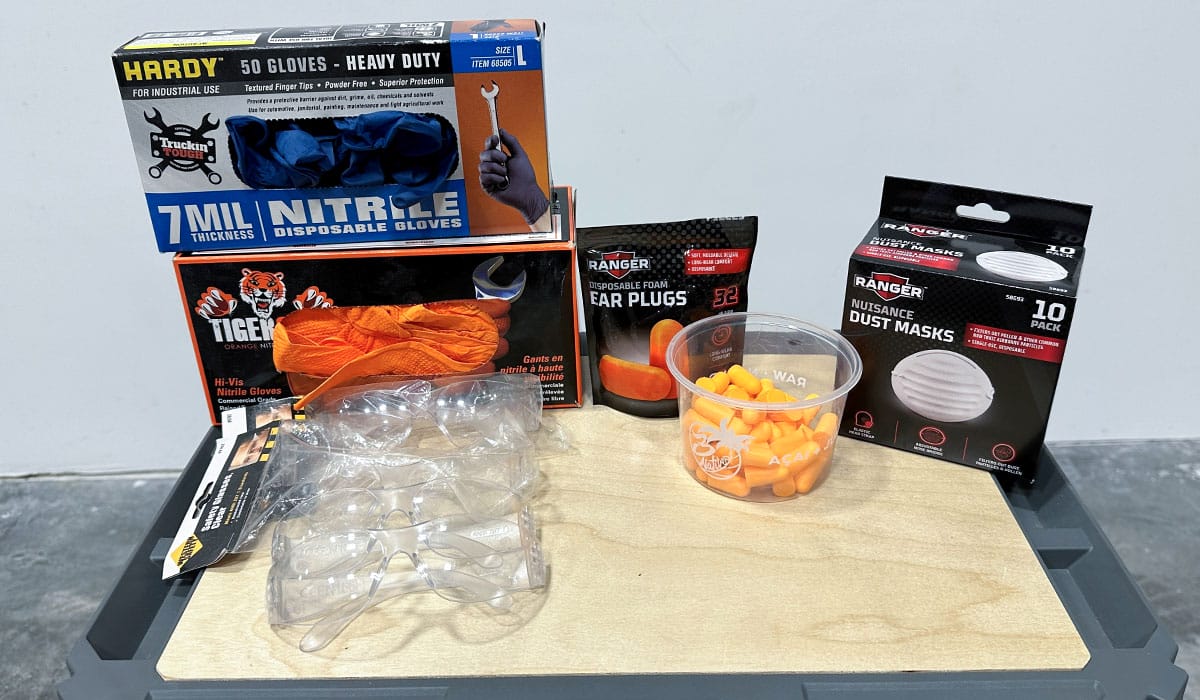
17. PPE – Personal Protection Equipment
The most important aspect for any class you teach is to keep your students safe. Nothing is worse than someone getting hurt. You should have and offer the most commonly used Personal Protection Equipment and, of course, feel free to go to extremes.
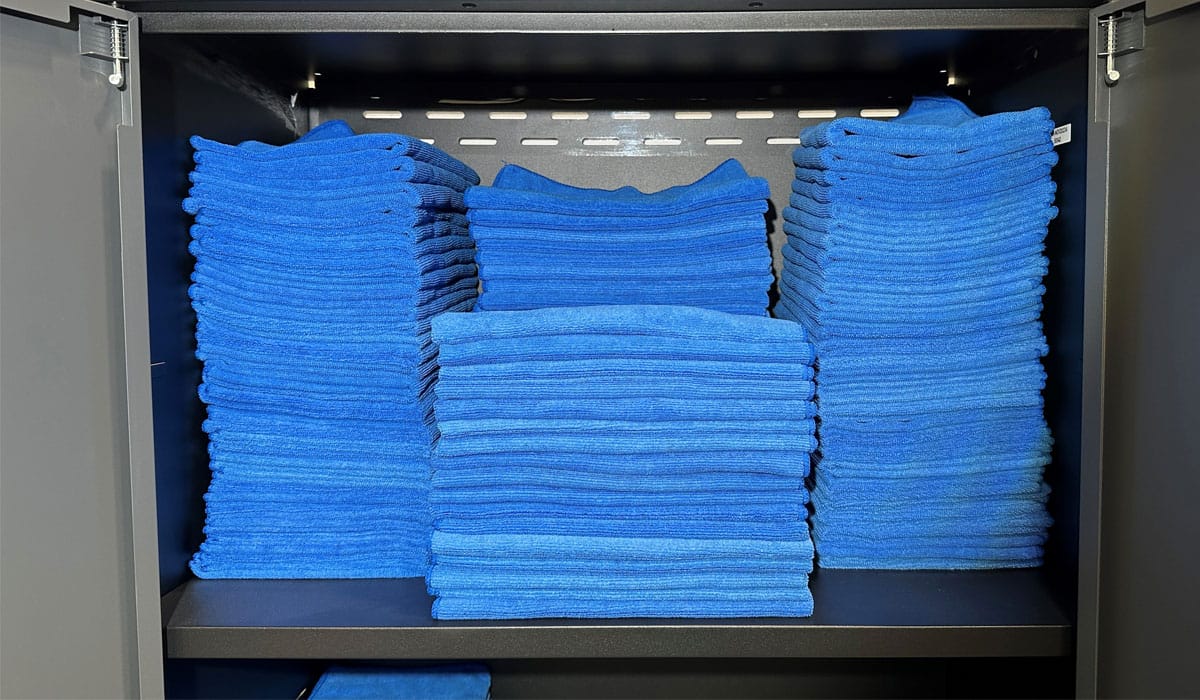
18. Microfiber Towels – LOTS of Microfiber Towels
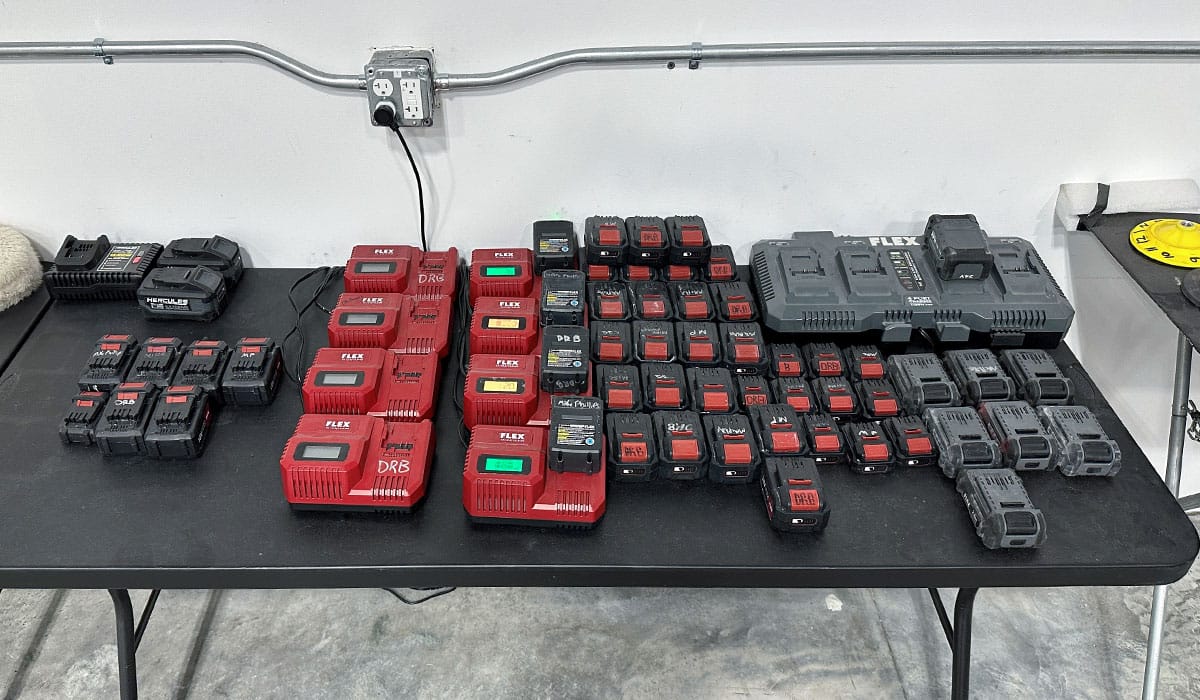
19. Cordless Battery Charging Station
I use a lot of cordless rotary polishers and orbital polishers in our classes. When you have anywhere from 12 to 20 people using cordless tools, you’re going to drain a lot of batteries very fast. You need a bank of battery chargers, plugged in and ready to go.
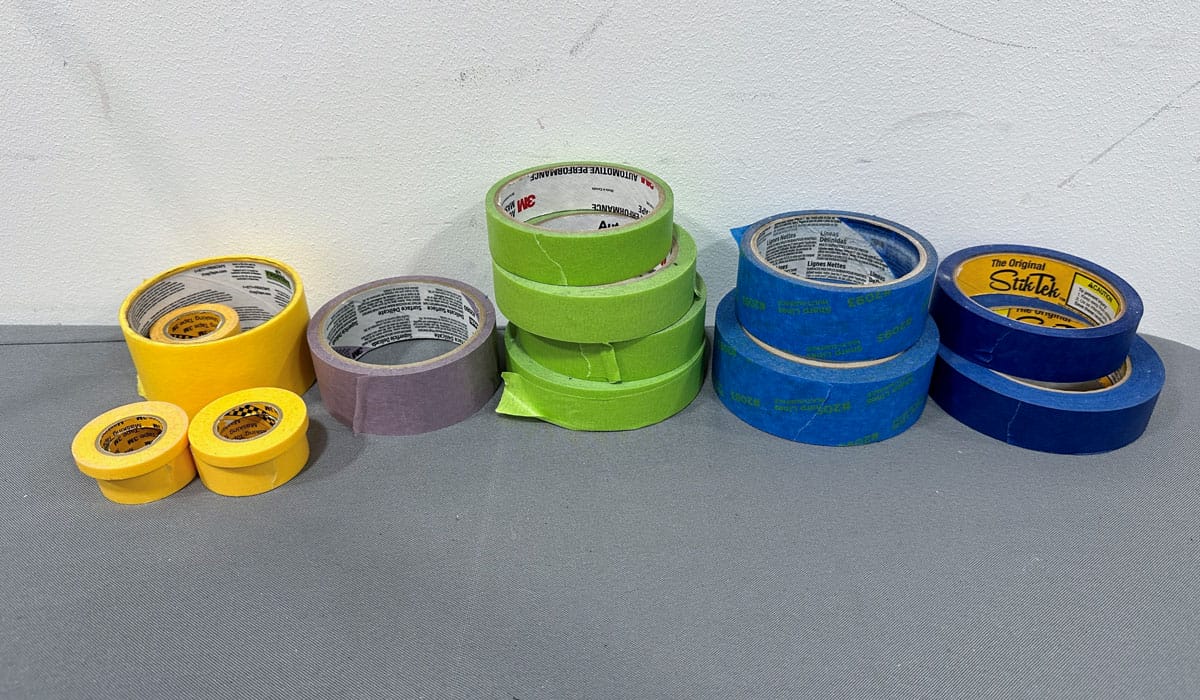
20. Lots of Painter’s Tape or Masking Tape
Painter’s tape is important because it covers and protects sensitive surfaces or materials like vinyl graphics and/or boot stripes.
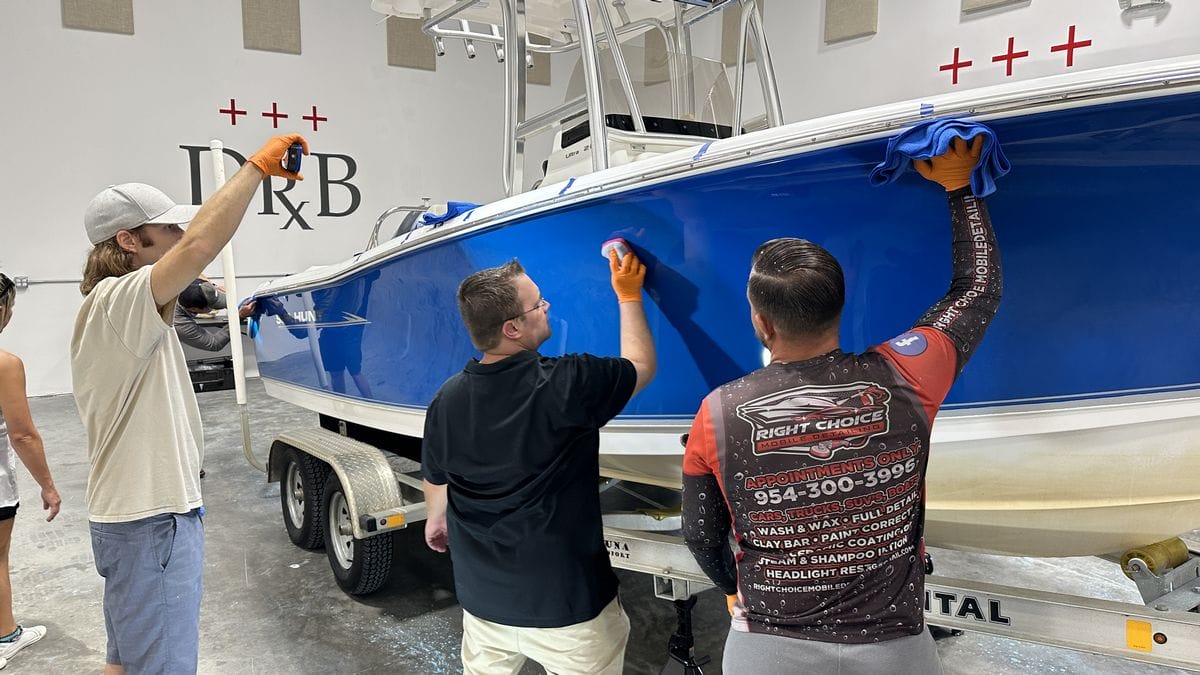
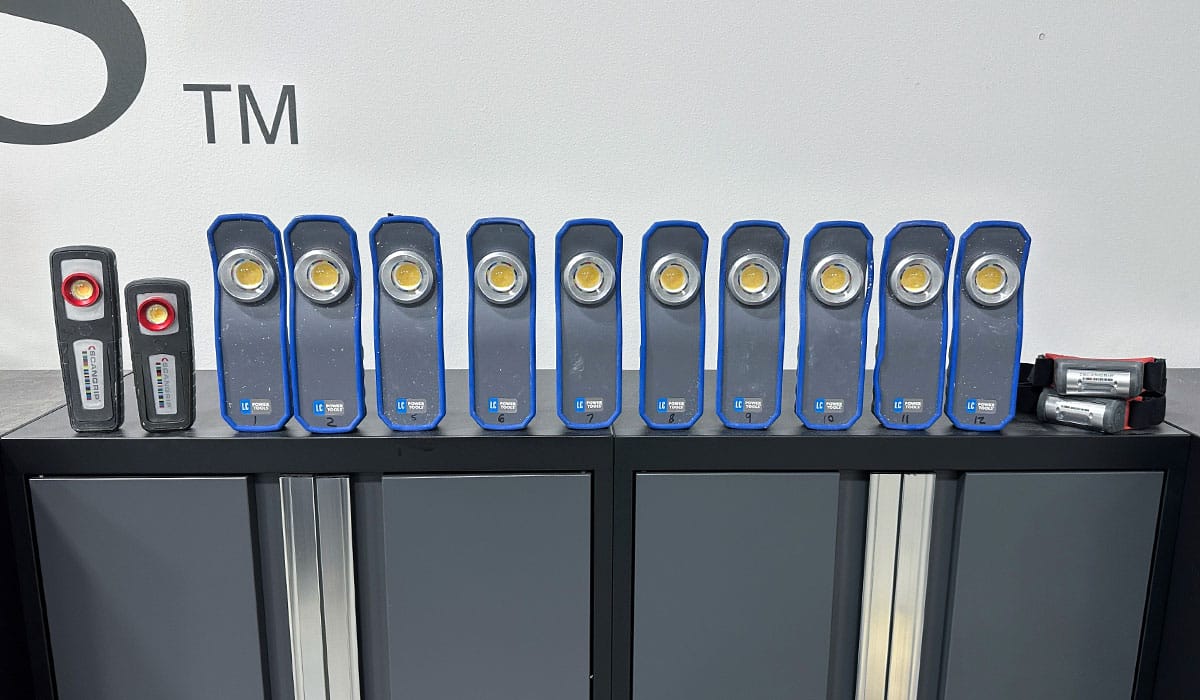
21. Swirl Finder Lights and LOTS of Them!
The Swirl Finder Light is an essential tool for teaching car and boat detailing classes. The students MUST be able to see defects before a process, then monitor their progress during a process, and then again for final inspection to make sure they removed them 100% or to the expectations of the class session.
Besides inspecting for defects, you need a quality swirl finder light to inspect for ceramic coating high spots. You’ll also need a charging station for lights.
22. Detailometer
The Rhopoint Americas Detailometer is an easy-to-use surface quality measuring device that will accurately measure multiple aspects of the before and after condition of the gelcoat surface. The readings obtained by the Detailometer not only show your students the dramatic changes to the surface from using a multiple-step gelcoat correction and protection process but can also be used by professionals to show your skills and abilities to potential customers.
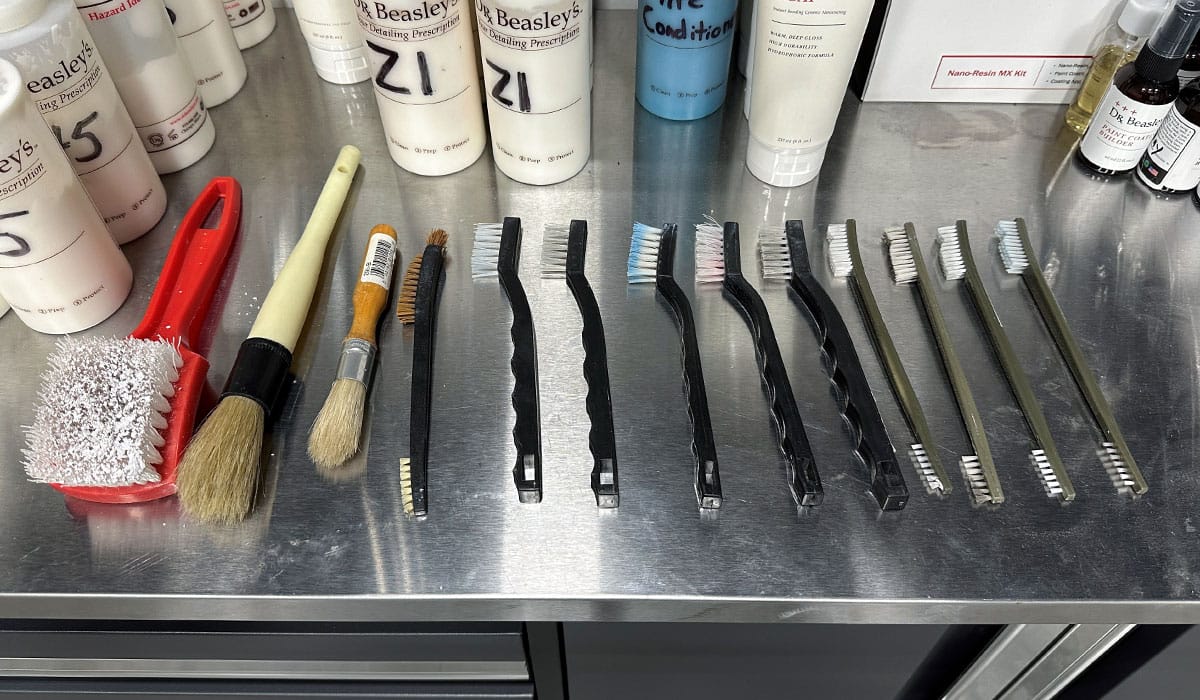
23. Detailing Brushes
A proper detail is not done correctly until all the compound and polish residues are removed from all the cracks and crevices. These types of brushes can also be used to clean the face of foam and microfiber pads on-the-fly.
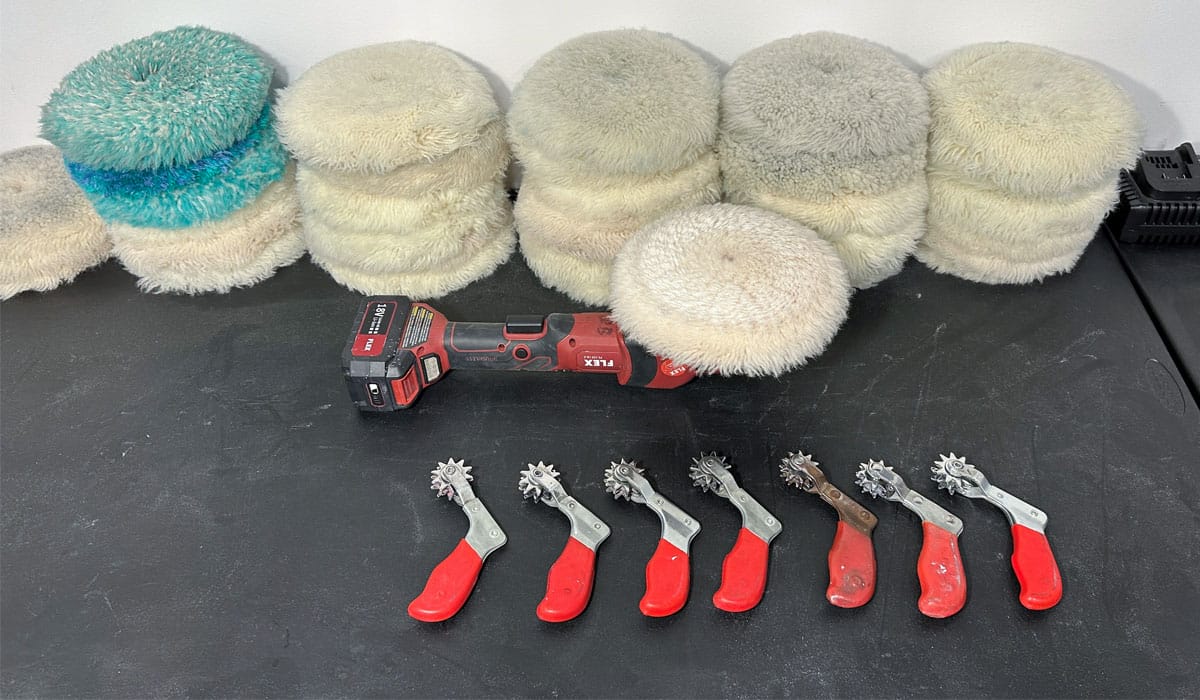
24. Pad Cleaning Spurs
If you’re going to teach how to use wool pads on rotary polishers, you’re going to need ample Pad Cleaning Spurs.
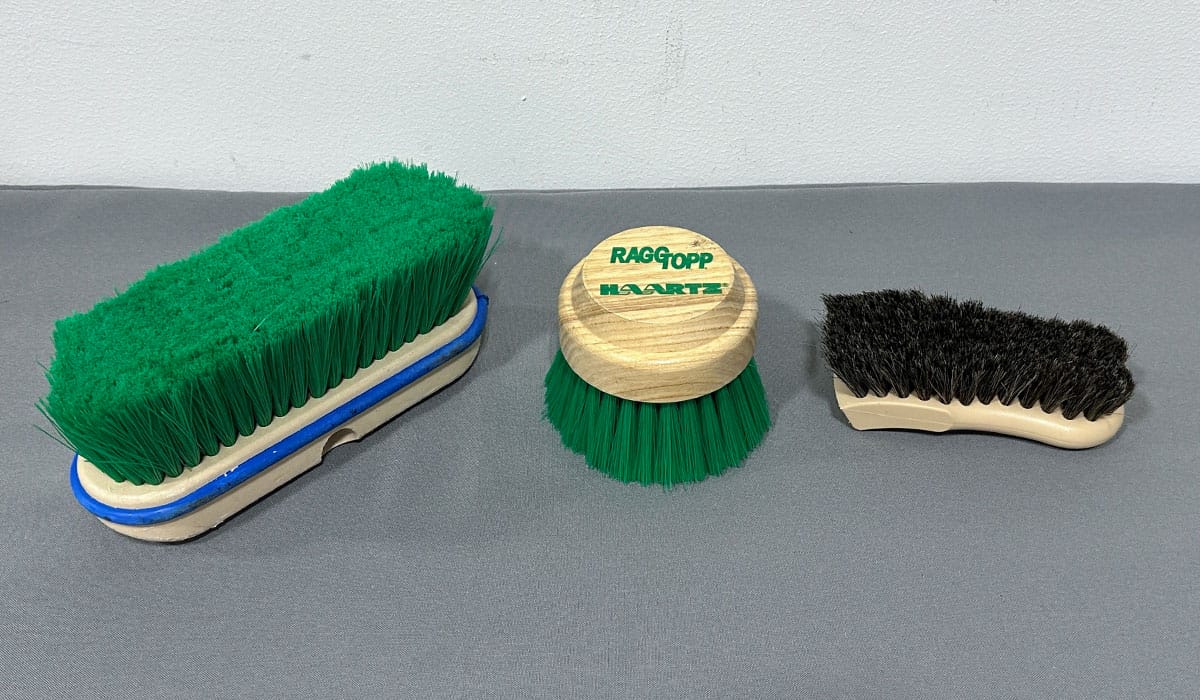
25. Proper Canvas Cloth Top Cleaning Brushes
I cover how to correctly and safely clean and protect Bimini Tops and/or canvas enclosures. In order to teach this, you must have the correct brushes for cleaning fabrics without tearing up the fibers.
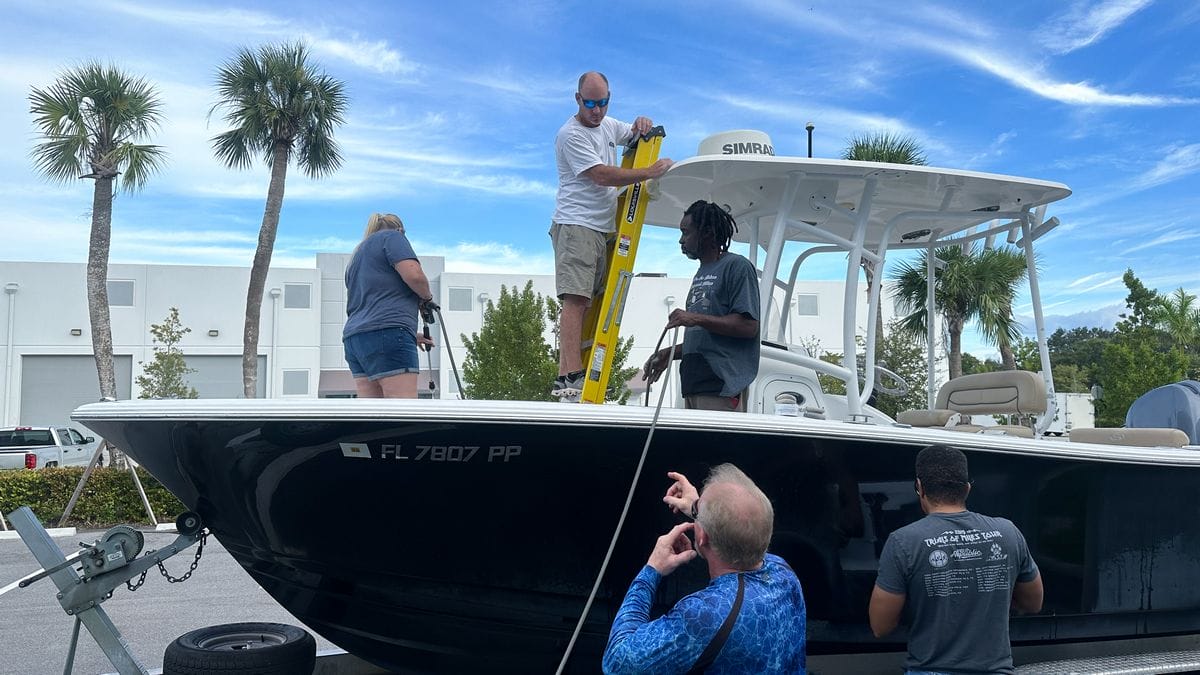
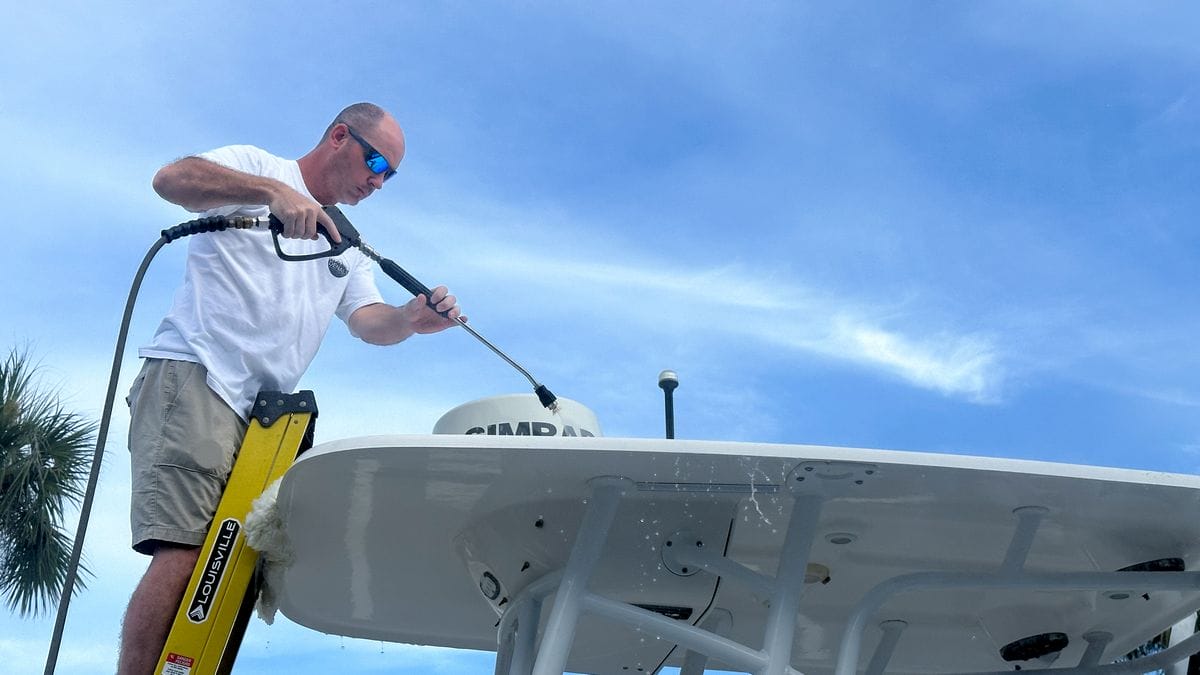
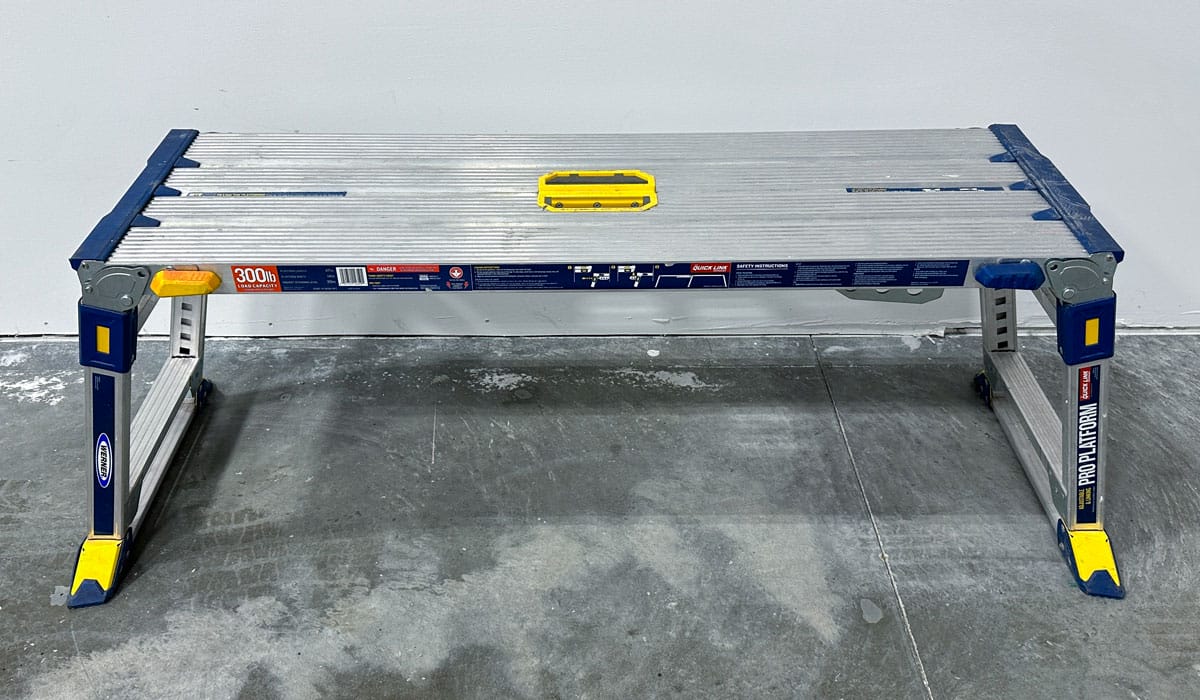
26. Quality Work Platforms and/or Scaffolding
Boats, by their very design, are tall both on and off the trailer. For this reason, in order to keep your students safe while also having a way to reach the highest points, you’ll need different types of scaffolding, ladders, and work platforms.
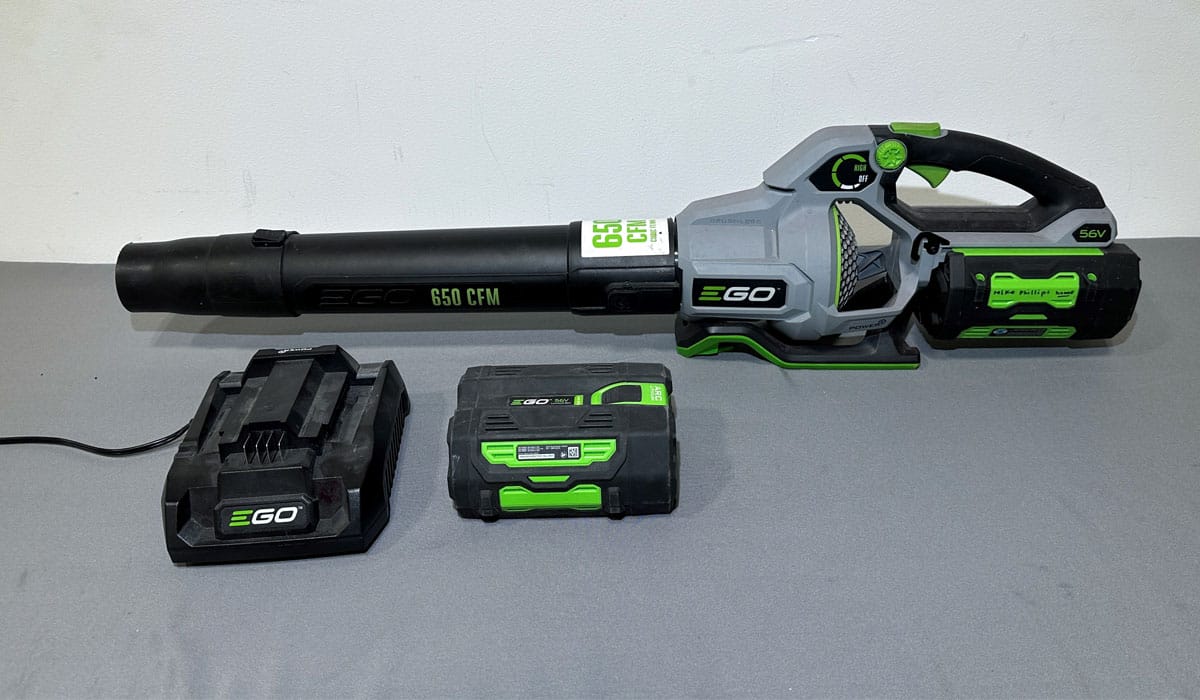
27. Leaf Blower
While these only work great at blowing water off boats that are regularly maintained with a ceramic coating or boat wax (something that makes water bead up), they are also great for other uses.
Blowing water out of rod holders, cup holders, instrument panels, cracks, crevices, etc. They also work great for blowing out boats before vacuuming.
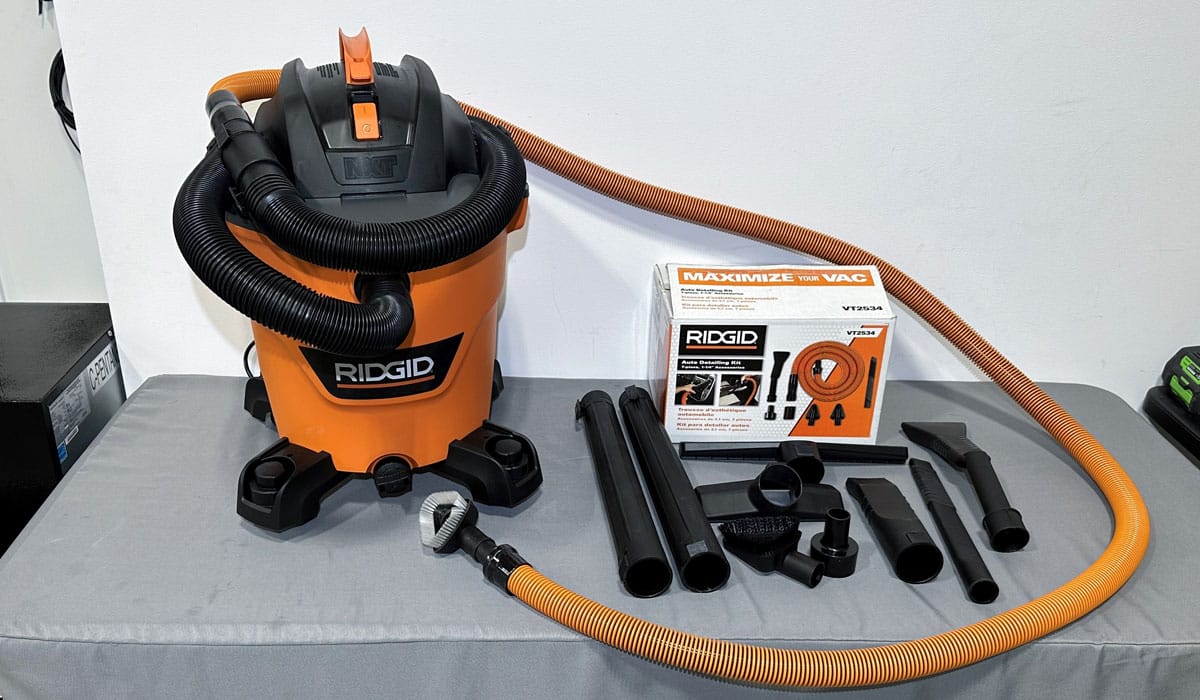
28. Wet/Dry Vacuum
Cleaning the inside of a boat sometimes means vacuuming out the inside of the boat. Often there are live bait wells, storage compartments, and other areas where you want to do wet or dry extraction. There are a lot of great vacuum options on the market today; the one we use in our shop is the RIGID Model HD1200 – 12 Gallon unit. It’s also a great idea to get the companion RIGID Model VT2534 Auto Detailing Kit so you’ll have all the attachments you need to work fast and efficiently.
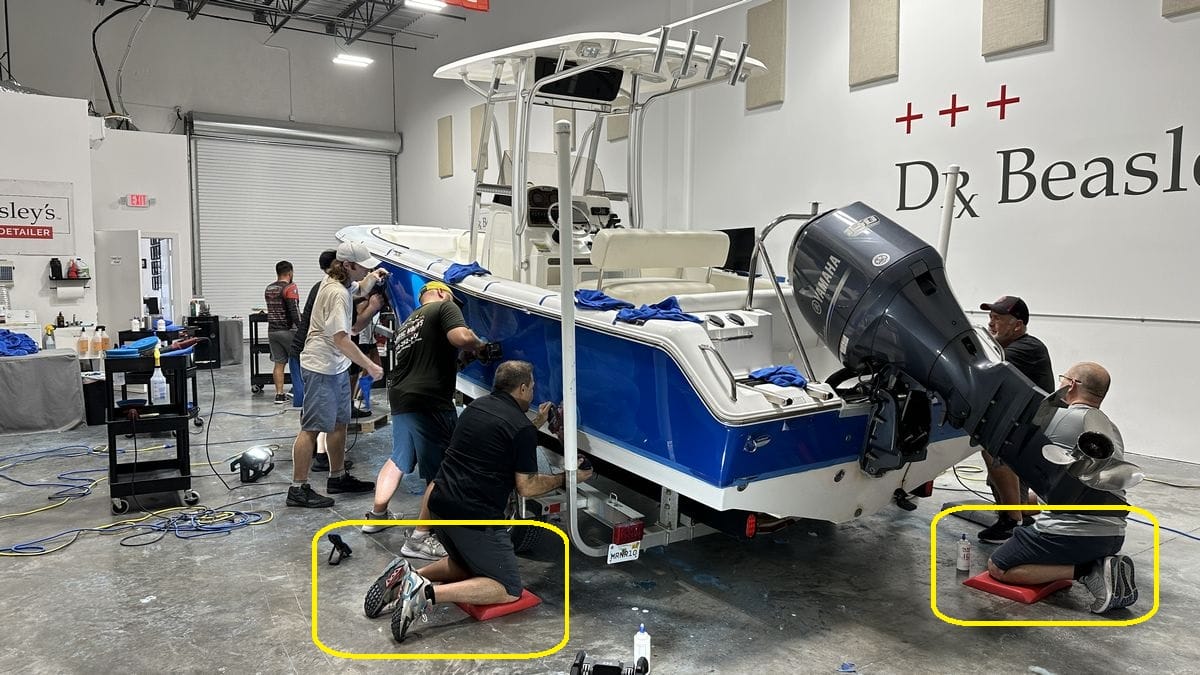
29. Knee & Back Cushion – or – Butt Cushion
It’s never fun or comfortable sitting on a hard surface while doing work to the lower portions of the boat. The Knee & Back Cushion I show in the picture is a bit on the spendy side at $60.00 a piece, but they are the best in my opinion, and they don’t soak up water. Check out Knee N’ Back Pad by Bennette Design Group on Amazon.
30. Indoor Space, Large Enough for at Least One Boat and a Group of People to Comfortably Work
It kind of goes without saying that trying to teach a boat detailing class outside can be done, but it makes everything more complicated. When teaching outside, you must deal with ambient and traffic noise, direct sunlight, exposure to weather, airborne dirt, and dust, etc. I’ve taught classes outside, so it can be done, but the scope of this article will focus on teaching a class indoors, and/or under cover.
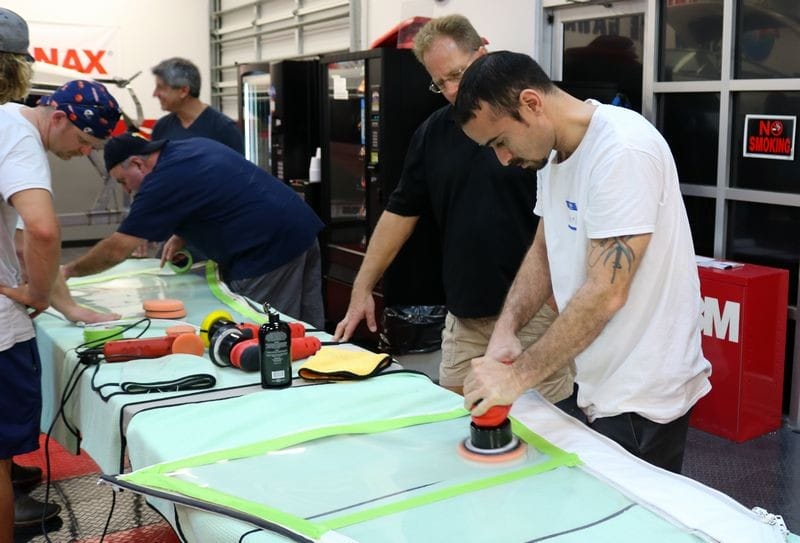
My own personal practice for teaching boat detailing classes is to keep them focused as hands-on training with very little to no sitting. I’ve taught academic classes for years—these are the types of classes where you start out in a classroom, usually going through a PowerPoint presentation and/or watching videos about detailing.
Nothing wrong with academic classes—I’ve been there, done that. But what I’ve found is that the type of people interested in detailing boats are also the type of people who learn better by doing versus sitting in a chair. Thus, over the years, my classes went through an evolution to the point that there are no PowerPoint presentations, no chairs, and zero sitting.
Thus, for the type of classes I teach, I need room for at least one boat and enough room for two boats is optimum. In this context, if you want to duplicate my teaching style, you’ll need some form of shop or garage large enough to hold at least one boat with room for a group of people to stand and work around the boat.
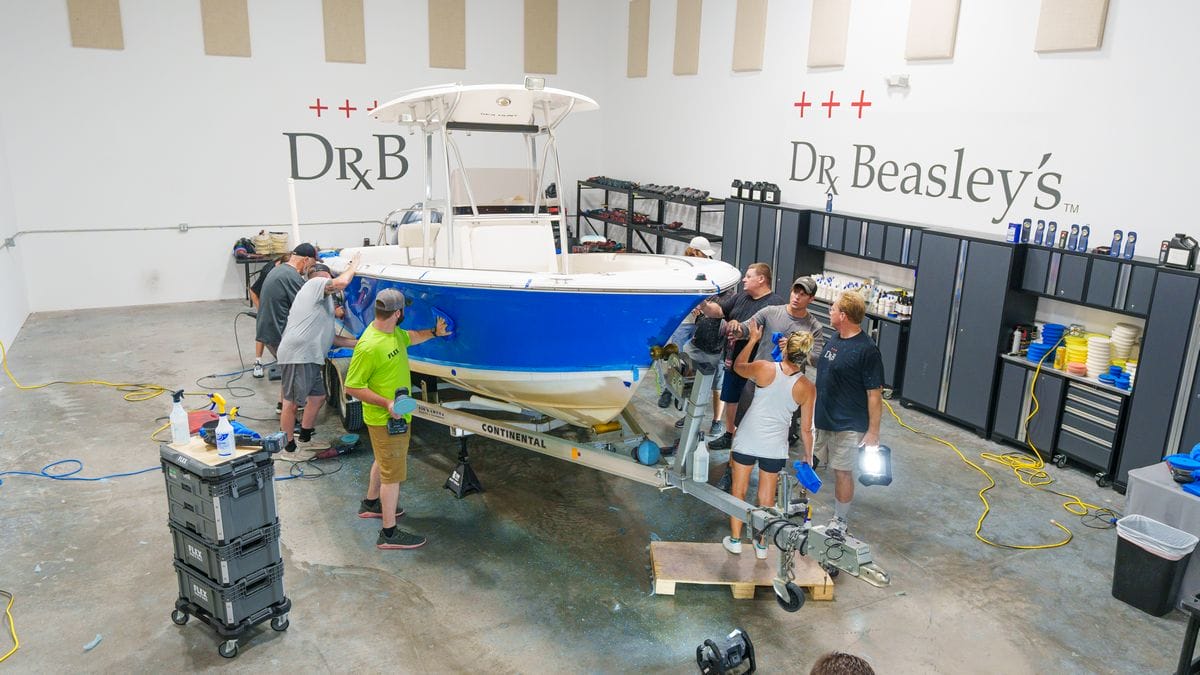
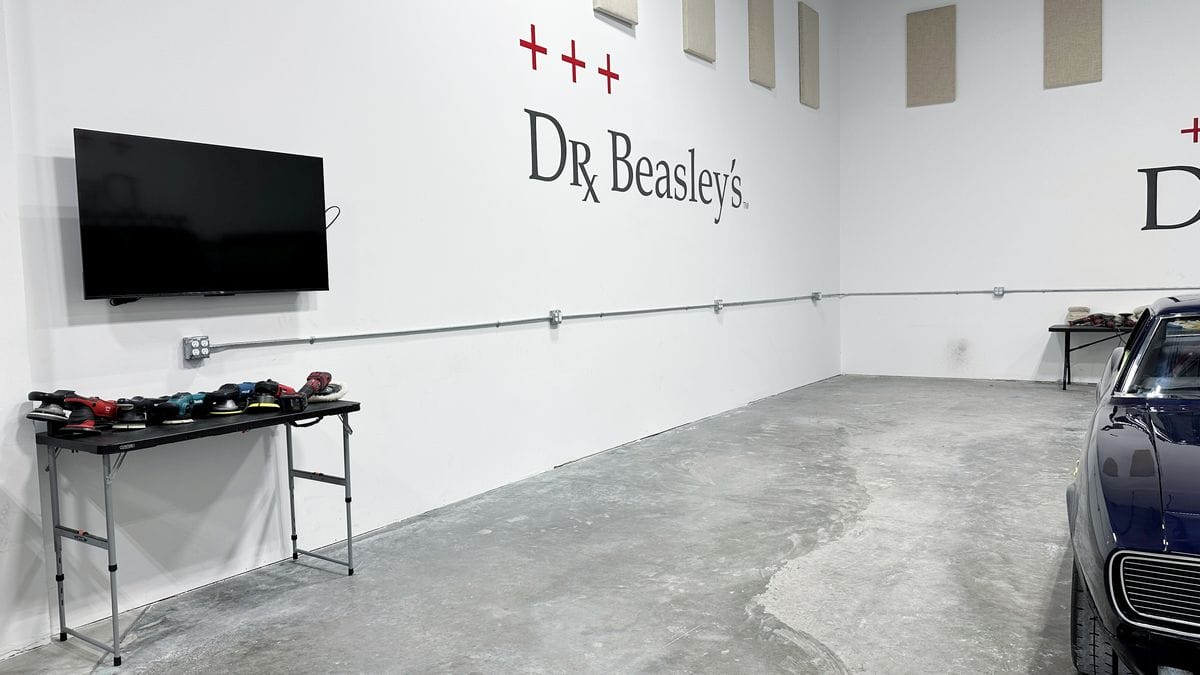
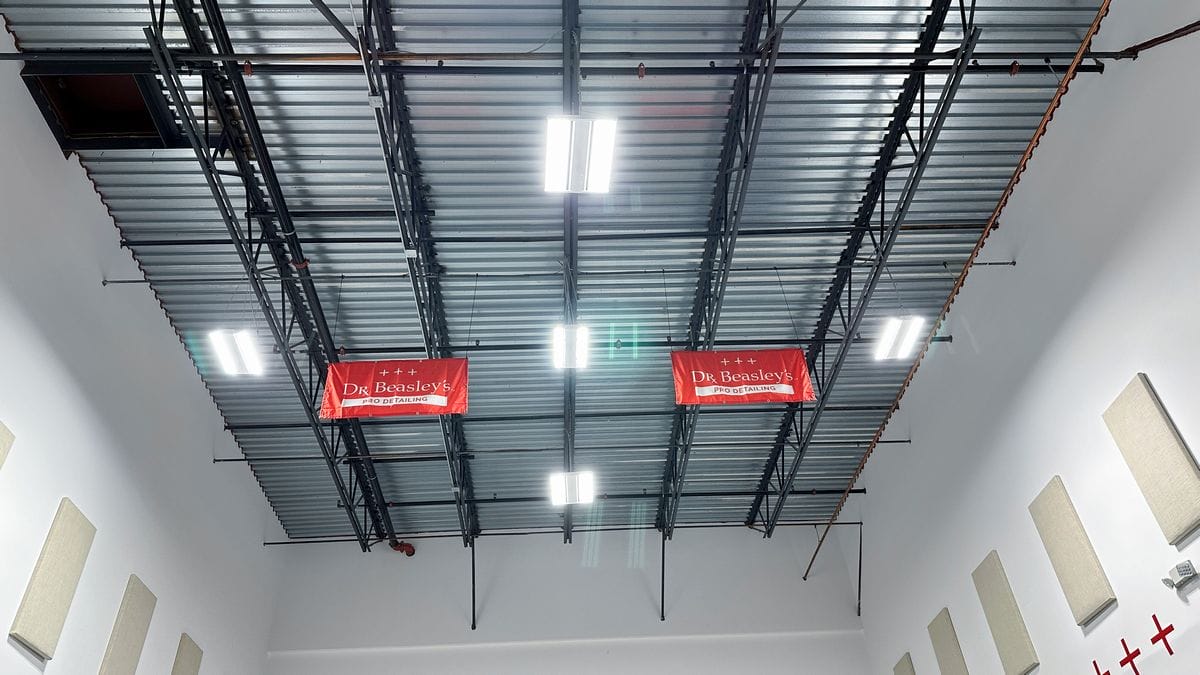
31. Great Lighting – Overhead and Vertical Wall Lights
You cannot work safely or effectively if you cannot see what you’re working on. Most shops have good overhead lighting, but not all shops have good vertical wall lighting. Without good lighting, your students cannot easily see the current level of oxidation, stains, dock rash, etc.
Good lighting is also important to inspect the progress as the students work through the various steps. Sure, you can have plenty of hand-held lights and light stands, and while these are better than nothing, they are not as efficient as good vertical wall lighting.
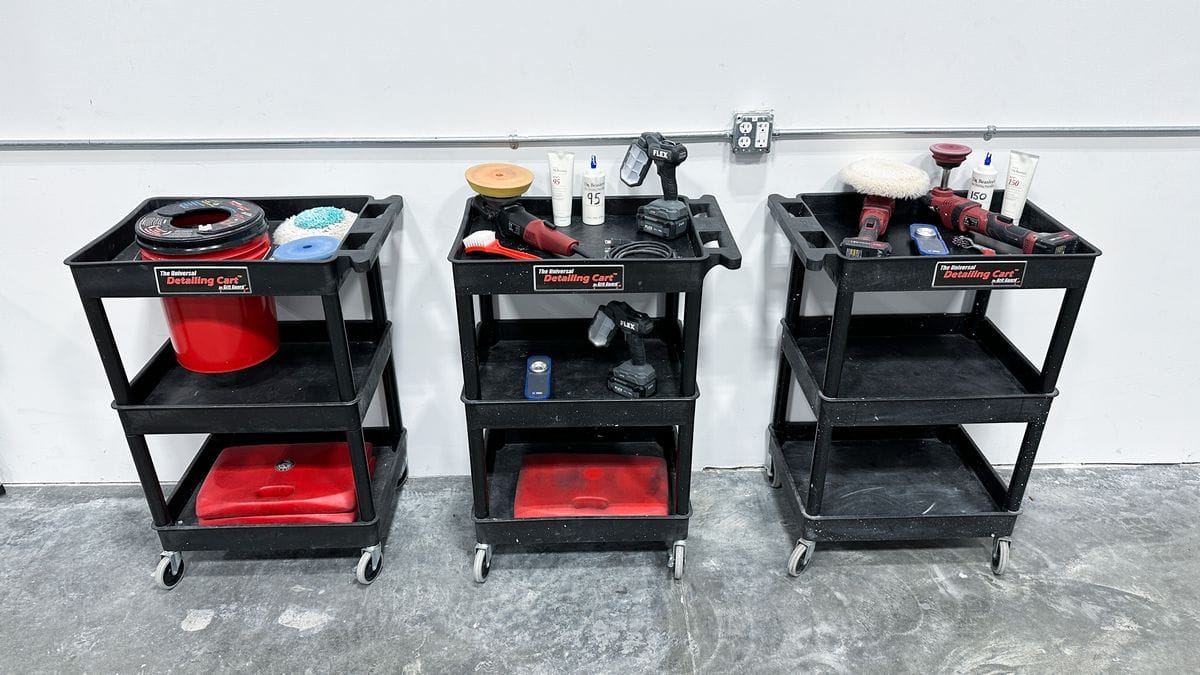
32. Tables – LOTS of Tables, Counter Space, or Detailing Carts
It seems like a topic you wouldn’t have to think about, but when YOU start setting up a shop for a hands-on boat detailing class, you’re going to need a LOT of tables, counter space, or detailing carts. Assuming you have a lot of tools, products, buffing pads, microfiber towels, and supplies, you’re going to need a clean place to set up all these things. You can’t set this stuff on the ground and then make all the students bend over to pick up what they need.
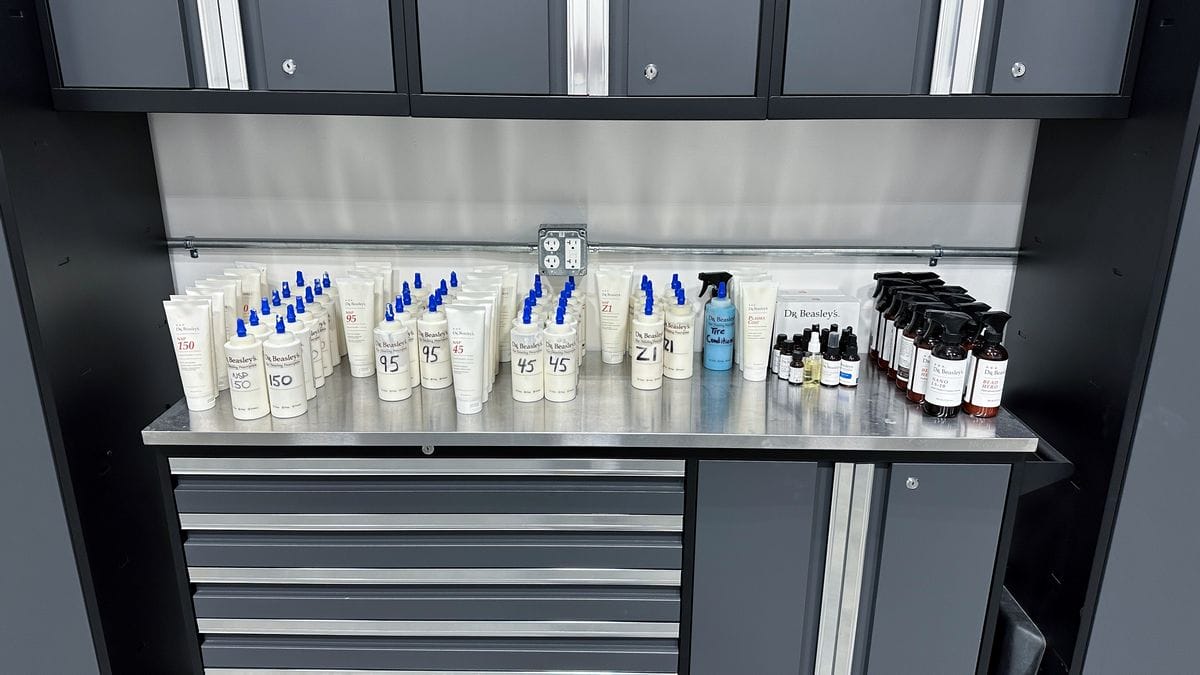
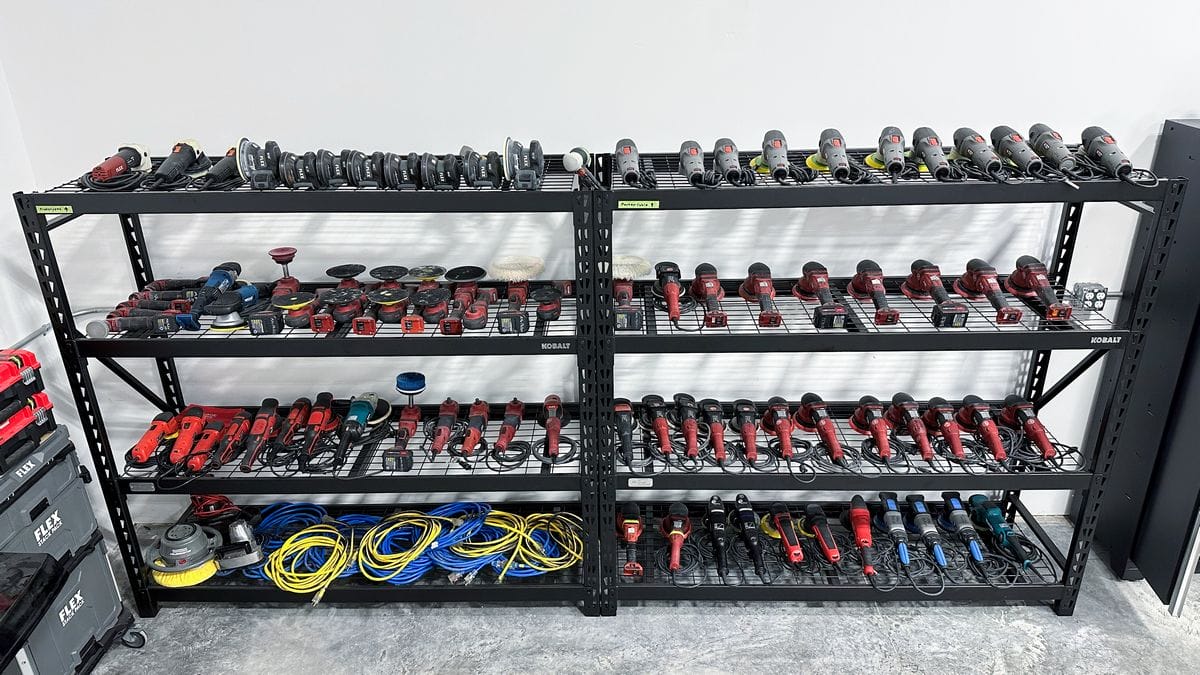
33. Storage Cabinets
Detailing is about getting things clean and shiny. You must have storage for various things that you need to both store as well as keep clean. For the Stuart shop, we purchased cabinets from NewAgeProducts.com.
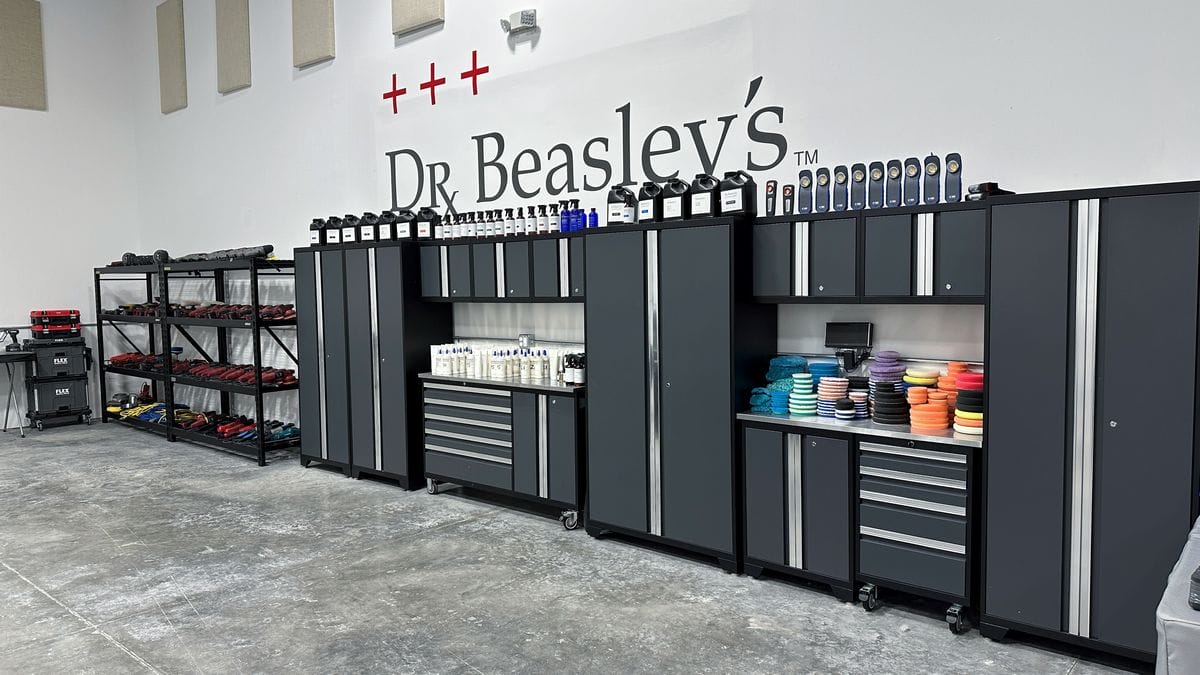
When You Teach Hands-on Classes, You Need LOTS of Storage.
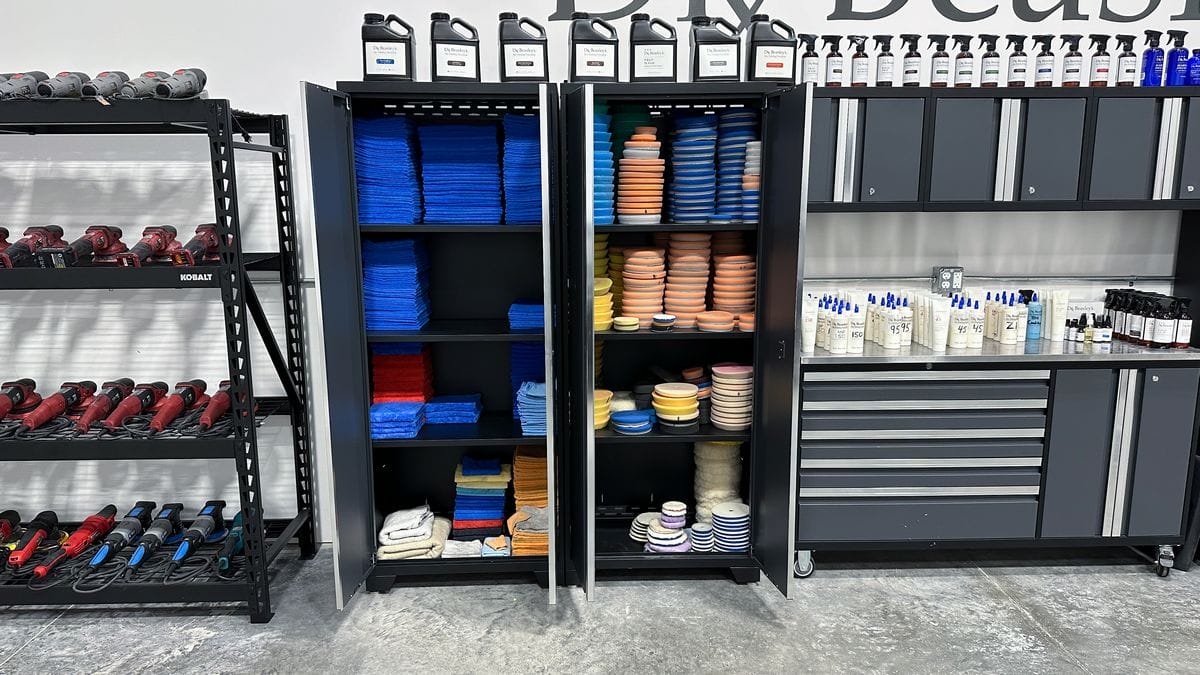
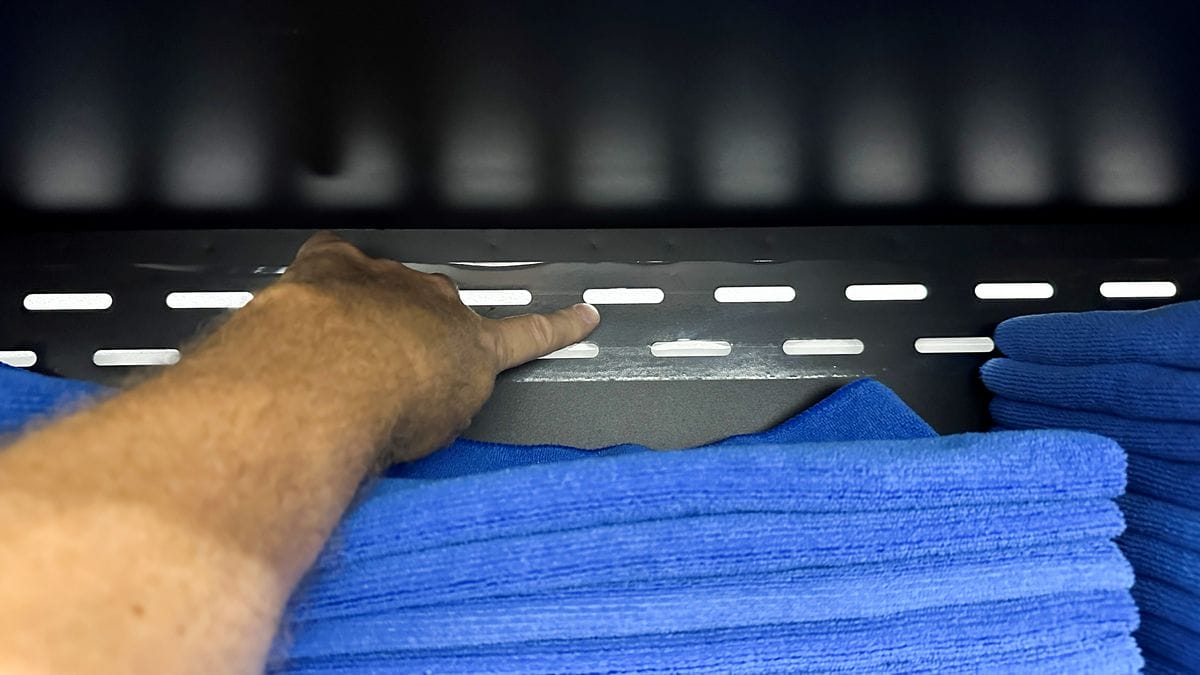
Here’s a tip: use some tape to seal the vent holes on the back of the cabinets before placing them against the wall. This will prevent airborne dirt and dust from getting into your cabinets and contaminating your supplies like microfiber towels and buffing pads.
34. Sound Deadening Boards or Insulation
Power tools make noise! It’s one thing if you’re in the garage by yourself running a Porter Cable 7424XP, it’s another thing if you have 20 people running rotary polishers and cutting hard!
There are a number of different sound-absorbing options available, and you need to do your own research to see what will fit your needs best. At the O.R. in Stuart, Florida, we use ATS Acoustics Panels – 24x48x2 Inches with Beveled Edges in Ivory. These run around $70.00 apiece.
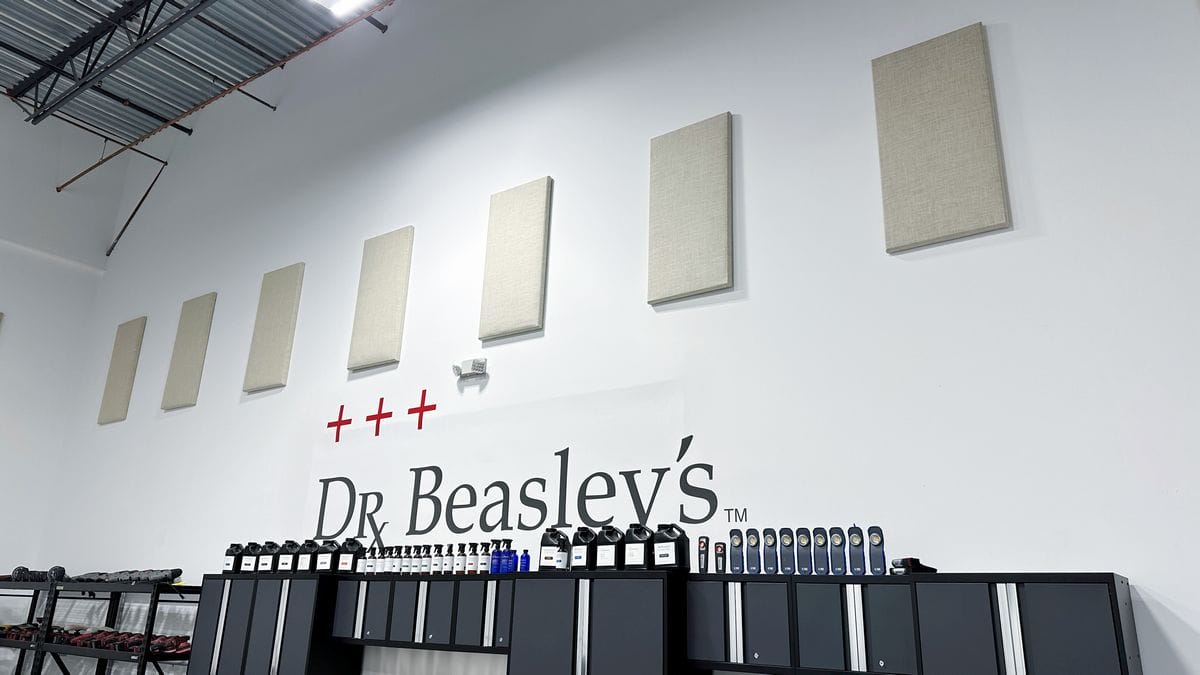
And keep in mind, you’ll need to rent a scissors jack in order to mount them high on the walls. For our shop, we rented a SkyJack SJIII 3219 19′ Scissor Lift at a cost of around $500.00 for one week.

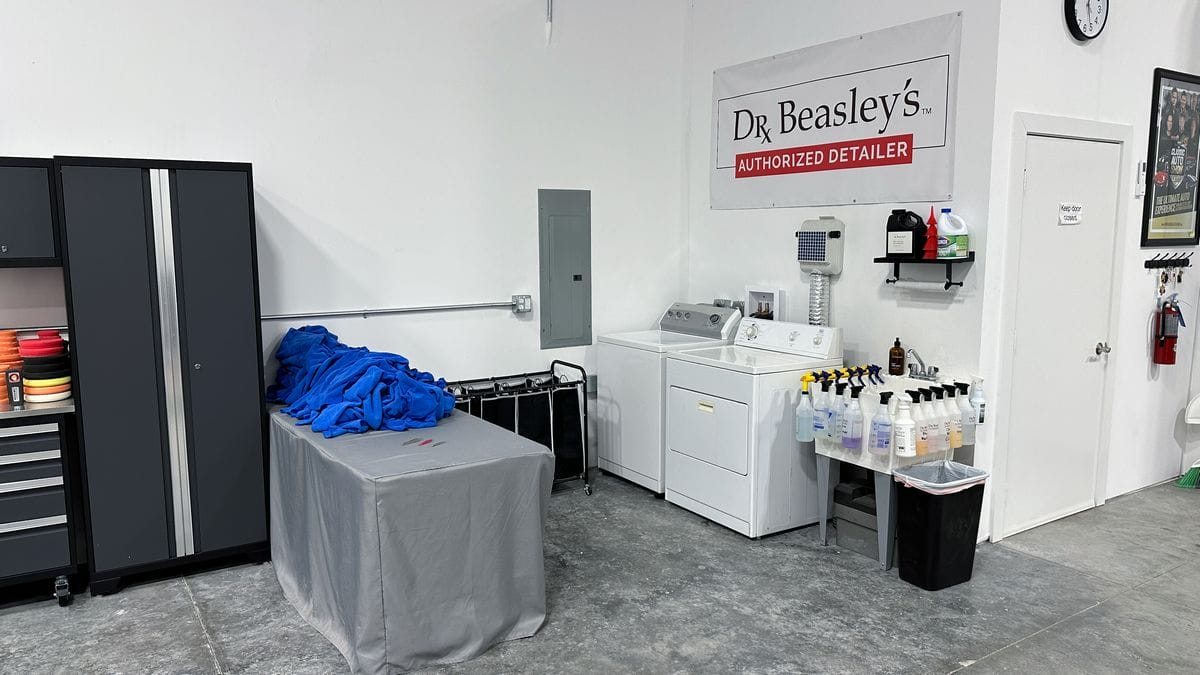
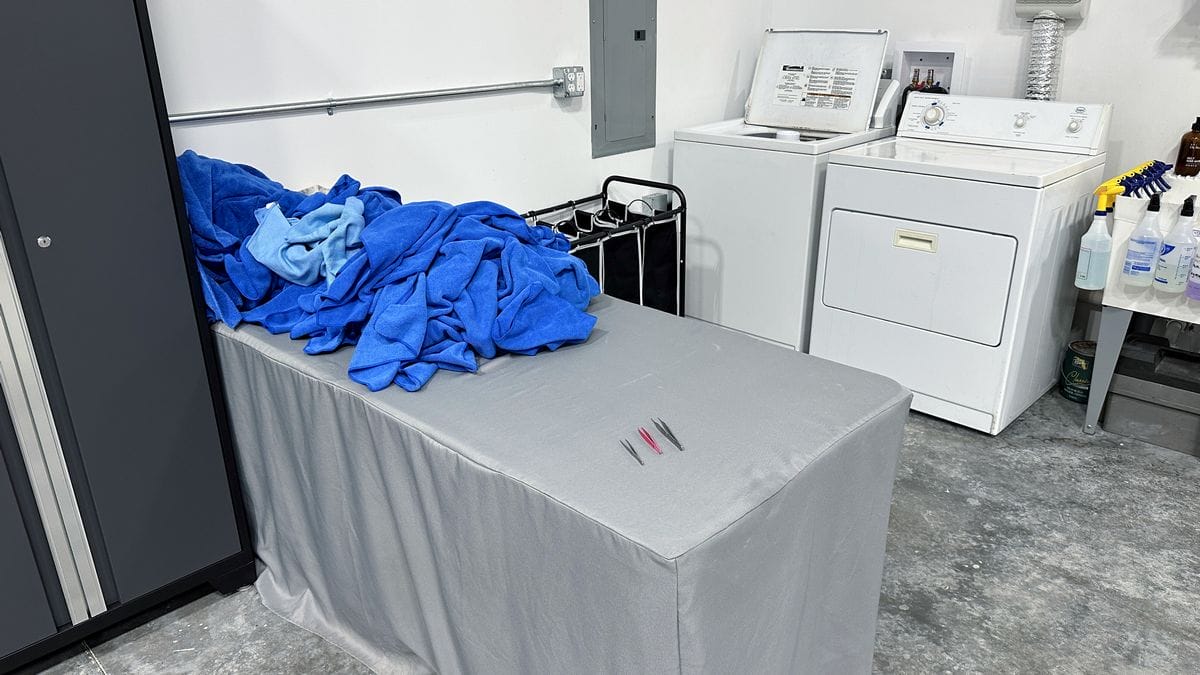
35. Washer and Dryer Station
Teaching a boat detailing class means going through a LOT of microfiber towels. You need a system in place to keep them clean after use and a protocol for washing, drying, inspecting, and then storing the towels. We used a corner of our shop where we had both power and access to water to set up our washing and drying machines. We also have a multi-chamber laundry hamper to hold dirty towels until we’re ready to make a wash load. We placed a table near the washing and drying machines so we have a clean area to place dry laundry for inspection and folding. The cabinet next to the laundry table is also for holding microfiber towels. By keeping everything in the same localized area, there’s a lot less walking and thus wasted time.
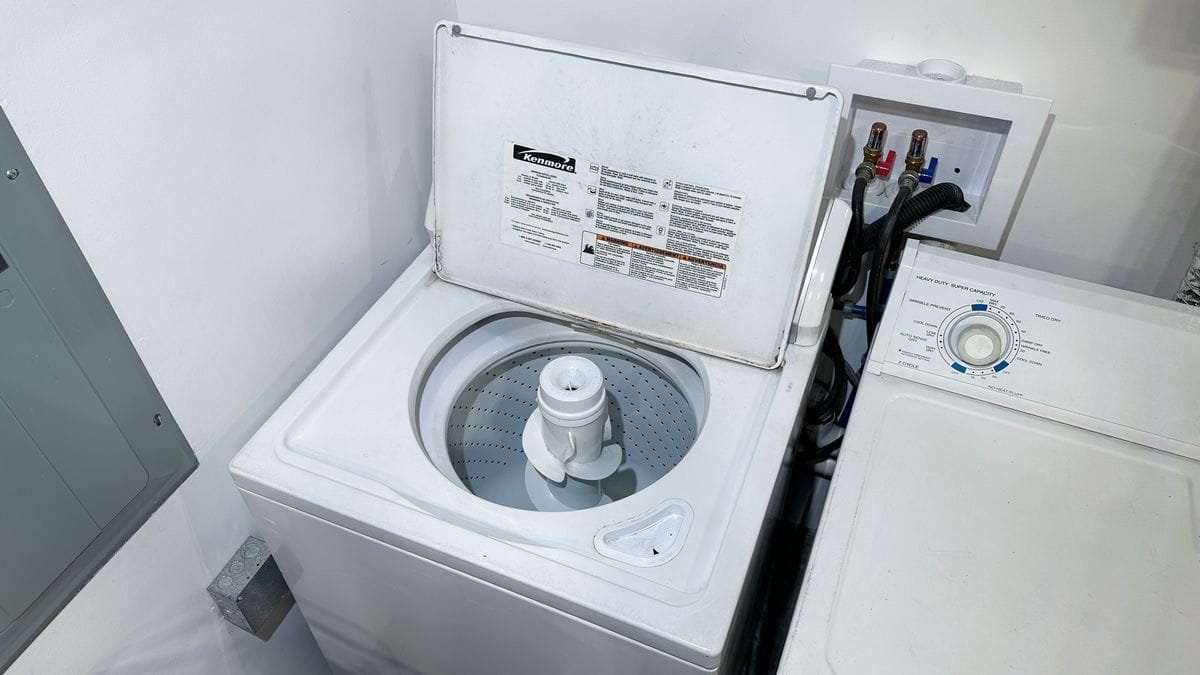
Washing Machine Tip
When outfitting a new shop, here’s my advice: Do NOT purchase a modern washing machine or clothes dryer. This is a case where KISS (Keep It Simple Simon) is your friend. Modern top-loading machines have a vane at the bottom of the wash basin that doesn’t do anything to get dirty microfiber towels clean. Even with new washing machines with agitators, the agitators spin so slowly, they don’t agitate your microfiber towels enough to get them clean. And front-loading washing machines are great for dainties, but not shop towels.
In your hometown, I’ll guarantee you there’s an established appliance repair shop. Make a visit to this business and introduce yourself. Explain to them you’re looking for an old-school top-loading washing machine with an agitator that goes NUTS! Be happy to pay them to find a reputable brand like Maytag, Kenmore, Whirlpool, etc., in the back of their warehouse and then inspect and rebuild or replace any worn-out components. By the time they are done, you’ll have a workhorse of a washing machine, and it will still cost LESS than the purchase price of a new washing machine. I did just this thing and am the proud owner of a Kenmore 600 Top-Loading, old-school washing machine that works GREAT.
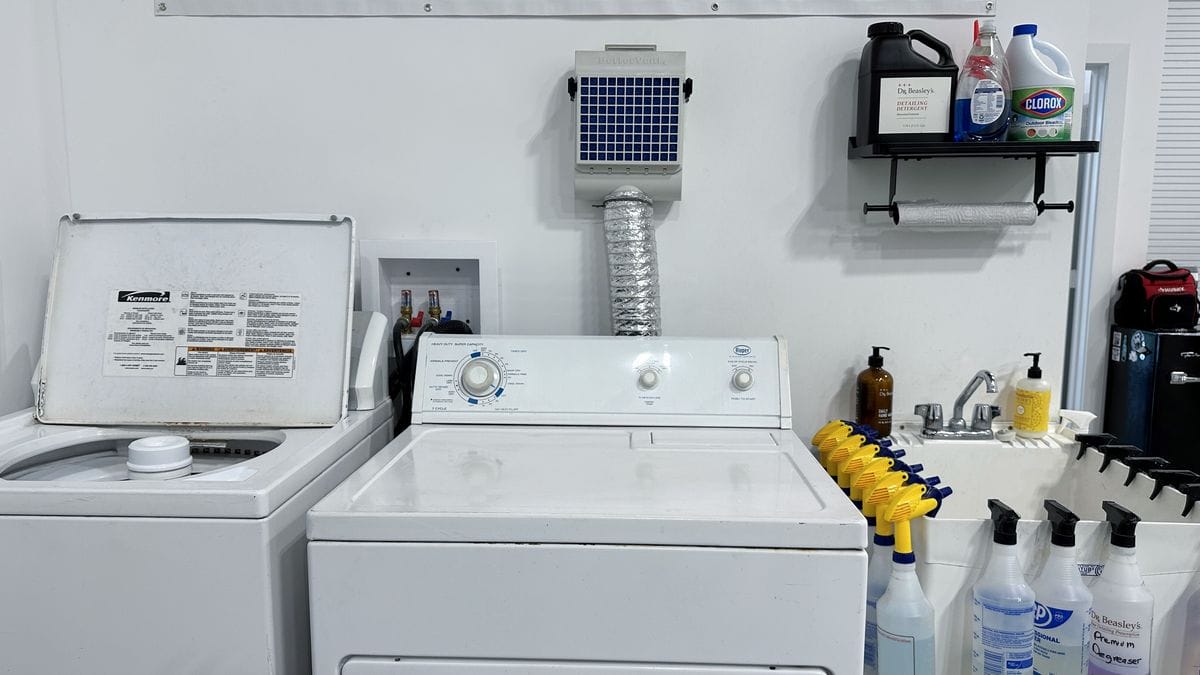
Clothes Dryer Tip
Just like my tip for a washing machine, while you’re at the appliance repair shop, might as well pick up an old-school front-loading dryer. The best dryers are the dryers with the LEAST amount of technology. All you want the dryer to do is spin and dry the microfiber towels. You don’t need any late-model unit with moisture sensing sensors or any other modern over-engineering. Plus, old-school dryers are very simple. There’s a dryer tub, an electric motor to spin it, a drive belt, and a heating element.
Ask the appliance repair shop owner to inspect the dryer, replace or rebuild any worn parts, and thank me later. If you’re lucky, they will have a brand- and color-matching set.
Our unit is the Roper brand, a sub-division of General Electric, and it works GREAT. Because there was no option to safely route the dryer exhaust out of the building, we purchased a BetterVent Indoor Dryer Vent by ADR Products, which is a wall-mount dryer exhaust and filter, off Amazon for around $70.00. While not a perfect solution, it gets the job done. If your shop is going to do any type of PPF or Wraps, then you’ll want your washer and dryer in a separate room anyway.
36. Microfiber Towel Inspection and Folding Station
I’ve been teaching classes for a long time, and if you’re serious about teaching your own class, you need to have protocols in place to keep your microfiber tools clean and uncontaminated. We keep a table near the dryer to make it easy to move dry towels to the table, where we can then inspect visually and also with our sense of touch. We keep tweezers handy to enable us to pick out any foreign contaminants to ensure our towels are safe for wiping after polishing. The cabinet next to the table is for storing clean, inspected, and folded towels.
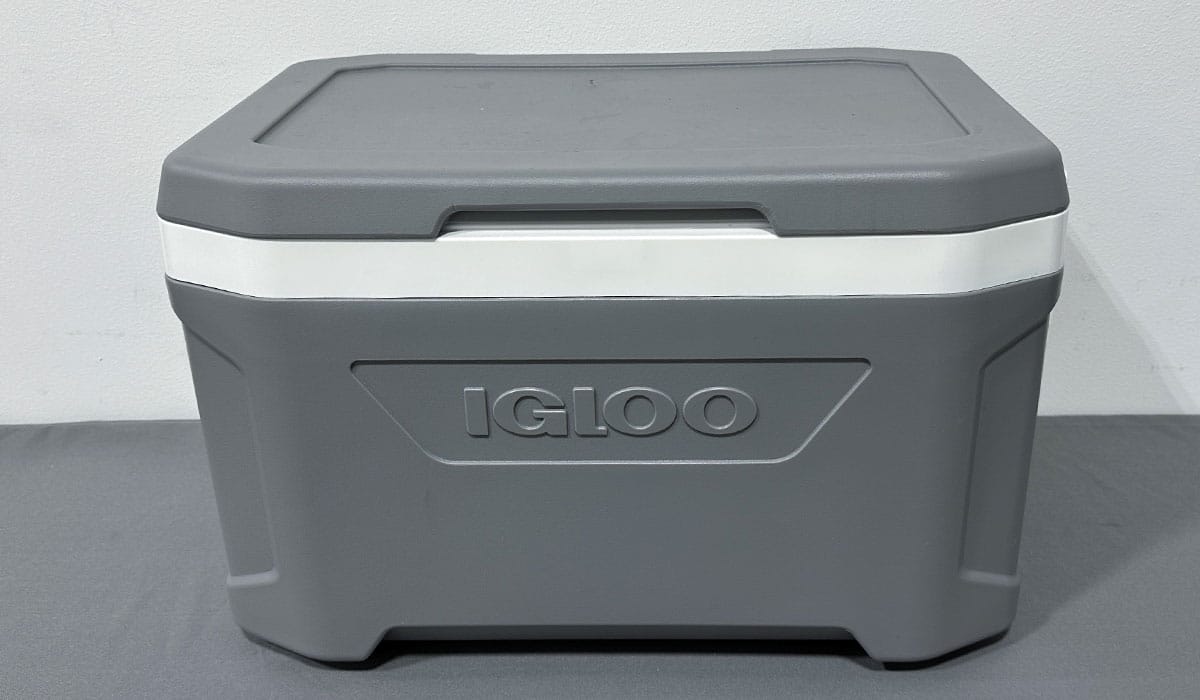
37. Refrigerator or Ice Chest for Bottled Water
Of course, a nice big, beautiful refrigerator in your shop is a blessing. But if you don’t have room or the budget to start out with a refrigerator, an ice chest will work just fine. Just be sure to purchase fresh ice each morning to cool down the bottles of water.
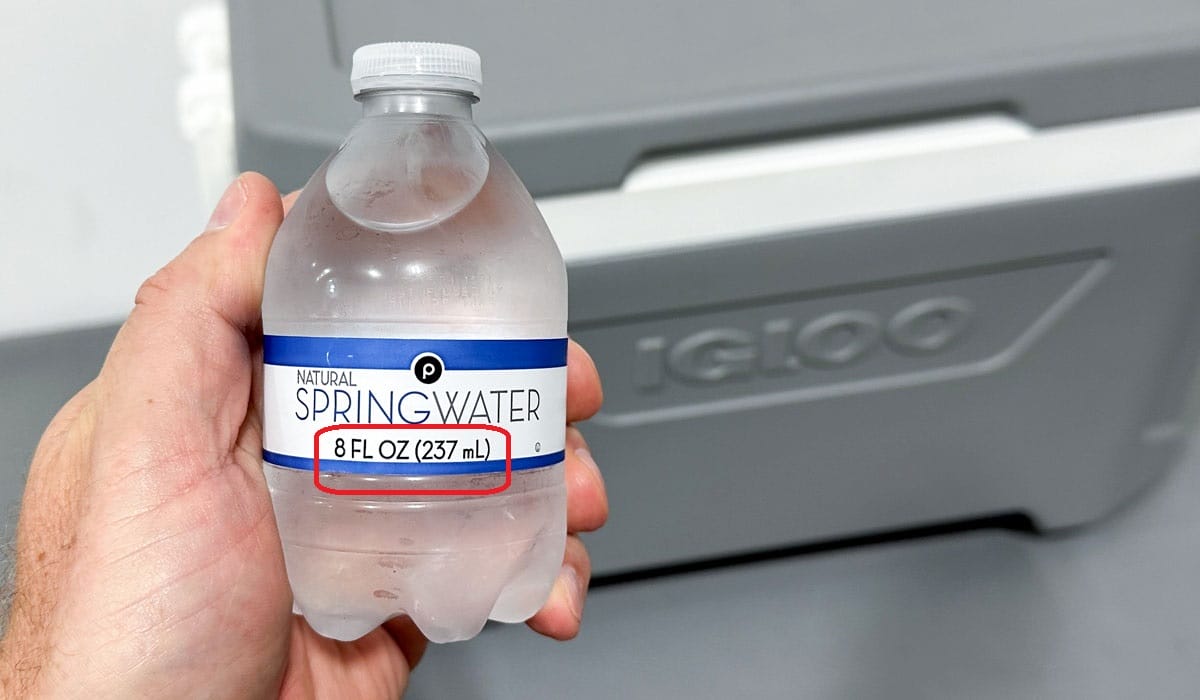
38. SMALL Bottles of Water
Do not purchase normal size, like 16-ounce bottles of water. Instead, purchase small bottles of water like the 8-ounce size.
Why?
Because TOO many people will open a bottle of water, take a few sips, put the lid back on, and set it down somewhere. After this, you’ll end up throwing it away because whoever opened it will have lost track of where they set it down, and now NO ONE will drink it. No one will put their lips on an unknown bottle of water.
Here’s what to do instead:
Purchase small bottles of water and, at the beginning of the class, explain why you bought small bottles of water. Everyone will understand and most will agree with you on this topic.
Here’s what I tell the people in my class:
“If you’re thirsty, grab a bottle of water, drink it, and then throw the empty bottle in the recycle bin. Think about it: IF YOU’RE THIRSTY – DRINK THE WHOLE DARN BOTTLE. It’s only 8 ounces. Be done with it and get back to work. If you’re SUPER THIRSTY – drink two 8-ounce bottles of water, dispose of them in the recycle bin, and get back to work.”
You can take my word for this or not, but what I just shared is the reality of it. If you buy large bottles of water or cans and bottles of soda pop, you’ll end up throwing away a lot of half-drank bottles and cans.
No Soft Drinks
First, do not buy any soda pops. I used to do this, and it simply makes things more complicated. There’s also the sticky sugar problem. If anyone spills a can of Coke or anything that’s not a diet drink, you now have a sticky, sugary spill to clean up. If you don’t clean it up ASAP, people will track it all over your shop. So, avoid any and all soft drinks for your class.
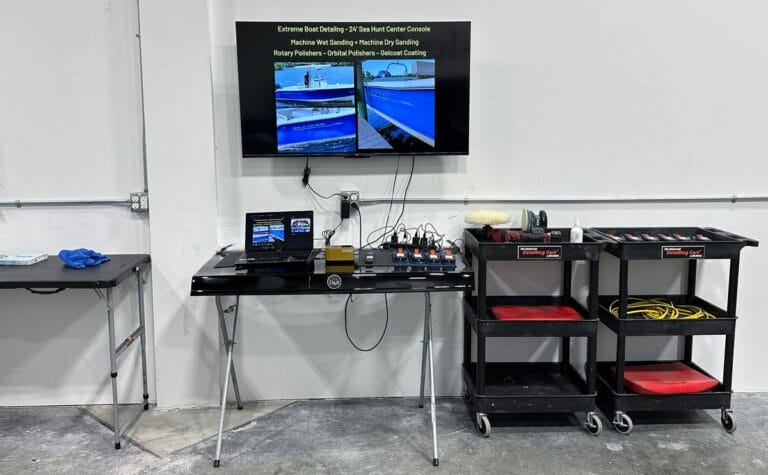
39. Big Screen TV – For a PowerPoint Presentation and/or Internet Access
This can be as simple as a dedicated table for your laptop hooked to the TV.
But Mike, I thought you said you never use PowerPoint Presentations?
This is accurate; I don’t use traditional format PowerPoint Presentations. What I create is a simple set of slides that show the training boats and the tools, products, and pads used for the boats.
I Create These Slides for 2 Reasons:
- The slide being displayed on the big screen TV looks good in pictures and videos taken at the class because it shows the boats shown in the PowerPoint presentation slide match what’s actually in the garage.
- Students will take pictures of the slides to help them remember the tools, products, and pads used for the boats instead of writing this information down in a notebook or trying to remember this information. The pictures they take on their phone or tablet become their notes.
40. Internet Access
I write a lot of articles and make a lot of videos, and sometimes it’s helpful to bring these up on the big screen TV for the students to see and know where to find them later.
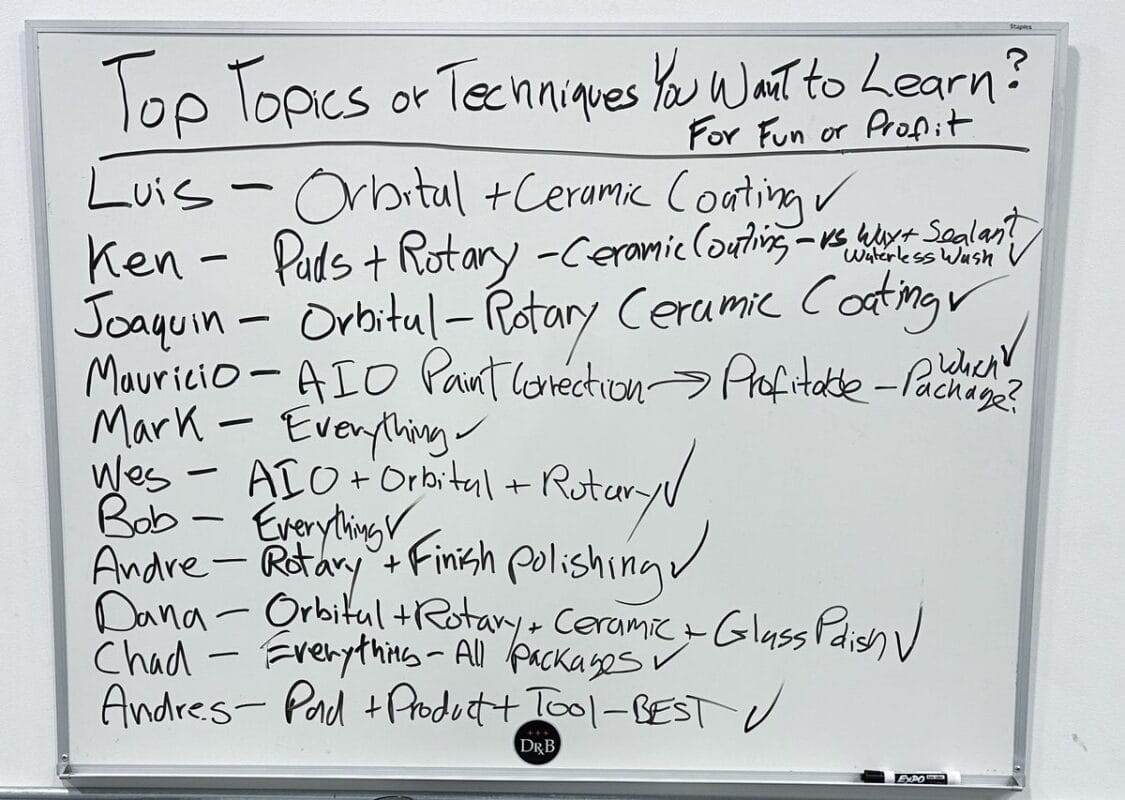
41. White Board on the Wall and Plenty of Dry Erase Markers
Back in 2018, when teaching a 2-day boat detailing class, I borrowed a technique shared with me by Jason Rose. Jason told me this is something he does in all his classes. I loved the idea and incorporated it into all my classes.
The Big Picture Idea?
At the start of the class, ask each person if there are any specific topics, techniques, tools, or products they want to learn in the class. Then write their name on the board and what they share.
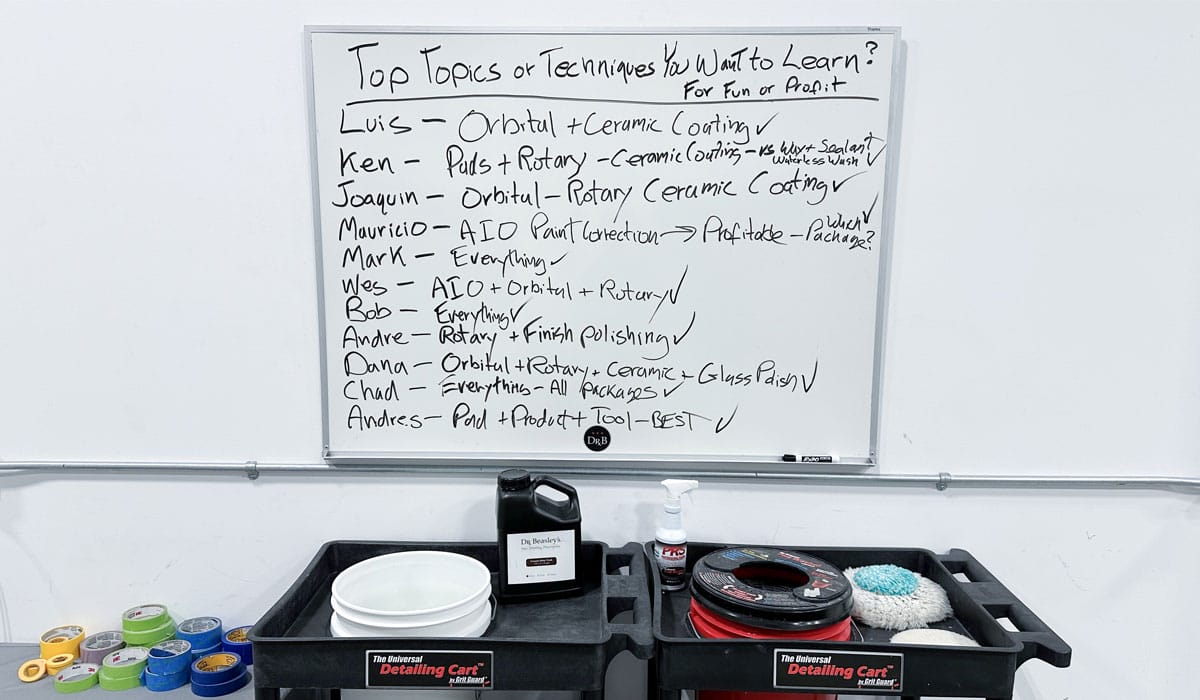
The Benefit?
As a teacher, using this technique enables you to make sure you give each student exactly what is most important to them. Of course, there are tons of other topics and techniques each student will learn, but by documenting the most important things for each student, you give yourself the best chance for success.
Plus, people are paying to be in the class—it’s your job to deliver on your promises. I promise the most hands-on classes on planet Earth, and this includes giving everyone what they want—at least to the best of my abilities.
Plus, if someone is there to learn something your class does NOT cover, now you know at the get-go and can address this first thing in the morning. For example, if someone is erroneously in my class to learn how to use a hot water extractor, I let them know they signed up for a paint correction class, and this class will not be covering this tool or the techniques that go with it.
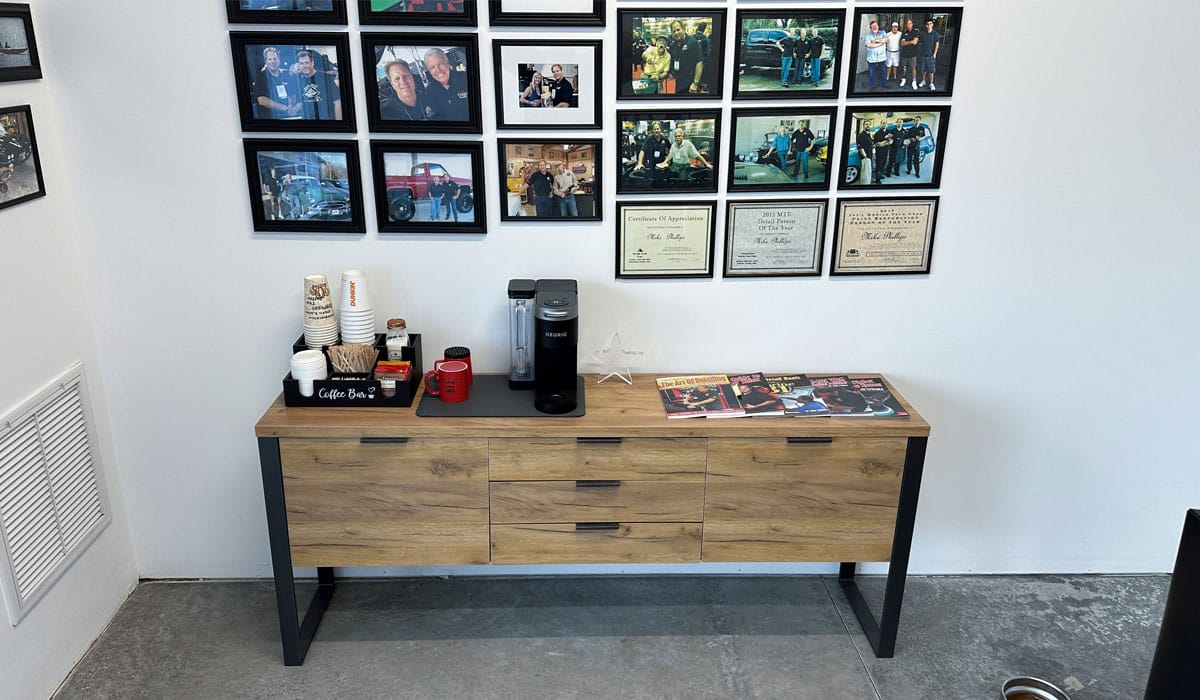
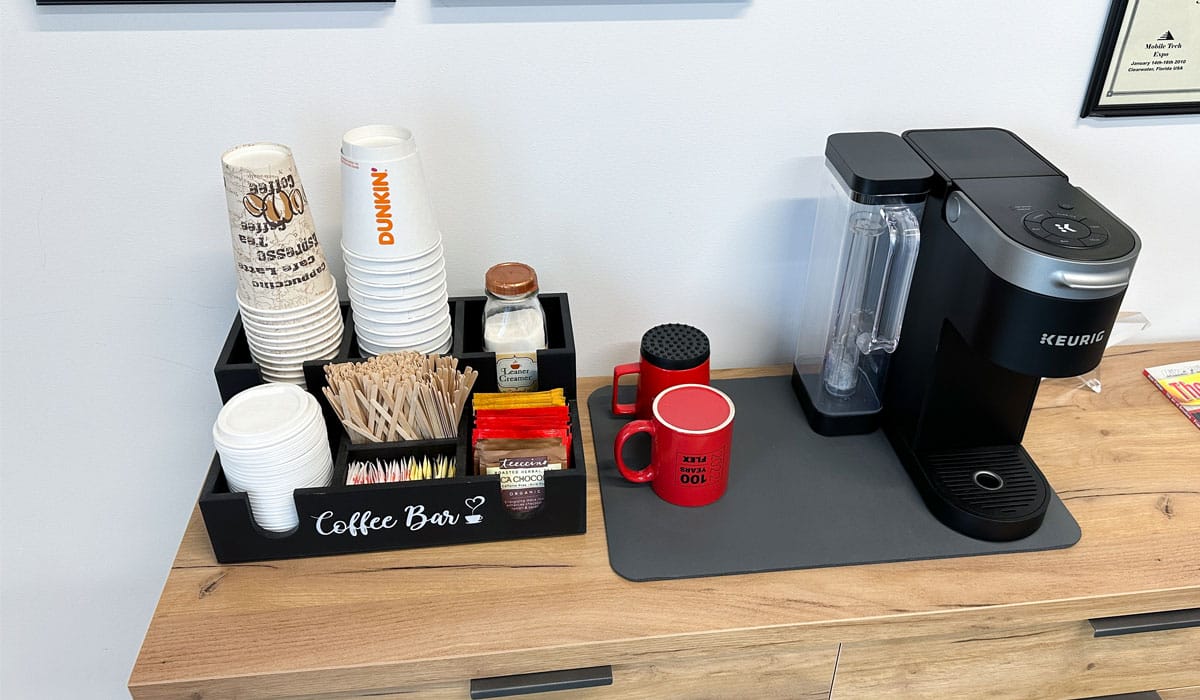
42. Coffee Station
I’m a coffee drinker; I like a quality cup of hot coffee in the morning. Some of your students are also coffee drinkers. So, if you have a place, set up a coffee machine with cups, sugar, sugar substitutes, and creamer.
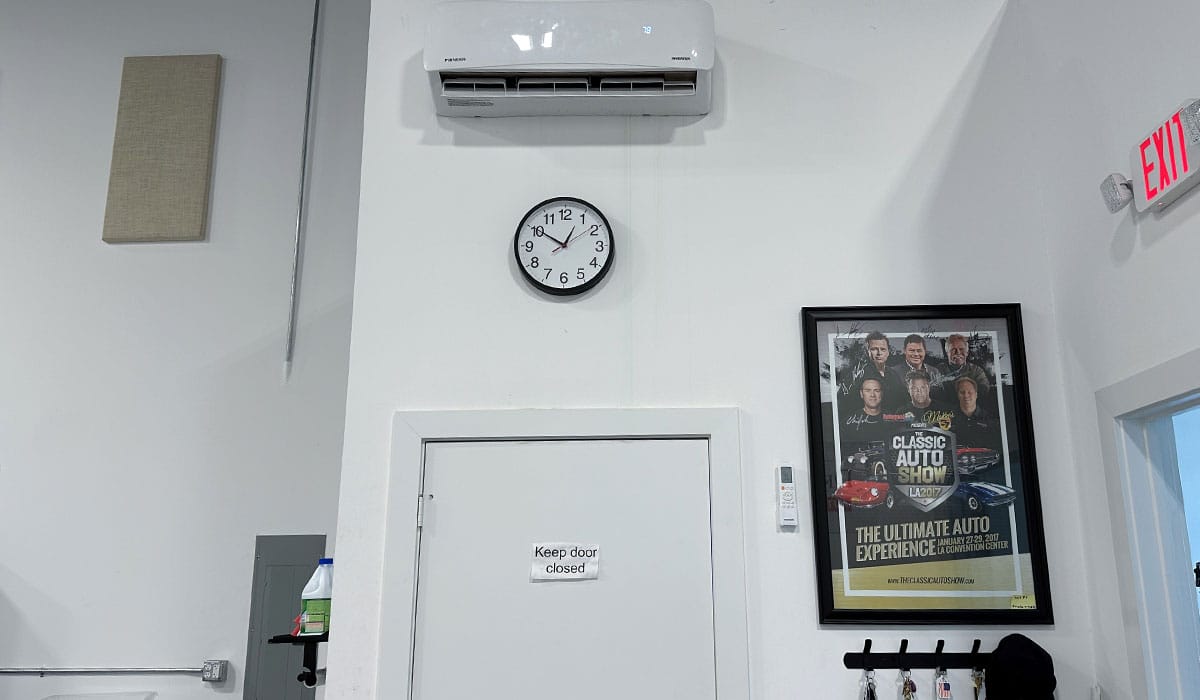
43. Wall Clock
As an instructor, you need to monitor the time so, if needed, you can be proactive in finishing whatever the current process or class session is being conducted. This also helps your students, so they know what time it is throughout the day. It can also let you track how much time any given step or process took to complete.
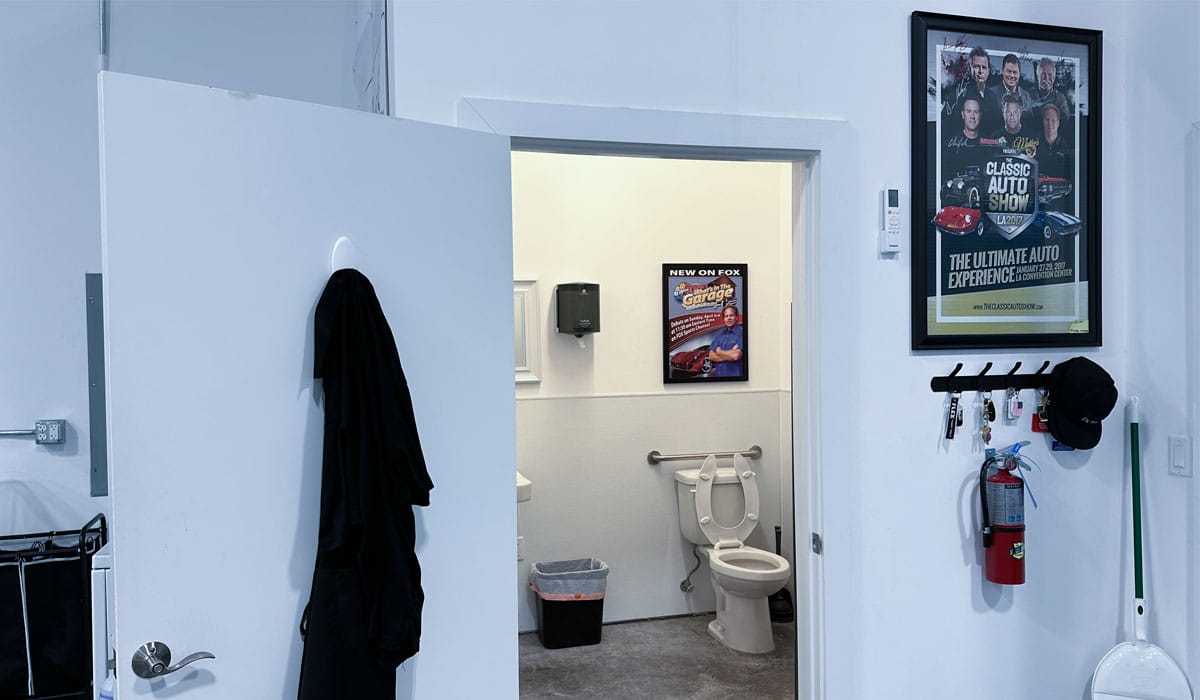
44. Facilities for Men and Women
Kind of goes without saying. Keep it stocked up with all the necessary supplies and check and monitor throughout the day to fix any problems ASAP.
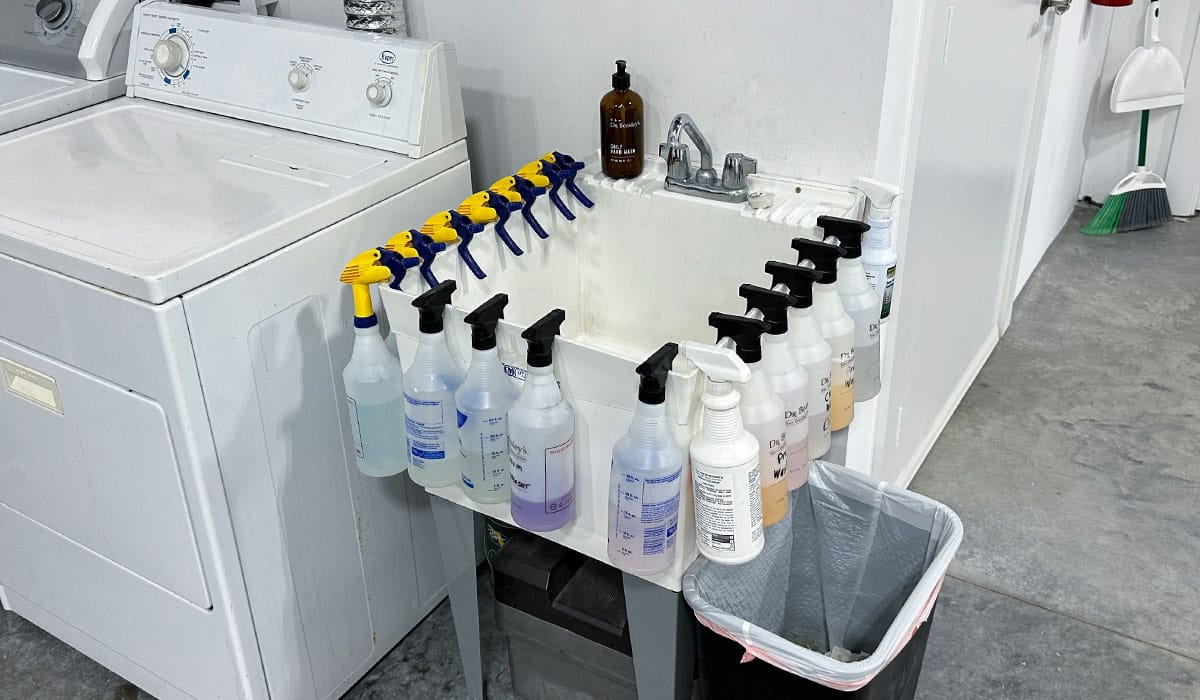
45. Slop Sink
Not a deal breaker, but certainly comes in handy.
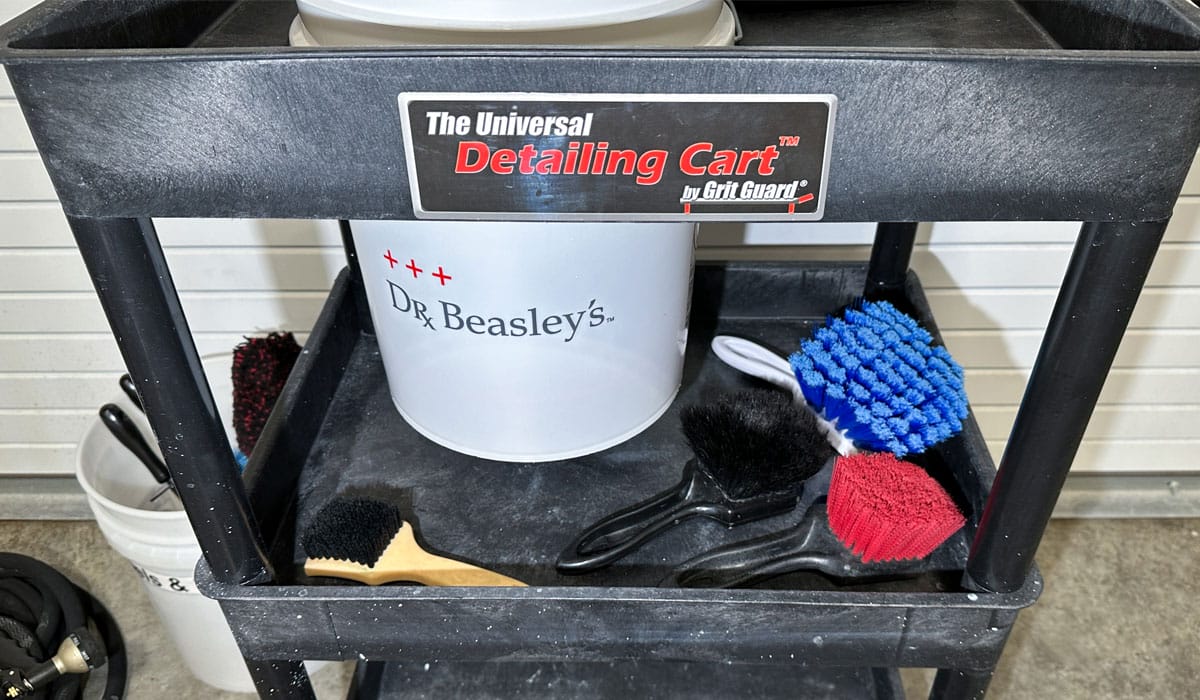
46. Rolling Car Wash Carts
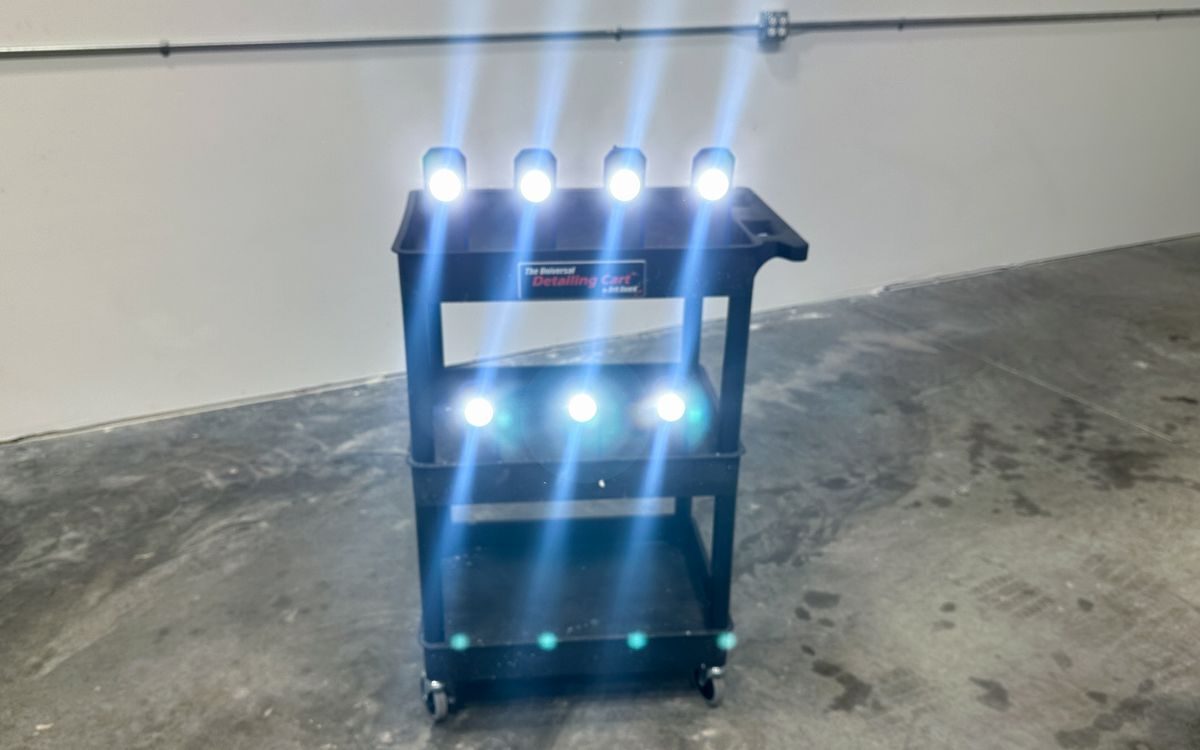
Personally, I always use the Grit Guard Universal Detailing Cart to hold my wash buckets off the ground, as this way neither my students nor I have to bend over each time we need to dunk our wash mitt in the soapy boat wash solution. Plus, you can push it around the boat as needed, and it also works great for holding tools and products.
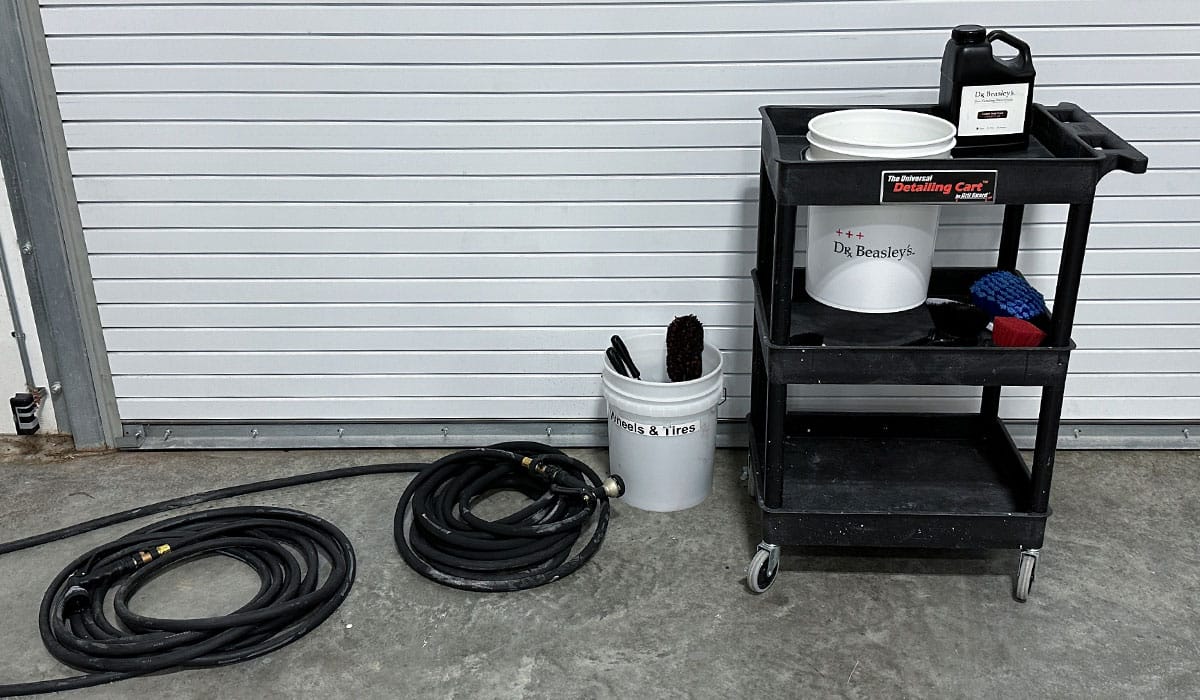
47. Quality Water/Garden Hose
Like the old saying goes, “Buy once, cry once.” For locally sourced water or garden hoses, I like the Continental 25’ water hoses, usually available at Home Depot or Amazon. I like the 25’ hose because they are easier to handle, roll up, and then store. If I need a 50’ or longer hose, I can always connect multiple hoses.
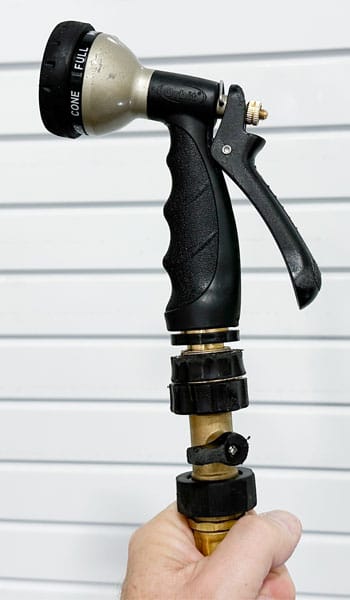
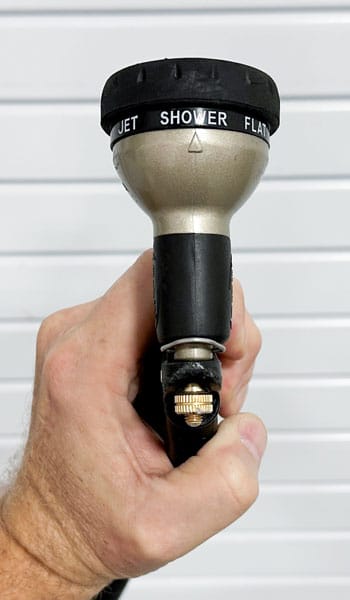
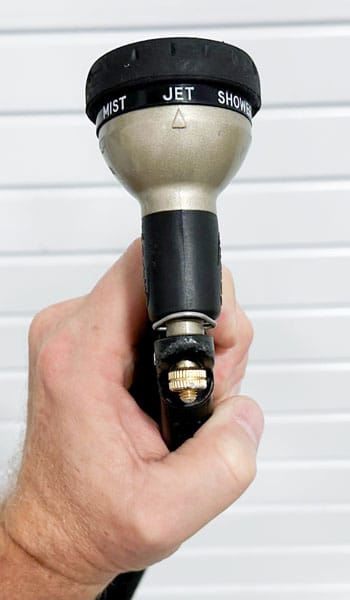
48. Quality Water Sprayers and Quick Connects
Most of the cleaning, washing, and rinsing steps will be done using a pressure washer. However, there are times where you need a simple water sprayer. I’m a huge fan of quick connectors to make switching between water tools faster and easier. Quick connects also reduce steps, as you can turn the water off at the end of the hose versus having to walk all the way back to the water spigot.
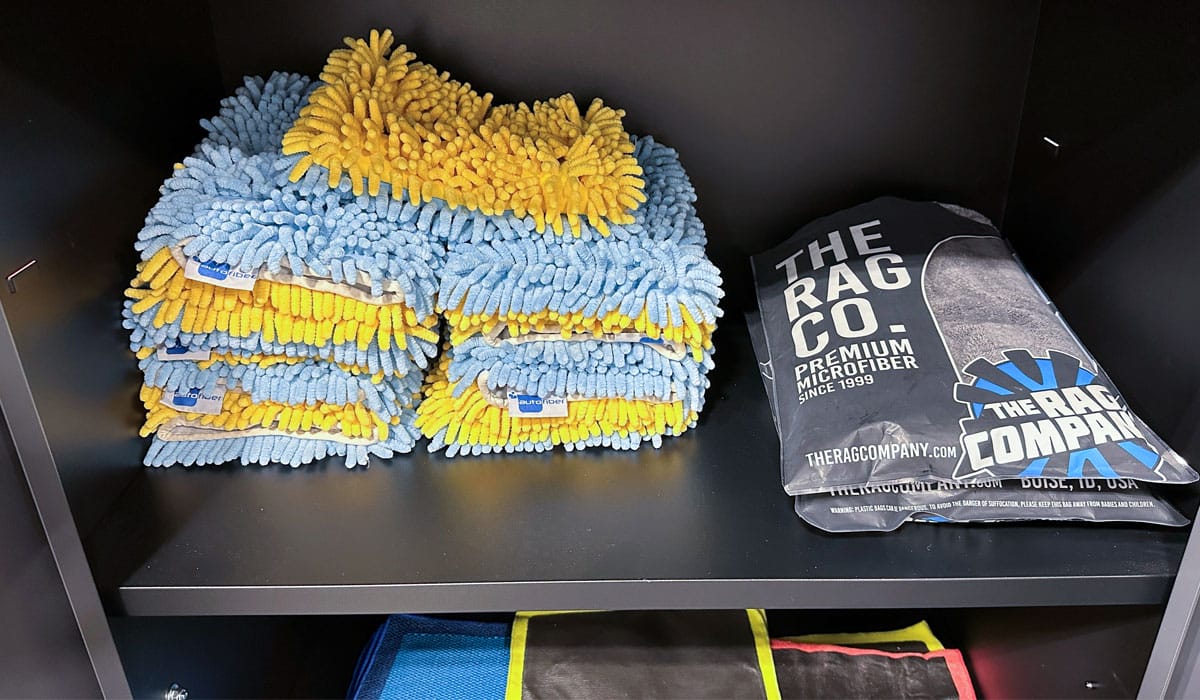
49. Quality Wash Mitts and Premium Quality Drying Towels
I’m kind of picky about my wash mitts. I prefer the Chenille Microfiber Wash Mitts not so much for how they wash the boat but because when I wash them in my top-loading, old-school washing machine, I can trust the agitator that goes nuts and the loose design of the hundreds of microfiber fingers will come out clean and uncontaminated.
There are a lot of great options for drying towels and chamois; I like the Gauntlet from The Rag Company, but find what works for you.
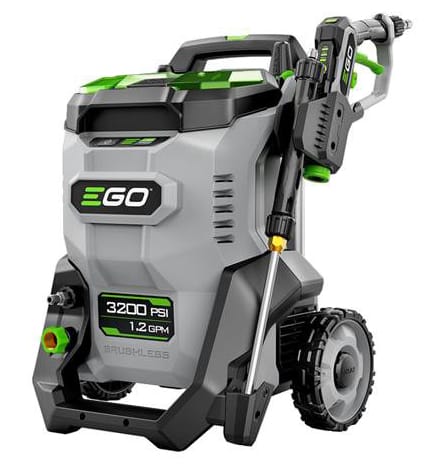
50. Pressure Washer
Kind of goes without saying, but a pressure washer makes cleaning and rinsing the inside of a boat much faster and easier. It also works great for washing the outside of the boat.
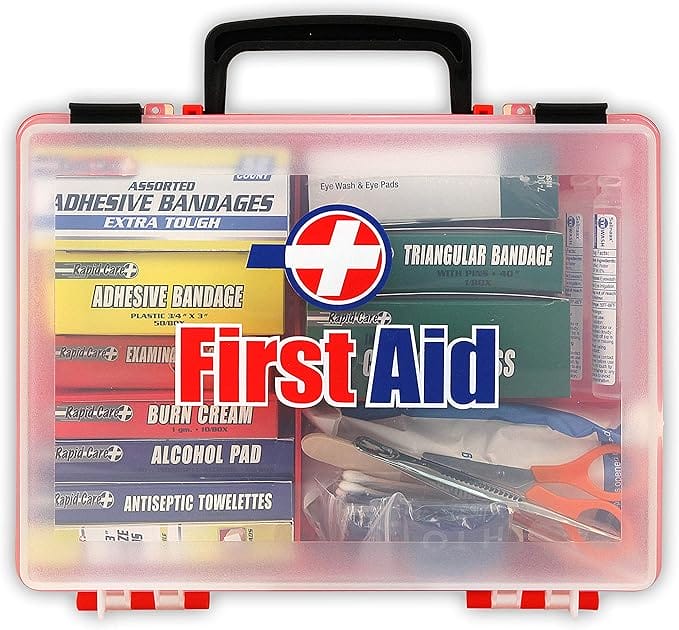
51. First Aid Kit
Hope for the best but expect the worst. Having a good general-purpose First Aid Kit ensures you have the basics in case of any accidents. It’s also a good idea to have the phone numbers for the Fire Department, Sheriff, and City Police handy next to the First Aid Kit.
52. Class Food
While I like to provide some food for breakfast and lunch, my priority is not to feed people but to teach people. For this reason, I keep the food aspect SIMPLE.
First rule: All food must be hand-held. No food that requires forks, spoons, or knives. Use your hand to pick up the food and push it into your mouth. Chew, drink some water, and get back to work.
Morning Breakfast – Donuts, Bagels, Coffee
I tend to bring in a selection of donuts, bagels, and munchkins. I pick simple donuts, like glazed or chocolate-frosted, and avoid anything with sugar or powdered sugar. I pick a variety of bagels and also get cream cheese. Of course, I keep a bagel toaster handy.
I always get the Dunkin Donuts Munchkins because I know some people will not want an entire donut, but it’s nice to have something small to go with your coffee. When picking Dunkin Donuts Munchkins, I get 25 of the glazed and 25 of the jelly-filled. These donut holes tend to hold together. All the other donut hole options break up too easily, and now I have donut crumbles all over the floor.

Afternoon Lunch
For this, you want to find a food source that delivers and can provide a variety of different food options depending upon how many days the class goes on. The normal options are:
- Pizza
- Hot sub sandwiches
- Cold sub sandwiches
I pick up a box of the variety pack of lunch-size chips and also the variety pack of cracker snacks.

53. Misc Supplies
Besides all of the above, here’s some other items you’ll want to make sure you have plenty of stock on hand:
- Paper towels
- Paper plates
- Garbage cans and trash bags
- Disinfecting products
- Dish soap
- Hand soap
I’m sure I’m forgetting a few things, but the above is a good basic inventory for teaching a quality, 5-star hands-on boat detailing class.
Final Thoughts
Taking on the responsibility to teach a boat detailing class is admirable. It’s also a lot of hard work and responsibility.
Besides all of the above, the most important thing you need to teach a quality class is patience. When holding a class, you’ll get a lot of different personality types. Some people are quick learners and have lots of experience. Others attending your class may be just starting out and have virtually zero experience. Some people tend to be slow learners and require extra attention and hand-holding as you work through the various tools and techniques.
Most of us don’t have a lot of patience naturally, we, (including me), have to learn to have patience via practice. Always remember, when teaching a boat detailing class, you’re not only representing your company or the company you work for, but you’re also representing yourself and the professional boat detailing industry in general.
Be slow to anger. Always smile when talking and/or answering questions. If you don’t have the answer, admit it but also say you’ll do your best to get the answer. Always be on the lookout for other’s safety. And learn to read the room, monitor, and cater to your students’ needs. If you see a person holding a polisher and looking confused, help them find a place on one of the boats to work, get them anything they need, like the right products, pads, power cord, swirl finder light, personal protective equipment. Be proactive from the start of day to the end of the day.
After a few classes, everything will start to fall into place and flow when teaching future classes. One of the best things about teaching boat detailing classes is the rewarding experience of knowing your helping others to work more efficiently while increasing their profits.
My Personal Offer to Help
I’ve been answering boat and car detailing questions professionally since 2002 when I worked as a Trainer for Meguiar’s and ran their discussion forum. Moving forward, if after reading this article you have any questions, my contact information is below, reach out to me, I’m always happy to help.
Would You Like to Learn How to Machine Polish Like a Pro?
Would you like to take your boat detailing skills to a higher level?
Do you find you learn better by doing versus sitting in a chair looking at a PowerPoint presentation about boat detailing?
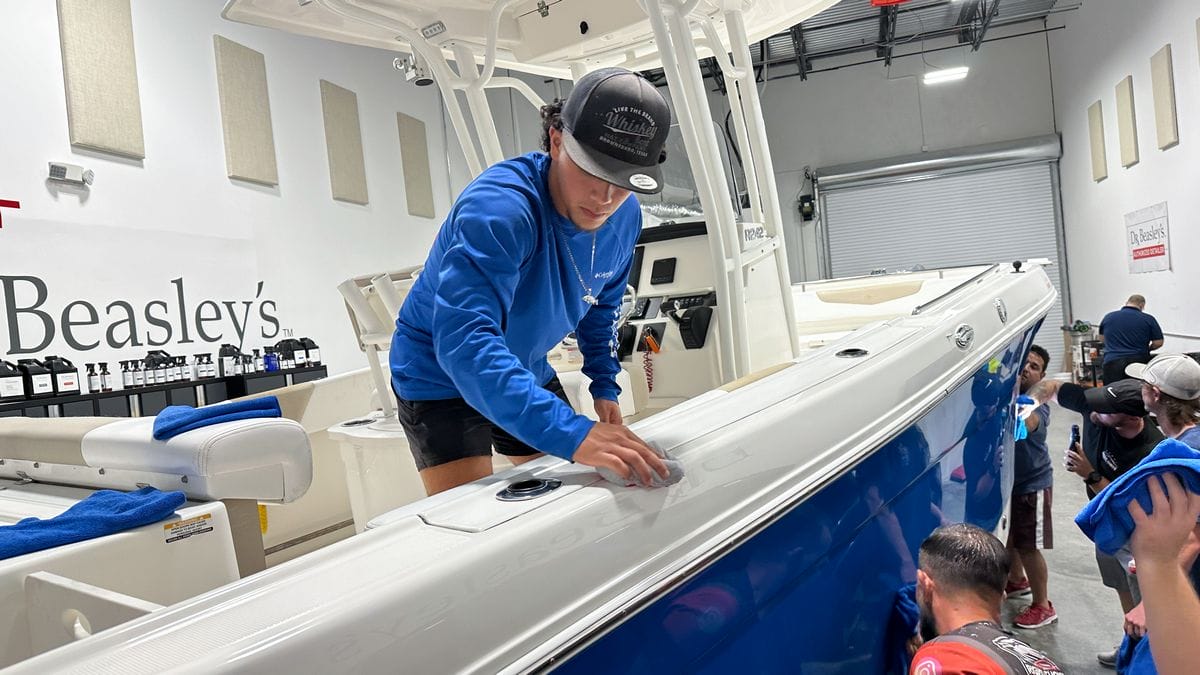
Here at Dr. Beasley’s O.R., (Operating Room), in sunny Stuart, Florida, we teach the most hands-on car and boat detailing classes on planet Earth. And we prove it too. You can find write-ups on the Dr. Beasley’s Blog that photo-documents just how hands-on our classes are plus you’ll see the kinds of cars and boats you’ll be training on.
Click the link below to find the dates, locations, topics, and prices for all upcoming detailing classes.
Upcoming Detailing Classes – Prices – Info – Topics – Locations
And if you ever have any questions, always feel free to reach out to me personally via text, phone call or email.
I hope to see you in a future detailing class!
Sincerely,
Mike Phillips
Chief Education Officer for Dr. Beasley’s
Mike@drbeasleys.com
760-515-0444
Questions? Comments?
Email Us