


Last Updated July 9, 2026

Transcript
You know, back in the 70s and the 80s and even into the ’90s, people were always talking about how newspaper was the best way to get streak-free glass.
Well, let me dispel that myth and share with you a lifetime of tips and techniques for getting glass optically clear and streak-free.
So, first I want to dispel the myth about newspaper. First, I’ve got a theory on why newspaper was popular back in the old days. The reason why is because it’s cheap and plentiful.
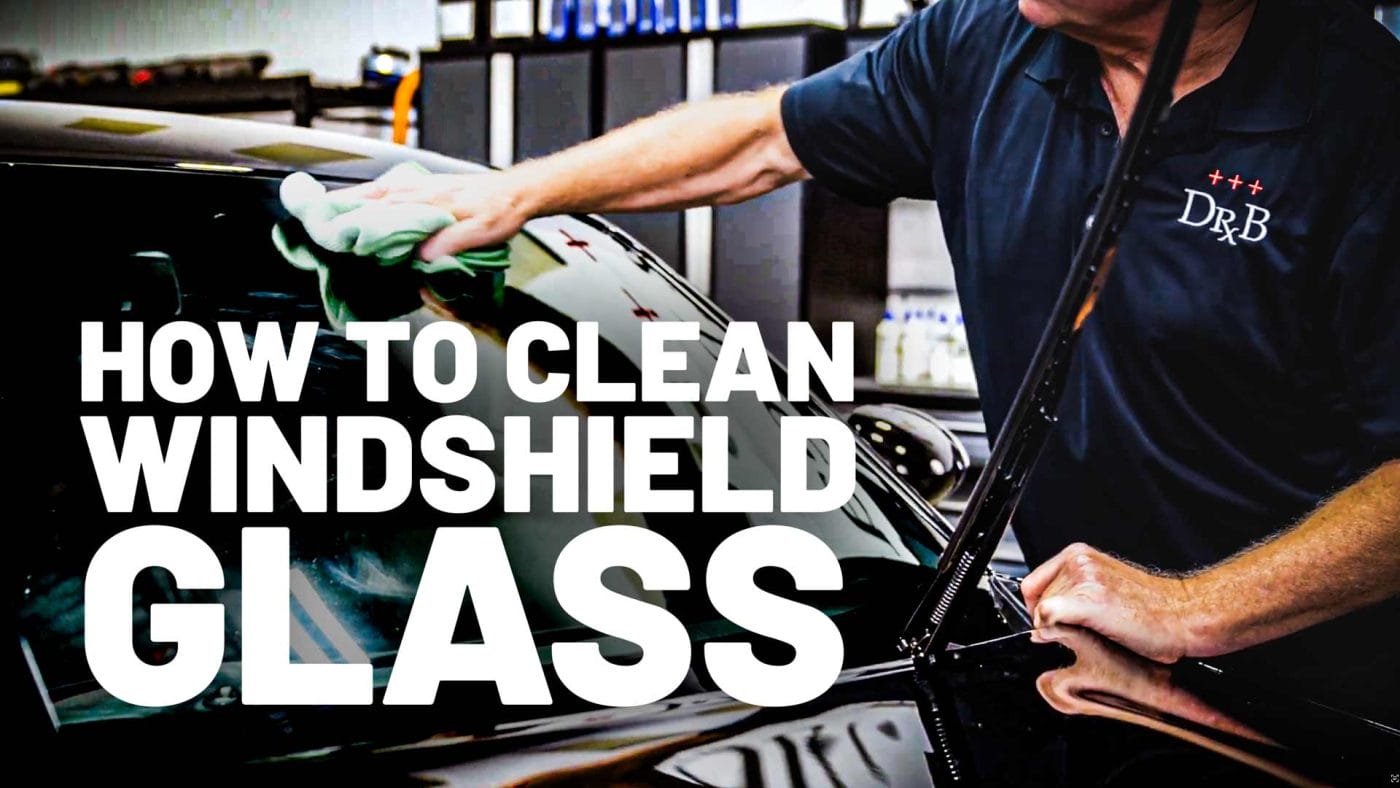
⚠️ Before You Clean or Polish Glass…
Streaks, haze, and water spots on your windshield aren’t just annoying — they’re a safety issue. Our auto glass cleaning guide walks you through the right way to get a truly clear, streak-free windshield inside and out.
Go to Decision GuideIn fact, if you didn’t even subscribe to get the newspaper delivered to your home, you could stop by just about any store and pick one up for 50 cents, 75 cents.
Now, the thing about newspaper is it’s cheap and plentiful. It’s paper. But as you use it—in fact, just by holding this—I’m already getting black ink on my hands, and that means you’re leaving black ink on the glass.
And the other reason newspaper was such a popular thing to clean windows with back in the old days is because microfiber had not been invented yet.
Why Microfiber Wins (Absorb vs. Adsorb)
So microfiber is this amazing tool that we all love. And the reason we like it is for two things that it does. It adsorbs and absorbs.
They sound the same, but they’re different words. And what that means is absorb means wicks into itself, and adsorb means wicks onto itself.
So, when it comes to pretty much anything you want to remove off of a surface like the paint or the glass or plastic trim, microfiber excels over newspapers, but also excels over diapers, t-shirts, old bath towels, and cheesecloth. And that’s why we all love microfiber so much.
And in this video, I’m going to be sharing a specific, um, microfiber towel that’s made just for cleaning glass.
Anyway, but that’s kind of why people used to use newspapers—because it was cheap and plentiful and, for the most part, it got the job done except for the black ink all over your hands and on the glass.
Why Glass Streaks and How to Fix It
So, when it comes to cleaning glass, it can be very frustrating. And the frustration comes from not getting the streaks off either the outside or the inside. And because it’s clear and we can see through it, you’re going to see the streaks no matter which side they’re on.
So, let me share some tips and techniques for getting optically clear, streak-free glass. And I’ll go over the supplies that I needed, and I’ll also go over the tips I shared.
I’m going to be dropping a lot of information, but there’s no need to remember this or stop the video or back it up. Just go to the description. There will be links to all the tools and the products that I show, and there’ll be a downloadable detailed PDF checklist to make sure you got everything you need and you do everything in the right steps.
Tools and Supplies You’ll Need
First, let’s take a look at the different tools, the different supplies you’re going to need to effectively clean glass.
So, this first product I have here—this is an insect remover. It’s a dedicated insect remover. And the difference between using an insect remover versus a glass cleaner is insect removers have an enzyme that actually helps to break up that dead bug splatter, make it easier to remove.
Another tool I have for that is—this is just an old-fashioned bug sponge. It’s kind of scrubby and it helps you to scrub that glass to make it quicker, faster, and easier.
So besides a good insect remover, sometimes you might need an adhesive remover. And the reason you might need an adhesive remover is because a lot of times you’re going to get tree sap. You’ll get it on the paint, you get it on the glass. It’s a very sticky substance. And so what an adhesive remover does, it helps to dissolve it so you can wipe it off.
Choose the Right Glass Cleaner (No Ammonia)
Of course, you’re going to need a glass cleaner, okay? And you want to pick a glass cleaner that’s formulated for automotive use. That means it contains no ammonia. And the reason for that is because a lot of cars have tinted windows and you just don’t want to use ammonia-based window cleaners on tinted windows—the tinted, uh, plastic film.
Then another tool that you may need will be a clay spray.
When and How to Clay Glass
Now, um, the reason for this is because a lot of times there’s air contaminate—there’s contamination in the air—the pollution, overspray paint, uh, industrial fallout, things like that. And just like it lands on the paint, it also lands on the glass.
Uh, so if you find that your windows are contaminated, then you’re going to want to use either some clay—I got a clay bar here. And I’ve also got a clay towel here. And then you can clay and you can remove that contamination off because usually a glass cleaner or washing the car is not going to remove something that’s bonded to the surface.
Inspecting Your Work: Light and the Baggie Test
Uh, besides that, I’ve got a strong inspection light. Okay. So, the inspection light is just to help you to see, uh, streaks and smears from the tight areas or different angles.
Uh, I got some baggies here. The baggies are basically just to do the baggie test to see if the glass actually does need to be clayed. This also includes if you got, like, uh, moonroof, sunroofs—a lot of the glass up there might be contaminated.
Um, I have a couple different applicators right here. And I also have—this is actually a paint polish. You can use a dedicated glass polish, but anything that’s clearcoat safe—so any car polish or compound that’s clearcoat safe—is also glass safe. And sometimes you may have road film or, uh, water spots—things that a glass cleaner won’t remove. And this is where you can go in by hand or machine and physically machine polish the glass to get that film or those water spots off.
Microfiber Towels and Cross-Contamination
And then besides that, you’re going to need a lot of microfiber towels. And that’s one of the real tricks to, um, getting glass clean on the inside and outside—by switching to a fresh towel often.
And here’s why. If I take this towel and I wipe off some type of film off the glass, theoretically that film is now on this side of the towel. If I continue to use this towel, it’s just so easy to take what’s on here and put it back on the glass. That’s called cross-contamination.
So, what’s more effective is after you’ve used the towel a couple times on a glass, get rid of it—don’t get rid of it—throw it in a clean bucket to keep it clean and switch to a clean towel.
And, and that also is why we don’t use newspapers anymore. Uh, newspapers put black ink all over you. They leave black ink on the windows. They are cheap. They are, for the most part, free, but microfiber excels at cleaning glass windows.
So, get a good glass towel like I’ve got here. And of course, I’ve got my little tweezers here. Uh, the tweezers are—basically I always teach people to inspect anything that’s going to touch the paint, but this also applies to the glass. You just want to make sure whatever you’re going to use to wipe the glass is completely contaminant-free.
The Glass Cleaning Wand (And When to Use It)
Uh, and then I have one more little tool here. Now, this is a little glass cleaning tool. And as you can see, it’s got this little head that swivels. So, it’s got a triangle-shaped head. You can get this pointy corner here into the corners of the glass. Or for the big flat areas, you flip this over. Then, you would just use this to get the big areas.
But there’s a technique that I teach with this tool. And the technique is—you don’t use it for the initial cleaning. And this is primarily for the inside glass, not the outside. The outside’s pretty easy to use your arms cleaning glass.
When you get into the inside, you’ve got your windshield and you’ve got your dash and you’ve got this tight area in there. It can be really hard to get your hand and your arm up in there to clean the glass. So, this little tool just comes in real handy.
But the secret to using this tool is not to clean the entire glass. You use it for the final wipe.
Outside First, Then Inside (Here’s Why)
So, for the initial cleaning, you’re going to be working by hand. That’s where you’re going to be removing the streaks and the smears and all that stuff is going to end up on your towel. Once you’ve removed the majority of any gunk that’s on the glass, now you come back with this little glass cleaning tool. You mist a light spray of glass cleaner on there and you use it for the finishing touches. So that’s how you correctly use one of these tools.
Okay, so those are the tools and the supplies we need. So let’s talk about which order to clean the glass. You clean the inside first or the outside first? Well, the answer is simple. You clean the outside first.
Now, the reason you do this is because it’s just easier to clean because once you get inside, you’ve got to deal with the steering wheel, you’ve got the dash. It’s, uh, it’s at a steep angle. It’s just more awkward to sit inside and clean the glass.
So, you want to nail the outside. And here’s why. You want to make sure you’ve got the outside absolutely clean so that when you go to the inside, anything that remains, you know is on the inside and you know you’ve got to get it off the glass.
Identify Specific Problems First
And of course, I’m going to share another technique towards the end of this video that’ll help to ensure you’ve got any streaks or smears—any kind of films—off both the inside or the outside. So, stay tuned for that secret technique.
So, when we talk about cleaning the outside, one of the first things you want to do is you want to look for specific problems. Okay? So, in this case, I’ve got bug splatter on the windshield. I’ve already looked at the windows. There’s no tree sap. So, I don’t need to remove tree sap.
But before I start cleaning the glass, I want to actually just remove just the bug splatter. And then we’ll go to cleaning the rest of the glass.
Old-School Bug-Soak Trick
For that, I’m just going to use one towel just to get that off. But when I get ready to actually clean the glass with my glass cleaner, I want to use the two towel technique.
The two towel technique is just—I’m going to use one towel to make the initial scrub. I’m going to use a secondary towel that I know doesn’t have any of the stuff that I’ve removed off the glass to make the final wipe to really get that towel clean.
And after I clean it, then I’m going to do the baggie test. And if I feel contamination, then that’s when I’m going to clay the glass and of course wipe off the clay residue. So that’s how we’ll take care of the outside.
So just to get started here, let me get my insect remover and my bug sponge and we’ll go to work on these isolated bug splatter spots.
So, the first thing I’m going to do is I’m going to pull up the wiper arms. Now, something I would caution you about is—and I don’t know why they do this—but sometimes when you pull the wiper arms up on some vehicles, the arm actually hits the paint on the back of the hood.
So, be careful that if the car you’re working on does that, that you don’t do that, cuz you’re going to put a scratch in the paint. In this case, for this, uh, car, there’s plenty of gap there between the wiper arm and the paint. So, I’m not going to scratch it.
“Clear the Pipes,” Then Scrub
Now, the next thing I want to do is I just always want to shake your products. Anything—if it’s sitting on a shelf—you just want to give it a couple good shakes and do what I call clear the pipes.
So, anything that might have been in the siphon tube and in the nozzle—maybe it’s degraded a little bit—so you’re just getting pure insect remover.
Now, instead of spraying this directly on there, first thing I’m going to do is I’m just going to take the nozzle and I’m just going to stick that right into this bug sponge, which has a foam core, so it’s going to absorb some of the insect remover—also kind of moistens this. Then, I’ll go ahead and spray some on.
By the way, I’ve got 1, 2, 3, 4, 5, 6 dedicated or isolated bug splatter up here. And then basically just come down and just scrub. And again, if you’ve never used one of these, when you feel it, it’s very—I wouldn’t use the word scratchy—but it’s very coarse. It won’t scratch the glass, but it does a quick job of just abrading and loosening all those, uh, dead bug bodies that are on your glass—much faster than a microfiber towel.
Dwell Time for Stubborn Bugs
And if they’re really stubborn, here’s another technique you can use. I didn’t show this, but I should have. You can take—say you’ve got some bug splatter that’s really baked on—you can take and dampen a microfiber towel with your insect remover, spray some right onto the glass, and instead of letting it run down, just sit this there and let it sit there and dwell.
The towel’s wet with the insect remover. You’ve got some insect remover actually on the glass. And what the towel does is it traps that insect remover onto the dead bug splatter so it can do its job. It can go to work softening, emulsifying, loosening the bug splatter so it can be more easy to scrub or wipe off. But that’s an old-school technique—soaking the glass with an insect remover.
Okay, so let me go ahead and wipe this off. We’ll see how well I did. And I think I did a good job. All the isolated bug splatter is gone.
Two-Towel Technique in Action
Okay. So, I’m going to dispose of that towel and put this back here. So, now that I got the bug splatter off, now I just want to go ahead and clean the glass. So, I’m going to grab my actual glass cleaner. This is ammonia-free. Not a big deal on the outside, but on the inside it is.
And then, remember I talked about the two towel technique. So, here’s my first towel. So, now I’m just going to do this nice big sweeping motion. And what I’m doing is I’m taking everything that’s on the driver’s side of this window off. And whatever it is is now on this side.
Now I could switch to a dry side or just grab a fresh towel. So either way, in this case, since I got lots of towels, I’m going to grab a fresh towel. And for the second wipe, I’m just going to go ahead and mist a little bit onto the towel. Give this a second wipe. And then flip it over.
Wow. There’s, there’s like nothing—no kind of glass coating or anything on here. It kind of is squeaky clean. That’s what we would say.
Final Wipe Directions: Know Which Side
Okay. And then here’s an important technique tip. When you’re working on glass for your final wipe, for the outside you want to go side to side. For the inside, you want to go up and down.
And there’s two reasons for this. The first reason is so if there is a streak—and you follow this pattern of up and down for the inside, side to side for the outside—you’ll know which side the streak is on.
But the reason you do it in that manner is because it’s really easy for me on the outside to go back and forth. But when I get on the inside, it’s a lot more difficult, especially on the driver’s side where you got the console, the steering wheel. So it’s a lot easier to go up and down on both sides. So that’s why you go up and down on the inside, side to side on the outside.
Baggie Test for Glass Contamination
Now that I’ve cleaned the outside, as I look at this window, I see a lot of smudges. And I know they’re on the inside because I’ve absolutely cleaned everything off the outside.
So, the next thing I want to do is the baggie test. And this is the same kind of thing you do to check paint to see if it’s contaminated. So, a lot of times, you know, after you wash your car, you want to feel the paint and you’re feeling for little bumps. That’ll tell you if you need to clay the paint.
But you can do the same thing for the glass. And you just want to take and rub that glass. And I don’t feel anything on there. Now, if I did—in fact, it’s squeaky clean—if I did, that’s where I would be using either a clay towel or a piece of detailing, a clay bar with a clay lube, and I would just clay the glass and that would peel all that stuff off.
Typically, a glass cleaner—washing the car—it’s not going to remove anything that’s bonded, stuck onto the surface.
Inside Glass Is the Hard Part
Now that I’ve cleaned this side, let me jump over, get the passenger side clean, and then we’ll take a look at how to expertly clean the inside. Nice.
So cleaning the outside’s easy cuz you can stand up and the glass is easy to reach. Cleaning on the inside becomes a lot more awkward, a lot more difficult just because you basically got to sit in one of the front seats and then somehow reach up and clean the glass.
Now, this is a 2021 Dodge Challenger Super Stock, and it has the seat adjustment delete because a lot of times what would help you is actually to tip the seat upward and forward just to make it easier to reach the glass.
How to Avoid Overspray Inside
Now, as I said earlier, this is a really cool little glass cleaning tool because you can get into the corners with the tip of this diamond-shaped paddle or you can flip it around to get the flat area and get into there where it’s really tight where the dash meets the windshield. But this is not for the initial use. This is for the finishing touches. Okay, this is, this is for the finishing touches. So, don’t get this wet with glass cleaner yet.
For the initial wipe, you just—look, if you look in here, I’ve got a whole stack. I told you the trick to cleaning glass is have plenty of microfiber towels so you don’t cross-contaminate.
I also have a clean bucket down here. And to me, this is really important because I’m going to be getting these dirty with whatever this film is on the inside, but I don’t want to get them dirtier by having them on the ground where they get contaminated. So, I always have a clean bucket to put my dirty towels.
Initial Wipe: Circular, Overlapping
So, the first thing I want to do is I just want to spray my towel. Now, if you look up here, this has this huge flat dash. And if I were to come up here and spray the glass, I’m going to invariably get overspray all over everything. And not that it’ll hurt anything. I just don’t want to put glass cleaner all over this pristine dash.
So, I’m going to start by just taking and dampening one side of this microfiber towel with my glass cleaner. And notice I’m holding the nozzle very close so I don’t get overspray over the B-pillars or anything like that, the A-pillars.
And I’m going to use a fairly heavy, heavy—or wet—concentration of product because there is some kind of film in here and I want to break that up chemically and then pull it onto the cloth.
Passenger Side First, Then Driver’s
Now, it doesn’t really matter what direction you go for the initial wipe, but I’m going to use an overlapping circular motion cuz it’s always easiest to spread a product out using an overlapping circular motion.
And here’s another little tip. The passenger side’s kind of easy to clean cuz there’s nothing in the way. The driver’s side—you’ve got the steering wheel, you got the arm controls, you know, you’ve got actually a raised dash for the gauges. It gets a little more cumbersome.
So, what I do is I try to reach over and clean as far as I can comfortably, and then I only got to come back to the driver’s side seat to clean a small spot. Okay?
So, I’m going to do my initial scrubbing right here, and I can go to just about 3/4 of this glass. And theoretically, whatever that film was—whatever that film was—it’s now on my towel.
Secondary Wipe, Then Finishing Wipe
So, I don’t want to risk contaminating anything. So, I’m just going to plop that down there. And I’m going to go ahead and I’m going to do a secondary wipe to remove whatever film is on there.
And then I’m going to grab the little glass tool. Now, for this, I’m going to use a lot less glass cleaner because I’ve already got the bulk of whatever that film is off. So again, just kind of holding this close to the towel so I don’t get overspray all over the car. Mist a little bit in there.
I use the cup holders, by the way, to hold my glass cleaner. Fits in there perfectly.
So now I’m going to come in here. I’m going to make a secondary wipe to make sure I got everything off. And then I’ll come in here with the glass tool.
Finish Up-and-Down Inside
Now, at this point, if you don’t have this little cool glass cleaning wand, this is where you would want to do your finishing wipe. I’m going to fold to a clean side—since this is only dampened—fold a clean side. Again, just dampen this with a light amount of glass cleaner.
And this is where I’m going to end up with my strokes going up and down. So, on the outside, I went side to side. On the inside, I’m going to finish out going up and down. And that way if there is a streak, it’ll be directional and I’ll know which side it’s on.
And then I’m going to share my little technique tip that’ll save you from having to get in and out of the car and in and out of the car fighting those streaks.
Use a Spotter to Hunt Streaks
Okay, so here’s my big tip. Have what’s called a spotter. I have my friend Justin here. He’s my spotter. He can look at my glass cleaning quality of my glass. Can you—where? Do you see something down there? Right there. Huh?
Okay. So, once he identifies where the streak is, I can come down and clean just that area. And then once he gives me the thumbs up, I know I can switch over to the other side.
Now, if you do have the little glass cleaning wand here like this, let me show you how to use this.
The Wand: Only a Light Mist
Okay, so this is important. You saw me spray an abundant amount of glass cleaner on the initial towel and just a few light mists on the secondary towel. But for this one here, it’s important—you just want a light mist. I’m going to just kind of—just like that. Just a light mist because, theoretically, there’s nothing on there. This is just the finishing touches.
So now I can get in. Same thing—I’m just going to go up and down. As I’m doing this, I’ll ask my spotter to spot me. Am I leaving a streak-free windshield, Justin?
Something right in there. And you know what? It’s from the inside. I can’t see it. That’s where I trust my spotter. Did I get it? Okay, good.
Anyway, those are the tips and techniques I use to get streak-free glass for the windshield. I finished the passenger side. I’m basically just going to repeat this over there to the driver’s side. And then I’ll show you a couple other things just on the outside glass that might help you into the future.
Check for Road/Traffic Film Before Coating
Now that the hard part is over—the inside’s been all clean—uh, what I have here is absolutely streak-free glass. It wasn’t that hard. Only took a couple different tools, chemicals, and products to get it done.
But if you ever wanted to apply a glass coating to the glass, let me share a couple tips and techniques for putting a coating on.
First of all, this glass looks clean, but I want to make absolutely sure we’re just down to pure bare glass—bare glass—and there’s no film like, um, road film or what they call traffic film. And what road film or traffic film—same, same words, uh, same thing—is if you’ve ever looked in a parking space at a store and you see where the cars that are parked, they drip oil in the middle of that parking space.
Well, those same cars that drip in a parking space when they’re parked still, they also drip when you’re driving up and down the road. That’s why if you look down a straight road on a dry day, the center always looks a little darker. It’s from all the transmission, gear oil, power steering fluid, radiator fluid—all the different oils that leak out—and it creates this darker section in the middle of the road.
Why Glass Gets Filmy (And How to Polish)
Now, the next time it rains, any of the cars in front of you are mixing that oily dirt into the rainwater and they’re splashing it up on your car. So, that’s where road film—or traffic film if you’re across the pond; they call it traffic film—that’s where it comes from. It comes from the road.
And, um, when I look at this, I cannot see it. So, chances are, being a 2021, uh, Dodge Challenger with only 5,000 miles on it, it shouldn’t have a film on it. But here’s how I’m going to check. And here’s how I’m going to clean that glass.
I’m going to take—this is just an old-school cotton applicator pad. And I kind of like this for glass polishing by hand because it’s, it’s got a little bite to it. Okay.
And then you can—I mentioned earlier that you can use anything that’s clearcoat safe. So, anybody’s compound or polish—if it’s clearcoat safe, which is much softer than glass—then it’s probably glass safe.
This is actually a product we brought out. It’s called Core Cut. Uh, one of my friends—he found out it works. Where he lives, they have horrendous water spots, and he found out it worked great for getting the water spots off the glass.
Hand or Machine Polish to Bare Glass
But I’m just going to go ahead and try it here to clean this glass off to get it ready for a coating. And to do that, it’s—I mean, it’s pretty straightforward. You could also do this by machine.
So, just put a little bit onto an applicator pad. I’m going to start right out here, kind of in the middle. And I’m using an overlapping circular motion just to kind of spread it out. And I don’t really see any film on the glass at this point.
A lot of times, just the act of applying something will kind of reveal the film. So, if you don’t see any film, that’s a good sign. And then go ahead and just go ahead and polish out all the glass. And you’ll come back and wipe it off. And that way you know you’ve gotten down to pure glass.
And the reason that’s important is so that the coating can make a strong bond. Um, I wouldn’t skip this step. If you were going to put a coating on, I would go ahead and follow all the way through.
And before, when I cleaned this glass, it was, um, very grabby. People call it squeaky clean. And now that I’ve hand polished it, there must have been some kind of film on there because it sure is a lot smoother now.
Prep, Apply, Level: Glass Coating Basics
Okay, let me just take and put a little glass cleaner on here. Get the rest of that film off there. So again, this is kind of an optional step.
So let me just share what a glass coating does. A glass coating seals the microscopic pores of the glass to make it incredibly smooth and it also creates a hydrophobic surface. So now when you’re driving in the rain, your glass will pretty much self-clean. Water will just go flying off and it’ll stay cleaner longer.
So you’ll have an extended period of time before you got to come back in and do this intensive glass polishing and coating process.
But after you’ve got that completely polished out like that—okay. So, um, all glass coating is a little different. You know, important thing is read the directions—follow a manufacturer’s directions.
For this coating, uh, it comes with a glass coating prep. So, I’m just going to spray some of this onto my towel. Couple mists onto here. And this is just going to make sure any of those polishing residues have been removed. So, again, we just have nothing that’s going to hinder the bonding of the coating to the glass.
Okay. Then after that, then it’s time to put the coating on. And most of these glass coatings—the Dr. Beasley’s included—work pretty much the same way a paint coating does.
Cross-Hatch Application and Final Wipe
So here’s the ceramic glass coating. I’m going to take some and put it right across my little applicator pad here. It’s a little microfiber suede patch wrapped around a hard block. I always tape mine on to make it easy.
And then just come down and—just like a paint coating—whoops. Let me get a little more on there. The, uh, foam kind of absorbs some of the product. So, every time you use a coating—usually the first time you put a coating applicator—you put a little extra on there.
Okay. Then you just want to make an overlapping, uh, cross-hatch pattern. And the whole idea behind this is just to make sure every square inch of the glass gets some of the coating onto it.
And then at some point, come back with the clean towel, give it a final wipe. This levels the coating and it removes any excess. Okay. And that’s how you would install a glass coating.
Easy Maintenance with Glass IQ
And just—if you know, if you don’t want to do a two-step process, this is a product I really like. It’s the Dr. Beasley’s Glass IQ. So after you’re done cleaning the glass, instead of doing the two-step coating process, you can basically just mist this on.
And where this helps out is it’s actually a great maintenance product. So every time you wash your car, when you’re done, just hit it with a couple little mists like that. Spread it around, wipe it off, and you’ll maintain that glass coating and kind of refresh that water-beading characteristic.
And now that glass is actually slippery. It wasn’t when we first started.
Anyway, so there’s a whole bunch of tips and techniques for getting your glass clean. Um, remember you don’t have to remember all the different techniques I just covered or the products. In the description, there is a downloadable PDF checklist.
And if you like this video, then make sure you hit the subscribe button and hit the like button. And if you think some of these tips might help someone else, then share it with your friends. Hope to see you at a future video.
Questions? Comments?
Email Us