


Last Updated May 28, 2026

There’s a saying we use in every detailing class we teach: it’s easy to take a car that’s in rough shape and create a dramatic before-and-after. What actually takes skill — real skill, the kind built from experience and the right products — is taking a car that already looks incredible and getting it that last 5% better.
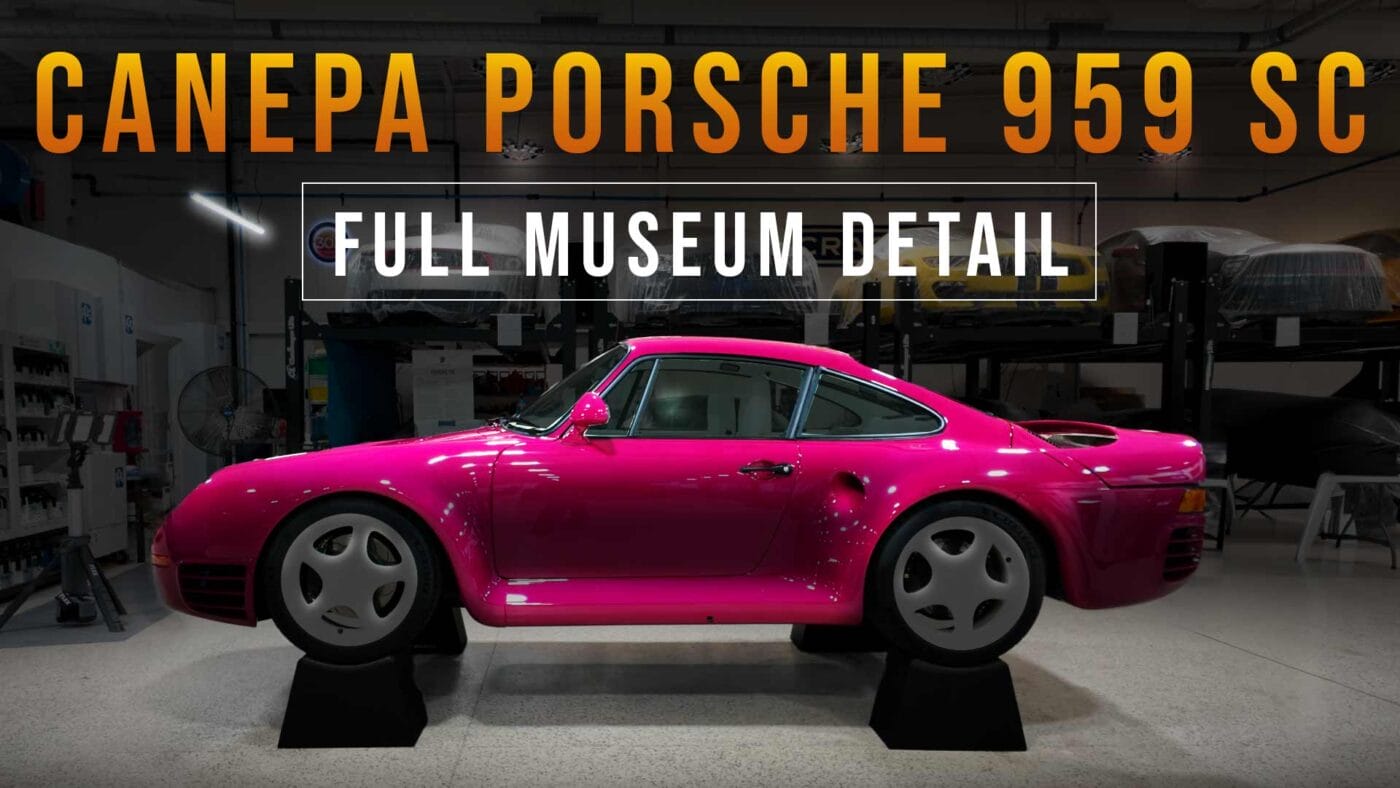
That’s exactly what Ed Dedick and I faced when a Canepa-built Porsche 959 arrived at the American Muscle Car Museum. One of only 292 ever made. A one-of-a-kind color called Ruby Stone Red, matched to a hand-selected arctic white leather interior. Fresh off display at Amelia Island. And headed for permanent display under the museum’s full LED lighting — which shows every flaw, every smudge, every imperfection without mercy.
What follows is the full walkthrough, straight from the shop floor.
Mike: So, I’m here at the American Muscle Car Museum with my longtime friend, Mr. Ed Dedick.
Ed: Good to see you, Mike.
Mike: Good to see you again. Uh, we work on a lot of cool stuff together, don’t we?
Ed: Definitely do.
Mike: Uh, this car behind us, it’s a supercar. It’s a Porsche 959. And although to the average person, this thing already looks amazing, to the trained eye, we’ve already seen some areas that we can improve.
And the thing we want to do is, because this is going to go on display here at the American Muscle Car Museum, this thing’s got to look perfect.
So, I think, Ed, let’s start out by just giving it a good inspection and just kind of take an inventory as to what are we going to need to do to this car to get it perfect.
Mike: So, looking with that swirl finder light, that’s a very high-powered light. And what that does is it’s going to reveal defects that the human eye can’t naturally see.
How’s it looking to you so far, Ed?
Ed: Well, Mike, the car, when we received it at Amelia Island, you know, the car looked fantastic. Sure.
But obviously, with dust in the air, a day of display—
Mike: You know—
Ed: A lot of foot traffic—
Mike: A lot of foot traffic.
Ed: We get it back in the transport trailer, you know, it’s going to get some minor scuffing and marring.
And in a sense, this is where we inspect the car. We can see what it has, what we need to address, and make it just that much better.
Ed: The other thing we want to do is, for long-term preservation of it, we want to make it as easy on us as we can, meaning how do we protect the car?
But before we even protect it, we got to get it to looking the best it can.
Taking Inventory of the Paint
Mike: Yeah. So, here’s something I always say because, you know, I teach a lot of car detailing classes where I bring in really bad-condition cars.
And I always tell people, you know, it’s easy to take something that’s in really bad shape and do an extreme before and after. You really take it to a higher level.
But what actually takes, you know, more skill, more talent, more experience, and the right products is to take something that already looks really good to a higher level.
And one of the things I noticed you doing is you’re kind of looking everything with a swirl finder light. And what I tend to do is I look at high-touch areas.
So right here, where someone will put their hand in here, their fingernails will tend to go in here and put little scratches in there. We’ll want to look into those areas.
I already see some marring up here. That could be when someone just puts the window down and puts their arm outside the window.
And then there’s something else we want to do. It’s called the baggie test. And even though this is a new car, this is just a good idea.
You just take a simple sandwich baggie, and what you’re going to do is you’re just going to run your hand lightly across the top. And what you’re doing is you’re feeling for bonded contaminants.
And luckily for me, and this is a brand-new car, I didn’t really feel much.
Ed: This is called a paint thickness gauge. And this will just give us a general idea how much paint is on the car.
I have this set up to measure in mils because, well, that’s how I was raised, with mils, not microns.
We’ve got 29.80 mils there. And if we just come over about 6 inches, we’re at 33. So there’s quite a bit of variance there.
Each panel was removed from the car. The car is fully stored. They’re painted individually. They’re sanded and buffed individually.
And I am confident they put plenty of clear on here for us to work on down the road, now and in the future.
Mike: Absolutely. And when they do these cars, they’re actually refinished in PPG materials. This one has the PPG 2021 urethane clear on it, which is a very high-bodied, in a sense, very thick clear.
Put four coats on that. But yeah, by the time you figure sanding and polishing on it, you’ve probably lost at least one coat at that point.
We also want to be, as you know, careful about it, is we don’t want to remove any more than we have to.
Ed: Yes. Yep.
Mike: So, there’s an old saying in our industry. It goes like this. Use the least aggressive product to get the job done.
And a lot of people leave it right there, but they forget the other part of that saying. It goes like this. Use the least aggressive process to get the job done.
So, you leave the most paint on the car. And that’s just like if this were a daily driver and we had to do paint correction, we want to do it in a way that we leave the most clear.
So then, when the owner is driving this and he hits a bug and gets bug splattered and there’s acid etching, you still got plenty of paint. You can buff that out without repainting the panel.
So that’s why we always take that approach, to use the least aggressive process to get the job done.
Masking, Wheels, and Interior Details
Ed: Okay. Now, Mike, what we see right here, this has not been touched since we took it out of the transporter.
Mike: Okay.
Ed: So, in a sense, in my mind, see if we’re on the same page here. We’re going to wipe this car down.
Mike: Yep.
Ed: We’re going to go ahead and do our protective masking on all the moldings and all that so we safely them, and in a sense, we can do a test spot to see where we’re at with the car.
Mike: Yep. Yeah. And a couple other things I just want to look at real quickly is, you know, this car has brand-new wheels and tires.
But I always like to see if they put anything on here. So, when I just take my hand and I rub this tire sidewall, there’s nothing coming off. And to me, that’s a good sign.
A lot of times shops, they’ll put some kind of greasy, gooey tire dressing on there. I’m not a big fan. So I’m glad to see they haven’t done nothing with it.
This has these very beautiful high-gloss white wheels. And I’m sure if we just ceramic coat those, they’re going to look amazing.
They look good now. They’ll look even more amazing. And kind of to your point, once this is set up on display in the museum, the maintenance will be so much faster and easier due to the ceramic coating.
Ed: Well, and you mentioned the wheels. This was something that Canepa did an amazing job at.
It’s not only a nice job of picking out the interior, but he matched the wheels to the interior.
Mike: And then look at this interior. This is a real leather interior. And this white, it’s almost like an arctic white.
It’s vibrant. It’s crisp. It looks good. But one thing about white is it will show any kind of staining or dirt buildup.
So, we’re going to want to go ahead and, even though this is new, we’re going to reclean, recondition this, and protect it and just take it to the highest level possible.
This is a very nice high-end interior.
Mike: So everything that we’re going to use is going to be completely safe, and it’s actually formulated to be used on white leather.
So there’s an added bonus to that.
Looking Closer at the Engine Bay and Trim
Ed: The handle right there in the back of the door jamb. Go ahead and pull that.
Mike: Okay.
Ed: And so not only does the interior look good—
Mike: Oh wow. Look at that. That is incredible. I love this high-gloss kind of a pewter color to it.
Ed: It goes good with the body colors, and he cleaned this up nicely. You see a lot of the wires that, in a sense, were needed on the older cars are not needed on the modern updated conversions.
Larger intake tubes. I mean, actually a gloss finish on the air box—
Mike: Really dressed it up nicely.
Mike: I guess it’s putting out like over 800 horsepower.
Ed: Correct.
Mike: So, the first thing you want to do when you’re using a new towel, sometimes they come with a tag, and just a firm yank will usually pull that thing right off there.
And the reason you do that is because the tag could actually scratch the paint.
You know, I looked this car over very carefully at the pictures you sent me, and one of the things I was looking for was actually what this material is made out of.
It’s called simple textured black plastic trim. It has a texture to it, and if you accidentally run your polisher into it and get it into the nooks and crannies of that texture, it’s almost impossible to get 100% out.
So that’s why it’s safer to tape this type of stuff off than to try to have to clean it with a toothbrush when you’re all done with the car.
Mike: So, after we wipe this down, Ed and I, we started to find some defects that aren’t real apparent till you start to look at them.
Right here, something has dripped off this rear gasket down this channel right here. And you got to keep in mind, we’ve already cleaned the car.
So, whatever this is, it’s not wiping off. It’s going to have to be polished off.
And we got to cross our fingers that whatever that is didn’t leave an etching in all those little drip spots.
Finding Swirls, Micro-Marring, and Holograms
Mike: Then, as we kind of walk around, and again, to the average person, this car probably looks done.
But when we throw one of these swirl finder lights on here, there’s actually all kinds of swirls and scratches already in the paint.
It may have left the factory flawless, but just through taking it to Amelia Island, probably wiping it down, transporting it, it’s ended up with little fine scratches everywhere.
And these are going to show up out in the main hall of the museum here.
Mike: Now, when we come over here, this is kind of interesting. I’m actually kind of surprised.
And the camera probably can’t capture this, but there’s what’s called micro-marring in the panel. And this light reveals it.
So here’s what micro-marring is. At some point after they painted and sanded this, they compounded it and they polished it.
Polishing would be the last step before the car would be completely finished out. The problem is this paint is soft, and so whatever they were using for a pad and/or a product left its own very tiny marks in the paint.
That’s called micro-marring. It happens with an orbital polisher. So, it’s not a big deal.
But now that we’ve seen it because we used a strong light, now we know that we’ve got to actually remove that.
Mike: And the thing about that is one of the things Ed and I have also—oh, this is fully scratched up. See if you can capture this.
In fact, these are holograms. When I move this light back and forth, sometimes you can see like a little pattern running linear. And what that means, I can really see it right in here.
Besides the swirls and scratches, it has holograms. So, what that tends to mean is someone, the last machine they used on this thing was a rotary polisher.
And the problem with the rotary polisher—I use rotaries all the time. They’re great for cutting hard.
And a lot of guys try to finish out with them, but the problem is they will tend to leave holograms in the finish.
And the way you get around that is, instead of finishing out with the rotary, finish out with an orbital. You change the action of the tool, you get rid of the problem.
Performing the Test Spot
Mike: So, what we’re going to do first is called a test spot. And the whole purpose of a test spot is to dial in a process into one area and ensure—dial in and make sure it works in this one area.
Then theoretically, if it works in this one area on the back of this spoiler here, it should work over the rest of the car.
If it doesn’t work here, then we can retry different pads, tools, and product combinations till we dial in a process that works perfectly here, meets our satisfaction, our expectations, and then again duplicate that over the rest of the car.
Mike: So, you always want to start out doing a test spot. And I chose this section right here because there’s actually a bunch of scratches running across the top of this.
And I’m going to put a tape line right down the top of it. And then we’ll just do our test spot on one side.
And then it’ll be easy for us to tell one way or another if the process I’ve chosen is actually going to remove the defects and also, just as important, finish out flawless.
Earlier we talked about how we found micro-marring, and that would be from the previous polishing process before the car left the factory. You found some micro-marring.
So that tells me the paint is soft. So we got to dial in a process that’s going to work.
Mike: So, for that I’m going to use what’s called a free-spinning random orbital polisher.
Free spin just means it’s not gear-driven. As you can see, I can spin that pad freely with my hand. That’s free-spinning.
It’s actually the BigFoot 15 cordless. So it’s a really nice tool.
And then, keeping with the philosophy or the best practice called use the least aggressive process, not product, but process, to get the job done, I’m starting out with the soft foam finishing pad.
And I’m going to be using a very—it’s an ultra-fine cut polish is what it is.
And then to use this, we’ll just take and put three pea-sized drops down here on the pad. And then I’m going to kind of warm this up, break it in, and then I’ll do a couple passes.
We’ll pull off and look.
Mike: So, the first thing I’m going to do is turn my speed down all the way. I’m just going to turn this on and just kind of let that polish migrate around the pad.
Mike: Just have to do it for a few seconds.
Mike: If I turn this pad over, it’s kind of hard to see on white, but that product has started to create a uniform film over the entire surface.
So, that means the entire pad is going to cut equally.
Dialing In the Right Polishing Process
Mike: So, now that I’ve got this done, there’s two ways to approach buffing out a car.
You can either count out loud or count in your head seconds, how many seconds you polish an area, or my preferred way is to count how many section passes I do.
And the reason why is because it’s just easier for me to count out section passes than it is seconds.
But here we go. Here’s what I mean by section pass. Here’s my tape line.
So, I’m going to run this polisher up and back. That’s one pass. That’s two passes. There’s four passes.
There’s five passes, and there’s just six solid passes just across this one section. So, up and back.
And I’m going to come down and just carefully wipe this off.
Mike: And the reason I only did six section passes is because when you’re doing your test spot, you want to underuse the amount of section passes, not overuse.
Otherwise, you won’t know at what point the scratches came out.
So, now I’m going to go ahead and inspect. Now, I always like to start by looking at the ugly side.
So, I can see the scratches there. When I come over here, wow. Here’s some good news and bad news.
Let’s see if the camera could pick this up. Can you capture any of those scratches in there?
Now, when I come over here, they’re all gone.
Mike: So, six passes, follow me. Six passes with a soft pad and a very safe tool and a fine-cut polish removed the majority of scratches on this rear spoiler.
So that tells me if I would have done maybe eight section passes, I would have hit perfection.
Preparing the Paint for Ceramic Coating
Mike: So, what we’re doing now is we’ve finished all the paint correction work. We machine polished this thing.
I’d say we removed at least 99.9% of the swirls and scratches.
We’ve removed all the protective masking tape off all the gaskets. And now what Ed is doing is he’s applying a product.
It’s called paint coating builder, but what it does is it creates anchor points for the coating to bond to.
It also maximizes clarity and gloss. And so when you put the ceramic coating on, you’re sealing in all that clarity and gloss.
Mike: That’s really what you want out of a clear coat. You always want to think of the clear coat as the window to the base coat or the window to the color coat.
And you want to get that clear coat as clear as you can.
So, the first step is to apply the paint coating builder. And then you let that sit one or two minutes if you want to, and then just carefully wipe it off.
And then you’re ready to put the coating on.
And then let’s just, Ed, let’s talk about why we’re going to ceramic coat a car that’s going to be in a museum.
I mean, a lot of people think of a ceramic coating as something that’s going to hold up to repeated car washes and last through inclement weather, and you might not need that for a museum, but there is a good reason to put a ceramic coating on a museum car.
Ed: Well, it’s a great question, and I see where you’re coming from. It’s not like it’s going to see weather.
It lives in a pretty climate-controlled environment, but as far as we go through and we wipe down the cars, we detail the cars over the years, we’re going to get micro-scratching and stuff like this.
And this will protect that and help it keep, you know, looking as good as it can. It’ll have a great gloss for years to come.
Mike: Yeah. The ceramic, one of the things the ceramic coatings really do to paint is it gives it that candy look.
And everybody loves a glossy car. And so when this thing is going to be sitting on display amongst an incredible collection of cars, the paint is just going to pop.
And you know as well as I do, people are going to walk by and take pictures and videos and point at the color.
So the coating is going to just really do justice to all the polishing work we just did.
Applying the Ceramic Coating
Mike: So, now that we’ve went over the entire finish using the paint coating builder, that’s the first step. Next is actually applying the ceramic coating.
And there’s no magic really into applying a ceramic coating. It’s just what I would call tedious.
But you just apply—I’m using the opposite side from the one we just used. I put the coating right on there.
And then basically what most guys do is they like to kind of box out the section they’re going to coat.
Then they make an X pattern through it. And then the reason for that is then, as you start to overlap your passes, every time you go over that initial wipe you made, you’re kind of picking up some of that coating.
So you’re putting down an ample amount of coating. And you wait about 30 seconds to 45 seconds, and then you wipe it off.
Mike: So, what I like to do is what I call the buddy system. So I got a buddy. It’s Ed over there.
Now, after I put the coating on, Ed’s going to come over, and the first thing he’s going to do is he’s going to gently wipe this surface.
And what that does is it levels the coating. Make sure it’s completely uniform coverage over the entire surface area.
Then he’ll flip to another side of the towel and give it a final wipe.
Mike: And then, this is real important. After he’s done wiping, he wants to come back with a strong handheld light and inspect that area for what’s called a high spot.
And a high spot is simply just some coating that you didn’t quite get off.
In the old days when we used car wax, you might get a streak or a smear. So, it’s the same idea. It’s just some excess product that did not get wiped off.
And then once it passes your inspection, we’ll move on to this next step and basically do that to the entire car.
Mike: And the cool thing about a coating, unlike a traditional carnauba wax or a synthetic paint sealant, is that a coating pretty much makes a mechanical bond with the paint and it doesn’t wear off.
It’s pretty much what we call semi-permanent. It’s just as permanent as the paint.
You could take the paint off if you wanted to sand it off, but no one in their right mind does that.
Same thing with coating. You could take the coating off if you wanted to sand it off, but nobody in their right mind would do that.
So, you just come back and you just make a series of overlapping passes. And, you know, when you got paint polished up like this to a very high degree, it’s very smooth to start with.
And then I let Ed take over. So, he does the leveling, the final wipe, and then inspects for high spots and then follows me to the next section.
Protecting the White Leather Interior
Mike: So, Ed, when I look at this interior, it’s like this arctic white leather. It’s got to be incredibly expensive.
The last thing anybody wants to do is make a mistake.
So one of the most important things that I know is anytime you’re working on something like this, you want to make sure that the products you’re using—like a lot of leather products are tan in color.
You don’t want to stain white stitching or white leather. So you want to use a leather cream that’s actually white to start with.
Mike: And then a technique that I show, see all the perforations here for the heat and the air conditioning?
A lot of times if you put your leather cream on your applicator pad and you put that right down on there, you’ll fill those holes up.
So what I do is I’ll take and I’ll press the cream into my foam applicator pad so it’s not sitting on top. And then I’ll massage it in.
And that’s how I avoid clogging all those perforated holes.
And then besides that, just covering the whole thing with our cleaner and our conditioner. And not only will it look amazing, but it’ll be protected.
And when people take a look at it, their jaws will just drop.
Ed: You know, along with that, even though this car may not see a lot of use, you know, taking the family to the beach, we still need to preserve and protect it.
Mike: Exactly. Yep. We don’t want this leather drying out while it’s sitting on display. So, let’s get out.
Final Results on the Porsche 959
Ed: Well, Ed, what do you think?
Ed: You know, I appreciate all your efforts on this and all the help. I think the ceramic coating on it really enhanced the car.
You can see how the color pops even more. Has almost a plastic look to it.
Mike: So, here’s what I know is when we got here, this car looked amazing. But what I said in the beginning of this video says it’s easy to take a car that’s really bad and do a dramatic before and after.
It’s more difficult to take a car that already looks good to a higher level.
That your skill, your experience, the products, the tools, everything you do has to be at the very high end or you won’t get that improved look to it.
And I think we’ve accomplished that with this. This thing looks amazing.
Ed: It really did. I mean, I can see a difference in it. Like you said, to get that extra little 5%. Yep. That’s what I always wanted to call the shop, the last 5%.
Mike: Yep. But something like this, you know, and it’s here again, it’s ongoing training. It’s using the best products out there, the best procedures, and constantly learning.
Mike: Yeah. Well, I know you’ve got to go take care of a phone call right now, but I saw Mark, the owner, just walked in.
Maybe I can get him to come out here and just share why he chose this color for this car and what this car means to him.
Ed: Sounds good. Mikey, thank you for coming out. Have a good one.
Mike: Appreciate you.
Why This Porsche 959 Is Special
Mike: So, Mark, this is the first time I’ve ever worked on a 959. To be honest, I didn’t even know what they were till I did some research.
So, now that I know how special this car is, what’s your fascination with it?
Mark: Well, the beauty of the Porsche 959, it was every car manufacturer likes to have a halo vehicle that they could build.
And maybe they build one every 10 years, every 20 years, every 25 years.
And Porsche had come out with the 911 way back in the 1960s. And of course in the ’70s they came out with the 930 Turbo, which again was a supercar standard.
Well, they had to come up with something in the 1980s, and in the 1980s, of course, Porsche started looking with that, you know, front-engine design, and they got into the 924, 944, 928 series.
But a lot of people that really love Porsches said, you know, that’s not a real Porsche.
And so Porsche decided to build what they call the Porsche 959.
Now, they only built 292 of these worldwide, and they built most of them in 1987 to 1988.
So, the very first thing you saw is something that’s totally unique when you look at it. It’s not your typical vehicle.
And since they made such a limited number and they were never officially available for sale in the United States when they were new, well, most of the 959s, let’s face it, they were silver, they were black, white, or red.
Typical Porsche colors.
Mark: Bruce Canepa from Canepa out in California, he worked with Porsche to actually be able to build the Porsche 959.
So Bruce has said that everybody who builds one of these, he will build it in a unique color if he so choose.
And if he builds it in a unique color, nobody else will ever have a vehicle built that color under his SC program.
Choosing Ruby Stone Red
Mark: So, knowing that I don’t plan to drive this as an everyday vehicle, we definitely were showing it here at the American Muscle Car Museum.
I wanted to pick something that’s bright. You know, if you picked black, white, red, silver, nobody would know it’s a new SC.
Mark: And we already have two other 959s here in the museum.
We have a silver 959 that’s beautifully restored with about 7,000 original miles. And then we have a red one. Okay.
Classic Guards Red with a little less than a thousand original miles.
Mike: Wow.
Mark: But this vehicle, I wanted to pick something truly bright. And so the color is called Ruby Stone Red.
And we’ll be having the car on display here. And it truly is a stunning automobile.
And I want to thank you for all your effort. You’ve come here, donated your time, donated products from, you know, Dr. Beasley’s to be here.
The car looks absolutely fabulous.
We have all LED lights here, so it’ll show any imperfection, any smudge, any flaw. It does.
And it’s just truly outstanding. So, I want to thank you for your time coming here today.
A Reimagined Supercar
Mike: Well, I always appreciate when anybody trusts me or Dr. Beasley’s to touch their toys, and this is an incredible toy.
The other standout things that I kind of picked up on listening to Bruce Canepa talk about this car is this is what he calls reimagined. Correct.
So, it’s not restored. It’s enhanced to be the best it can be using all the latest in technology.
Yet it has great vision. Like a lot of supercars are compact, tight, and you can’t really see out the sides, and there’s actually room in here to hold your luggage.
So, you could take—it’s a supercar that can not only be tracked, but it could also be a daily driver or go across the country.
Mark: You could if you wanted. You’d get a lot of attention if you went coast to coast in this vehicle.
Mike: You would have lots and lots of people taking videos as you would go down the highway.
Mark: I know I would. Anyway, thank you very much for letting us be a part of this, and I can’t wait for the unveiling.
Mark: Okay. Well, thank you.
Questions? Comments?
Email Us