


Last Updated August 25, 2023
In the car detailing world, whether you’re the detailer or the customer, it’s vital to capture the before condition of the paint for a number of reasons:
1: To document the current condition of the paint.
2: To determine which steps and how many steps to perform to remove the paint defects and restore a swirl-free, show car finish. This helps to also choose the best detailing service package to address the paint defects as well as the customer’s budget and expectations.
3: To share with the AFTER pictures to document the work performed as well as share on social media to promote your detailing abilities and/or your detailing business.
As a professional detailer and also an instructor in the car and boat detailing world, I need to capture the before shots, for marketing my detailing services and also my car and boat detailing classes. When you show the before pictures followed by the after pictures, you can prove you are a professional detailer to help others make the decision to use you as their detailer. In my example as an instructor, I show the before pictures for the training cars for upcoming classes to show people what they get to work on and how bad of condition the vehicles are that people will get to work on.
Another reason it’s important and helpful to know how to capture the swirls shots is to then send to a potential detailer via texting, so they can see the current condition of the paint as this better helps them to give a potential customer a ballpark range for what it will cost to undo the damage. Of course, it’s always important to see a vehicle in person because often times, even good pictures don’t share the complete story.
Common paint defects
The most common type of paint defects normally found in a car’s finish include:
- Swirls
- Scratches
- Water spots
- Oxidation
Use bright, overhead sunlight to capture swirls
The sun is an amazing swirl finder light, it just has to be present to be useful. This means you need a sunny day as a cloudy sky tends to hide any pre-existing defects. If using overhead sunlight, pick a time when the sun is high overhead. Then stand on the side of the car in a way that the reflection of the sun is bouncing back into your eyes.
Tip: It helps to take a picture that includes part of the car — don’t just take a picture of the sun reflection in the paint. The reason why is often times your camera will not focus properly without something providing contrast in the picture. Also – we want to see the LOCATION of where you’re shooting the picture for context.
For example, take this 1968 Camaro I photographed to document the current condition of the paint finish before doing the paint correction steps.
Here’s the frame-up shot
From this picture I can see the entire car and I can easily identity make and model.

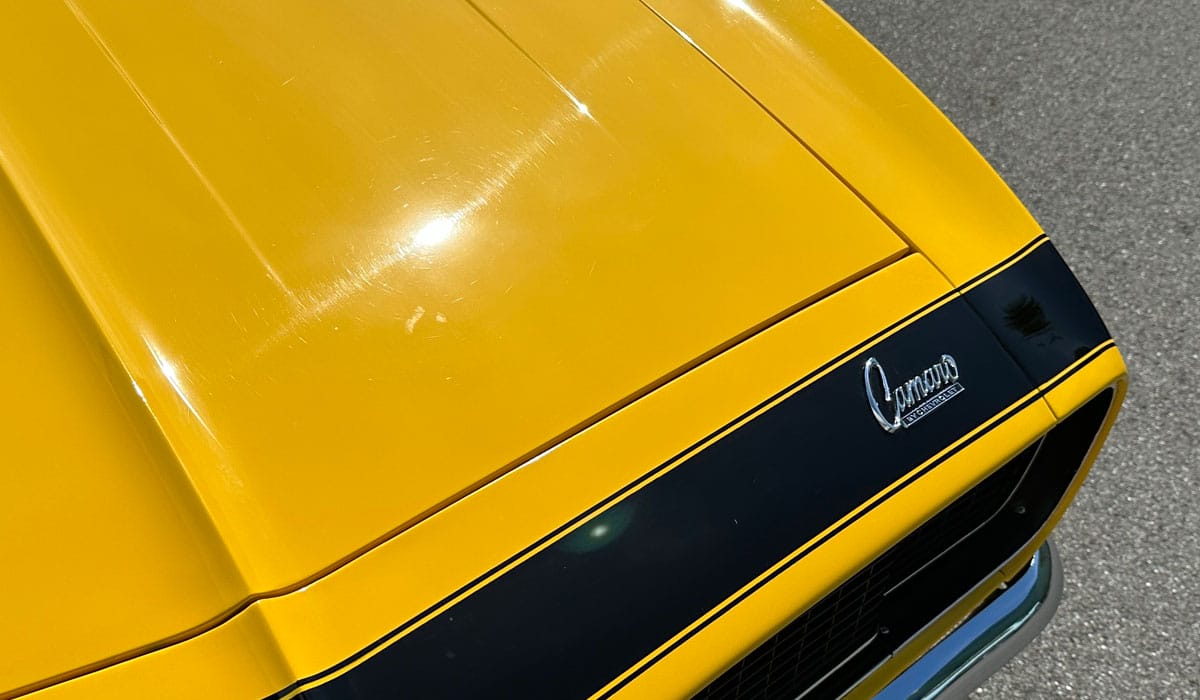
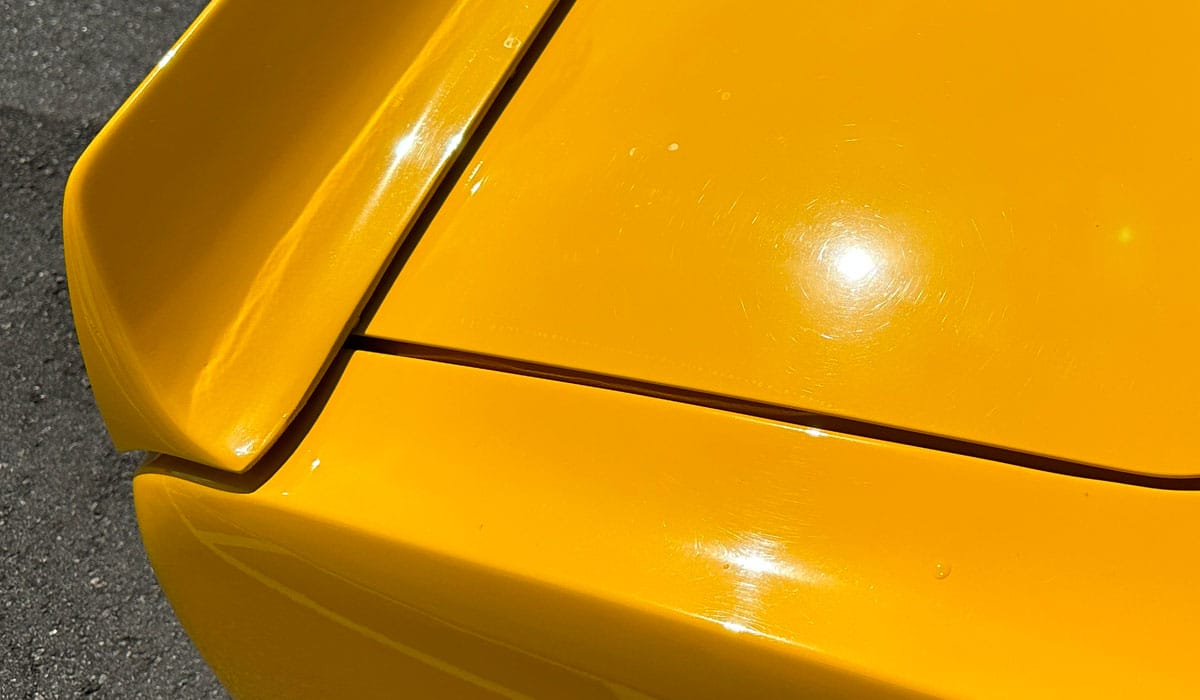
Taking photos of swirl shots on the hood
See how I captured the sun in the paint but also capture the front driver’s side corner of the Camaro? Keep in mind, the hood is the most looked at and also most inspected before and after a detail job.
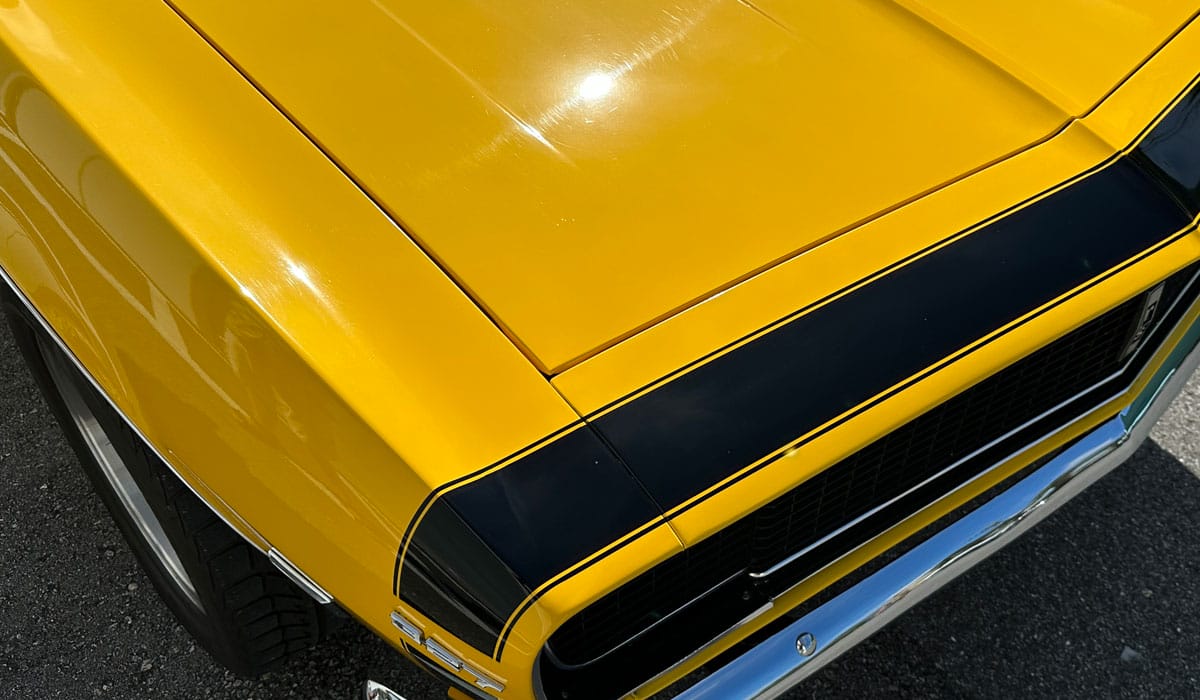
Swirl shots on the hood
Same concept here, captured the swirls in the paint on the hood and you can easily see the location of the car I’m photographing.
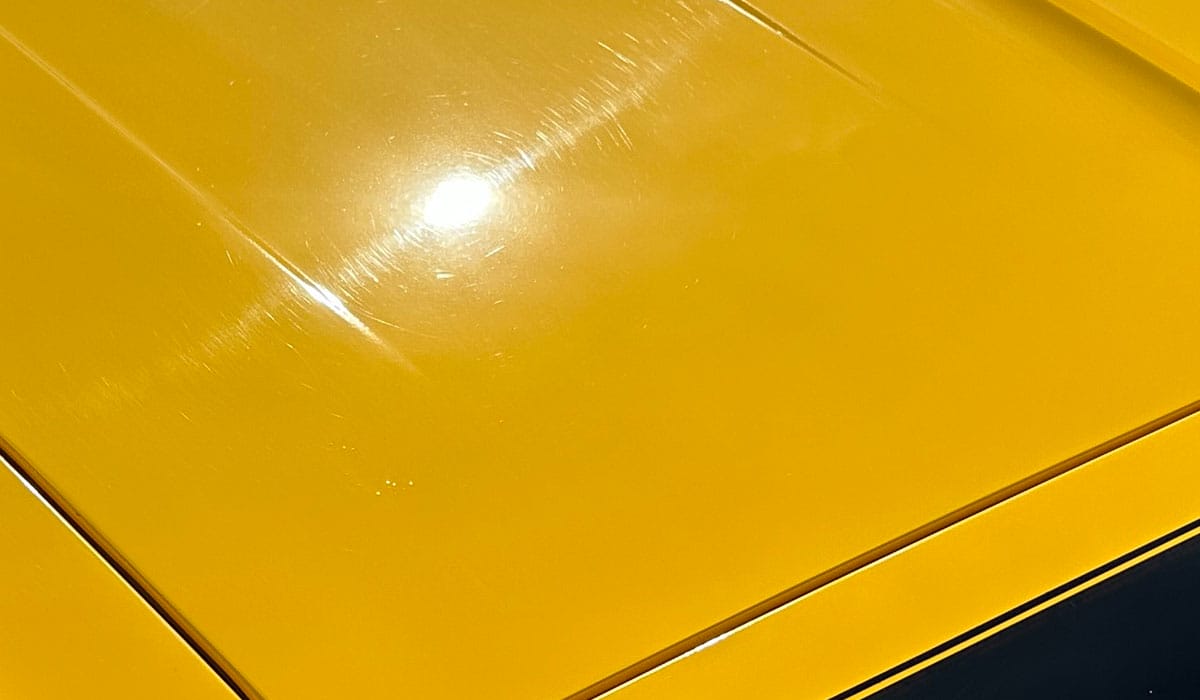
Cropped out section
This is the same photo above only I cropped out the surrounding fluff and zeroed in on the pertinent portion. I’m using an iPhone 14.
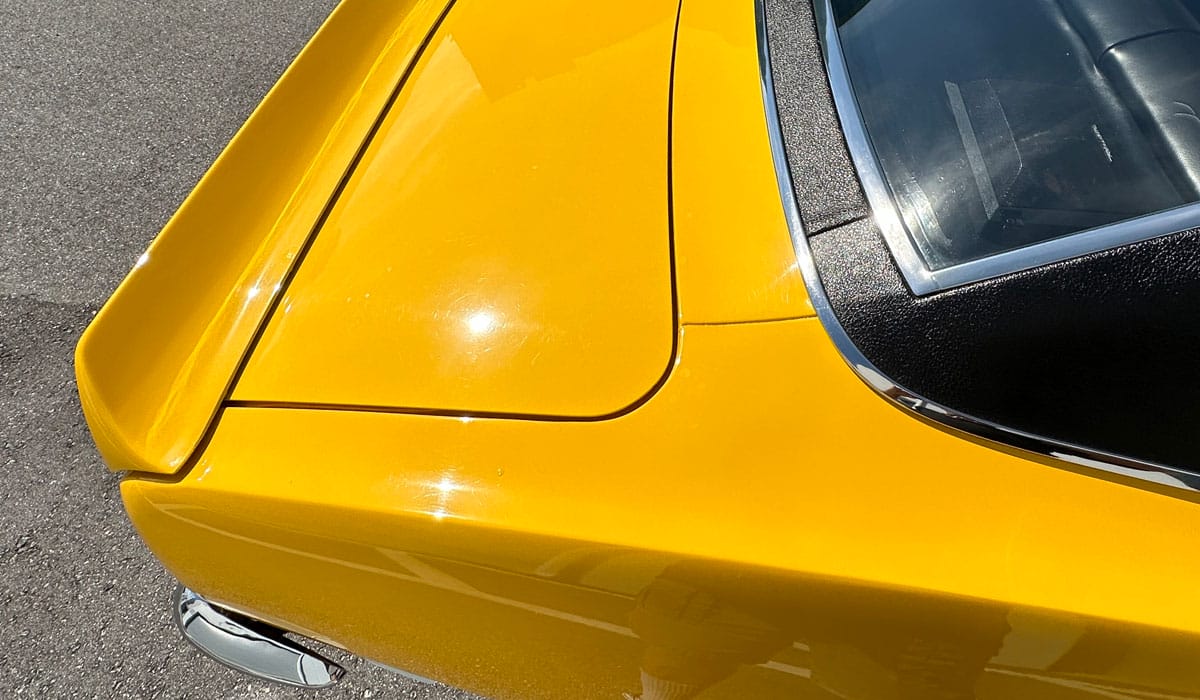
Frame-up shot
You can easily see I’m shooting the top of the trunk lid on the passenger side of the car.
More swirl shots
You can easily see where the sun is shining and lighting up 3 different areas on the back of the car – all totally swirled-out.
Using a step stool
I’d also just like to add that if you’re working on a truck, van or sports utility vehicle, it can help to capture swirls and scratches on the horizontal surfaces by standing on a step stool, ladder or work platform. The important thing is to capture the swirls BEFORE you start any paint correction steps. The time to get the swirl shots are before you start. It’s all too easy to get busy doing the work and skip getting great before shops but you’ll always regret it after the fact. So STOP. Slow down and get great before shots.
Focusing the lens
These days phones have amazing lenses with great auto focus that makes picking up swirls in the paint very easy. Sometimes, especially when you’re dealing with lighter paint colors, it can be hard to focus the camera on the scratches because there isn’t enough contrast between the scratch and the paint. In cases like these, place a small object — a piece of clay, a penny, your finger — to help the lens find the focus.
How to capture etching, water spots, stains and oxidation in car paint
All of the tips I shared above also apply to etching, water spots (both Type I and Type II), surface stains, oxidation, holograms — pretty much any paint defect you can think of. It’s all about having a powerful light (preferably the sun), aiming the camera at the right angle and making sure it’s focusing on the defect at hand.
One last tip – clean the camera lens!
The most common problem I see when looking at other people’s pictures is for the pictures to look cloudy, or out of focus. The usual suspect is a dirty camera lens. This is especially true when using your smart phone as your camera. Your fingers are always grabbing the phone and it’s all to easy to leave fingerprint smudges on the lens. So before you shoot, look at and inspect the lens and if needed, wipe it clean.
Taking photos of swirls is just one of the many topics I cover in my detailing classes, and I’ve almost always got one coming up with my employer Dr. Beasley’s.
These classes are 100% hands-on with no chairs, no powerpoint and no sitting! My classes typically cover advanced paint correction topics like multi-step corrections, how to use rotary polishers and wet sanding. Many of my past students have gone on to start successful detailing businesses — this is the perfect place to get your start as a pro!
Click here to get more information, dates, locations or to sign-up for an upcoming class!
What are you working on?
Besides detailing cars professionally, teaching classes on both car and boat detailing and writing articles and making videos sharing tips and techniques on these topics, I also love answering questions and helping others to success for their projects in their shop or garage. If you have any car or boat detailing questions, as well as glass polishing questions, feel free to reach out and I’ll do my best to help.
Mike Phillips – 760-515-0444 – Mike@drbeasleys.com
Questions? Comments?
Email Us