


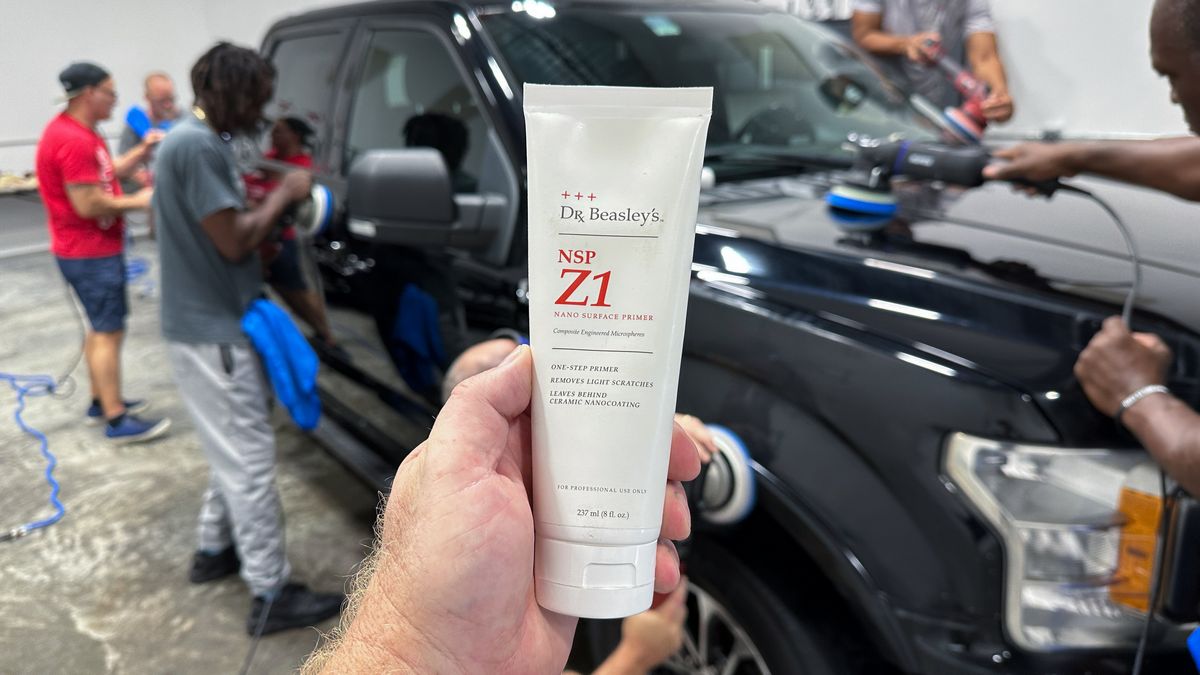
Last Updated June 1, 2026
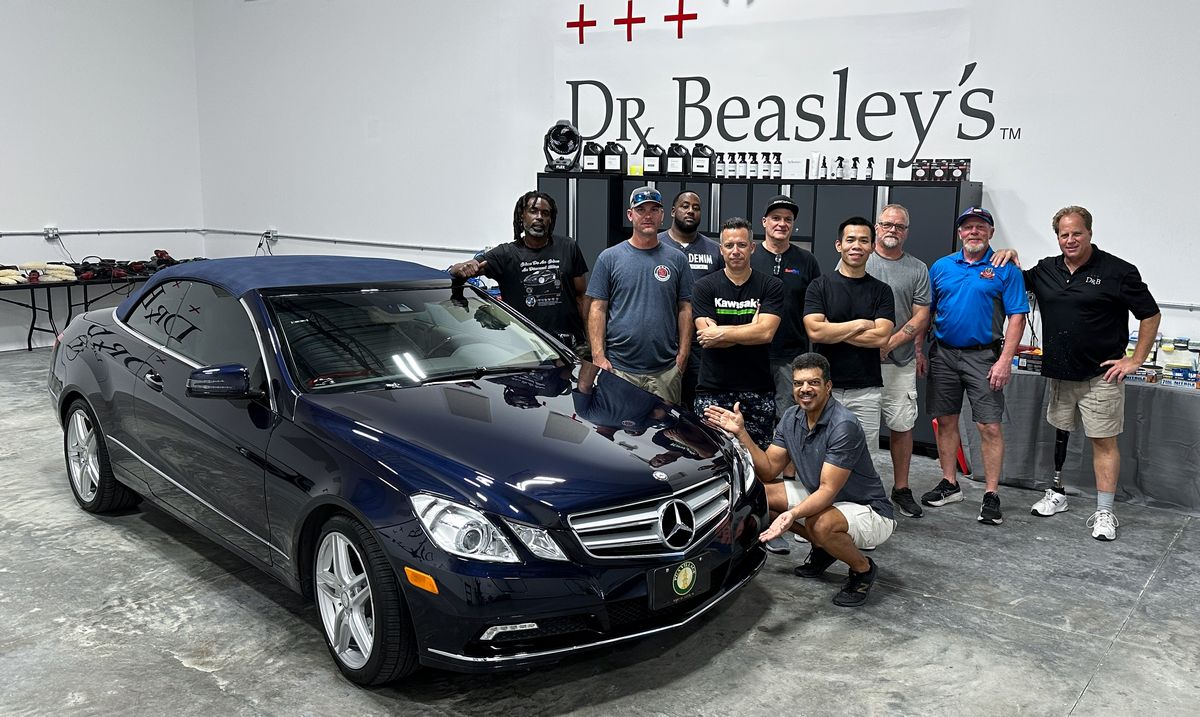
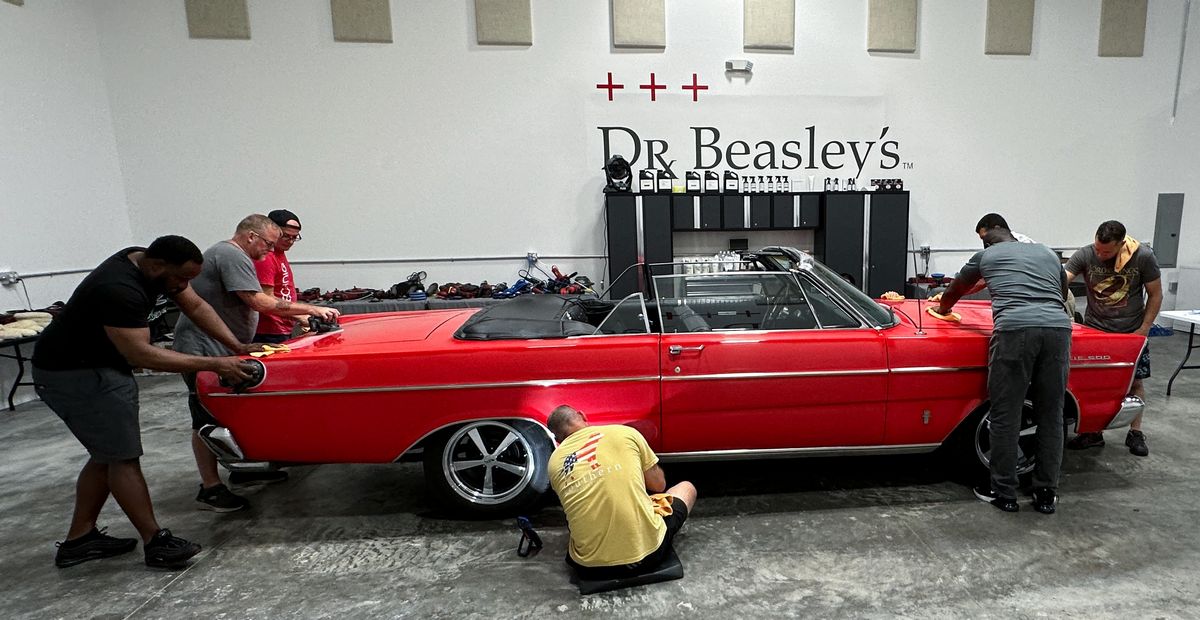
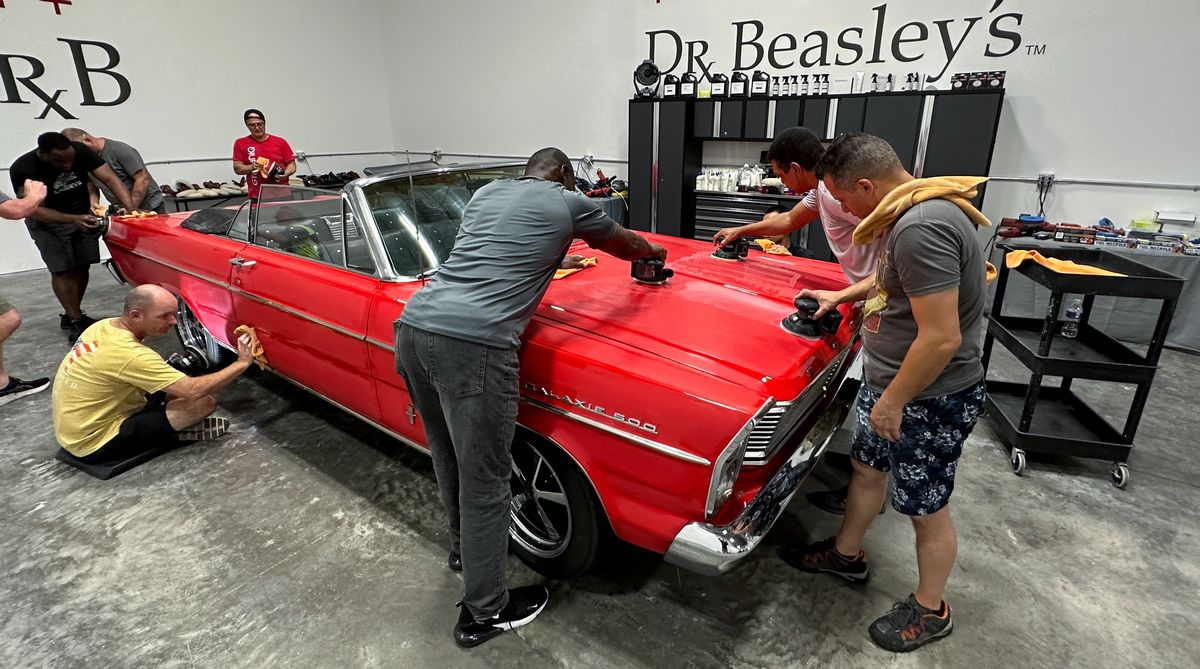
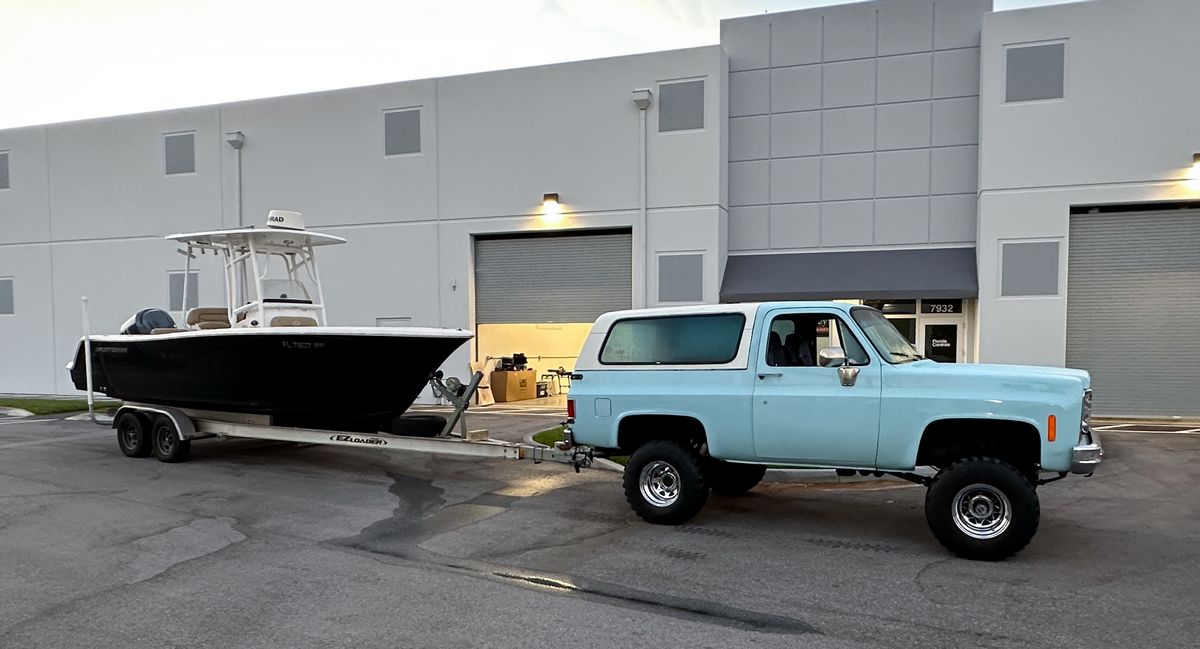
From Friday, November 10th to Sunday, November 12th, we held our first full 3-Day Auto & Marine Detailing Class here at the Dr. Beasley’s O.R. or Operating Room in sunny Stuart, Florida as part of the “Future of Detailing” education series. Over the course of the three days, students detailed six cars and one boat. Each vehicle was used to teach unique techniques and each vehicle came out looking better than new. The boat came in with deep oxidation and left with a mirror gelcoat finish.
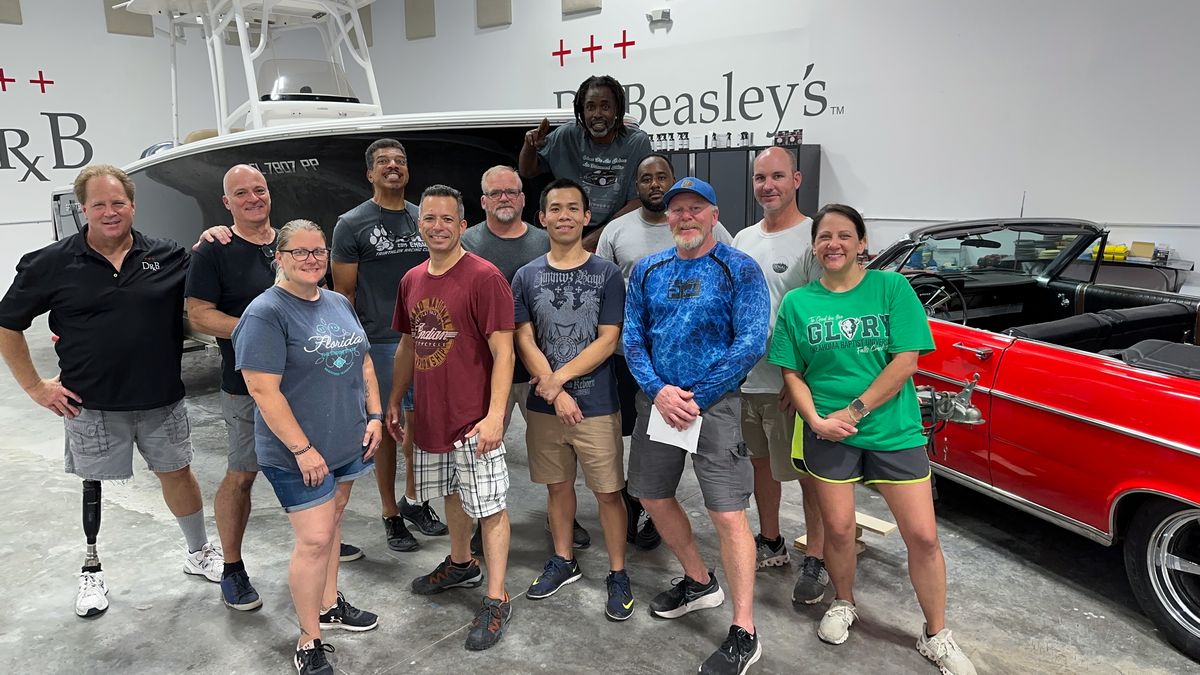
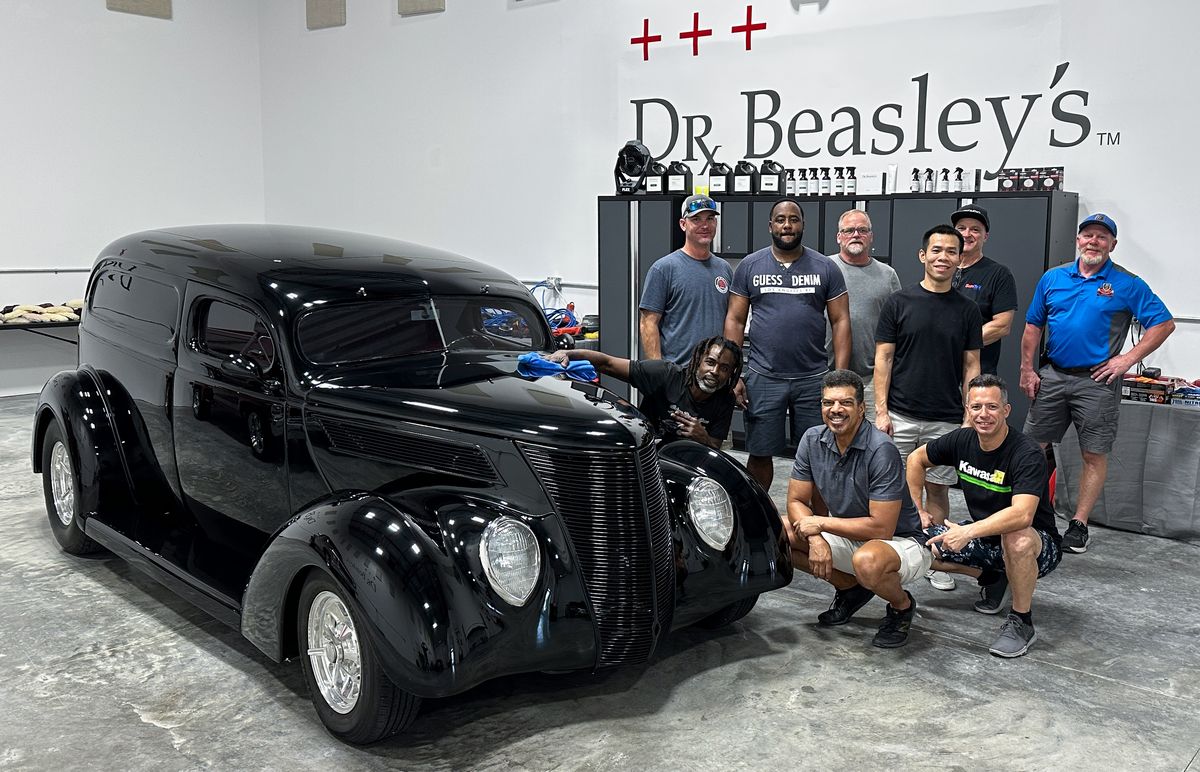
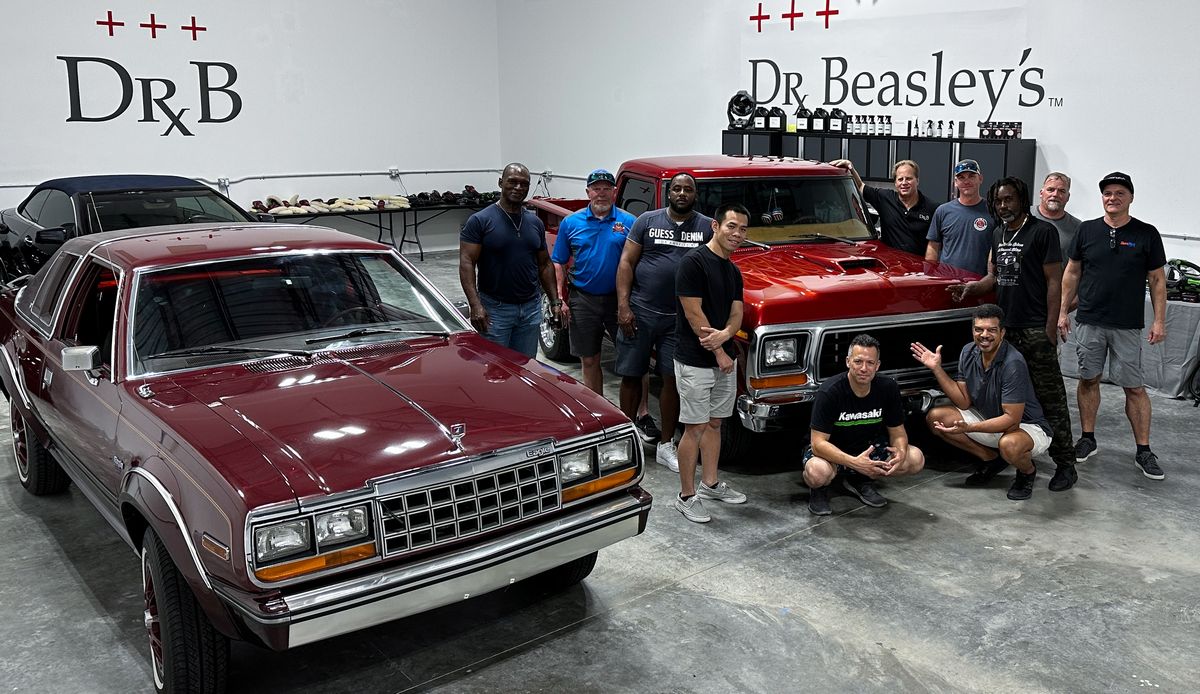
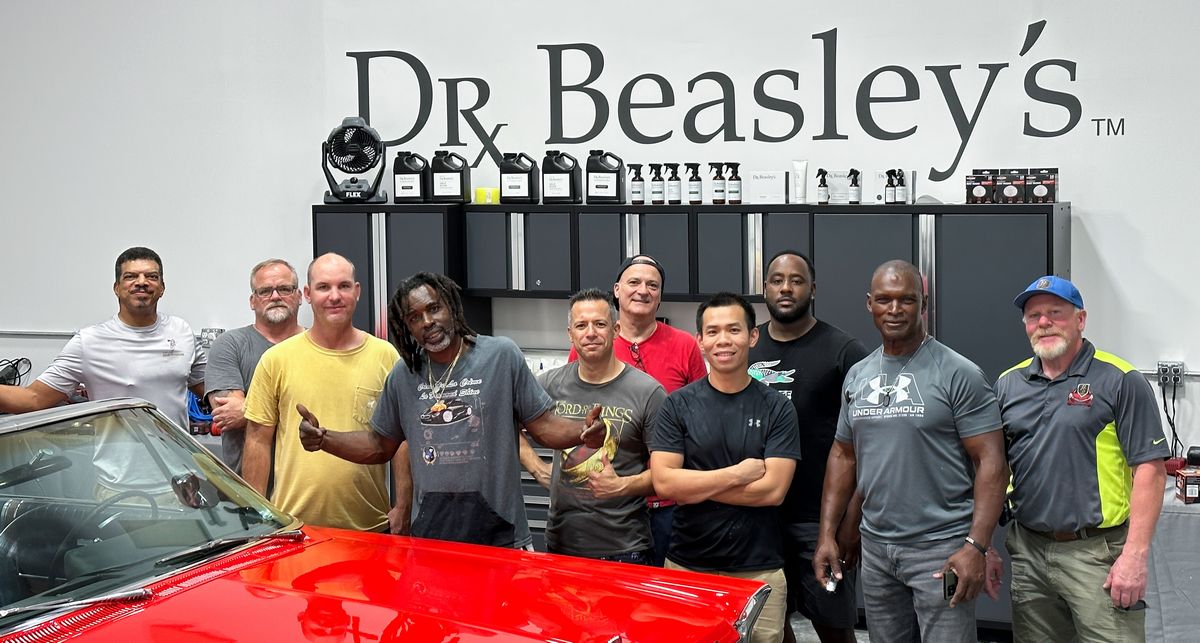
Meet the Graduates
After 3 long days of fun, these folks have earned their certificates! Meet your November 2023 3-Day Auto & Marine Detailing Class graduates:
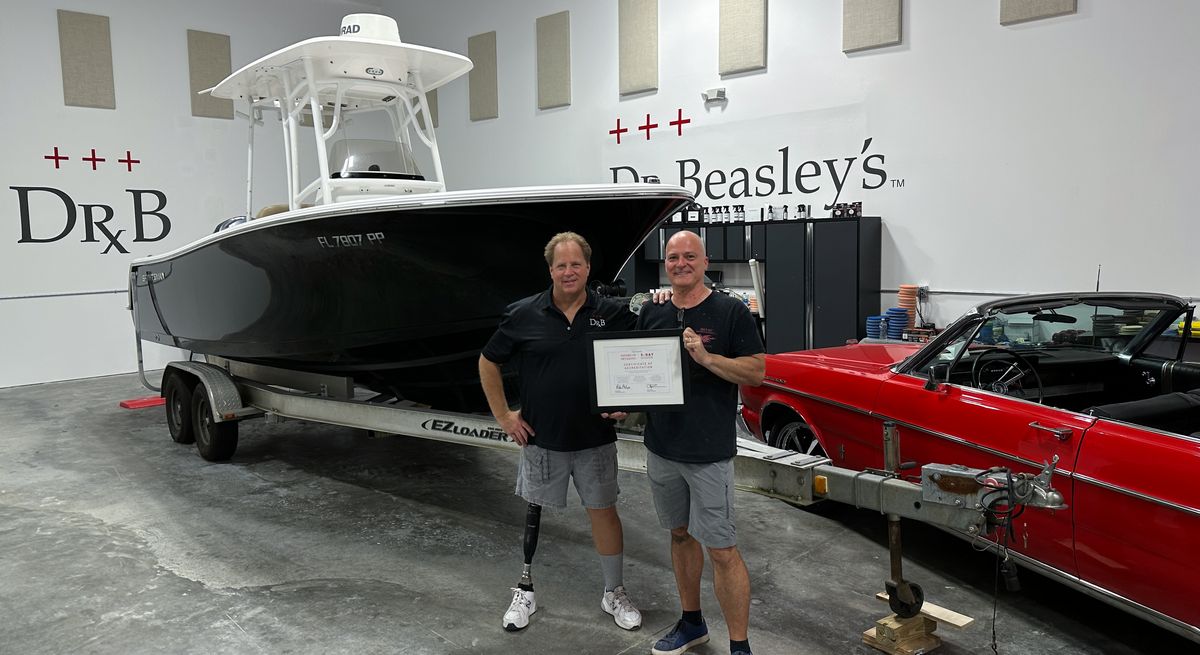
Derick Robinson – Jacksonville, Florida
Website: Crème de la Crème La Diamond Shine – Facebook – Instagram – NextDoor

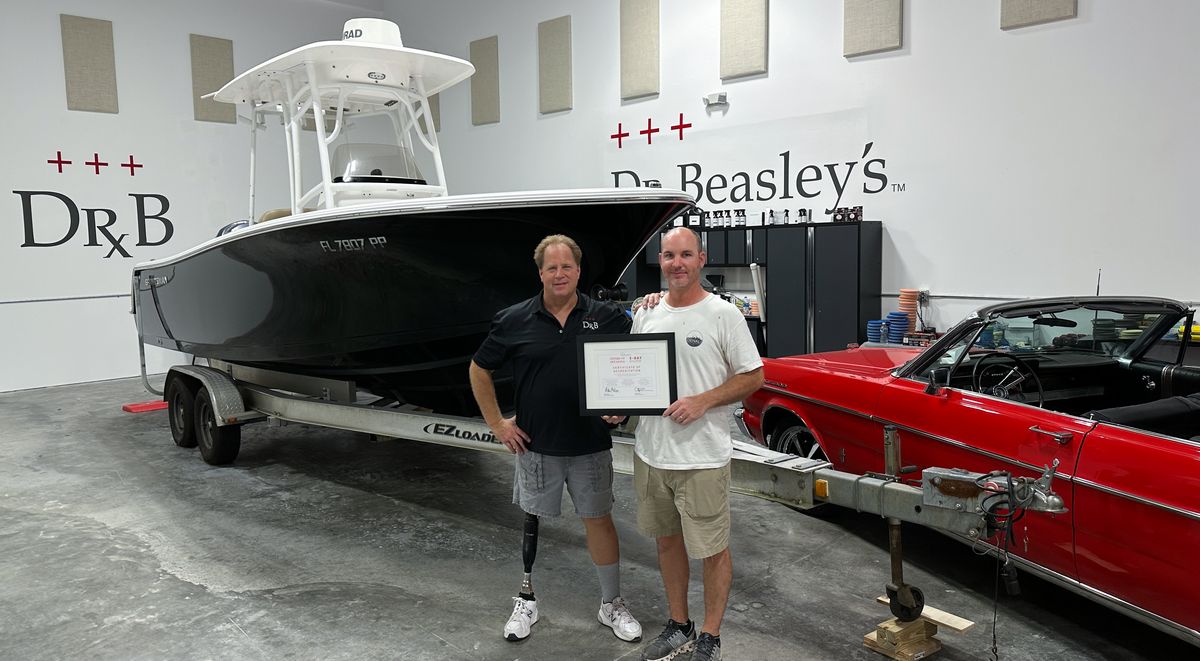
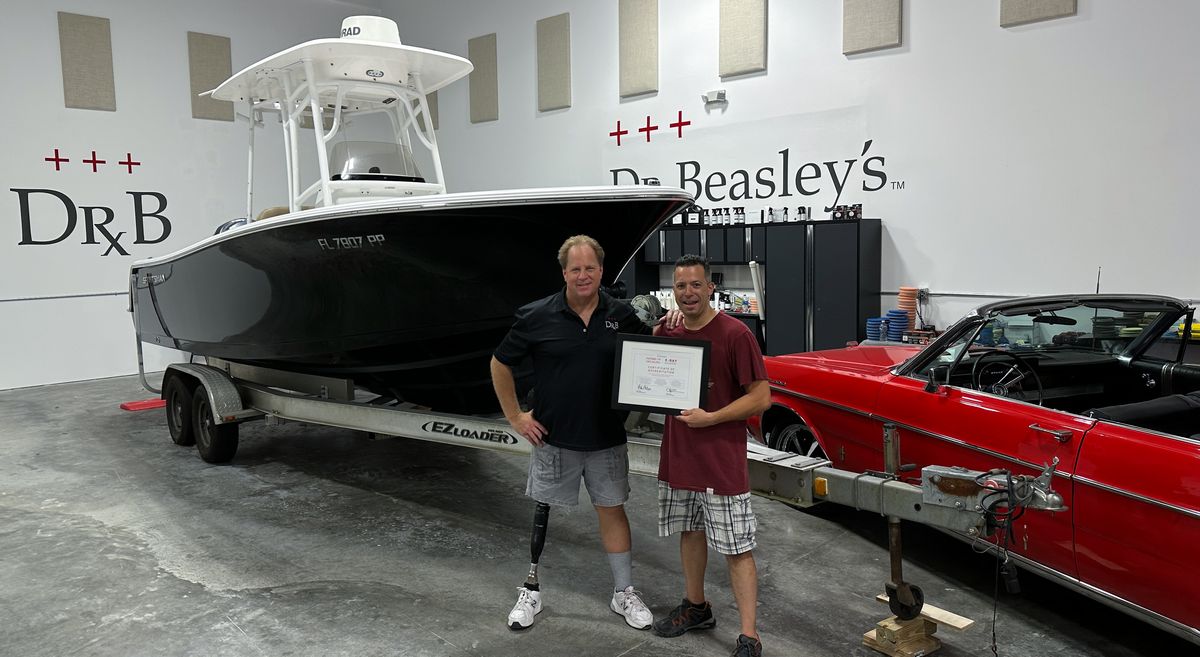
Thomas John – Denton, Texas – Traveled 1,300 miles!
Website: Caribbean Sparkle – Facebook – Instagram
Daniel and DeAnne Brunson – Montgomery, Alabama – Traveled 600 miles!
Facebook – Instagram
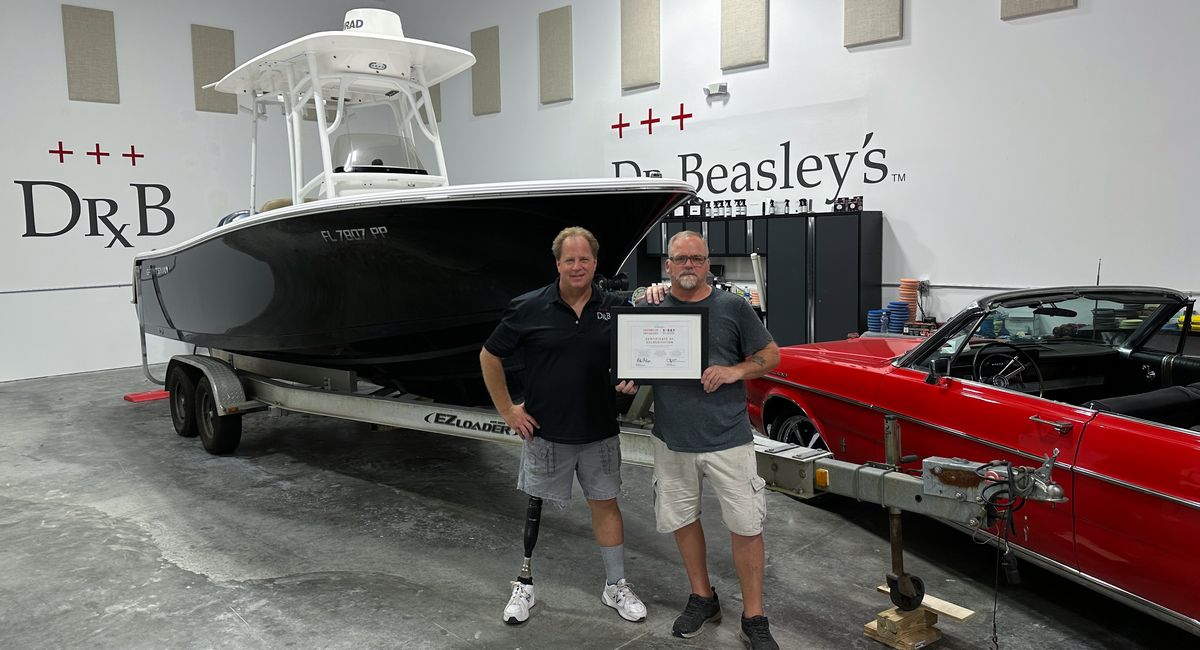
David Hess – Fort Pierce, Florida
Joe Melcarski – Fort Pierce, Florida
Website: Keep it Glossy Ceramic Coating Experts – Facebook
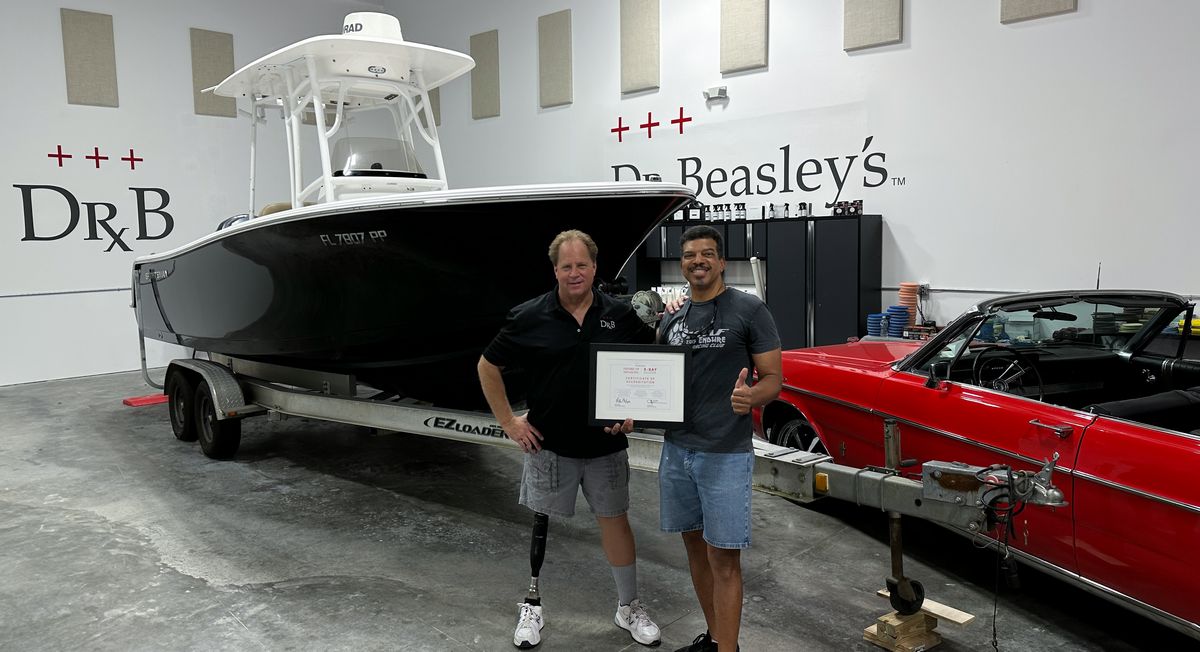
Jhonathan Rivera – Port Saint Lucie, Florida
Business: Eagle Coatings
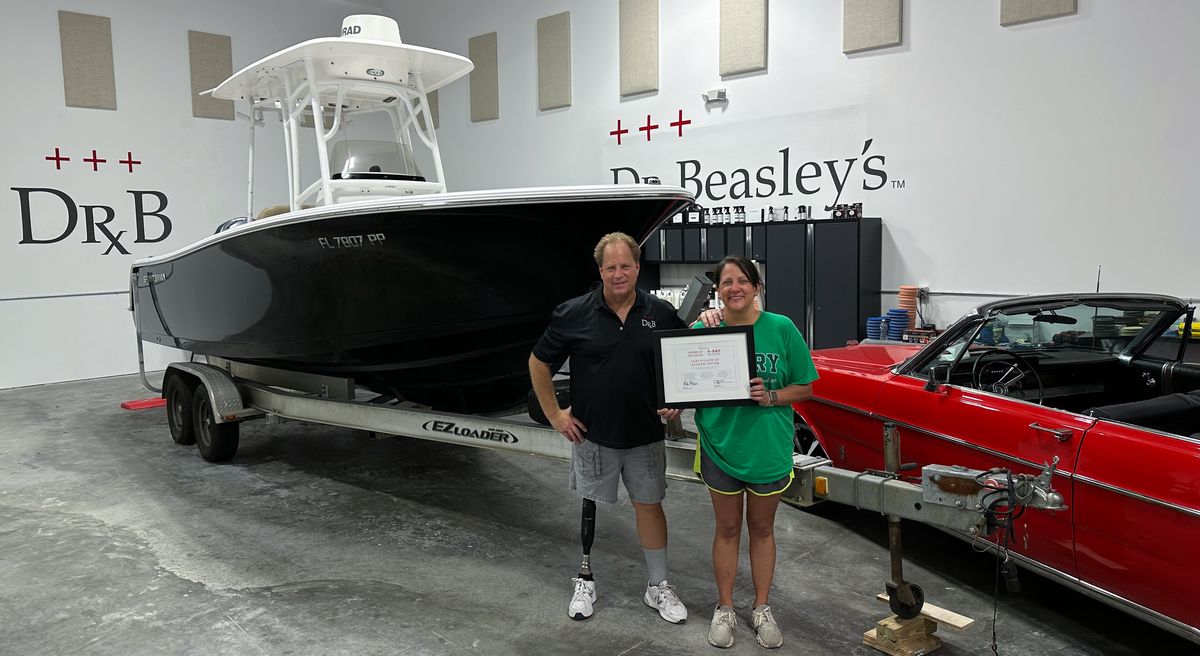
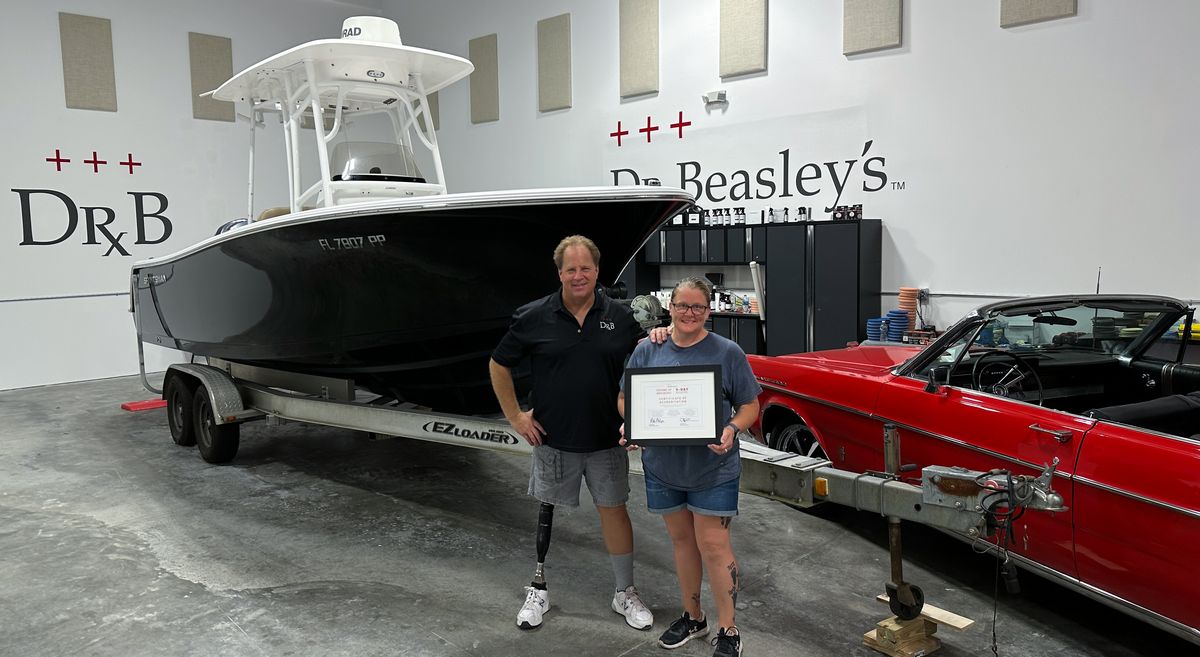
Crystal Peffers – Tampa, Florida
Business: Crystal Clear Detailing – Facebook
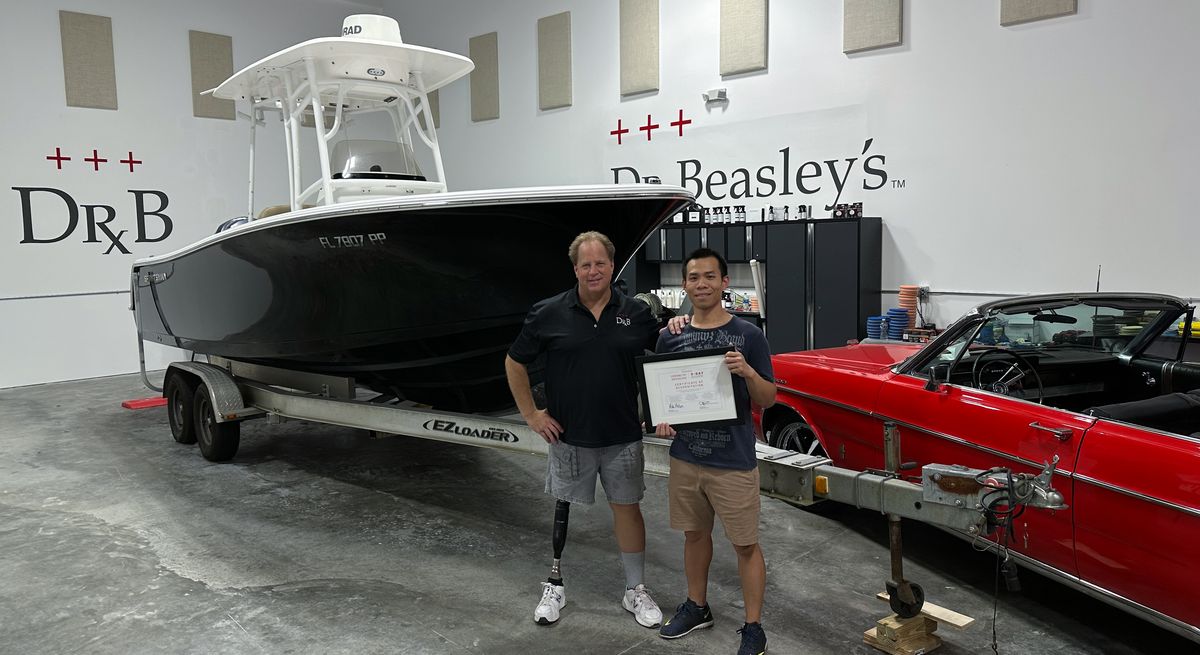
Andy Tong – Palm Beach Gardens, Florida
Website: Facebook – Instagram – YouTube
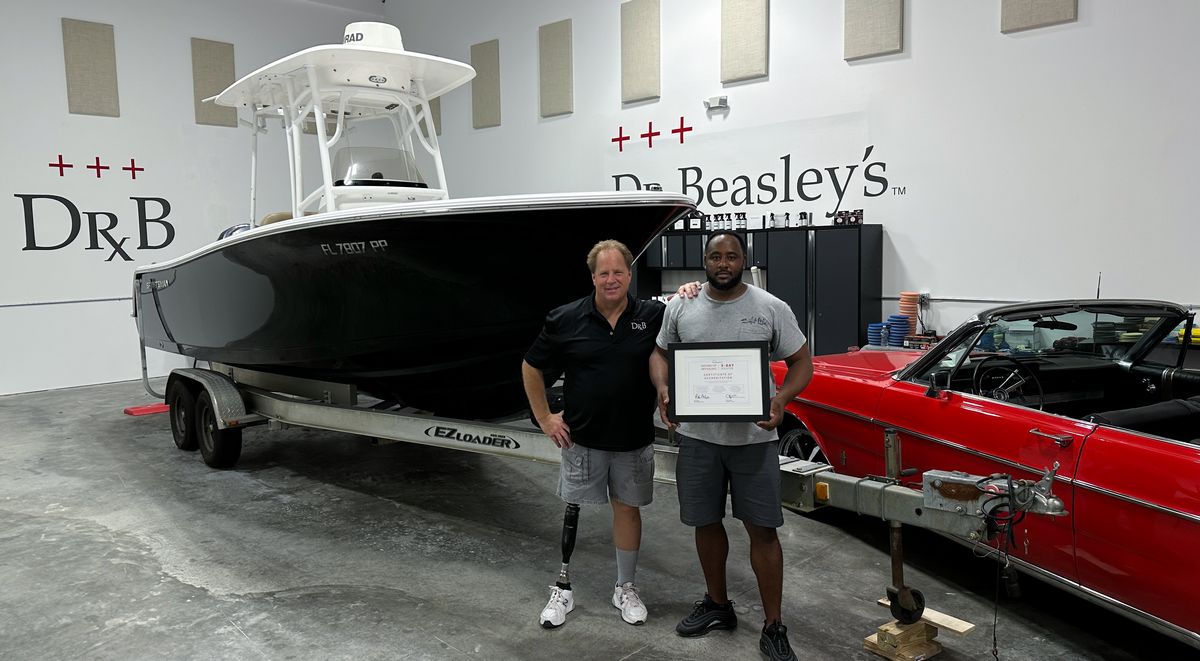
Lameko Simmons – West Palm Beach, Florida
Business: Big Bros Cleaning and Boat Services
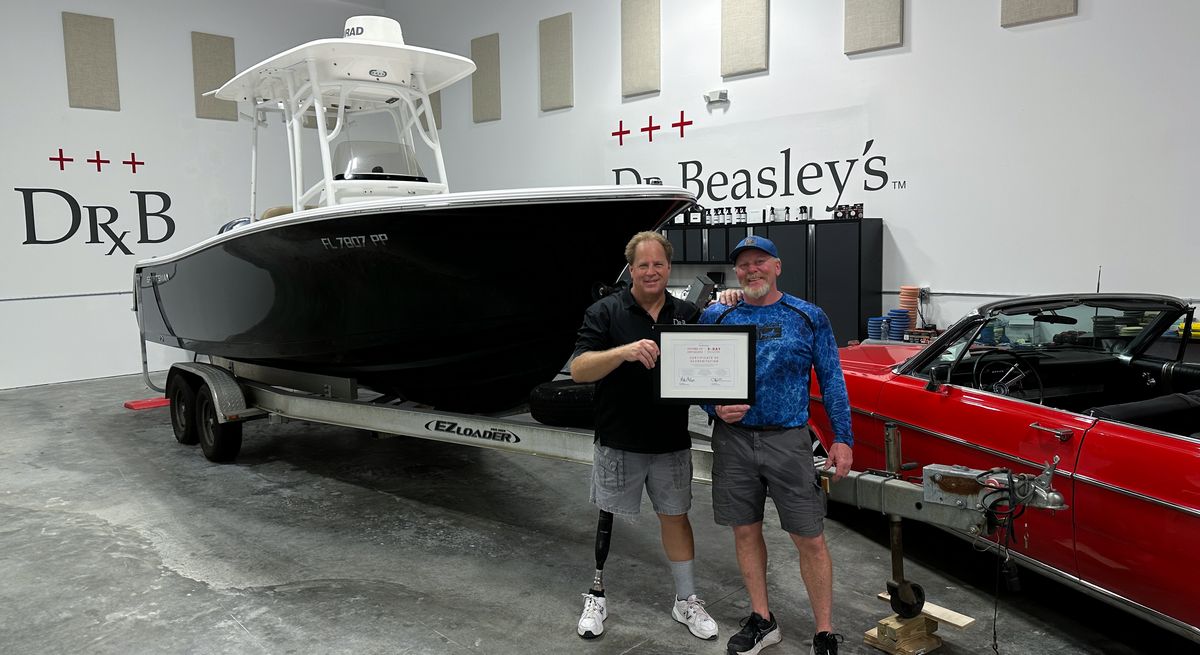
Russel Stender – Yulee, Florida
Website: Perfect Shine of Jax – Facebook – Instagram – YouTube
Note: Russel was my co-instructor for this class. As a seasoned, professional detailer, he’s a great instructor and a wealth of knowledge based upon real-world experience.
Group Photo — 3-Day Auto & Marine Detailing Class Graduates
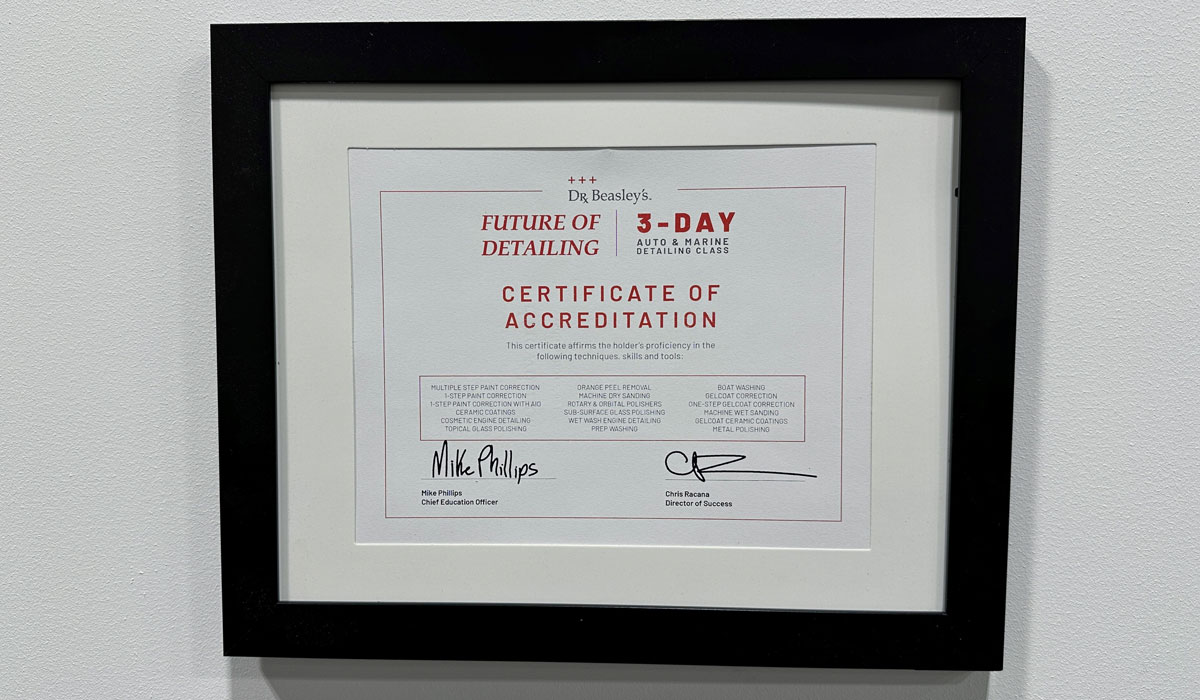
Framed & Signed Certificate
This is the “Certificate of Accreditation” students posed with for their graduation photos. Individual framed certificates personalized with the graduate’s name were mailed from Dr. Beasley’s Chicago HQ after class. We make sure these certificates list the major topics students trained on so you can proudly communicate your skills in your shop, garage, mobile work rig or home office.
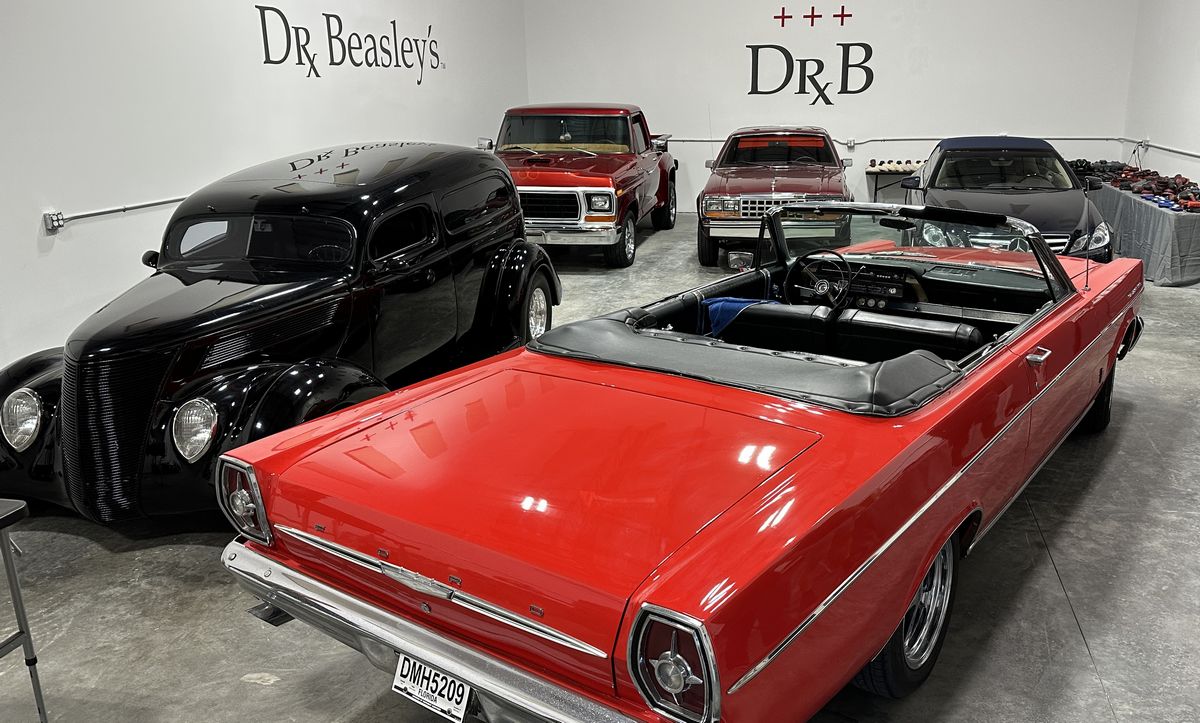
Training Cars (and Boat) for our 3-Day Auto & Marine Detailing Class
Here’s a brief overview of all the cars (and boat!) we detailed at our 3-Day Auto & Marine Detailing Class with a quick description of the topics we covered.
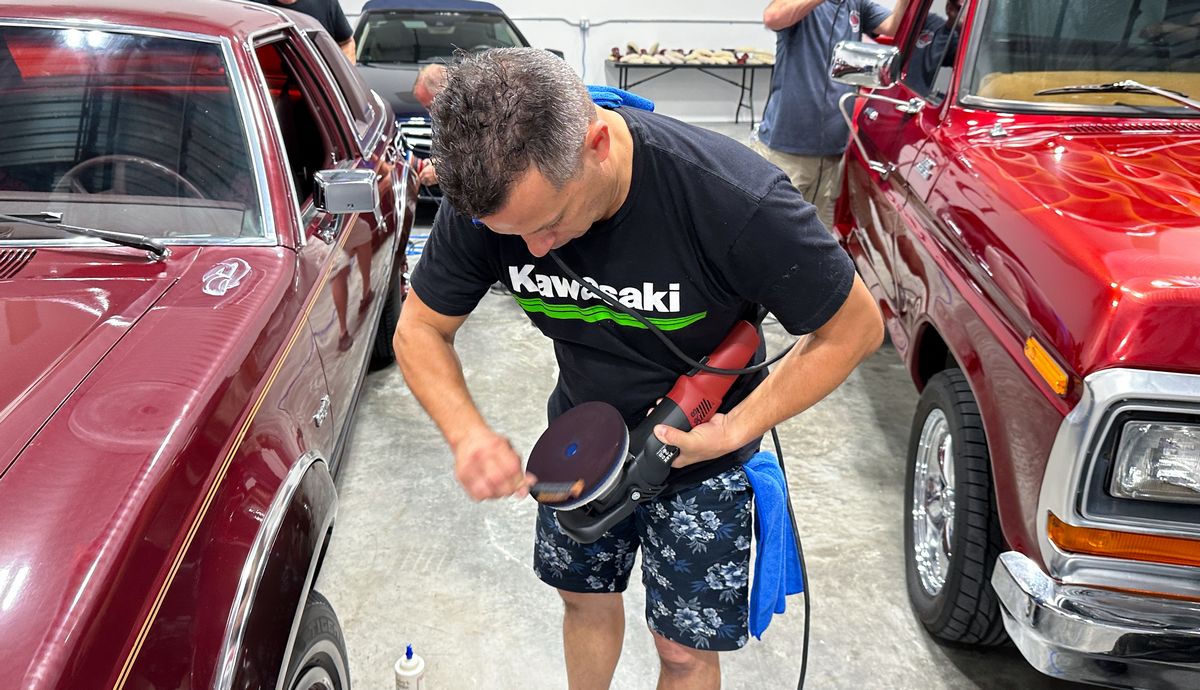
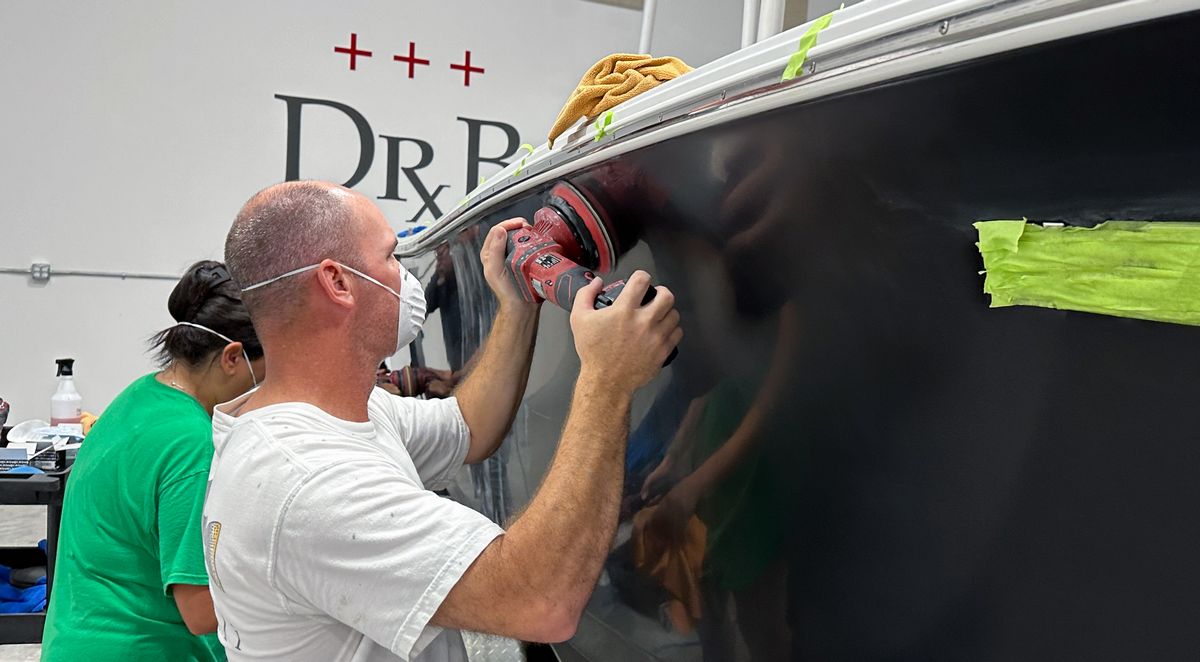
Friday Morning Session – Multiple Step Paint Corrections learning how to use rotary polishers, orbital polishers, plus Dr. Beasley’s Nano Surface Primers & Ceramic Coatings.
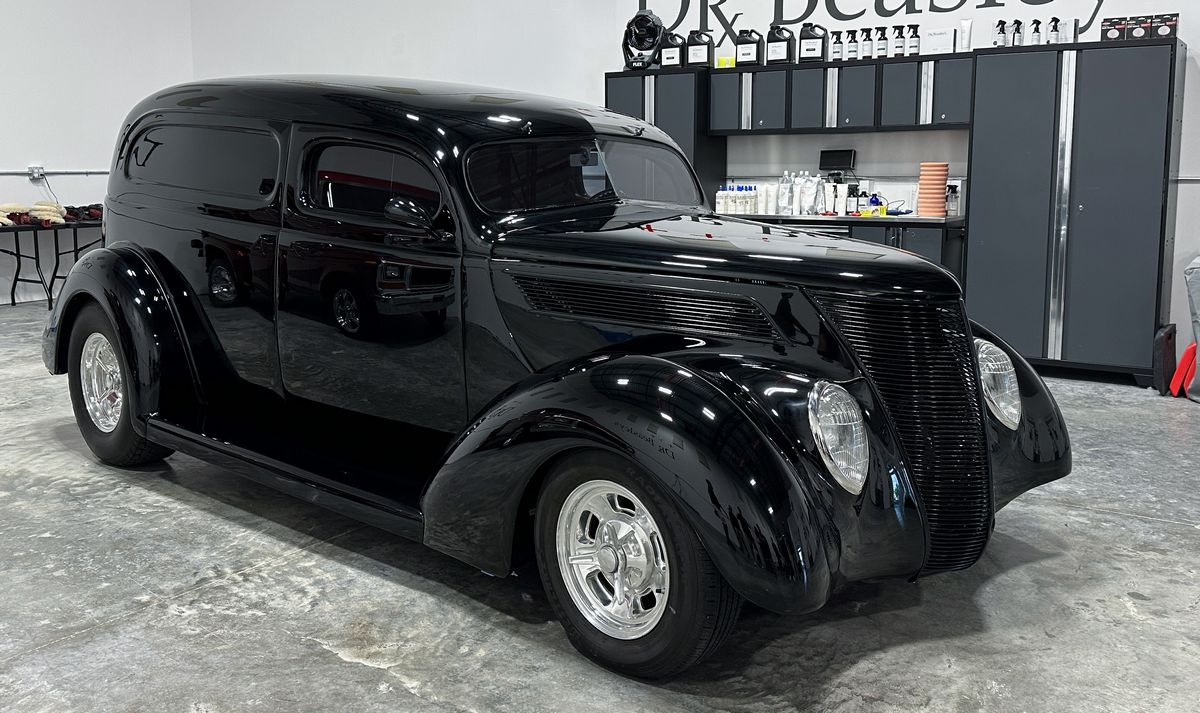
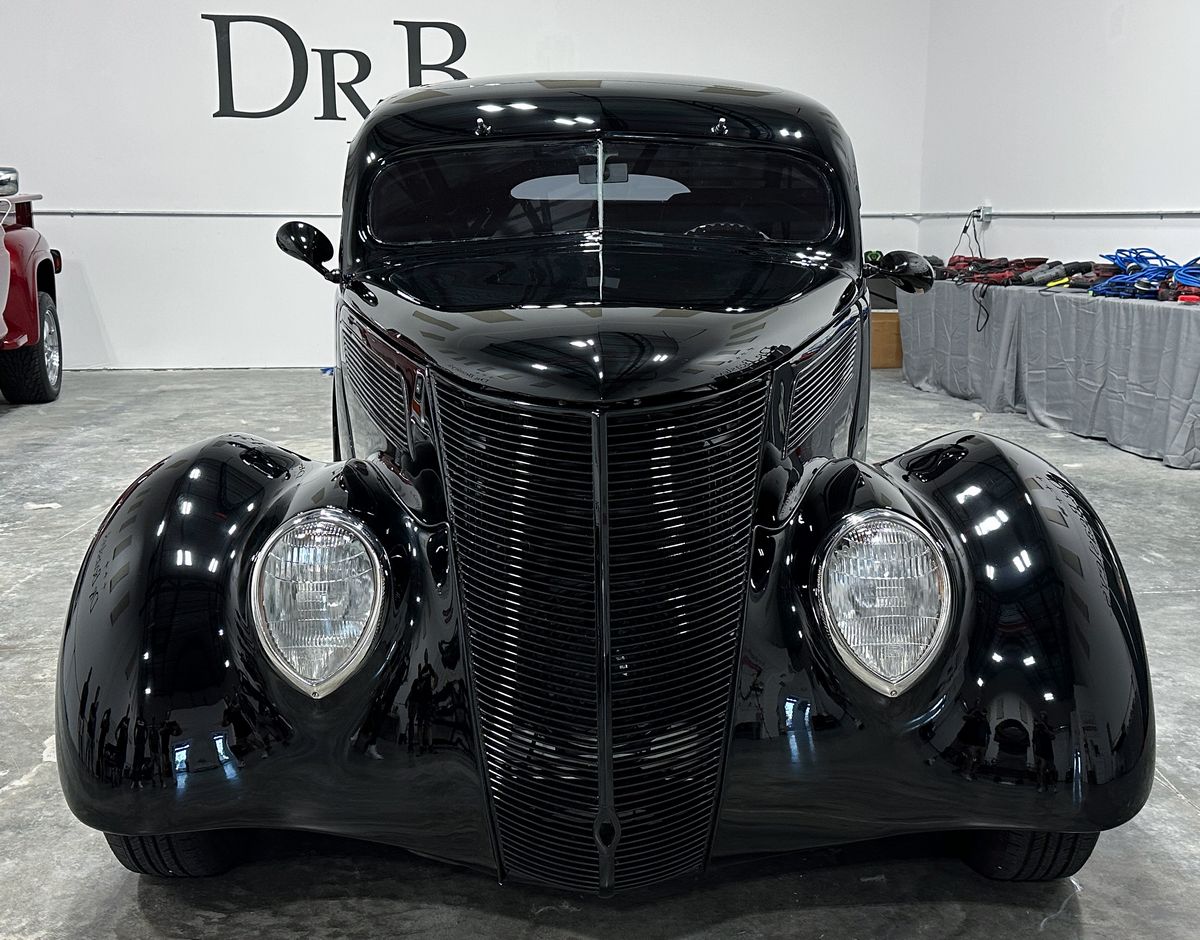
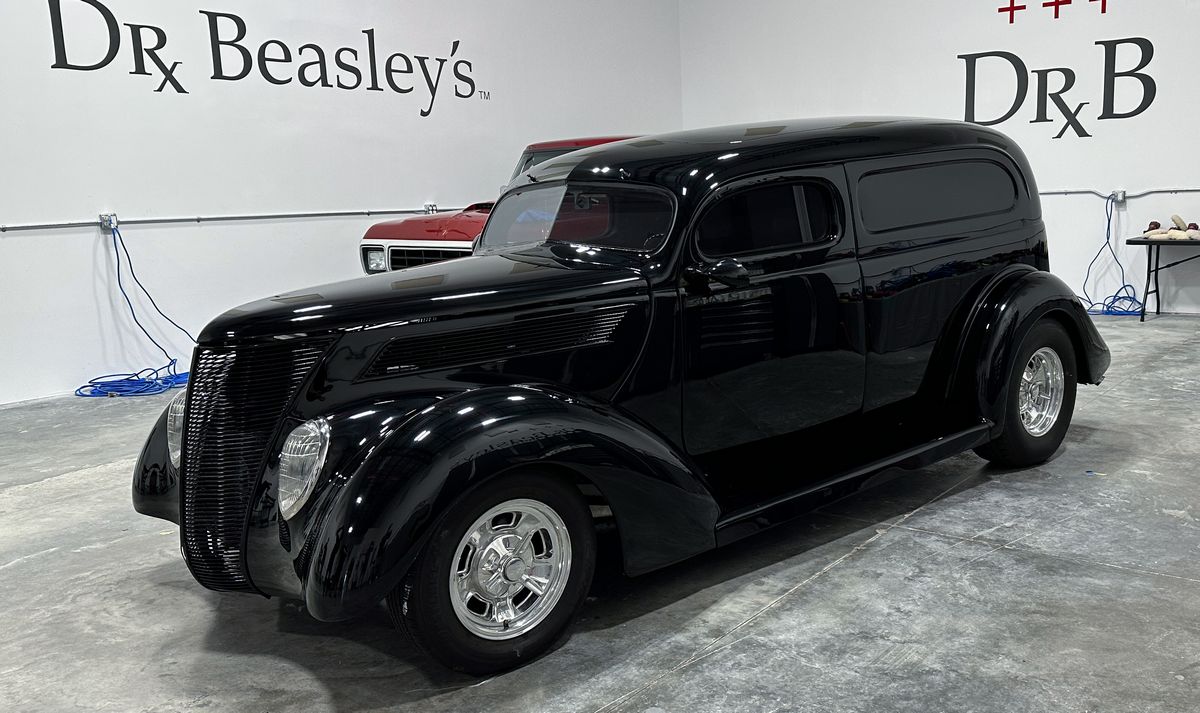
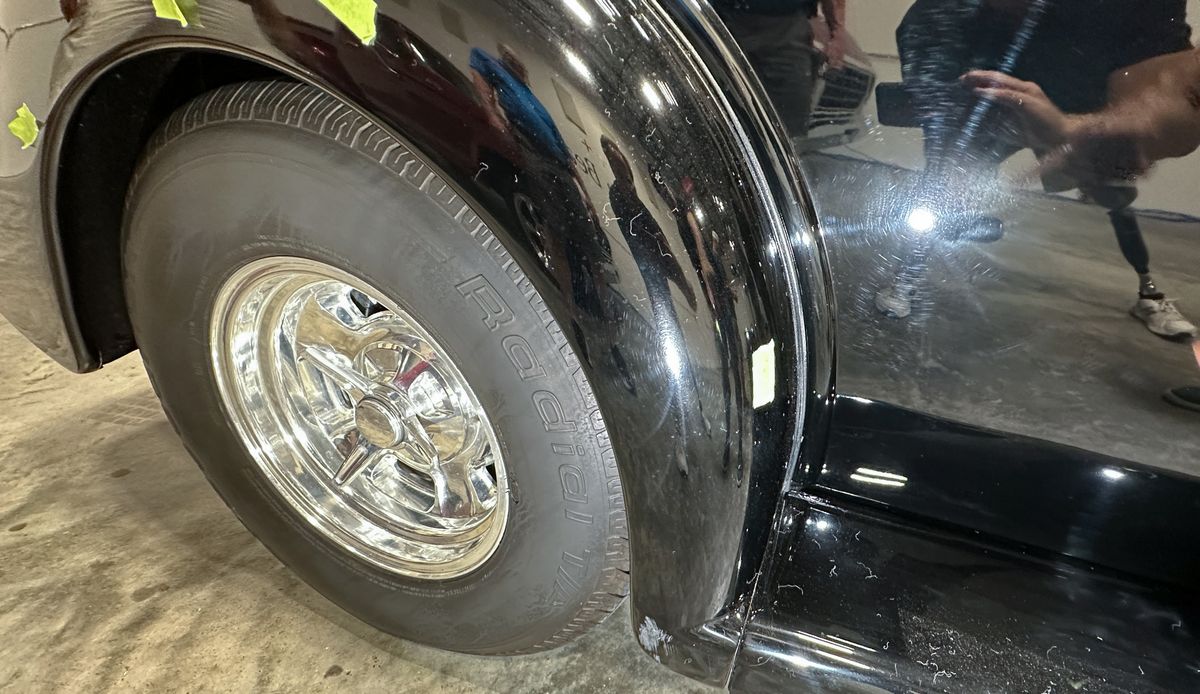
1937 Ford 2-Door Sedan Streetrod – Custom basecoat/clearcoat paint system
Friday Afternoon session – Single step paint correction using orbital polishers plus Dr. Beasley’s Nano Surface Primers and Ceramic Coatings
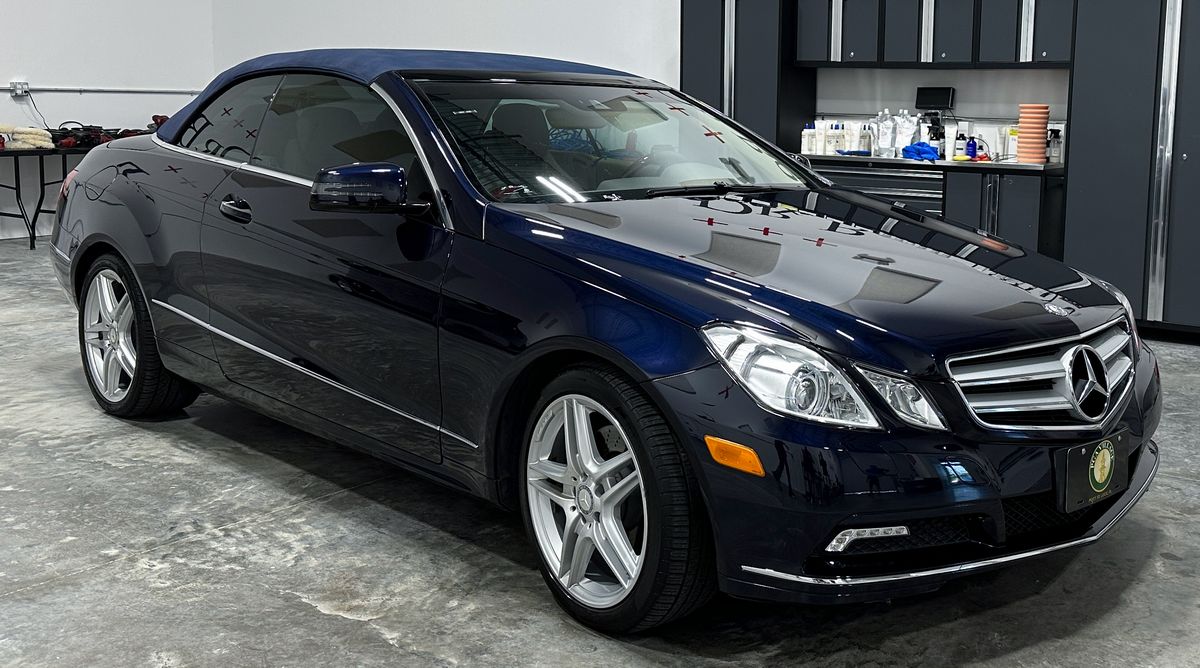
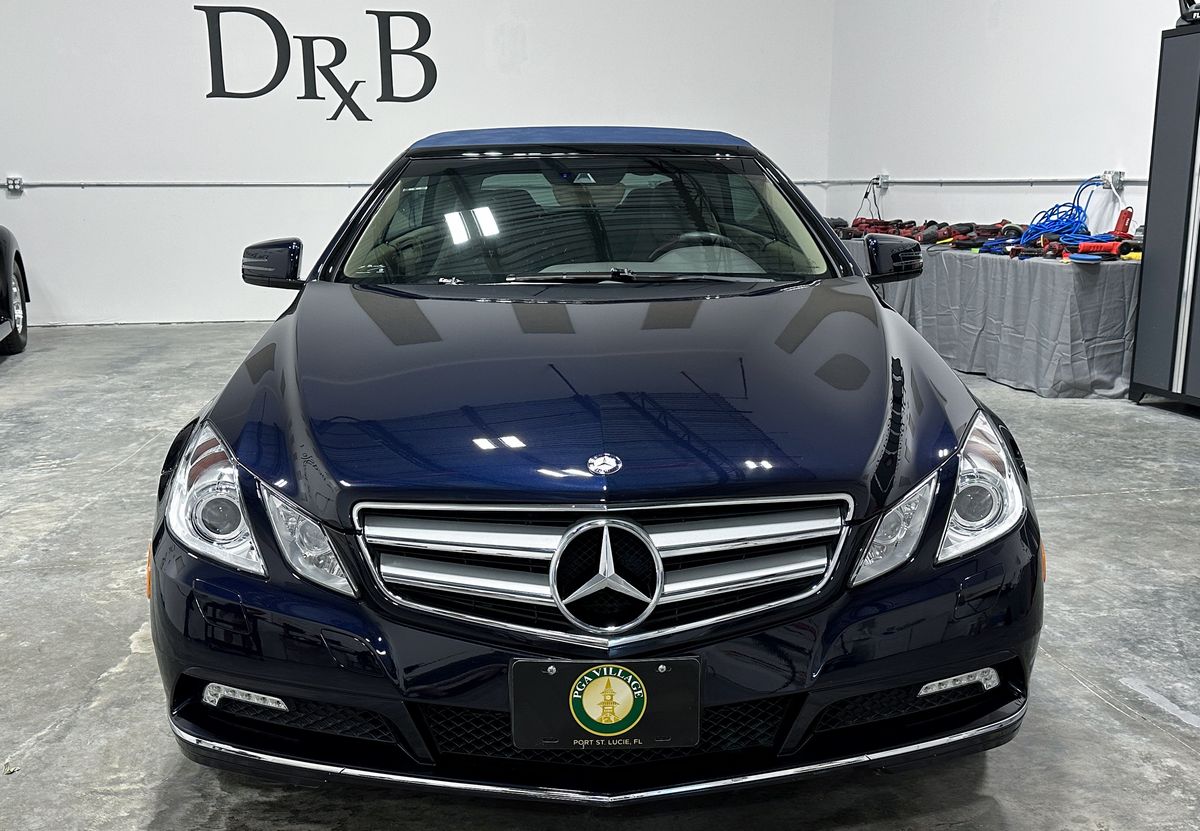
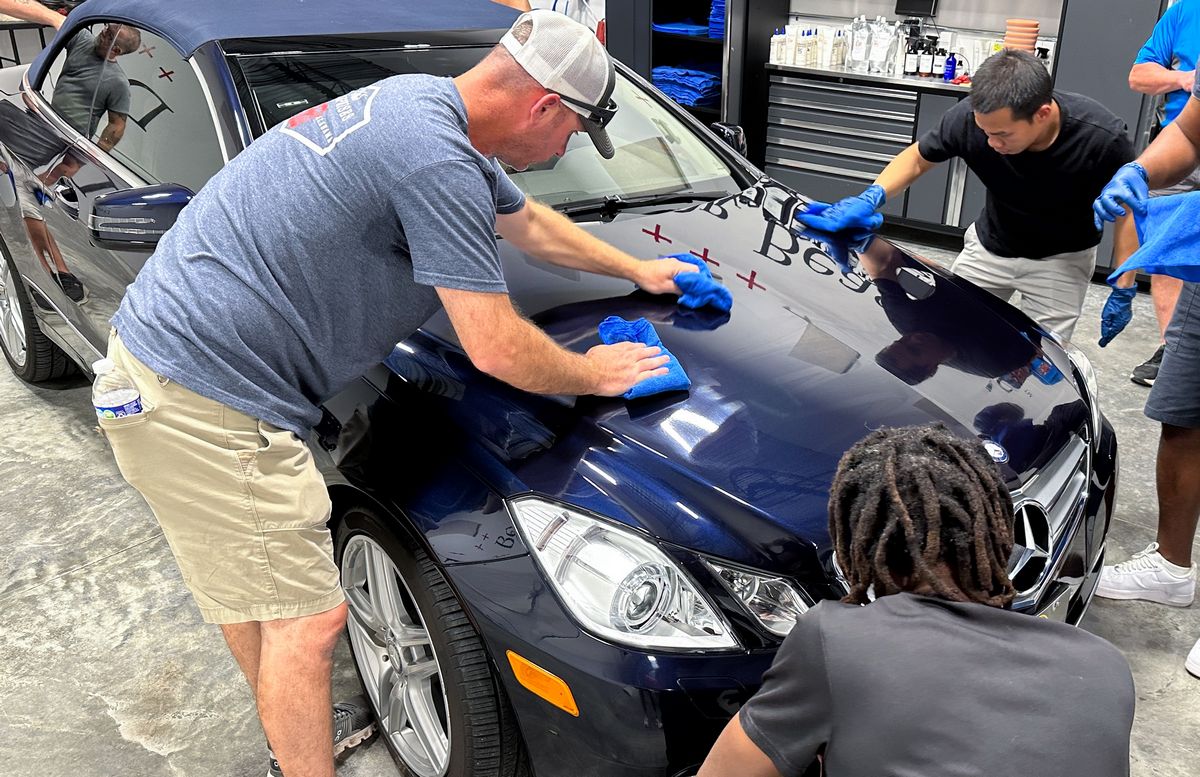
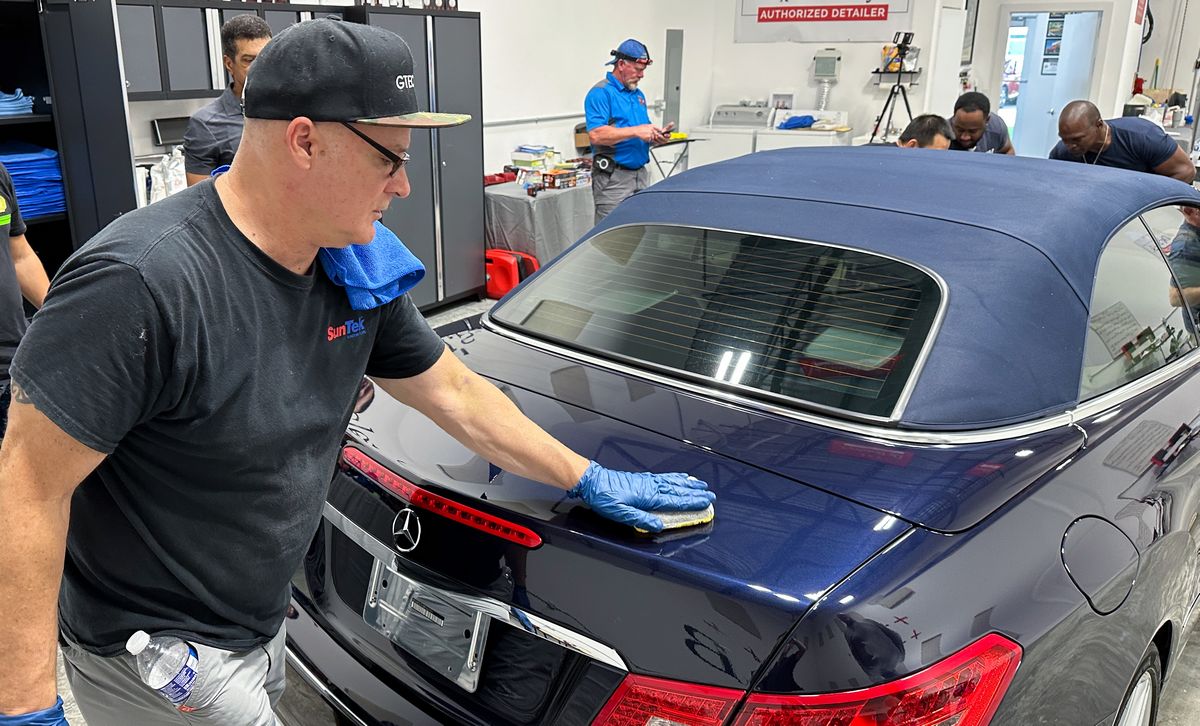
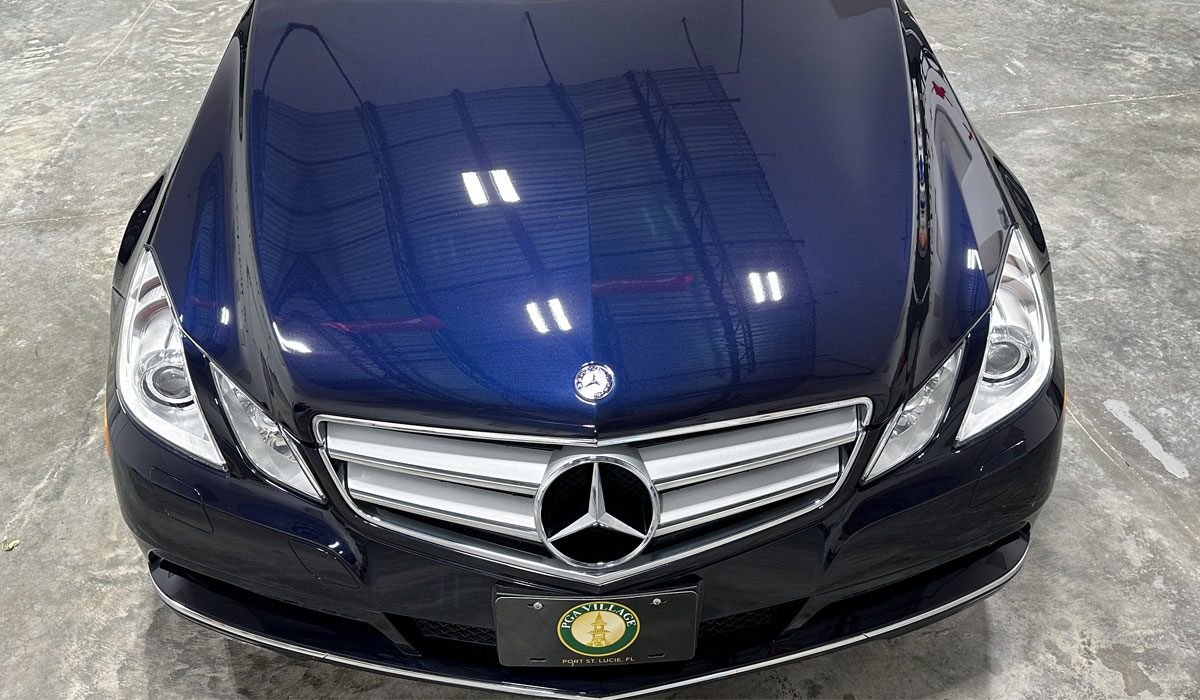
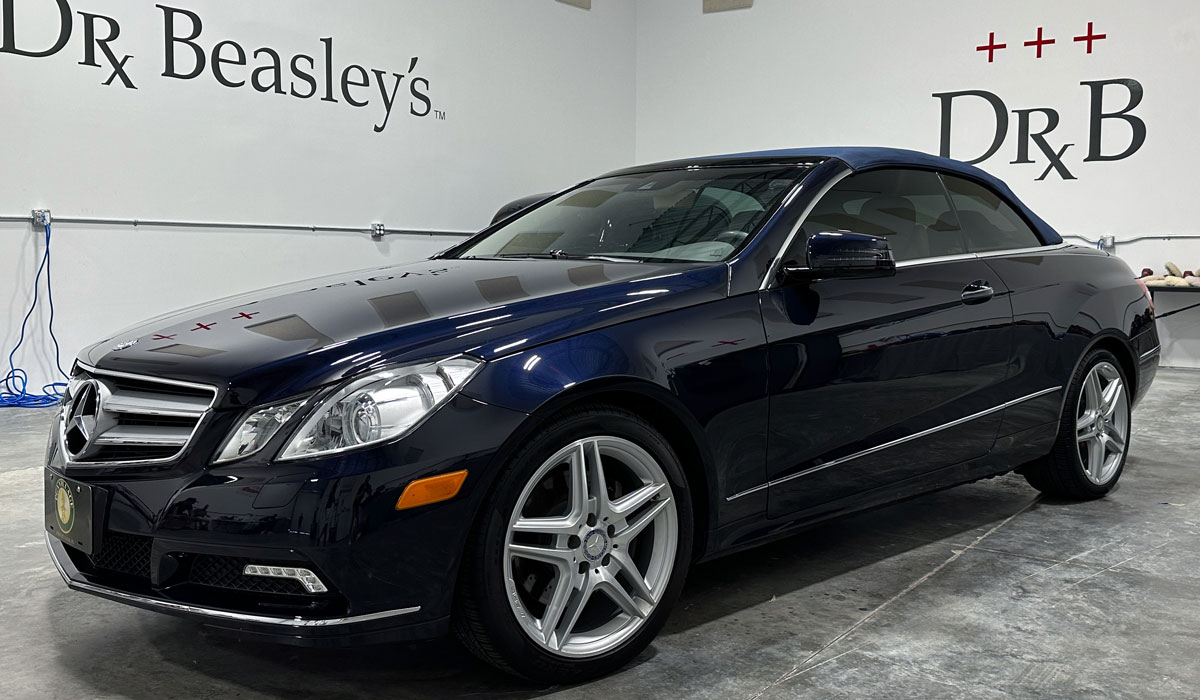
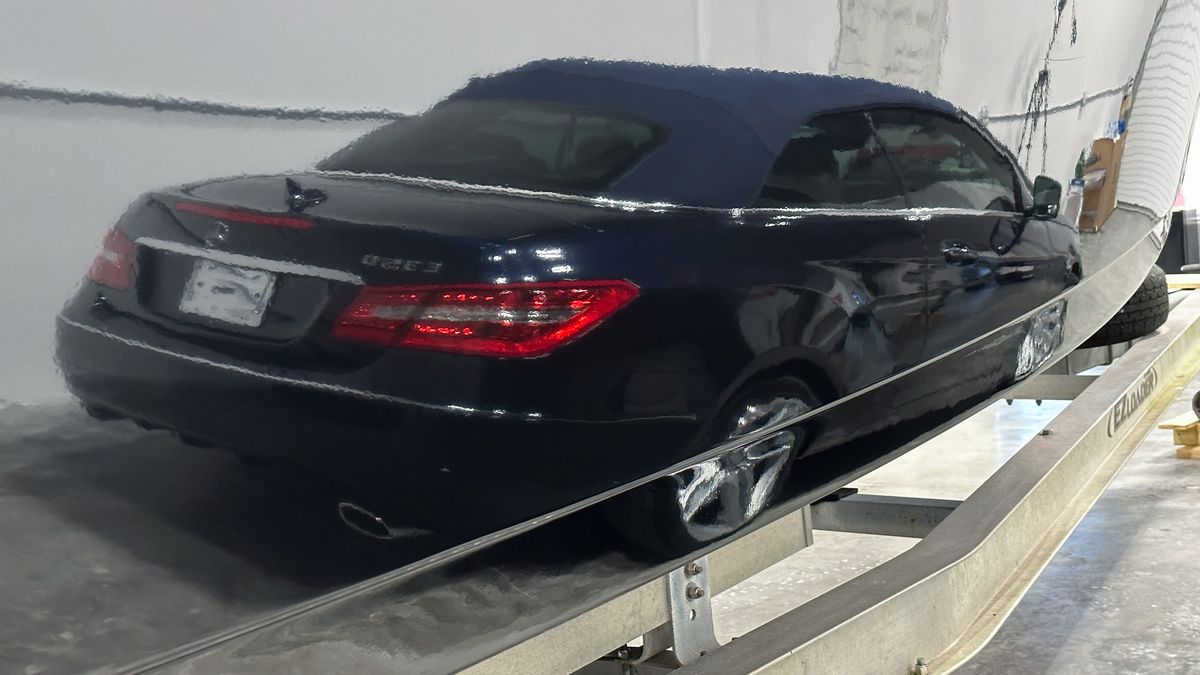
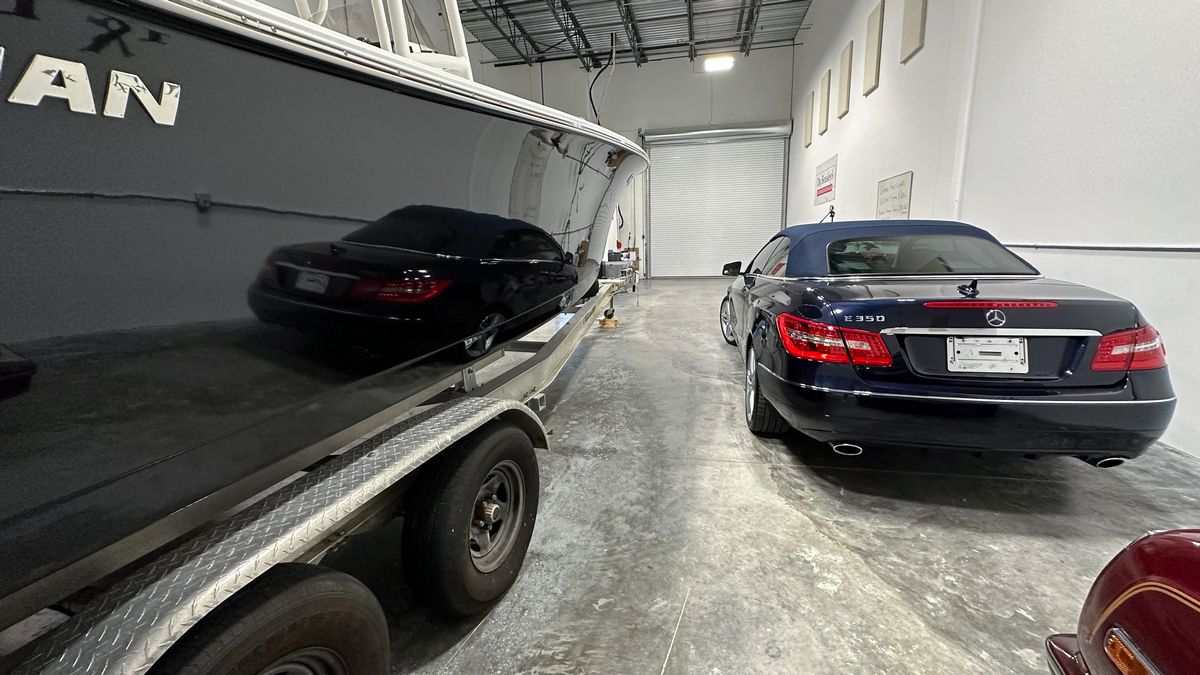
2011 Mercedes-Benz E350 Cabriolet – Factory original basecoat/clearcoat paint system
This vehicle served two topics:
1: How to correctly clean and protect a canvas cloth top convertible.
2: How to do 1-step paint correction and ceramic coatings.

Friday Late Afternoon Session – Single step paint correction using orbital polishers and Dr. Beasley’s Z1 Ceramic AIO or All-in-One.
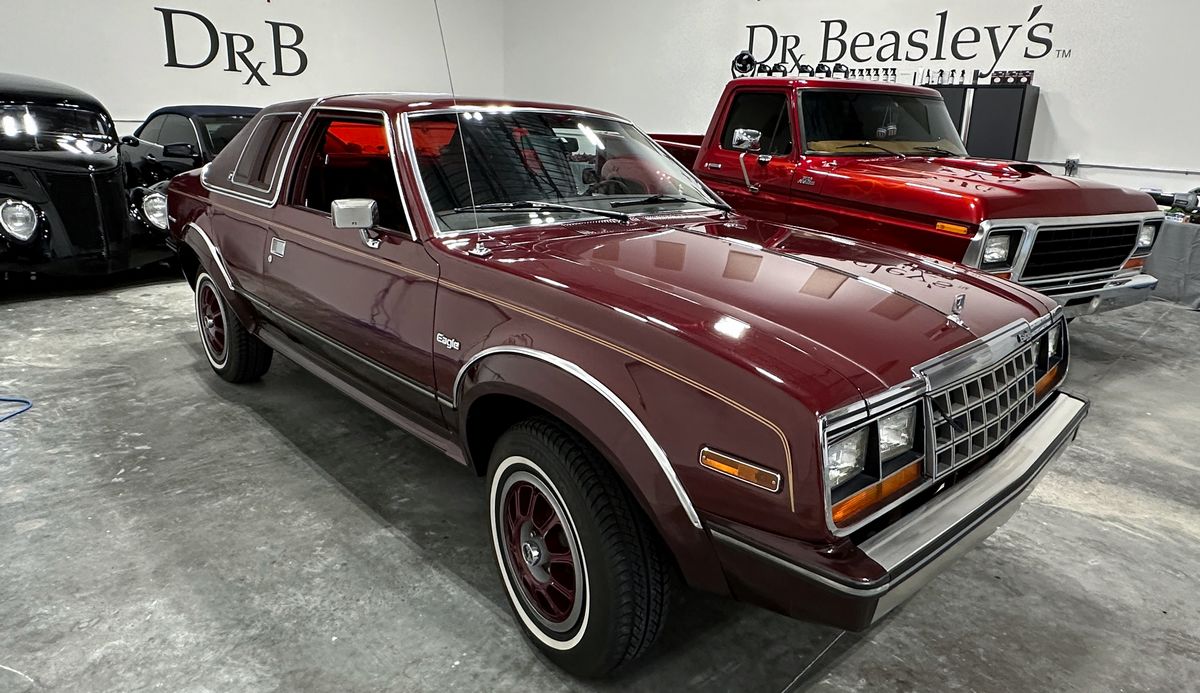
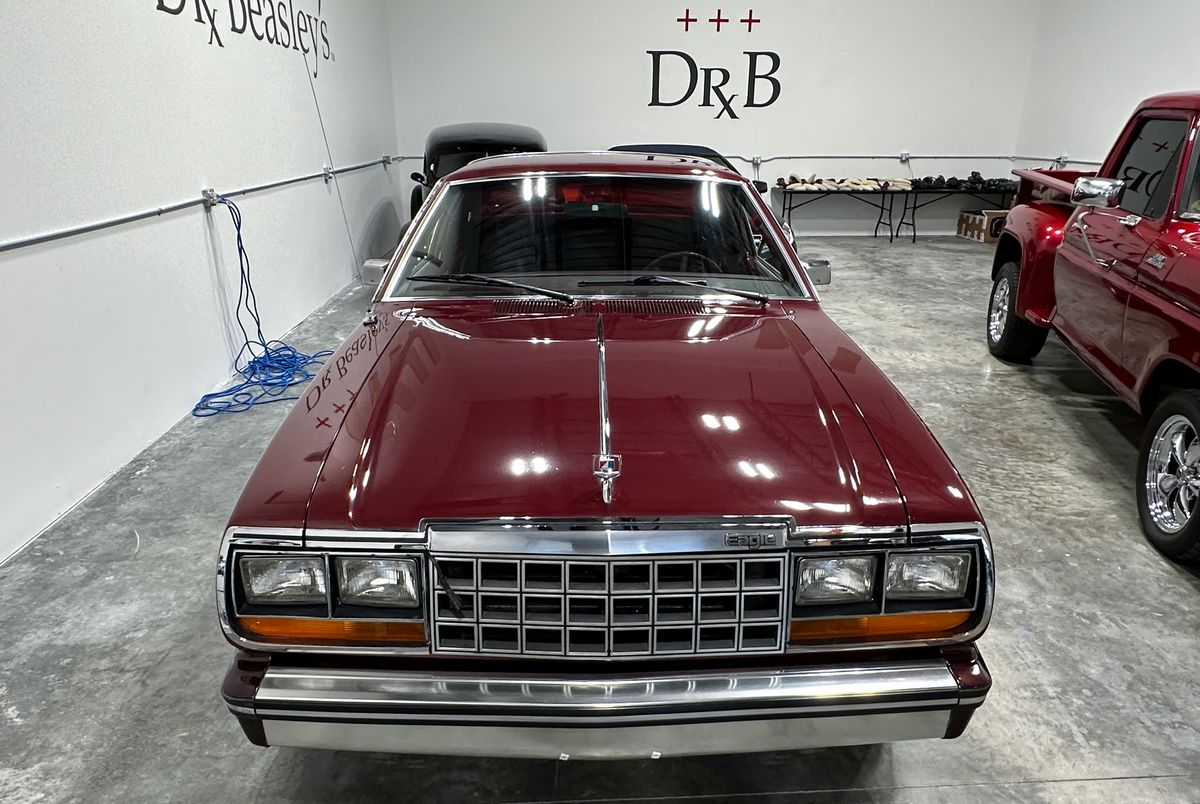
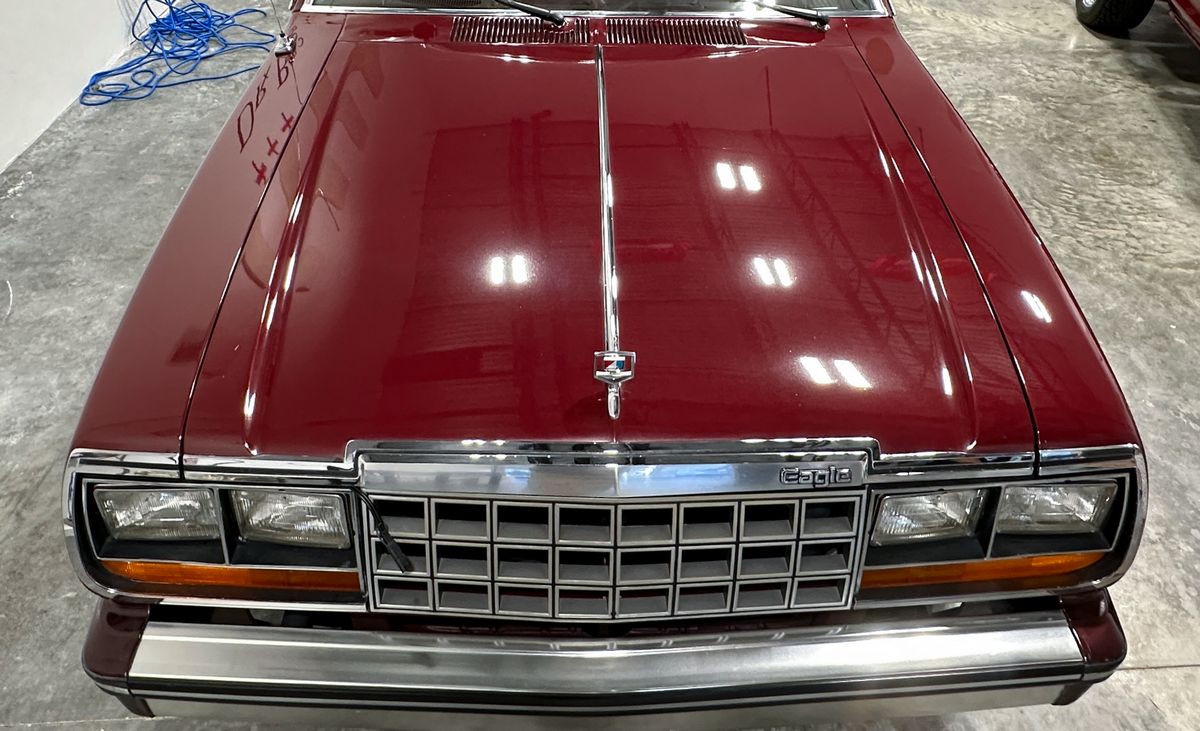
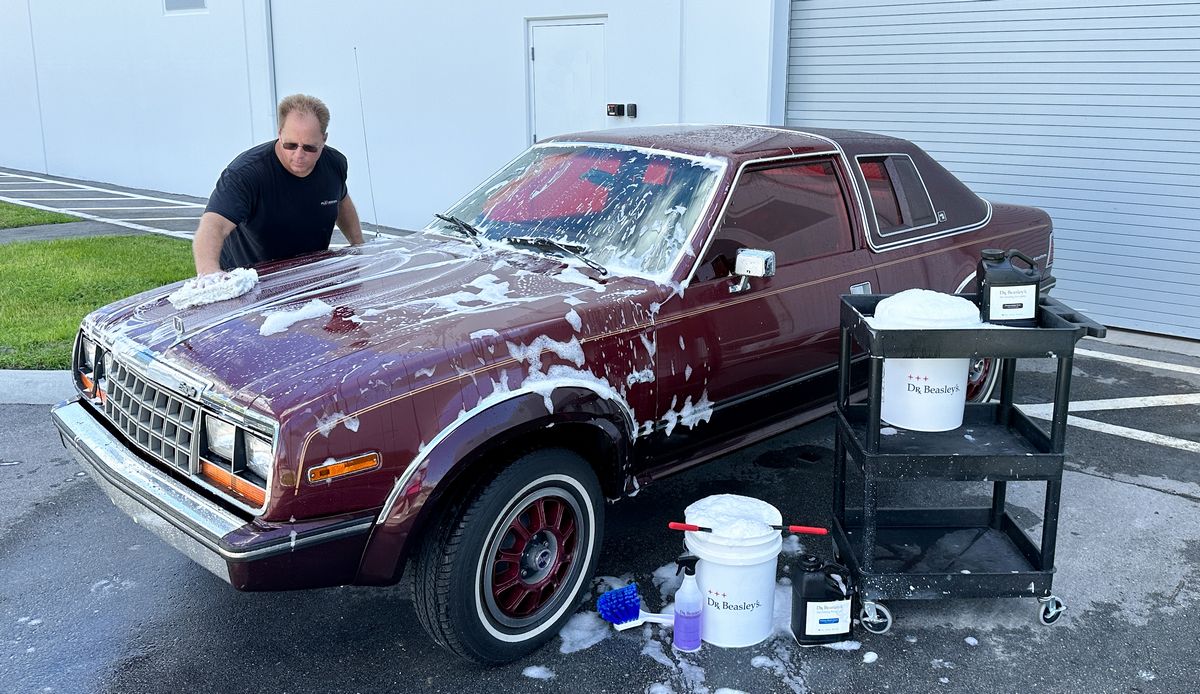
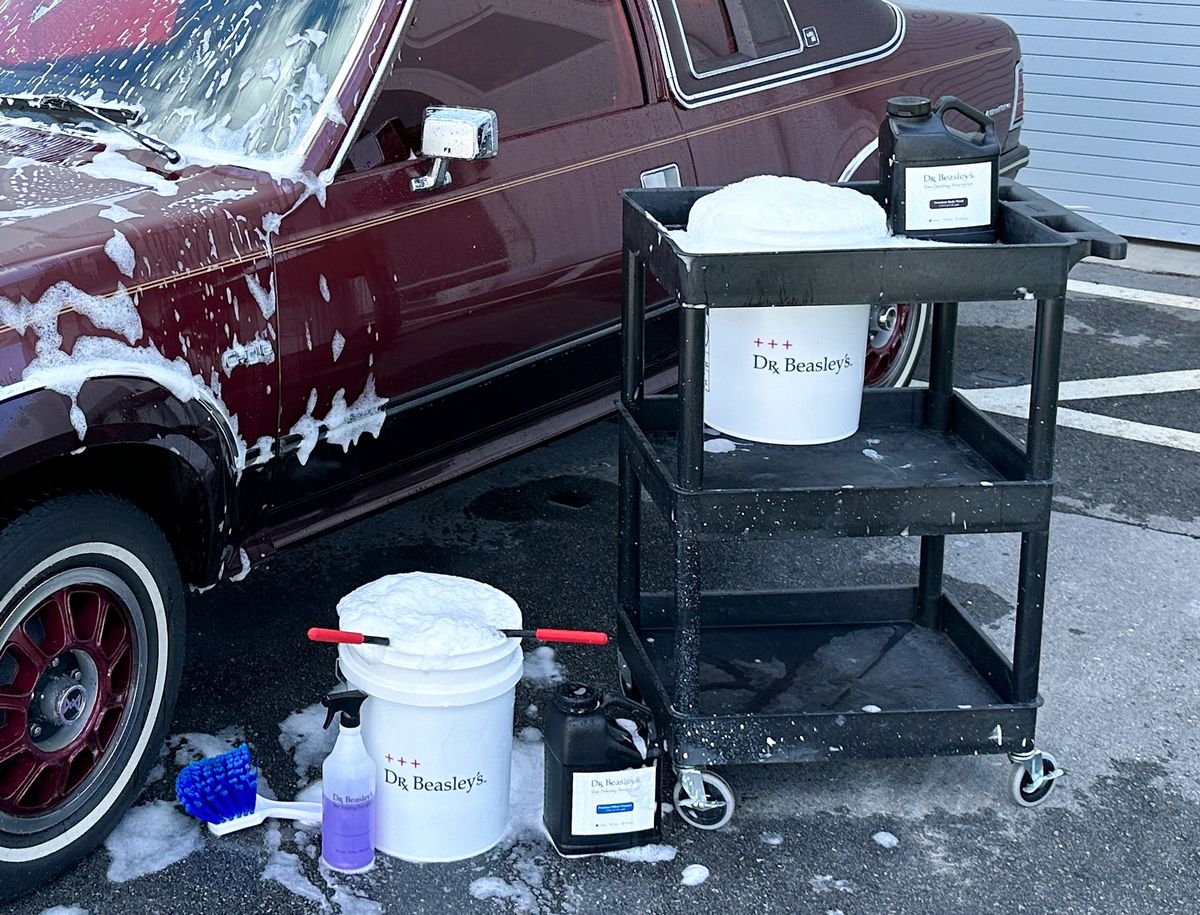
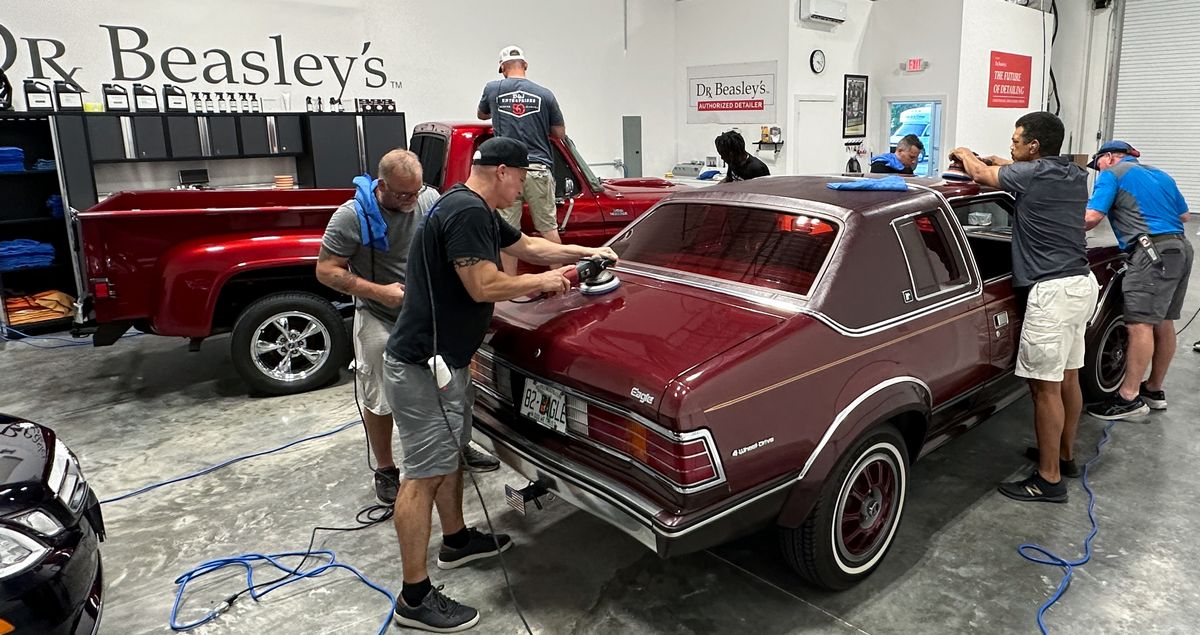
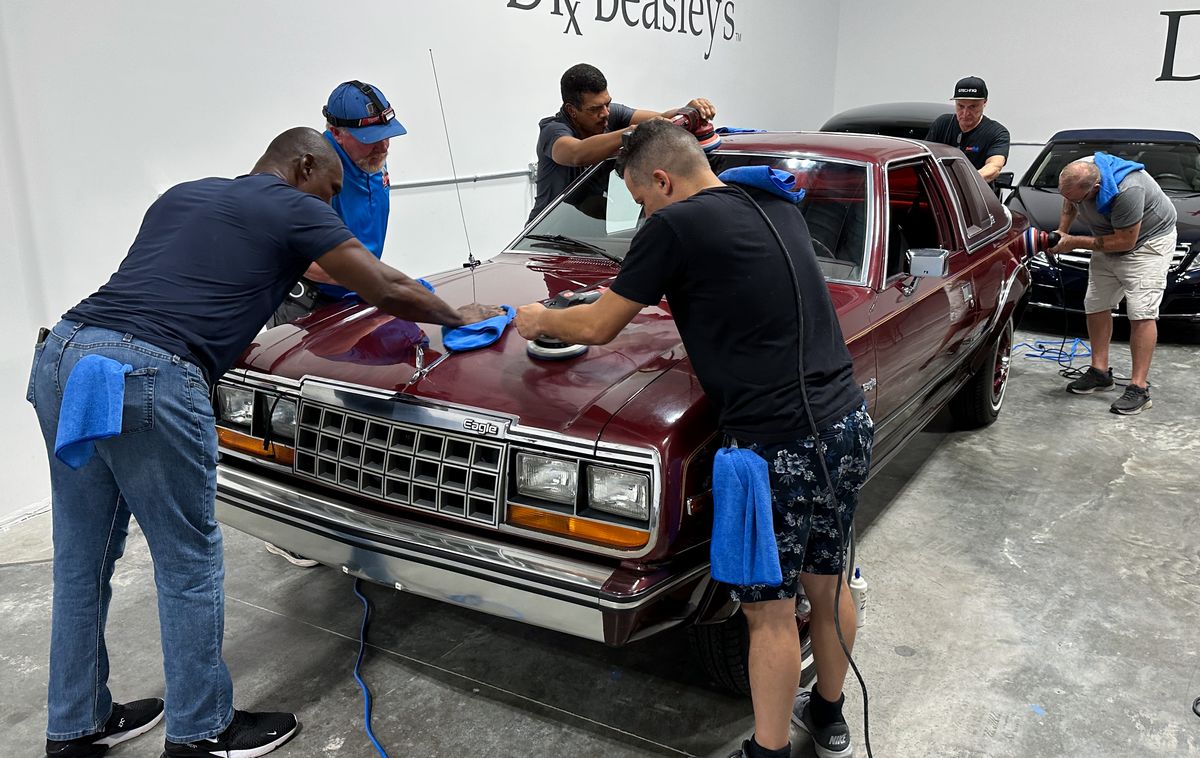
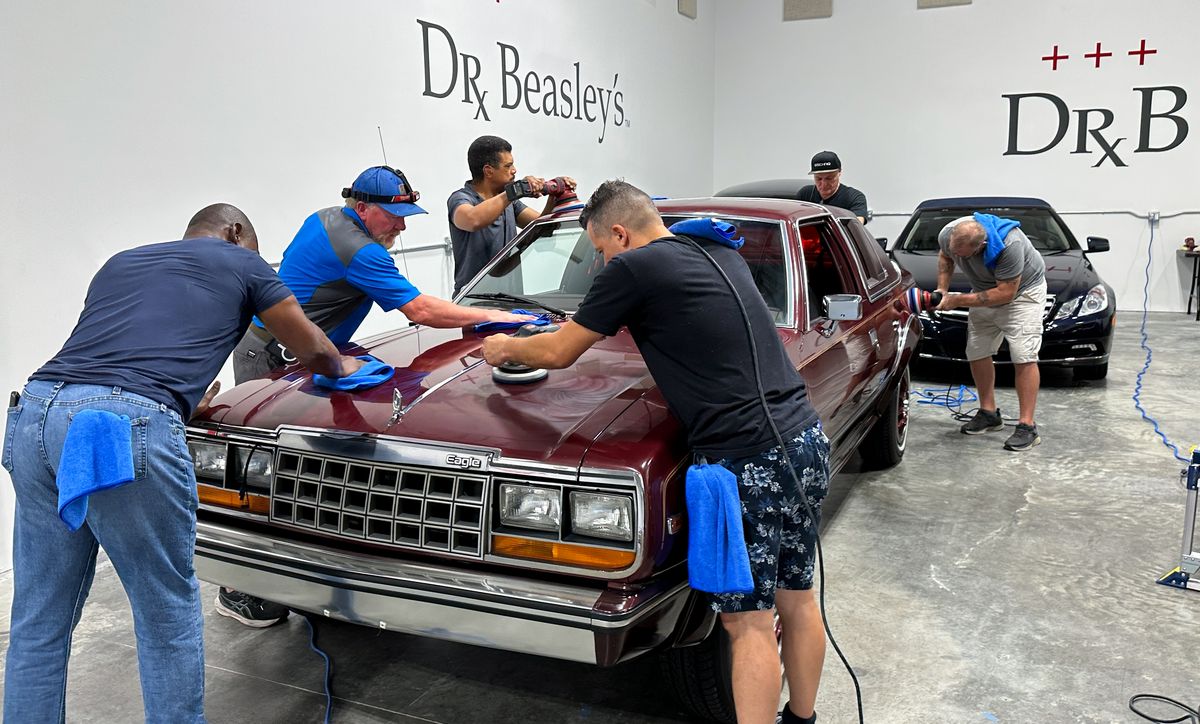
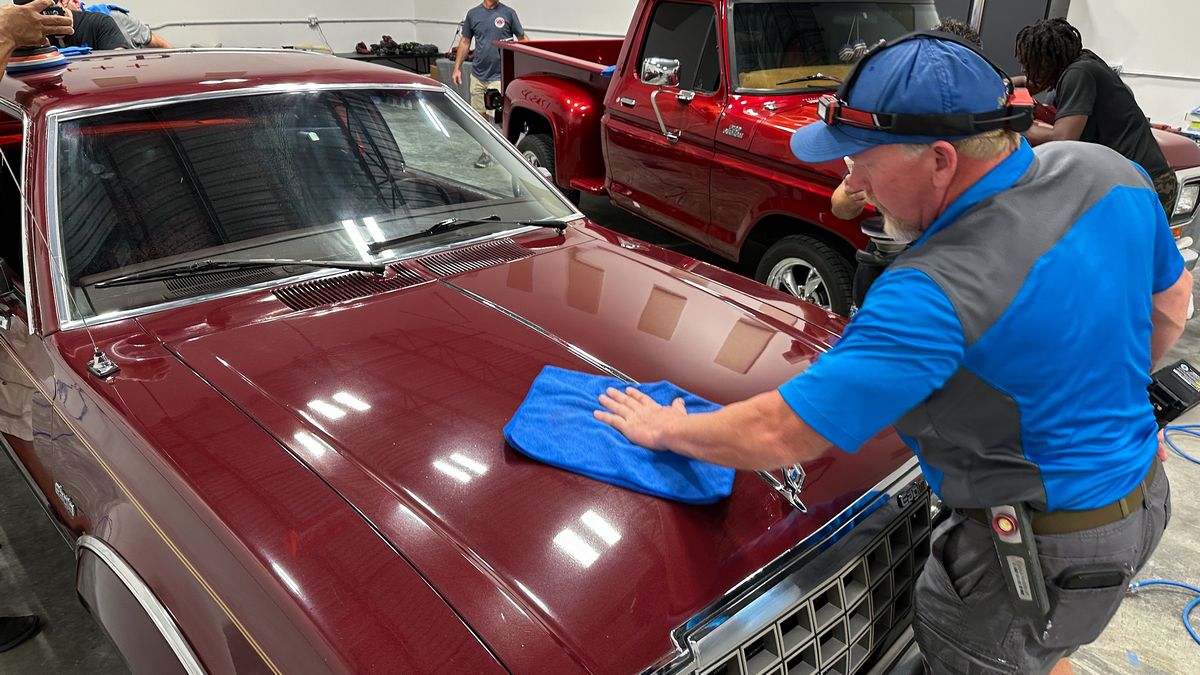
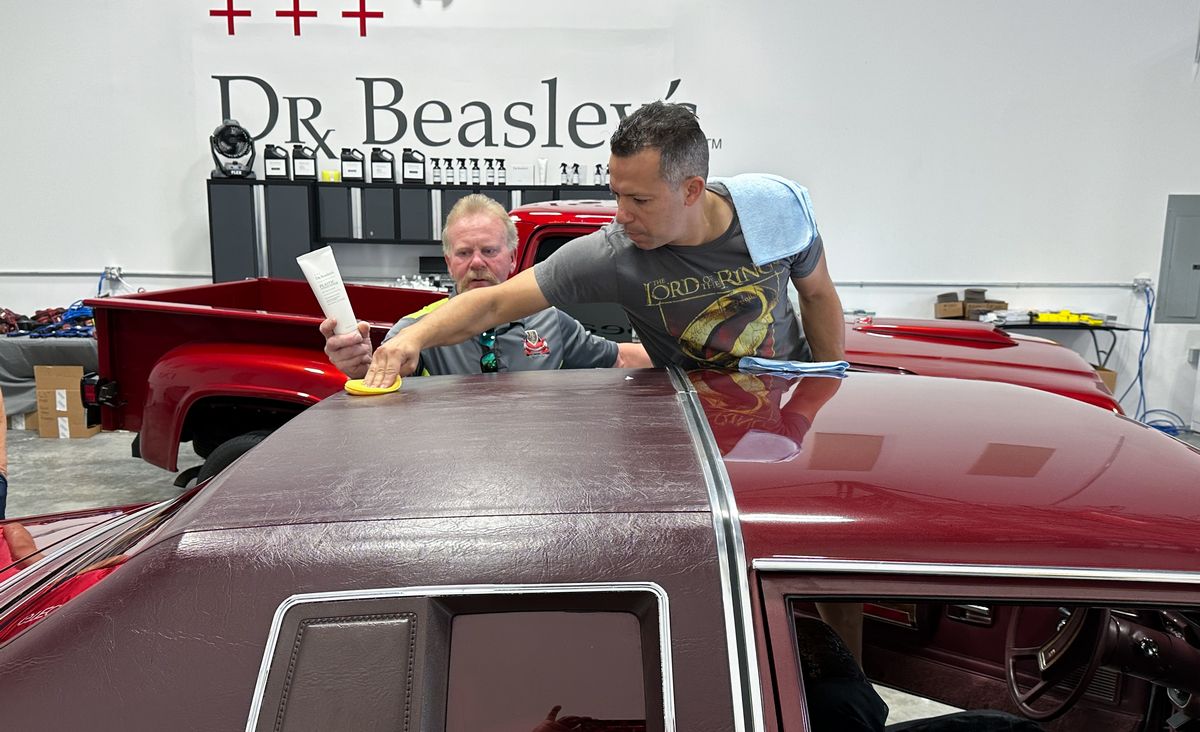
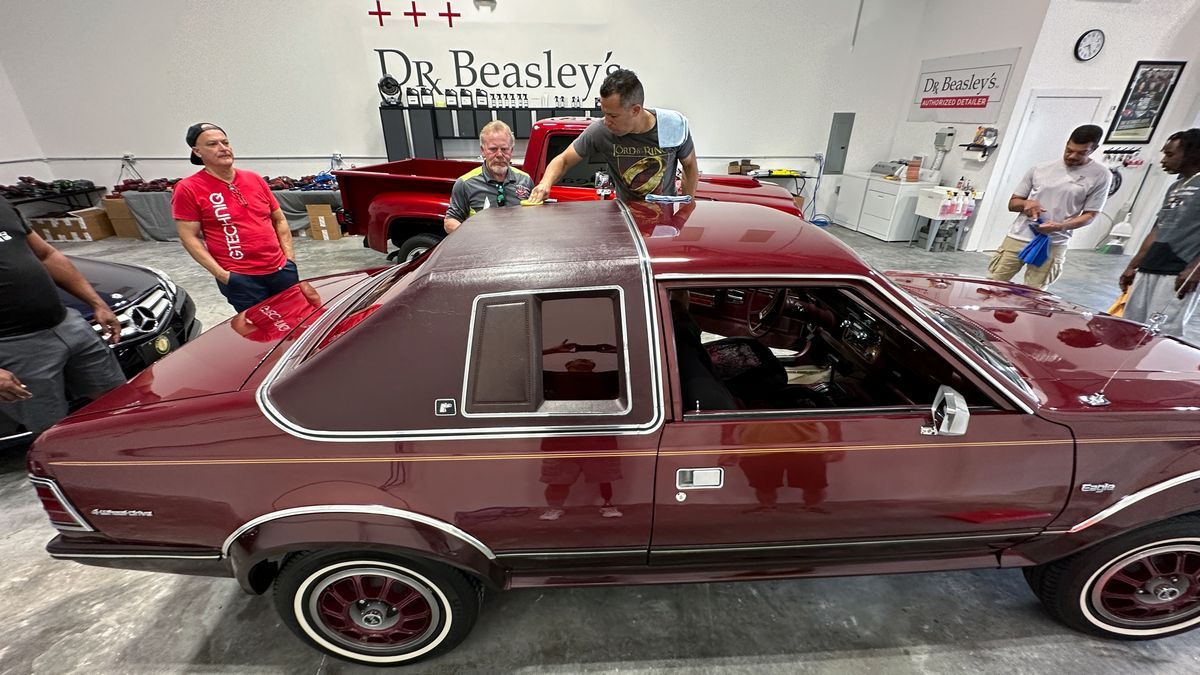
1982 AMC Eagle – Original Single Stage Paint (rare)
We try to bring in a wide-spectrum of cars and different types of paint systems to provide the most well-rounded learning experience possible. This way, when our students return to their world they are the most prepared to tackle anything that drives up to their shop or garage.

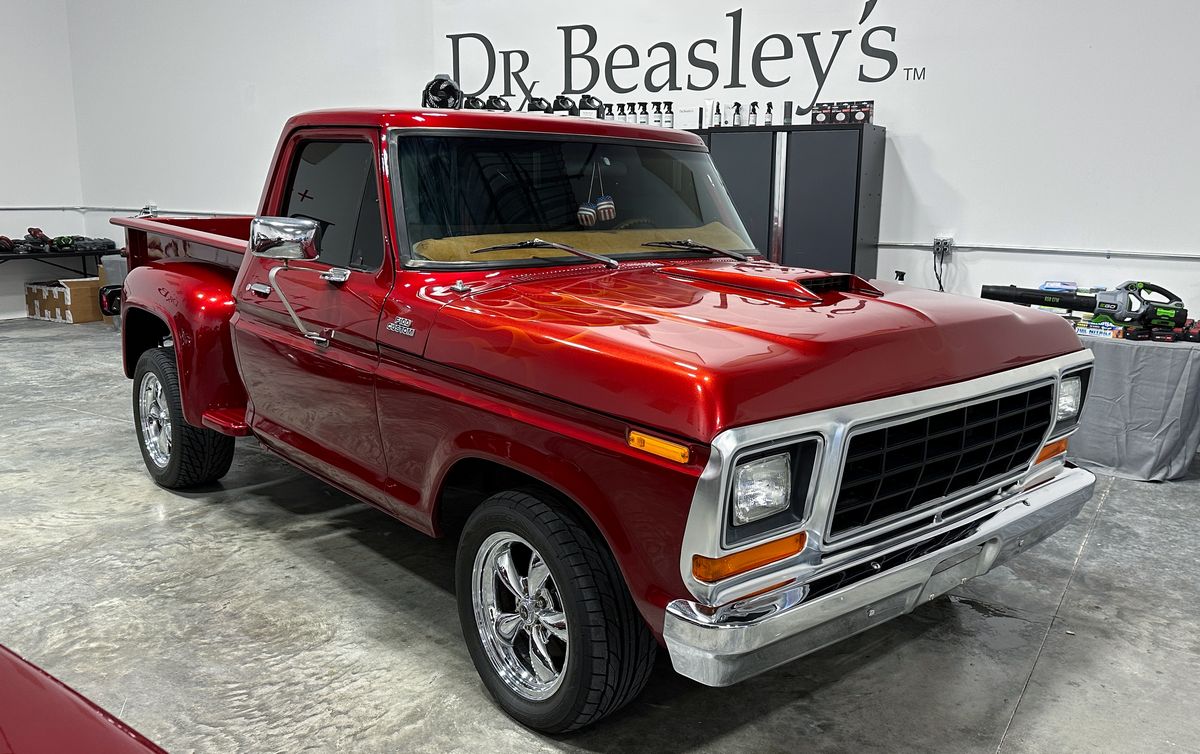
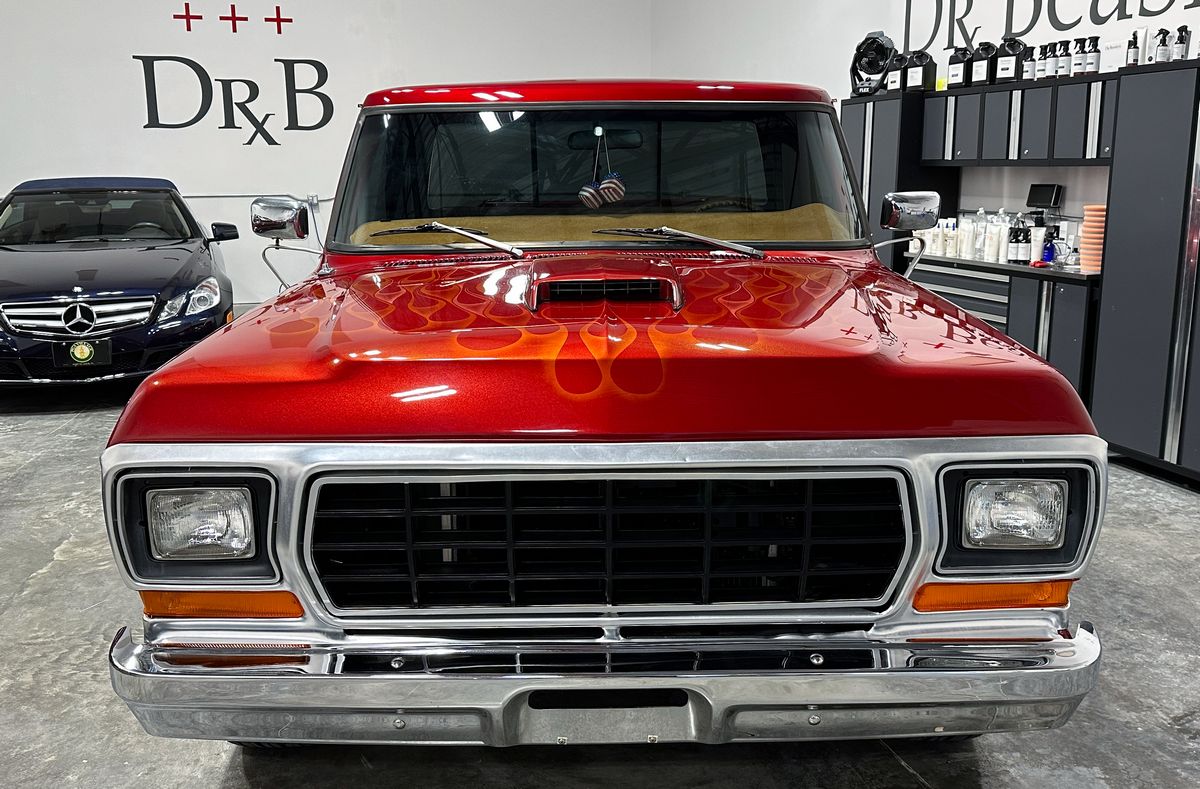
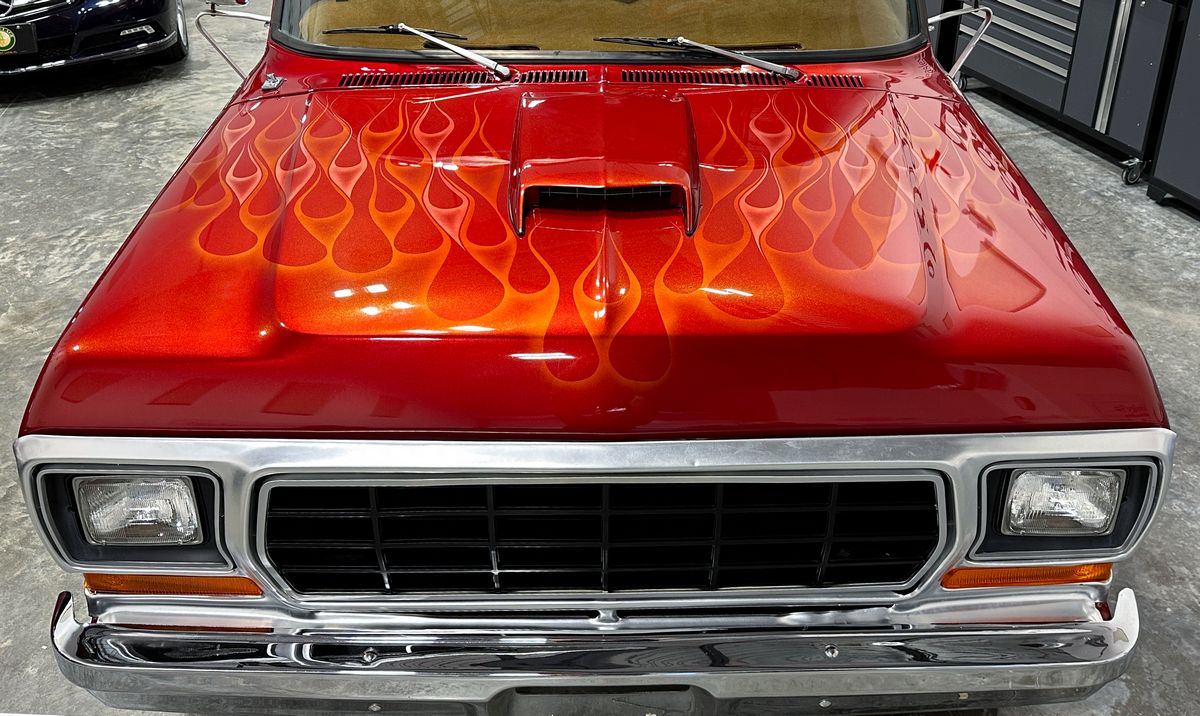
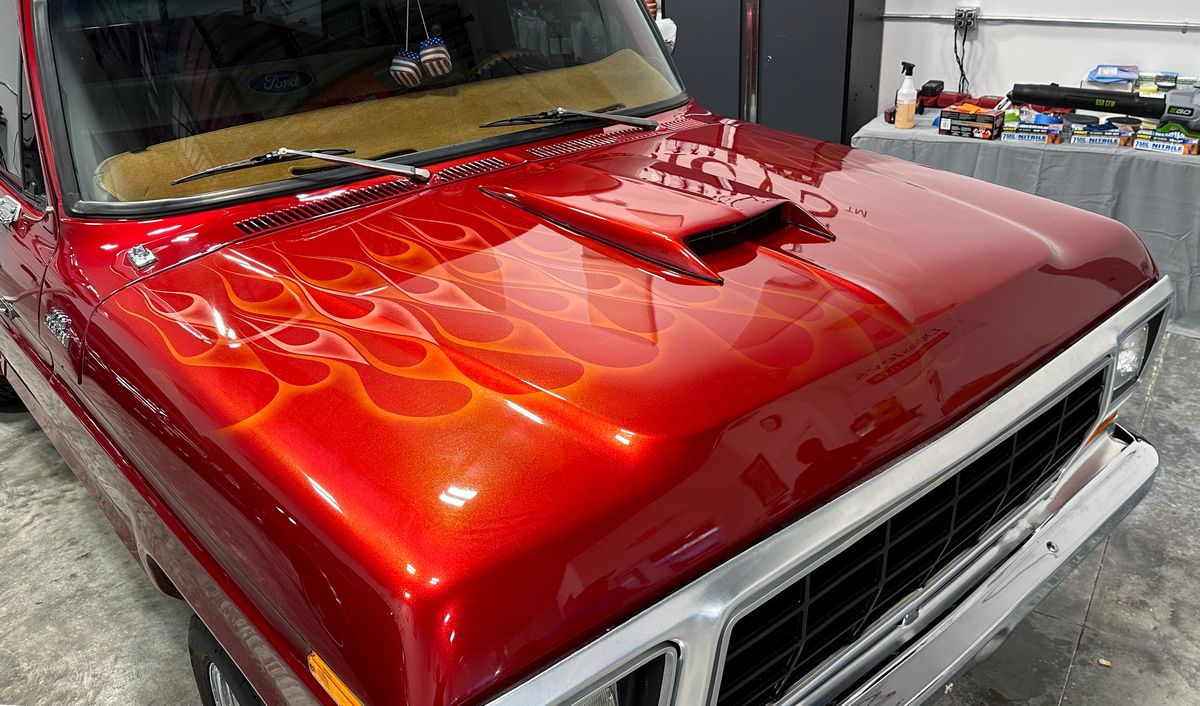
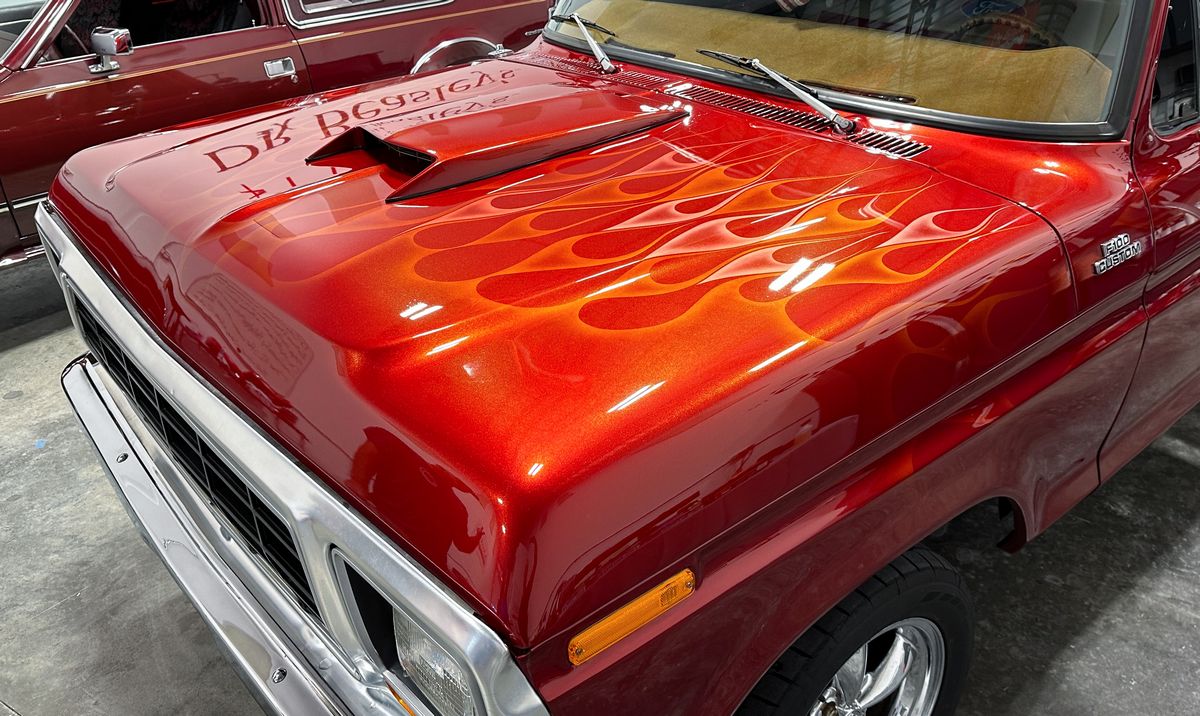
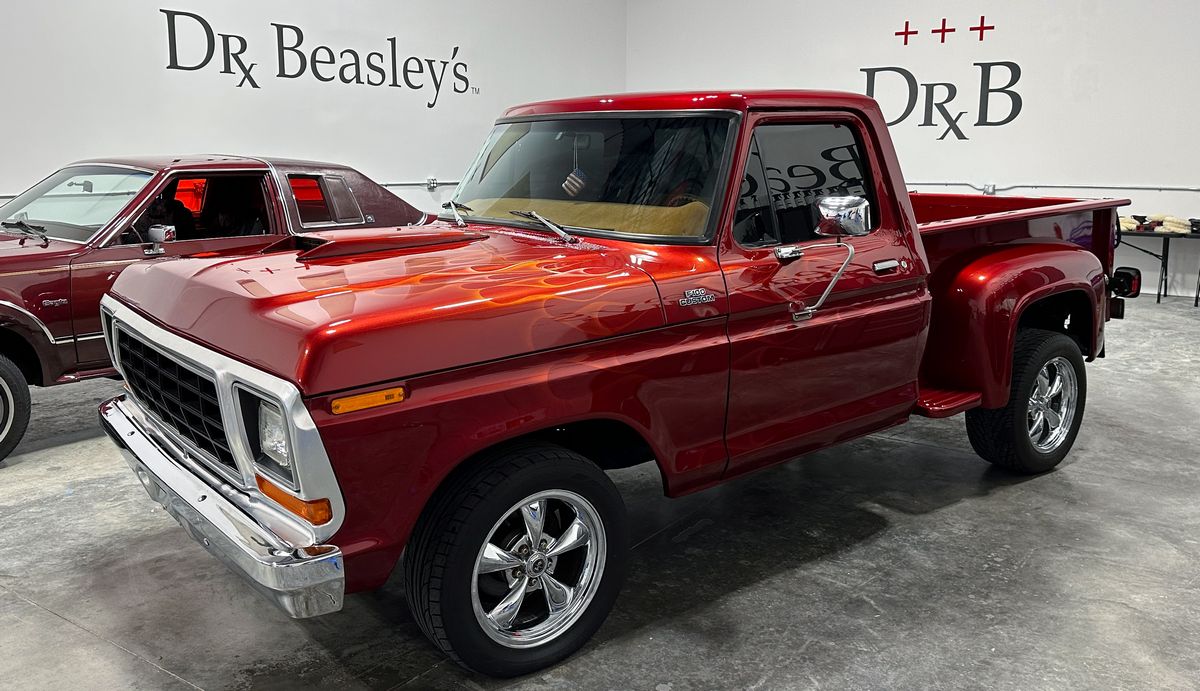
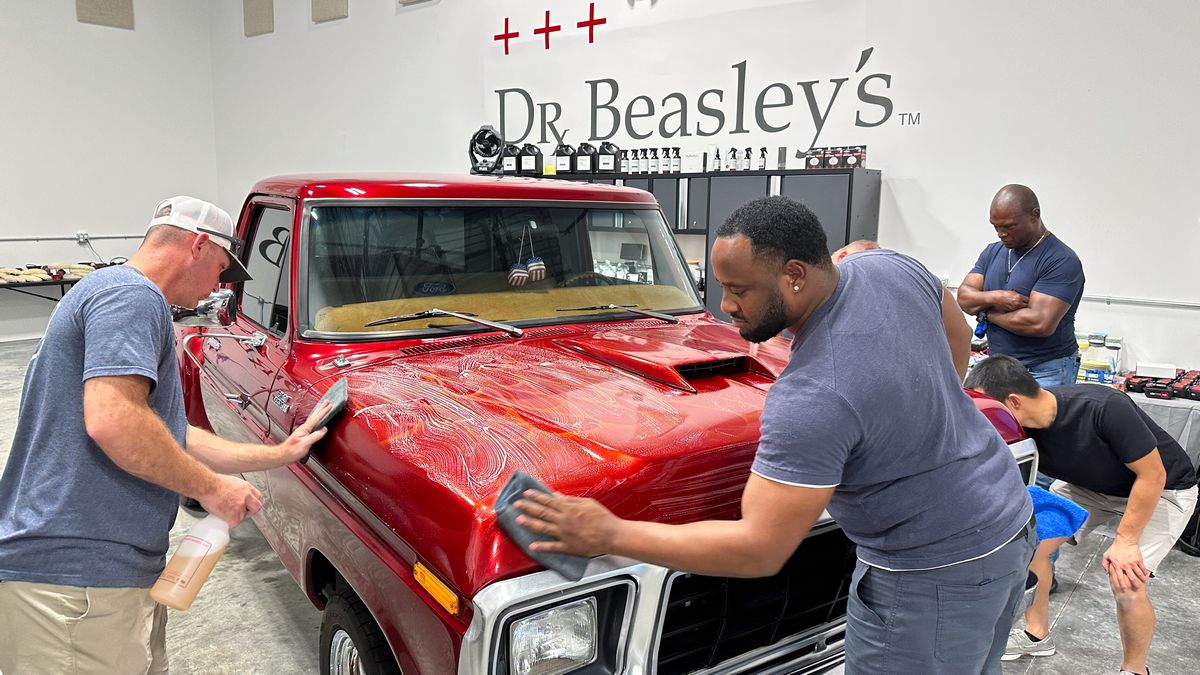
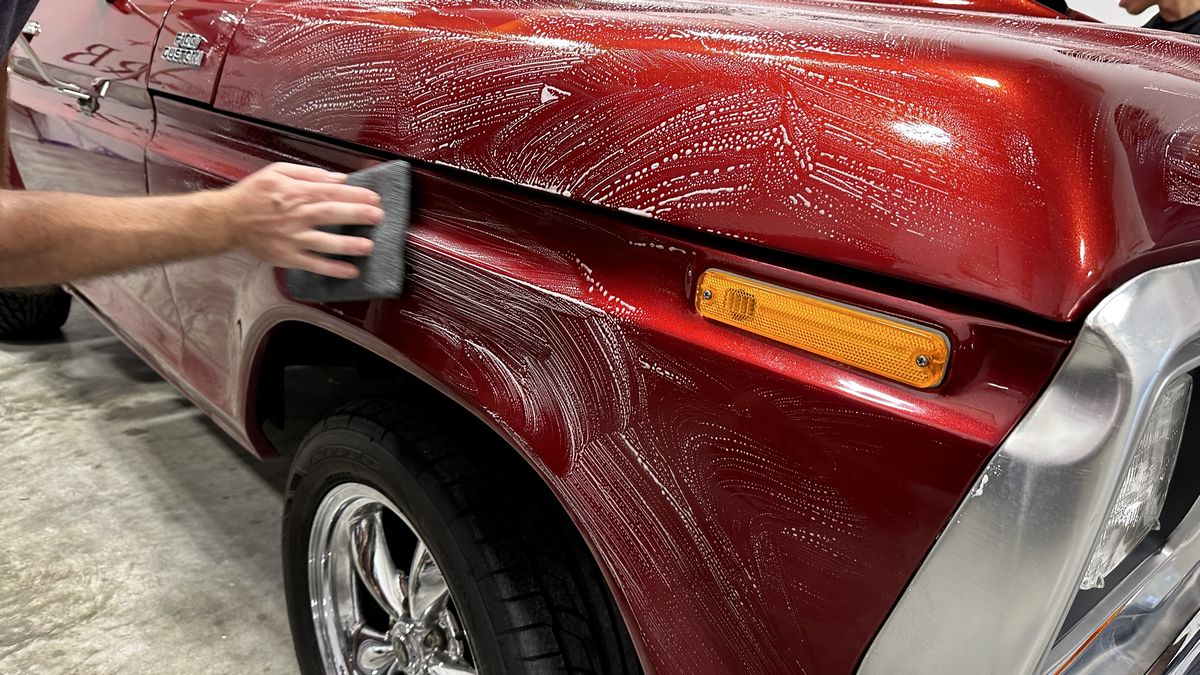
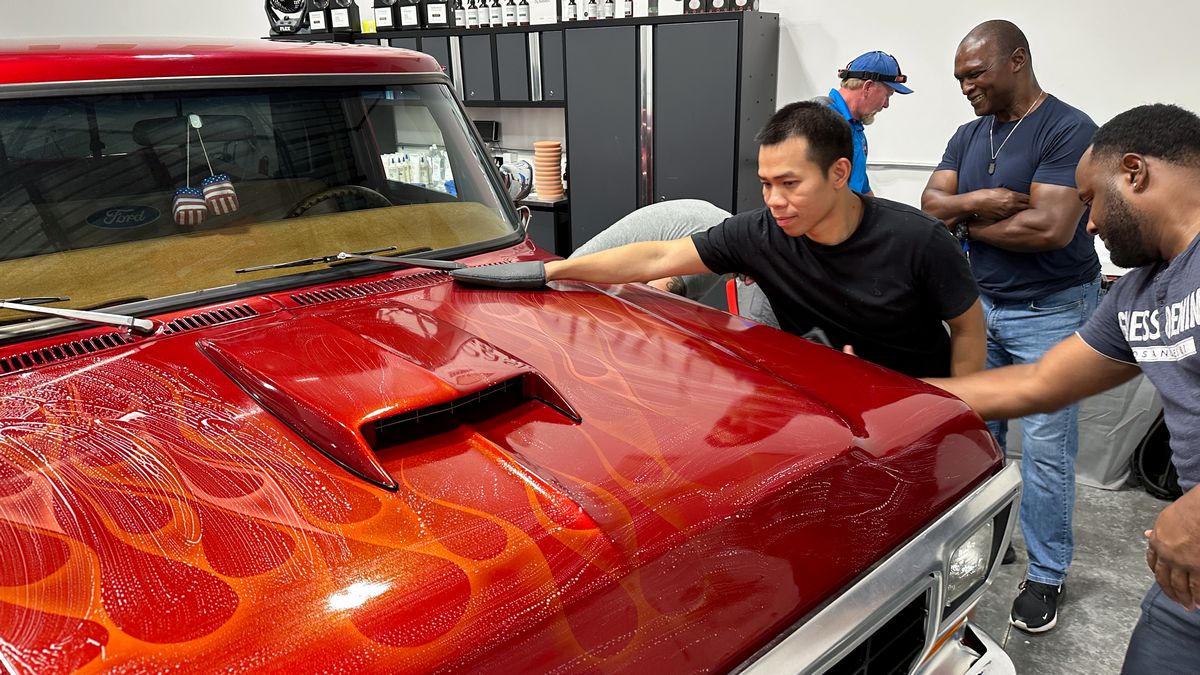
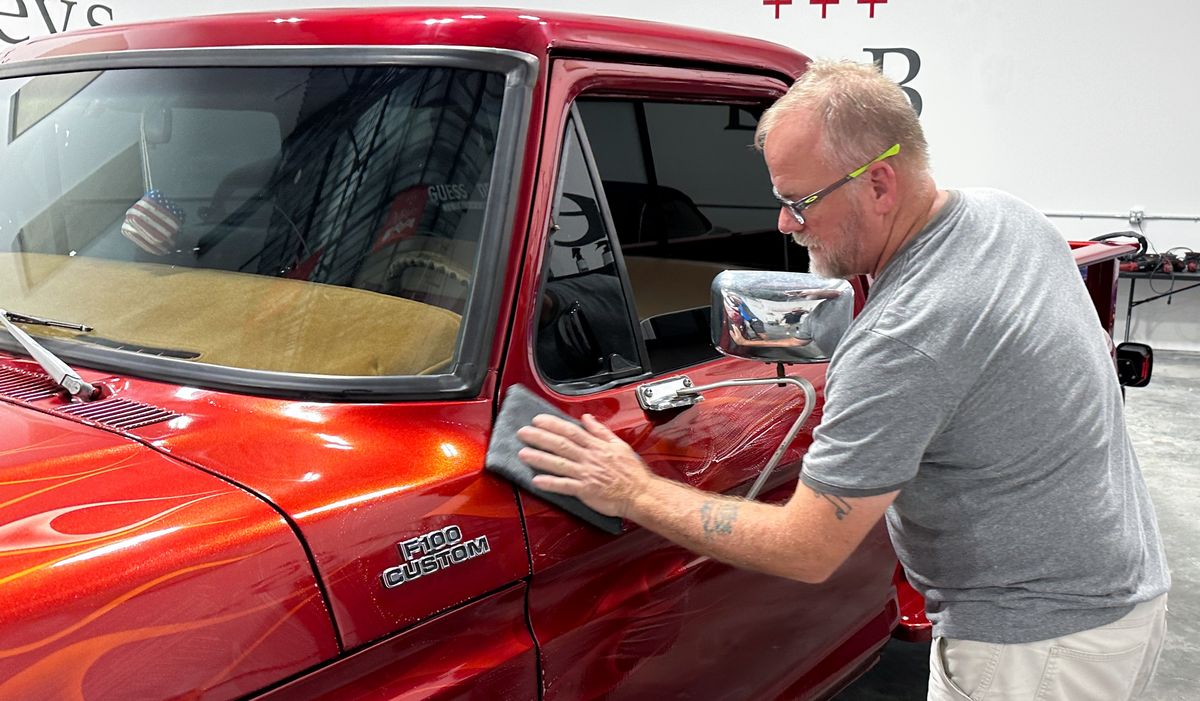
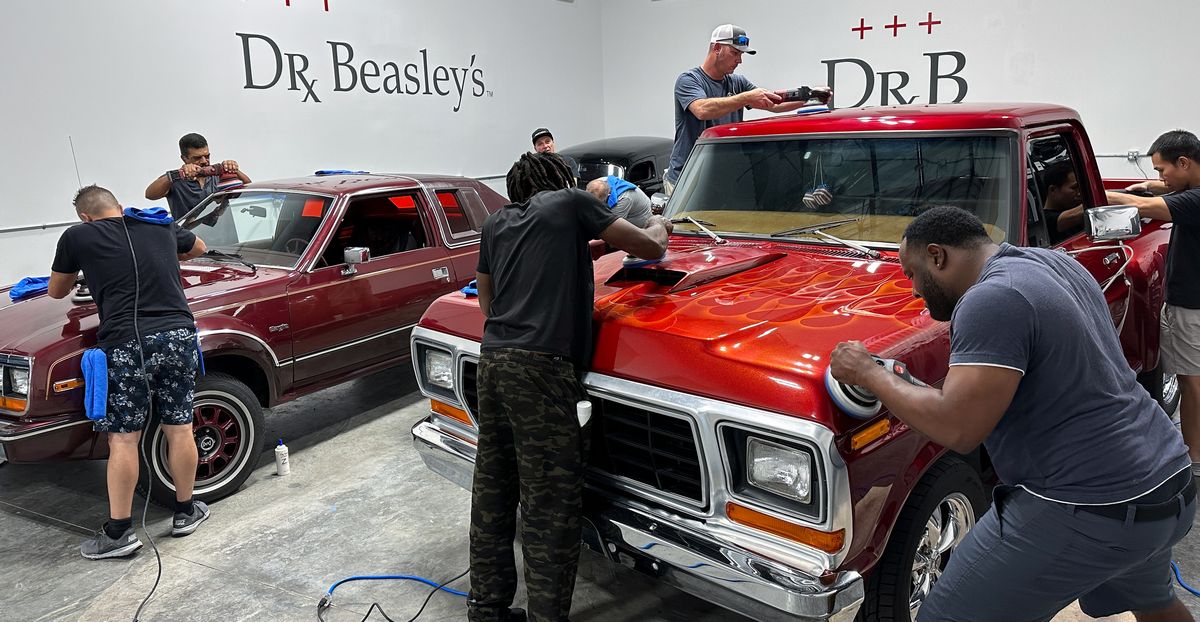
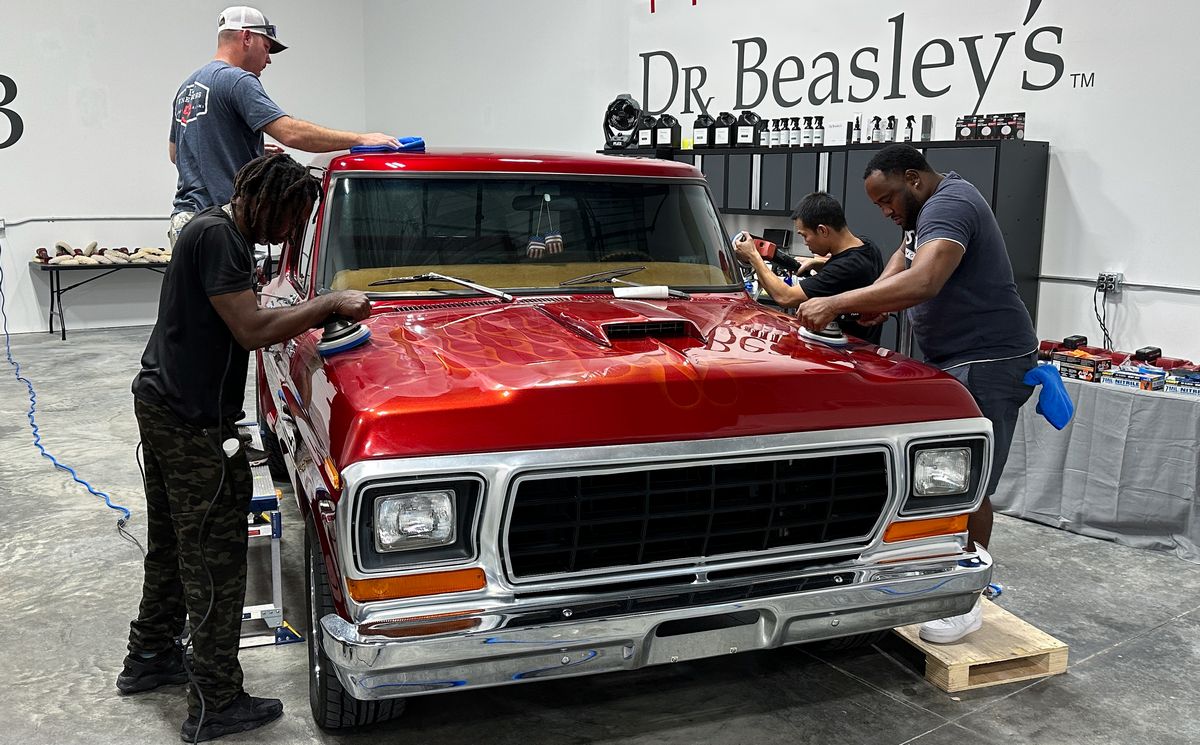
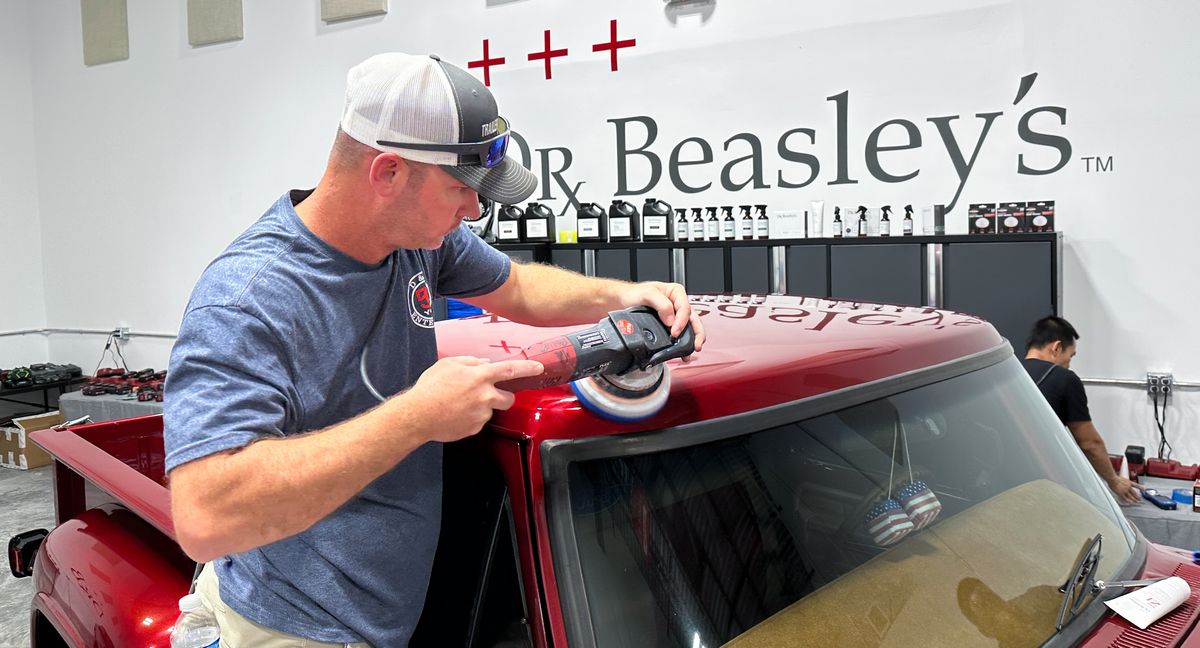
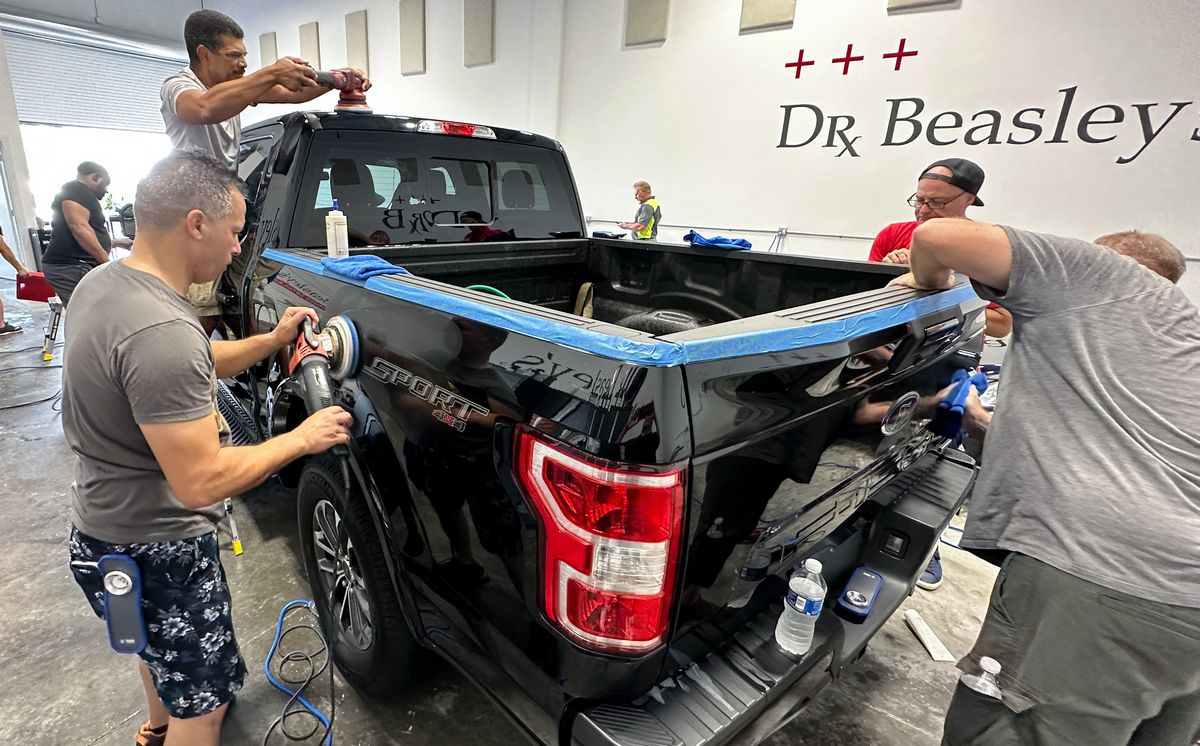
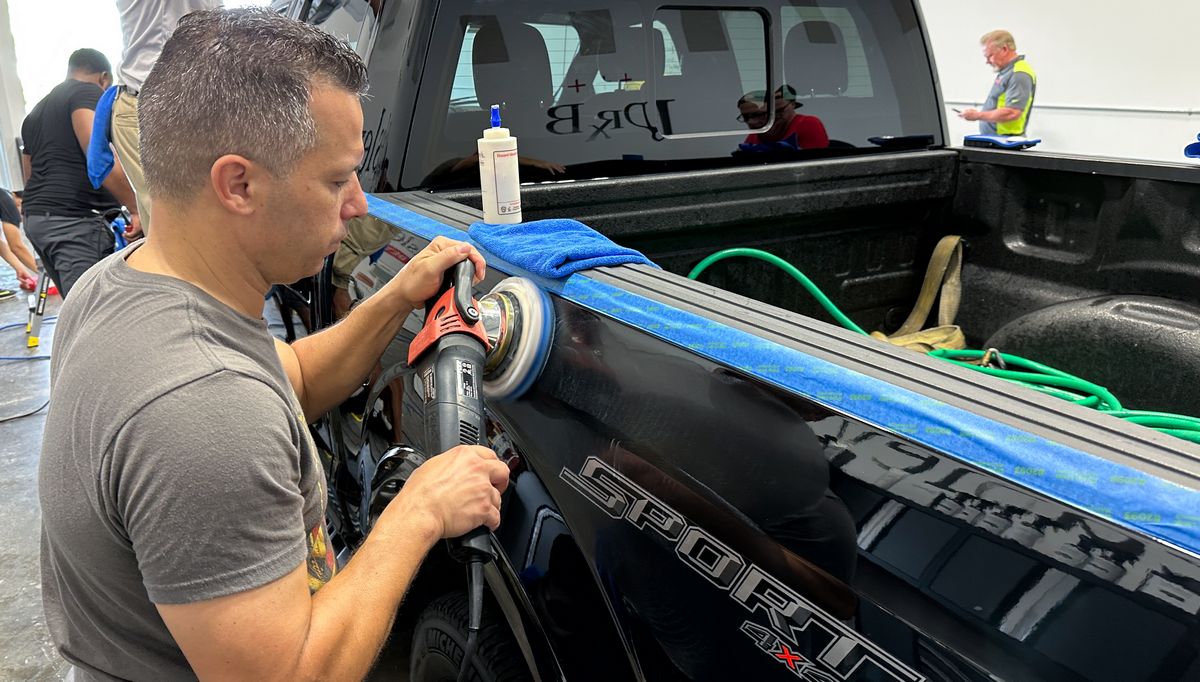
1979 Ford F150 Stepside Shorty – Custom basecoat/clearcoat paint system
This custom built truck has a high dollar custom paint job including a wild flame job under the clearcoat finish. When it arrived here the paint was filled with the normal swirls and scratches and also holograms from the misuse of a rotary polisher. The class fixed this paint job using Dr. Beasley’s Z1 Ceramic AIO.
Saturday morning session – Return to Dr. Color Chip
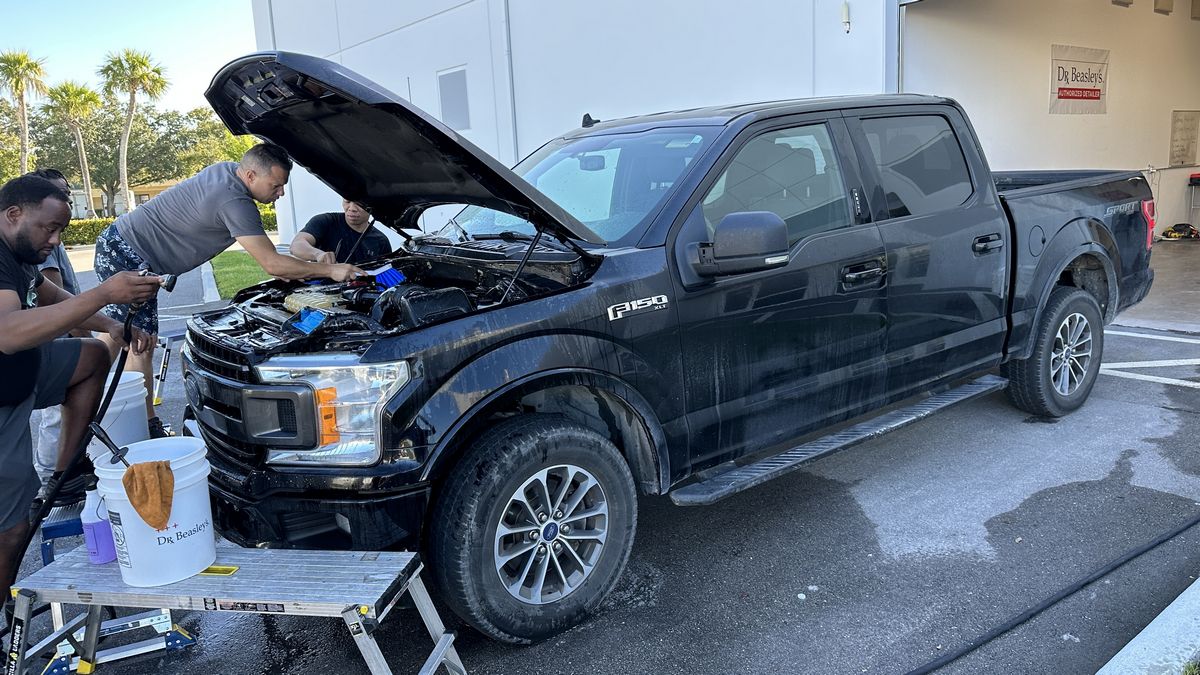
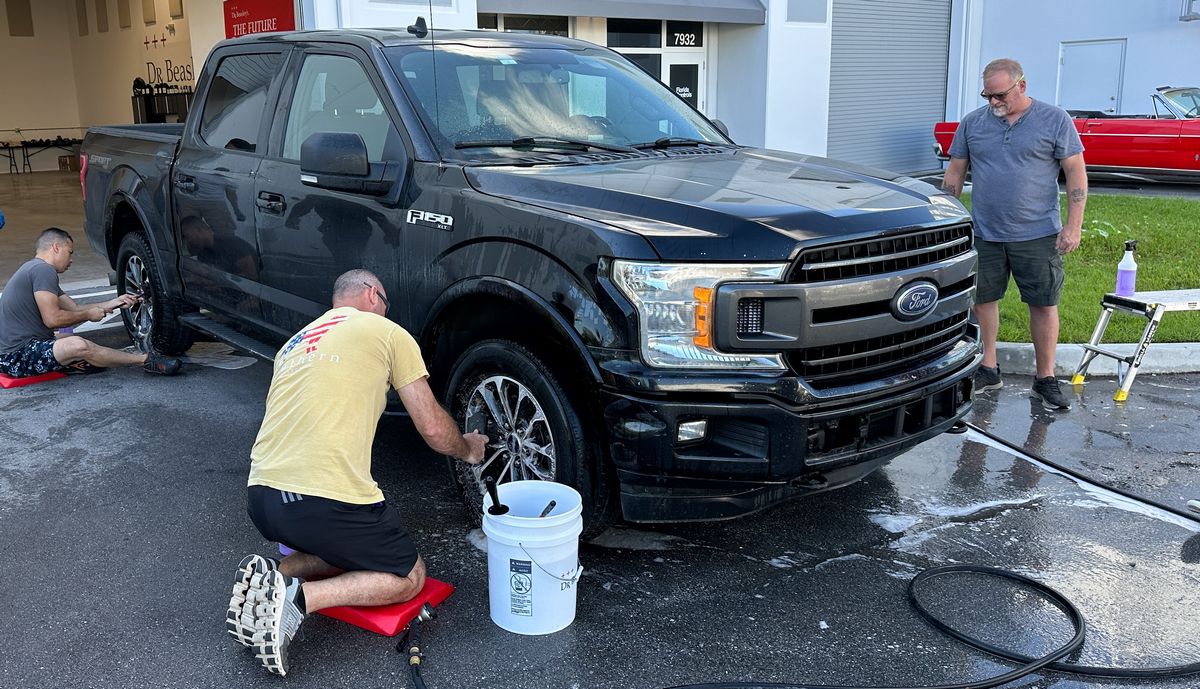
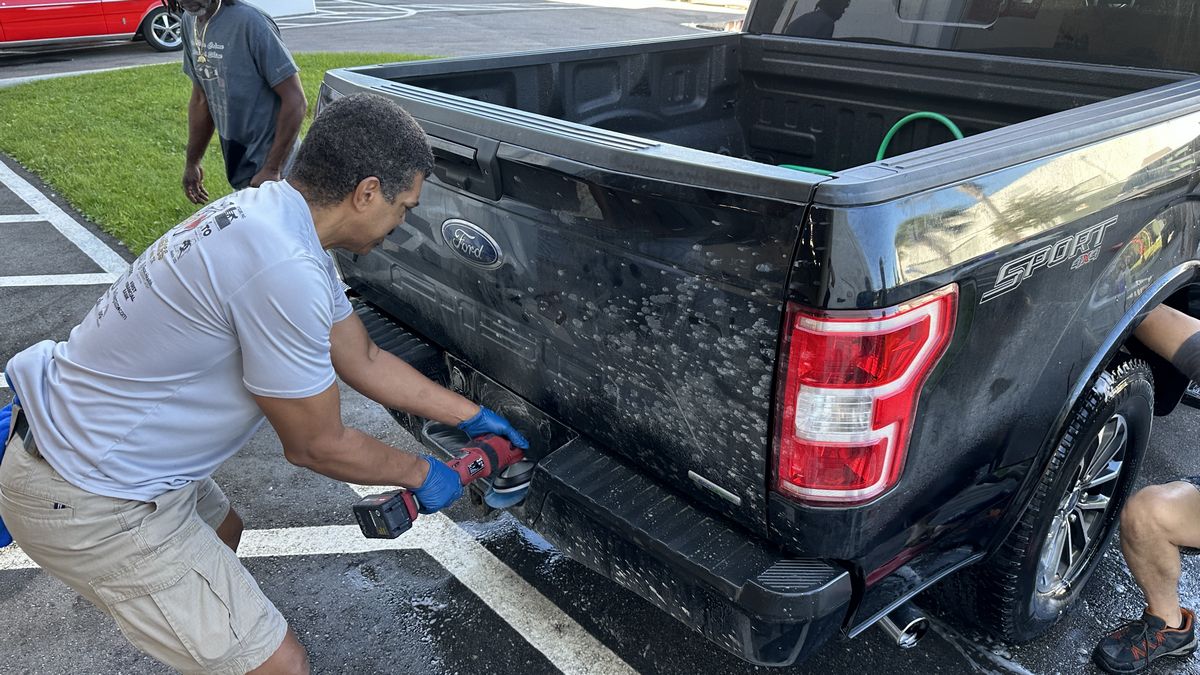
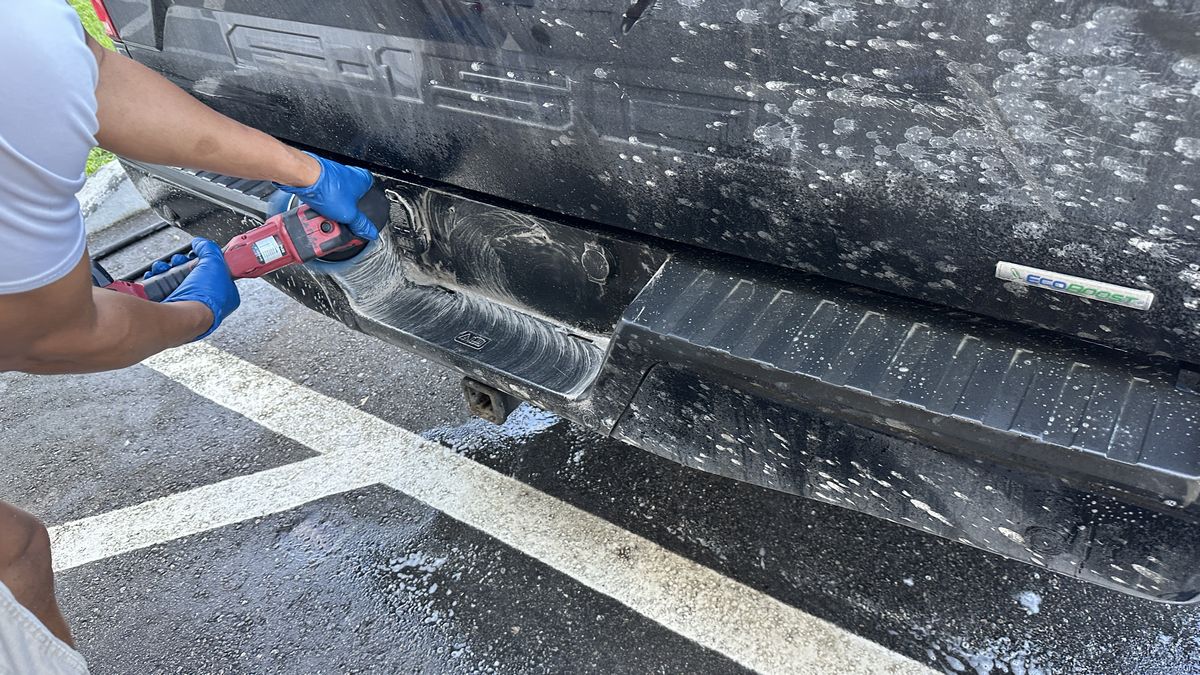
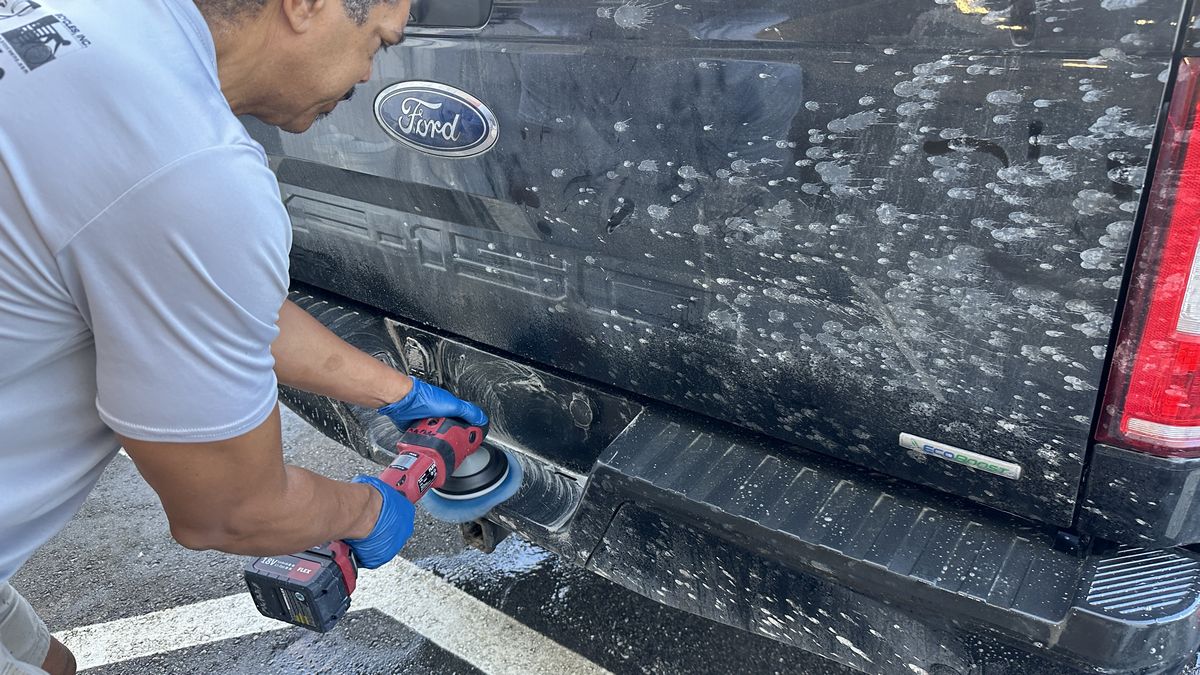
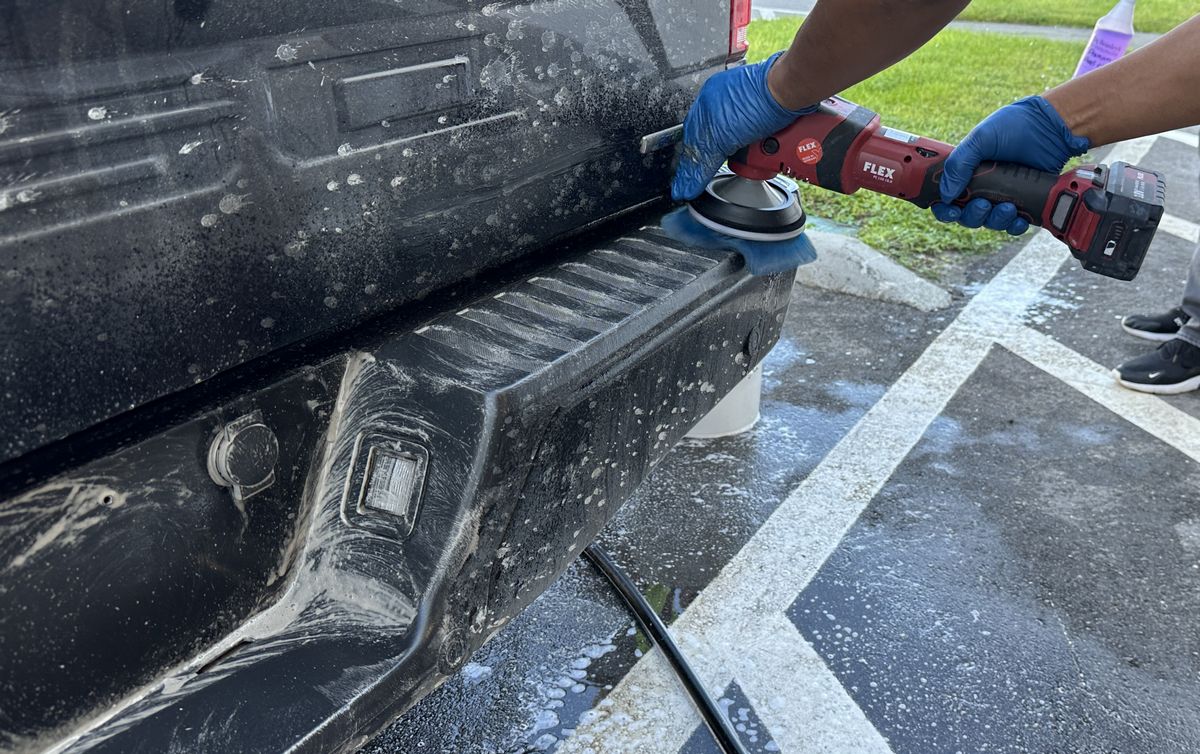
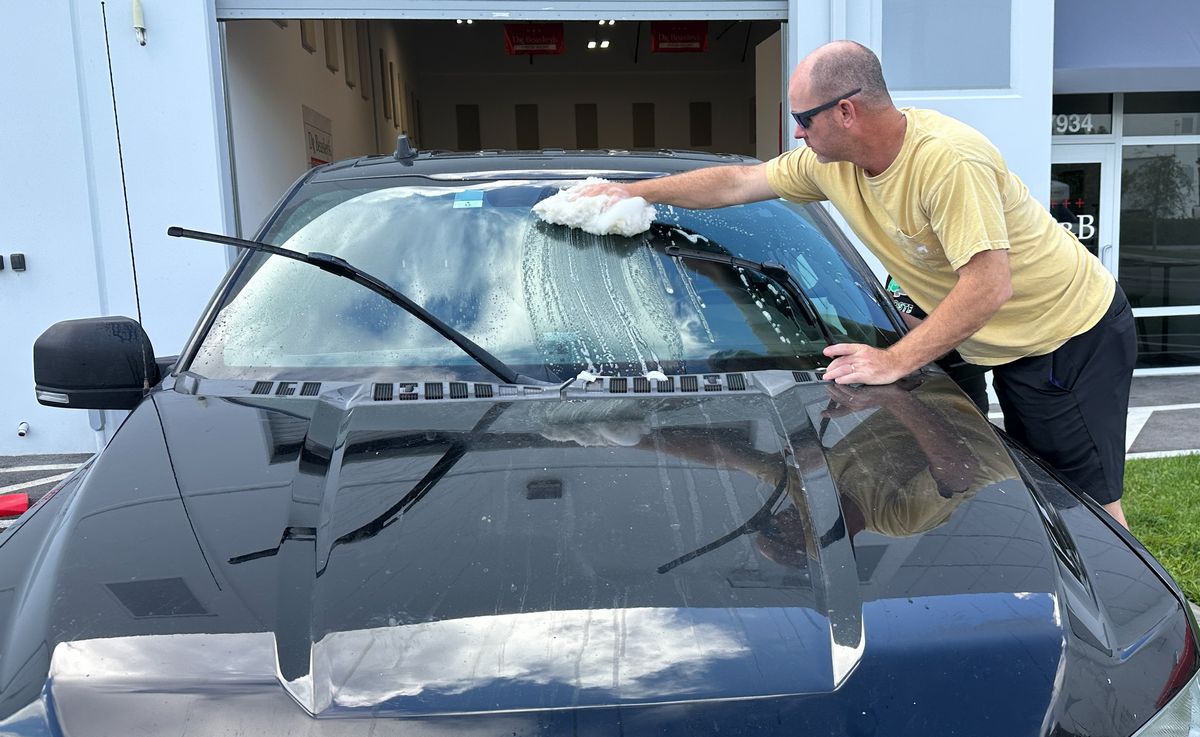
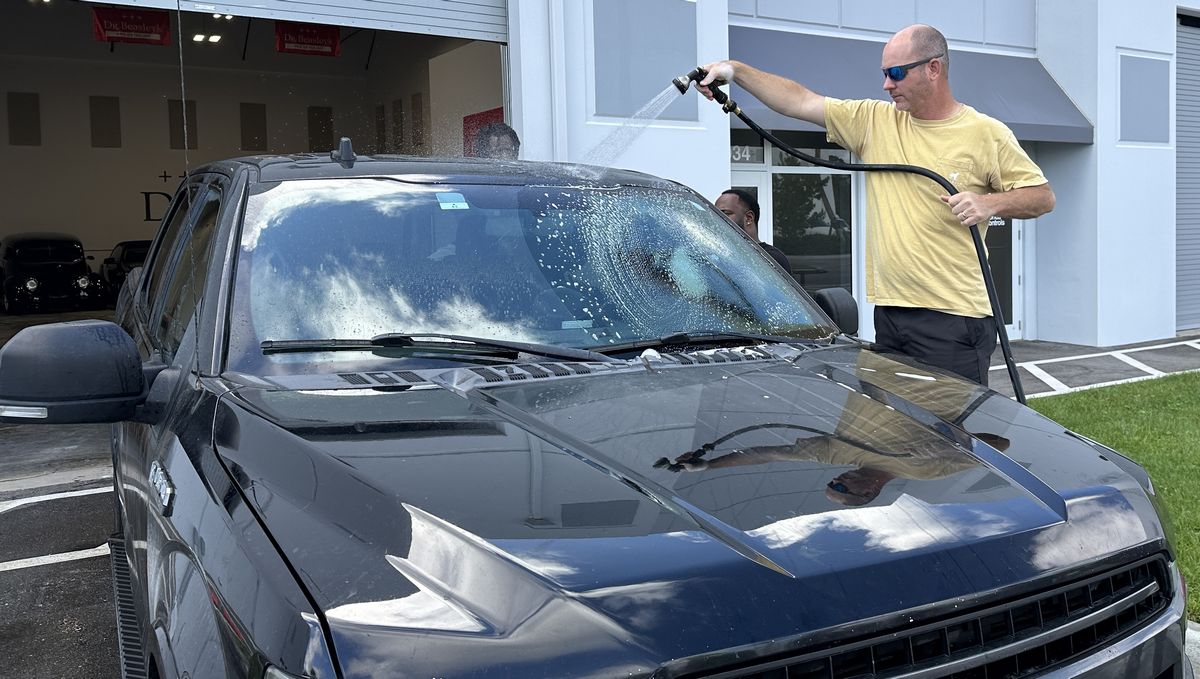
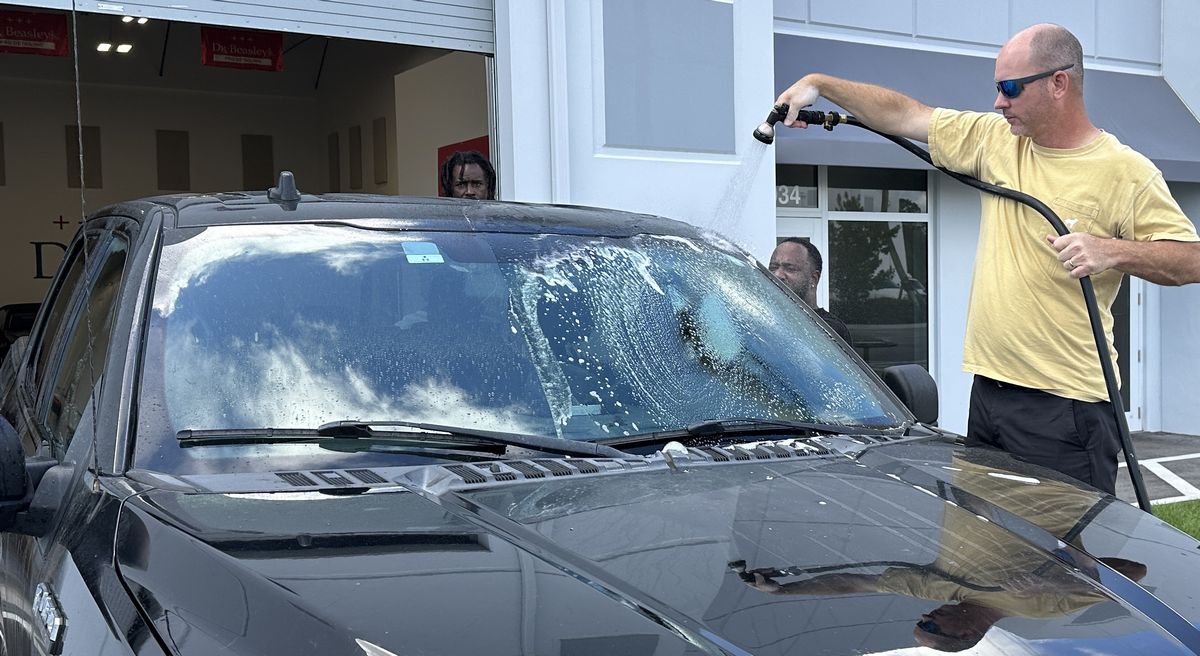
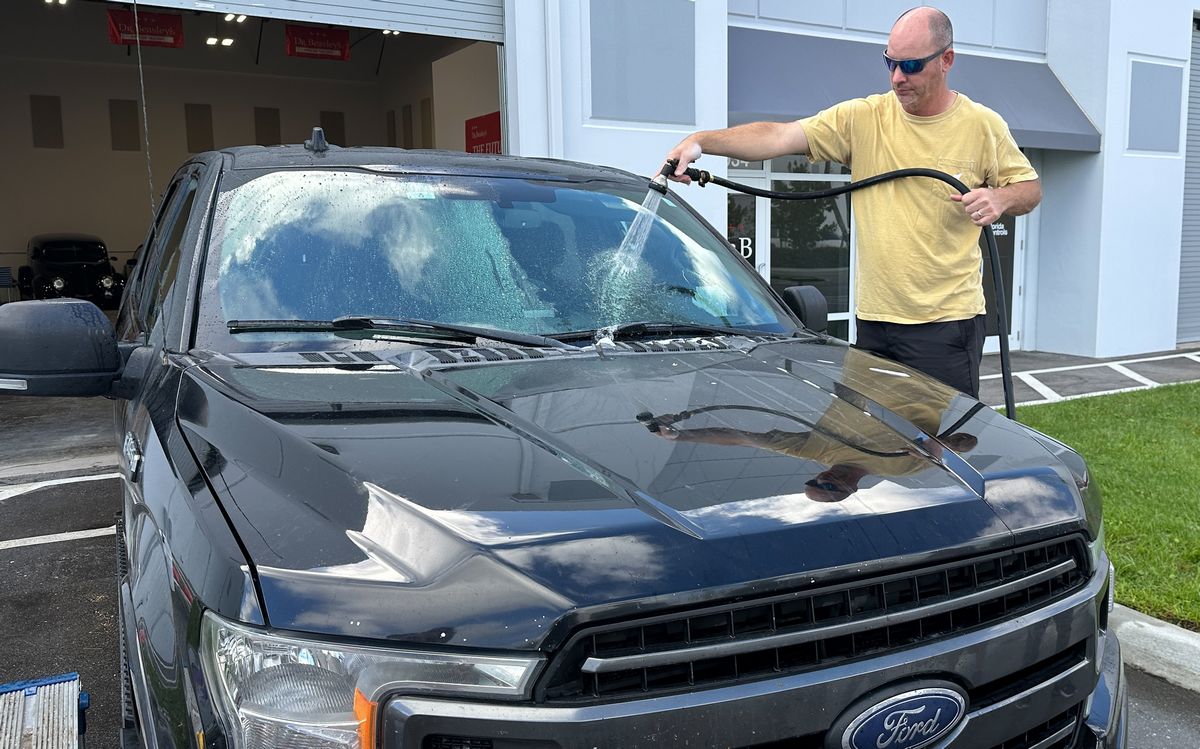
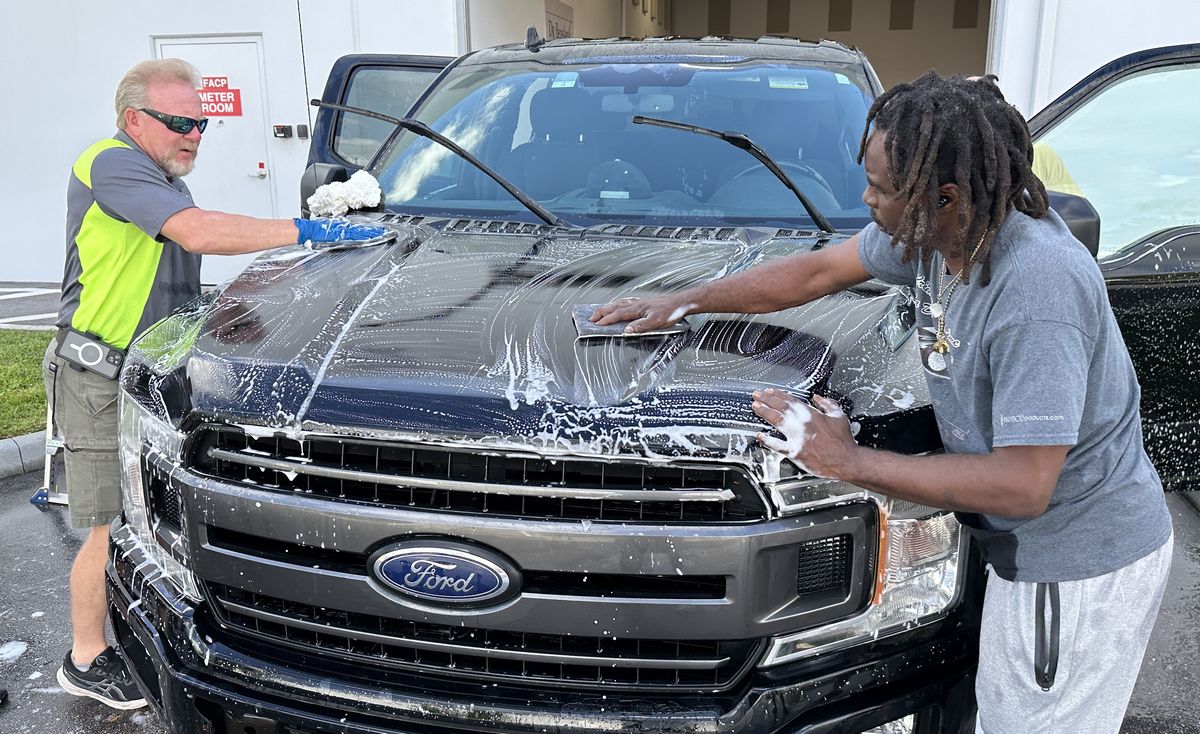
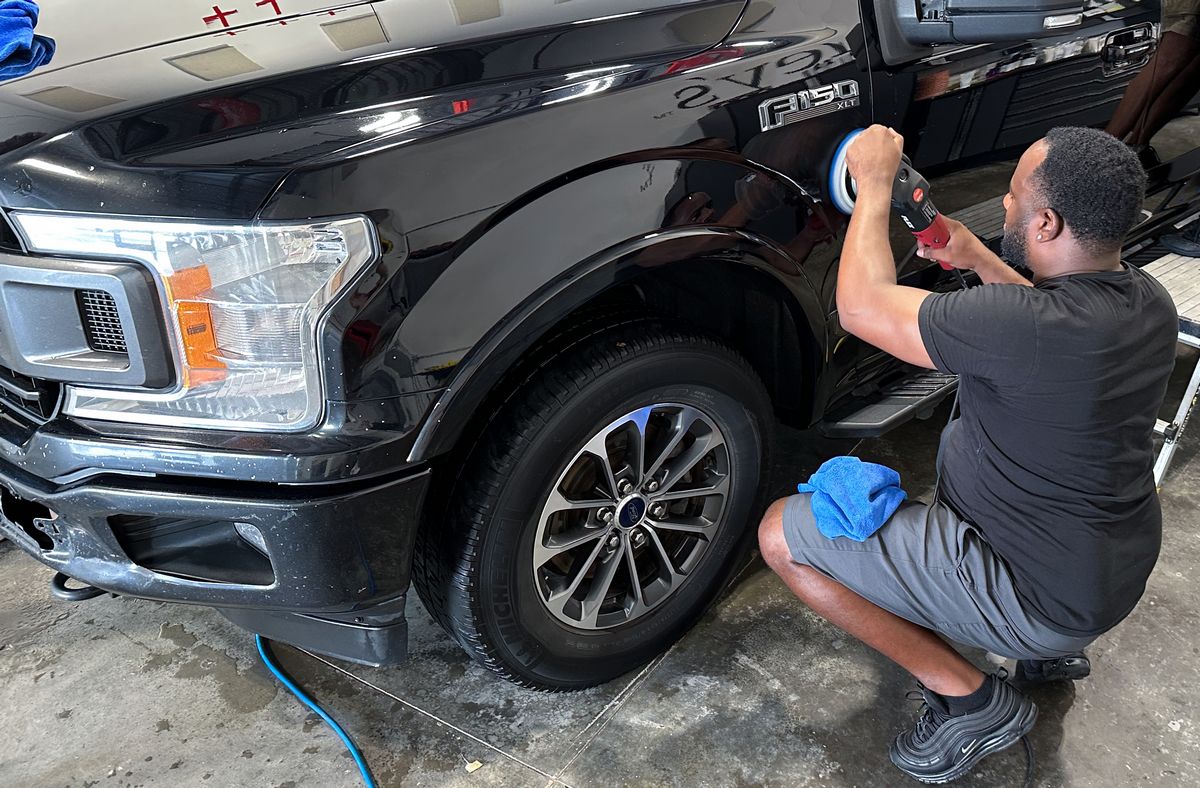
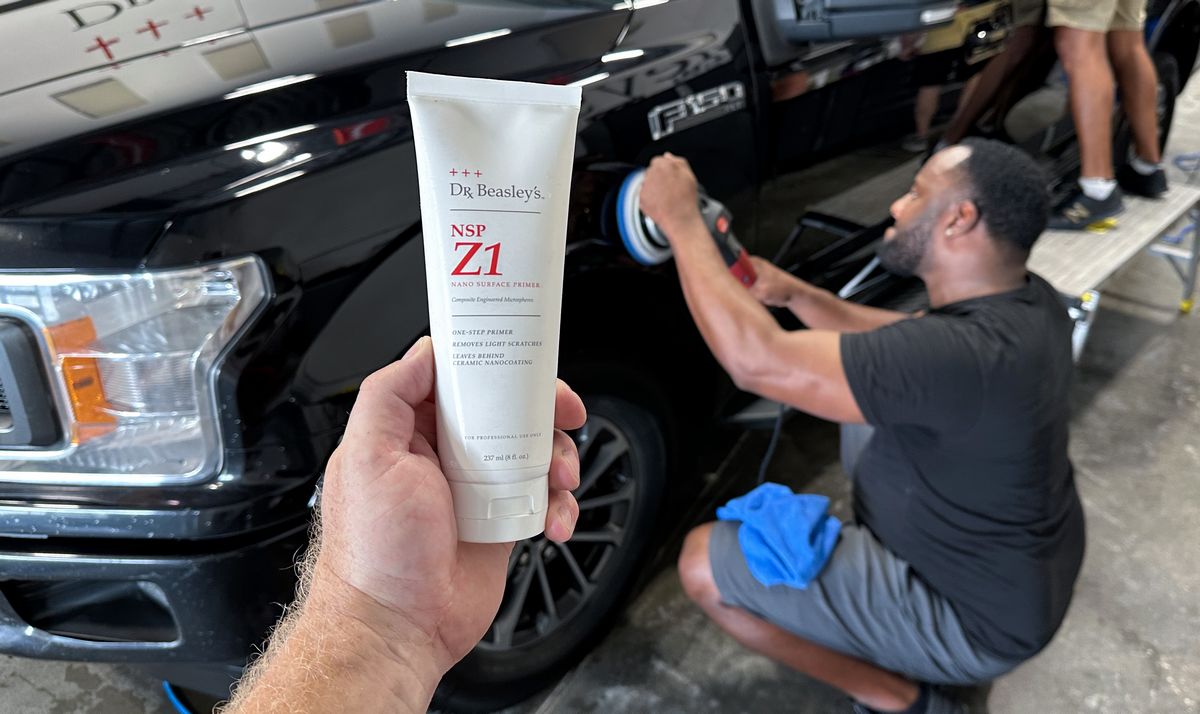
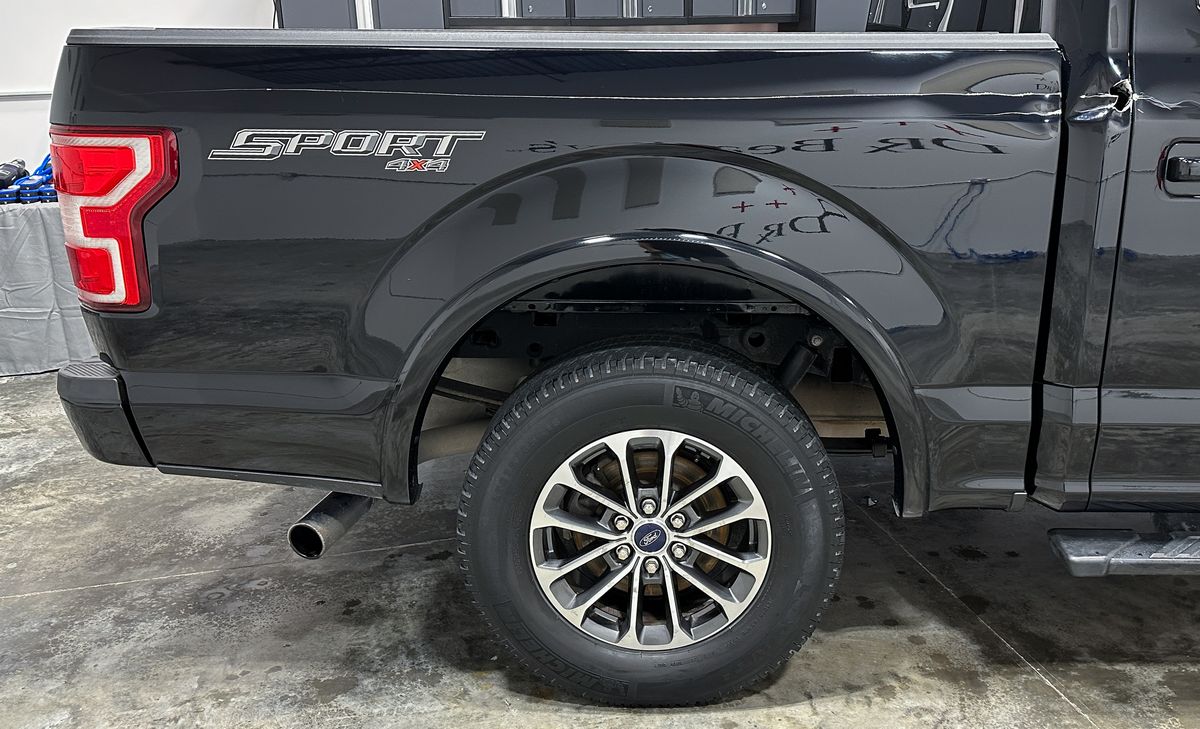
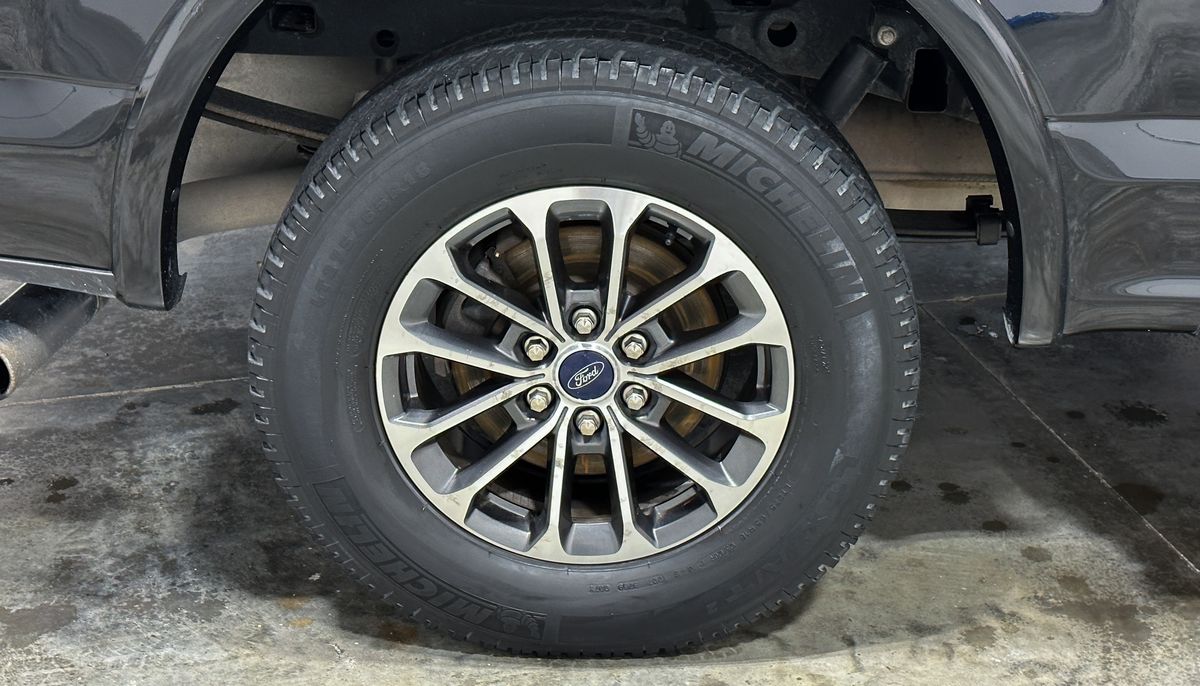
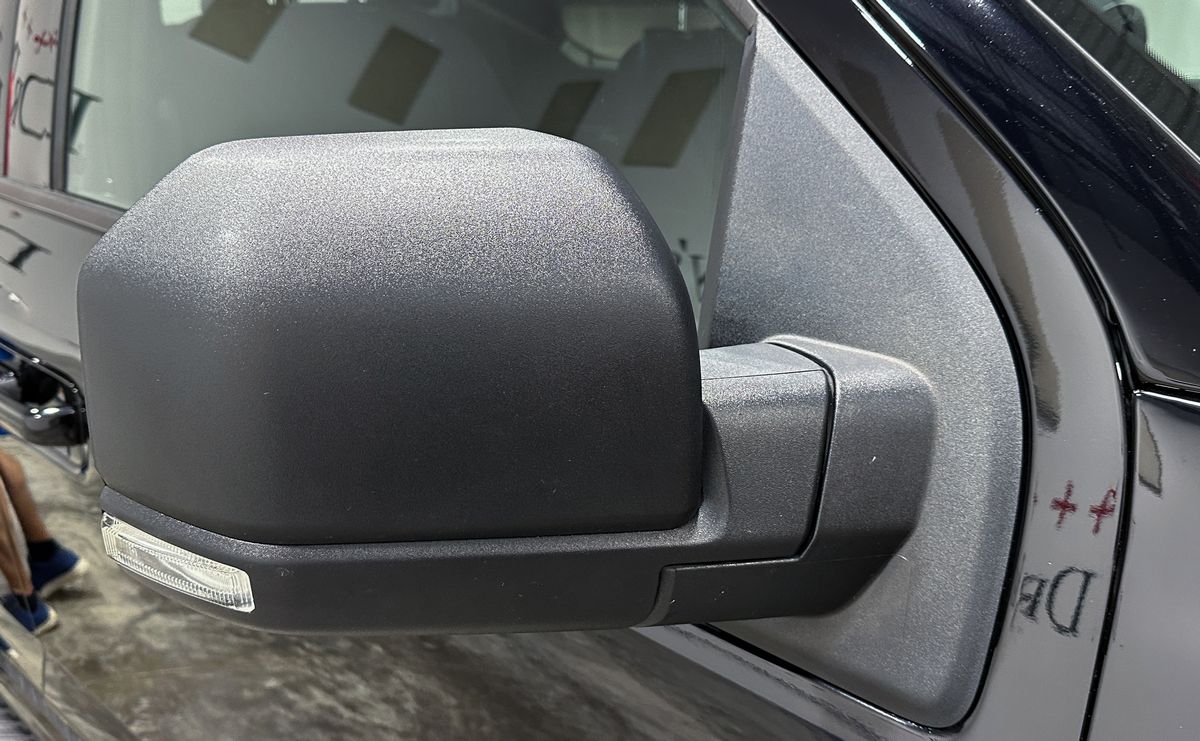
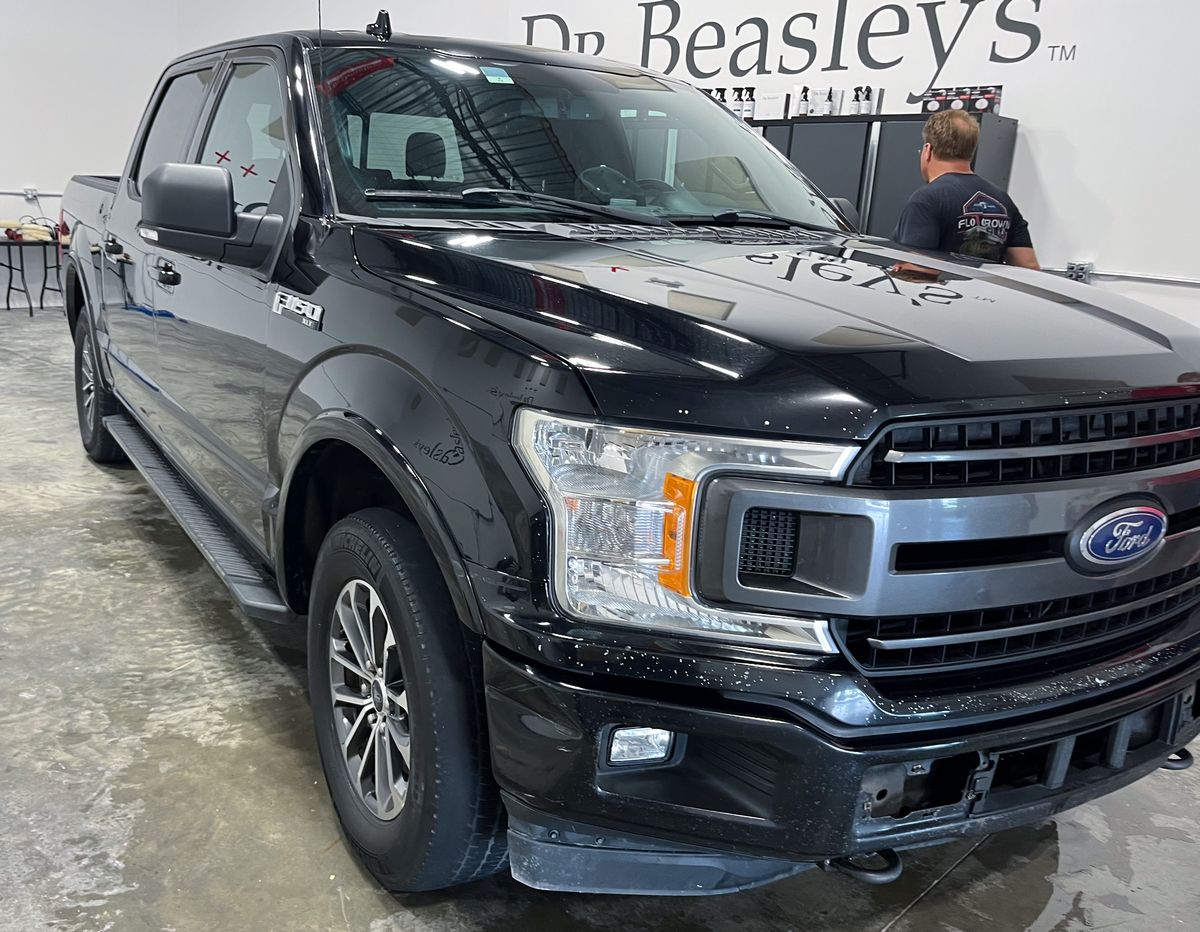
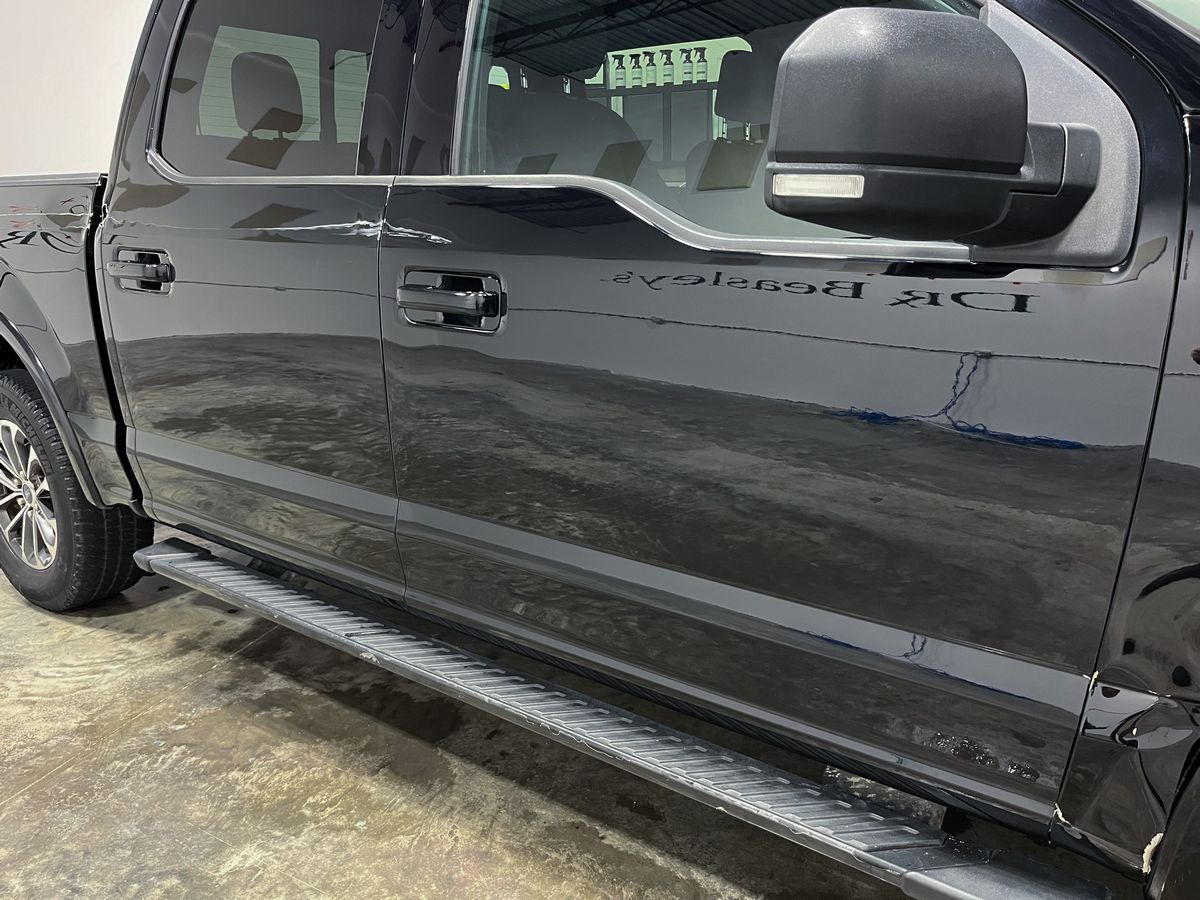
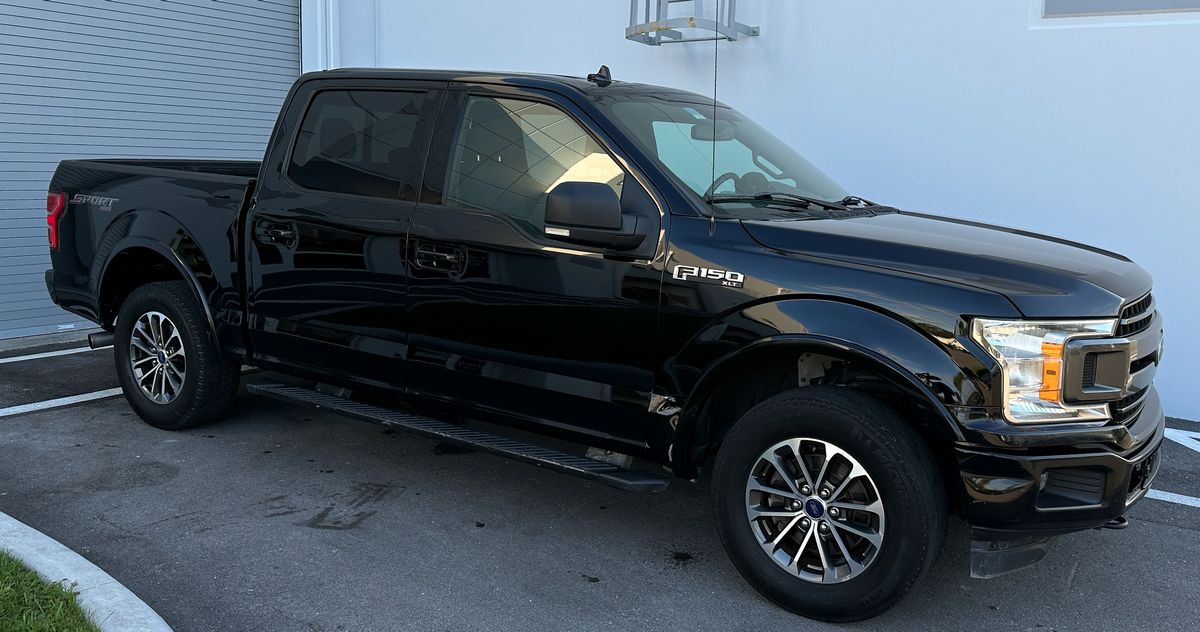
2018 Ford F150
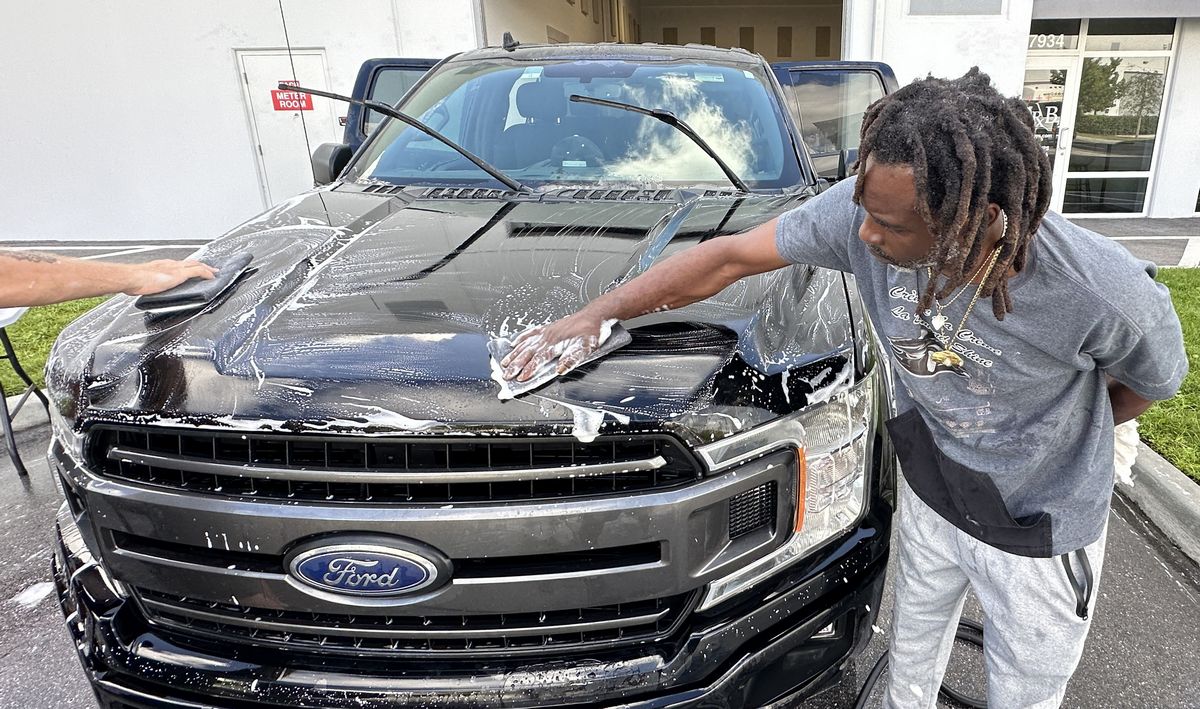
This black Ford F150 is a daily driver and the paint was absolutely trashed. The class learned 1-step ceramic AIO paint correction using Dr. Beasley’s Z1. After the class performed all of the paint correction steps, they used the Dr. Color Chip Rock Chip Repair System to address all the rock chips in the paint.
Saturday afternoon session – Removing Orange Peel
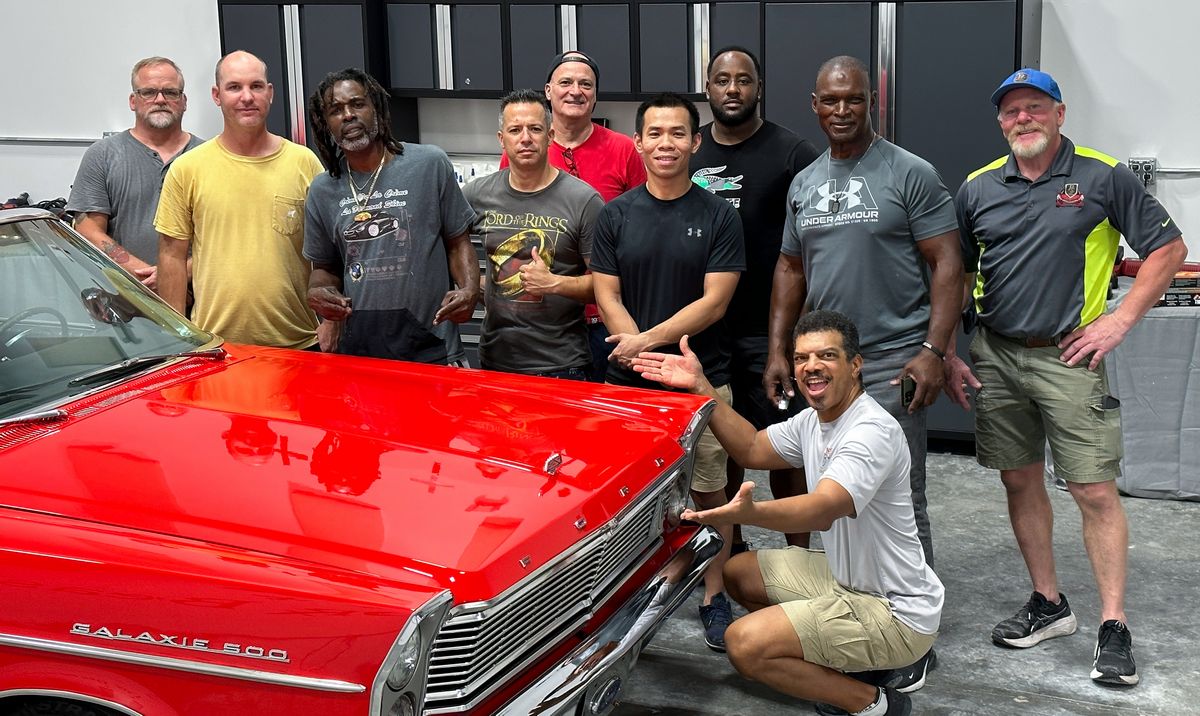
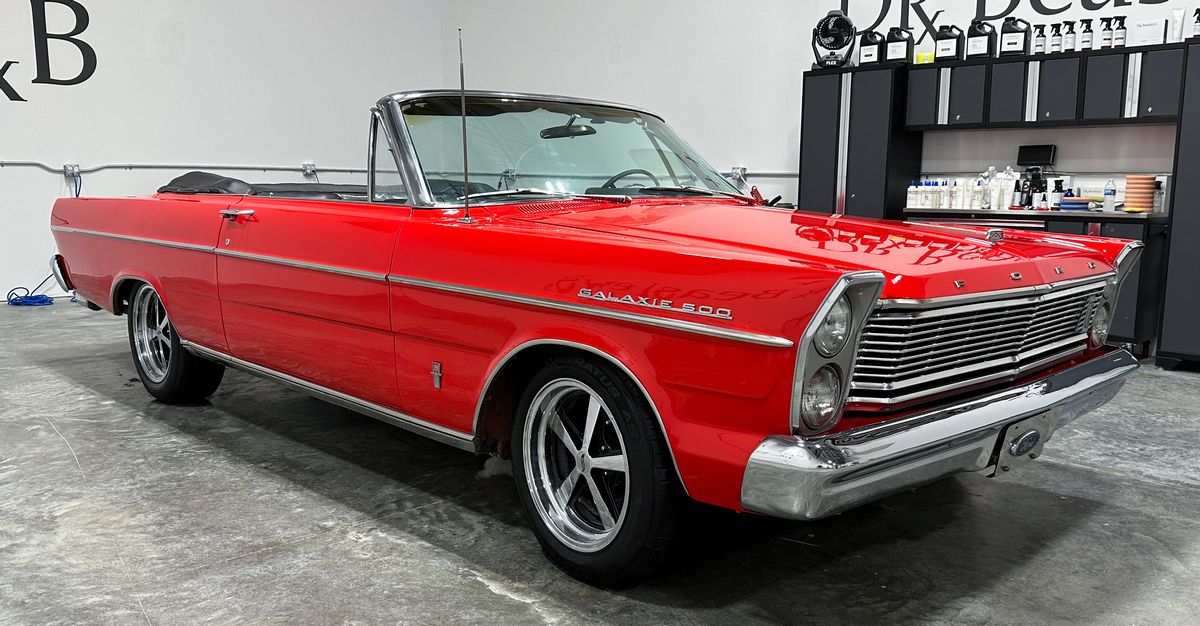
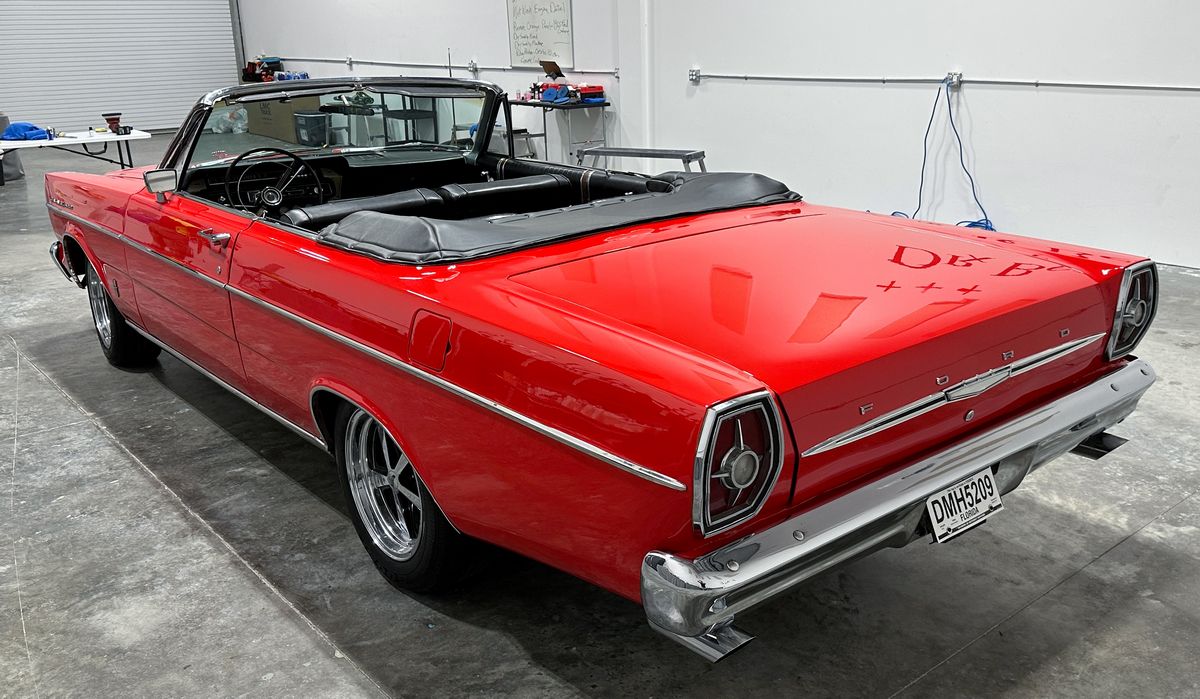
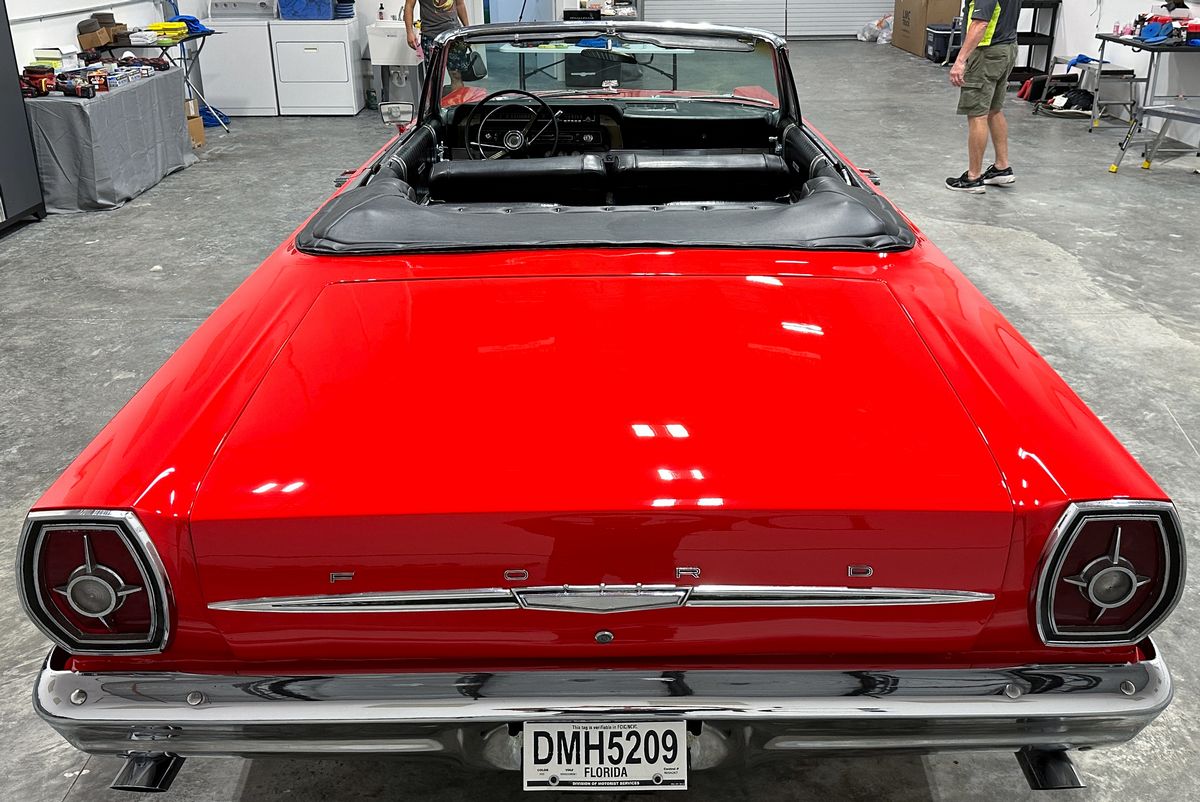
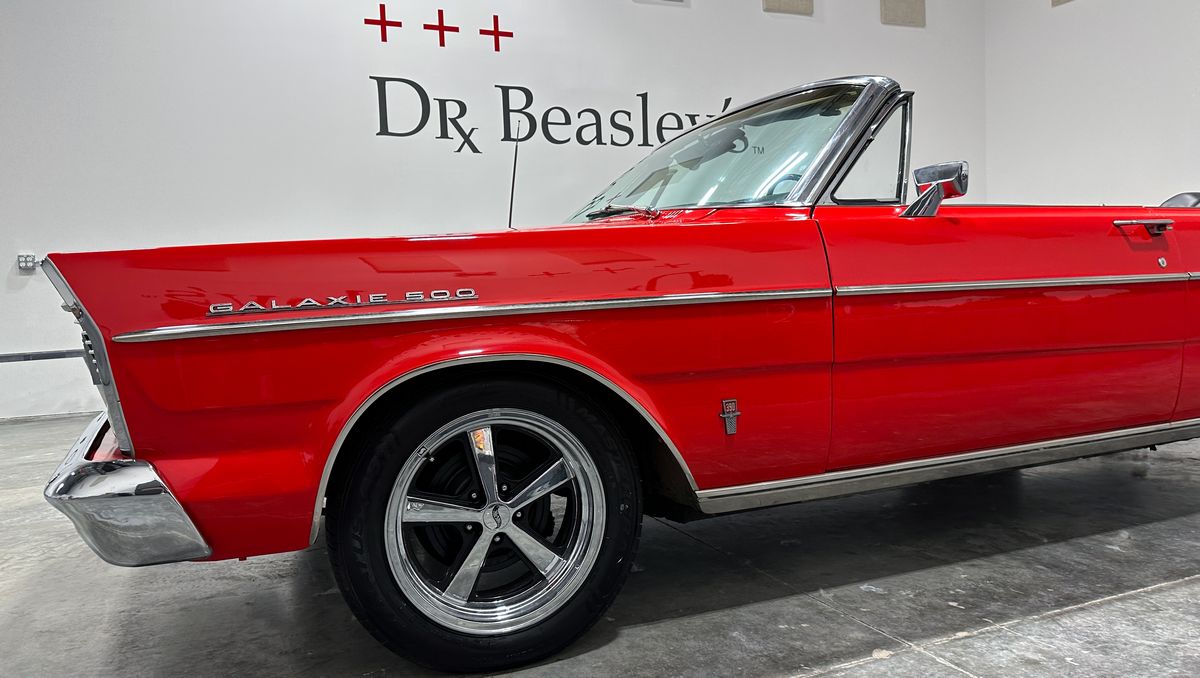
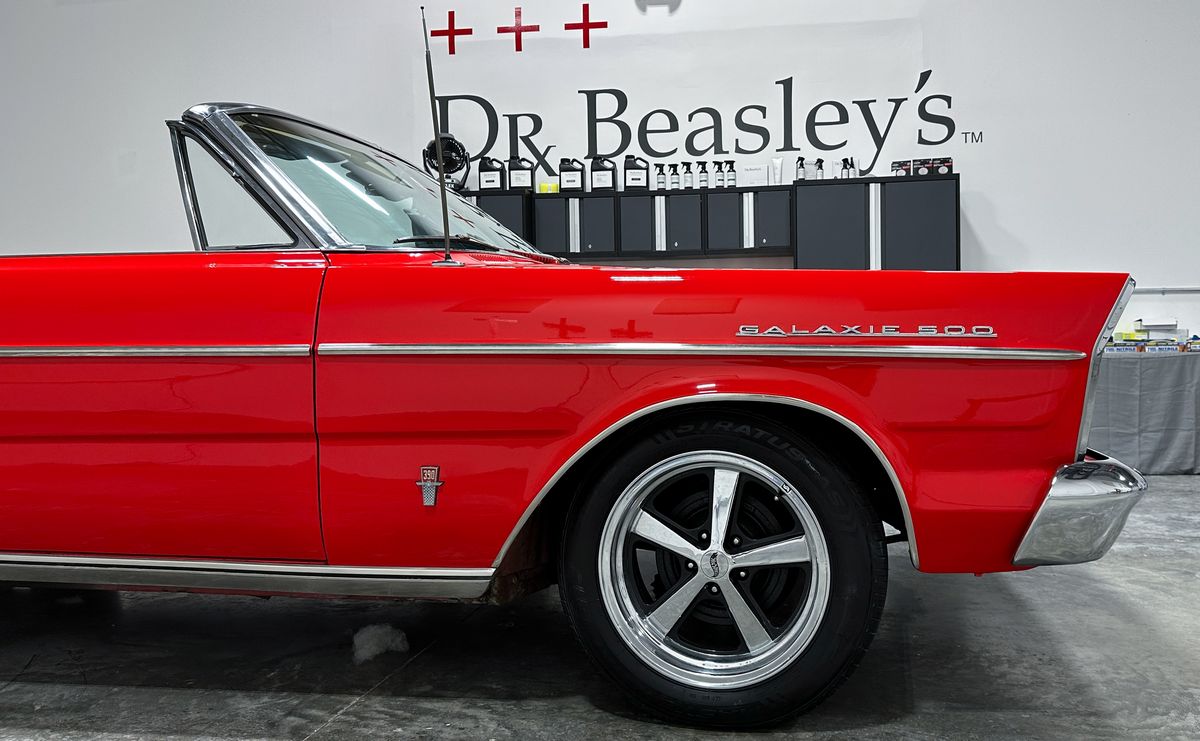
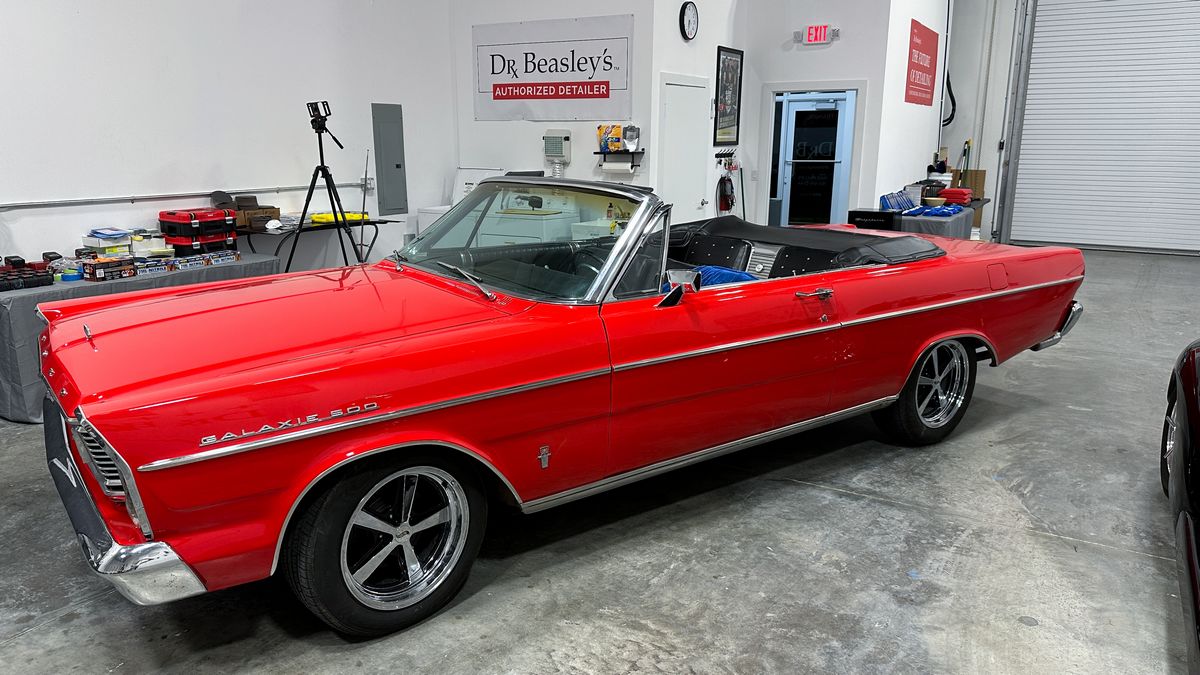
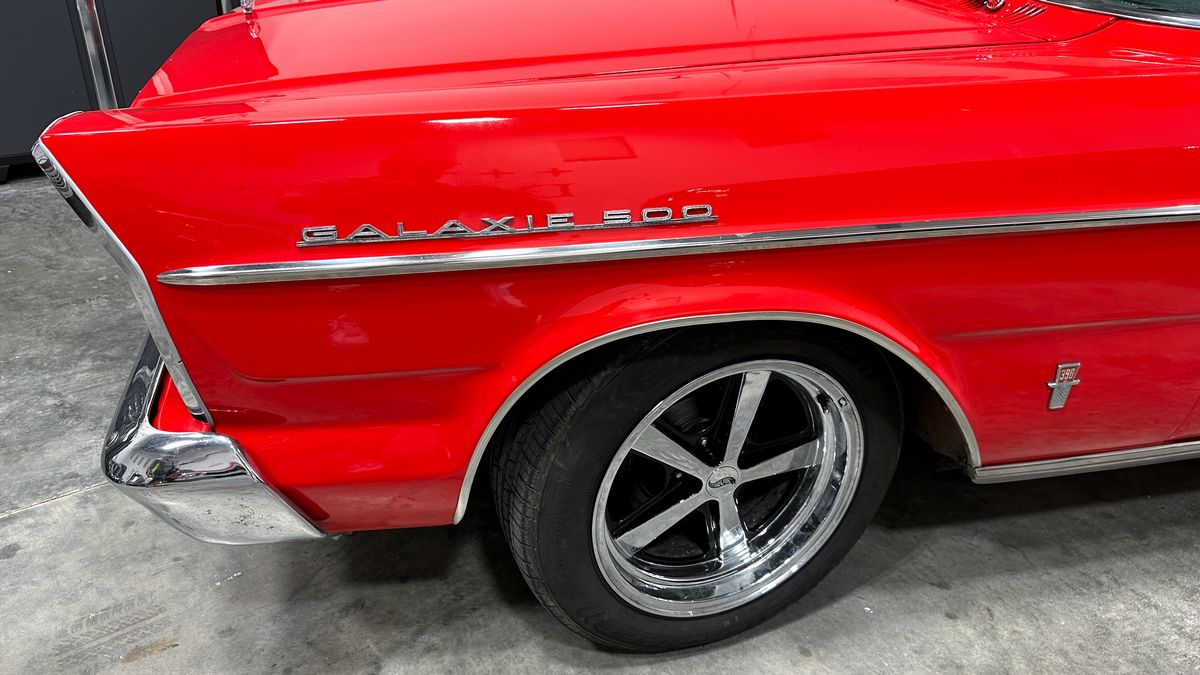
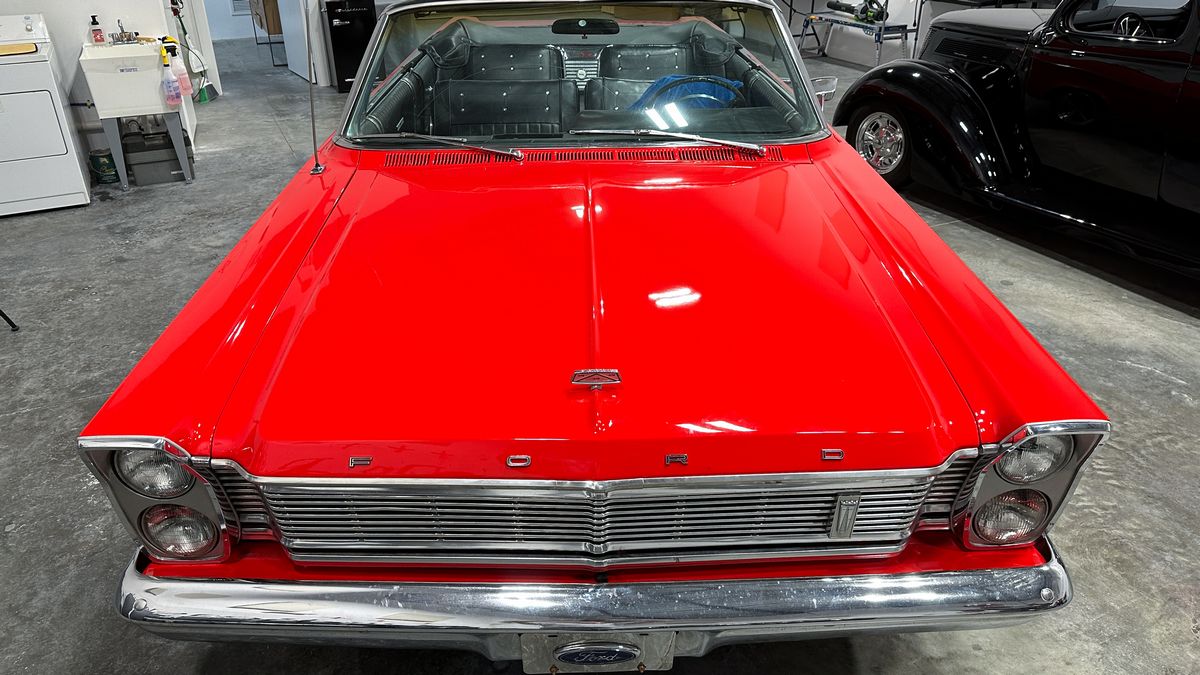
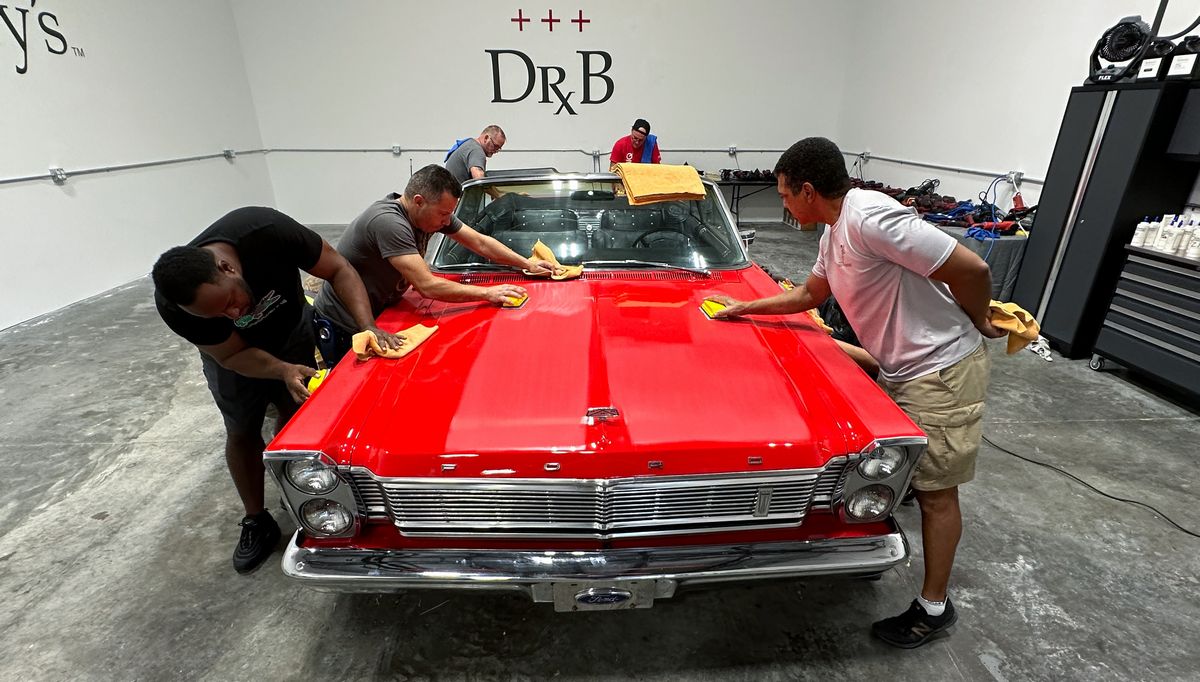
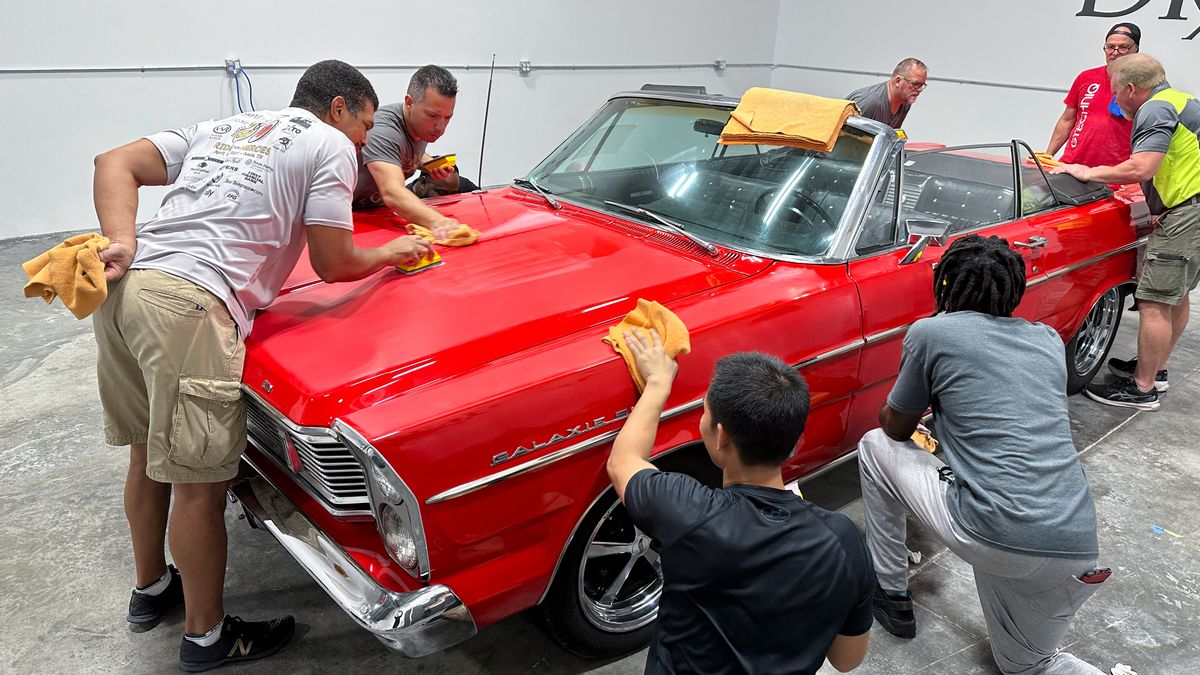
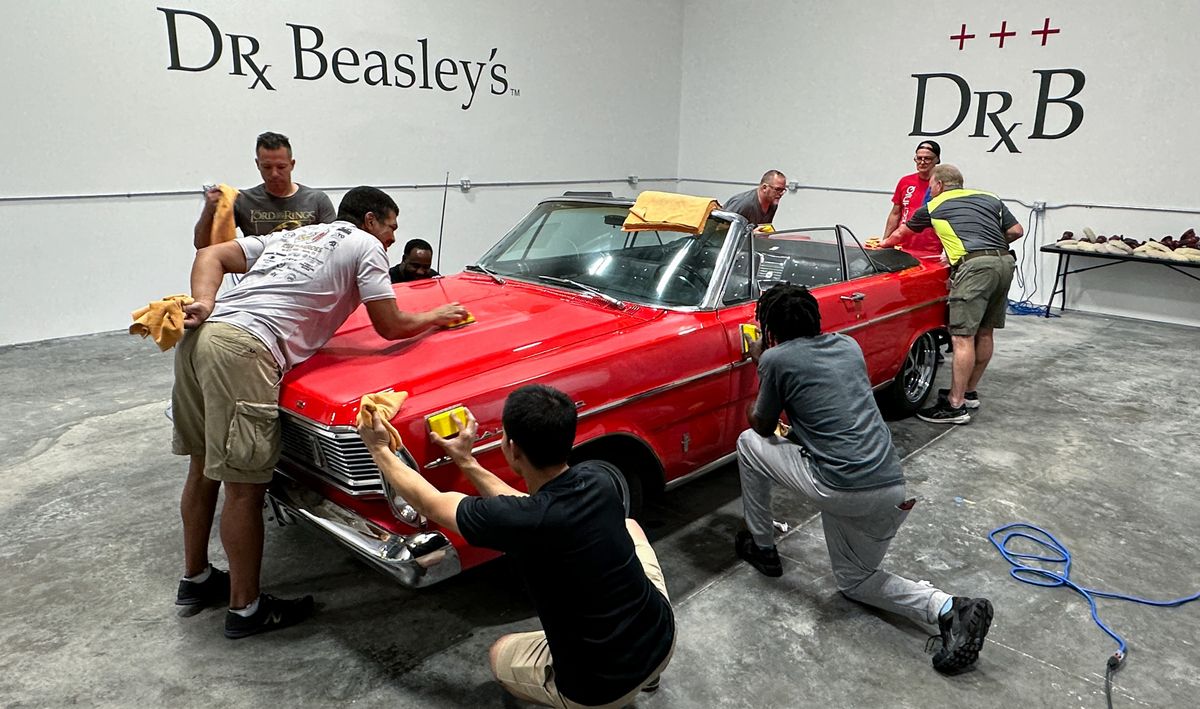
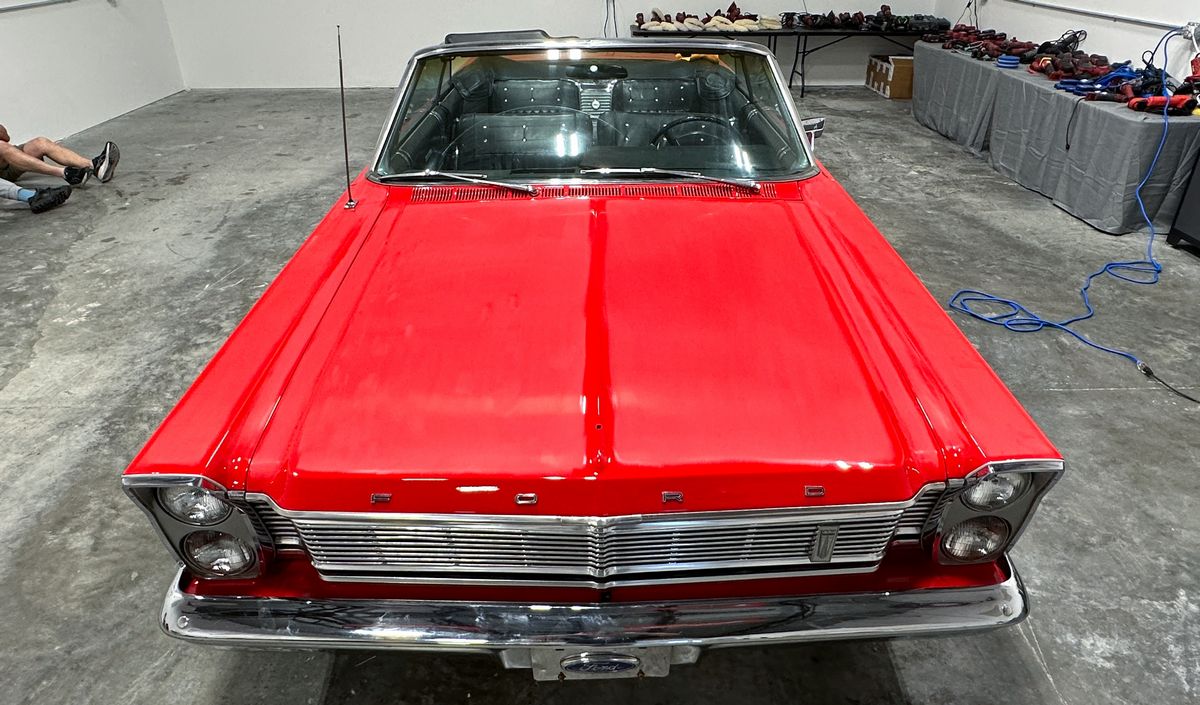
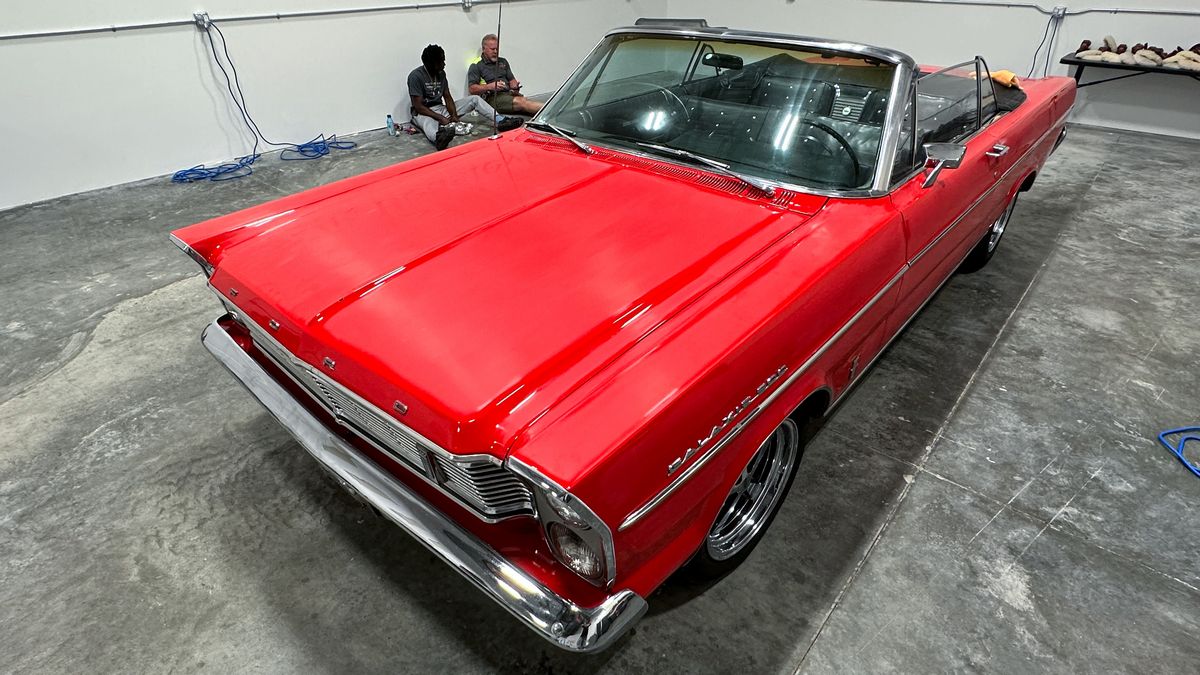
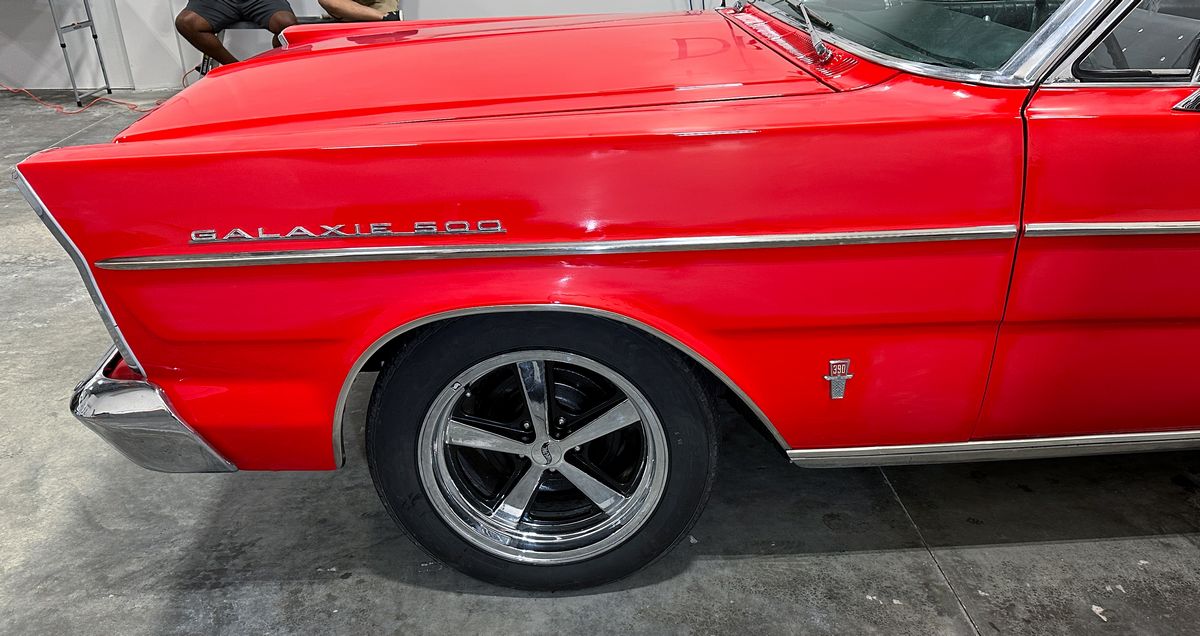
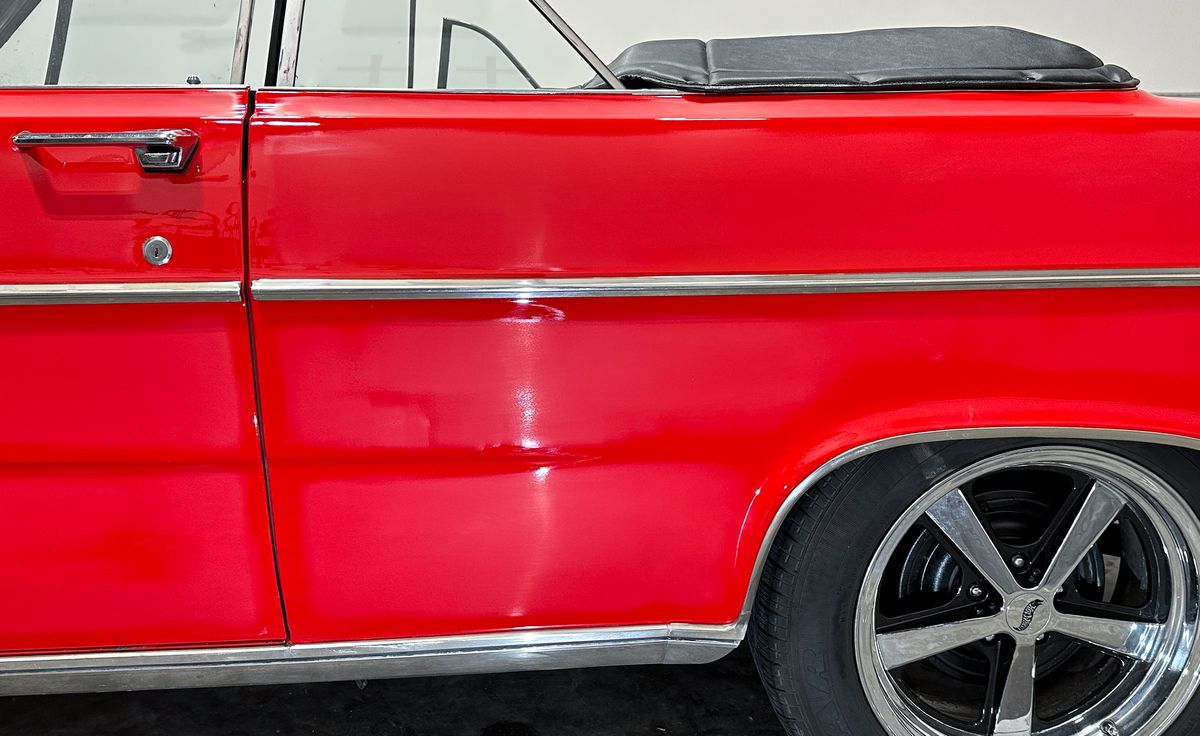
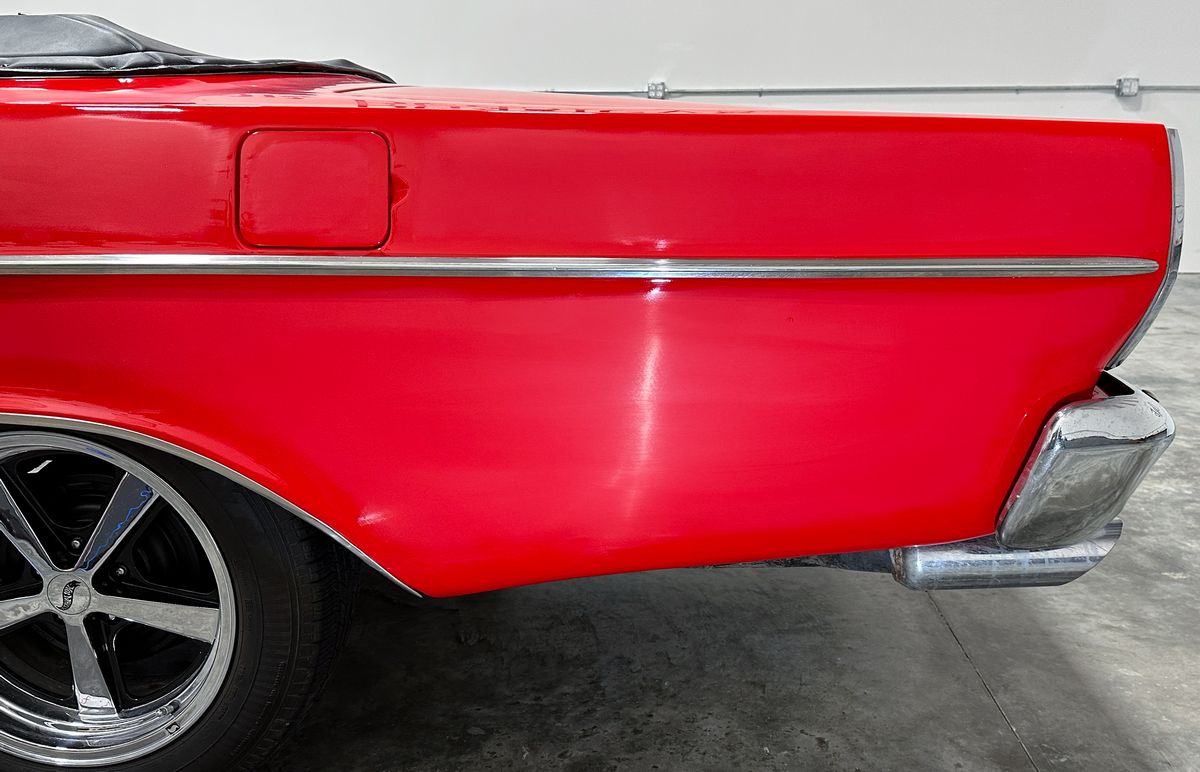
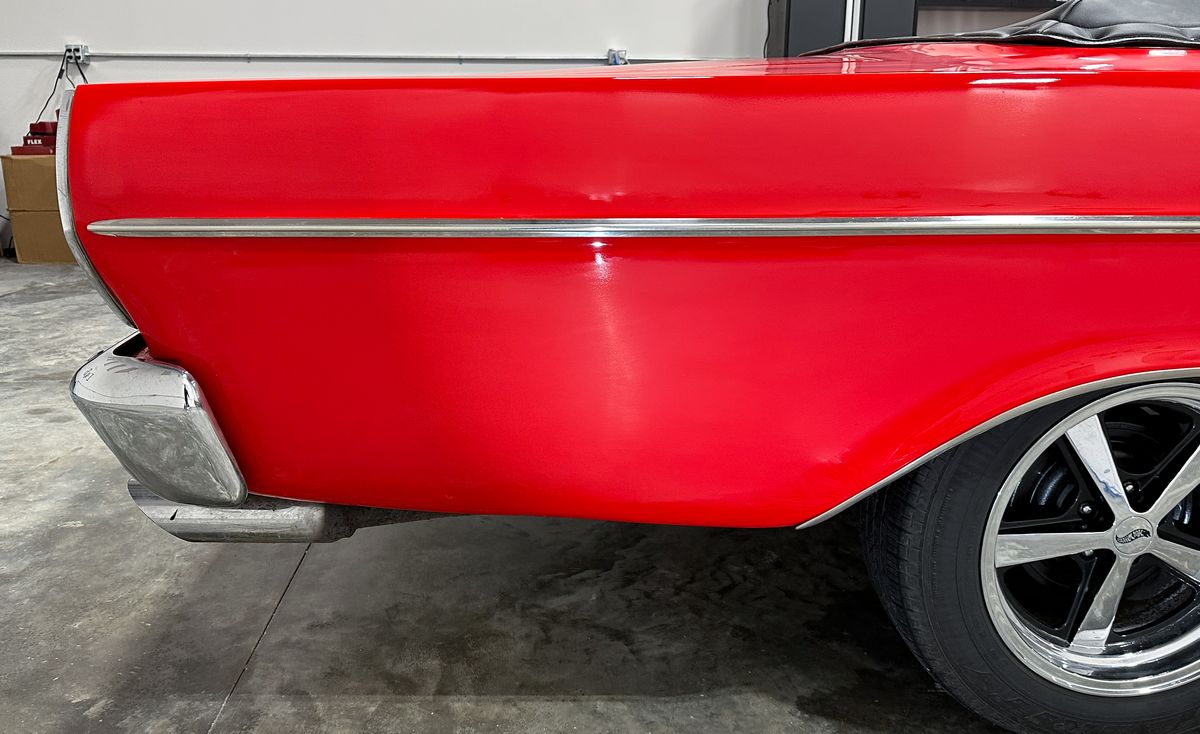
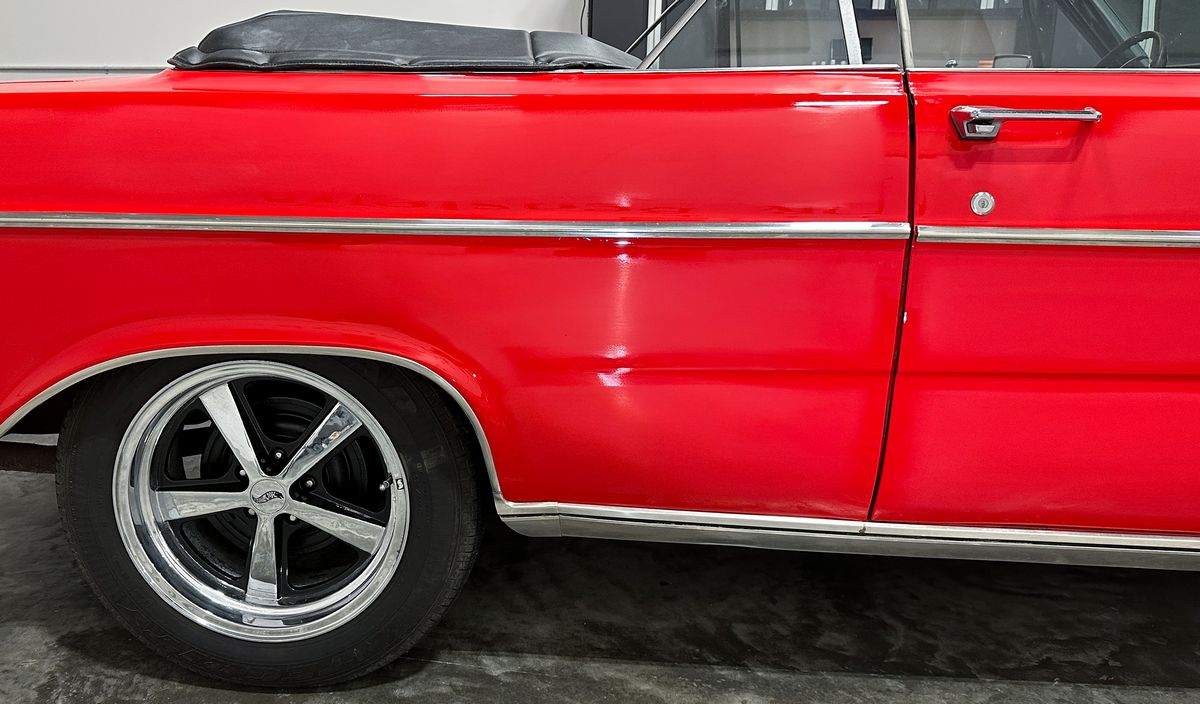
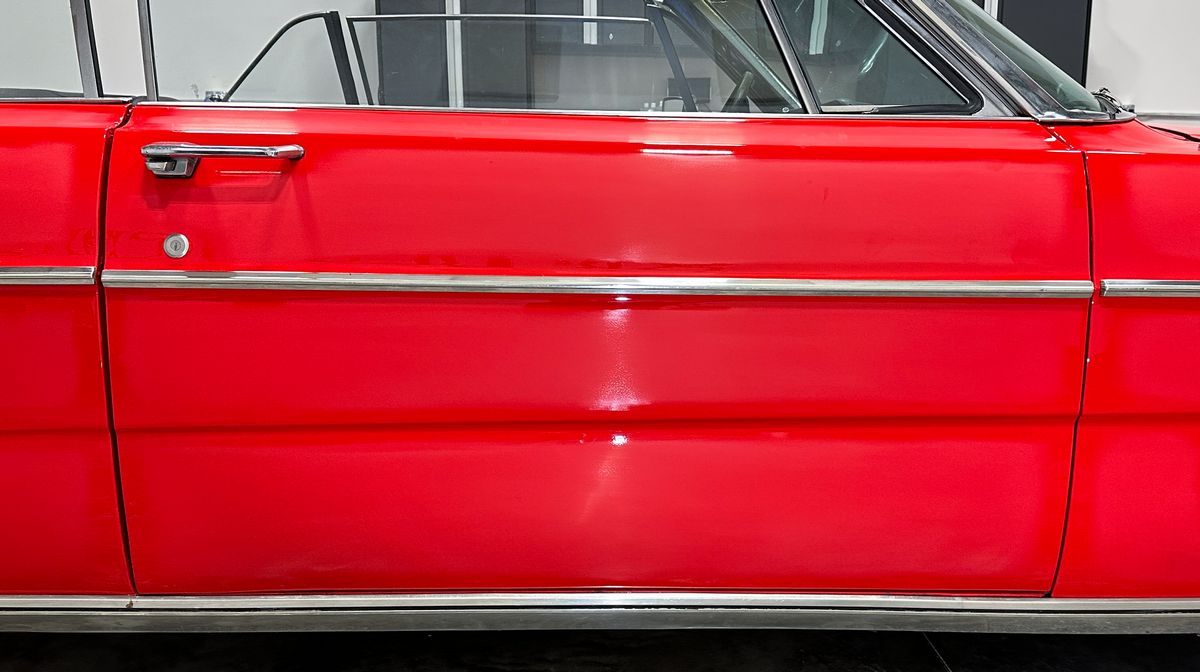
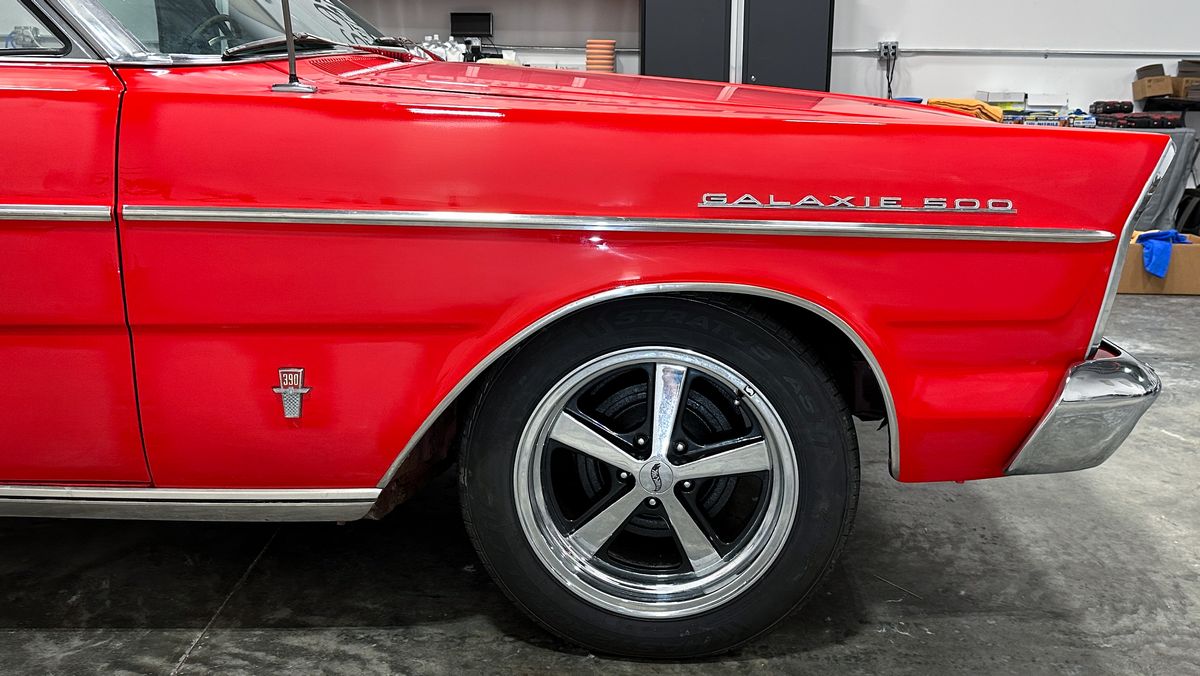
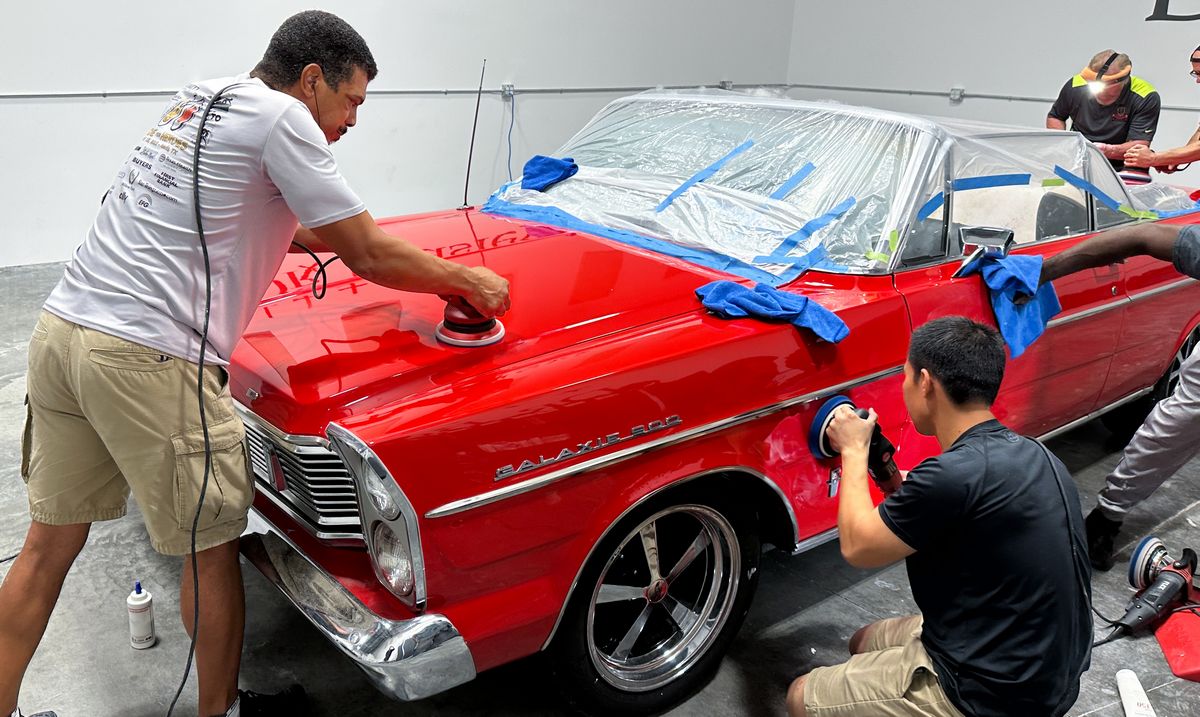
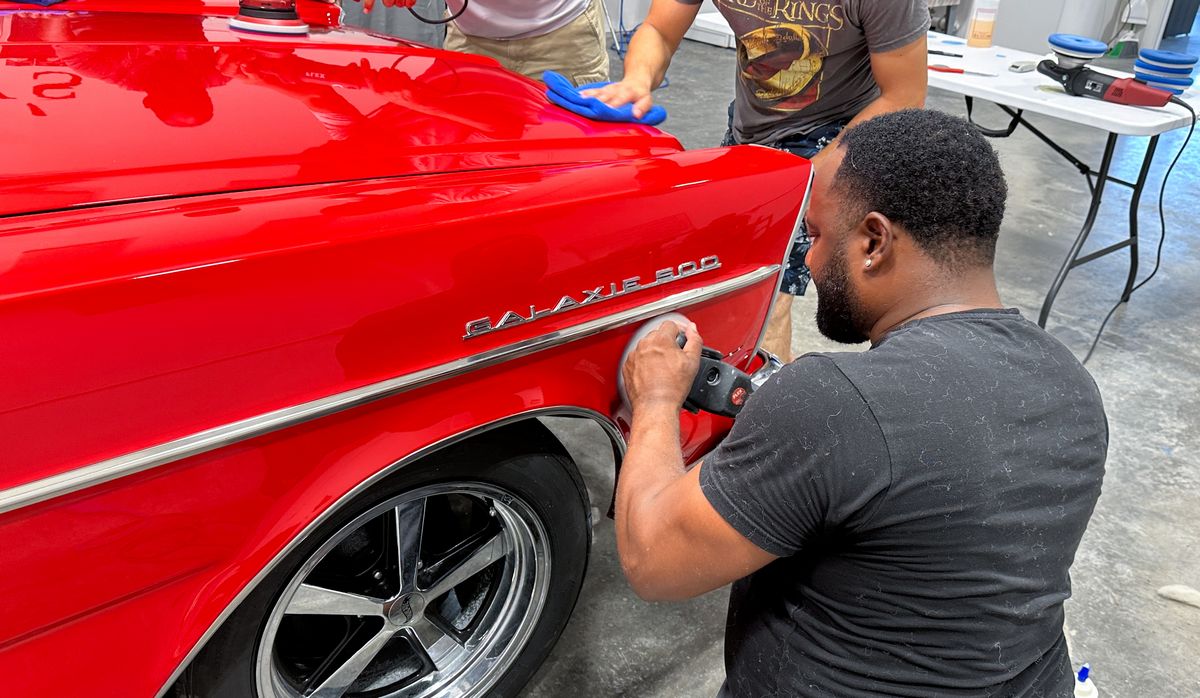
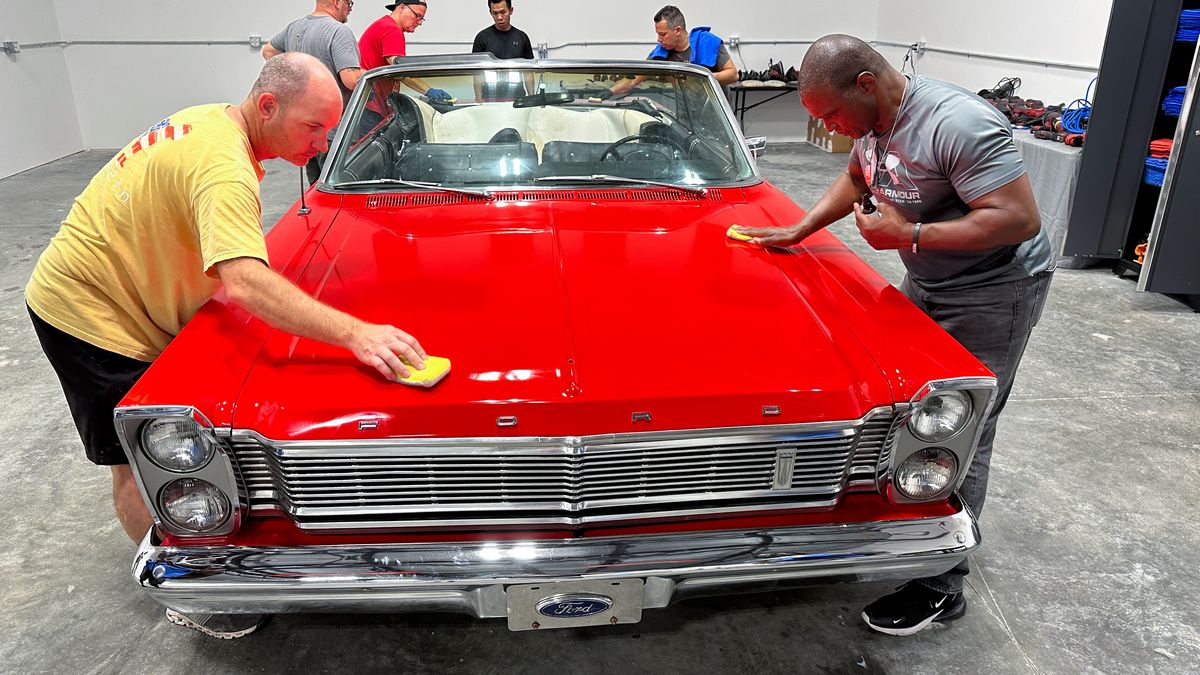
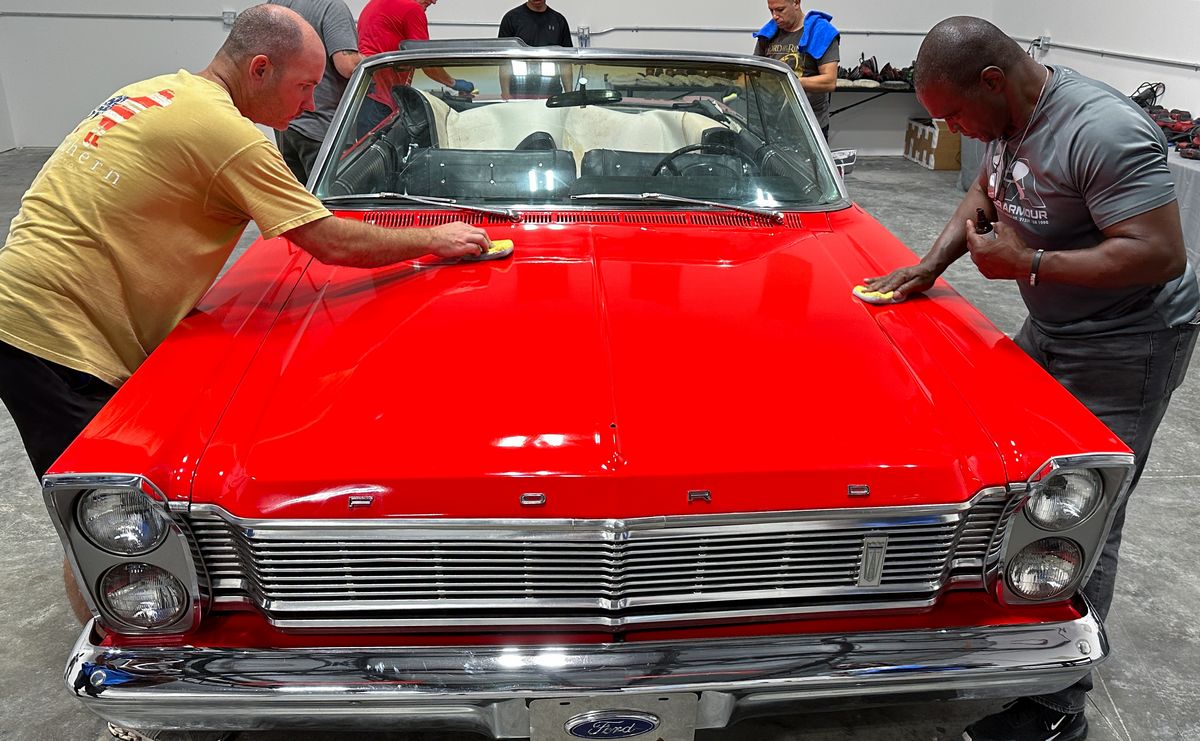
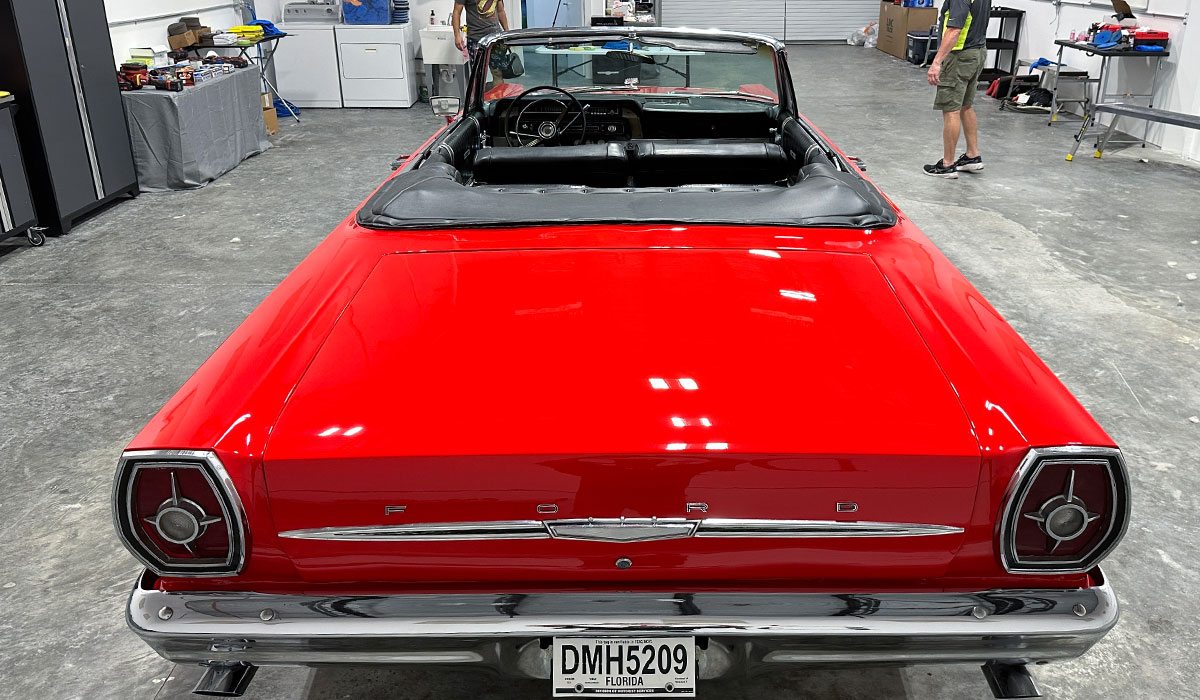
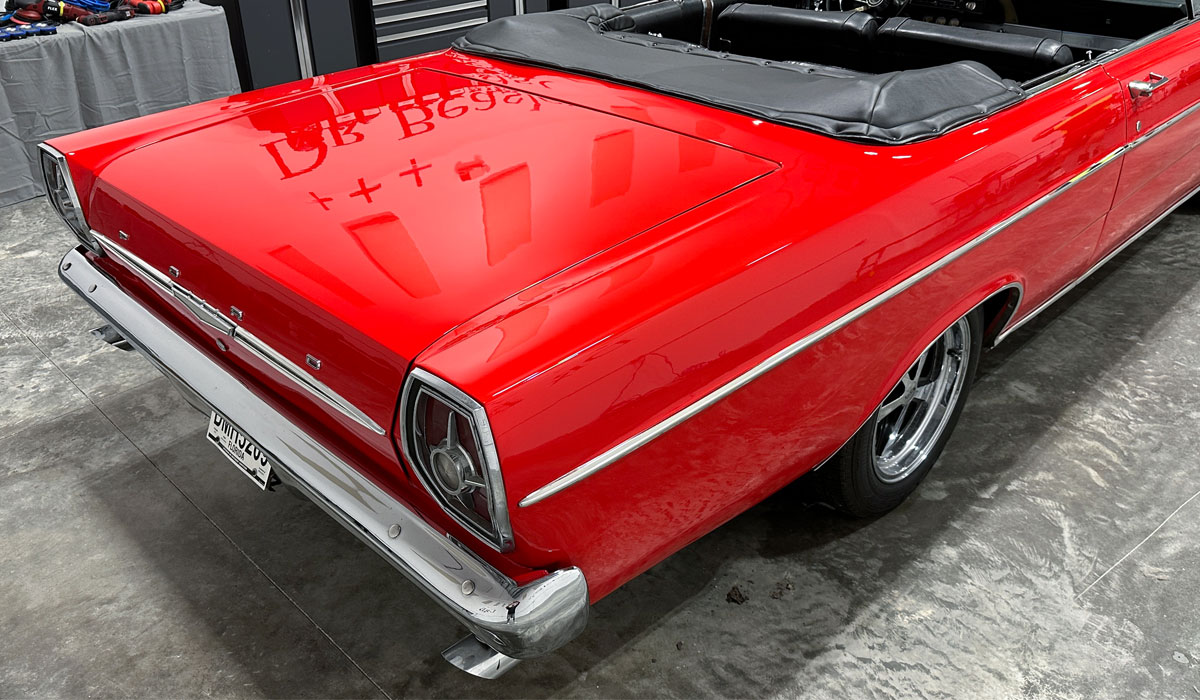
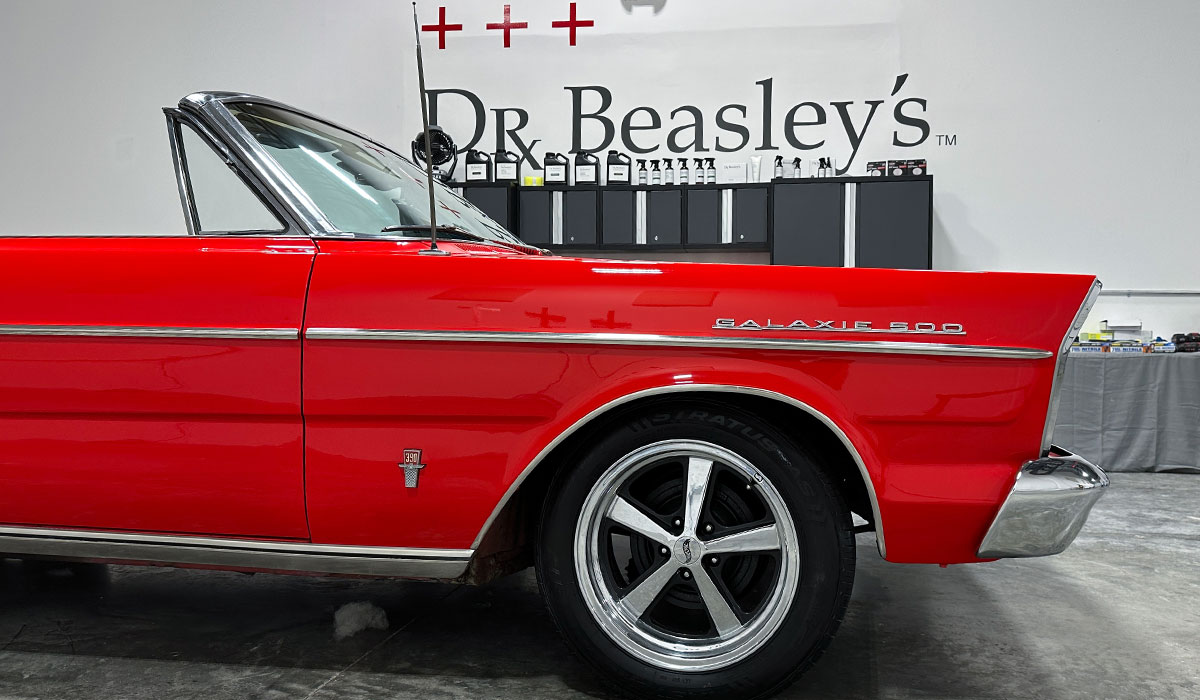
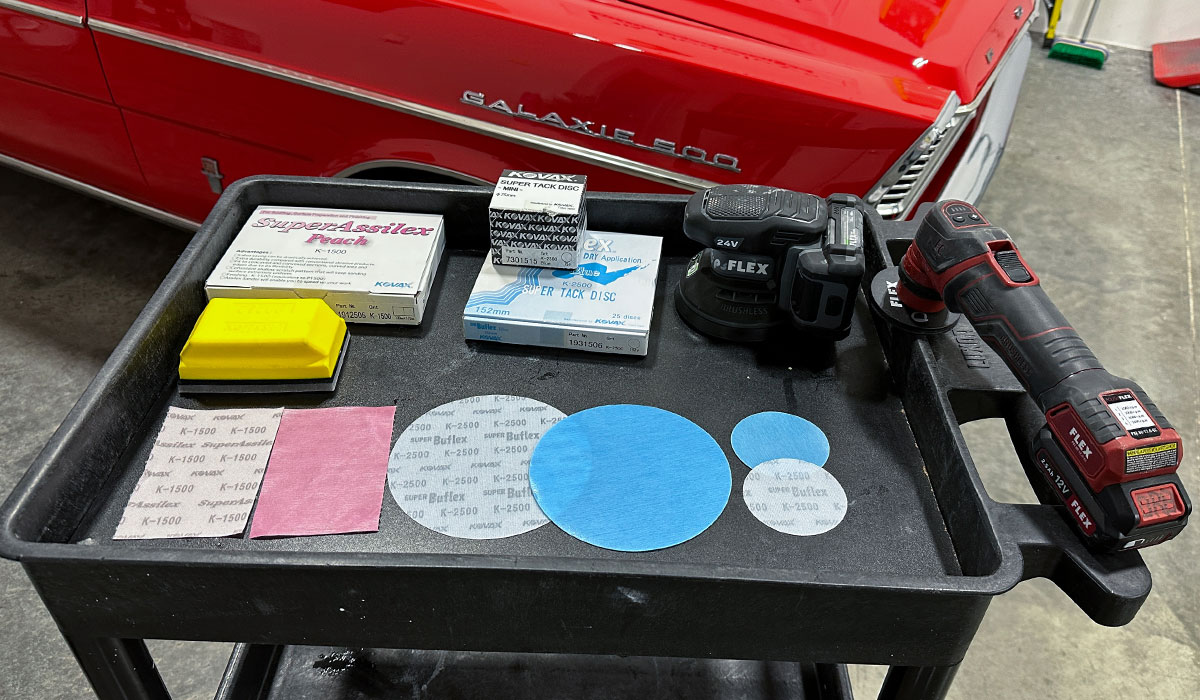
1965 Ford Galaxie 500 Convertible
For this custom resto-rod, the class learned to use the BEST dry sanding brand on the market today, the Eagle Abrasives by KOVAX dry sanding system, as well as how to use rotary polishers, orbital polishers and Dr. Beasley’s Nano Surface Primers and Ceramic Coatings.


More…
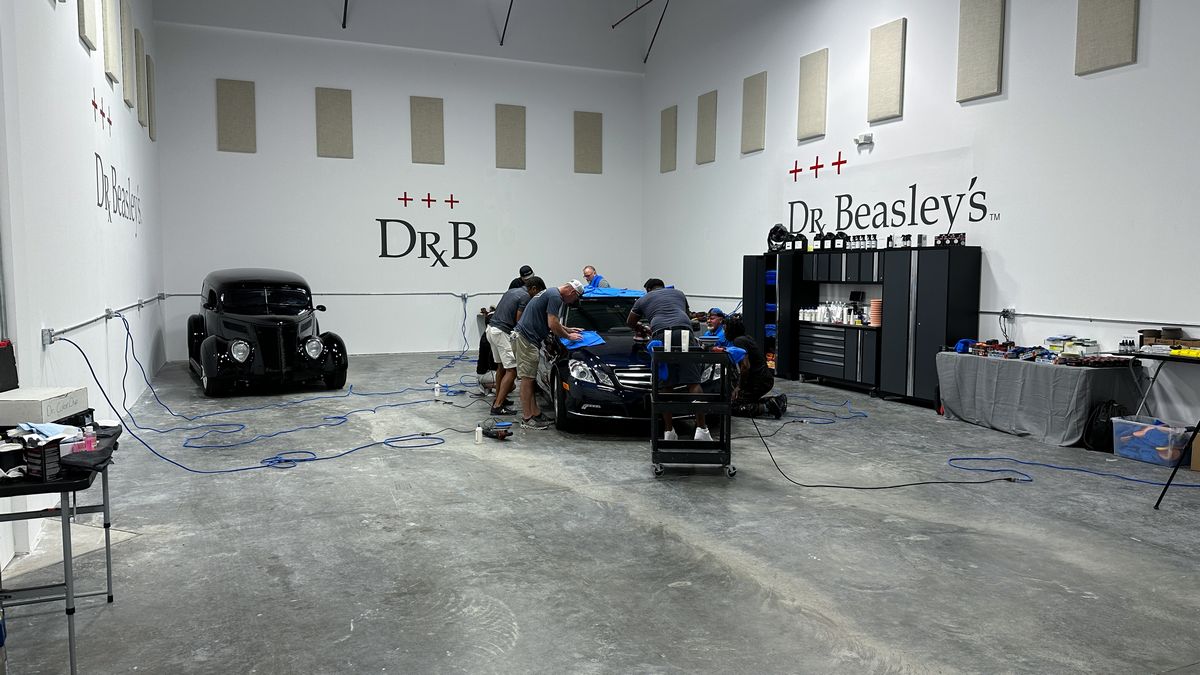
Here’s how the garage looked the night before the first day of class
I count 5 training cars and there’s still a 2019 Ford F150 truck not in the picture. I showed all of these cars on my forum weeks in advance so students could see what they would get to train on BEFORE they ever paid and signed-up for a class.
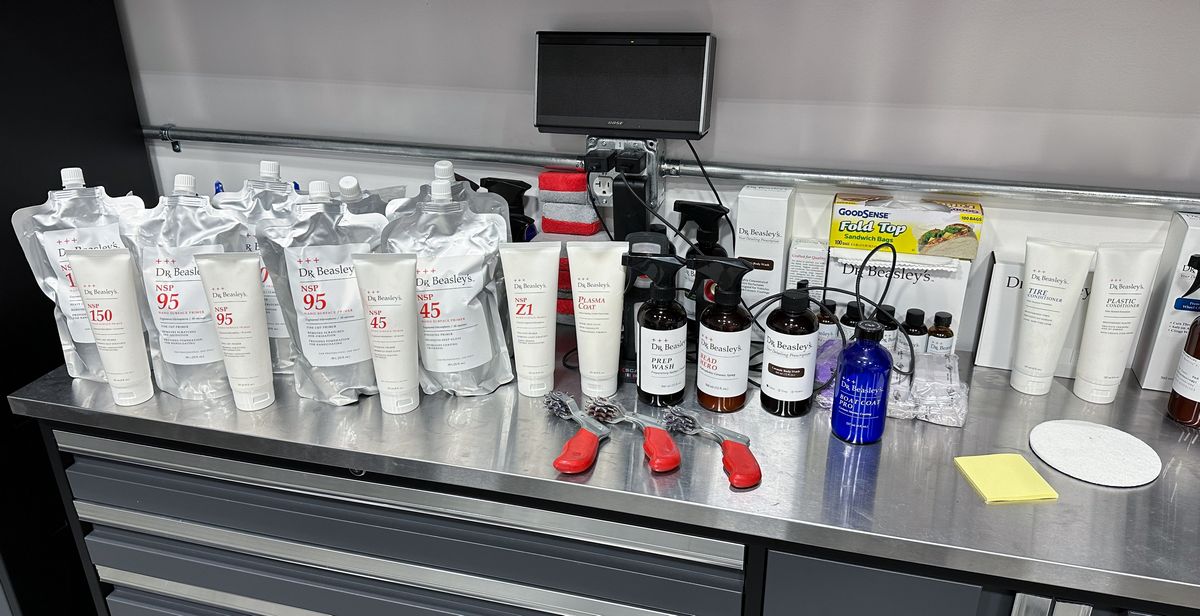
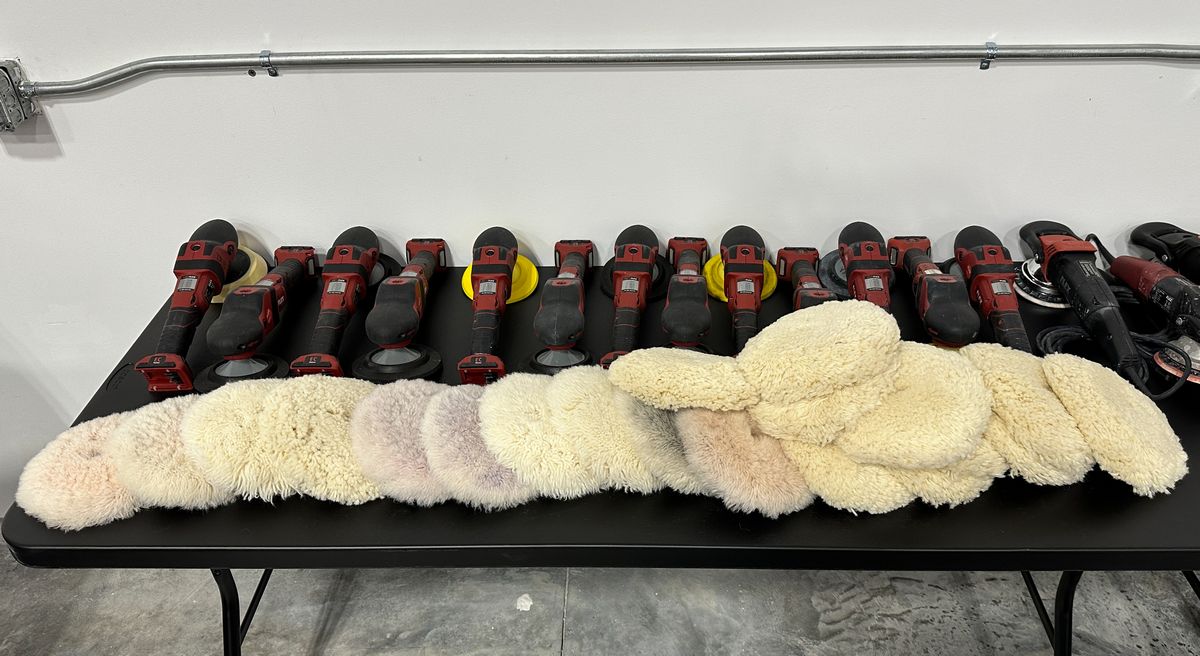
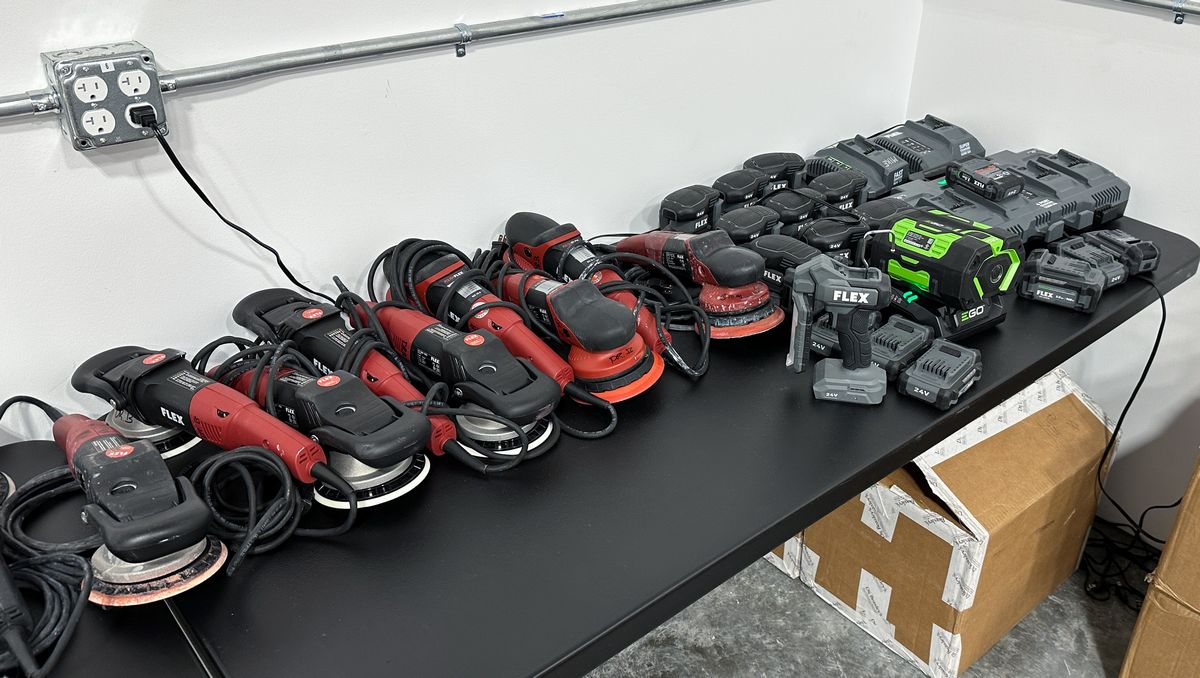
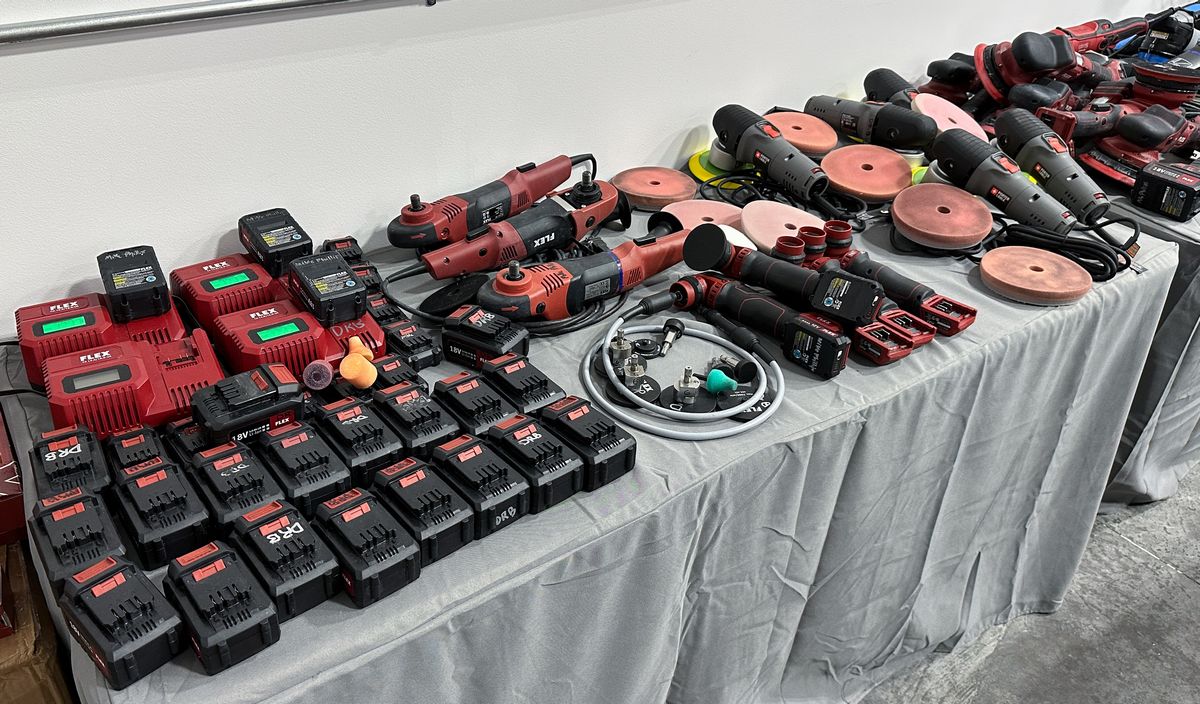
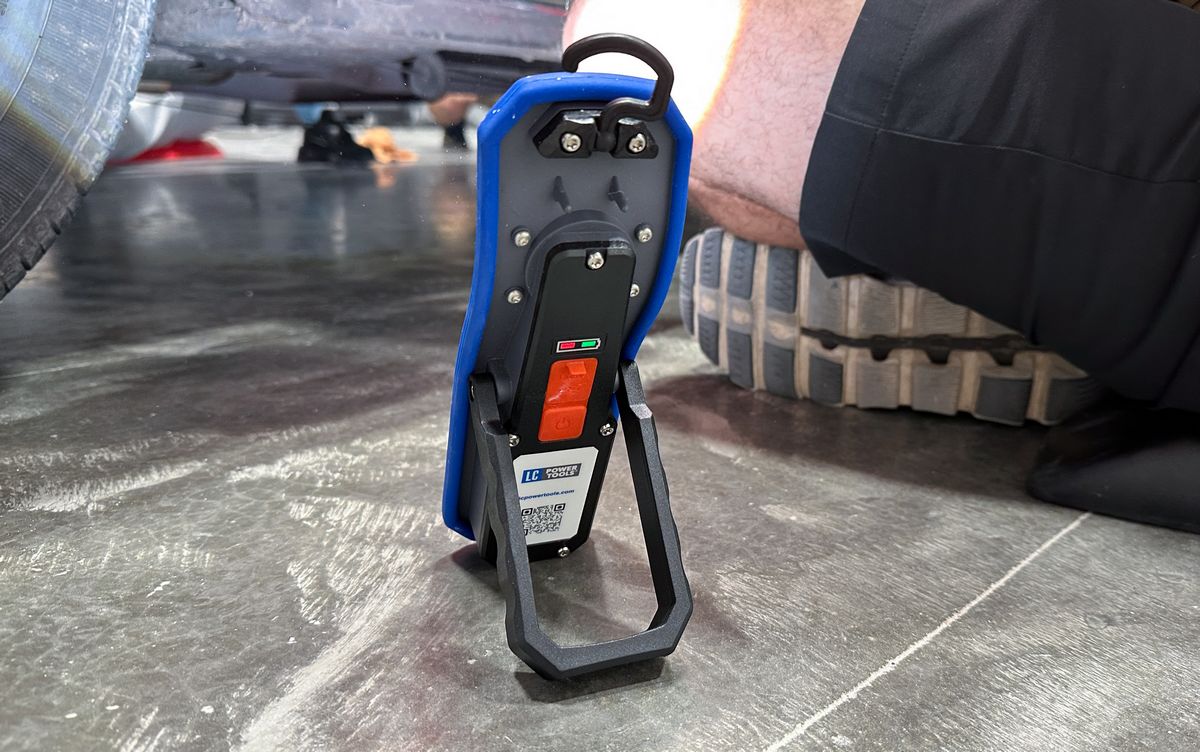
Tools, pads, products ready to go!

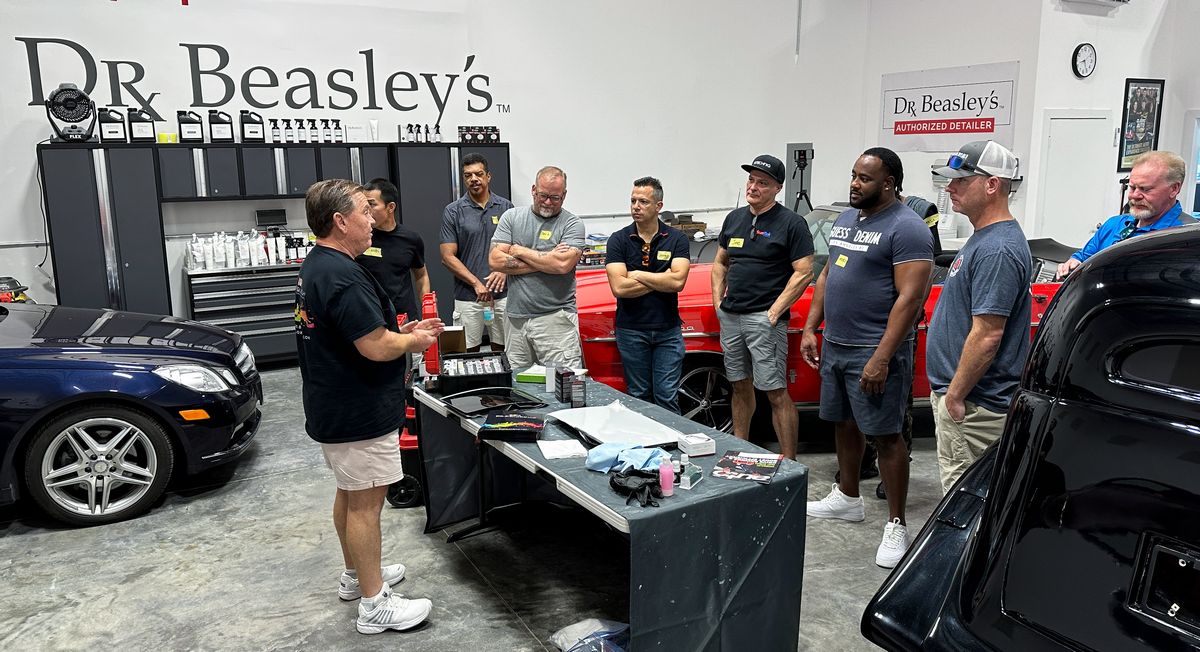
Full Class Recap
Now you’ll see this photo-documented hands-on class in the order for each topic on each day. First up is Tony Pando with Dr. Color Chip early on Friday morning, the first day of this 3-day class.
We start our classes ON TIME!
Here’s Tony Pando with Dr. Color Chip with a full array of products and tools for his training session.

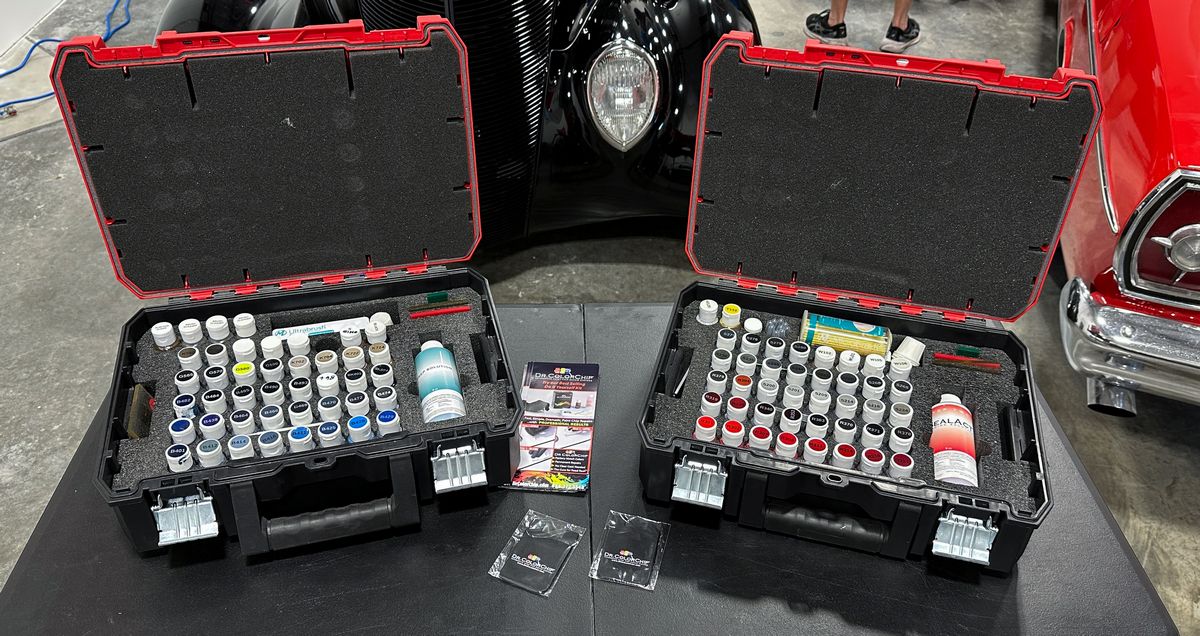
After the educational portion of Tony’s presentation, it’s time for the students to take what they learned and put it into practice. For this session I brought in a 2019 BLACK Ford F150 Pickup with hundreds of rock chips. This way EVERYONE has a chance to practice with the Dr. Color Chip Rock Chip Repair System.
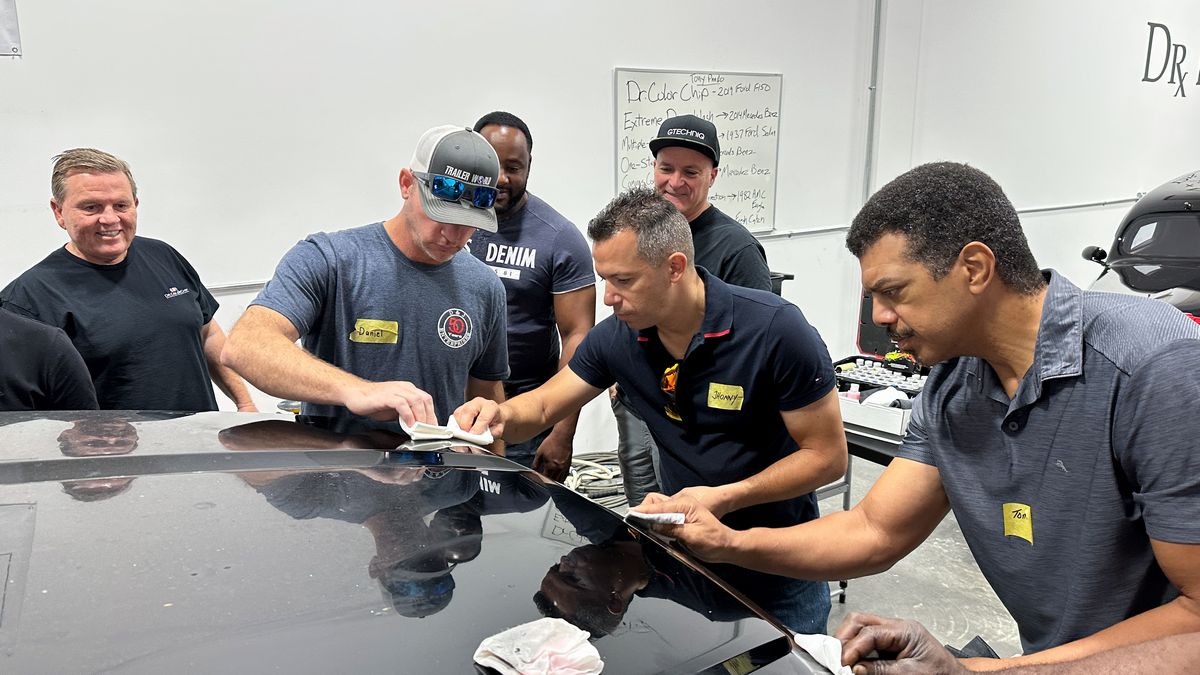
The class had a chance to whet their appetite, but it’s time to move onto the next class session. The class will come back to this truck AFTER they have performed the paint correction steps and finish the rock chip repair work.
A HUGE thank you to Tony Pando for carving out time to join us early Friday morning!
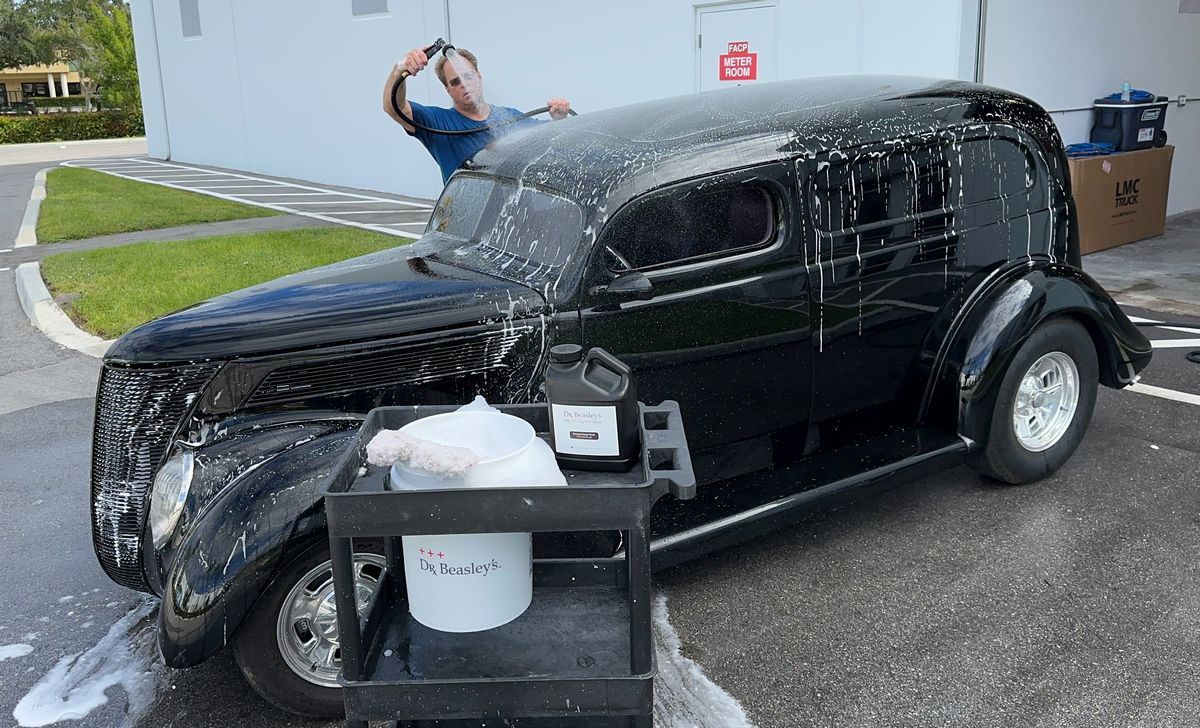
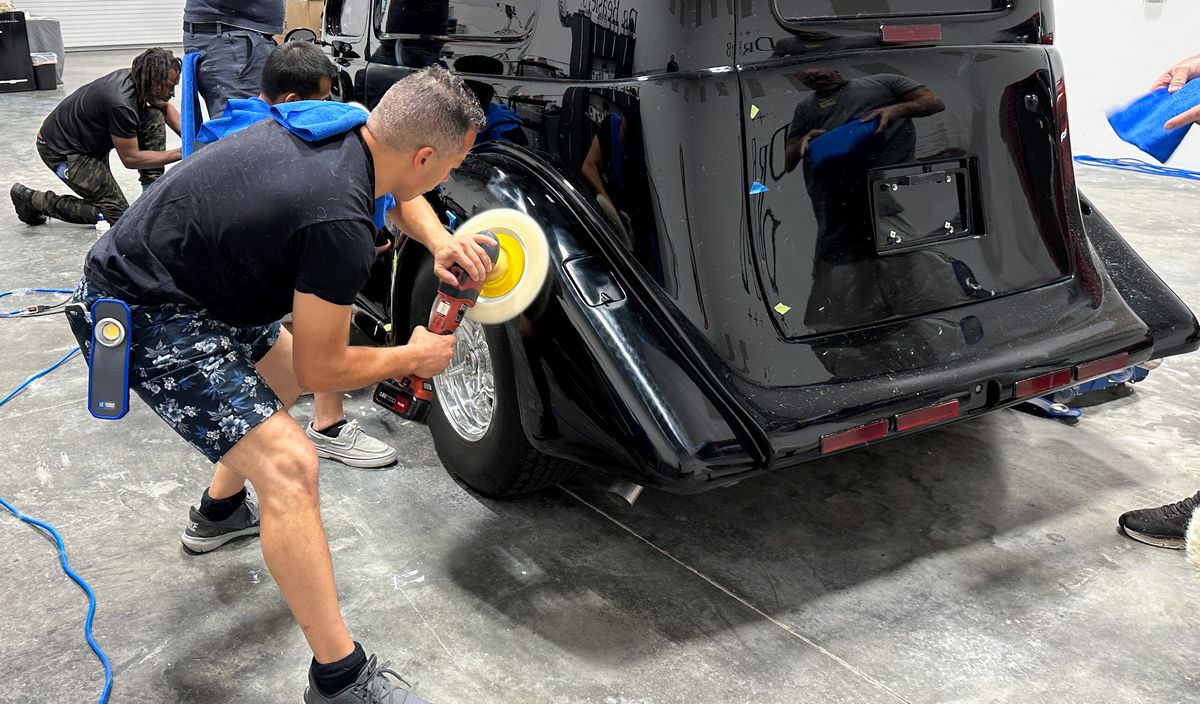
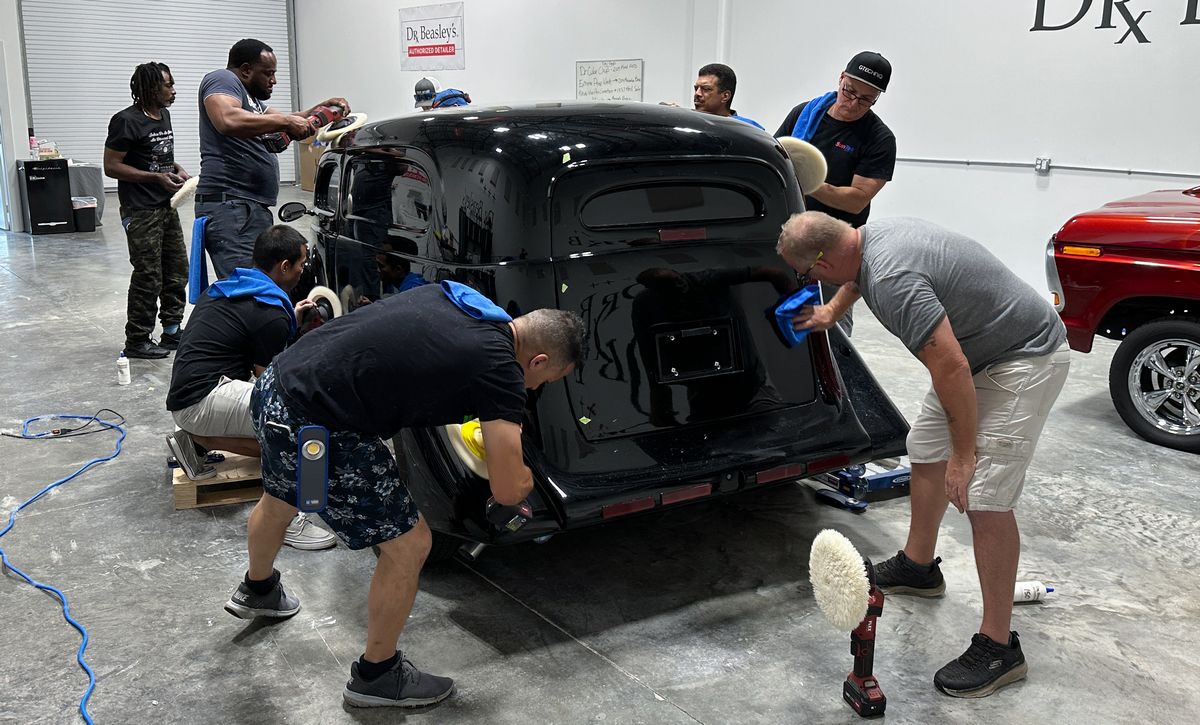
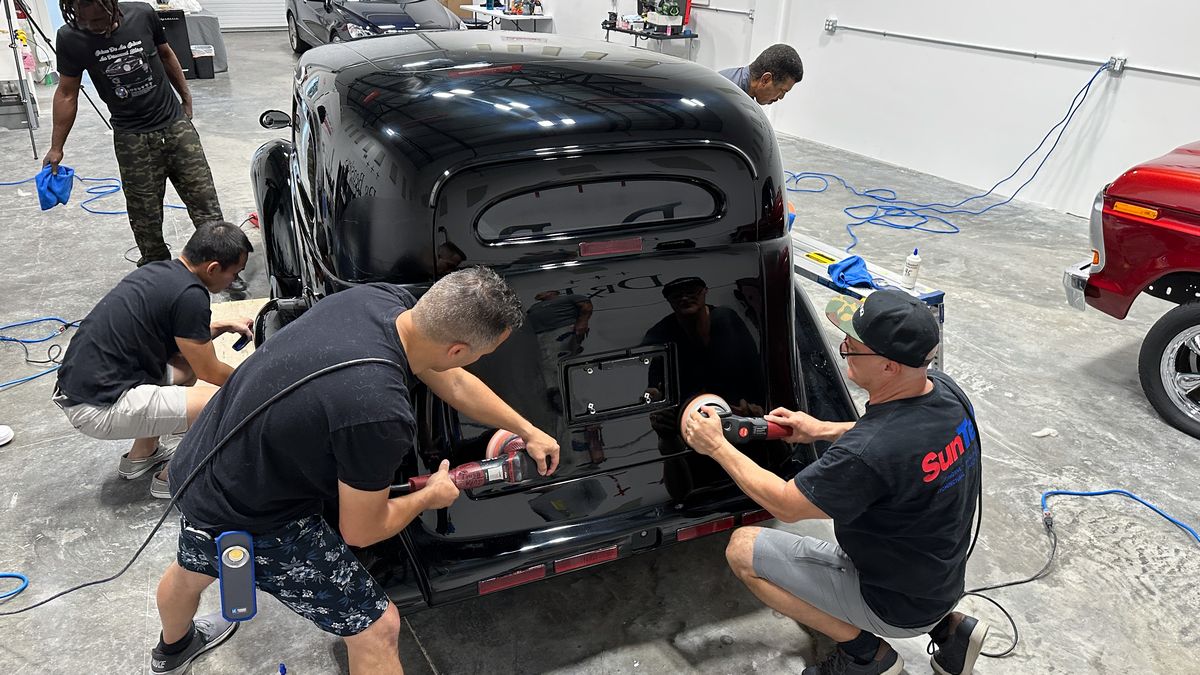
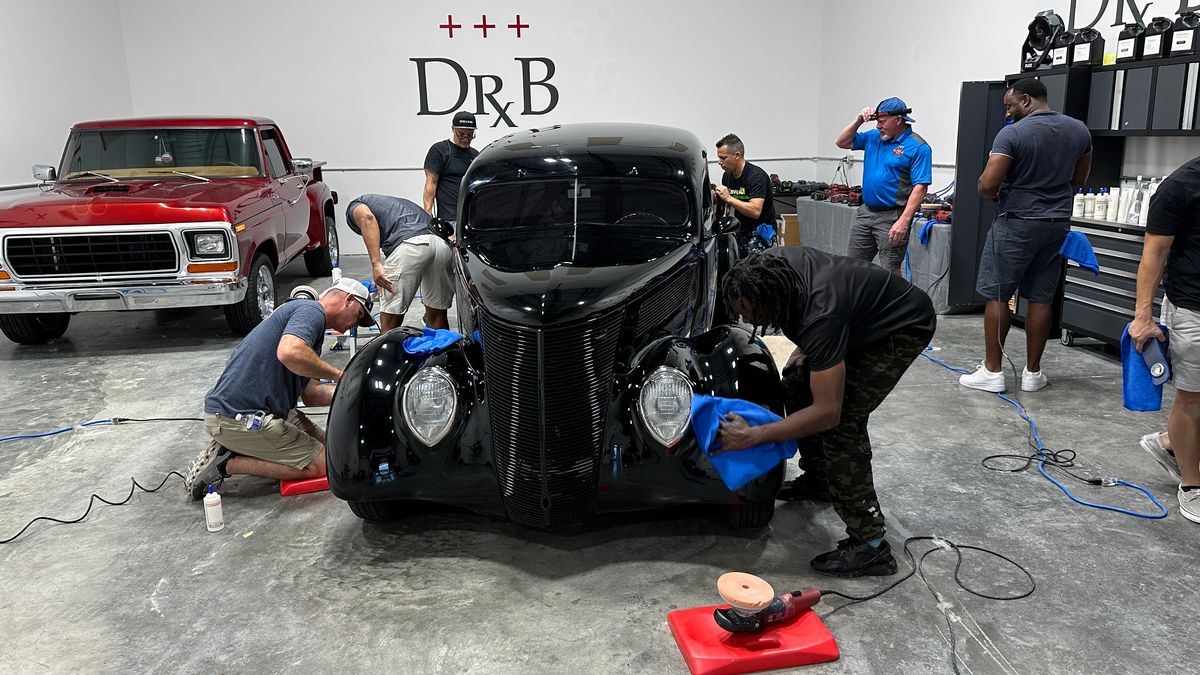
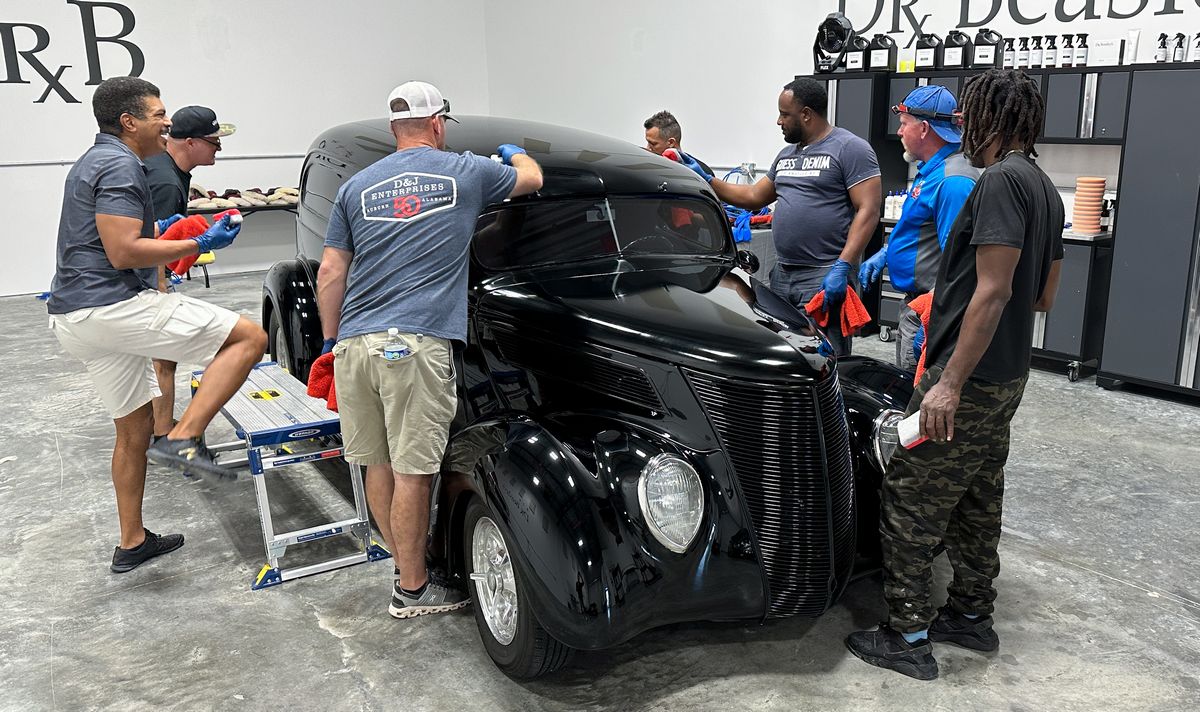
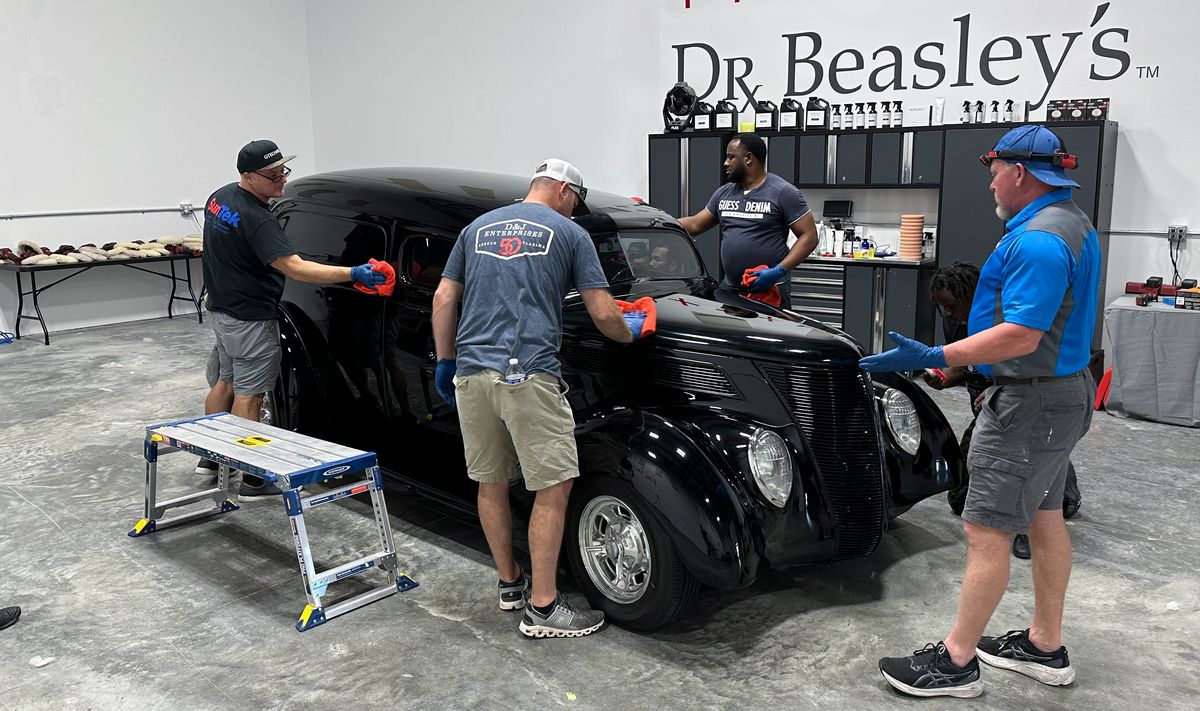
Friday Morning Session – Multiple Step Paint Corrections learning how to use rotary polishers, orbital polishers, plus Dr. Beasley’s Nano Surface Primers & Ceramic Coatings.
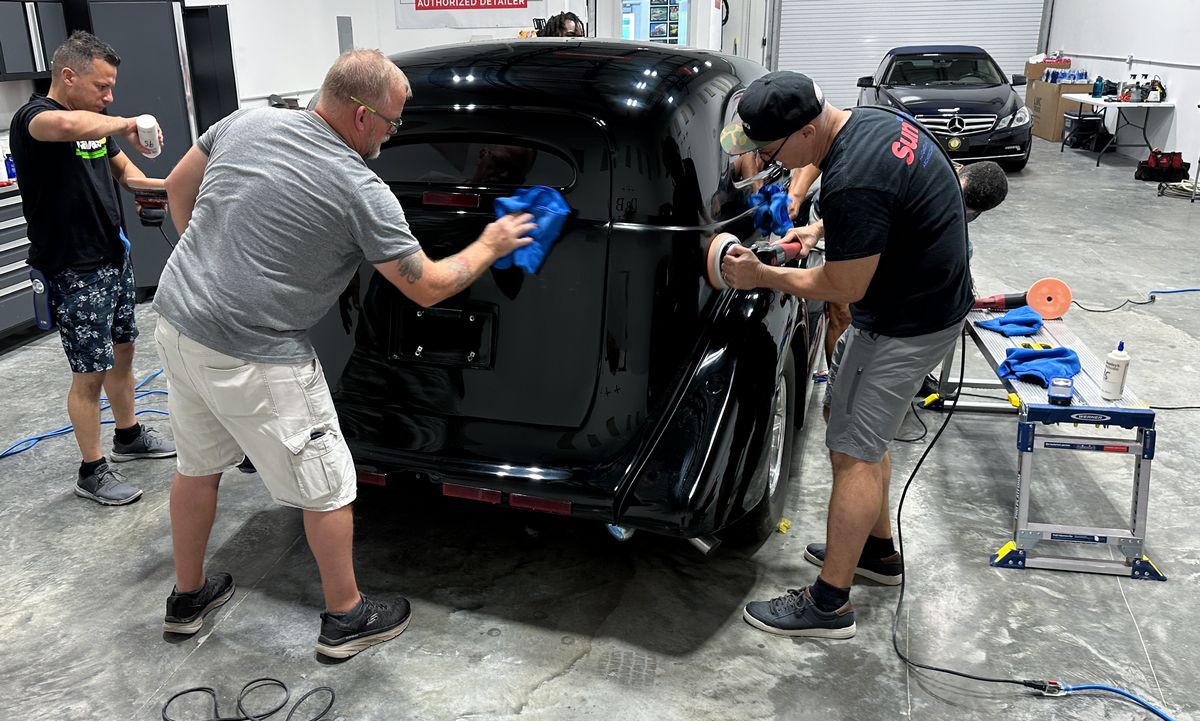
1937 Ford 2-Door Sedan Streetrod – Custom basecoat/clearcoat paint system
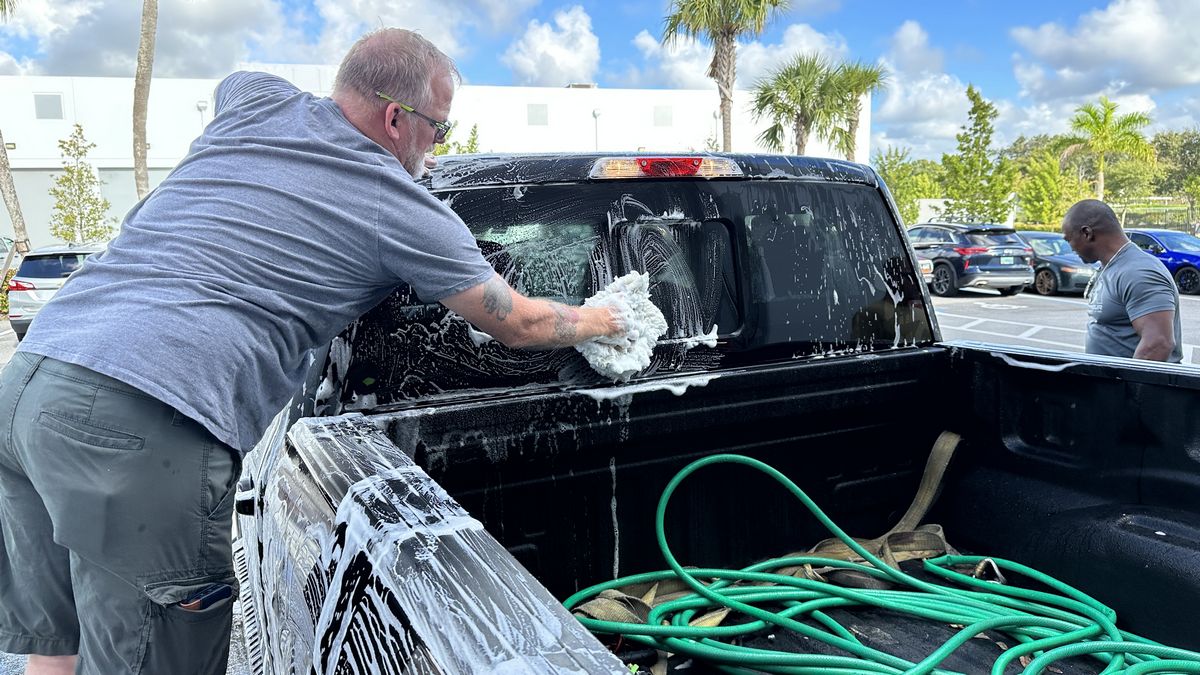
Prep Wash
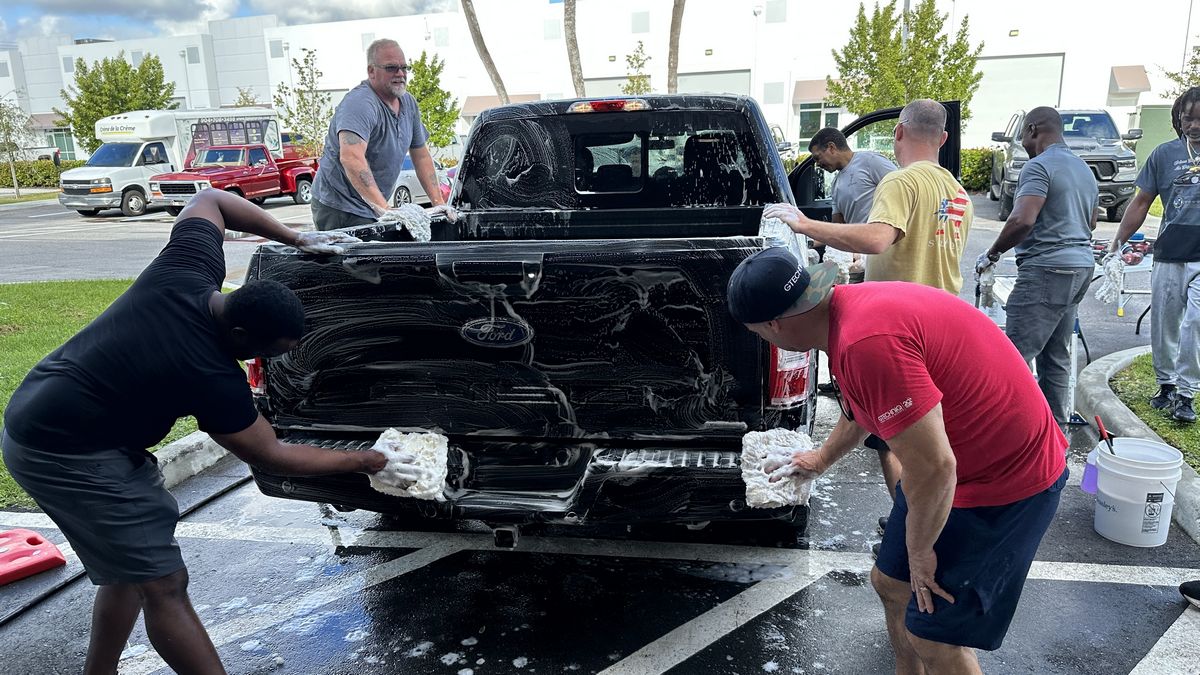
On Thursday morning, the day before the class started, I washed the 1937 Ford ahead of time. I also performed the mechanical decontamination step after thoroughly rinsing after washing. The class will get PLENTY of hands-on time learning how to do an EXTREME Prep Wash when we wash the Ford F150 on Saturday morning.
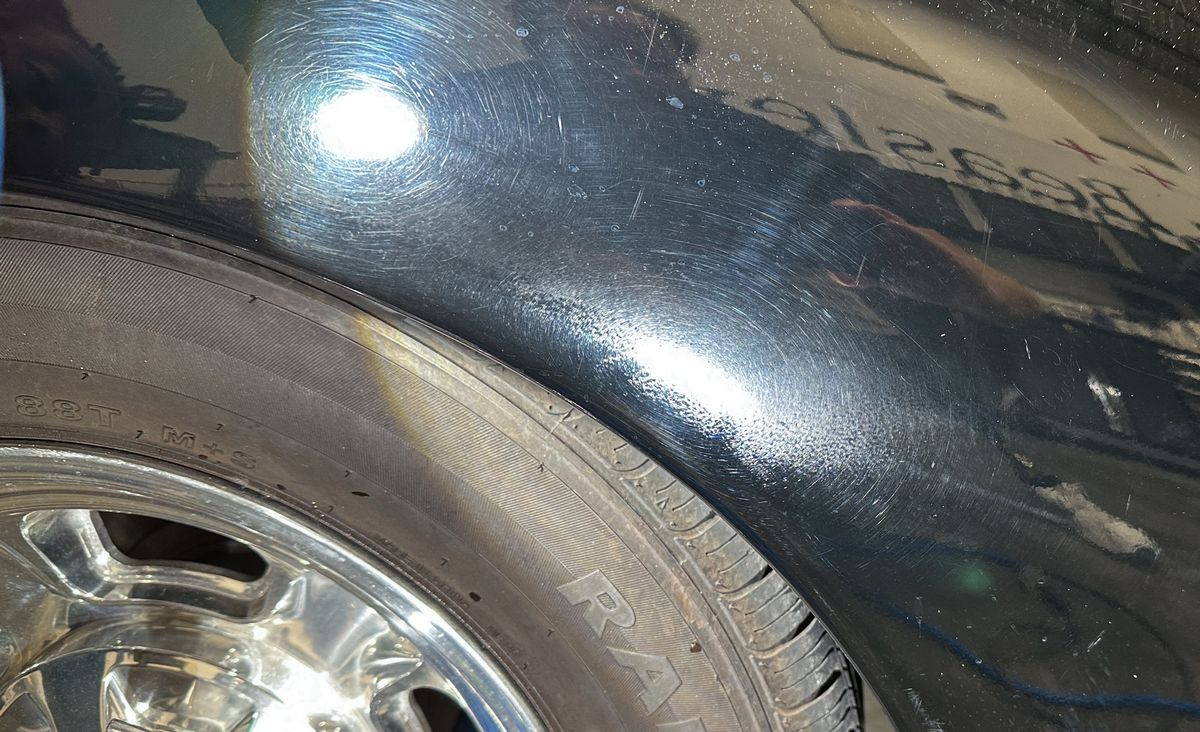
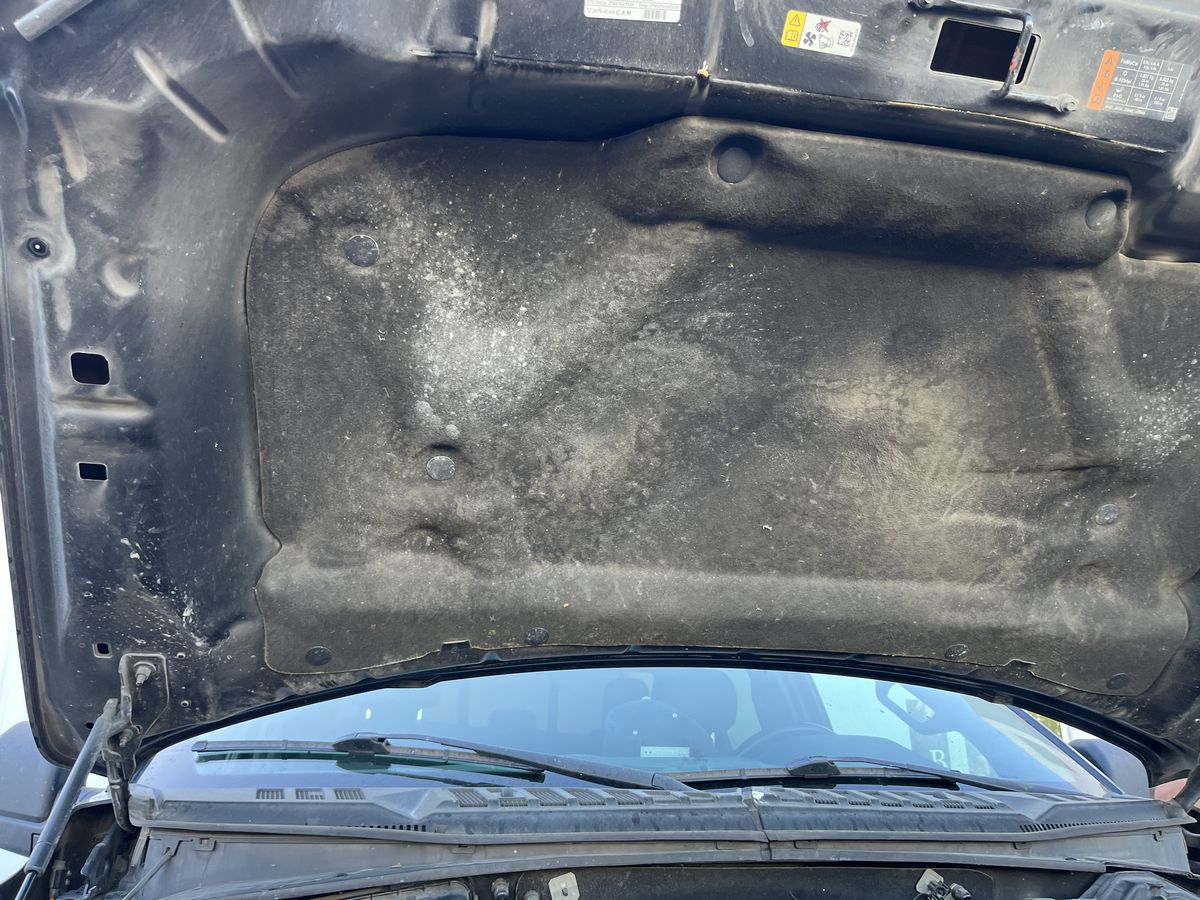
Photo-Documenting the Pre-Existing Damage
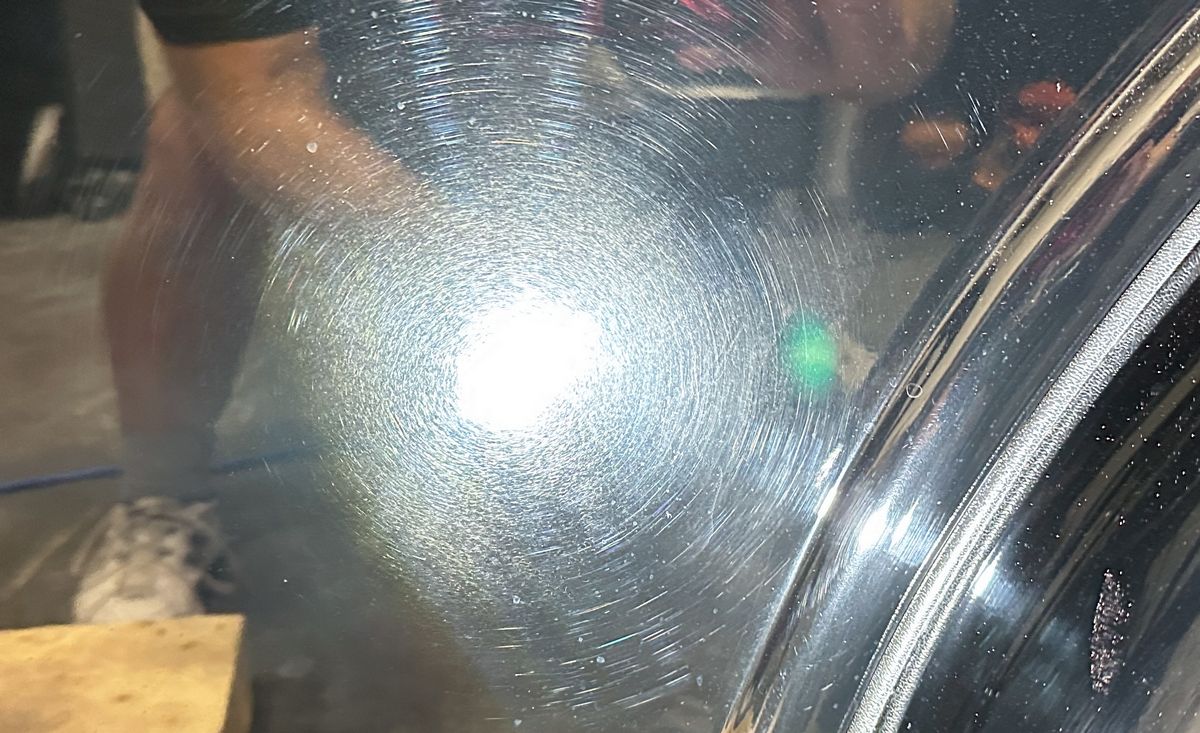
In our classes we teach people how to properly inspect the current condition of the paint and the value and importance of photo-documenting any pre-existing damage. With the average daily driver, this would mean inspecting and documenting things like swirls, scratches, water spots and oxidation.
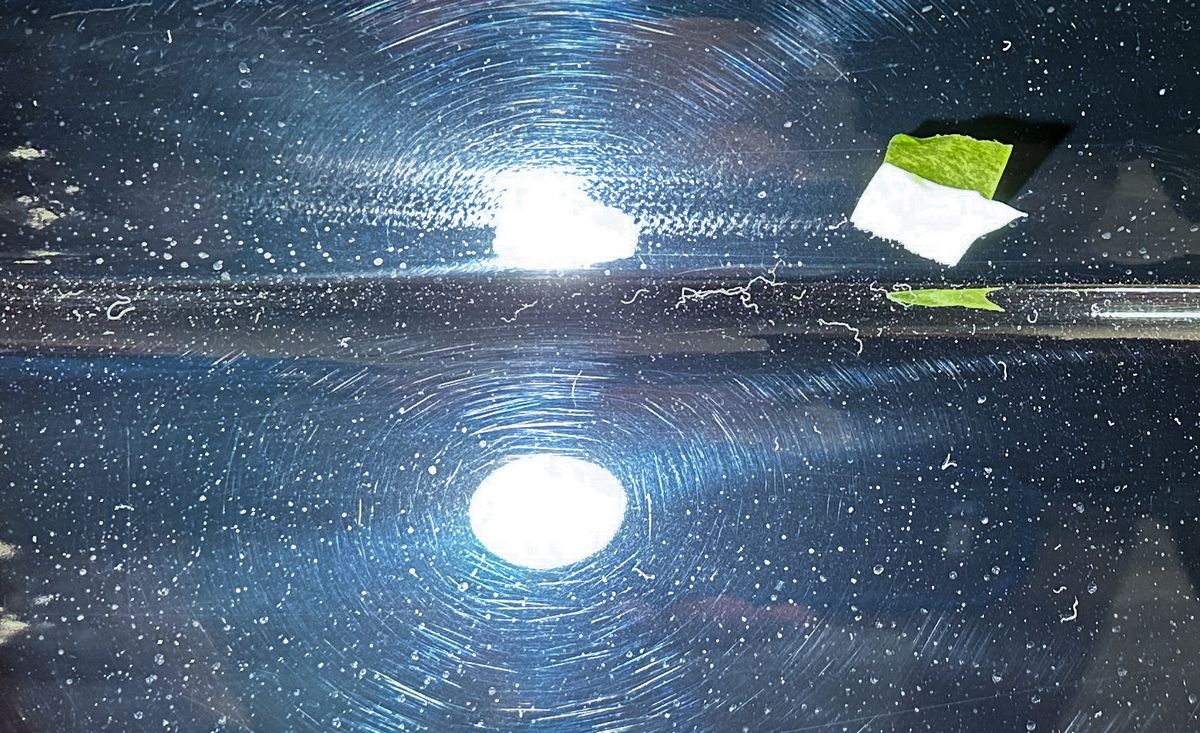
DA Sanding Marks
With a custom paint job on a streetrod, we teach to inspect for sanding marks left behind by the other person. I’m sad to say we found PLENTY of DA Sanding Marks in the paint. DA Sanding Marks are sanding marks left in the paint after using a DA Sander or Dual Action Sander. When sanding by hand, it’s common to find TRACERS, which are straight-line scratches left by hand sanding.
Sanding marks next to edges and raised body lines
The most common place to find sanding marks, by either hand or machine sanding, is next to edges, raised body lines and/or any place that’s more difficult to put a spinning wool buffing pad. Of course, in our classes, we teach how to avoid all these problems during the sanding class that takes place during the second day of our 3-day classes.
Let’s take a look at the pre-existing damage…
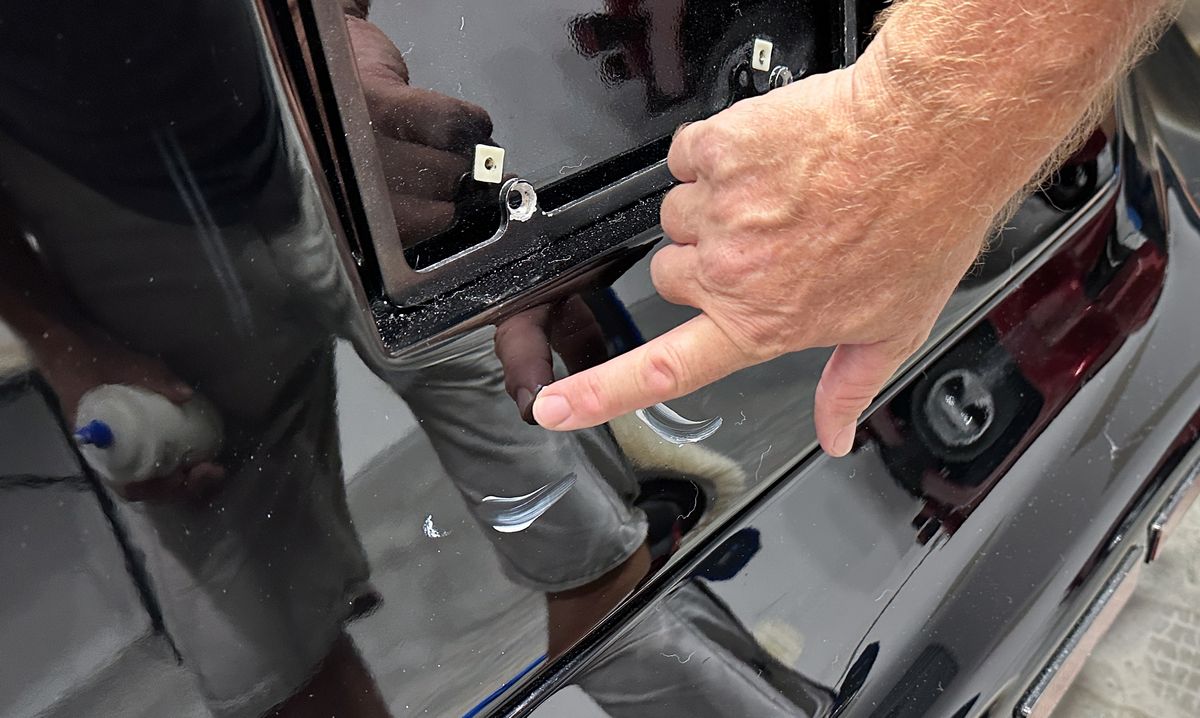
Here’s the back of the 1937 Ford 2-door Sedan. We’re placing the Lake Country Swirl Finder Lights, so they light up the paint by the edges of the rear door.
Passenger side – There are DA. Sanding Marks all along the edges of the side of the door.
Driver side – There are DA. Sanding Marks all along the edges of the side of the door.
Driver’s side rear fender
On the left side of the below pictures are swirls from improper washing, drying and wiping. On the right-hand side, a little lower next to the edge of the fender are DA Sanding Marks.
Driver’s side rear body panel
Yup… DA Sanding Marks. See the green painter’s tape? We teach in our classes to pre-inspect and MARK the locations you discover sanding marks or any other serious paint defect that you need to concentrate on and make sure to remove.
These are DA Sanding Marks
Passenger side rear fender
Same thing all over the car – DA Sanding Marks.

Pigtails
The term pigtails means, tiny circular scratches, that look like the curly tail on a pig. These happen when a sanding abrasives particle or some other contaminant becomes trapped between the sanding disc and the paint.

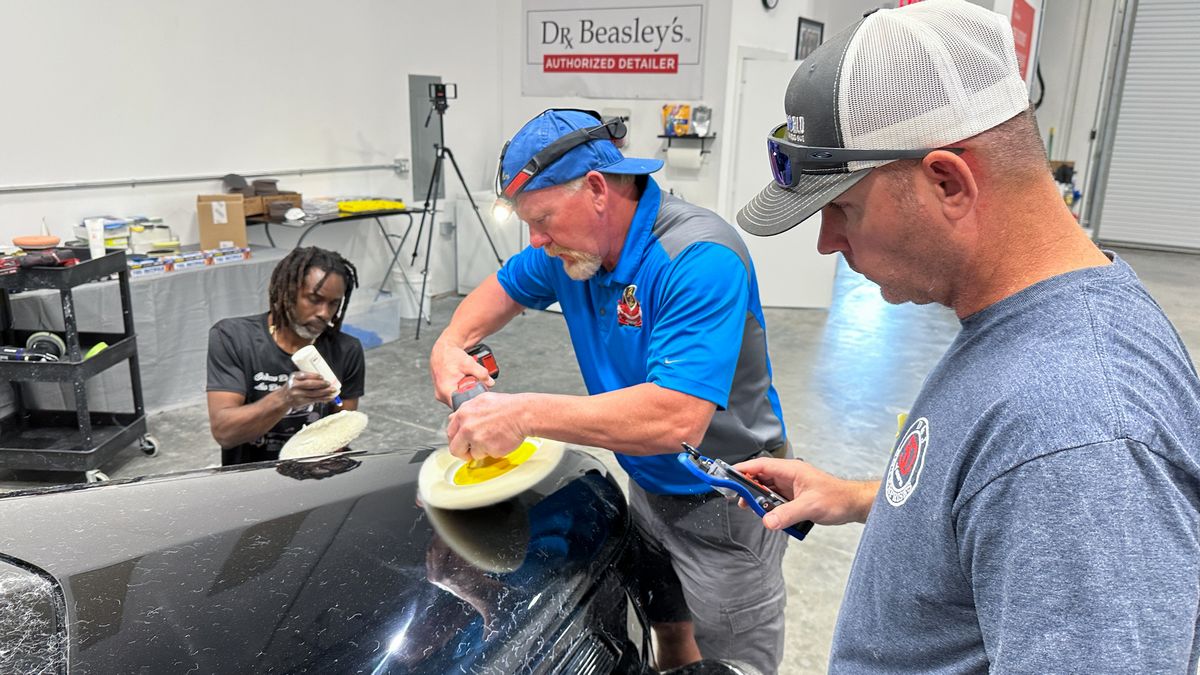
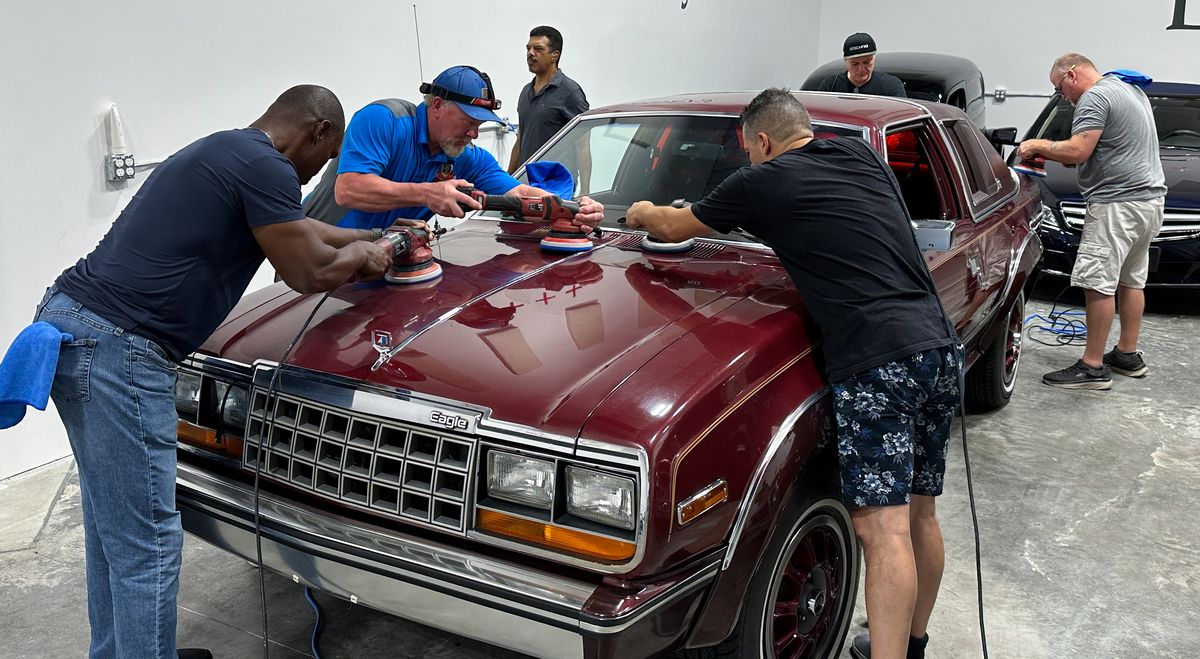
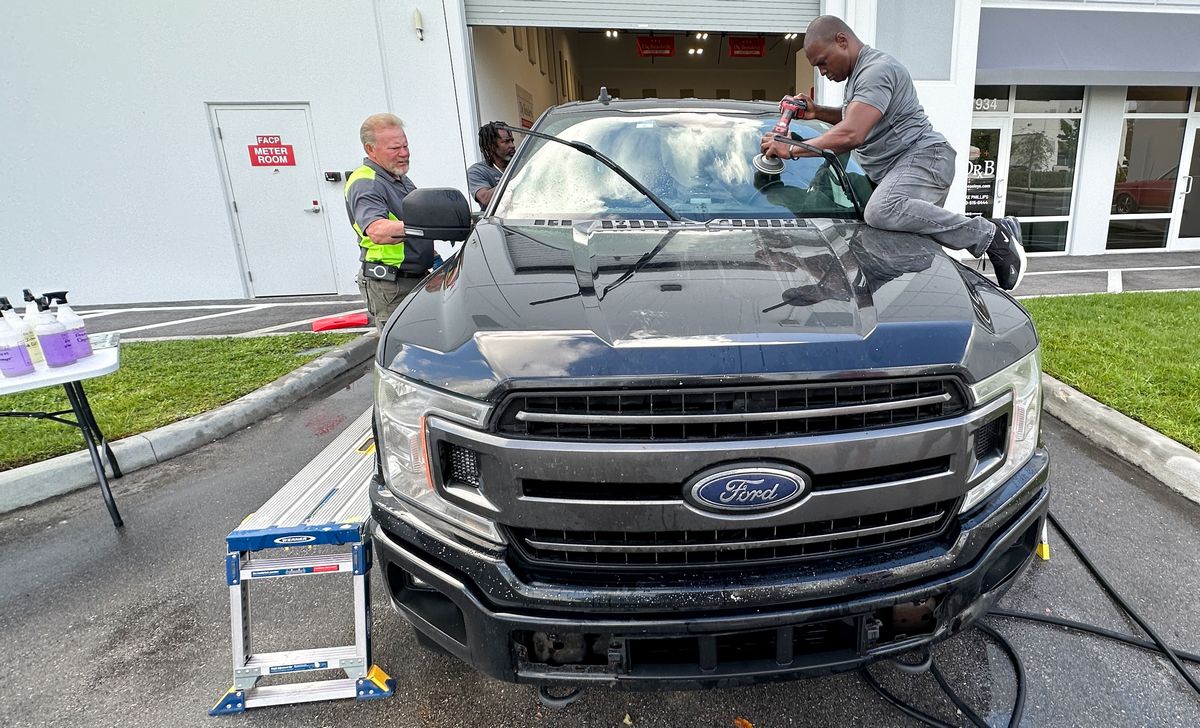
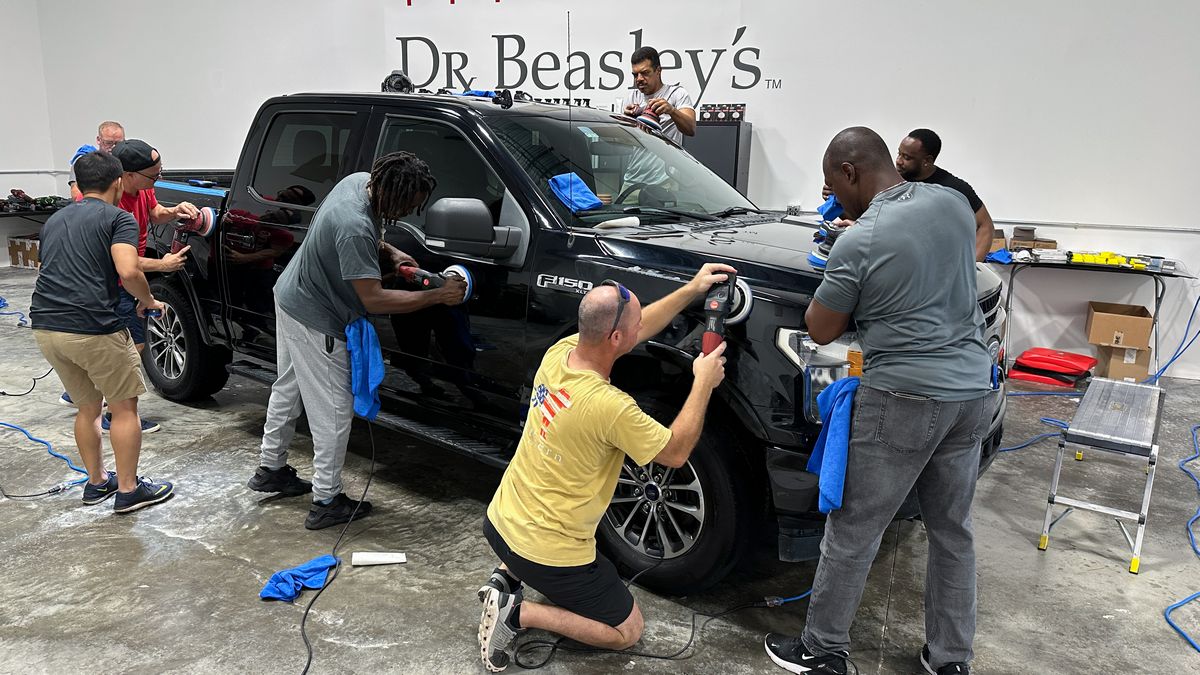
Go time!
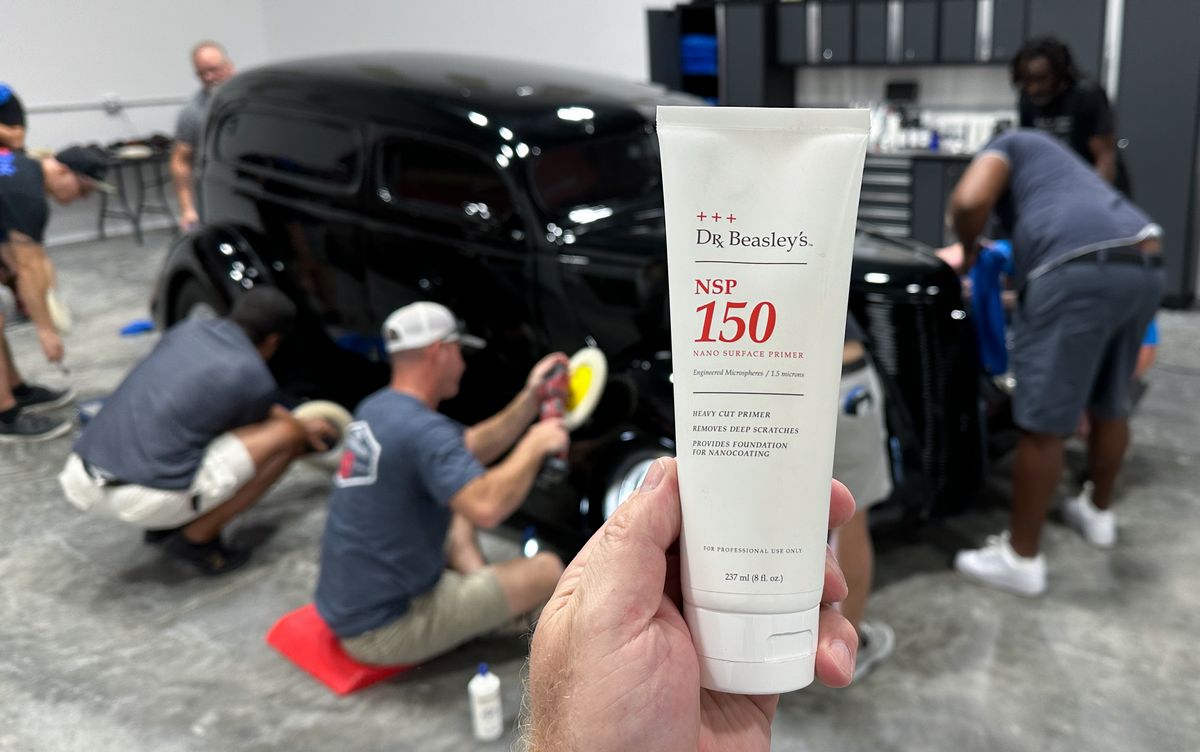
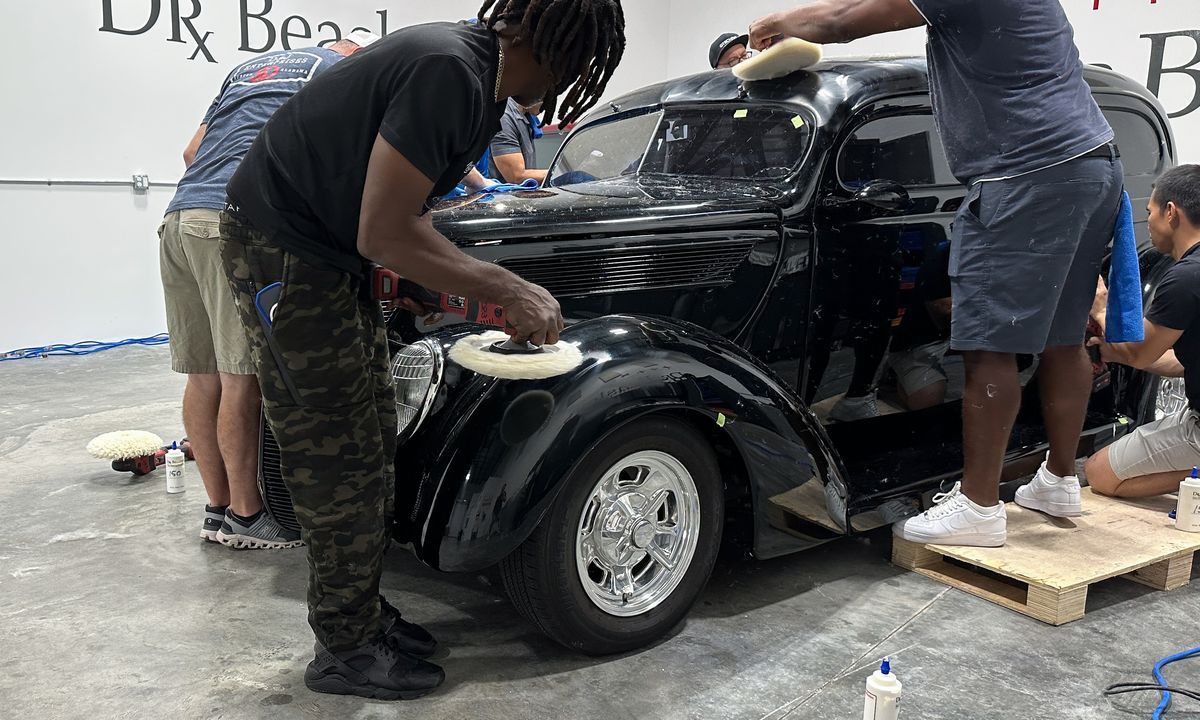
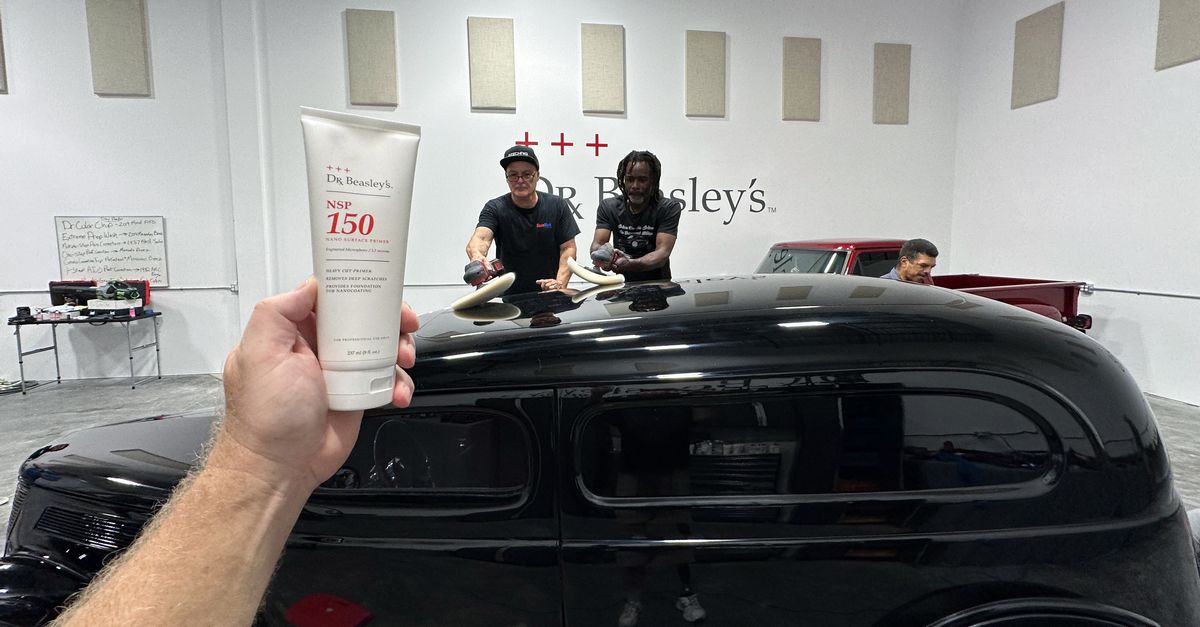
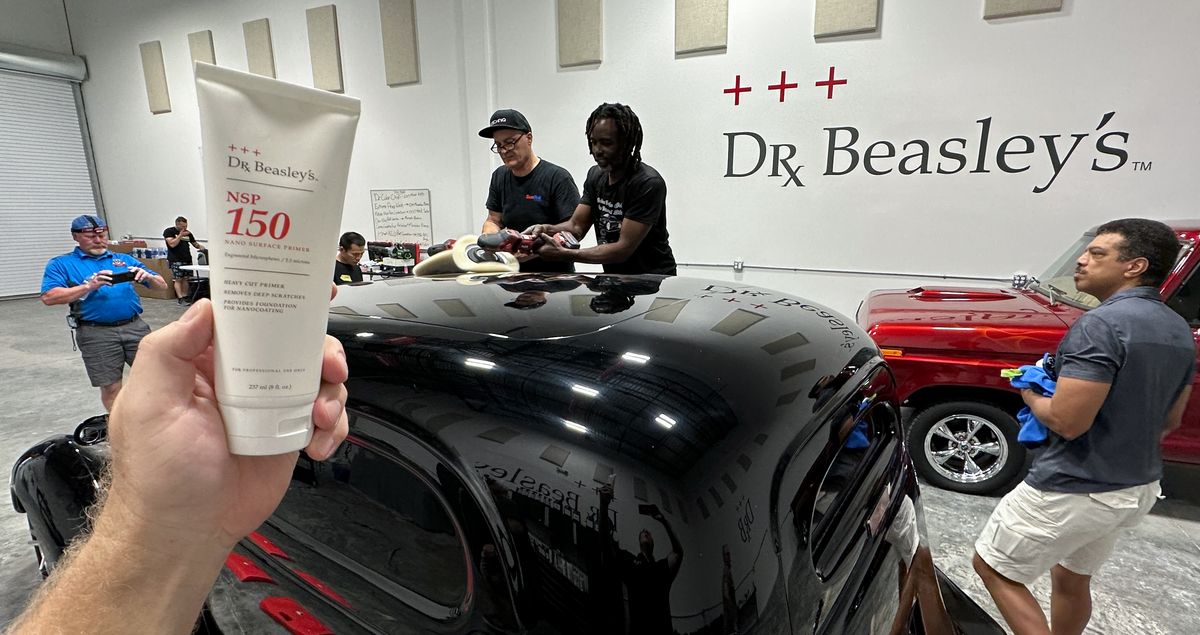
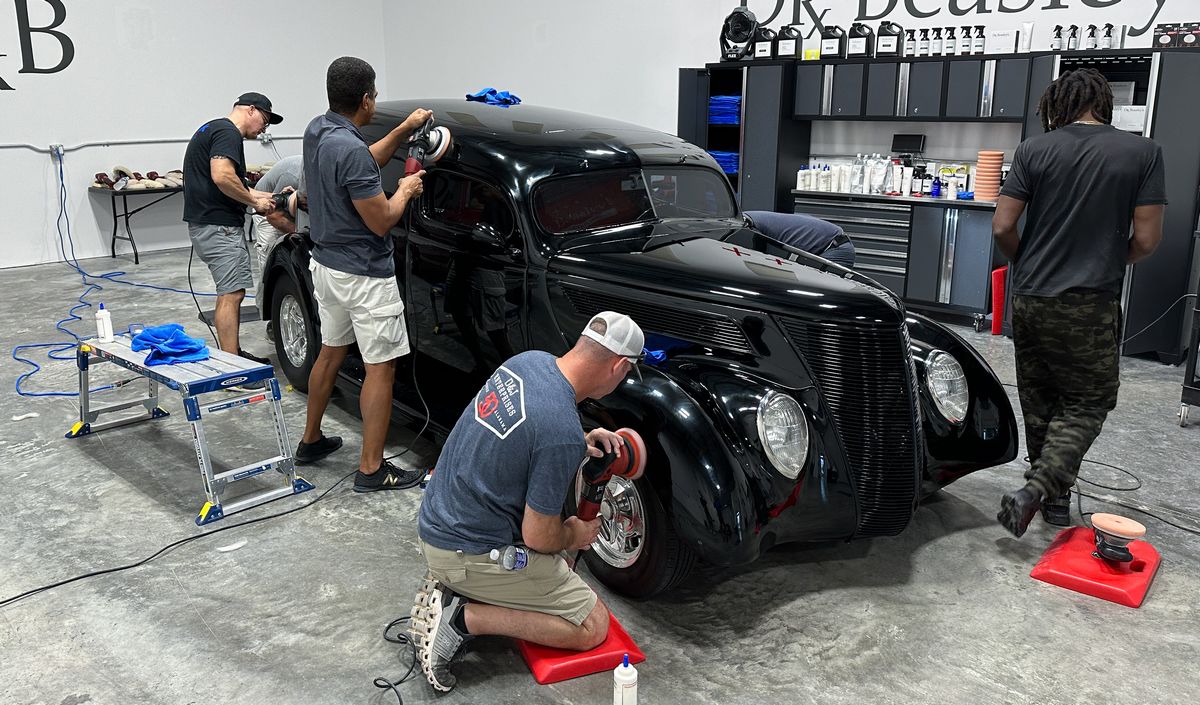
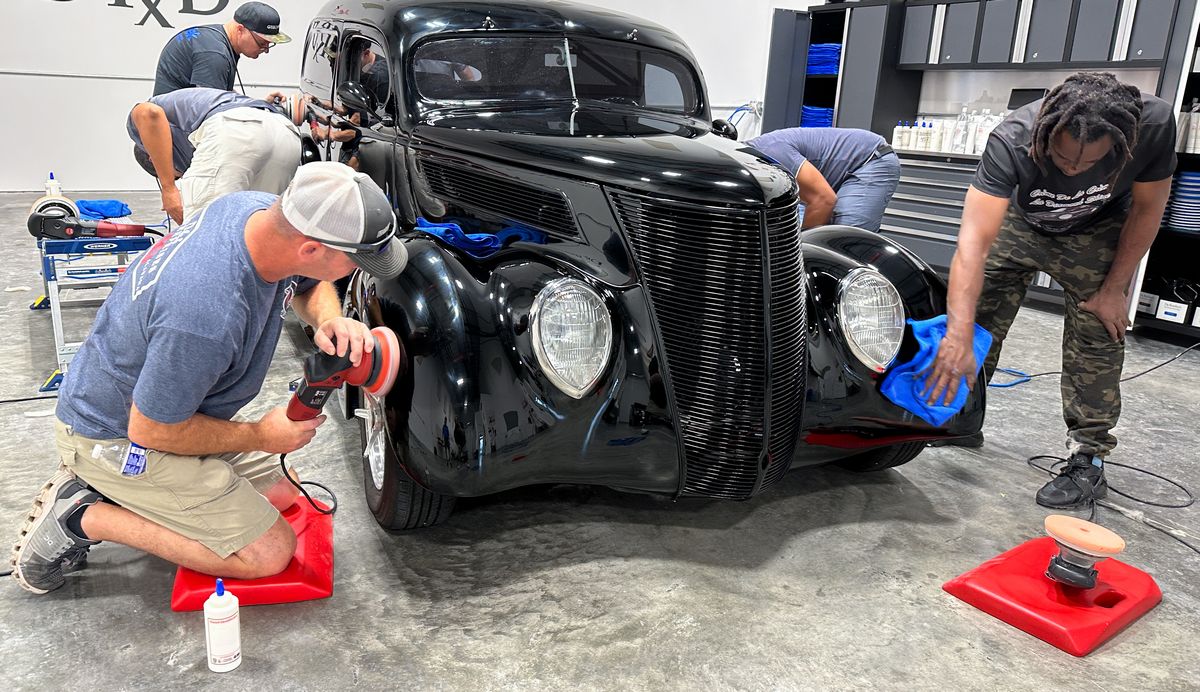
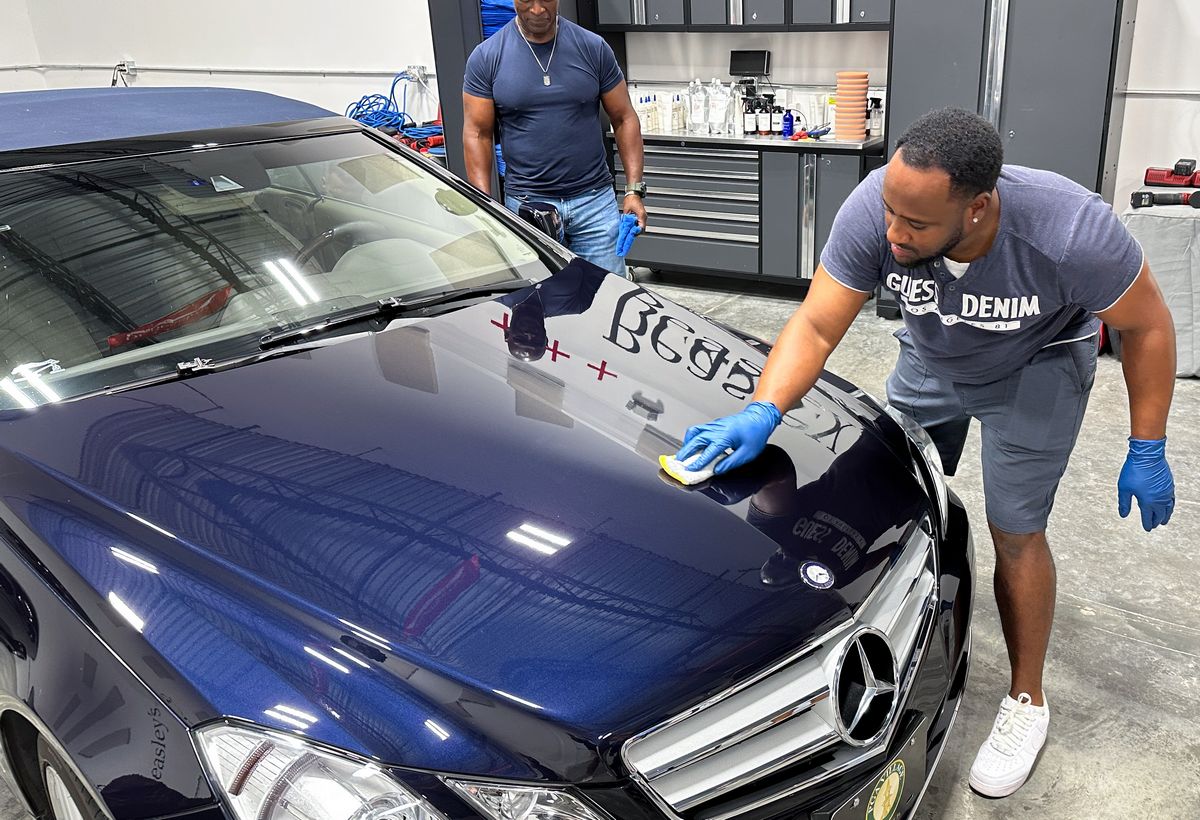
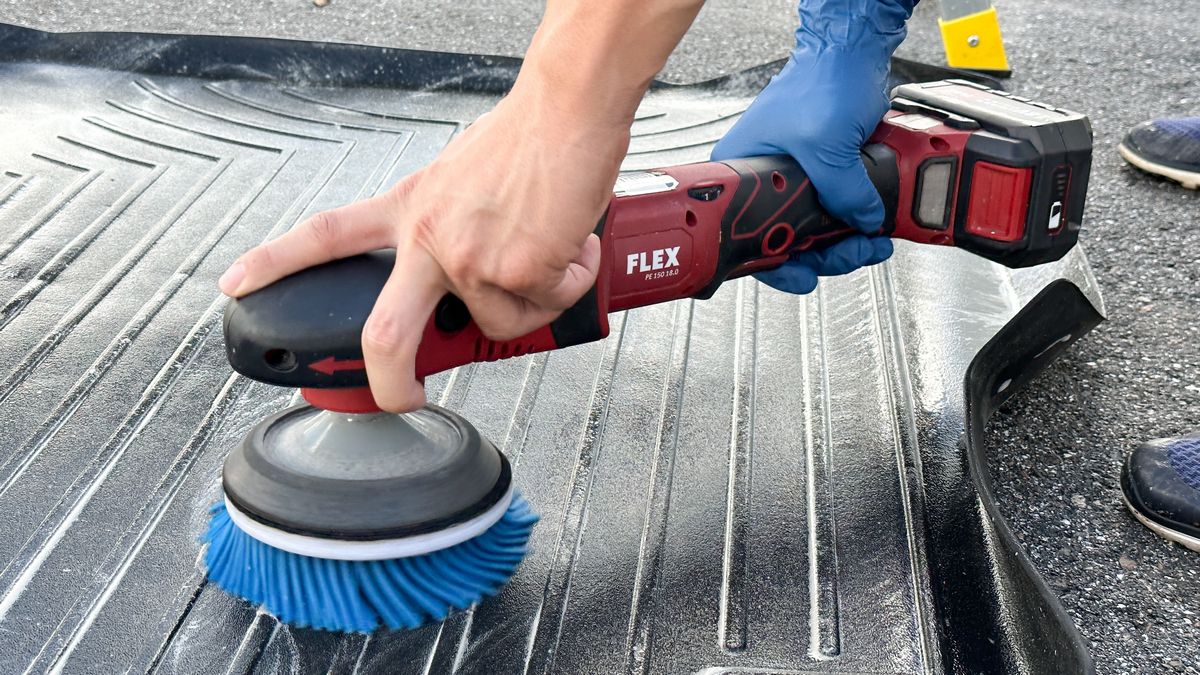
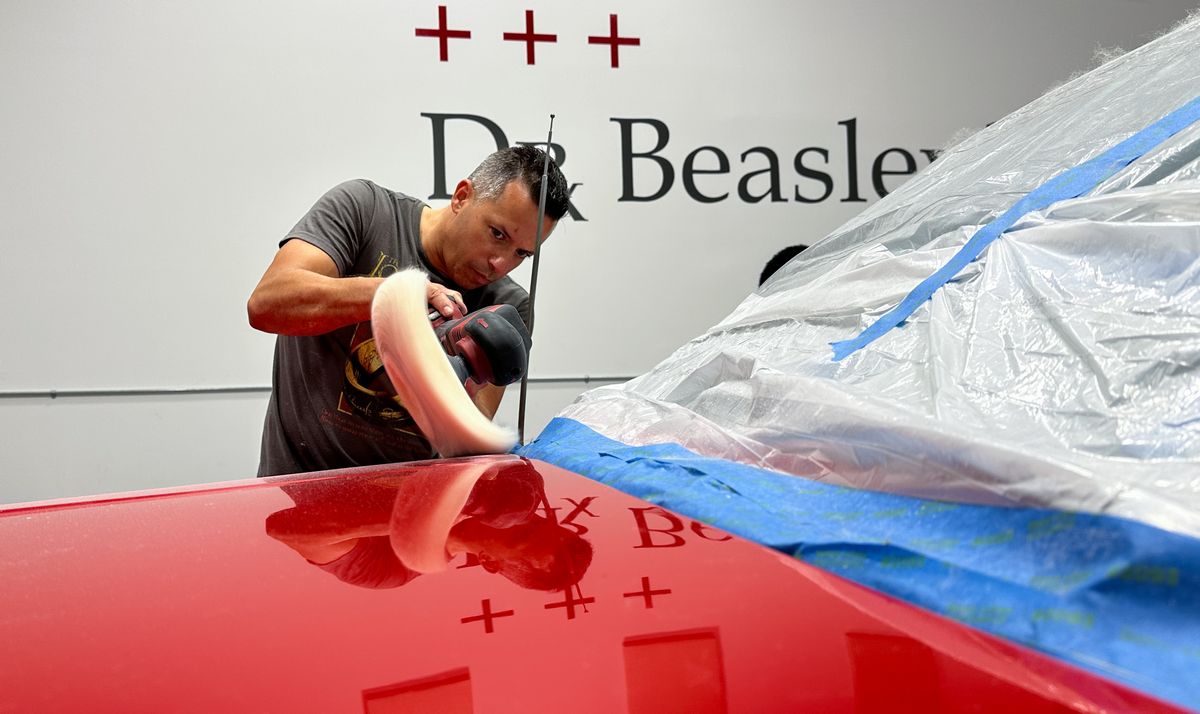
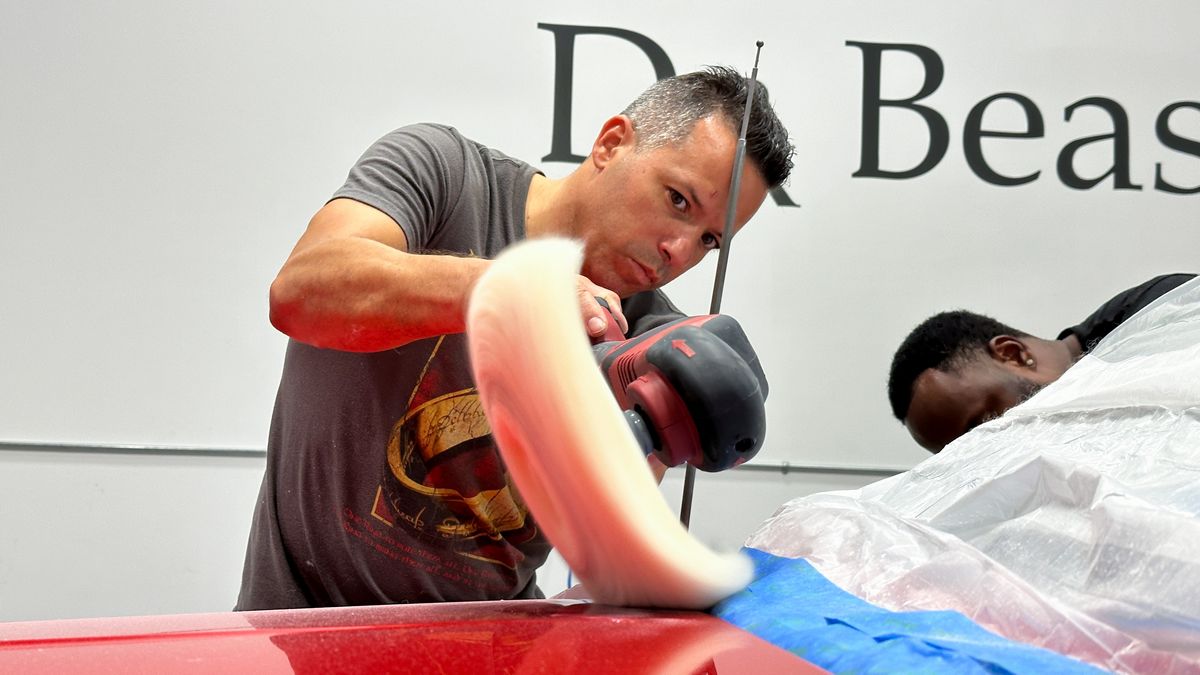
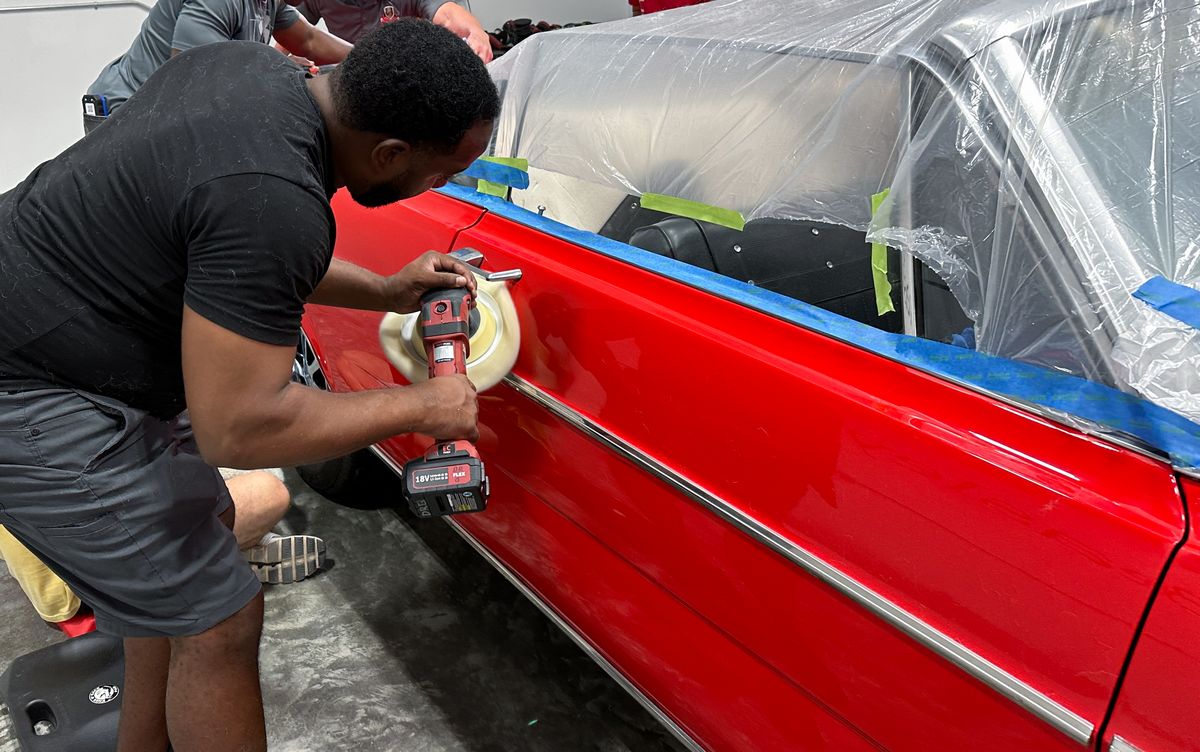
I had already washed and clayed this car on Thursday morning, so after identifying and marking where the pre-existing sanding marks were in the paint, and after a demonstration on how to correctly use Dr. Beasley’s NSP 150 Primer with a wool pad on the FLEX PE-150 Cordless Rotary Polisher – I turned the class loose on some other guy’s black streetrod!
There are no other car detailing classes where you start out first thing in the morning, on the first day of class, using a rotary on some other guy’s black streetrod. In most cases you’ll be sitting in a chair, looking at the wall, (looking at a PowerPoint Presentation), while someone drones on and on and on about how great their products are or worse – how great they are.
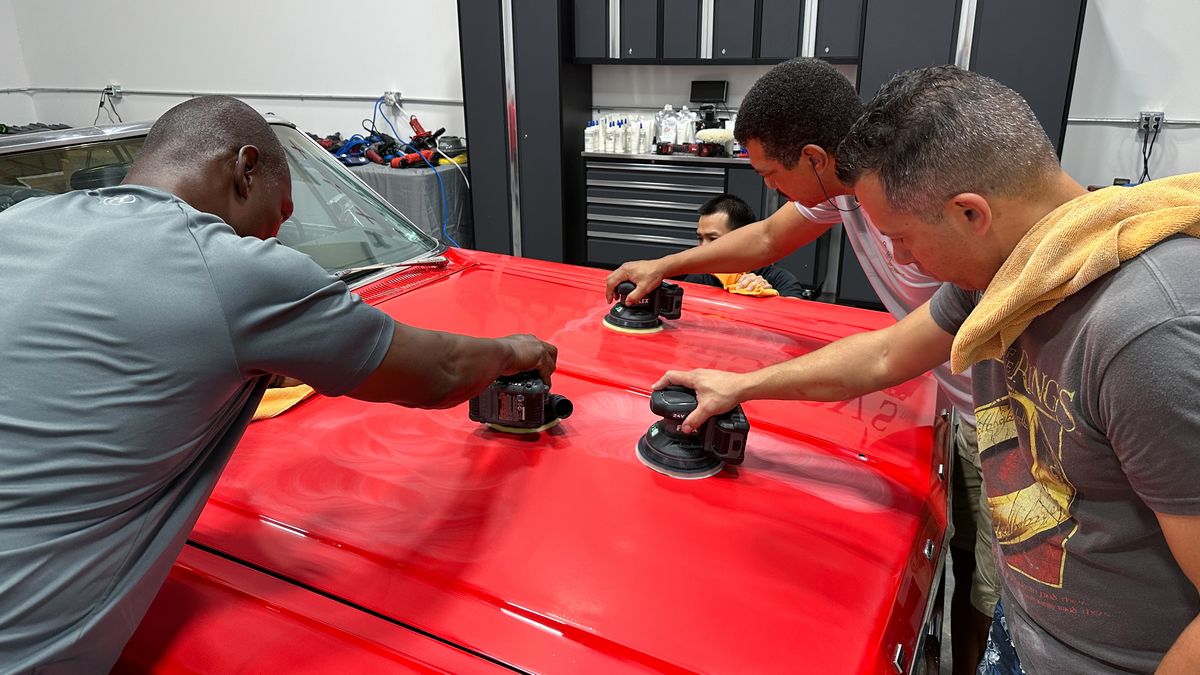
Shortly after 9:00am and this team is learning the way of the rotary polisher and the power and effectiveness of Dr. Beasley’s NSP Primers!
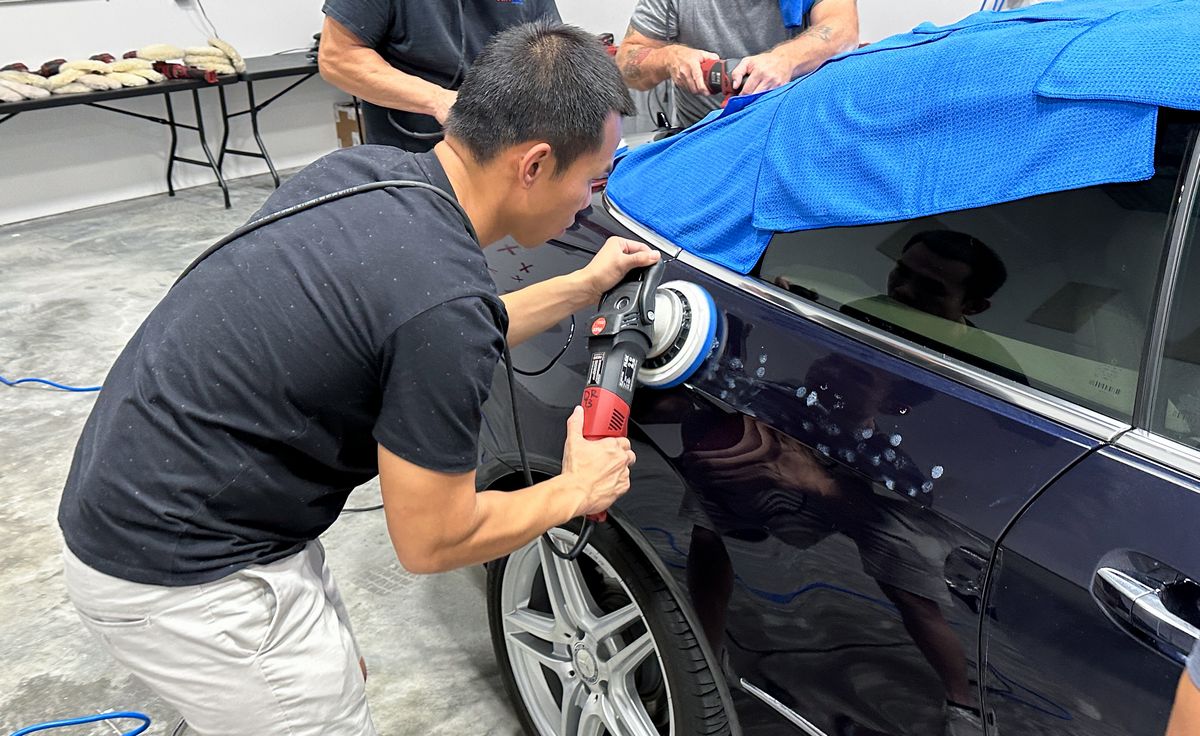
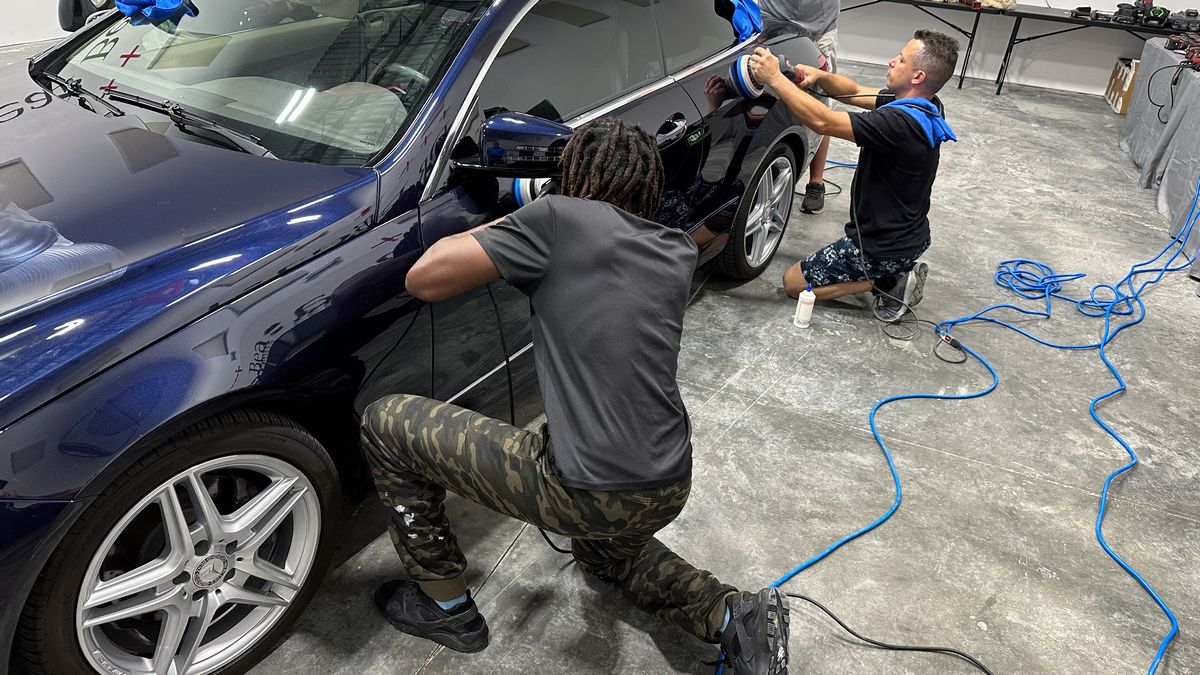
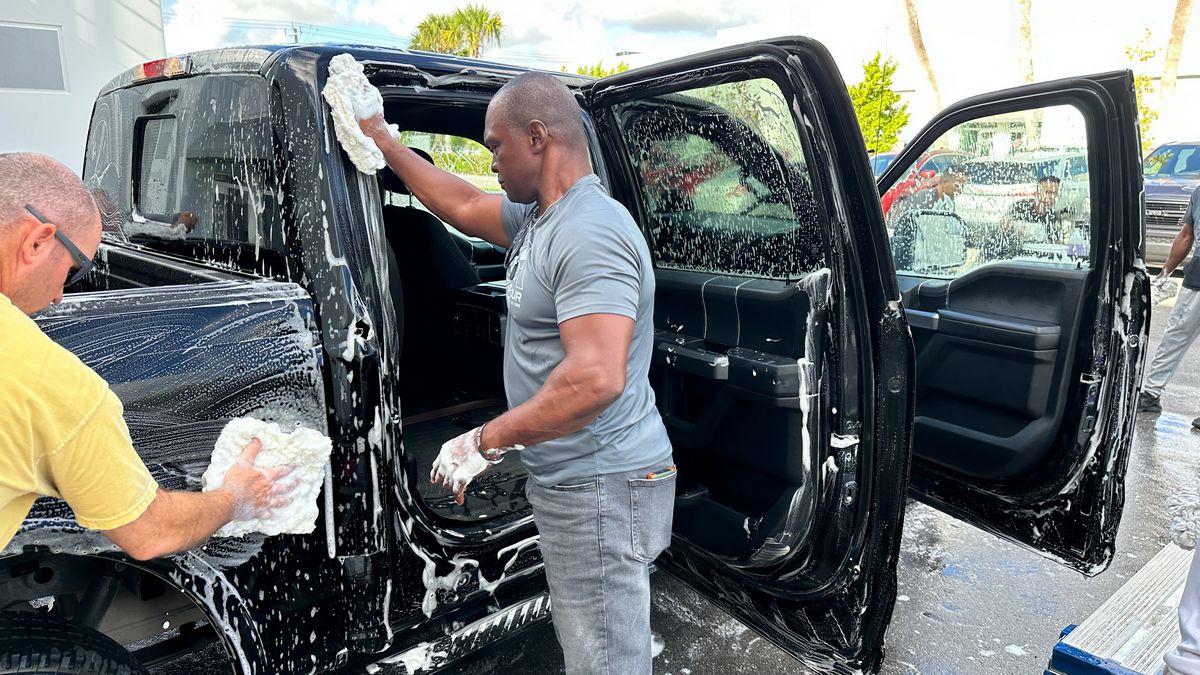
Derick working the driver’s side front fender…
Lameko (Meko for short) working the driver’s front side of the roof…
Here’s Andy, demonstrating a text book example of how to correctly use a rotary polisher on the side of a car
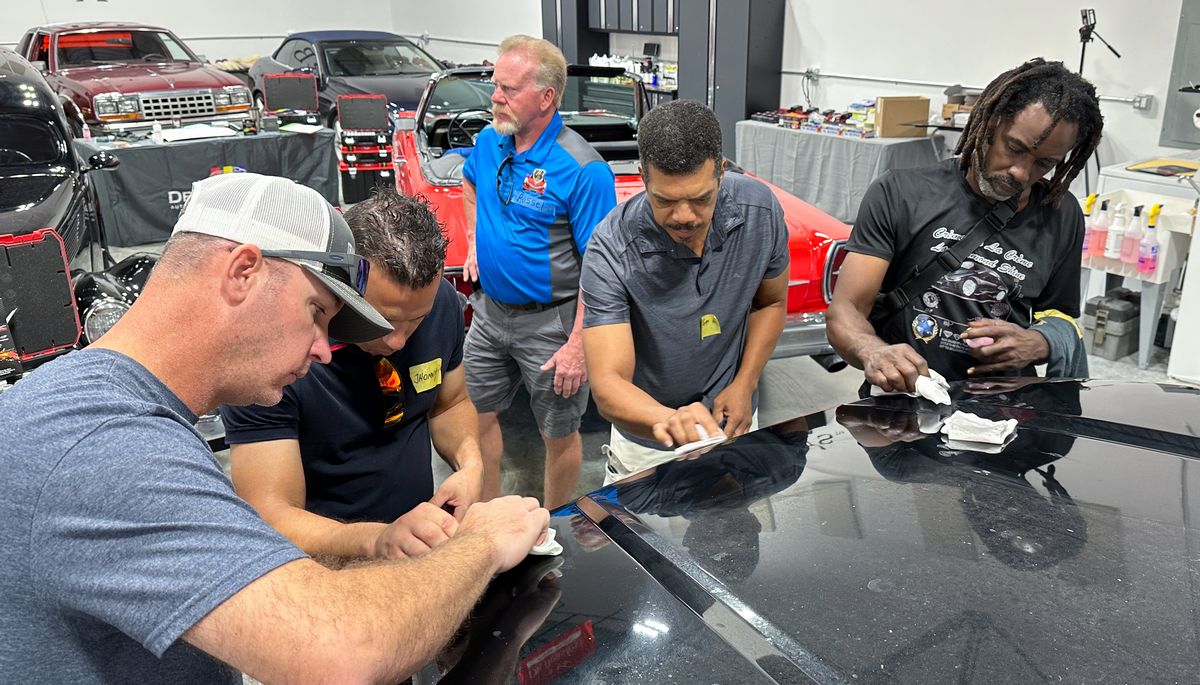
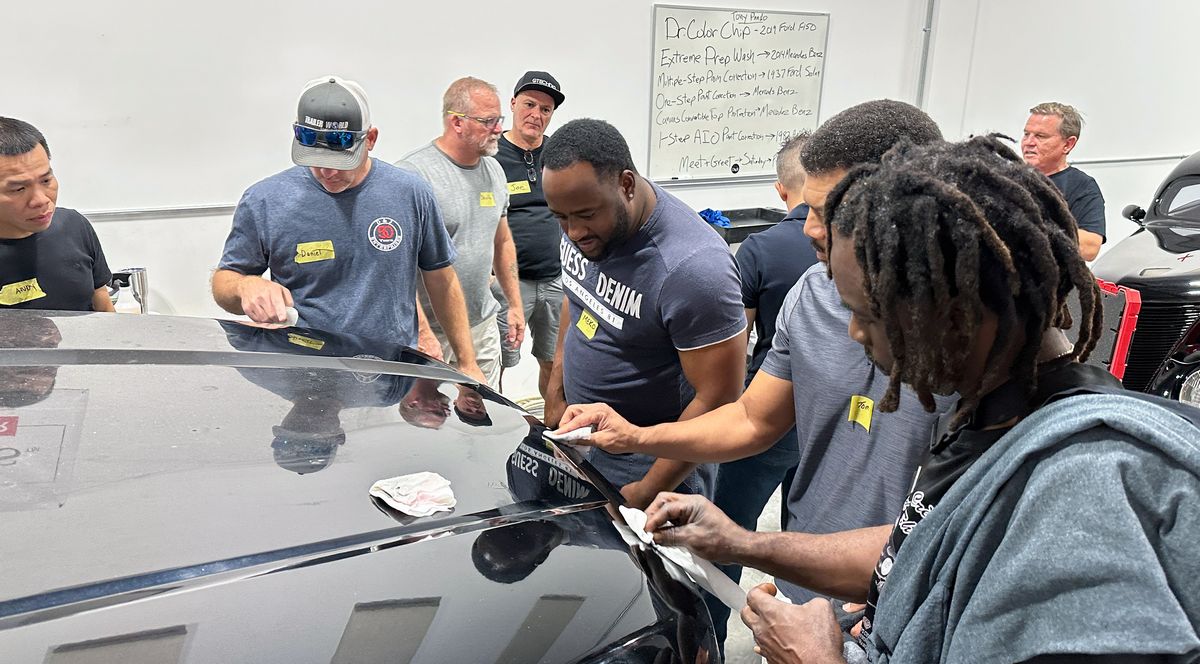
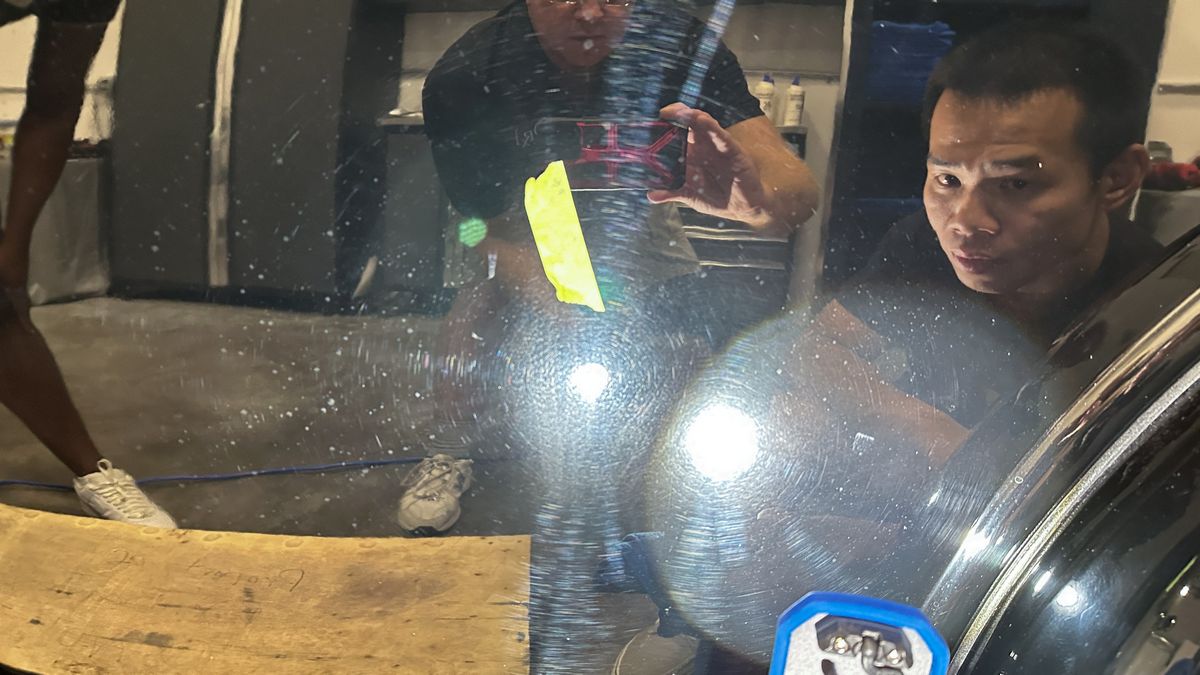
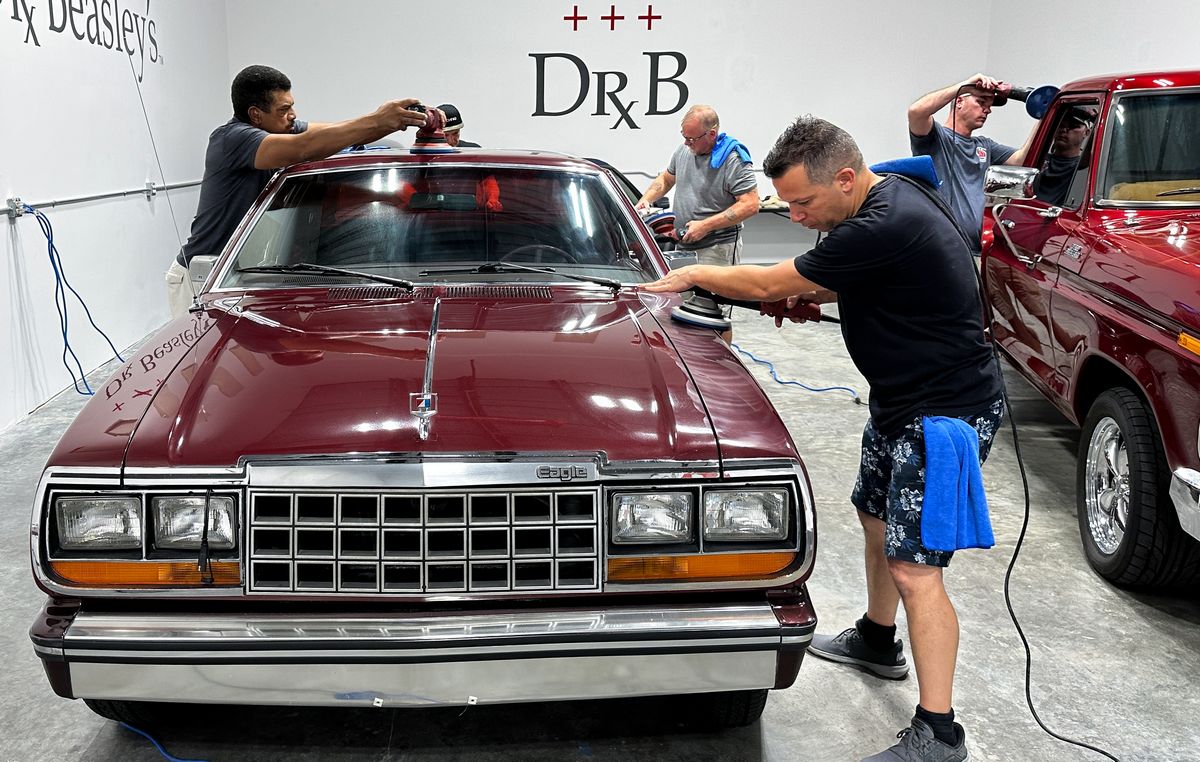
Team work now and over the course of the 3-day class. Learning, training, working hard, having fun and making new friends.
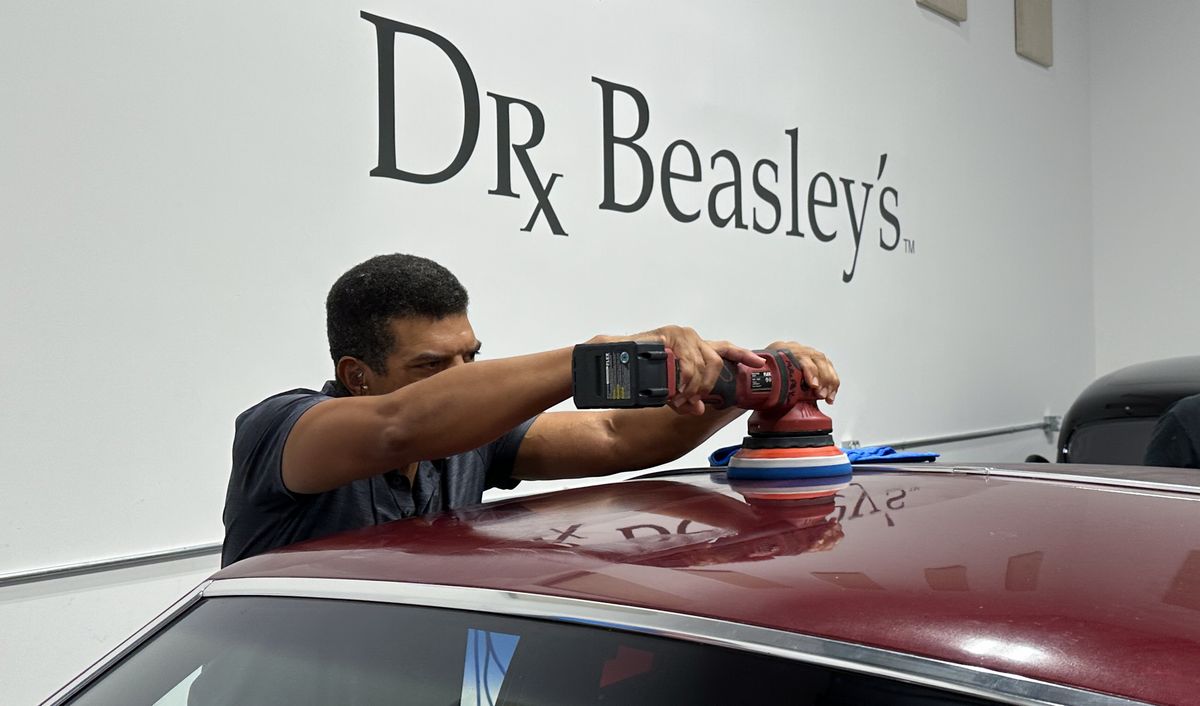
Here’s Jhonathan working the driver’s side rear fender…
Here’s Joe working the rear passenger side body panel…
Here’s Thomas working the passenger side of the roof in partnership with Meko on the other side.
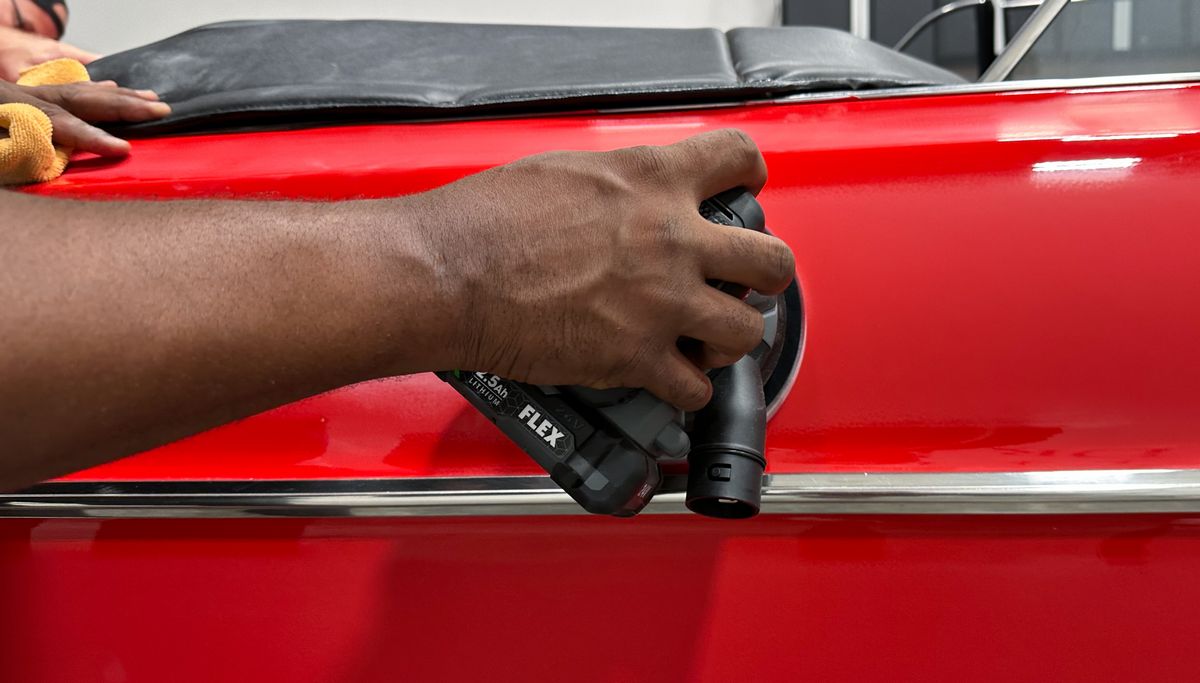
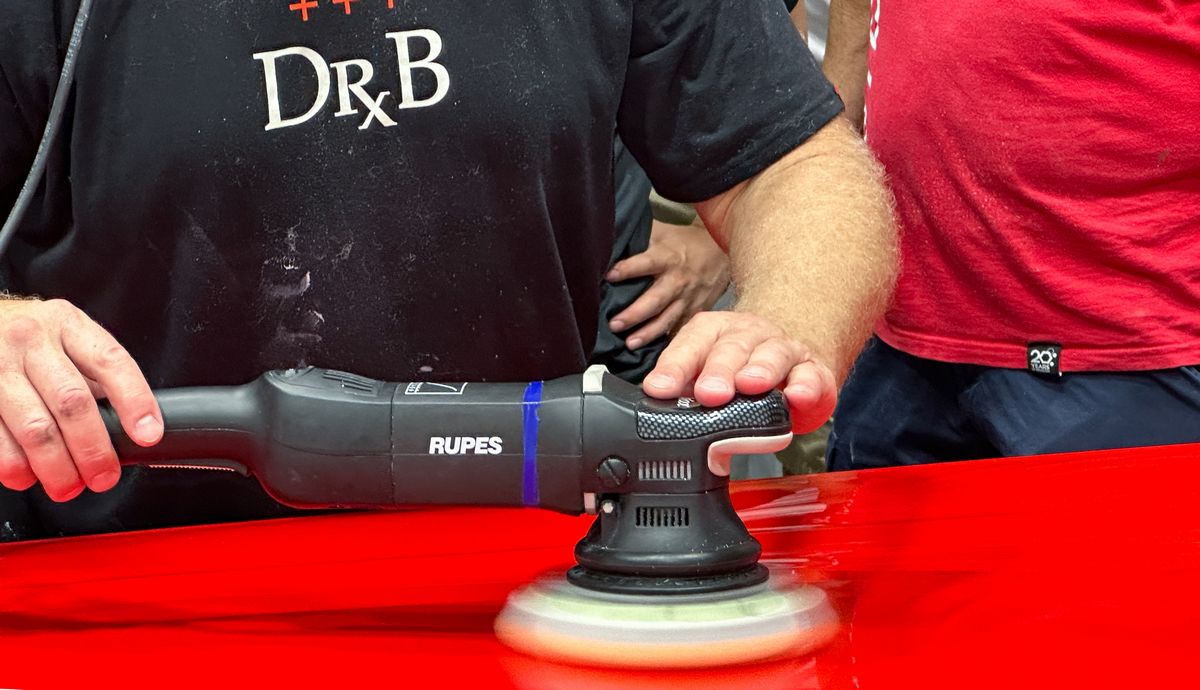
Here’s Russel sharing tips and techniques for using Dr. Beasley’s NSP 150 Primer with the FLEX Cordless PE-150 Rotary Polisher
Here’s Daniel working the passenger side front fender…
Text book example – Joe working the rear passenger side fender.
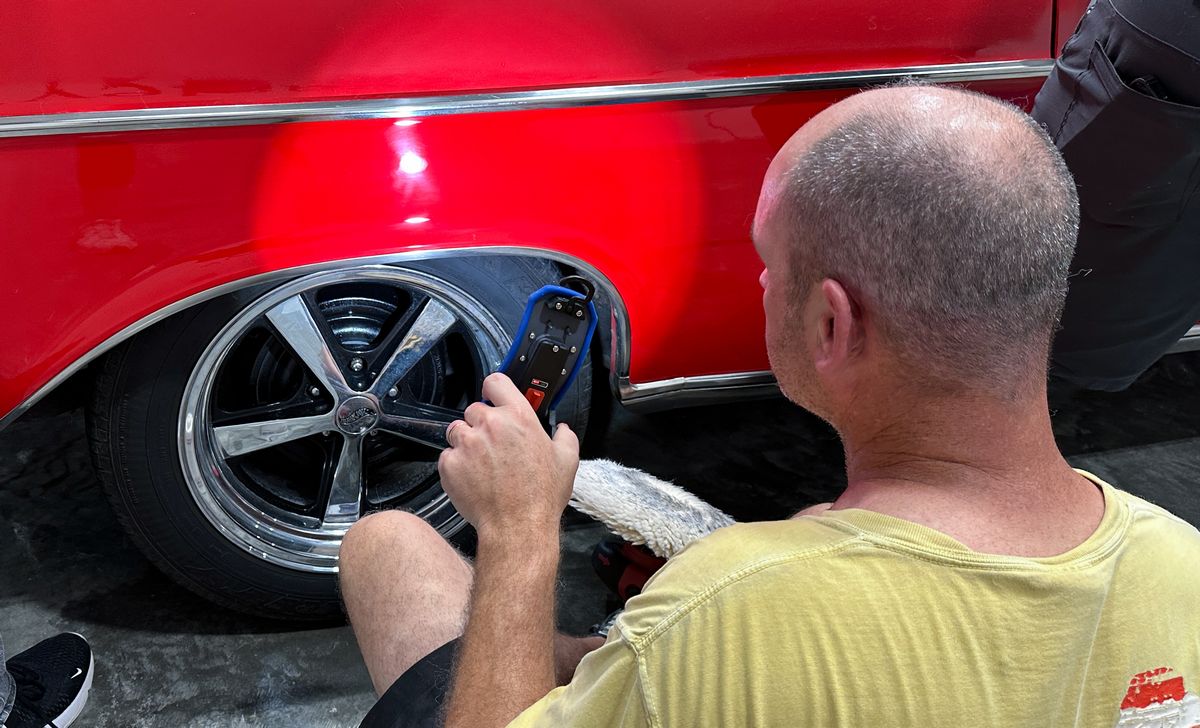
Here’s David using the Finger Painting Technique to place two dabs of product on a small section of paint below the recessed license place inset.
Next he picks up the product on the face of the wool buffing pad and works that section.

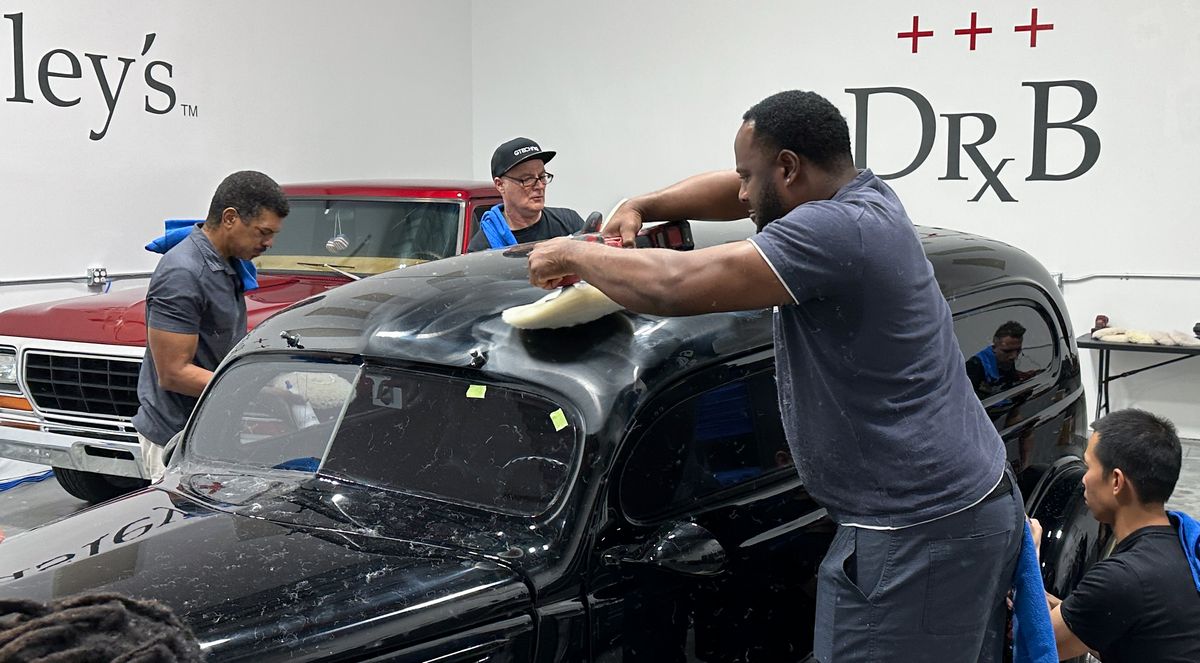
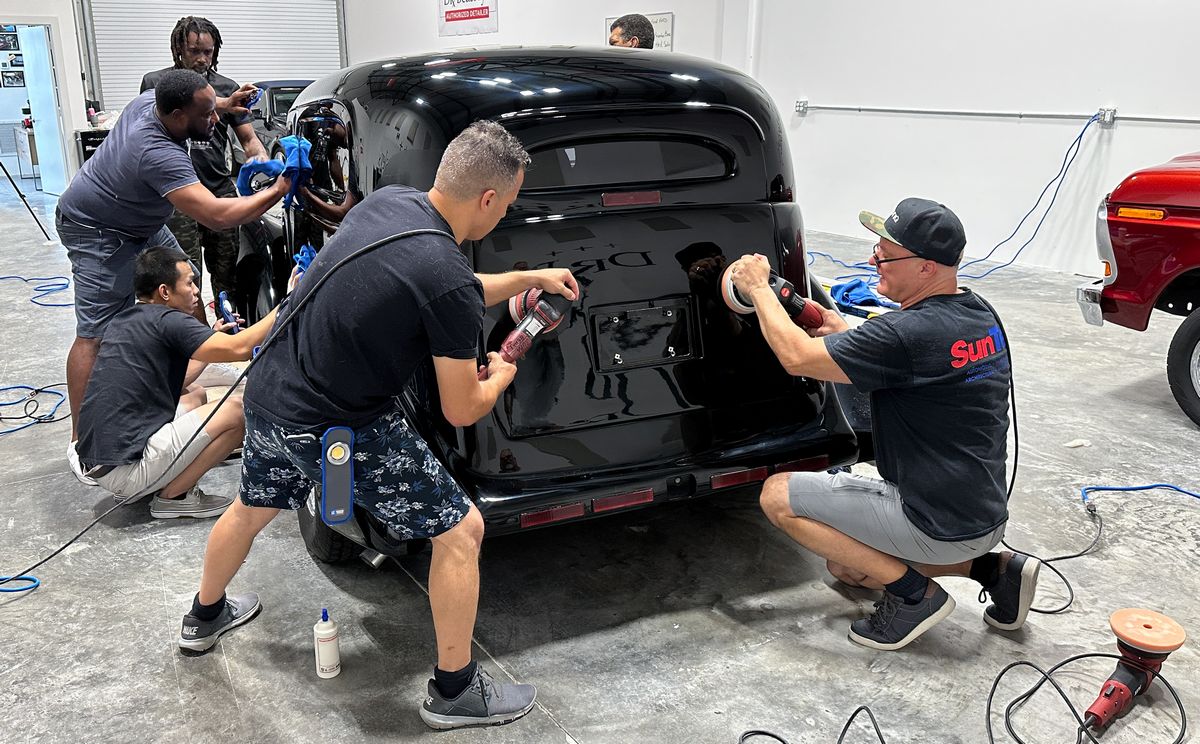
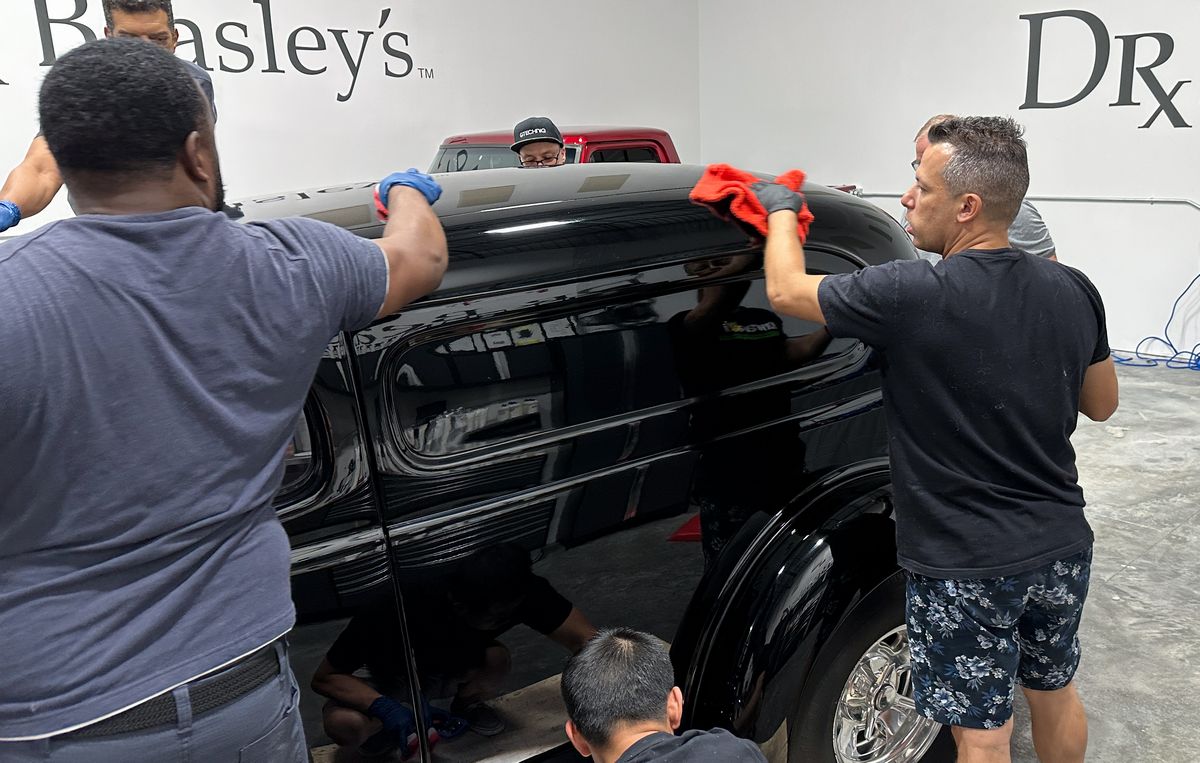
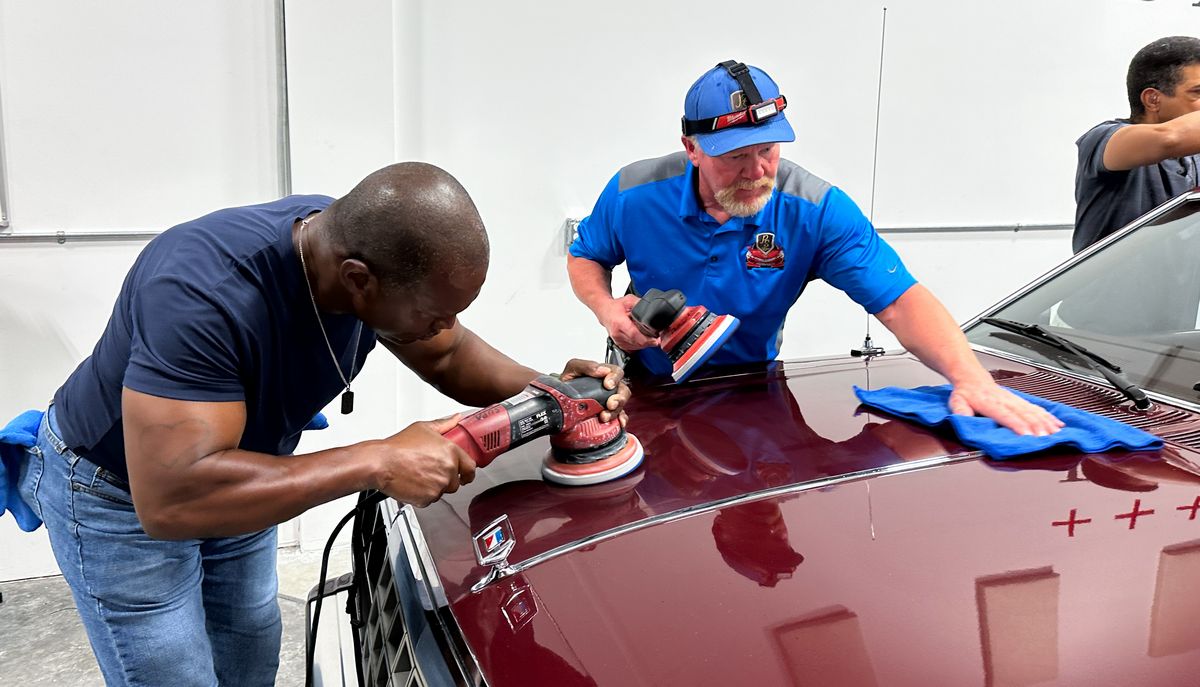
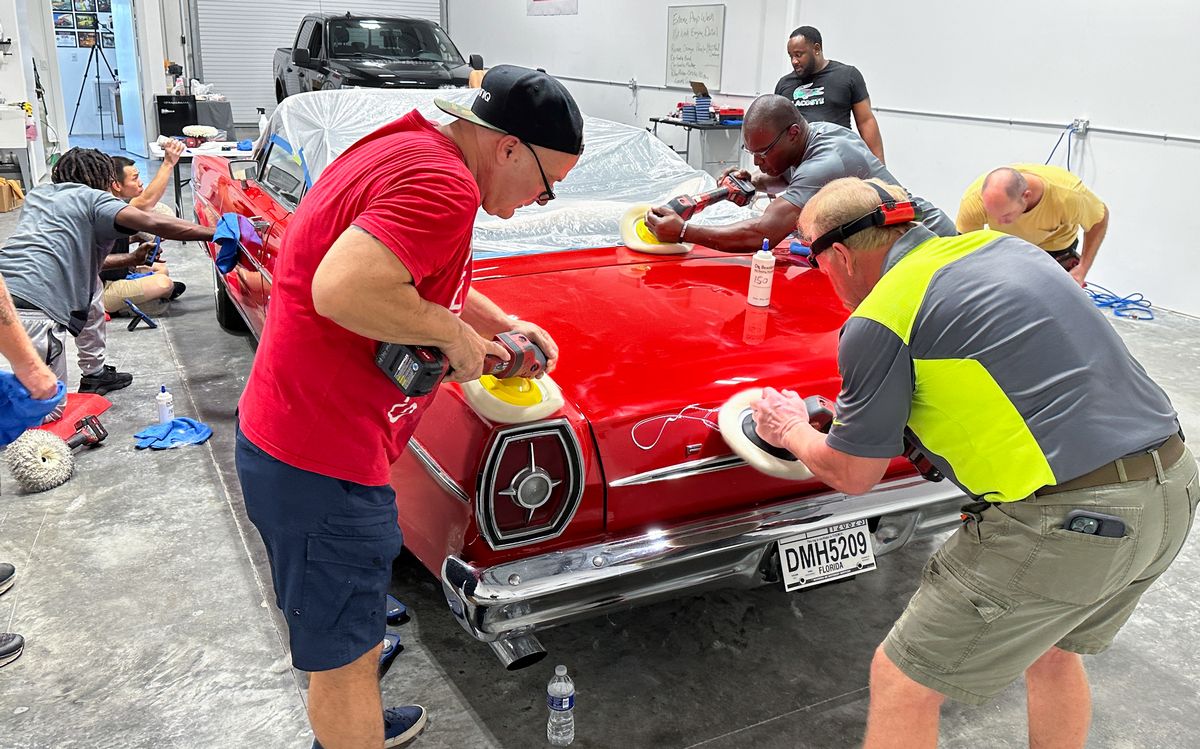
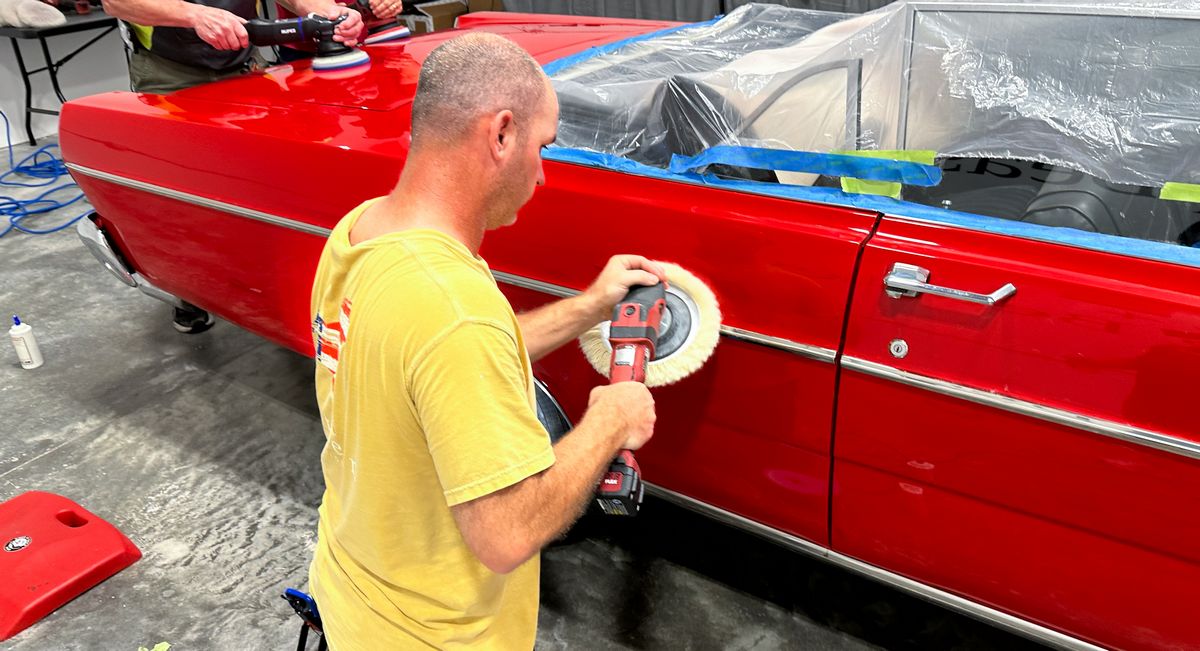
Here’s Joe and Derick tag-teaming the roof…
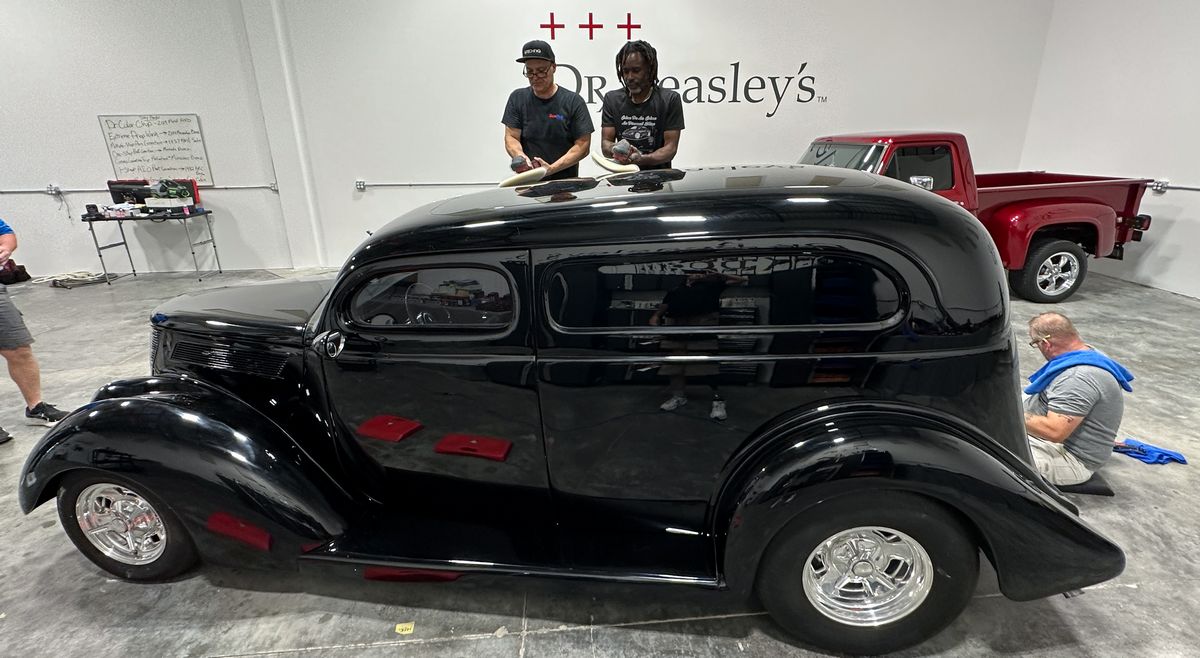
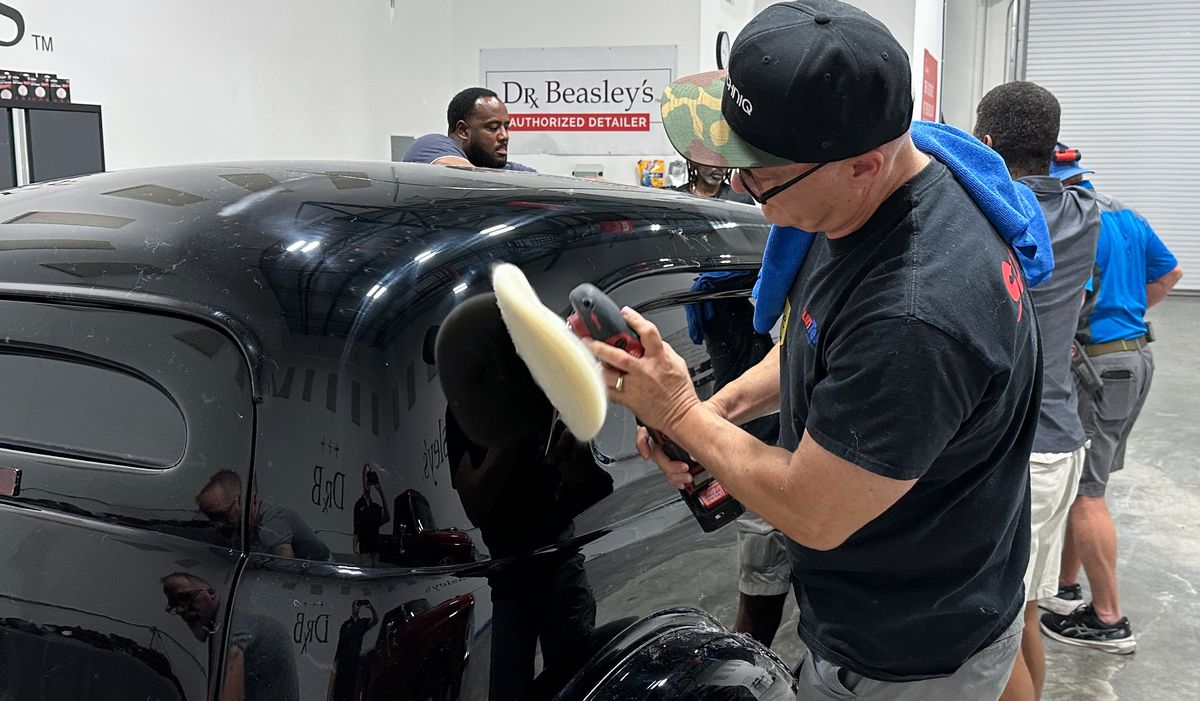
Next up – Second step paint correction – removing the holograms and perfecting the paint!
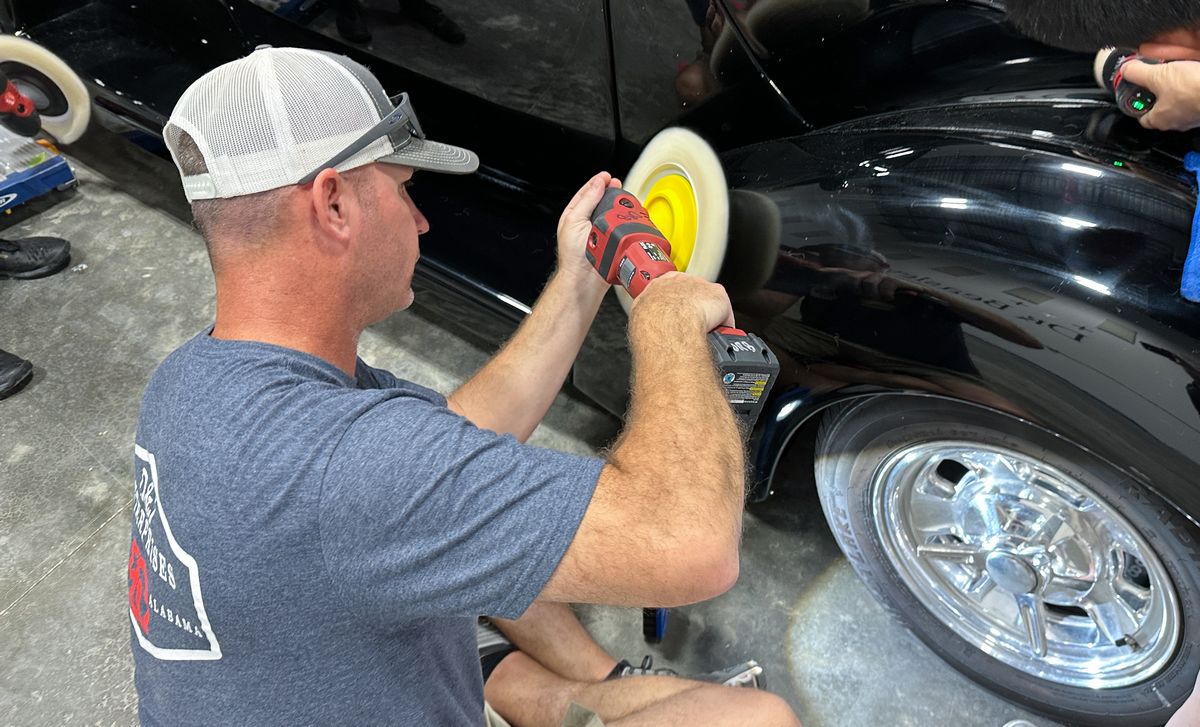
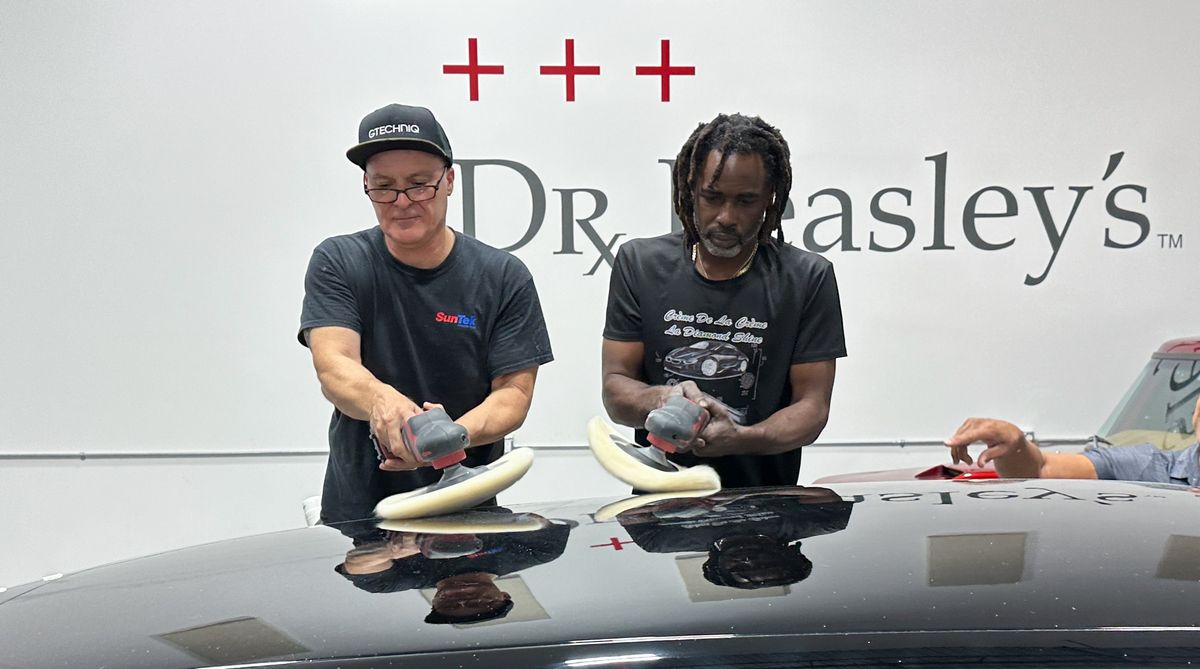
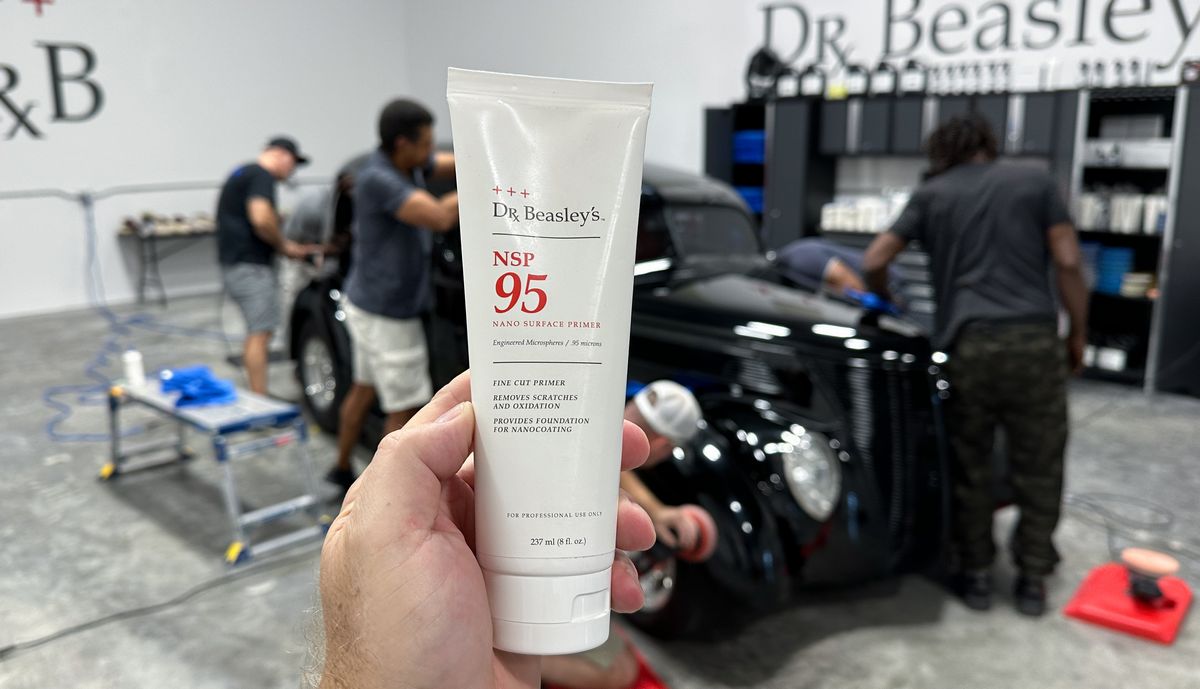
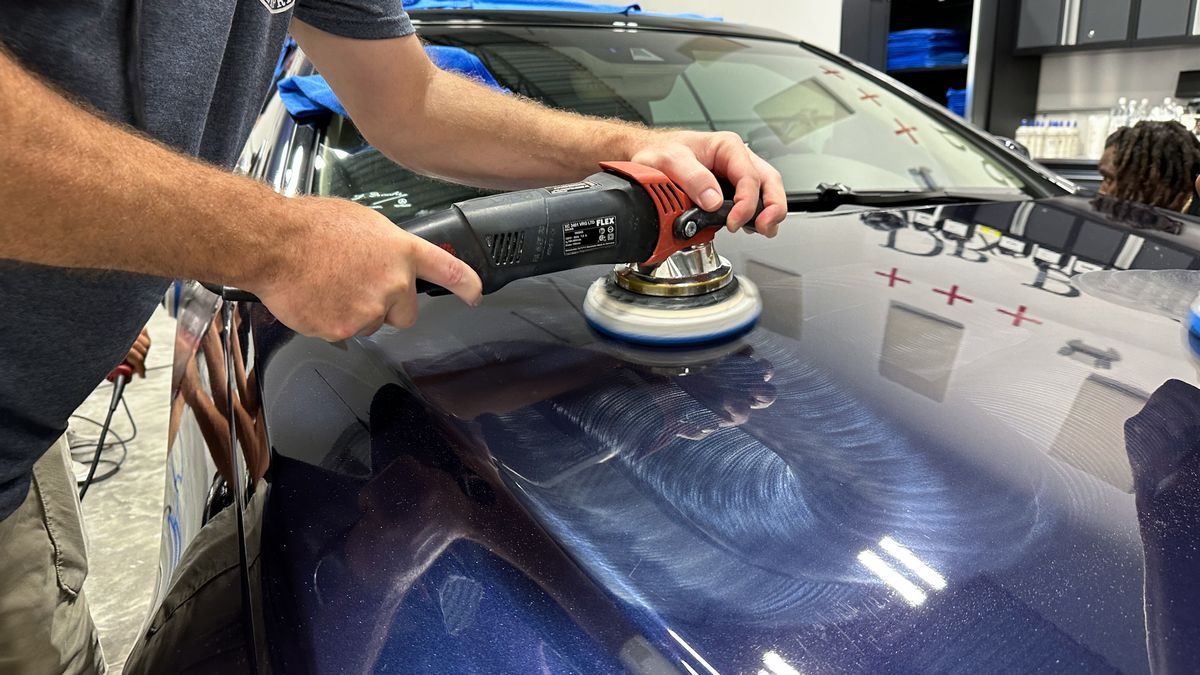
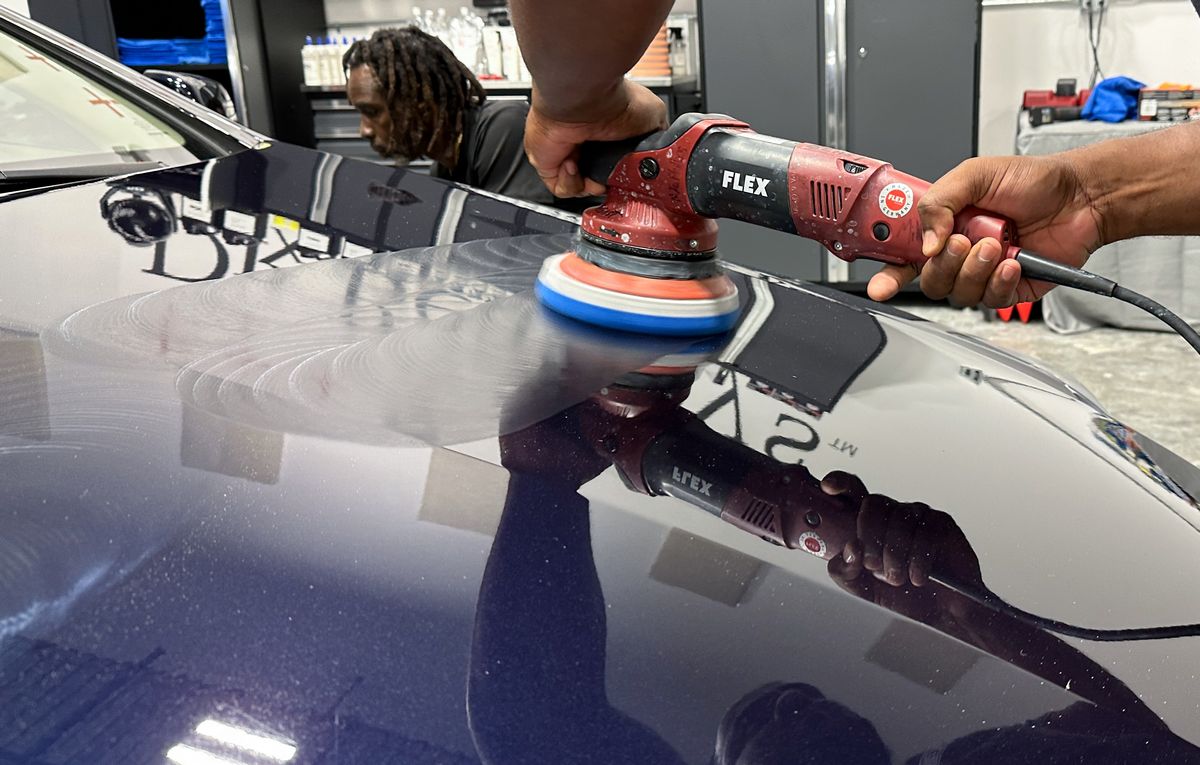
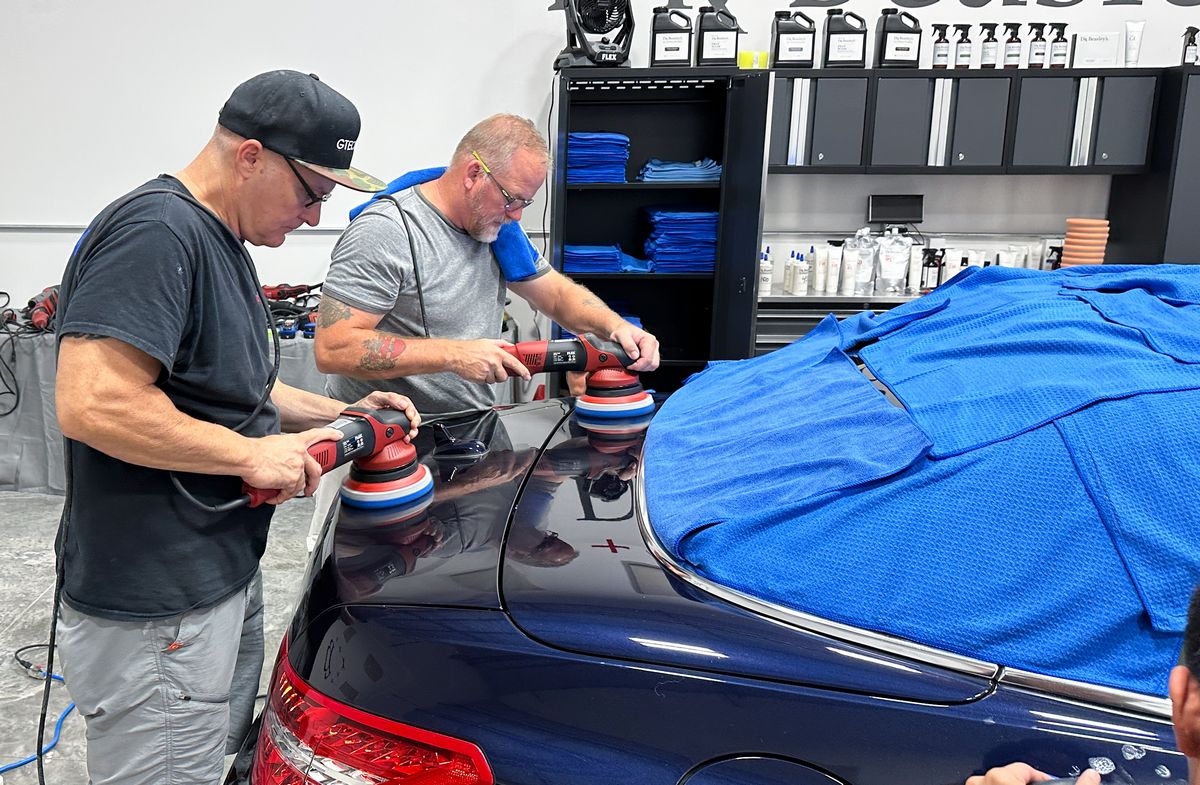
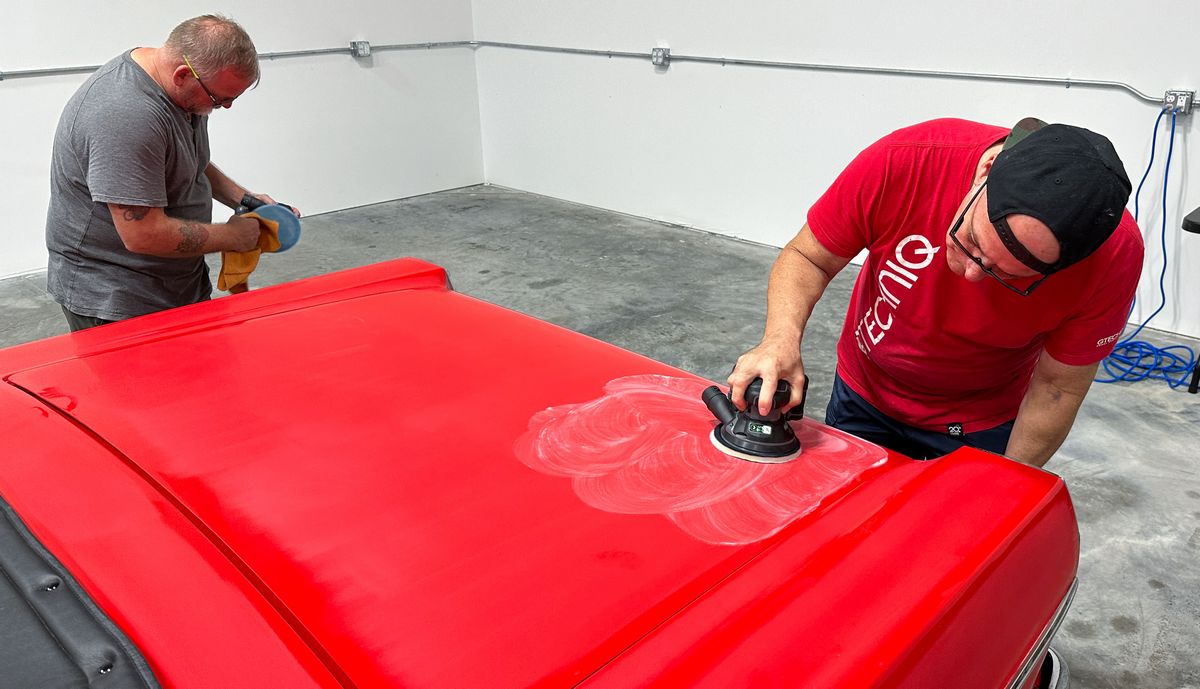
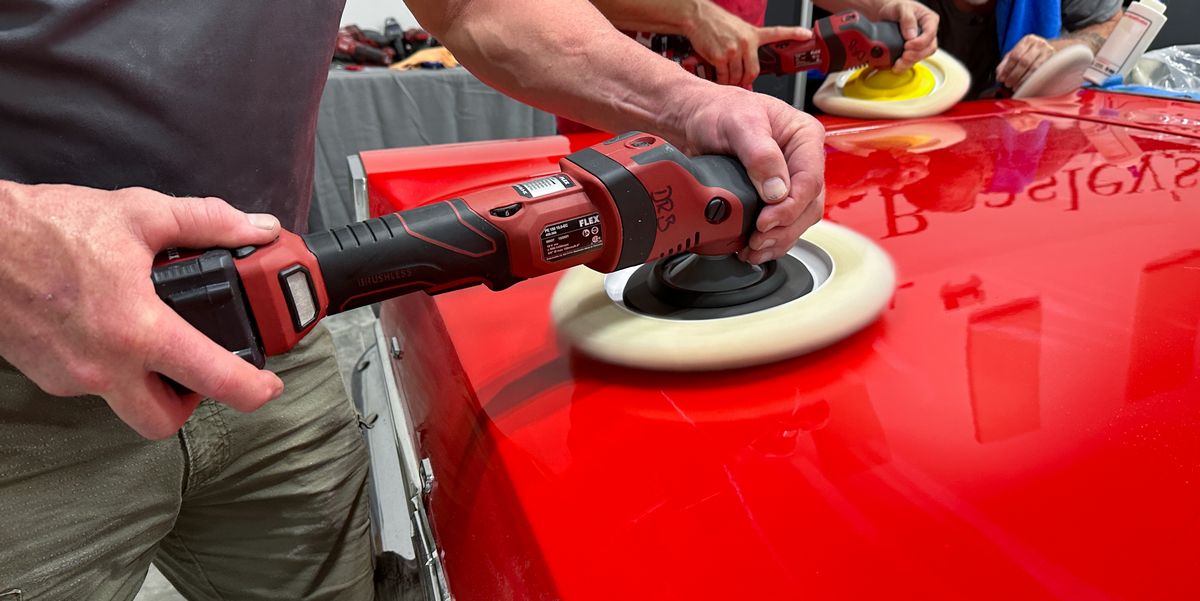
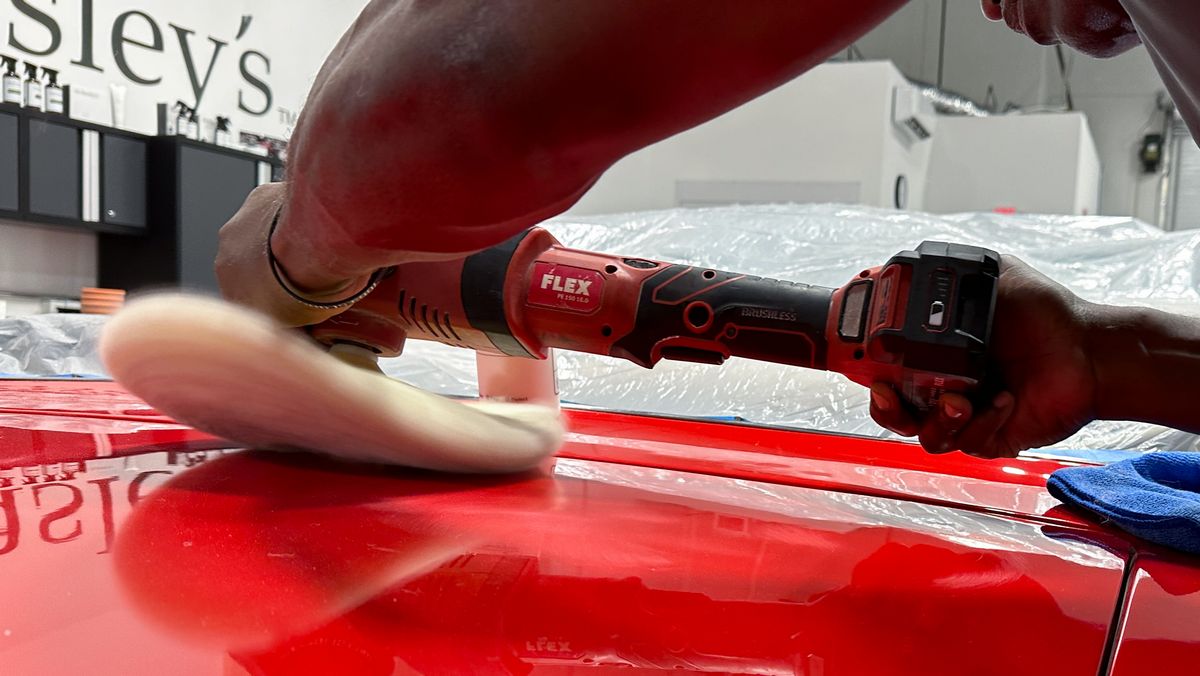
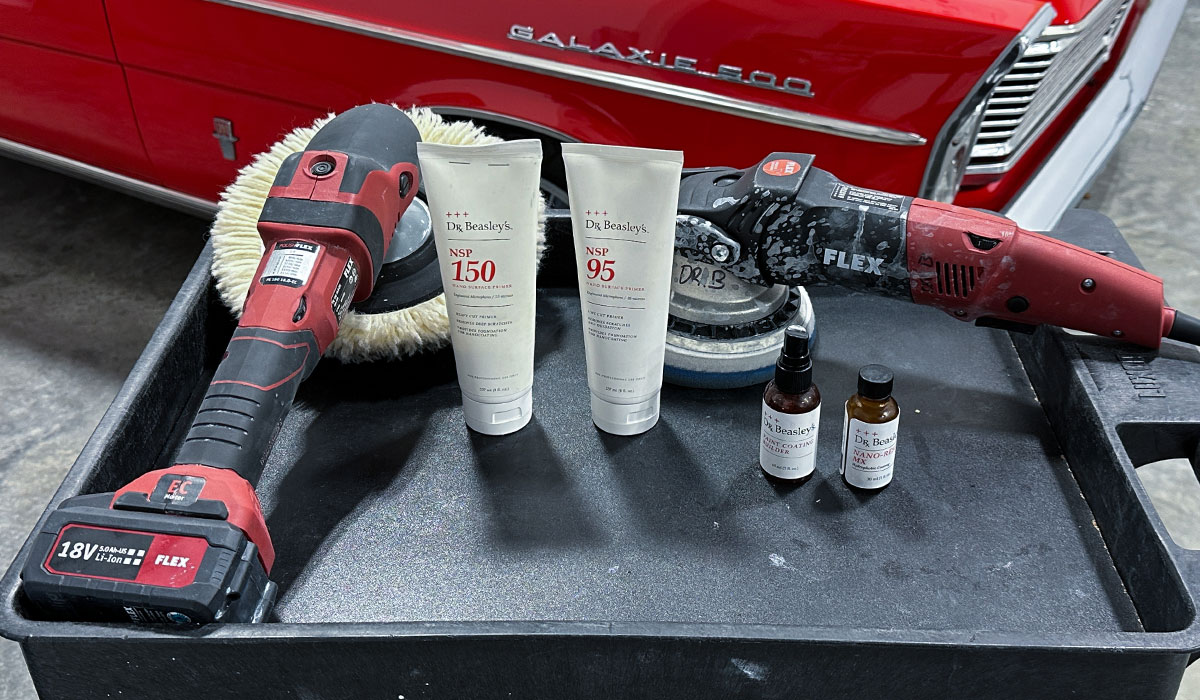
After removing all the sanding marks, swirls, scratches and random isolated deeper scratches, it was time to move on to the second step – machine polishing using the Dr. Beasley’s NSP 95 with Dr. Beasley’s Orange Foam Polishing Pads using FLEX orbital polishers. The BEAST and the Supa BEAST. Both of these are 8mm gear-driven orbital polishers.
By now, a unique phenomena begins – the students begin to gel… they begin to work together as a team, no longer strangers.
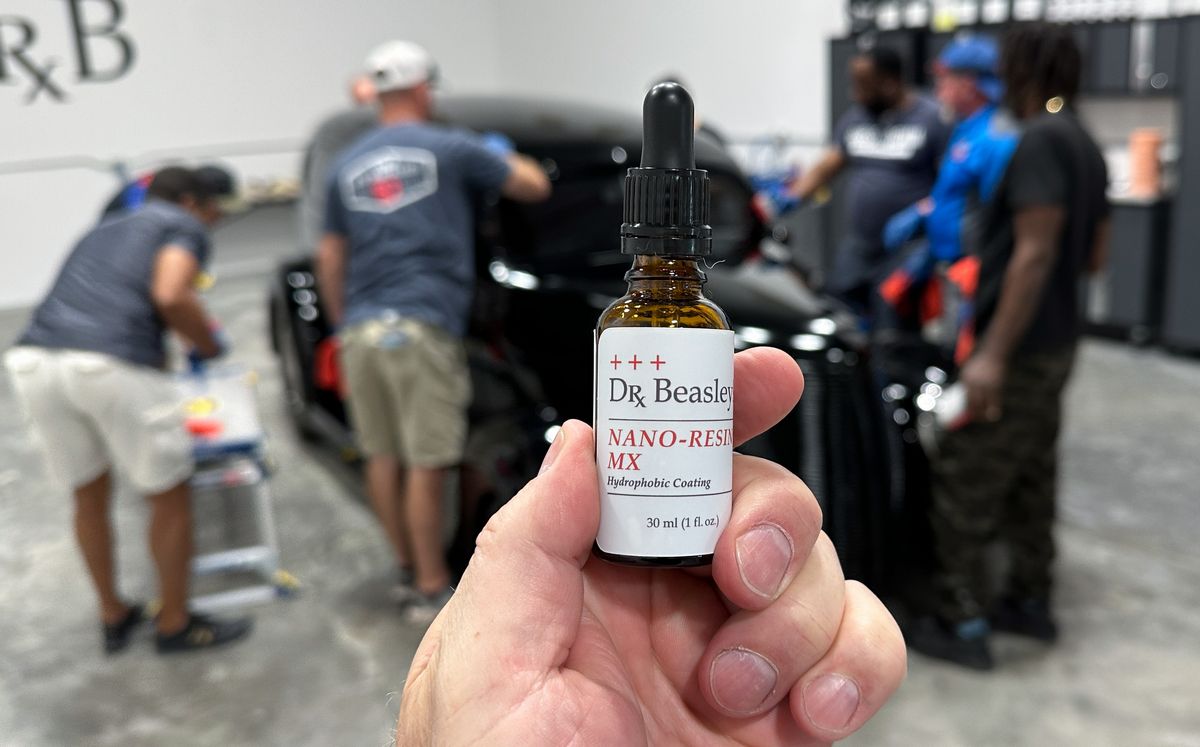
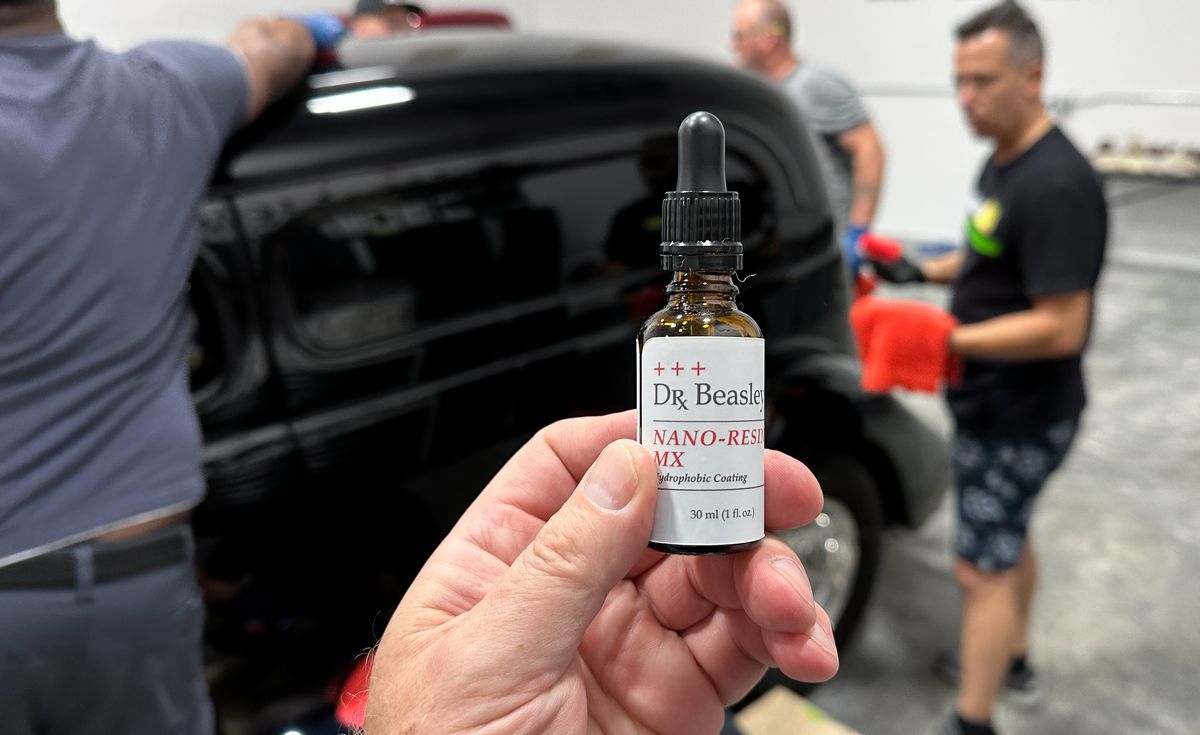
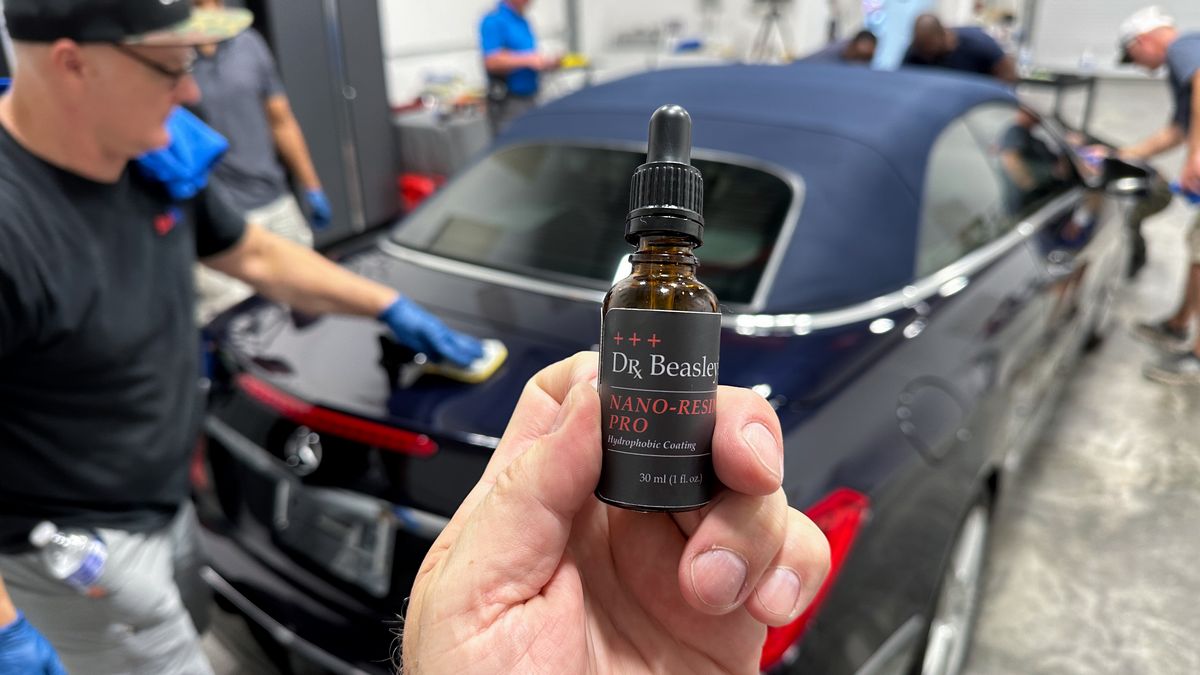
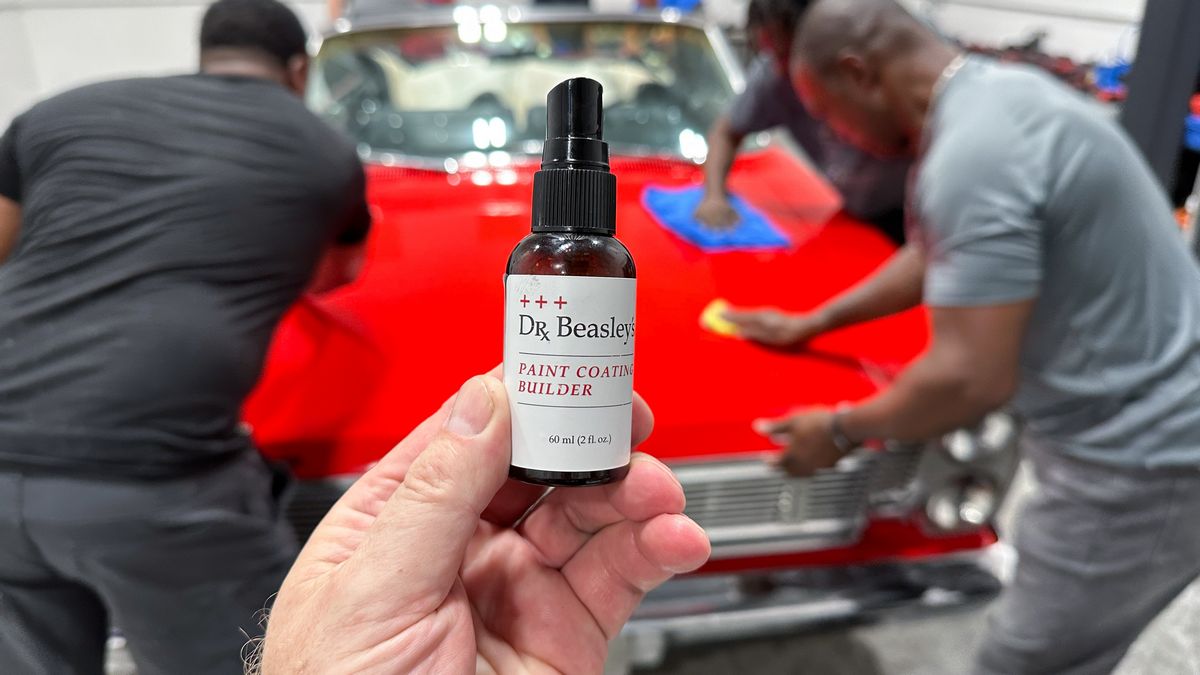
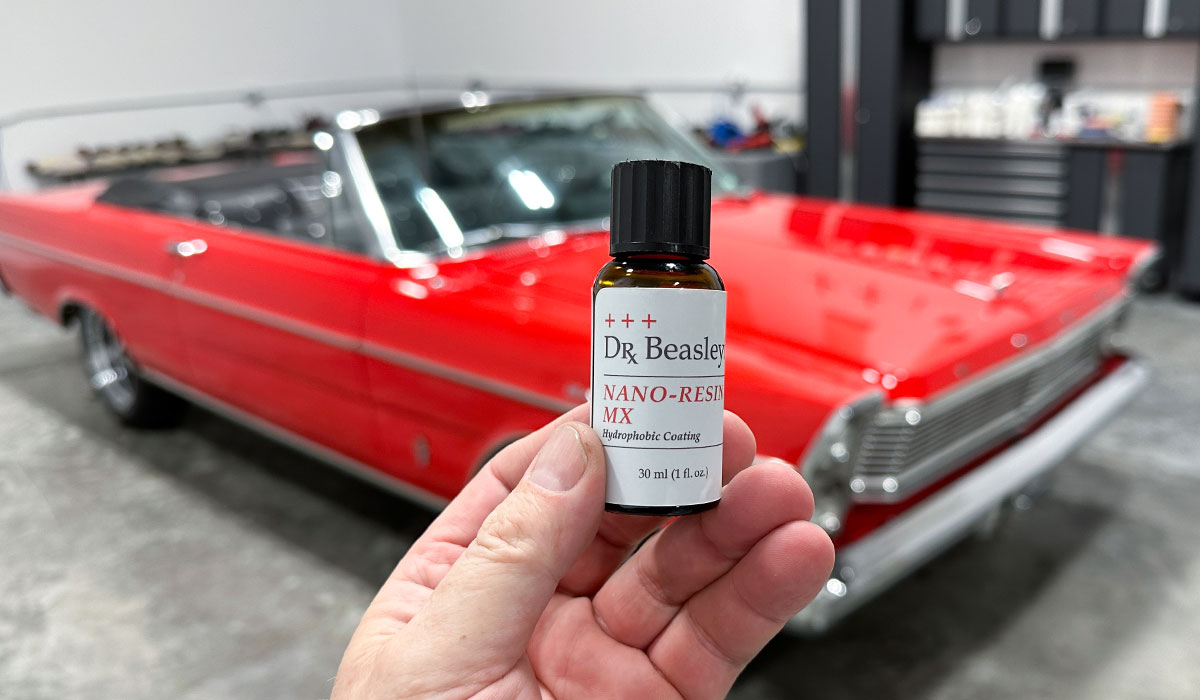
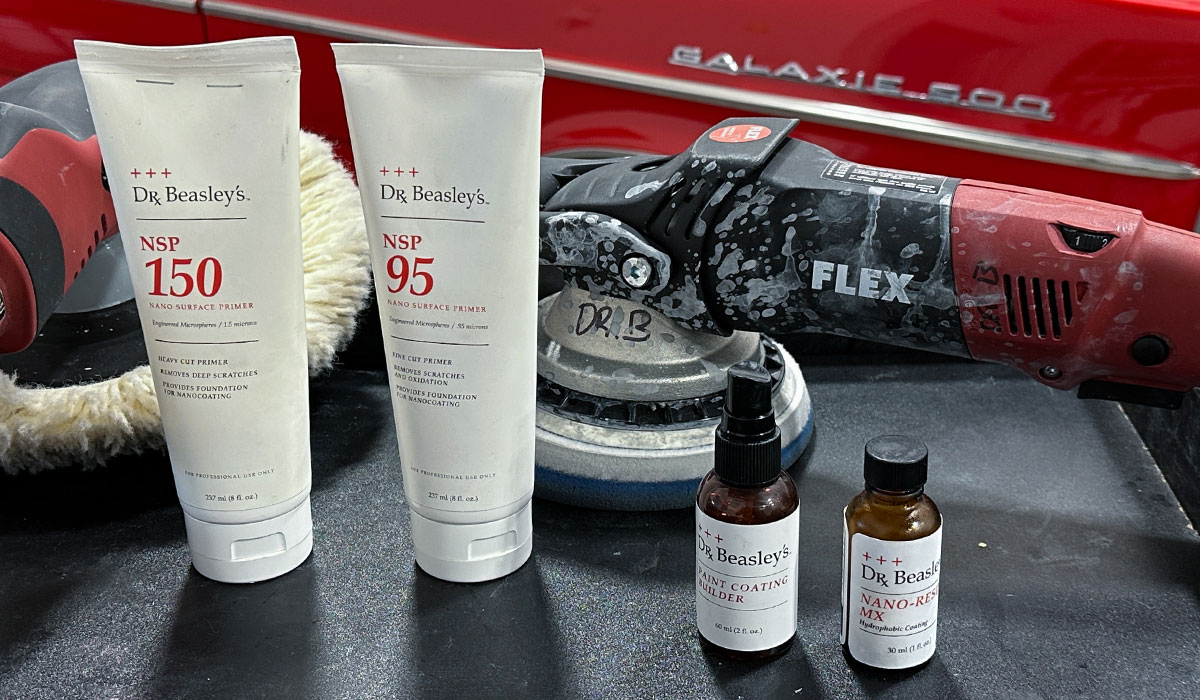
Next step… installing the Dr. Beasley’s Nano-Resin MX Ceramic Coating
The Dr. Beasley’s Nano-Resin MX Ceramic Coating Kit is a two part ceramic coating system. The first part, the Paint Coating Builder, primes the paint for the proper bonding of the MX Ceramic Coating for maximum gloss, protection and durability. It perfects the paint surface while laying down anchor points for the MX Ceramic Coating to build on.
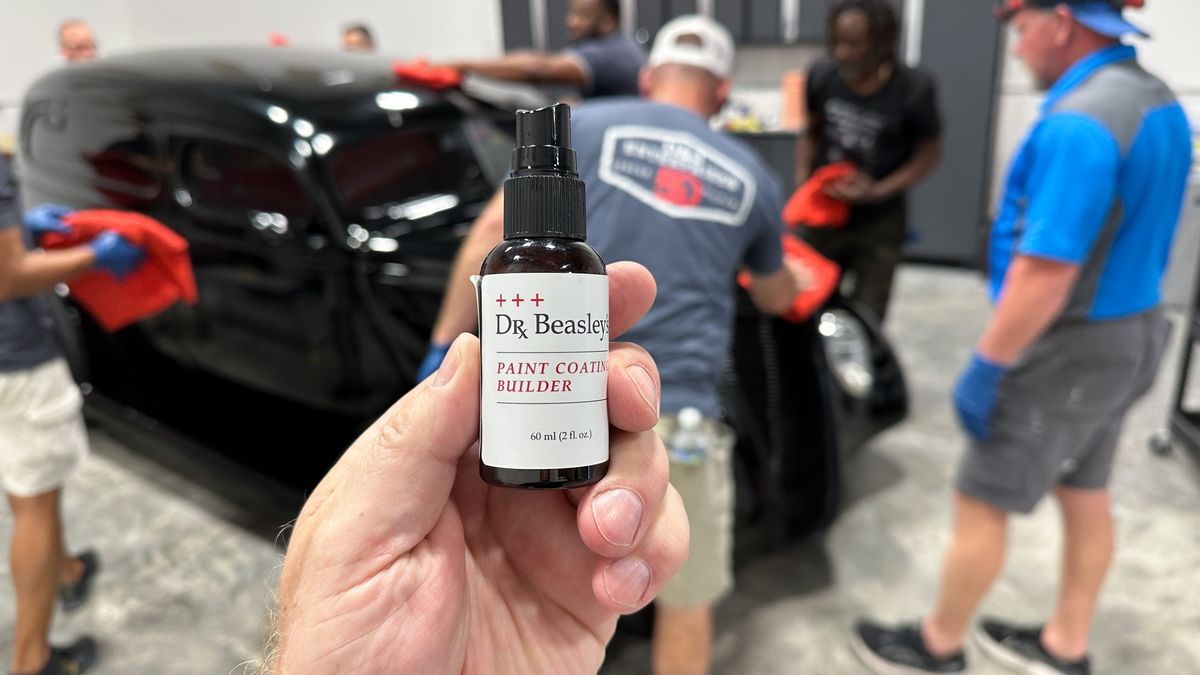
Next up – Installing the Dr. Beasley’s Nano-Resin MX Ceramic Coating
This is a ceramic coating system for vehicles with glossy paint finishes. A variant of our Nano-Resin Pro formula, Nano-Resin MX is graded for 7 years of durability and adds self-cleaning properties, micro-scratch resistance and a brilliant candy gloss with proper washing and drying, (gentle touch).
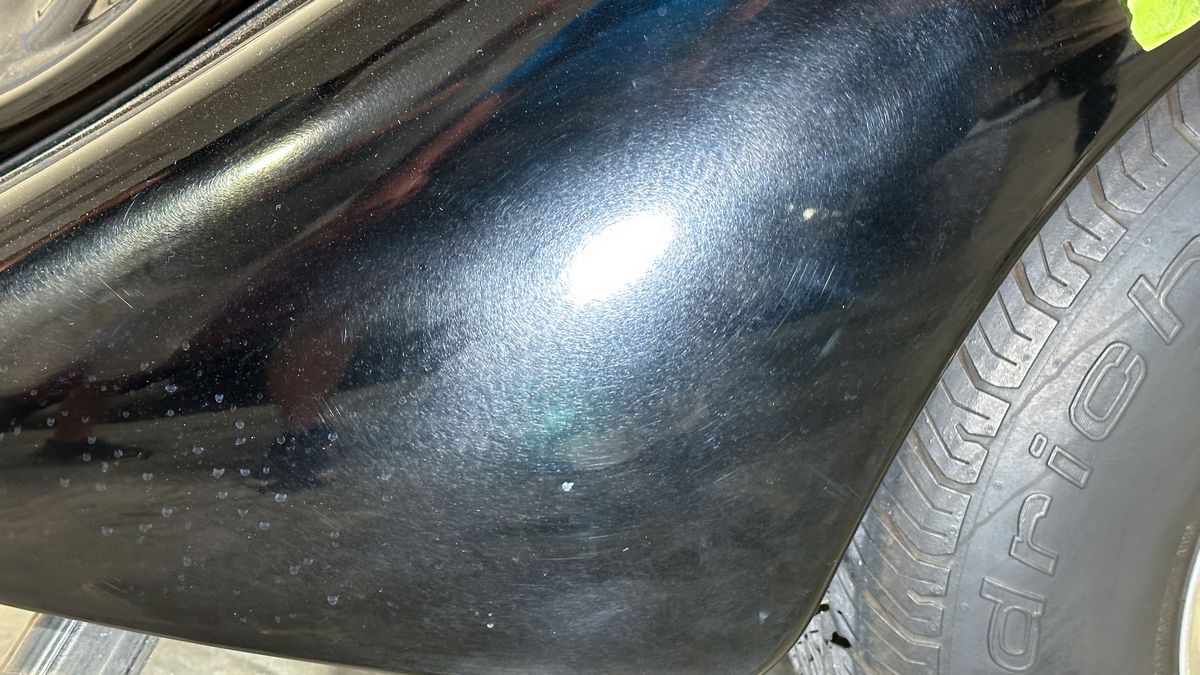
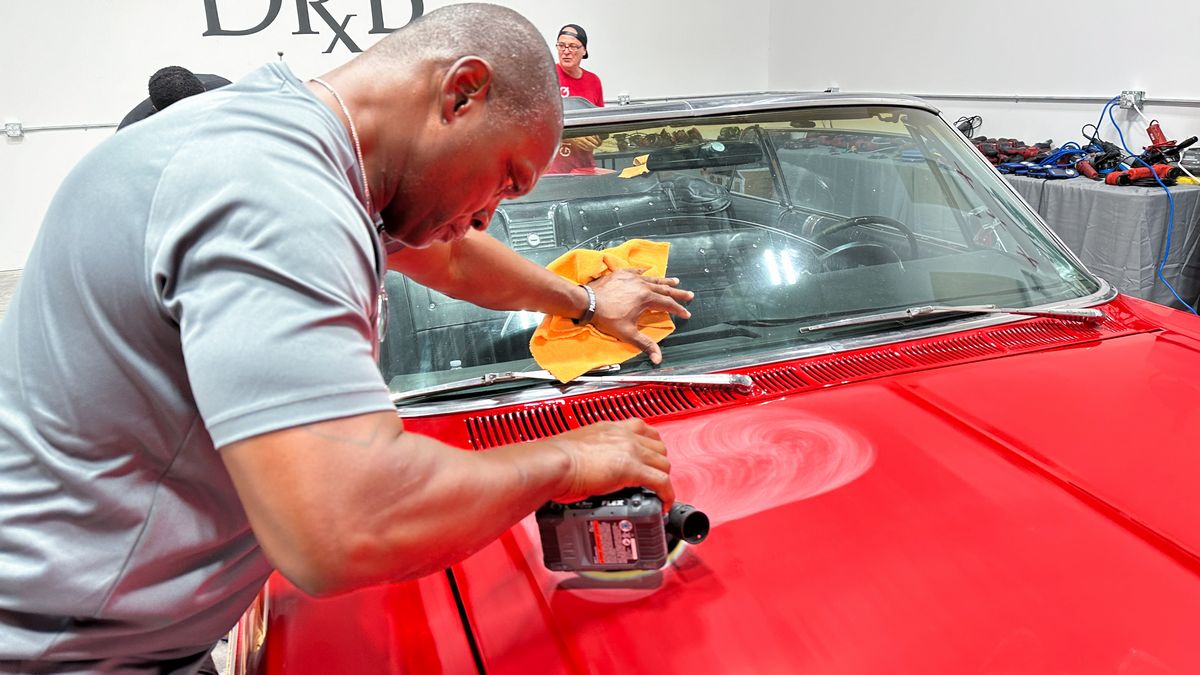
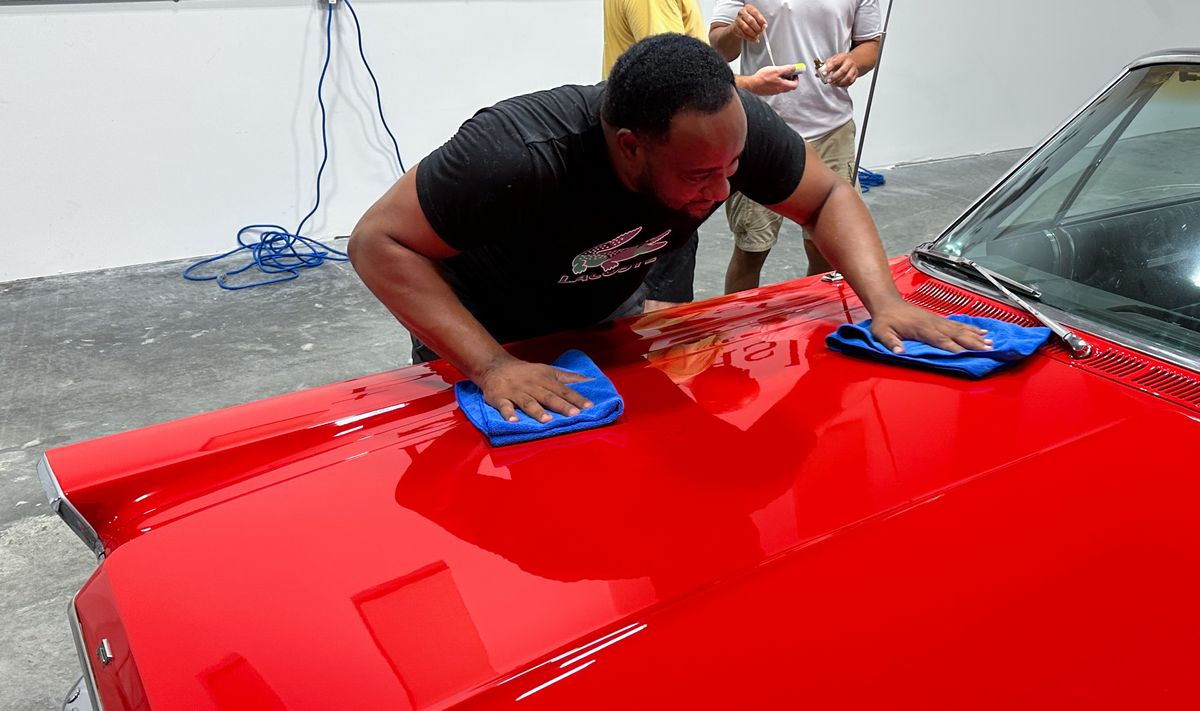
Final results!
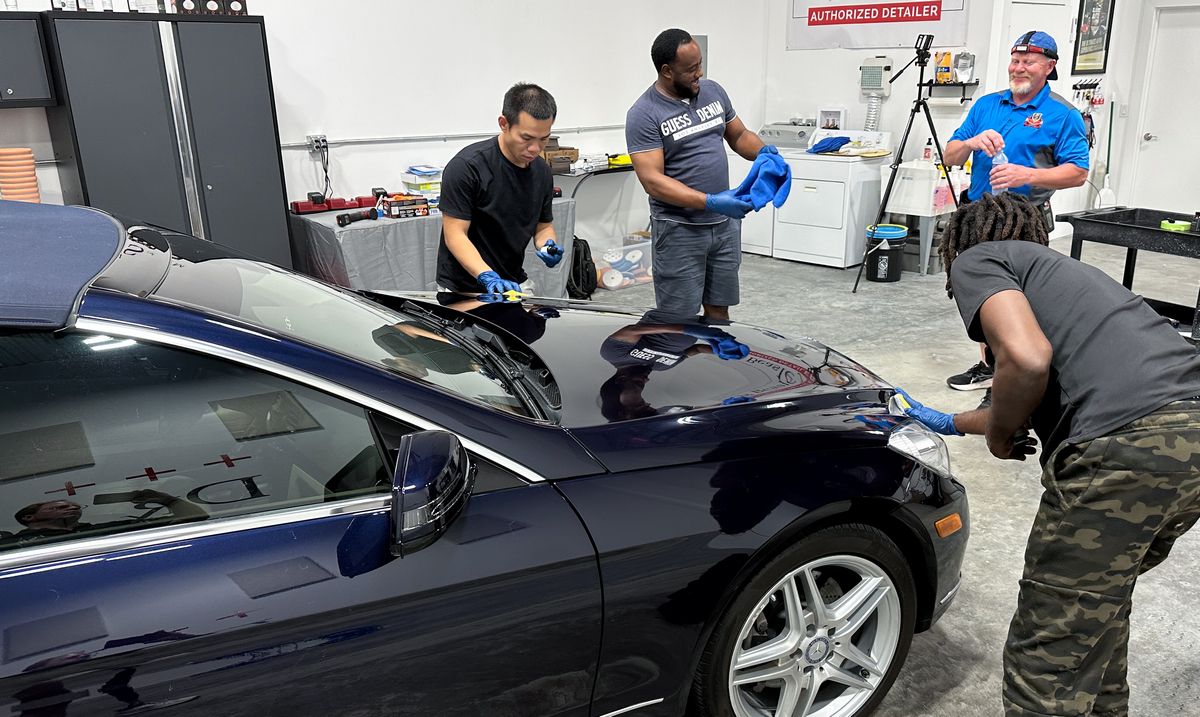
Just to note, the pictures you see in this linear thread are sharing the flow of the class. Thus the 1937 Ford 2-door Sedan in the pictures above were the first car and TOPIC covered on Friday. After taking our beauty shots, we moved the 1937 Ford over to the rear of the shop and moved the Mercedes-Benz into position to teach the next topic.
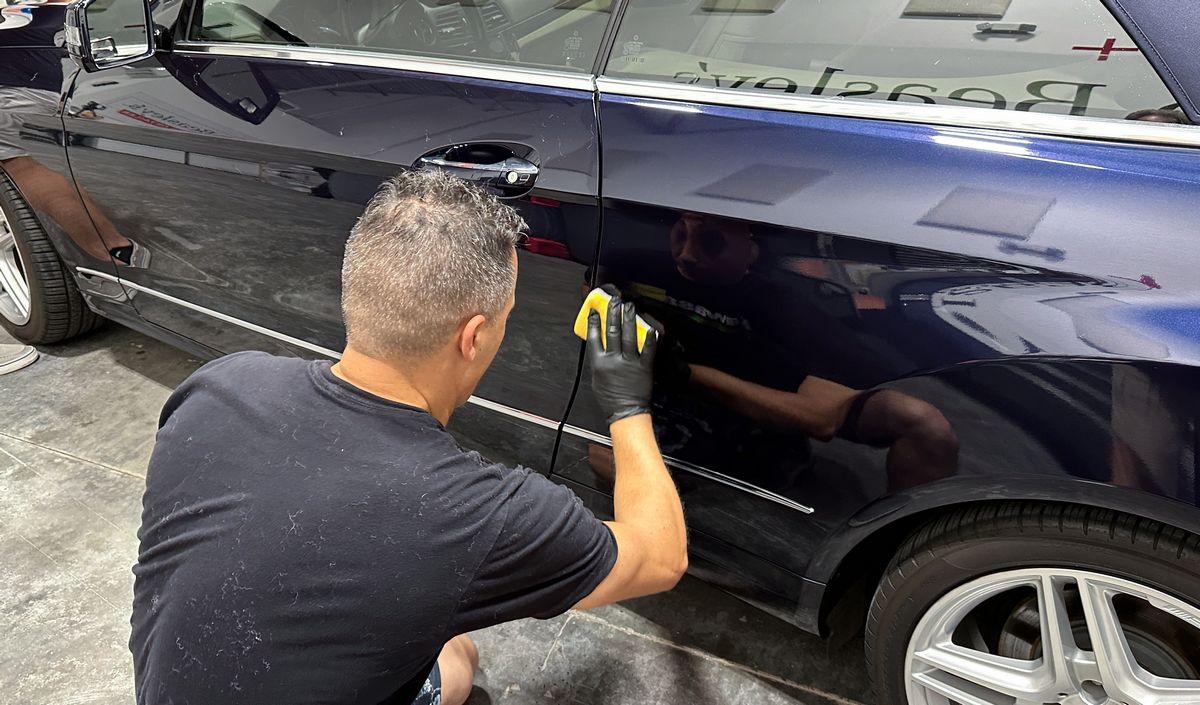
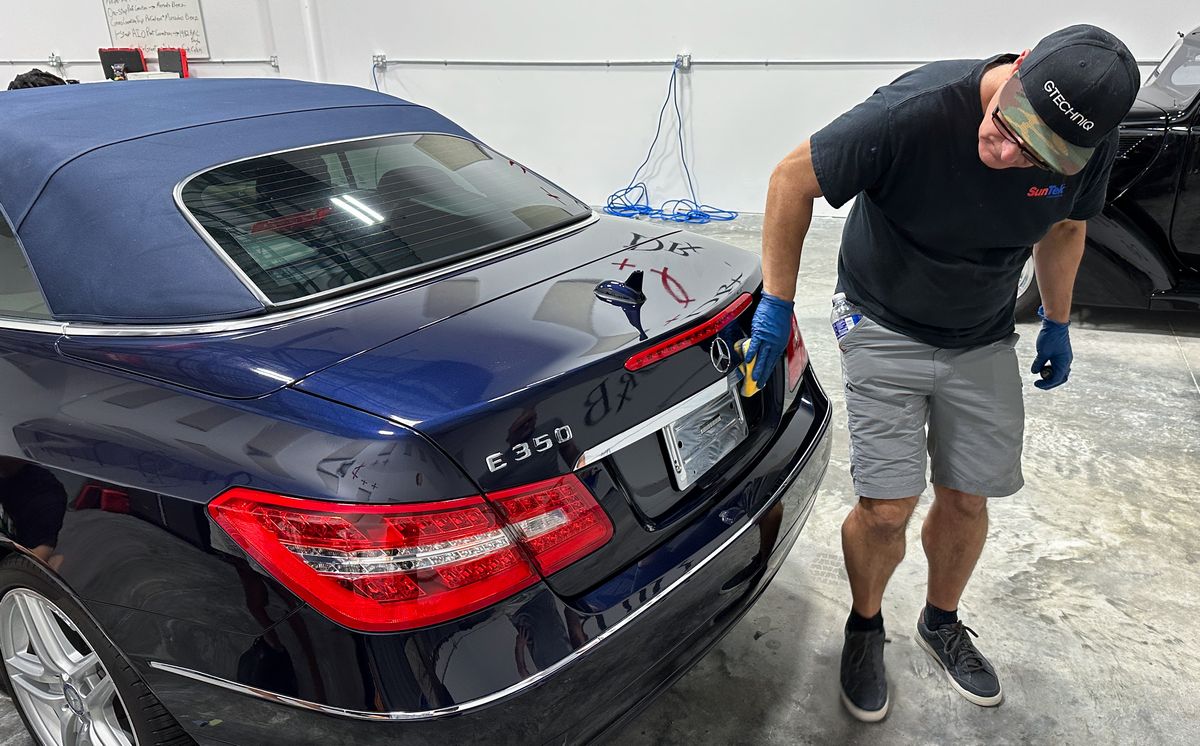
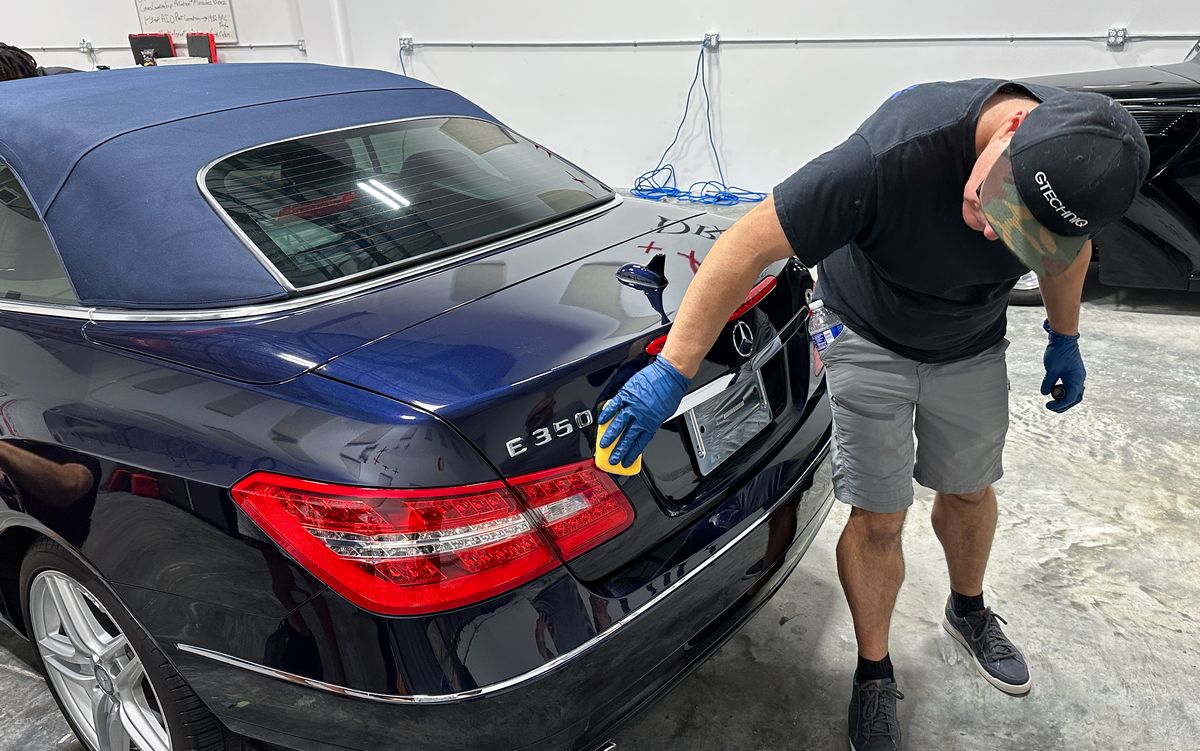
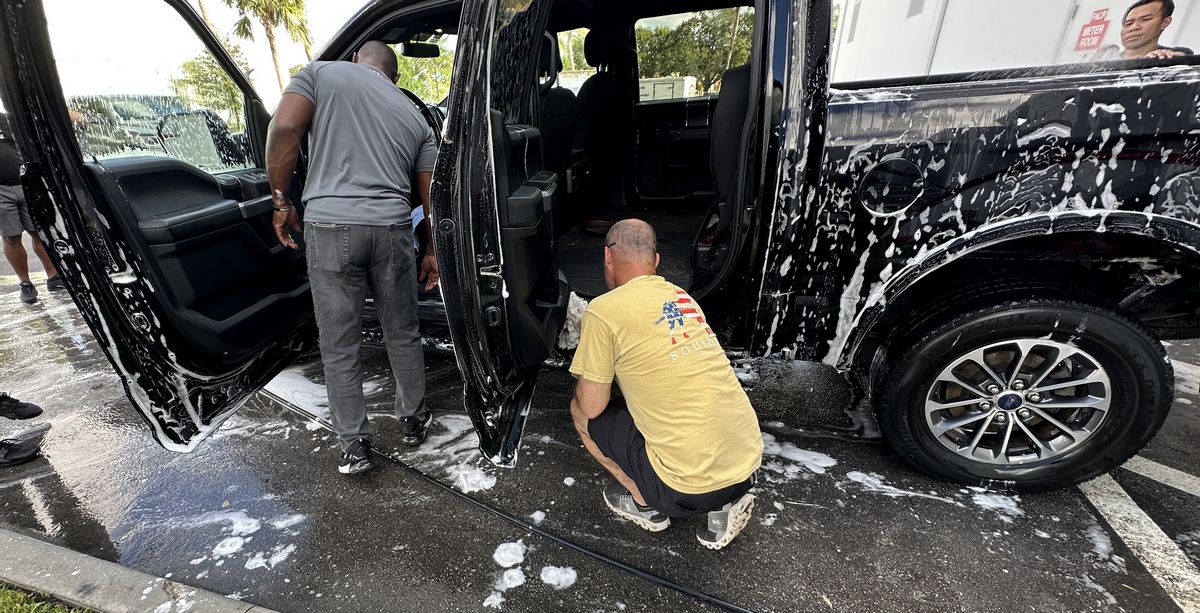
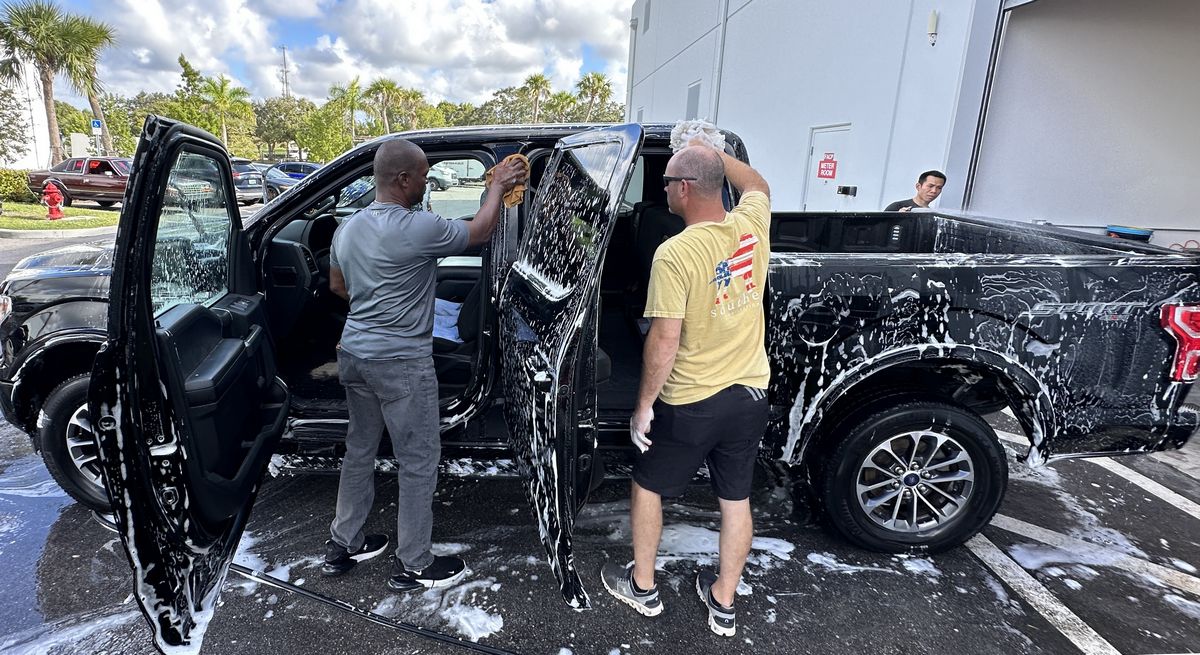
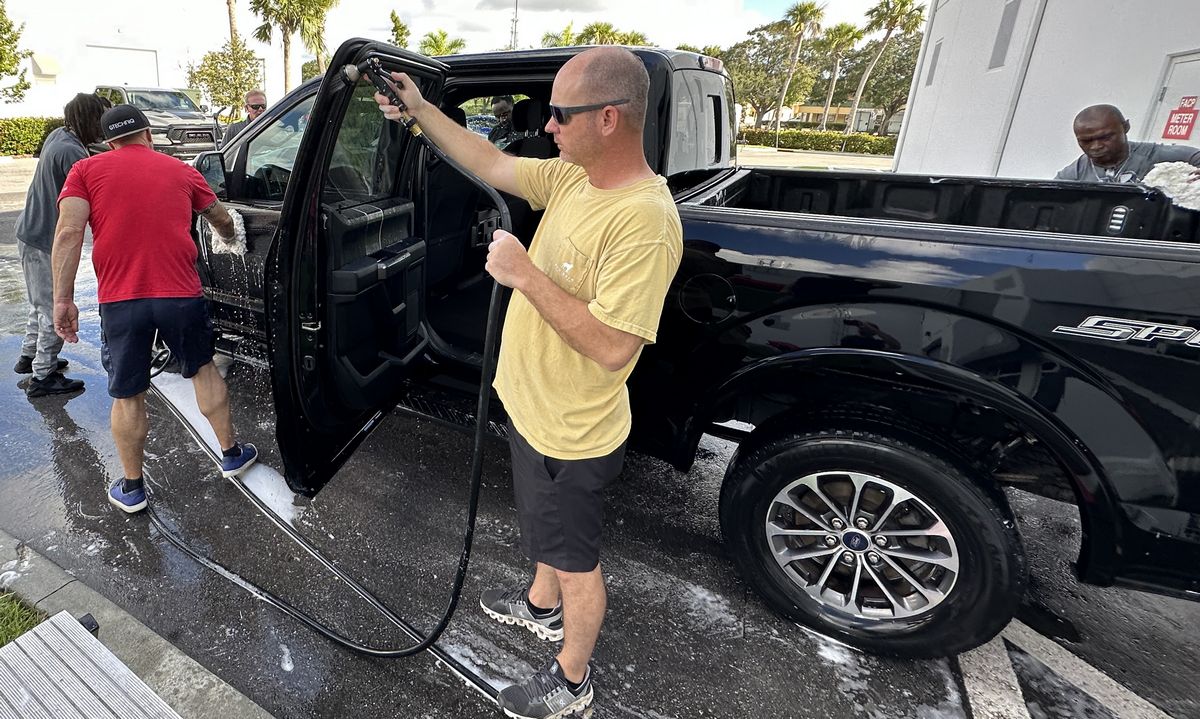
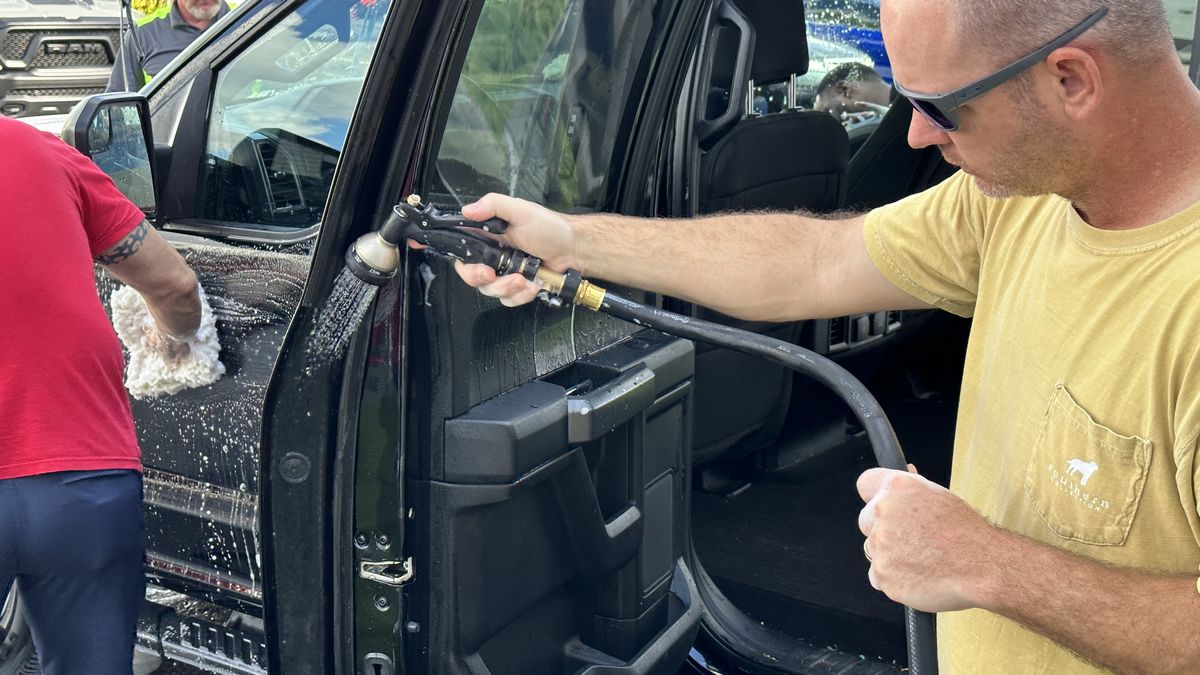
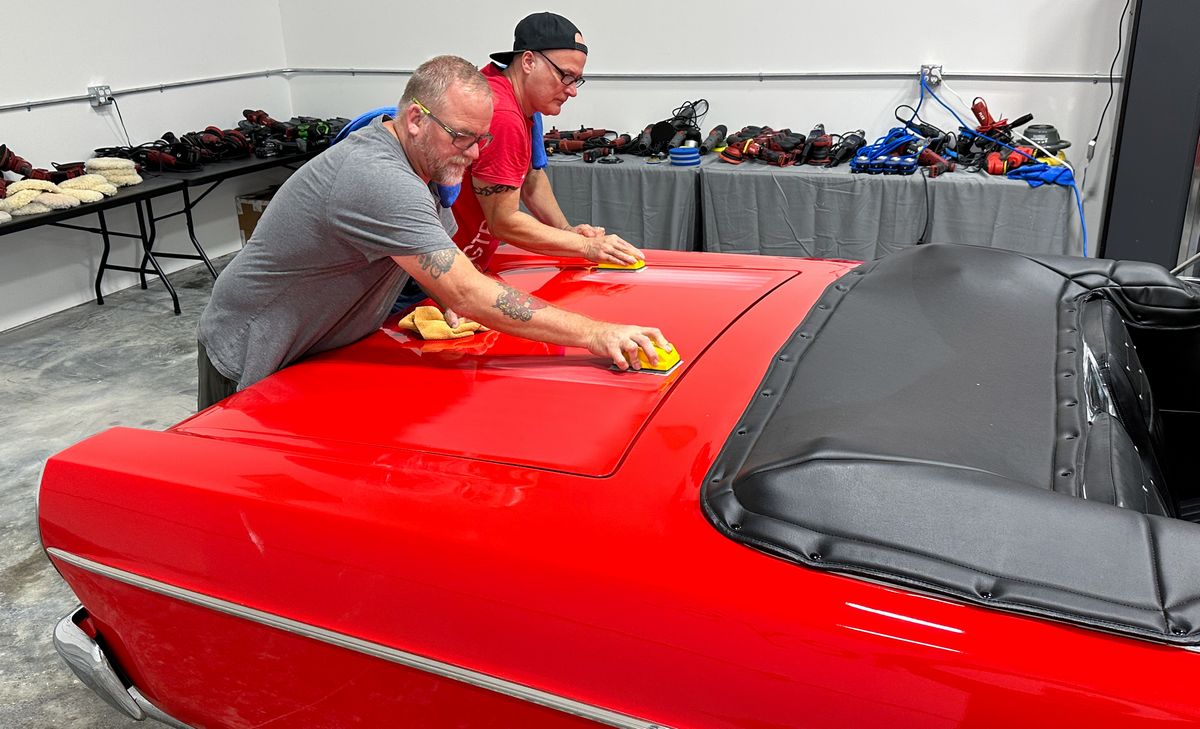
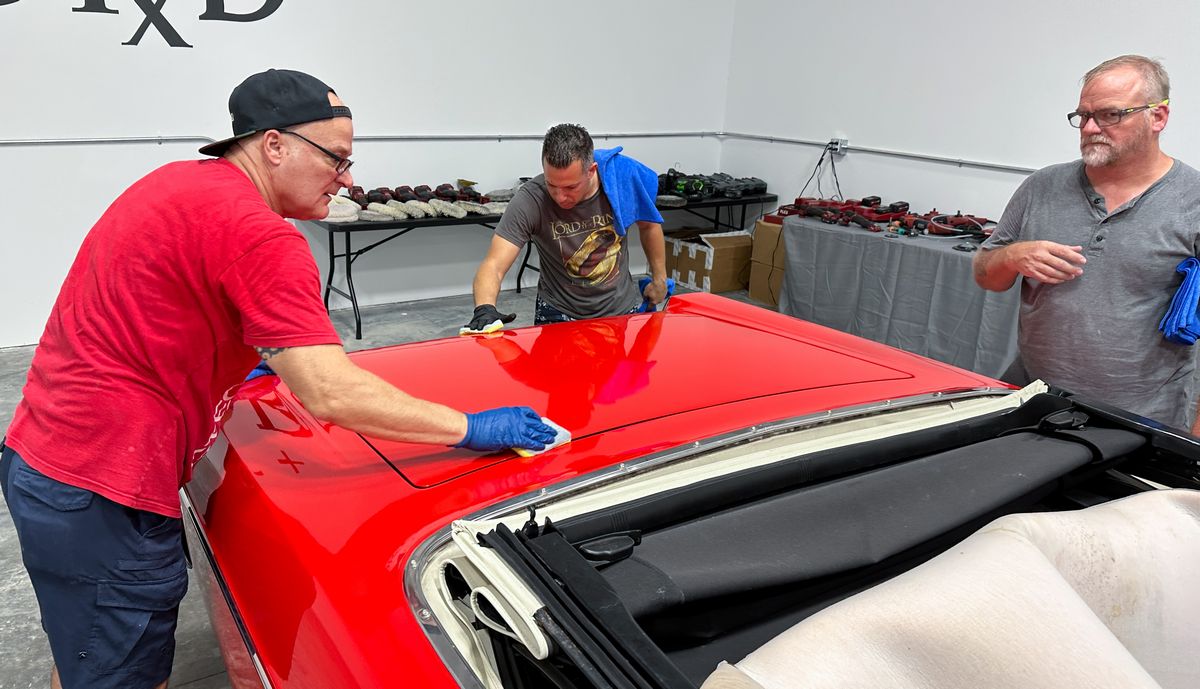
Friday Afternoon session – Single step paint correction using orbital polishers plus Dr. Beasley’s Nano Surface Primers and Ceramic Coatings
2011 Mercedes-Benz E350 Cabriolet
This will serve to cover three topics.
1: How to do an Extreme Prep Wash.
2: How to correctly clean and protect a canvas cloth top convertible.
3: How to do 1-step paint correction and ceramic coatings.
Extreme Prep Wash Plus Correct Washing of a Cloth Top
The next class topic was to do an Extreme Prep Wash to the Mercedes-Benz. The reason we jumped right on this next is so the cloth, canvas top could be drying while we tackled the 1937 Ford 2-door Sedan. Before you can apply the Dr. Beasley’s Fabric Coating Pro, the top must be clean and dry. Apologies that we didn’t get a lot of pictures for this Extreme Prep Wash, but we’ll make up for it when you see the pictures and thus the process for the Extreme Prep Wash for the Ford F150.
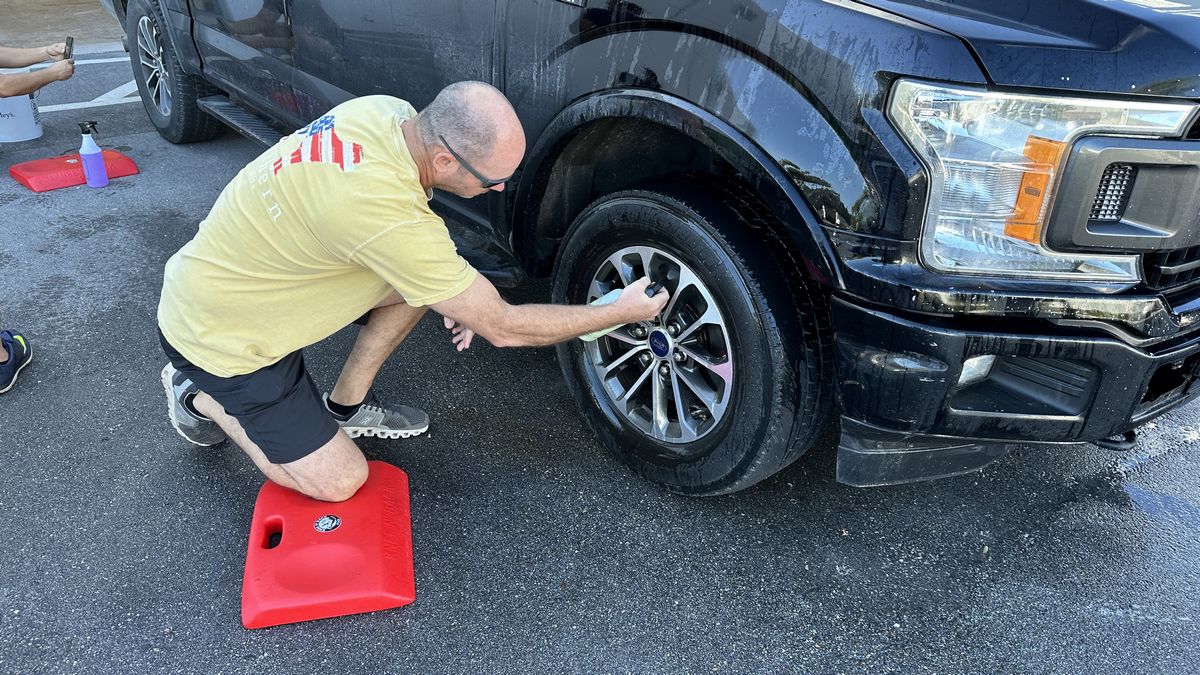
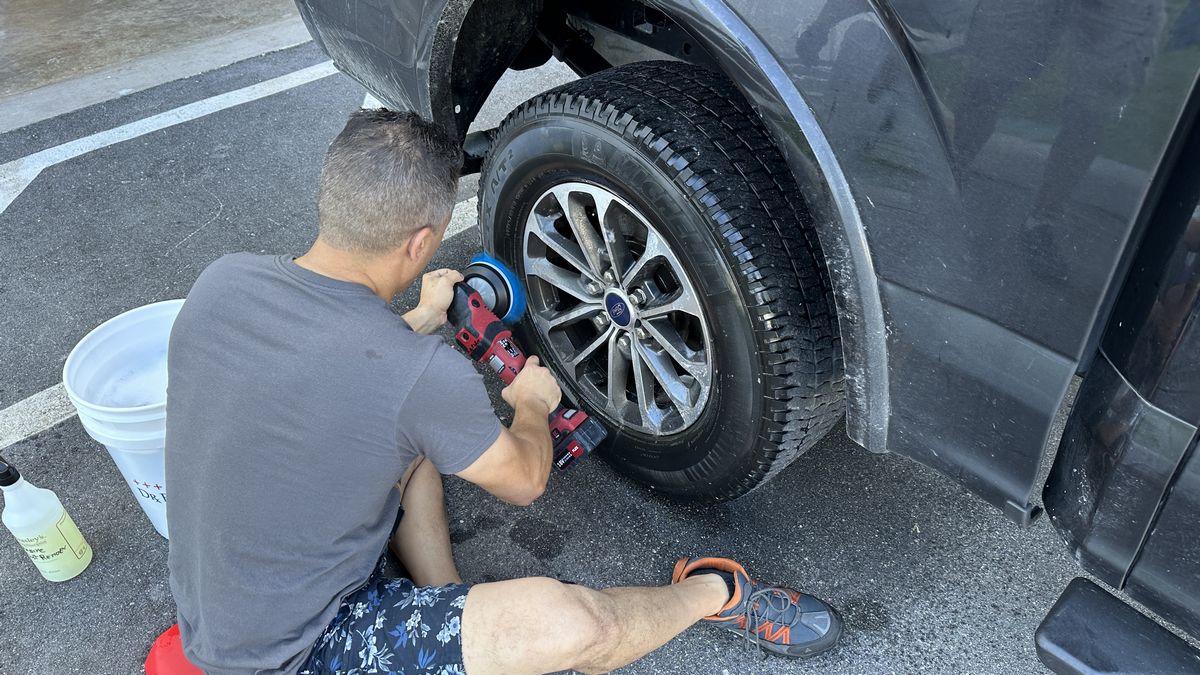
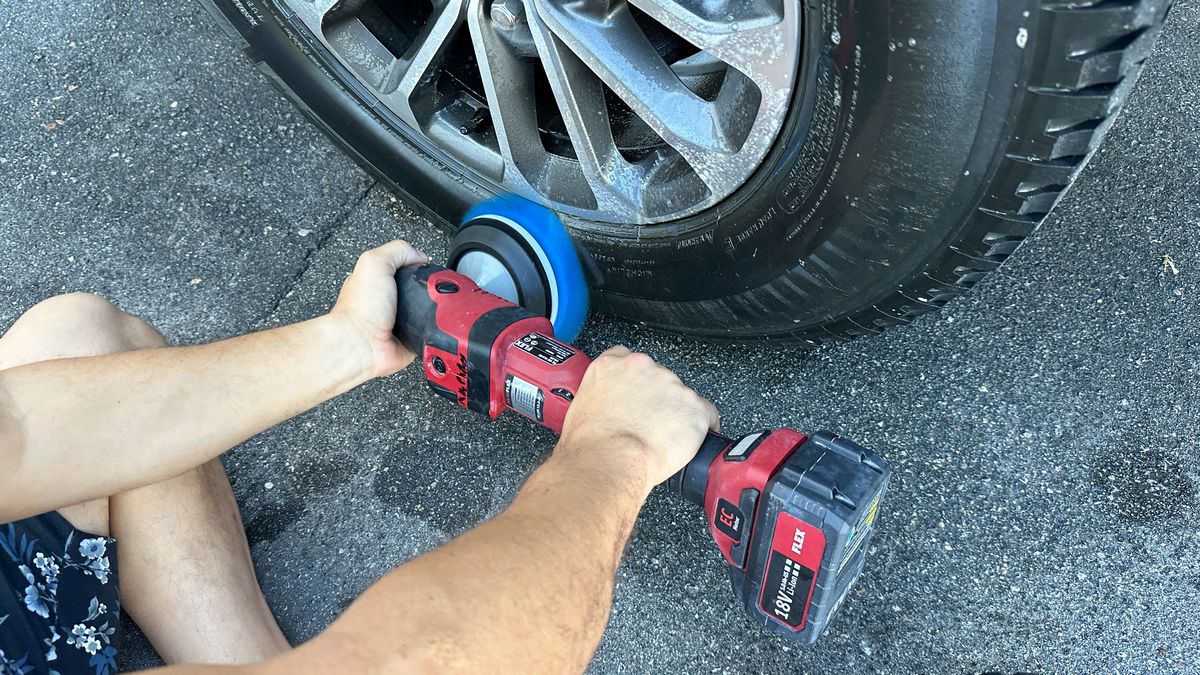
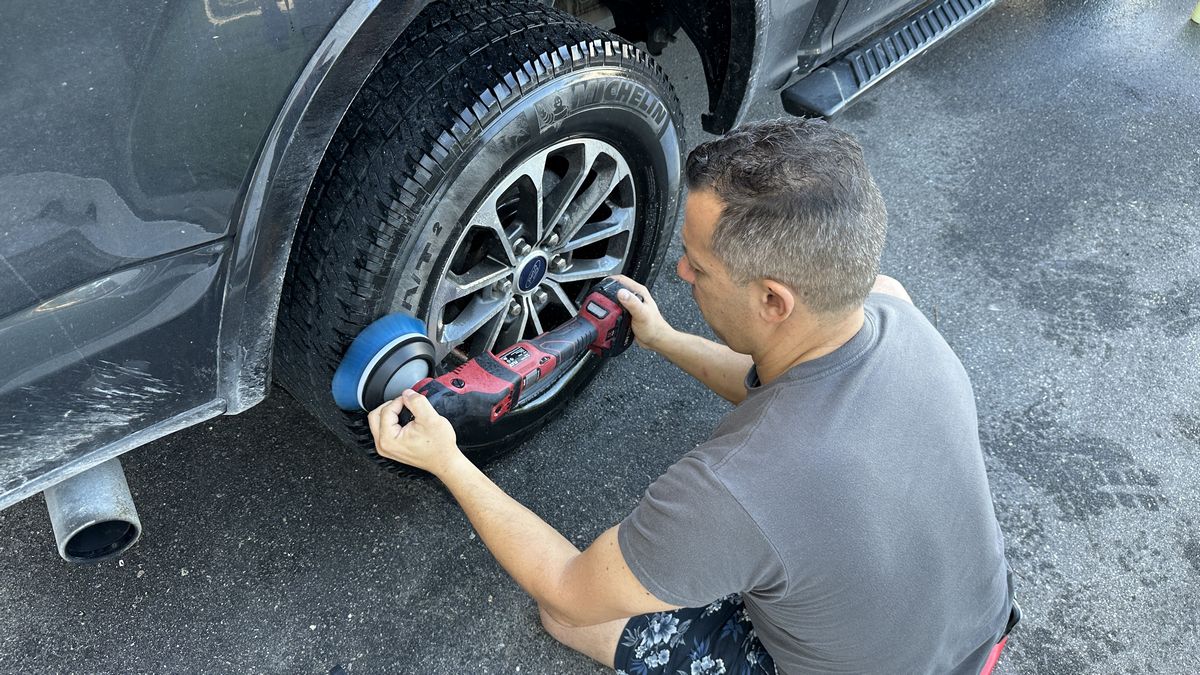
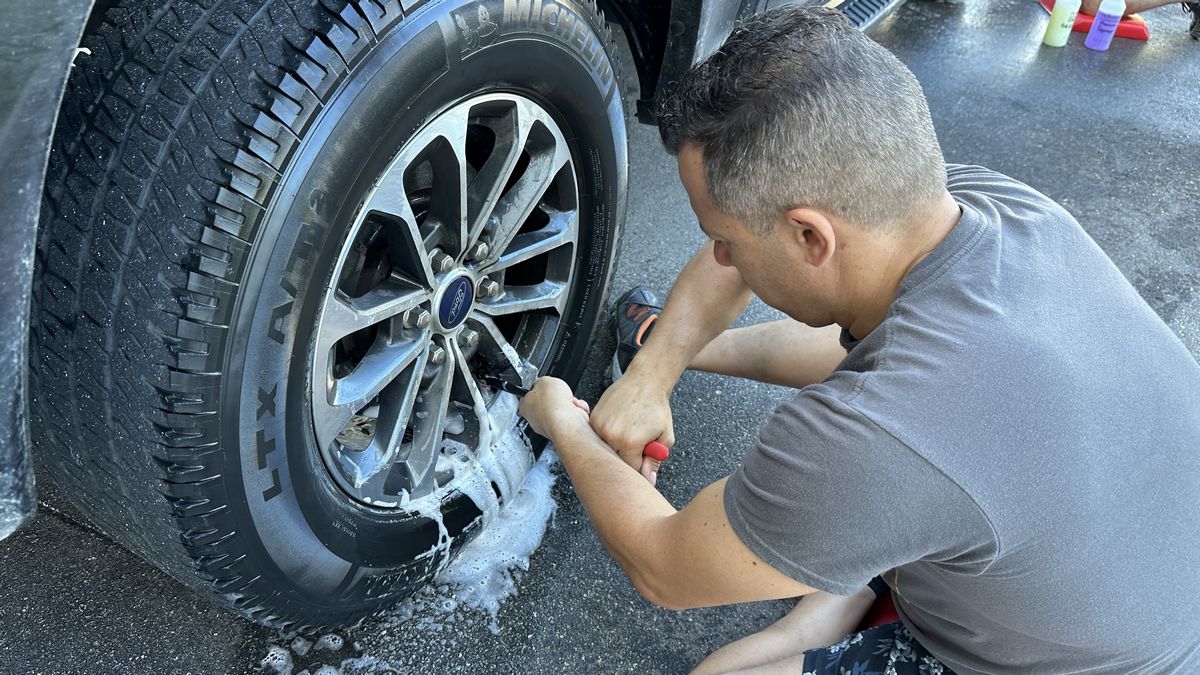
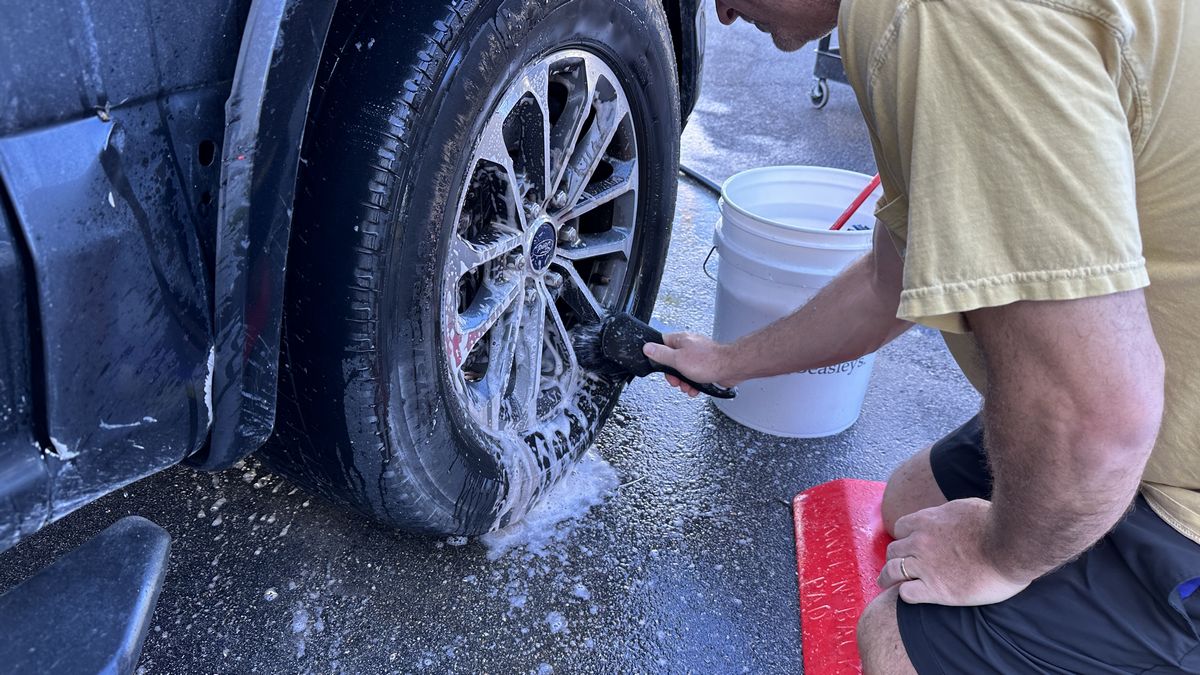
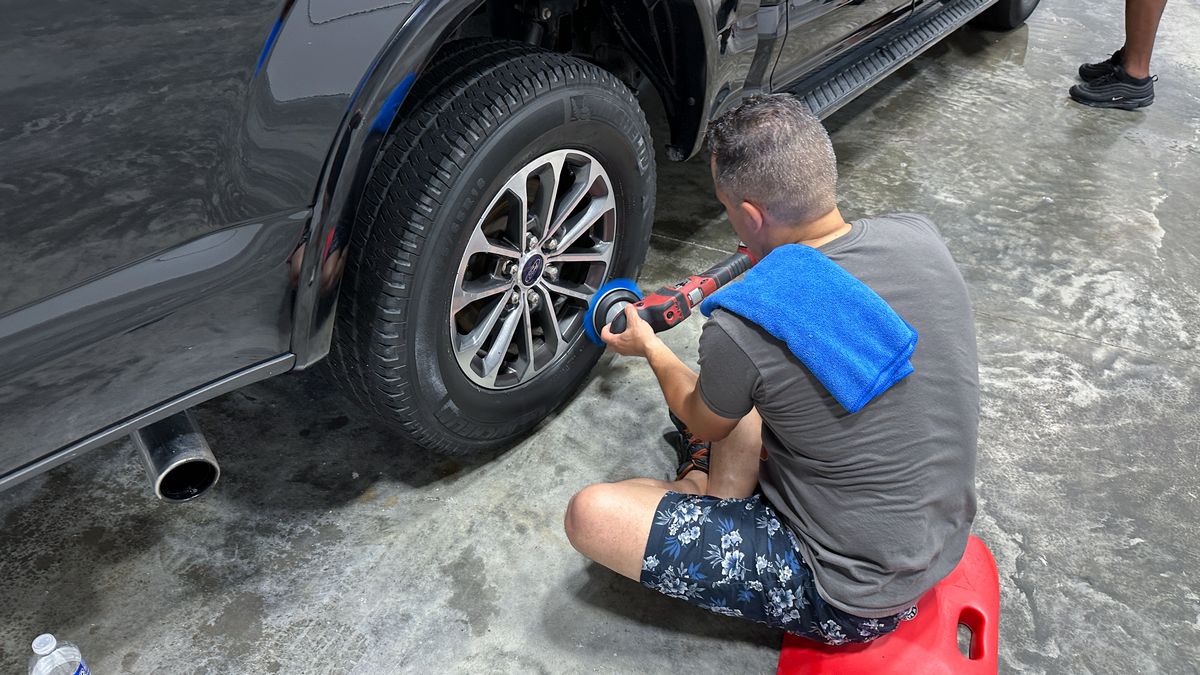
Wheels and Tires First
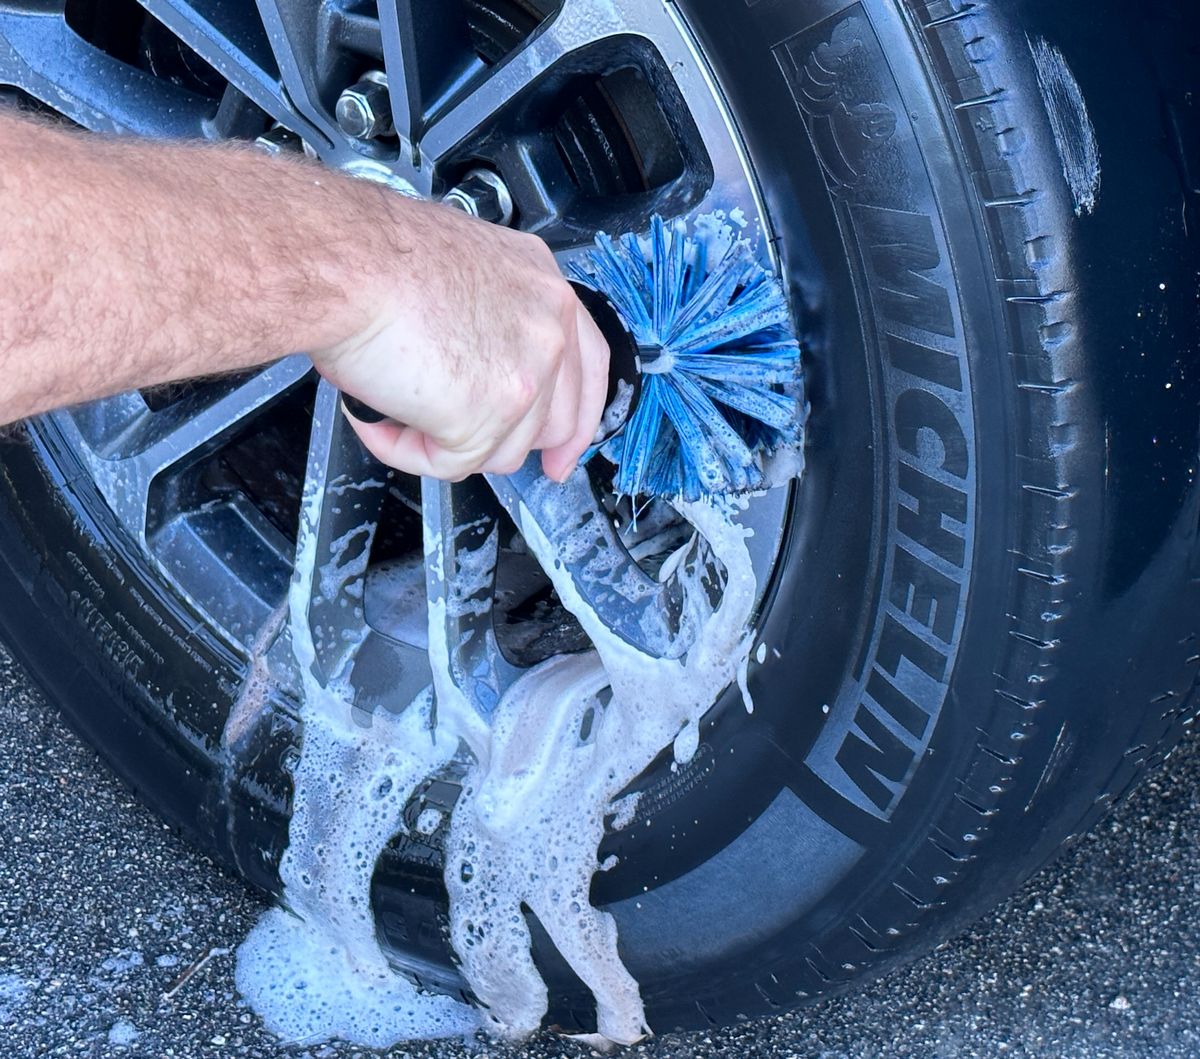
Been teaching and practicing the correct order to wash a car for about 30 years now. You always start with the wheels and tires first. You don’t start by washing the car first. While cleaning tires by hand with a tire brush will get the job done, we teach how to do EXTREME tire cleaning when we teach Extreme Prep Wash and this means machine scrubbing the tires to get the super clean.
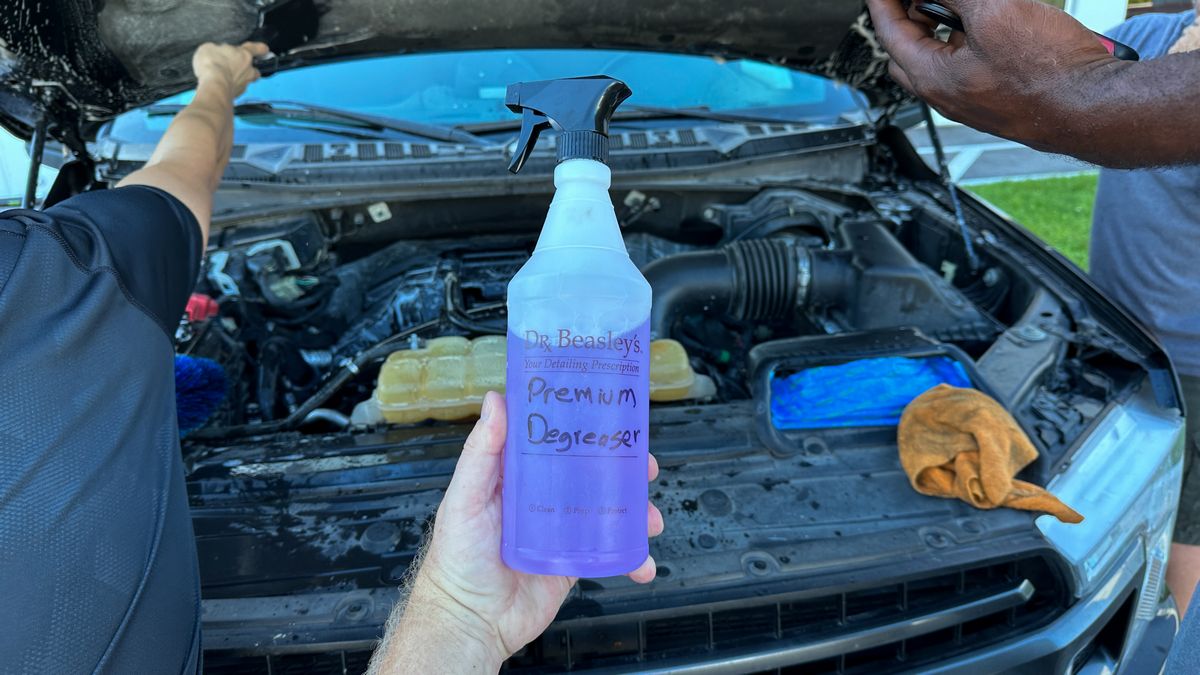
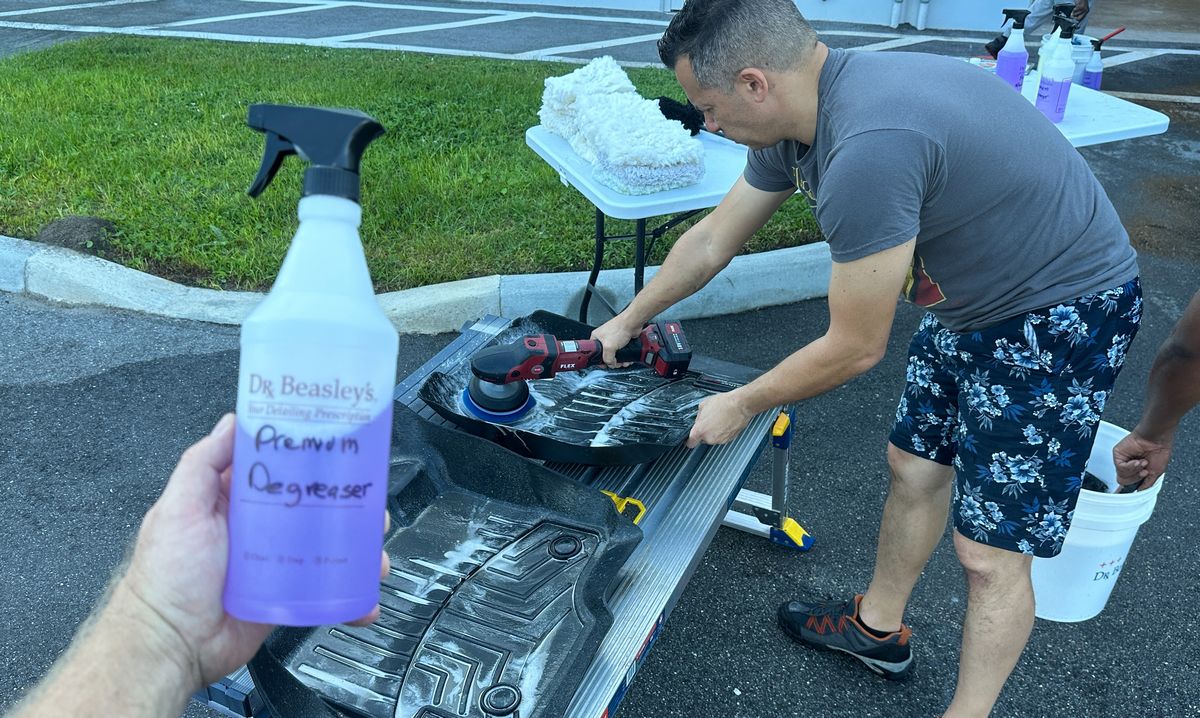
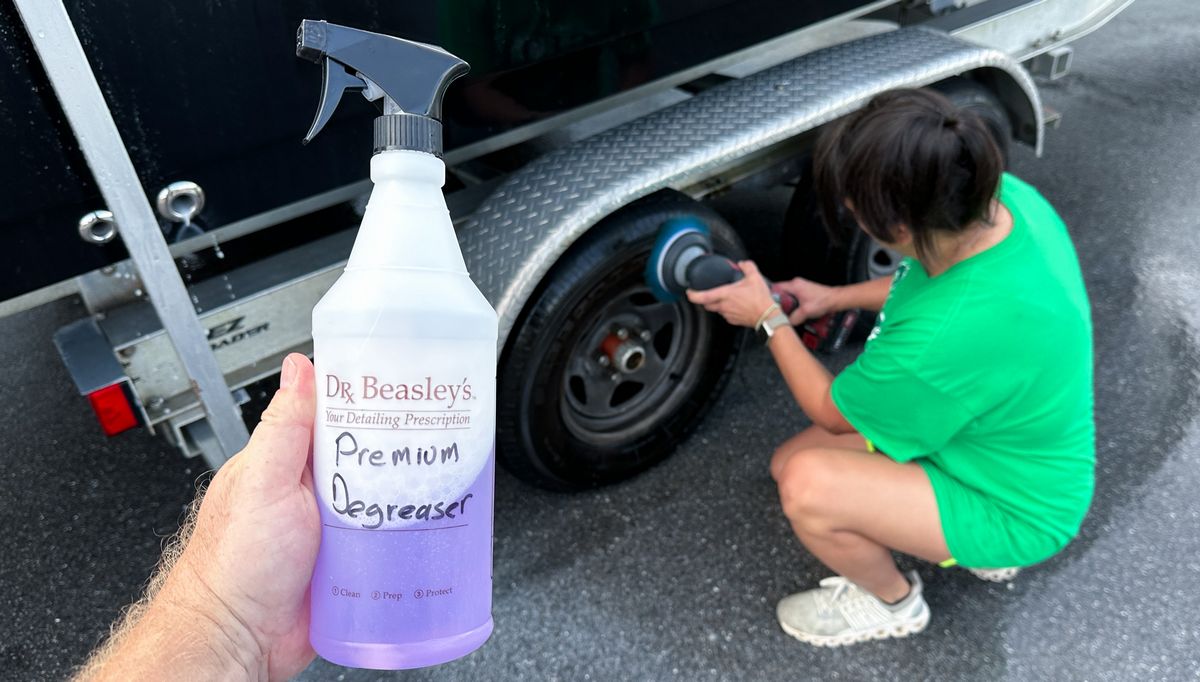
Here’s Jhonathan machine scrubbing the tires on the Mercedes-Benz using Dr. Beasley’s Premium Degreaser.
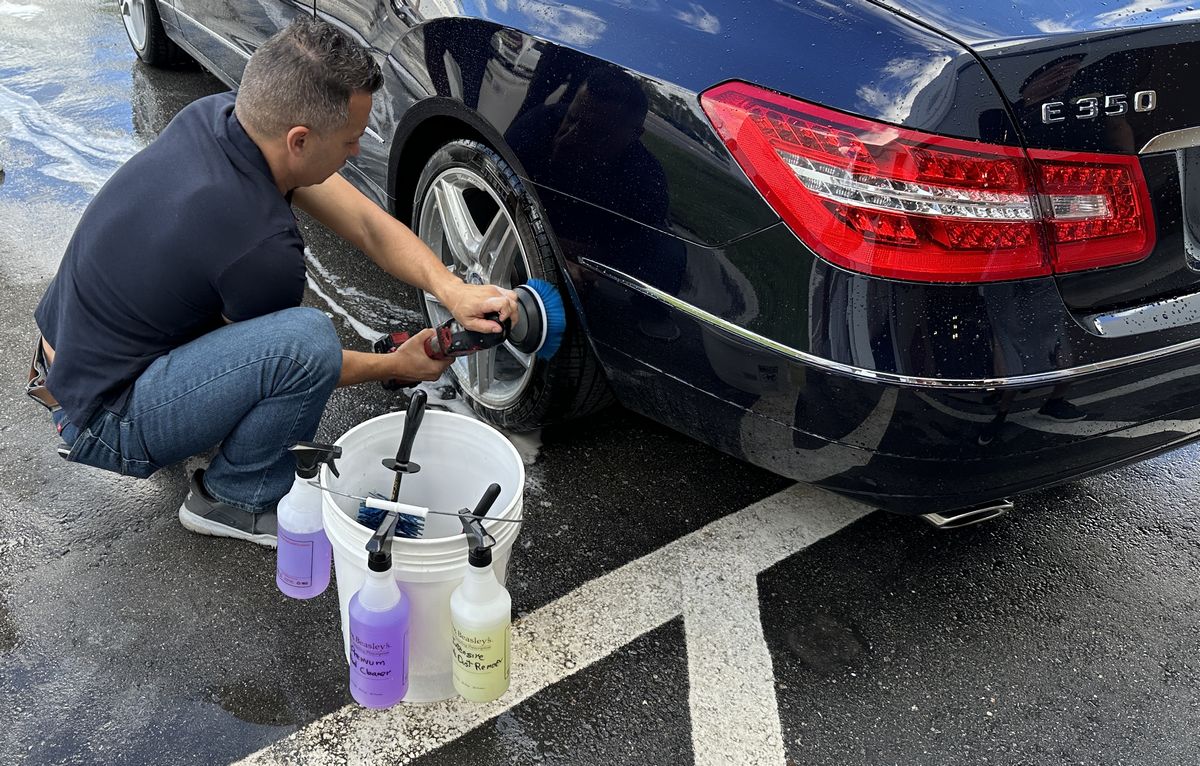
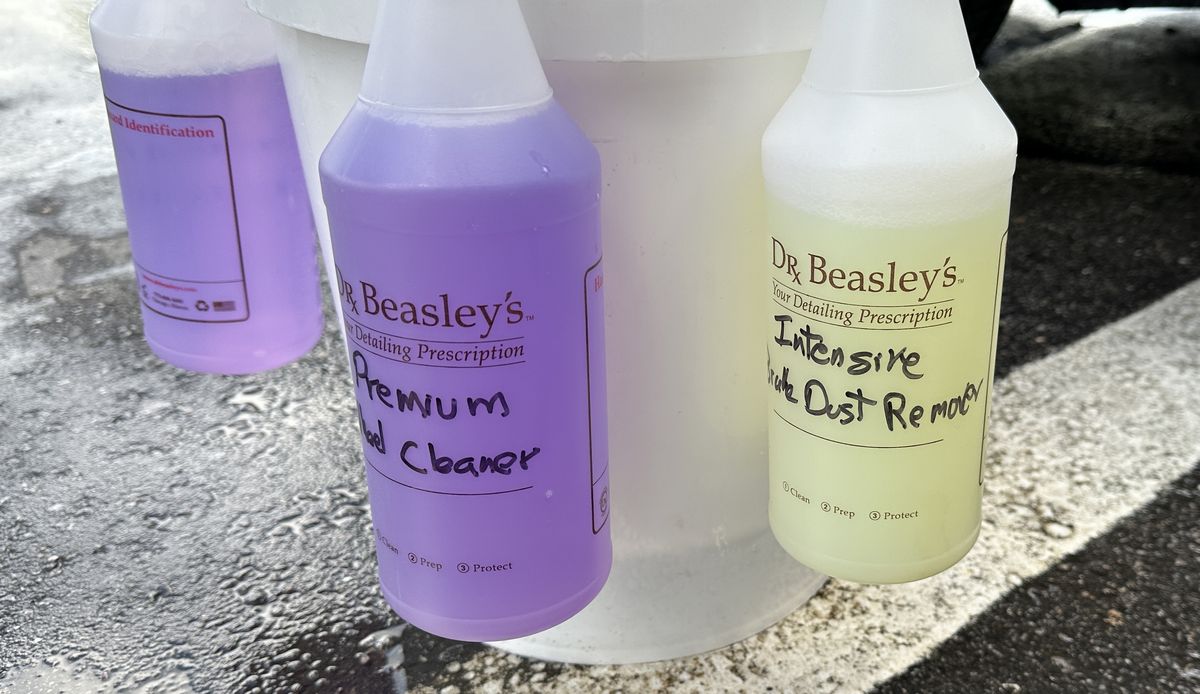
To clean the tires we’re using the Dr. Beasley’s Premium Degreaser and to clean the wheels we’re using the Dr. Beasley’s Intensive Brake Dust Remover.
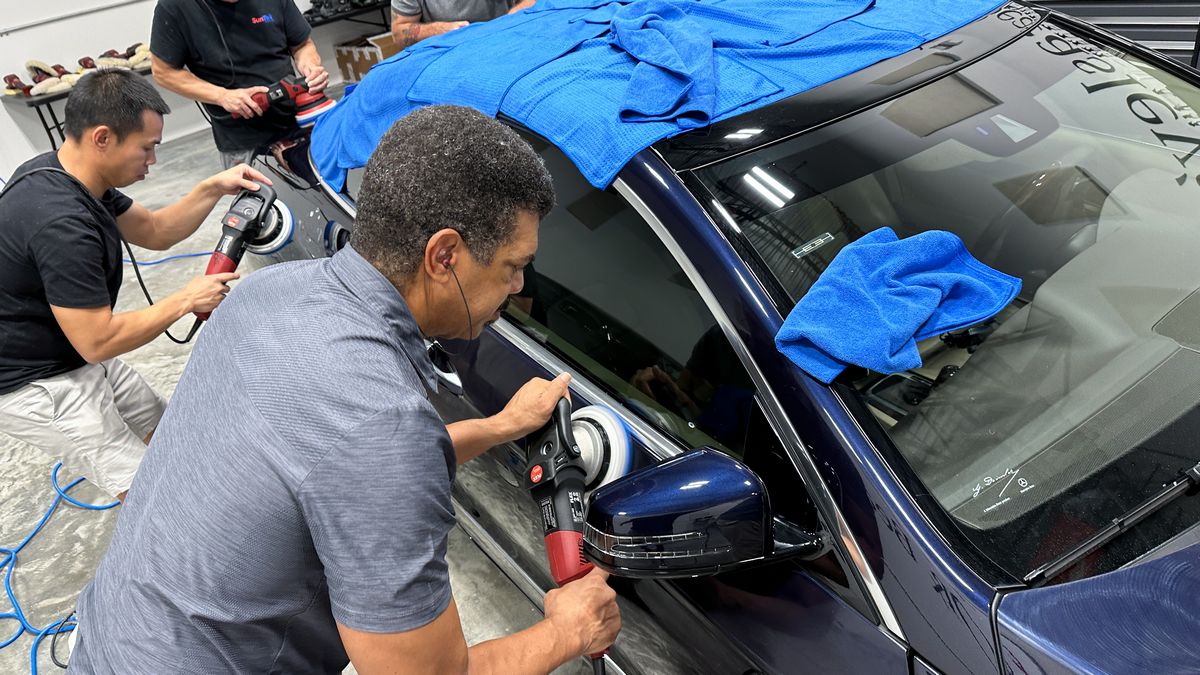
After gently washing the cloth, canvas top followed by all the body panels, Meko gives the car a final rinse and then we dry including wiping down all the jambs.
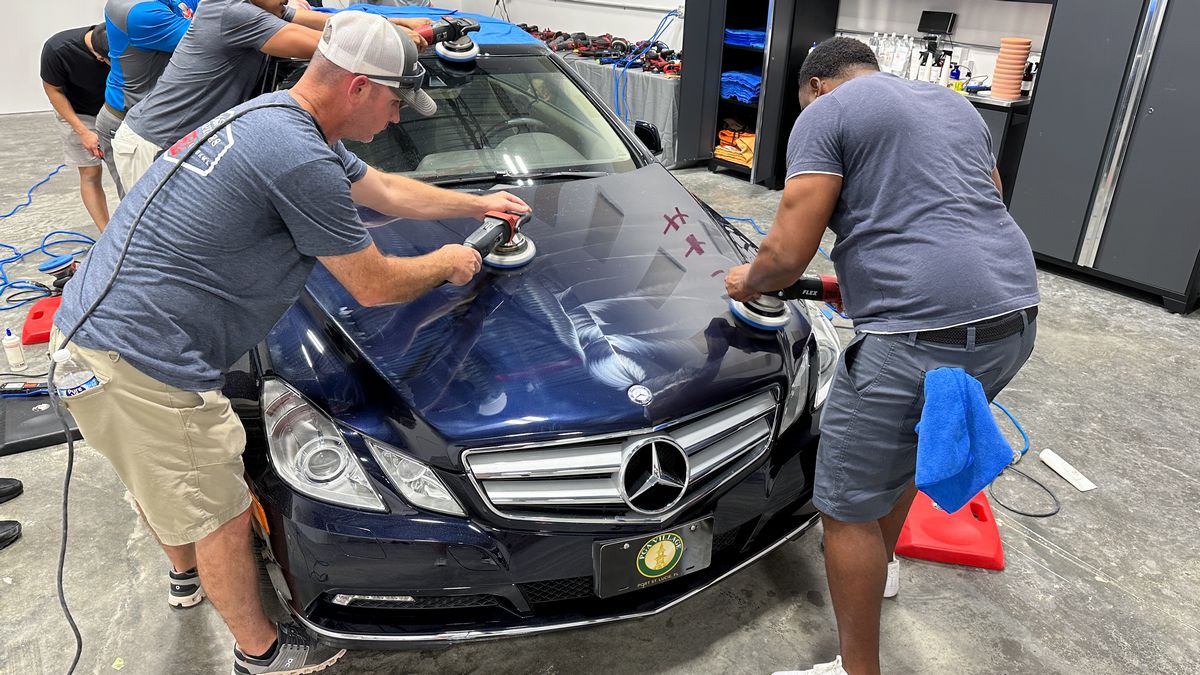
One-Step Paint Correction & Ceramic Coating
With the 1937 Ford, the class learned the multiple-step process to perform paint correction to create a show car finish. For this next class session, we go over how to do one-step paint correction plus ceramic coatings.
What’s the difference?
A: Some customers or car owners may not want to pay for or invest the extra time it takes to do multiple-step paint correction.
B: Some vehicles might not need a first step that’s an aggressive paint correction process.
It’s important to know how and when to use both multiple-step and one-step paint correction processes in the REAL WORLD. Thus we cover these topics in our classes. And you learn these processes by DOING – not sitting in a chair while someone talks and talks and talks ABOUT detailing.

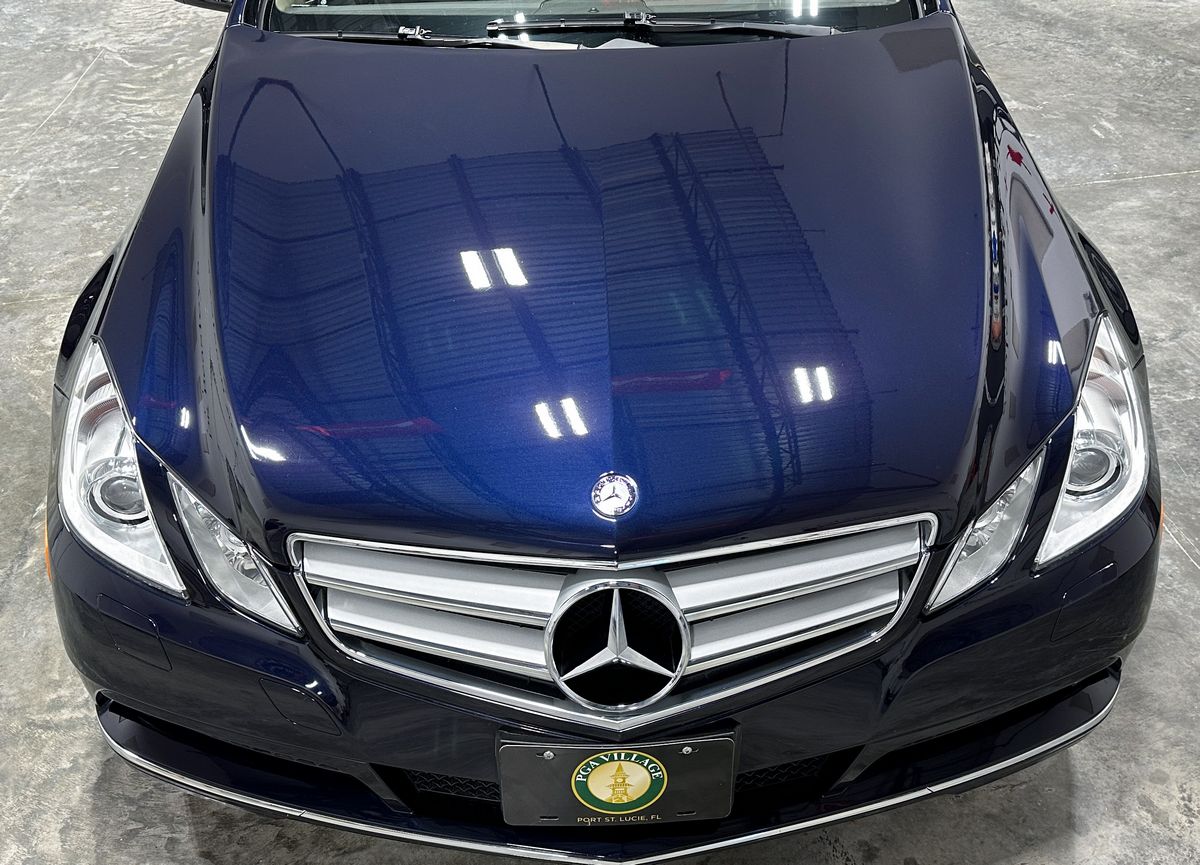
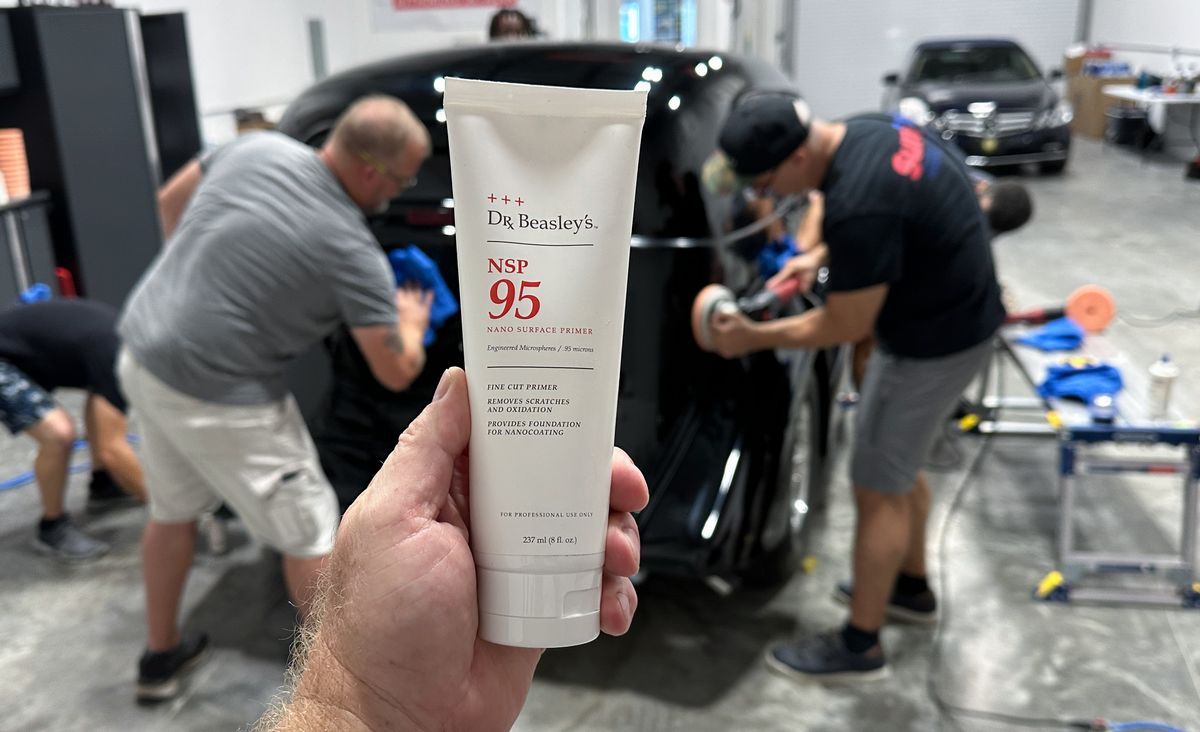
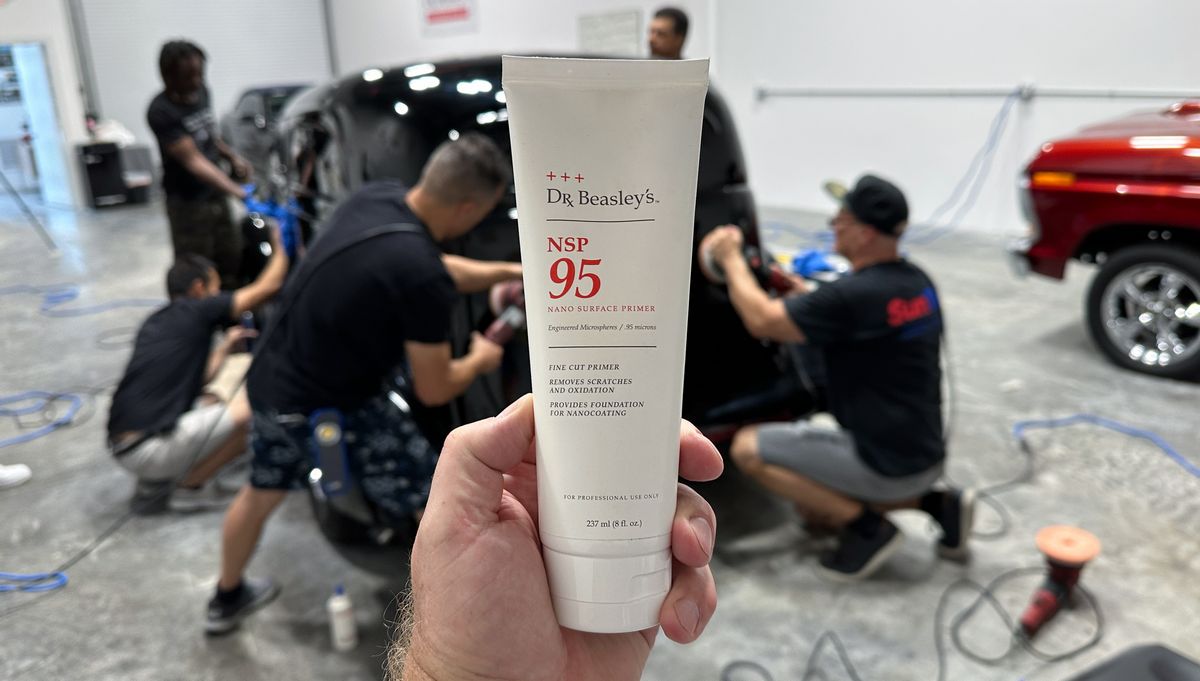
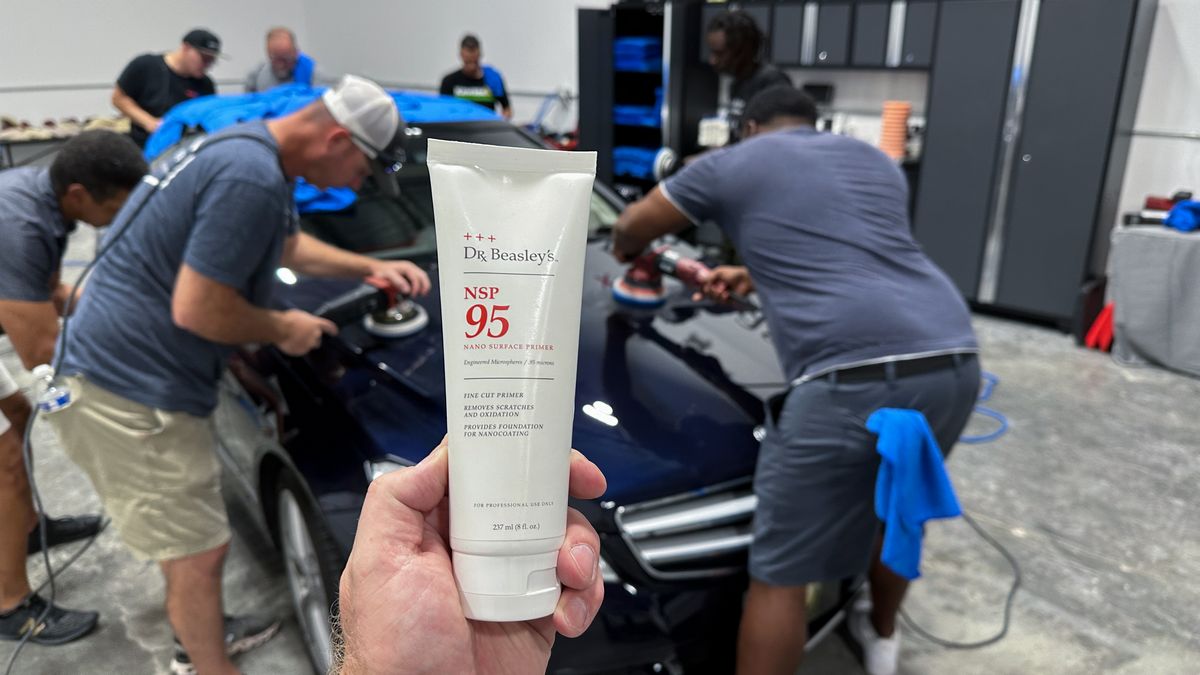
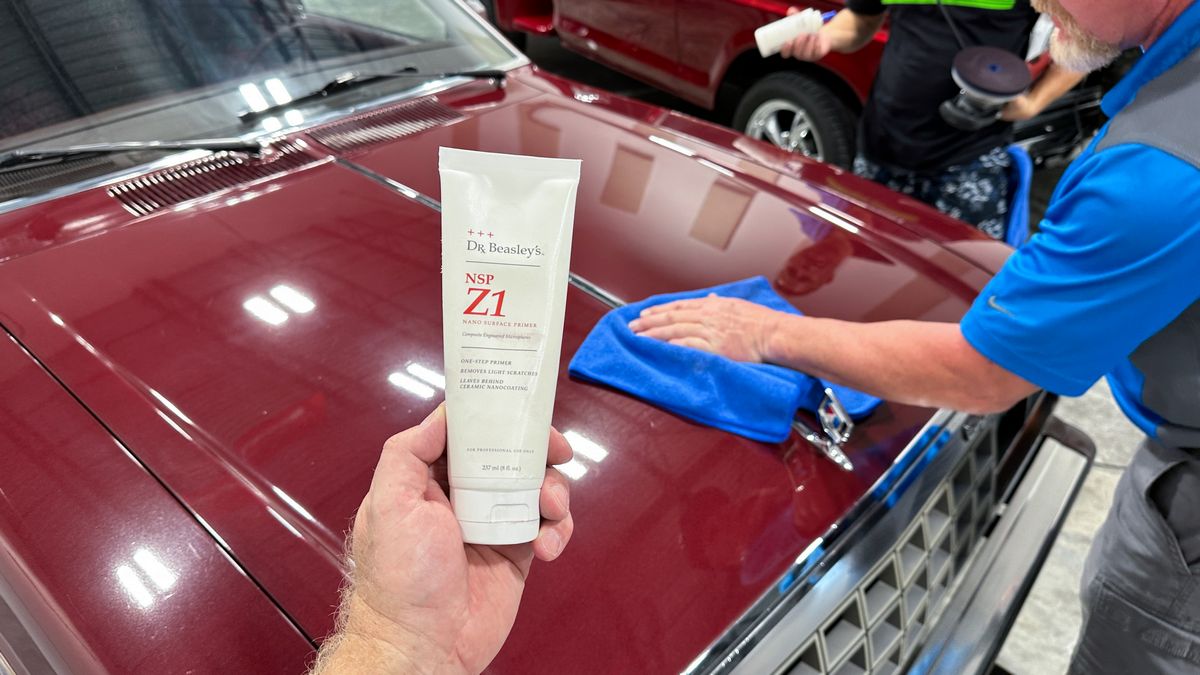
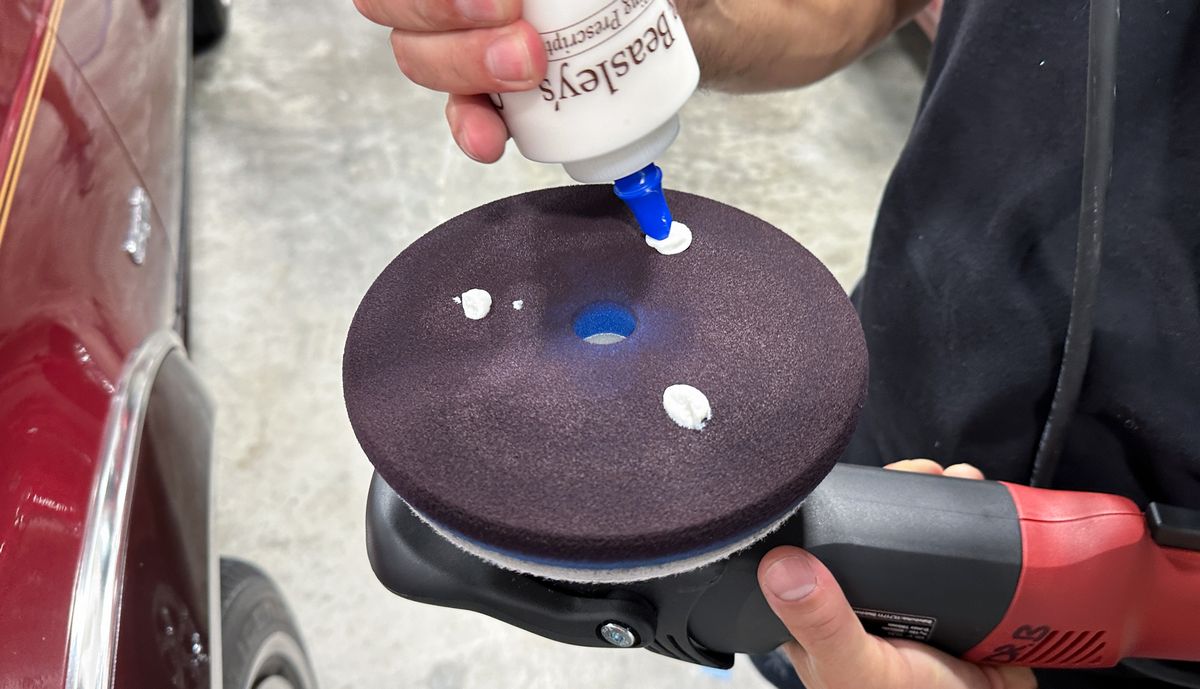
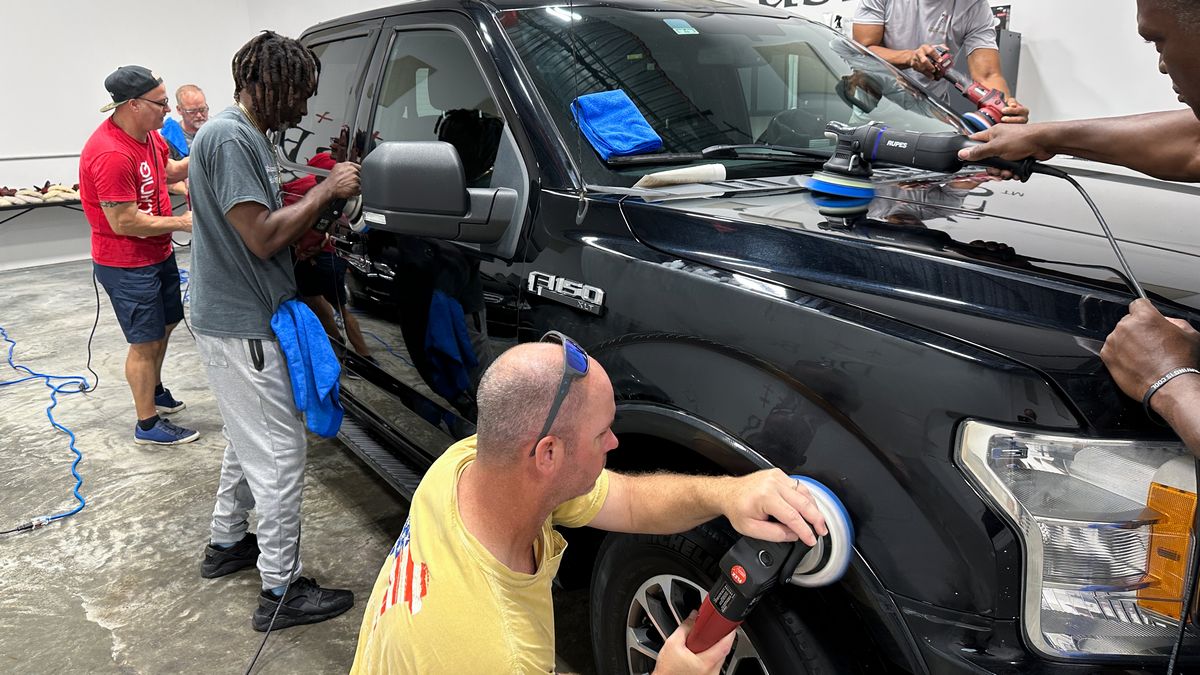
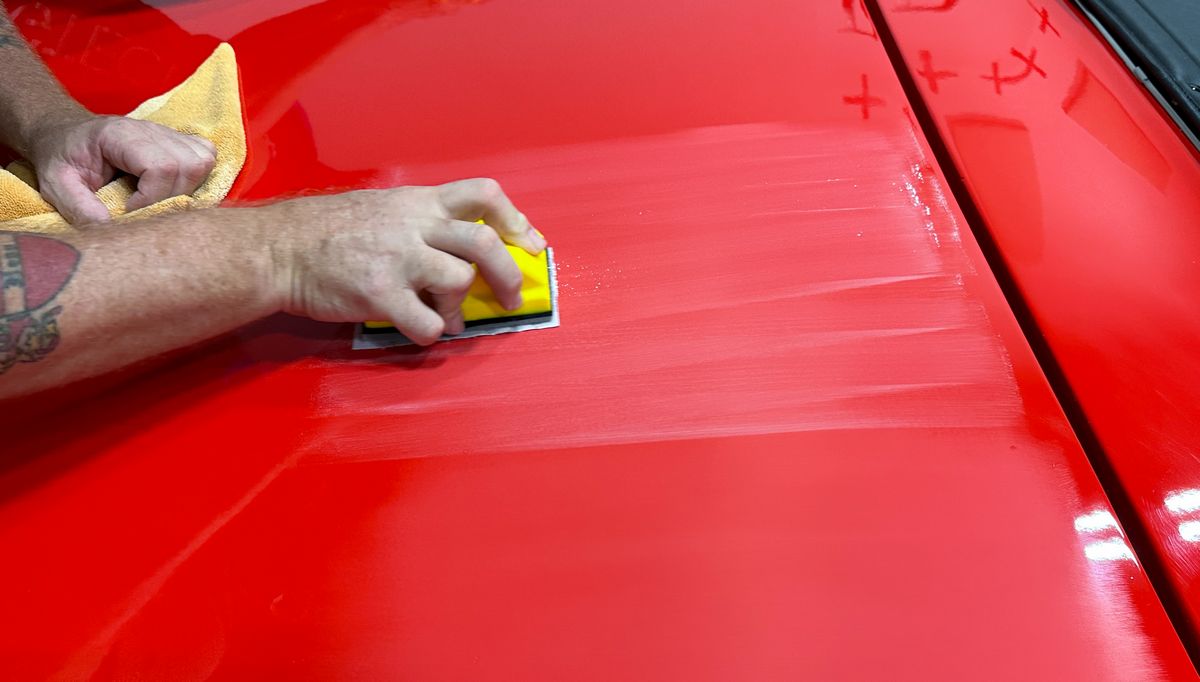
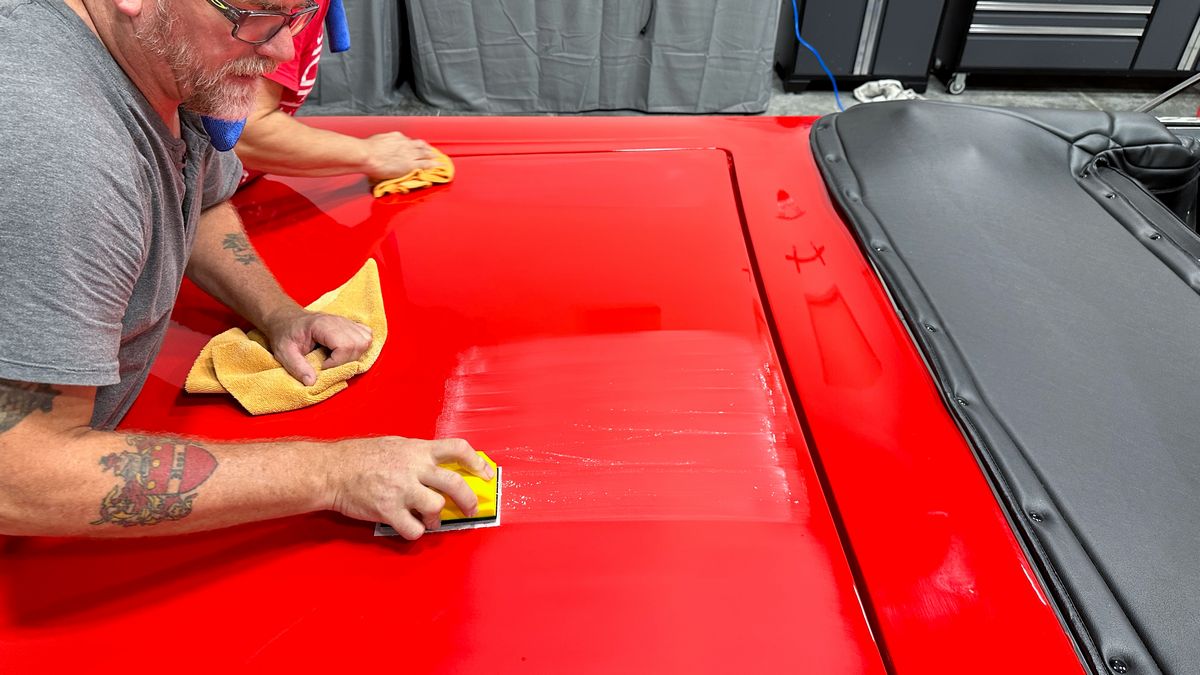
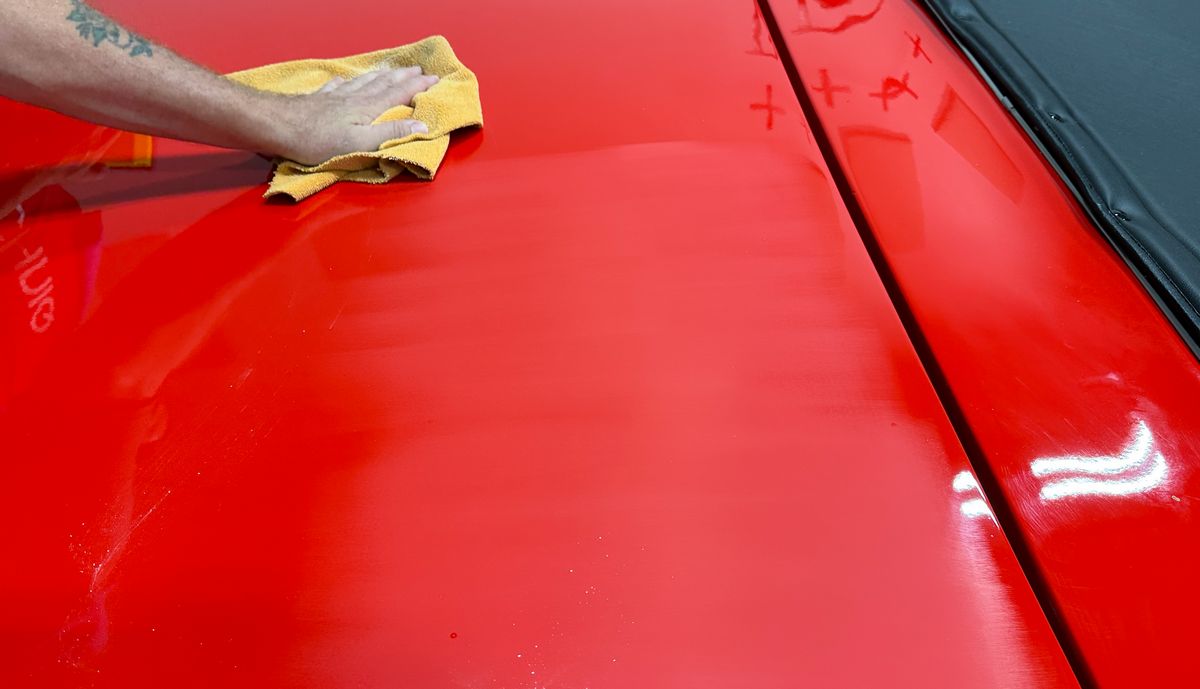
Dr. Beasley’s NSP 95
The paint on this Mercedes-Benz was actually in great condition. The few paint defects like swirls, scratches, water spots and oxidation were shallow and sparse. Thus the class was able to remove the vast majority of defects using Dr. Beasley’s NSP 95 with FLEX gear-driven orbital polishers.
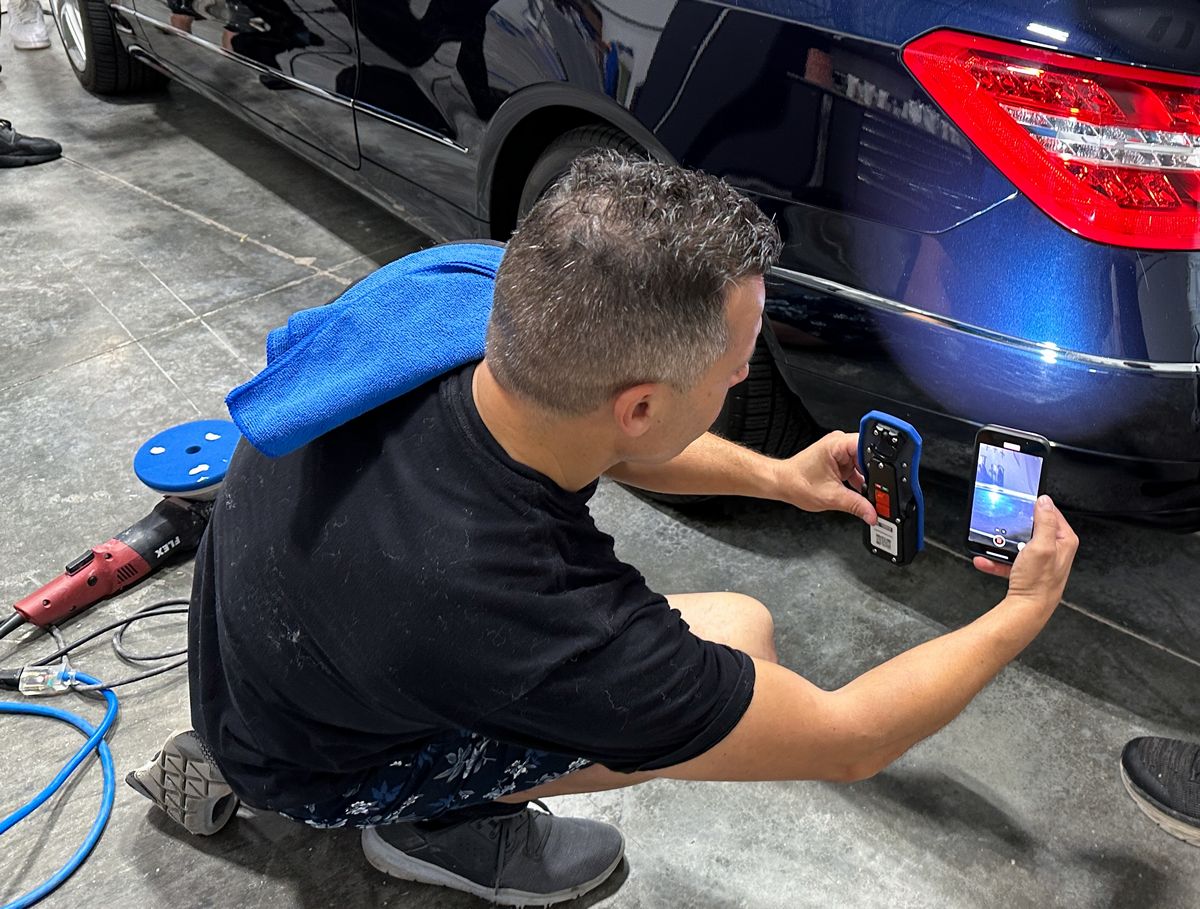
Here’s Jhonathan checking his results and also photographing his results after using the NSP 95 and inspecting with the Lake Country Swirl Finder Light.

Installing the Dr. Beasley’s Nano-Resin MX Kit
After all the paint correction was finished, next the class applied the Dr. Beasley’s Paint Coating Builder as the first step in a two-step ceramic coating process.
Installing the Nano-Resin Pro Ceramic Coating
After removing the Paint Coating Builder, next the class installed the Dr. Beasley’s Nano-Resin Pro Ceramic Coating.


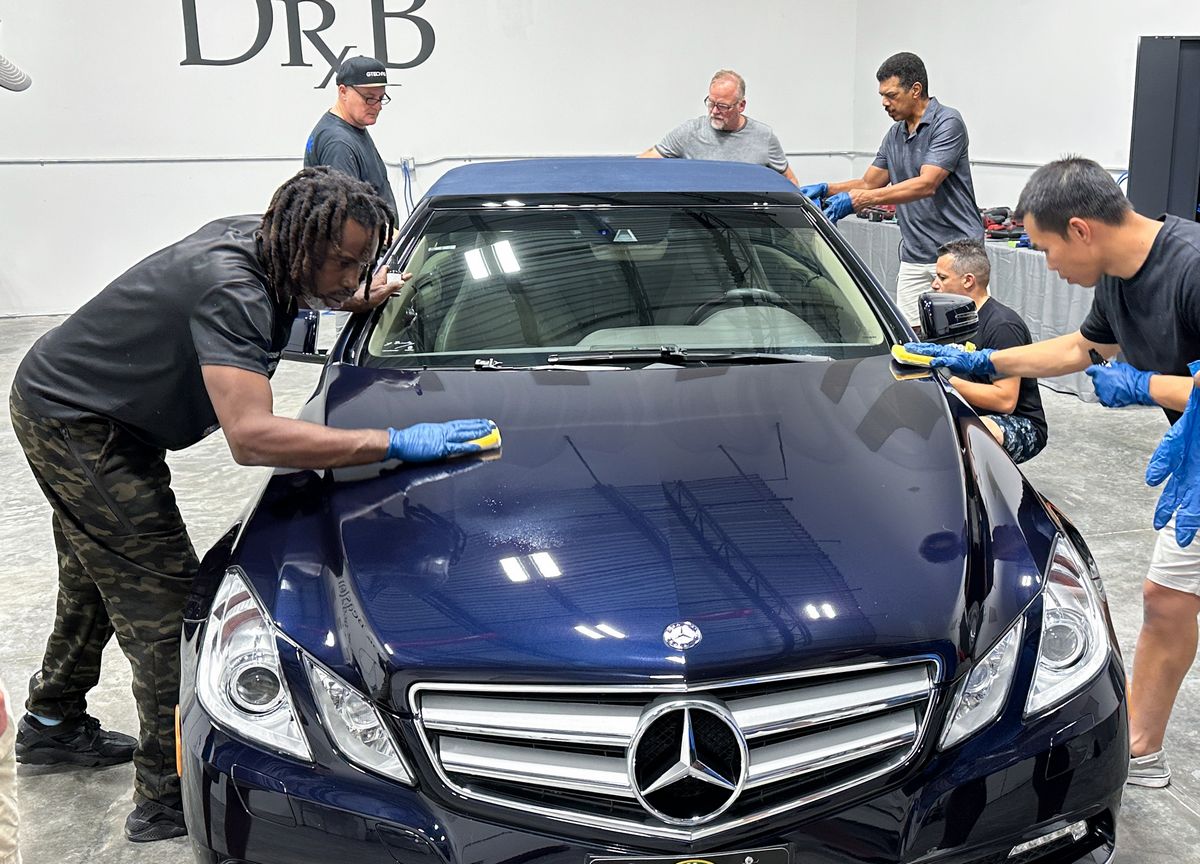
Here are the results!
Next up…
One-step Ceramic AIO Paint Correction!
To recap, the class started out doing Multiple-Step Paint Correction and Ceramic Coatings, (the 1937 Ford), followed by One-Step Paint Correction and Ceramic Coatings, (the Mercedes-Benz), and now the class will learn One-Step Ceramic AIO Paint Correction.
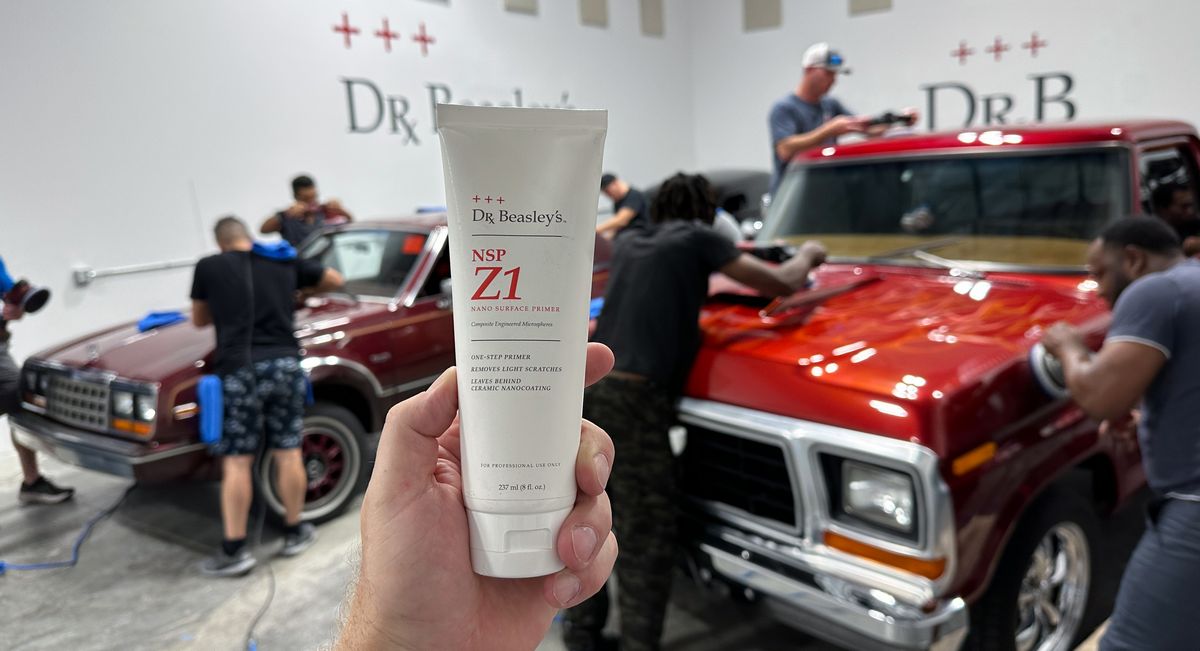
With this process, the class will use an AIO or All-in-One, which is the Dr. Beasley’s Z1. The Dr. Beasley’s Z1 will do 3 dedicated processes in a single step:
- Remove paint defects like swirls, scratches, water spots and oxidation.
- Polish the paint to a clear, smooth high gloss.
- Protect the paint with a layer of ceramic protection.
The BIG PICTURE idea is to learn 3 different approaches to detail cars, which if you detail for money, this is 3 different PACKAGES you can offer your customers. Which package your customer chooses depends upon their budget as well as the type and condition of their vehicle plus how they use it. There’s a HUGE difference between doing Multiple-Step Paint Correction and Ceramic Coatings to a true show car like the 1937 Ford, where the goal is to create a perfect, swirl-free show car finish – and detailing a daily driver, that basically serves as a grocery getter and work transportation.
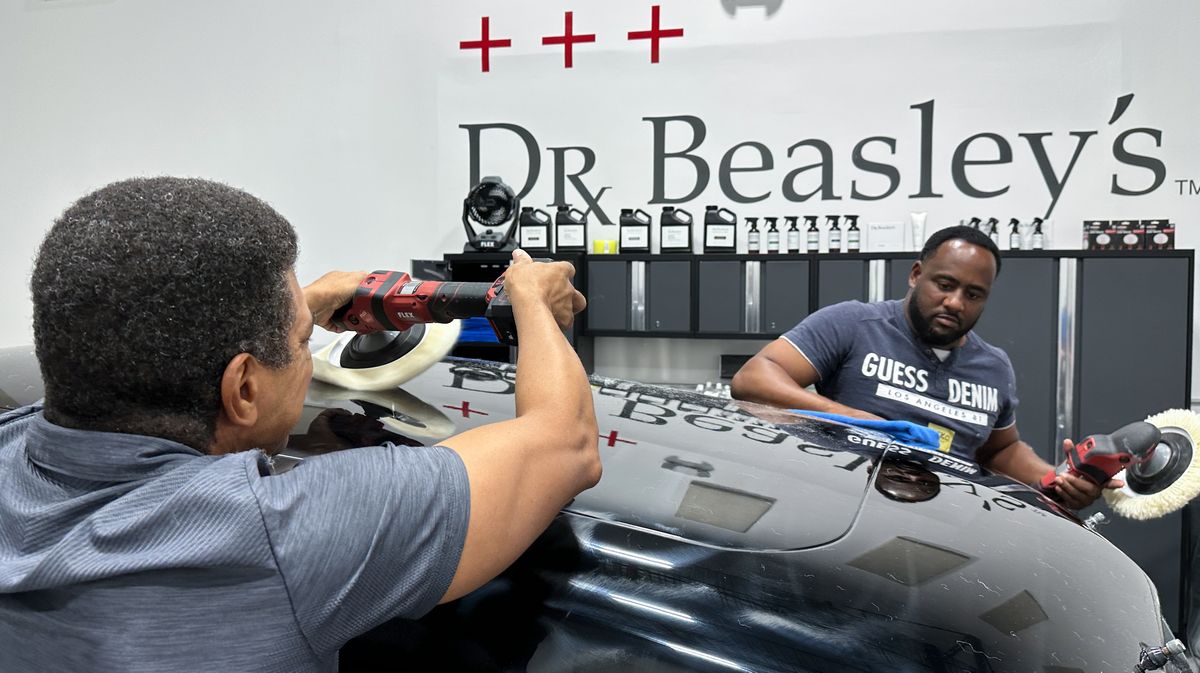
Training cars to learn One-Step Ceramic AIO Paint Correction
- 1979 Ford F150 Stepside Shorty Streetrod with a custom basecoat/clearcoat paint job
- 1982 AMC Eagle with original single stage paint and a vinyl top
We work real hard at bringing in real-world, unique and also fun vehicles to train on. For this class session, the class will have the opportunity to learn One-Step Ceramic AIO Paint Correction on a super cool classic truck and an original paint AMC Eagle.
Yours truly washed both the 1979 Ford Stepside Shorty and the AMC Eagle before the class started. I skipped the mechanical decontamination step on the Ford to let the class learn how to do this as a dedicated step after washing. I did however wash and mechanicaly decontaminate the panit on the 1982 AMC Eagle. We actually used the 1982 AMC Eagle for line of our LIVE Online Detailing Classes and you can watch the video here.

Go Time!
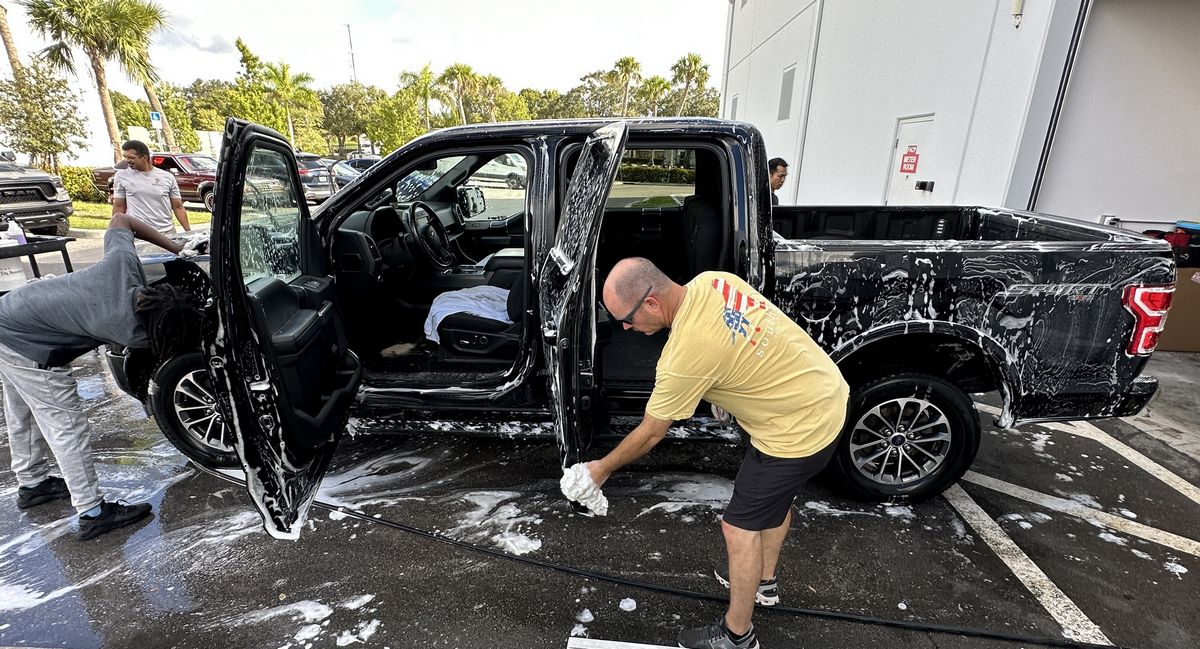
It’s now late Friday afternoon. This class has already detailed 2 cars, washed 1 car and enjoyed the Dr. Color Chip Rock Chip Repair System presentation by Tony Pando. As well as had lunch. Next the class will tag-team these next two vehicles to round-out the topics, techniques, products and tools for this FIRST day of class.
Mechanical decontamination
I washed the truck, but now the class will get to learn how to do mechanical decontamination as a stand-alone process. While it can save you time to do this step when you’re washing the vehicle, there are actual reasons why to NOT do the mechanical decontamination step during the wash process and we share this reason in our classes.


And here are the final results…
1982 AMC Eagle – Original Single Stage Paint (rare)
1979 Ford F150 Stepside Shorty – Custom basecoat/clearcoat paint system
This custom built truck has a high dollar custom paint job including a wild flame job under the clearcoat finish. When it arrived here the paint was filled with the normal swirls and scratches and also holograms from the misuse of a rotary polisher. The class fixed this paint job using Dr. Beasley’s Z1 Ceramic AIO.
Saturday Morning Session – Extreme Prep Wash
The first step in detailing a car is normally to wash the car using one of the many options available. What we teach in our classes is how to do an EXTREME Prep Wash and the reason for this is because a proper wash job will save you time, steps, energy, products, towels and create a vehicle that is surgically clean for all the next steps of the process.
The correct order of steps to do an Extreme Prep Wash
Doing a prep wash can include cleaning every aspect of a vehicle, or just the wash process. In this section I’ll cover every area you can clean during the washing process or as I like to call it, when doing the wet work. Of course, some of the listed areas to address may not apply, for example cleaning a canvas cloth top if the car has a painted roof or doing headlight correction if the car is brand new.
Work smarter, not harder
We all hear this cliché thrown around rather loosely, the problem is we’re often not told how to execute a process in order to actually fulfill the spirit of the cliché. I will show you how to work smarter and not harder.
The way you work smarter instead of harder during a prep wash is simply to avoid repeating steps. This means, washing the vehicle and cleaning any of the various areas that can be cleaned in the correct order so as to not repeat or duplicate steps.
Topics covered and the order to do each step when doing an Extreme Prep Wash. Feel free to modify to fit the vehicle and/or your detailing style or environment.
- Inspect for tar, sap, dead bugs and bug splatter.
- Headlight correction.
- Wet wash engine detailing.
- Topical and/or Sub-surface glass polishing.
- Wheel area – Rims, Tires & Wheel Wheels.
- Cleaning canvas cloth tops.
- Cleaning vinyl tops.
- Chemical decontamination.
- Wash car from the top down.
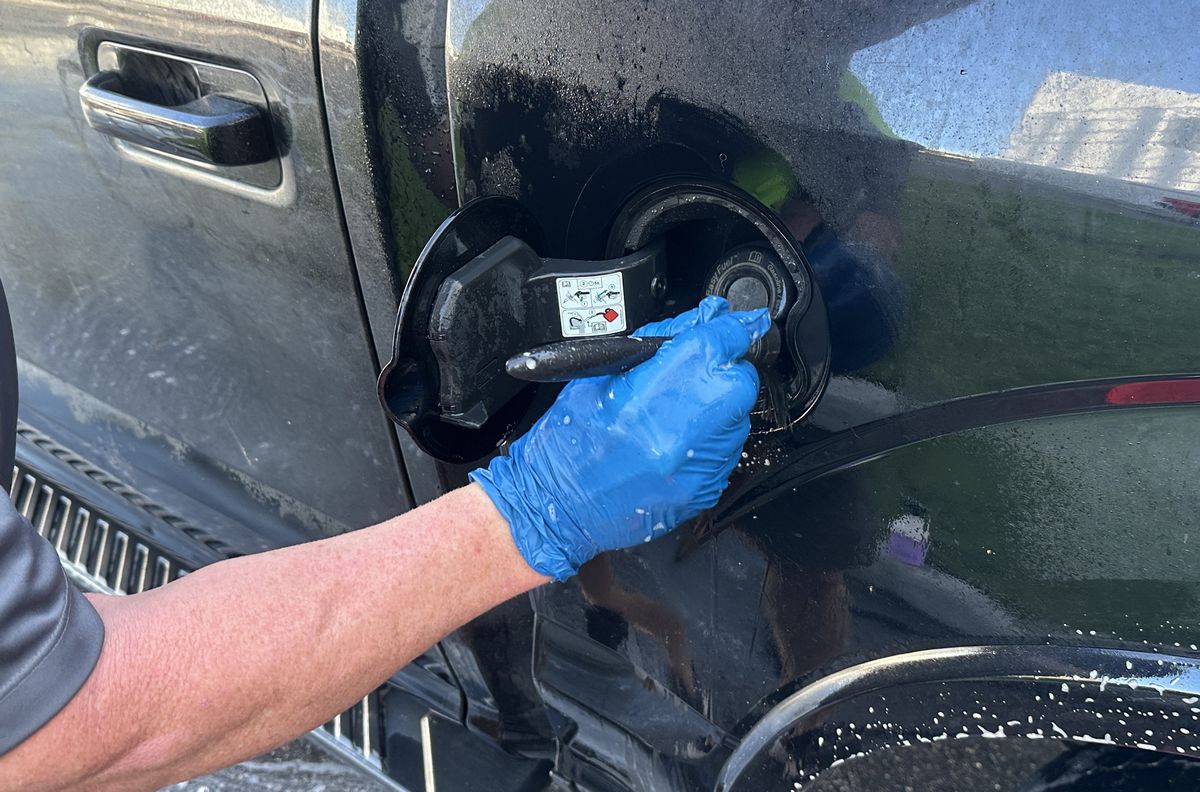
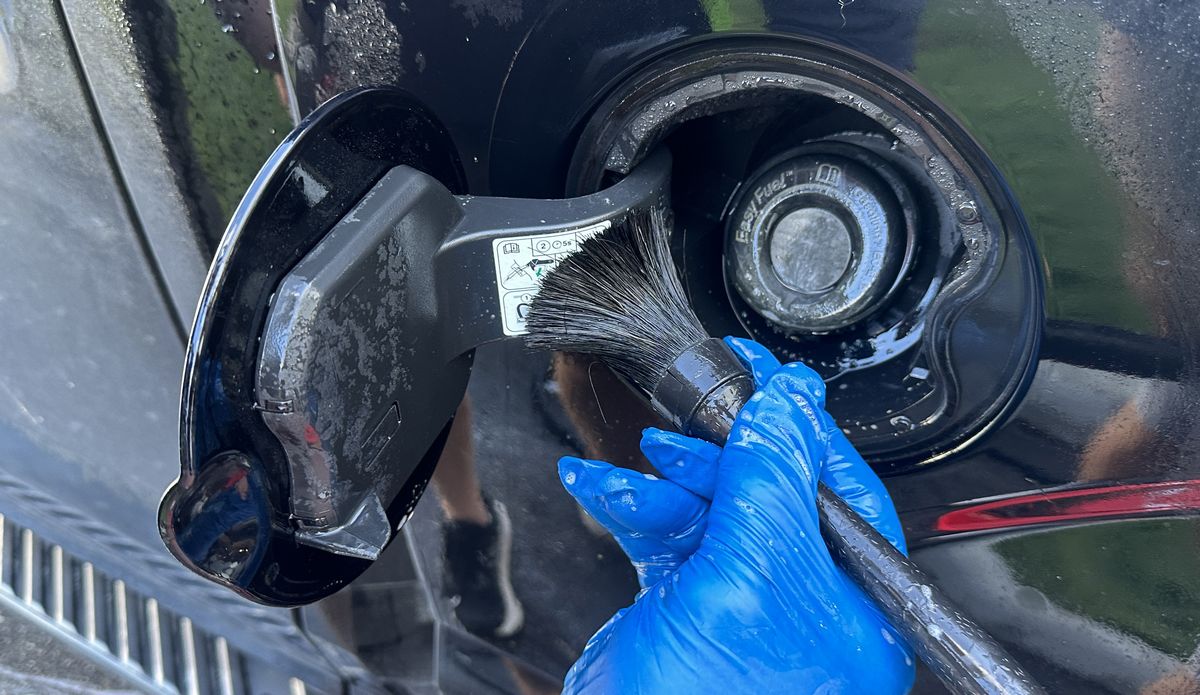
- Forgotten areas – fuel doors, fender lips, lower body panels, license plates, wiper arm facia, grills, emblems, badging.
- Hand or machine scrub neglected plastic – fender flairs, running boards, body cladding.
- Thorough rinse.
- Mechanical decontamination.
- Final rinse.
- Dry the car.
- Open all doors, trunk lid and hood, this is called stretching – wipe down all jambs.
Note: The reason you want to inspect for and remove any tar specifically before washing the car is so you don’t contaminate your wash mitt with tar. Kind of takes the wash mitt out of action.
Wet Work Table
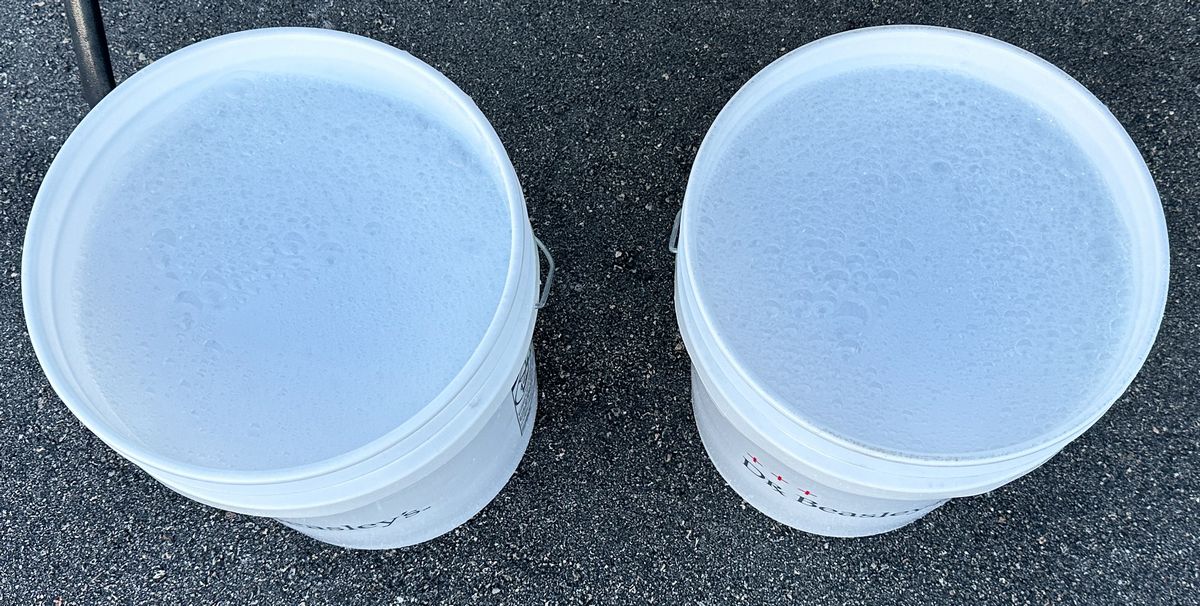
Setting up all the products you’ll need to do a proper Extreme Prep Wash saves you time, energy and step. This includes all the tools, brushes, car cleaning chemicals and multiple wash buckets.
IDA SV TEST
A lot of what is covered below are the answers to questions asked when taking the IDA or International Detailing Association Skills Validation Test. I’m a RIT or Recognized Independent Trainer for the IDA so I have a pretty good feel for what’s on the test and thus what to share in our Extreme Prep Wash.
Here’s our Wet Work Table all set up and ready to go.
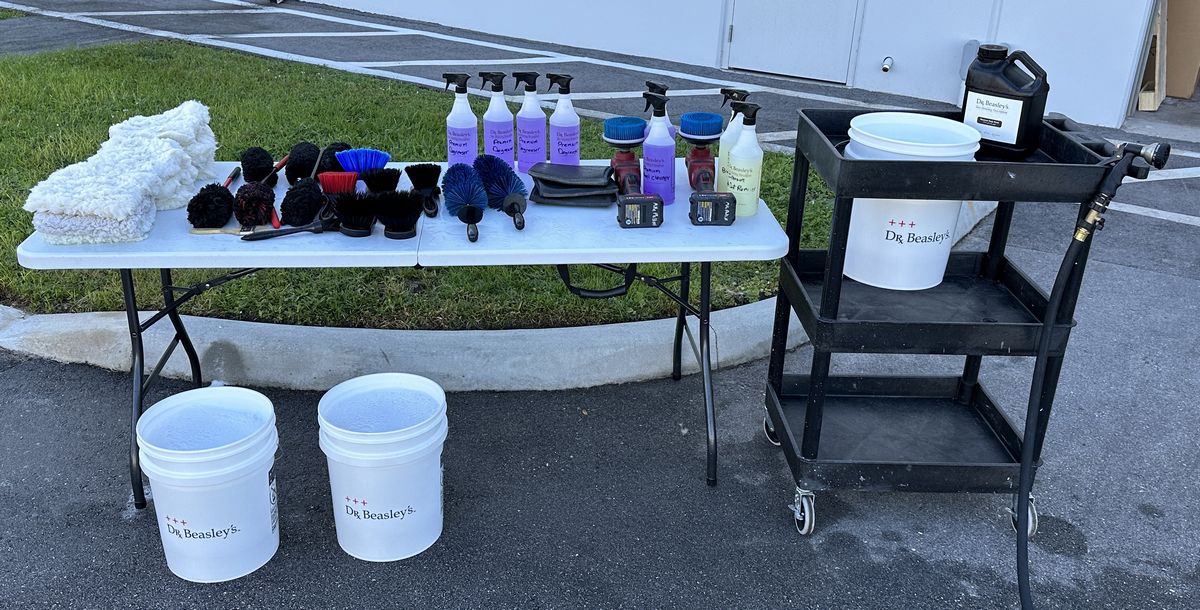
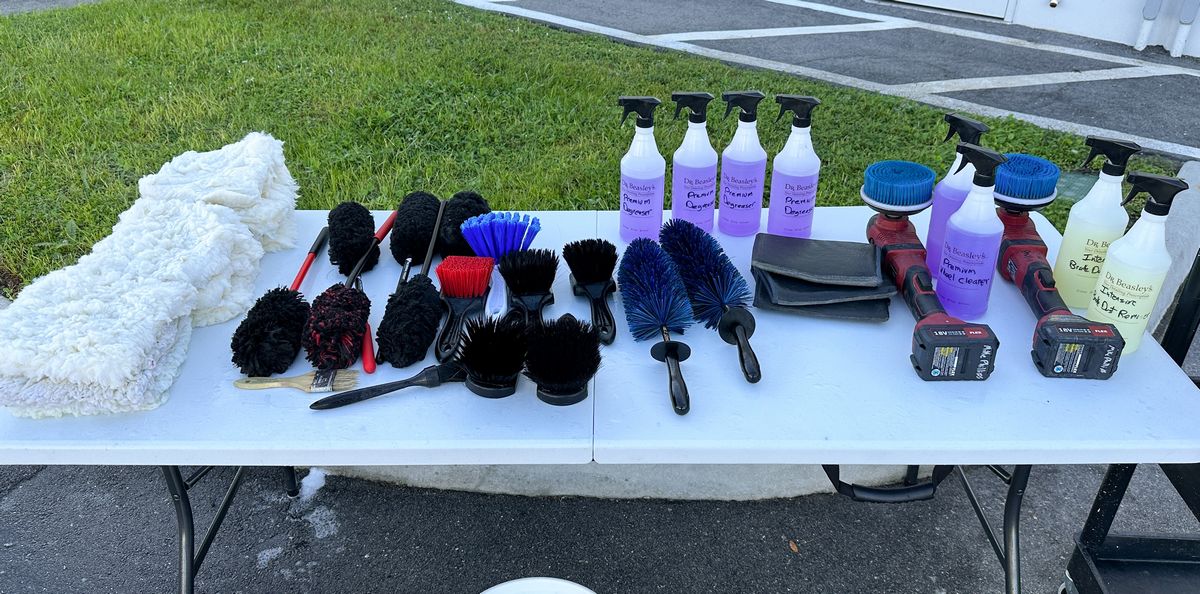
Plenty of Dr. Beasley’s 9″ x 9″ Wash Mitts for doing the full body wash.
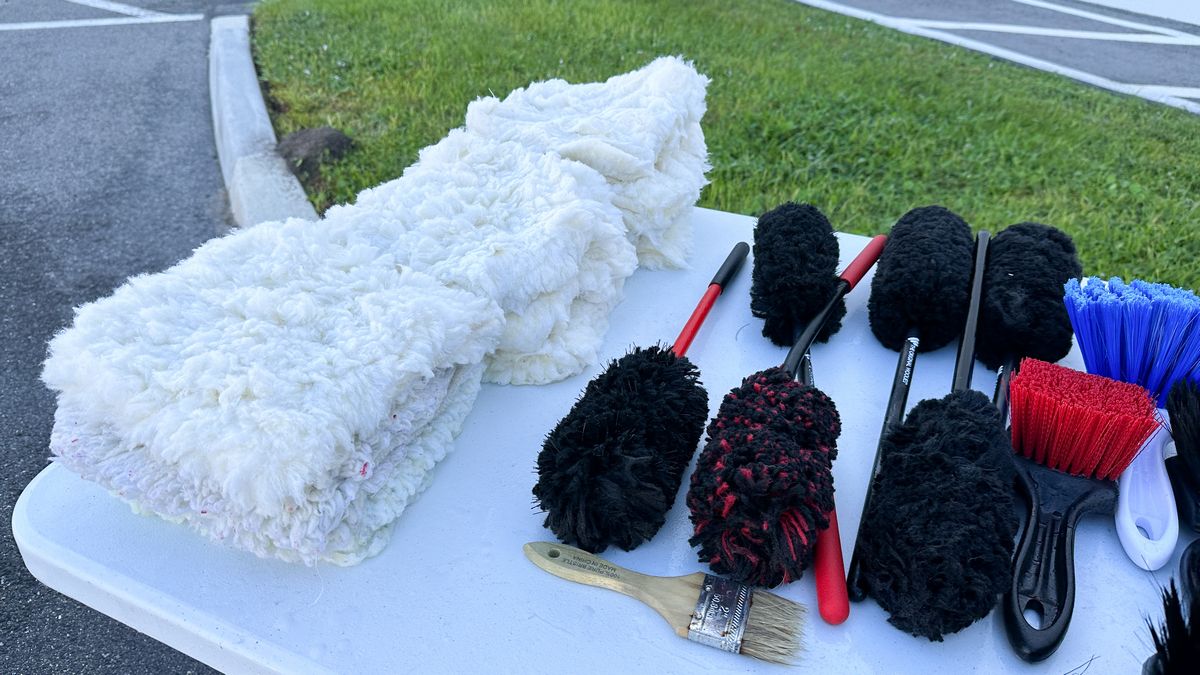
A selection of brushes including,
Wheel Woolies Wheel Cleaning Brushes – Great for cleaning wheel barrels.
Blue Wheel Brush – Great for wheels, bumpers, fender wells.
Bruan Wheel & Fender Brush Great for delicate wheels, grills, engine cleaning, interior cleaning.
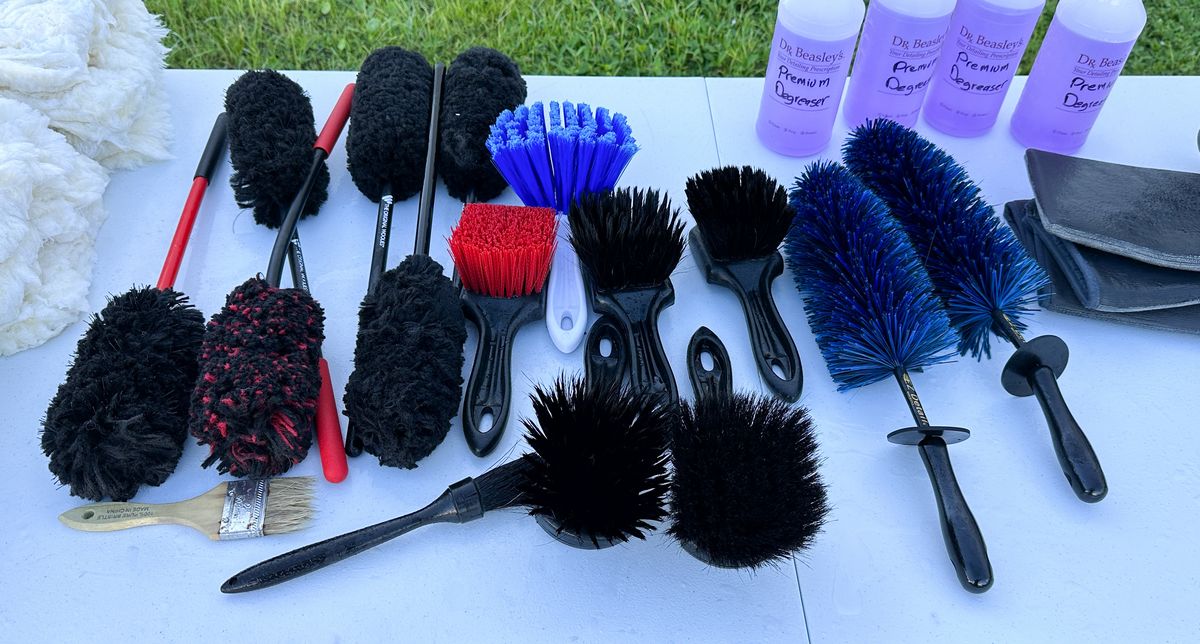
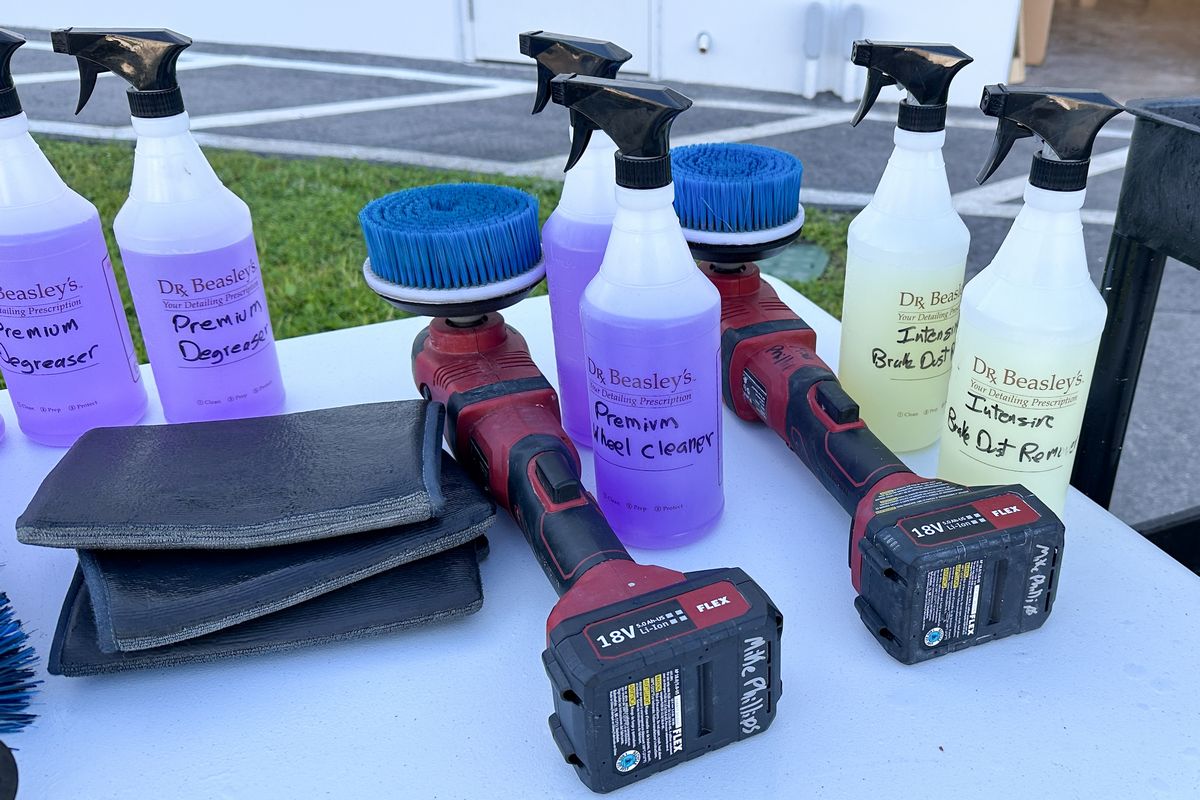
Dr. Beasley’s Premium Degreaser – for engine detailing, cleaning tires and cleaning other excessively grimy areas and or components.
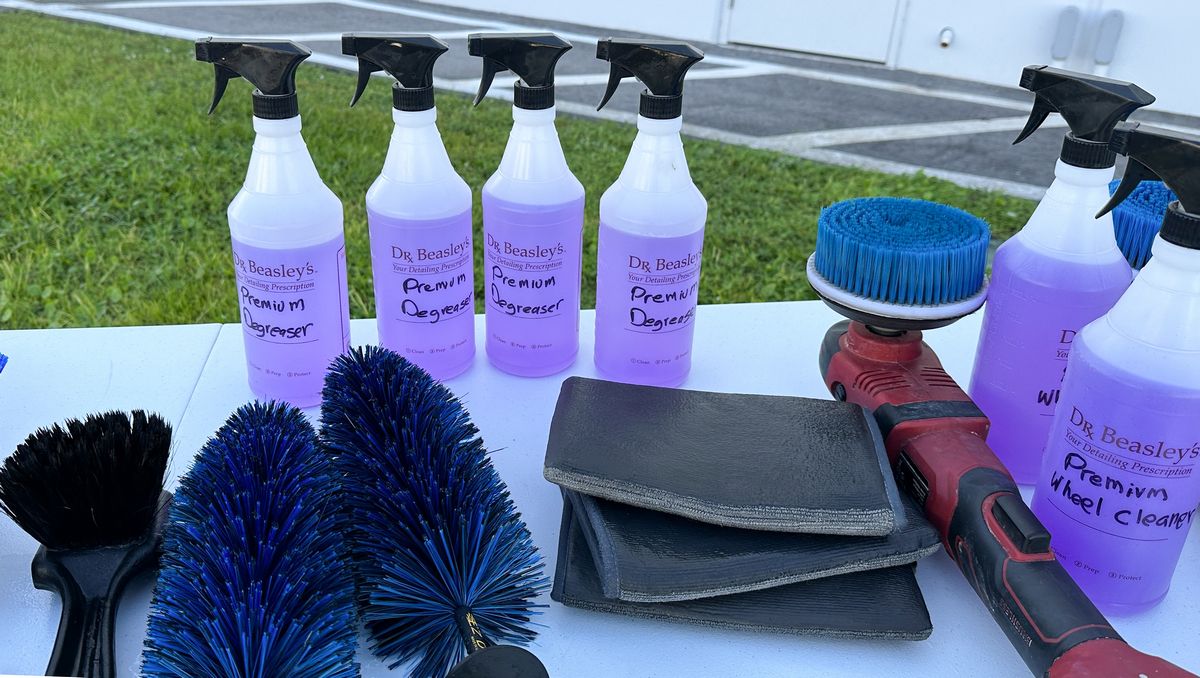
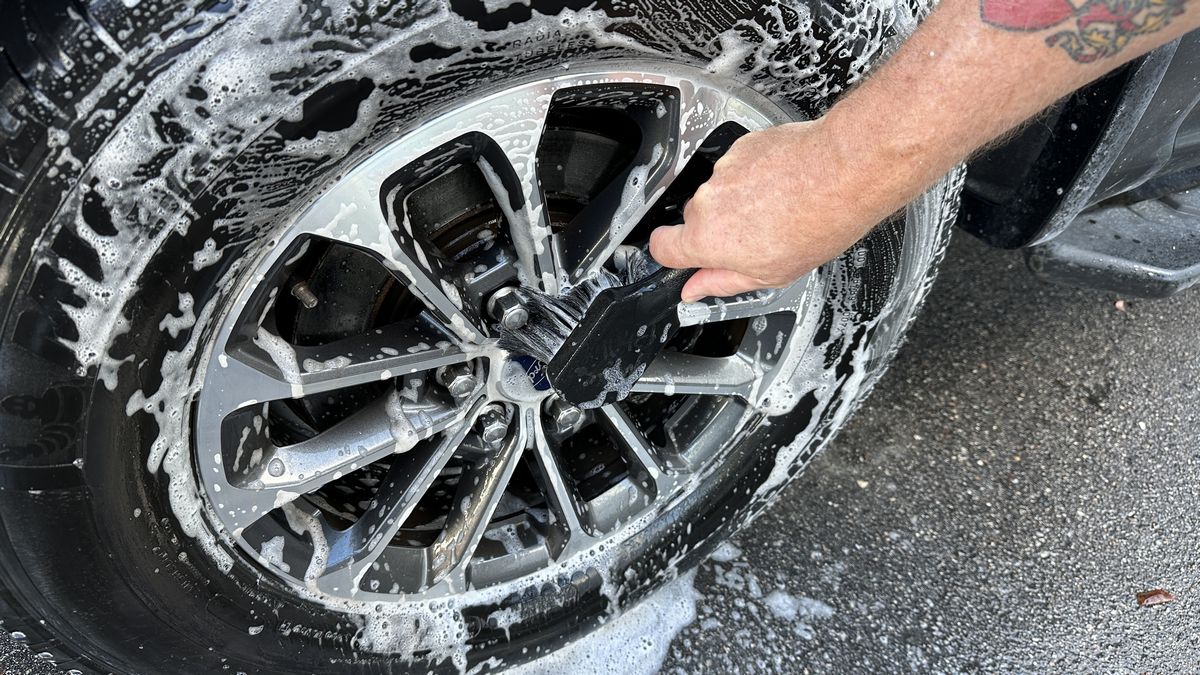
For cleaning wheels, Dr. Beasley’s Premium Wheel Cleanser and for severely neglected wheels with baked-on brake-dust, Dr. Beasley’s Intensive Brake Dust Remover
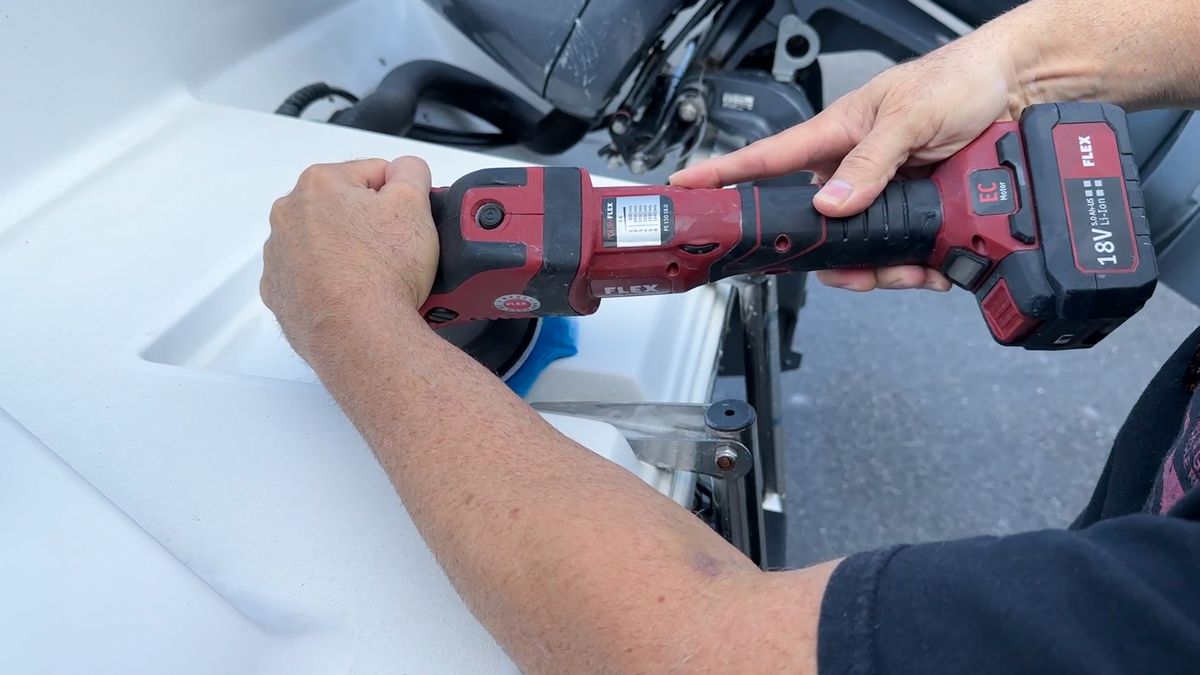
We teach machine scrubbing tires because machine scrubbing tires is faster and does a better job. The key thing when using power tools around water is to use CORDLESS tools to reduce and electric shock dangers. In our classes, we use the FLEX PE-150 Cordless Rotary Polisher with 5″ Rotary Brushes. After the full body wash and rinse, we show Clay Mitts for doing the Mechanical Decontamination Step.
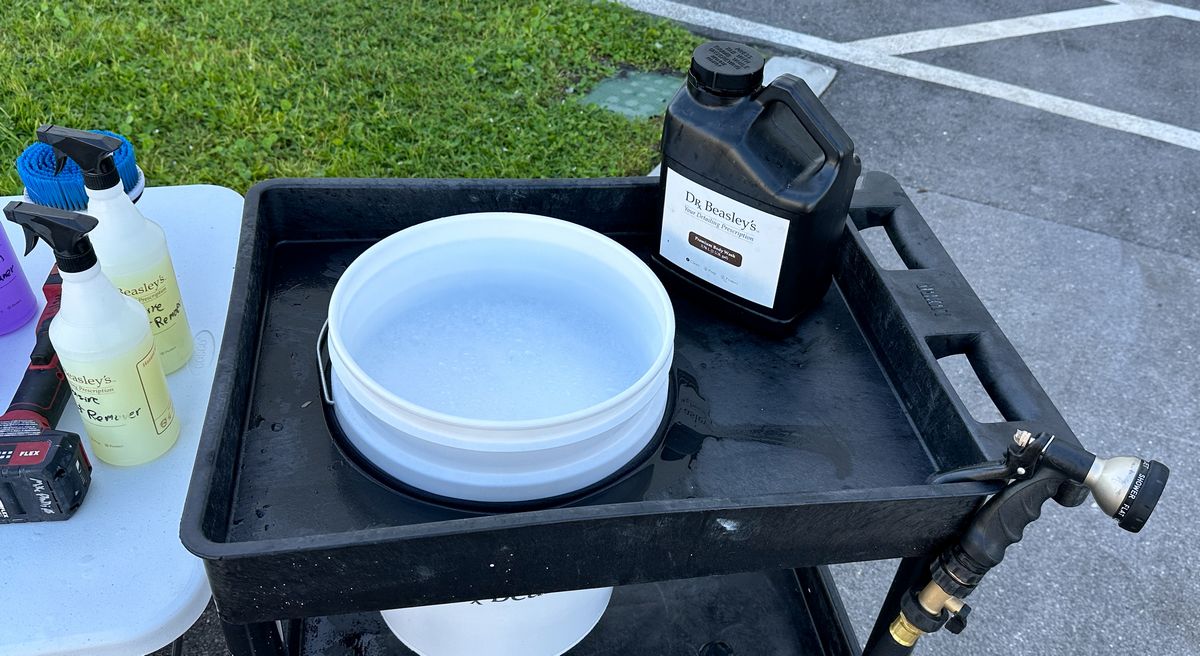
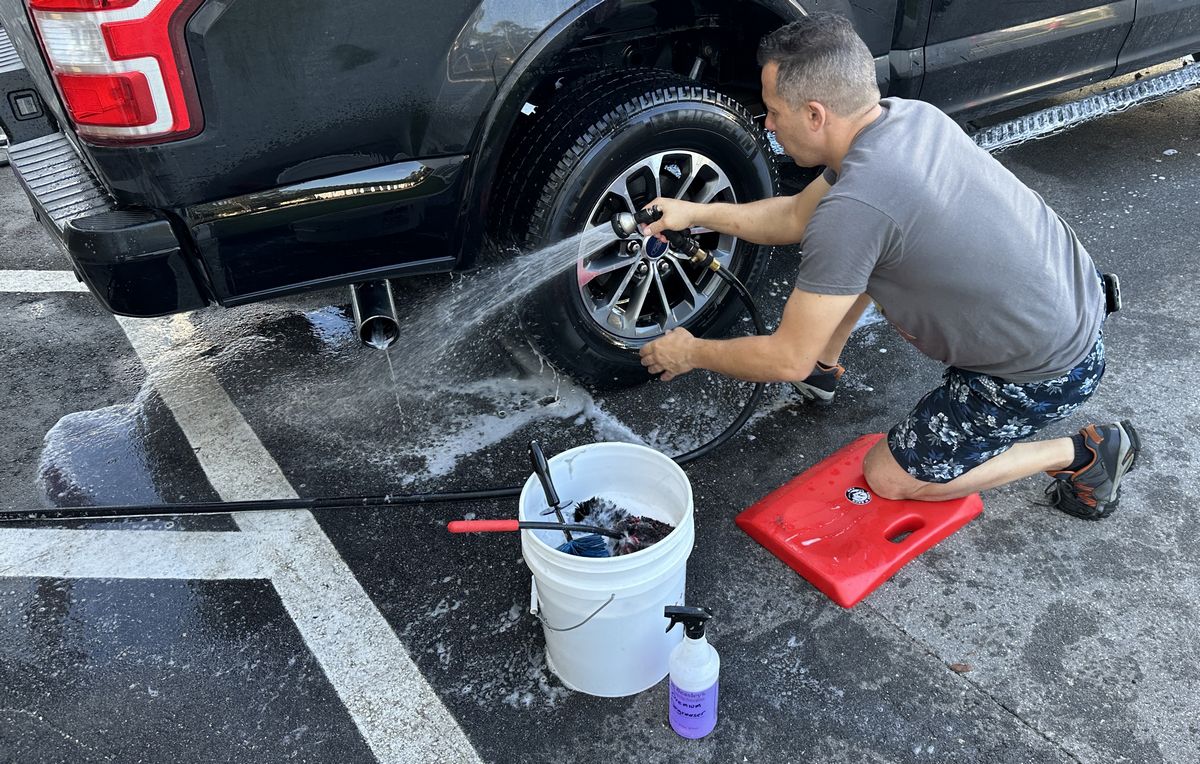
Wheel & Tire Brush Buckets
You should always have a dedicated wheel and tire brush bucket or in our case, buckets. The reason why is because when washing the wheel and tire area, you may pick up loose metallic brake dust particles on your brushes. When you return your brushes to the bucket, these abrasive particles will flush off the brush and into the soapy water solution. If you were to dip a wash mitt into this soapy solution and then wash a painted body panel – you risk scratching the paint. So always have a dedicated bucket of soapy water solution for your wheel cleaning brushes. This is on the IDA SV Test. For our Wheel and Tire Buckets we use Dr. Beasley’s Premium Body Wash for our soapy water solution.
pH Balanced Car Wash
For washing the exterior body panels, we use the Dr. Beasley’s Premium Body Wash when we teach Extreme Prep Wash. Later, after a car is detailed and ceramic coated, we show and encourage people to use our Ceramic Body Wash as a Maintenance Wash. And of course, for all our buckets we use the Dr. Beasley’s 5 Gallon Wash Buckets with Grit Guard Inserts
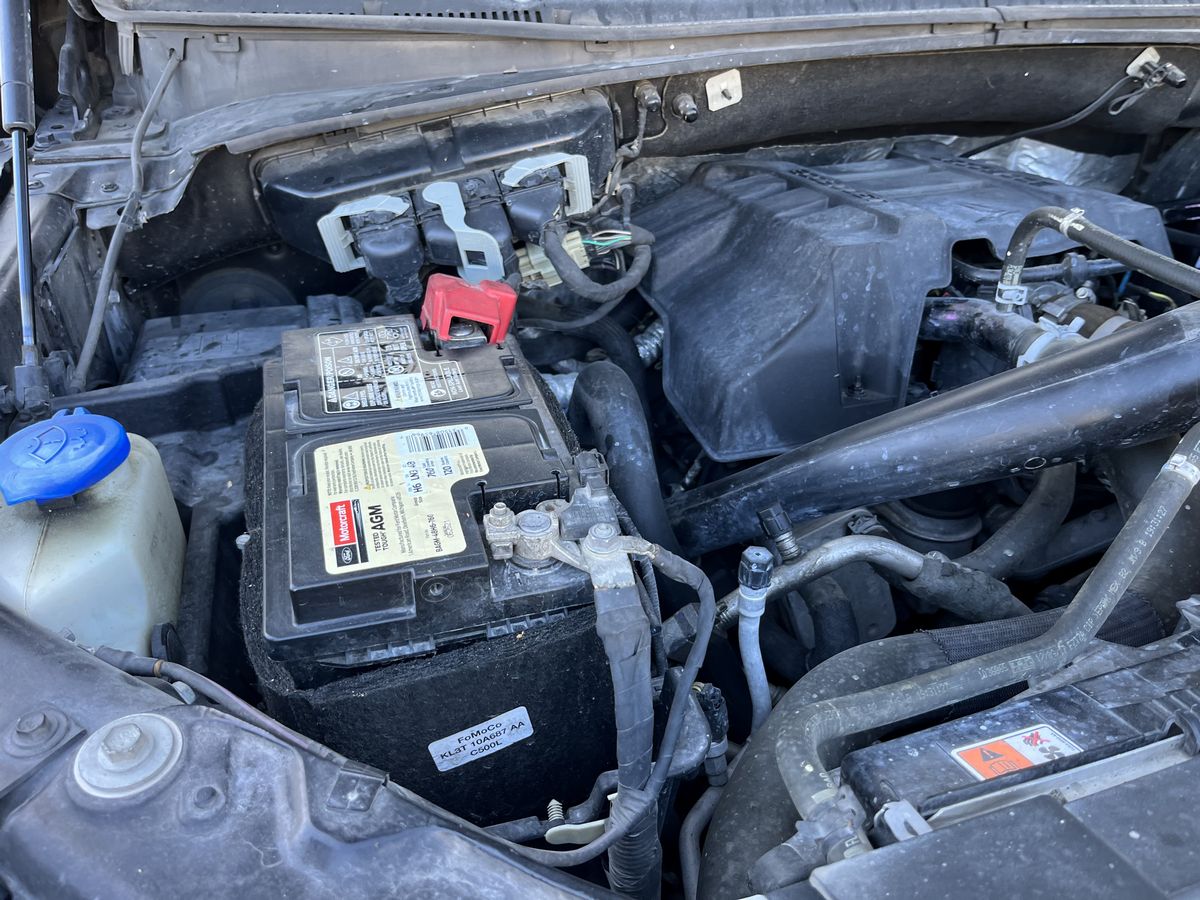
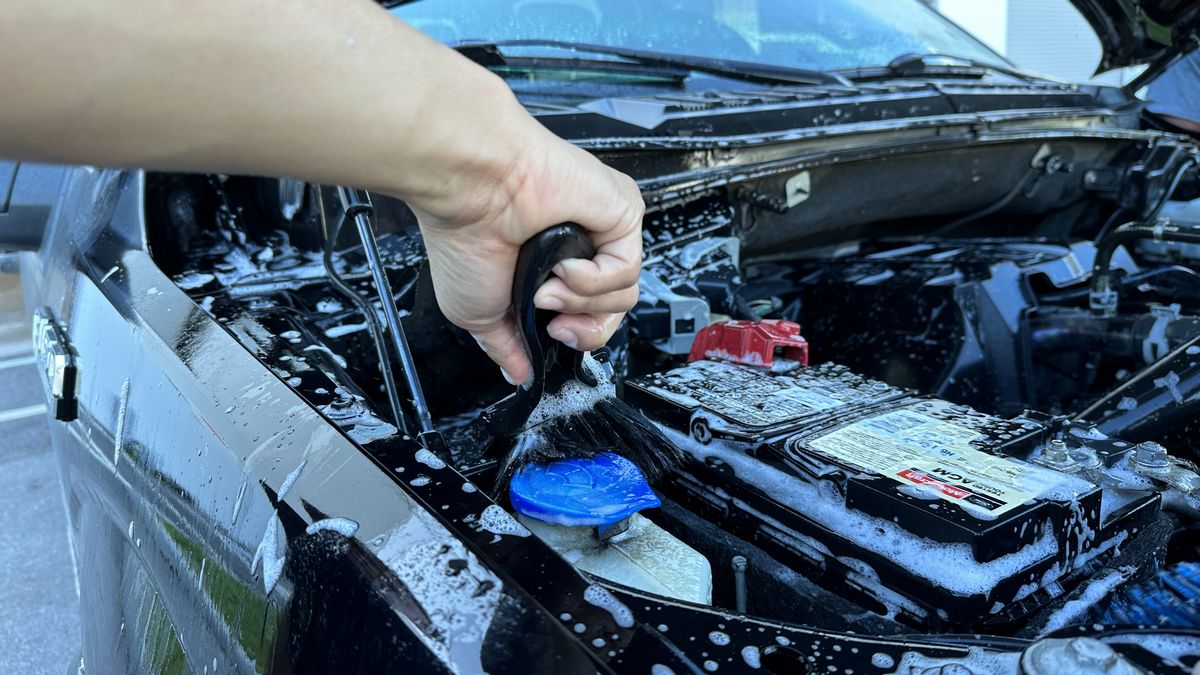
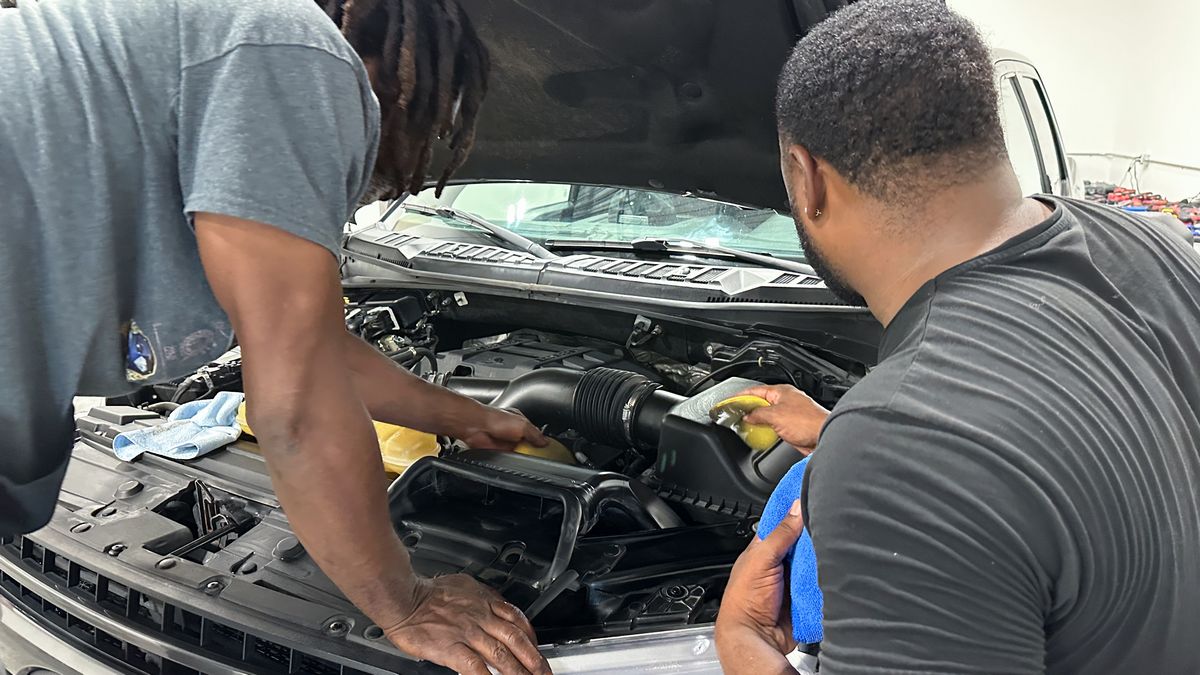
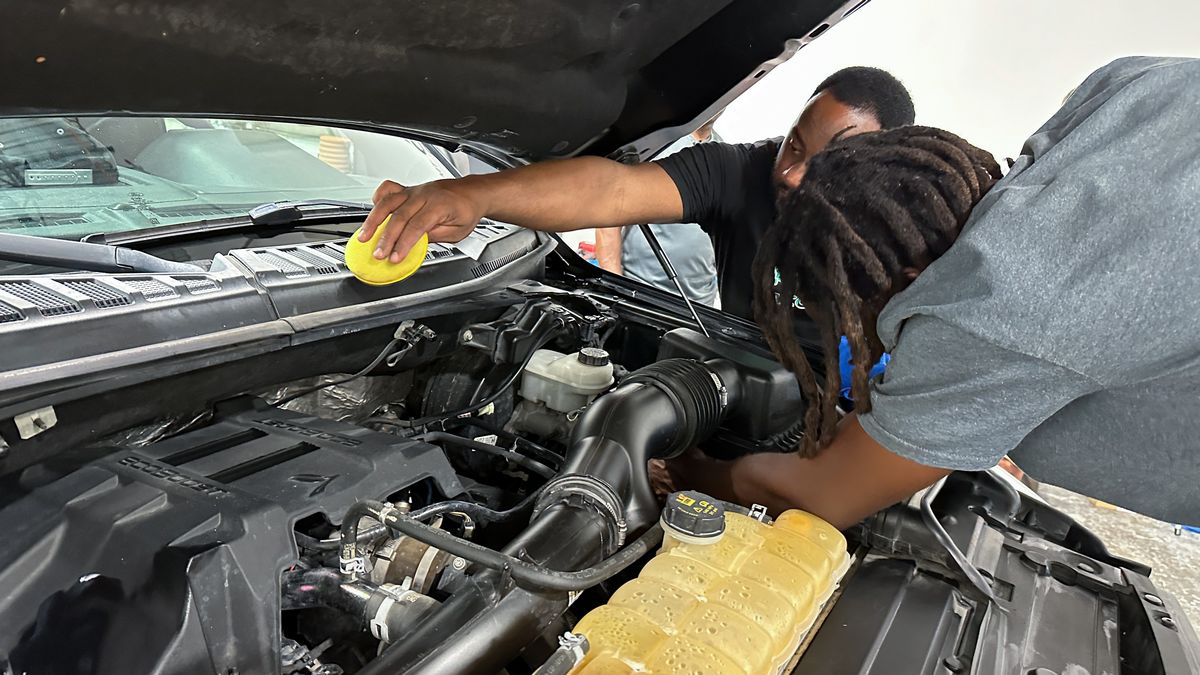
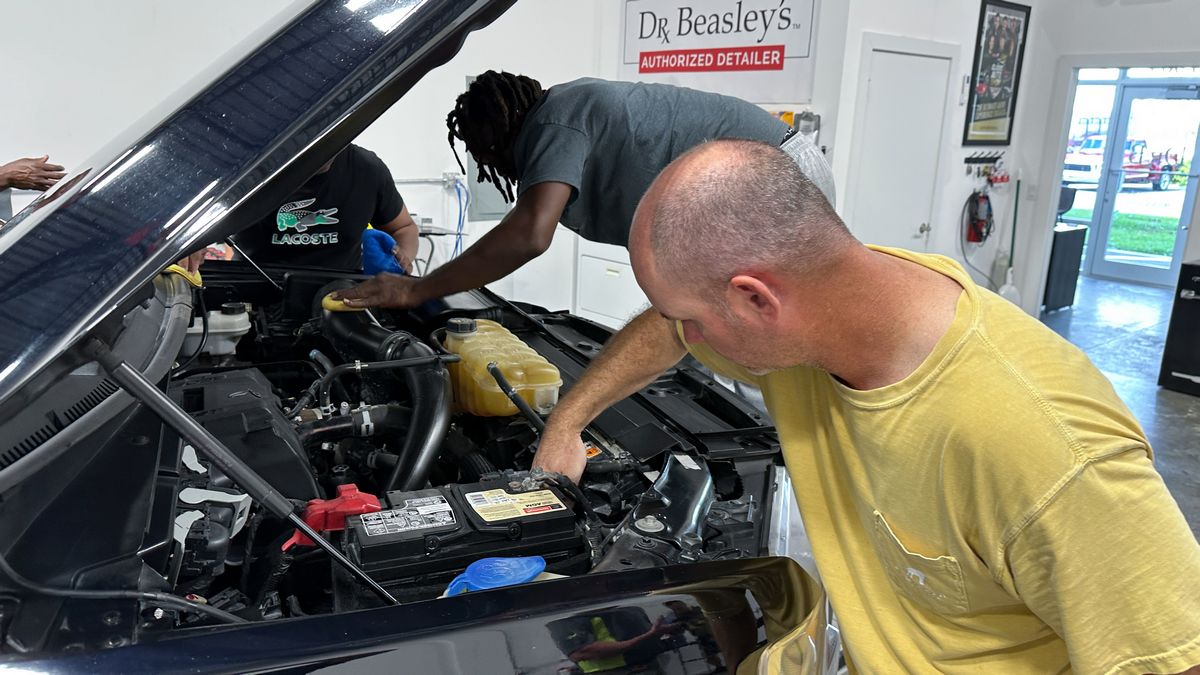
Wet Wash Engine Detail
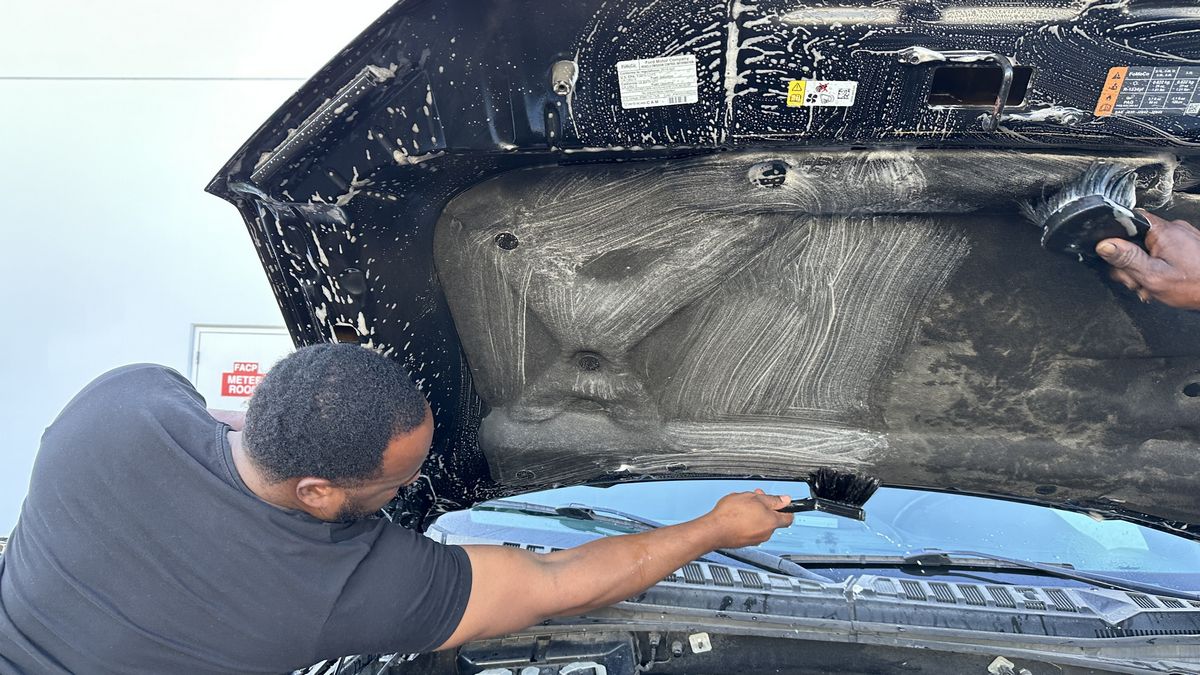
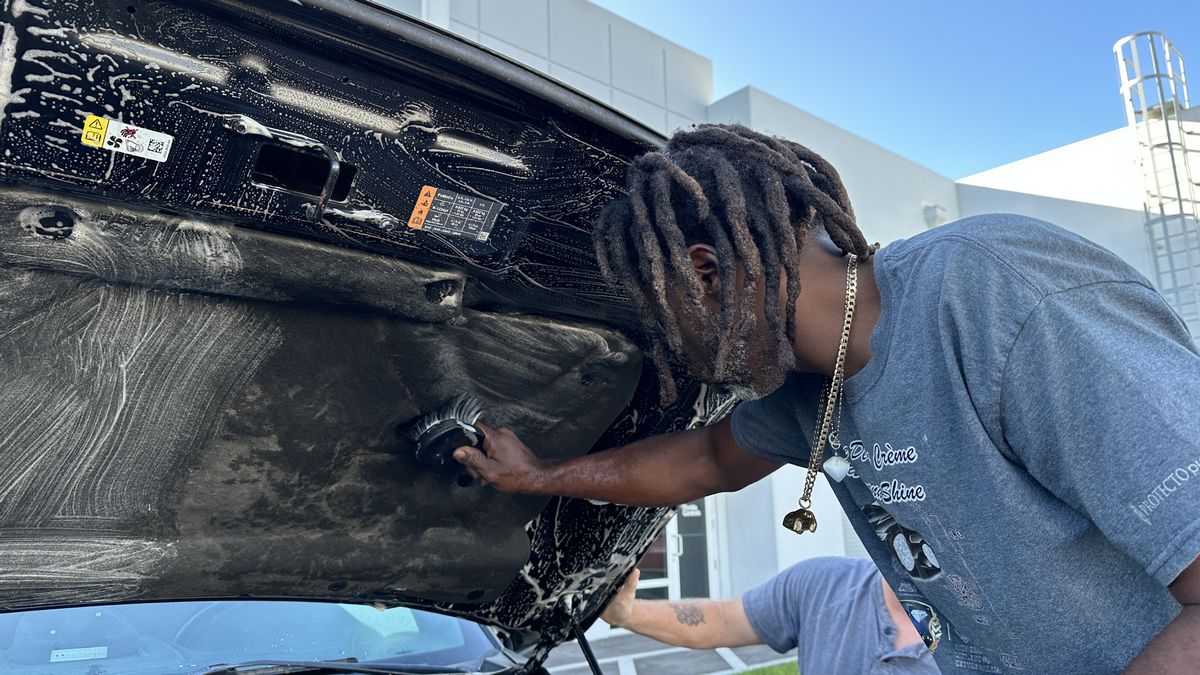
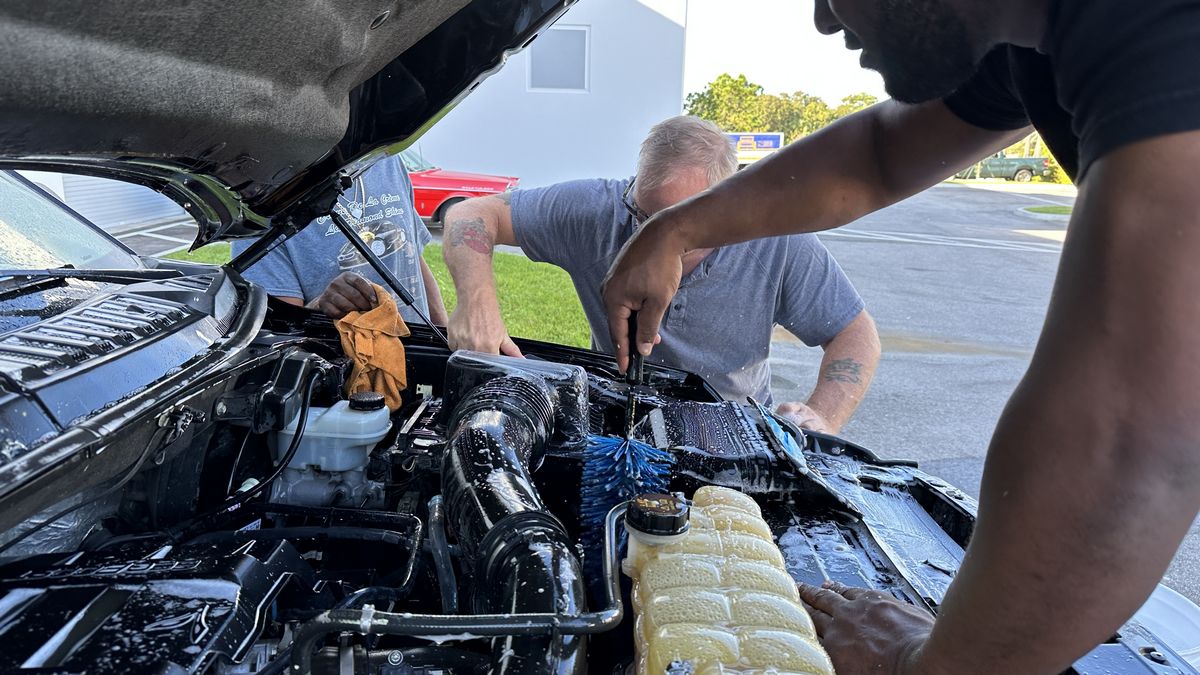
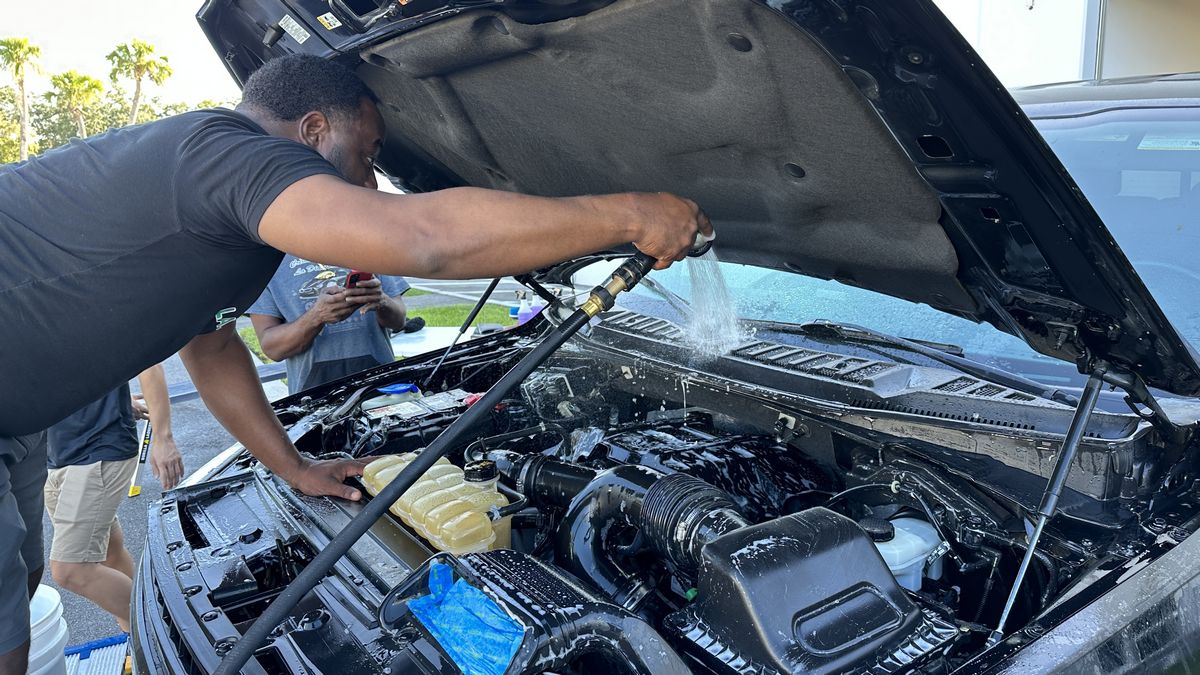
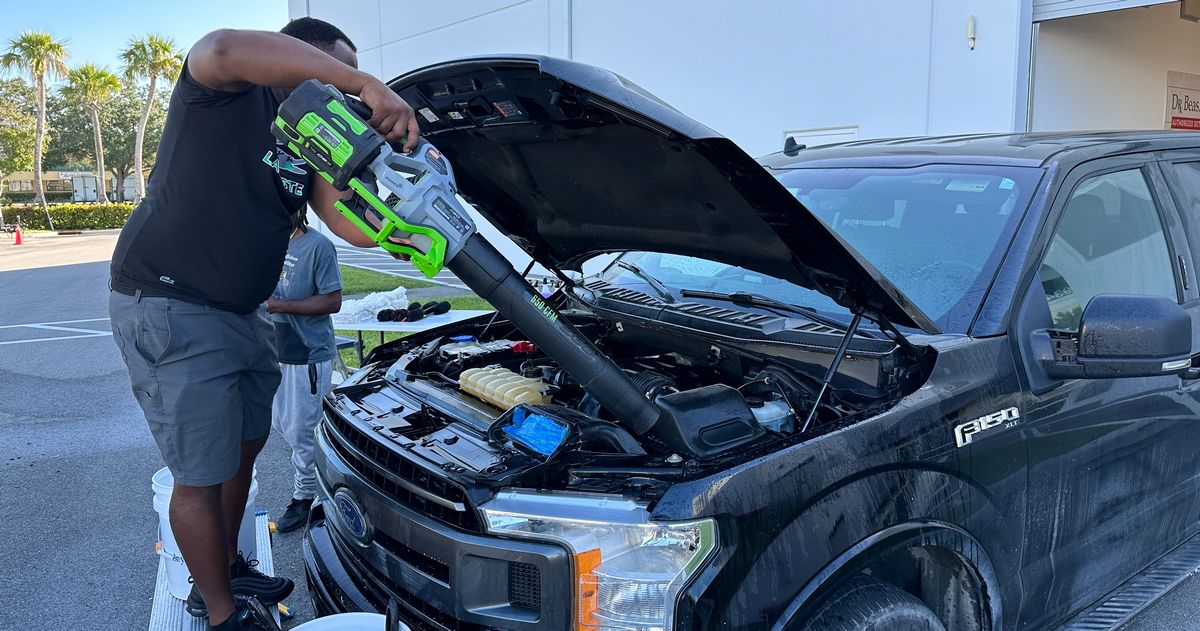
Because our training vehicle does NOT need headlight correction, we skip this step and start with doing a Wet Wash Engine Detail. If this vehicle had cloudy, hazy oxidized headlights, we would do the Headlight Correction Step BEFORE cleaning the engine and engine compartment. The reason for this is often times you will open the hood to remove any hood paint away from the headlights when sanding to avoid accidently sanding the paint on the hood next to the headlights. Sanding and buffing headlights will get splatter onto the engine and in the engine compartment. If you clean the engine first and then restore the headlights – you risk repeating steps. So work harder instead of smarter and clean headlights first, then clean the engine and engine compartment.
Before pictures…
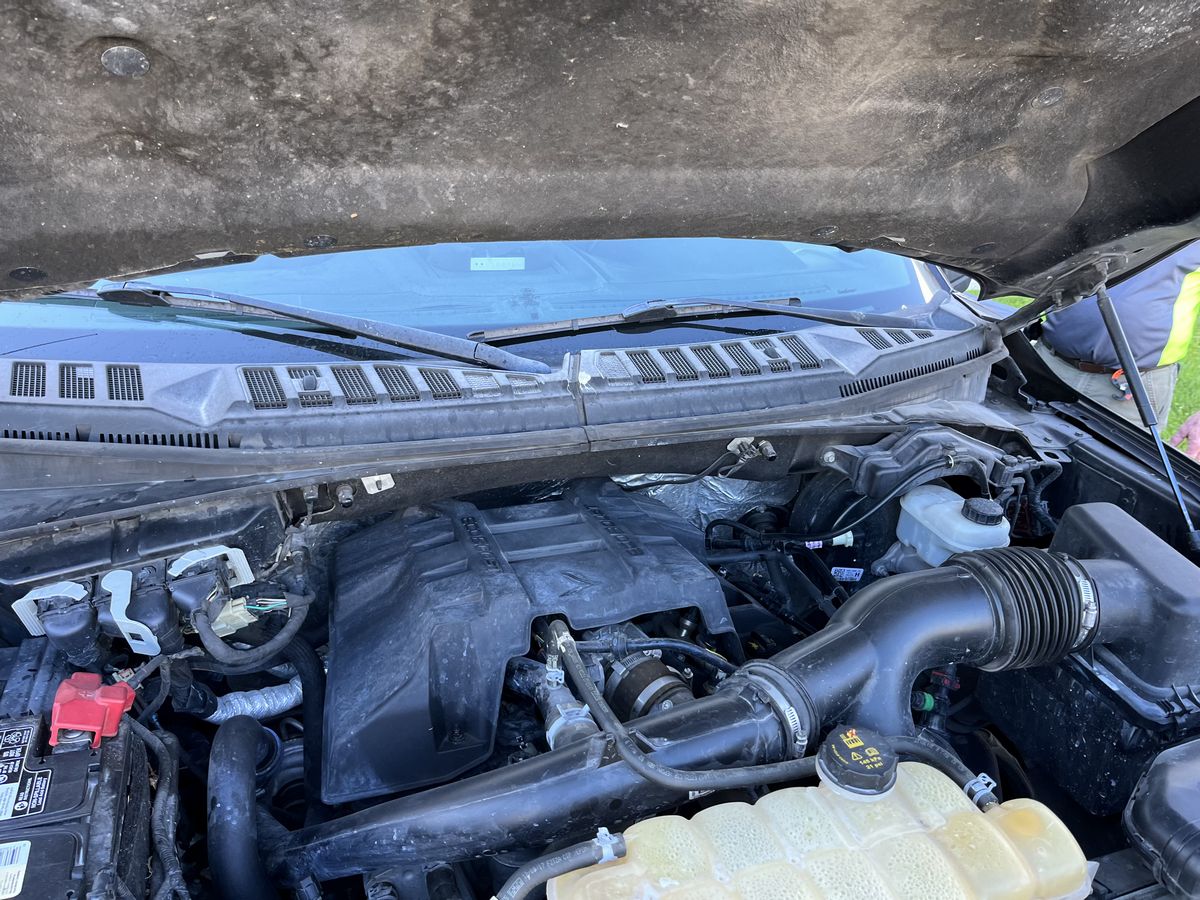
Work from the top down
The first thing you do when cleaning an engine compartment is to clean the underside of the hood. If you clean the engine and engine compartment first and then clean the underside of the hood – you will get the now clean engine and engine compartment dirty with the drippings coming off the underside of the hood. So work smarter instead of harder and clean the underneath of the hood first.
For this the class is using the Dr. Beasley’s Premium Degreaser – for engine detailing and cleaning other excessively grimy areas and or components. with a variety of brushes to agitate the degreaser.
Under hood detailing – How to clean insulated heat and sound deadening mats
When possible, we show the least aggressive method for cleaning these delicate materials because they are easy to tear-up, especially when wet. For example, if the mat is only lightly dirty, you can often times clean it by wiping with a water-dampened microfiber towel. In this example however, the under hood mat is extremely dirty, so the class uses the Bruan Wheel & Fender Brushes, which are great for tasks like these.
Here’s Meko and Derrick tag-teaming the underside of the hood.
Rinse thoroughly
For rinsing under the hood, the engine and engine compartment, we recommend getting a water sprayer that has a SHOWER setting. This flushes a gentle spray of water that is much safer to the mat and also to electrical connections and sensors in the engine compartment as compared to a spray with only a JET setting.

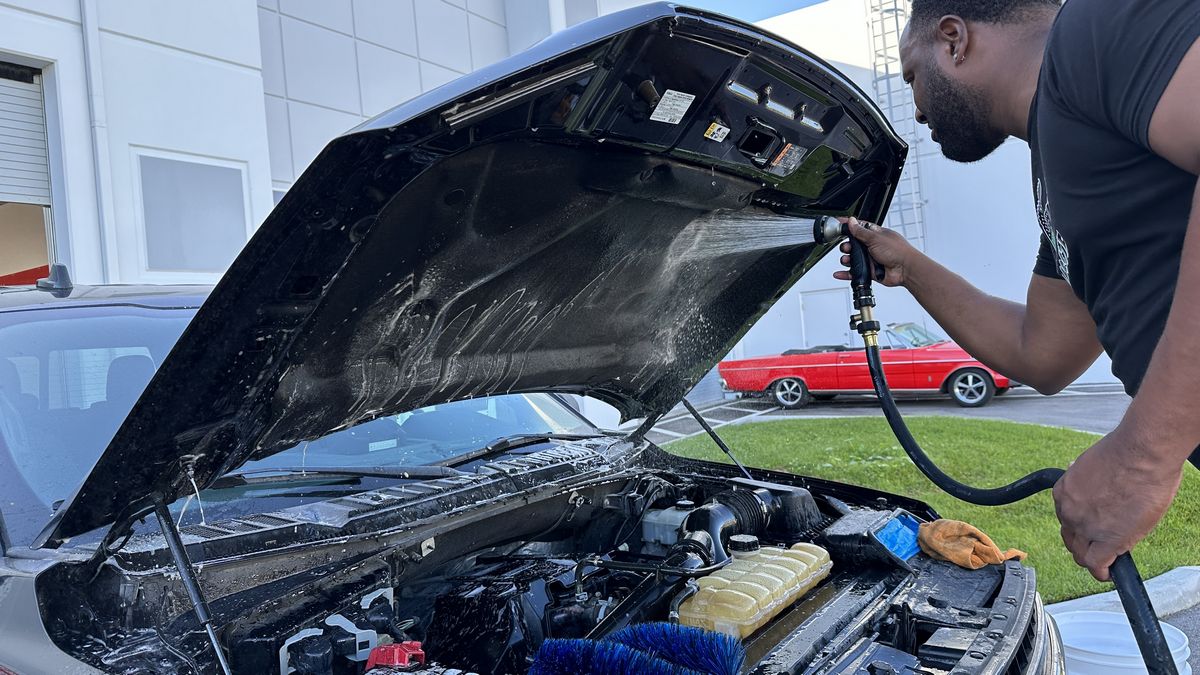
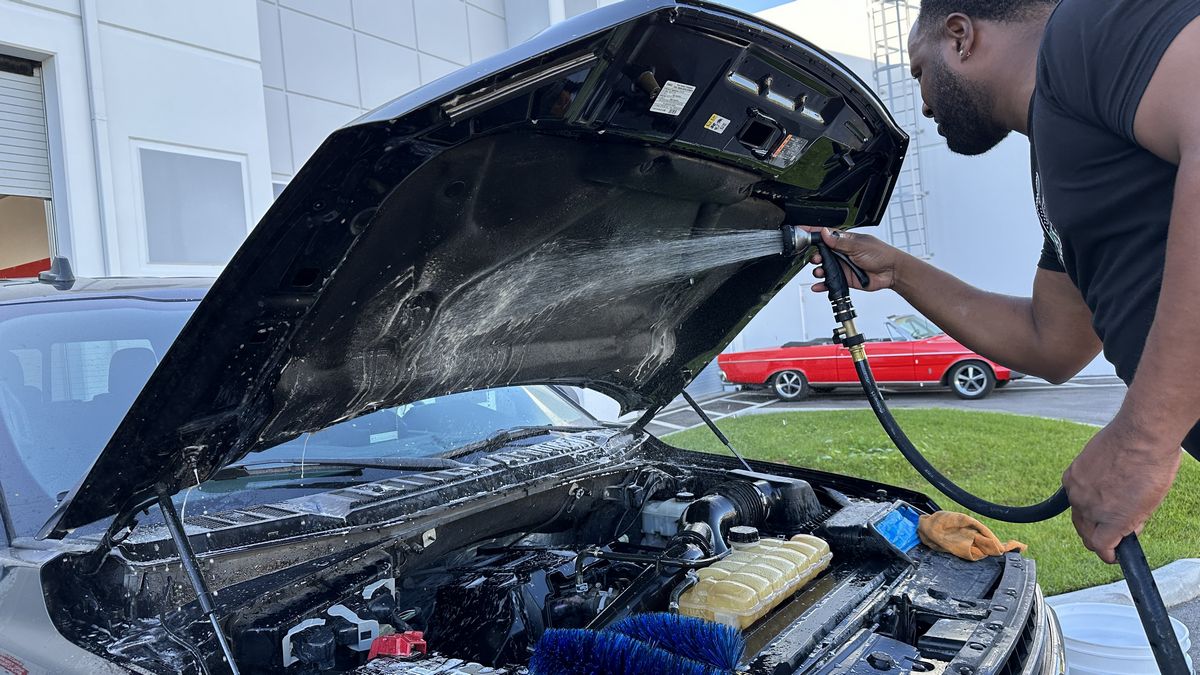
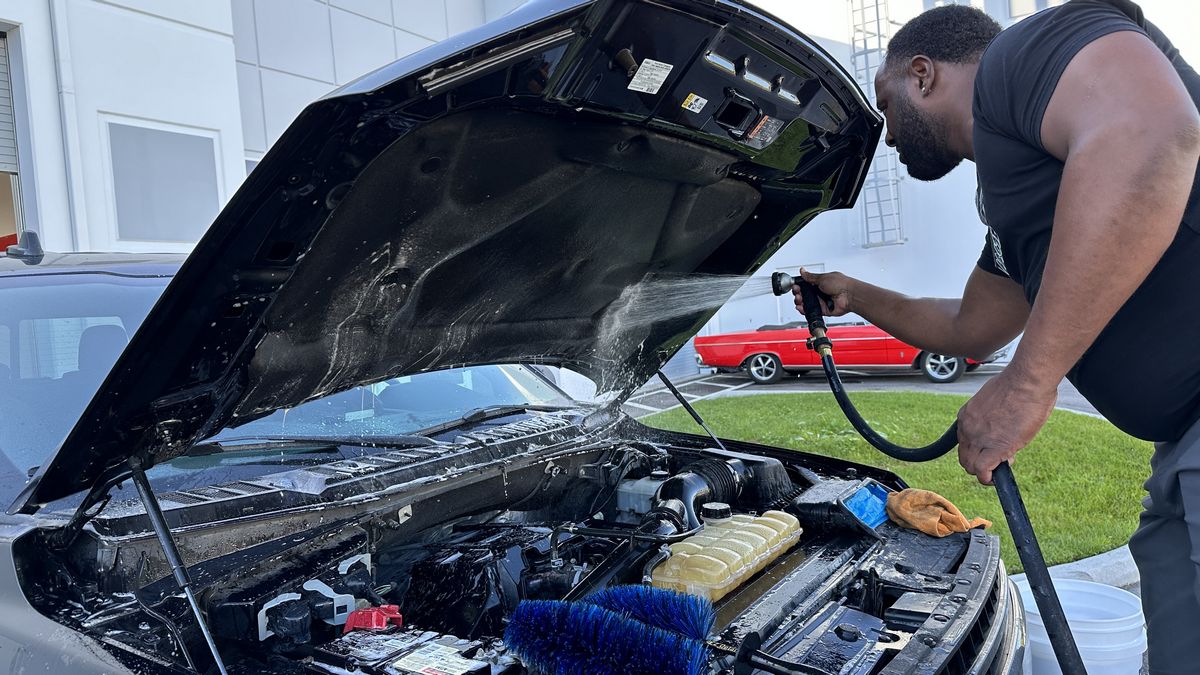
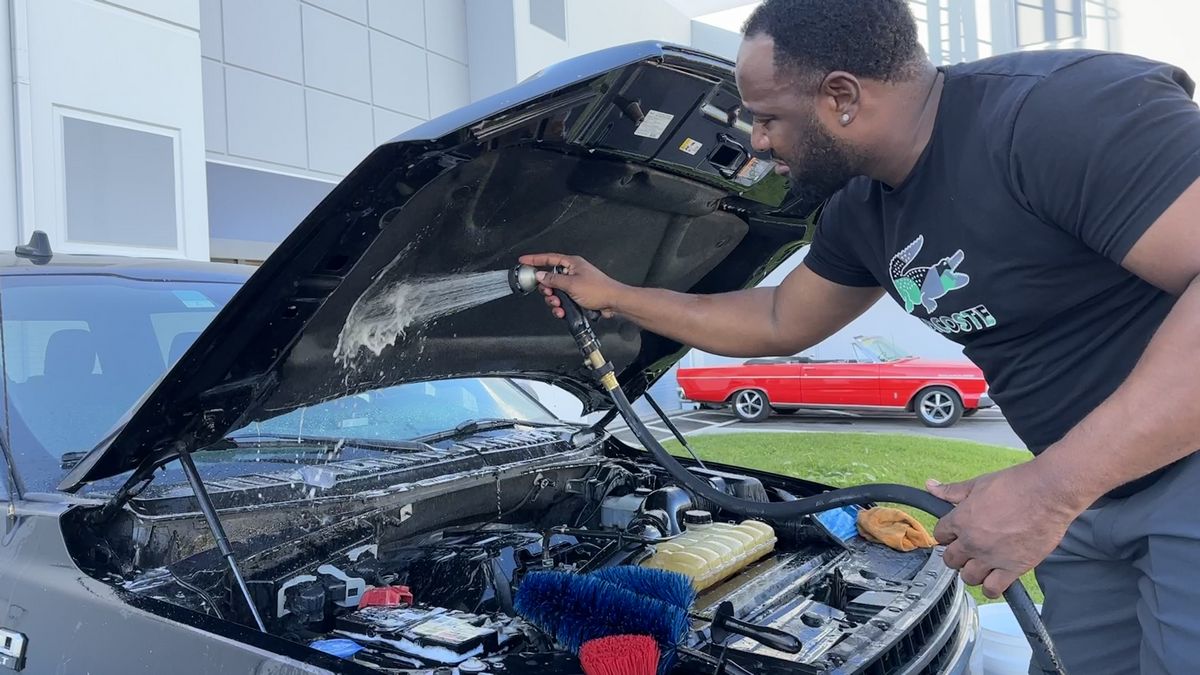
Wet Wash Engine Detailing
After cleaning the underneath of the hood, it’s time to get the engine and engine compartment clean. For this the class will use the Dr. Beasley’s Premium Degreaser plus a variety of brushes to agitate the degreaser. It’s vital to have a good selection of different brushes to get into all the tight and intricate areas found in an engine compartment.
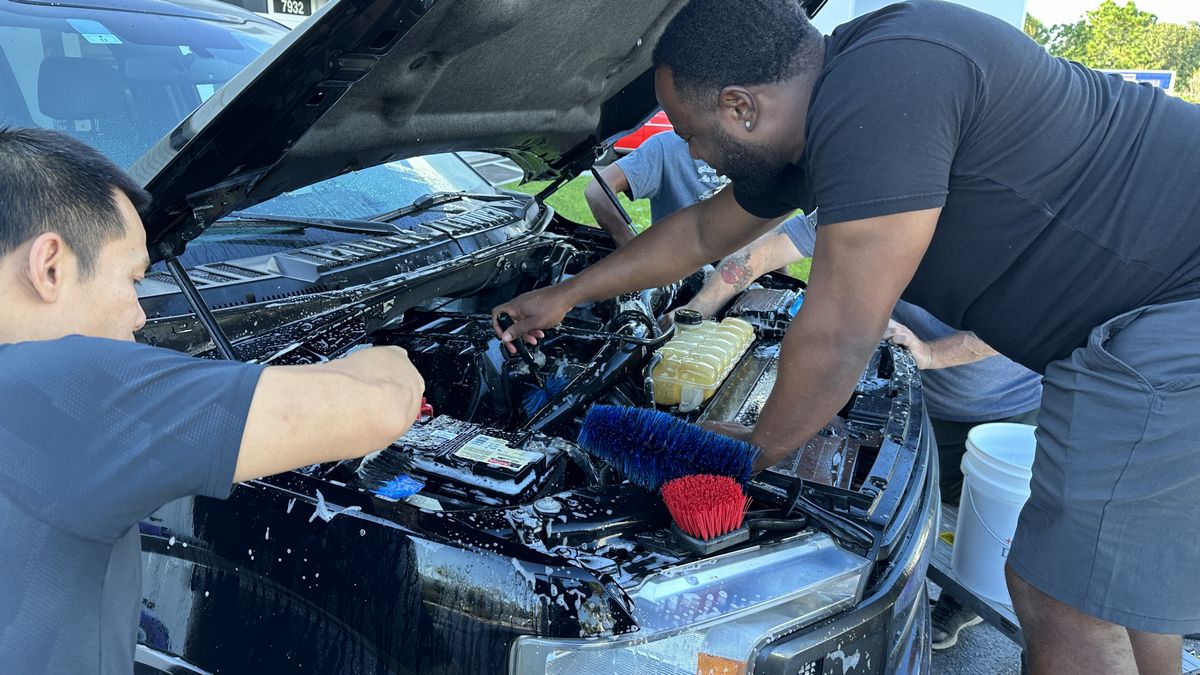
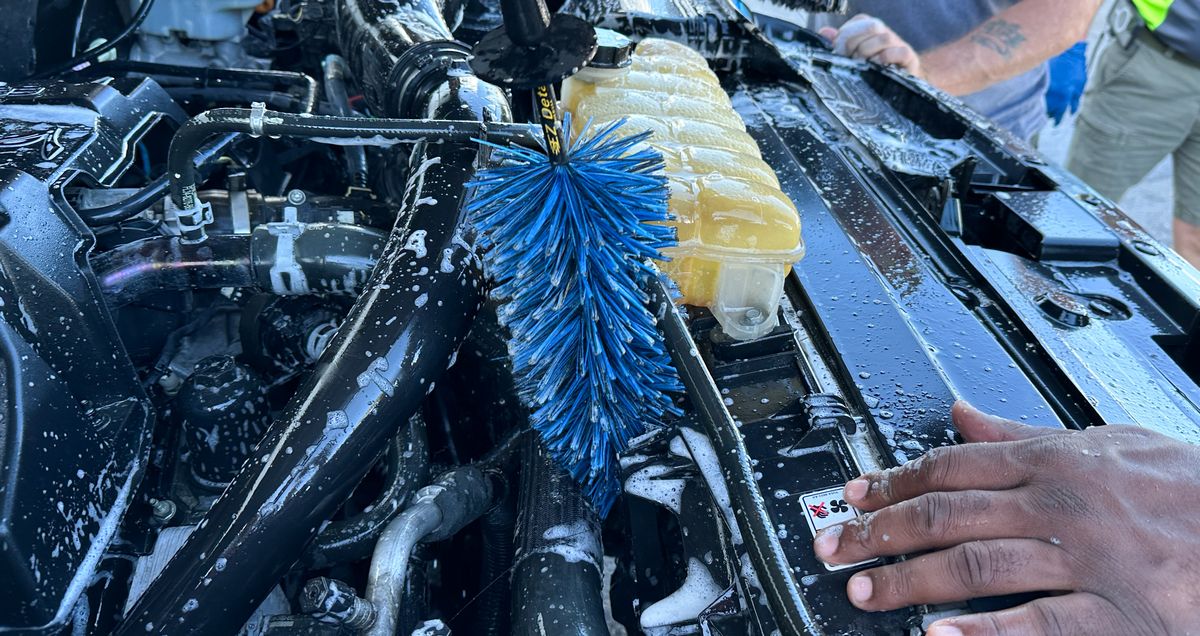
Bruan Wheel & Fender Brush
The Bruan Wheel & Fender Brush is actually a great engine and engine compartment cleaning brush. The bristles are 2′ long and the perfect blend of not to limp or not to stiff so they can get into tight areas to loosen dirty, oily engine sludge.
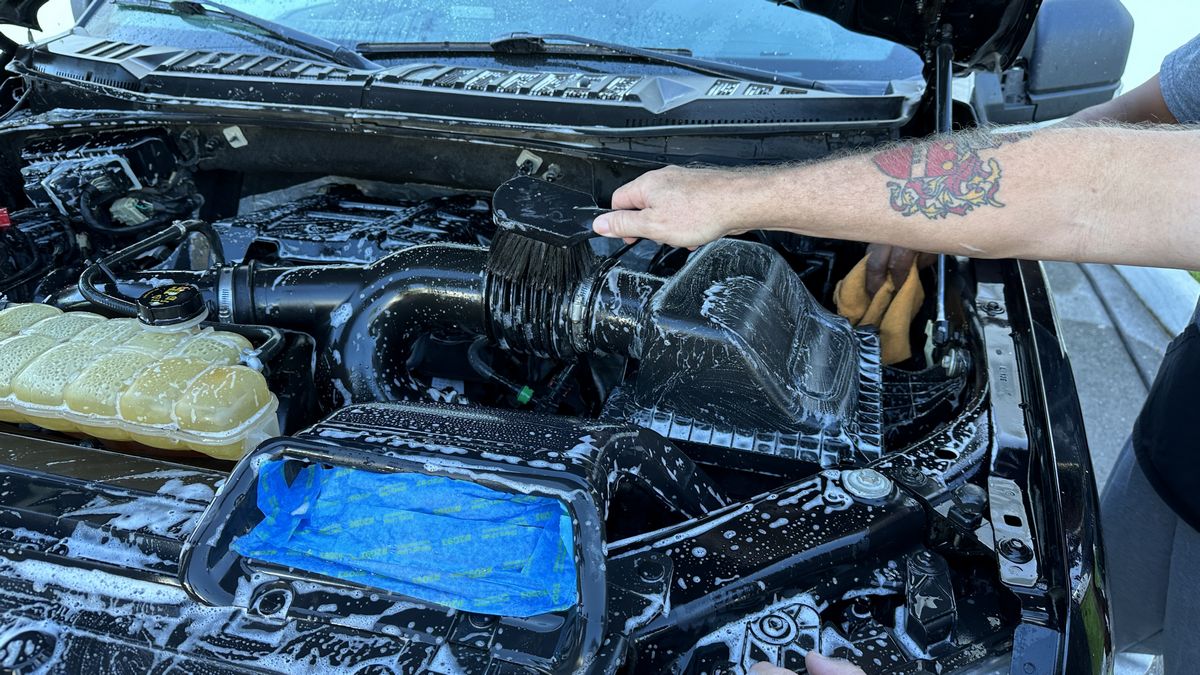
See how the bristles easily getting into the corrugated air flow tubing?

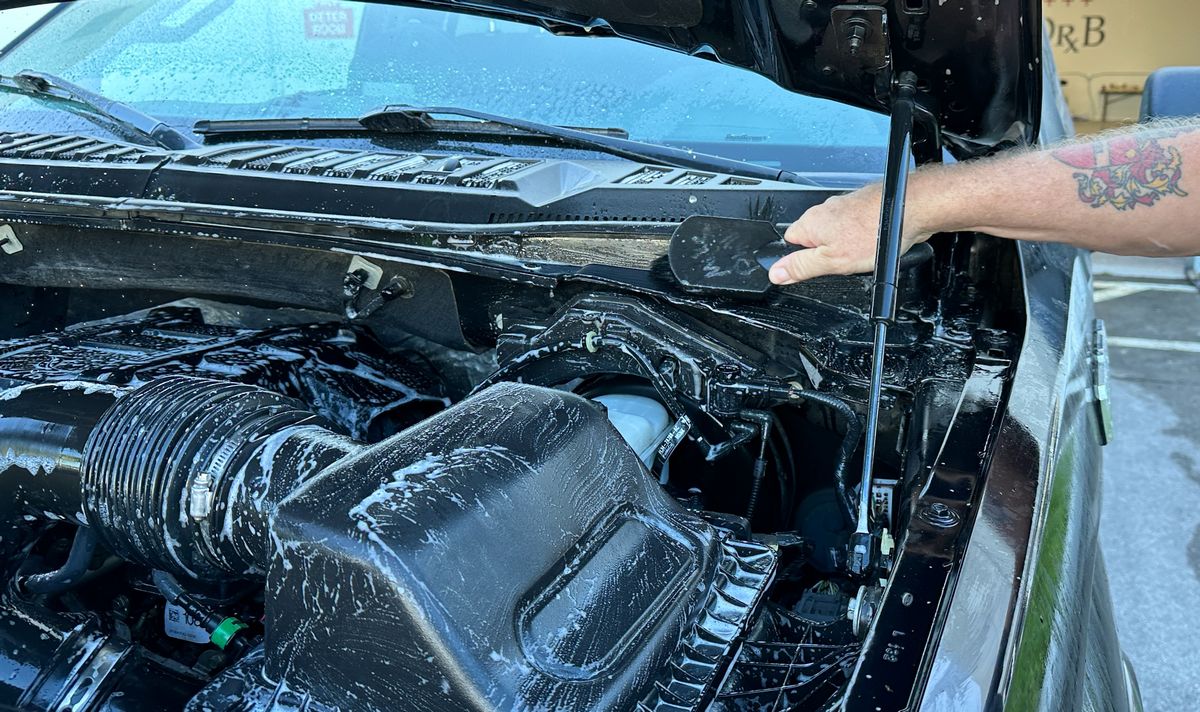
Rinse thoroughly
Here’s Meko rinsing all the dirt and oily grime off the engine and out of the engine compartment.
Air Dry
After rinsing the engine, it’s a good idea to used some form of compressed air to blow any standing water out off of the engine and out of the engine compartment. I share a couple of important techniques for this step but you have to take the class to learn them.
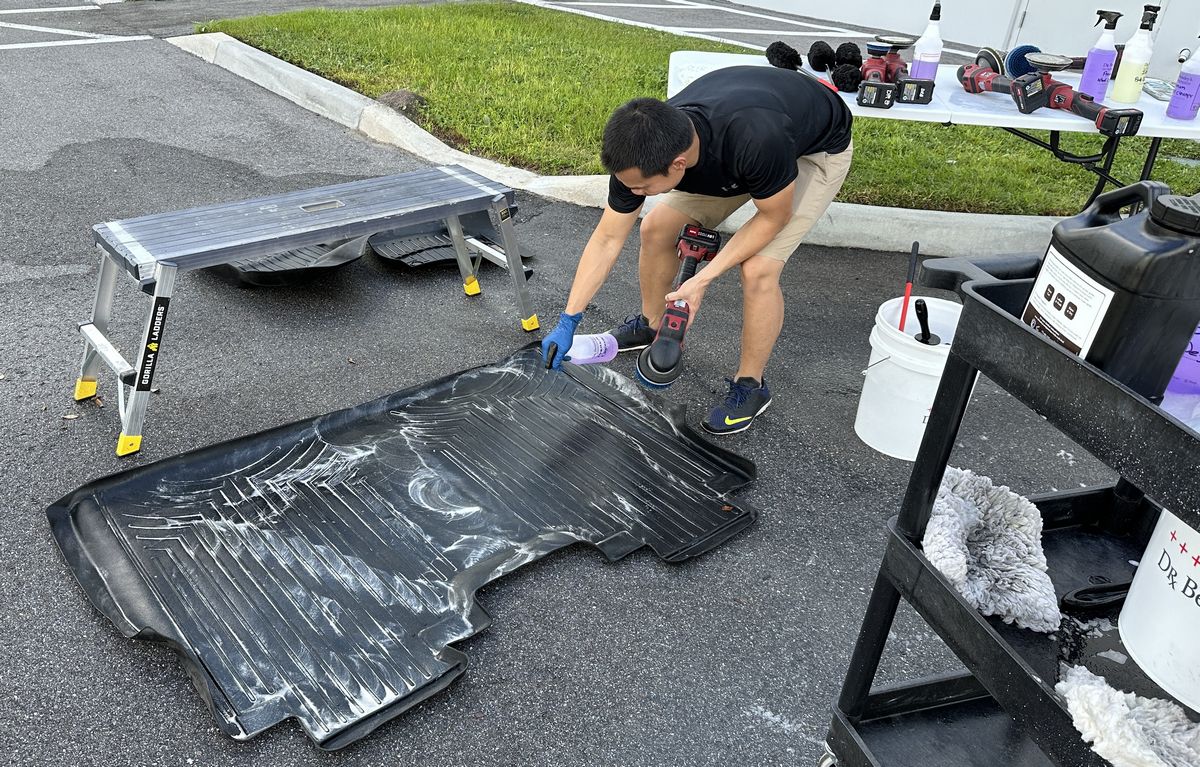
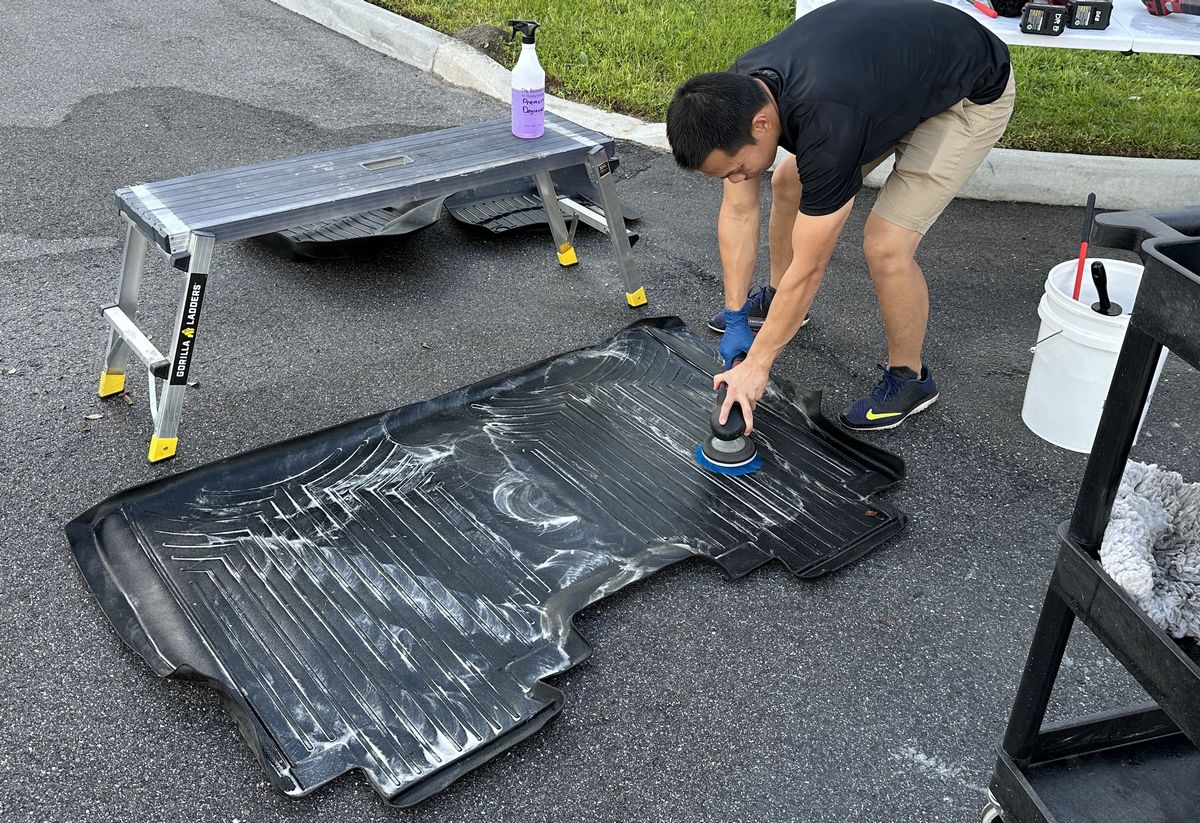
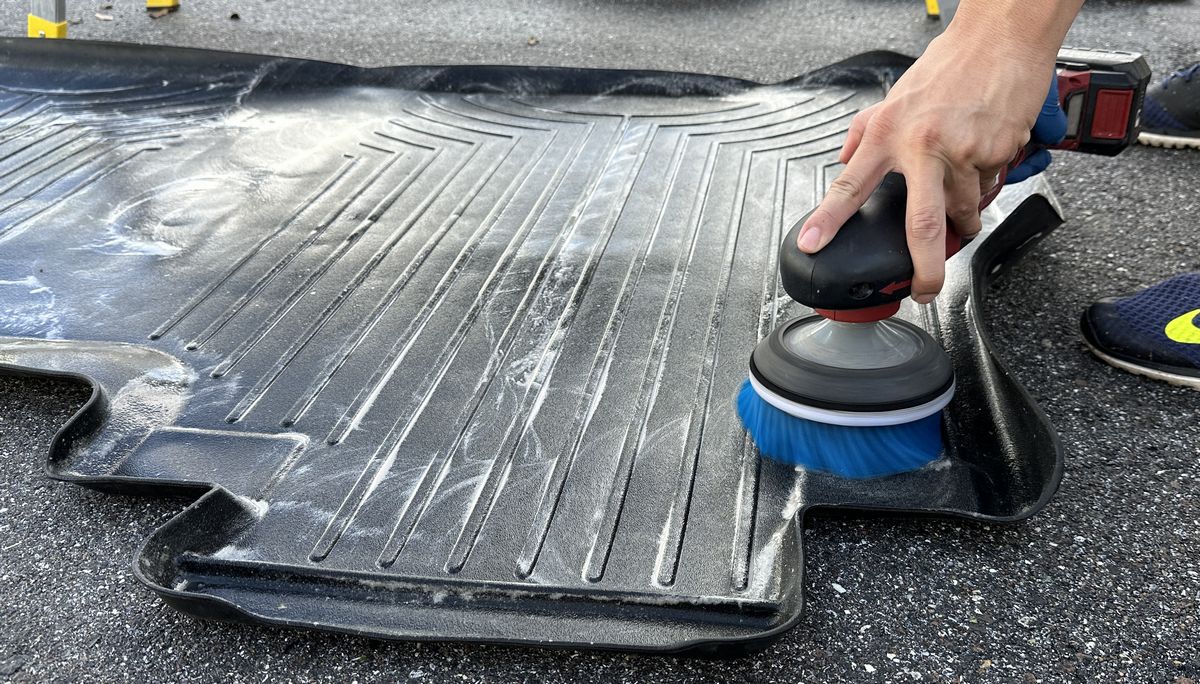
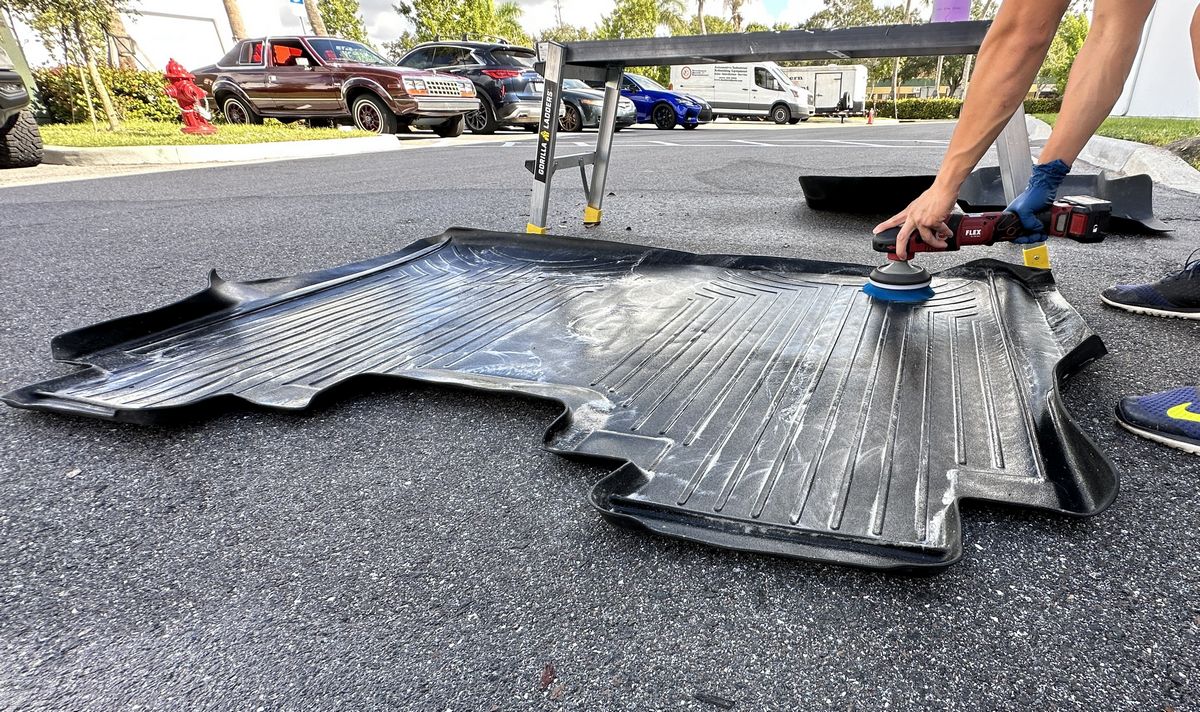
Remove mats – wash and dry
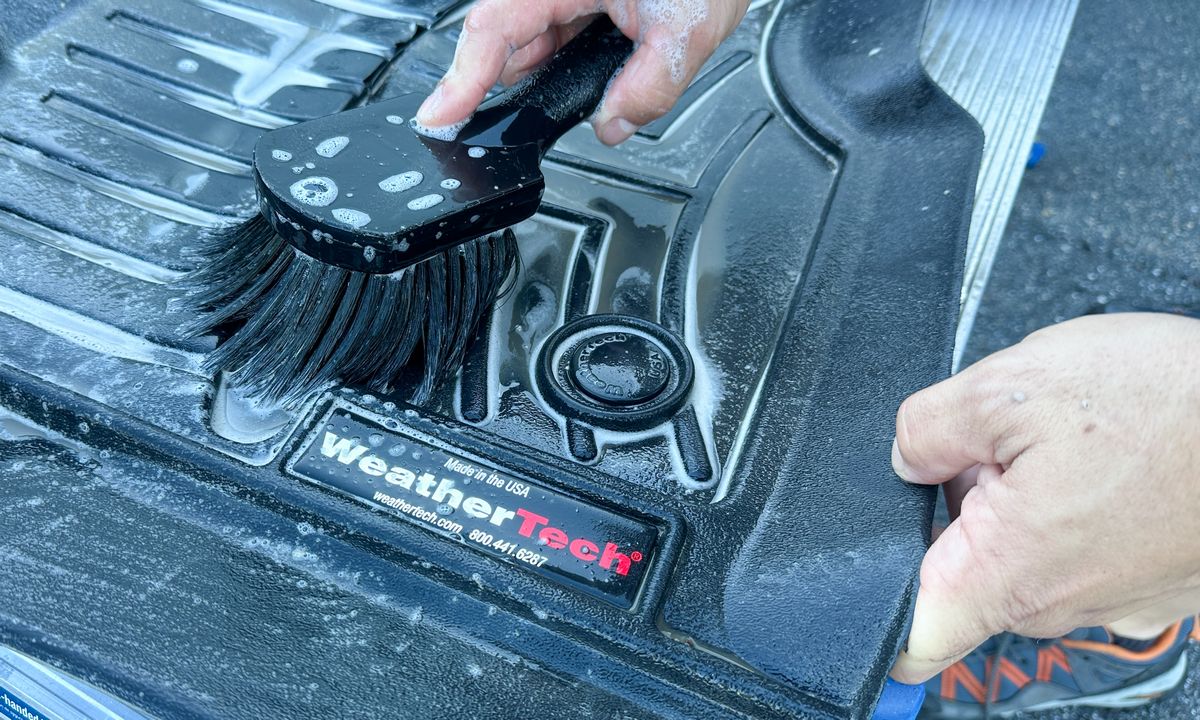
When you’re new to detailing, sometimes you forget to remove the mats and wash them during the wash process. Then later, after the detail you open the door of the vehicle and see dirty mats. Make it a Best Practice to always remove mats and wash them at the start of the Extreme Prep Wash.
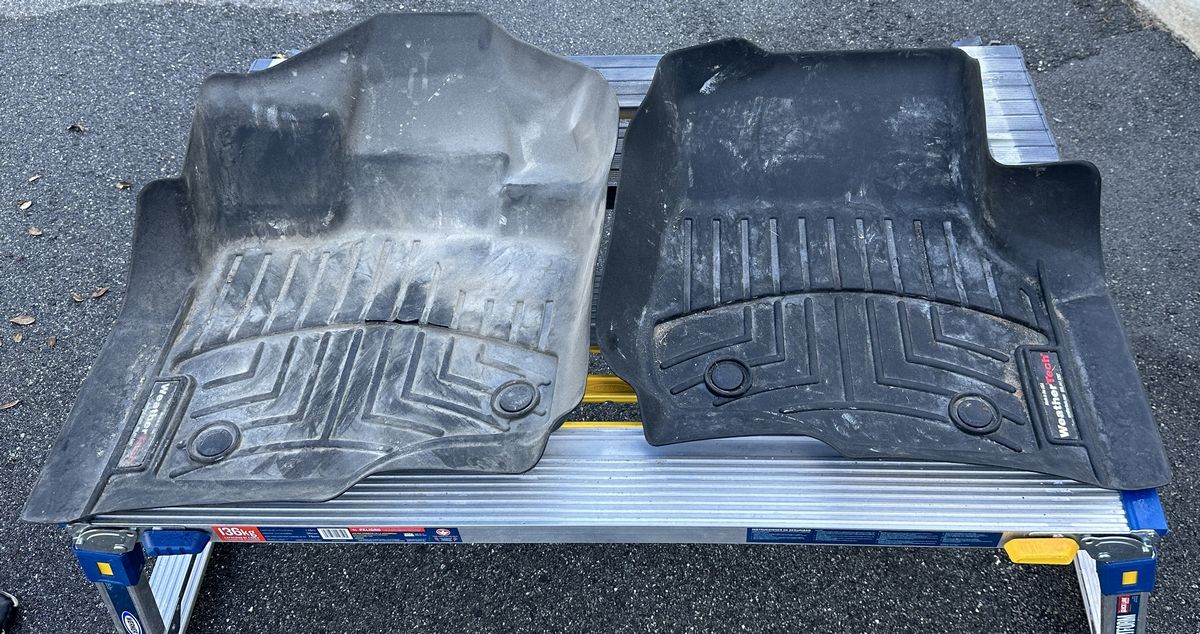
Tables or Work Platforms
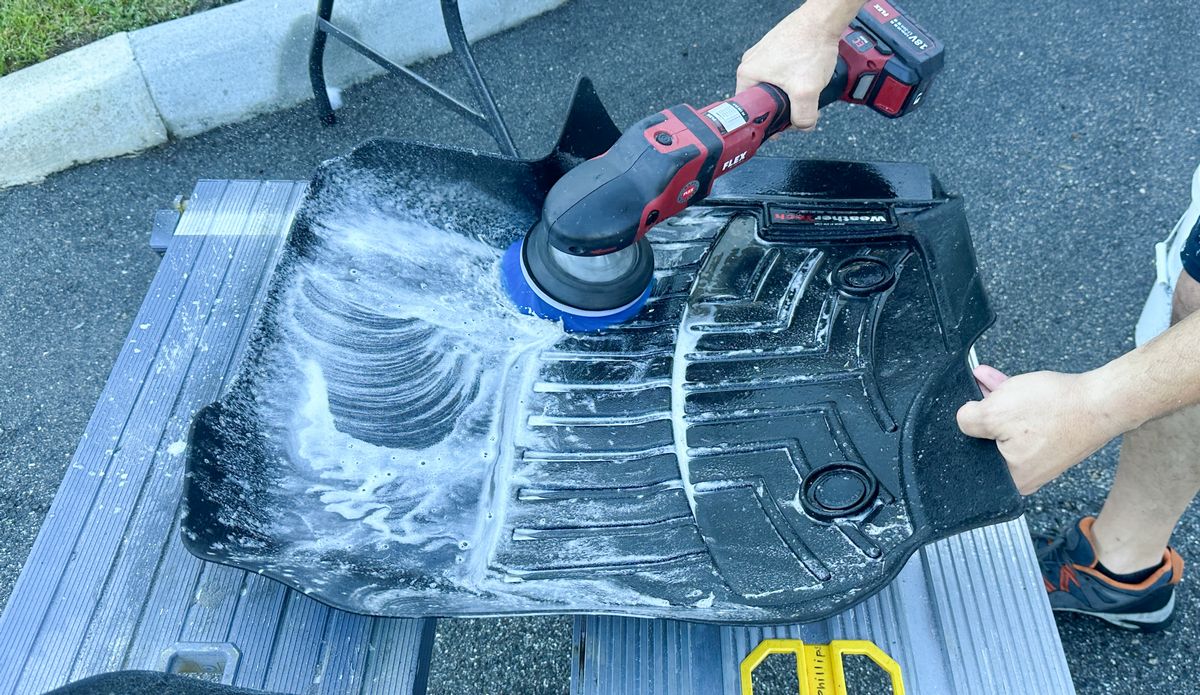
If you have work tables or even a couple of work platforms, these work great to get the mats off the ground to make cleaning them easier. In all our classes, we show machine scrubbing instead of hand scrubbing. Machine scrubbing does a better job and it’s faster.
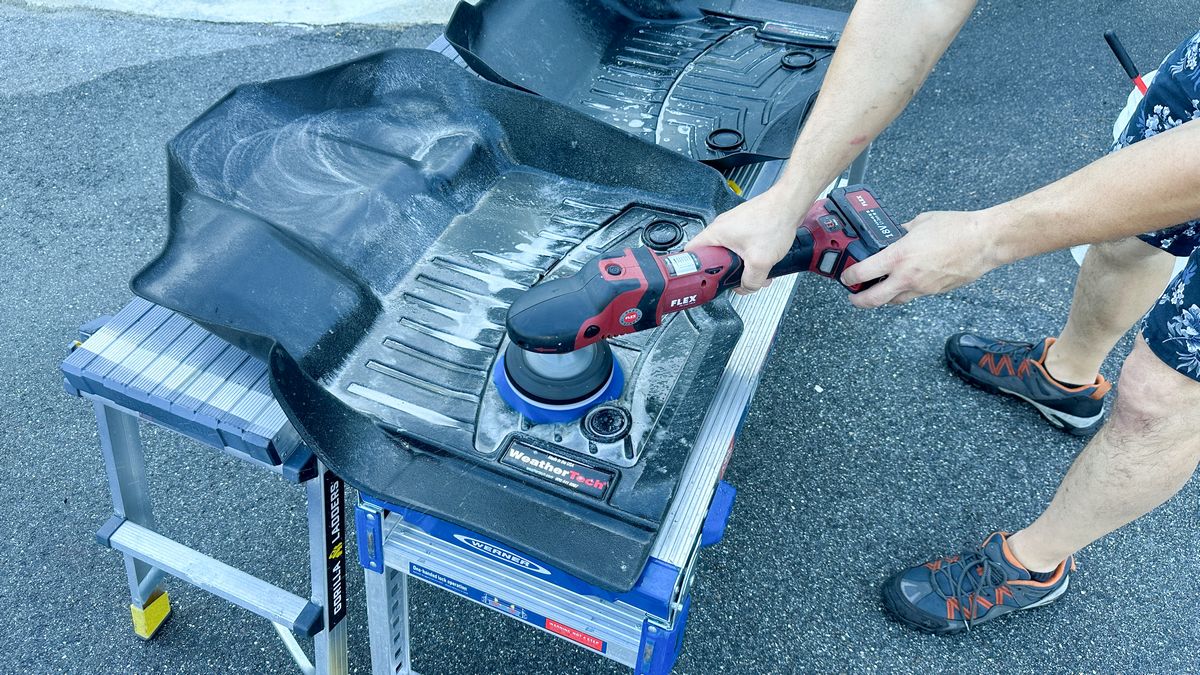
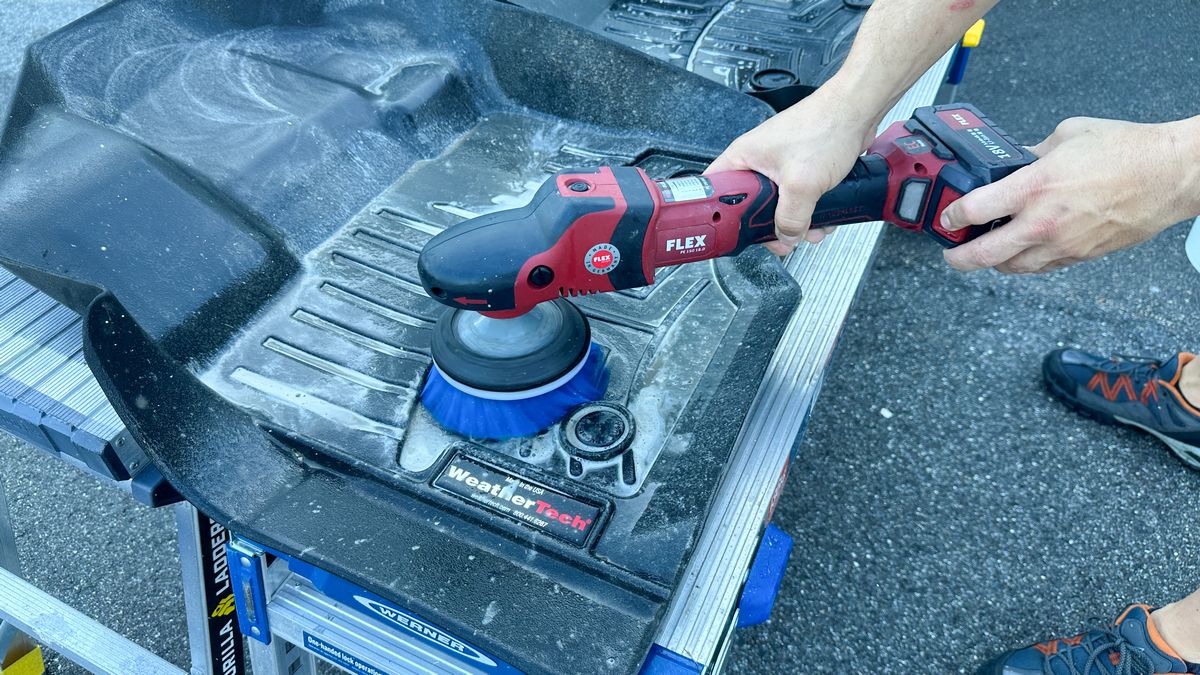
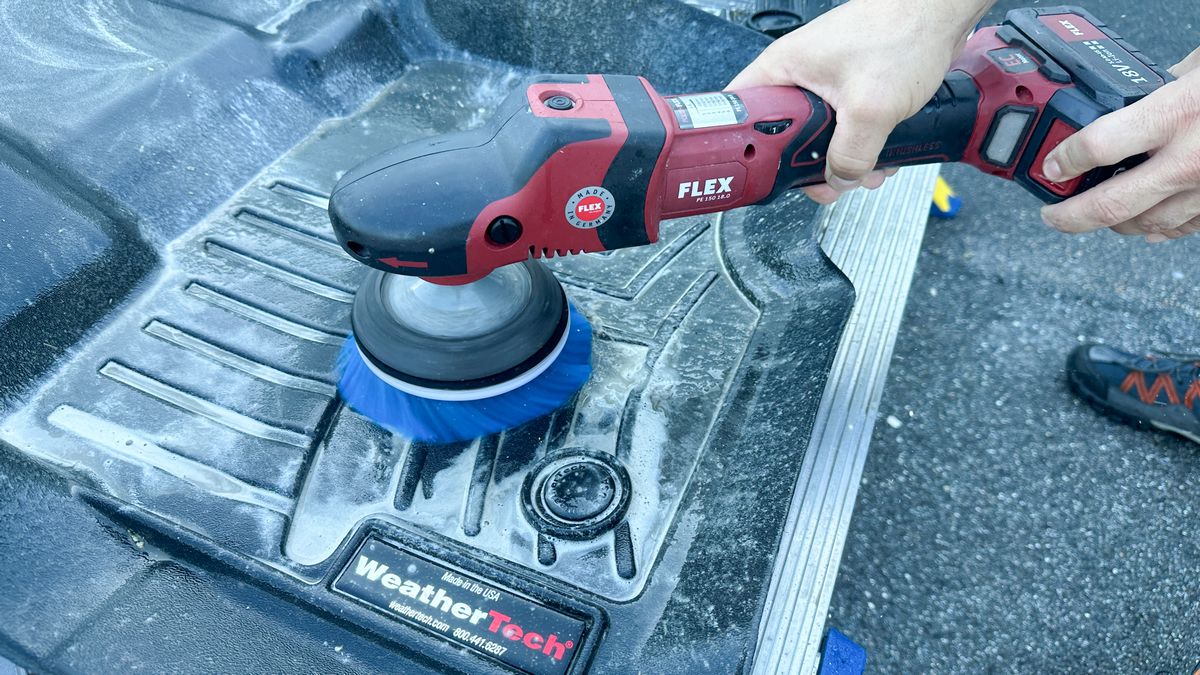
To clean these extremely soiled WeatherTech floor mats, we’re using the Dr. Beasley’s Premium Degreaser – for engine detailing and cleaning other excessively grimy areas and or components.
Someone borrowed one of the work platforms to reach the windshield, so Andy uses the ground table.
Clean wheels, tires and wheel wells
Most of our lives, anyone recognized as an authority in car care, when it comes to washing a vehicle, they will say,
Start at the top and work you’re way down.
Wrong. Anyone that’s washed and detailed more than a handful of cars in their lives understands that the order in which you wash the vehicle or the wheels and tires on the vehicle is relative, by this I mean, the car doesn’t care which area you wash and dry first and it makes no difference when it comes to the order EXCEPT as it related to avoiding water spots.
Water Spots in my opinion and experience are one of the worst types of defects to have to remove be they on glass, plastic, chrome or on or especially in paint. (There are 4 types of water spots and the type that are actual etchings IN the paint in most cases mean compounding the paint in order to remove them completely).
Here’s why a professional with experience will start with the wheels and tires first. It’s to avoid water spots on or in the paint. Let me explain.
It takes approximately 15 minutes to properly clean and rinse one wheel and tire. If you multiply this by 4 wheels and tires on a normal vehicles, this adds up to 1 hour to clean all 4 wheels and tires.
Now follow me,
If you wash the vehicle using the age-old advice of starting at the top and working your way down, after you have washed and rinsed the entire vehicle it will have standing water on it and drying, while you sit your but down in front of each wheel and tire to clean them for the next hour.
During this time, depending upon the ambient heat, sunlight heat, wind patterns and humidity, the standing water will be actively drying. Most water, be it city water or well water, is contaminated. Some water is so contaminated that as the water evaporates off the surface, the contaminants in the water make the water more and more corrosive. Then as this corrosive liquid is on the surface it can and does etch or eat into the clearcoat paint leaving a mark.
Light water marks might be able to be wash or wiped off, such as mineral deposits from hard water. But more severe water marks become imprint rings or crater etchings and this is where a portion of the clearcoat has been physically eaten away leaving these types of defects in the paint.
Like I said before, as a person that has been hired to do the paint correction to cars with imprint rings or crater etchings, these require machine polishing at a minimum and machine compounding in worst case scenarios to fully remove.
What about drying the car after washing and rinsing so there’s no standing water to cause water spots and then clean the wheels and tires?
This is a good and common question by people set on washing the car first but here are the issues with this approach. If you start with wheels and tires first, the ground where you will be sitting will be dry. Nuff said.
If you start with washing, rinsing and drying the vehicle first and then washing and rinsing the wheels, invariably you will get rinse water splatter on nearby panels thus causing you to waste time, energy and steps re-rinsing and re-drying these areas. You think it won’t happen because you’ll be careful but trust me, you’re going to end-up repeating steps.
Again – the order in which you wash the vehicle’s body panels versus the wheels and tires is relative, it just doesn’t matter to the car. It’s all about working smarter instead of harder.
Bonus reason
There’s another good reason to wash the wheels and tires first and then wash the car starting at the top and working your way down, and this is the cause and effect of gravity.
When you do a thorough job of washing wheels, this includes using products specifically formulated to remove brake dust and oily traffic film. After scrubbing the wheels and tires with brushes, next you rinse and at some point gather your supplies and move onto the next wheel and tire. While you’re cleaning the other wheels and tires, gravity take over and any loosened brake dust and traffic film plus the wheel and tire cleaners, will flow downward and pool in lower areas, often times behind the face of the wheel spokes, in the barrel and around the brakes. By washing the wheels and tires first, you’ll have multiple chances to blast the wheels and tires again as you wash the vehicle from the top down thus more thoroughly flushing these substances completely off the wheels and tires. Genius.
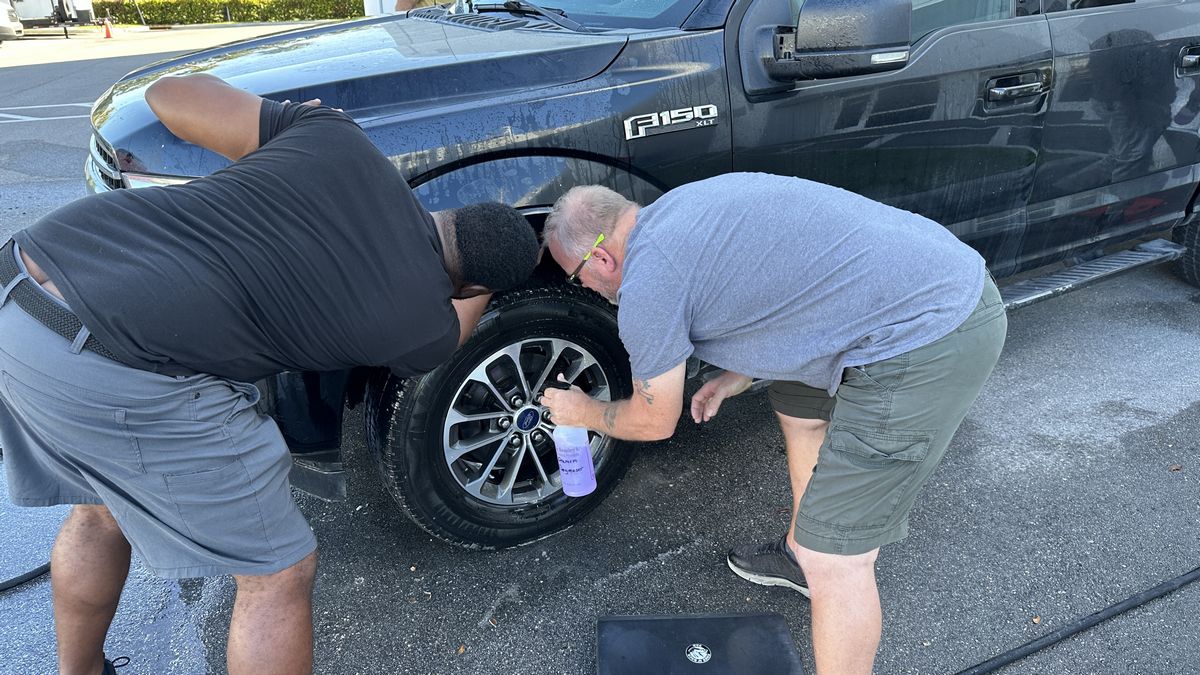
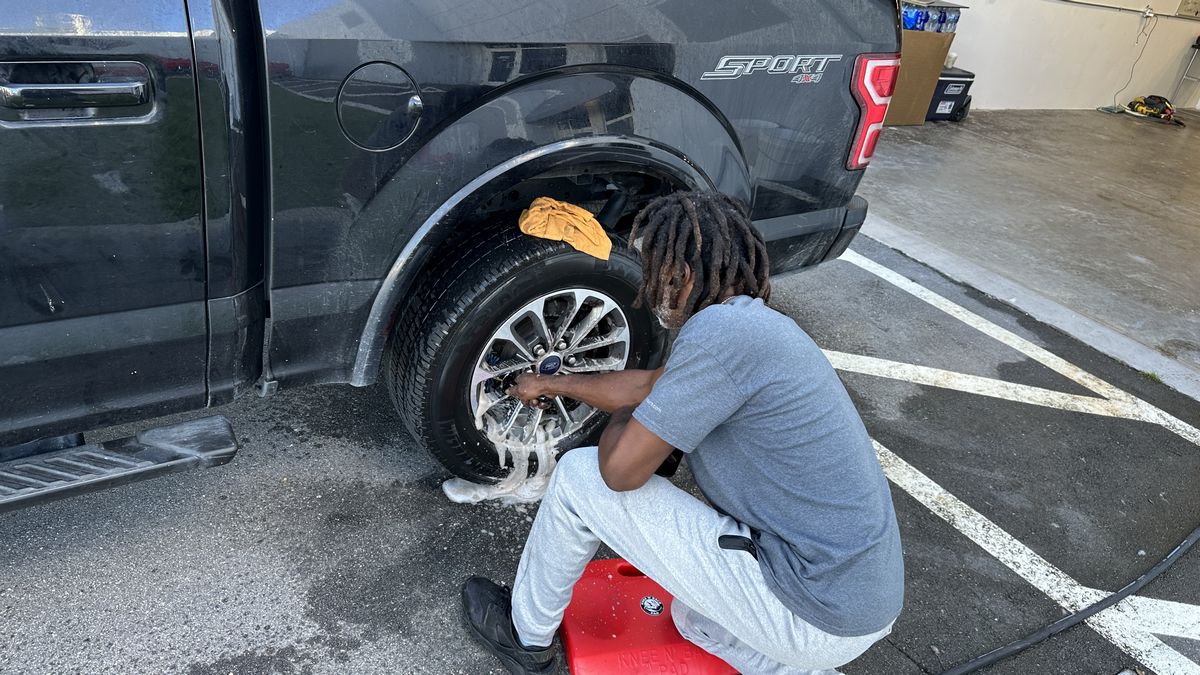
Here’s Daniel using Dr. Beasley’s Intensive Brake Dust Remover on the front wheels. Normally the front wheels will have a higher concentration of brake dust and traffic film, so the Dr. Beasley’s Intensive Brake Dust Remover is a great choice.
If the front and back wheels are not to bad, then Dr. Beasley’s Premium Wheel Cleanser will easily tackle the job.
Machine scrubbing tires
Once you machine scrub tires you’ll never want to go back to hand scrubbing.
Here’s Jhonathan machine scrubbing tires using the cordless FLEX PE-150 with Dr. Beasley’s Premium Degreaser
Bennette Knee & Back Cushions
Considering if you’re by yourself washing a car or truck, you’re going to spend around 15 minutes minimum cleaning one wheel, tire and wheel well. Multiplied by 4 whees and tires equals 1 hour. It’s a tick on the spendy side, but the Bennette Knee & Back Cushion provides plenty of cushion to sit on or kneel on plus it will keep your pants dry when the ground all around you is wet. The only place I know to get one of these is on Amazon – Bennette Design Group Knee and Back Cushions
Machine scrub any plastic cladding
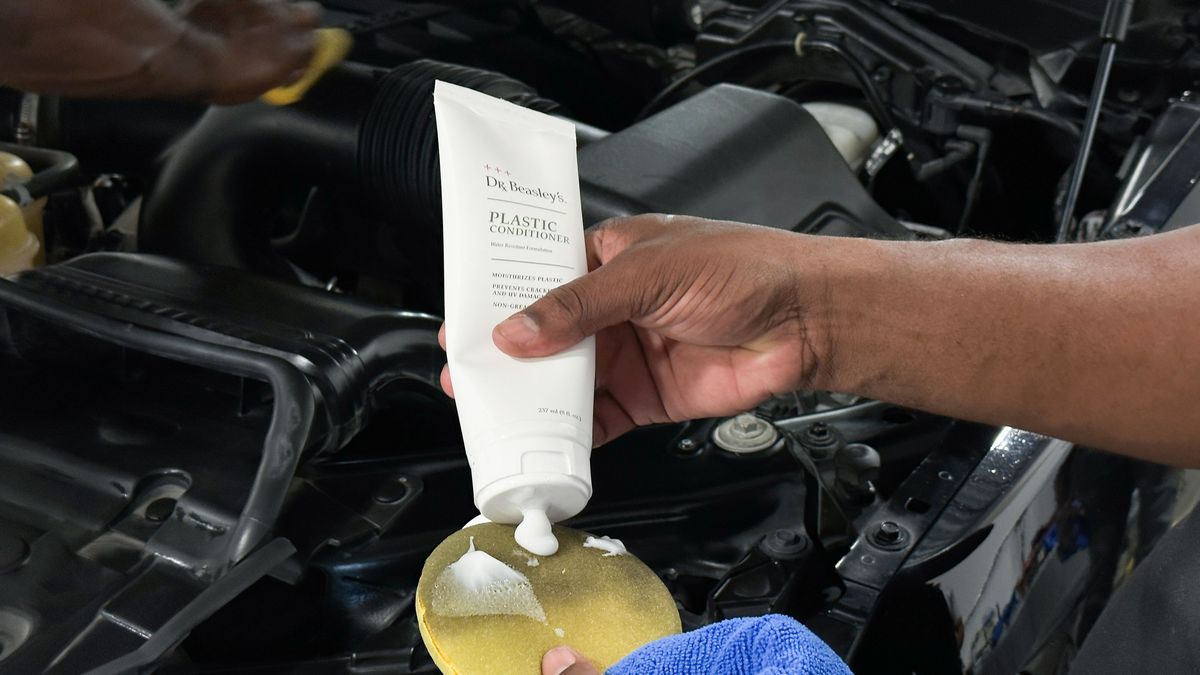
Lots of modern cars, trucks, vans and SUVs have plastic cladding on the exterior. This plastic oxidizes and fades over time. Dr. Beasley’s has both a Plastic Conditioner and a Plastic Trim Coating Kit that you can use to restore and protect plastic cladding and other types of plastic trim. The key is getting this material super clean and the best way is to machine scrub with Dr. Beasley’s Premium Degreaser during the Extreme Prep Wash.
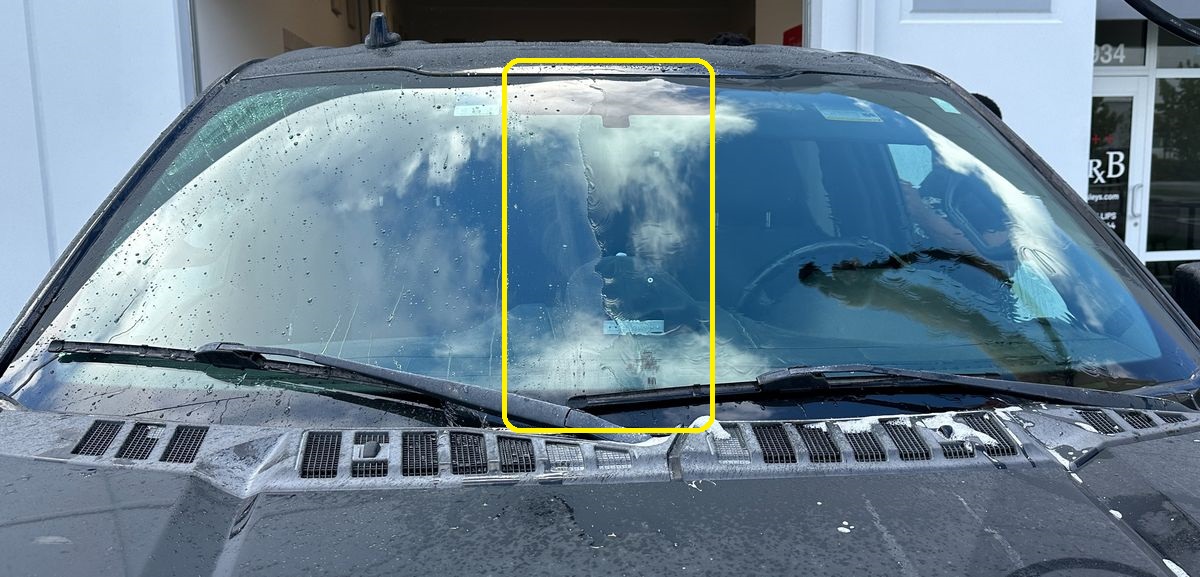
Topical Glass Polishing
There are 2 types of glass polishing, topical and sub-surface glass polishing, and both are messy. The good news is the different products used to do both types while messy, will easily wash off when you wash the vehicle. If you do either type of glass polishing AFTER you wash and dry the car – now you get to re-clean all the major body panels a second time and thus you’re wasting time, energy and steps. Work smarter instead of harder and do any glass polishing before you wash the vehicle.

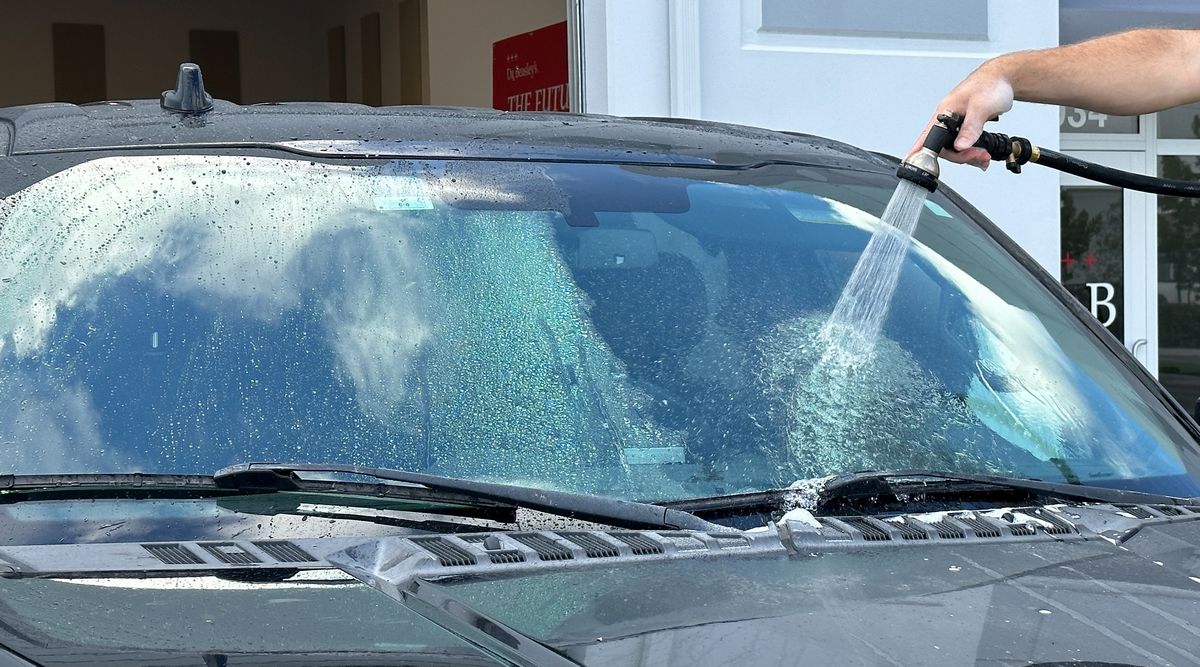
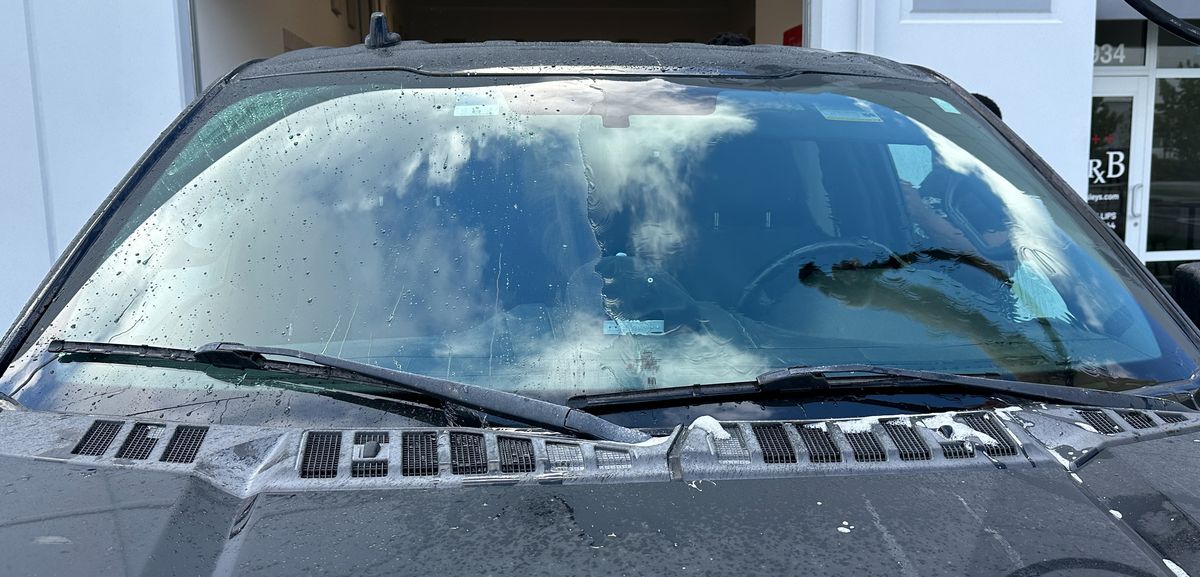
Now see the difference?
The water reacts very differently on the glass that has been machine polished.


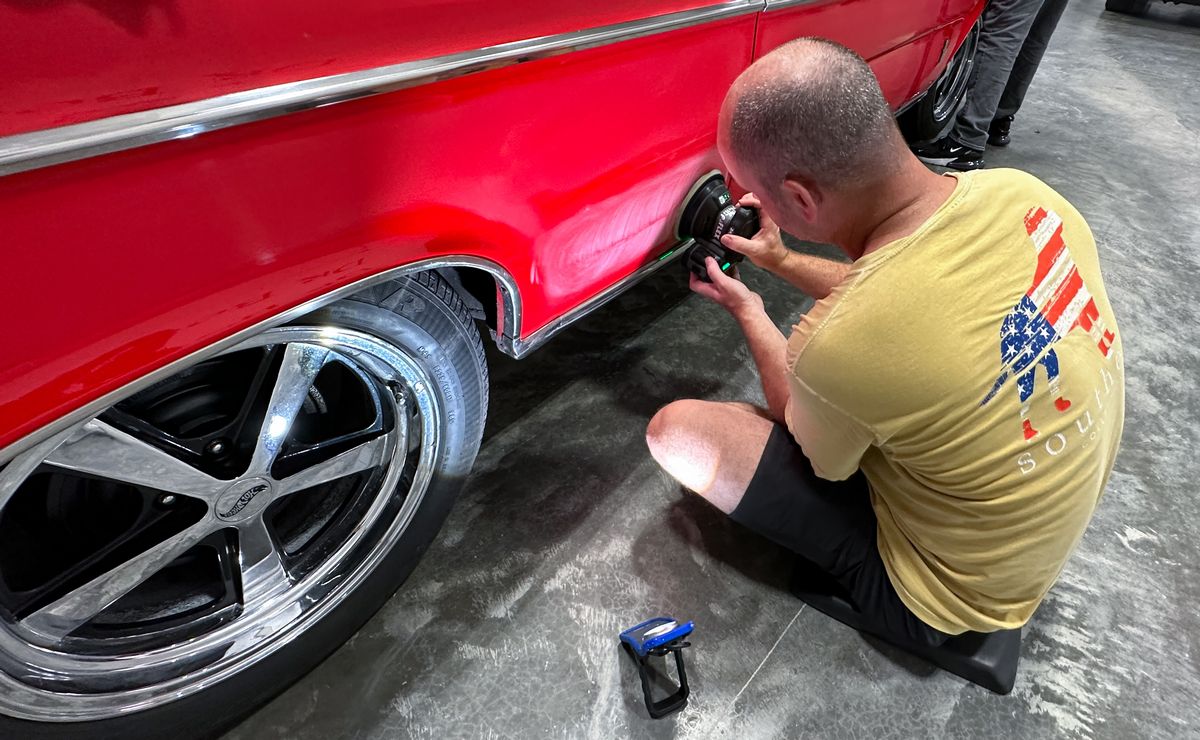
And of course, after showing this visual way showing the water characteristics on the polished and unpolished sides of the windshield, we did go ahead and polish the glass on the passenger side. Here’s Jhonathan taking on the job.
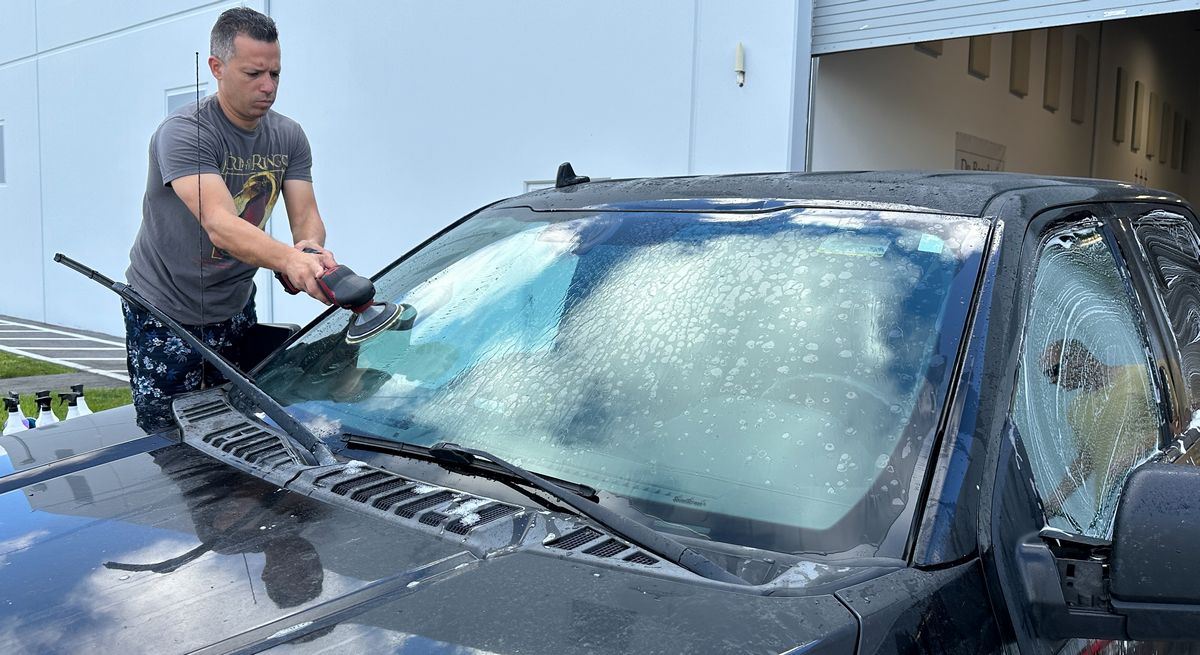

After machine topical glass polishing – then simply wash the windshield to was away any glass polishing residue. This saves you time, steps, energy, towels, etc., by doing this during the wet work versus washing and drying the vehicle and then polishing the glass and then having to remove the residue. Another example of working smarter instead of harder. This is actually a part of the next step – Full Body Wash.
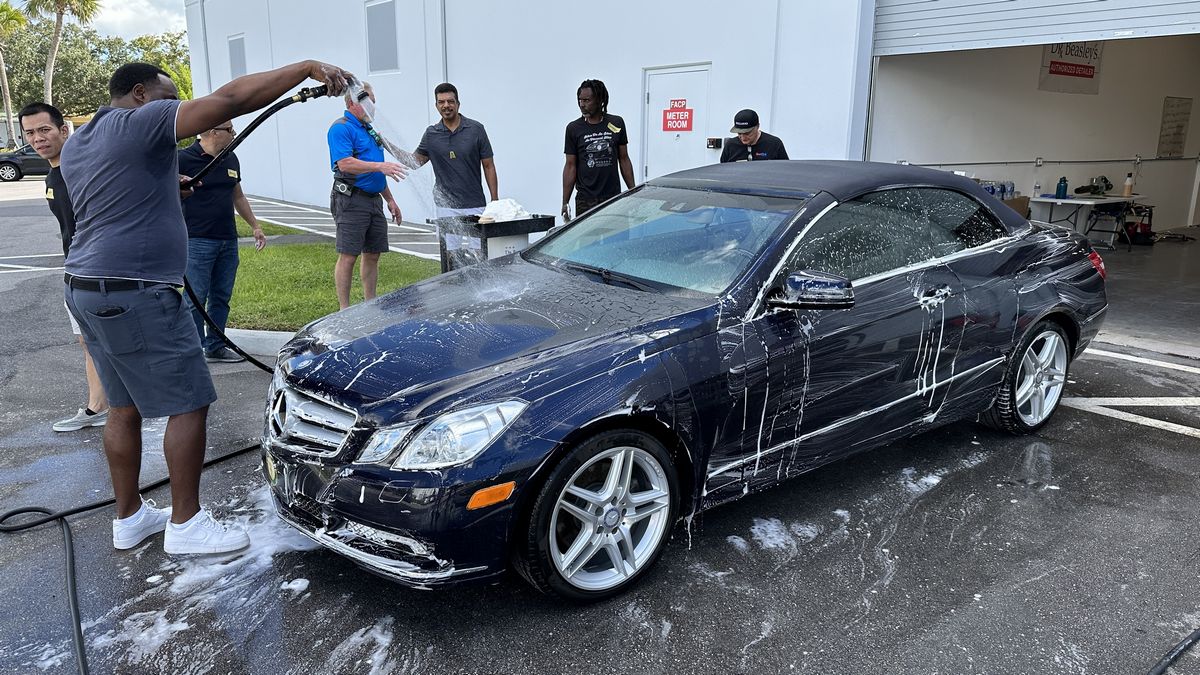
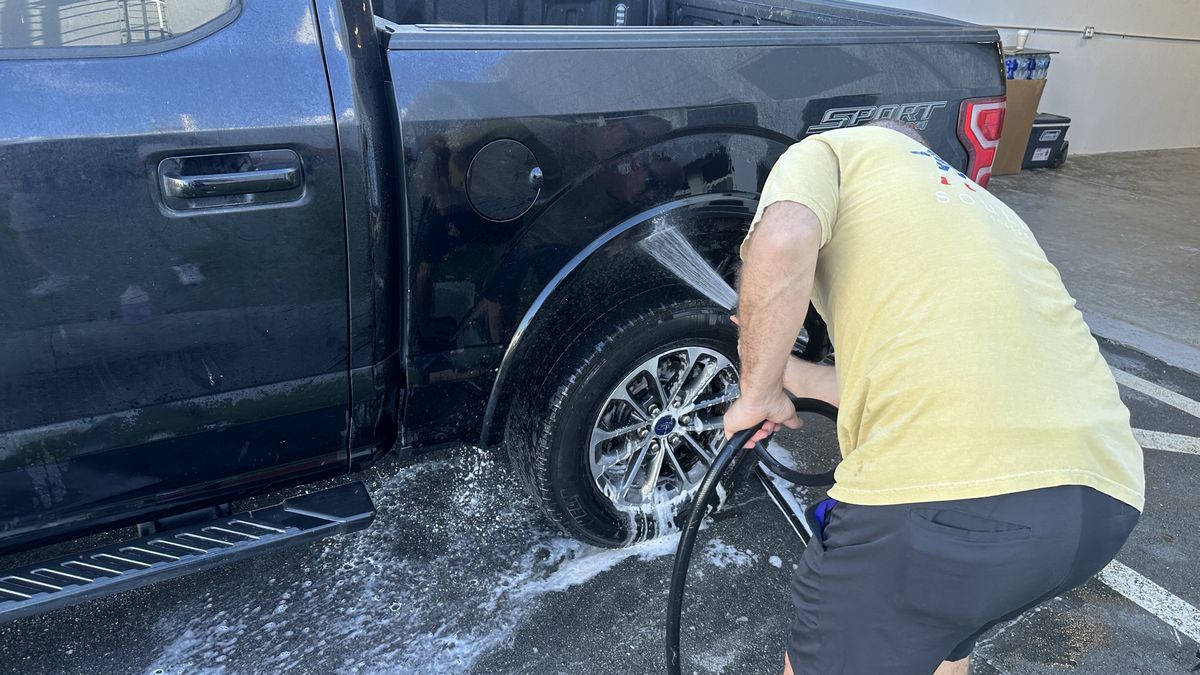
Full body wash
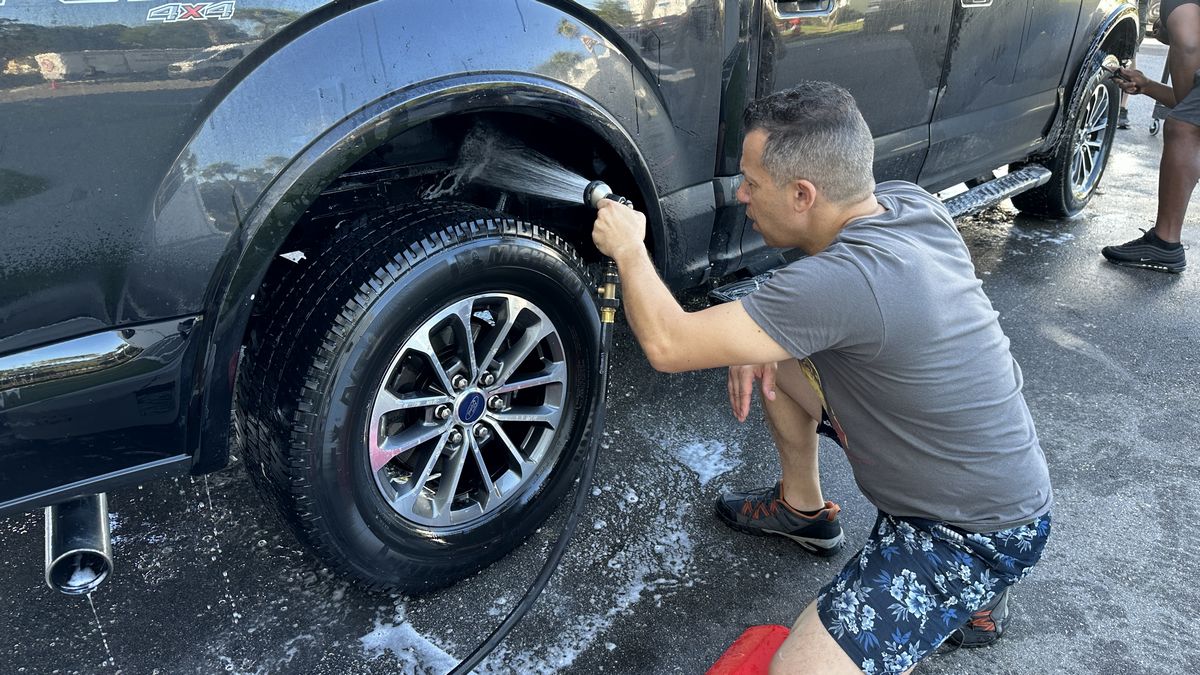
After wheels and tires, cleaning any plastic cladding, doing topical glass polishing, now it’s time to wash the entire vehicle starting at the top and working your way down and around the vehicle.
Washing door, hood, trunk and hatchback jambs
Some people like to wash and clean all the jambs during the Extreme Prep Wash process. This too will save you time, steps, products and towels. The key is to be careful not to introduce water into the interior of the vehicle when rinsing these areas. The other option is to clean and dry these areas after washing and the final rinse. For this class session, we’re going over washing jambs as a part of the wet work.


Here’s Daniel carefully rinsing all the car wash soap and all the dirt that’s been loosened off the jambs.
Be sure to wash and clean forgotten areas – This is on the SV Test for the IDA.
Mechanical Decontamination
When it comes to doing a prep wash, the vehicle in question is normally neglected and as such will have some form of contamination that is bonded to the paint and glass that will not wash off during the washing process. As an option, once the car is washed and fully and thoroughly rinsed, you can use a clay bar or a clay bar substitute like a clay towel or clay mitt, to remove the decontamination while the car is wet. This saves you 2 steps and is the technique I use and recommend to most people.
IMPORTANT – You must thoroughly rinse the vehicle after washing and before using any type of clay product on the paint. The reason why is so you don’t grind loosened dirt into the paint with your clay tool.
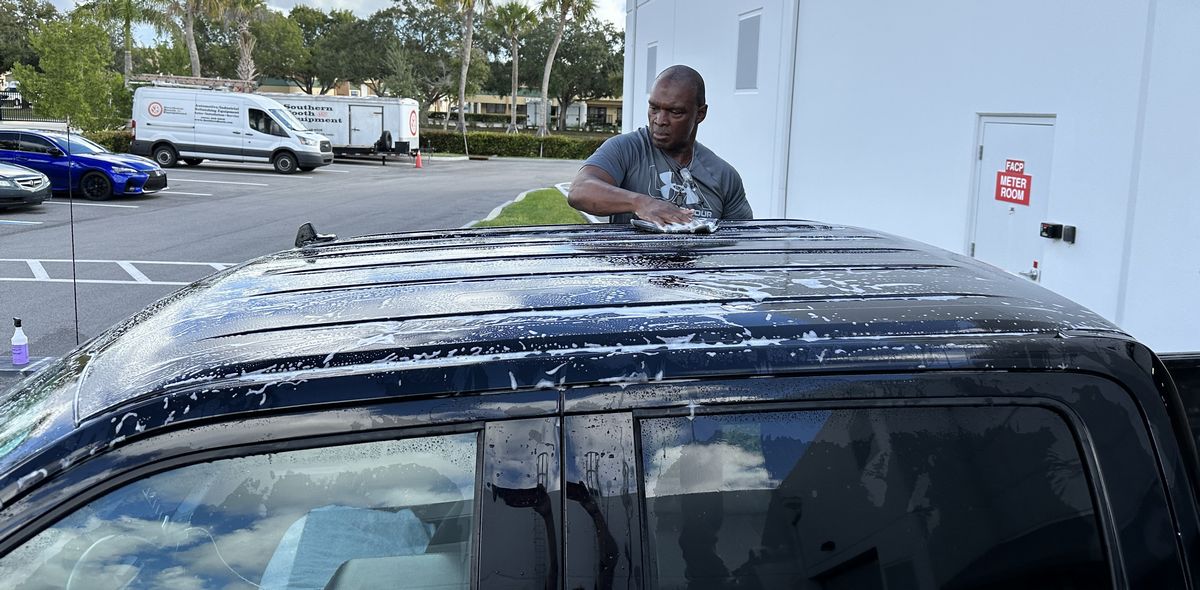
Here’s Godfrey using a clay mitt on the roof of the Ford F150 Pickup Truck
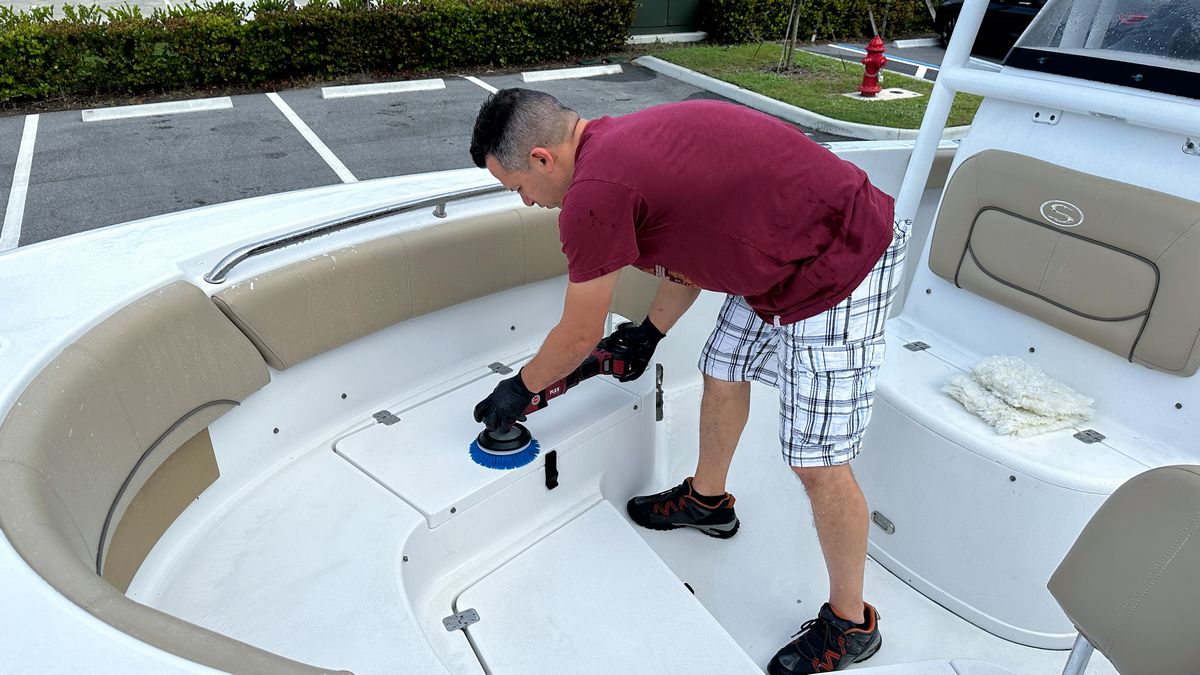
Here’s Derick claying the hood…
David lends a hand…
So does Meko…
Even Russel gets into action!
Here’s Meko and Godfrey mechanically decontaminating the tailgate.
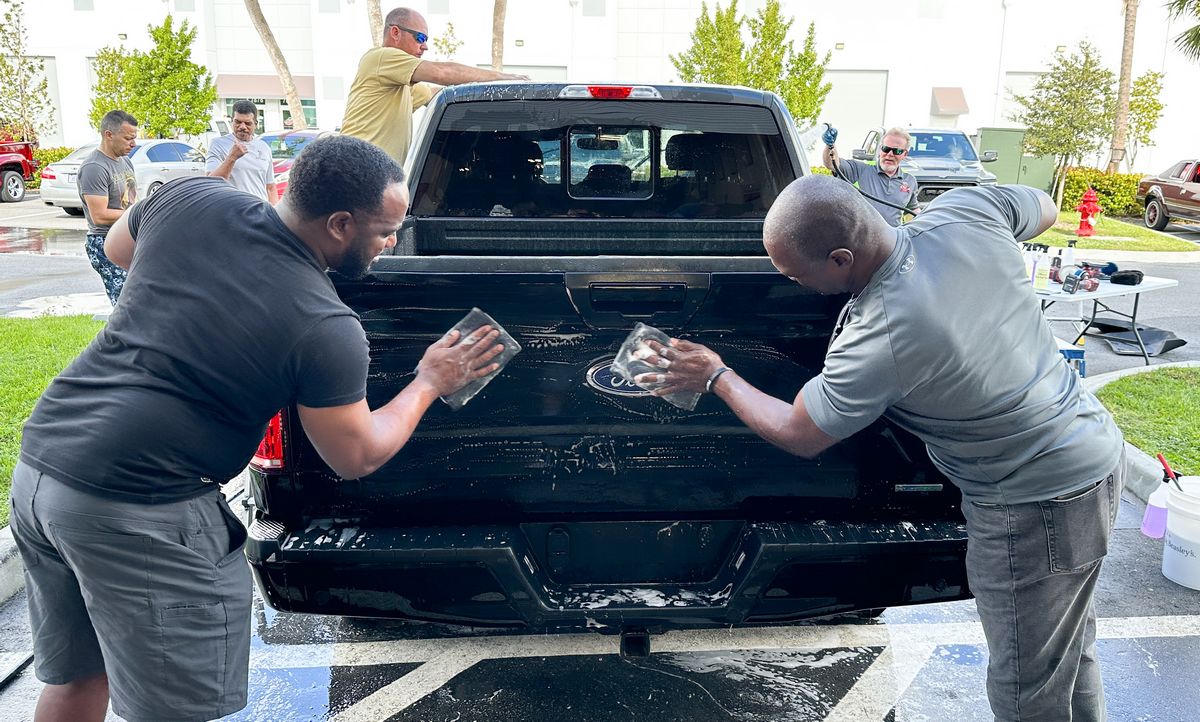
After the mechanical decontamination step, give the vehicle one last final rinse. When done correctly, thoroughly and in the correct order you get the vehicle surgically clean, perfect for all the next steps in the shortest amount of time.
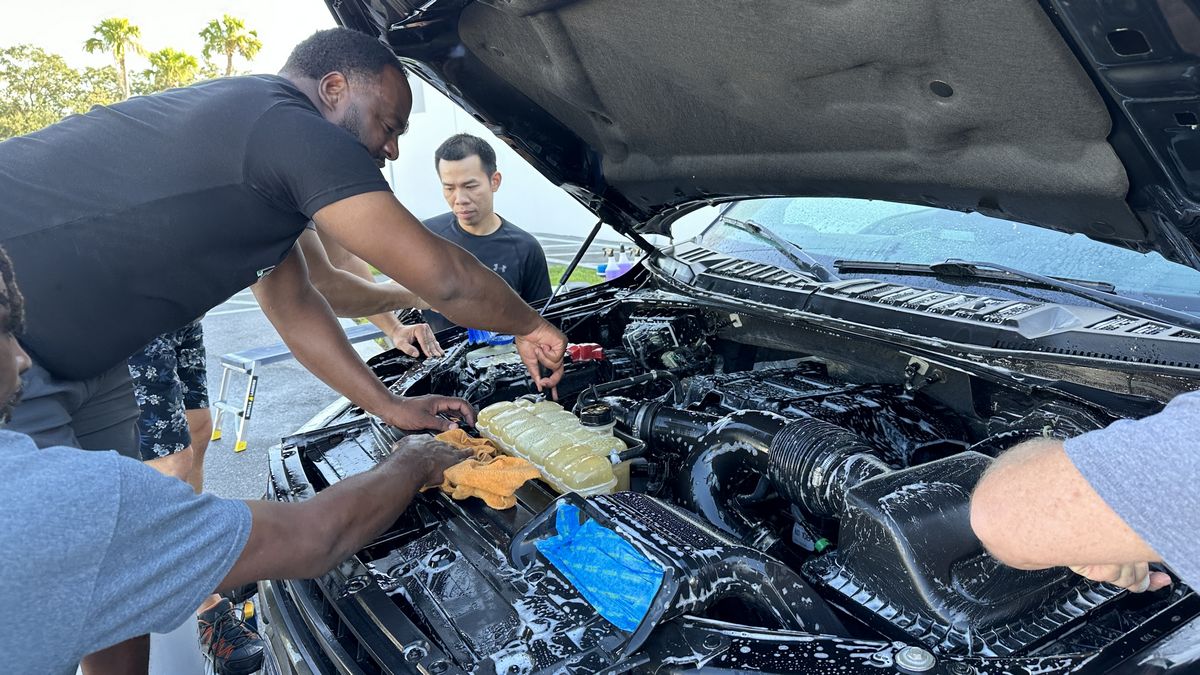
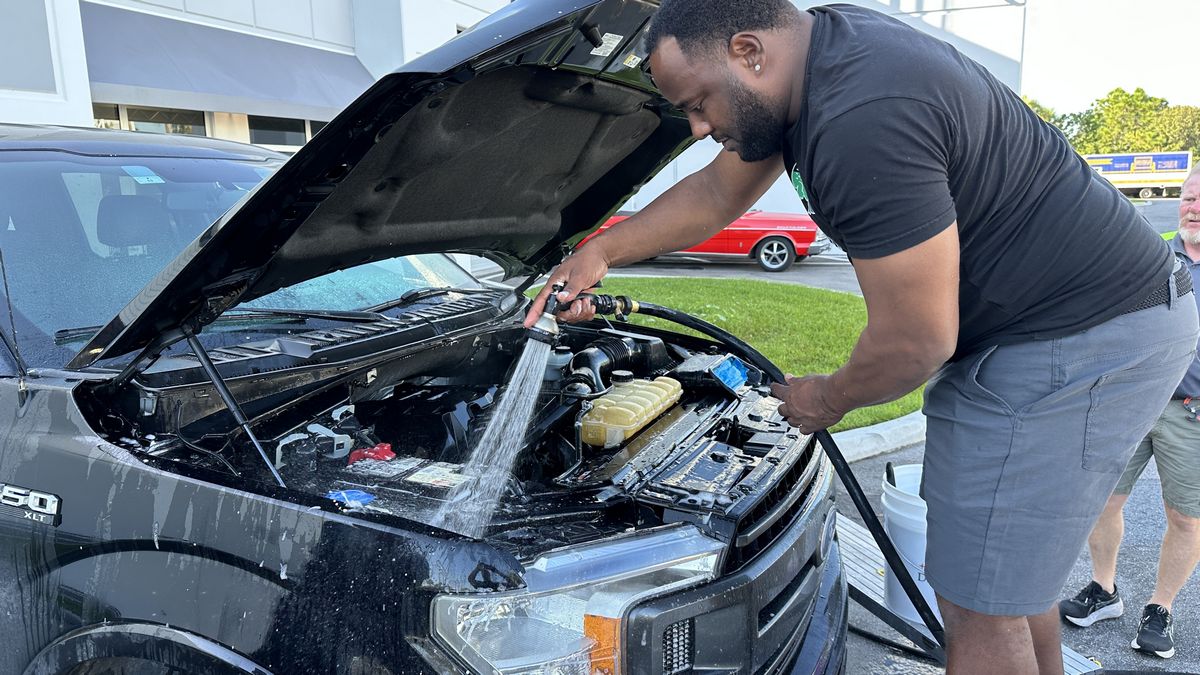
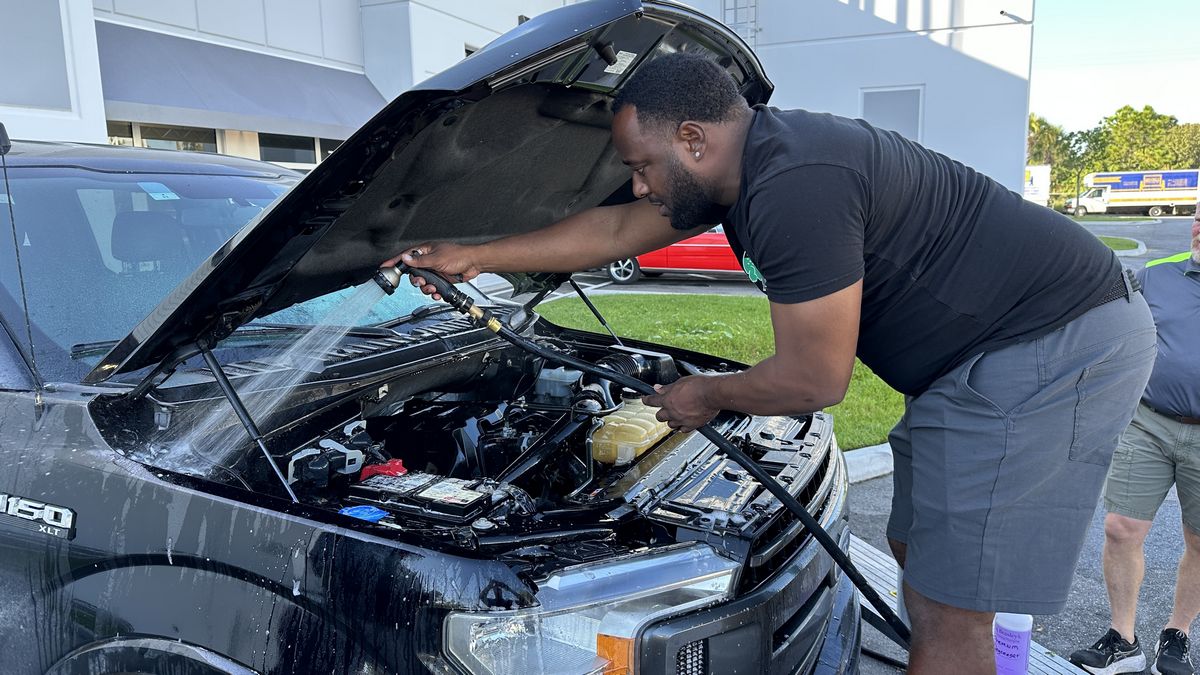
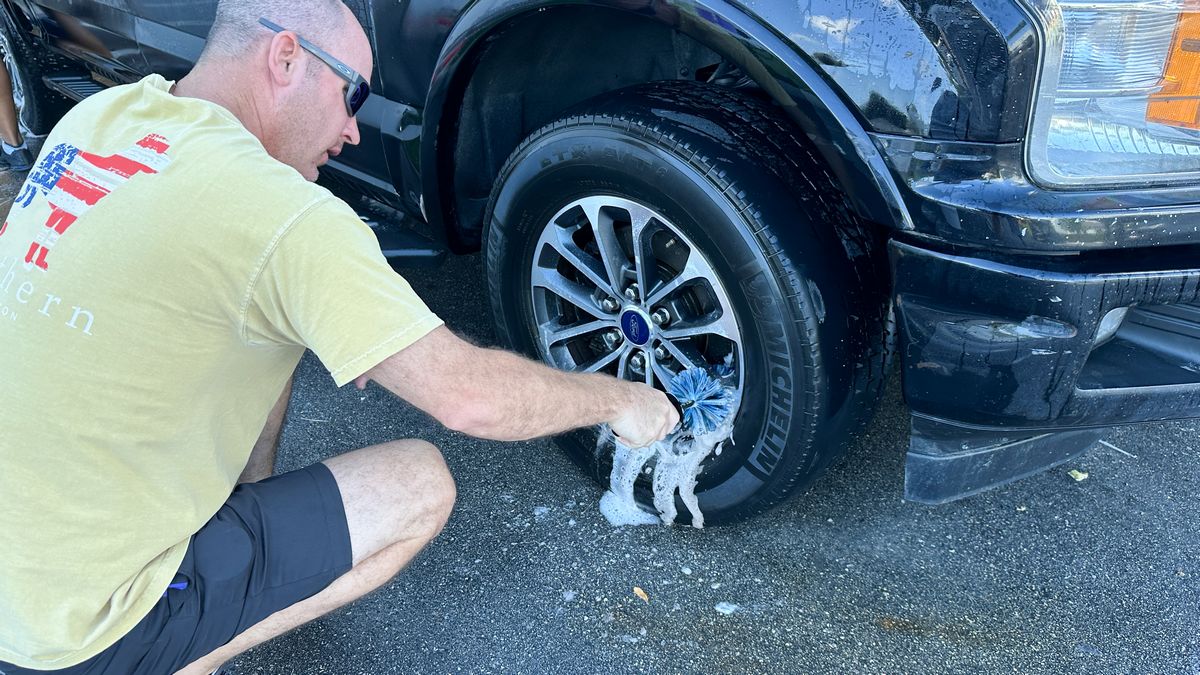
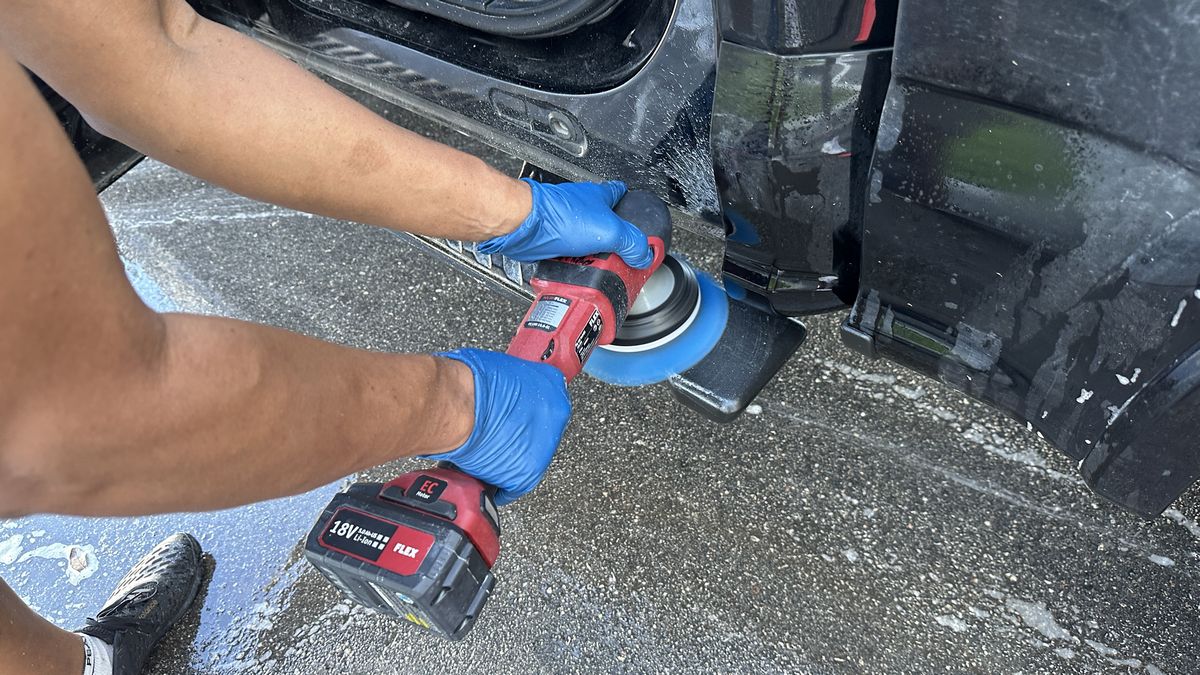
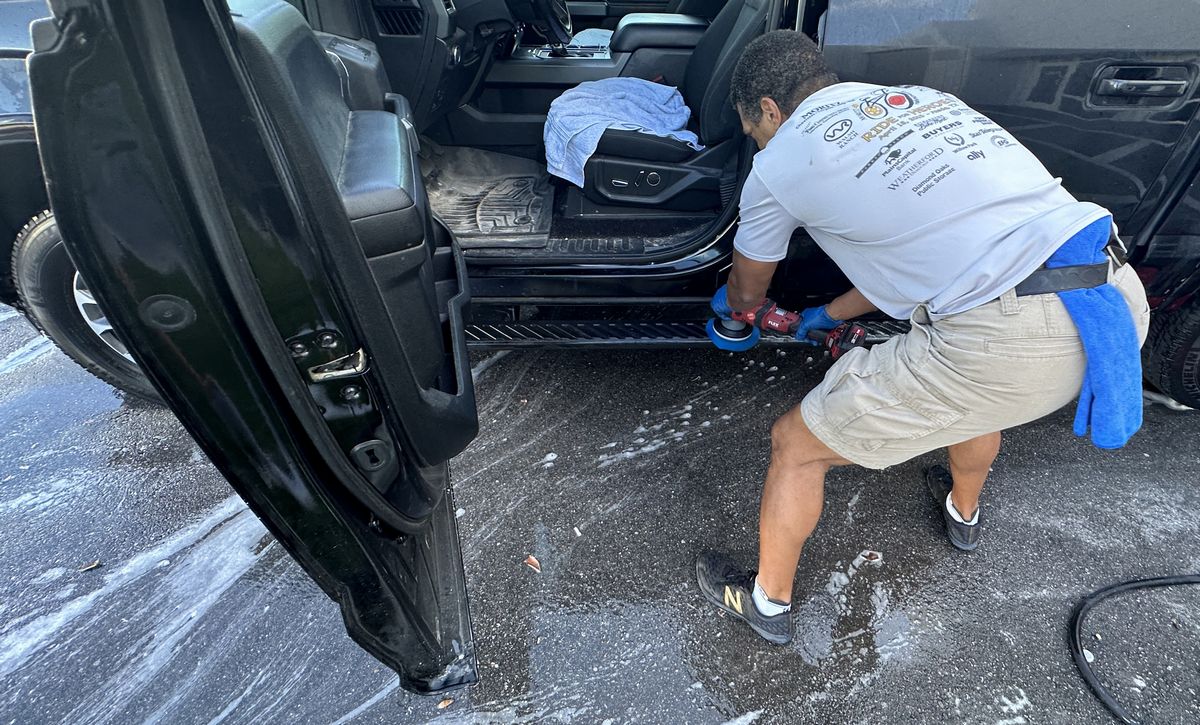
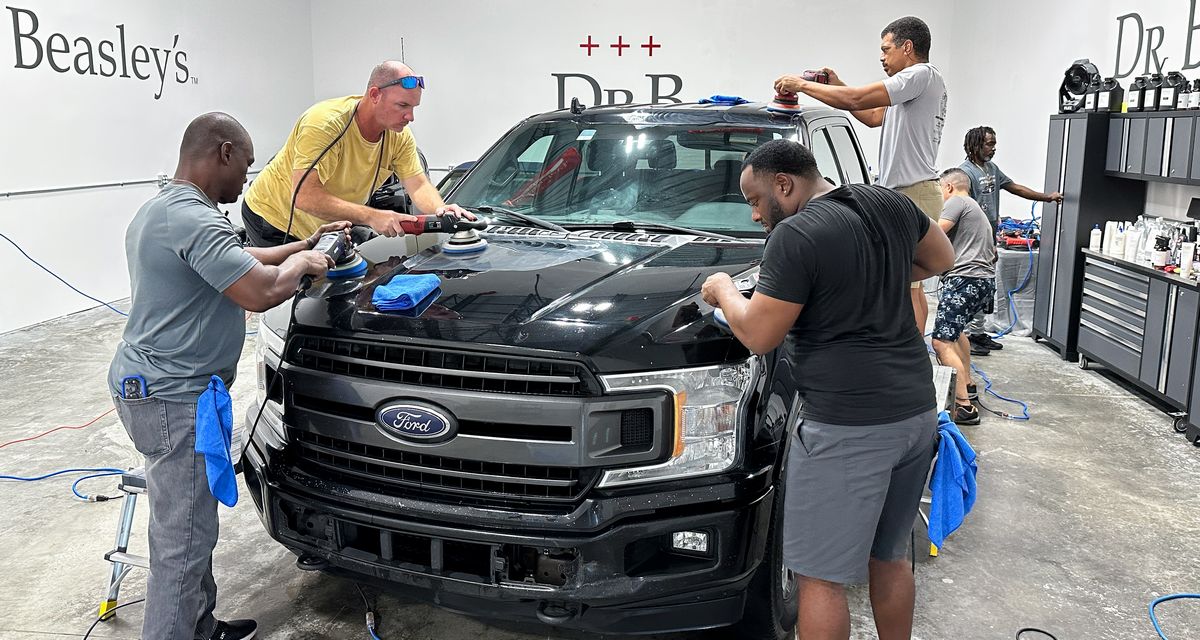
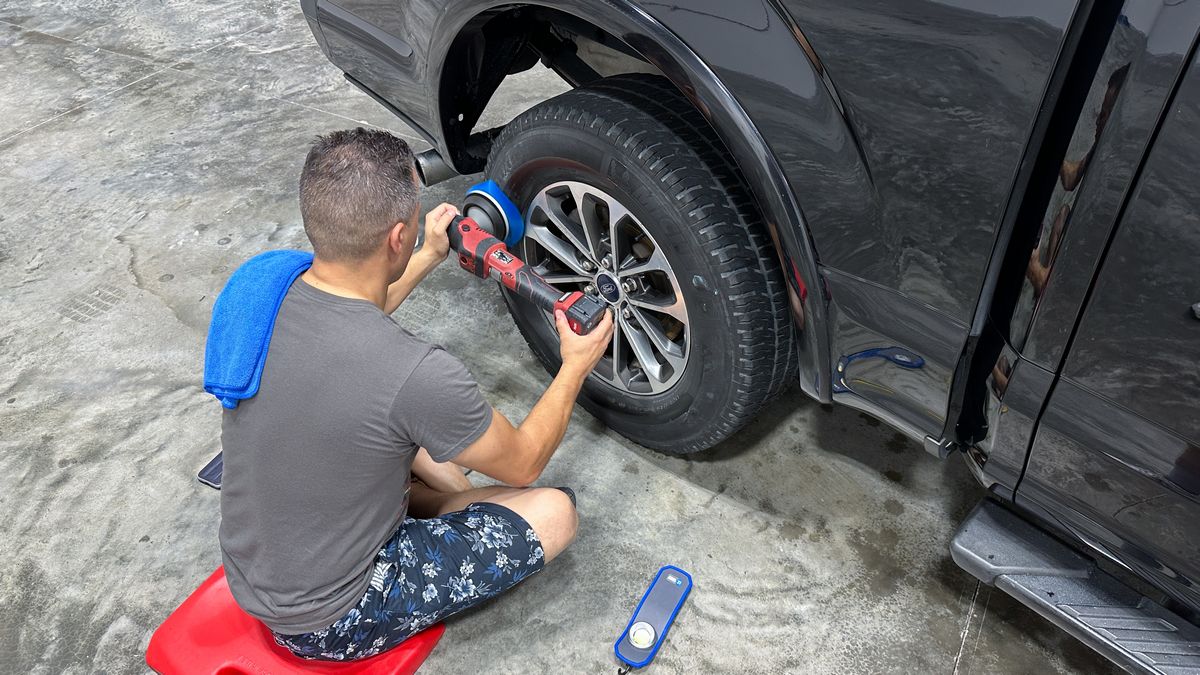
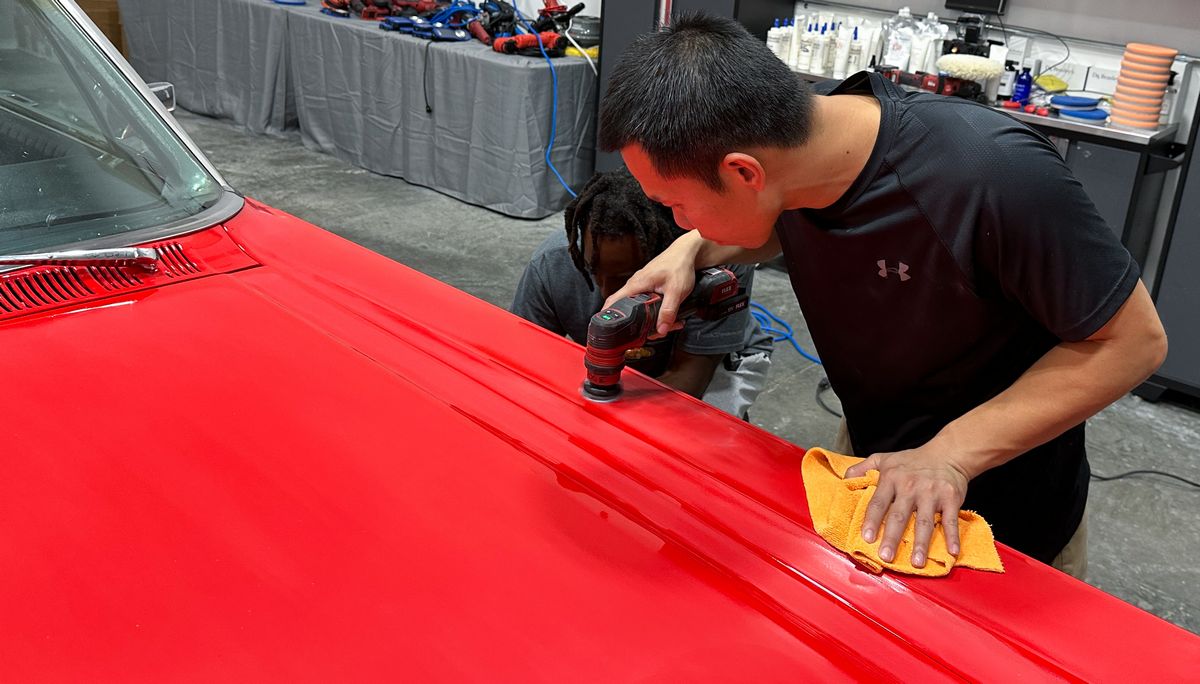
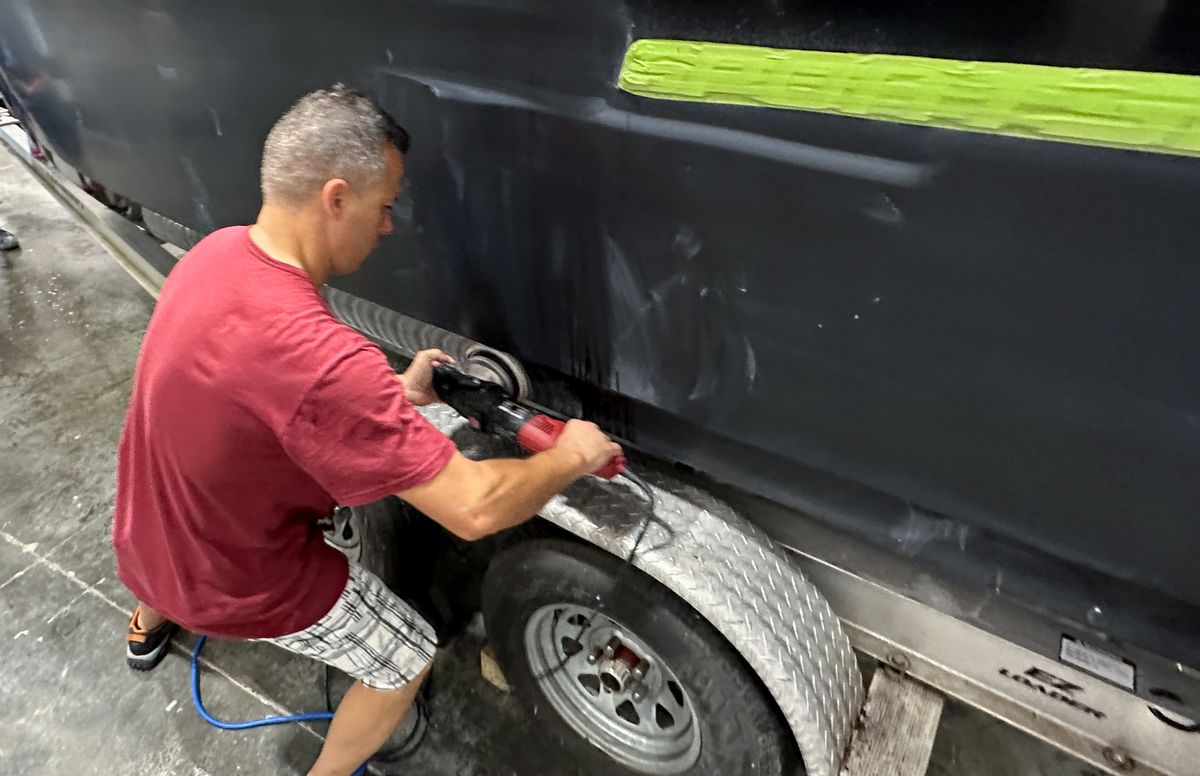
Saturday mid-morning session – One-step paint correction using a Ceramic AIO or All-in-One
Now that this truck is surgically clean, the class will now use the same process used for the 1979 Ford Stepside Shorty and also the 1982 AMC Eagle. This will reinforce the value in using a great AIO for daily drivers as well as get the paint on this truck ready for the Dr. Color Chip Rock Chip Repair System. On Friday morning the class learned all about the Dr. Color Chip system and had a chance to test the system out before polishing the paint on this truck. In the real world, you do all the paint correction FIRST and then do the rock chip touch-up repair work.
For this process, the class is using the Dr. Beasley’s NSP Z1 with their choice of orbital polishers and the Dr. Beasley’s HDO Blue Cutting Pad.
Gelling
By this time, the class has now detailed 4 cars, this is Number #5 – and they class is really starting to gel. By this I mean, they are now working as a solidfied team.
Here’s Godfrey using my personal RUPES Mark II BigFoot 21 – Serial Number 16
This polisher was given to me by RUPES at SEMA the year the Mark II polishers were introduced.
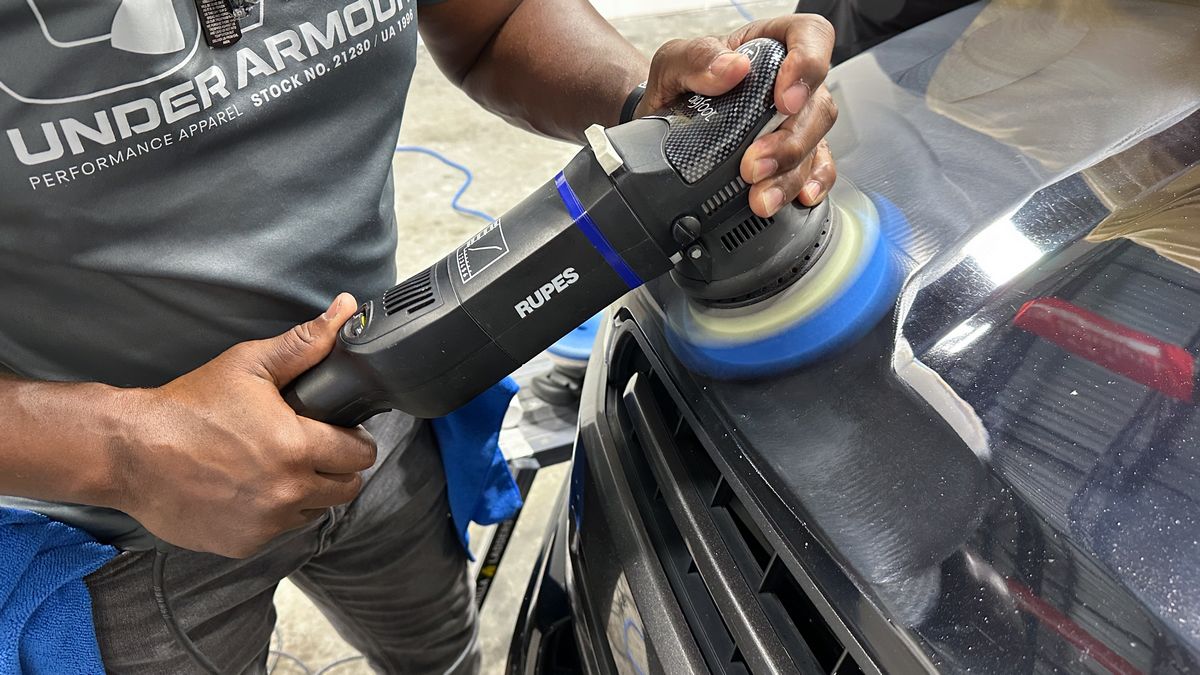

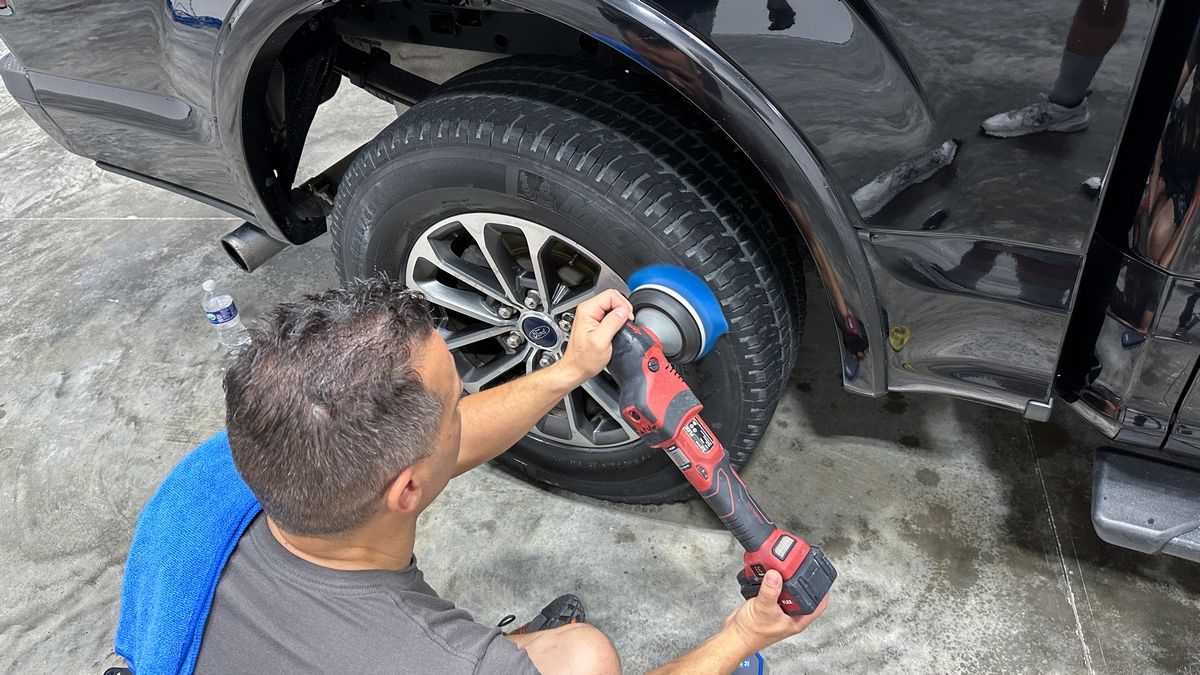
FLEX Red BEAST Inside
Here’s Jhonathan using the FLEX RIB or Red BEAST Inside personally given to me by the President and CEO of FLEX Power Tools in Germany, Christian Neuner. This is #66 of #1000 tools produced to celebrate FLEX 100th Anniversary!
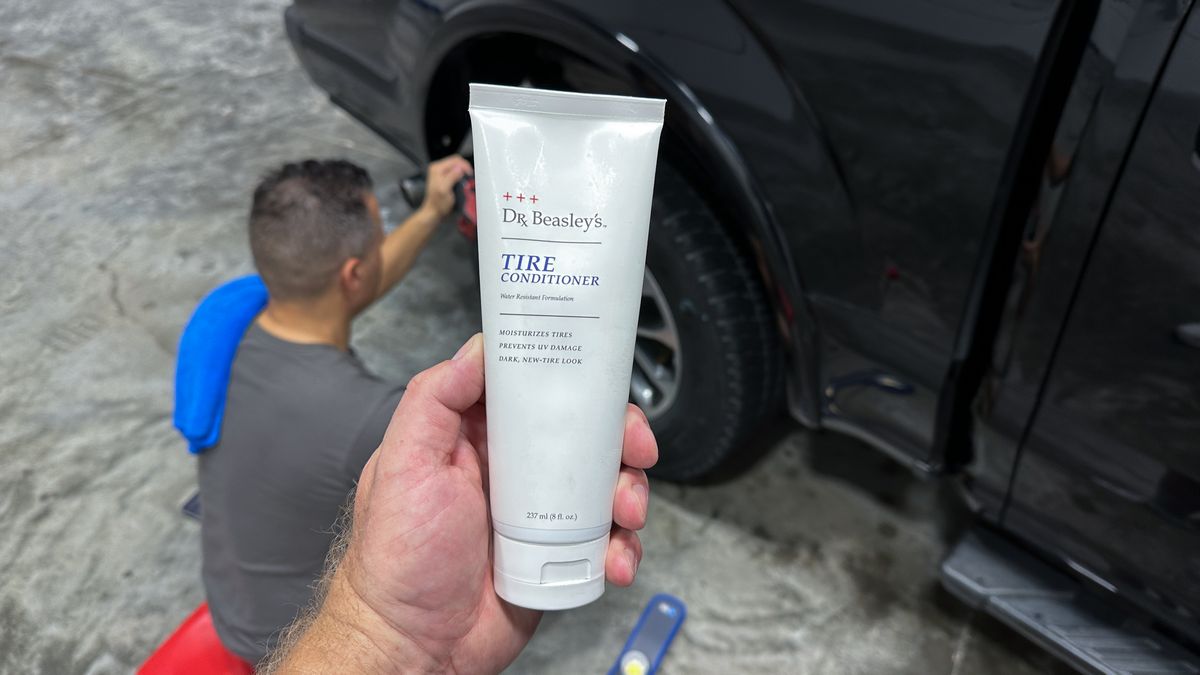
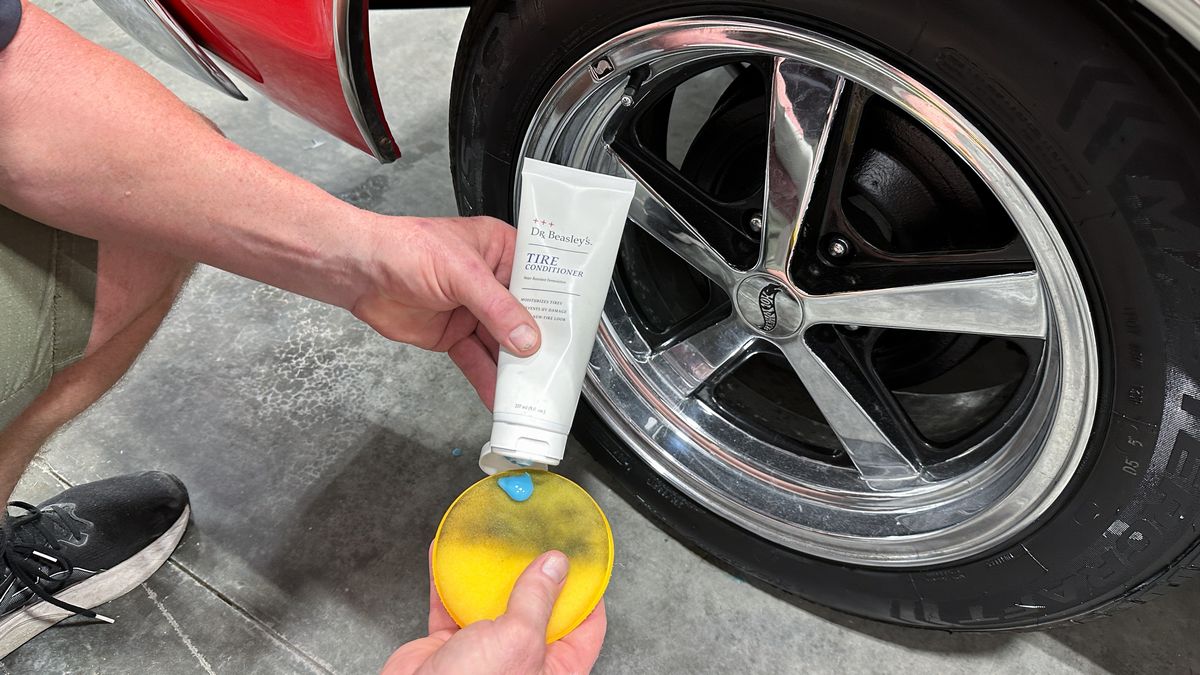
Machine Dressing Tires
Here’s something unique to our classes. Not only do we teach how to machine scrub tires – we also teach how to machine apply tire dressings. Simply put, the human hand with some form of applicator pad will never do as good as job as a 5″ rotary brush on a FLEX cordless rotary polisher. The spinning bristles excel at massaging the dressing into the tire sidewall as well as any intricate lettering and siping. Siping are the likes you often find as a part of the design of a tire sidewall and they are difficult to get tire dressing into and out of. But not when you work by machine.
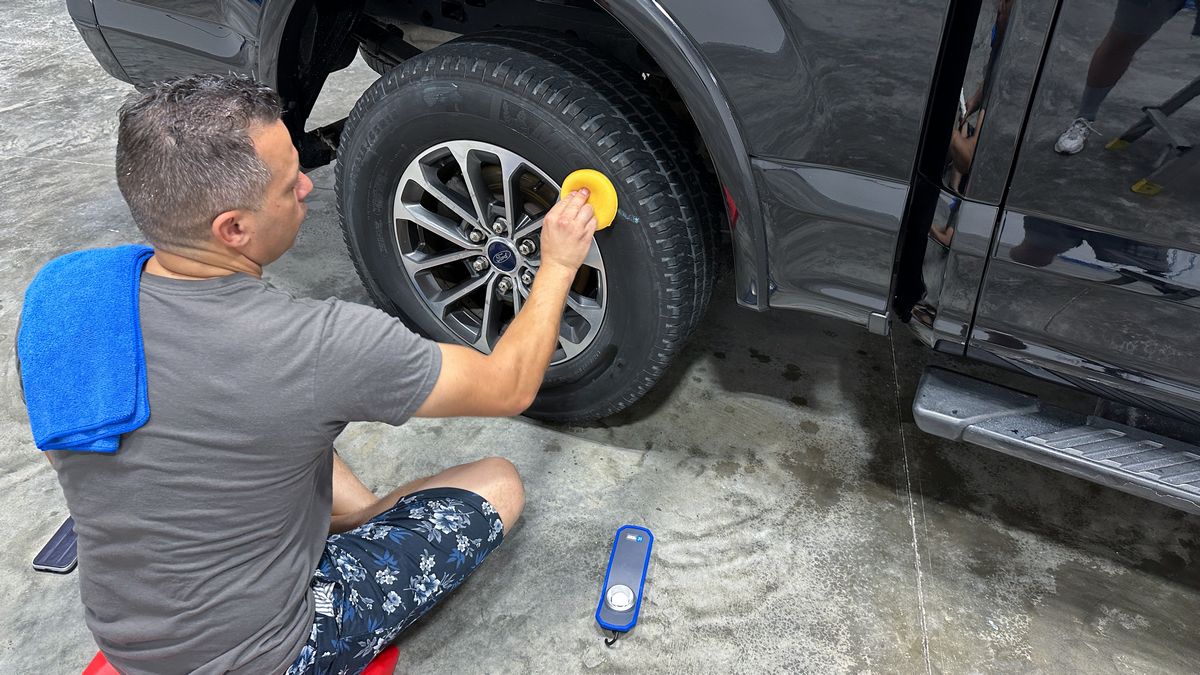
To dress these large tires, Jhonathan is using the Dr. Beasley’s Tire Conditioner
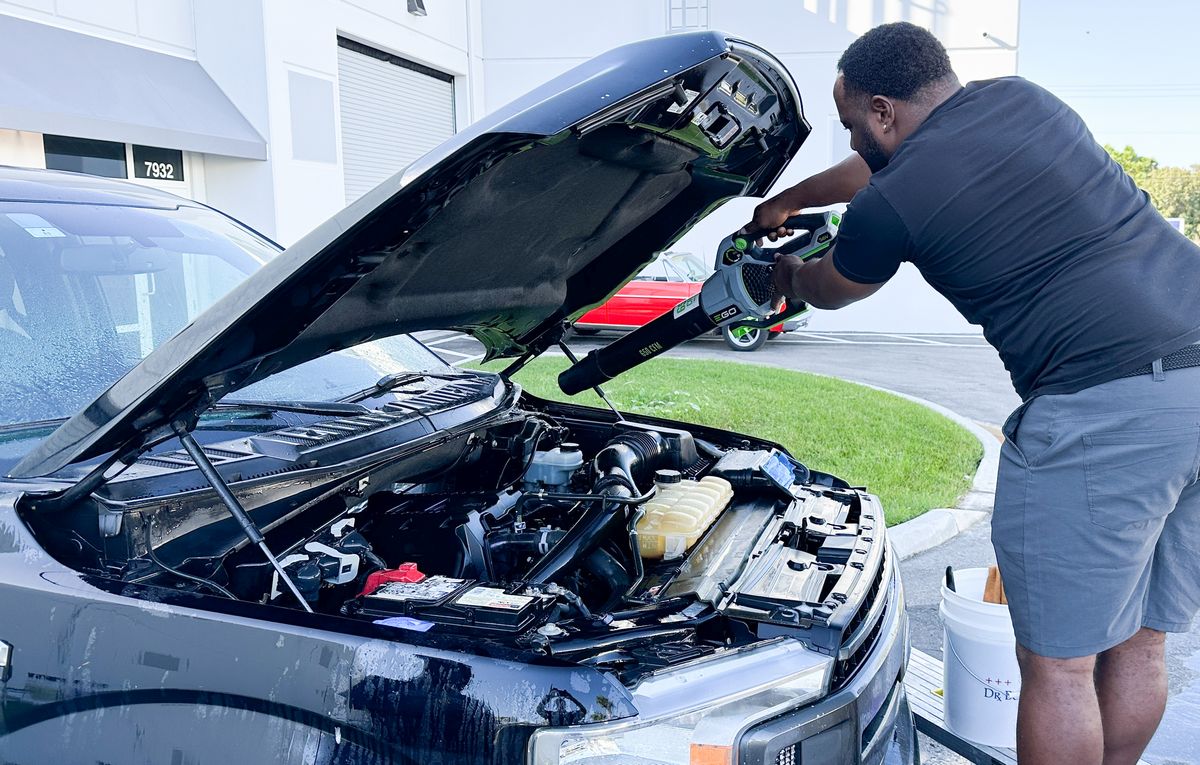
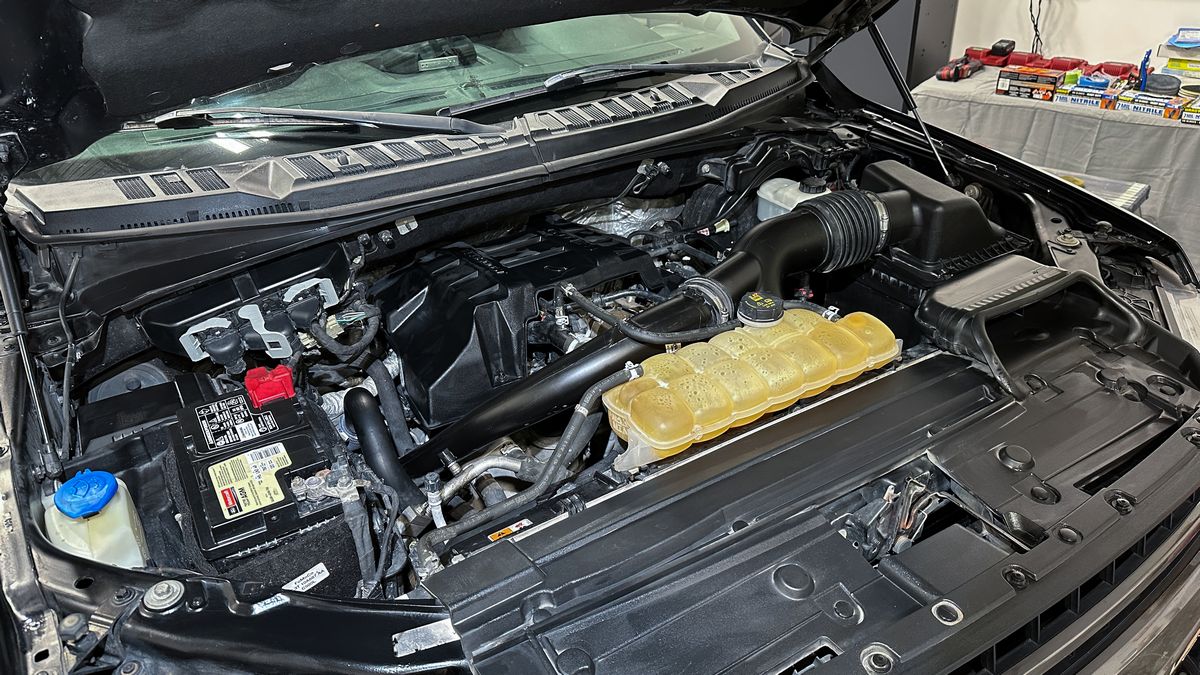
Dressing the Engine & Engine Compartment
Remember the before pictures? Pretty ugly…
To restore a factory fresh appearance after a very thorough engine and engine compartment cleaning and scrubbing, the class applies the Plastic Conditioner

Here’s the final results!
Not to shabby for a 6 year-old truck that’s driven hard. And keep in mind, this was the first time for most of the class to do a proper Wet Wash Engine Detail.
Here’s the final results…
Apologies, I forgot to take the “after” shots for this truck, but Jhonathan sent me the below two pictures while the truck was still inside.
I did snag this photo after moving the truck outside. In this photo, the rock chips at the front of the truck have all been touched-up using the Dr. Color Chip Rock Chip Repair System.
Jhonathan also sent me this video of the results on the F150:
And here’s the team that made the magic happen!
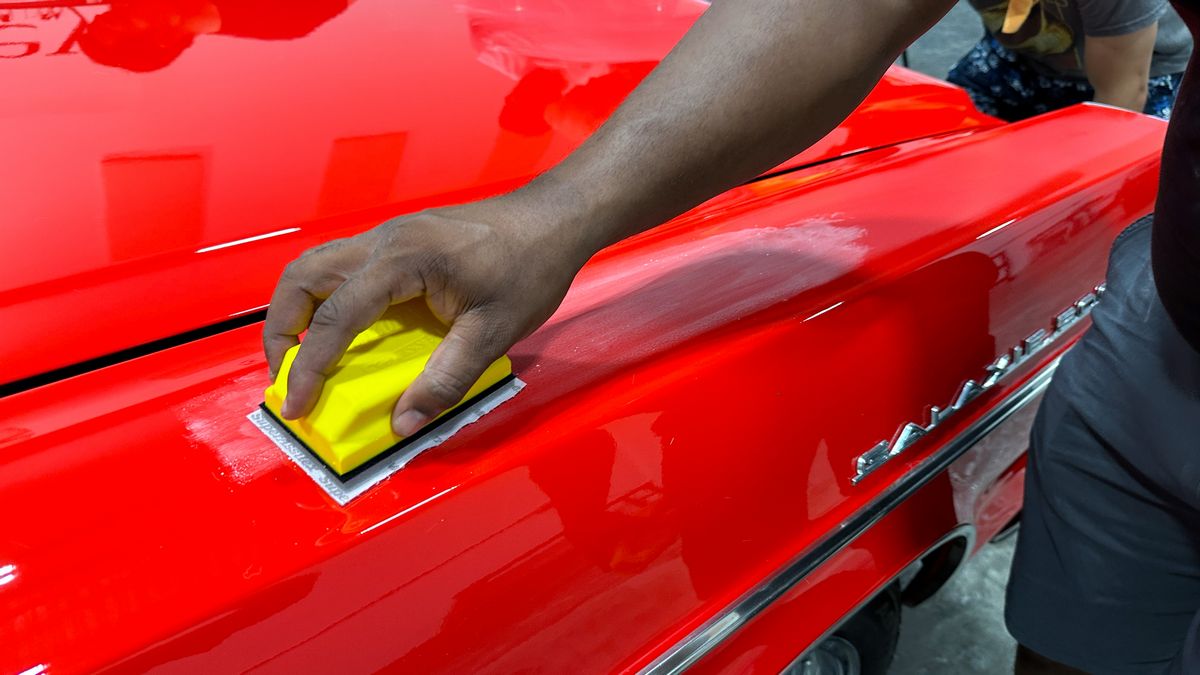
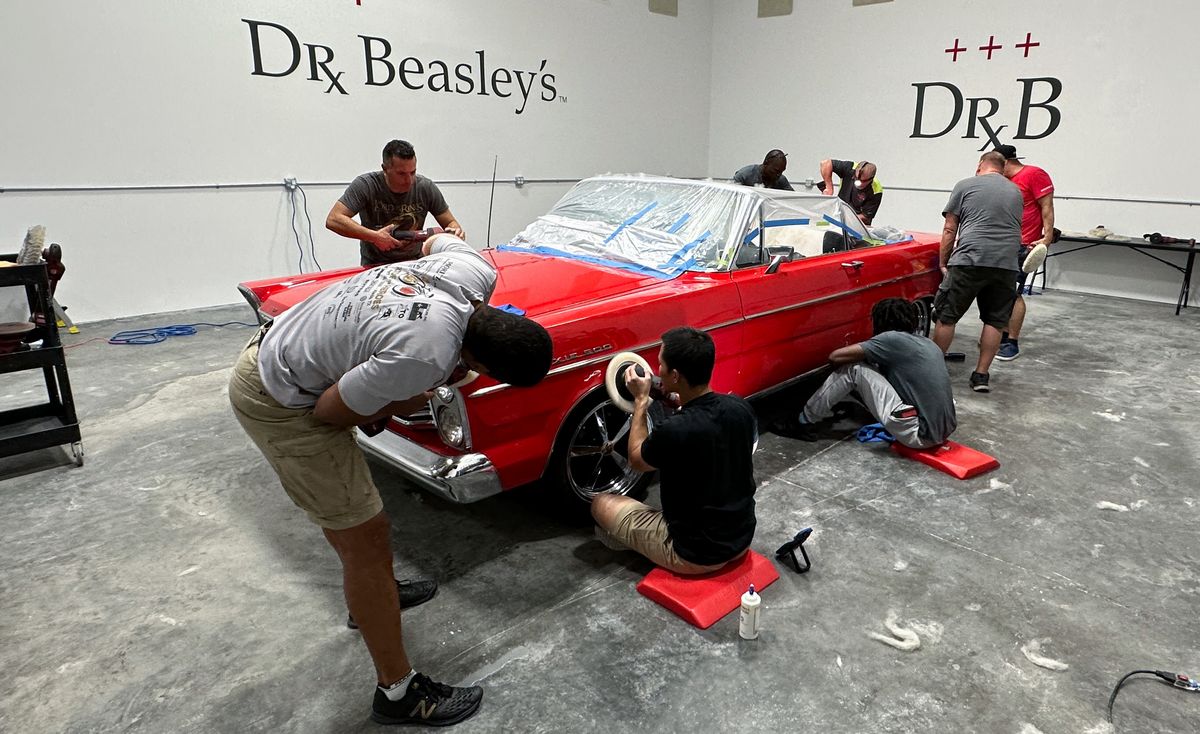
Saturday Afternoon Session – Hand & Machine Dry Sanding
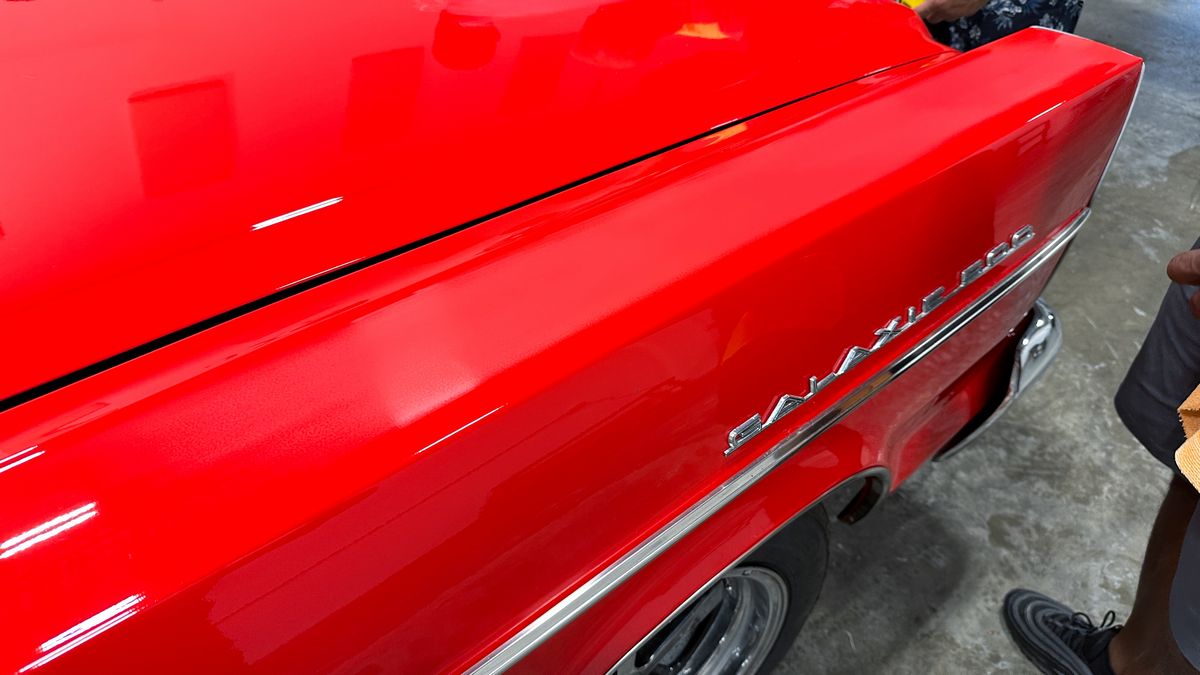
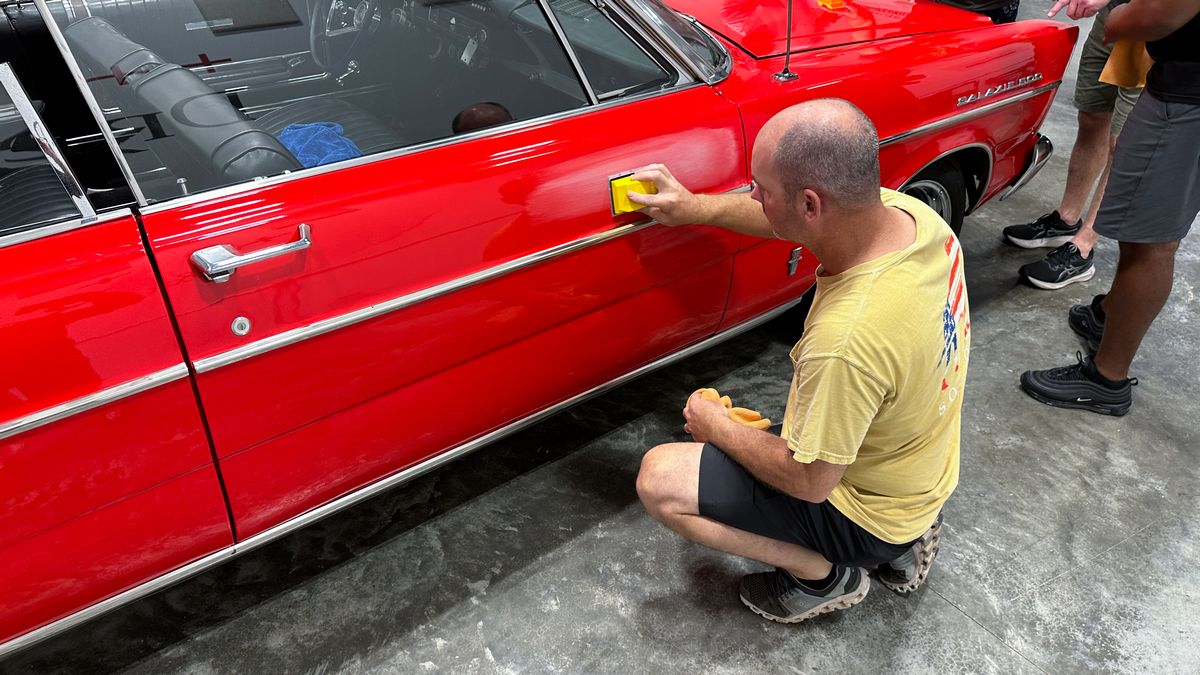
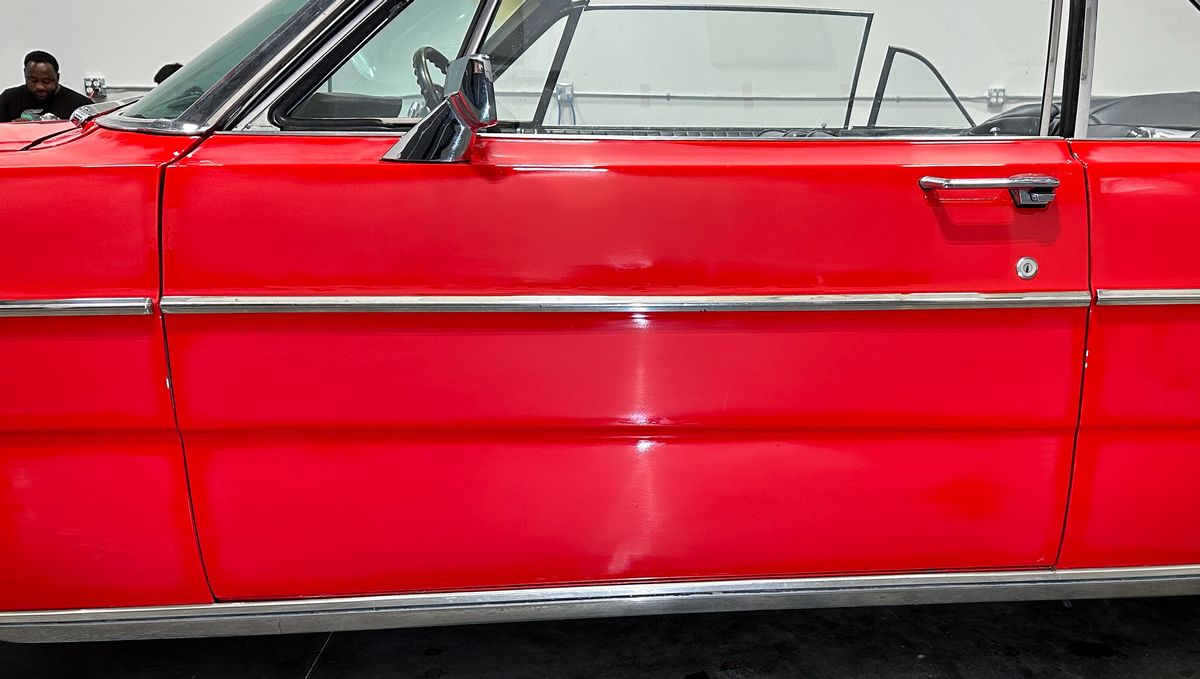
Now this is a very special are rare opportunity – the chance to remove the orange peel and create a swirl-free, show car finish on the custom paint job on this 1965 Ford Galaxie 500 Convertible.
Real cars – No demo hoods in our classes
A lot of detailing training programs out there don’t offer sanding in any of their classes, and if they do, you will train on a demo hood or fender resting on a body shop fender stand or X-stand. The problem with this type of training is it’s so easy that you simply don’t learn much and there’s definitely no IMPACT. When you train on a real car and the actual type of car that really gets a CUSTOM paint job and thus has real-world orange peel, dirt nibs, runs, sags and other surface texture – all of a sudden, the rubber meets the road. This is some other person’s streetrod, not a lame demo hood. YOU have to be thinking. You have to be focusing on the task at hand. You have to be aware of edges and raised body lines as well as fresh air grills, antennas, door hands, chrome trim, emblems, etc.
For this training session, the class will use the best dry sanding brand on the market today, the Eagle Abrasives by KOVAX dry sanding system. After sanding the car down to remove the orange peel, the class will revisit and the rotary polisher they learned how to use on the 1937 Ford 2-Door Sedan Streetrod, plus revisit the techniques they learned using orbital polishers. The class will be using the Dr. Beasley’s NSP Primers and Ceramic Coatings to complete this project.
What is Orange Peel?
In the context of a custom paint job, the term orange peel refers to the way the surface of the paint, the topcoat looks after the paint is sprayed and dried. The surface of the paint resembles the surface of an orange – that is it has a bumpy, pebble like surface texture.
What’s wrong with Orange Peel?
The problem with orange peel, in the context of a custom paint job is that normally anyone investing the quantity of money required to restore or hotrod a car, usually a classic car, muscle car, vintage car, exotic car, etc., these owners are looking for a show car finish, not a bumpy, lumpy, paint job with orange peel.
D.O.I.
The acronym D.O.I. stands for Distinction of Image. In the custom car world, builders, painters and most importantly – the owners, are looking for and hoping for a show car finish also called a MIRROR FINISH. Maybe you’ve heard someone comment about how certain car has a mirror finish. A mirror has a D.O.I. of 100% – this means it perfectly reflects and image with zero distortion. To create a mirror finish you must maximize the D.O.I. and in the context of custom paint jobs, this is done by making the paint surface as FLAT as possible. The flatter the surface, the higher the D.O.I. The way you make custom paint flat is via the sanding process.
Lots of options
When it comes to sanding paint, there are lots of options. In our classes we keep it real-world. By this I mean, the tools and techniques we teach are affordable and easily learned and mastered with practice and patience. If a person really wants to go deep down the rabbit hole on how to sand paint flat, the best thing they can do is get a job at a body shop that is known for doing show car work. You’ll likely start at the bottom pushing a broom, but if you stick with it and work hard, the shop will provide more and more training as they are always in need of skilled craftsman to continue on their business model. Plus sanding and buffing is really hard work and shops are always wanting to attract and keep qualified technicians.
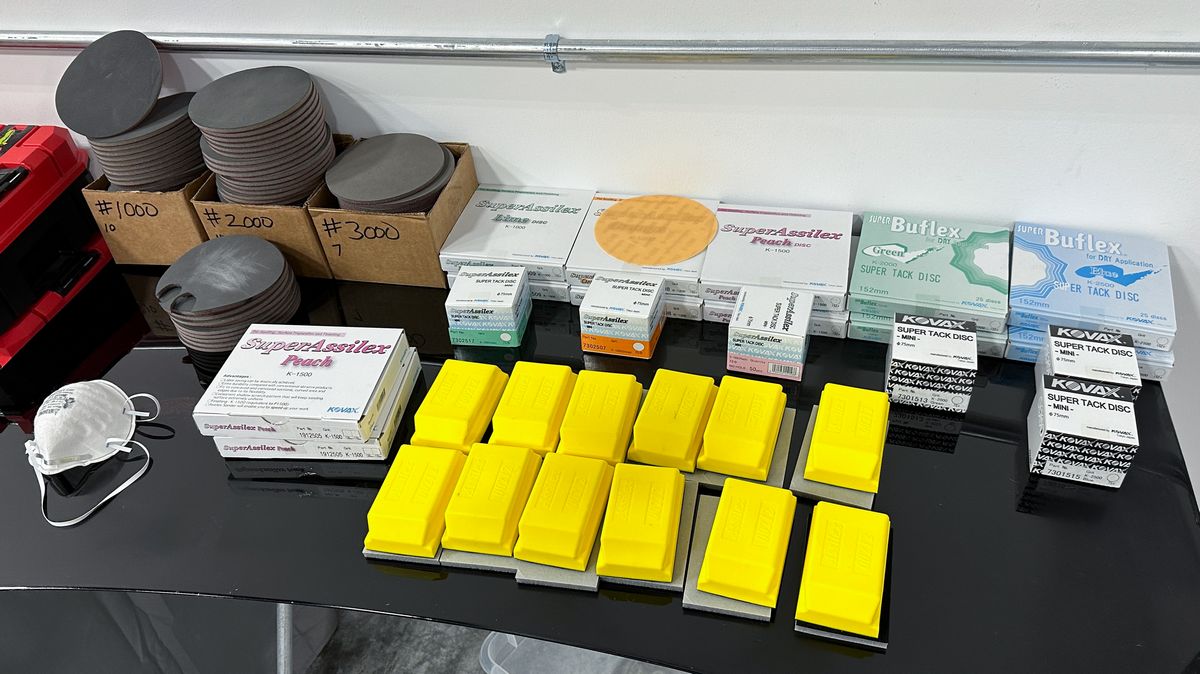
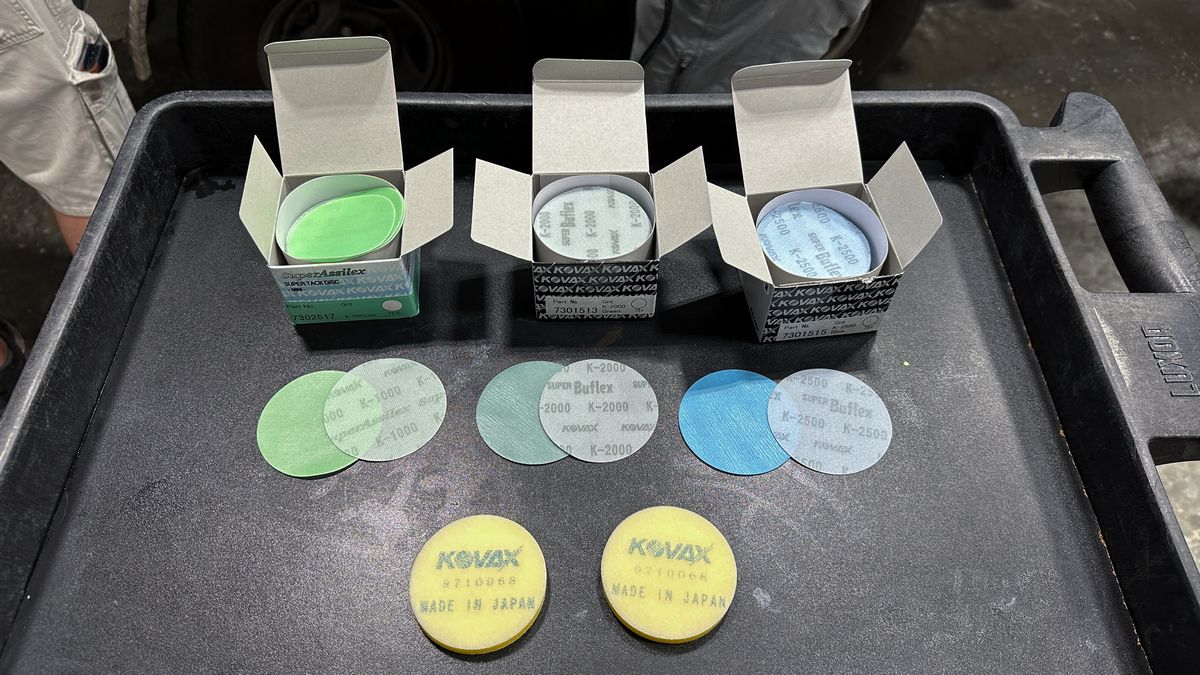
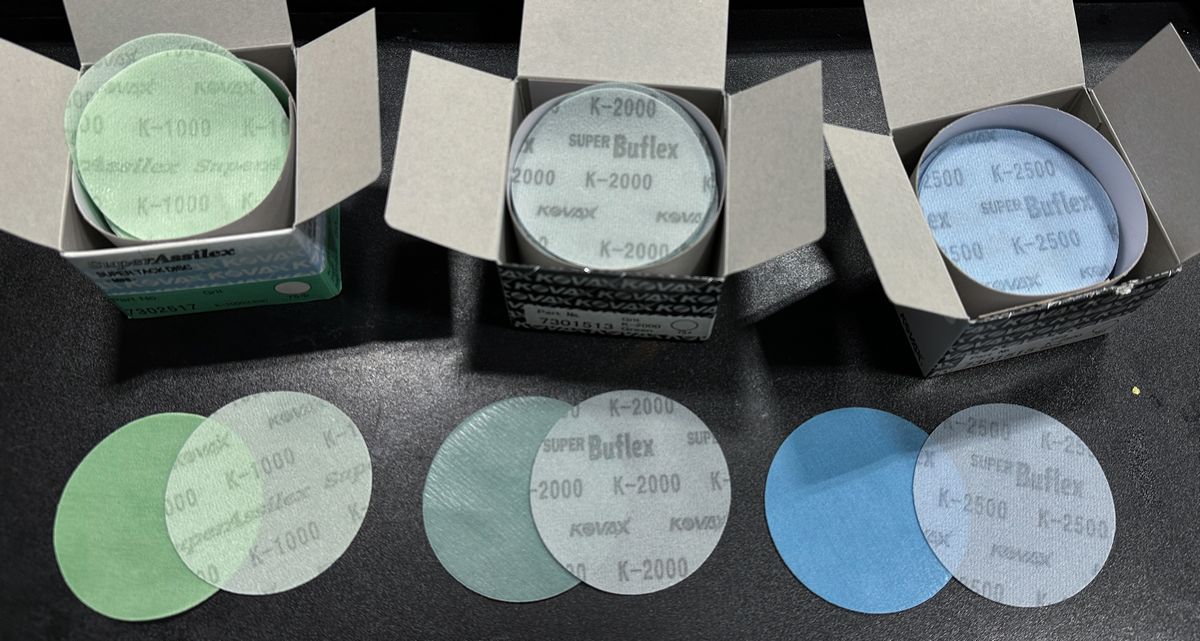
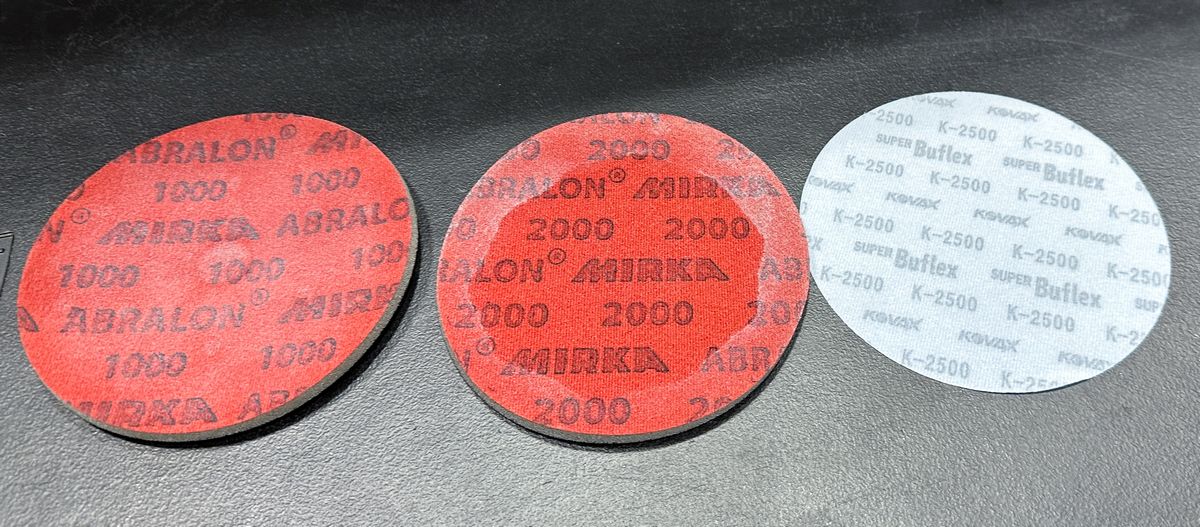
The Eagle Abrasives by KOVAX Dry Sanding System
I used to teach hand wet sanding for years, actually decades, when I started working as a Trainer for Meguiar’s back in the 1980s and then continued this format when I worked for the geek. Once I discovered the Eagle Abrasives by KOVAX dry sanding system a few years ago, I switched over to this system for my own work and adopted it for our classes.
Sanding sheets & sanding discs
What’s nice about the Eagle system is they make a wide spectrum of sanding tools including pre-cut sanding sheets for hand sanding and also circular sanding discs for machine sanding.
In a perfect world, you start out hard blocking the paint to get it absolutely flat. After hard blocking you then soft block sand the finish to maintain this flatness while refining your sanding marks. After the soft block step, some shops will start the buffing process. In my experience, this is the best approach when you’re truly looking for the maximum D.O.I. for a true show car finish. That said, hand sanding brings with it an unwanted, deeper sanding scratch referred to as tracers. Tracers are almost impossible to avoid 100% and make the buffing process take longer and even make it more risky as a technical will tend to buff harder to remove tracers and sometimes this can lead to burn-through.
Machine sanding
Machine sanding also has a drawback called, pigtails. Pigtails are s squiggly circular scratch that looks like a curly pig tail. Like tracers, these are annoying to remove and cause the buffing process to take longer in order to remove them 100%. In my experience and my opinion, you’re less likely to leave pigtails in than tracers. And also in my experience and my opinion, removing 100% of machine sanding marks is faster, easier and safer than removing 100% of hand sanding marks.
Well-rounded class
In our classes we teach both hand sanding followed by machine sanding so our students will learn both techniques. This will give them a foundation for which they can then build-on if they choose to pursue doing more and more sanding work in the custom paint industry.
After doing a waterless Prep Wash using Dr. Beasley’s Prep Wash, I did a full demo from start to finish on these topics:
- How to correctly hand dry sand.
- How to correctly machine dry sand
- How to use a rotary polisher with a wool cutting pad to remove sanding marks.
- How to use an orbital polisher to remove holograms left by the wool/fiber cutting pad on a rotary polisher.
After the above demo and a brief time for questions and answers, it was time to turn the class loose and then walk around and monitor the class. Anytime I see someone using the correct technique and getting great results I stop to talk with them and let them know they are spot-on. Anytime I see anyone doing anything incorrect, I also stop to talk with them and offer feedback on how and where they can tweak their technique to work faster, more efficiently and most important – safer.
Here’s Meko tackling the front passenger side fender…

Here’s Daniel sanding the passenger side door…
The approach being used here will work but I moved Joe to the back of the car and then let him work the sanding block and not only did he find it faster but also easier.
Teamwork!
Inspection Time – More sanding needed
The guys are doing good, especially for the folks that have NEVER sanded down orange peel before. What you’re seeing in the picture below is some light sanding but a lot more is still needed.
Looking good!
Sanding on the driver’s side of the hood is Thomas with Meko and Jhonathan on the passenger side…
Andy knocks out the driver’s side fender while Derick tackles the driver’s side door…
Here’s the results after the hand sanding process.
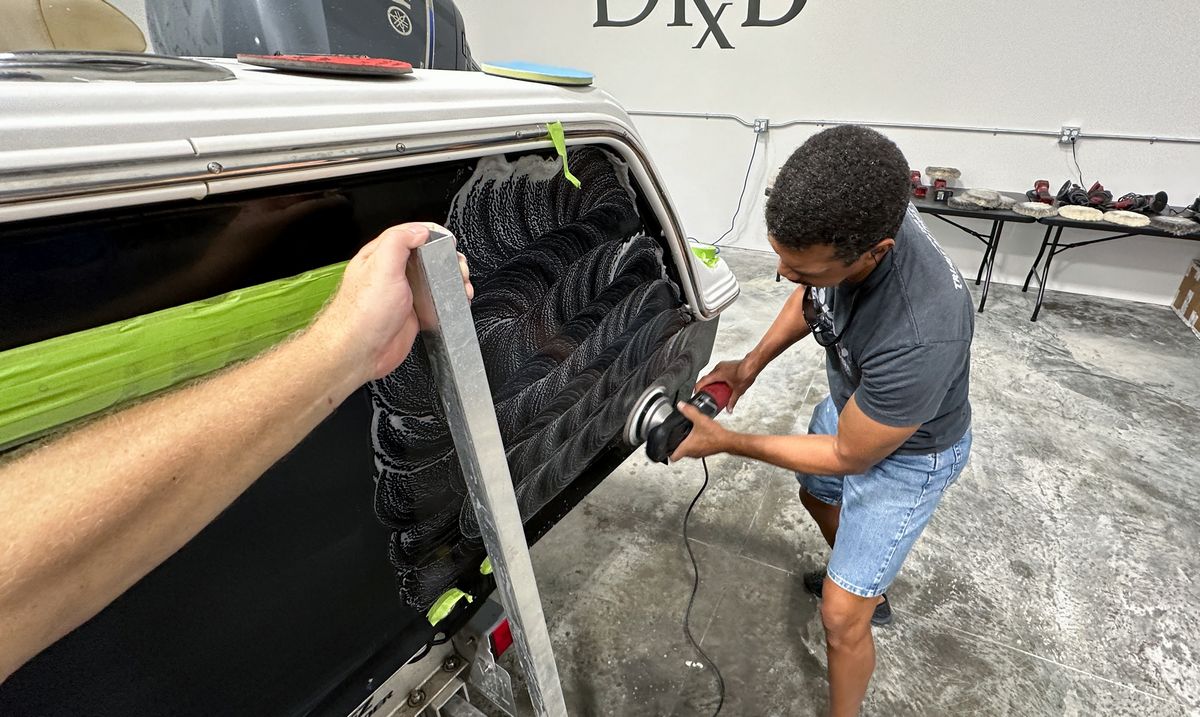
Machine dry sanding using FLEX tools and Eagle Abrasives by KOVAX
In the pictures below, you’ll see the class switch over to machine dry sanding. The goal here is to refine 100% of the 1500 grit sanding marks from the hand sanding step to 2500 sanding marks. This will not only further increase the D.O.I. – it will also make removing the sanding marks via the rotary polisher faster and easier. This is the segment of the sanding class that we SUPER STRESS the importance of doing a great job refining 1500 to 2500 sanding marks. If you don’t, then it’s going to be a lot more difficult and require more time to buff out 1500 grit sanding marks. Can it be done? You bet. It’s just more time consuming and you risk creating more heat as you buff longer and press harder on the rotary polisher.
Thank you FLEX Power Tools!
A shout out to say thank you to John Carnevale and Chris Metcalf for providing FLEX tools for all our Future of Detailing classes.
The FLEX FX3411-Z 24 Volt Random Orbital Sander – 1.6mm Orbit Stroke Length or approximately 1/16th Orbit Stroke Length
John and Chris sent us the brand-new CORDLESS FLEX FX3411 D.A. Sanders Because it’s a cordless, electric dual action sander, there’s no stiff compressed airline like pneumatic air sanders have as well as no electric power cord to hassle with. This truly makes controlling and using the sander a breeze – especially for first timers. This is actually a power tool sold into the wood sanding industry and as a wood sander, this would be considered a finishing sander. As a finishing sander, it’s the perfect follow-up to hand sanding to refine 1500 grit sanding marks to 2500 sanding marks, which will make buffing out the sanding marks faster and easier.
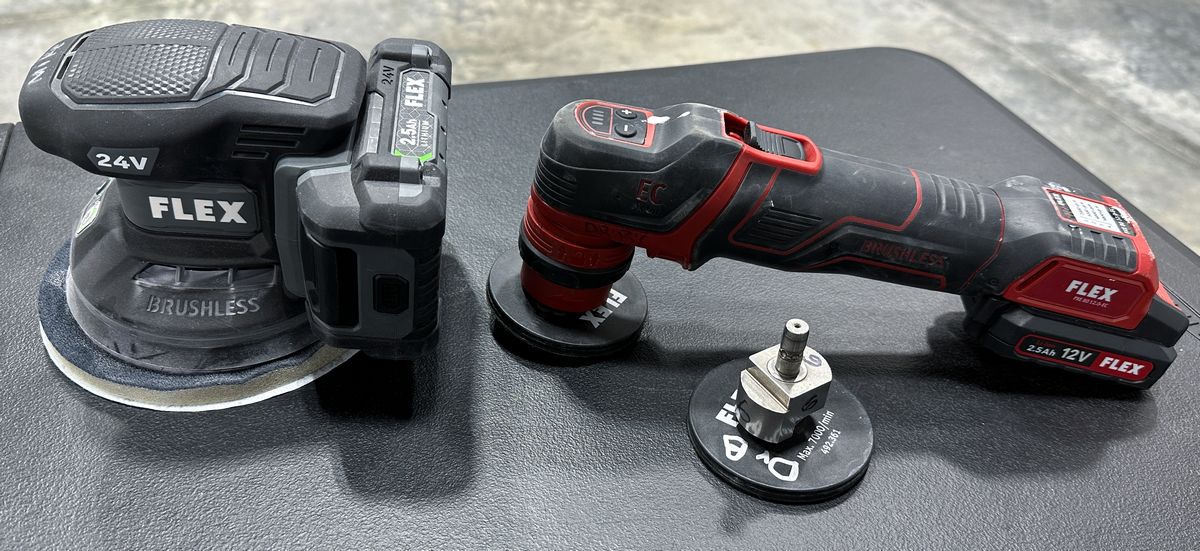
The FLEX PXE 80 aka the FLEX PiXiE
The FLEX PiXiE is another cool cordless tool from FLEX. Originally it came with 3 drive units, rotary, 3mm random orbit and 12mm random orbit. I was given one of the first PiXiE’s in the United States from Chris Metcalf at SEMA a few years ago when this tool was first introduced to the public. Immediately a saw it as the perfect micro-tool for machine sanding. The problem is the 3mm and 12mm random orbit drive units simply weren’t optimum for machine sanding. I contacted Chris Metcalf and asked if he could get the Engineers at FLEX to make me a 6mm random orbit drive unit and I’m happy to say then not only sent me a prototype, but they have since then introduced this as an accessory drive unit that you can now purchase to turn your FLEX PiXiE from a paint correction polisher to a 3″ random orbital sander. Thank you everyone at FLEX.
Here’s Godfrey, Jhonathan and Thomas using the new FLEX FX3411 D.A. Sanders to refine 1500 to 2500 on the hood of the 1965 Ford Galaxie.
Here’s Andy using the FLEX PXE 80 with a custom cut 2″ sanding disc on a 2″ backing plate.
Before the class started, I custom cut 1″ and 2″ sanding discs out of larger 6″ discs for machine dry sanding in tight places and for thin panels.
Here’s Meko working the passenger side fender. with David and Joe behind him working the trunk lid.
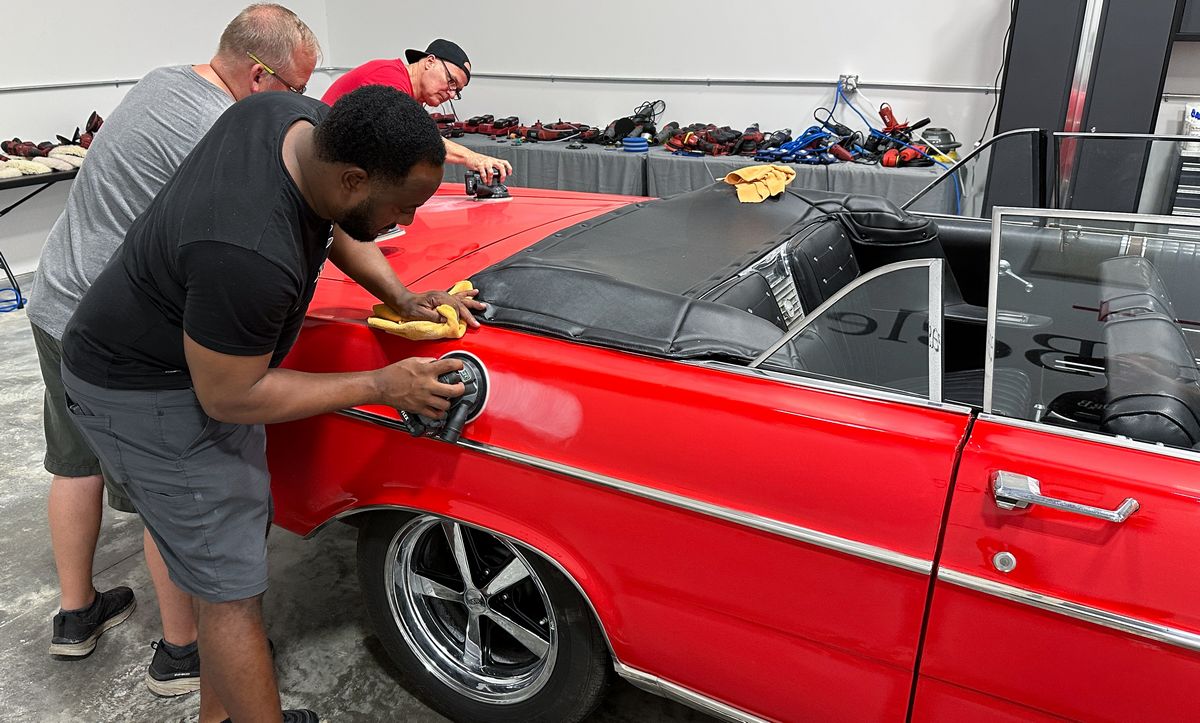
David and Joe tag-teaming the trunk lid…
Here’s Daniel using the FLEX FX3411 DA Sander and also a Lake Country Swirl Finder light to light up the side of the passenger rear fender as he sands.
Here’s Derick using the FLEX PiXiE with a 3″ sanding disc on the driver’s side door.
Here’s Russel sharing some sanding technique tips with Daniel.
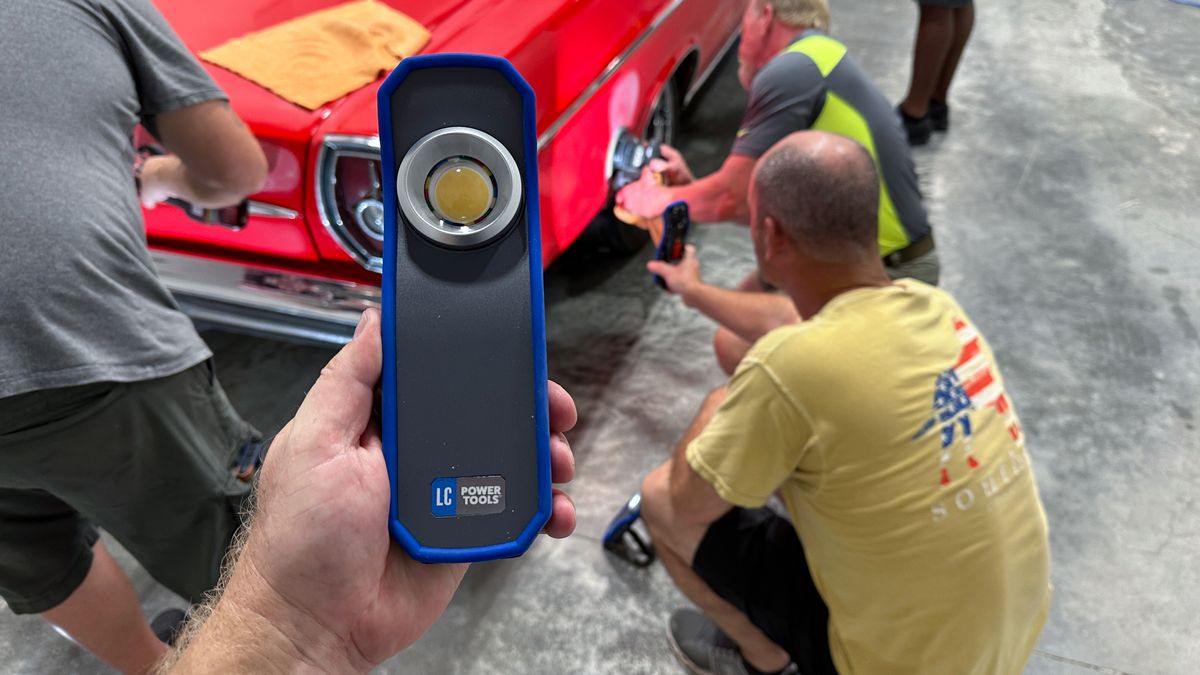
Thank you to Bob Myers at Lake Country Power Tools for sending us 12 Lake Country Swirl Finder Lights for our classes. Just to note, anyone doing this type of work NEEDS a great hand-held light.
More…
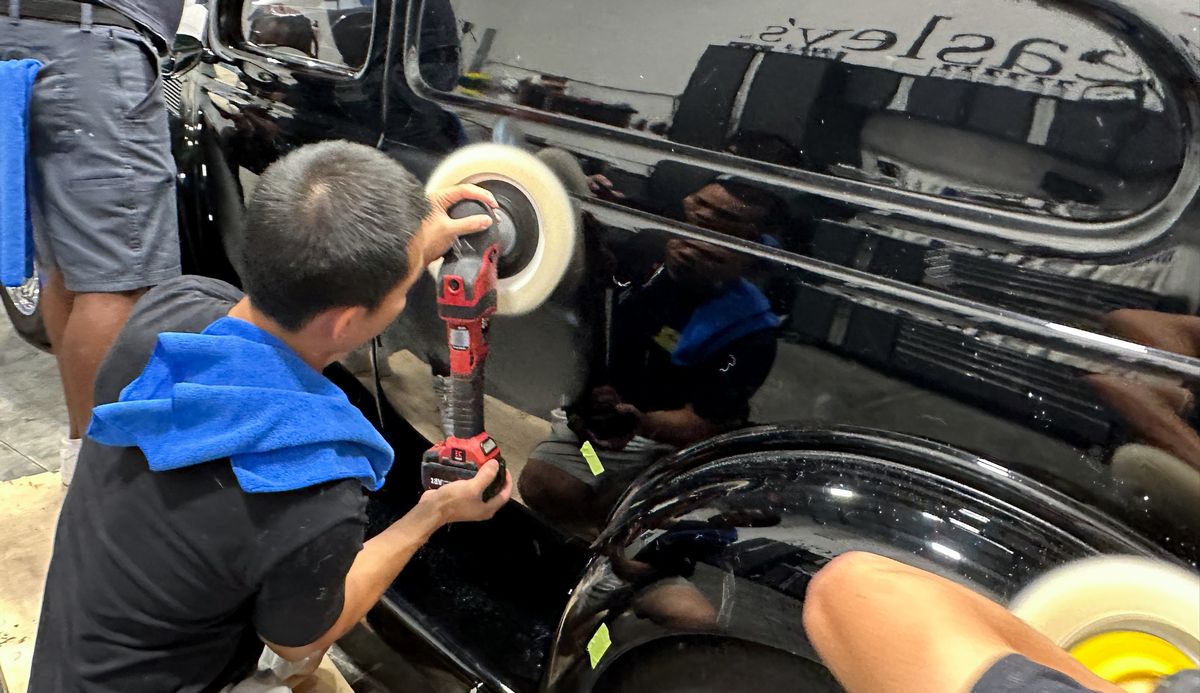
Dr. Beasley’s NSP 150 + Wool Cutting Pads + FLEX PE-150 Cordless Rotary Polishers
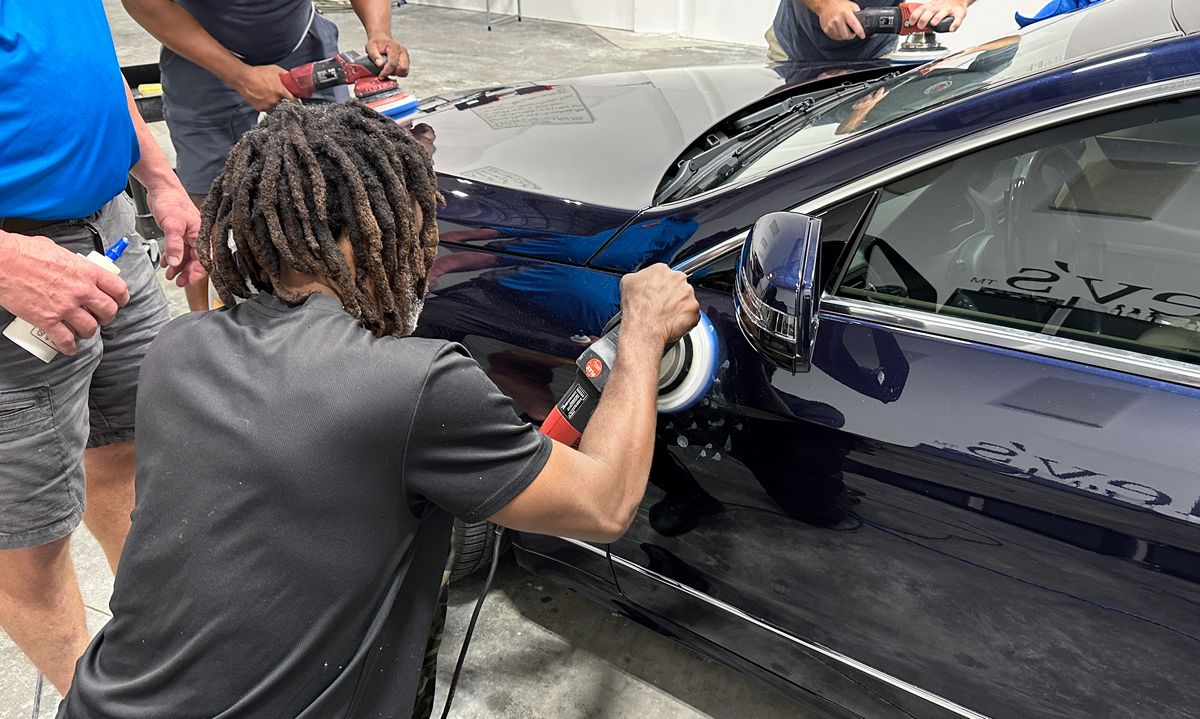
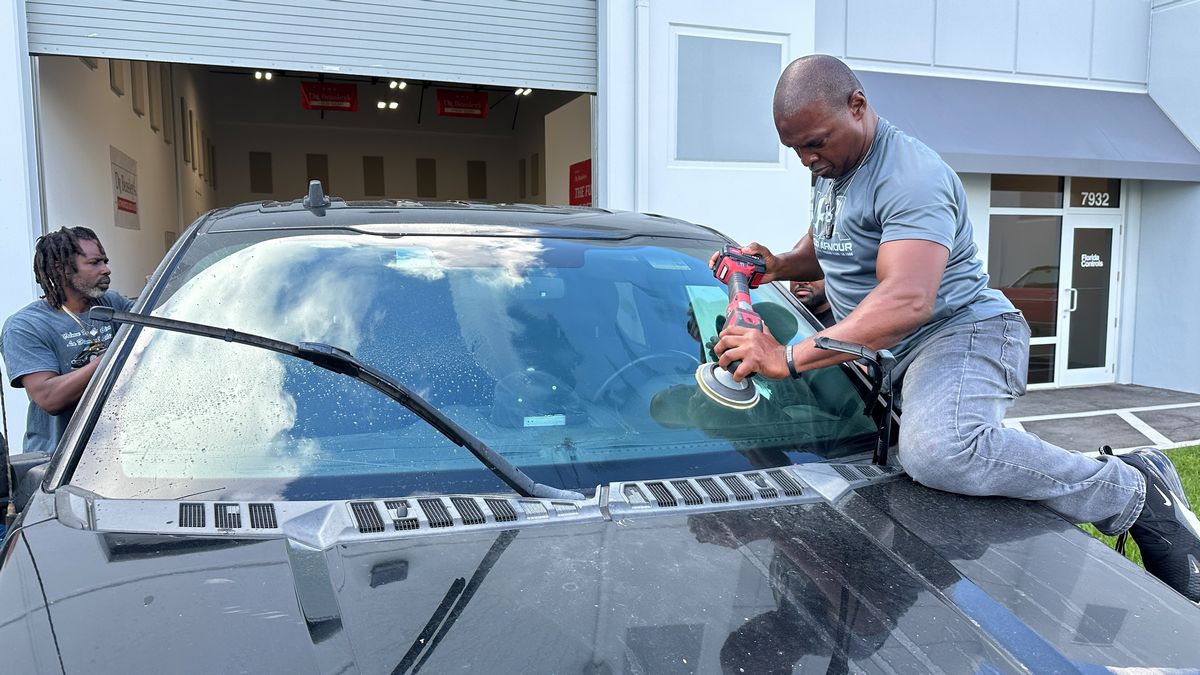
After the machine dry sanding step, it’s time to remove our sanding marks. It’s VITAL that each person is completely focused on the task at hand. If you don’t buff enough – you leave sanding marks behind. If you buff to long you risk burning through an edge or raised body line.
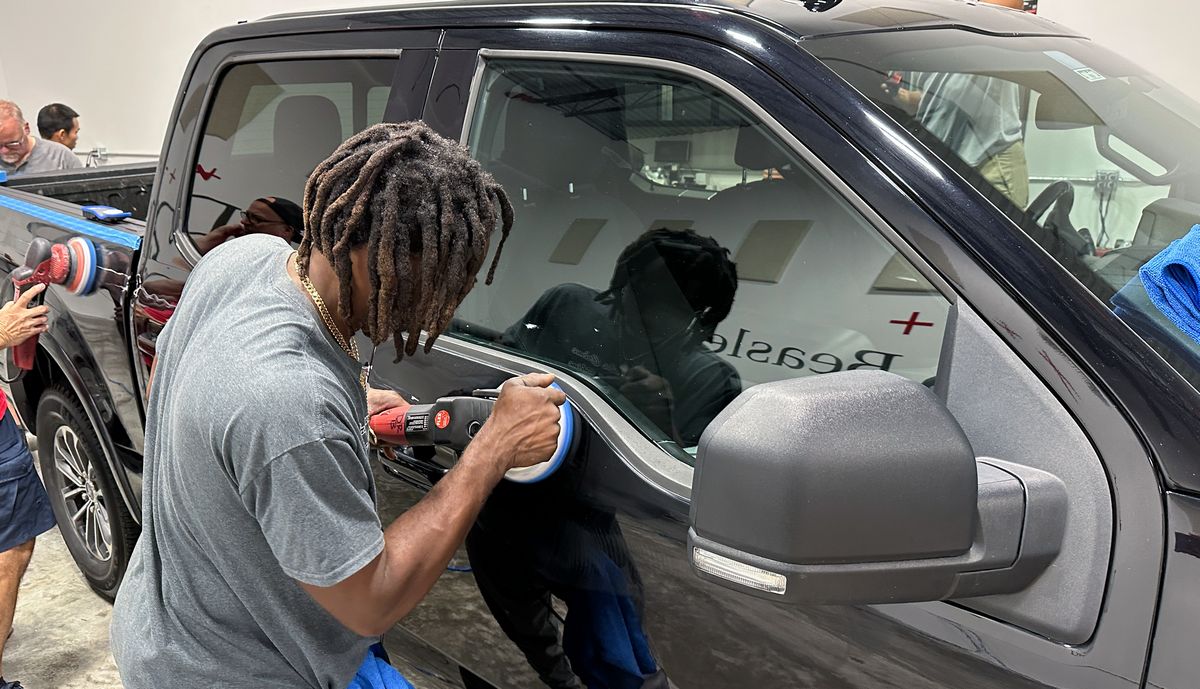
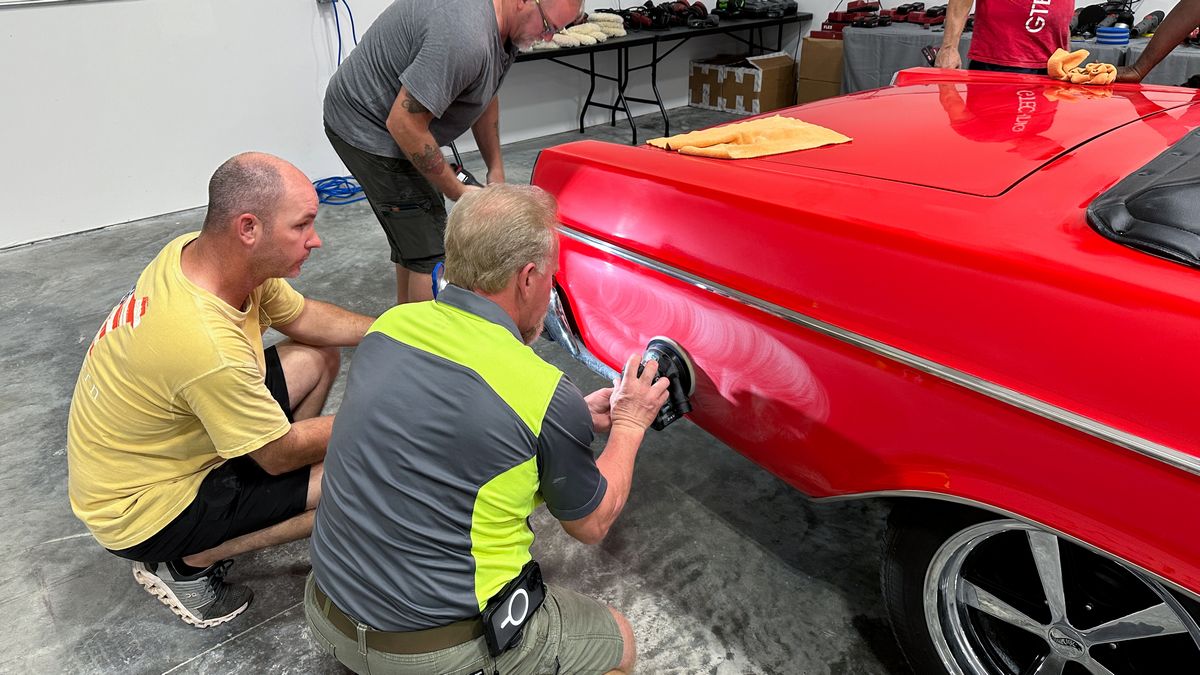
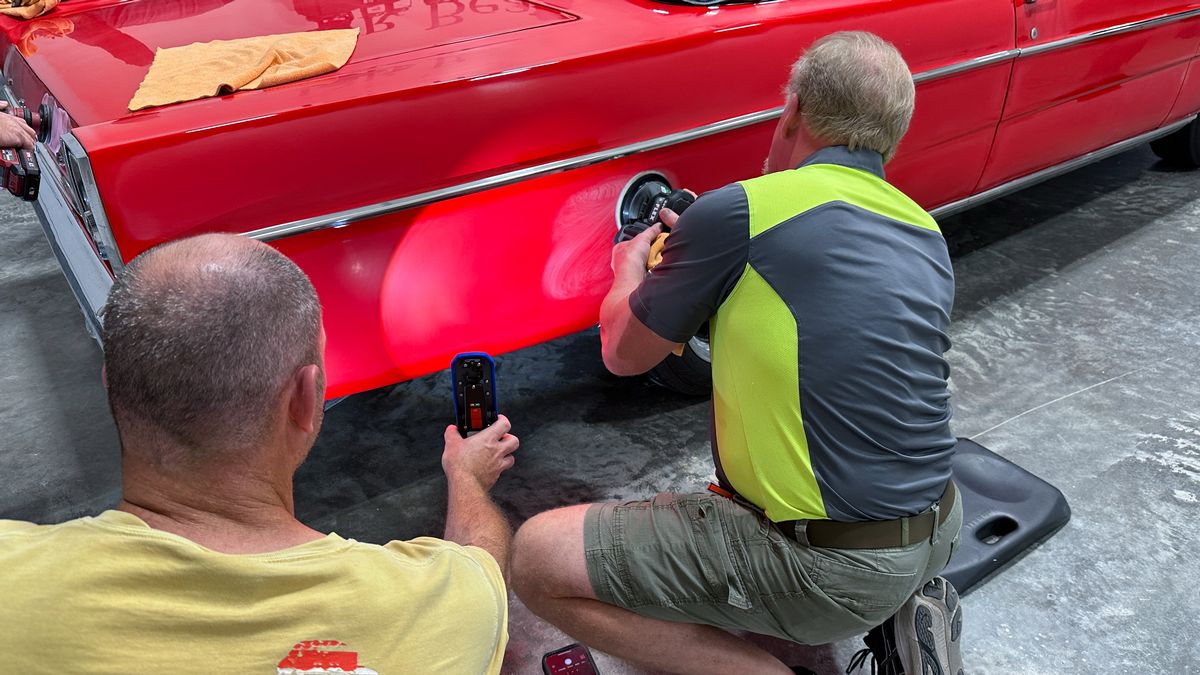
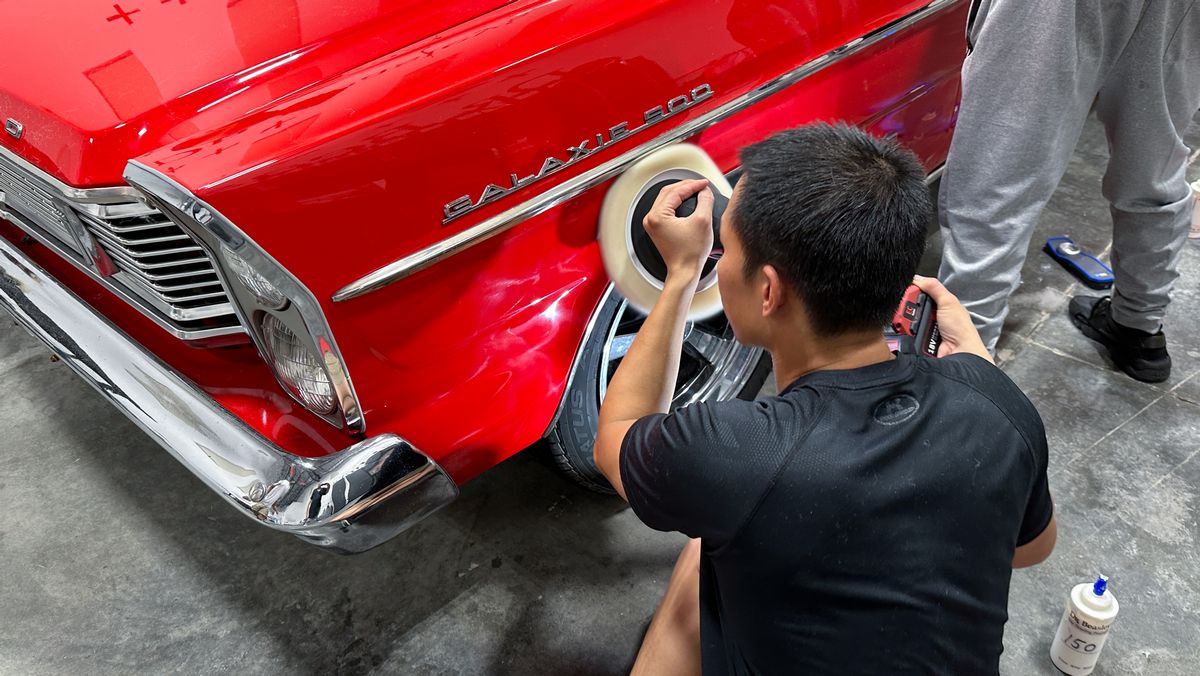
Check out the extreme concentration in the eyes of Jhonathan as he performs EDGEWORK with a spinning 8″ wool cutting pad on a rotary polisher!
Step-by-step, this orange peel removal process is coming along just fine!
When buffing large panels, after tackling the edgework, you always start in the middle and work your way outward.

Here’s Andy working the FLEX PE-150 like a BOSS!
Look at Meko shoving the spinning wool cutting pad under the door handle to remove the sanding marks. The FLEX CORDLESS PE-150 has all the power of a corded tool without the hassle of dealing with a cord.
No chairs. No sitting. No PowerPoint – Pure, 100% hands-on learning.
Try to find ANY pictures, for ANY other class on the market that show this much hands-on time on not just cars – but COOL cars.

Don’t get stuck sitting in a chair looking at the wall as someone drones on and on and on about how great their products, instead, Click here to find locations and dates for upcoming Future of Detailing Classes!
The rotary polisher for the win!
Here’s Joe working the rotary like a pro! And David doing the same!
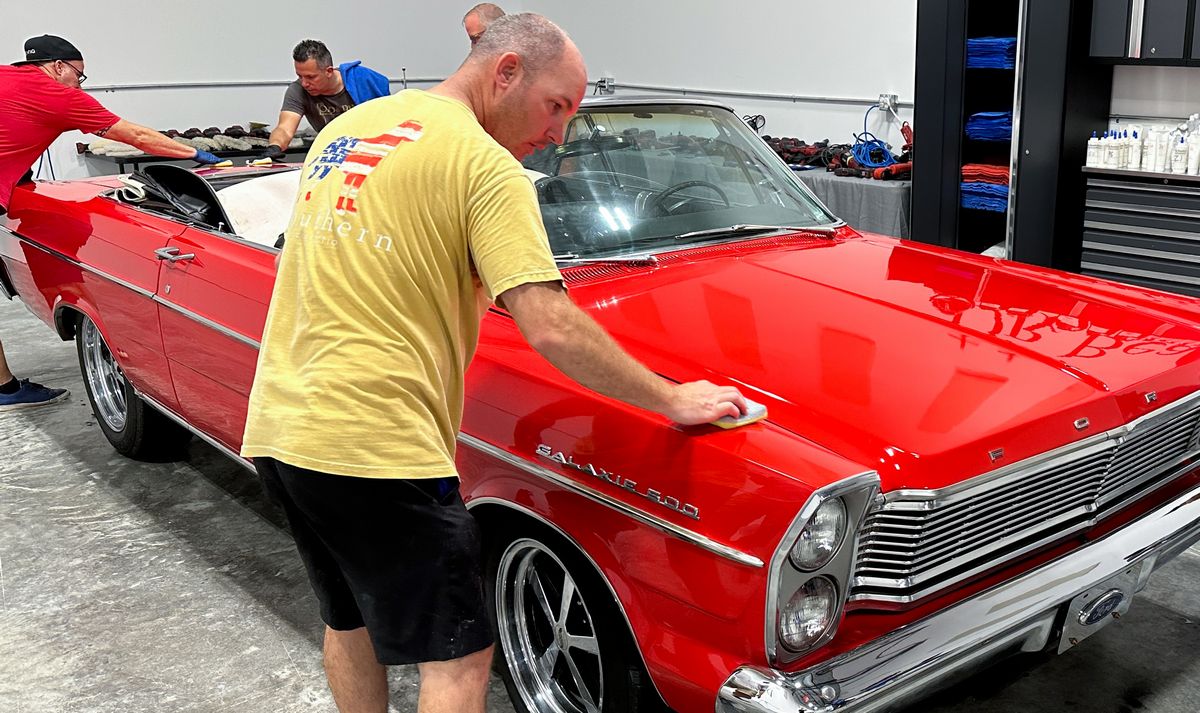
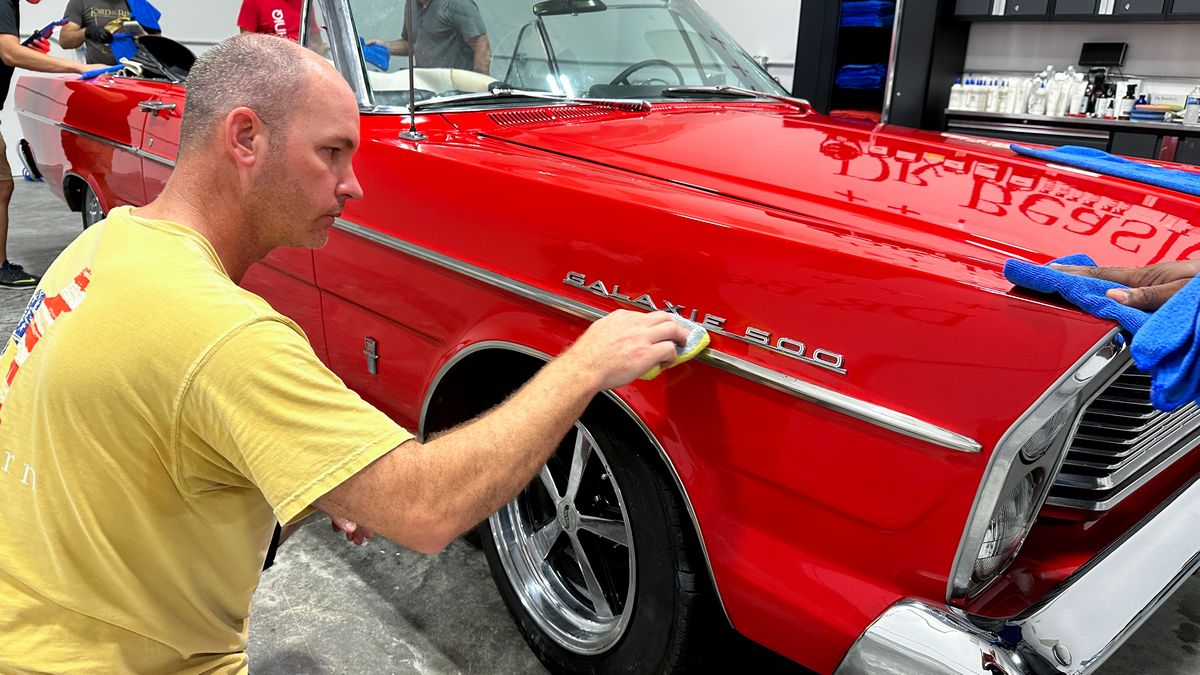
Looking good Daniel!
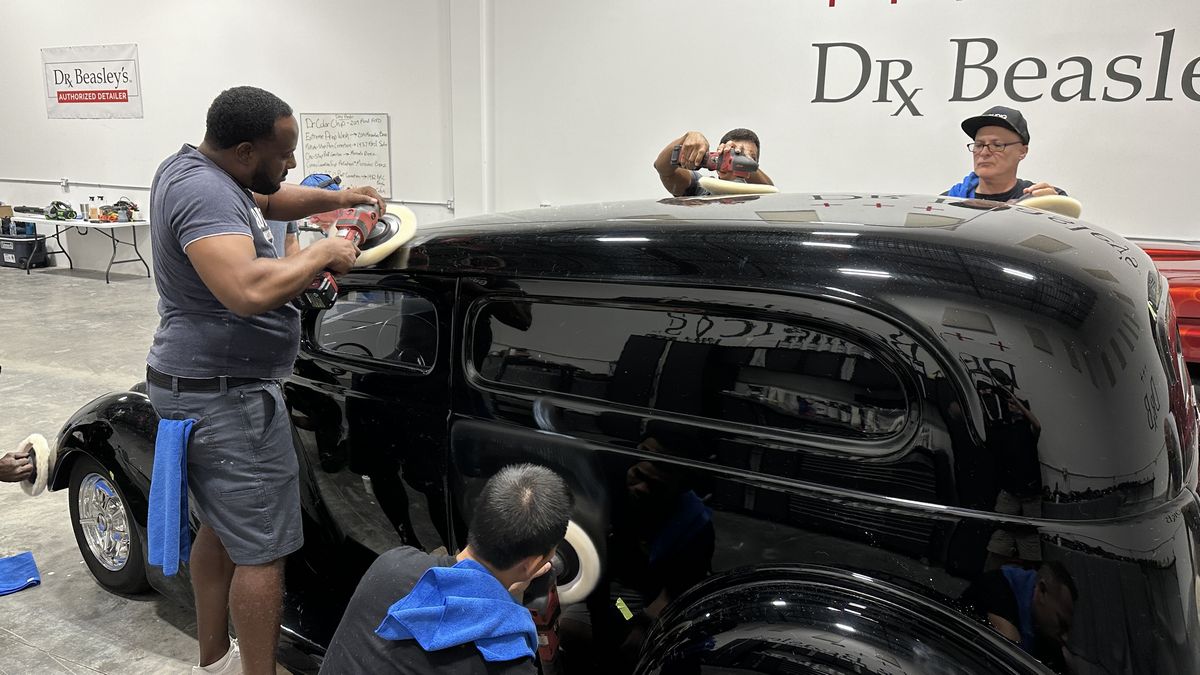
The class is finishing the rotary work and next up, we switch over to Dr. Beasley’s NSP 95 Primer with foam pads on orbital polishers.
More…
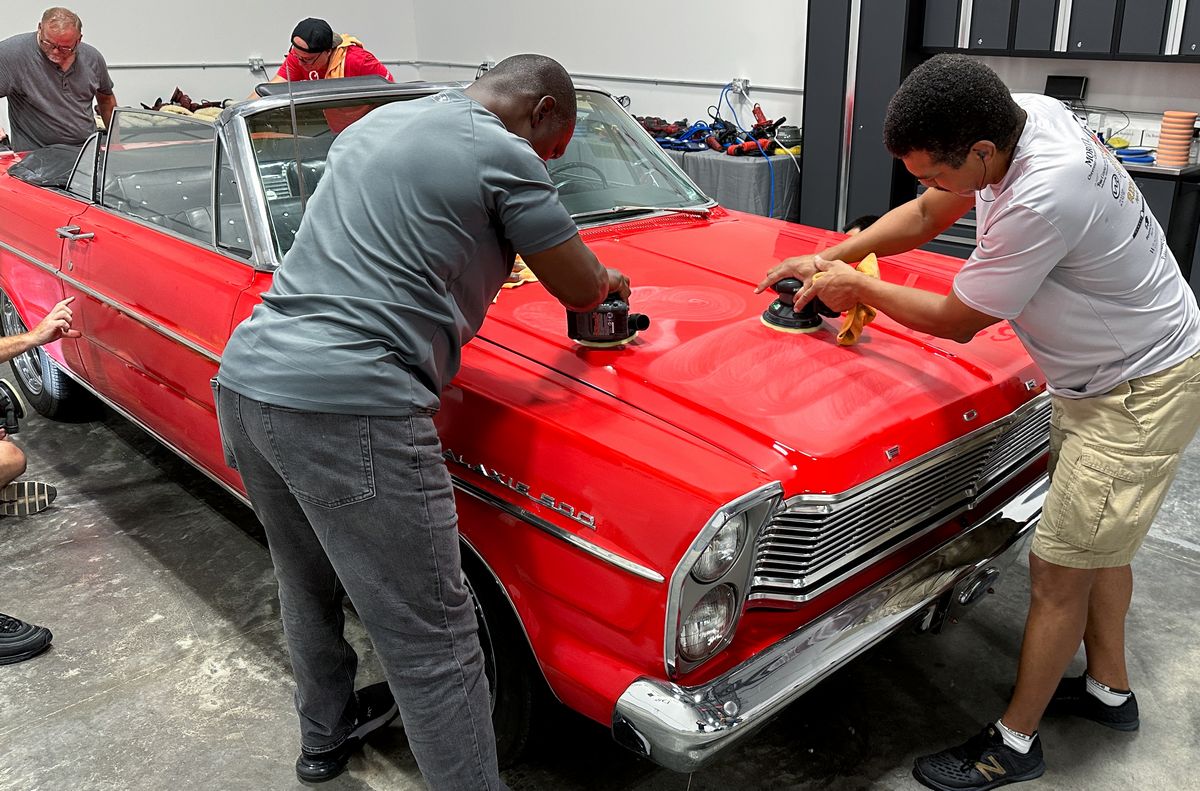
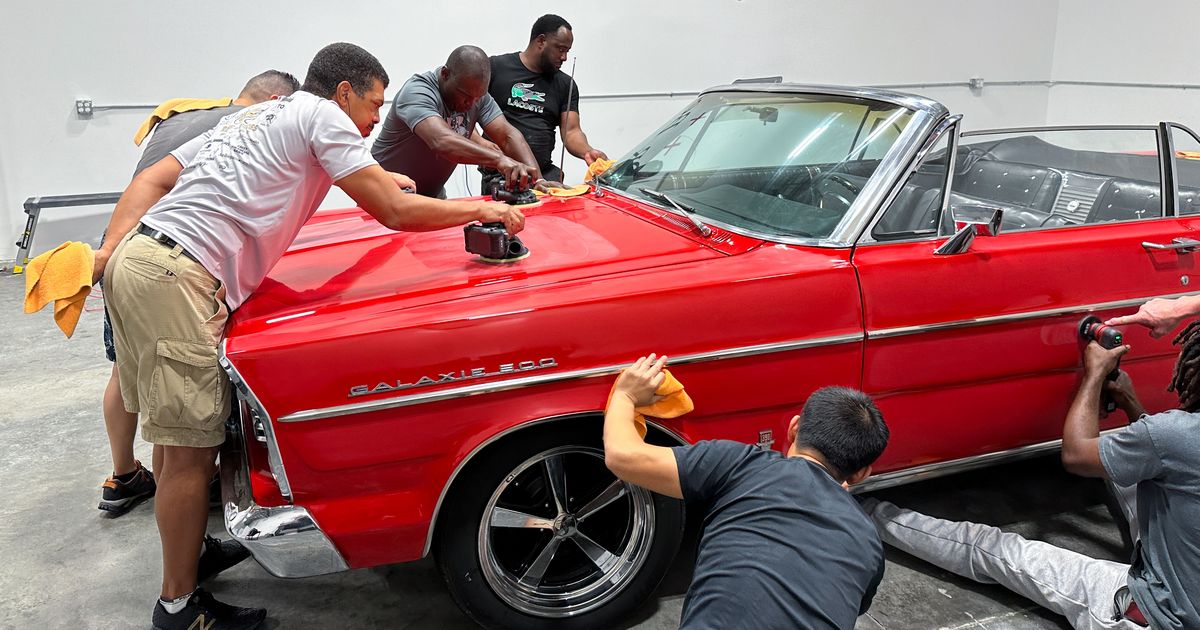
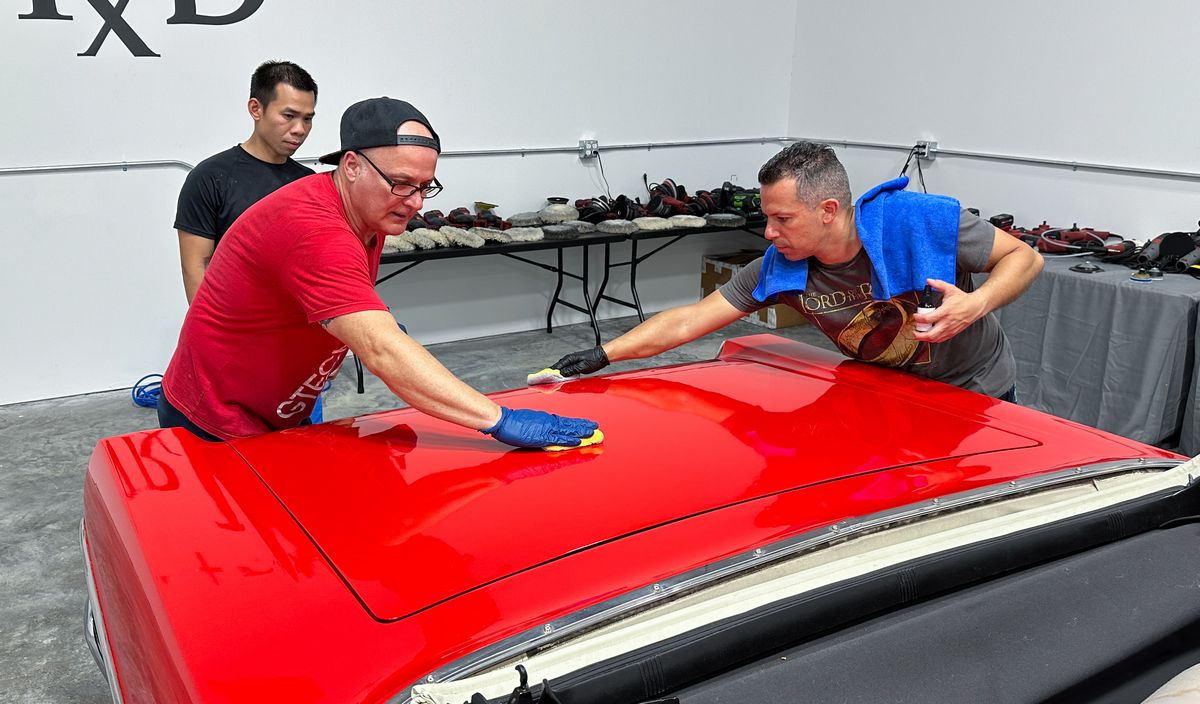
Removing holograms and creating a swirl-free show car finish!
As you’ve seen previous in the write-up, we teach multiple-step paint correction, (the 1937 Ford), one-step paint correction, (the 2011 Mercedes-Benz), one-step ceramic AIO paint correction, (the 1982 AMC Eagle and the 1979 Ford Stepside Shorty and the 2018 Ford F150 Pickup Truck), and on Saturday, after the class has built a FOUNDATION of skill and knowledge to draw from – now they are learning the real-deal. Real show car detailing that started with sanding, the rotary work and now using orbital polishers to perfect the paint.
What are holograms and were do they come from?
Holograms are a distinct and specific scratch pattern inflicted into the paint when using rotary polisher and some type of fiber pad and even from foam cutting pads. It’s a NORMAL defect from this type of tool, pad and process. The cure it to RE-POLISH using the uniform texture of a foam pad and some type of orbital polisher.
First a quick demonstration and explanation of the hologram removal process…
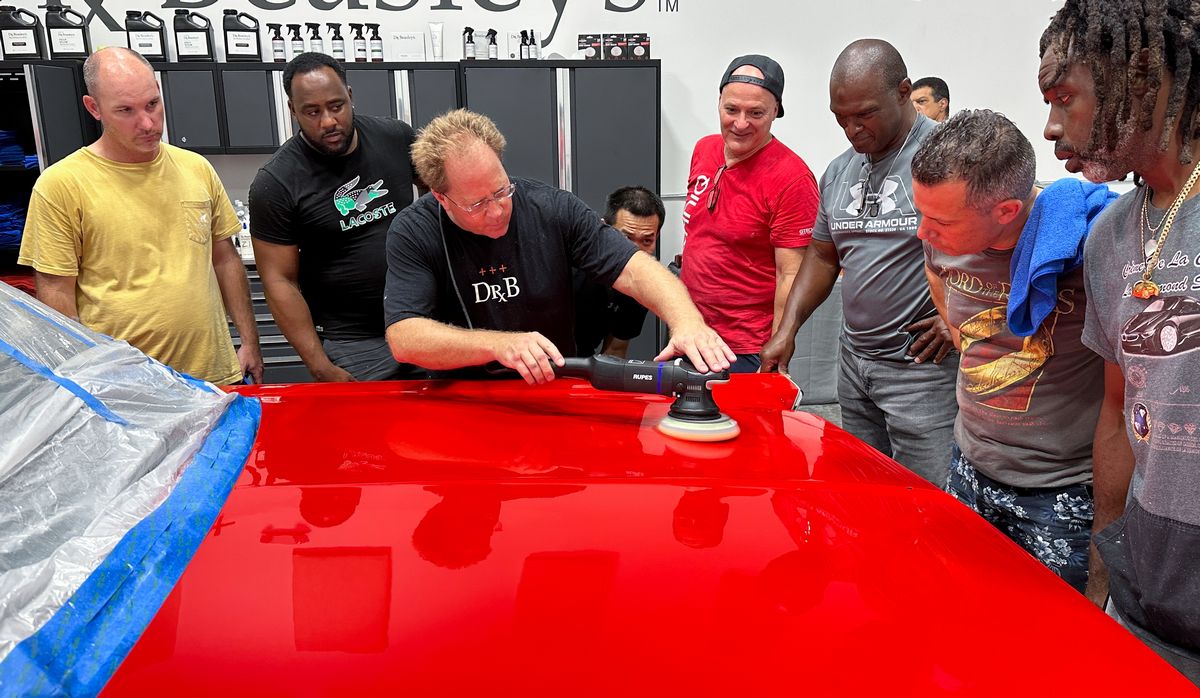
Then I turn the class loose to finish the job!
More…
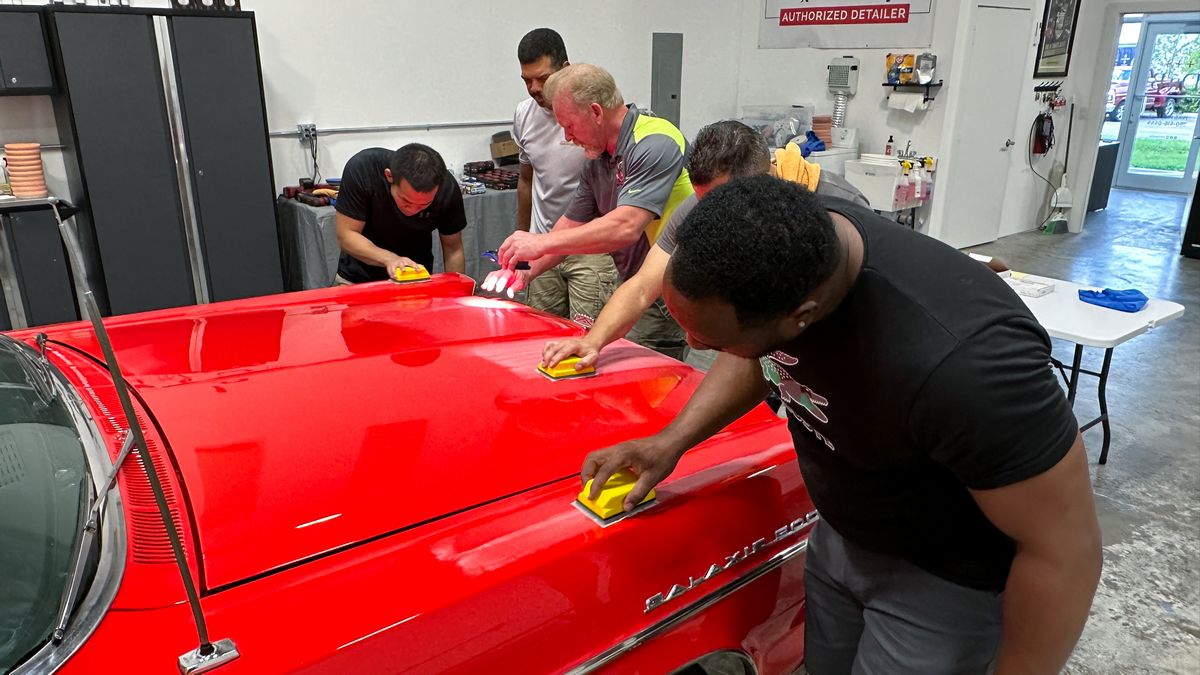
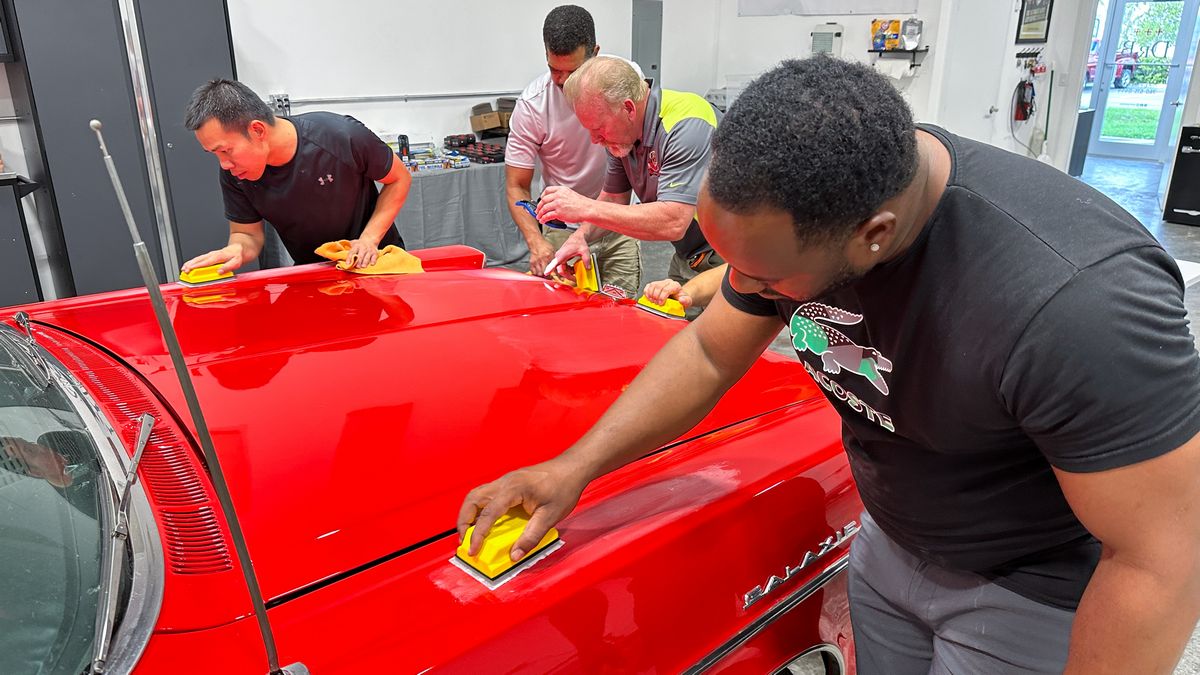
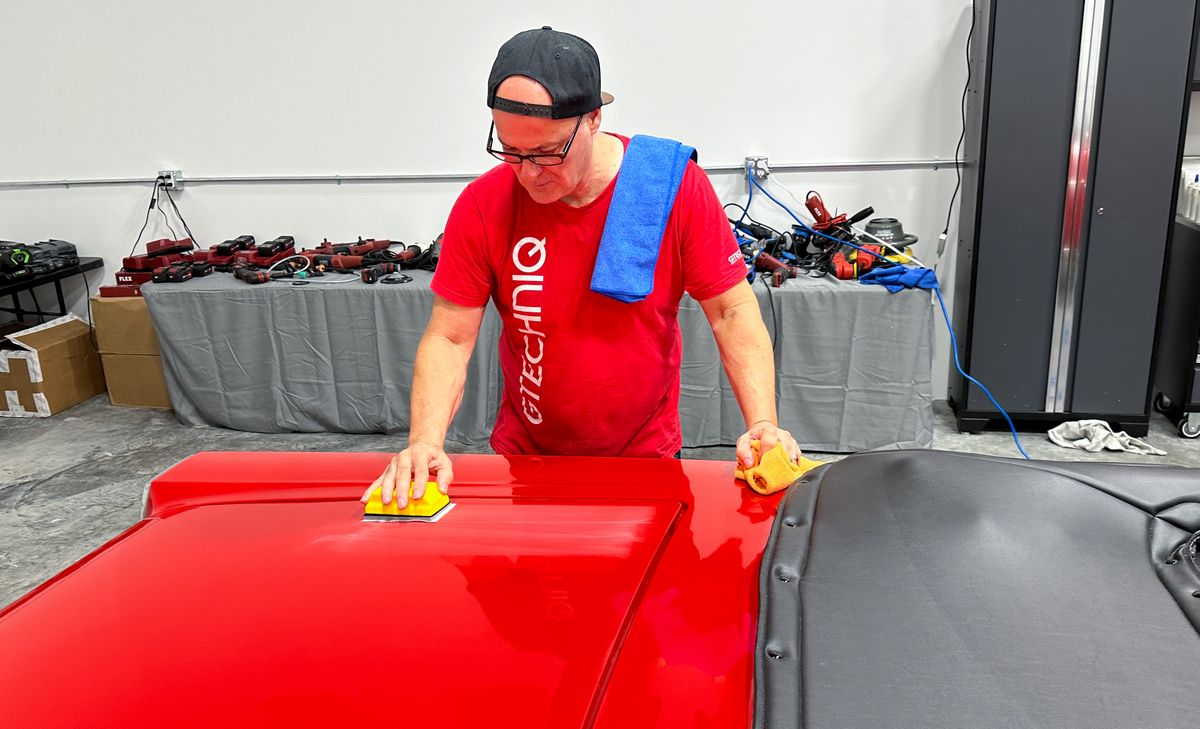
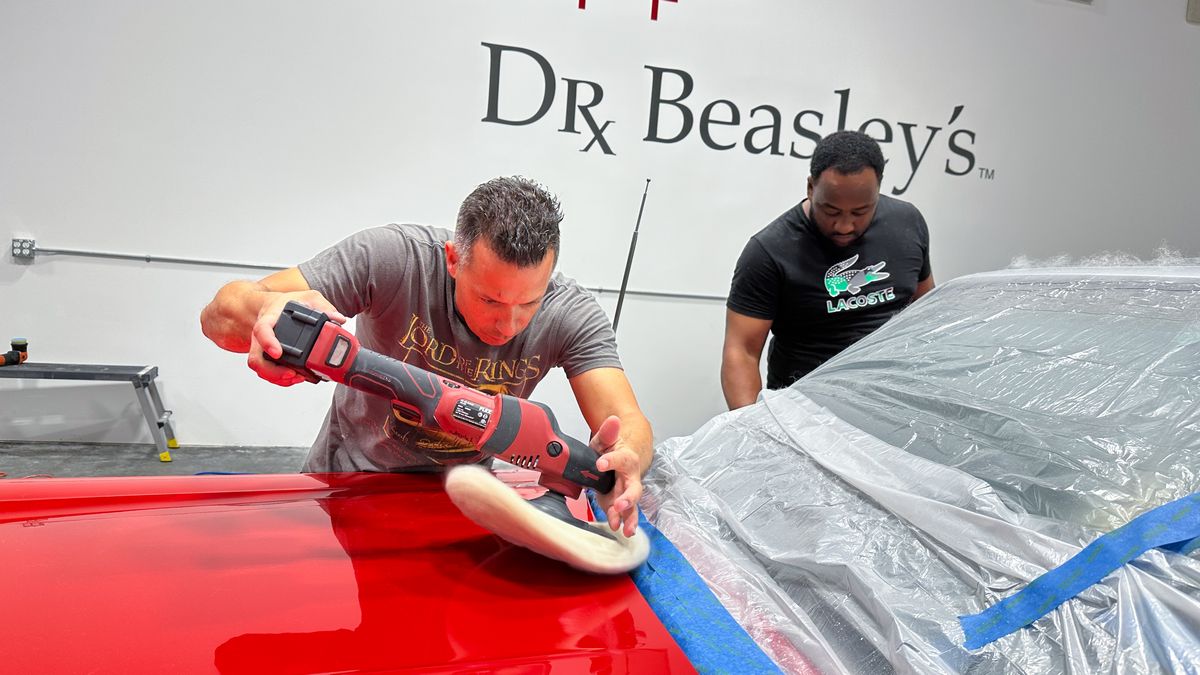
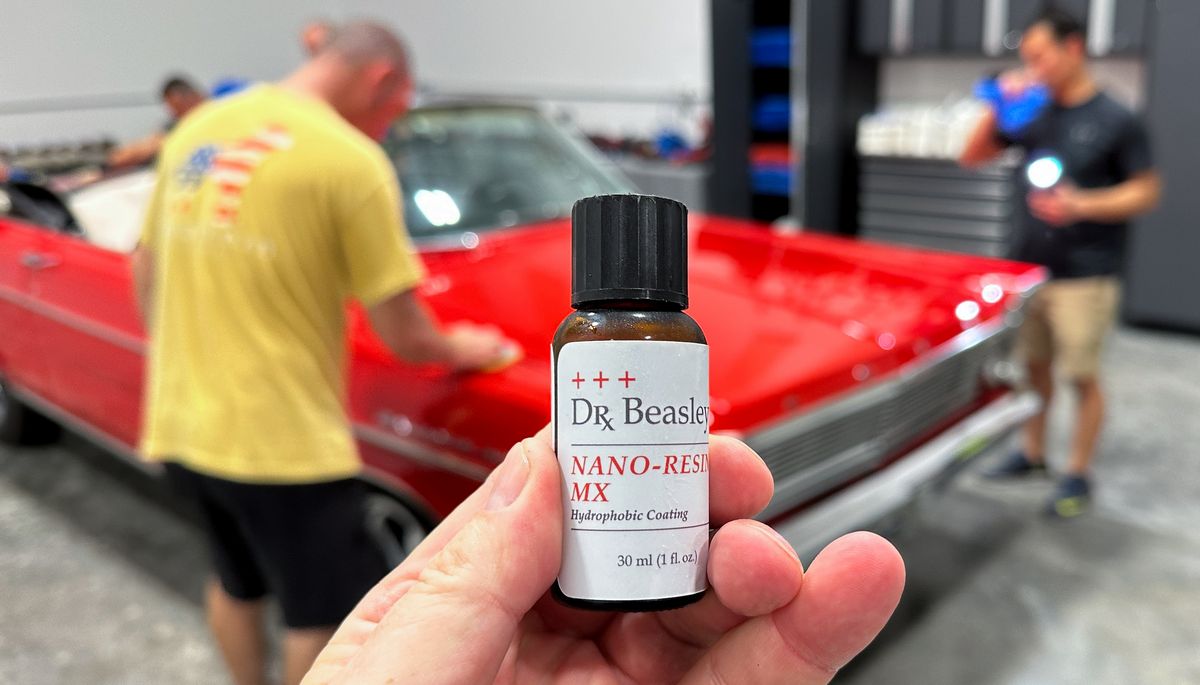
Installing the Dr. Beasley’s Nano-Resin MX Ceramic Coating
The MX Ceramic Coating is a 2-part system.
Part 1 – Paint Coating Builder
The first part lays down the foundation for the entire matrix of ceramic protection. You apply this using the an overlapping crosshatch pattern. Allow this coating to dwell for 2-3 minutes and the gently remove using clean, microfiber towels.
Part 2 – Nano-Resin MX
The second part is to install the MX Ceramic Coating. For this step, you apply using an overlapping crosshatch pattern. The flash time for this is 30 seconds to 1 minute. After waiting for 30 seconds to 1 minute, carefully level the coating using a clean, microfiber towel and remove any excess.
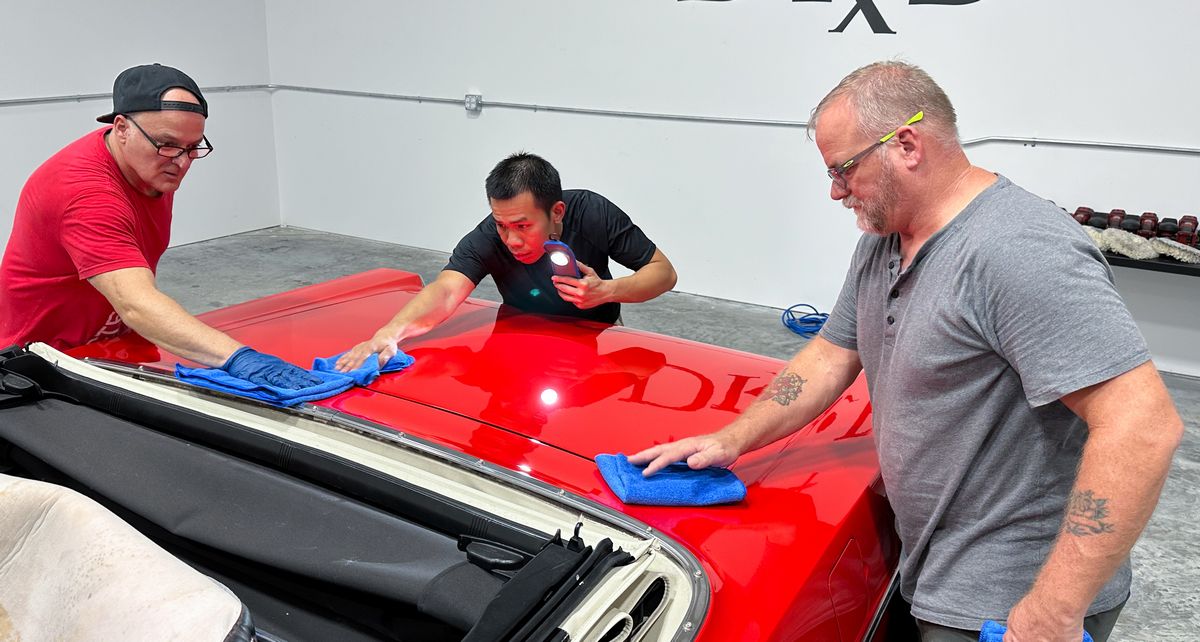
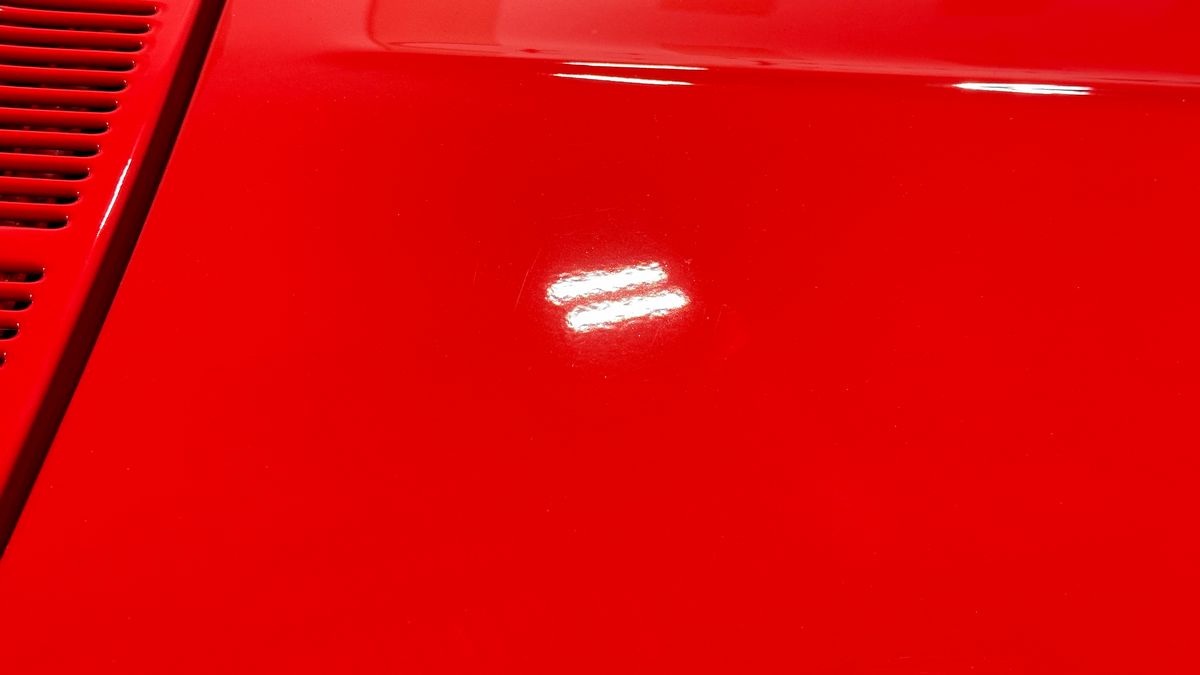
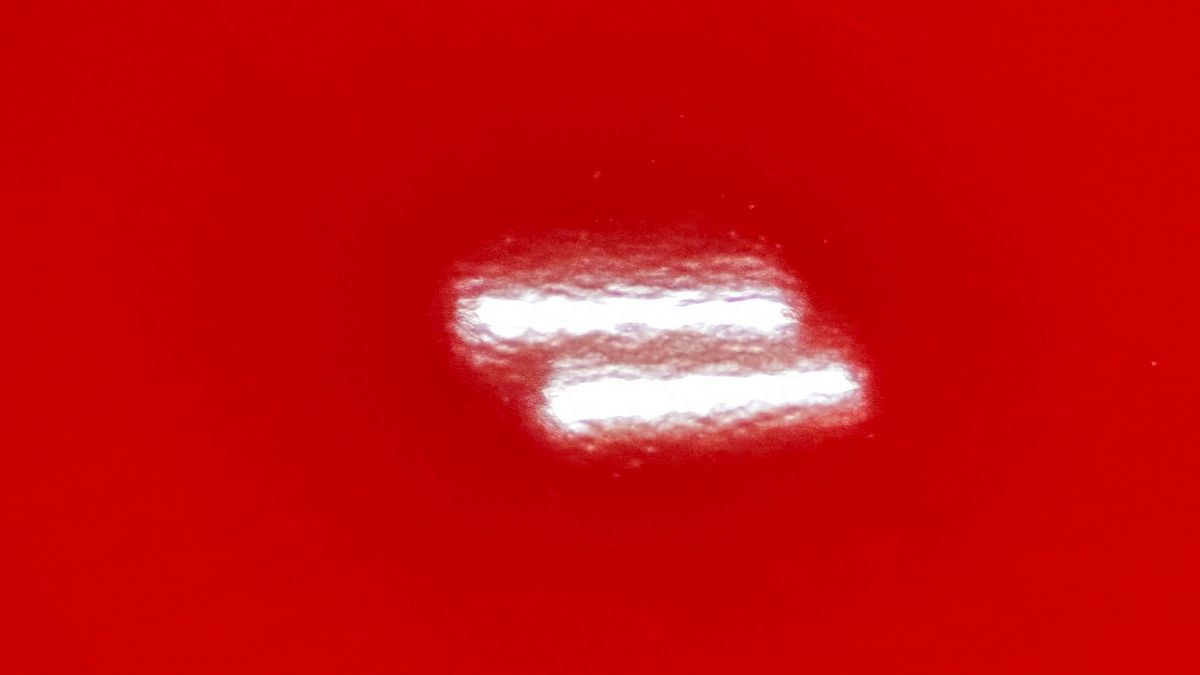
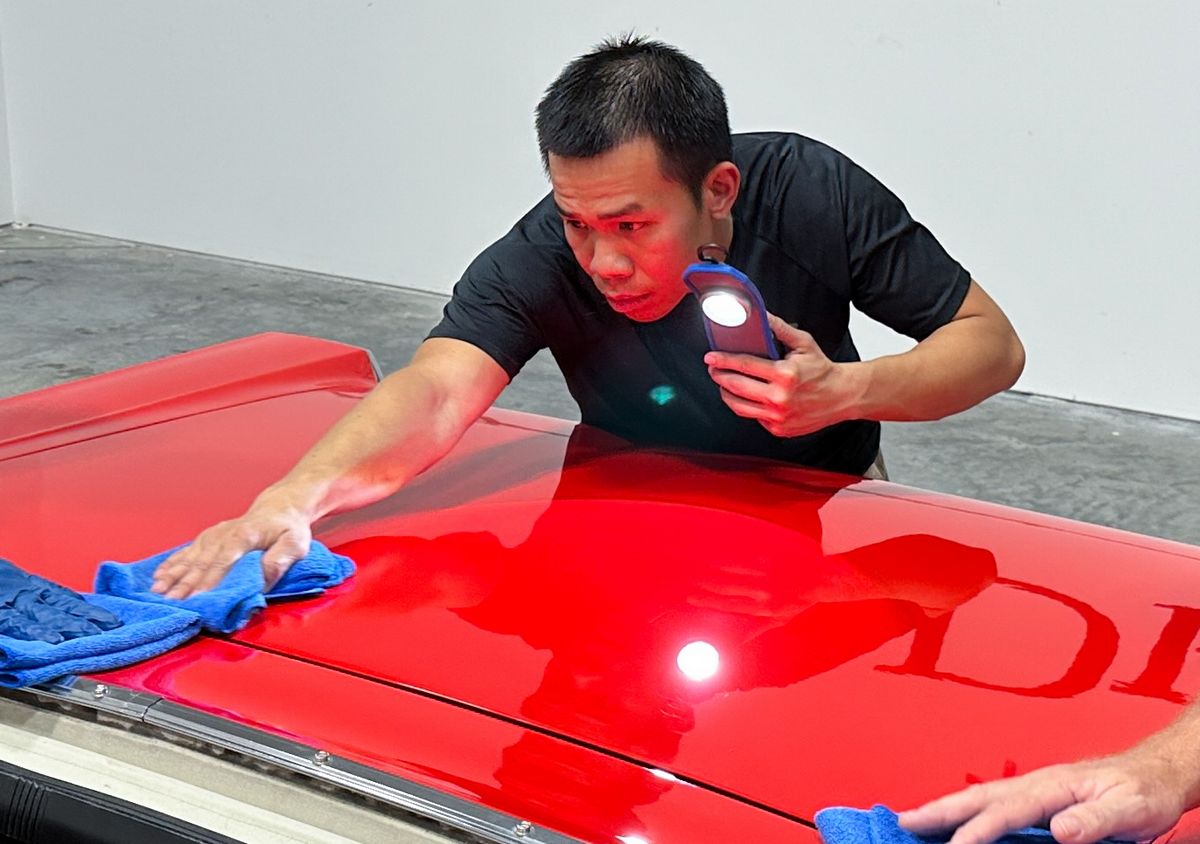
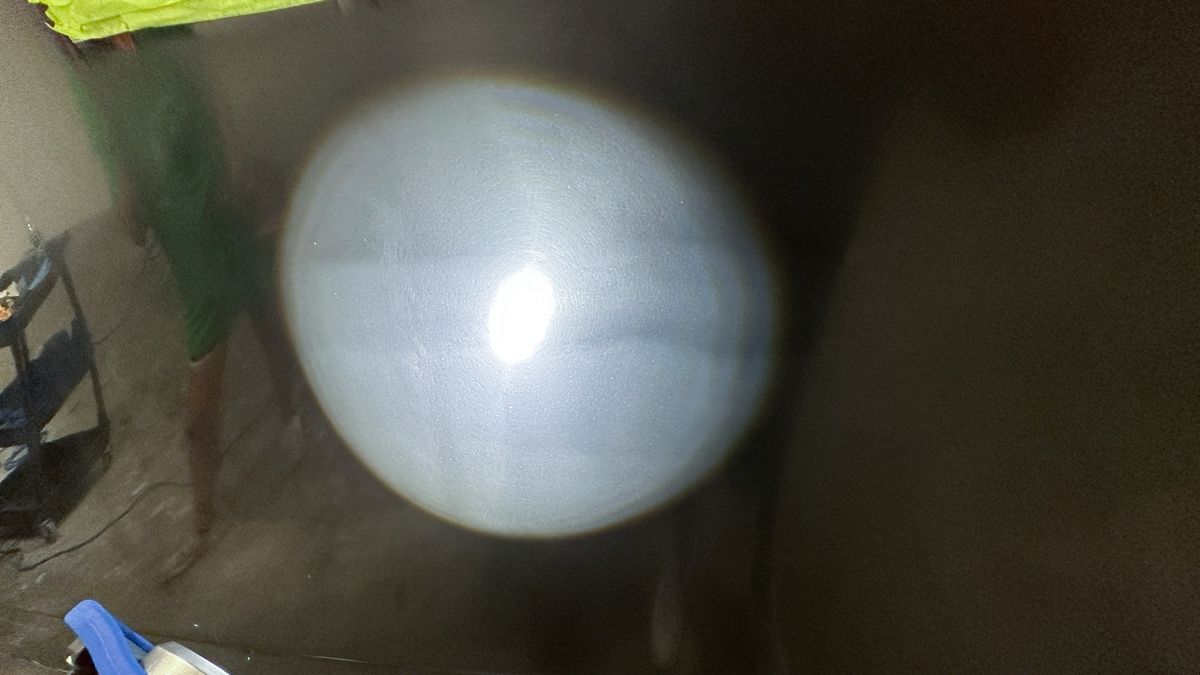
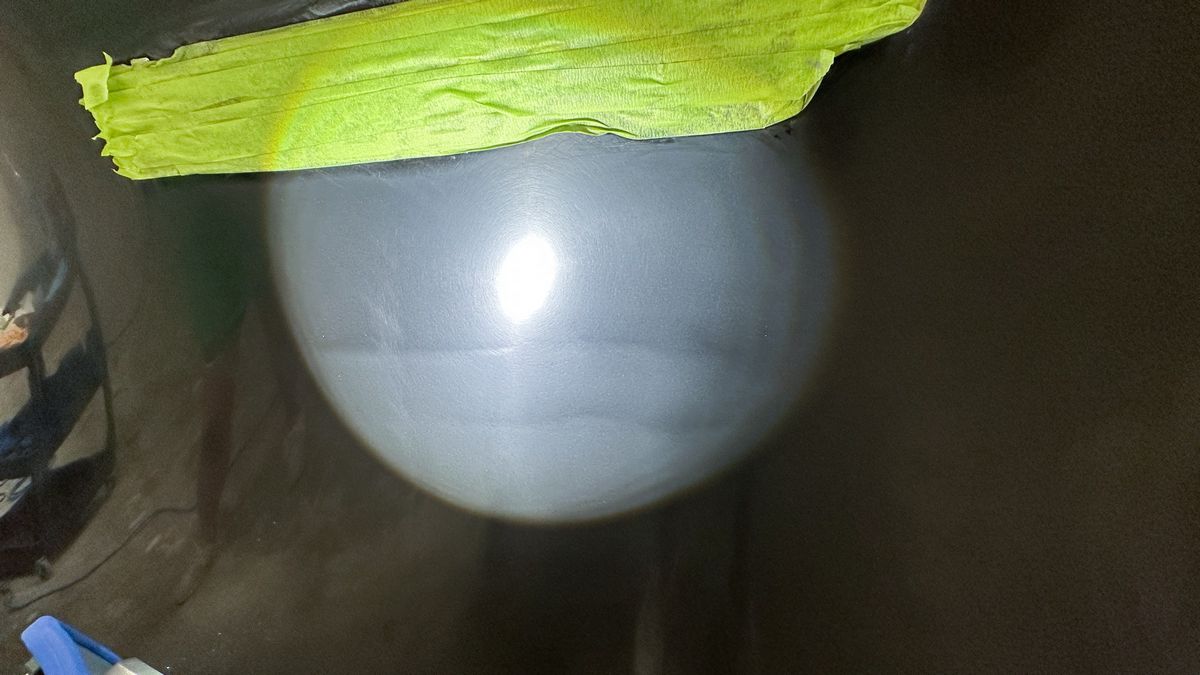
Lake Country Swirl Finder Light tells the whole story!
The below picture is cropped out of the picture above – The Lake Country Swirl Finder Light shows a perfect, swirl-free finish AFTER a complex multiple-step sanding, paint correction and ceramic coating process including,
- Block dry sanding by hand using Eagle Abrasives by KOVAX.
- Machine dry sanding with D.A. Sanders using Eagle Abrasives by KOVAX.
- A wool pad/rotary polisher process using Dr. Beasley’s NSP 150.
- A foam pad/orbital polisher process with Dr. Beasley’s NSP 95.
- Installation of the Dr. Beasley’s Nano-Resin MX Ceramic Coating Kit.
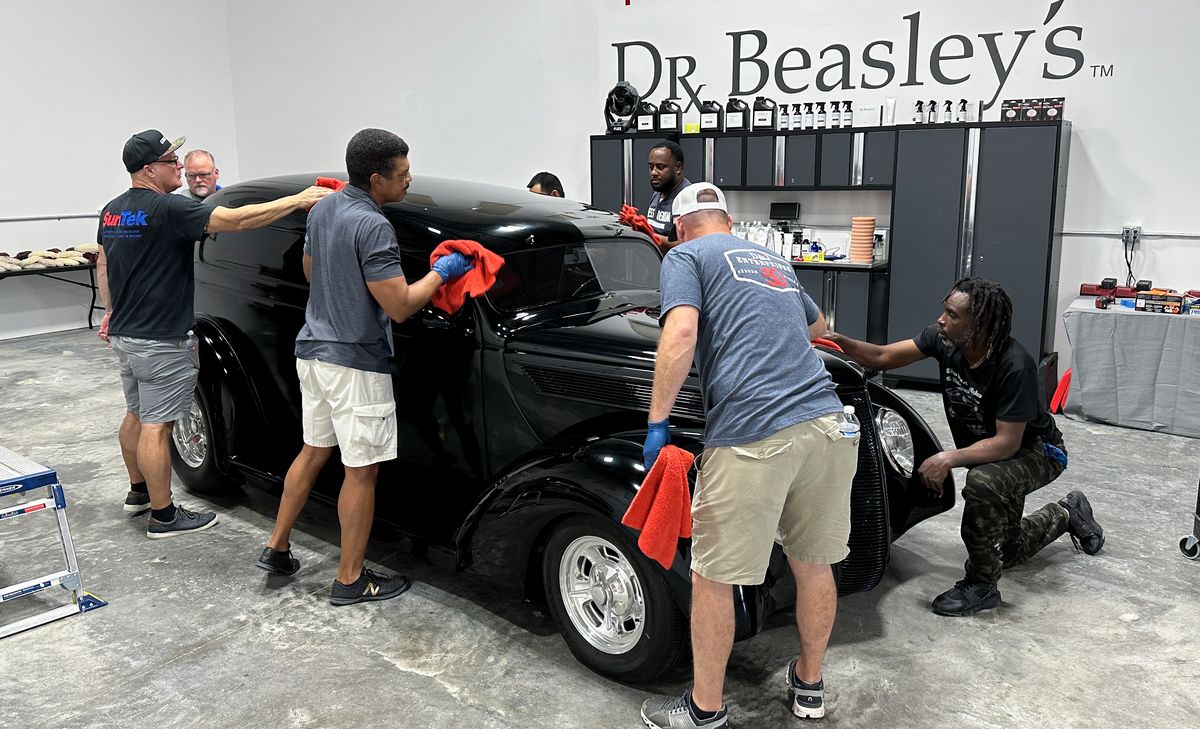
The class used many of the skills and techniques learned on Friday for this show car detail on Saturday. Nice work team!
I love Daniel’s passion for perfection!
Here’s Meko doing his impersonation of the Karate Kid – Wax on! Wax off! Or in our case, Ceramic Coating ON! Ceramic Coating OFF!
Finishing touches…
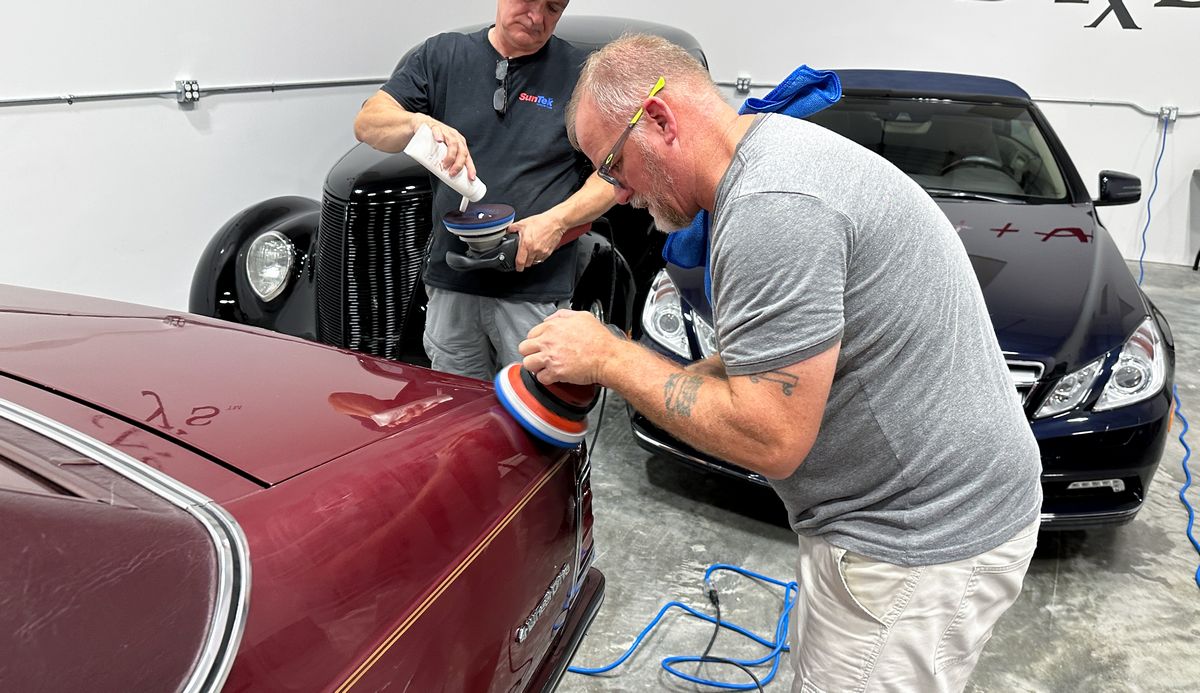
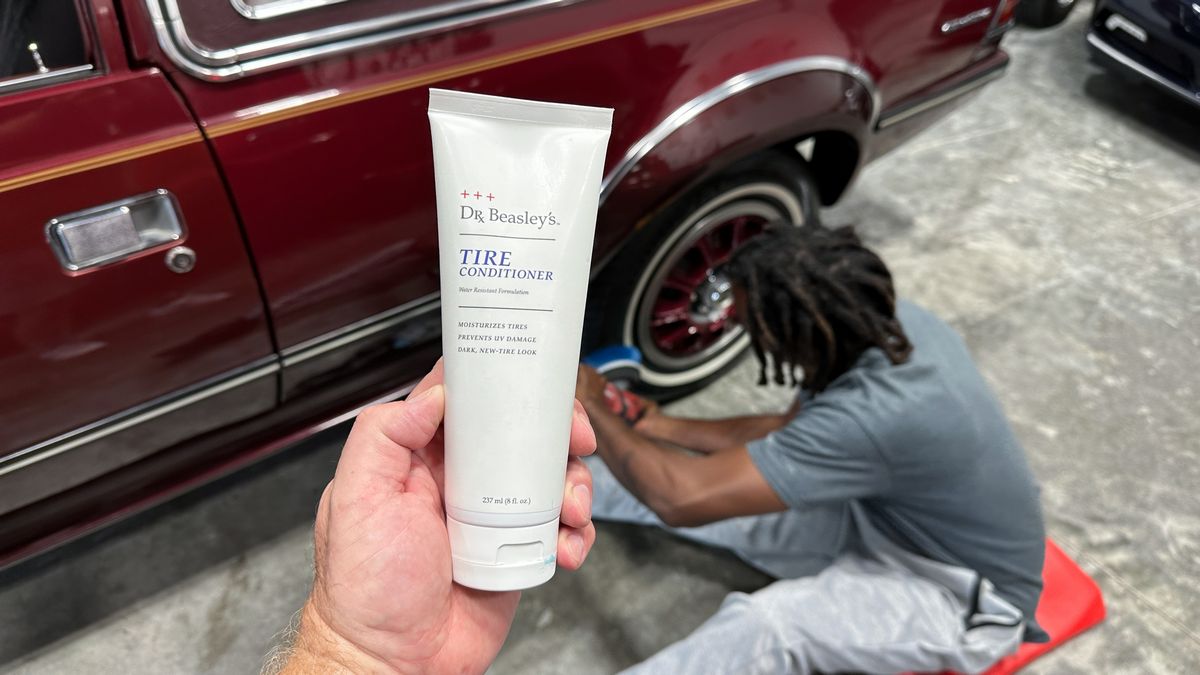
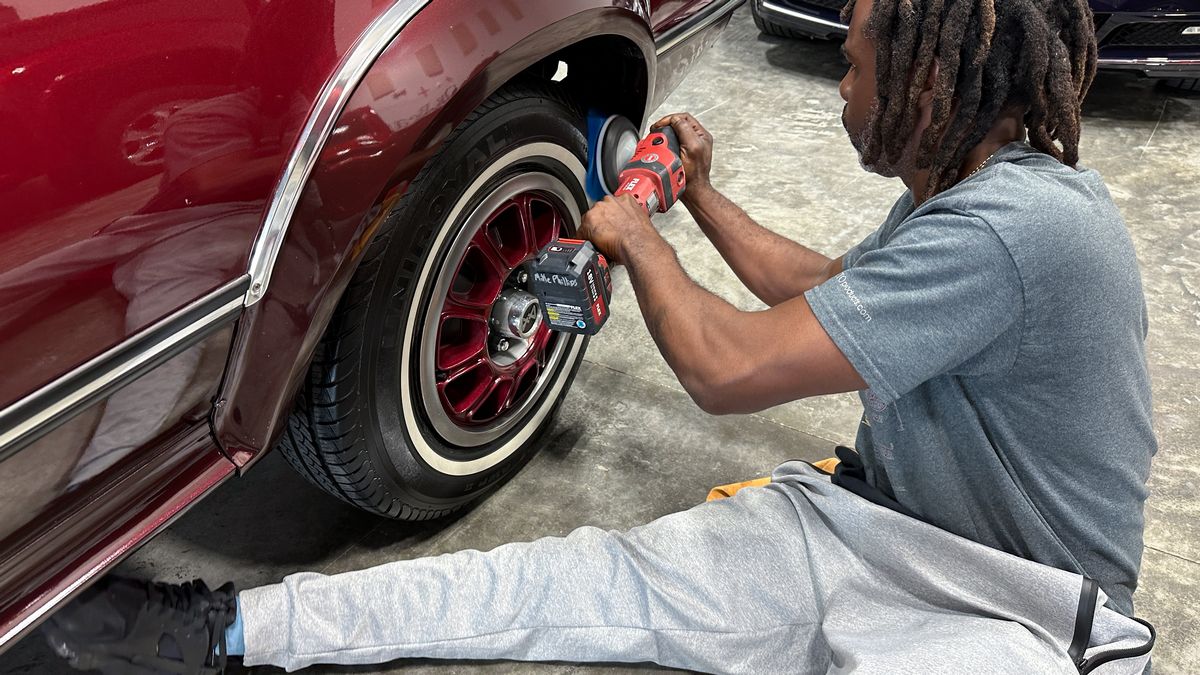
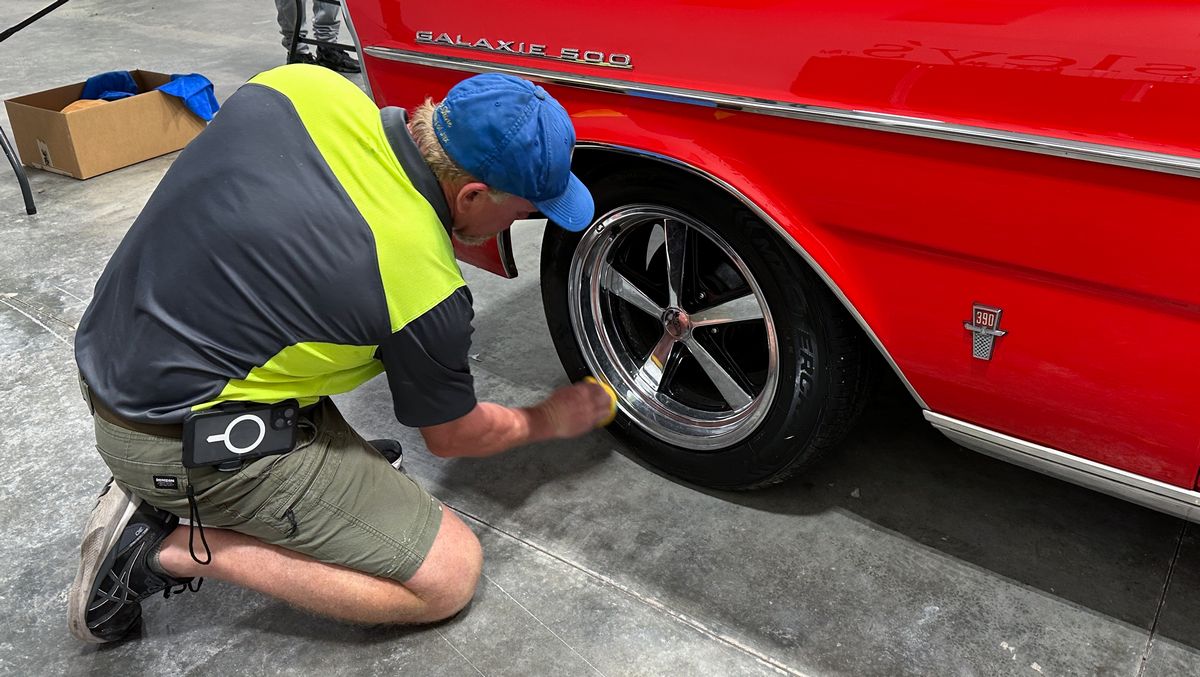
Thank you Russel for adding the finishing touches by applying Dr. Beasley’s Tire Conditioner!
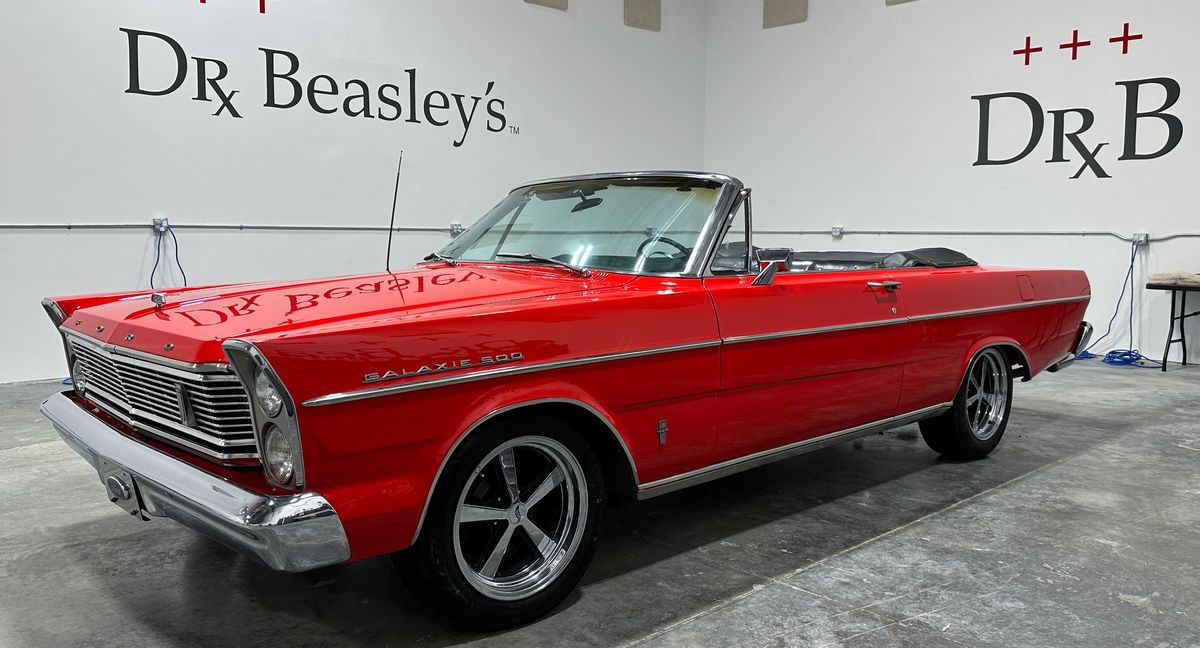
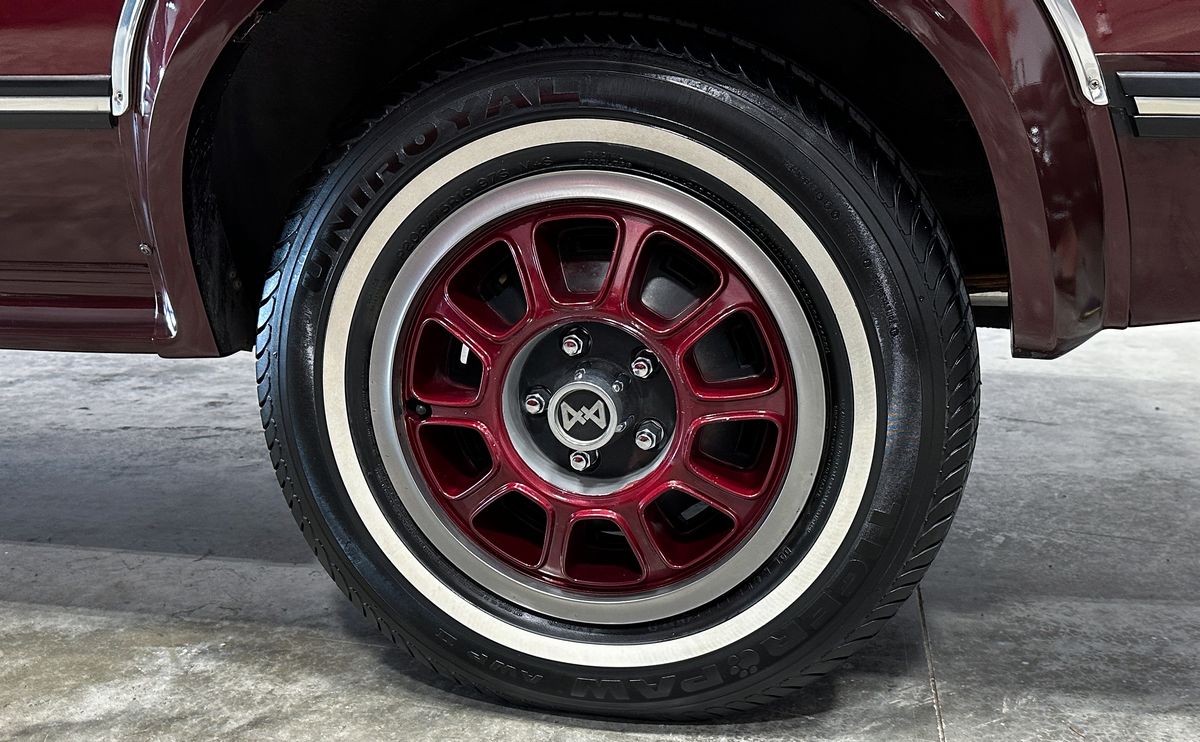
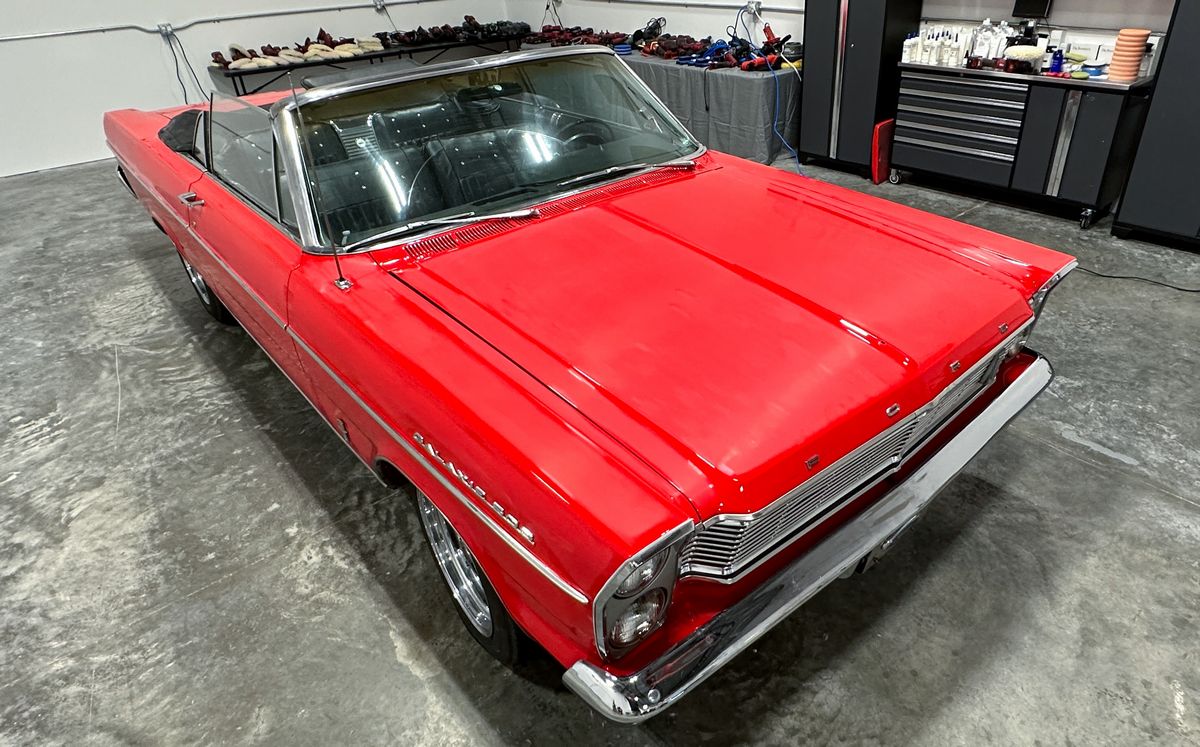
And here’s the final results!
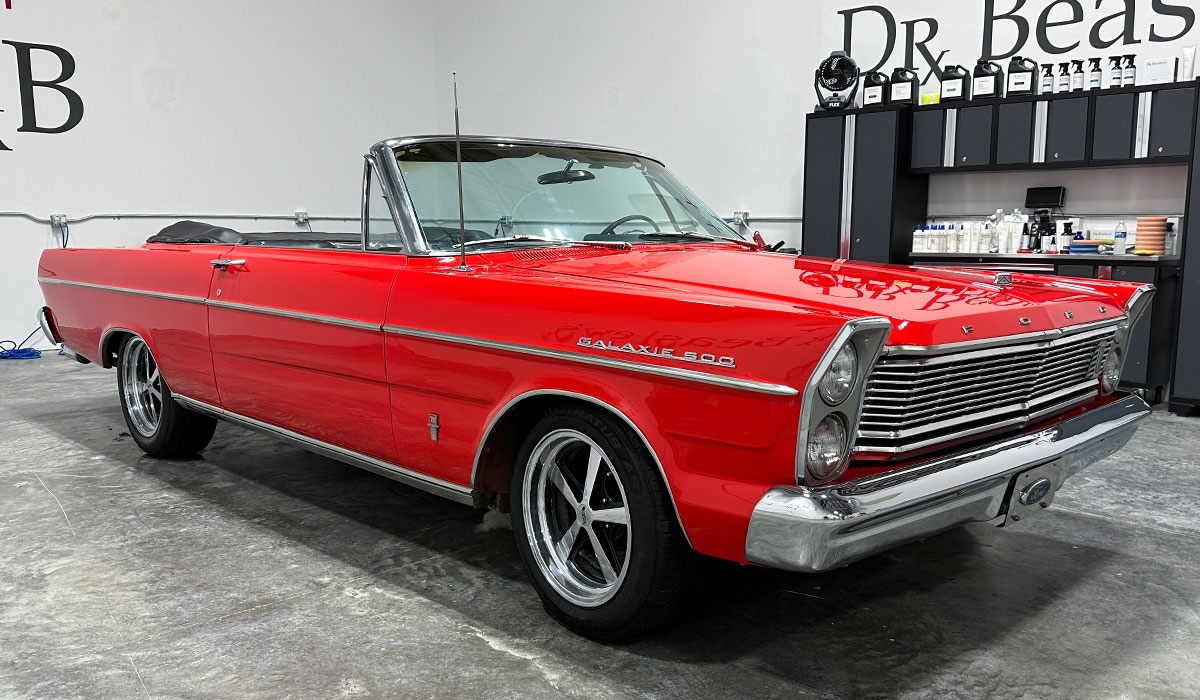
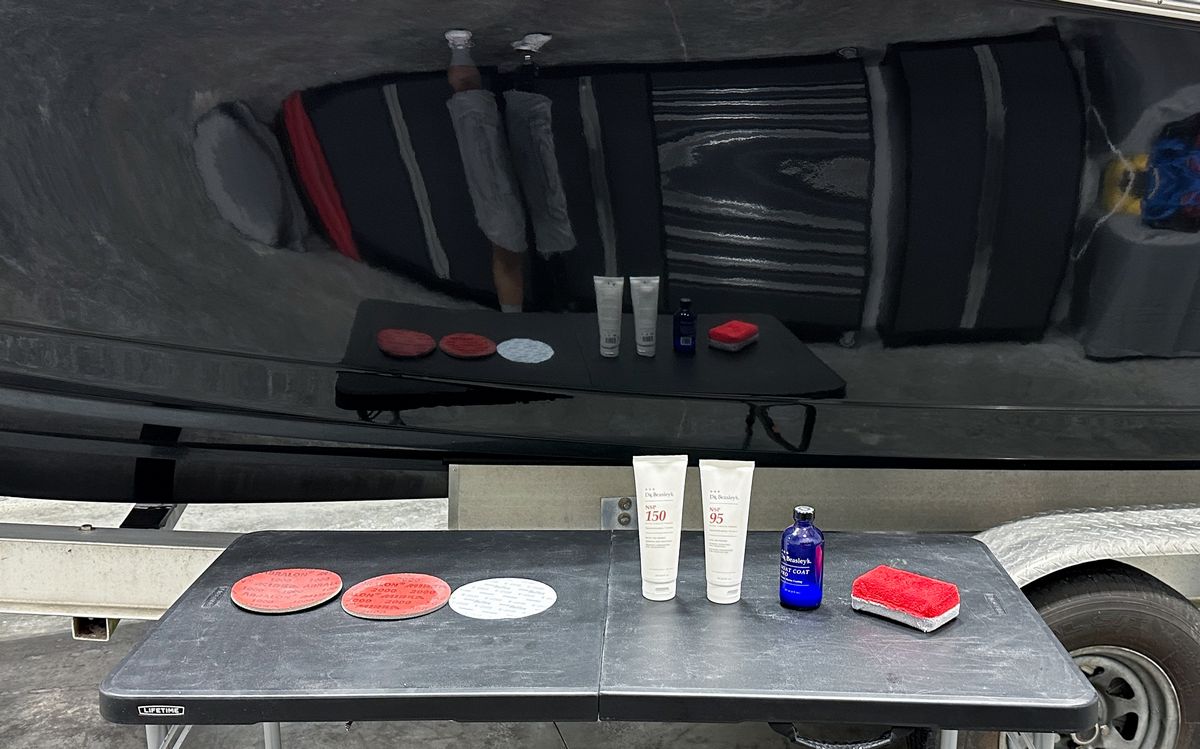
Here’s what we used…
The Eagle Abrasives KOVAX Dry Sanding System – FLEX Cordless FX3411 DA Sander – FLEX PXE-80 with the 6mm drive unit
For removing the sanding marks we used the Dr. Beasley’s NSP 150 Primer with wool cutting pads on the FLEX Cordless PE-150 Rotary Polisher.
For removing the hologram scratches from the fibers from the wool pad we used the Dr. Beasley’s NSP 95 Primer with orbital polishers and Dr. Beasley’s HDO Blue Cutting Pad
To seal and protect the paint and all their hard work, we used the Dr. Beasley’s Nano-Resin MX Kit
And here’s the team that made the magic happen!
Nice work everyone!
Saturday Night Meet & Greet!
This is a tradition for my detailing classes that dates back to 2010 and is my favorite part of the class. By the time we arrive for the Meet & Greet, this class has detailed 6 cars in 2 days. That’s a TON of hands-on training.
- 1937 Ford 2-door Sedan Streetrod – arrived here with D.A. sanding marks throughout the entire finish.
- 2011 Mercedes-Benz E350 Cabriolet – actually in very good condition and as such MATCHED the topic being taught for this class session.
- 1982 AMC Eagle – Original Single Stage Paint (rare).
- 1979 Ford F150 Stepside Shorty – Custom basecoat/clearcoat paint system.
- 2018 Ford F150 Truck – totally jacked-up black paint.
- 1965 Ford Galaxie 500 Convertible Restorod – Custom paint job with lots of orange peel.
There’s really no other car or boat detailing class on the market anywhere on planet Earth where you get this much hands-on training TIME on really cool training vehicles. At the Meet & Greet, after enjoying some great seafood, we go around the table and ask each person a few questions:
- What was your favorite car to work on?
- What was your favorite product to use?
- What was your favorite tool to use?
- What was the most interesting or eye-opening technique you learned?
- Do you have anything special in your garage at home?
It’s incredibly rewarding to hear everyone’s experience, feedback and perspective after two full days of training and hard work.
Here’s a few pictures from the November 2023 Dr. Beasley’s Future of Detailing Meet & Greet at Fresh Catch in Stuart, Florida!
I arrived early to secure our reservation and pre-order hors d’oeuvres.
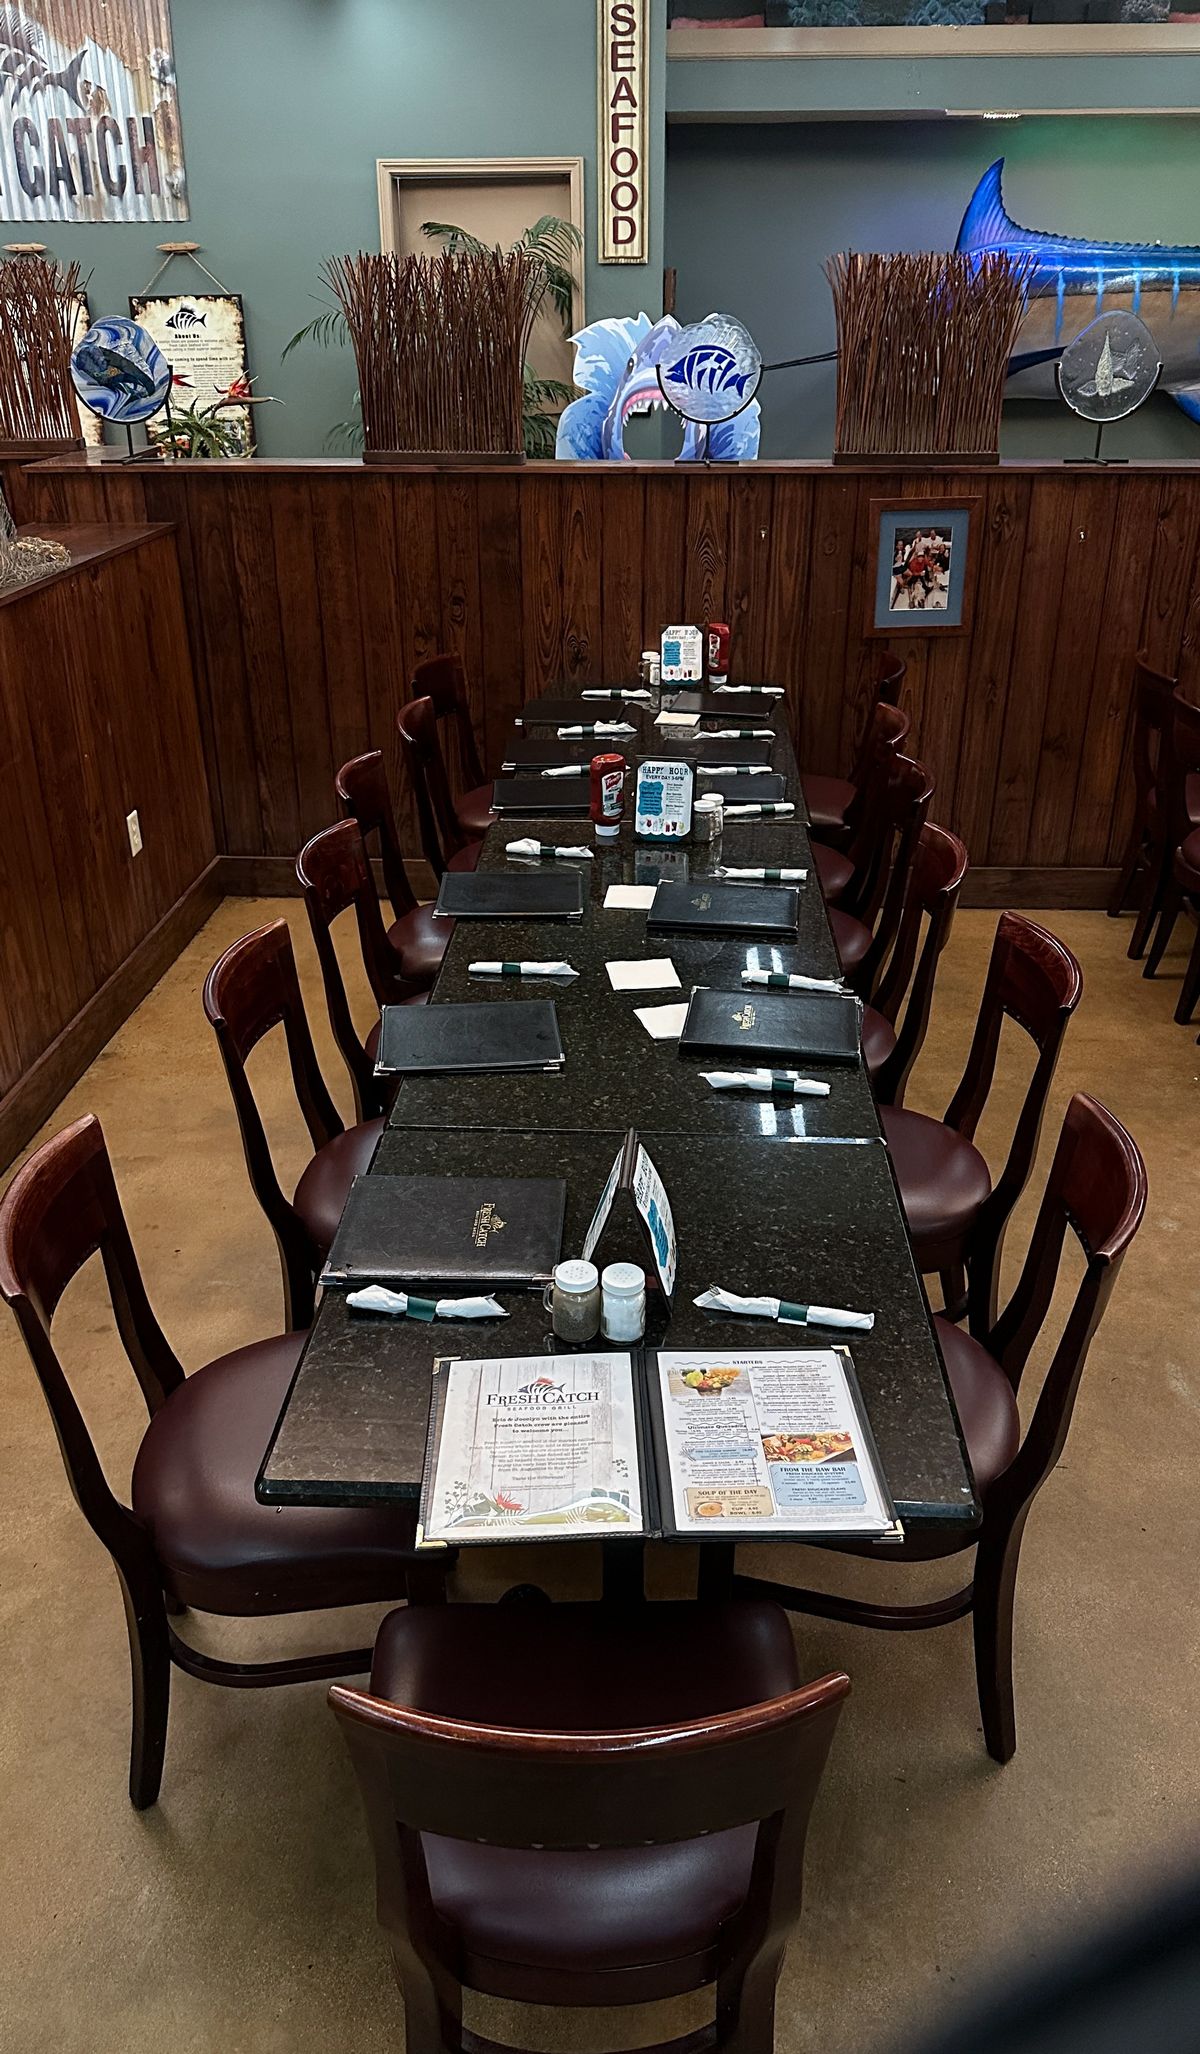
I’m personal friends with the owner and his wife, Eric and Jocelyn and the reason we like to hold our Meet & Greet events at Fresh Catch is because they ALWAYS have the best and freshest seafood on the entire Atlantic coast.
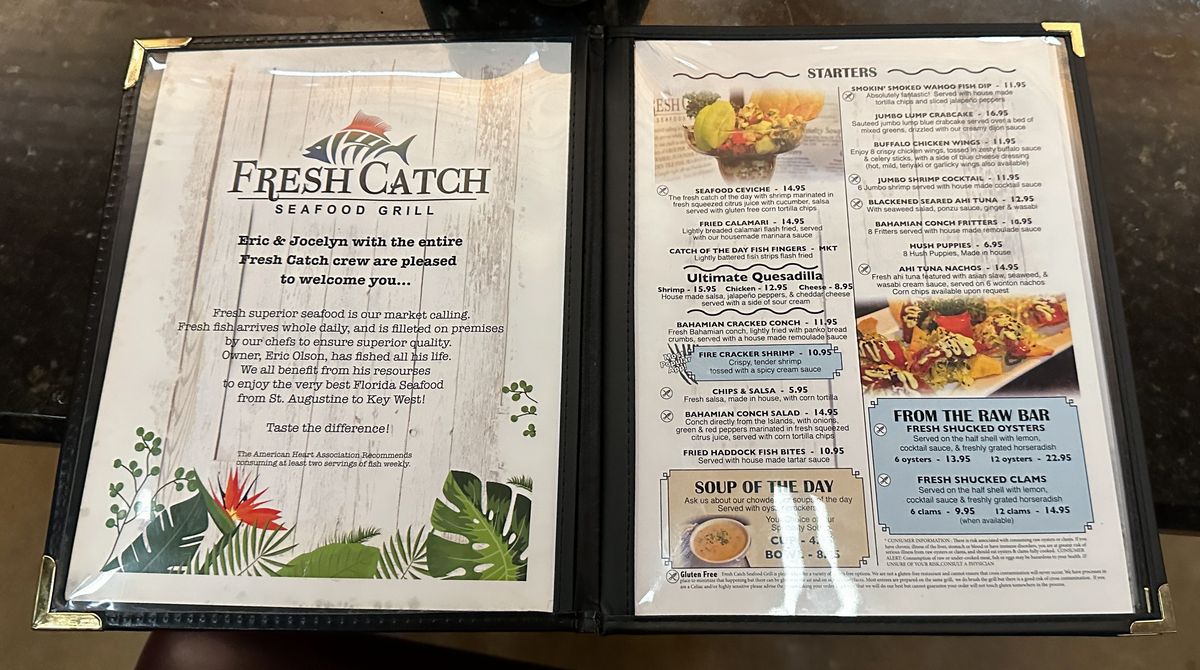
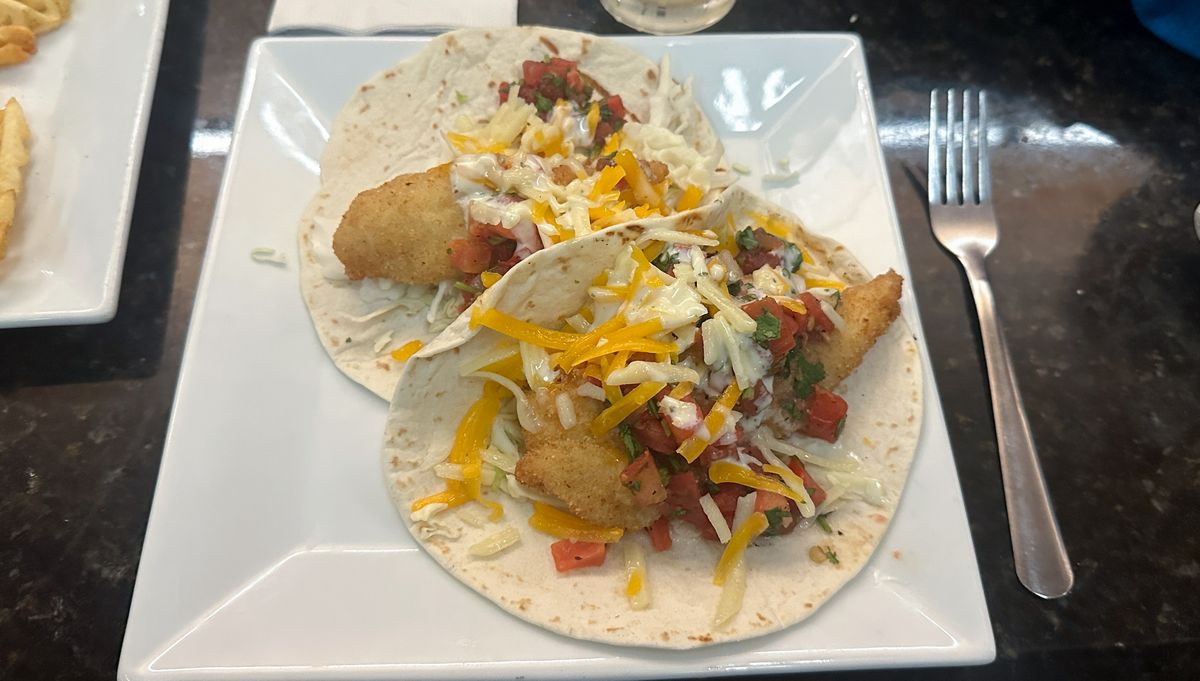
These are the Fish Tacos on the menu, and they are delicious! Especially when paired with the homemade Datil Pepper Hot Sauce. Eric grows these Datil Peppers at his home and custom makes the hot sauce at his restaurant. If you love a good hot sauce, be sure to ask for Eric’s awesome Datil Pepper Hot Sauce!
Great people and great food!
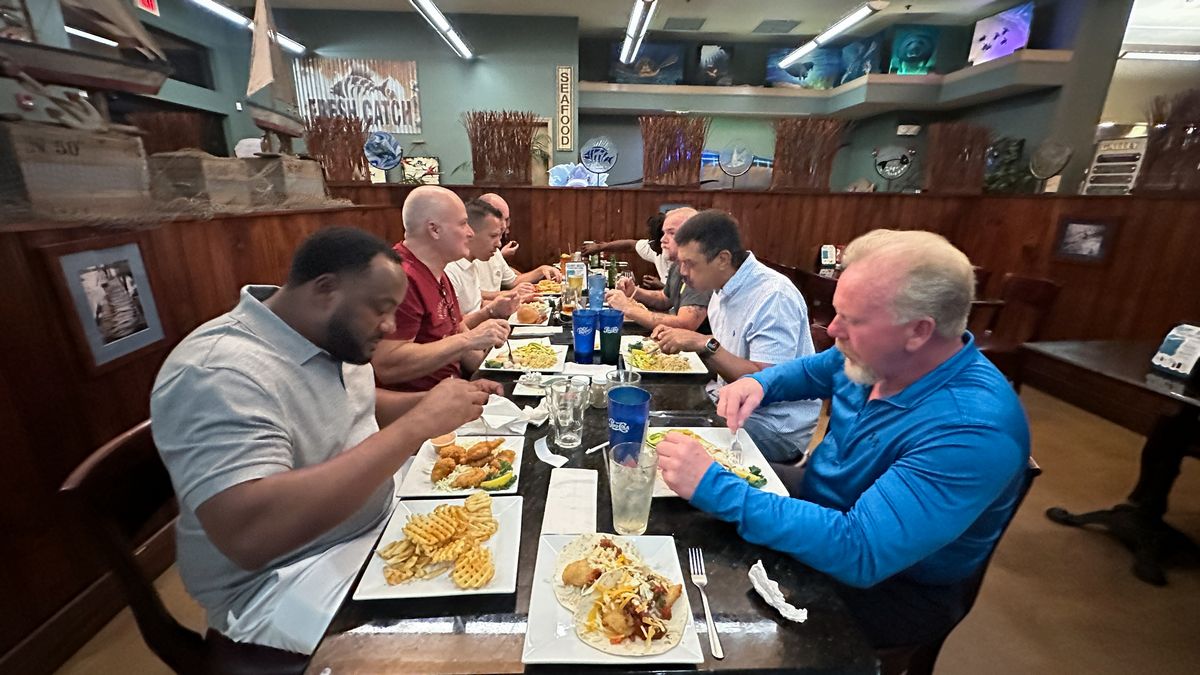
Another stellar Meet & Greet and Fresh Catch!
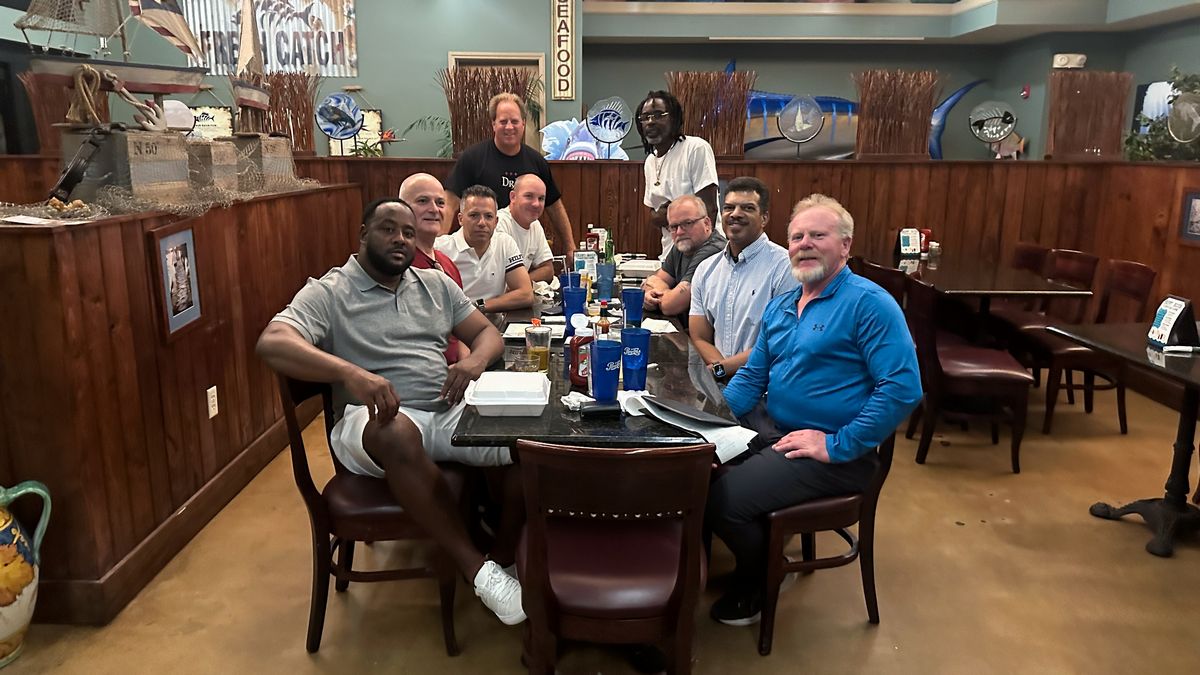
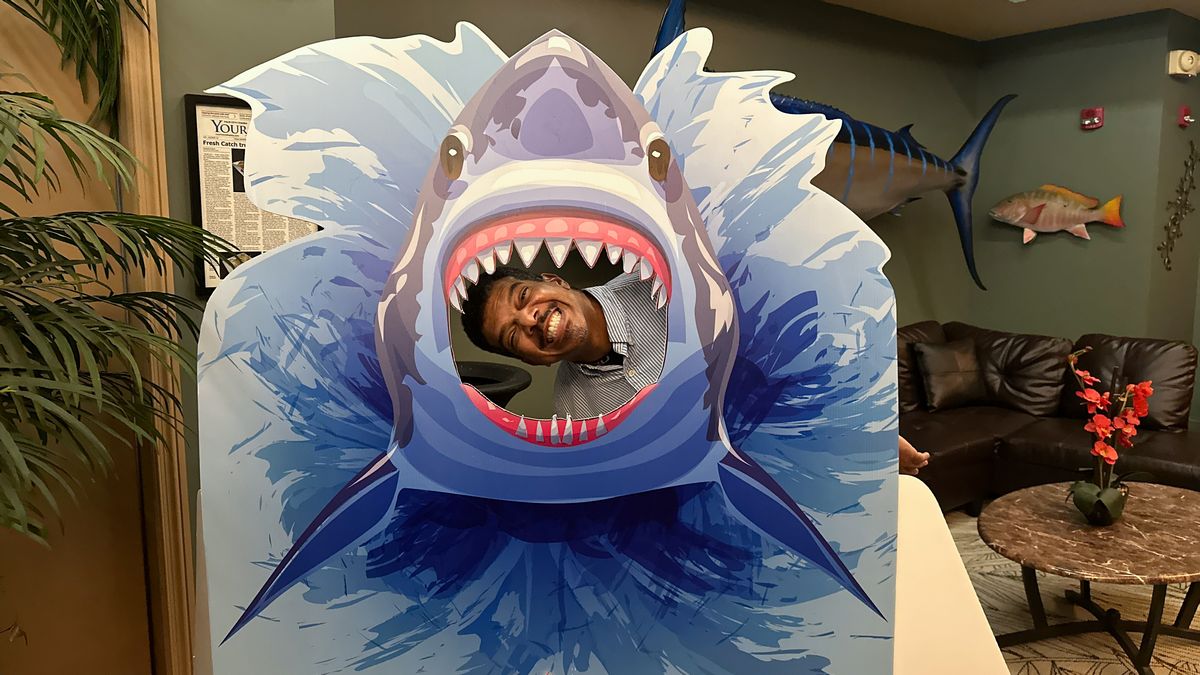
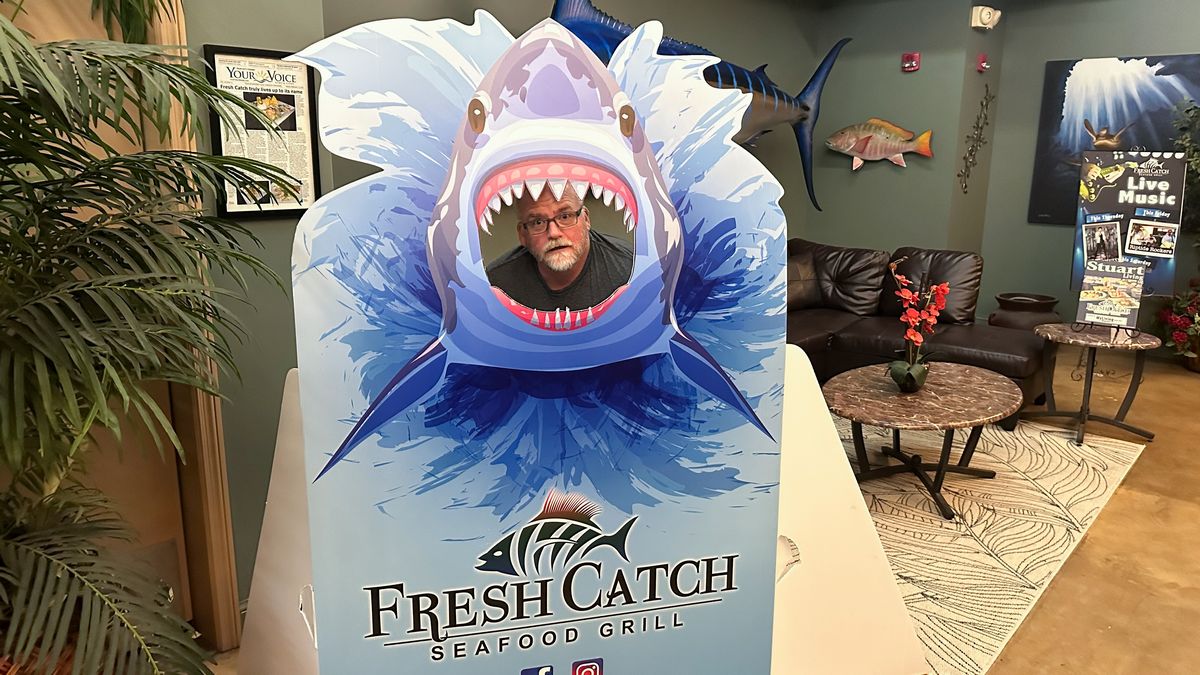
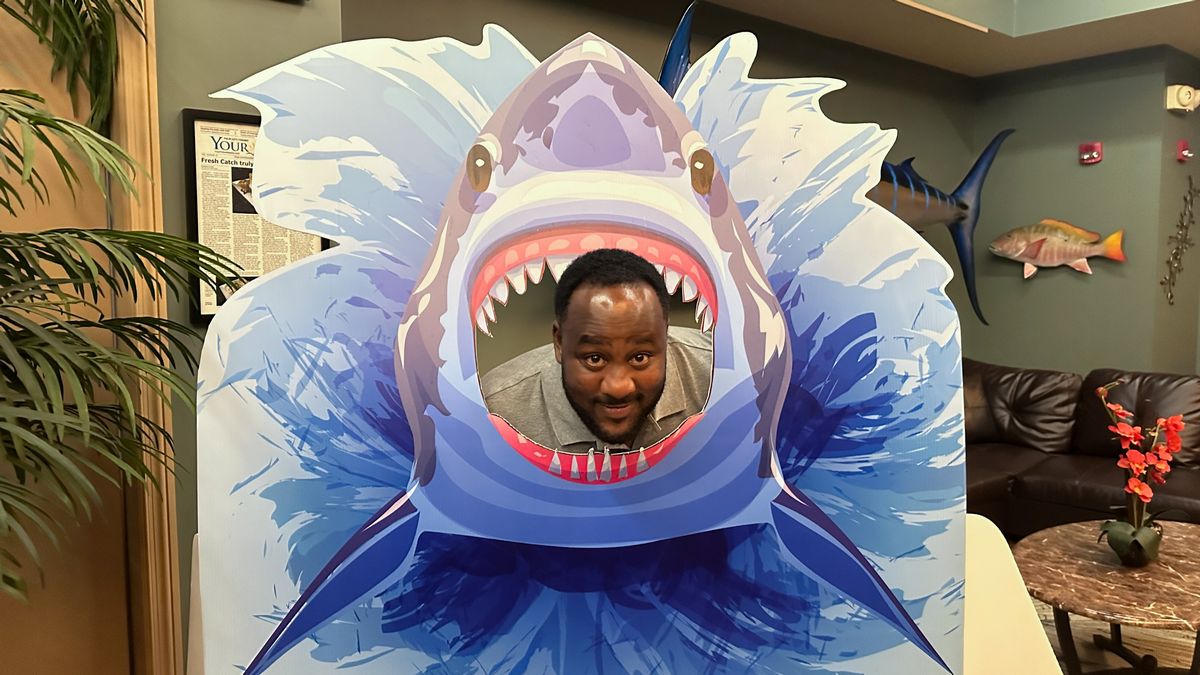
And of course, you can’t go to Fresh Catch without getting your picture taken with the Lobby Shark!
Great food, great people – good times!
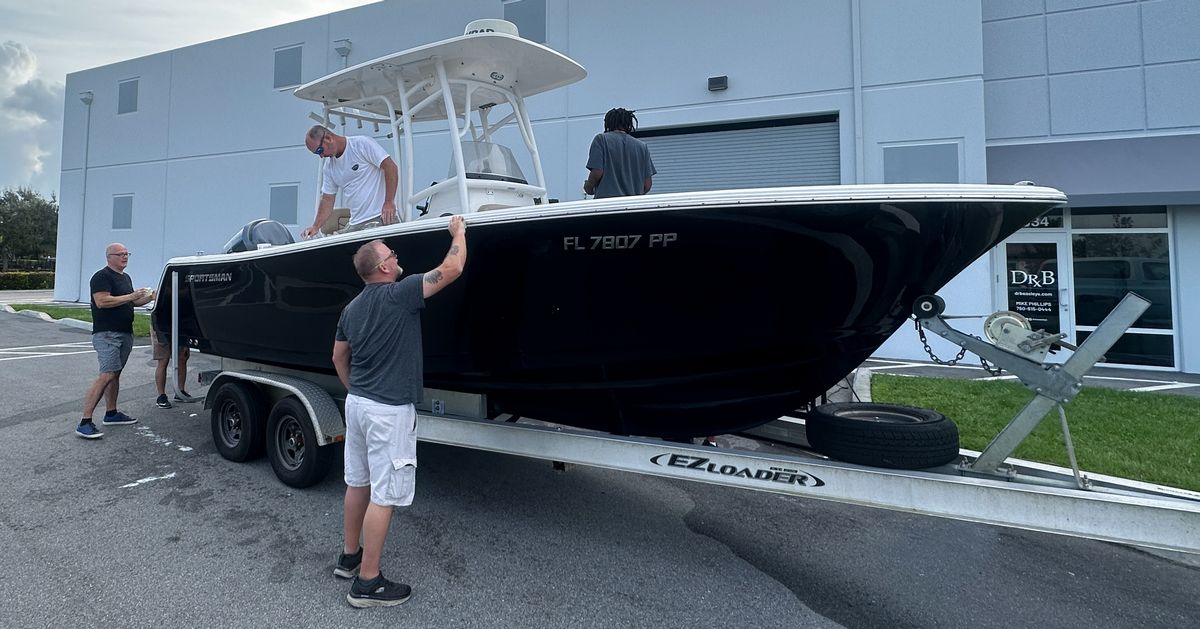
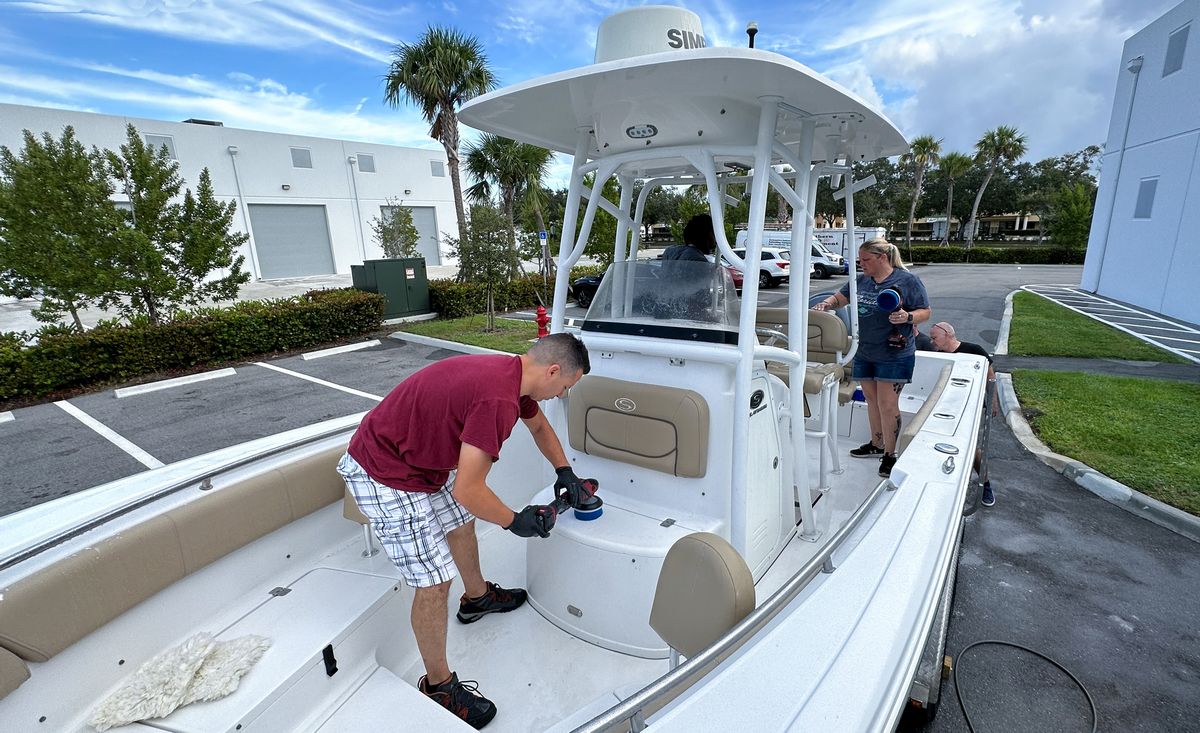
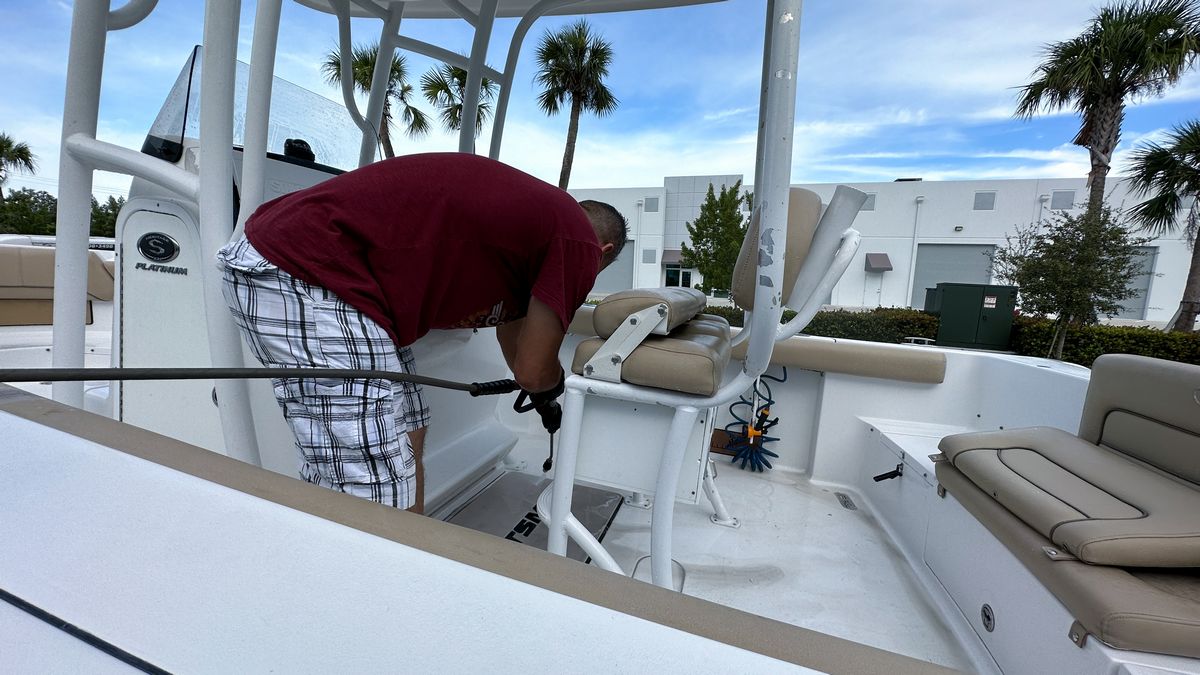
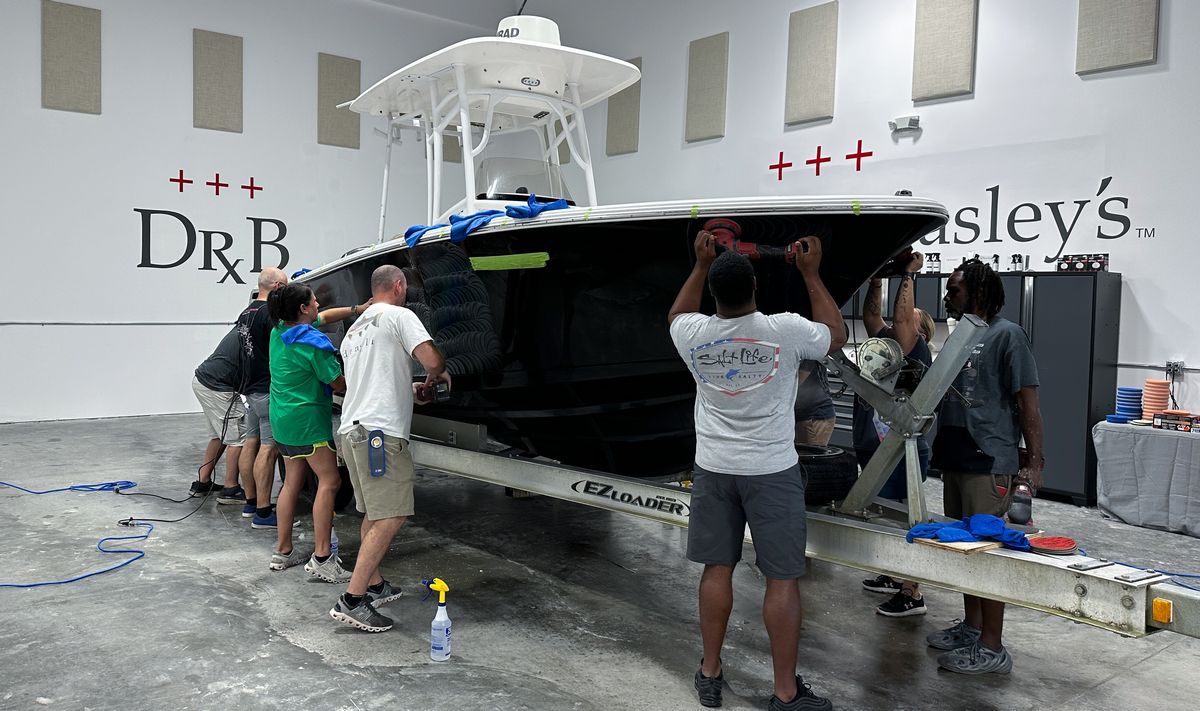
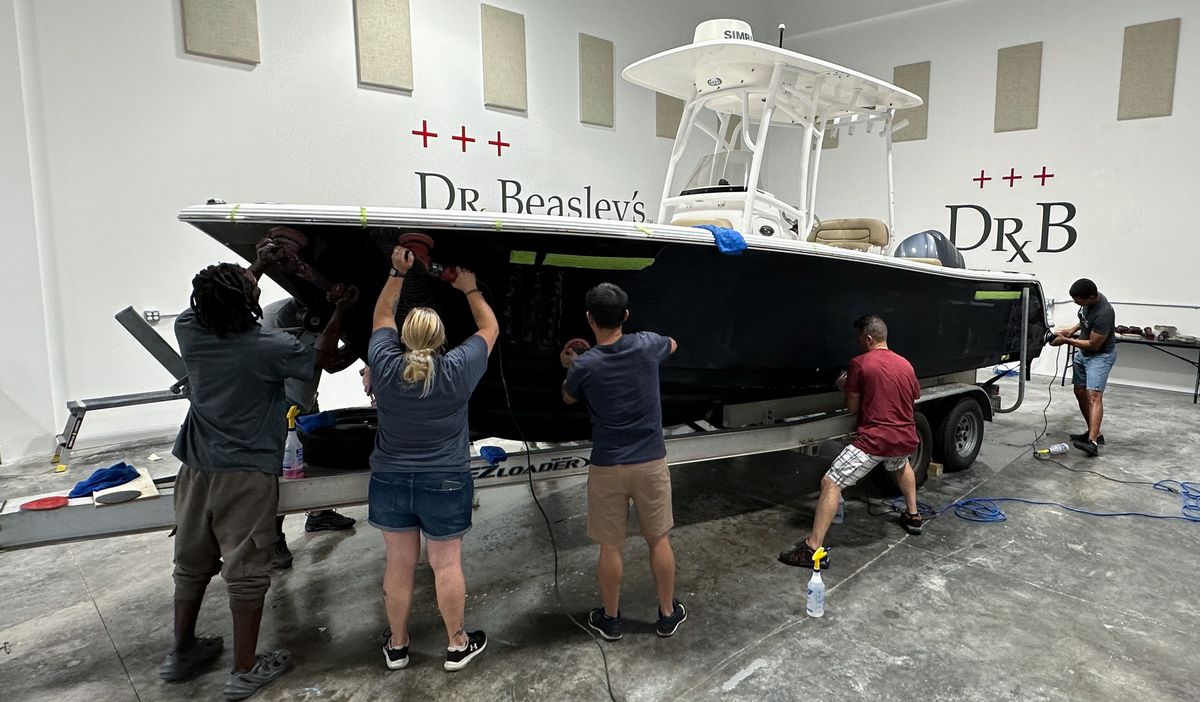
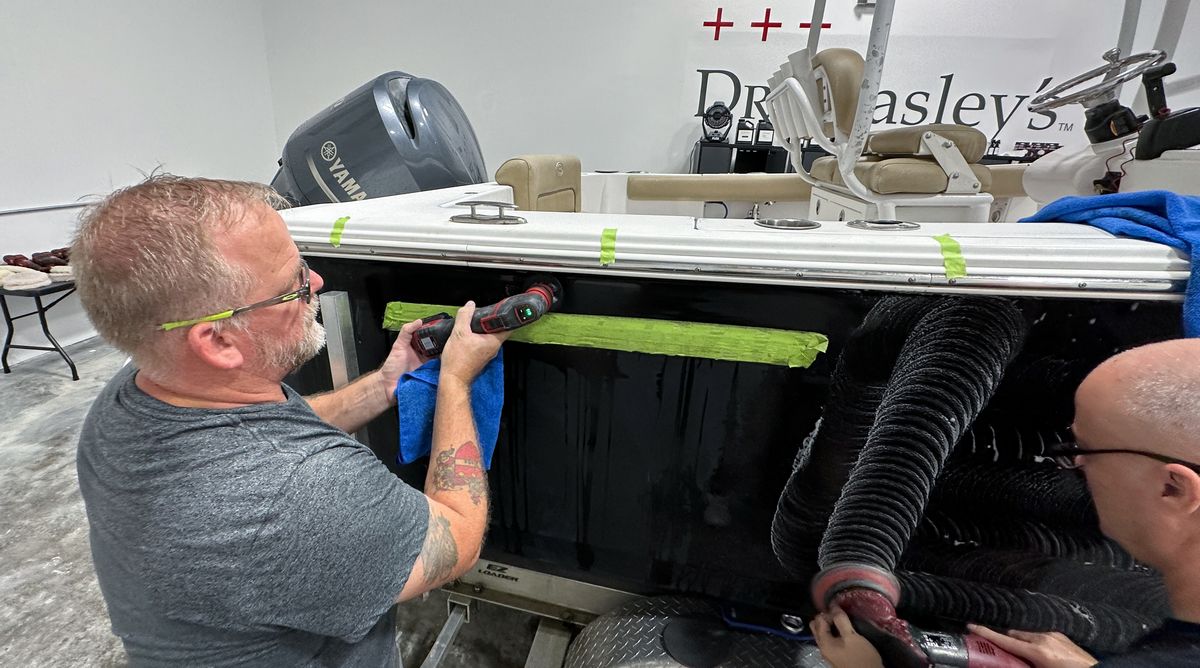
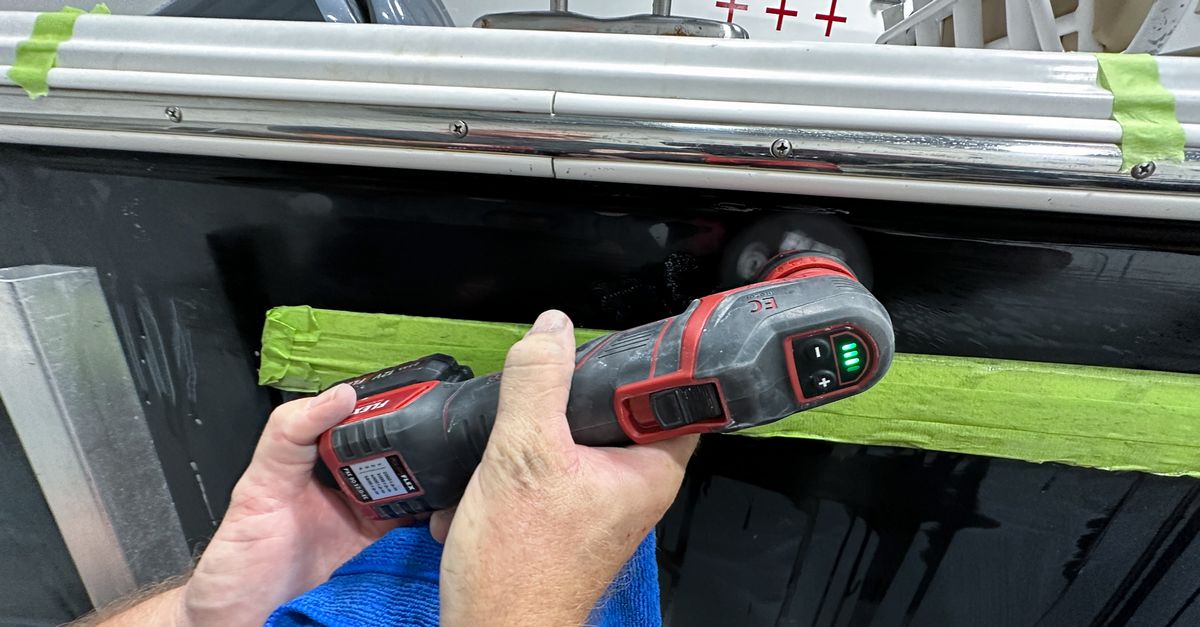
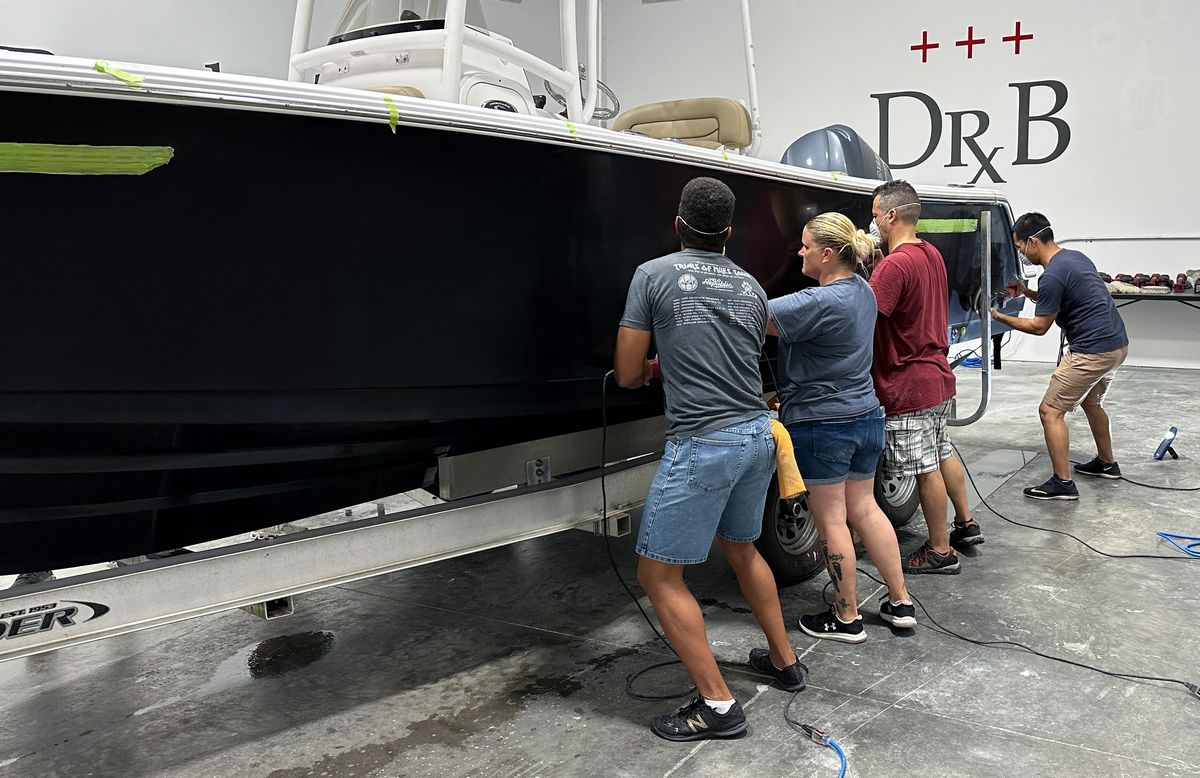
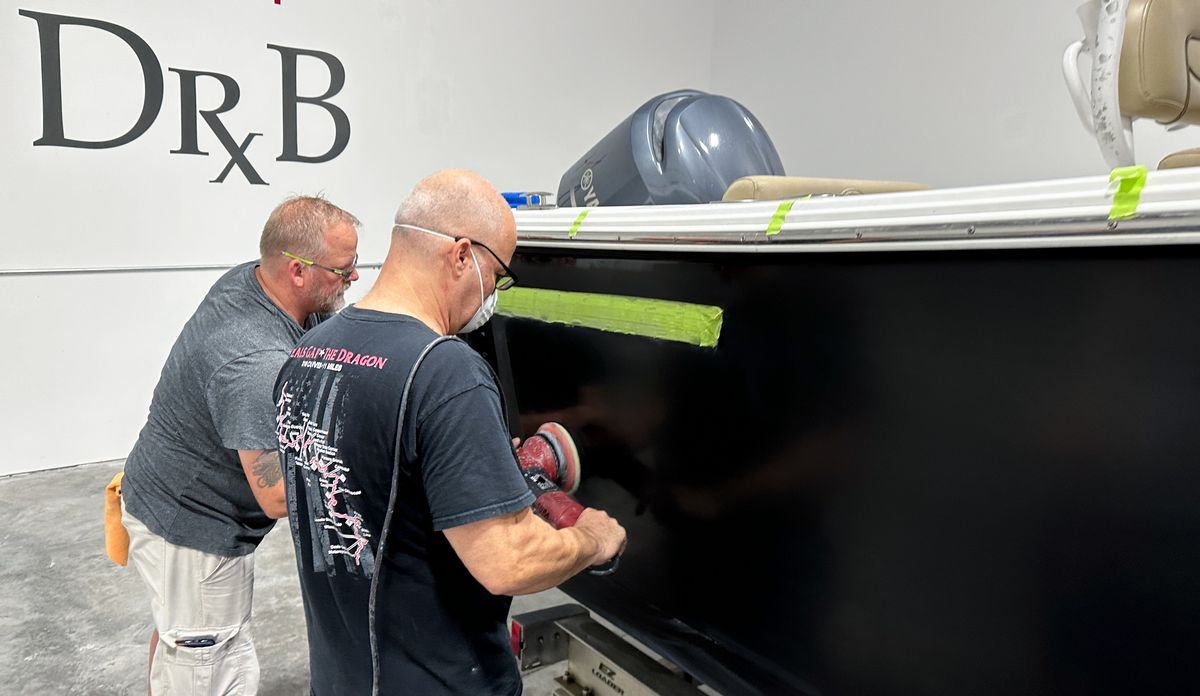
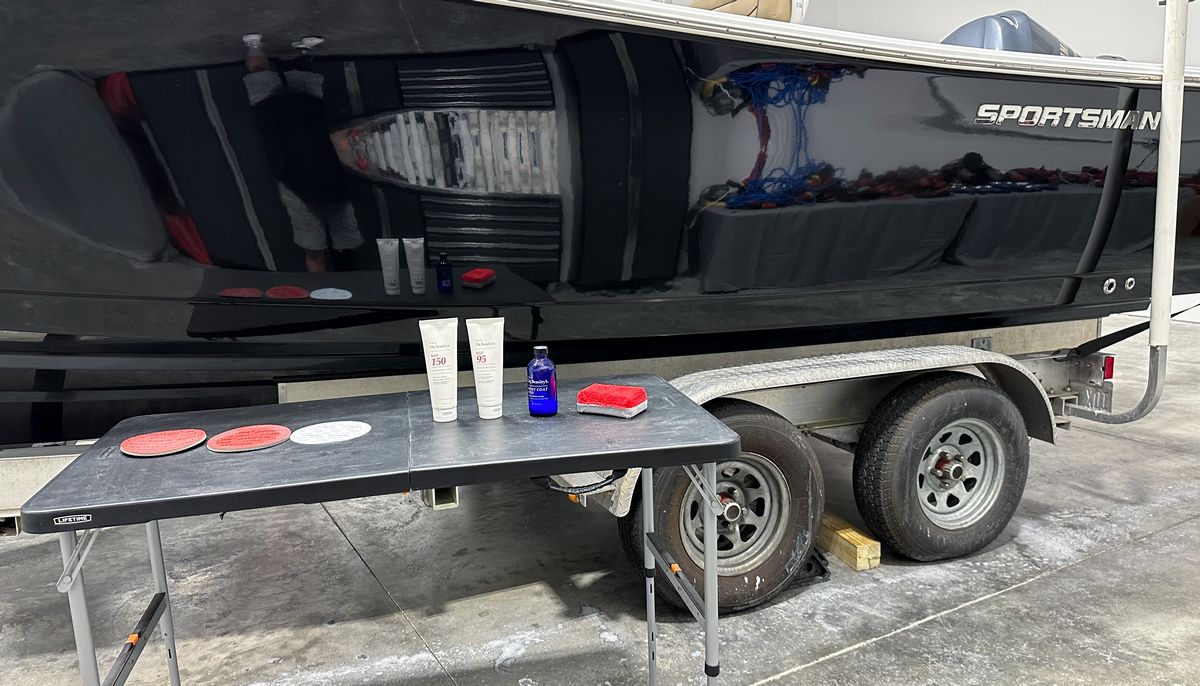
Sunday – Extreme Boat Detailing!
First stop – Fresh Donuts!
Each morning I pick up a fresh order of donuts and coffee to jump start the class. The first day everyone is kind of shy, they don’t know what they’ve gotten themselves into and only a few people go for the donuts and Joe. But by the 3rd day, everyone is in sync and the donuts don’t last long.
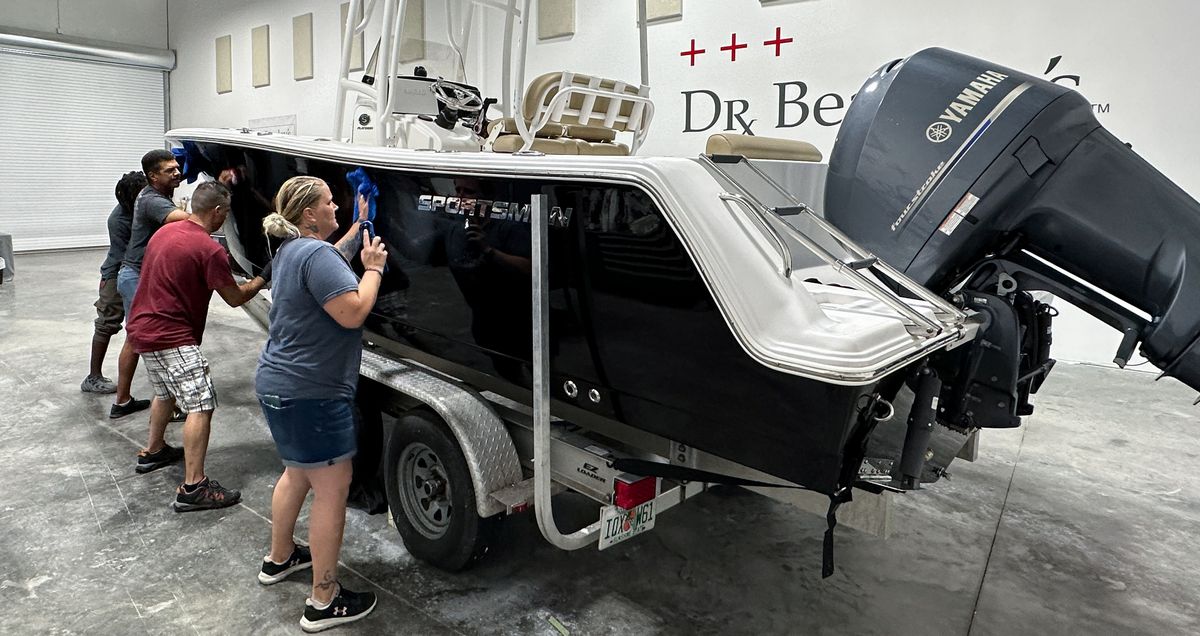
Extreme Boat Washing
By the time Sunday morning rolls around, I know from experience, the class is tired, they’ve been through 2 days of intense training. They have probably used muscles they’ve never taxed before, and they are sore. But it doesn’t matter. It’s time to pull it together because we have another day of intense training, and it starts at 7:30am in the morning. First up, Extreme Boat Washing!
It’s go time!
Cleaning the inside and the outside at the same time…
Safety first
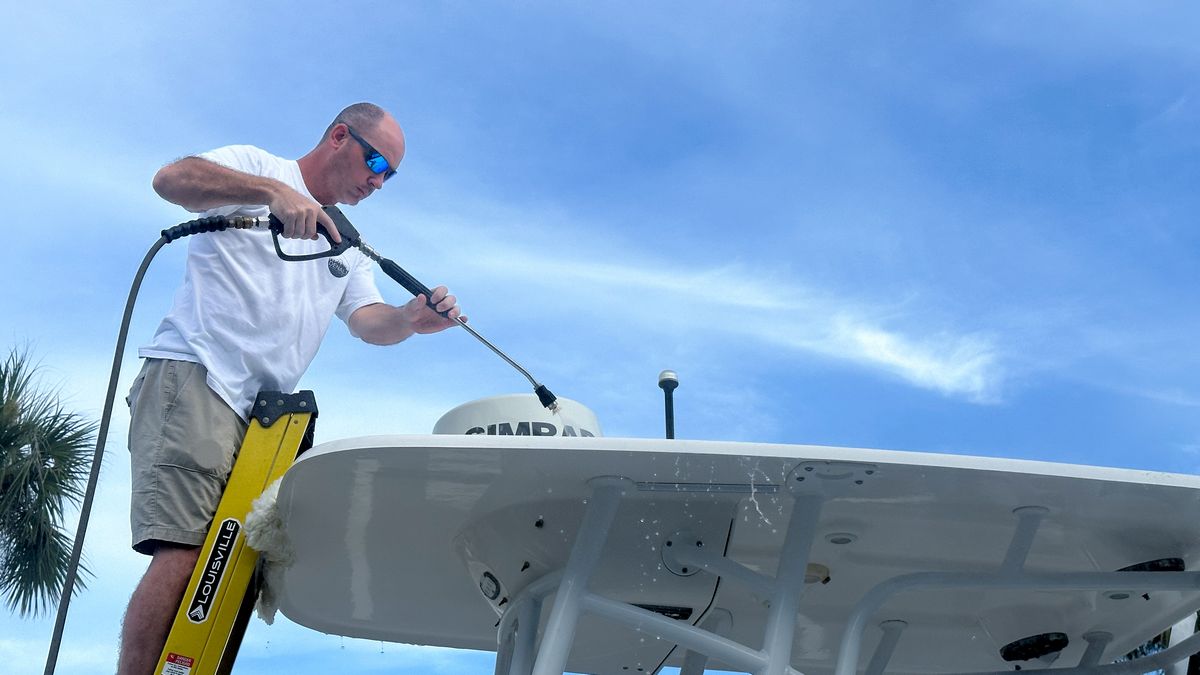
With the hardtop, it’s important to get the top clean but it’s also important to do it in a way that’s safe. After 12 years teaching boat detailing classes, we’ve never had anyone get hurt.
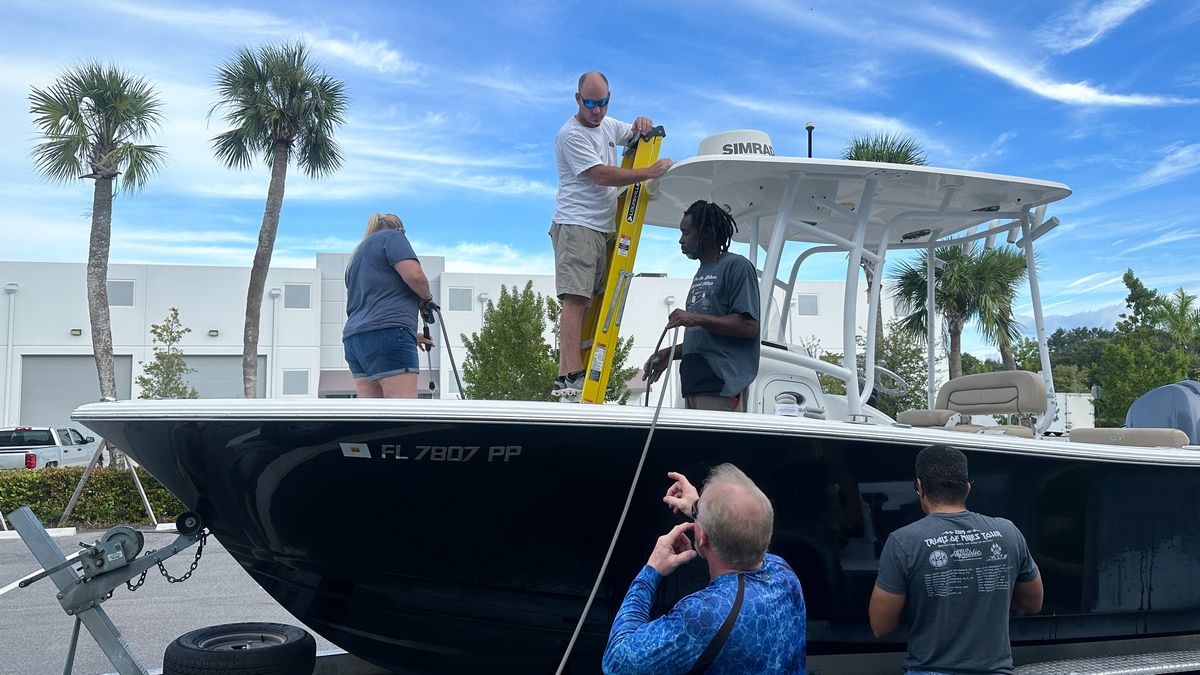
Here’s Daniel pressure washing to hardtop while supported by a ladder.
Now it’s time to do some machine scrubbing. Just like machine scrubbing tires and plastic cladding on automobiles, the human hand working some kind of brush cannot compete with machine scrubbing for effectiveness and speed.
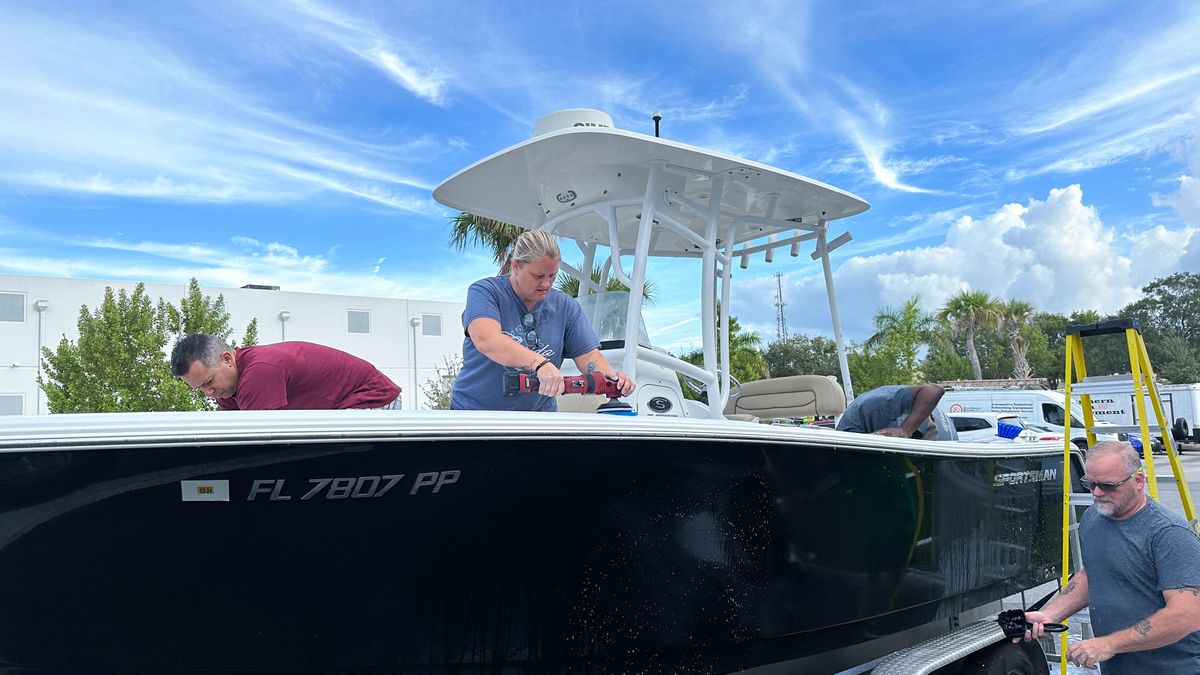
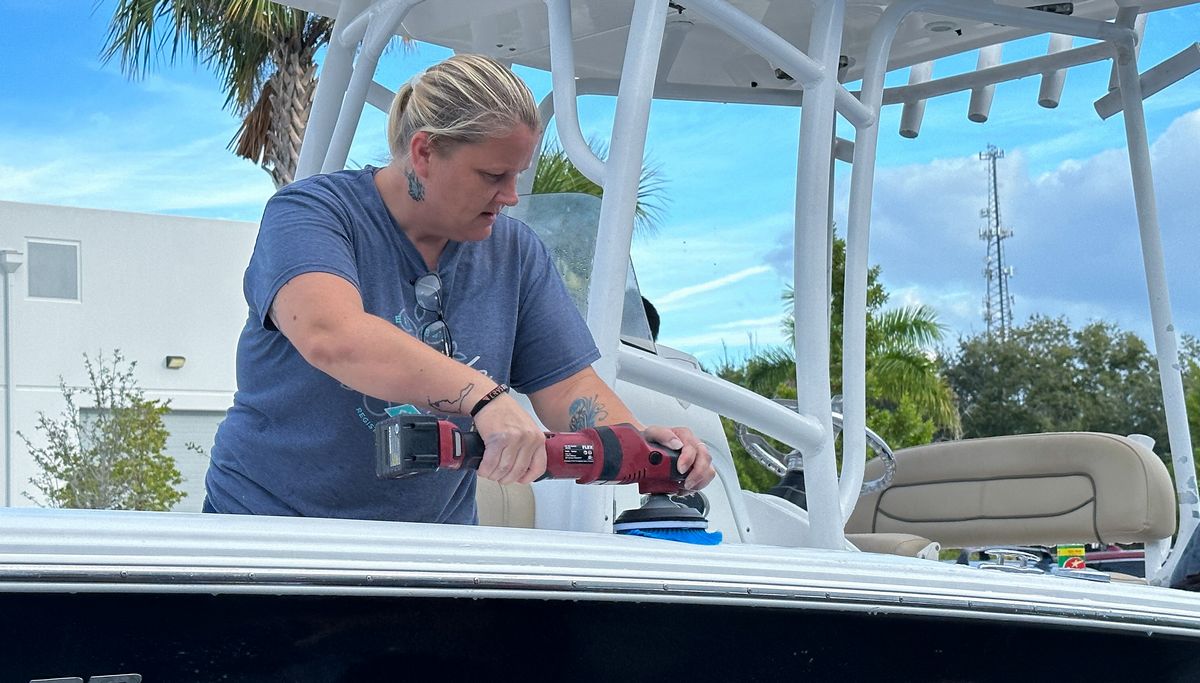
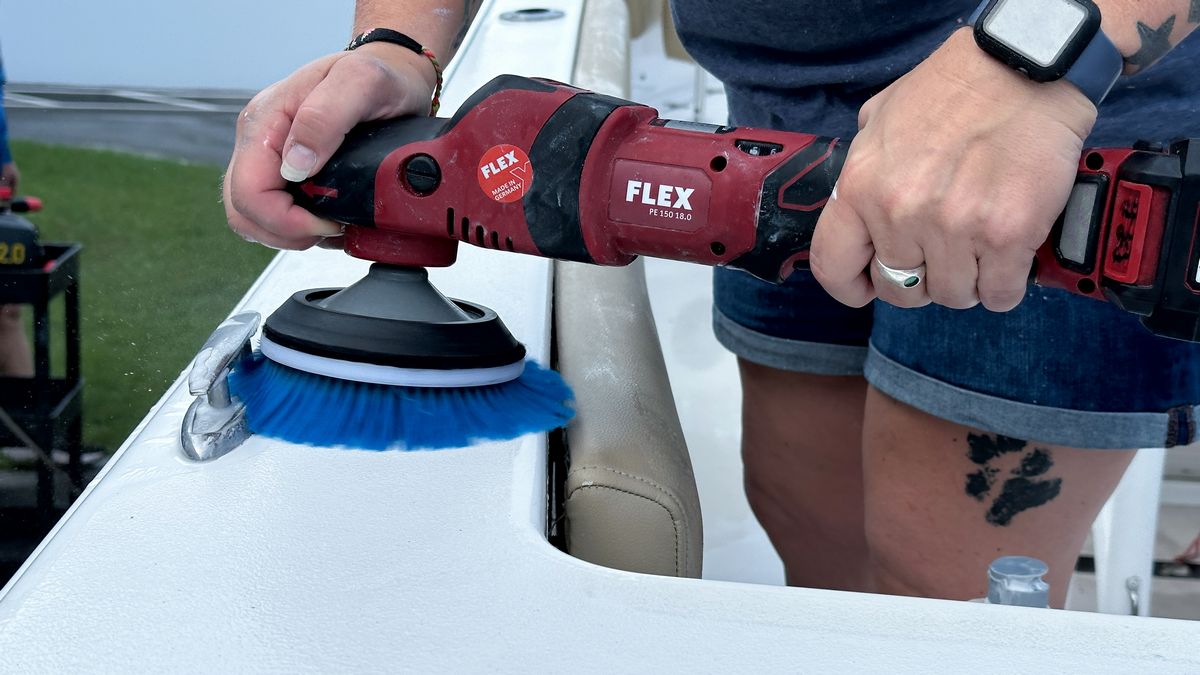
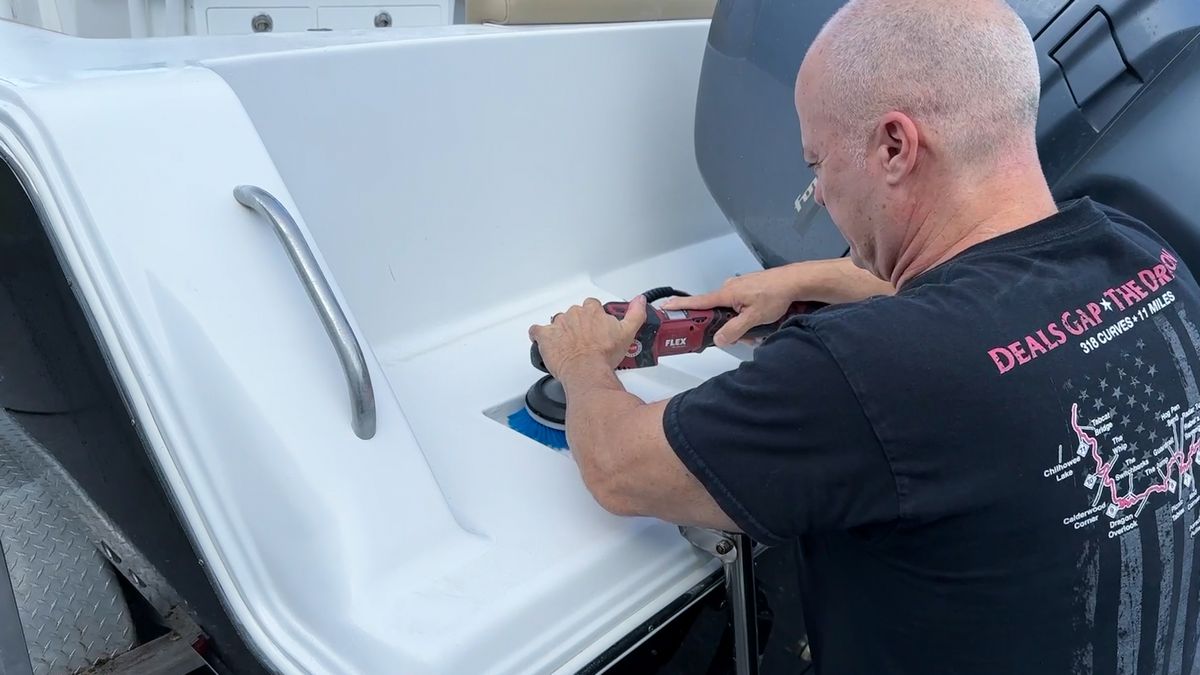
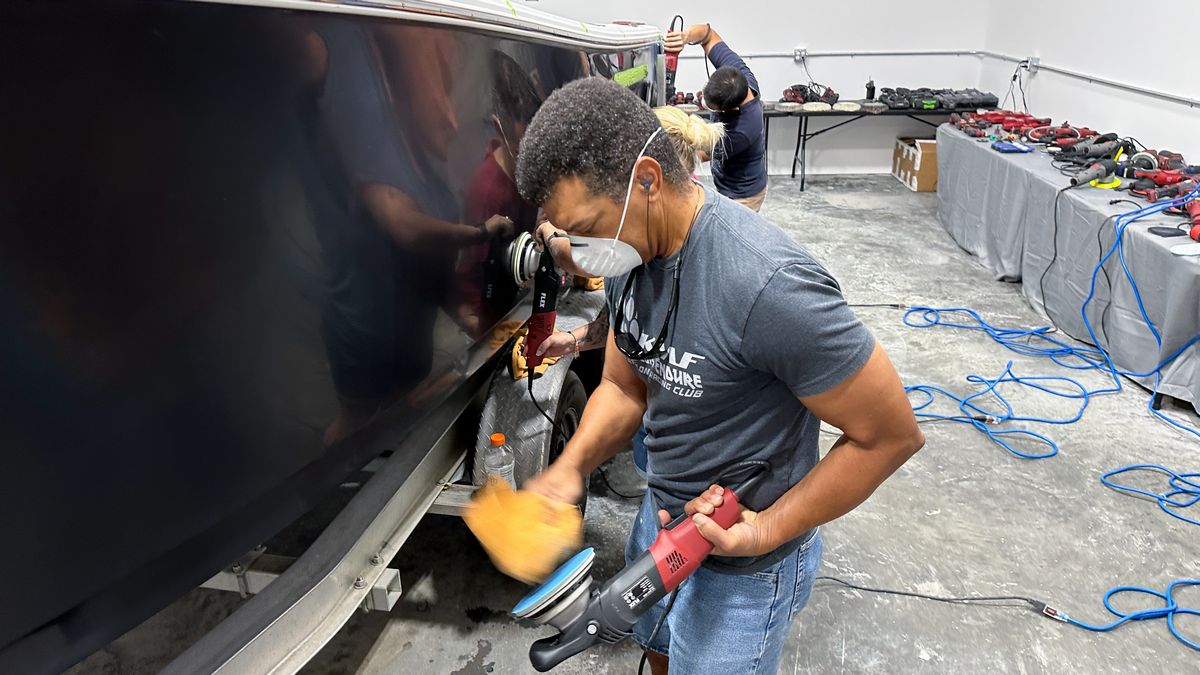
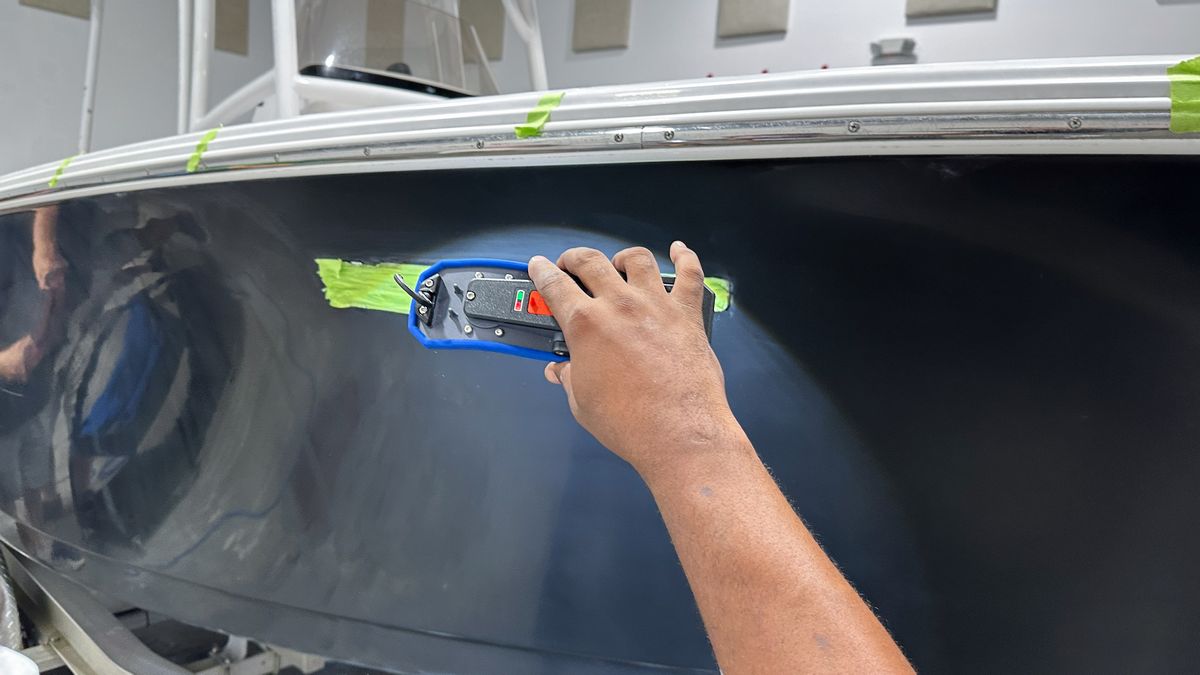
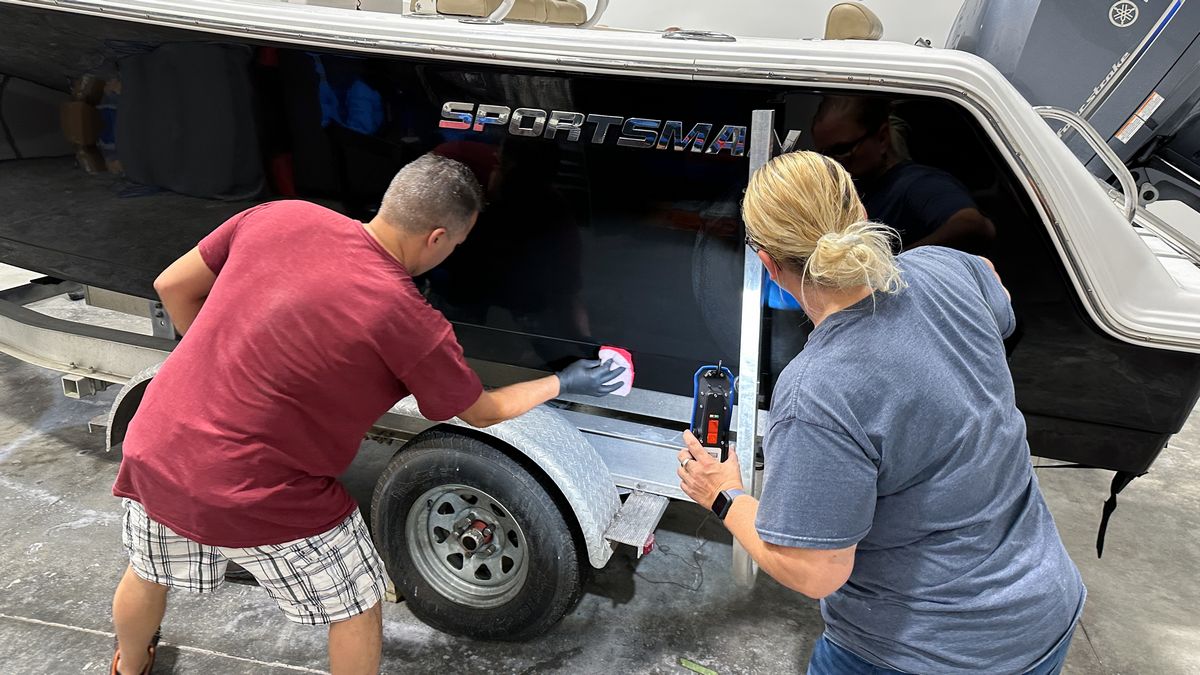
Here’s Crystal cleaning the topcap with the FLEX PE-150 Cordless Rotary Polisher with a 5″ Rotary Brush. The best thing about using cordless tools is there’s virtually no shock hazard.
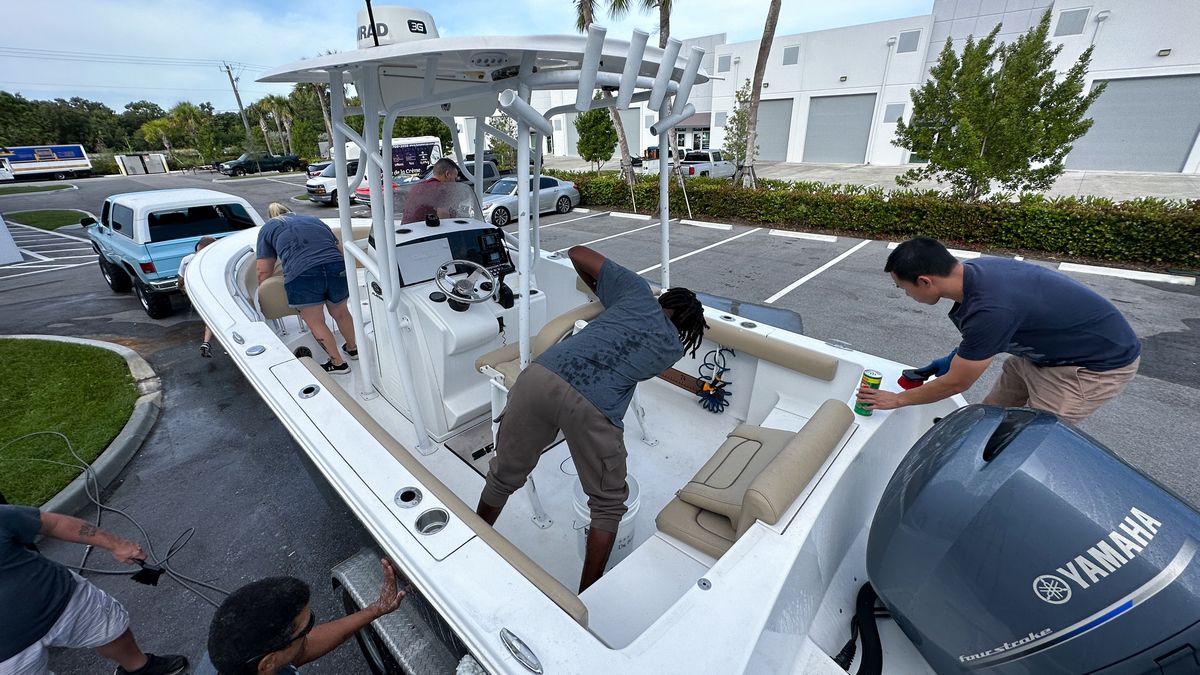
Here’s Jhonathan machine scrubbing non-skid to get it surgically clean.
This SeaDeck floor matt is completely stained and looking pretty worn-out. But a machine cleaning is going to bring it back to life.

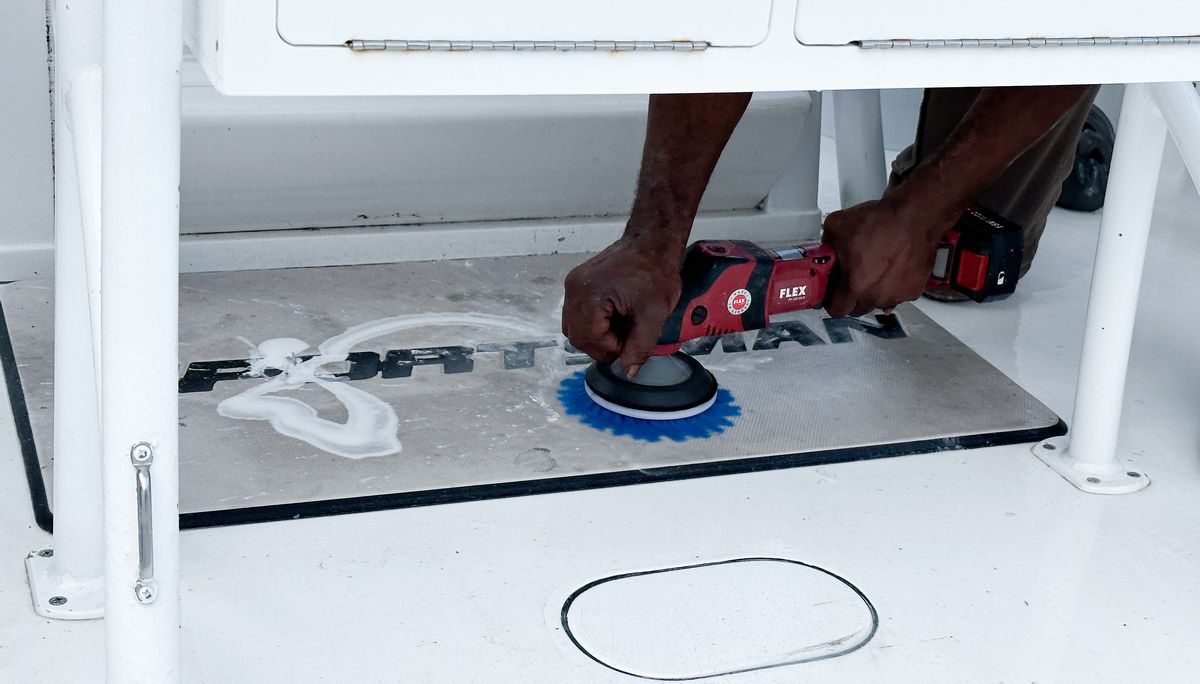
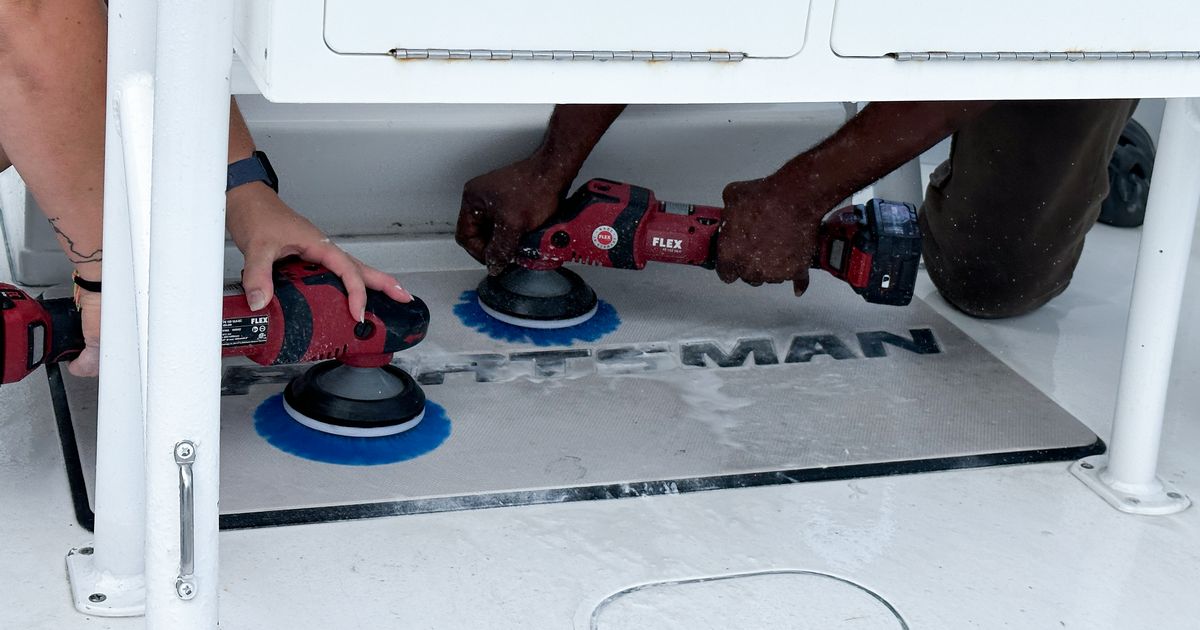
Looks like brand new again!

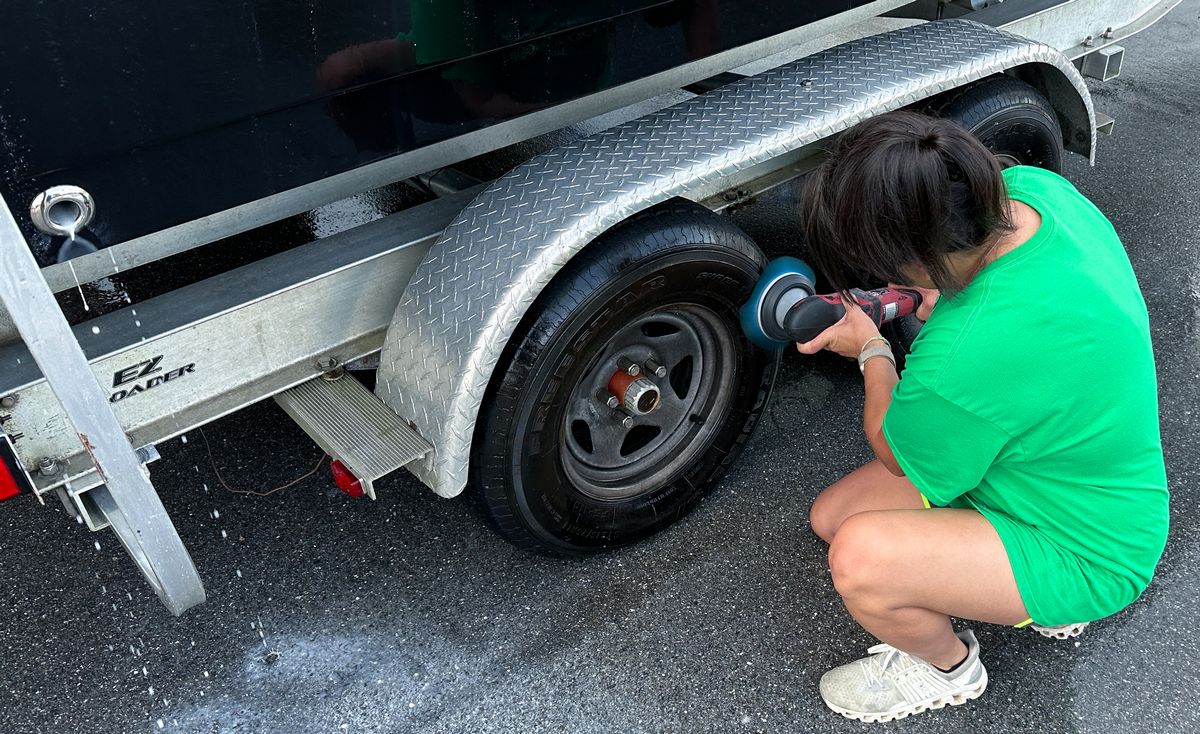
Here’s DeAnne machine scrubbing the tires on the boat trailer…
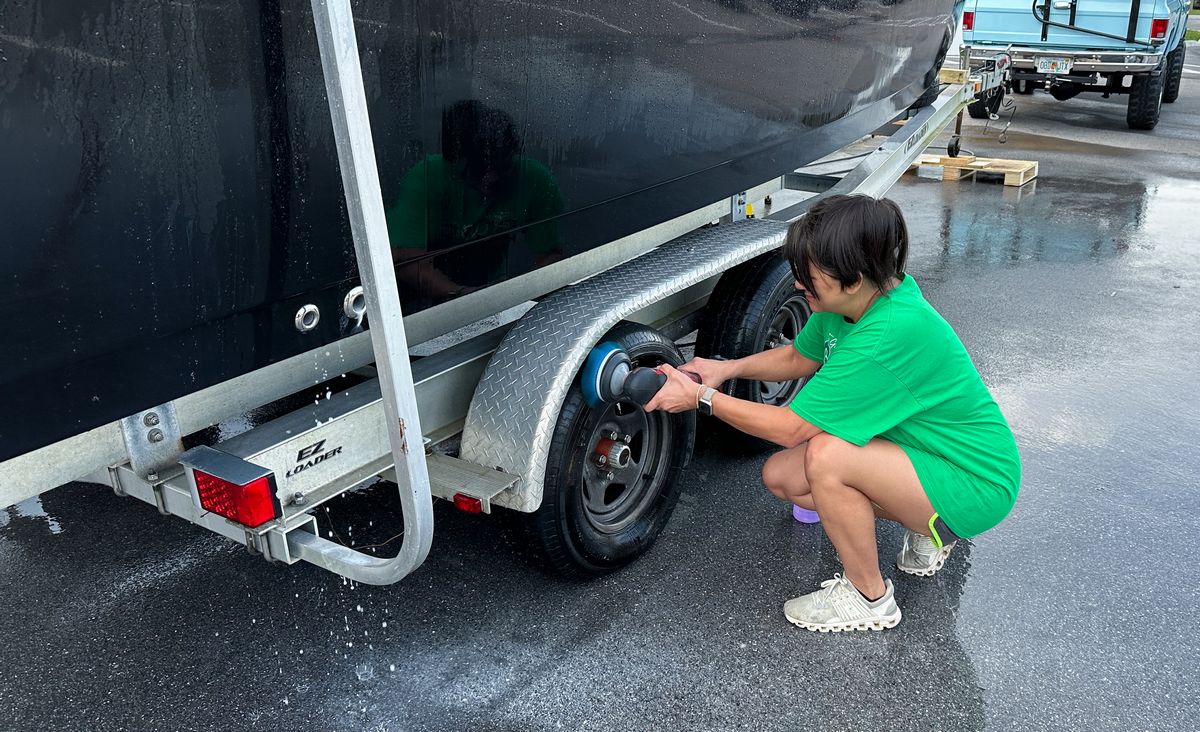
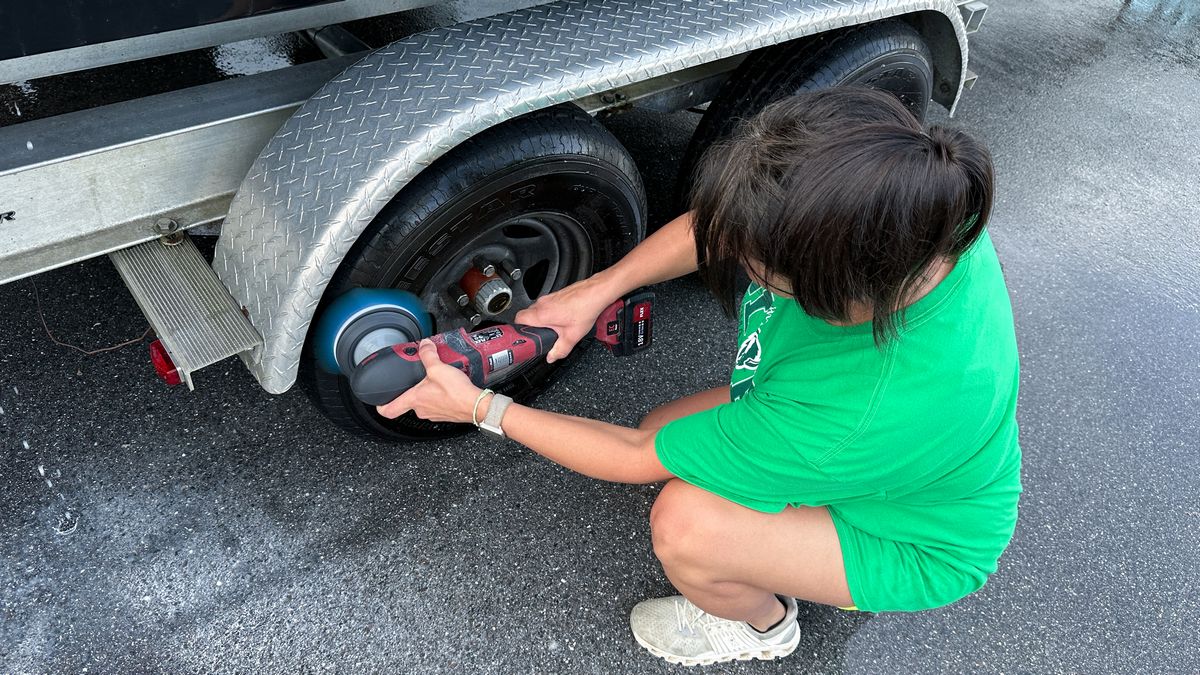
Dr. Beasley’s Premium Degreaser –
Works great for cleaning tires and as you saw previously – cleaning engines and engine compartments.
How to do a Gelcoat Test Spot
Before starting, we did a Gelcoat Test Spot to dial-in our process before tackling the entire boat. We also used this boat to show how to do a Gelcoat Test Spot in one of our LIVE Online Detailing Classes we host every Wednesday at 1PM PT/4PM ET on YouTube and Facebook. Here’s the link if you want to see the process.
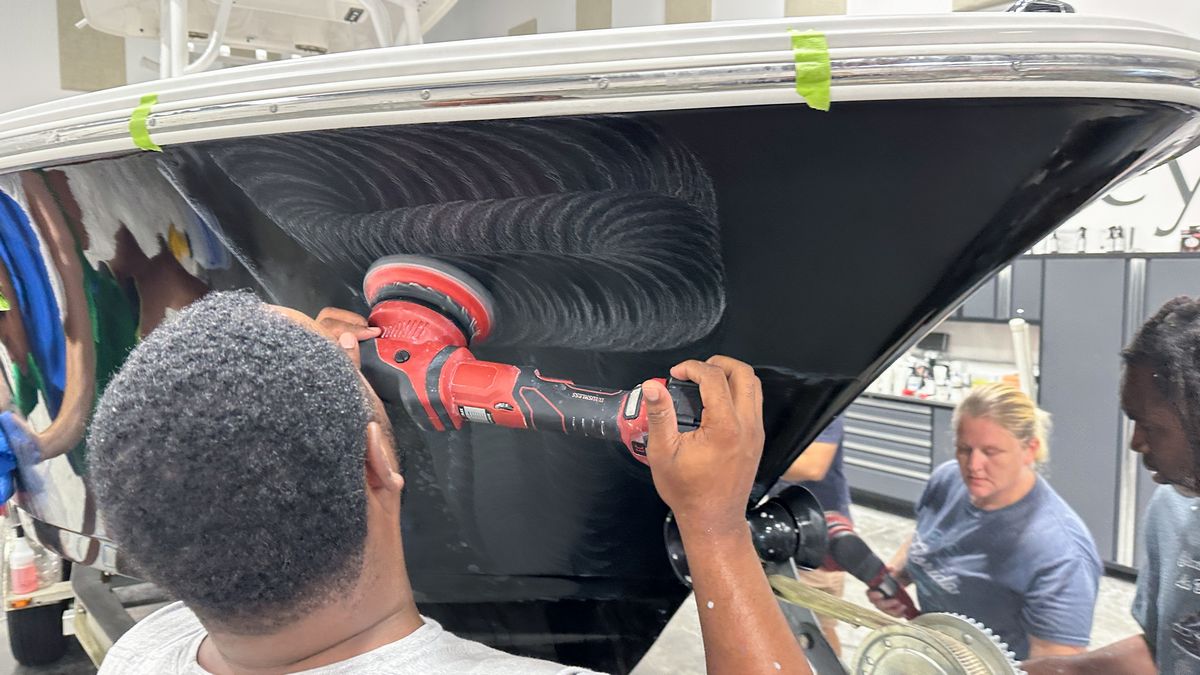
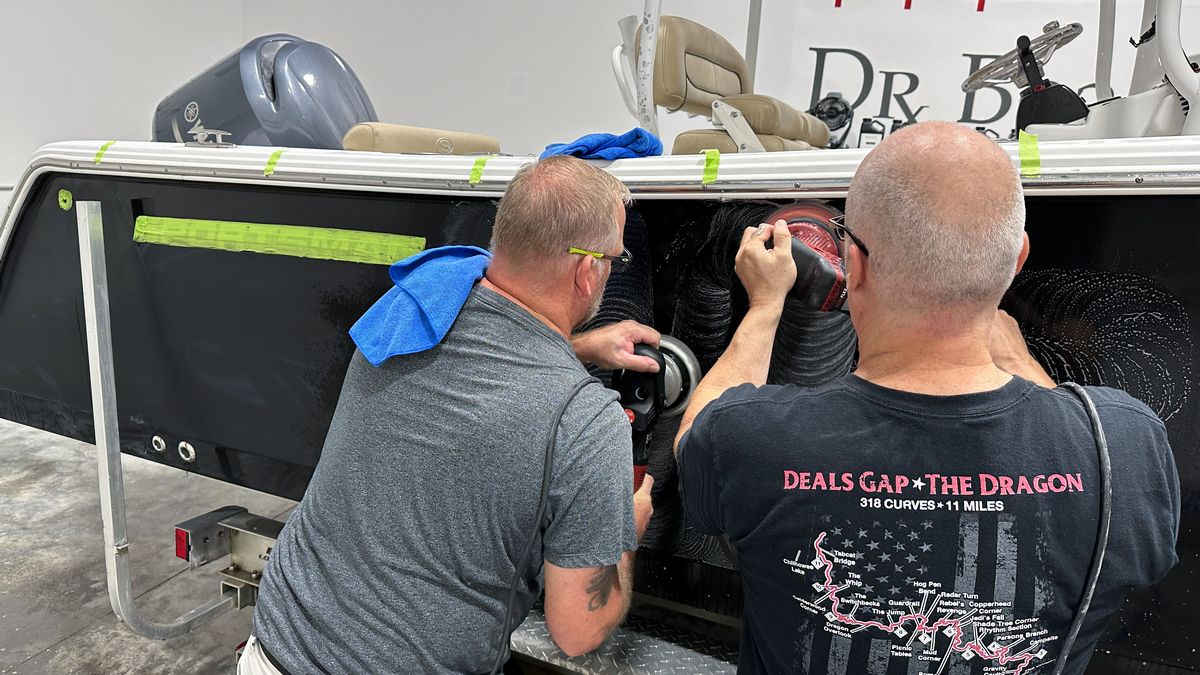
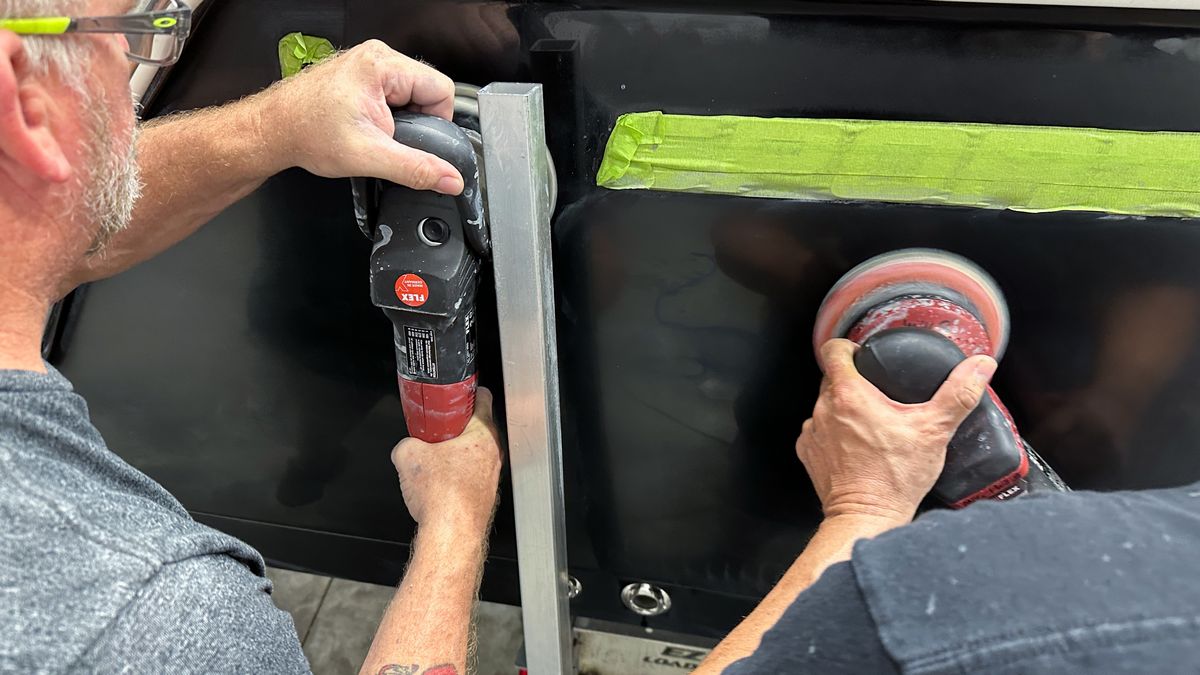
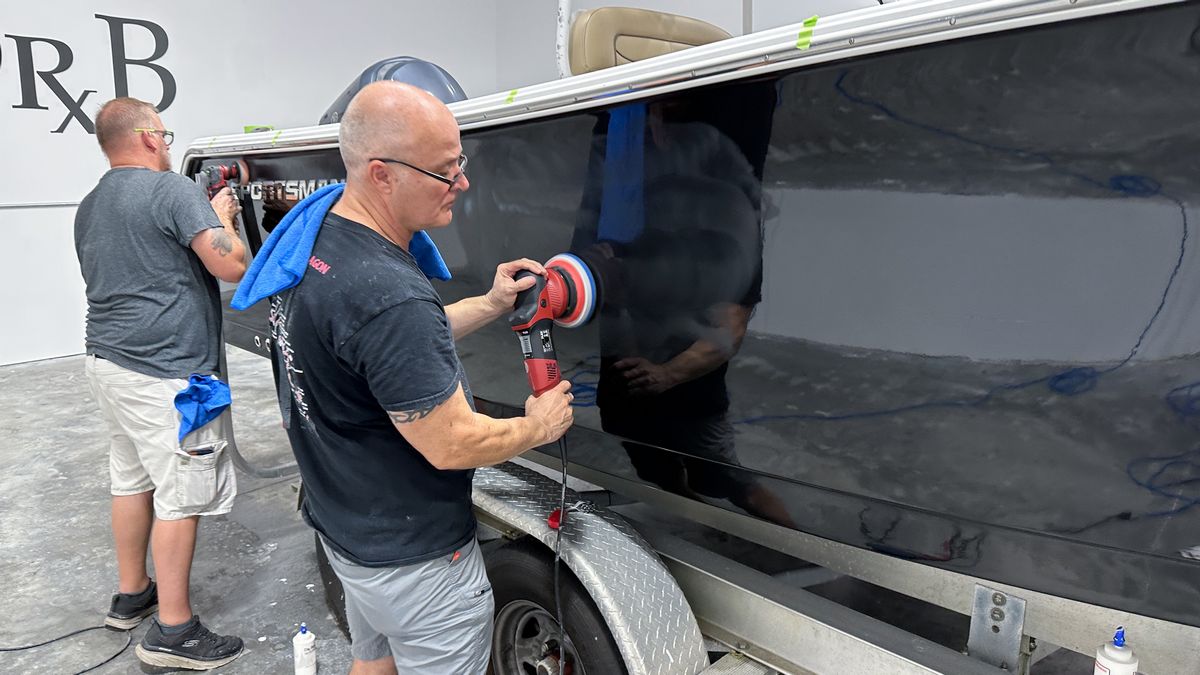
After the Gelcoat Test Spot – it was time to turn the class loose. First up – machine wet sanding using the 8mm gear-driven FLEX BEAST polishers.
Large, comfortable training center with LOTS of POWER!
The Stuart, Florida Training Center is huge with enough room to bring in 3 huge center console boats for our extreme boat detailing classes. We can also bring in and work on 3 cars at one time and we have the electrical power to run 20 rotary polishers at the same time and never throw a breaker.
I started the concept of roadshow detailing classes back in 2006 when I worked for another car care supply company. I’ve travelled around the United States of America and other countries around the world teaching detailing classes. The most difficult obstacle to overcome for the majority of shops I’ve taught classes in is POWER. To hold a great hands-on class you need lots of power. If the class is just sitting in chairs looking at a PowerPoint, then you don’t really need any power, just chairs.
Here’s Meko using the cordless BEAST or CBEAST to machine wetsand the hull.
Here’s DeAnne showing up all the big strong guys!
Joe and David tackle the stern
On the Port side, Derick, Crystal and Andy tackle the forward hull
This is my arm pulling back the aluminum pole that hold a plastic guide to help center and load or unload a boat so Thomas can fit the sanding disc into the section of boat hull behind the guide.
The reason we use gear-driven FLEX orbital polishers for machine sanding gelcoat boats is because there’s ZERO sanding disc stalling. It the FASTEST tool for sanding down a boat.
Here’s Jhonathan using the ORIGINAL FLEX BEAST!
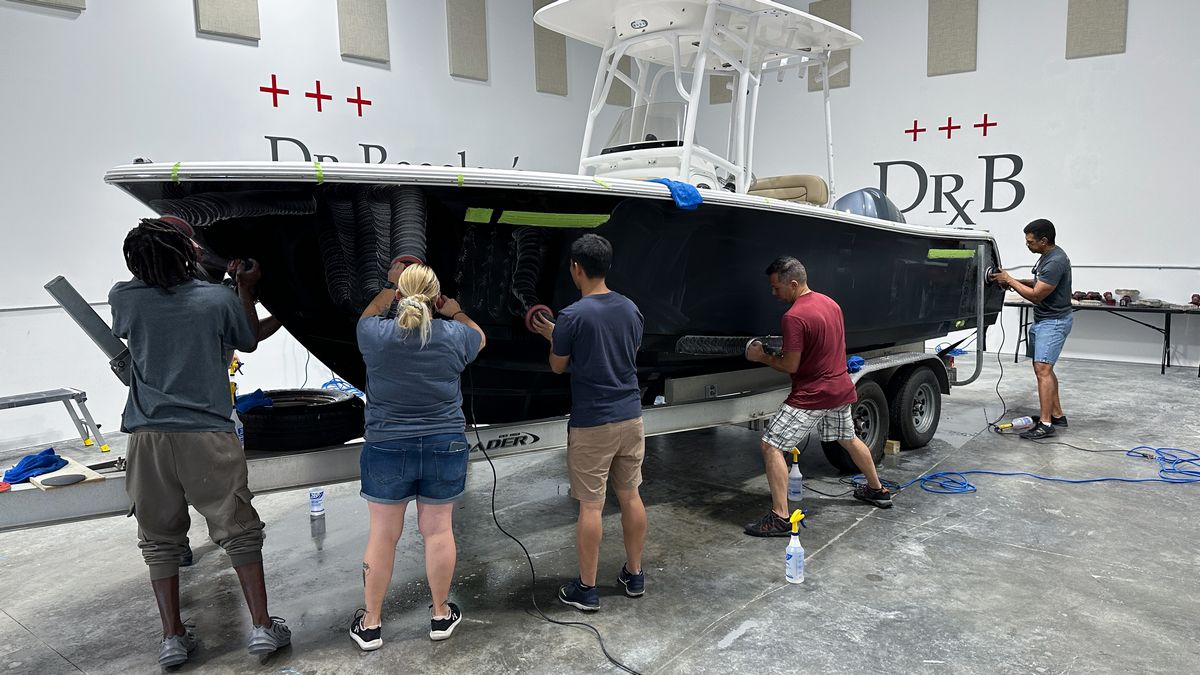
Machine wetsanding gelcoat can be a tick on the messy side…
There’s always a few thin panels and tight areas and for these areas, Daniel is using the FLEX PXE-80 with Eagle Abrasives by KOVAX sanding discs.
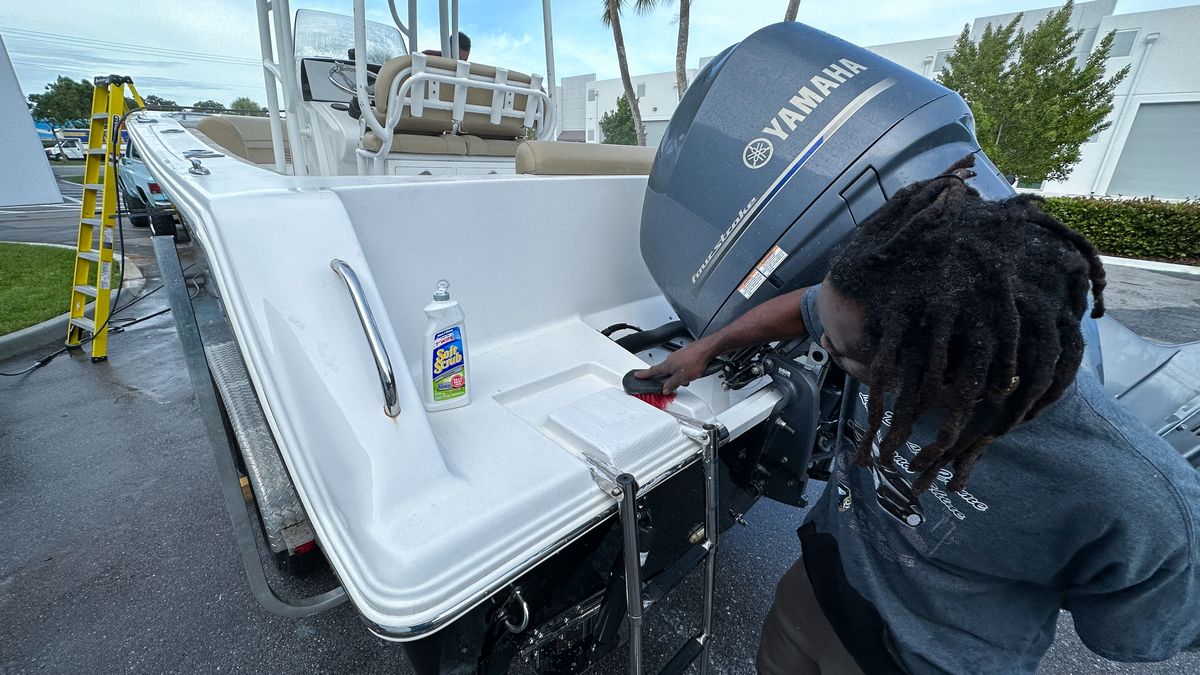
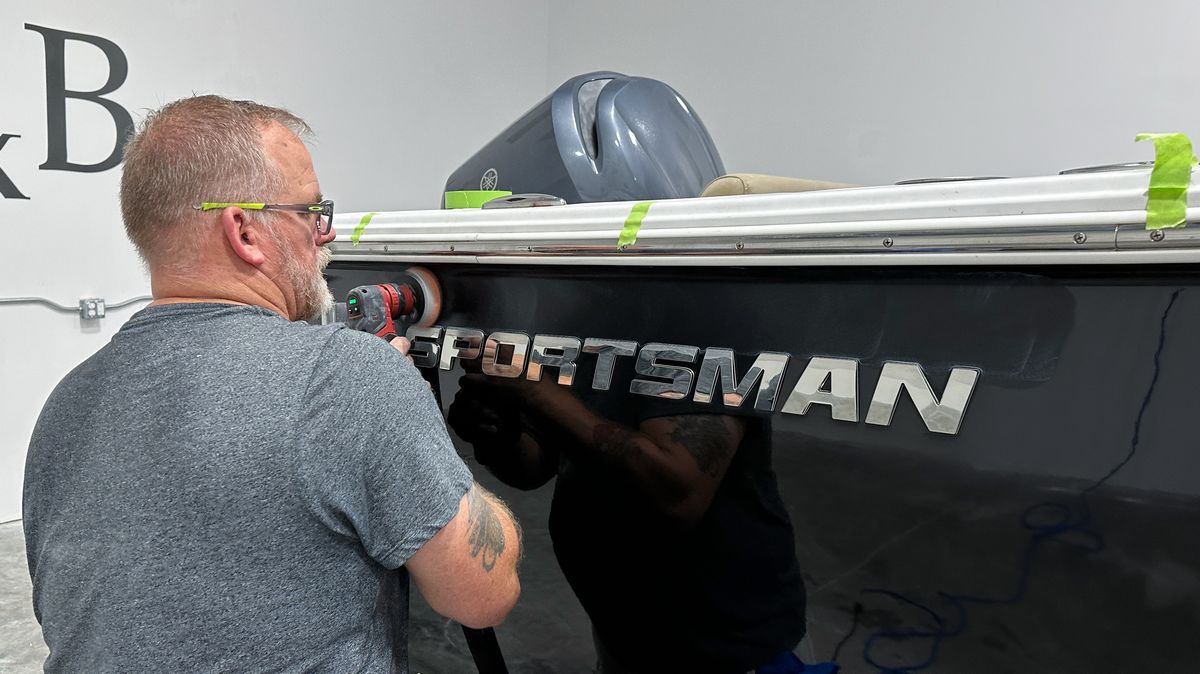
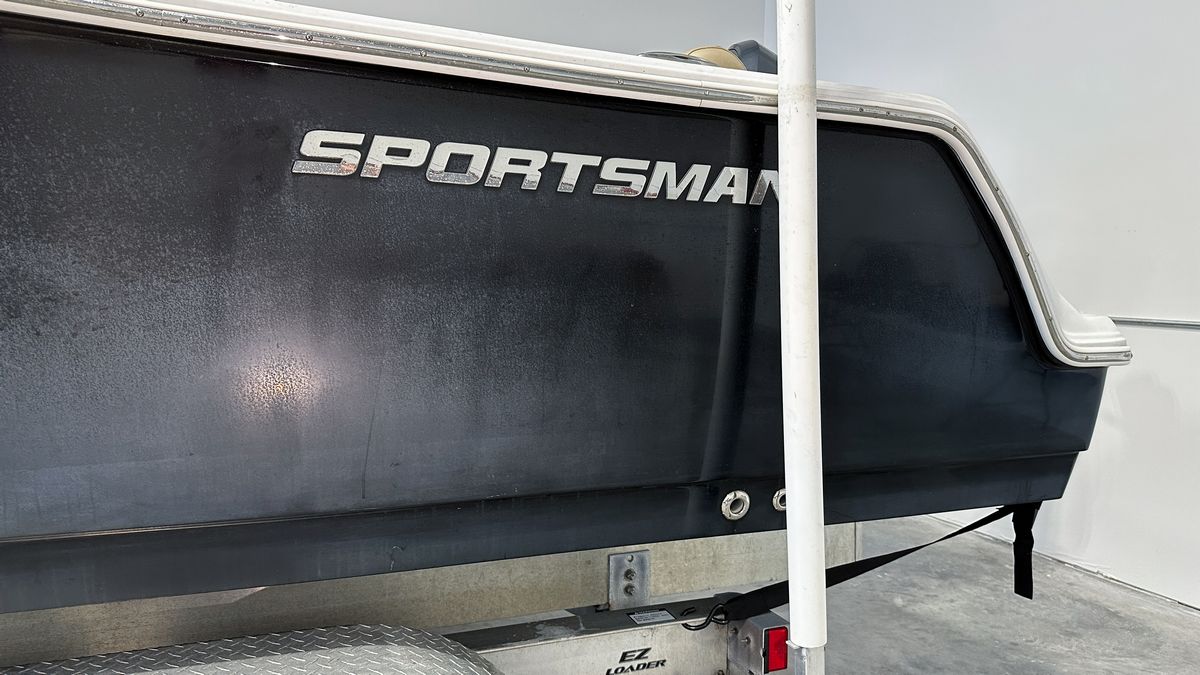
David is also using the FLEX PXE-80 to sand a section of gelcoat just above the Sportsman emblem.
Machine Dry Sanding
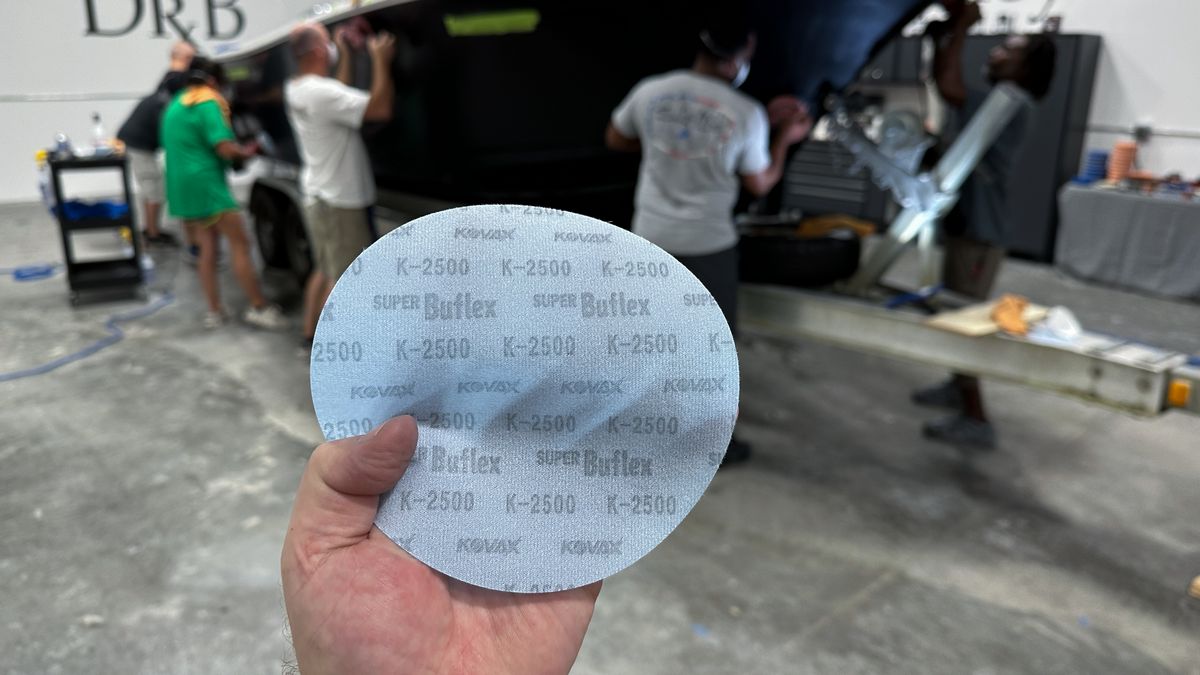
Just like the class used the machine dry sanding technique on the 1965 Ford Galaxie – now they’re going to use this same technique for the final sanding step on the gelcoat finish on the Sportsman Center Console Boat. For this they will be using the Eagle Abrasives by KOVAX Super Buflex in K-2500.
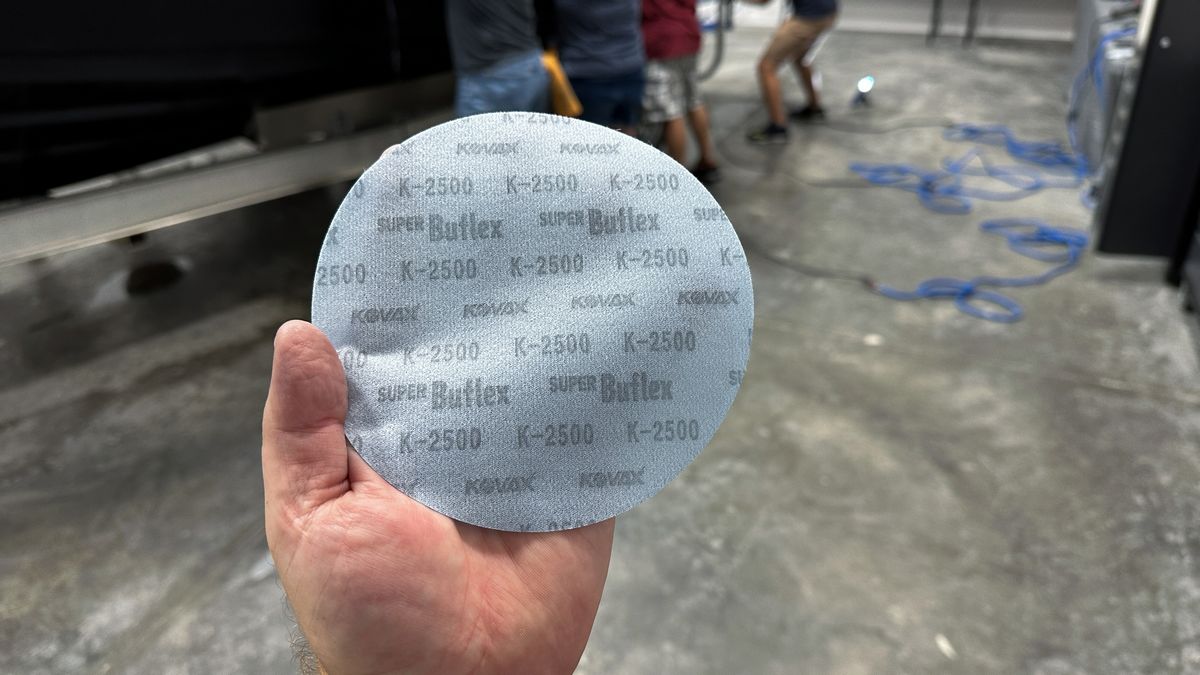
Refining 2000 wet to 2500 dry
The goal is the same as it was for removing orange peel from the custom paint on the 1965 Ford Galaxie. That is to refine the coarser 2000 grit sanding marks to 2500 grit sanding marks. The added benefit to switching over to dry sanding with the Eagle Abrasives dry sanding system is this will act to level the gelcoat surface to make it flatter and thus smoother with great gloss and reflectivity.
Teamwork and Gelling
By the third day, everyone is gelling and working as a team. The days are long. The training is hard. But the end-results are these people will have learned a TON of skills, techniques and knowledge that will last them a lifetime. They will also know what to do and how to do it and just as important – what not to do.

Rotary work – removing the sanding marks – No pictures
We didn’t get a single picture showing the rotary polisher, wool pad and NSP 150 step. The reason why is because I always lead by example in our classes and in this context, this means I order to assist in removing 100% of the sanding marks, I grabbed a rotary polisher and joined in the fun. If any of the students that were in this class are reading this and if you have any pictures of the rotary step – please text or email them to me. -Thank you.
Mike Phillips Cell Phone: 760-515-0444
Email: Mike@drbeasleys.com
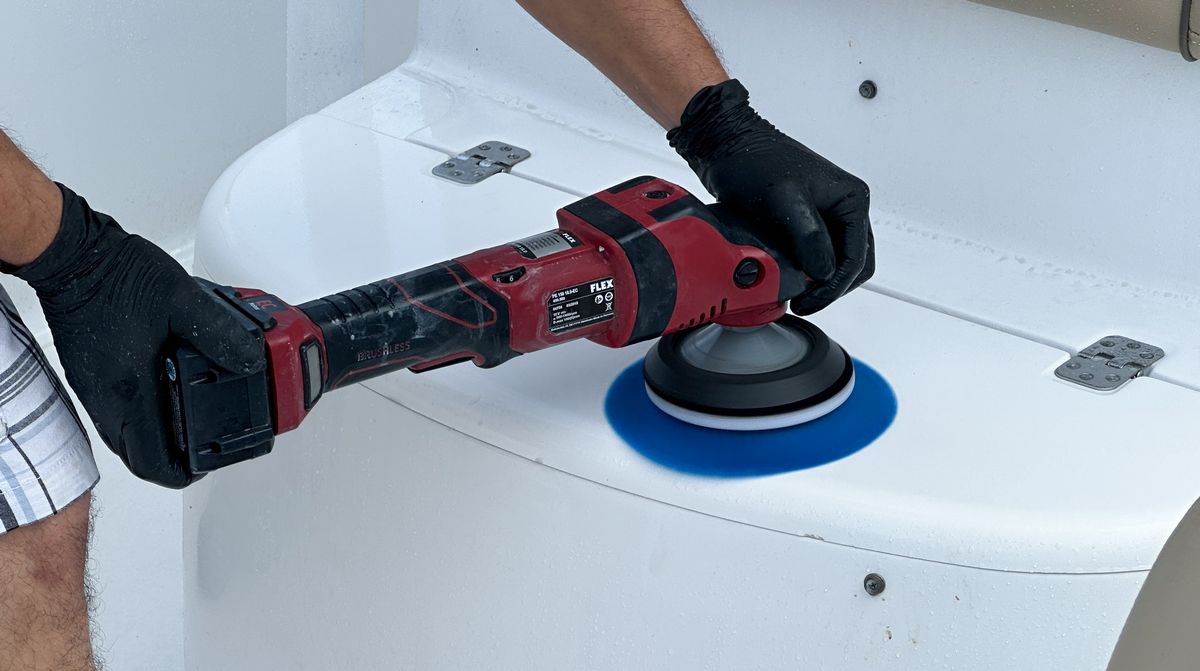
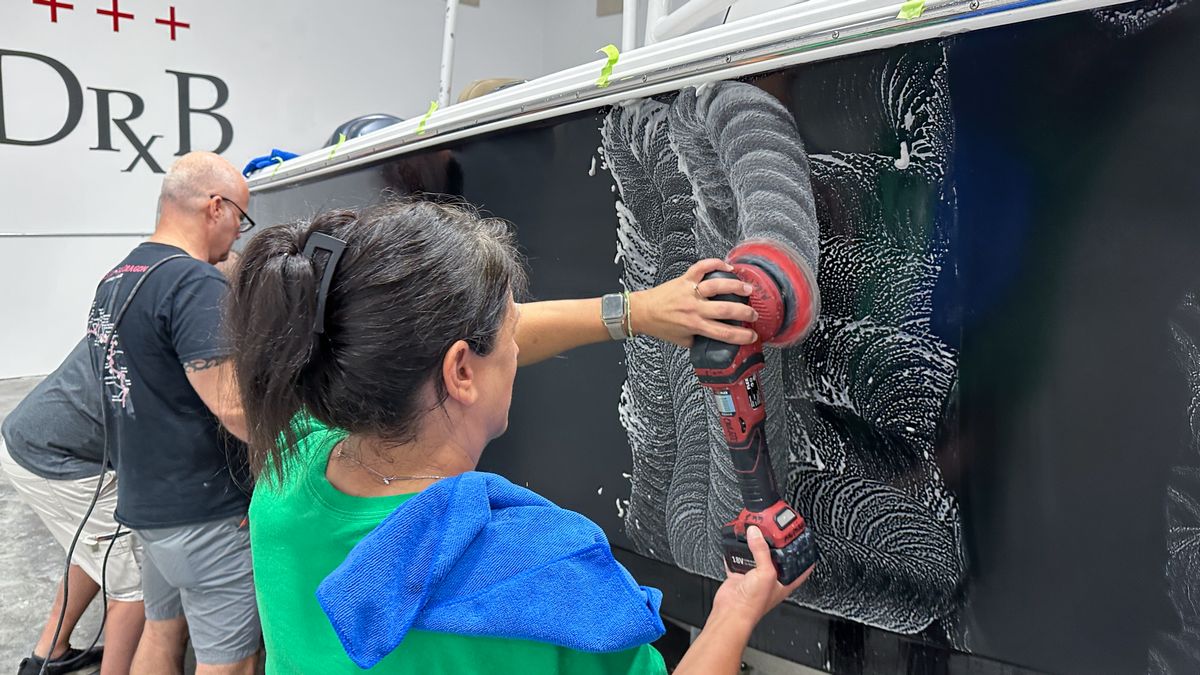
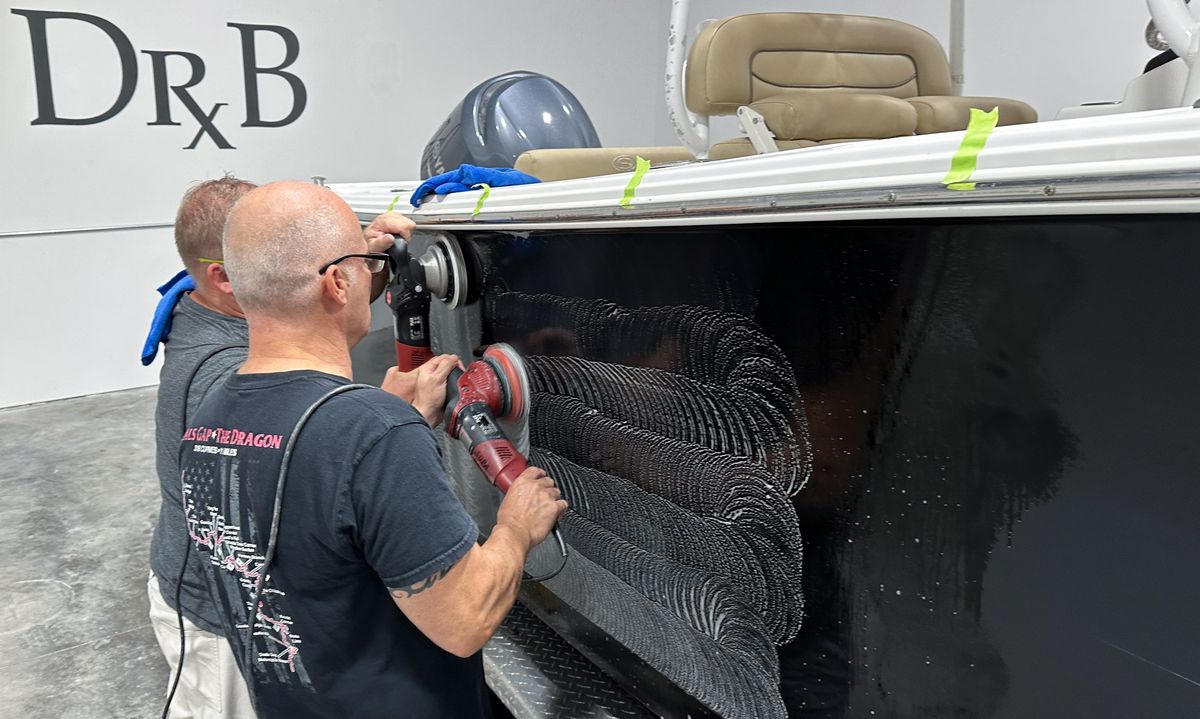
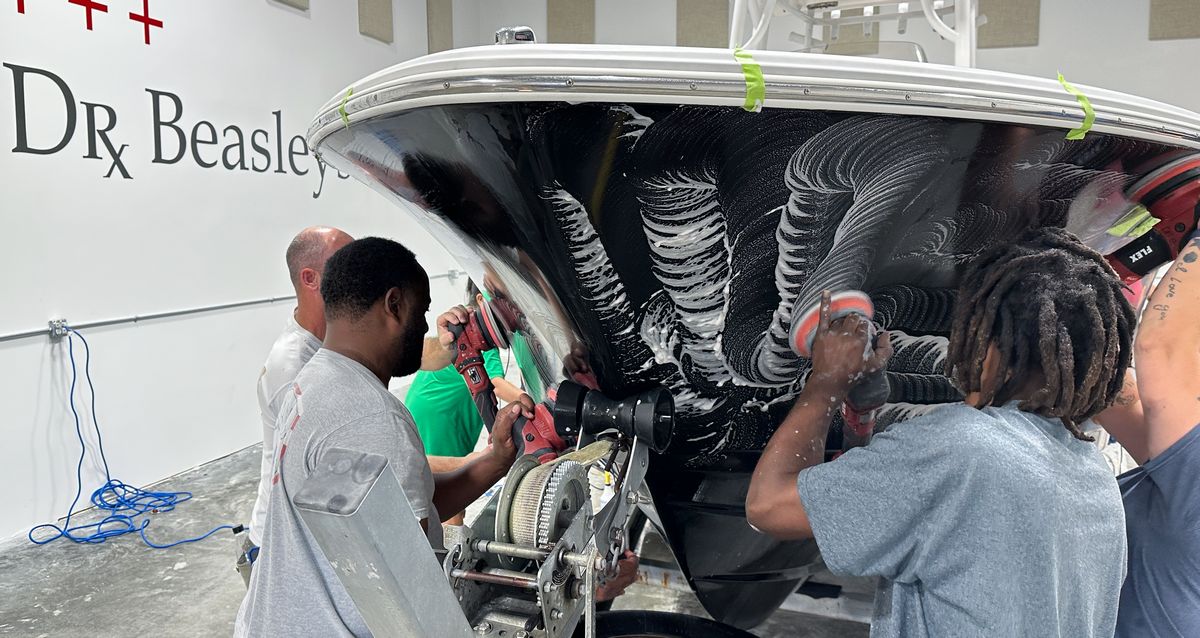
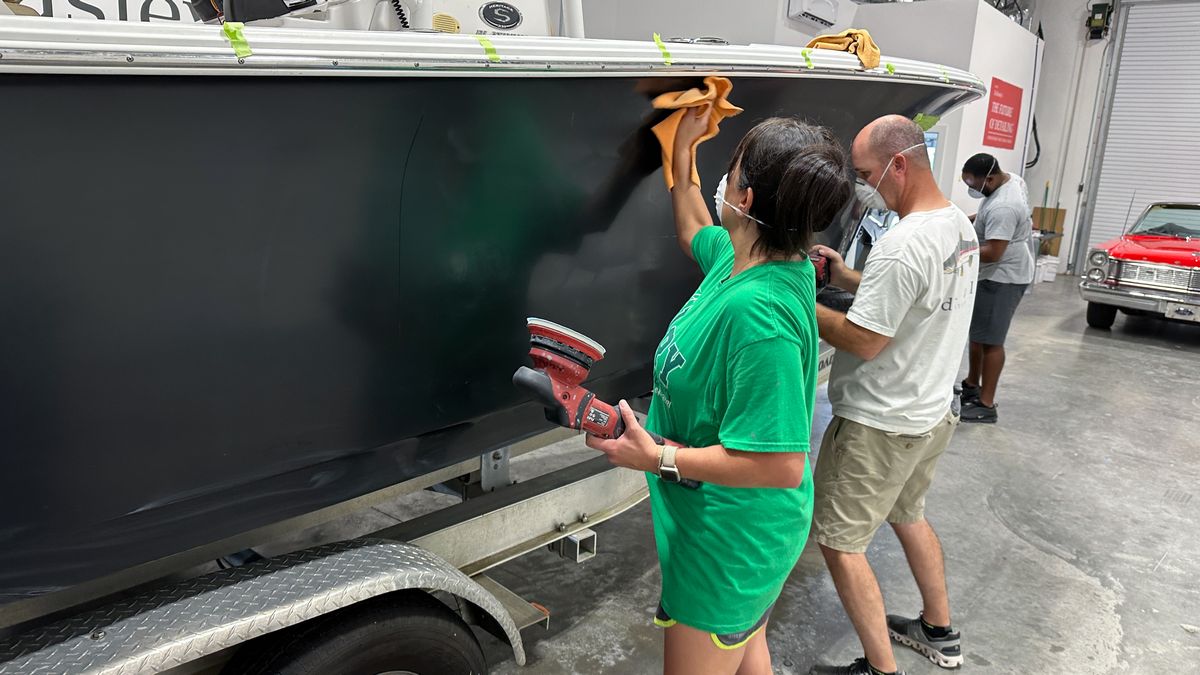
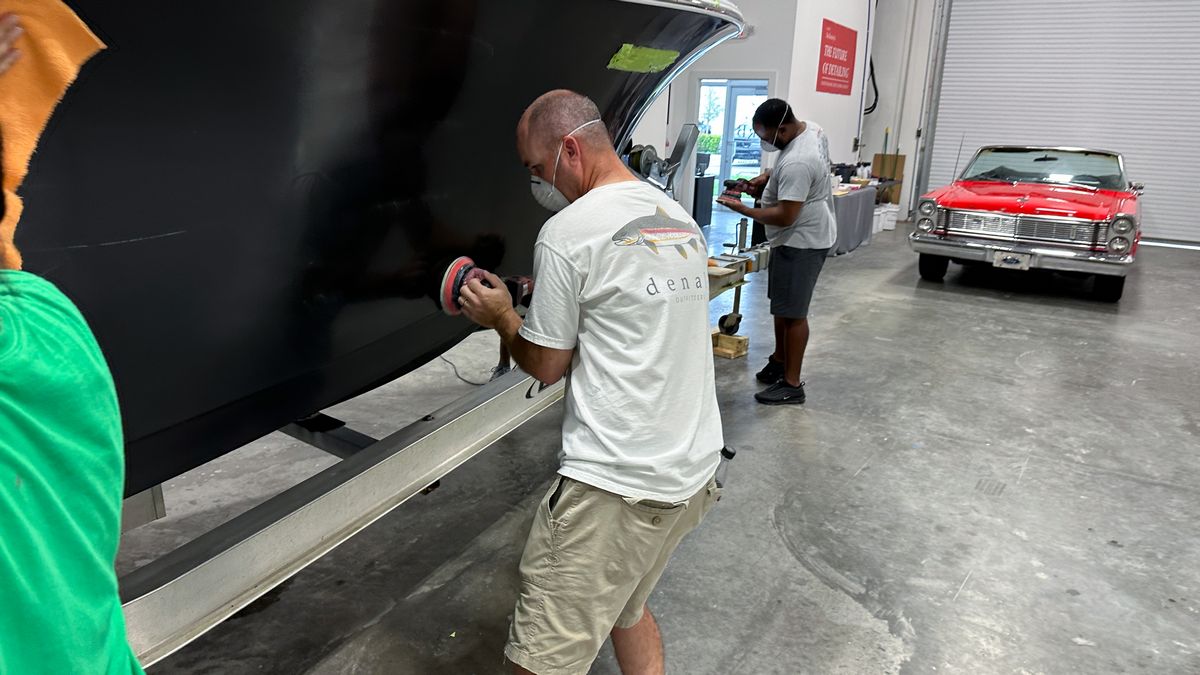
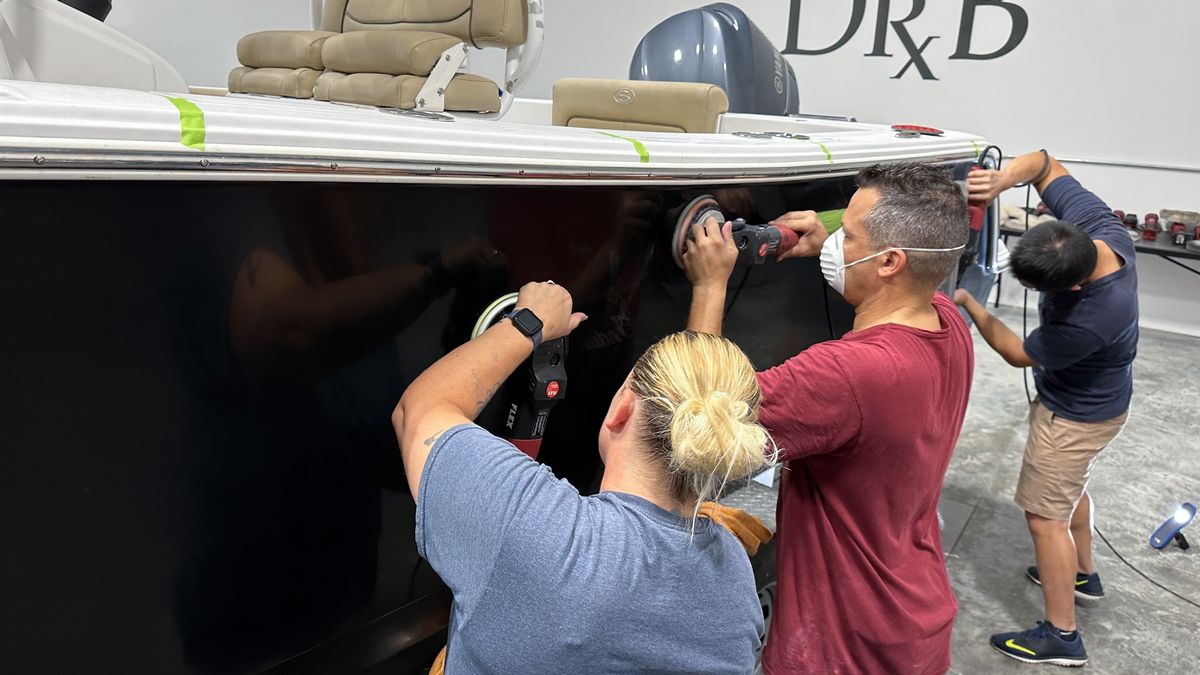
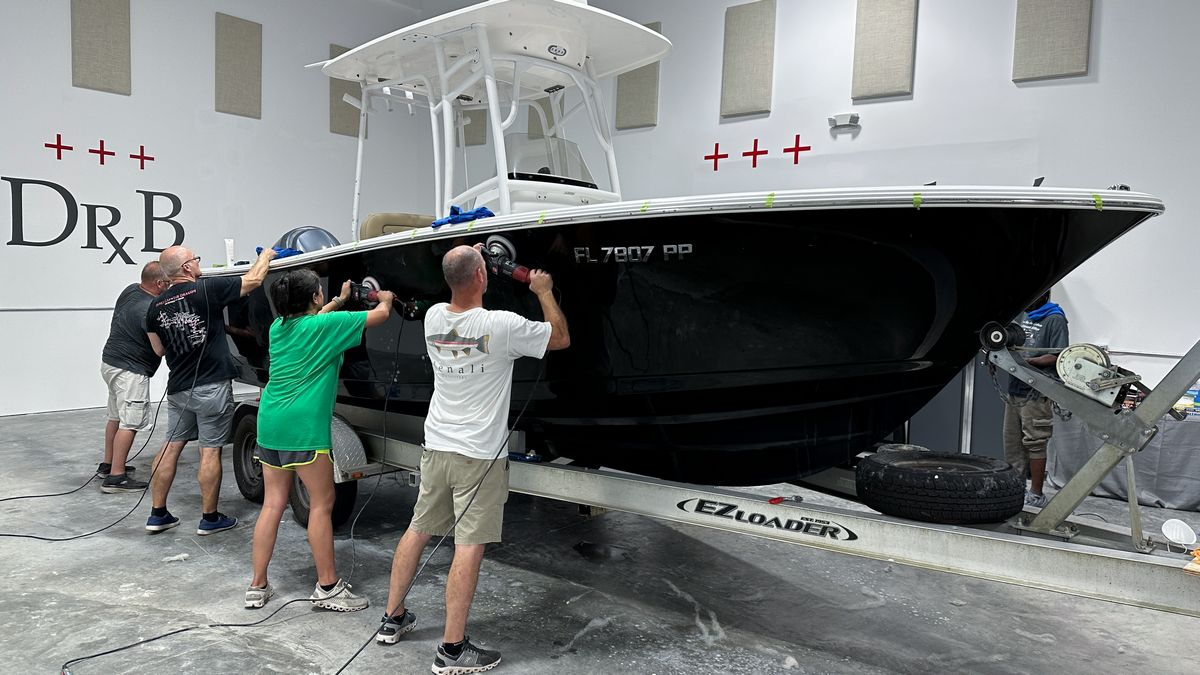
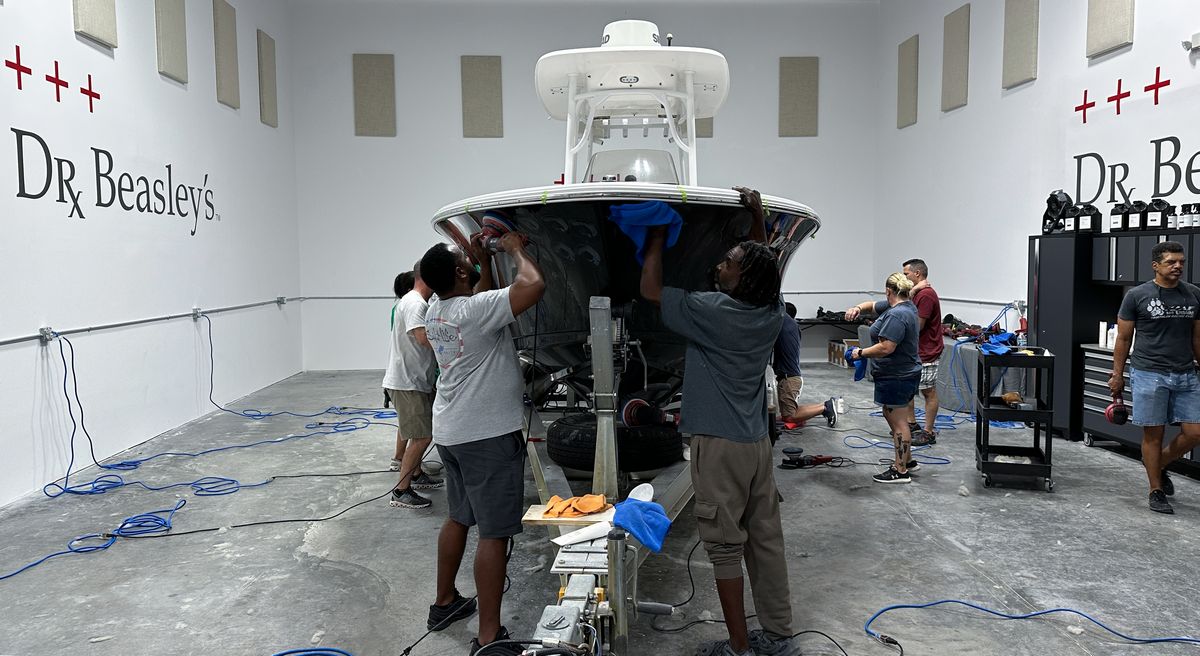
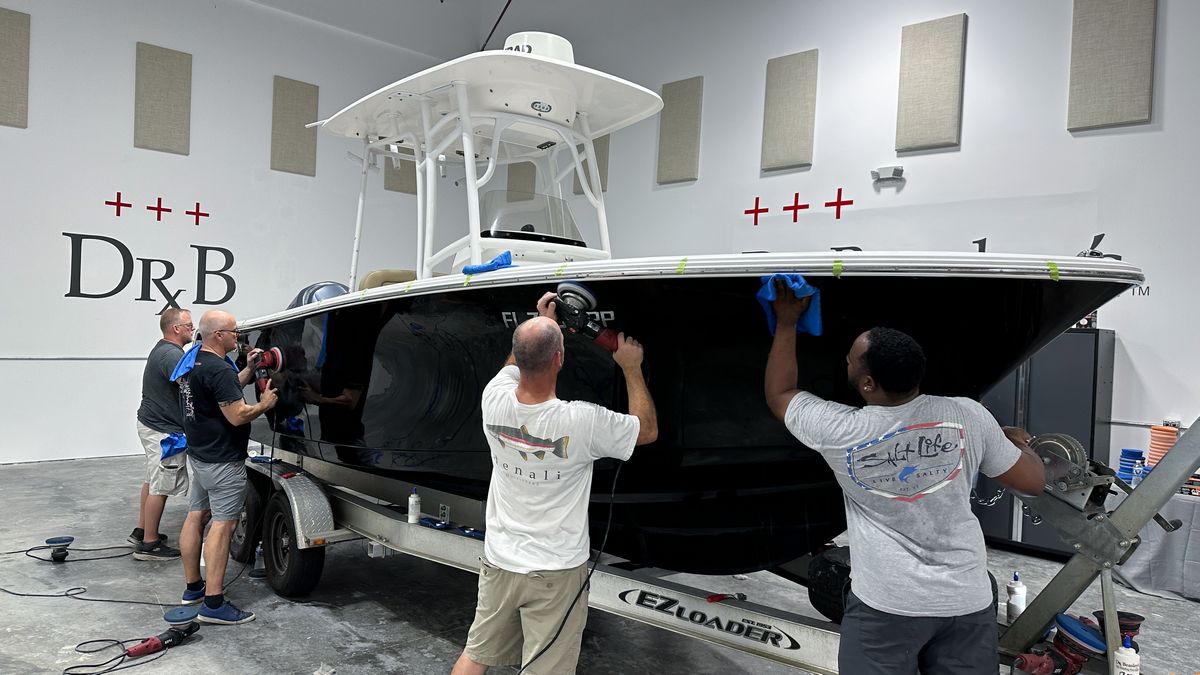
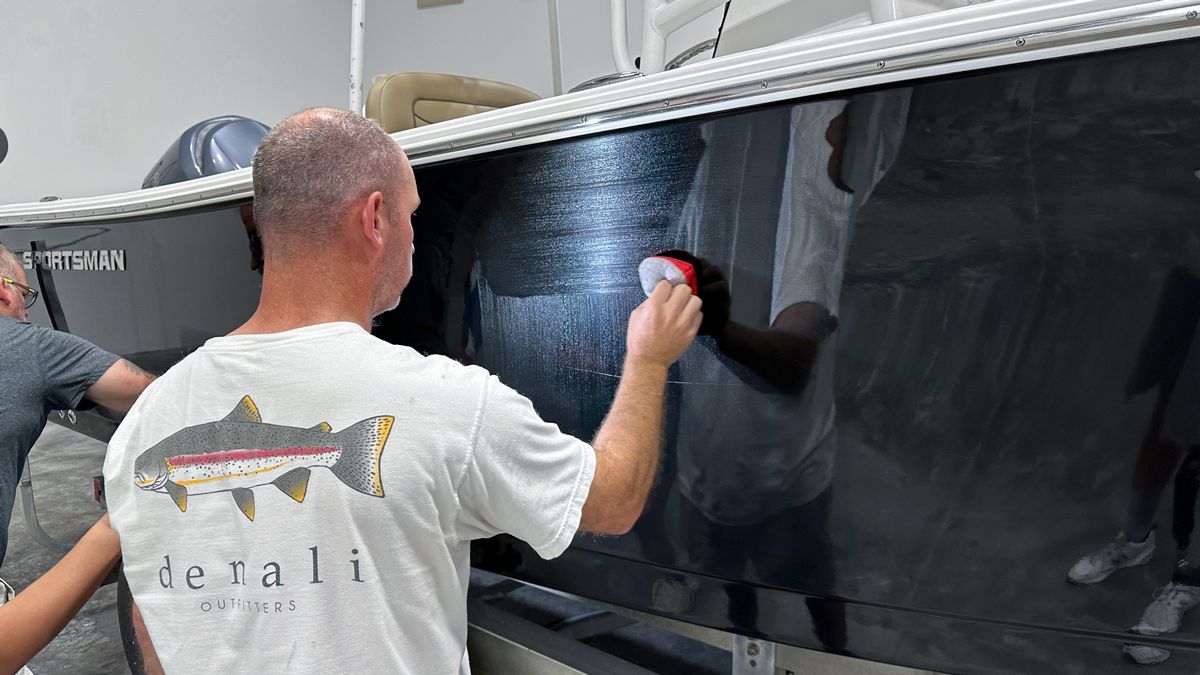
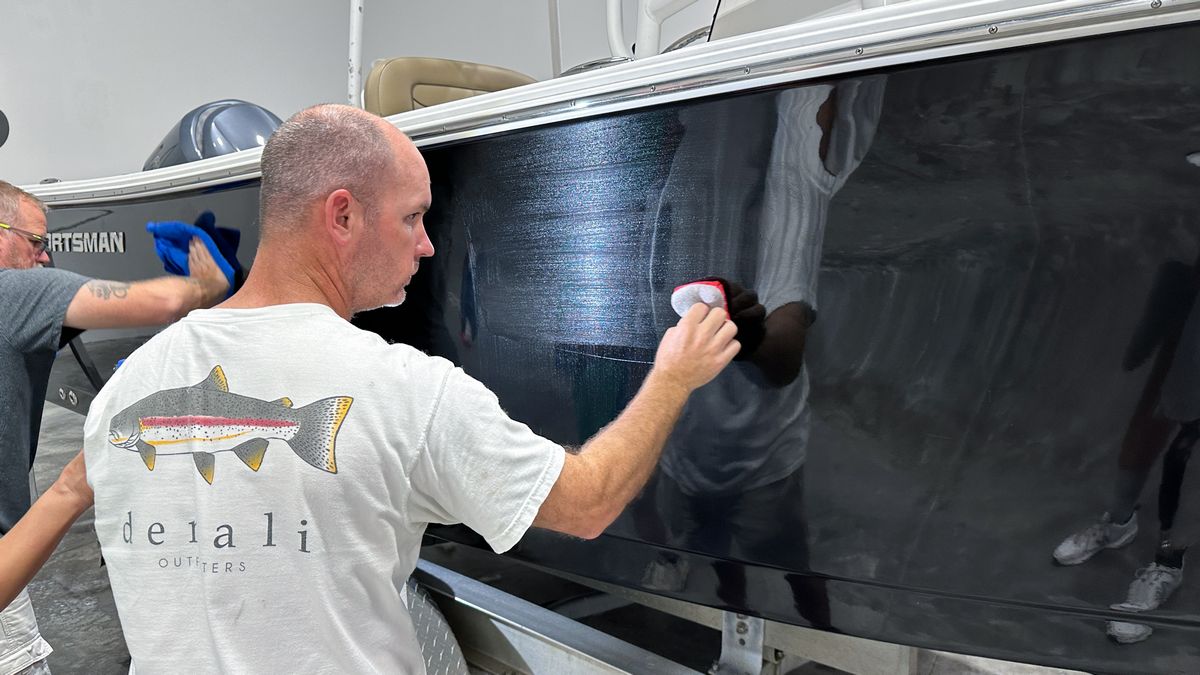
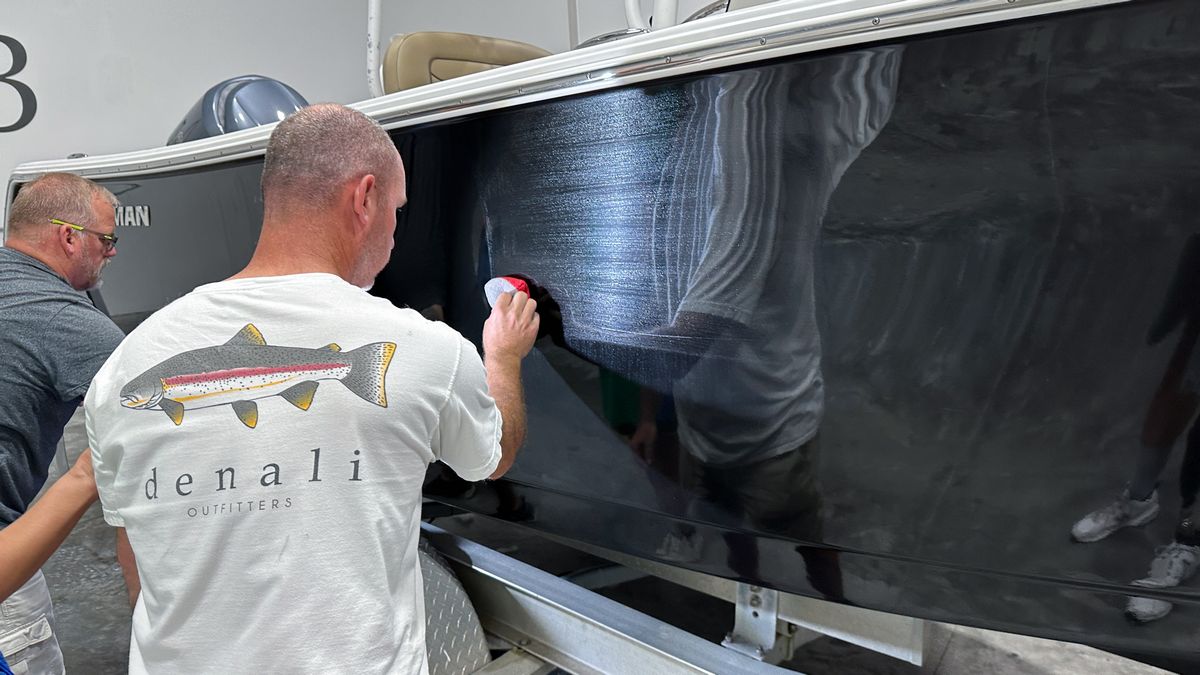
Machine polishing – removing the holograms and perfecting the gelcoat
Just like with the sanding and buffing work performed to the 1965 Ford Galaxie – after anytime you use a rotary polisher with some form of cutting pad – as a professional – you need to re-polish to remove any holograms.
Process
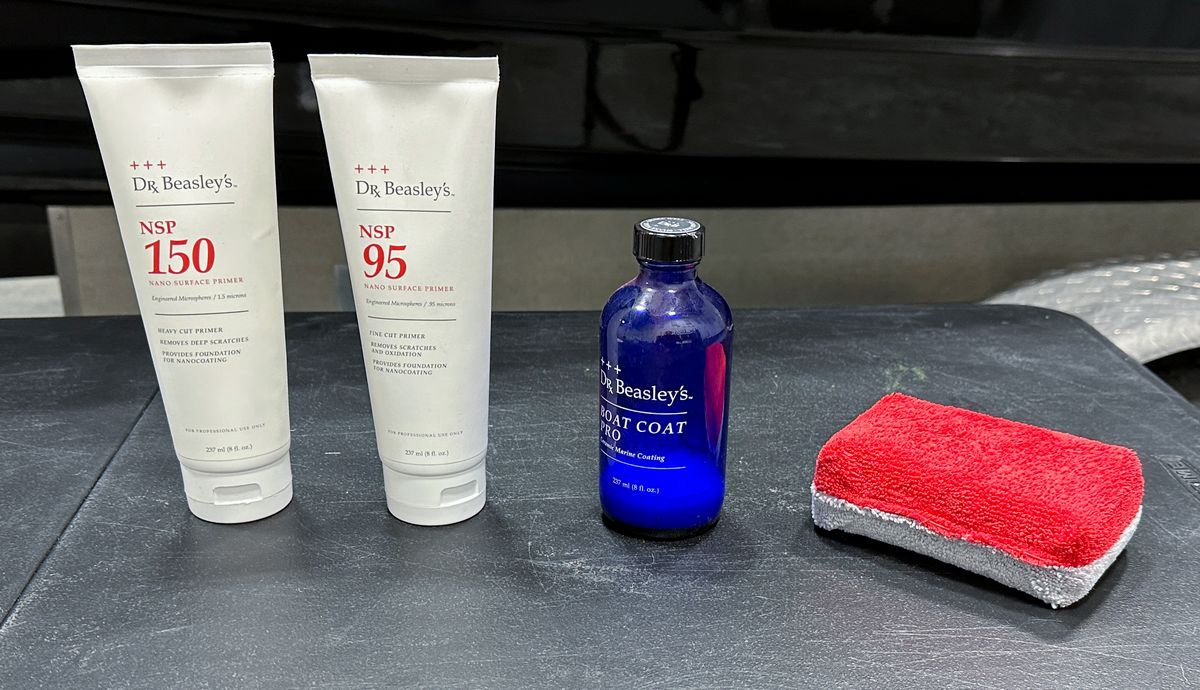
Dr. Beasley’s NSP 95 Primer
Dr. Beasley’s HDO Blue Cutting Pad
FLEX XC 3401 VRG 8mm gear-driven orbital polisher aka the BEAST
FLEX XCE 10-8 125 – 8mm Gear Driven Orbital Polisher – aka the Supa BEAST
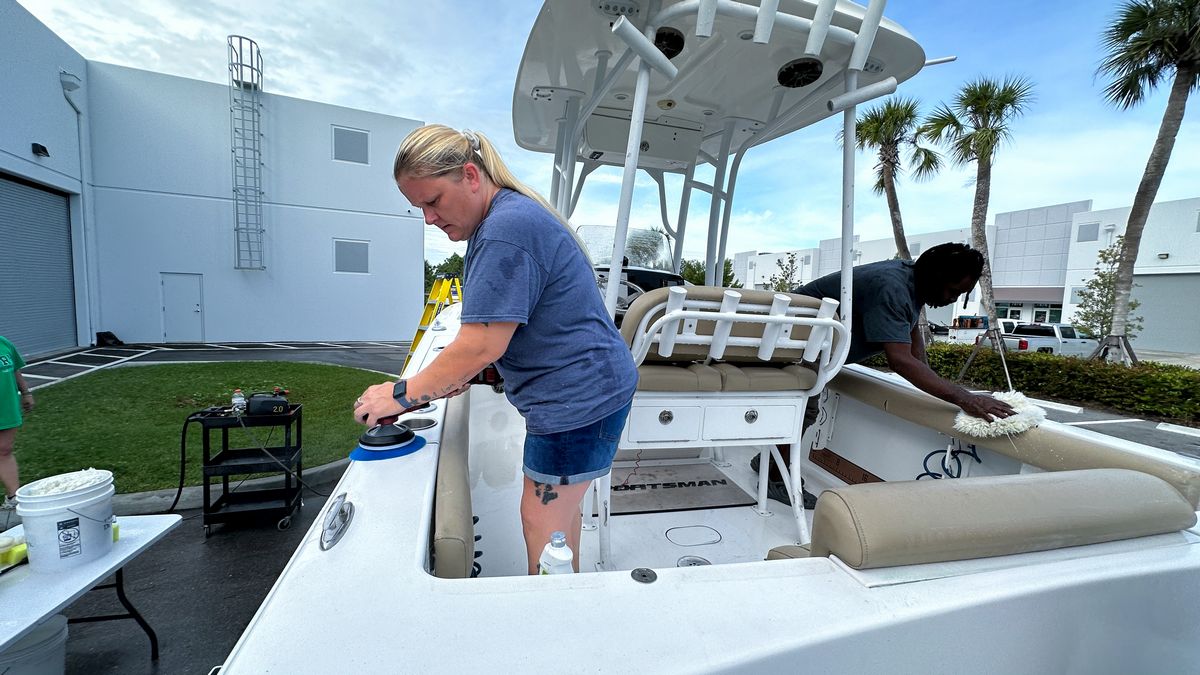
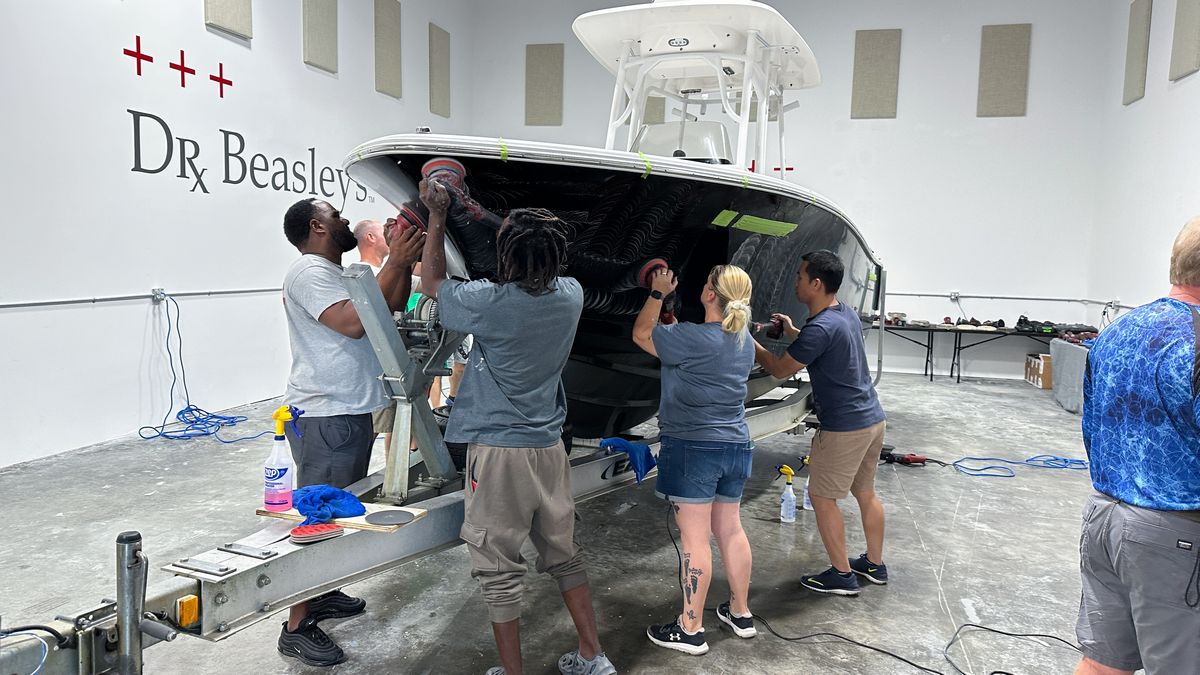
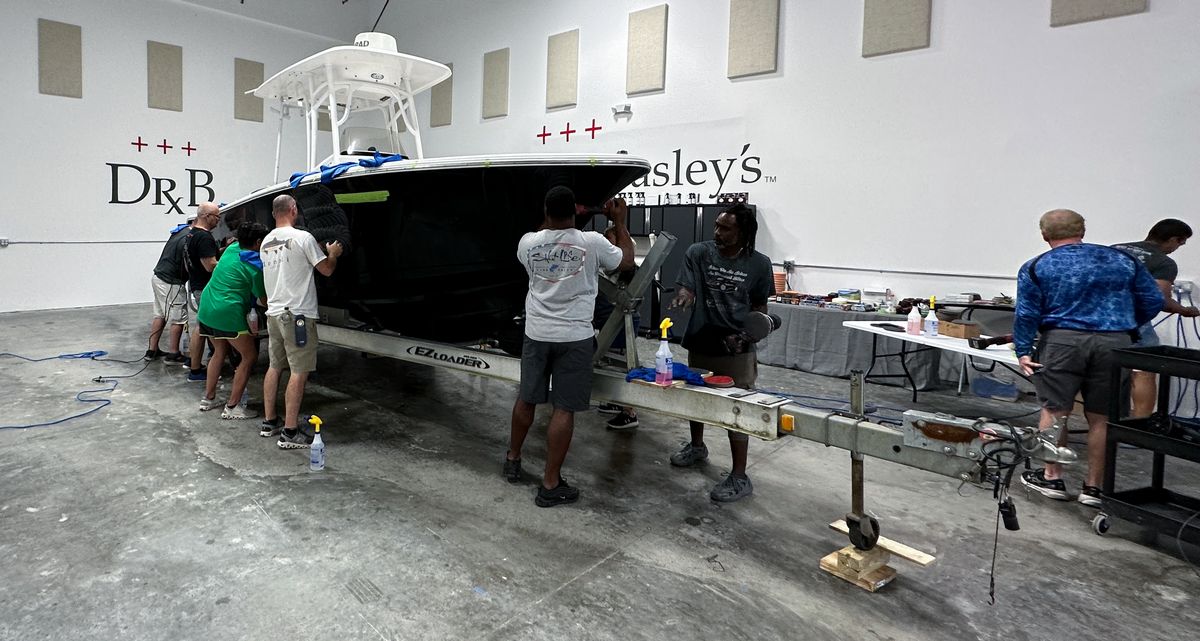
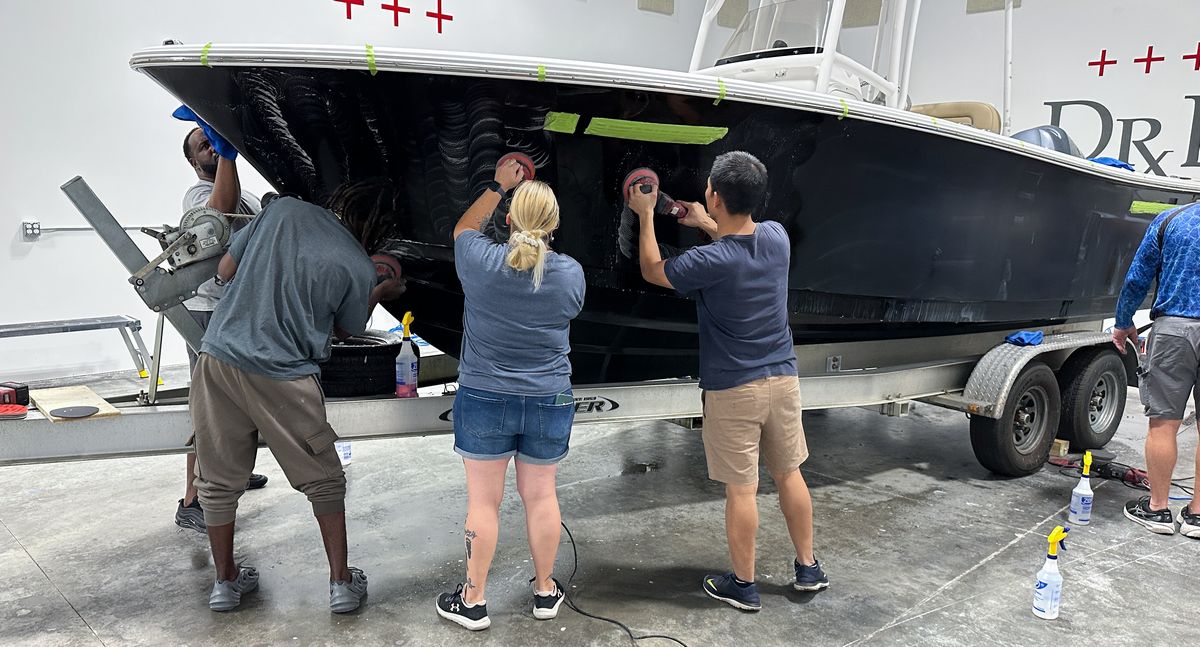
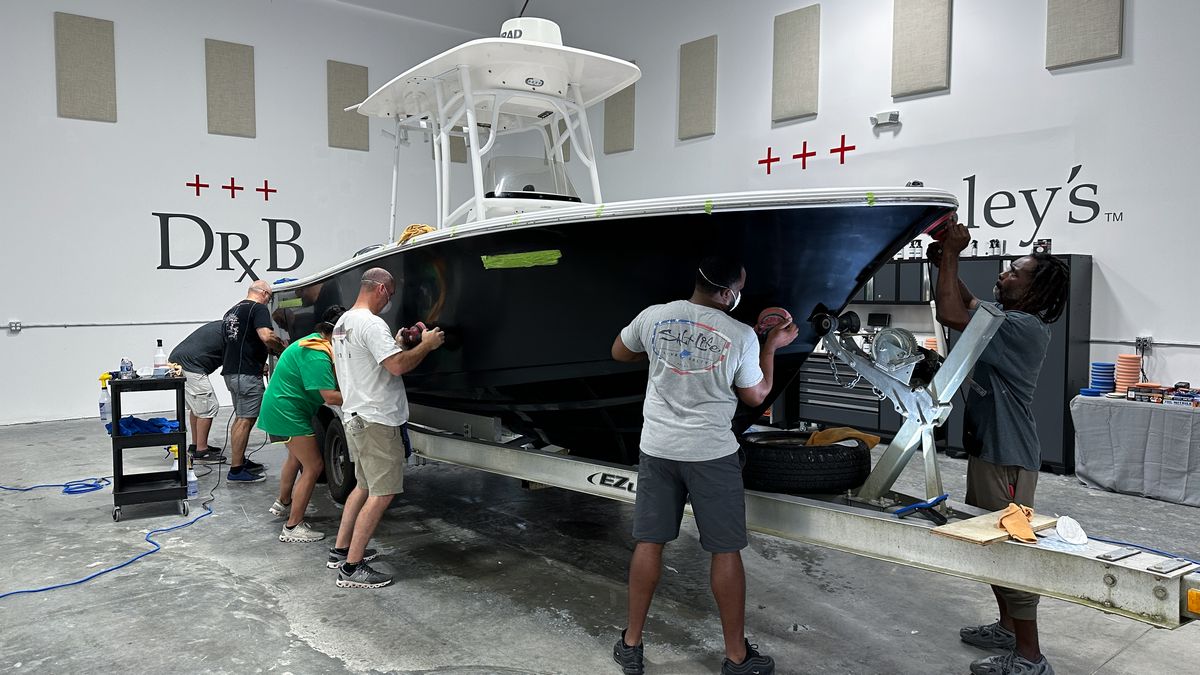
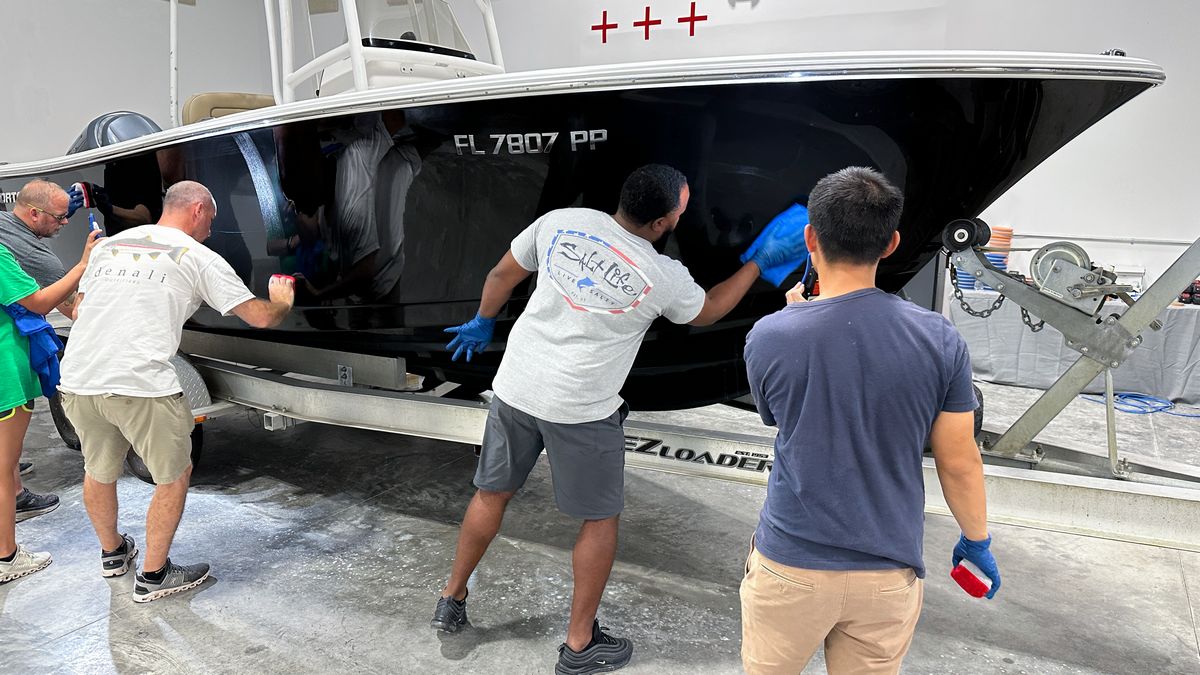
On the Port side, we have Crystal and Jhonathan with Andy in the back machine polishing the gelcoat
On the Starboard side, we have from stern to bow – David, Joe, DeAnne and Daniel
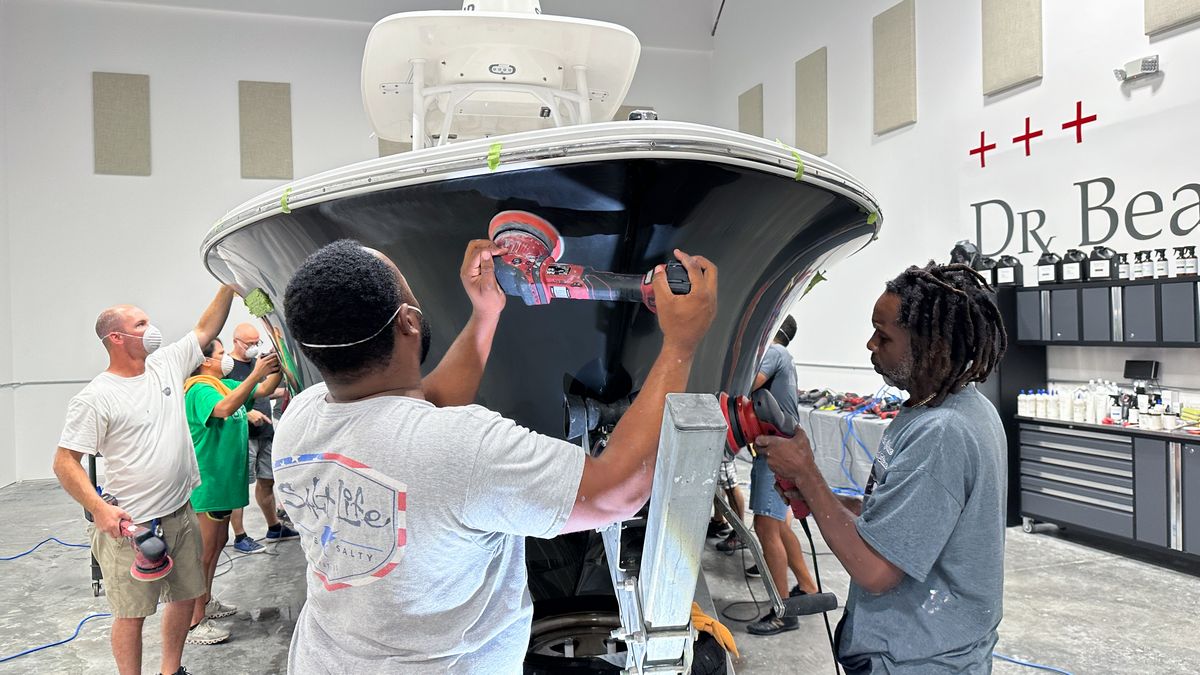
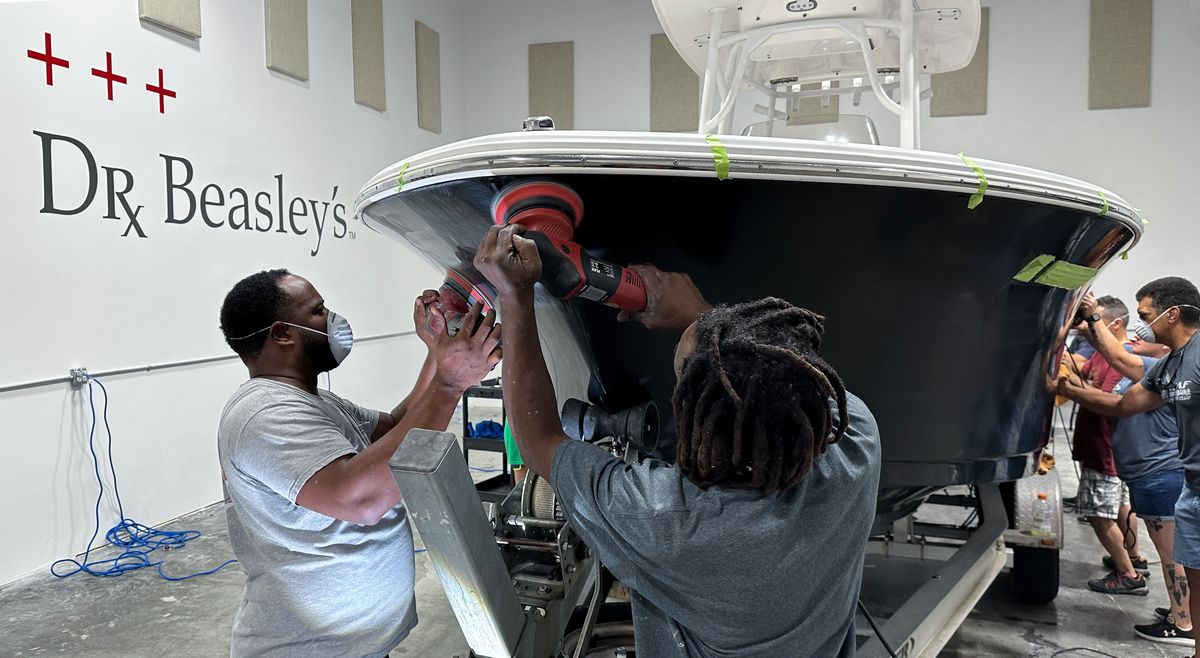
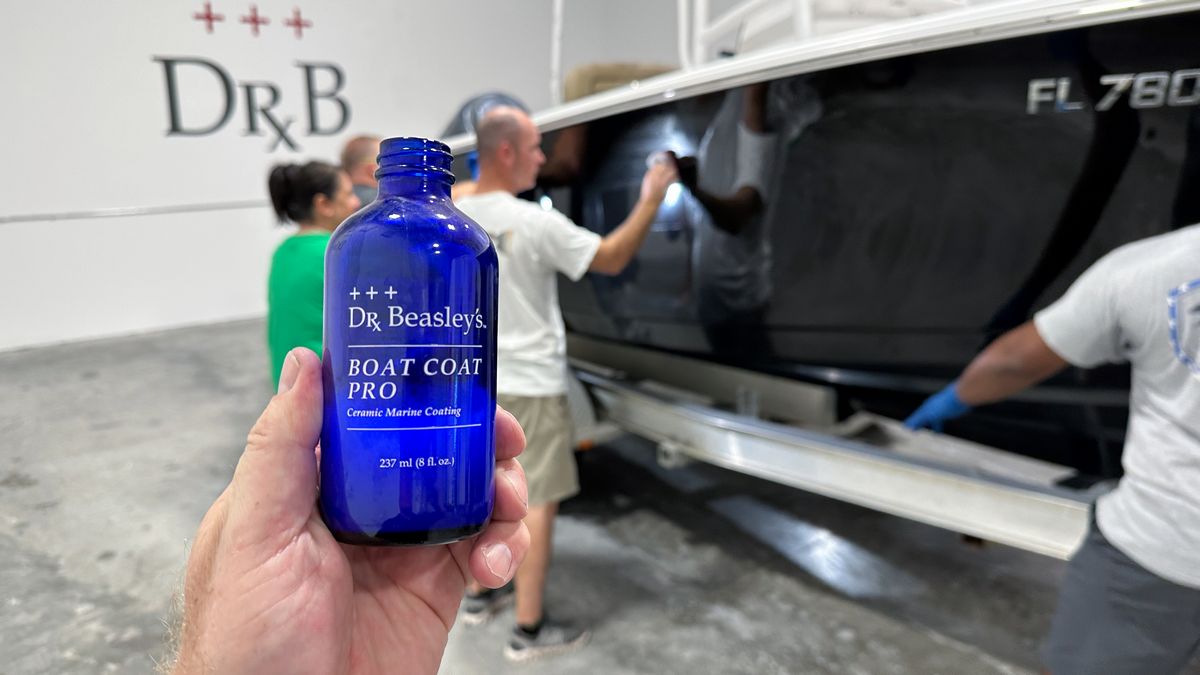
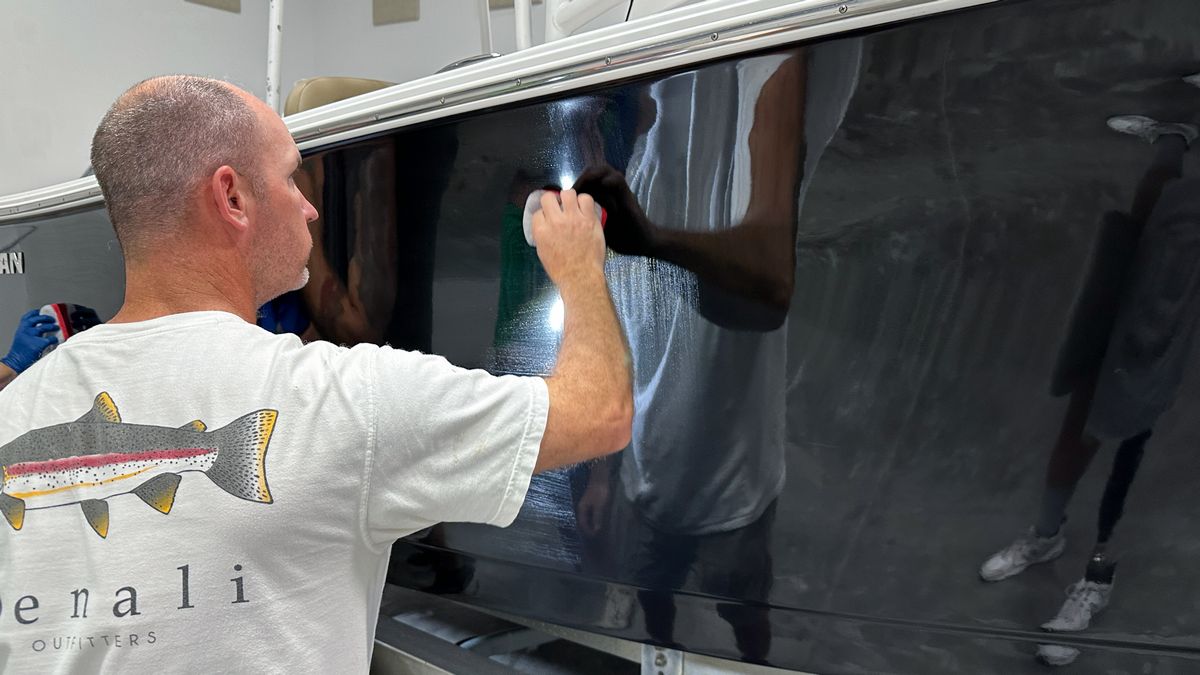
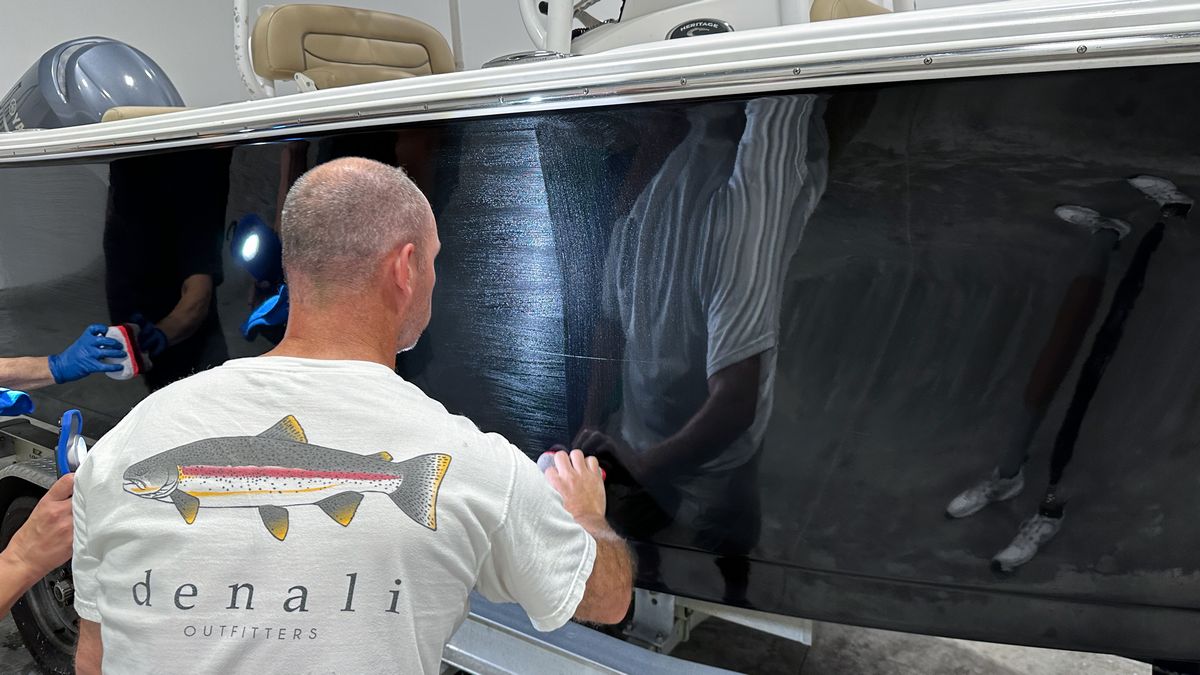
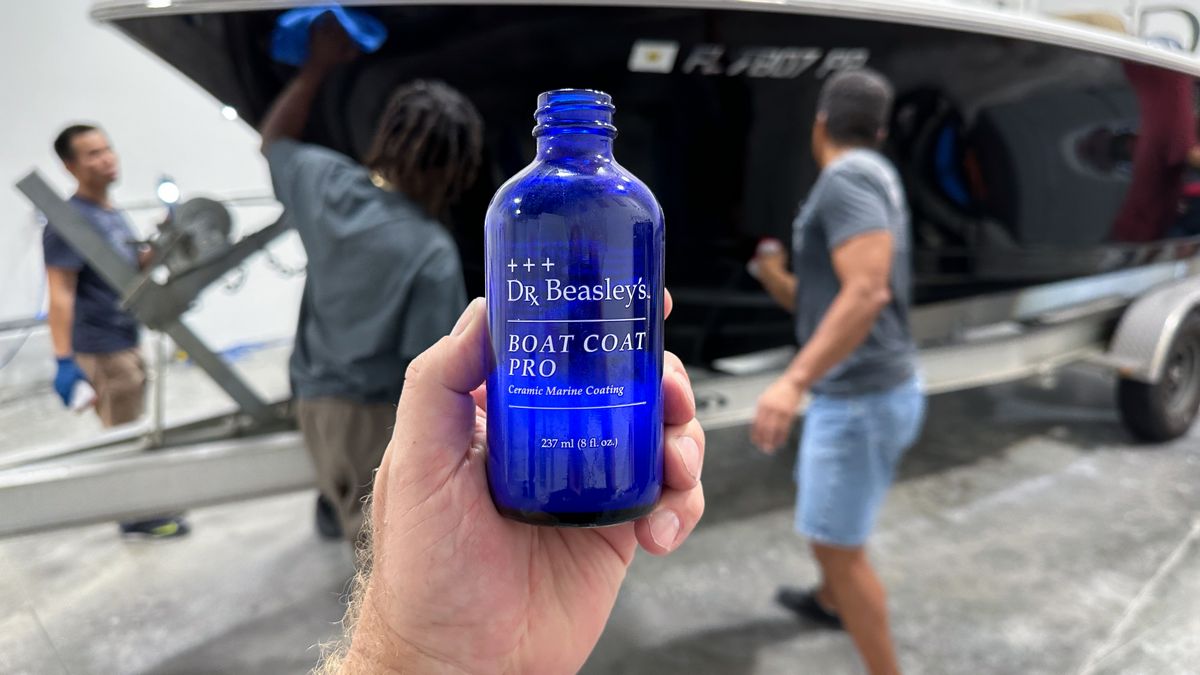
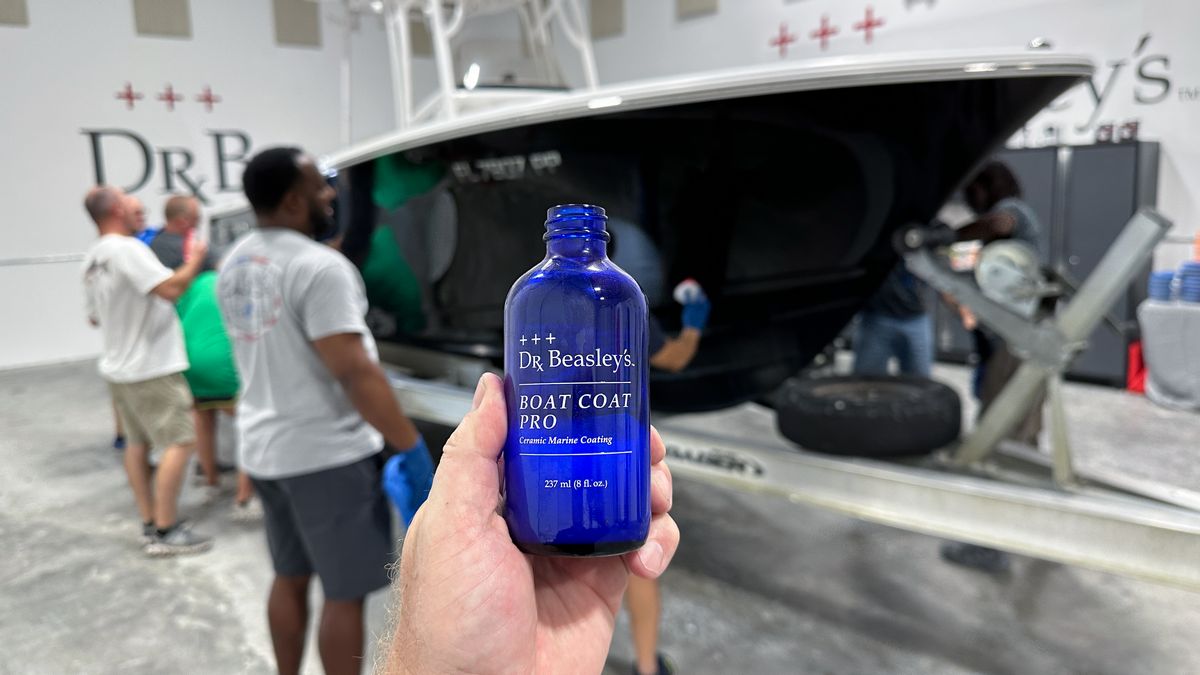
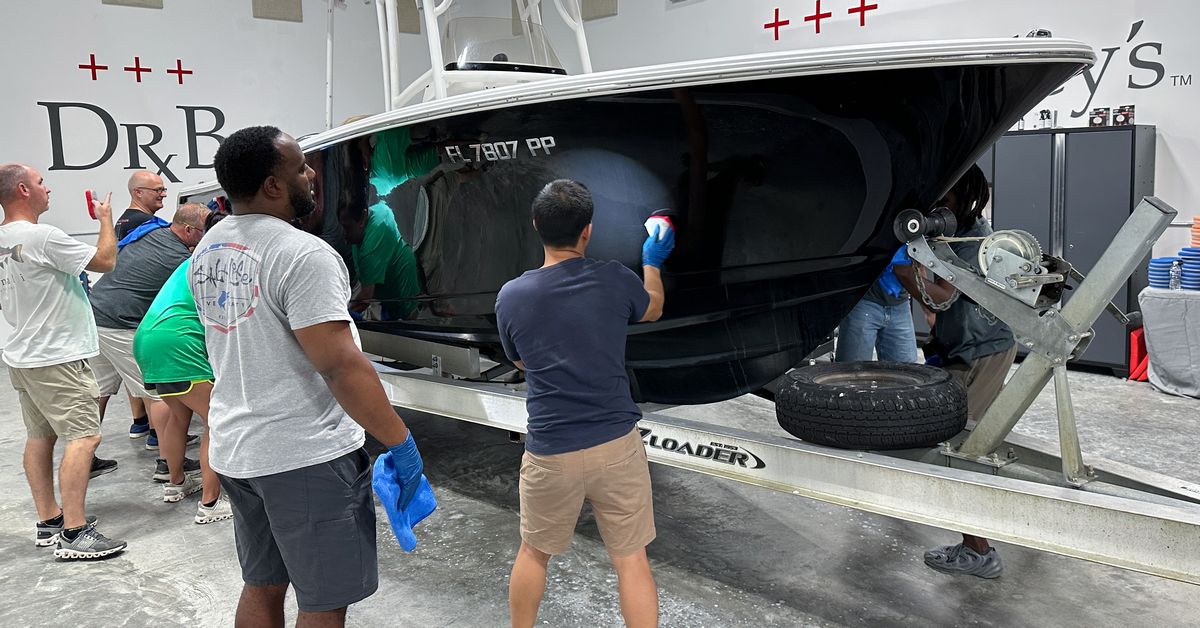
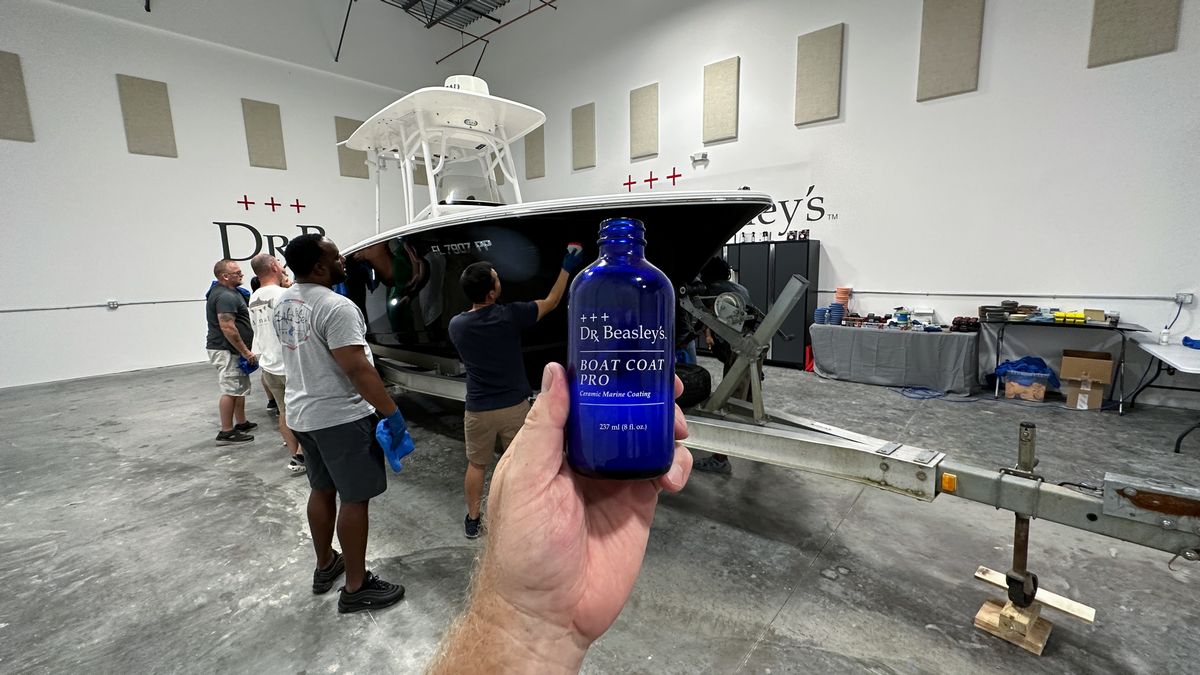
Installing the Dr. Beasley’s Boat Coat Pro Ceramic Coating
After all the polishing work was finished and the gelcoat was inspected and passed inspection (no sanding marks, no holograms), it was time to install the Dr. Beasley’s Boat Coat Pro Ceramic Coating.
Dr. Beasley’s BOAT COAT PRO is a ceramic coating for boats that protects against stains, salt and oxidation, leaves a brilliant shine and won’t harm marine life or the environment.
- Protects against stains, salt and UV damage.
- Leaves mirror-like finish.
- Makes future cleaning faster and easier.
- Will not harm marine life or the environment.
Extreme Durability
Boat Coat Pro is a ceramic coating more durable than any boat wax you’ve used before, lasting up to a year or more in most environments.
Easy to Apply
Goes on easily with effortless take-off and can be applied in the sun. Perfect for DIYers and professionals alike.
Also Protects Non-Skid & More
Boat Coat Pro is protects a variety of marine vessel surfaces like non-skid surfaces, metal and engine cowlings.
Works in Both Fresh & Salt Water
Boat Coat Pro resists corrosion from salt water, making it great for protection whether you’re lakefront or oceanfront.
Ultra Smooth Finish
Bonds with gel coat to create an extremely slick finish that resists dirt, grime and micro scratches from washing.
Reduces Water Spotting
Hydrophobic properties help repel water away from the hull, preventing them from drying into potentially corrosive water spots
3 layers Dr. Beasley’s Boat Coat Pro
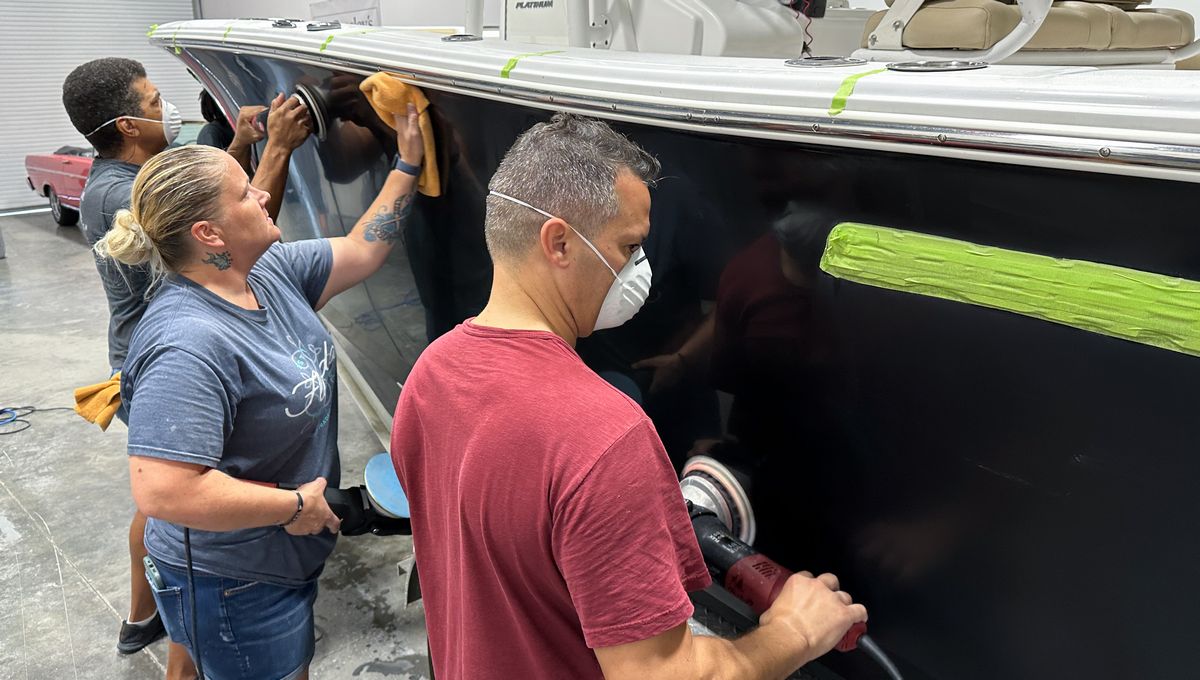
In our extreme boat detailing classes, we install 3 applications of the Dr. Beasley’s Boat Coat Pro with a 30-minute waiting time in-between each layer.
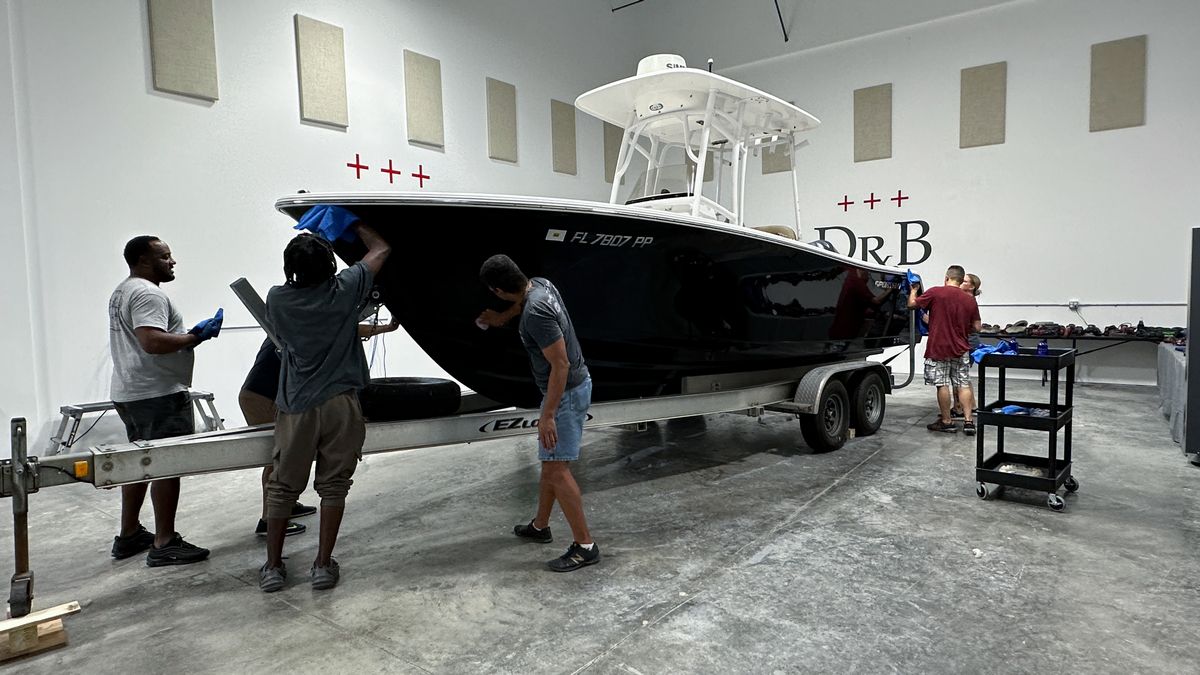
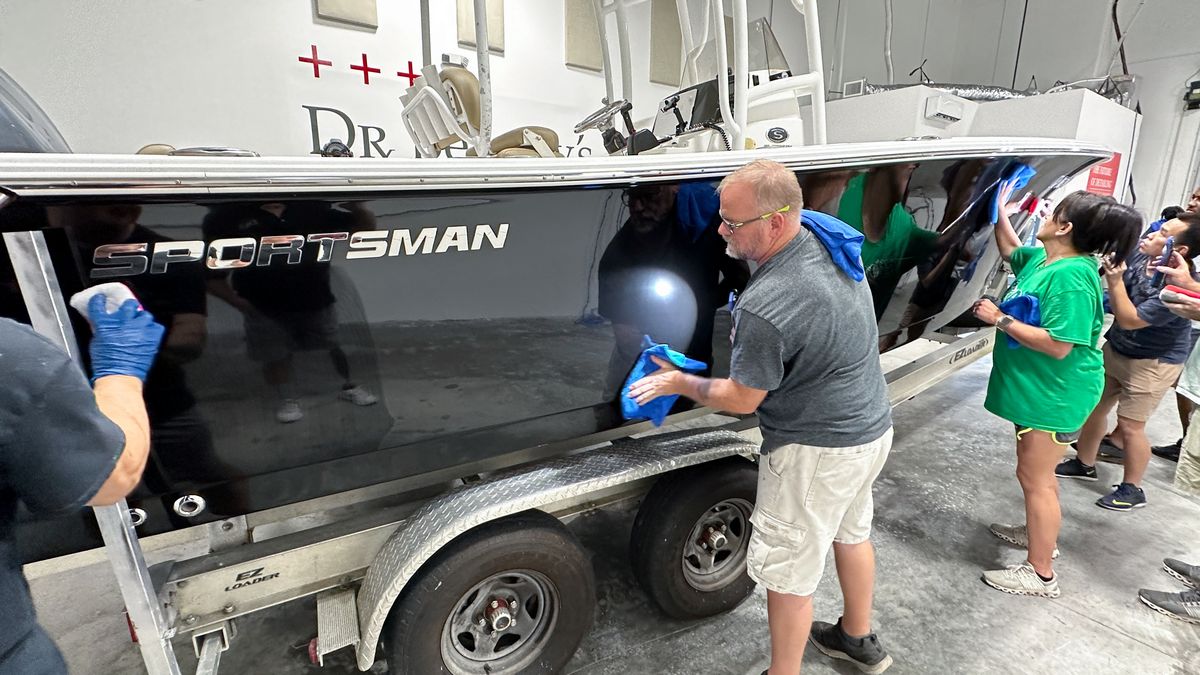
Here’s the class getting it done!
4 passes using the overlapping crosshatch pattern
Below you’ll see Daniel using a textbook example for how to apply the Dr. Beasley’s Boat Coat Pro using an overlapping crosshatch pattern working the coating over the gelcoat 4 times to this section he’s working.
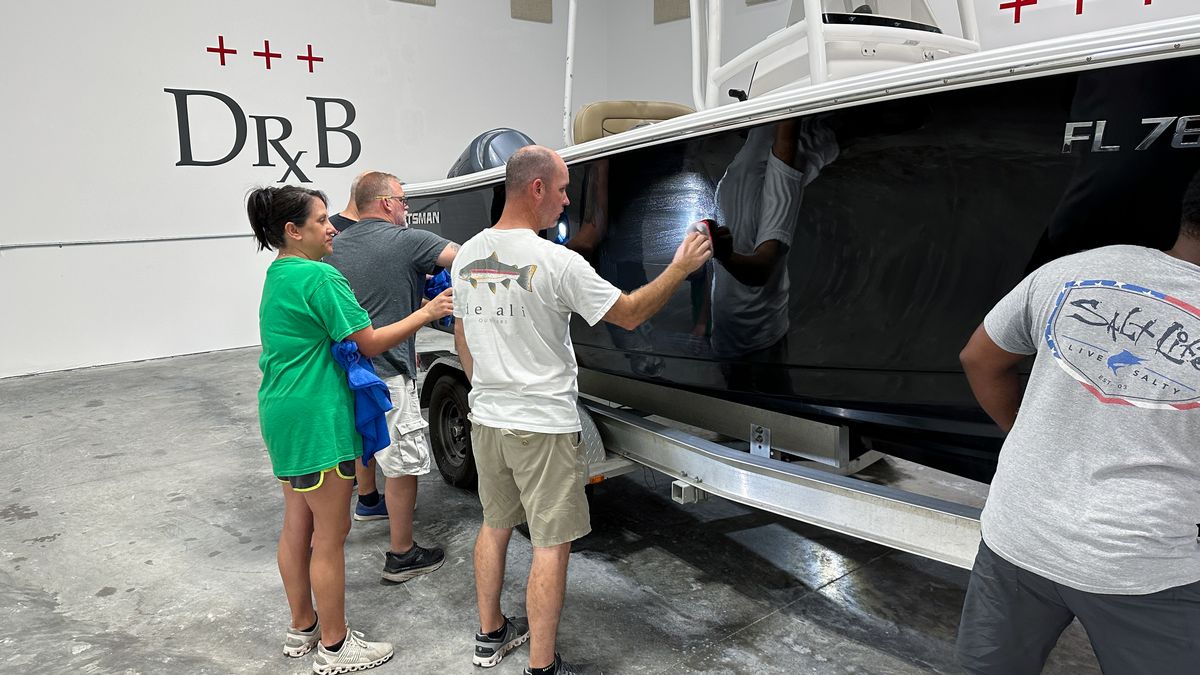
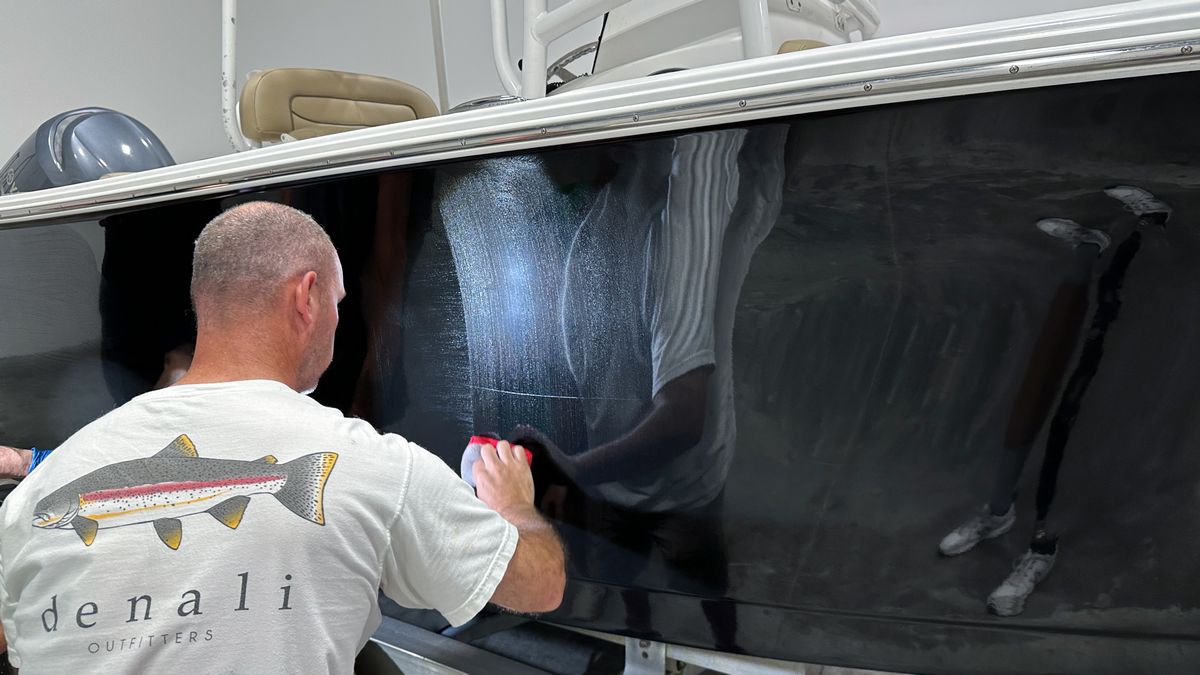
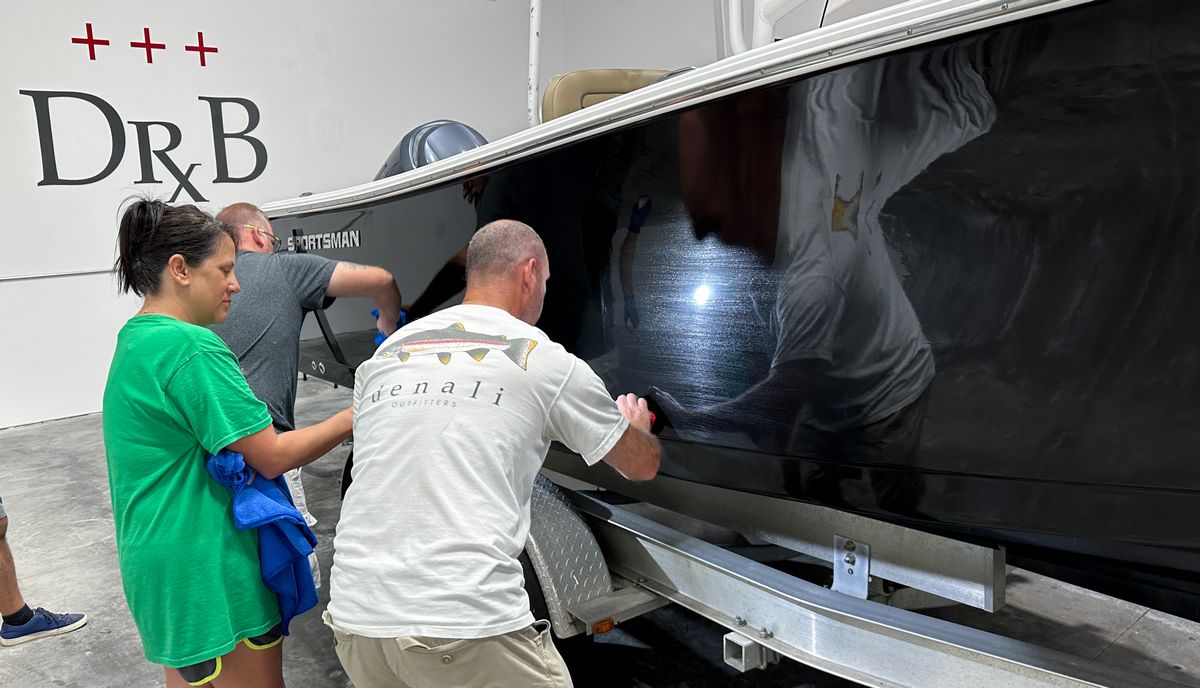
Then Daniel’s wife DeAnne, levels the coating and removes any excess coating
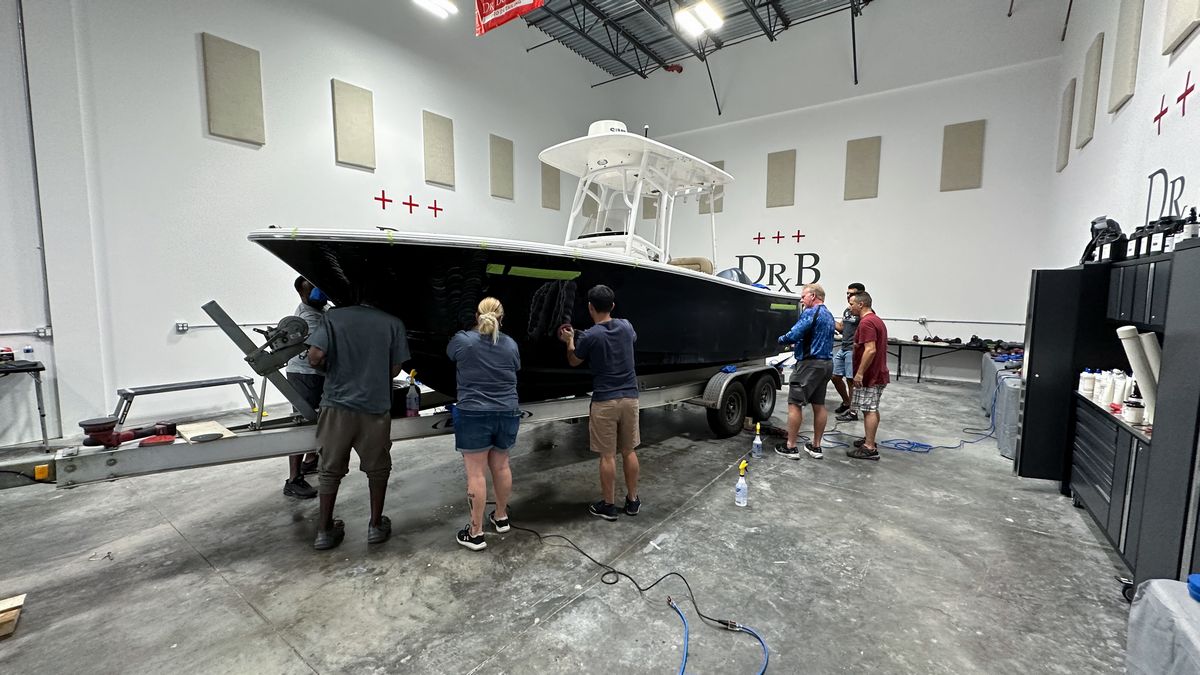
The team works together to get this 24′ behemoth coated!

I’m starting to see light at the end of the tunnel!

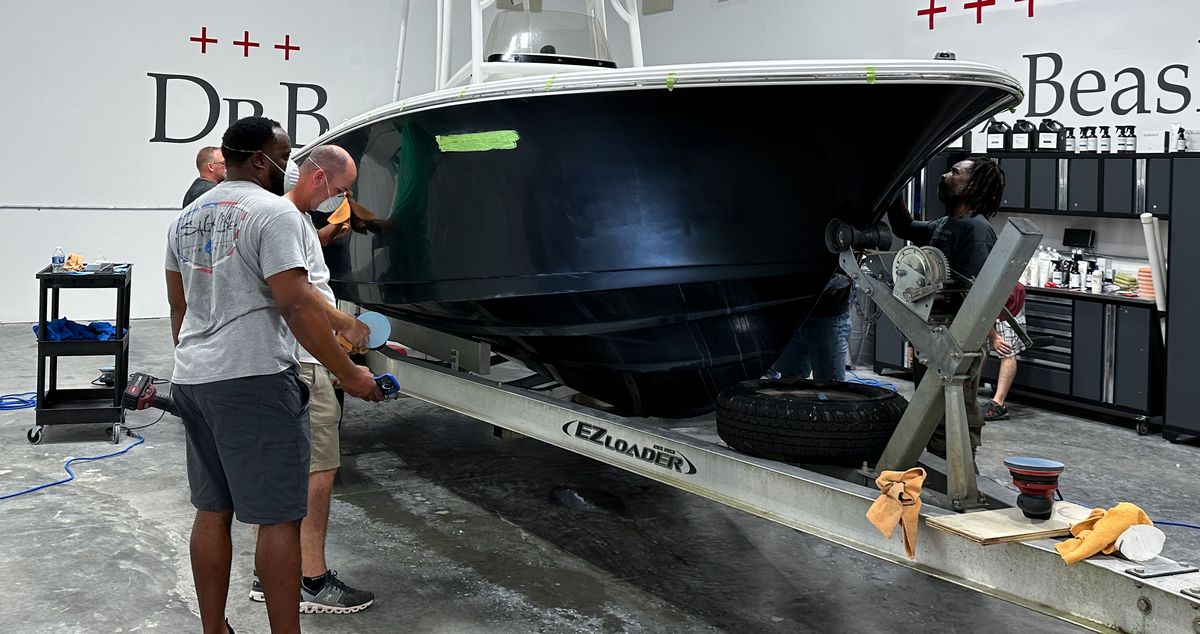
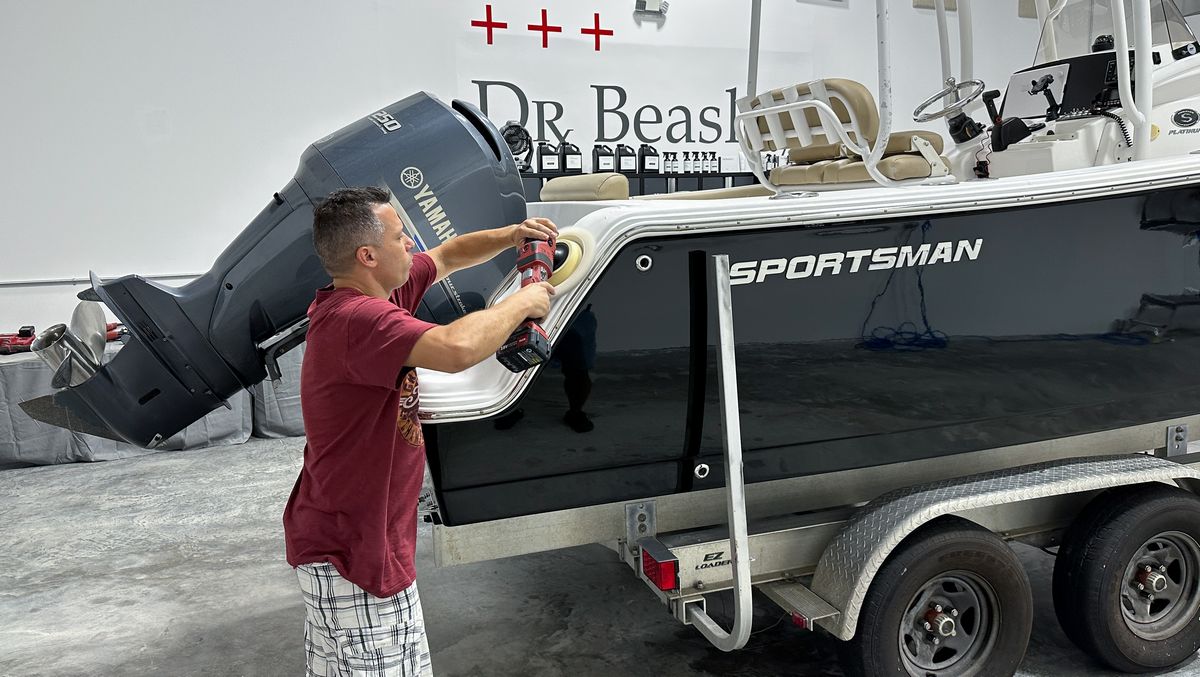
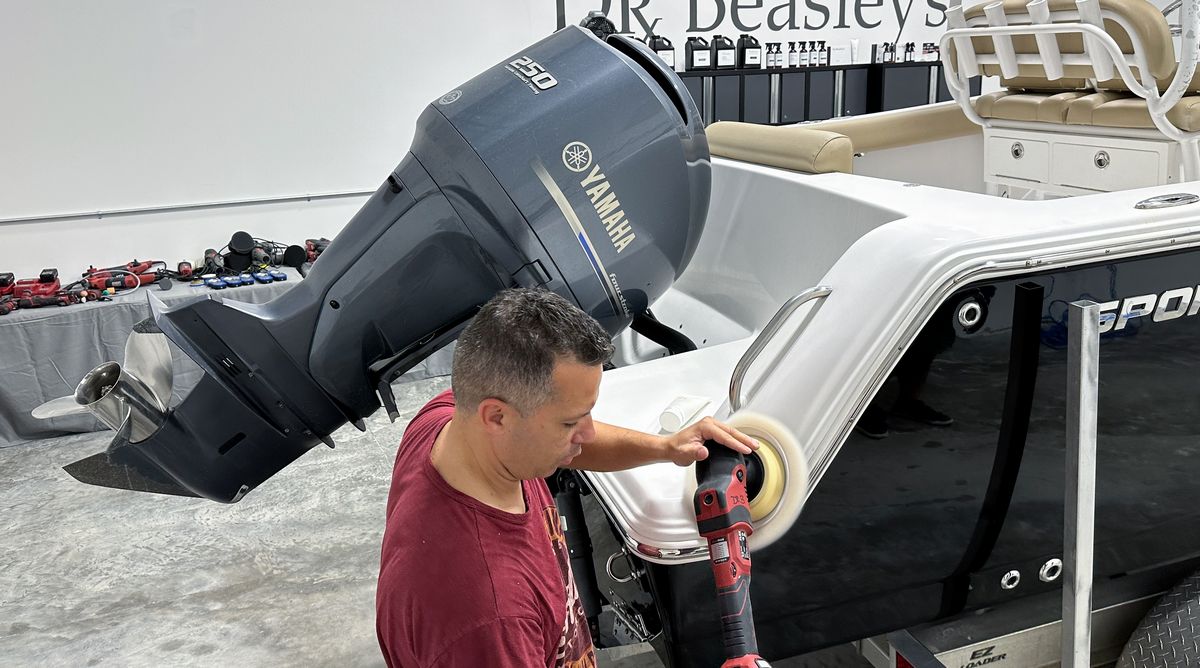
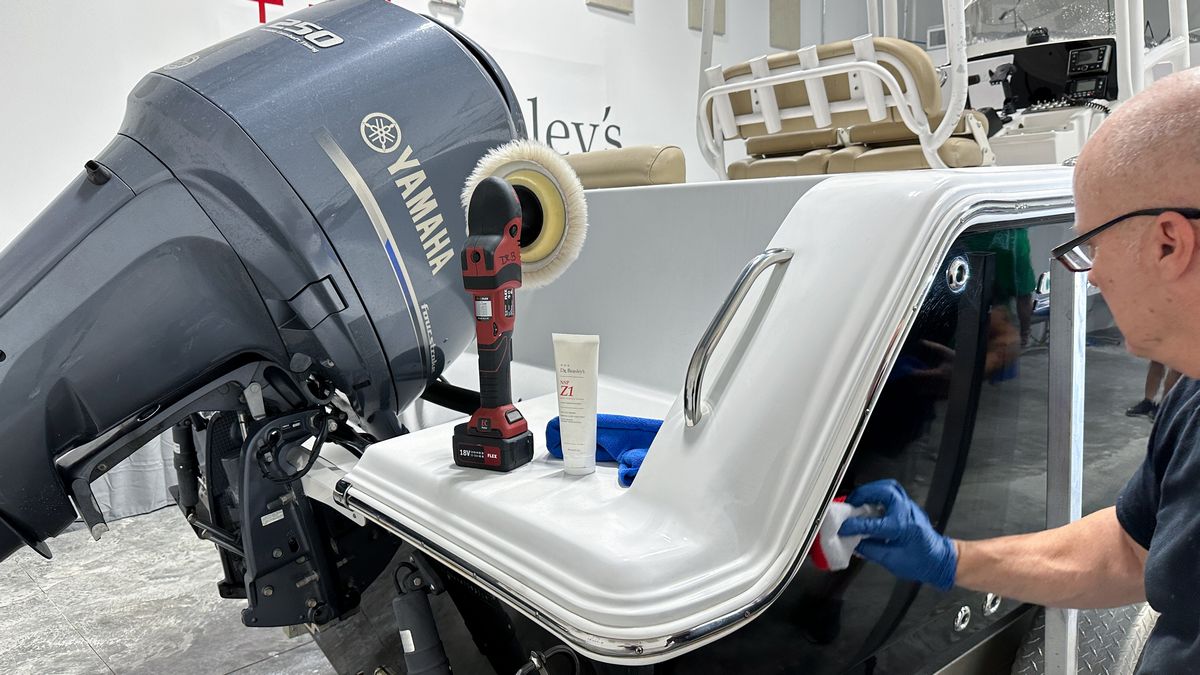
Top side detailing
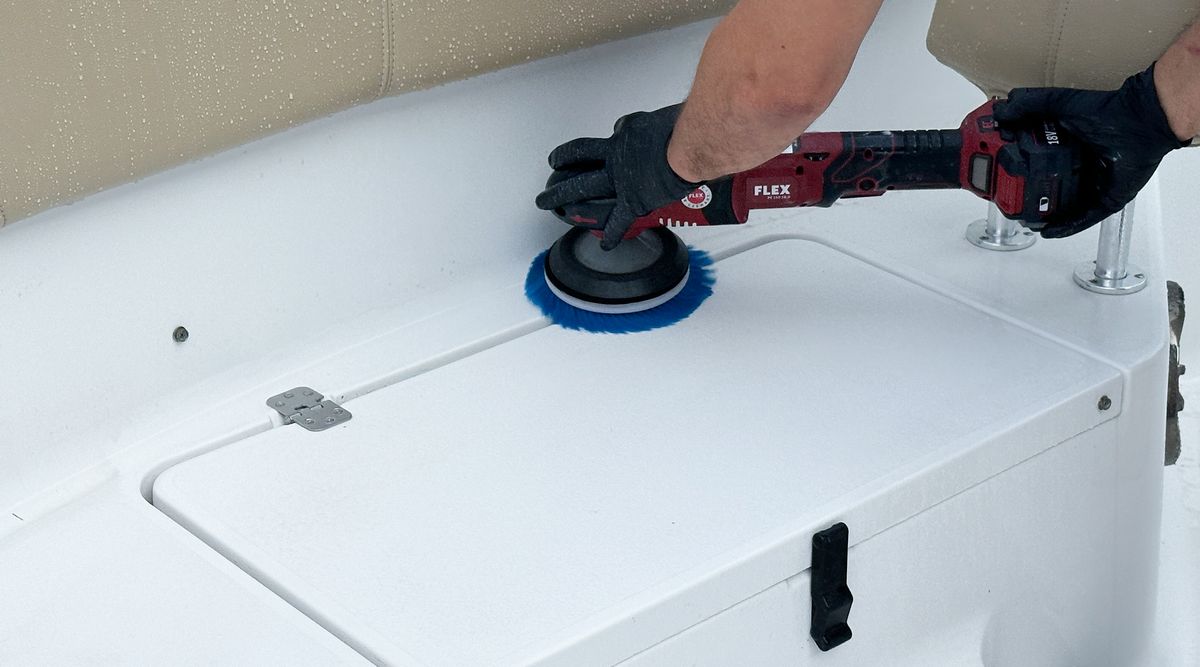
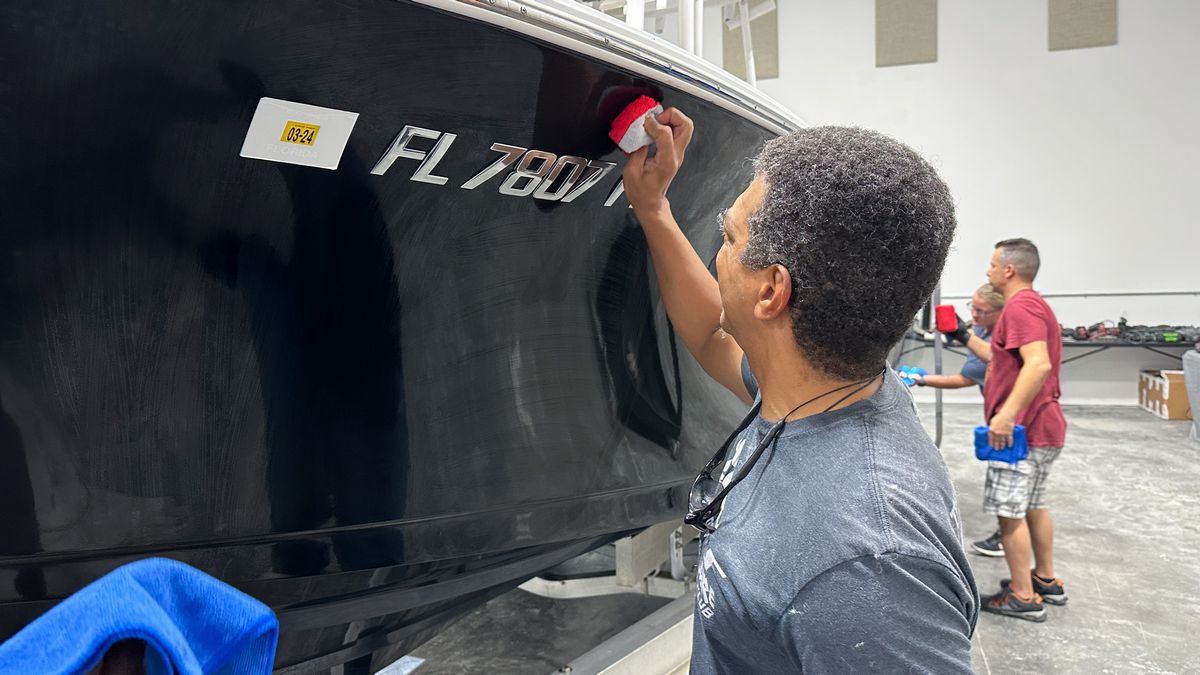
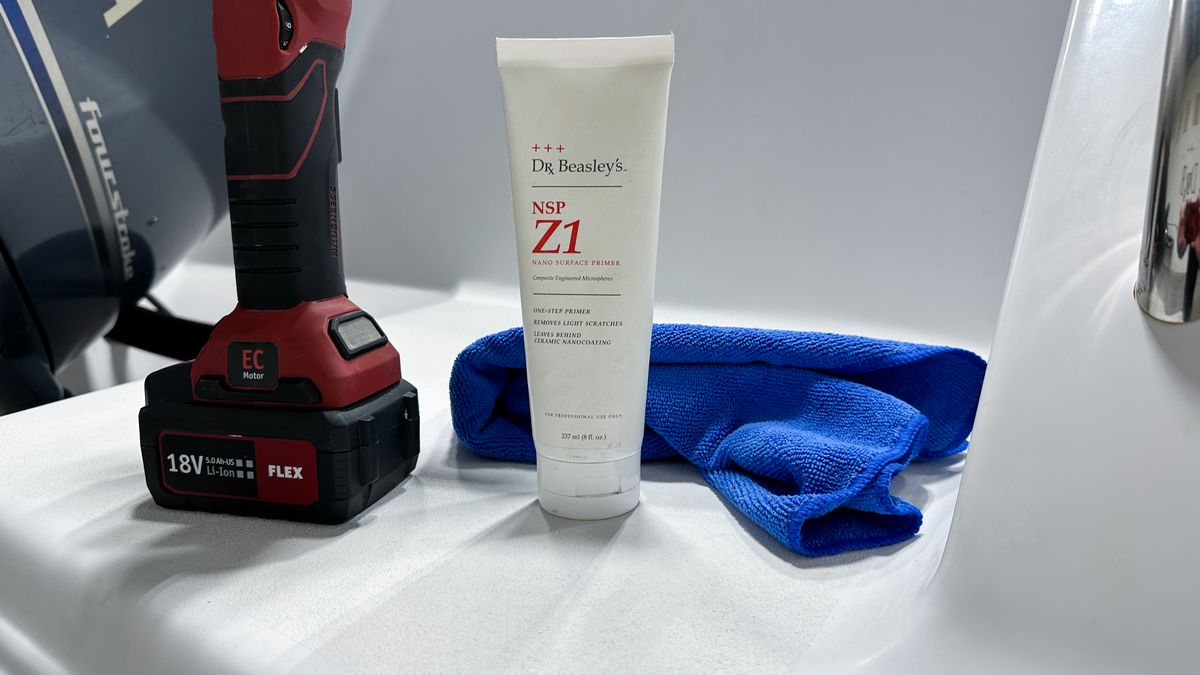
For the top side and all the smooth white gelcoat surfaces, we used the Dr. Beasley’s NSP Z1. Z1 is an AIO or All-in-One. It removes oxidation, restores gloss and shine and leaves behind a layer of ceramic protection in a single step.
Here’s Jhonathan using Z1 on the stern portion of the top cap

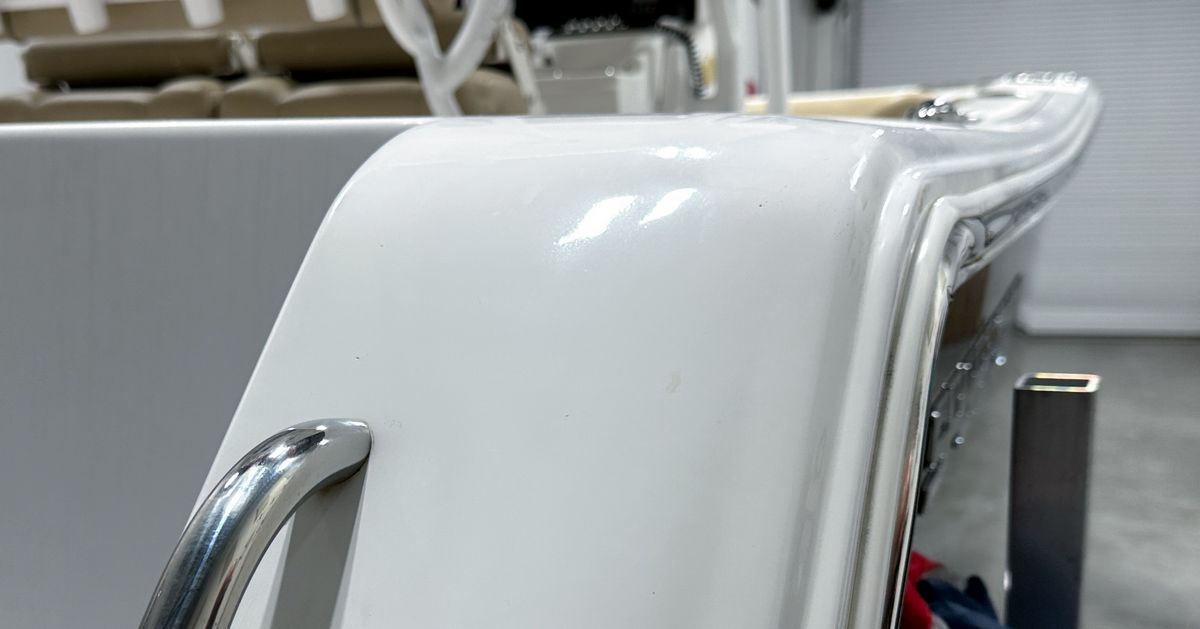
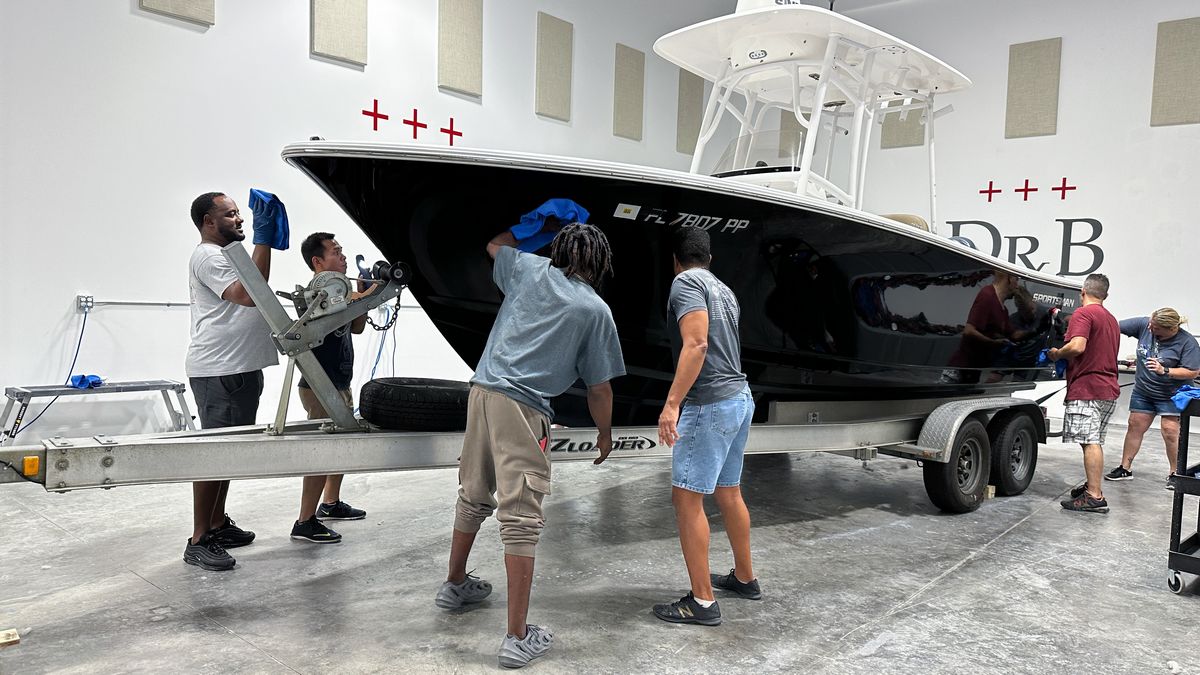
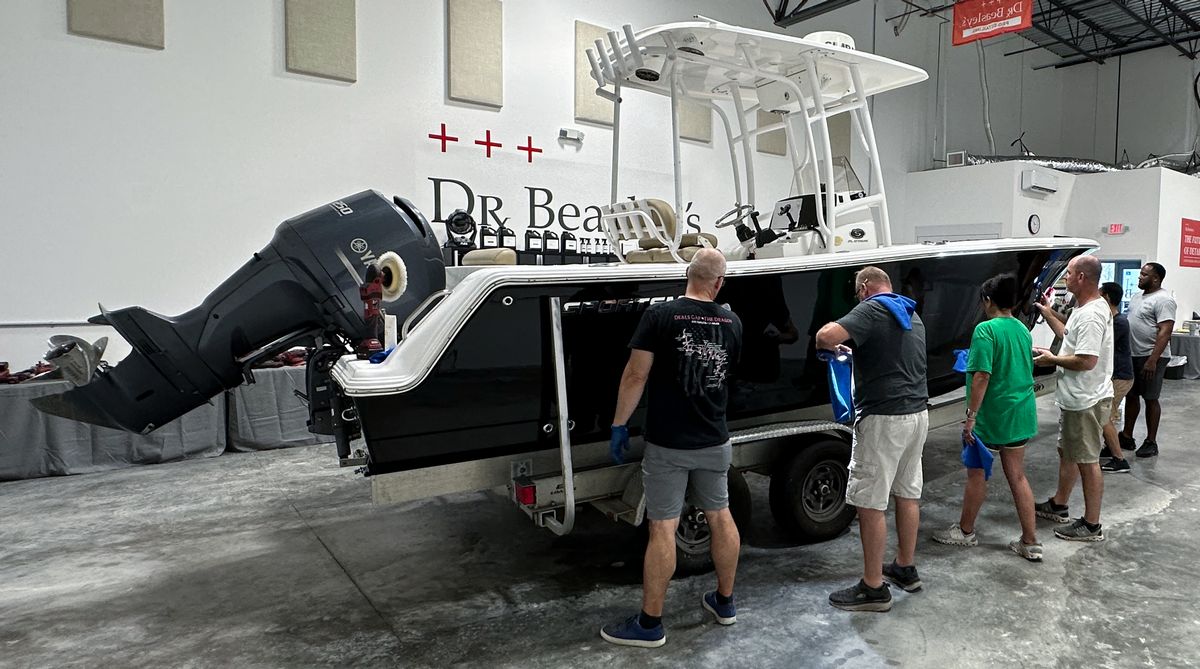
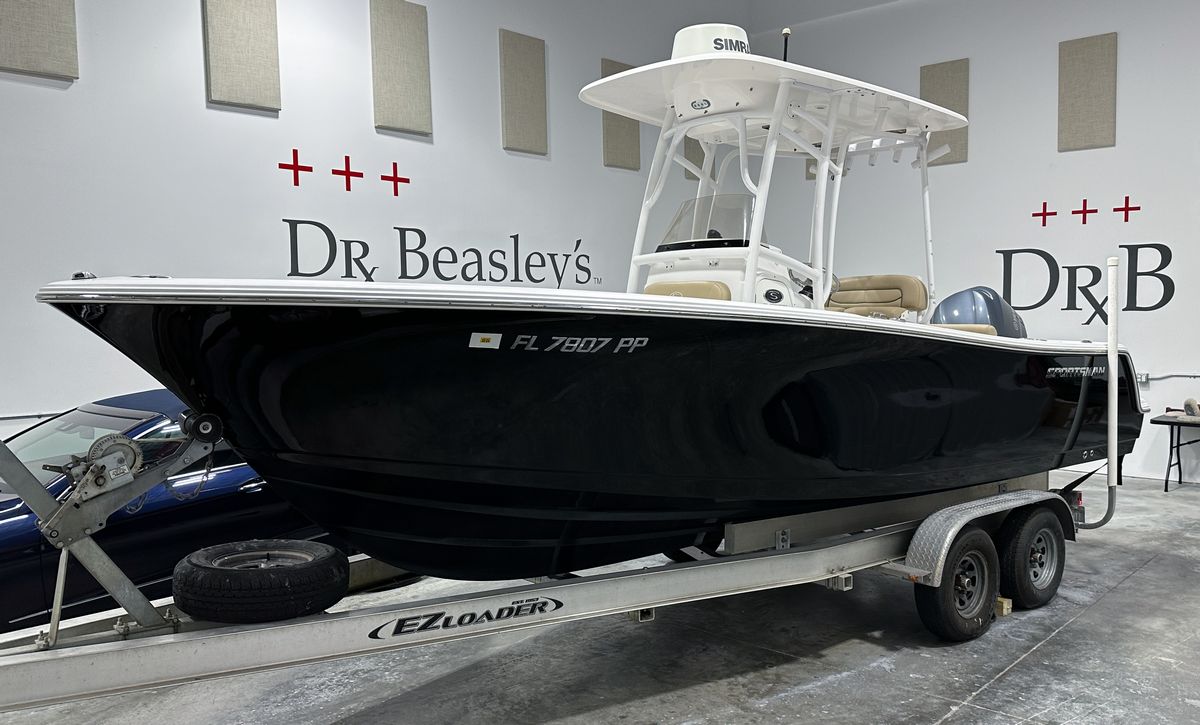
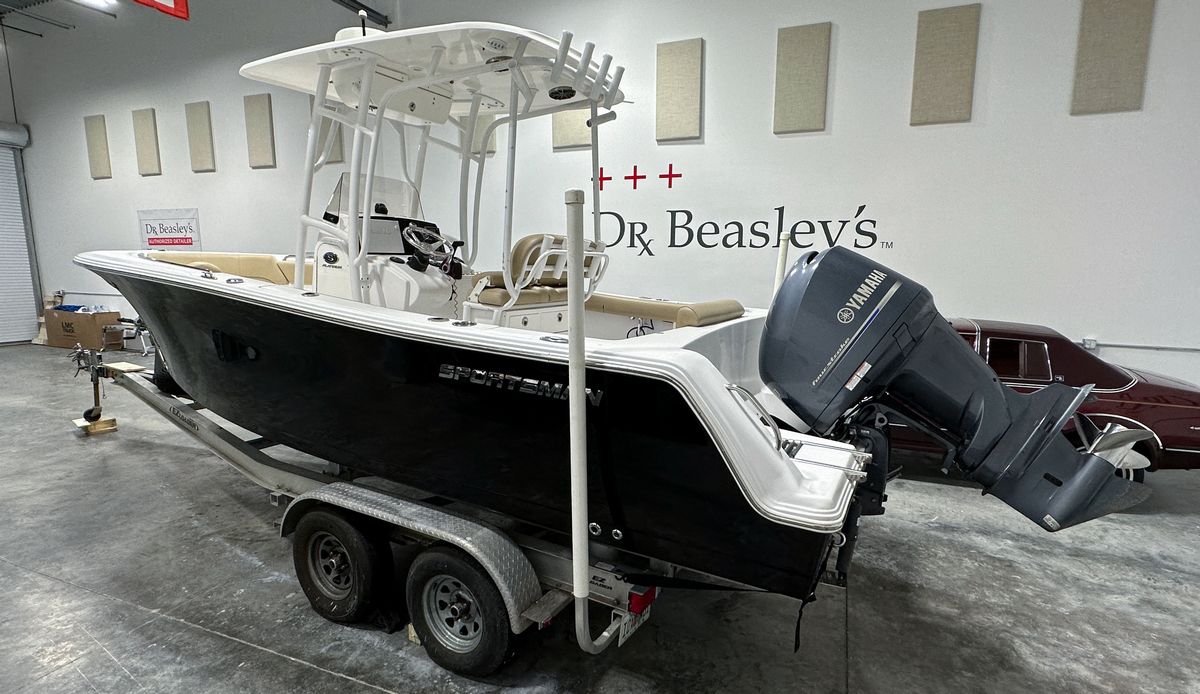
Before & After
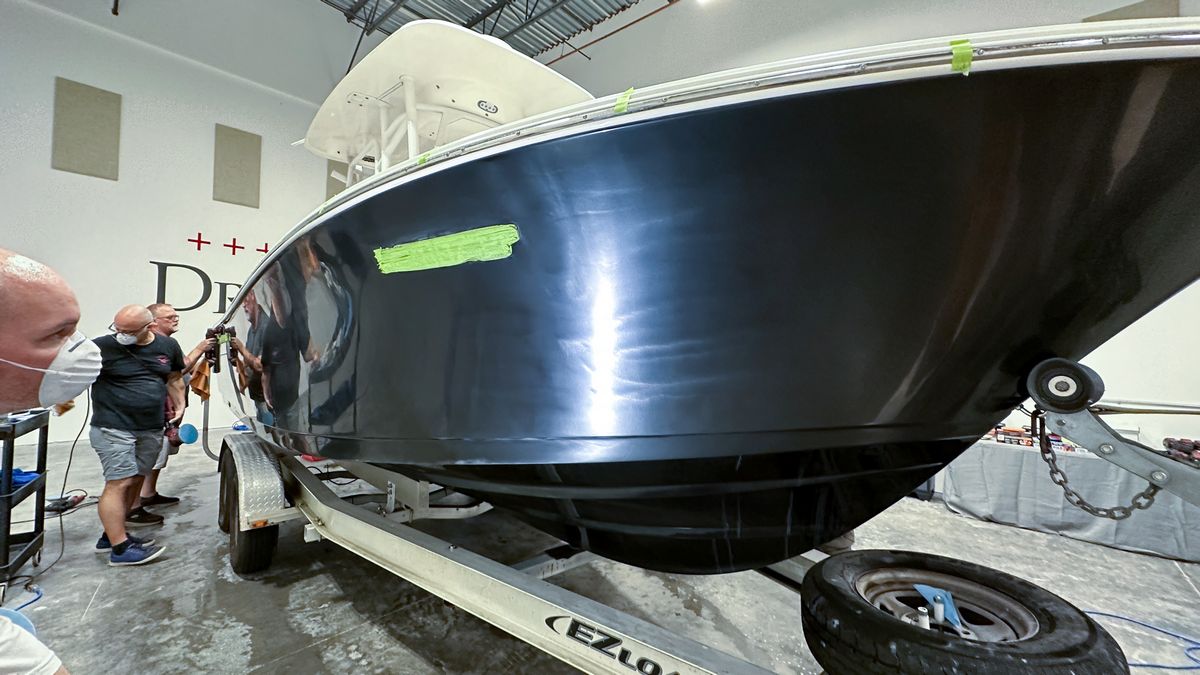
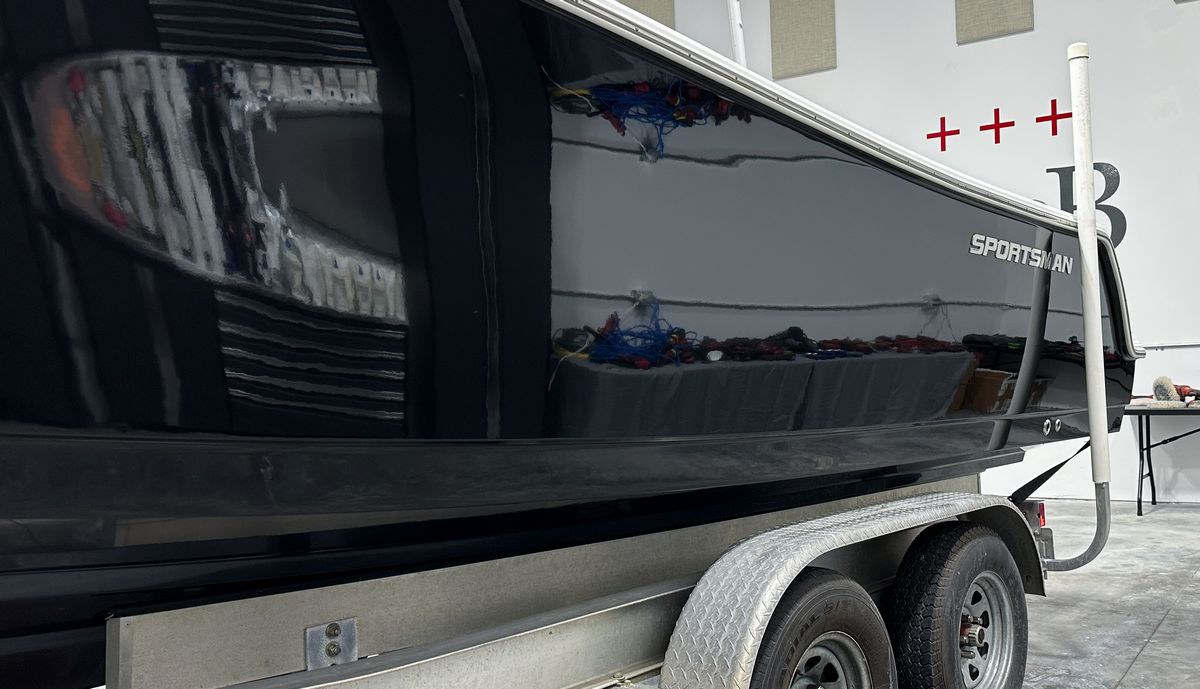
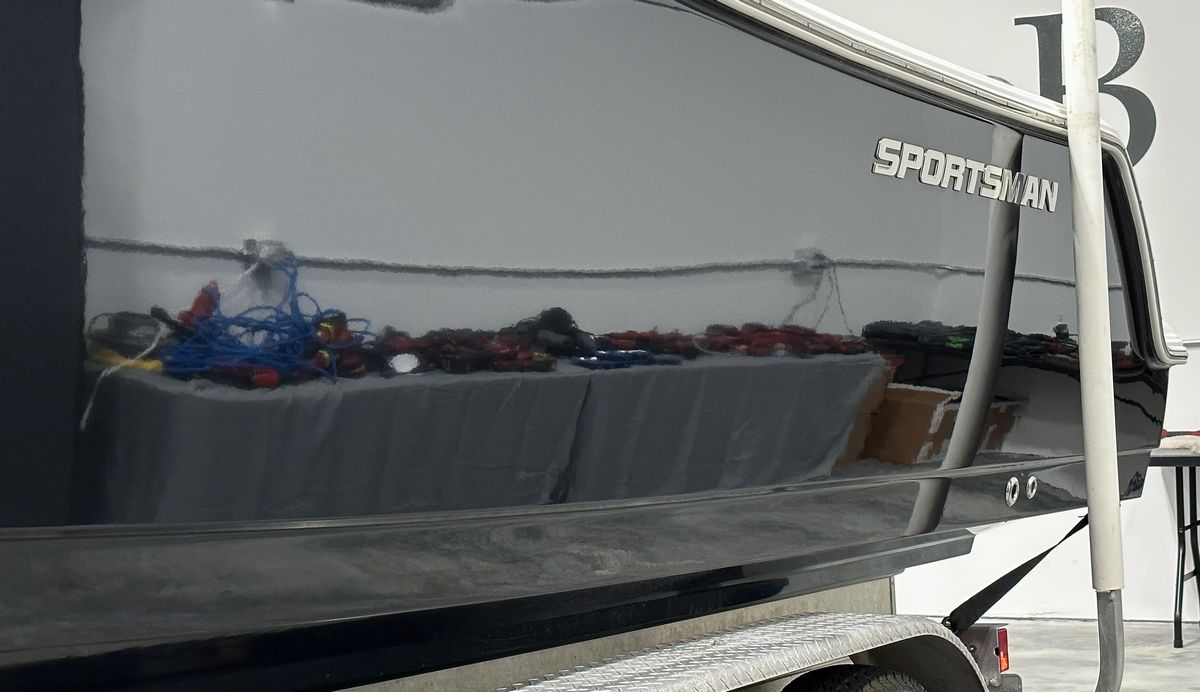
Here’s how this Sportsman Center Console looked when it arrived….
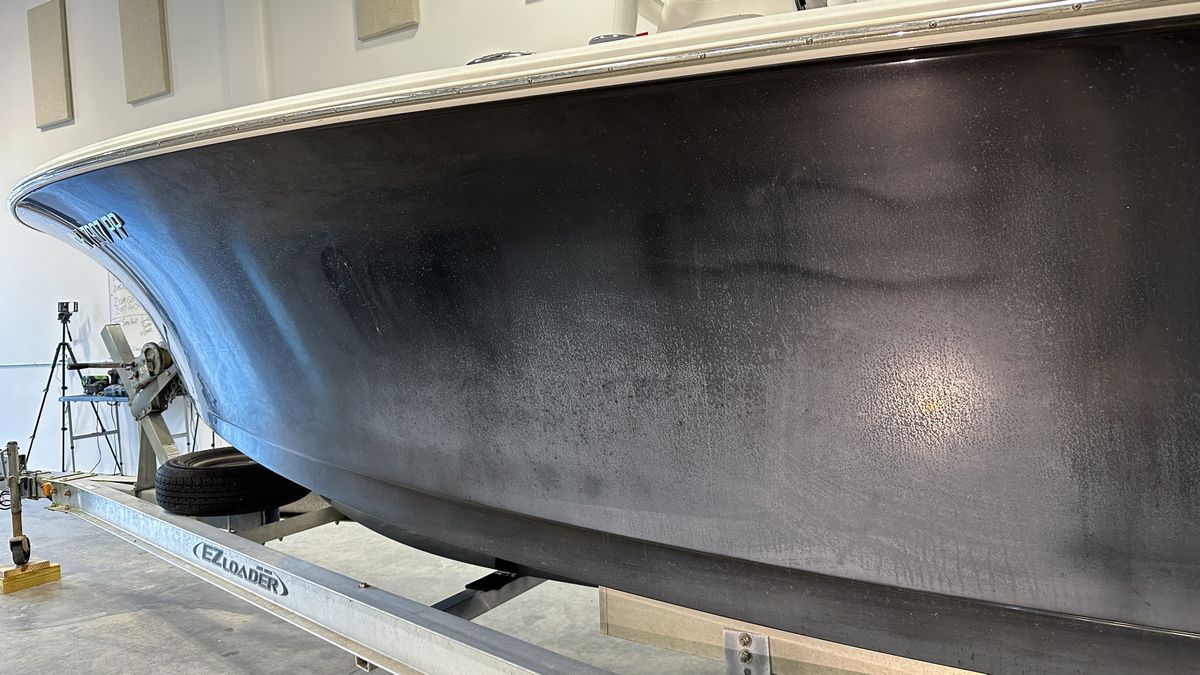
Here’s how she looked after the class performed an extreme boat detailing makeover!

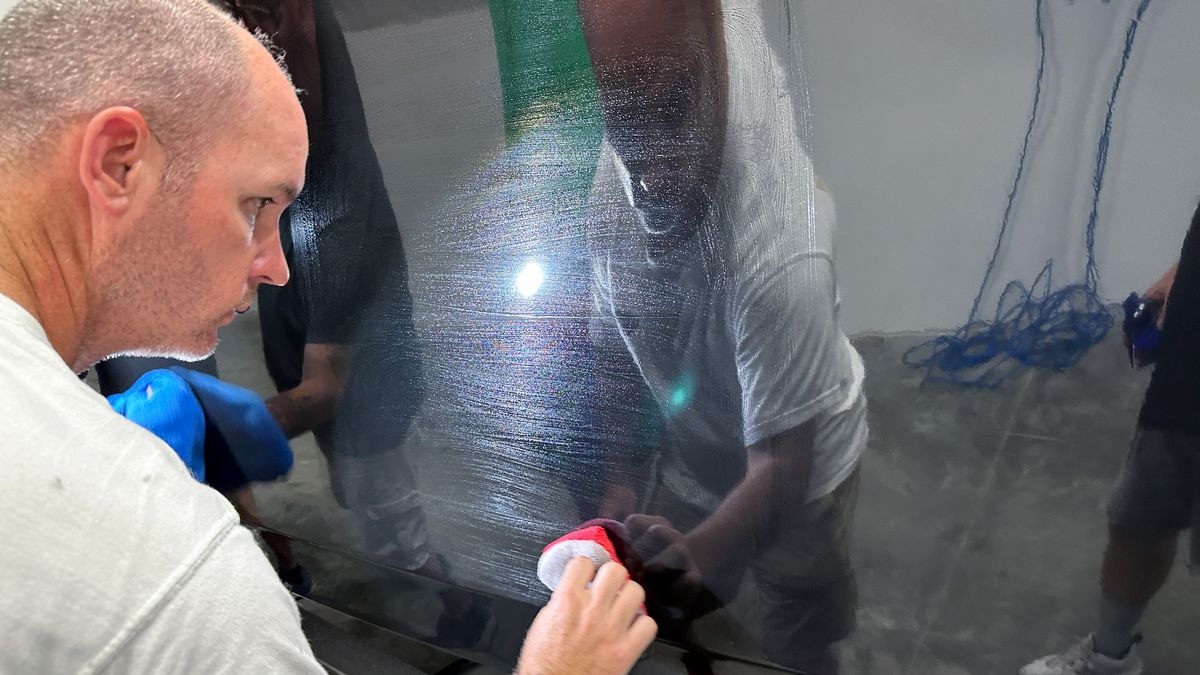
Look at the deep, well-defined reflections of the 1982 AMC Eagle and the 2011 Merecedes-Benz in the side of the hull!
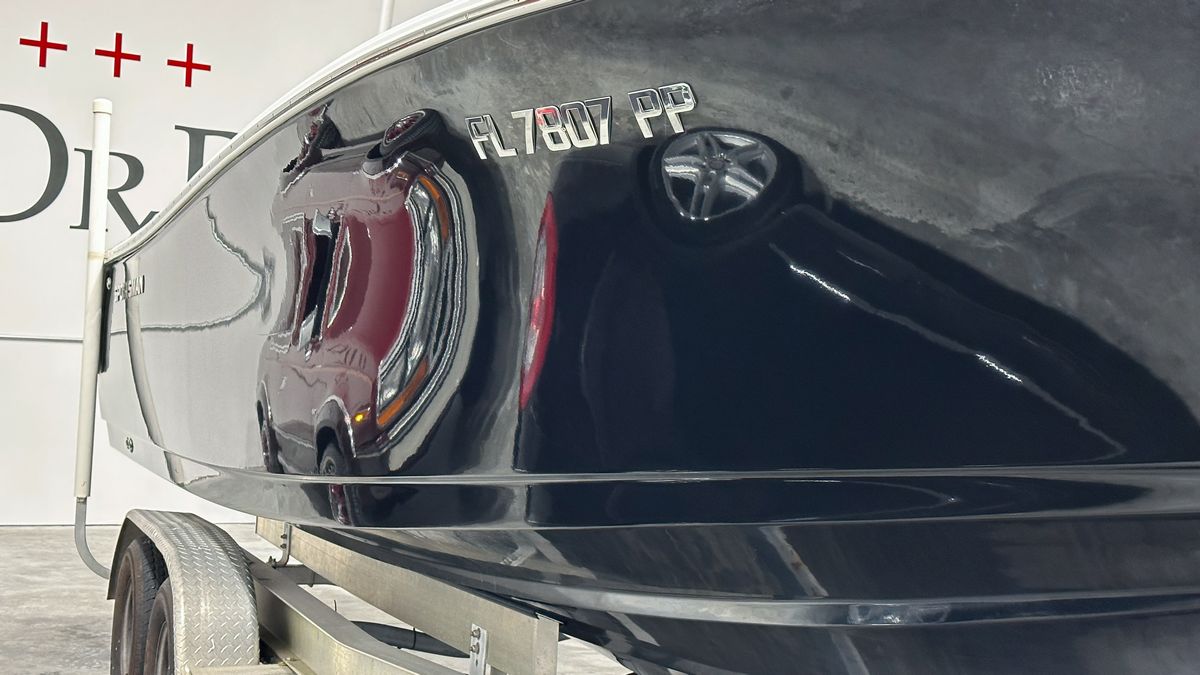
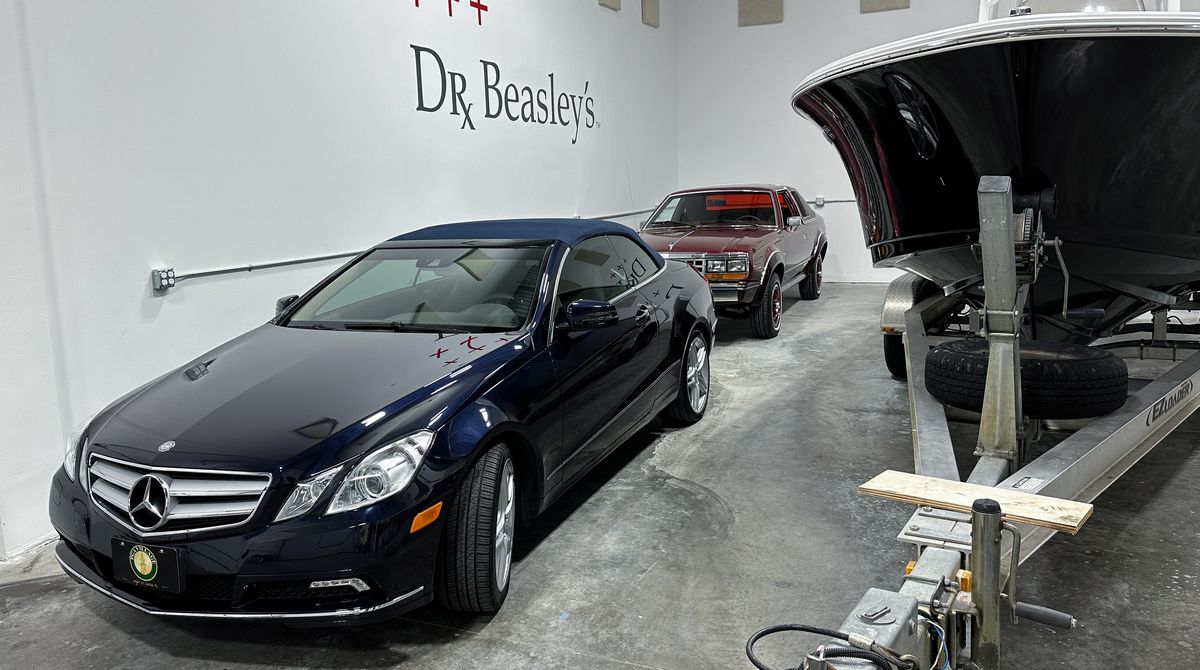
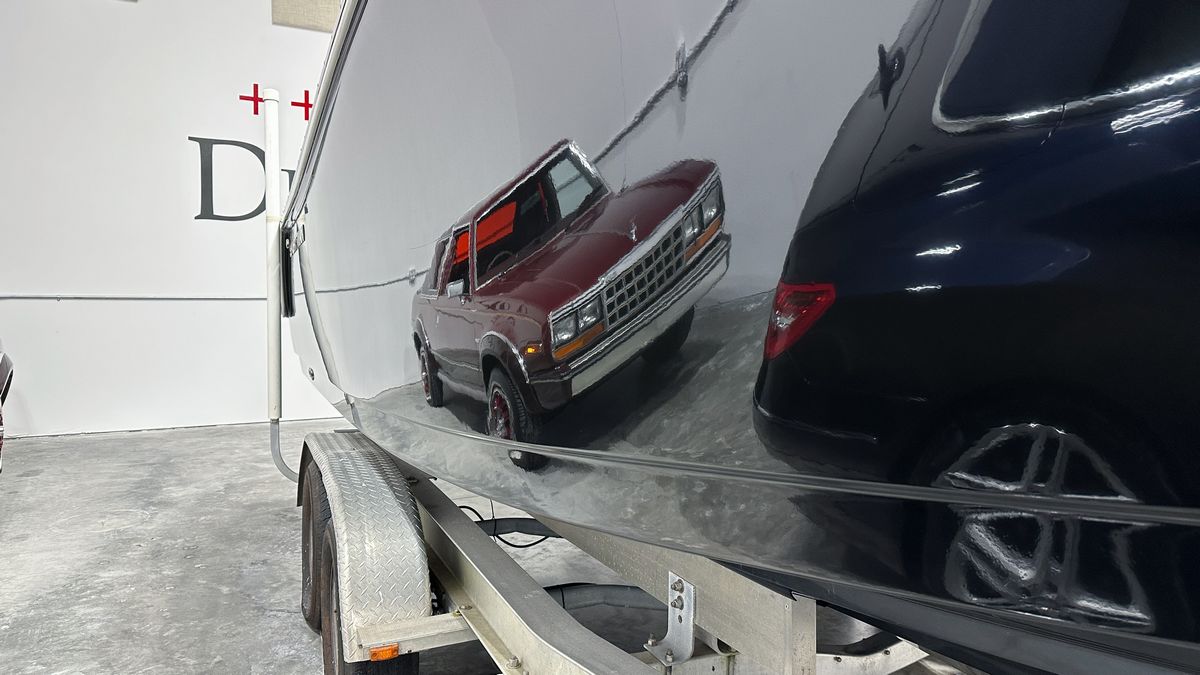
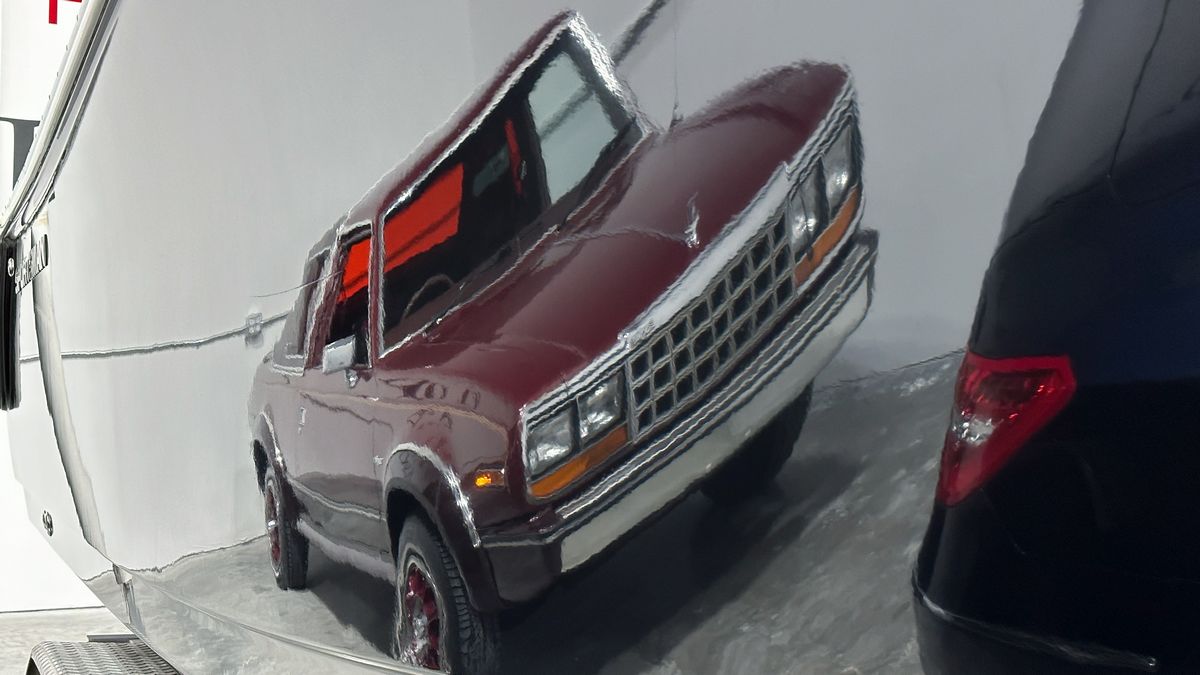
Nothing exciting on the Port side to reflect in the ceramic coated gelcoat finish except the tool tables, cabinets and workbench – but I think you’ll get the idea. The clas created a MIRROR shine finish on what previously was an extremely oxidized and salt water-stained gelcoat finish.

Yours truly…
Absolutely beautiful!
Here’s the team that took neglected to respected!
Upcoming classes
We have published our schedule for detailing classes in the United States for 2024. If you find you’re the type of person that learns better by doing than sitting in a chair, this class is for YOU. It’s hard to find classes that cover this much information in such an intensive, hands-on way so I strongly urge you to take this opportunity if you have the means. You can find the full schedule below:
Click here to find dates and locations for upcoming Dr. Beasley’s Future of Detailing Classes!
I hope to see YOU at a future class!
Questions?
Shoot me a text, give me a call or send me an email. I’m always happy to answer questions.
Cell Phone: 760-515-0444
Email: Mike@drbeasleys.com
Mike Phillips
")
")
Questions? Comments?
Email Us