


Last Updated August 15, 2024

Are detailing classes worth the money?
That is a great question. Watching YouTube videos and reading articles are a great way to gather a lot of information on all the different aspects of detailing cars. That said, NOTHING can take the place of attending a REAL, 100% hands-on training course. So the answer is yes! A quality detailing class is more than worth it because nothing can replace a physical, in-person training class.
Scroll down this page and see for yourself what one of our 1-day classes looks like. We challenge you to find a single picture showing anyone sitting in a chair. Also look at the facility. Along the walls are over 16 110 Volt Quad Outlets providing 64 in total, 110 Volt electrical outlets to plug-in corded tools. This shop was purpose built to run as many polishers as we need and NEVER throw a breaker.
Also take note there is not a single demo hood in the shop. When you take one of our classes, you not only train on actual cars, but you also get to train on super cool cars. This one aspect not only provides an exceptional training experience, but it also makes our classes more fun. And quality training is best when it’s fun.
The night before
Below is a picture of our Stuart, Florida training center after it’s been fully set-up and equipped for a real hands-on class.
Tools! Lots of tools!
In our classes, we don’t have chairs, we have tools. We find the type of people interested in detailing cars learn better by doing, versus sitting in a chair looking at a PowerPoint presentation the wall while someone talks and talks about detailing. No, instead we put the tools in your hands and show you how to correctly use them for fast and efficient paint correction and car detailing.


Pro quality products
We always have more than enough products to ensure each student has their own bottle of whatever the class is using for the topic at hand. This is a Dr. Beasley’s detailing class so of course we show Dr. Beasley’s products. The good news is our products perform as advertised but you will get to make up your own mind by using them on real-world detailing cars. And keep in mind, the techniques you learn in our classes can be used with any quality brand of product. We hope you like our products but of course, you when you return to your world, you can use the techniques you learned in our class with the product of your choice.

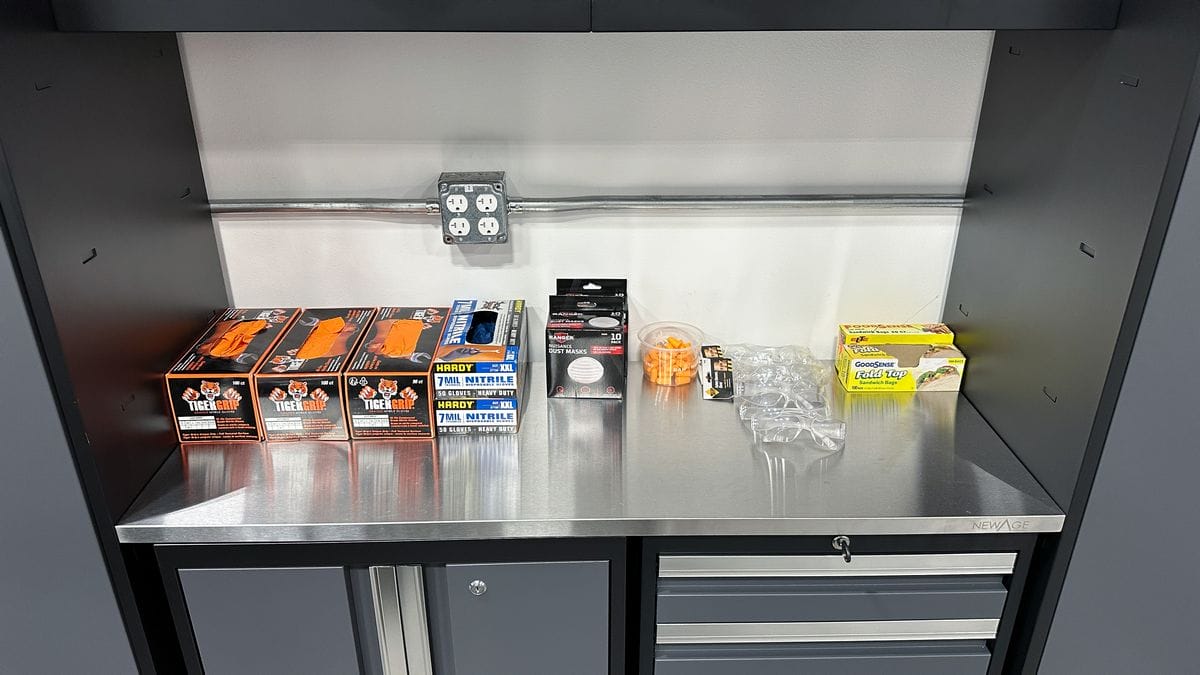
PPE or Personal Protection Equipment
Quality protection equipment is always available including nitrile gloves, dust masks, hearing protection and safety glasses.
Clay towels
One of the most intense topics we cover is how to correctly do an Extreme Prep Wash. The Extreme Prep Wash includes a lot of topics, one of them being when and how to do the mechanical decontamination step.

No PowerPoint Presentation
If you look at the picture below, this is in fact, a Microsoft PowerPoint Presentation, BUT – there’s only a 3-4 slides and the purpose of each slide is to simply show and reinforce the cars and products being used for each topical training session. We share this with the students and of course, a lot of students simply take a picture of each slide to help them remember the cars and the products used on each car. Note as you scroll down, there’s only a few slides for this class or any class.

Meeting your goals and expectation
Before the class starts, we go through and ask each student, what are the top topics, tools or techniques you want to learn, be proficient in and have confidence in. This is an old school dry erase board but it’s really all we need to make sure we meet your goals and expectations for our classes.

Training Cars – No Demo Hoods
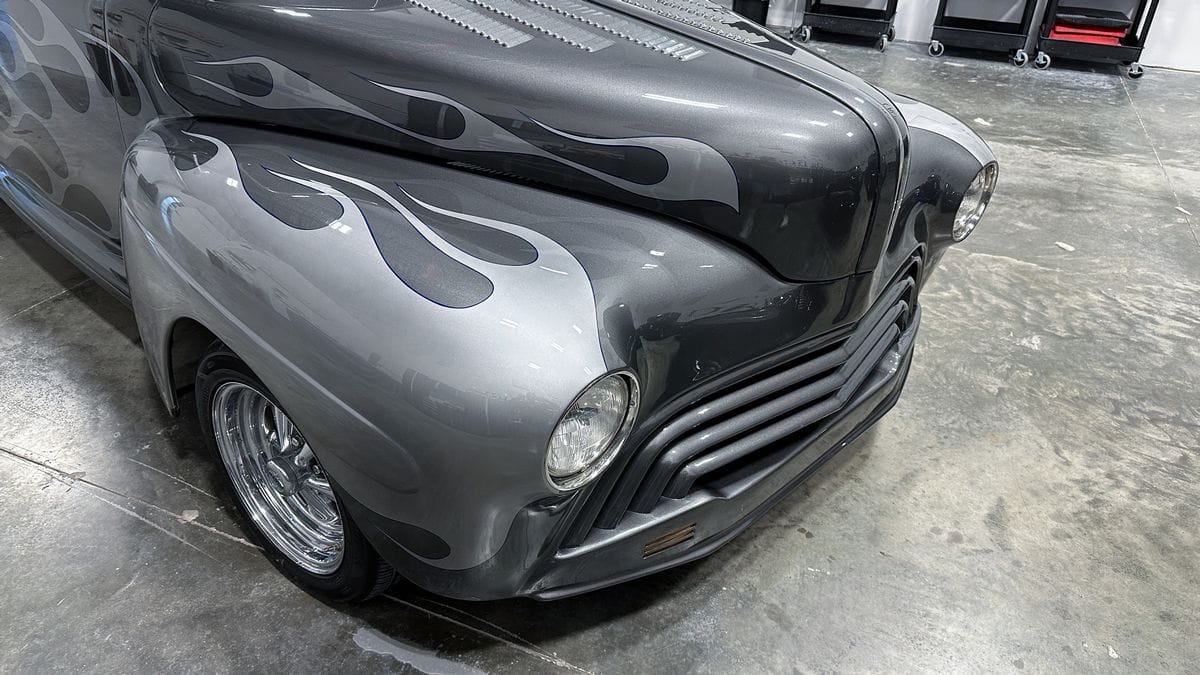
For this June 8th, 2024, 1-day Extreme Paint Correction and Ceramic Coating Class, we brought in 4 cars for the students to train on. Each car has a modern basecoat/clearcoat paint system. Just as important, the paint on each car is severely neglected, meaning the paint is filled with swirls, scratches, water spots and oxidation. Also notice, there are ZERO demo hoods. Compare our classes to any pictures you see for other classes, and we think it will be easily apparent what sets our classes apart from all the other class options in the market world-wide.

We start early!
Most classes start around 9:00am, you get a donut, a cup of coffee and find a nice comfortable chair to watch the PowerPoint presentation. Not us. We have TOO many topics, tools and techniques to cover so if you want a donut you need to get here at 7:00am. Me? I’m up at 5:00am and out the door by 5:30am then picking up fresh donuts at 5:45am – so I don’t feel sorry for everyone that has to arrive by 7:00am.

Extreme Prep Wash
The foundation for the final results always starts by doing the proper prep work. This is true for a custom paint job and just as well, it’s true for a professional quality detail job.
Always be working forward in the process
Historically, all the experts tell you when washing a car, you start at the top and work your way down. This is working backwards. The car doesn’t care about the order in which you clean it. If you wash and rinse the car, and then move onto the wheels and tires, there’s always the chance that any standing water on the car (from rinsing), can cause water spots. Instead, we teach you start at the bottom and work your way up.
We also show the latest and best techniques for all the topics we cover. In the pictures below, you’ll see the class machine scrubbing tires, instead of hand scrubbing tires with a brush. Machine scrubbing is better, faster and a lot more efficient for completely removing browning, old greasy tire dressings as well as traffic film. Also note the comfortable Knew & Back Cushions for our students to sit on. Not only is this a lot more comfortable than sitting on concrete, it also keeps your pants dry when doing the wet work.
Here’s Andreas testing out the FLEX PE-150 Cordless Rotary Polisher with a 5″ Rotary Brush plus Dr. Beasley’s Premium Degreaser to really get these tires clean

Here’s Bob machine scrubbing the passenger side rear tire.

Besides having a ton of scrubbing power, because these tools are battery operated, there’s no risk of getting an electrical shock when working around water.

Here’s Dana testing out the Harbor Freight Hercules Cordless Rotary Polisher to machine scrub tires.


The little things are the big things
When it comes to car detailing, the little things are the big things. Here’s an example of just one of HUNDREDS of techniques you learn. When done machine scrubbing a tire, right then and there, RUN the polisher and flush the brush bristles with a blast of water. Because there’s already a “cleaner” on the brush bristles, (Dr. Beasley’s Premium Degreaser), you learn to make the brush clean itself. A perfect example of working smarter instead of harder.


Machine scrubbing tires is one of the first tools and techniques you learn early in the morning. We START our classes at 7:30am SHARP – and this means you are working on a car. You’re not sitting in a chair eating a donut, that was something you needed to do before 7:30am.
After machine scrubbing the tires, the class then did a Contact Wash, followed by a thorough rinsing and then followed with Mechanical Decontamination while the car is still in the wet work session. We didn’t get any pictures of the rest of the washing process, but you can see what this looks like in one of our other classes by clicking the link below.
600+ Photos from Mike Phillips’ 3-Day Auto & Marine Detailing Class
PowerPoint Presentations
I have an old PowerPoint Presentation from my days of teaching classes at Autogeek that has 256 slides. Read that again. 256 SLIDES!
Now keep in mind this was for my big 3-day classes, so that’s about 85 slides per day. All great stuff, by stuff I mean all great SLIDES. A lot of people learn best via an academic class, sitting in a classroom setting, going through a PowerPoint presentation. But what I found out is the type of people that are attracted to car and boat detailing are also the kind of people that learn better by doing, not sitting in a chair.
So, about a decade ago, I simply QUIT using PowerPoint presentations. I agree they’re a great way to learn it’s just no longer my style or format for teaching car and boat detailing classes. That said – “yes” I do have a PowerPoint presentation for the class but it’s only a few slides long. It’s basically, 1 slide per topic.
Here’s the PowerPoint slide for this 1-day class. This slide displays the 3 universal paint correction APPROACHES to car detailing if you’re an enthusiast, or if you do this for a business, this would be the 3 universal paint correction MENU PACKAGES you should offer your customers. We teach these in reverse order as they are listed and that’s because the first tool you learn how to use is the rotary polisher and this is the starting tool for most multiple-step, show car detailing approaches, or packages.

Not every car a person owns and wants to detail needs a multiple step approach. But if you are an enthusiast with something special in bad shape, and you want to take it from neglected to respected, you need to understand the concept and process for doing a multiple-step process and this includes knowing how to use a rotary polisher.
Time to get busy, here’s the first PowerPoint slide and the first topic for this 1-day class.
Multiple-Step or Show Car Detailing

Every enthusiast and definitely ever professional detailer should possess the knowledge and skill to use a Mutiple-step approach to severely neglected paint to create a true show car finish. This is the first of 3 approaches or packages we cover in our 1-day and 3-day classes.
The first tool you learn in our class is the infamous Rotary Polisher
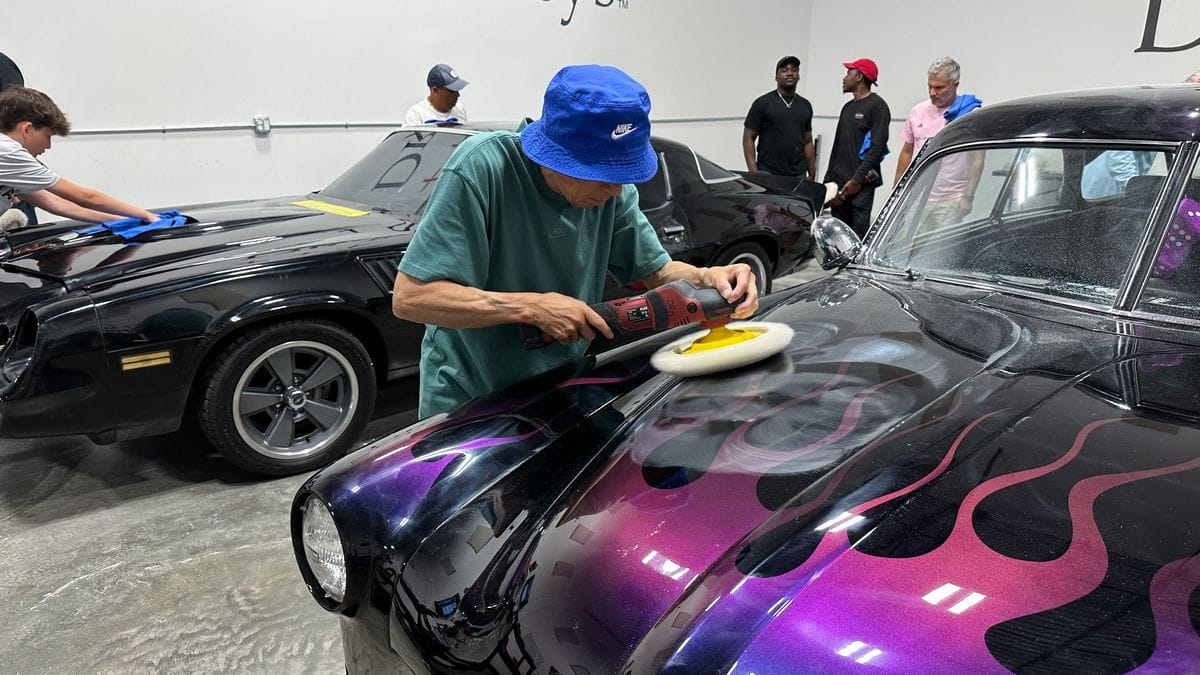
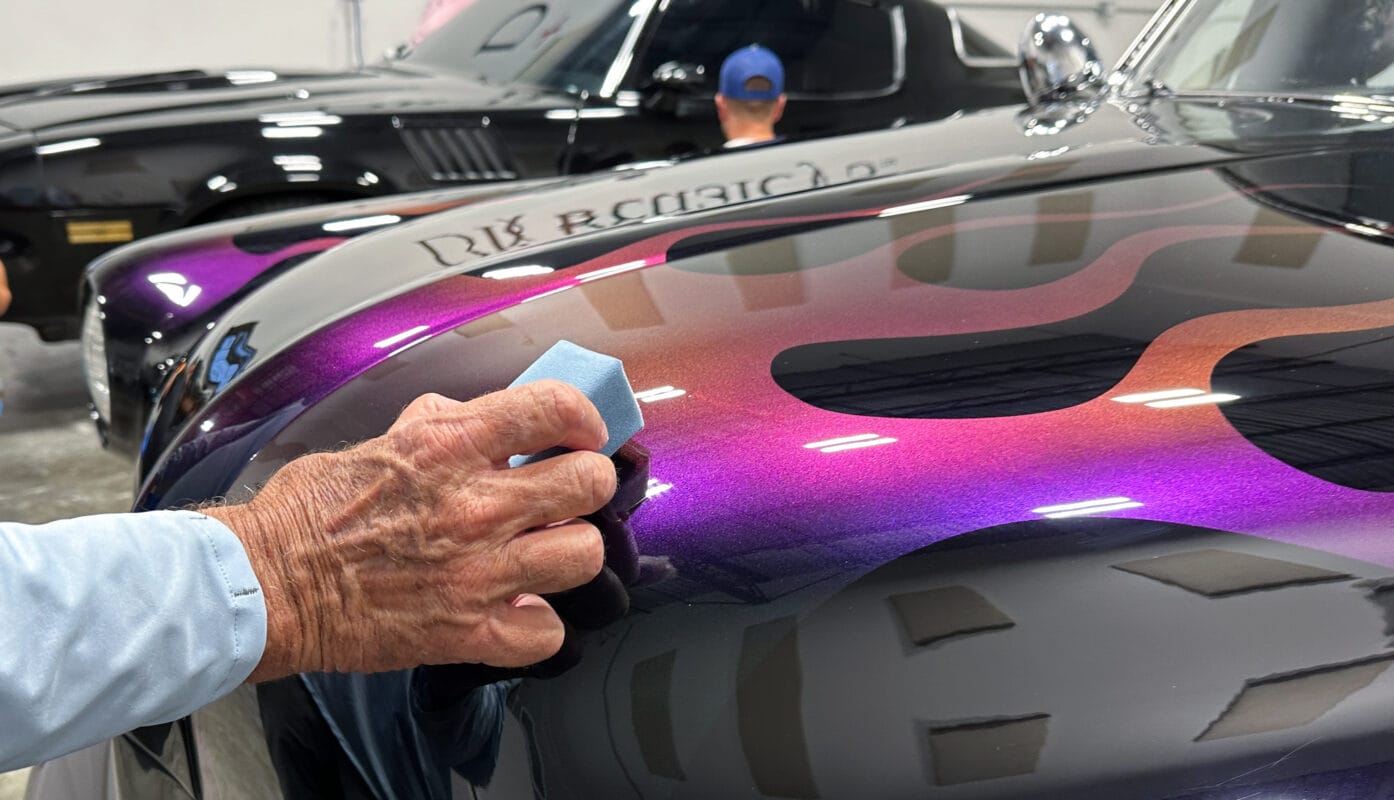
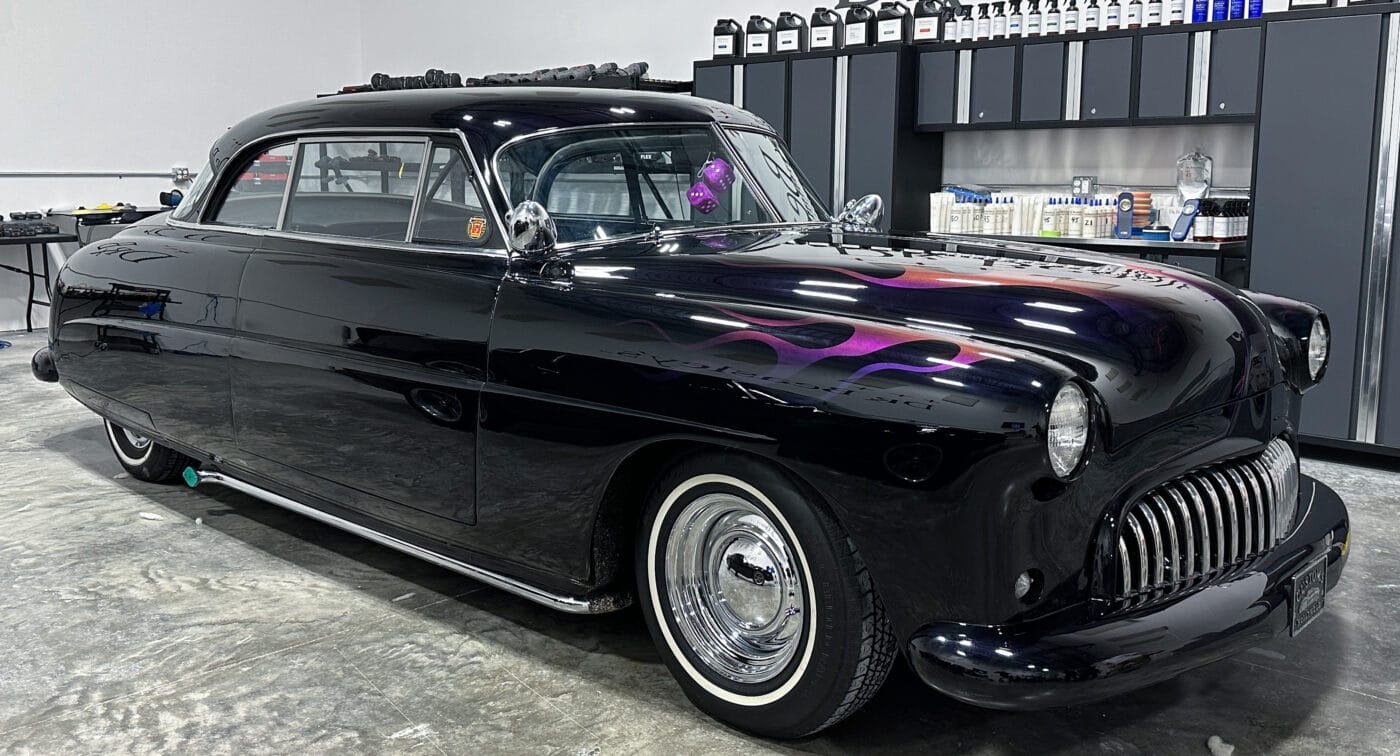
With the Extreme Prep Wash behind us, it’s time to dive in headfirst into using a rotary polisher with a wool pad plus the Dr. Beasley’s NSP 150 to remove all the swirls, scratches, water spots and oxidation out of the 1952 Hudson Hollywood Hornet 2-door Hardtop Custom and the 1978 Camaro Z28. Both of these cars have CUSTOM basecoat/clearcoat paint jobs. Both cars are also completely swirled-out. You’ll see the BEFORE pictures down a little further in this write-up.
Ken from Portland, Oregon
Here’s Ken training with the FLEX cordless PE-150 Rotary Polisher on the hood of the 1952 Hudson. I love Ken! Ken flew here all the way from Portland, Oregon, about 3000 miles to take this class.
On the Dry Erase Board, Ken listed pads, rotary polishers and ceramic coatings versus car waxes and synthetic paint sealants. The check mark at the end of his list documents he confirms he learned everything he was hoping to learn and a LOT more.

Looking back through the years in the detailing industries, I can now clearly see there’s been a huge shift AWAY from using rotary polishers. And there’s a GOOD reason. Factory paints are getting thinner and thinner, so when using a rotary polisher, it’s VITALLY important to understand both how to use one and just as important, WHEN to use one. Fast-forward to the present and what I see are a LOT of people that have no clue how or when to use a rotary polisher and specifically, how and when to use a rotary polisher with a WOOL CUTTING PAD. So we cover this as the first tool you learn how to use in all our paint correction, sanding and boat detailing classes.
Often times I see people refer to tools like the RUPES Mille, the FLEX BEAST, the Harbor Freight Hercules Forced Rotation Dual Action Polisher and the Makita PO500C as FORCED ROTATION tools. This is wrong. A rotary polisher is a forced rotation tool. Gear-driven orbital polishers are NOT forced rotation tools, they are forced rotation, forced oscillation tools. There’s a difference. Rest assured, if you take any of hands-on classes, not only will you learn to correctly use a rotary polisher, you’ll leave the class with something just as important – CONFIDENCE when it comes to using a rotary polisher.
Here’s the class taking the rotary to the 1952 Hudson


Hey Mauricio – EYES on the car!

Bob listed he wanted to learn it all! Here’s Bob using the cordless FLEX PE-150 Cordless Rotary on the Hudson.


Below is Dana learning the way of the rotary on the 1952 Hudson.

The bumper on this 1952 Hudson is painted, (most classic cars have chrome bumpers), and here’s Mauricio using the rotary to correct the paint on the bumper.

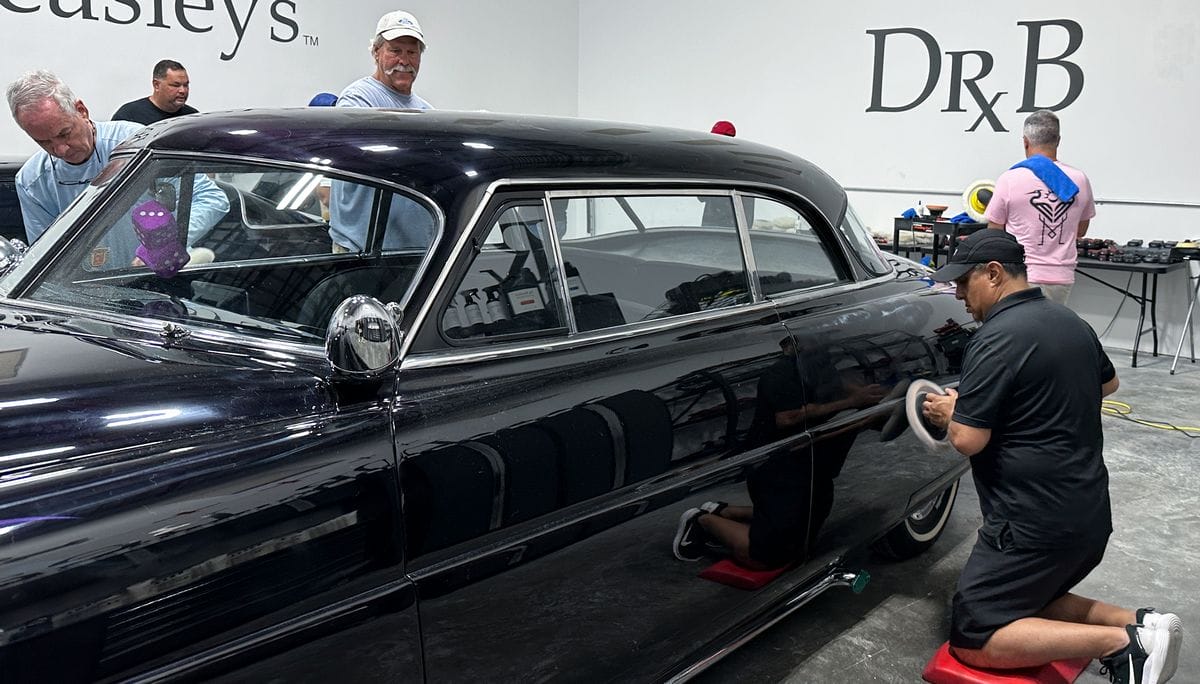
I always bring in HUGE cars, this way everyone has plenty of real estate to train on and gain real-world experience learning the different tools, pads, products and packages.

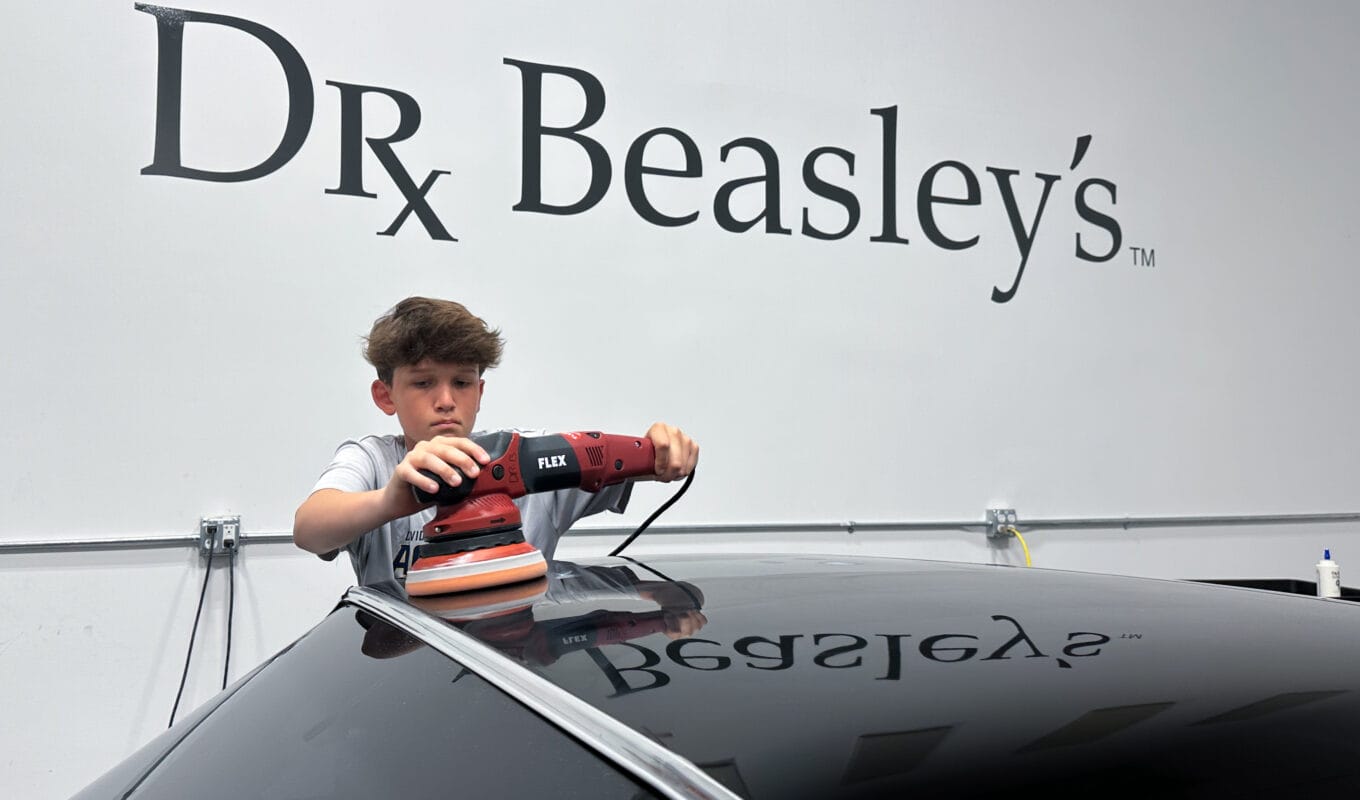
Here’s Wes training with the rotary polisher on the Camaro Z28. Wes came with Bob, who is his grandpa. Bob says Wes loves detailing cars and wanted to get Wes into one of our classes because he knows taking a real hands-on class will completely flatten the learning curve plus provide the kind of confidence you simply cannot get by watching YouTube videos.


Here’s Chad learning how to do TOPICAL glass polishing using the rotary polisher. Keep in mind, any car that has stained or contaminated paint, like this Camaro, also has stained and contaminated glass. Topical glass polishing is removing bonded contamination off the glass. Sub-surface glass polishing is removing defects BELOW the surface on glass. Two different types of glass polishing. We cover Sub-surface glass polishing in out 3-day classes.


Gear-driven Orbital Polishers – Forced Rotation/Forced Oscillation
After doing all the major paint correction to both the Hudson and the Camaro, the next tool this class will learn to use are gear-driven orbital polishers. This includes the FLEX BEAST and the FLEX Supa BEAST as well as the Harbor Freight copy of the FLEX BEAST, the Harbor Freight Forced Rotation Dual Action Polisher. All these tools are corded, 8mm gear-driven ORBITAL polishers. This means the gear-drive design forces the backing plate and thus the buffing pad to both rotate and oscillate.
The reason I teach this type of tool is because there is ZERO pad stalling and thus ZERO wasted time. The class will have the opportunity to use FREE SPINNING RANDOM ORBITAL Polishers when we get to Package 1-Step Ceramic AIO Paint Correction, this is the third topic the class will learn in one day. Until then, I teach people how to get the job done fast while turning out pro-quality work.
Pictures from all 4-corners of the shop
Look at the below 4 pictures, what you see is 100% hands-on training with BEAST polishers on two super cool cars. No chairs. No sitting. No PowerPoint.


Here’s Wes testing out the FLEX Supa BEAST on the roof of the Z28
Here’s Andre using the original FLEX BEAST on the driver’s side of the roof.


Here’s Melky tackling the lower body panels on the Camaro.


Sealing the paint on the Hudson and the Camaro
For these first two training cars, the class will use the Dr. Beasley’s Nano-Resin Ceramic Coating. This consists of the Paint Coating Builder, which you see Bob applying to the roof of the Hudson, followed by installing the Nano-Resin Ceramic Coating.


Here’s Dana coating the hood and front clip of the Hudson.


Ken follows Dana and levels the coating and then removes any excess to avoid high spots.


While half the class is coating the Hudson, the other half is coating the 1978 Camaro Z28


Final results!
Here’s the final results for the first 2 training cars this class have completed.


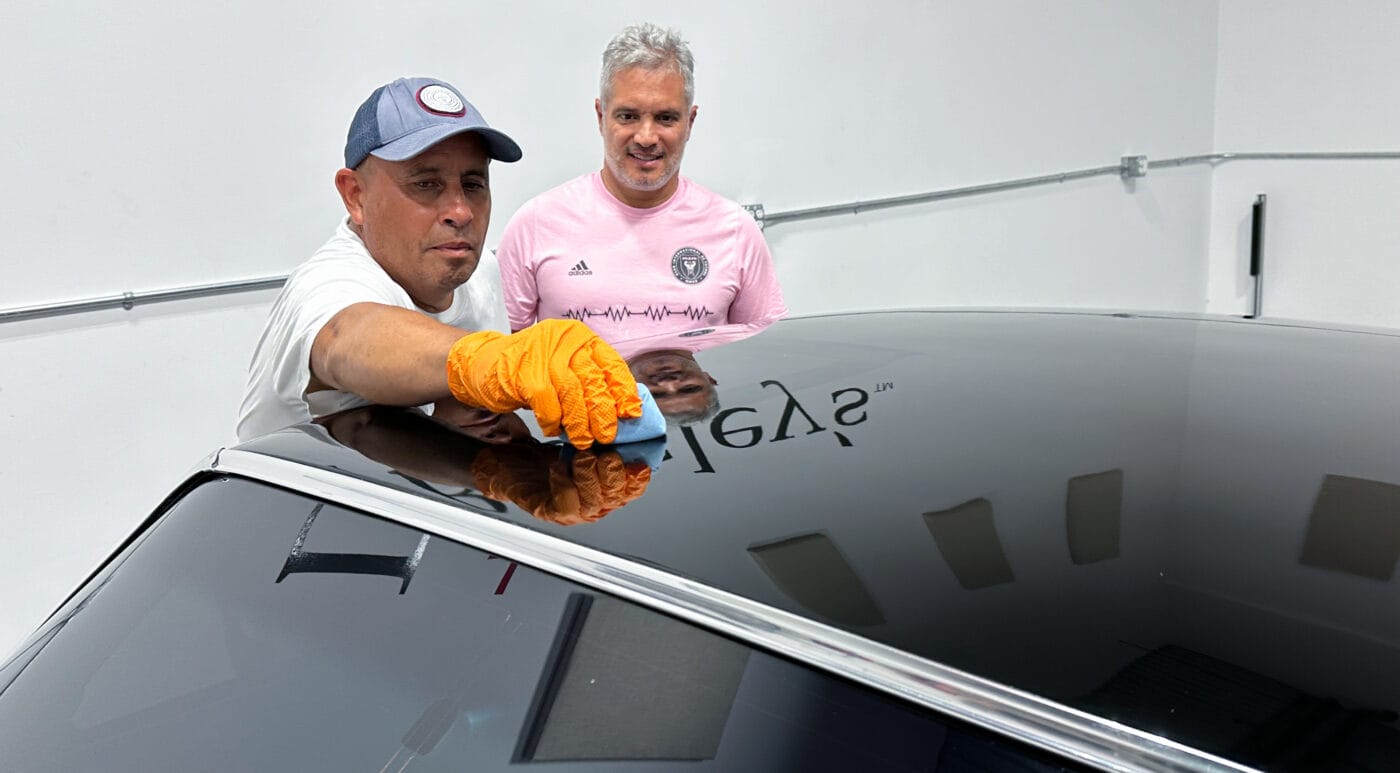
Here’s the team that made the magic happen!

From left to right,
Dana, Luis, Andreas, Mauricio, Joaquin, Melky, Ken, Andre, Bob, Wes, Chad and yours truly.

Pad Cleaners
Both Grit Guard and Lake Country support our classes with their Pad Washers. We do our best to showcase their products fand teach people how to use them correctly. The best time to clean your pads is at the end of the day. Both the Lake Country and the Grit Guard Pad washers get the job done. Just as important, after cleaning a wool pad, take the time to do the extra step of spurring the pad and this will fluff up the fibers and help the pad to dry faster overnight so it’s ready to use the next day.


1-Step Paint Correction & Ceramic Coatings
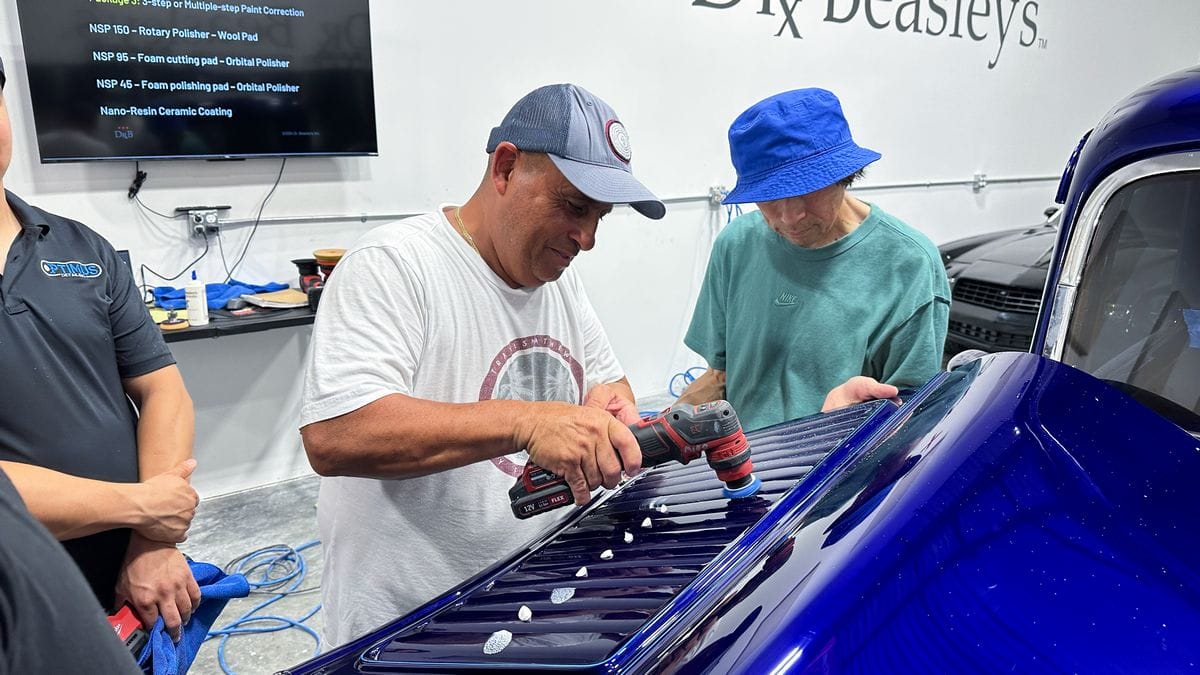
Next up, the class is going to learn how to do 1-step paint correction and ceramic coating on the 1936 Ford Pickup Streetrod. In the professional detailing world, this would be your mid-range package. It will consist of washing, claying followed by doing a 1-step paint correction process followed by installing a ceramic coating. If you’re not a professional, this would be the package or approach you would use for your car if the paint was in decent shape to start with. For this type of package or approach, you want to dial-in your process by doing a Test Spot. The goal is to achieve maximum paint correction using only a single product. For this we tested NSP 150 and NSP 95. We found we could create customer pleasing results using the NSP 95 with foam polishing pads and 8mm gear-driven orbital polishers.

The Baggie Test
Here’s Andreas, tactically inspecting the paint using the Baggie Test.


We found the paint was contaminated so we use clay detailing towels with the Dr. Beasly’s Prep Wash to mechanically decontaminate the paint.


Test Spot Results
Our Test Spot showed us the clearcoat paint on this streetrod is on in the medium range for paint hardness. I did the Test Spot, and I would put this paint on the soft-side-of-medium. The NSP 95 with an average of 8 section passes using foam pads on BEAST polishers achieved a more than satisfactory finish.


All BRAWL, ZERO STALL!
For this process, everyone is training with 8mm gear-driven orbital polishers. With a gear-driven orbital, there’s never any pad stalling, thus you can tackle any body panel, any shape, and get the paint correction step done without any wasted time or brain drain. For this session, the class is using either the FLEX BEAST or the FLEX Supa BEAST or the Harbor Freight Hercules Forced Rotation Dual Action Polisher.


Detailing Louvers
The 1936 Ford has a lot of louvers on both sides of the hood cowl. I teach a couple of techniques to make rubbing out louvers faster and easier plus how to do this type of paint correction work by hand and machine.


Dr. Beasley’s Nano Resin MX Ceramic Coating
For this classy streetrod, the class is installing the Dr. Beasley’s Nano-Resin MX Ceramic Coating. They used the Dr. Beasley’s Nano-Resin for the Camaro and the Hudson, so now something different for a well-rounded experience.


Machine cleaning and dressing tires
In the below pictures, as the class is finishing up with the coating, Luis is tackling the tires. We did a waterless wash to clean this truck and this means we were not able to machine scrub the tires. Instead, I shared with the class how to use a rubber and vinyl all-in-one to both clean and dress the tires in a single step.


We didn’t get a good before shot of the driver’s side rear tire before Joaquin machine scrubbed and machine dressed the tire, but we did get a great before shot for the rear passenger’s side tire.


Here’s the final results!


And here’s the team that made the magic happen!

1-Step Ceramic AIO Paint Correction
Next up, the class will learn how to do an entry level package or approach. The paint on this 1948 Ford Coupe Streetrod is in decent shape. I actually used this car back in 2018 when I taught a class with Jason Rose, from RUPES. The car has changed ownership 2-3 times since 2018 and to the credit of the multiple owners, they’ve taken pretty good care of the paint. That said, it does have the normal light swirls and scratches throughout the body panels and this makes it a great candidate for a 1-Step Ceramic AIO Paint Correction.

Mauricio from Lake City, Florida
One of the things Mauricio listed that he wanted to learn was how to use a Ceramic AIO. Mauricio also brought his own buffer, or BYOB. This is a cordless Milwaukee 15mm Free Spinning Random Orbital Polisher. Below right is Mauricio using the Dr. Beasley’s Z1 Ceramic AIO with the Milwaukee polisher.


Here’s Wes getting more hands-on time with the original FLEX BEAST aka the XC 3401 VRG.

Long but fun day!
After someone signs up for a class, I send them an email called IMPORTANT INFORMATION. This provides all the pertinent info a person needs like, shop address, start times, nearby airports, hotels, restaurants, etc. This email also tells people to GET A GOOD NIGHT’S SLEEP the night before the class because these are truly, intense and physically demanding classes.
If you look at the clock in the upper righthand side, it reads 4:25pm. The class started at 7:30am sharp and there’s only been one short lunch break, so this class has been going strong for 9 HOURS!
All hands-on as the class tackles the last detailing topic for the day, 1-step ceramic AIO paint correction. Plus, for this car, everyone can choose and use any polisher they are curious about or want to spend more time with.

Dr. Beasley’s Z1 – 1-step Ceramic AIO
For this training car, the class is using the Dr. Beasley’s NSP Z1, which is a ceramic AIO or All-in-One. This means it will do 3 things in a single step, or one-and-done. It will do paint correction, removing the majority of shallow swirls and scratches. It will polish the paint to a clear, high gloss and it will leave behind a layer of ceramic protection that can last up to a year. This is a great product for your entry level package if you detail cars professionally. If you’re an enthusiast detailer, primarily working on your own cars, this is a great product for your daily drivers, that is cars that you want to take care of to maintain their appearance and resale or trade-in value.

Testing out Free Spinning Random Orbital Polishers
Here’s Andre testing out the corded FLEX Finisher, which is a 15mm Free Spinning Random Orbital Polisher and to his right is Ken, testing out the Porter Cable 7424XP, which is an 8mm Free Spinning Random Orbital Polisher. For the first 3 cars, the class used gear-driven orbital polishers. By the end of the class, you will have had plenty of time with both types of tool drives, gear-driven and free spinning and then you can make up your own mind, which tools fits your detailing style best.


Here’s Joaquin knocking out the passenger side roof using the 8mm gear-driven FLEX BEAST.


In the below picture, see the TV monitor on the wall on the upper right-hand side? This is the EXTENT of our PowerPoint presentation.

The slide simply shows the topic for the training session, the product and the car. No more, no less. And often times, I’ll see the students take a picture of all the slides to help them remember the cars and the products they trained with, so they don’t have to try to remember later, after they return to their world.

Here’s Chad using the FLEX BEAST to knock out the body panels at the back of the car with Z1 and the BEAST.


Working safely
It’s important to have a solid work platform when working on tall vehicles. Sometimes however, you only need inches of lift, not feet of lift. I have a half-pallet, leftover from a shipment, and it works perfect to provide about 6 extra inches of height plus the 5 inches provided by our Werner Work Platform when it’s collapsed. Extending the legs of the work platform is also a great option but sometimes you end up towering over the roof and then bending over to actually do the buffing work and this isn’t safe and it’s also not great for your back.


Here’s the final results!
Remember, we did an extreme Prep Wash with this 1948 Ford first thing at 7:30am in the morning, and then as the last training car for the day, all the class used was the Dr. Beasley’s NSP Z1


The clearcoat is supper clear and super glossy! The metallic flakes in the paint really *POP*, which is always the goal with a metalflake paint job.


And here’s the team that made the magic happen!
It’s a tick hard to see, but the clock on the back wall reads 5:07pm – these guys are going to sleep great tonight! And more important, they learned a TON of new techniques that will help them the rest of their lives.

4 training cars in 1 day!

Luis from Port Saint Lucie

Ken from Portland, Oregon
Joaquin from Lake City, Florida – Father

Mauricio from Lakek City, Florida – Son

Bob from Stuart, Florida – Grandpa

Wes from Stuart, Florida – Grandson

Andre from West Palm Beach, Florida
Dana from West Palm Beach, Florida

Chad from Aiken, South Carolina

Andreas from Columbia

Melchicedek from West Palm Beach, Florida

Fun, intense, hands-on car and boat detailing classes
As you can see by the above pictures, these classes are exactly as advertised and that is 100% hands-on. Unlike other classes, there are also no demo-hoods. You train on real cars, and in most cases, really cool and/or unique cars. There’s also no chairs and no sitting around looking at pictures on the wall. There’s really only one break, and it’s a short lunch break.
You get tons of hands-on time behind the tools using multiple pads and products. We start early because we cover more topics and techniques than any other class option in the market and this is world-wide. If you find you’re the type of person that learns better by doing versus sitting in a chair, then click the link below, find a date for a class that works for you and then clear your schedule and get signed-up.
Dr. Beasley’s Future of Detailing Classes Schedule
Questions? Feel encouraged to reach out to me via text, phone call or an email. I’m always happy to answer question.
Mike Phillips
Chief Education Officer for Dr. Beasley’s
Mike@drbeasleys.com
760-515-0444
Questions? Comments?
Email Us