


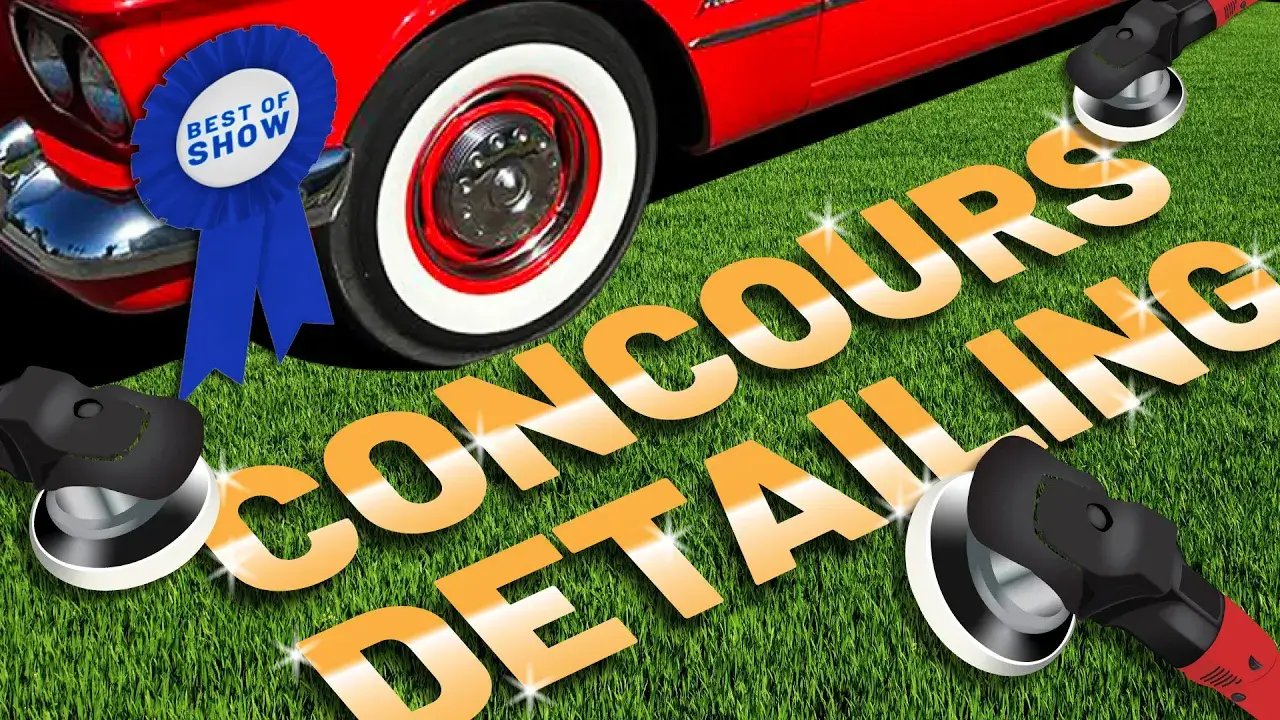
Detailing a car bound for a Concours d’Elegance like Pebble Beach or Amelia Island is no easy task. How do you best preserve the original appearance? How do you handle washing? How should you approach paintwork correction on old school, single stage paint? I answer all these questions and MORE in this condensed reel from a recent LIVE detailing class!
— Mike Phillips
Chief Education Officer, Dr. Beasley’s
(760) 515-0444 | mike@drbeasleys.com

The follow is an unedited transcript of the above livestream clip.
And the topic for today’s live detailing class is concourse detailing. And to share how to do that, I have a 1960 Plymouth Valiant here. This is actually a very unique and rare car in the car collector world.
One of the things that makes this thing so special is this car is so meticulously restored it’s crazy the underneath of the car the frame the body panels look just like the shiny paint on the outside the interior is perfect the engine compartment is perfect it looks just as good on top as it does underneath the only problem is the paint is all jacked up third over the entire car. It is completely uniformly filled with swirls and scratches.
And the owner wants to take and display this at an upcoming Concours d’Elegance show. So he’s asked me to do the paint correction work and I thought I’d use this for a video to show how I would tackle that. Now, one of the things you may notice is this actually came with two pieces of chrome trim, round trim up here, and I’ve already removed it.
And I’m going to share a tip. I left the Valiant emblem on here because I want to share a tip on how to take this stuff off carefully. So on the backside of this, there are these little clips with studs. And a lot of times when these things get older, what happens, you go to take it off, they’ll snap, they’ll break off, they’ll twist out.
And so the thing I always do is I add a little bit of penetrating fluid and let it soak in overnight before I attempt to unscrew the nut. And I wanna show you how I do So if you look over here, I’m going to open up the trunk lid. Okay, so go ahead and if you can, pan in. Look how beautiful this trunk, compartment is, okay?
Everything is flawless, and it has this original mat down here. So if I just take some WD-40, and I have some right here, and I put it up here, and I start squirting on these nuts up here, it’s going to drip all over and stain this, and the owner’s going to kill me, okay?
So the first thing I’m going to do is I keep this big fuzzy orange blanket around for all kinds of things. A couple, about a year ago, I buffed out a car by, um, Miranda, Jeremy Miranda, that had a completely matte hood. So I used that to cover up the matte paint so I didn’t get any splatter on it.
Because just the act of wiping splatter off a matte paint can make it shiny. Then instead of spraying those nuts, here’s what I do. I have the Dr. Color Chip Commercial Rock Chip Repair System, and with that comes these tiny little, these cute little cups and these tiny little paint brushes.
So what I’ve already done, but I’ll show you again, is I just spray some of this into the cup, okay? So now I got no overspray going inside of the trunk area. Then I take the paint brush, Then I reach up inside here and I just put some on the nut and on the threads as much as I can reach it.
And what this is gonna do is as I start to remove these nuts, the penetrating fluid is gonna be lubricating the threads and it increases my ability to remove them without breaking those studs. So that’s why I do that.
You know, this is the kind of work you gotta do very carefully so you do not make a mistake. Okay, so the next thing I’m gonna do is I’m gonna go ahead, I’ve already got a nut driver set up here. I can go ahead and loosen these and they loosen real easily, no problem.
Let them drop right down there onto the clean carpet. And the whole reason I’m doing this, and I think you’ll see, is so I can get all the paint. This is not just a daily driver detail. Here’s the nuts. And then, of course, this is real important too. Have some sort of container set aside and do not lose the nuts or anything that’s used to attach an emblem.
Some clips, nuts, whatever it is. Keep them safe. Set them out of the way because you’re going to need them later on. Okay, so I’ve got the Valiant emblem loosened. And now I’m just gonna come up here and just carefully wiggle it and pry.
Okay, now I’ve pulled it off. And now, can you zoom in and show all the dirt? And there’s other people’s compound and wax around here. All the way up here, there’s compound and wax. And what I wanna do is I wanna be able to clean all that out and then buff all the paint around it. So I’m gonna go ahead and set this aside too.
So then the next thing I’m gonna do is this is the Dr. Beasley’s Prep Wash. This is actually a product that Jim Lafeber made after taking one of my big three-day classes. And one of the things he noticed I did was instead of washing a lot of cars, that classic cars like this, I don’t like to introduce water to where it could form rust because this car has already been restored.
All the rust has been removed. I’m not going to be the guy that puts water into the car so the whole process starts over again. One of the most expensive things about restoring an automobile is cutting out rusted body panels, floor sheet metal, any structural components. and then welding and fabricating and restoring it by putting in new sheet metal and getting everything to align. Okay, so I pulled all that stuff off there.
Here’s one more little bit of compound. So I got all this stuff out of there, so now I can clean it without any dirt getting into my buffing pad. But anyway, that’s… That’s a product that Jim Beasley, he saw me using glass cleaner. And he says, I can make a better product than glass cleaner. So he came out with the Prep Wash.
And I think if you go up to the Dr. Beasley’s website, he actually tells the whole story about how he came up with this product. Okay, so Jim, can you zoom in and show the level of swirls in the paint at all here? Can people see that? How’s that look on monitor? Yeah? Okay, so, you know, a lot of times when myself or anybody in YouTube world is always doing a demonstration, they’re always working on the hood.
It’s easy, it’s waist high, it’s a big flat area. And we use the picture of this trunklet as a promotional picture in the thumbnail. And so I thought, you know what, I’m gonna go ahead and do something different because this is kind of a complex panel to buff out. So I’m gonna show you how I would tackle it.
So after I’ve got that done, the next thing I wanna do, is I wanna take, I’m gonna try to put a piece of tape on here in a way that’ll go right between the dual overhead high bay lamps up there and separate, so we have a separation between before and after because everybody loves a tape line.
Right, Craig? Okay. How close did I get that? This will be covering up the light, but there should be a light right there, right? Okay, and then just another tip. The tape I’m using is a delicate surface tape. I just picked some up at Lowe’s, but I am gonna take and press it down here. I’m gonna take and move it right here, because I gotta work around this. Anyway, so I’ll push down the towel, and then I’m gonna be using a rotary polisher. And so this beautiful restored, or this beautiful reproduction gasket here, this rubber gasket here, if you feel it, it actually has a little bit of a texture to it.
And what that means is if I get splatter under here, it could embed into that. By the time I’m done detailing this car, I’m gonna be tired. This is how I always explain to people, instead of trying to go around the car with a toothbrush and remove all this stuff, I just tape it off and then I keep the surface clean, unstained, and at the end of the day, I can go home instead of getting a toothbrush out.
And you can do it how you want to, but I prefer to tape things off, especially new cars. They got a lot of what they call pebble textured plastic trim. And it seems like no matter how careful you are, it’s easy to run your buffing pad into that trim and then stain it with whatever product you’re using.
So I have already cleaned and clayed this car, so I’m not gonna go any further on that. So the next thing I wanna do is I wanna dive in there and I wanna remove the swirls and scratches. Now, I did a test spot earlier on this. This thing is really hammered. And I found out that a foam pad on an orbital polisher will get the swirls and scratches out, but it’s just a little bit too slow for my own personal taste. So let me show you what I’m going to use.
First of all, if you want to pan over here, Craig. First of all, this is show car work. That means multiple step paint correction. so the first step I’m gonna do is I’m gonna do the 150. And for that, I’m gonna be cutting with a wool pad on a rotary polisher. So really good cutting action. Now I’m gonna have to come back and remove the holograms caused by the fibers. Can you zoom in and show the fibers against my black shirt?
I don’t know if you can see that. See these fibers? No? Okay. Now do you see them? Okay, so these fibers, I always teach people, fibers are a form of abrasive, okay? So it’s always, it’s great to start with a wool pad or a microfiber pad or a micro wool pad, but anytime you’re using a fiber pad, you should always do a follow-up step, especially if it’s show car work with a foam pad, because a foam pad, unlike a fiber pad, has a uniform surface texture and you eliminate those deeper cuts like you would get with the wool pad.
So I’m gonna start with the wool pad. Then Craig, follow me over here. And then I’m gonna switch over to the beast. Everybody knows I’m a pretty big fan of the eight millimeter gear driven tool, and I have two pads out here, and I found I was able to get the holograms out using a orange polishing pad.
But if the paint was really hard, I might have to use a foam cutting pad, but that’s when you do a test spot to dial that in. And while I’m standing here, I’m gonna show you what eight millimeters looks like by holding this in the air and turning it on. Okay, so now you can see there’s two perimeters here. There’s an outer perimeter and an inner perimeter.
And that space is eight millimeters. This will make more sense when I show you the Rupes. Now, I’m gonna use this with the 95 to pull my holograms out. And then because this is show car work, I’m gonna do a third polishing step to really maximize the clarity. This, by the way, is single stage paint. So it’s actually, the term is that maximize clarity is called bringing out the richness of color when you work on single stage.
And I think for doing show car work that a 21 millimeter, a 15 millimeter, a long stroke polisher really does the best job of finishing out versus short stroke. So this is a Rupes 21. Excuse me. By the way, this is interesting. This is the number 16 built of the Mark II. And this was given to me personally by Rupes at SEMA one year, which is next week, by the way. So let me show you what a 21 millimeter Orbistroke looks like.
Okay, I’m gonna turn this on. Now you see the outer perimeter and the inner perimeter? That’s 21 millimeters. So here’s eight millimeters. See the difference? And that’s how you can wrap your mind around what it means when someone says they’re using an eight, a 12, a 21, a 15, a 25, a three.
That’s the orbit stroke that shows up as the difference in the two inner and outer perimeters. Anyway, so I’m gonna use this with the 45. This is a soft foam finishing pad to do the finishing work and then we’ll wipe off and check out the results and then we’ll take questions. So first up, I’m ready to go.
One thing I always teach people is always take the time to center your pad. Because you want that pad completely centered. If it’s not centered, it’ll feel kind of like a flat tire on a car going womp, womp, womp as you’re buffing. It makes it harder to control, harder to buff, and it tires you out. Then after you get that thing centered, take an ink pen and just hold it against the backing plate. And you can mark that if there isn’t a mark already.
That’ll just make centering it in the future quicker, faster, and easier. And then the next thing you always want to do is make sure that you clean that pad with the spur. So I always show people with the cordless here, bring that up to high speed, lock that against your leg, and then run that spur from the inside all the way around the outside.
You really need to make sure these pads are clean, and I am a huge proponent of cleaning your pad often. Okay, so the pad’s ready to go, the product’s ready to go, and I know a lot of people are interested in paint thickness, so here’s my paint thickness gauge, and let’s just take a couple readings. I’m gonna take a reading in between these two screw holes here that hold the emblem on.
Can you zoom in and get that, Craig? I can read it off. 15.2 mils is what that reads. So I’ll just come up here and I’m gonna use these identifying marks, this hole and this hole and kind of go right in the center. And we’re at 13.9 mils.
And then I need an identifying mark. If I go from this tip to here, kind of right in the middle, we are at 17.5 mils. So try to memorize those if you can. Let me do those real quick. So this one was 22.4, 23.1 mils. Up here, 23.1, 16 mils. This thing’s all over the place. And then between these two holes right here, We’re at 17.3 mils. 23, 16, and 17. And when you’re working on a custom paint job, it’s really common for the paint thickness to vary.
And the thing about paint thickness gauges, you gotta remember, is they measure total film build, okay? So it’s not just the amount of paint, this orange paint on the surface, or if it’s a clear coat car, it wouldn’t just be the clear layer, it’s the total film build.
So the E-coat, the primer, the base coat, the clear coat, or in this case, probably just primer and then single stage paint. OK, let’s do some buffing. So the first thing I want to do, because I got a dry pad, is I kind of want to break this pad in. So I’m going to do this just right up here. I’m going to put a strip of product down.
Usually, I throw a pencil down here, about the size of the pencil. Because you’ve got to remember, this pad is dry. It’s going to absorb some of this product. And I don’t want to be doing dry buffing. So I need to kind of bring this in here, pick up my product. And I want it on the outer edge there.
That’s where I’m going to be doing most of my buffing. Now you can see the red paint’s coming off and you can see I’ve got some product on there. Okay, so anytime you’re buffing, always remember you need two things.
You need lubrication and you need abrasive technology. So here’s the product I’m actually gonna work with now that I’ve got my pad broke in. And I always tell people in order to show you how to do it, I gotta do it myself. So I’m just gonna bring this in, pick up my product. I like to spread around and I’m going to come up to the three setting.
And then just start polishing. And when you see me go back and forth like that, what I’m doing is I’m buffing, pulling back. I’m looking to see if the swirls and scratches are gone. If they are, I can move on. If not, I come back and hit it some more. So that’s what I’m doing it for.
I’m not doing it because I’m spastic. okay i think i’ve got all this major scratches out of there there are some indent impressions from where that valiant script sunk into the paint those there’s no need to take them out because the script is going to cover them up and if you try to take them out chances are really good you probably burn through the paint and expose the primer okay so the next thing i want to do is i’m just going to share a technique i call finger painting so i put some product down up there And what I wanna do is I wanna buff out this side part here, this nice angled curve here.
And so I’m gonna just take some products. This is the NSP 150. I’m gonna use my finger to just finger paint it in here. And so what I’m doing is I’m putting two things in there. and I never waste product, so I’ll just put that on my pad.
I’m putting lubrication and abrasive technology. You need both. I’ve seen people dry buff and burn through paint. So always remember, you need both components. Now, because this pad’s spinning this way, I’m gonna come down here. Tell you what, Craig, I’m gonna try to come to this side.
And I’m just gonna show you, I’m just gonna come in here and just gently, just gently pull that product into the spinning pad. and buff out that nice little radius curve there. And I’m being very careful not to buff on the raised edge here or here. So I’m just using this part of the pad right there. Now I want to come off this way with my pad spinning this way so I don’t pull that tape up there. Okay, let me check that out.
Beautiful. Okay, so I’ve taken out all the swirls and scratches out of the flat area here in the center, the general radius curve up. Now I’m gonna work on this outer edge here. And for that, I can do the same thing. I can just take and grab this product, spread it along here, and then as I’m buffing, pick it up and use it to buff out the paint.
Lock your button, don’t wear out your trigger, set it on three. I find this paint to actually be a little bit on the hard side. If it wasn’t, I would have just stuck with an orbital polisher and a wool pad. Okay, that’s looking good. One of the things I teach people is when they’re using a rotary, it’s natural So always put your hand up here or if you got a stick handle or a D handle. But a lot of times I just like to hold it down here and that way I get my arms and my hand out of where the pad is spinning so I can see what it’s doing.
Especially when I’m doing surgical work like this where it’s really important that I don’t make a mistake. I do not want to buy this guy a paint job. So the Dr. Beasley’s NSP primers, and we call these primers instead of the conventional terms, compounds and polishes, because what they’re doing in essence is they’re priming or prepping that paint for ceramic coating. I’m gonna jump over here, Craig.
There’s no silicone oils or any conventional oils or fillers. like other products use. So after you use any of the primers, you can go right to the coating. You can skip the whole panel wipe process. You know, I got a brand new ebook coming out. It’ll be available for download during SEMA, which starts next week. And one of the things I just wrote in this ebook was when doing a test spot was to, is that you don’t always have to use a tape line. There’s still some squirrels and scratches up here.
You don’t always have to use a tape line. I’m doing that for dramatic effect. But if you do use a tape line when you’re doing your test spot to gauge before and after results more easily or pick it up with a camera, video, or photograph, don’t ever buff on the tape line. You will leave a line in that paint that you can never get out. Okay. And here’s another rotary tip. Anytime you’re cutting with the rotary, and like right now, I’ve got a few extra scratches right here that I’m just trying to slowly and carefully massage out.
I tell you, if I burn through the orange on here, it’s gonna be black primer underneath. But what I do is I pick up my strip of product. Spread it out a little bit. Now watch, I cut from this direction, so the pad’s spinning this way, cutting this way. Then I come back and I cut the opposite side. So now the pad’s cutting this way. And I attack those swirls and scratches, especially the deeper rids, from two different directions.
You could even extrapolate that out and keep changing the directions you buff, but usually two directions is more than enough. Okay, that section there is completely swirl and scratch free. It has holograms, but it is swirl and scratch free. And let me just knock this out real quick. I’m gonna push here a little bit. Change direction. This is a very nice, real nice radius curve that you might be able to see on camera.
So I want to come back. I just want to let this wool pad just kind of seat right down into that curve without putting any pressure on this raised body line right here, because that could burn through. Okay, let’s pick a little bit of this up. I just want to follow this radius right here. Just come in real lightly. Okay, I was drawing from the product I put there, so I’m going to add some more product. Put a little bit here, a little bit right there.
Look at that red paint. Scary, huh? Okay, pick up my product, then just kind of go on back to As I like to say, just massaging these scratches out, letting the fibers from the wool pad, the NSP 150 microns, gently abrading the paint. As I’m doing this, I can literally watch the scratches disappear.
I think I got him, Craig. I know my audience always demands perfection, so I don’t ever want to let anybody down. I got what’s called a RID right there. So RID stands for Random Isolated Deeper Scratches.
And I’m just going to put some right on top. I’ll show you where it’s at by marking it. It’s right there. And usually what happens is when you buff out a car, you remove the thousands or millions of shallow swirls and scratches. What remains are the deeper defects, and these stand out like a sore thumb, and they’re called RIDs, random isolated deeper scratches, because they’re random, they’re isolated, they’re deeper, and they’re scratches.
Let’s see. So at some point, when I’m buffing out a car like this, I have to make a judgment call. How far do I want to go? to try to get that scratch out. So how important is, it’s gone by the way. How important is it to get it out 100%? And you have to balance trying to do 100% defect removal with the concept of not buying another guy a paint job.
And the only way to really do that is, no one likes this answer, but it’s with experience. You need to buff out a lot of cars. and i have a secret technique that i always put into practice that has somehow seemed to work for me for the last 30 years buffing out cars maybe 40 years and that’s across my fingers for good luck so okay so now that we’ve taken all the major swirls and scratches out of this section of paint, the next thing I need to do is I actually need to take out my holograms.
Now I’m not sure if these will show up, Craig, but let’s try. Usually if you hold the paint up and I move it. Can you see any wispy lines or 3D lines in there? I can see them with my own eyes. I can see them right here. They’re going this way because that’s how I move the buffer. Does that help if I go down lower? Anyway, take my word for it, there are holograms because the wool pad, the fibers are abrasive. So, okay, so the next thing I’m gonna do is I’m gonna grab the beast.
Okay, so this is a eight millimeter gear-driven orbital polisher. And in the new how-to book I just wrote, talking about how to use these products, this is the NSP 95. So this, you consider this like a medium to light cut polish. When you’re starting out, these products are highly concentrated, but again, we need lubrication and abrasives, two components. On the internet forever, I always see people talk about using three pea-sized drops.
And in my mind, that’s just ridiculous, at least when you’re starting out with the dry pad. You need some level of product to provide a film on the surface of the lubrication and the abrasives. So what I say when you’re starting out is put down about six dime-sized drops to get that pad so it has enough product on there by the time you spread it out, you’ve got a film to work with. You can always add more later on.
And then, of course, do the little smooshy thing. And I’m gonna break my pad in up here just because it’s easier to polish. Okay, starting to really break in. Not really pulling a lot of red paint off, because it’s not a really aggressive polish. But I wanna show you a technique that I show in all my classes. I’m gonna need to come in here and use the side of this pad to get into these curves here.
And so, there’s a couple ways to do this. You could put some product right here, take your finger and apply it to the edges. That’s a good way to do it. Get some, remember two things, lubrication and abrasives on the edges.
Or, I’m lazy, so here’s how I do it. I put down a strip of product, I put this thing up on edge, because it’s gear driven, it won’t stall out, slow speed, and I just slowly walk it in to that strip of product. And what that’s doing, It’s just lubricating that edge. Okay, now I’m ready to start doing some curve work.
Anytime I’ve got an edge like this, one of the things I like to do is I like to actually go up on edge and give some dedicated attention to that thin little strip of paint there about a finger’s width that you really have a harder time doing just holding the pad flat and pushing harder there. So it’ll look like this.
And anytime you do that type of edge work like that, you always wanna come back and make a few passes with your pad flat to remove any induced marring from being up on edge, because you’re basically putting about this much of that pad down on the paint with a lot of pressure.
Okay, let me come up here and snag this. Okay, so I primarily knocked out the center portions. I’m gonna come back and do that little edge trick along the edges. Now that I’ve hit these edges, I’ve got to come back with the pad flat to make sure I remove any marring from being up on edge.
Okay, now this last part in the center. And even though the chrome trim ring is going to nest right inside this radiused section here, I just want to come in here and clean this a little up because I’m OCD like that. Turn the speed down. I’ll hit the outer edge too, kind of clean it up.
No one’s ever going to see that paint, but if you’re a detailer, you’re probably OCD also, and you know you have to get that paint. okay so we’re done with that just let me show you how much red paint came off for that stuff just the half the trunk lid and what i’ll do is i’m going to place this in a bucket over there i’m going to take and squish it with some of the dr beasley’s liquid laundry detergent loosen that up flush it out throw it in the wash machine or a pad washer okay so the next step And I bet this looks pretty good here, but this is show car work.
I’m trying to make this thing look as great as possible. And I’ve already inspected these, but since I’m here, always look and inspect your towels, both visually and tactically. A lot of times your eyes may miss something that your sense of touch can pick out. Because like I always tell people, it takes hours to buff out a car.
It takes seconds to put a scratch in. And that’s because your towels, your wash mitts, your wiping towels, your drying towels are contaminated. Okay, and you know, the Dr. Beasley’s NSP products, they’re all compatible. If I didn’t get 100% of the residue off, it would just kind of blend in with the next step. But what I do wanna do is remove any paint I’ve loosened so I don’t grind it back in.
How’s that looking back there to you, Craig? Starting to look like a show car finish, huh? I have to stick around and finish this out tonight. Okay. Now, gonna switch over to the Dr. Beasley’s NSP45. This is a really nice finishing polish. Dry pad.
This was for an orange car I detailed a couple years ago. You can still see the pigment in there. Okay, so we’re gonna put six dime-sized drops on here. And one, two, three, four, five, six. Then I’m gonna break my product, my pad in, just up here where it’s nice and easy to polish. Okay, there we go, broken in. And now I’m gonna add, I’m just gonna add a little drop to the major sections I’m gonna buff.
Oh, God. That is speed four. And one of the things I really like about the Rupes long stroke polisher is just how smooth they are. Very, very smooth. It won’t wear out your nerves, your muscles. You know, I have a good friend right now that has nerve damage from years of buffing. And one of the things the Rupes engineers did was they designed this to be very ergonomic and human safe.
Now look, I got good pad rotation. I’m just going to bring this around and knock out that nice radius curve there. Okay, and again, the reason for the third step is to maximize the full richness of color. And just for fun, there’s some more of that red paint come off. Just a little bit now, because we’re using a finishing polish. That’s actually a finishing pad, so it’s very soft, very non-aggressive.
Fresh towel. This stuff wipes off really, really nice, nice and easy. Okay, so what I want you to do at this point is try to pan back and forth or zoom in and try to show that difference between the before and after. And then my comment would be for everybody that’s watching, the rest of the paint looks the same way. How’s that look on camera, good?
Okay, questions and answers before we wrap this up. We’ve got a question here from Sarah. She’s wondering, is it recommended to have polisher setting lower when using the wool pad? I know some people have it all the way up.
I prefer to be on a three or four. well every polisher is going to be a little different on the on the pe14 the cordless pe150 technically is what it is actually you know a good question but i’m always running on the three on automotive paints and that is 1150 rpm when i use these to start cutting sanding marks out of gel coat boats or just a buff heart on a gel coat boat i max out to the six this by the way was the prototype for this tool given to me by flex you can tell because there’s two different colors plastic.
And I should have counted how many cars and boats I’ve buffed out with this, but it’s uncountable, so many, and it’s still going strong today. But find a range that you’re comfortable with. I don’t think buffing like super slow with wool pad, you’re going to fight the wool pad a little bit, especially if you get into kind of curves. So you want to get some rotation going, but you don’t want to overheat the paint.
There’s a misconception out there. A lot of people think it takes heat to break down the abrasives. I probably wrote an article about this 15 years ago. And what I said in that article is heat is an unwanted and unnecessary byproduct of the process. Can’t avoid it. If we could, we wouldn’t use it or need it.
So, but just find something that works for you. The good wool pads, really nice. I use Lake Country pads.
Question from James. Is the long stroke polisher necessary to finish it out versus the beast since the LSP will equal it out? If yes, could a short stroke dual action polisher, parentheses, quarter cable do the job?
Yeah. You know, years ago I wrote this article. Before coatings were invented, I think it was called Wax, the great equalizer. And it’s to your point. If you finish something out really nice, a lot of times when you wax it or whatever you’re going to use for your LSP, it might kind of draw back some of that clarity and brilliance you created.
So even if you finished out with a long stroke, it kind of equalizes it back to where you were. You lose a little bit. But the point I wanted to make here was this is true show car work. This is a show car. If you were to go to a car show, you’d see something like this. You might not like it, but you’d see something like this on display. It is a show car.
And the owner of this is a good friend of mine. He’s a good client. I do a lot of cars for him. And he asked me to get this as nice as I could without making a mistake. So yes, I believe from all my experience, and I probably have, well, I have more books on long stroke polishers than anybody breathing.
But in all my experience with buffing out cars, I think you can create the nicest looking finish with a long stroke, free spinning polisher and a greater brace of technology and a finishing pad. Now you might lose it when you put the LSP on, but in my head, I know I did the best work I can do. Good question.
Yeah, this one’s kind of connected. Oh yeah. This one’s kind of connected to that. Do you prefer the 21 millimeter long throw versus the 15 millimeter when finishing on single stage paint? I prefer the 21 almost all the time. I really like the feel and the action and large, you know, if you say big foot, the big footprint of the pad.
I rarely use the 15, but you got to keep in mind when I’m using a 21, it’s usually just all for finishing work. It’s rarely for any major correction. I’ll use a wool pad on rotary or I will use foam cutting pad or even a micro wool pad on gear driven. Good question. Got a lot of good questions this time. I’m liking it.
Yeah. There’s like people that test me. Right. I learned, I learned, I cut my teeth teaching a body shop classes and most of the guys were drunk, you know, Hey, once you, Hey, can I put a little clinic on? He says, sure.
Come back about six o’clock. Well, he lets all the guys go to the local bar. They come back and they make fun of you, but it’s a great way to learn how to overcome any kind of gotcha question, you know? awesome all right anything else mike I think we got through except for the battery failure.
We’ll have to work on that, figure out how to keep the camera powered up when using 110 volts. All right. All right. Sounds good. All right. Well, thank you for watching, everybody. We’ll see you next time. Bye, everybody. Bye-bye.
Questions? Comments?
Email Us