


The 3M dry sanding system is actually what I consider like one of the safest sanding systems out there and especially if you’re brand new to sanding. One of the cool things about this system is you can use it by hand or machine. They make these in sheets. This is the 3000 six-inch disc, and they make these in sheets too that you can actually attach or hold on to with a backing pad. Hold on to it by hand and just rub and you can actually sand that way. But the optimum way for me at least is to go ahead and machine sand using a DA sander.
The 3M Trizact comes in 3000, 5000, and all the way up to 8000. I have the 3000 and 5000, and I gotta tell you, if you’re using any kind of quality abrasive technology, you’re gonna pull 5000 grit out super, super easy. In fact, I did a little test on this. I pulled out the 3000 using a free-spinning random orbital polisher. I didn’t even have to use the rotary polisher. Anyway, so this is the system.
Evaluating the Custom Paint and Orange Peel
Now, this car has a custom paint job. And since it’s a light metallic gold color, I’ve been told this is a PT Cruiser color, actually. But I don’t know if Yancy can pick up the orange peel. We’ll give him a chance when we get going here. But this has never been sanded. It’s never been buffed. It has a little bit of DIP, which is dirt in paint. We covered that with the black Corvette over there last week. And it also just has orange peel. I’m going to try to show some. Some orange peel? Yeah. It might work better just using the overhead lights. There it is. Look where the light is at. You see the orange peel on that one. Then if we go over to here. That one’s really bad. Now that one, yeah, they’re not supposed to be fuzzy people. Yeah. Those lights should be clear and distinct.
Using the Flex Cordless DA for Damp Sanding
This is a Flex cordless DA. It’s a 1.6 millimeter throw, so it’s what you’d call a finishing sander. But my experience is for at least the things and the kinds of cars we’re working on, it actually works great. And these also come in three-inch discs. Here’s a three-inch 5000 or three-inch 3000. And so these also work really good with the Flex Pixie. And of course, I like to use the six millimeter drive unit on there. It gives you the perfect balance of good sanding disc rotation and able to sand within a thumbnail distance of any raised body line or edge.
Using the Interface Pad for Smoother Sanding
Anyway, so let me just kind of walk through the process then. So I’ve already attached a, um, a 3000 disc on it. I may pull it off because I want to show you, this is the interface pad, and it’s important to use the interface pad because it’s going to do a couple of things. It’s going to smooth out the sanding action that you’ll feel just holding the tool. It also enables the sanding disc to conform to the contours of the body panels. Now, the 3M Trizact discs, they do have a foam backing. It’s very thin. I probably guess that’s about a sixteenth of an inch. So the foam interface pad gives you just a little bit more cushion, again, just to follow the contours of the body panels. And like any time you’re sanding, machine sanding, it’s important to perfectly center up the sanding disc so that no part of the interface pad comes into contact with the paint.
Applying Water for Damp Sanding
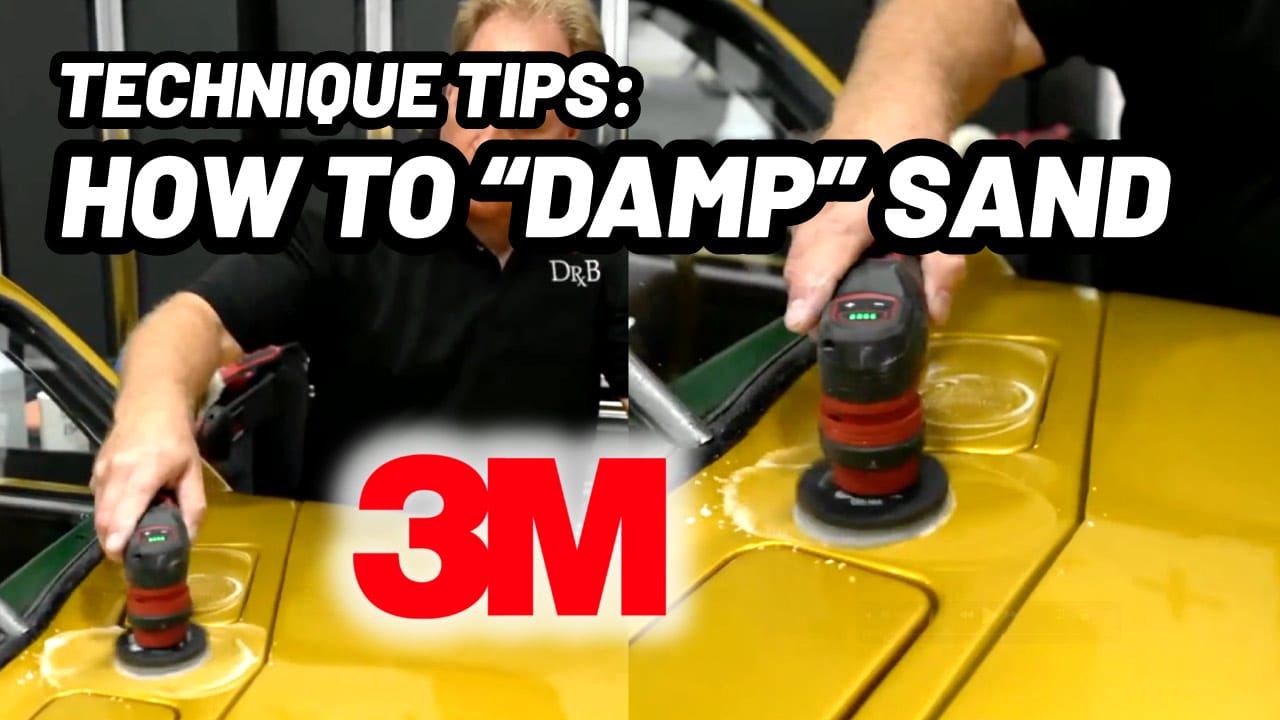
Then the way this works is you want to take some clean water. You can put a drop or two of some soap in there. You don’t want to do too much. You know, recently, I had a guy sitting in a boat, and he called me up and says, Mike, the sand is just not working. And I says, well, what are you using? He explained everything. He’s using Mirka Abralon on a cordless CBeast, a Flex Beast, cordless Beast. And I says, well, I just said instinctively, how much soap did you put in your water? He says, I put a lot in there. I wanted it to be good and lubricated. And I says, well, try mixing just like one or two drops. He called me back in about a half hour and says, hey, that was the trick. So what he did is he made the surface so slippery, the sanding paper couldn’t bite the surface of the sanding paper. It was hydroplaning, yeah.
Sanding with a Crosshatch Pattern
So you just want to put some water down, a few sprays. You don’t want to get too much. Maybe a squirt right onto the face of the disc as you’re starting out. And then it’s really just kind of like I demonstrated last week. You want to use, anytime you can use a crosshatch pattern, you want to use a crosshatch pattern. That ensures what’s called UMR, uniform material removal. And uniform material removal is what results in uniform appearance. You know, your paint looks the same all the way over the car because you removed the same amount of paint or refined any deeper scratches the same amount. And then, of course, overlap by about fifty percent.
Demonstrating Damp Sanding
So let me just go ahead and demonstrate that real quick here. Now, this is on speed setting two, and I got pretty good sanding disc rotation. I’m going to bump it up to three. Now I’ve got a little bit better sanding disc rotation. Down the crosshatch. That’s three passes. Turn this thing off, and you can see the clear coat’s coming off. So this is called your slurry. And anytime you abrade something clear like glass or clear coat paint, you notice it turns white or opaque. Then you just want to come in here and wipe that off. Now you’re going to see a very, very flat uniform surface. And I can already tell just by looking at this, the lights are going to be more distinctive in the reflection when we look at that.
Refining to a Higher Grit for Gloss
Oh, that’s a bad color. It’s really a bad color for you to capture. Black’s always the best. You can see the Dr. Beasley’s there in the middle of your screen, and you go up, and then it disappears. Yeah, okay, so now, you know, in the real world, if you wanted to, this would pull out real easy with a wool pad, you know, something like this. I mean, this would, you wouldn’t even have to struggle to pull that sanding mark out. I’m going to pull it out. I’ve already pulled it out. I did a little test spot using the Griot’s G9 with a foam cutting pad and the Dr. Beasley’s NSP 95.
Refining to 5000 Grit for Clarity and Gloss
But just to demonstrate, I’m going to go ahead and refine this to 5000. And this is what the students are going to learn when they’re here for the class this weekend. And again, center this up. This is a brand new disc. And let’s see if we can capture any more gloss or clarity after 5000. Okay, so again, just a mist of water onto the disc, one spritz of water right there, and then the same kind of overlapping pattern. Four solid section passes there.
And how many section passes you need to do to level the orange peel or to remove the surface texture that’s apparent in the paint is something you just have to kind of experiment with. Wow, I can see the individual bulbs and the LED overhead now. Back that way a little bit. Sure. No, the other way. Alright, and… Yeah, you can definitely see the Dr. Beasley’s starting to come back up. Yeah, starting to gloss up already.
Determining Number of Section Passes for Orange Peel Removal
But one thing I want to mention, like some people ask me, how many section passes, how many times you got to go over the surface? Well, it just depends on how hard the paint is. So the harder the paint is, the more section passes you’re going to have to make in order to remove the orange peel, to basically abrade enough material to remove the orange peel or any surface texture or DIP or even fish eyes. So the red one, you’re going to do a lot of passes. Yeah, but…
I would say in most cases, you’re going to be in the four to eight section passes. From what I have experienced so far, I would say this paint is on the medium side. It’s not hard, it’s not soft, but it’s right there in a sweet spot where all of us detailers really like the paint to be something we can work with. You should nickname that Goldilocks syndrome. Yeah, the Goldilocks syndrome.
Demonstrating the Flex Pixie for Small Areas
Okay, so I’m going to set this over here, and I just want to go ahead and demonstrate what I’m talking about when I’m saying the Pixie’s good for getting into thin areas. Let me get you back on the camera. So here’s the… Here’s the Flex PXE or the Pixie. And again, I’ve got an interface pad on here. This is the Eagle Abrasives. I like their little micro hooks. It works really good when you’re using the sanding disc. It doesn’t really matter with this type of sanding disc because of the foam backing. But again, center that up so no part is touching.
And then what I’m going to do is if you look up here, these are little opening cowl vents. And they just let air flow in when you open them up. But that is just a nice little thin size. And here’s a little thin panel here. And this is what I’m talking about. Sometimes it’s so nice to have a smaller disc so you can get in and you can sand these other areas. I’m going to bump this up to four. And that way they’re not going up on an edge, possibly running the edge of the paper in and blocking it. And same thing over here. Look how convenient this is. I can never get a six-inch disc on here. See, it goes back to having the right tool for the job.
Refining with 3000 and 5000 Grit on Small Areas
Wow, 3000. Look at the slurry cutting really fast. And then, of course, refine with 5000. I’m going to let the students take care of that. And I don’t want to do too much here because I don’t want to rob the students of the blessing of attending this class and, like me, the first time they’ve ever sanded and buffed a forty-one Graham Hollywood, which is pretty cool.
Buffing and Polishing After Sanding
Anyway, so then after you’ve done the sanding, of course, you would finish out the entire vehicle. Then you’re going to come back and normally, in fact, for my class I’ll probably have the guys use a wool pad and a rotary polisher, mostly because it’s so much faster than using a free-spinning or even a gear-driven orbital polisher. But the most important thing that rotaries come in handy for when taking out sanding marks is… It’s really easy in a big flat area here to use an orbital polisher to pull sanding marks out. I mean, anybody can do that.
The trick is when you start getting next to edges or thin body lines, you know, orbital polishers just are not the most effective way because with the rotary, you can just go up on edge… boom, there’s no pad stalling, you can pull that sanding mark out. So that’s why I’m kind of a big fan for this. But I wanted to demonstrate that I could pull these out using orbital because I just wanted to do a shout out to my good friends at Griot’s Garage. They sent us some brand new polishers for our detailing classes.
Griot’s Garage and Polisher Performance
So I just want to do a shout out to Rod Kraft and everybody at Griot’s. Thank you for sending us these polishers. I’m going to unbox them before the class starts, and they’ll get into the hands of all the students. Okay, so this is the G9. This is actually one of the very first ones ever built. My longtime friend Doug Hodge sent this to me. And I got a foam—it’s a Lake Country HDO foam, light blue foam cutting pad, Dr. Beasley’s NSP 150.
And I am literally going to put three pea-sized drops on here for that big old patch of sanding marks. Yancey, I’ve gone over this section one time, and it is almost perfect. Not quite, but that was one time going over it with the Dr. Beasley’s NSP 150 spherical abrasive technology and a foam cutting pad on a free-spinning random orbital polisher. Let me do three more and then we’ll take a look at it. Really good pad rotation.
Concluding Remarks on Machine Polishing
If you’re new to machine polishing, the Griot’s G9 is actually a great first tool to start out with. Can’t go wrong with a lifetime warranty. Yeah, it’s a quality tool. It’s powerful. What’s that? It’s very powerful. It’s got a lot of power to it. Yeah, I mean, look at that. Let’s go look. That is sanded and buffed. And we could amp up the clarity and gloss by going to the NSP 95 and a soft foam polishing pad. But again, I’m going to let the students take care of this.
Achieving Distinction of Image (DOI) with Sanding
But now the clarity difference, or what they call the DOI, the distinction of image. So a mirror, when you look into a mirror, a mirror is a hundred percent DOI. And that’s what you’re looking for when you’re sanding paint. That’s the whole reason we sand paint. We want to sand it to flatten down the orange peel, any surface texture, any other kind of defects like DIP. And even sometimes you can eliminate some of the fish eyes that you might see in the paint.
But you want to get it as flat as you can. And when you polish it out, the reflections are accurate, and they look like you’re looking into a mirror. And that’s where we get the term a mirror finish. So that is the Trizact damp sanding system. Again, to me, one of the most important things about it is if you’re new, like say you’re an enthusiast, and say you restore a car, ’67 Mustang, something you had in high school, it goes to the body shop, it comes out with a fresh paint job, and you want to personally do the sanding work on it.
Grit Progression for Show Car Finish
You could start out with a 1,500 film disc from 3M, or from Eagle Abrasives, or even Harbor Freight, and then refine with the 3000, go to 5000. Heck, if you want to go to 8000, go to 8000. The higher you sand, the easier the buffing will be. And that’s how you could create a show car finish on your own car at home.
Sanding Practices: Only Use Custom Paint, Not Factory Paint
And it is important to me to point out two things. One, anytime we’re teaching classes here—can you pan over just and grab the Corvette and the Model A over there—anytime we’re sanding cars here in our classes, I bring in custom cars with custom paint jobs. We’re never here sanding the factory paint because the factory paint on a new car is thinner than a Post-it note. You always got to remember, sanding takes off paint, compounding takes off paint, polishing takes off a little paint, but pretty soon you’re not going to have anything left.
So just as a professional practice, I bring in cars with custom paint. The paint, in fact, this car here, the Model A, I saw the bill. It has had, quoted there, add X—you know, add more coats of paint and more coats of clear coat because it’s going to go get sanded and buffed. So they knew that car was coming to this class.
Ensuring Proper Refinement When Moving Between Grits
And then, so that’s one point, only sand custom paint. The other point I want to make is every time you’re sanding, when you move to the next grit, you need to make sure you sand enough in the previous areas to totally refine them. Otherwise, when you do come back to pull up the sanding marks, you’re going to really struggle because you’ve got these deeper scratches that you did not refine. So that means you need to focus on the task at hand. That means no talking on cell phones while you’re doing it.
Measuring Paint Thickness After Sanding
Yeah. And, you know, I forgot this, Yancey. Someone says, hey, you should take paint thickness. It’s too late now. We’ve already sanded here. I did test this before we started, and I zeroed this out. It was fourteen point eight. We’re at fourteen point one. So we removed point seven mils through two sanding processes and a compounding step. So very, very little paint.
Questions? Comments?
Email Us