


Last Updated June 1, 2026

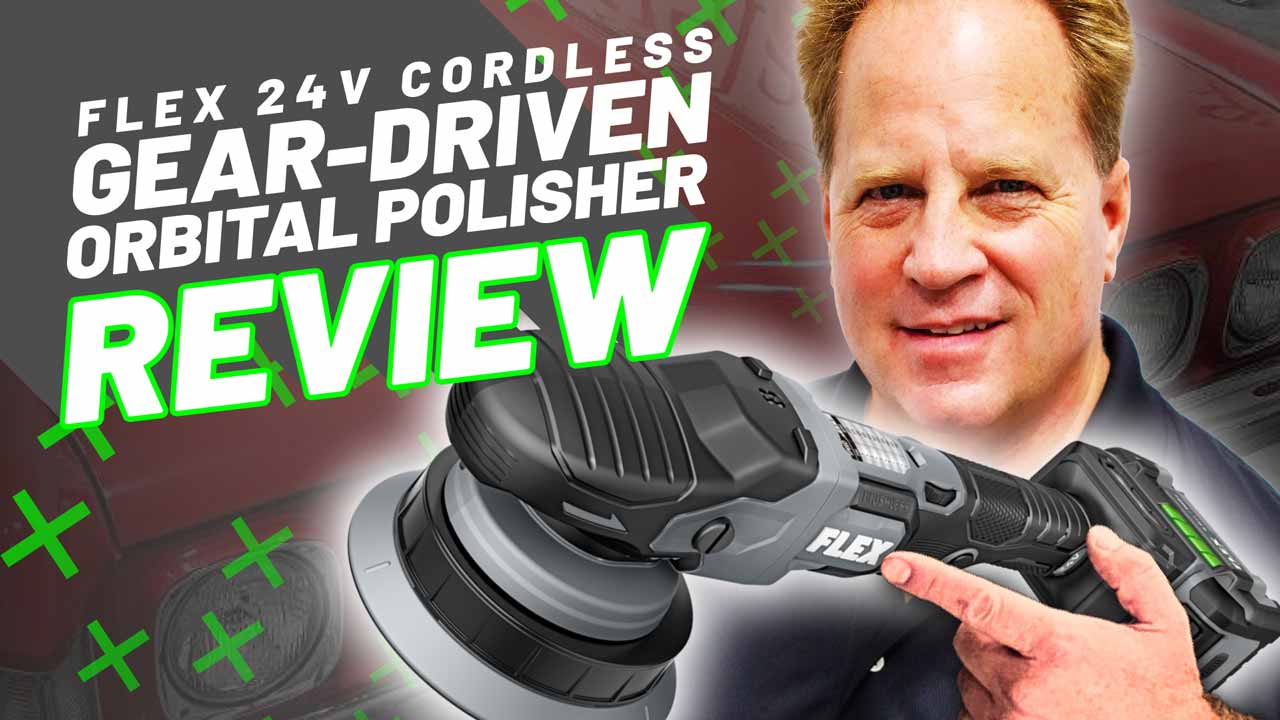
- [ Flex FX3331 24V 8MM Gear-Driven Orbital Cordless Polisher Review ]
- [ Learn About Gear-Driven Orbital Polishers ]
Read My Other 24V Flex Polisher Reviews!
This is the second of three reviews for the new 24 volt FLEX polishers. Below are the links to the other two tool reviews. As I worked through using these tools, making videos, and writing these reviews, you can watch the transformation and extreme makeover to the 1970 Pontiac Grand Prix Model SJ as I used all three tools to torture test the tools and the lithium battery technology.
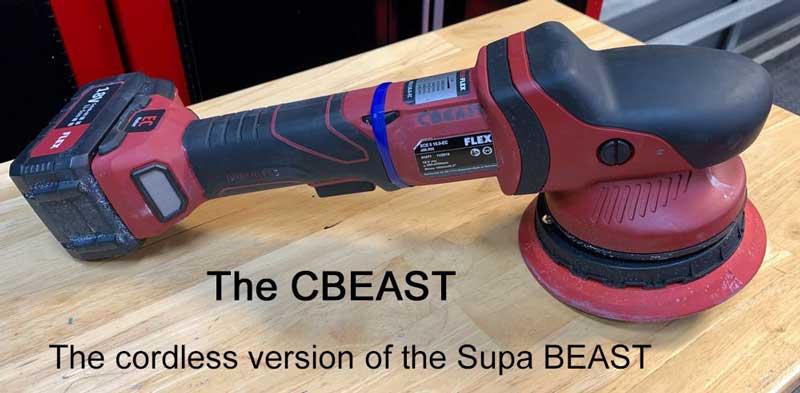
If you’ve read my other reviews on the new 24V cordless polishers from Flex, you’ll already know I’m a longtime Flex tools user — I even wrote the guidebook for the original Flex gear-driven polisher, the XC 3401 VRG (the BEAST, as I call it).
When FLEX introduced their first cordless XCE 8-125 18.0 – aka the CBEAST (cordless BEAST) at SEMA in 2018, I’m honored to say I received the very first production unit. This was an 18V unit and it performed great, but now Flex is launching a new line of 24V cordless tools.
Now Flex has a brand new 24V cordless gear-driven orbital called the FX3331 and they were kind enough to send me one for review in addition to the other two cordless polishers. In this article, I’ll take a deep dive into gear-driven tools, the improvements made over the 18V CBEAST before an in-depth honest review of the new FX3331.
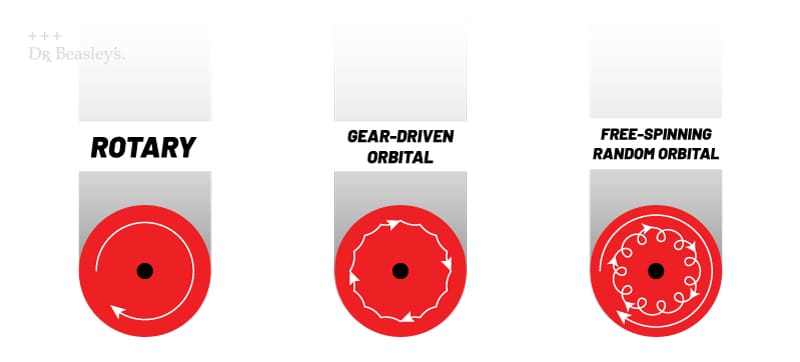
What is a Gear-Driven Orbital Polisher?
The FLEX FX3331 24 Volt Cordless 8mm Gear-driven Orbital Polisher aka CBEAST is an 8mm gear-driven battery operated orbital polisher.
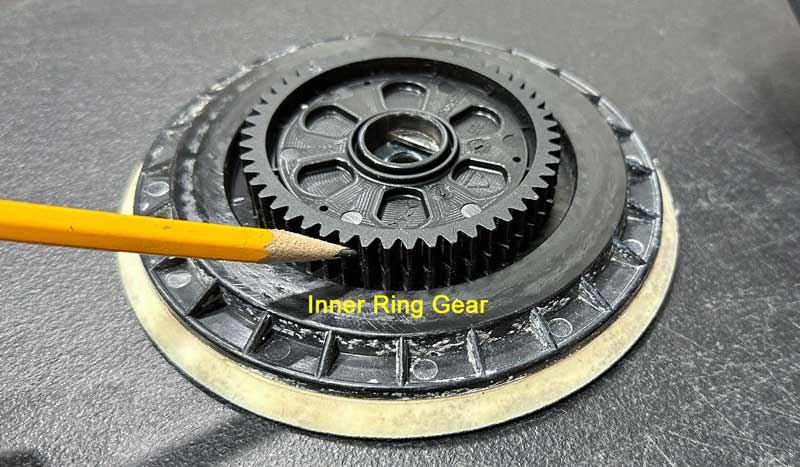
By the words gear-driven, this means the backing plate is moved via a dual ring gear design that forces the backing plate and thus the buffing pad move in both rotating action and a partial orbit stroke action.
Because the gears are constantly rotating the pad, it won’t stop rotating when you press too hard like a free-spinning random orbital polisher would.
The below pictures show the inner and outer gear ring found in the original FLEX 8mm gear-driven polisher (the FX3331 has its gears hidden by a secondary interface plate).

Rotary polishers are also gear-driven, but they don’t have a secondary orbit stroke action like a gear-driven orbital (hence the term orbital).
Gear-driven orbital polishers are essentially a combination of rotary and random orbital polishers: they spin no matter what, but they also orbit as they spin.
Benefits of Using a Gear-Driven Orbital Polisher
Gear-driven orbital polishers have some major benefits over free-spinning random orbitals and even rotary polishers.
Rotary Power, Orbital Safety
With a gear-driven orbital polisher, you get the cutting power that constant rotation provides and the safety that an orbital action ensures. Because the buffing pad is orbiting as well as rotating it doesn’t linger in any one place for too long, ensuring you don’t burn through the paint.
Finishes Without Holograms
Holograms are a distinct scratch pattern imparted into paint by the single, rotating action of a buffing pad. That means only rotary polishers can impart holograms — you don’t have to worry about them with a gear driven orbital.
That being said, orbital polishers can also leave behind a scratch pattern depending upon the paint, the pad and the abrasive technology. These patterns, however, are referred to as buffer trails, micro-marring, tick marks, shadow effect, pad marring, etc.
No Pad Stalling — Constant Rotation
Due to the gear-driven design for the reciprocating action, there is zero pad stalling. Pad stalling is where the pad will slow down and even stop rotating and/or oscillating. Pad stalling only occurs with free spinning random orbital polishers due to the free spinning attachment spindle that these types of tools us to rotate and oscillate a buffing pad.
Things to Remember When Using a Gear-Driven Orbital Polisher
If you’re used to free-spinning random orbital polishers, you may find a gear-driven polisher operates a little differently than you’d expect. Here are a few things to watch out for.
The “Walking” Effect: Don’t Let The Tool Pull You!
With a gear-driven polisher, if you don’t hold the face of the pad completely flat to the surface, the tool will feel like it’s trying to pull you either forward, backward or side-to-side (depending on which side of the pad is making the most contact with the paint). This is called The Walking Effect.
If you feel this type of tool pulling as you are buffing, it’s as though the tool is talking to you and telling you that you’re NOT holding the pad flat to the surface. If you tweak your technique for how you hold and move the polisher you can avoid the walking effect. For some people, any amount of walking effect is too much and thus they prefer using free spinning random orbital polishers.
Requires Strength to Operate Properly
Because of the Walking Effect I described above, gear-driven orbital polishers tend to require more strength and physical force to operate smoothly over the paint.
Leaves Micro-Marring in Softer Paints
When you’re using a gear-driven polisher on medium or hard paint, there’s rarely any chance for micro-marring due to the action of the tool.
On softer paints however, over the decades I have noticed that when working on soft paints, the action of the tool is too aggressive or too powerful and the results will be a very slight visual appearance of micro-marring or pad marring.
I’ve tested this using the same pad and the same polish on known soft paints, where the only difference is when I used gear-driven orbital versus free spinning random orbital.
Unboxing the Flex FX3331-2 24V Cordless Gear-Driven Orbital Polisher Kit
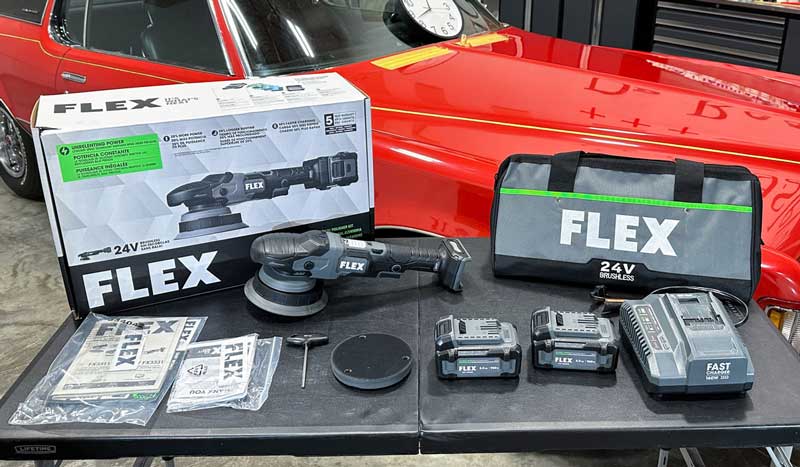
Let’s take a look at what comes in the box with a close examination of all the tool’s features and benefits or the new 24 Volt FLEX Cordless FX3331 aka the CBEAST.
- 24 Volt FLEX Gear-Driven Orbital Polisher – Part number tool only FX3311 – in kit form FX3311-2C
- 2 each 5 Amp – 960 Watt Lithium Cylindrical Cell Batteries
- 1 each 160 Watt Battery Charger
- 1 each 6” Rotary Backing Plate
- 1 each 5” Rotary Backing Plate
- FLEX storage bag
- Owner’s tool manual
- Owner’s charger manual
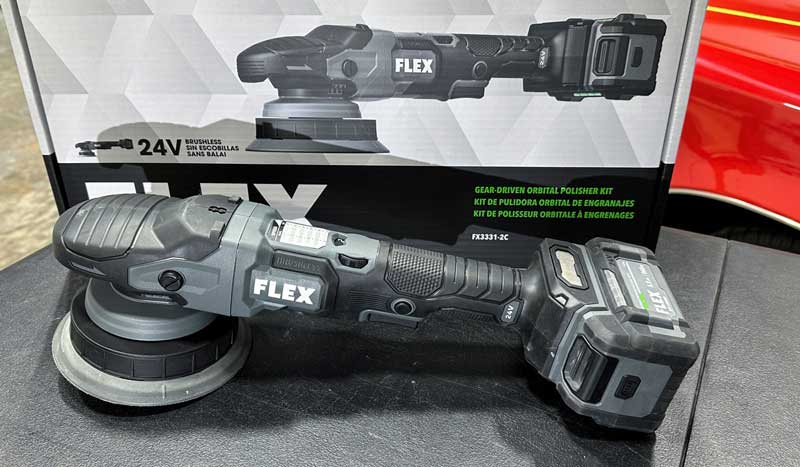
Here’s the new FLEX 8mm gear-driven orbital polisher with a 5 Amp lithium battery installed.
| No-load speed | 225 – 700 RPM |
| Brushless | Yes |
| Max. polishing pad diameter | 6 in |
| Max. back-up pad diameter | 6 in |
| Orbit Diameter | 0.31 in (8 mm) |
| Orbit Rate (No Load) | 2,700-8,700 OPM |
| Tool Weight | 4.4 lbs |
| Tool Height | 5.4 in |
| Tool Length | 15.2 in |
| Tool Width | 3.8 in |
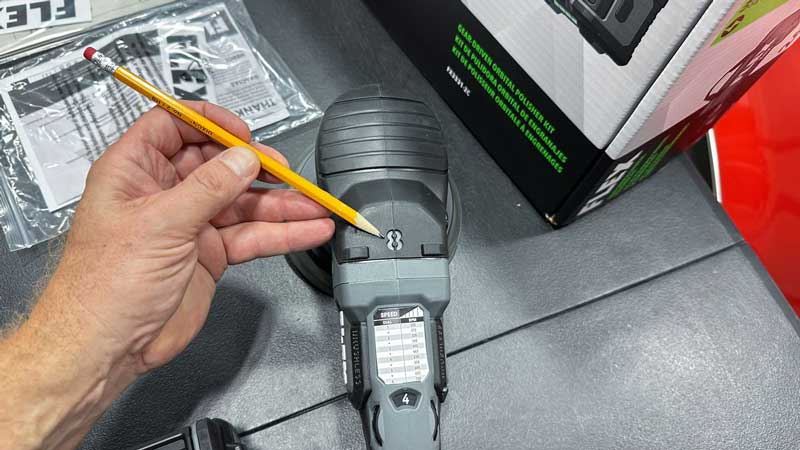
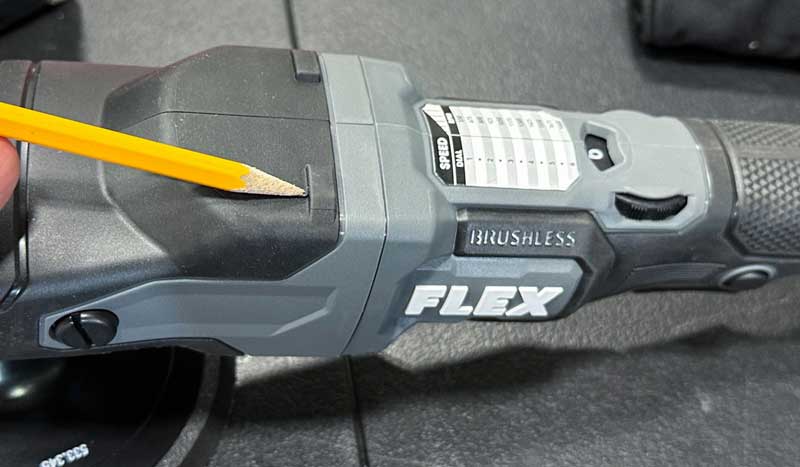
Easy Tool Identification: The size of the orbit stroke is displayed on the top of the tool for fast tool action identification.
Ergo Rubber Overmold: The head of the tool has a rubber overmold with ribs to make gripping and controlling the tool easy.
Tool Rest: The middle of the tool body has built in flat tool rests. These come in handy because when not in use, you can lay it upside down and it remains stable instead of rolling over onto its side.
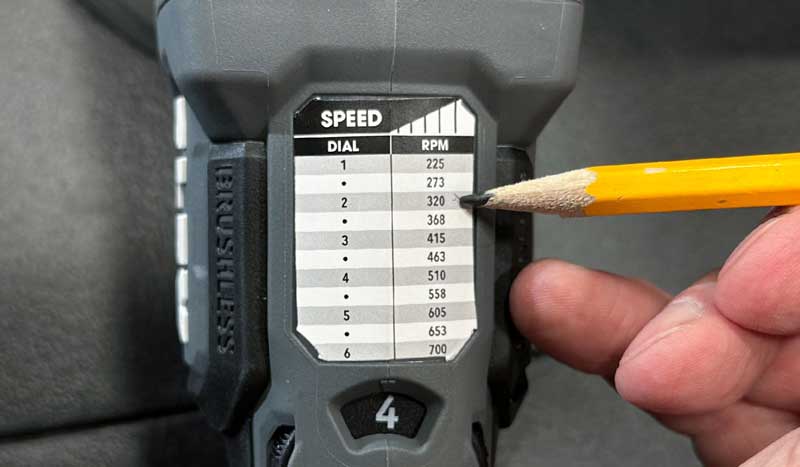
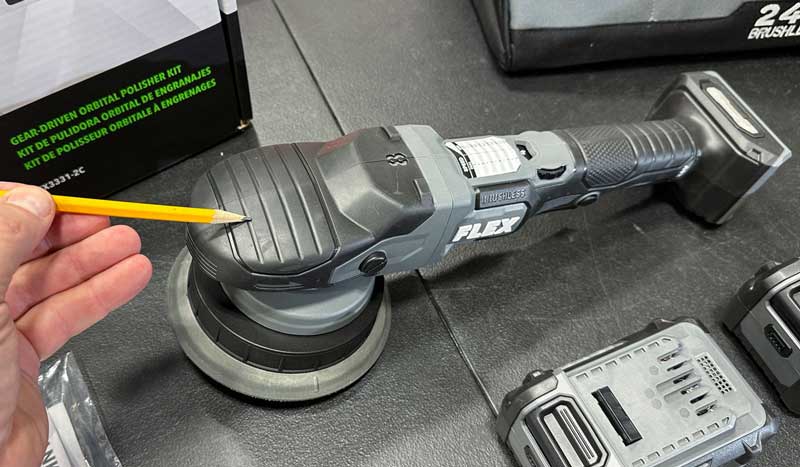
Ease To Read Speed Chart: Conveniently located on the top of the tool, just in front of the speed dial adjuster is an easy-to-read speed setting to RPM indicator chart.
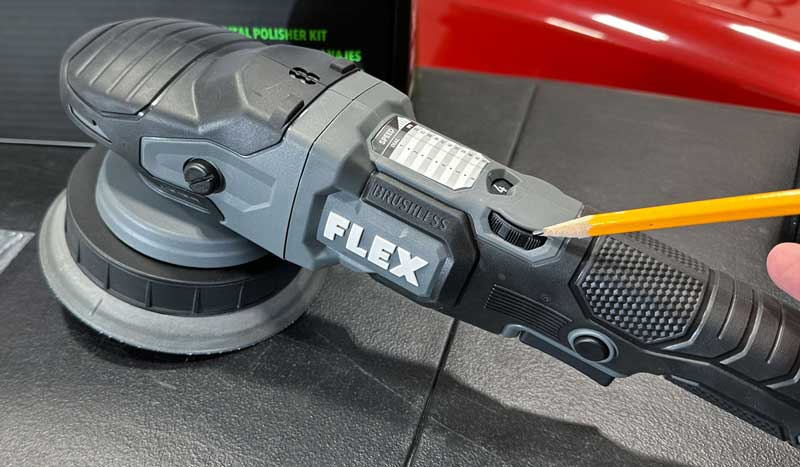
Ambidextrous 11-Speed Control Dial and Large Speed Indicator: With access to the dial on either side of the tool, it’s easy for anyone to set and/or adjust the speed setting.

Large Variable Speed Trigger: Instead of a simple on/off speed trigger, all FLEX polishers come with an easy-start, variable speed trigger to give you precise control over power to the buffing pad.
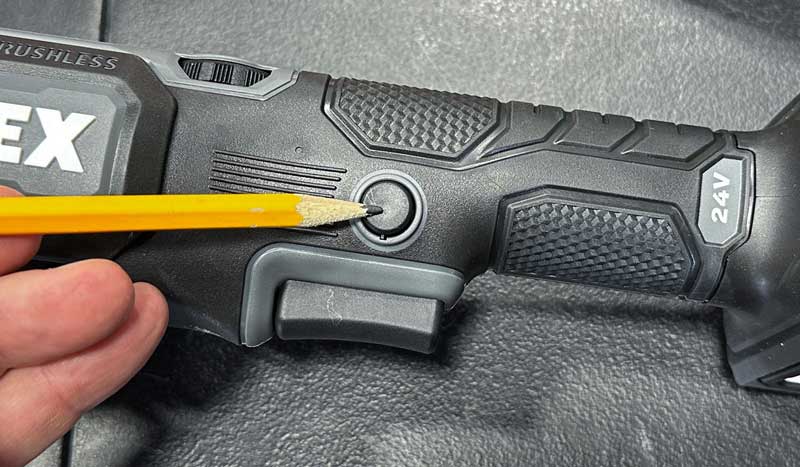
Speed Power Lock Button: This simple feature enables you to lock in the selected speed so you don’t have to hold the trigger in the on-position the entire time you’re using the tool. This is IMPORTANT to learn how to use the Speed Power Lock Button because once you lock in the speed, you can then move your hand to the back of the tool to hold onto the back of the battery.
By using this hand position you can more easily support the weight of the battery plus with this extreme gripping station, you have more leverage and thus more control over the tool.

Brushless Electric Motor Technology: One of the more significant advantages of brushless DC motors is that they are between 85% and 90% more efficient than brushed motors which only have an 80% efficiency rate. For the most part, this high efficiency comes from the reduction of sound and heat, which in turn minimizes loss of power
A brushed motor requires direct contact between the brushes and the commutator whereas brushless motors have fewer contact parts, for example there is no friction between the brushes and commutator, therefore require less maintenance through wear and tear.
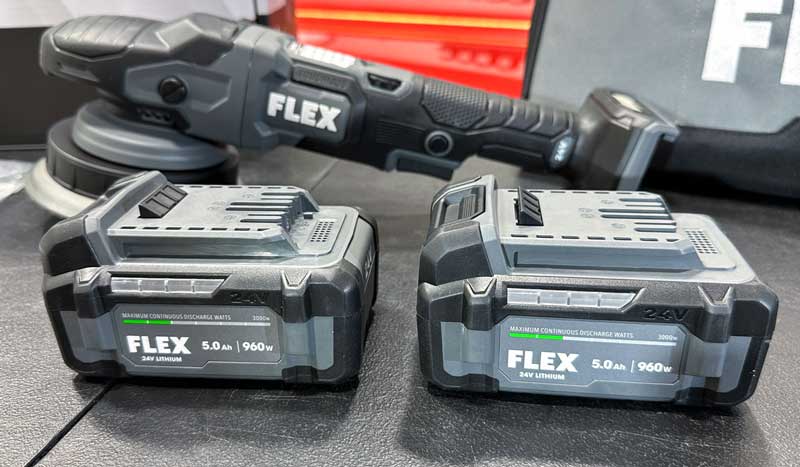
2 Each 5 AMP Batteries: The kit form comes with 2 each 5 Amp – 960 Watt Lithium Cylindrical Cell Batteries
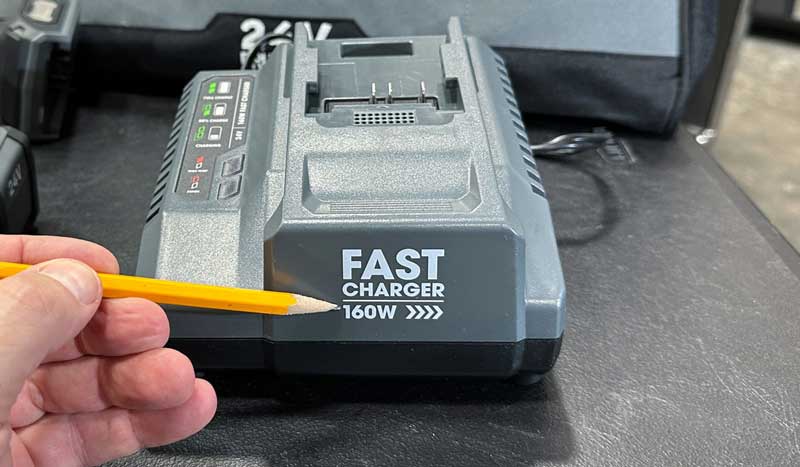
1 Each 160 Watt Battery Charger: Watt for watt, FLEX 24V chargers are faster than the competition. With more wattage in our base charger, dual-fan cooling, and a built-in intelligent processor, FLEX batteries spend less time on the sidelines and more time on the job.
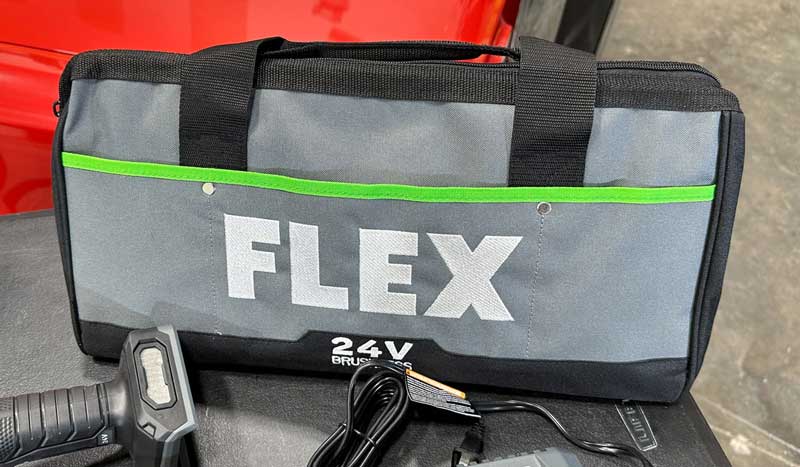
Sturdy Storage Bag: This strong heavy-duty construction with large zipper and handles makes this perfect for storing and transporting your FLEX Polisher with enough room to hold the tool, batteries, battery charger.

Owner’s Manuals: There are two included owners operating manuals included in the box. One for the polisher and one for the charger.
Flex FX3331 24V Cordless Gear-Driven Orbital Polisher: Review
I think it’s fair to say, having received the first 8mm gear-driven CBEAST back in 2018, plus having done months of torture testing for the prototype for this tool, I have a lot of experience with the CBEAST. Fast forward to the year 2024, and now FLEX is introducing the newest version of the original, the 24 Volt CBEAST. I’ll share my thoughts down below in the review section without holding any punches.
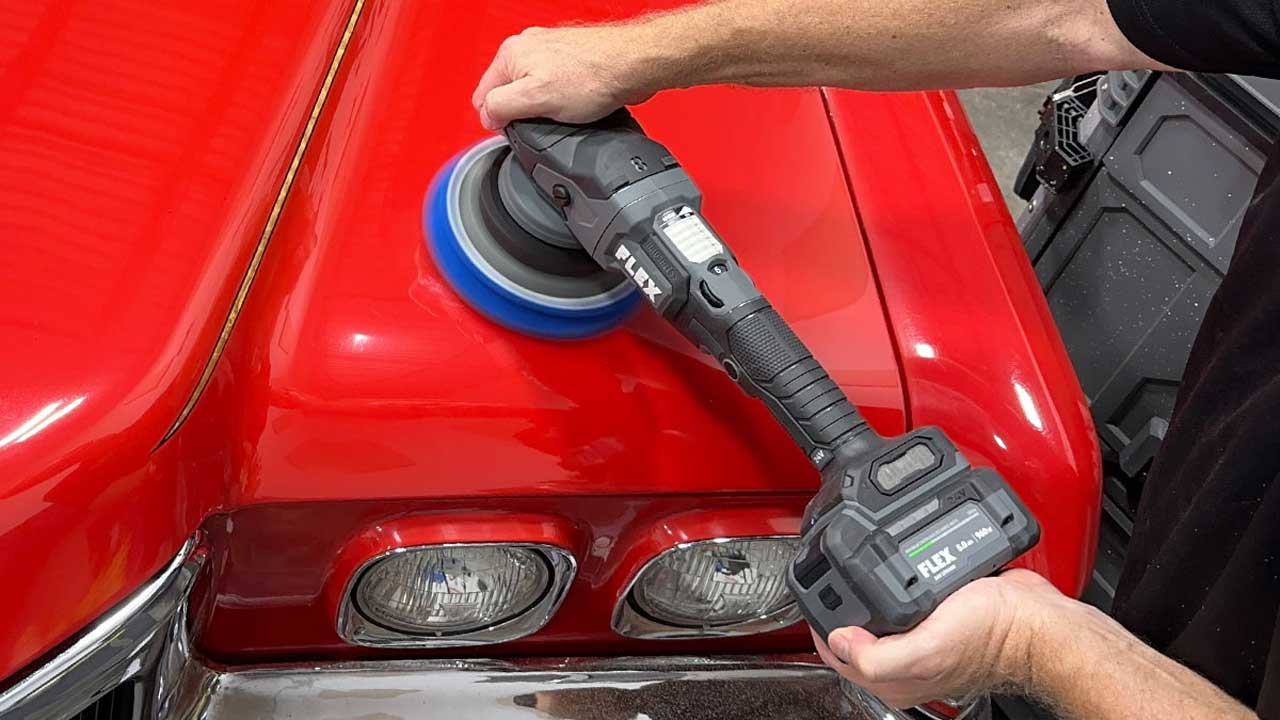
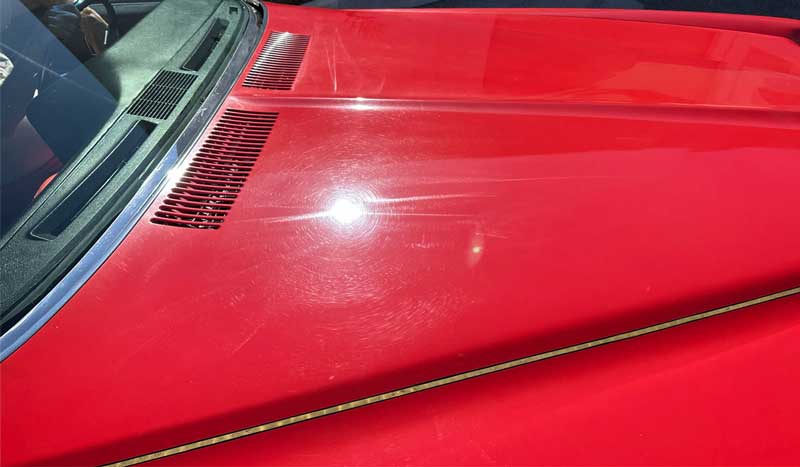
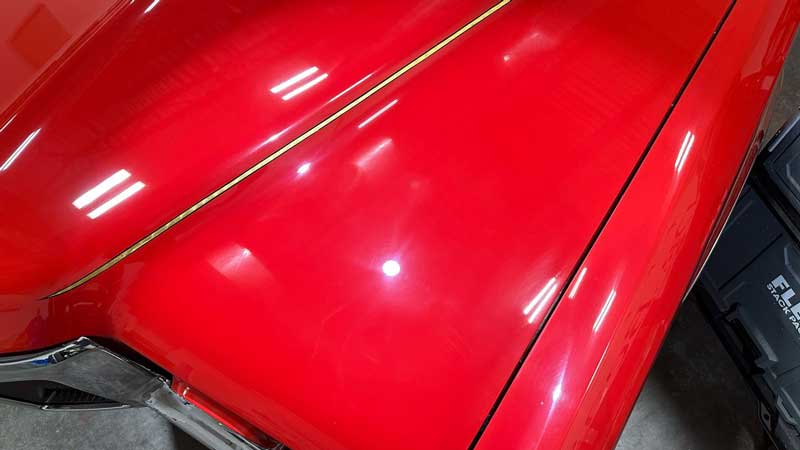
Test Vehicle: 1970 Pontiac Grand Prix Model SJ — Custom Single Stage Paintwork
In the first review for the new 24 volt cordless rotary polisher, I used this new polisher to cut the horrific, custom paint job on this classic muscle car. I actually machine dry sanded the worst panels, the horizontal panels as the holograms, swirls, scratches and other paint defects were dangerously deep.


After sanding these worst panels, I dove in head first and used a super aggressive wool pad and an experimental new Nano Surface Primer Jim’s been working on, and buffed out the entire car.

This review picks up where I left off with the rotary polisher, only now switching over to the new 24 volt CBEAST to re-polish the entire car to remove the holograms left by the fibers of the wool pad.
Polishing Procedure: Hologram Removal
All the body panels except the driver’s side of the hood have been cut and cut HARD using the Dr. Beasley’s Nano Surface Primers with an aggressive wool pad and of course, the new 24 volt cordless rotary polisher.
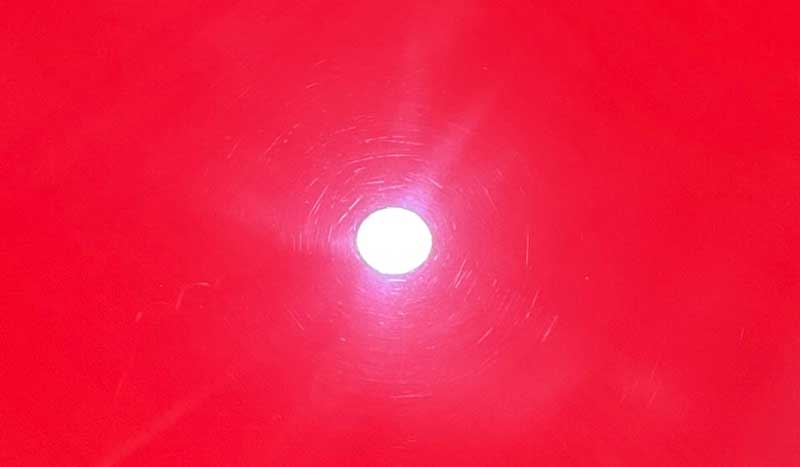
When using a wool pad on a rotary polisher, the idea is to cut or level the paint finish and thus remove all the random, deeper swirls, scratches and in this example horrific holograms. What you’re left with are UNIFORM hologram scratches that will be easy to buff out via the next paint correction step. This is where the new 24 volt CBEAST comes into play.
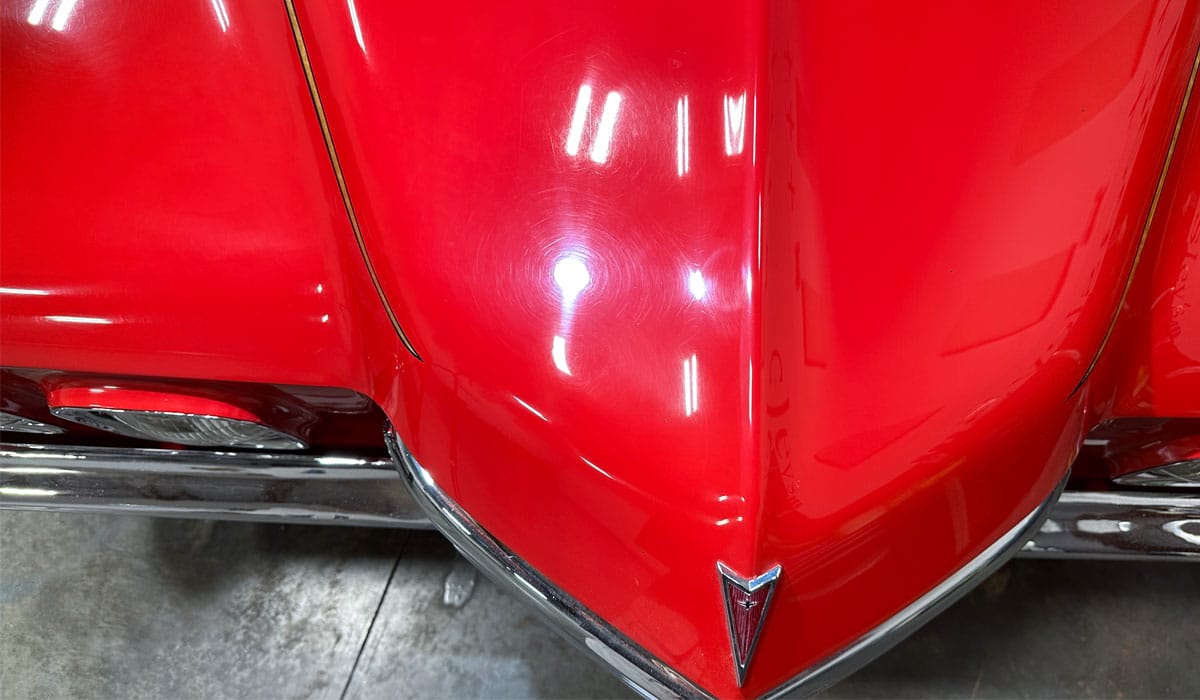
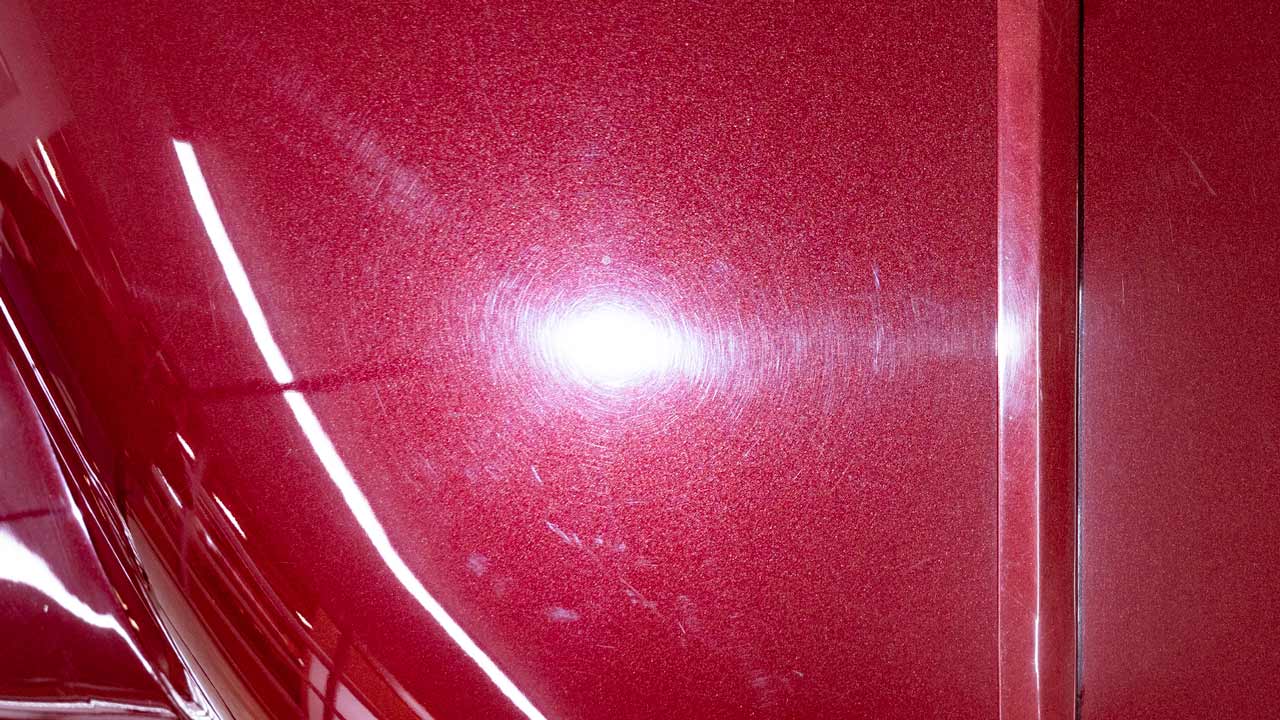
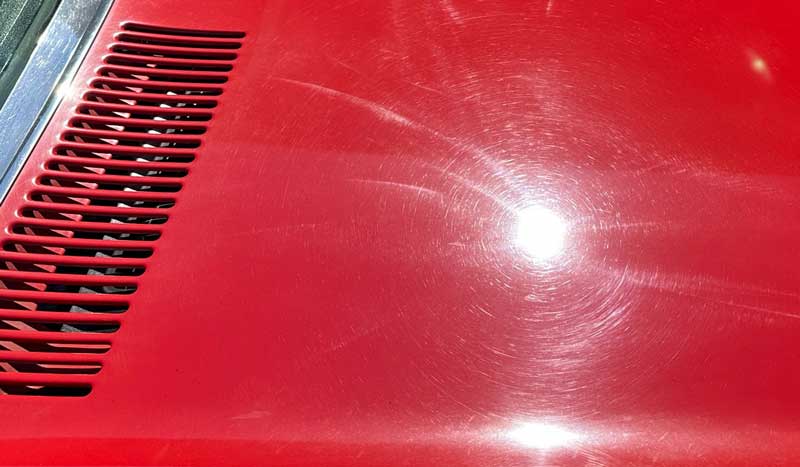
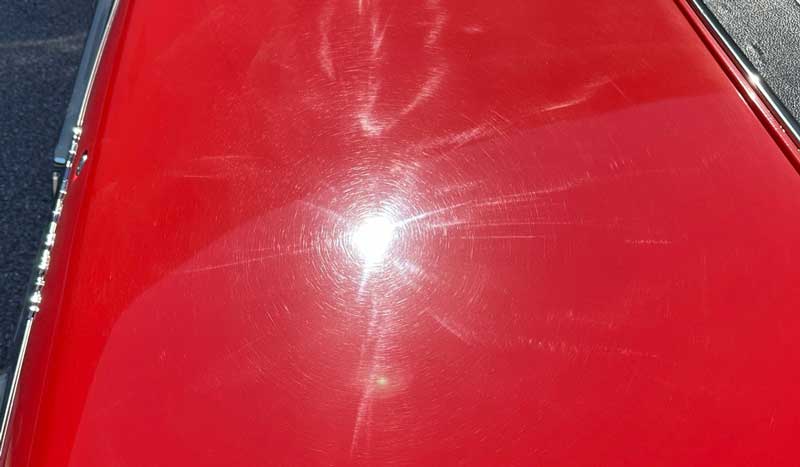
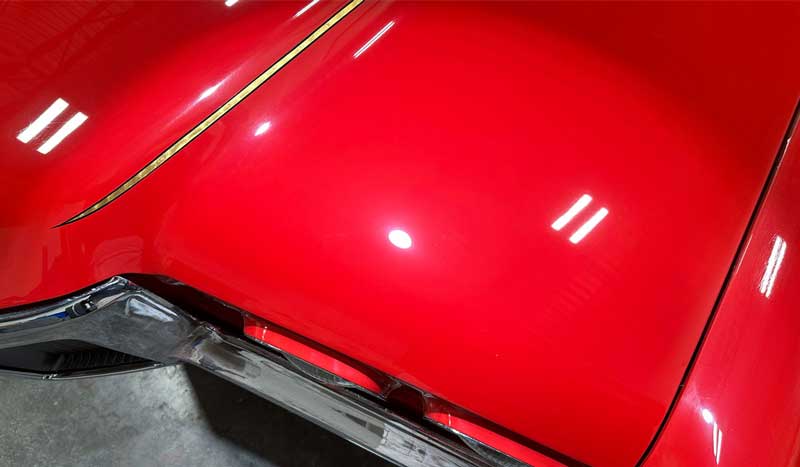
Here’s the results after the rotary step.
Here’s a close-up of the same section above. Here you can see the shallow, but very visible holograms.
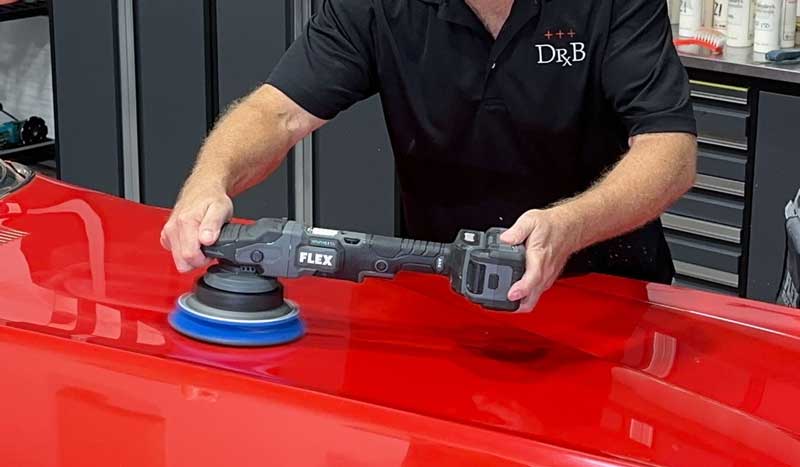
After doing a Test Spot, I found the fastest way to remove these out of this single stage paint, was to use the NSP 150 as my polish, (same product I cut the paint with), with a Buff and Shine Blueberry Heavy Polishing Pad on the new 24 Volt CBEAST.
Professional Technique Tip: The best way in my opinion and experience to use these FLEX cordless tools is to learn how to use the Speed Lock Button and after locking this button, move your hand to the back of the tool and support the tool body by holding the back of the battery.
Battery Stress Test: 21 Minutes Non-Stop Runtime
Just like all the battery testing I’ve done for FLEX over the years, to really get a good idea for how long the battery will last, I focus on buffing without turning the polisher off unless necessary. For example, I will turn the tool off in order to get some fresh product, but this takes SECONDS.
In the real world, most of you will buff a section and then turn the tool off and wipe-off the residue, get some fresh product, maybe answer your phone or get a drink of water. The longer you are NOT running the tool, the longer the battery life.
For me however, I’m TORTURE TESTING these tools and these batteries, so I try to run them SOLID, no stopping and then CLOCK how long the tool runs.

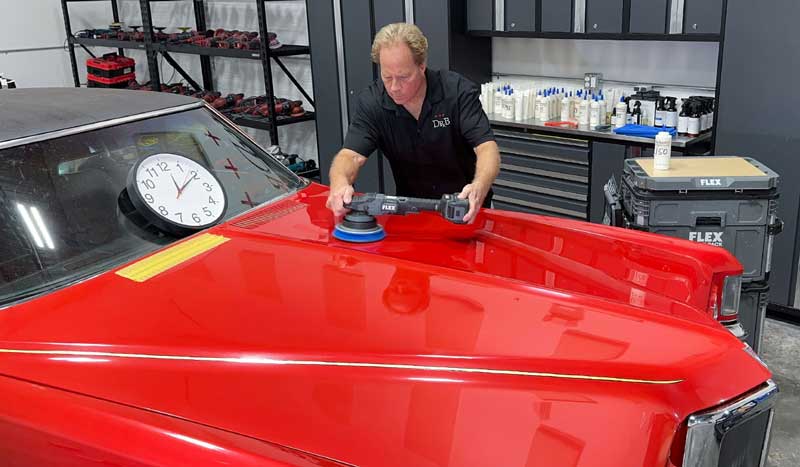
I polished out most of the hood of this Pontiac, removing the holograms using the new 24 Volt CBEAST and as you can see by the clock I have resting on a microfiber towel on the windshield, the battery lasted an easy 21 minutes.
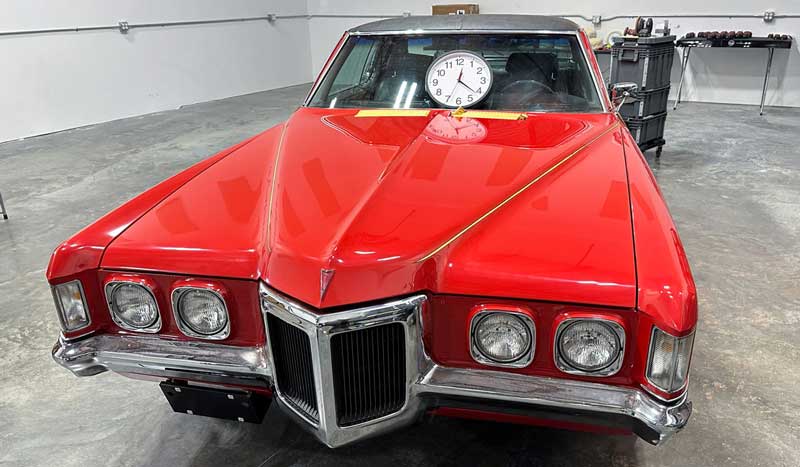
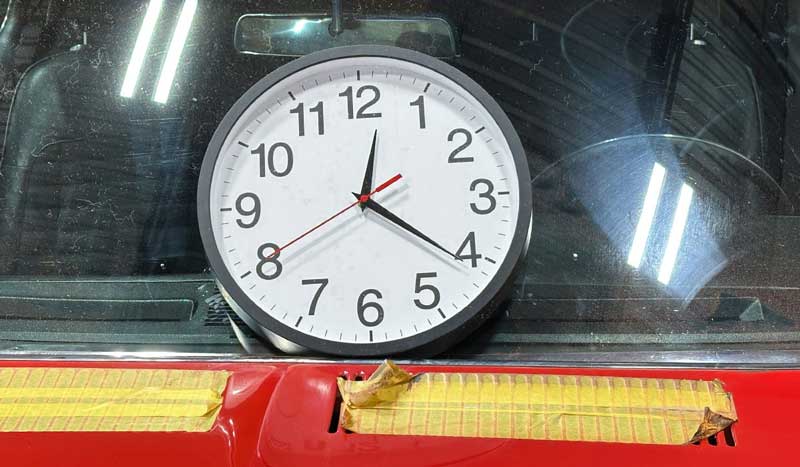
This is 21 minutes, non-stop while PUSHING HARD on the head of the polisher to ensure 100% defect removal. From experience, in the real-world, as you turn the polisher off in-between buffing sections, you will see 40 to 45 minutes of run time. And with 40 to 45 minutes of run time, if you placed your discharged battery into the battery charger immediately after removing the battery from the tool, then by the time you run the other battery down, the battery in the charger will be fully charged and ready to use.
Overall Impressions: Bigger Backing Plate, More Power and More Consistency
The first thing I noticed about the FX3331 gear-driven orbital is that there’s noticeably more power and more consistency throughout the battery’s run time. I will attribute this to the increase in voltage and the new lithium battery technology.
Major Benefit: Comes With 6” Backing Plate Installed!
I really appreciate that this latest version of the CBEAST comes from the factory with the larger, 6” backing plate. Gear-driven orbital polishers have a LOT of paint correction power with ZERO pad stalling like found with any brand of free spinning random orbital polisher. My point has always been,
Why not take advantage of the power?
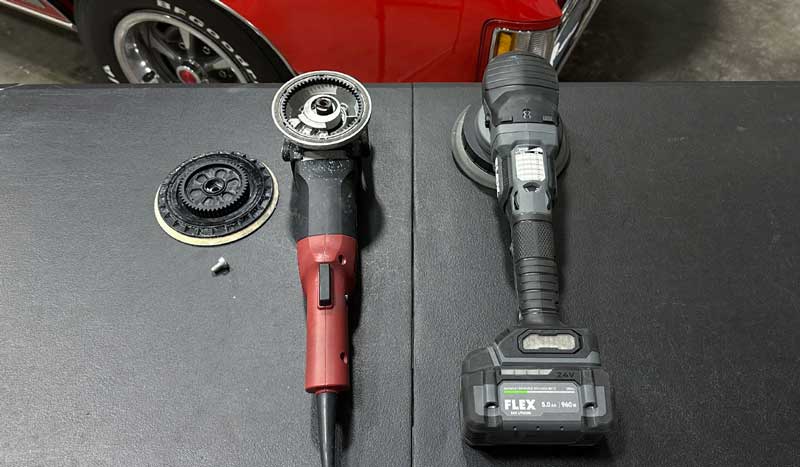
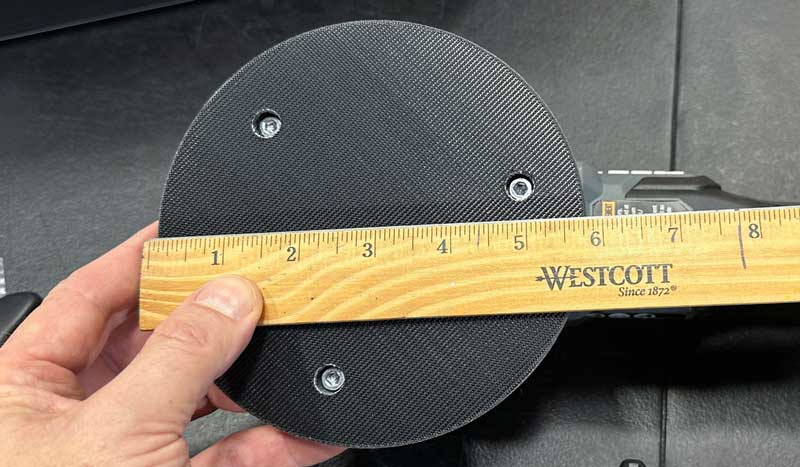
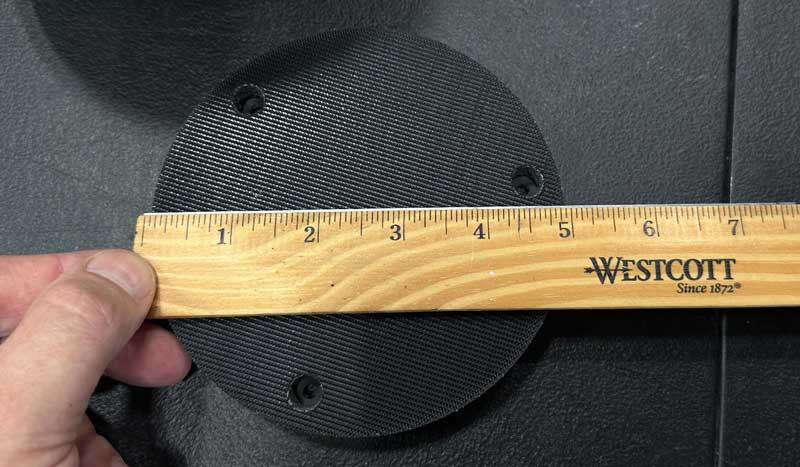
And the way you take advantage of all this power is by turning and churning larger pads versus smaller pads. Here’s a picture showing a 6” buffing pad next to a 5” buffing pad and the size or footprint difference is noticeable.
The larger, factory installed backing plate enables you to use larger pads right out of the box. And this is important because often when a person purchases a new polisher, they also invest a tidy sum of money into buffing pads for the new tool.
By starting people out with the larger backing plate, you enable these people to then invest their pad budget into the correct size pads from the get-go.
In the past, if a tool comes with a smaller, 5” backing plate, and the person buys matching pads, then one day they read one of my articles about this topic of larger backing plates and then buy the larger backing plate, (to take advantage of the power), they NOW have to re-purchase buffing pads to fit the larger backing plate.
So I’m very happy to see the new FLEX 24 Volt Cordless CBEAST comes from the factory with the larger backing plate option versus the smaller backing plate that comes with the original, maroon colored 18 volt CBEAST.
My Review: Recommended for Light Swirls, Scratches & Hologram Removal
If I have an easy job — that means the car has only shallow swirls, scratches or holograms — then I’ll use the CBEAST. This also means I’ve done a TEST SPOT and found the paint corrects easily, meaning the paint hardness is in the medium to soft range but definitely not what I would consider hard paint.
While there are other gear-driven polishers that could certainly get the job done, the pleasure of not hassling with a power cord cannot be understated. I love the freedom of no cord.
Unfortunately I don’t get to use the CBEAST as often as I’d like. Alas – most of the cars I detail are severely neglected with lots of swirls, scratches, water spots and oxidation, and I find rotary tools like the Flex FX1131 to be better suited for heavy defects. Tool choice for me is about the condition of the paint and the speed in which I want to plow through the job.
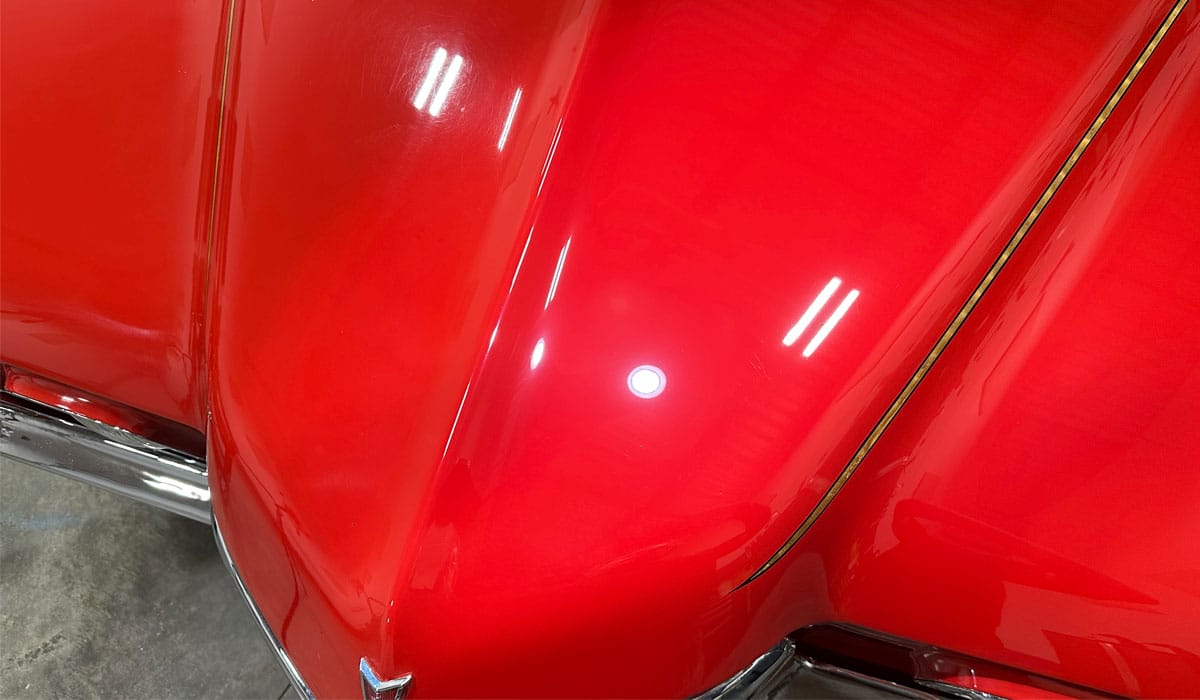
Before (Results After Rotary Polisher)
After (Results After Gear-Driven Polisher)

Battery Charger Stress Test
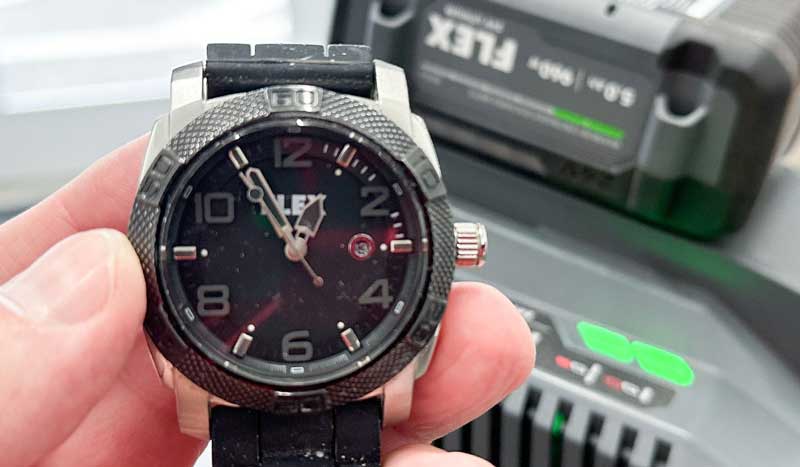
I ran the battery all the way down to empty charge, and then repeated the charging process documenting the time needed to bring a fully drained battery back to full charge. According to my trusty, dusty FLEX wrist watch, it took approximately 55 minutes.
The 160 Watt battery charger that comes in the box is fine for enthusiast detailers, but if you are a professional, or a do-it-yourselfer that prefers to have your batteries recharged faster, then spring for the 560 Watt Charger and cut the charging time in half.
My Personal Offer to Help
I’ve been answering car detailing questions professionally since 2002 and moving forward, if after reading this article you have any questions about polishing and waxing, or how to use an AIO, my contact information is below, reach out to me, I’m always happy to help.
Would You Like to Learn How to Machine Polish Like a Pro?
Would you like to take your detailing skills to a higher level? Do you find you learn better by doing versus sitting in a chair looking at a PowerPoint presentation about car detailing?
Here at Dr. Beasley’s O.R., (Operating Room), in sunny Stuart, Florida, we teach the most hands-on car and boat detailing classes on planet Earth. And we prove it too. You can find write-ups on the Dr. Beasley’s Blog that photo-documents just how hands-on our classes are plus you’ll see the kinds of cars and boats you’ll be training on.
Click the link below to find the dates, locations, topics, and prices for all upcoming detailing classes.
Upcoming Detailing Classes – Prices – Info – Topics – Locations
And if you ever have any questions, always feel free to reach out to me personally via text, phone call or email.
I hope to see you in a future detailing class!
Sincerely,
Mike Phillips
Chief Education Officer for Dr. Beasley’s
Mike@drbeasleys.com
760-515-0444
Questions? Comments?
Email Us