


Last Updated November 27, 2024

Read My Other 24V Flex Polisher Reviews!
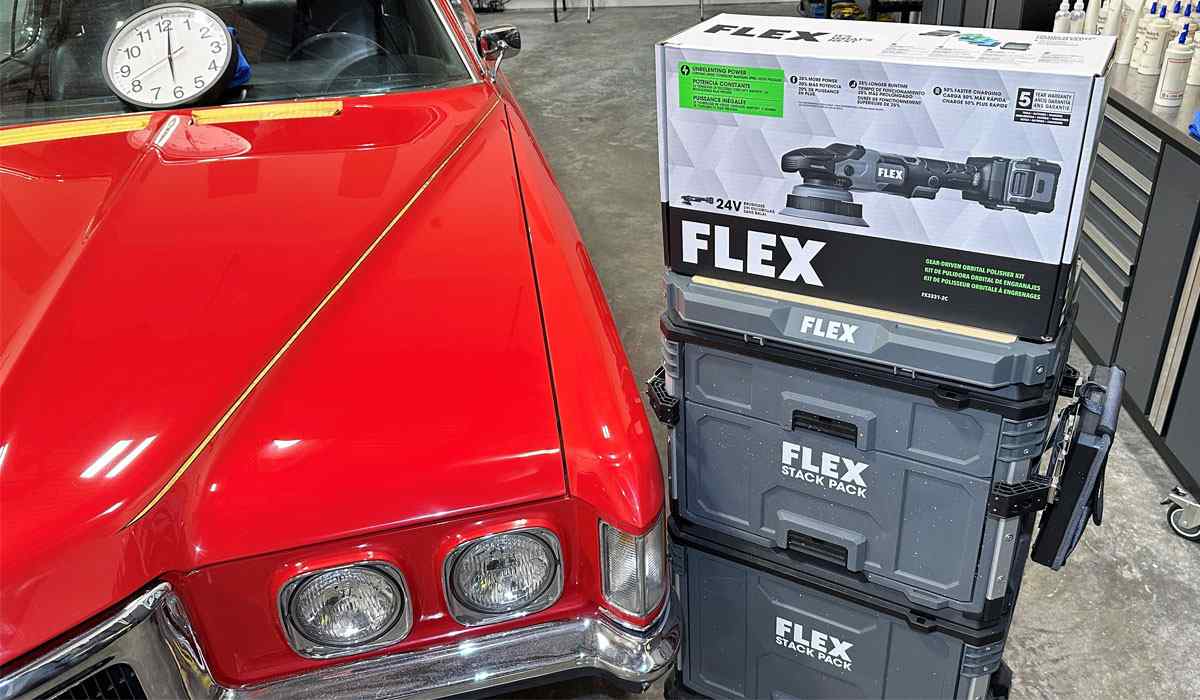
This is the one of three reviews for the new 24 volt FLEX polishers. Below are the links to the other two tool reviews. As I worked through using these tools, making videos, and writing these reviews, you can watch the transformation and extreme makeover to the 1970 Pontiac Grand Prix Model SJ as I used all three tools to torture test the tools and the lithium battery technology.
- Review: FLEX FX3331 24 Volt Cordless 8mm Gear-driven Orbital Polisher aka CBEAST
- Review: FLEX FX3311 24 Volt Cordless Random Orbital Polisher aka FINISHER
I’ve been a frequent user of Flex polishers and even sanders for years. I’ve even written and published physical guidebooks to their polishers that I believe you can still buy online. Because of that, Flex often sends me new tools to test.
Back in July of 2017, FLEX sent me a prototype for what would become the FLEX PE 150 18.0-EC, their first cordless rotary polisher. Later that year, FLEX revealed their new cordless rotary polisher at the annual SEMA show that takes place the first week of November.

As I write this, the date is October 24th, 2024, and I’ve had ZERO problems and ZERO failures with this prototype tool despite using it constantly. The thing that makes this more interesting is normally, a prototype tool is exactly that – a prototype or experimental tool. I’ve literally buffed out hundreds of cars and dozens of boats using the prototype polisher and I’ve been nothing short of impressed.
Flex recently sent me their new line of 24V cordless polishers to test, including a new cordless rotary polisher called the FX3311. Based on how well the 18V PE 150 served me, this newest version has big shoes to fill, and time will tell if it’s better than the original. But here are my initial thoughts after a couple weeks testing these new tools.
What Comes With the Flex FX3311 24V Cordless Rotary Polisher?
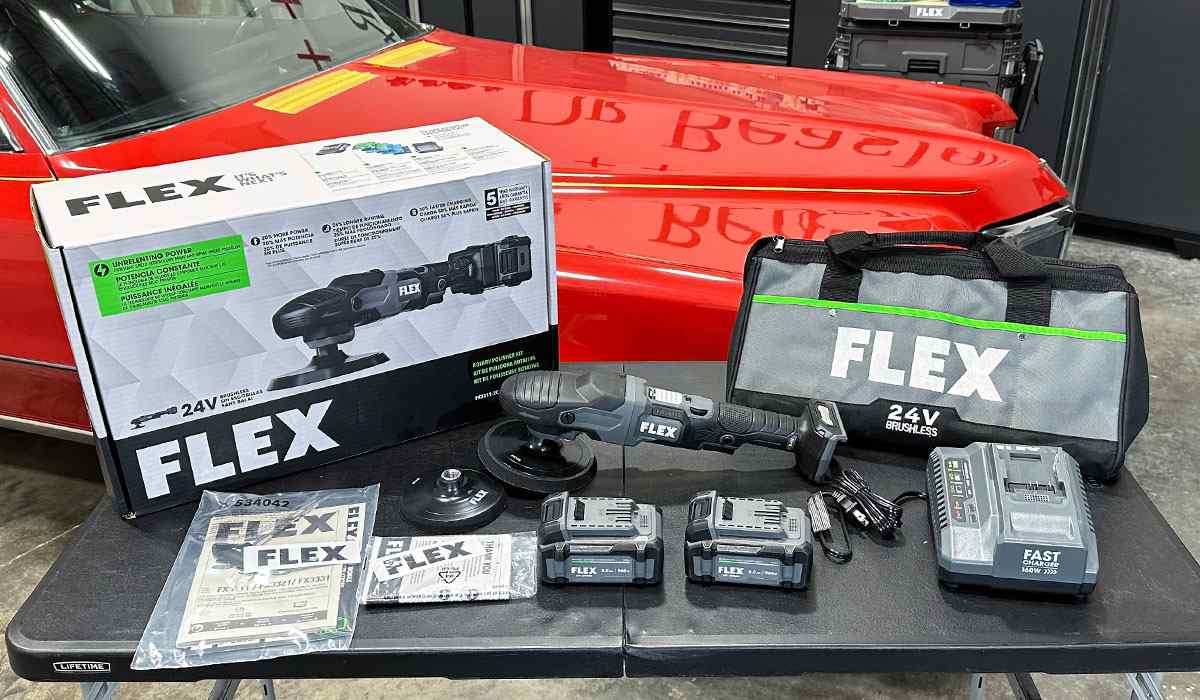
Let’s take a look at what comes in the box.
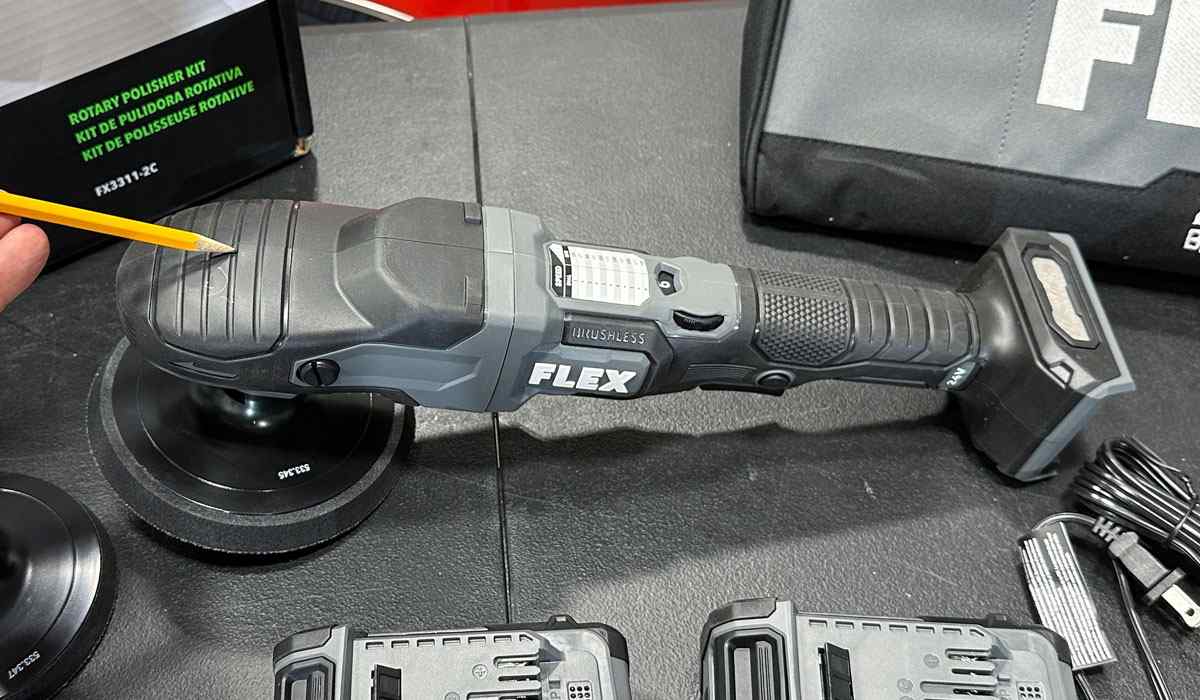
- 24V FLEX Rotary Polisher (Individual Part No. FX3311) (Kit Part No. FX3311-2C)
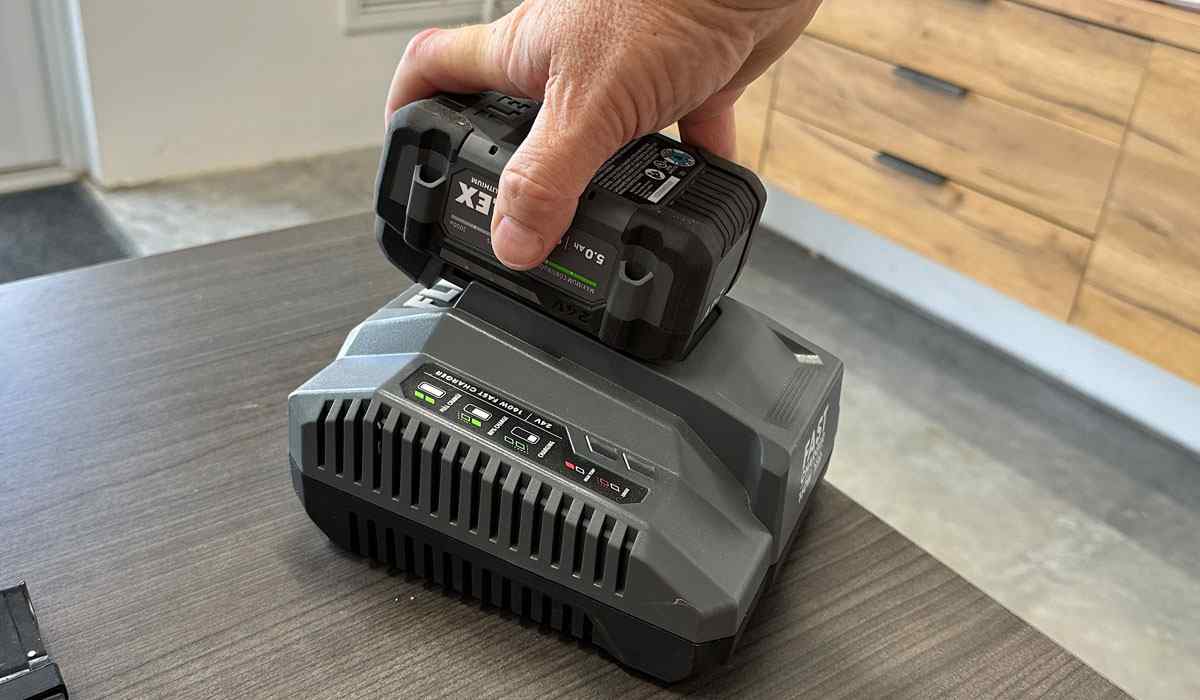
- 2 each 5 Amp – 960 Watt Lithium Cylindrical Cell Batteries
- 1 each 160 Watt Battery Charger
- 1 each 6” Rotary Backing Plate
- 1 each 5” Rotary Backing Plate
- FLEX storage bag
- Owner’s tool manual
- Owner’s charger manual
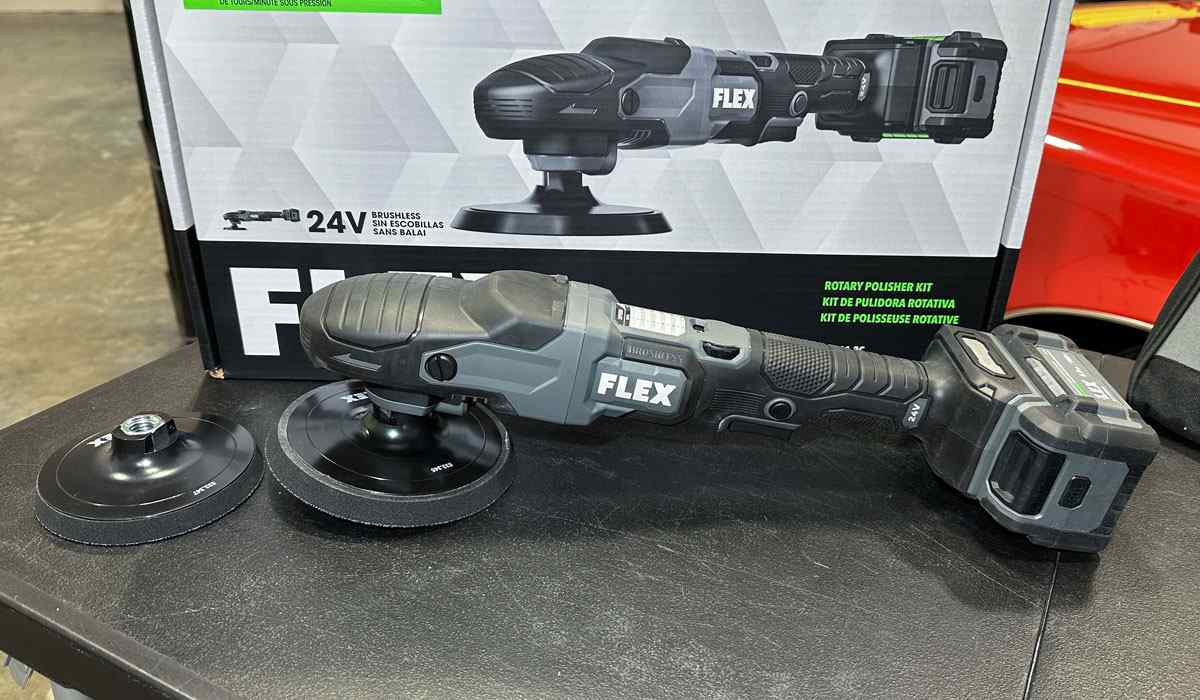
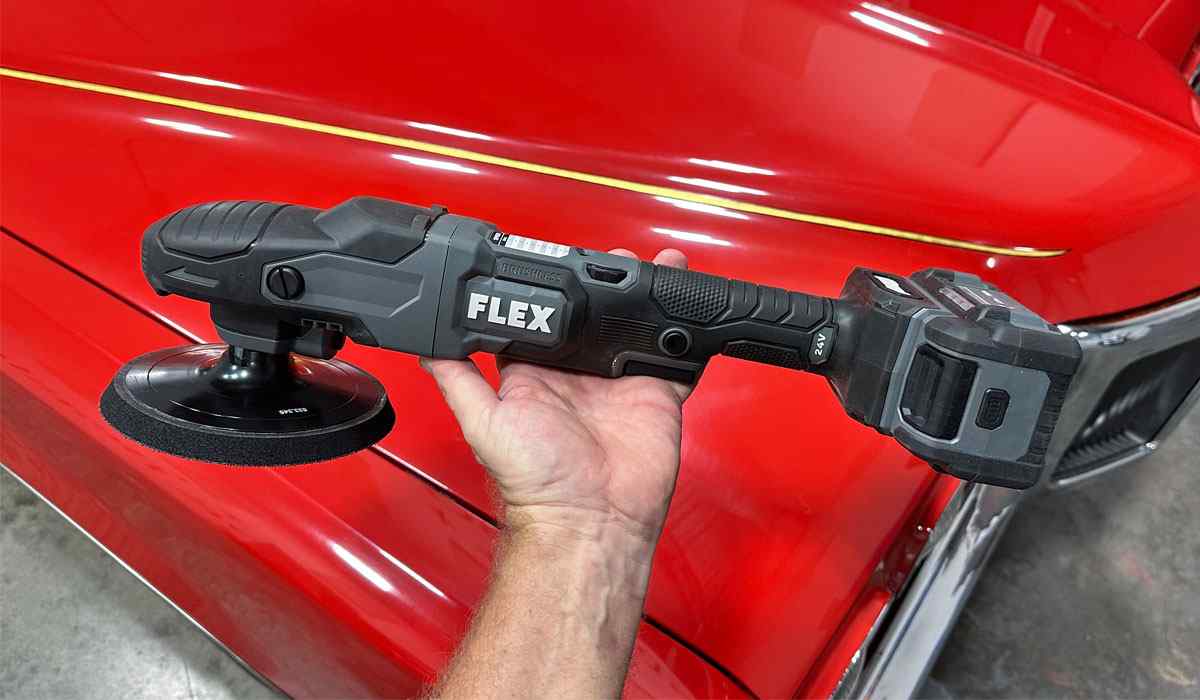
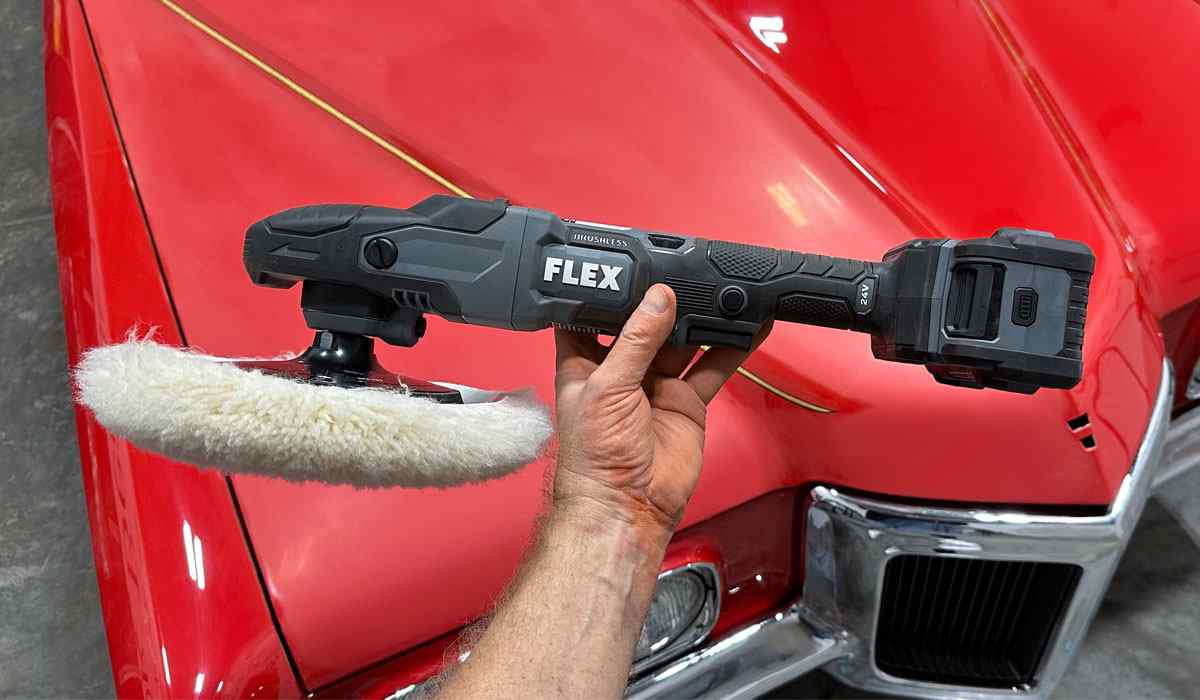
Here’s the rotary polisher with the 6” backing plate attached and a battery installed.
| Flex FX3311 24V Cordless Rotary Polisher Tech Specs | |
| No-load speed | 550 – 1,800 RPM |
| Brushless | Yes |
| Max. polishing pad diameter | 6 in |
| Max. back-up pad diameter | 6 in |
| Tool Weight | 4.6 lbs |
| Tool Height | 5.4 in |
| Tool Length | 16.5 in |
| Tool Width | 3.8 in |
Examining the Flex FX3311 24V Cordless Rotary Polisher
Now let’s take a look at the tool as I explain the various exterior features.
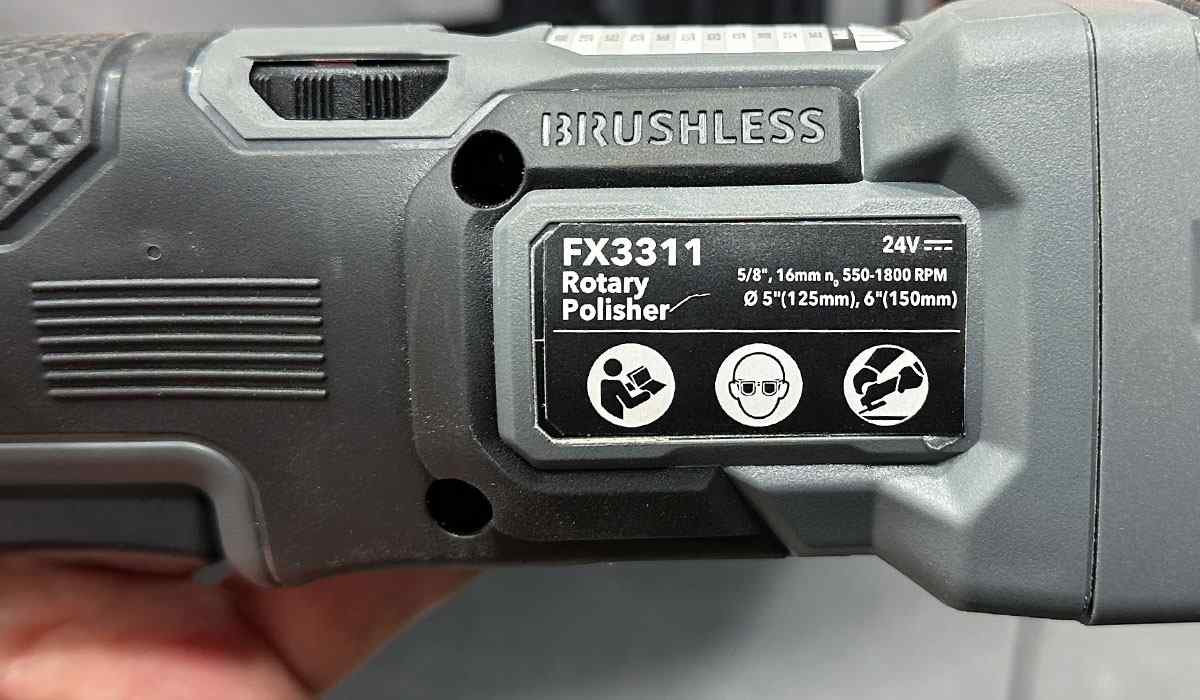
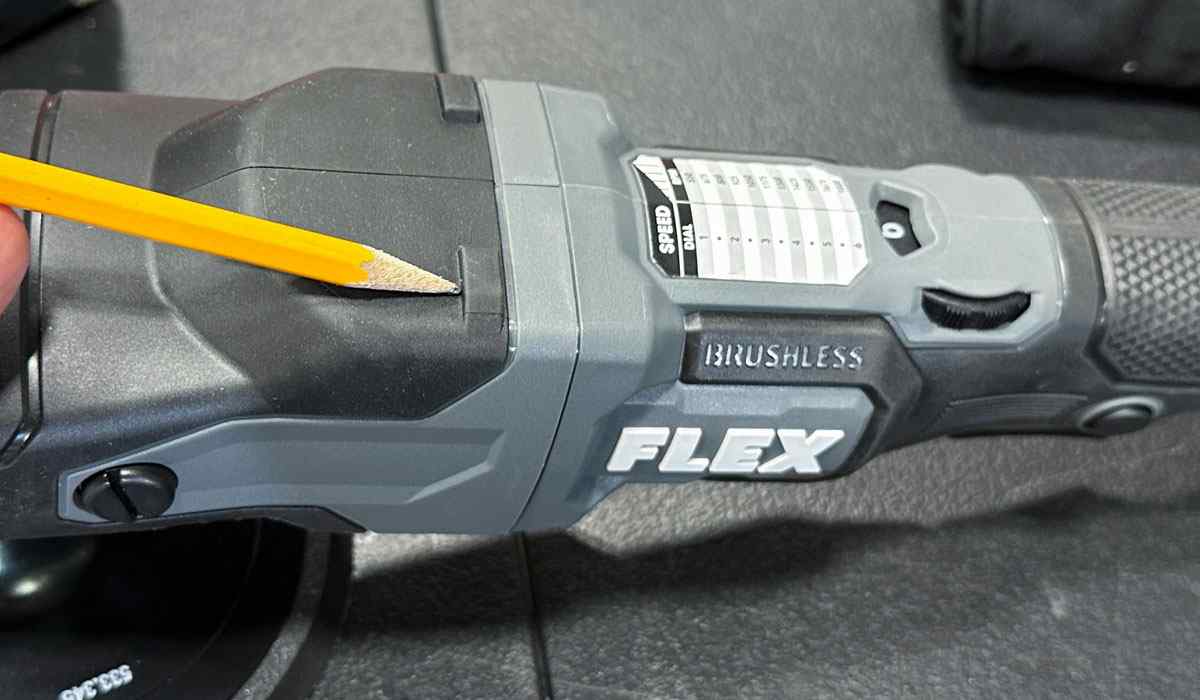
Part Number: First, just so everyone is clear, here’s the part number for this tool, it’s FX3311.
Ergo Rubber Overmold: The head of the polisher has an ergonomic design overmold for easy gripping.
Tool Rest: The middle of the tool body has built in flat tool rests. These come in handy because when not in use, you can lay it upside down and it remains stable instead of rolling over onto its side.
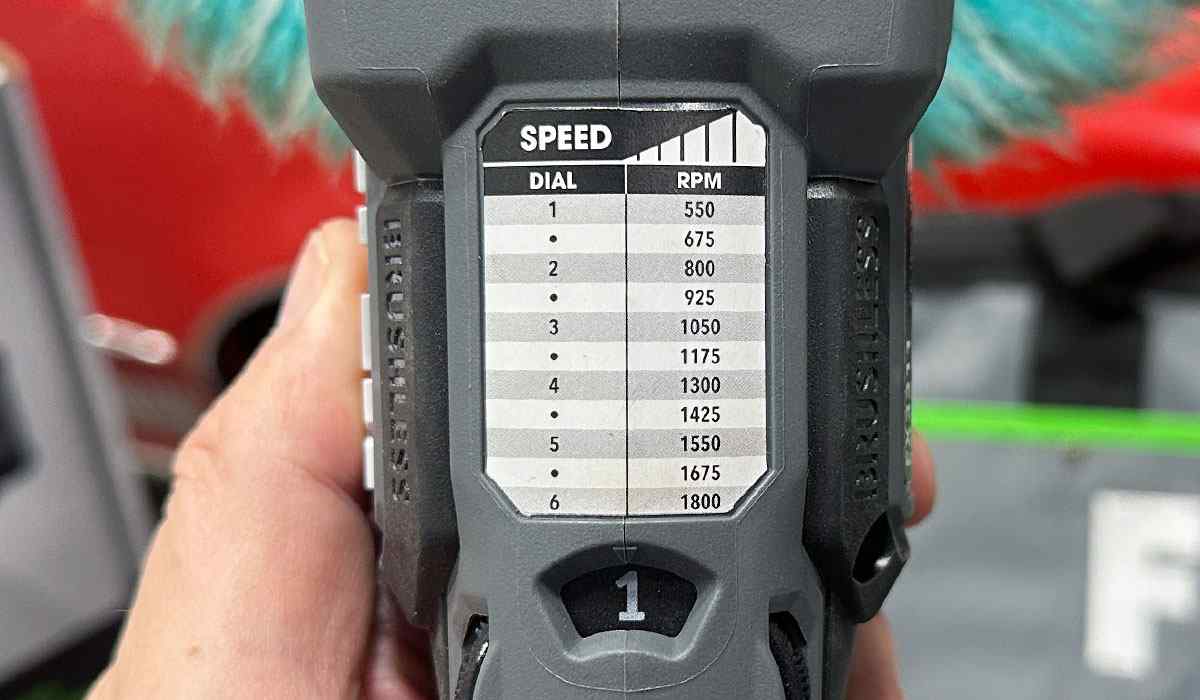
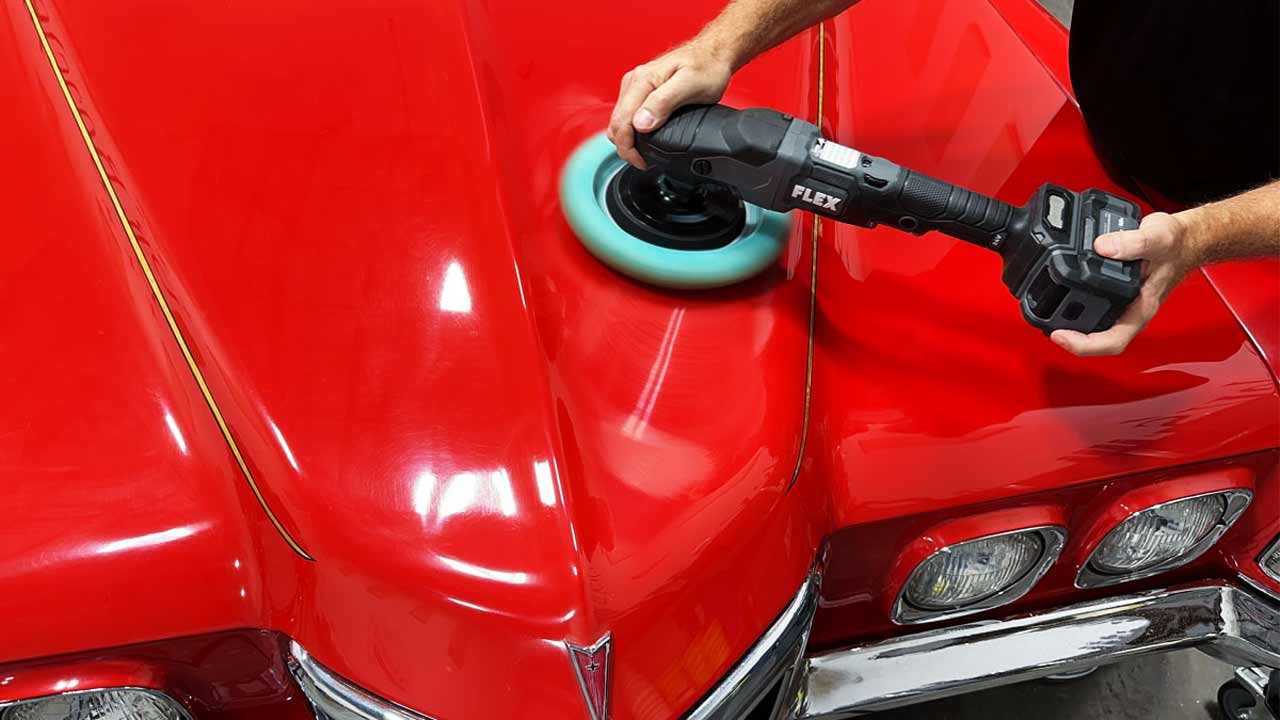
Speed Guide Above Speed Dial: This FLEX 24 Volt Cordless Rotary Polisher has a total of 11 dedicated speed settings from a low of 550 RPMs when set to the 1-speed setting and all the way up to 1800 RPMS when set to the 6-speed setting. For what it’s worth, I normally run my rotary polishers around the 1100 RPM range when cutting clearcoat paints and all the way up to the highest speed setting when cutting marine gelcoat finishes.
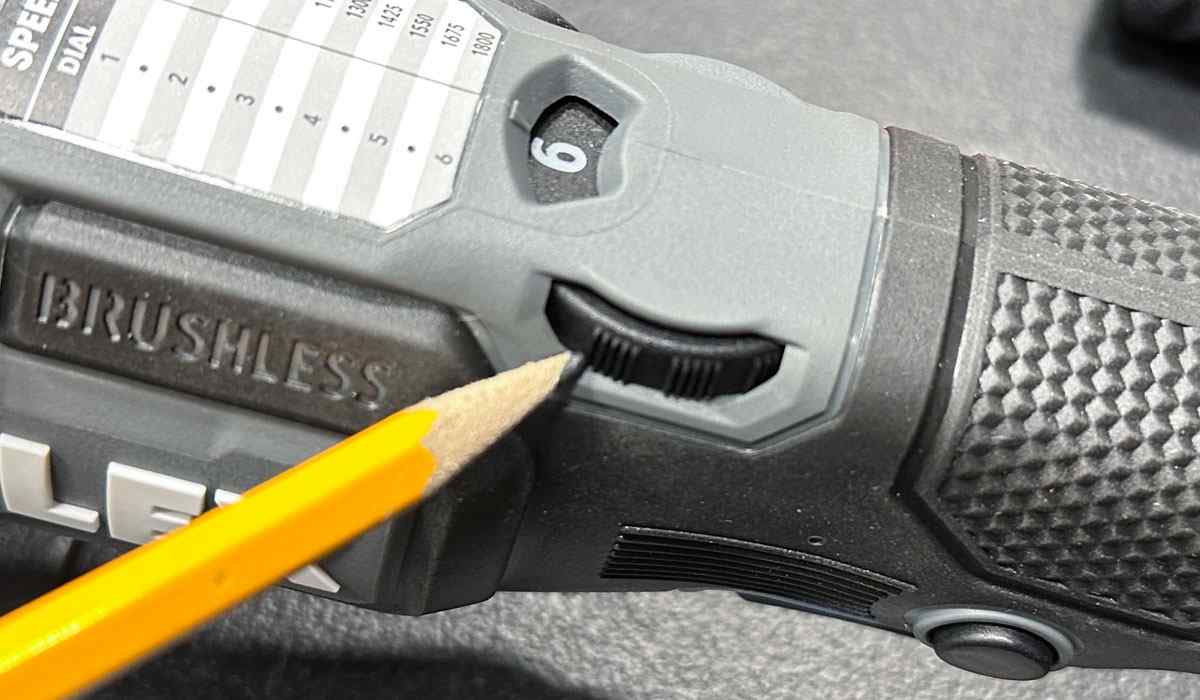
Ambidextrous Speed Dial and Easy-to-Read Speed Indicator: This is a nice feature because you can adjust the speed on-the-fly from either side of the tool. Large speed indicator to let you quickly see the current speed setting.
Large Variable Speed Trigger: Instead of a simple on/off speed trigger, all FLEX polishers come with an easy-start, variable speed trigger to give you precise control over power to the buffing pad.
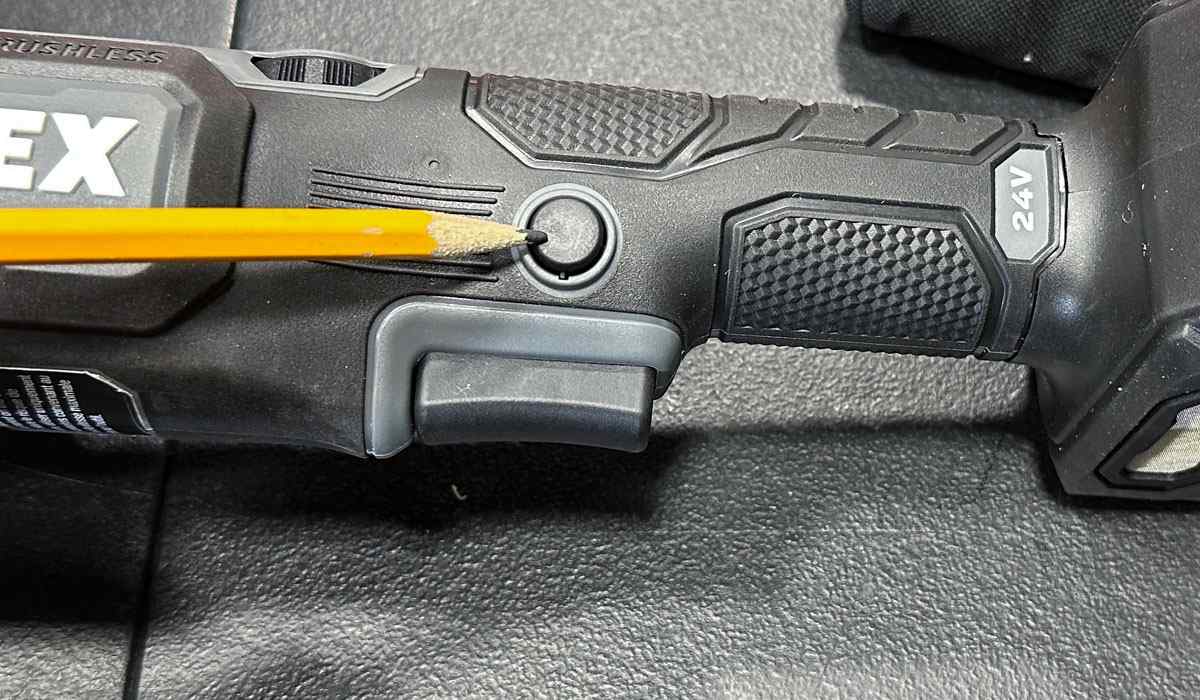
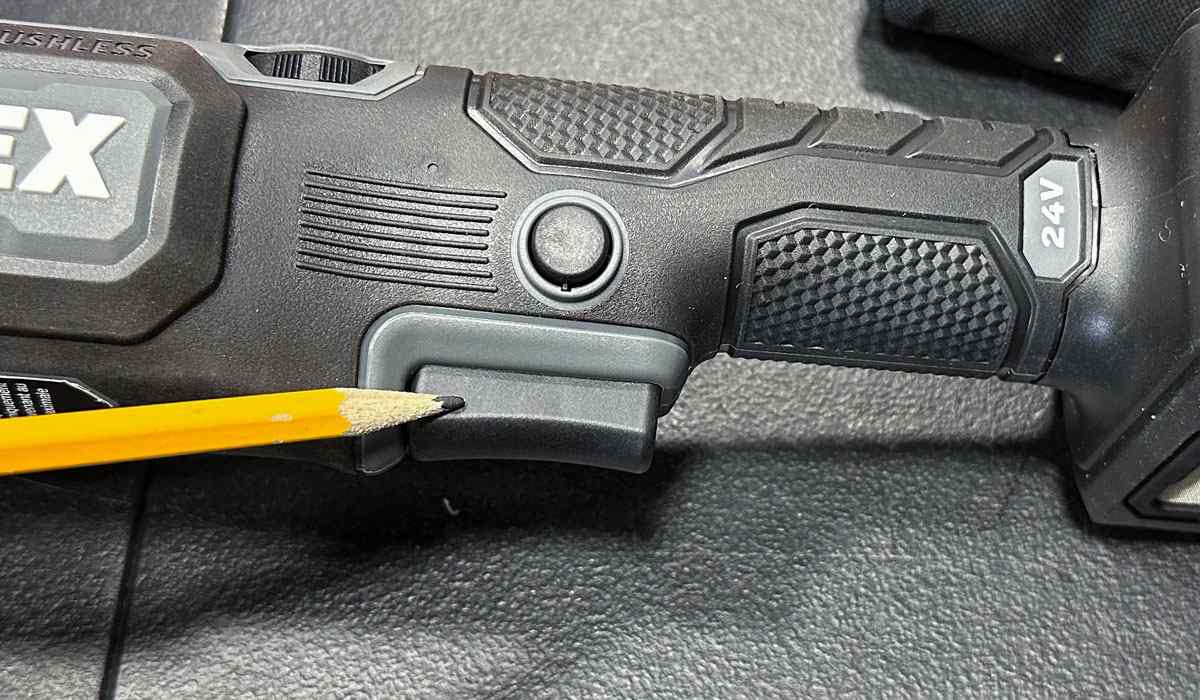
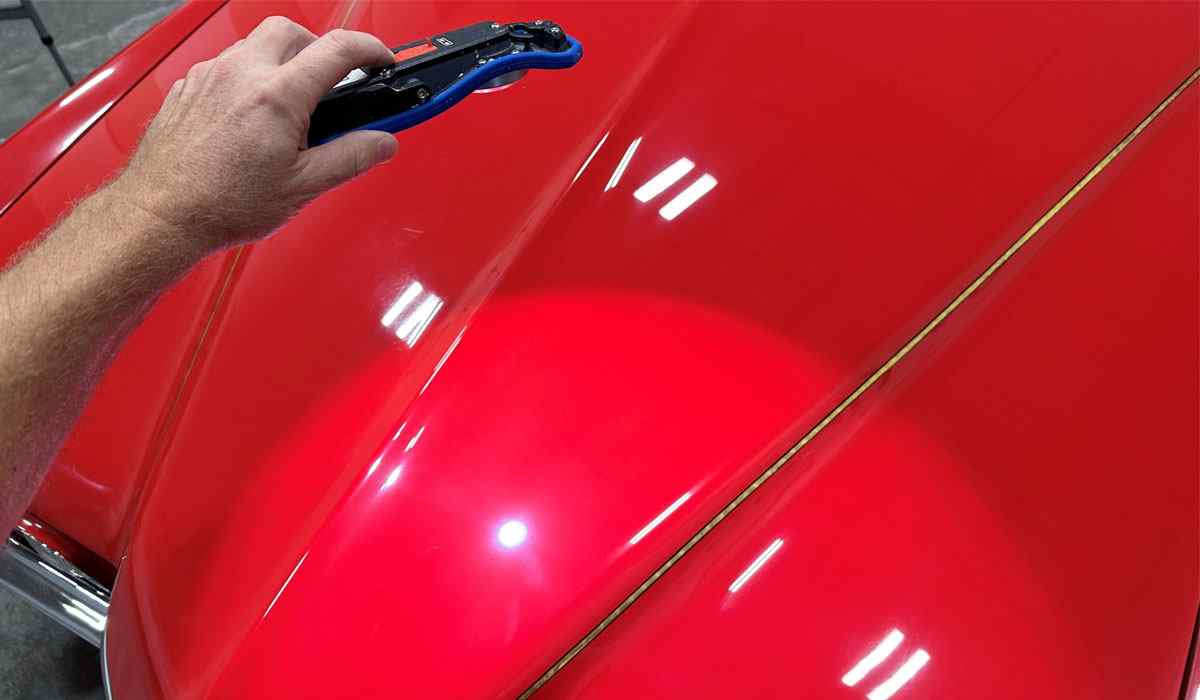
Speed Power Lock Button: This simple feature enables you to lock in the selected speed, so you don’t have to hold the trigger in the on-position the entire time you’re using the tool. This is IMPORTANT to learn how to use the Speed Power Lock Button because once you lock in the speed, you can then move your hand to the back of the tool to hold onto the back of the battery.
By using this hand position you can more easily support the weight of the battery plus with this extreme gripping station, you have more leverage and thus more control over the tool.
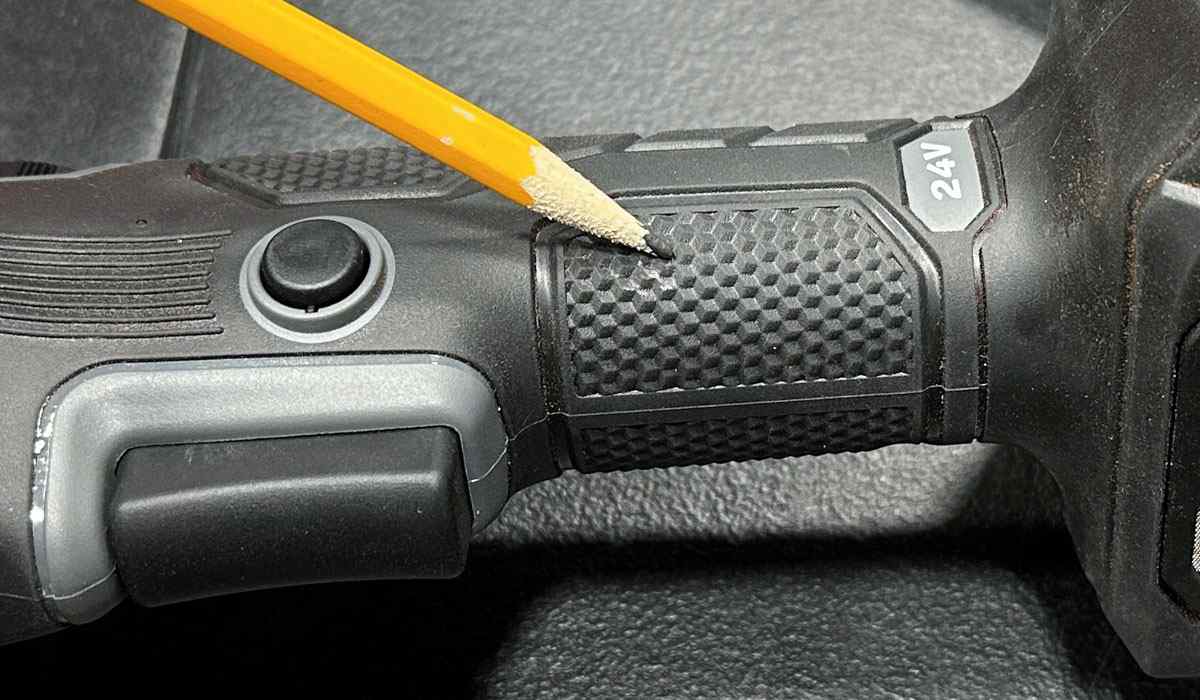
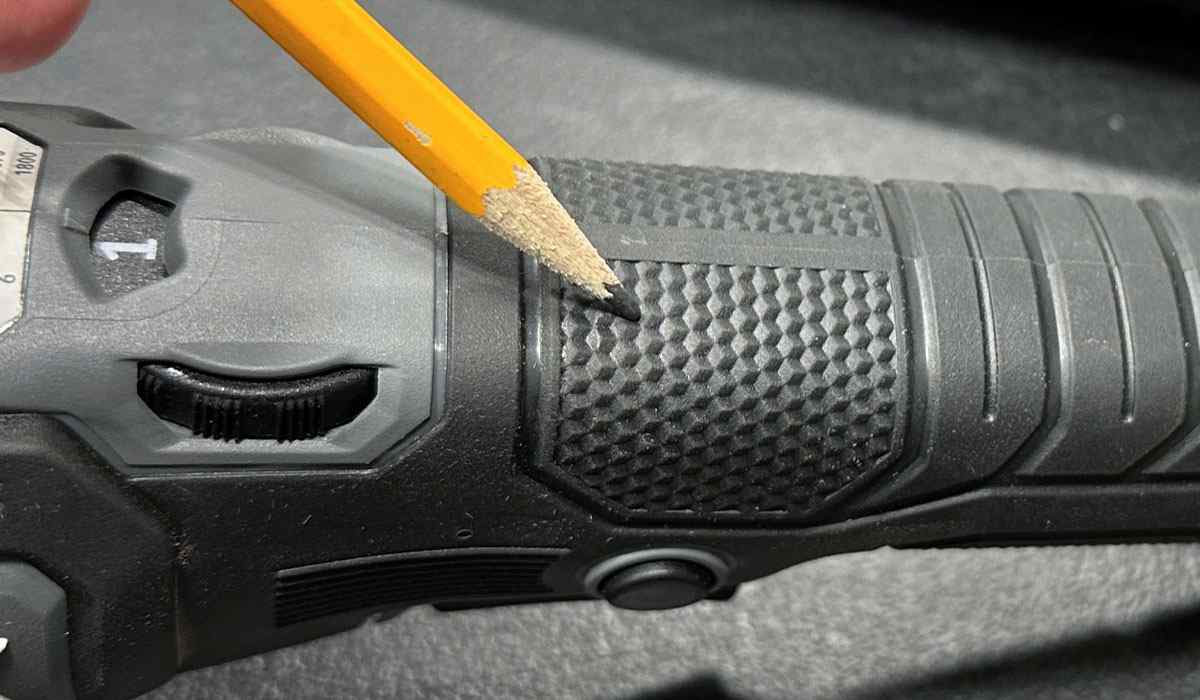
Textured Handle for Slip-Free Grip: Molded into the tool body are textured panels to make gripping the tool easier.
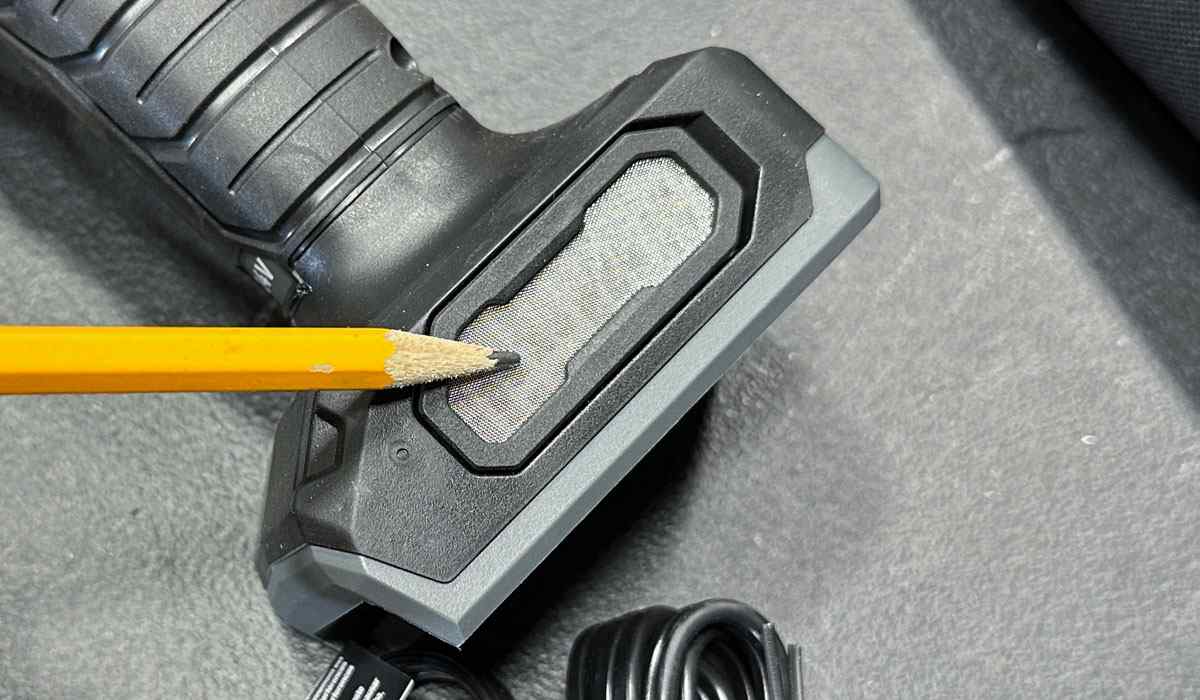
Stainless Steel Wire Mesh Fresh Air Intakes: These are important as the tool pulls air through the battery to cool it, and then through the tool body to help keep run temperatures down. The tiny mesh design allows for plenty of air movement while preventing dirt and dust from getting into the tool.
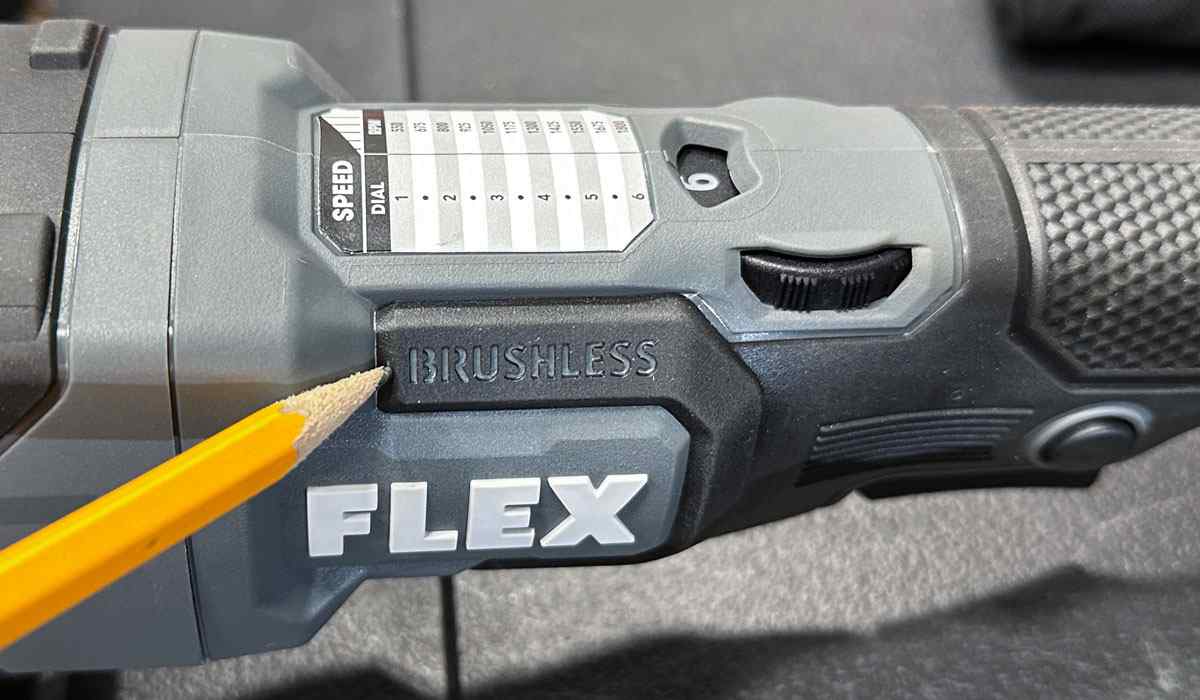
Brushless Electric Motor Technology: One of the more significant advantages of brushless DC motors is that they are between 85% and 90% more efficient than brushed motors which only have an 80% efficiency rate. For the most part, this high efficiency comes from the reduction of sound and heat, which in turn minimizes loss of power.
A brushed motor requires direct contact between the brushes and the commutator whereas brushless motors have fewer contact parts, for example there is no friction between the brushes and commutator, therefore require less maintenance through wear and tear.
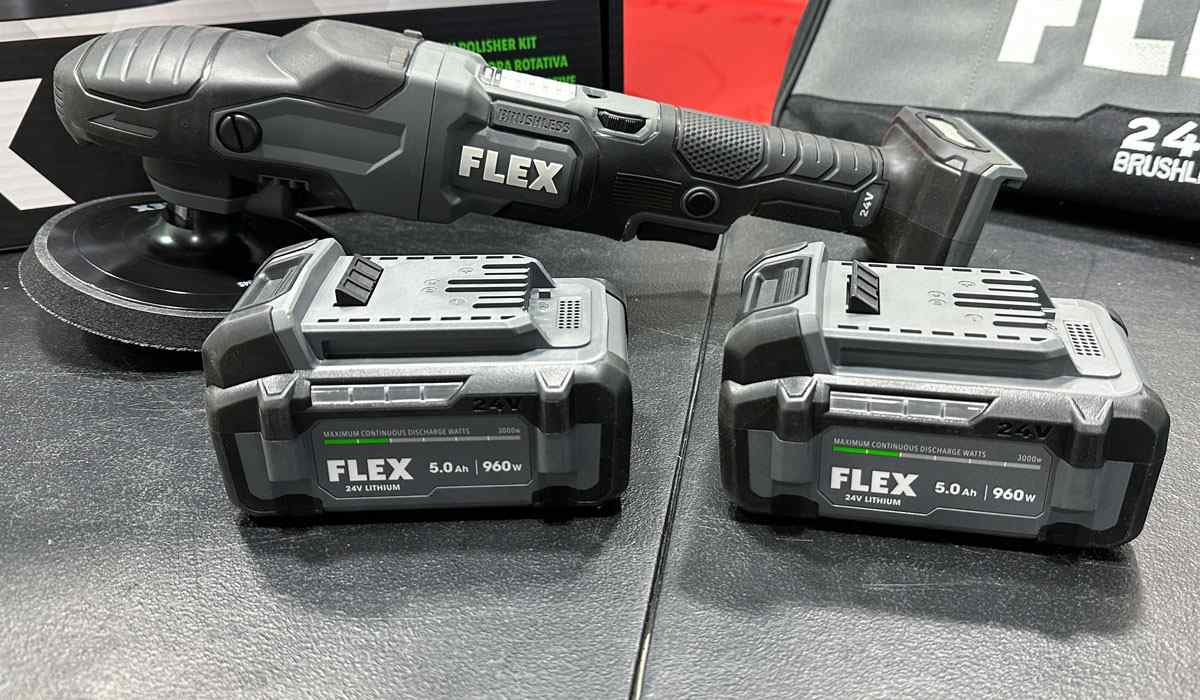
2 Each 5 AMP Batteries: The kit form comes with 2 each 5 Amp – 960 Watt Lithium Cylindrical Cell Batteries

1 each 160 Watt Battery Charger: Increased wattage in base charger speeds up charge times significantly over previous iterations.
2 Backing Plates: This is a nice touch, with a 6” and a 5” backing plate, you now have a lot of different options for pad sizes you can run on this tool.
Just to note, the real diameter for a backing plate, (any brand), is always a tick undersize than the advertised diameter and this is because in order to center a buffing pad on a backing plate, the backing plate needs to be a tick smaller than the velcro attachment material on the back of the backing plate so you can accurately see how to center the pad.
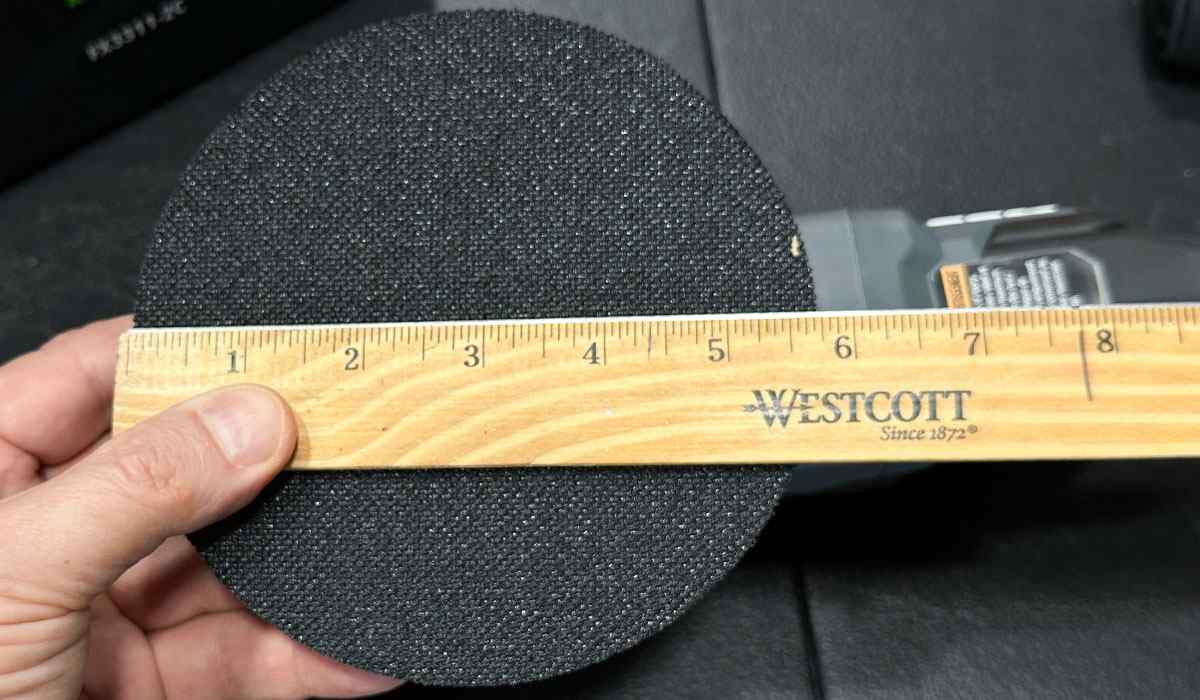
The 6” backing plate is approximately 5 ¾” in diameter.
The 5” backing plate is approximately 4 ¾” in diameter.
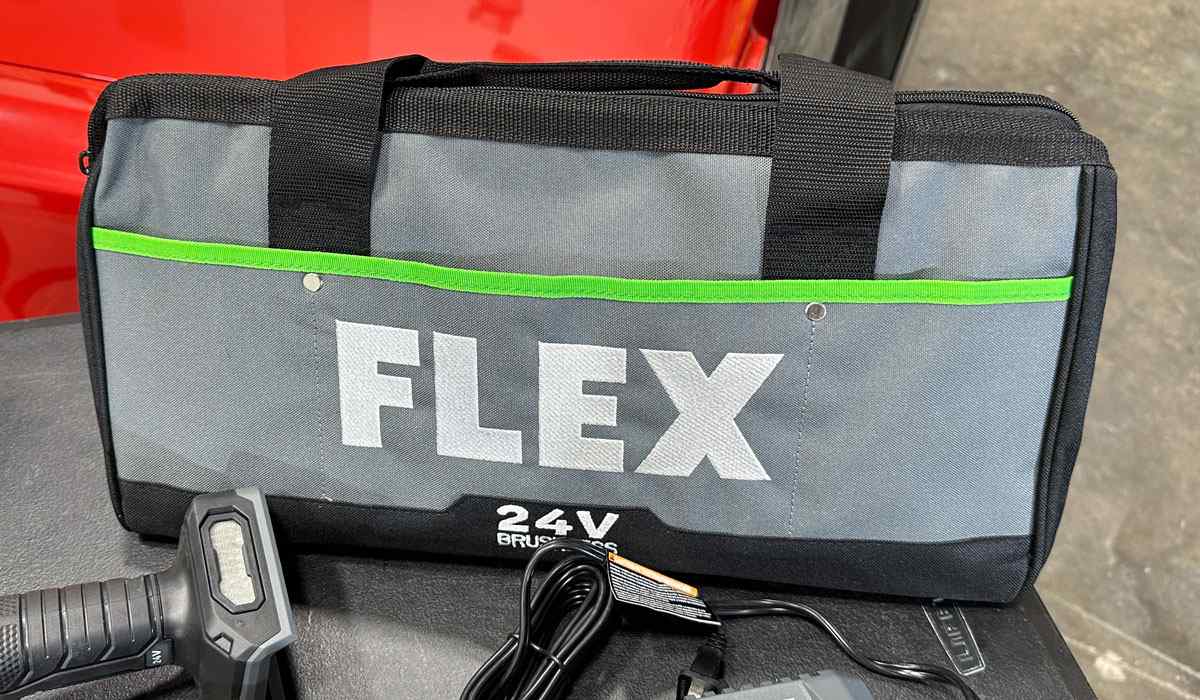
Storage Bag: Polisher comes with a durable carrying case that can also fit the batteries and battery charger.
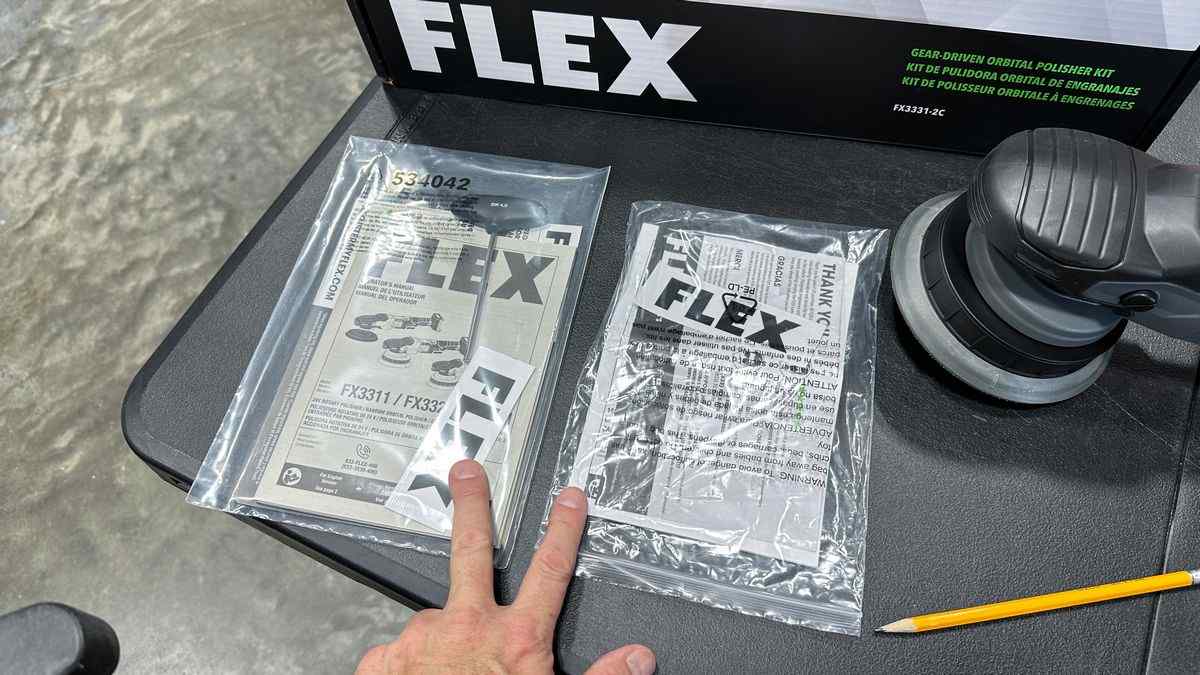
Owner’s Manuals: There are two included owners operating manuals included in the box. One for the polisher and one for the charger.
Flex FX3311 24V Cordless Rotary Polisher Review
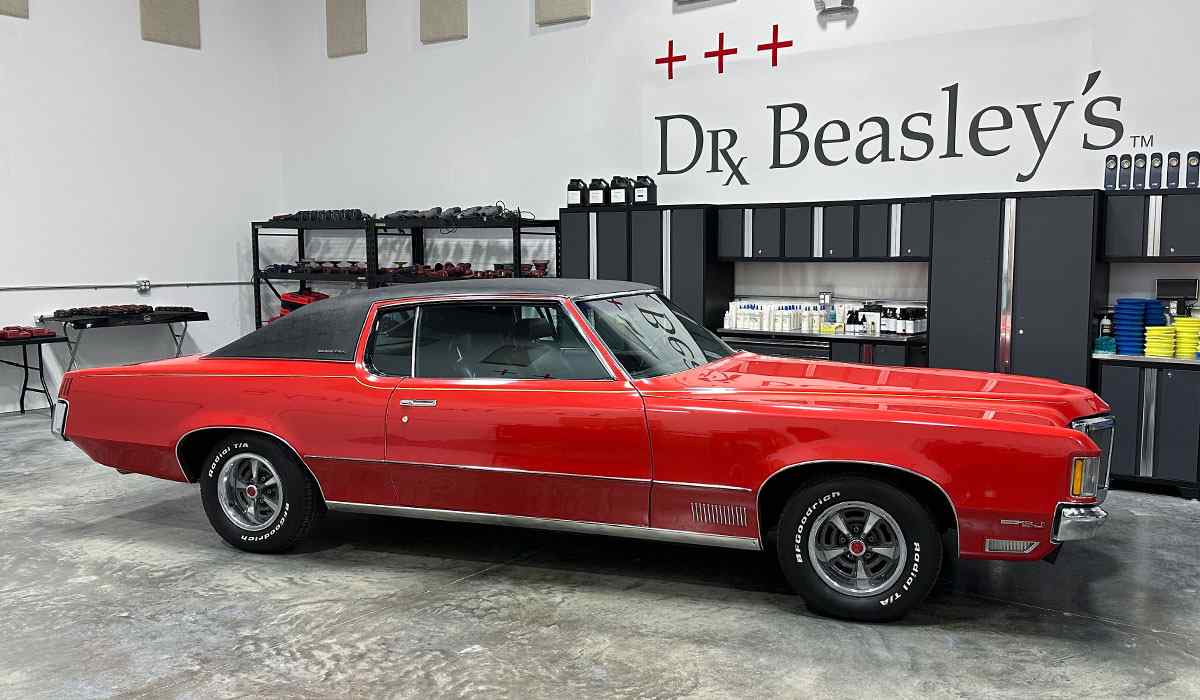
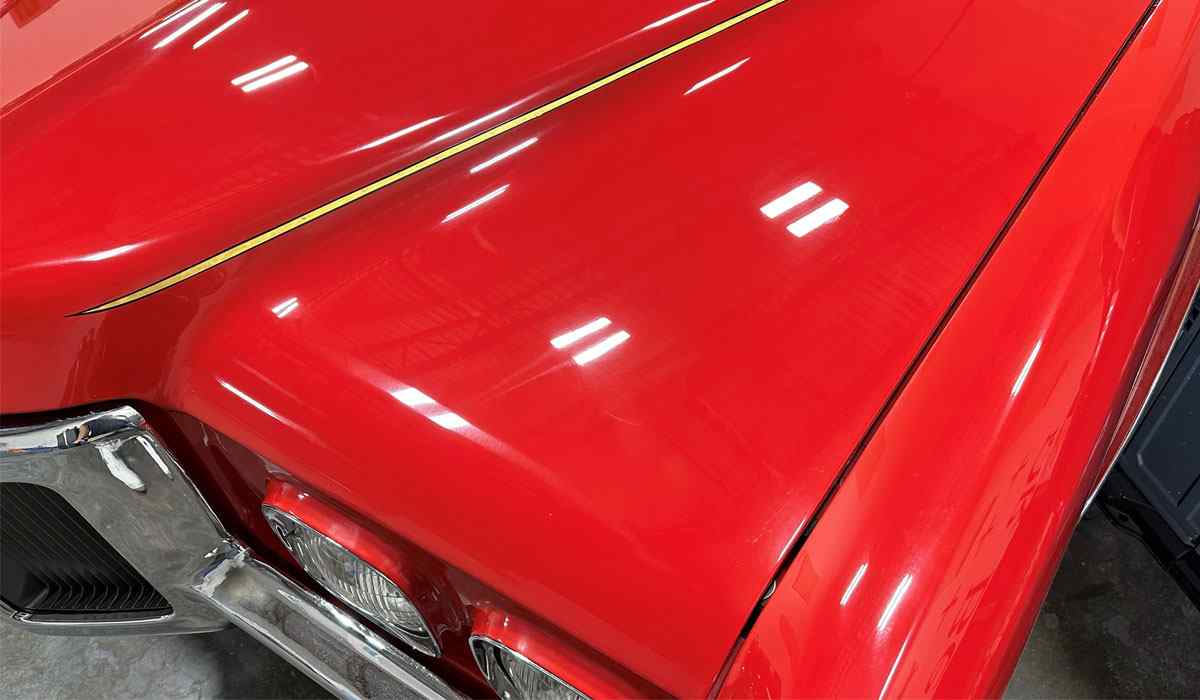
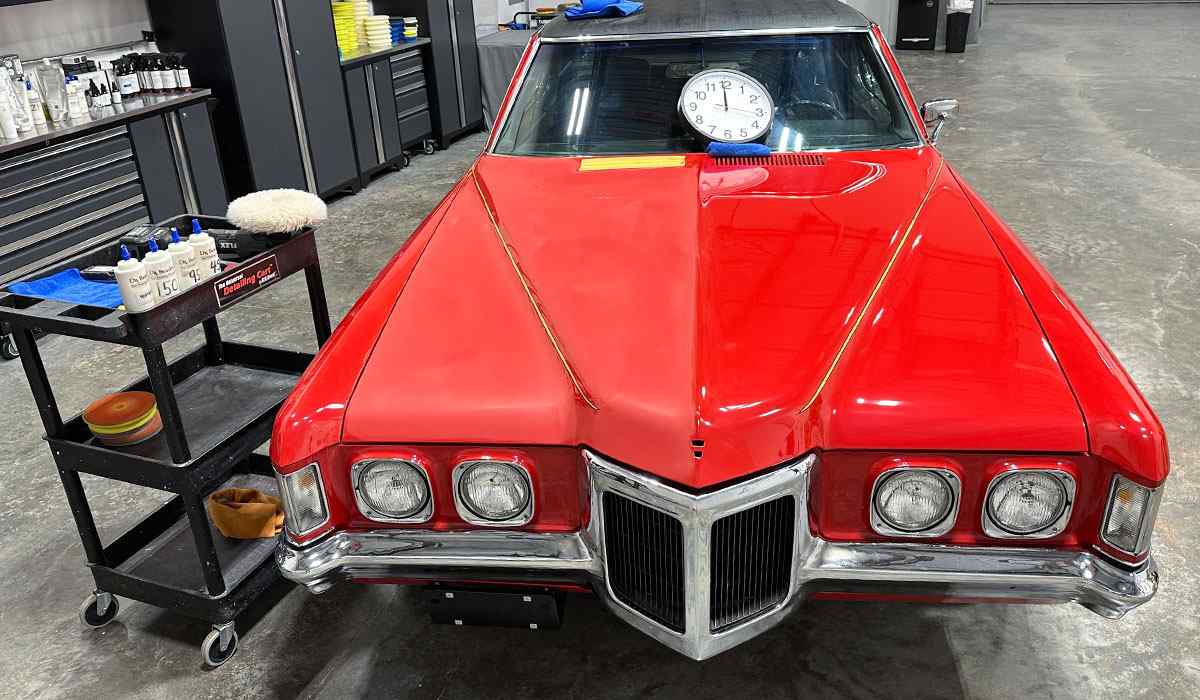
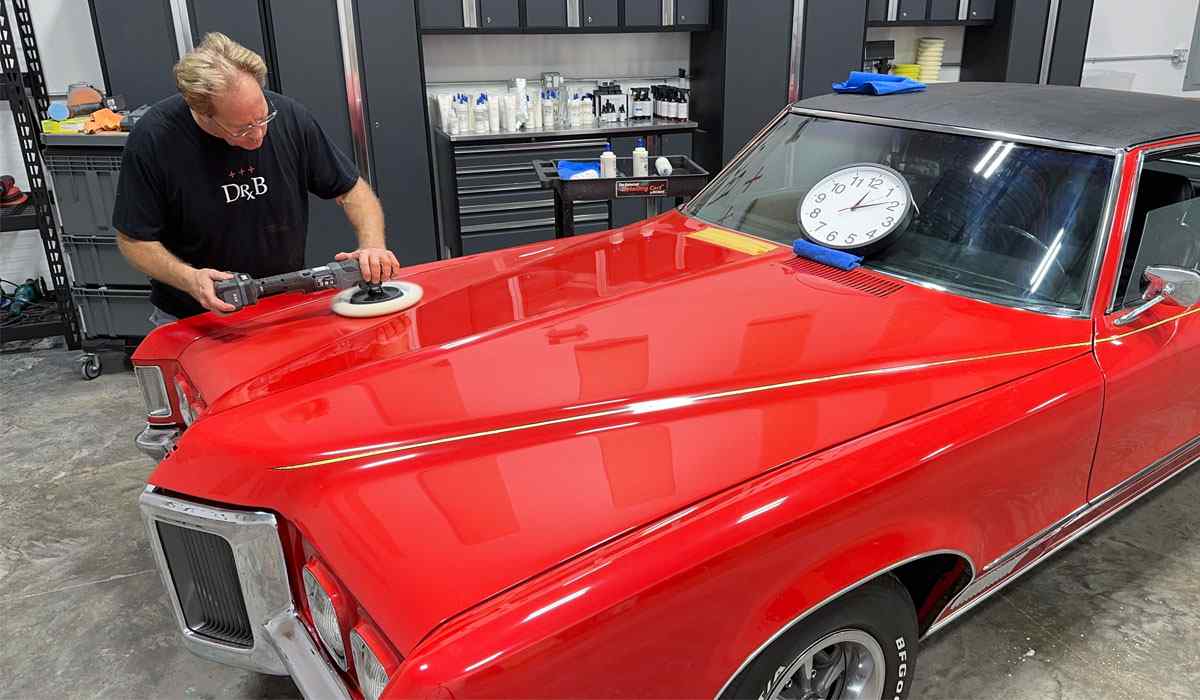
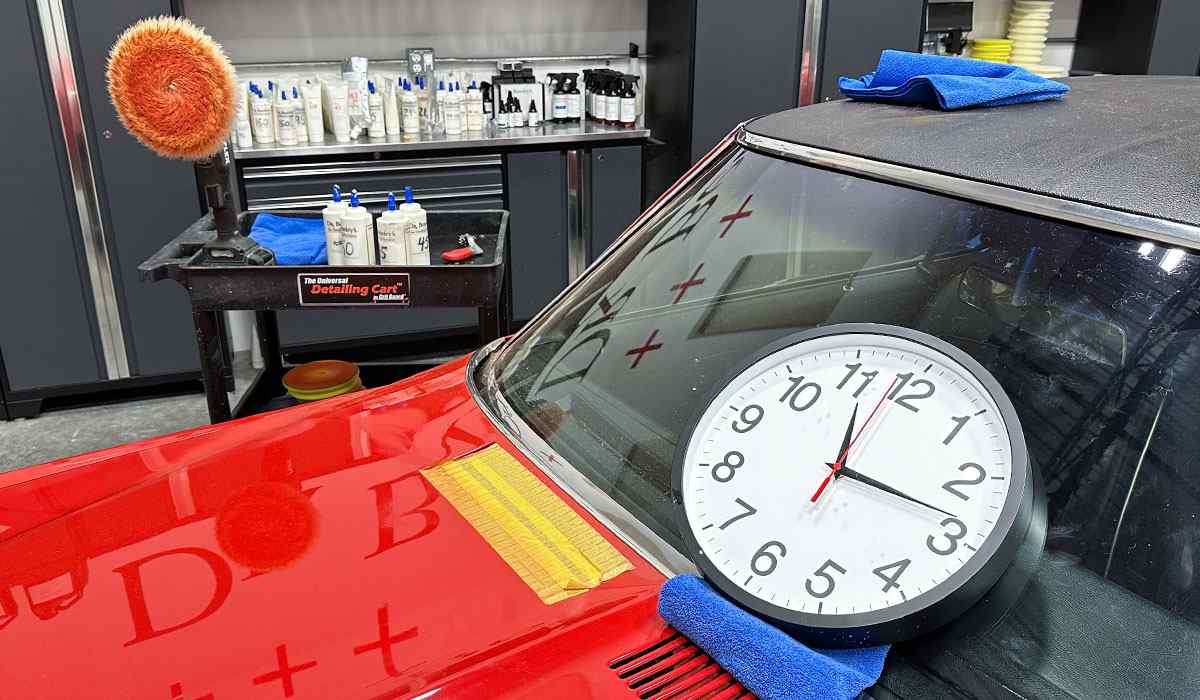
Test Vehicle: 1970 Pontiac Grand Prix Model SJ — Custom Single Stage Paintwork
In order to really put these new tools to the test and also test the battery runtime and battery recharge time, I needed a car that was in dire need of paint correction.
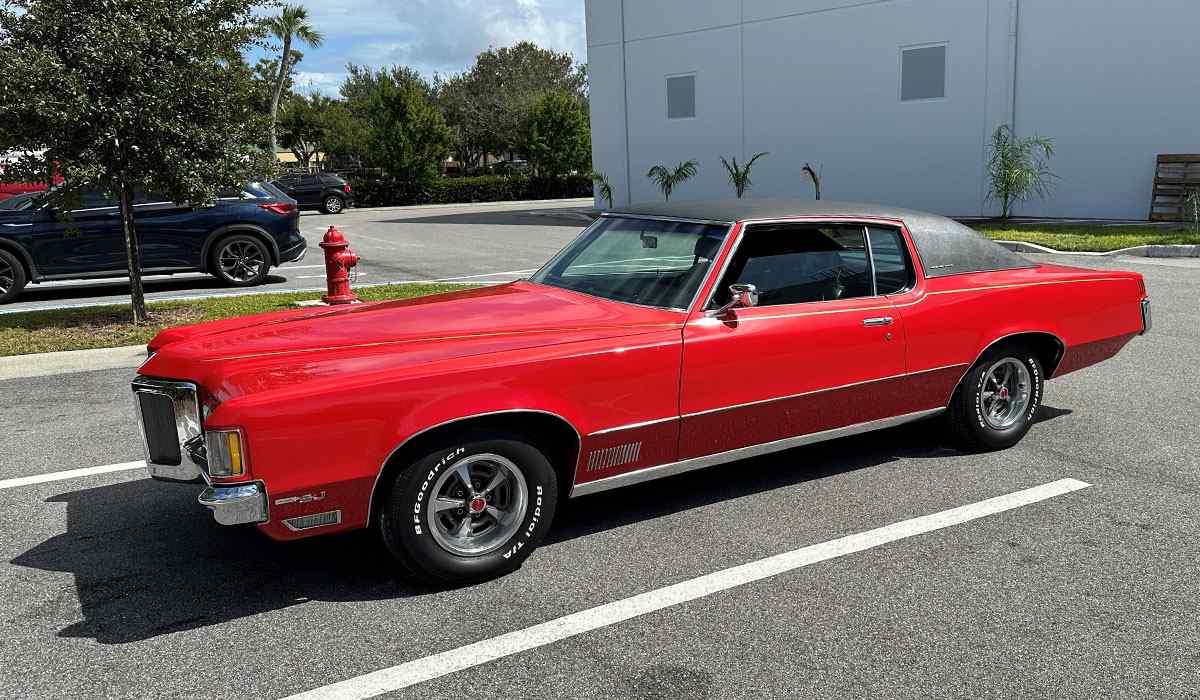
This 1970 Pontiac Grand Prix Model SJ, was recently purchased by my long-time friend Mike and after it was unloaded from the car hauler, the first thing he did was bring it by for me to take a look at the paint and determine if it can be fixed or if it will need to be repainted.
Defects For Removal: Holograms & Swirls
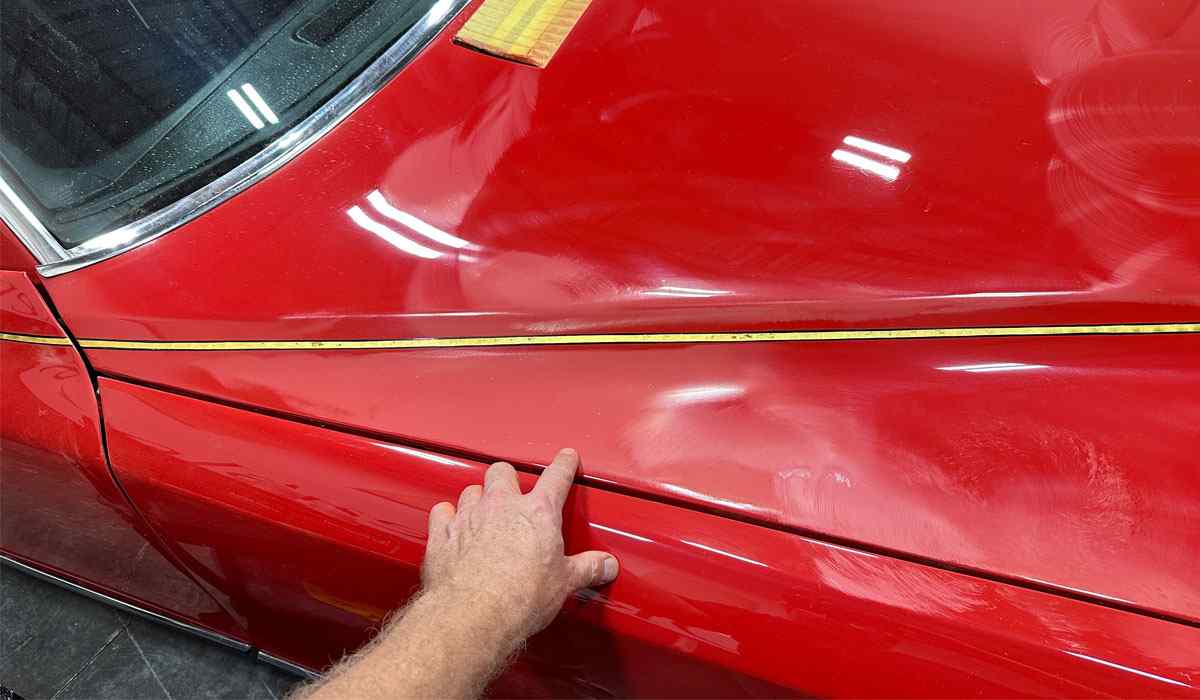
Here’s some pictures of the car while parked in bright, overhead sunlight and as you can see, someone buffed out the paint using a wool pad on a rotary polisher and what I believe was a “Caveman Compound”, AKA “Rocks-in-a-Bottle” AKA low quality abrasives.
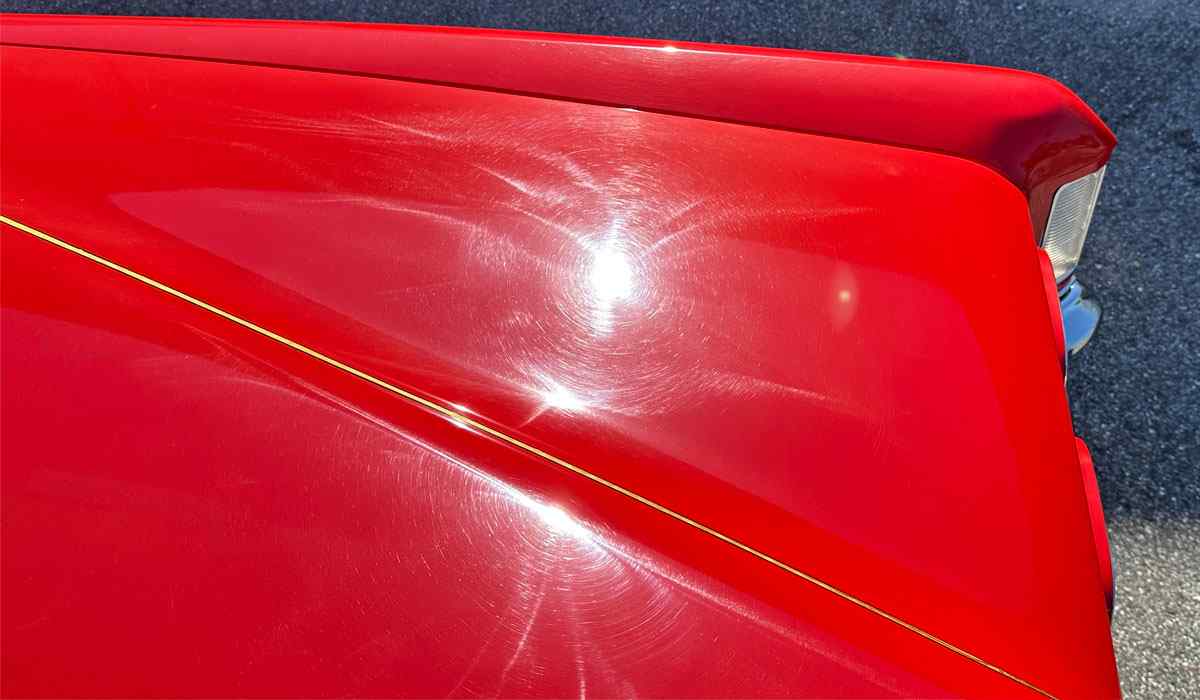
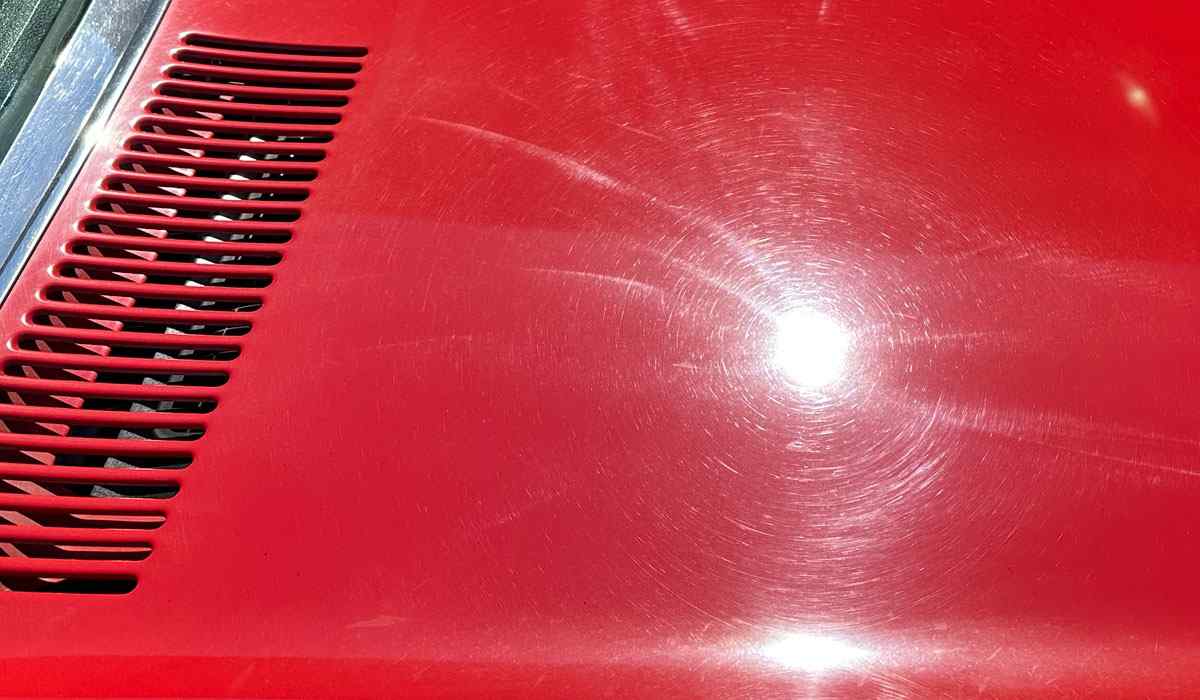
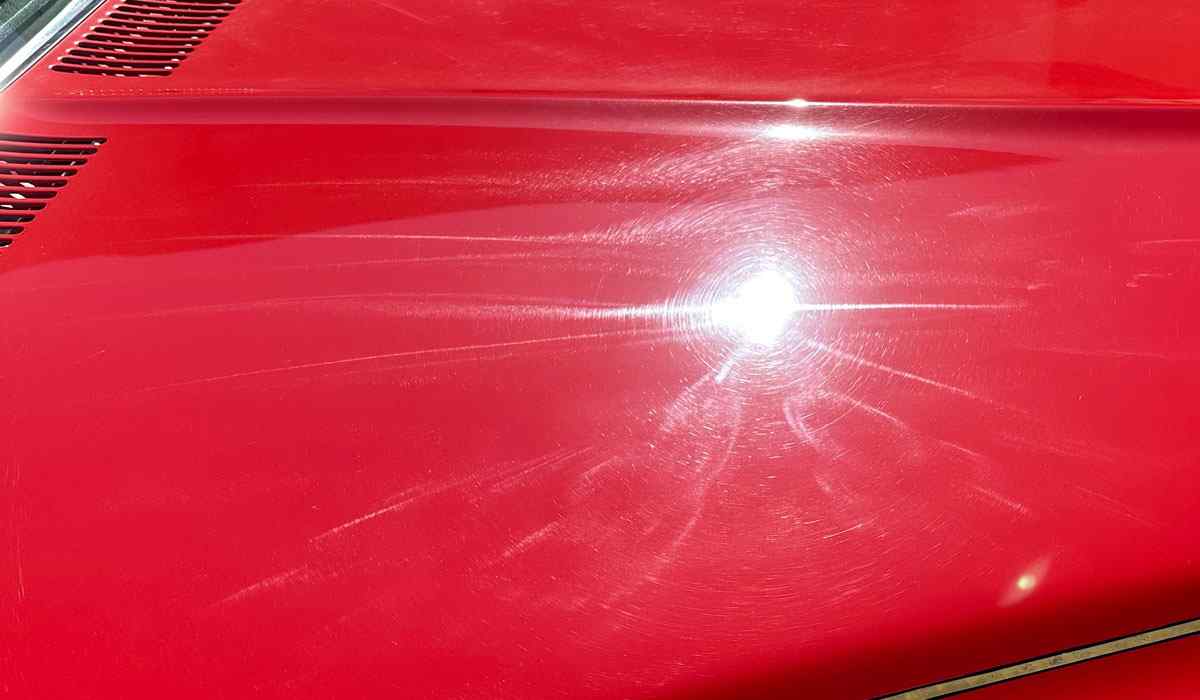
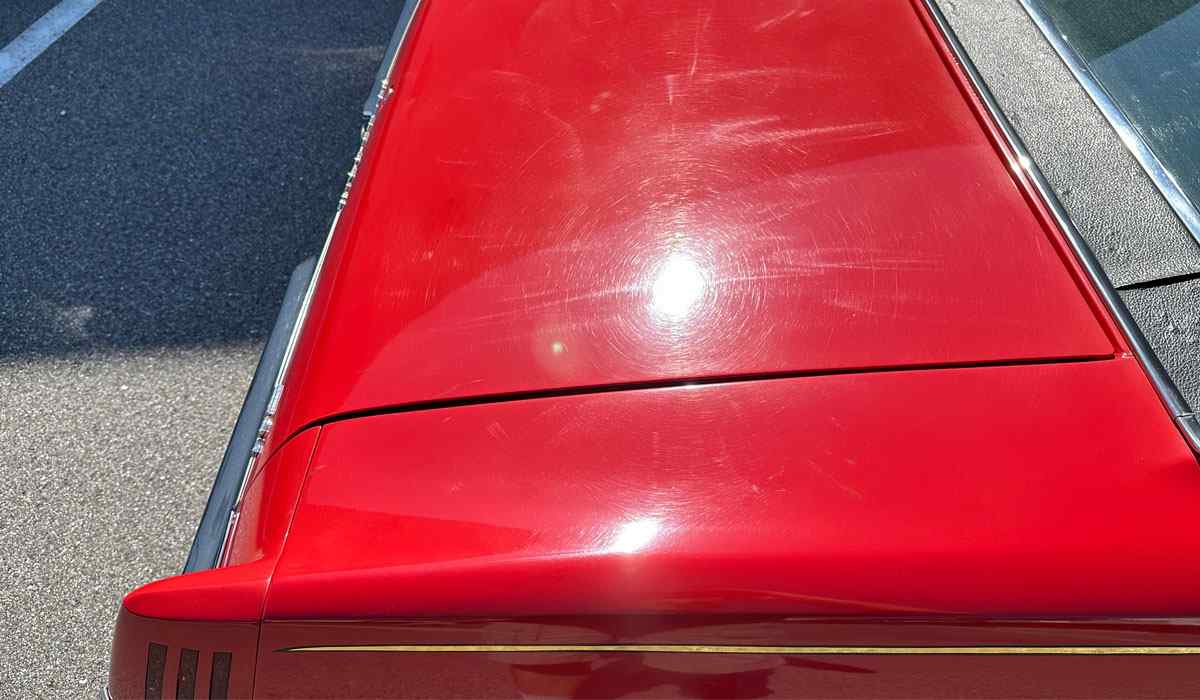

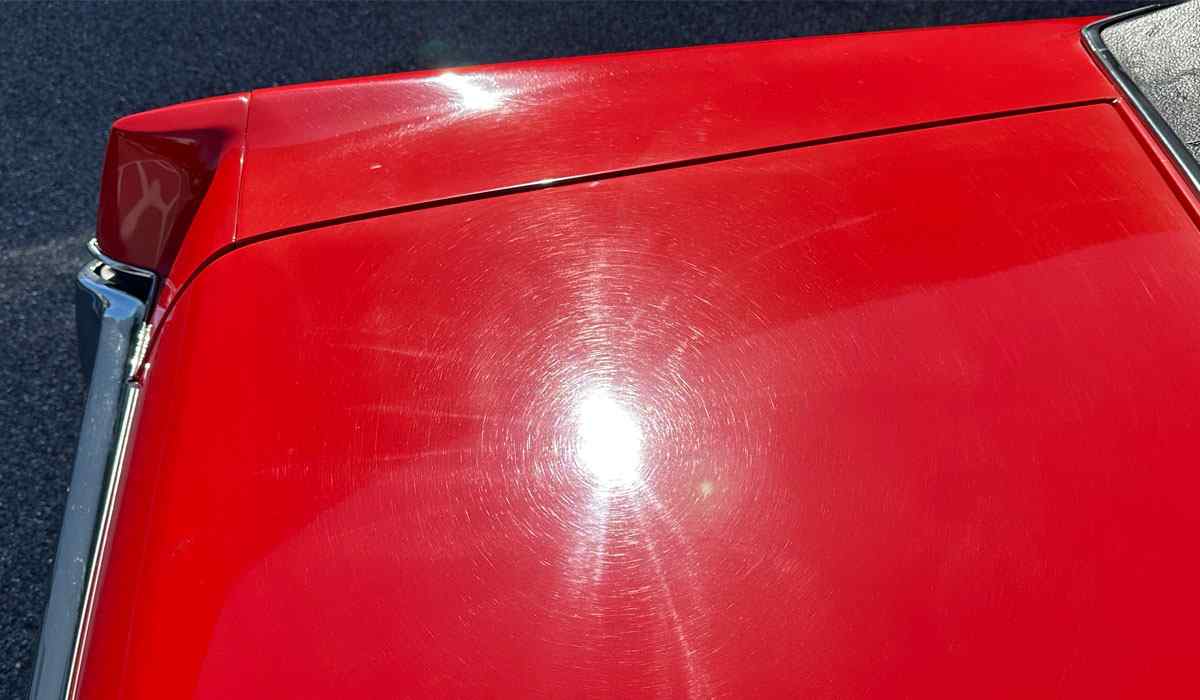
As I will come to find out when I do my first Test Spot, these hologram scratches are DEEP!
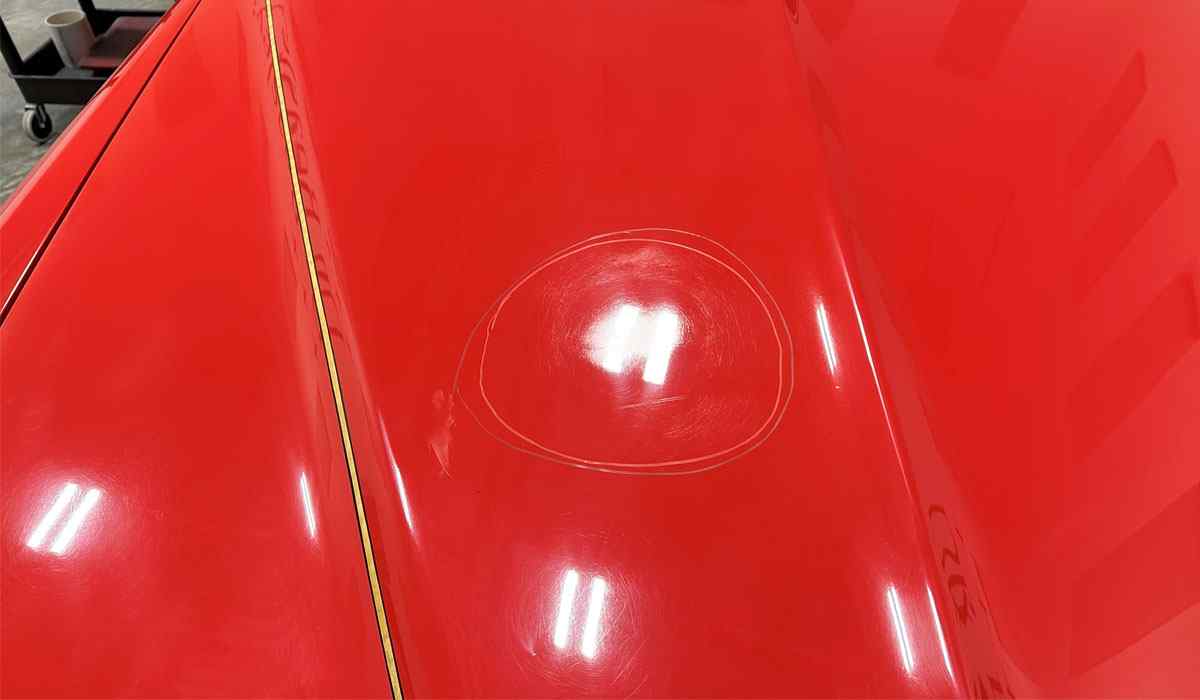
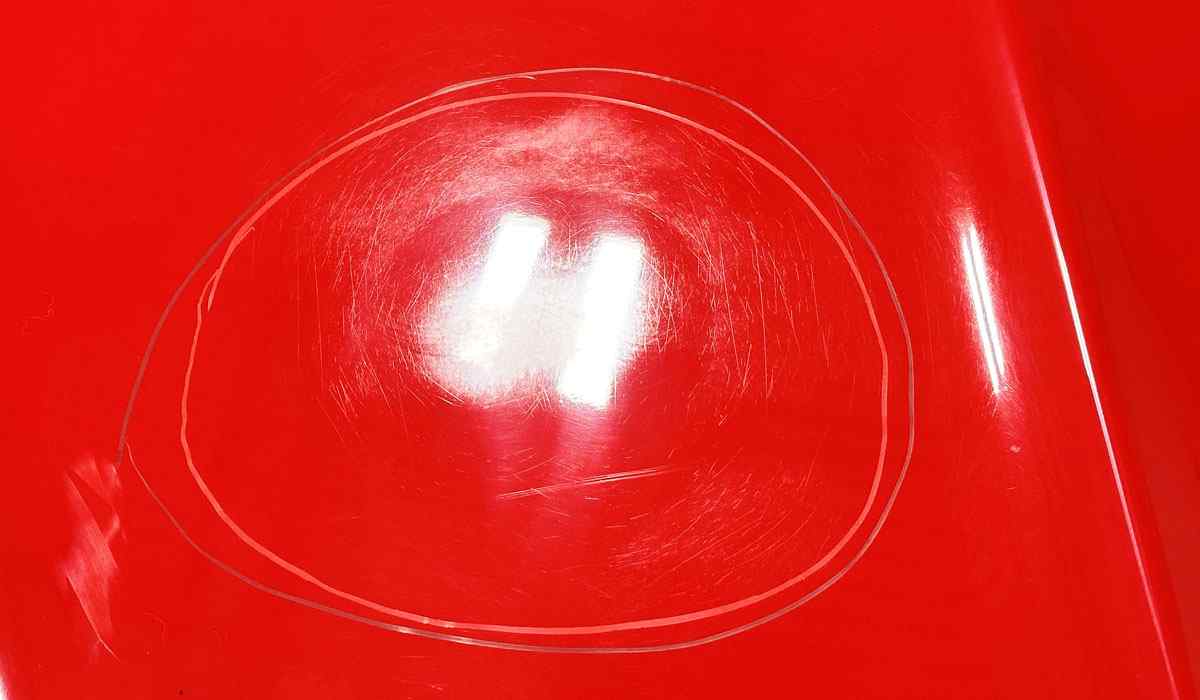
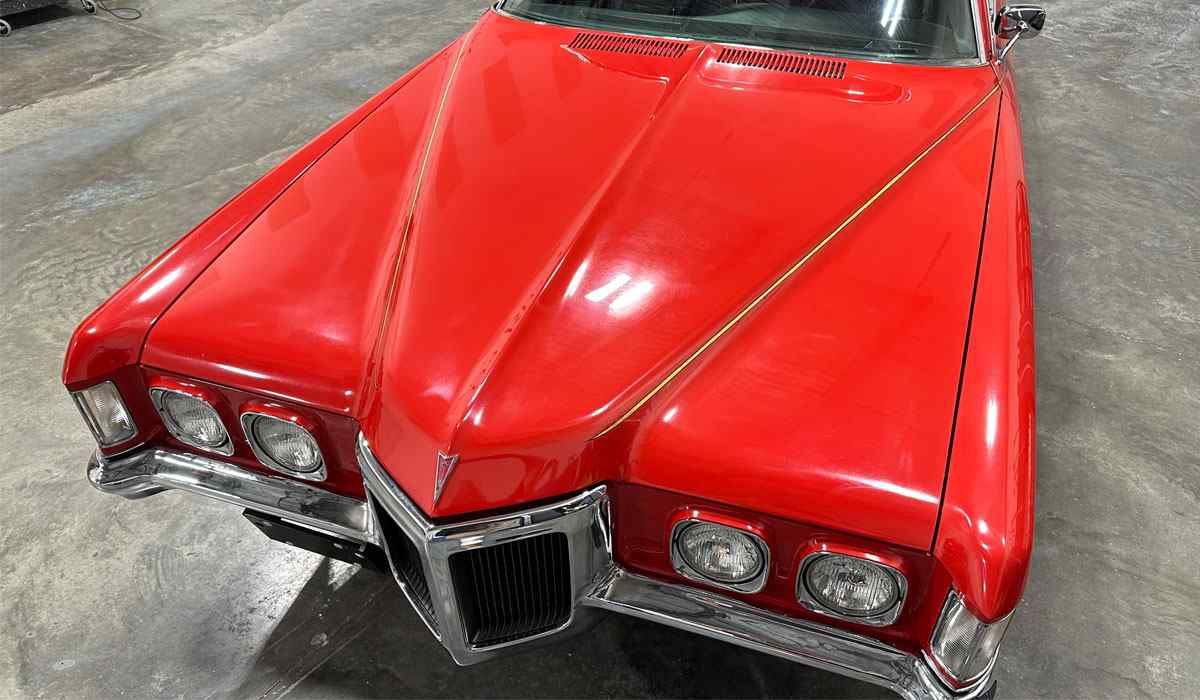
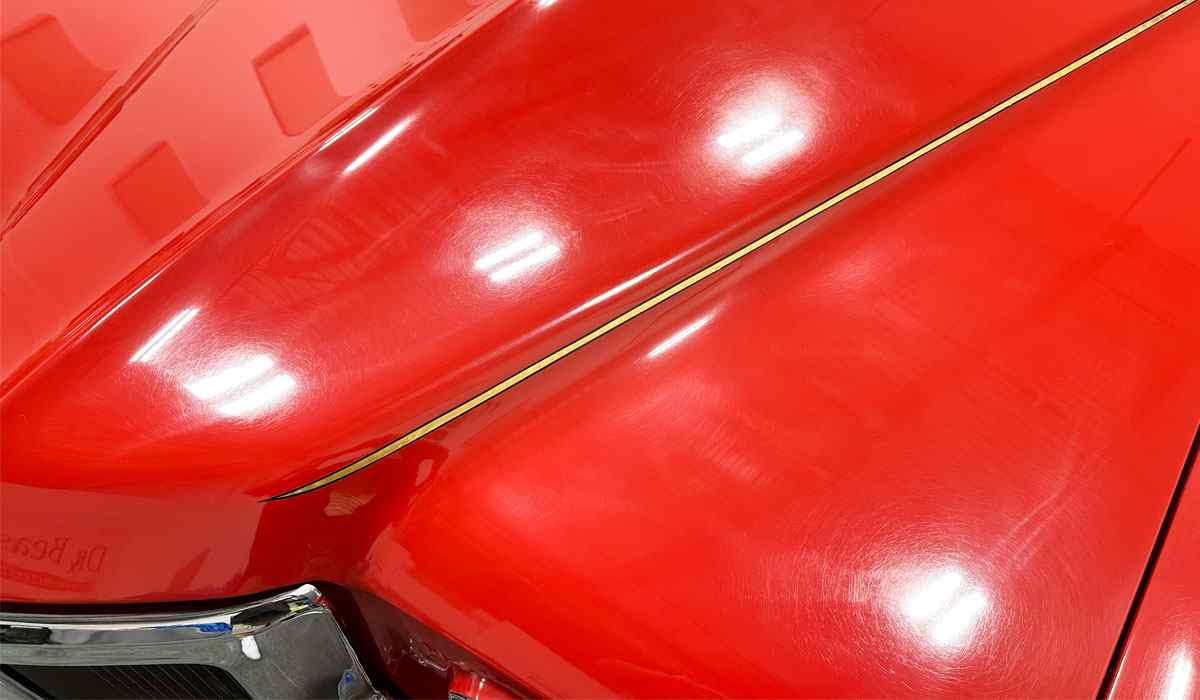
I also found a strange looking defect pattern in the passenger side hood. I have no idea how someone could have inflicted this kind of defect… regardless, I’ll do my best to fix it as I work around the car.
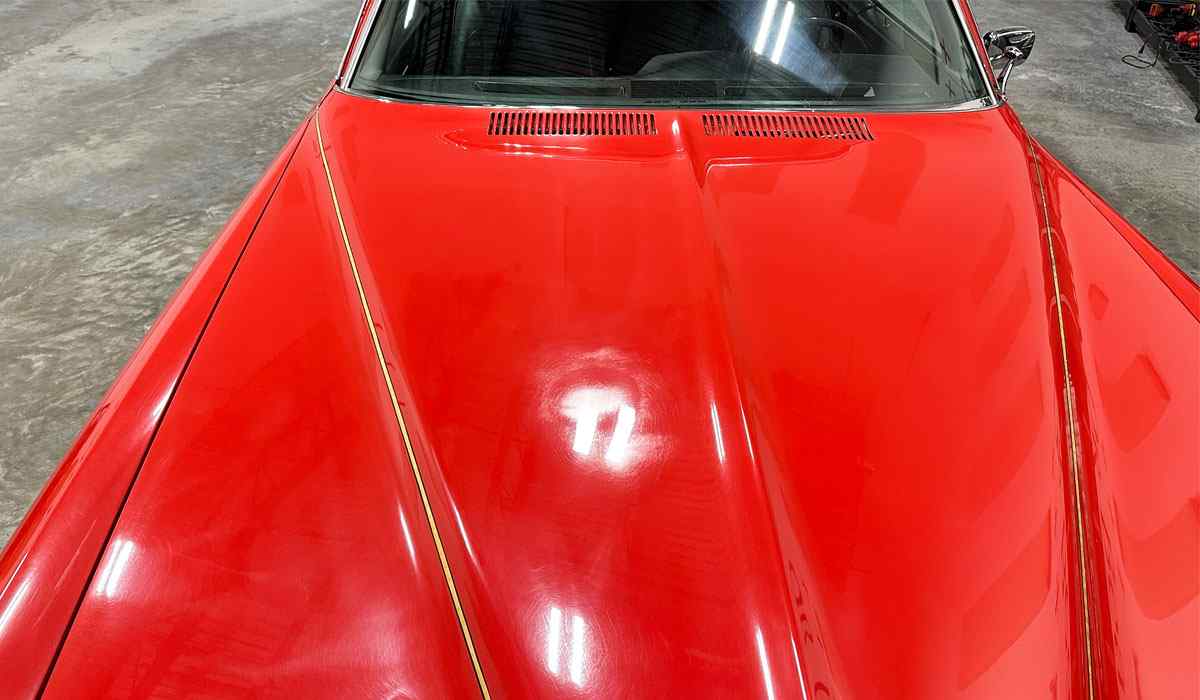
After photo-documenting the holograms in full sun, next I moved the Pontaic into the shop.
Abrasive Product Used: Nano Surface Primers
Due to how horrible the paint is on the classic muscle car, I opted to test out some of the experimental Nano Surface Primers that Jim (owner of Dr. Beasley’s and the head chemist) sent me.
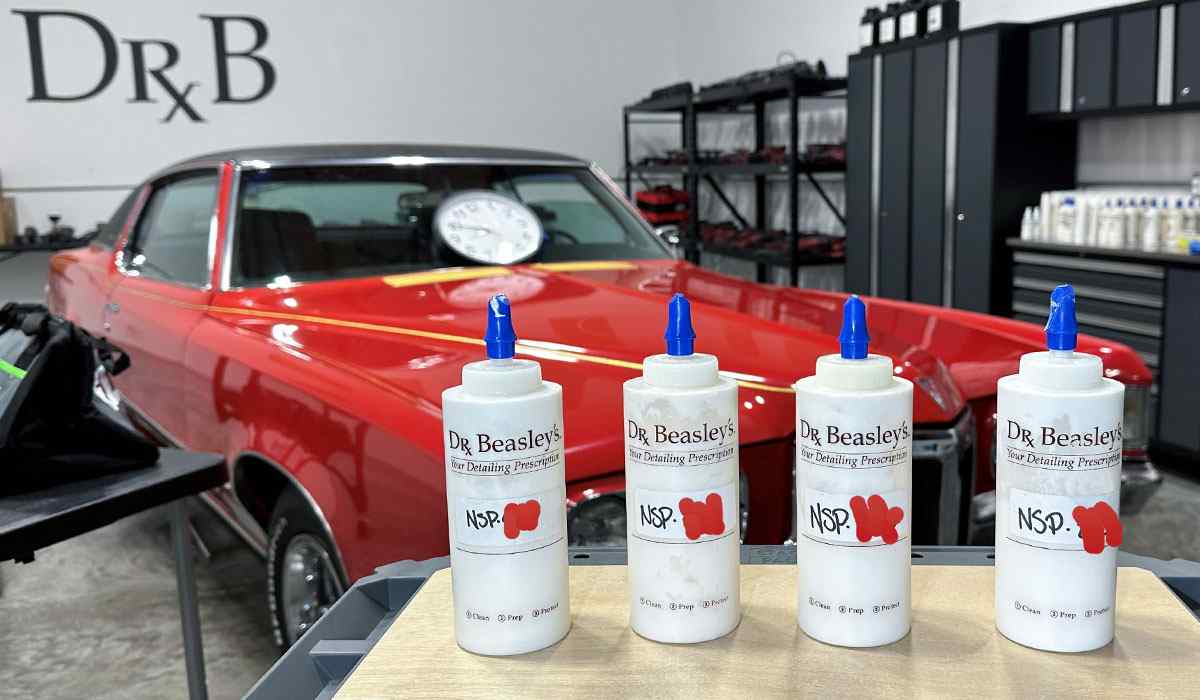
I blocked out the numbers since we haven’t released these yet.
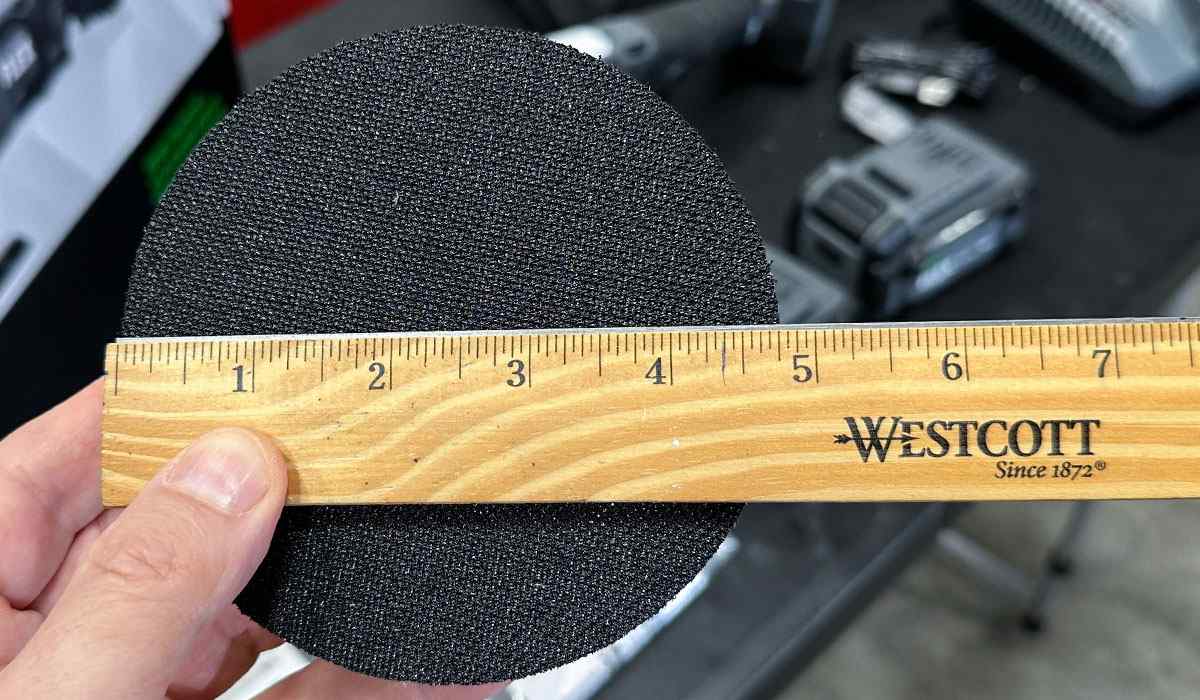
Pad Used: Lake Country MarineMaster Wool Cutting Pad
I’m also using the new Lake Country MarineMaster Wool Cutting Pad.
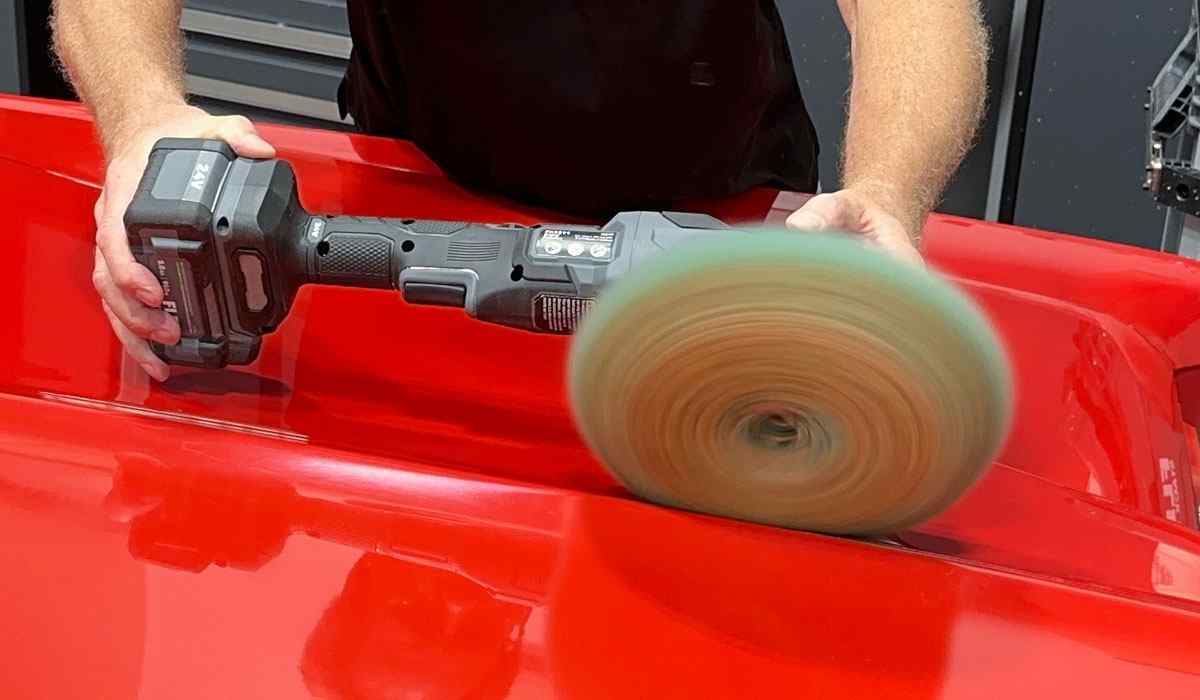

This is a very aggressive and fast cutting wool pad, and I DON’T recommend anyone using this on a factory paint job. The paint on this Pontiac is a custom paint job and PTG measurements show the car to have plenty of film-build.
Pro Tip: Use Speed Lock Button for Better Grip
After setting the speed dial to the preferred speed setting, LOCK the speed lock button and MOVE your hand to the back of the tool and grip the back of the battery when using this tool.
It’s normal that batteries are heavy due to the job they do, so by holding the battery instead of the grip portion in front of the battery, you’ll find it easier to hold and support the tool while using it.
The other benefit for this grip style is because you have your hands at the extreme ends of the tool, YOU have the maximum leverage over the tool. You lose this leverage and thus control of the tool when you use your hand to hold the grip station above the speed trigger.
Final Results After Using Flex FX3311 24V Cordless Rotary Polisher
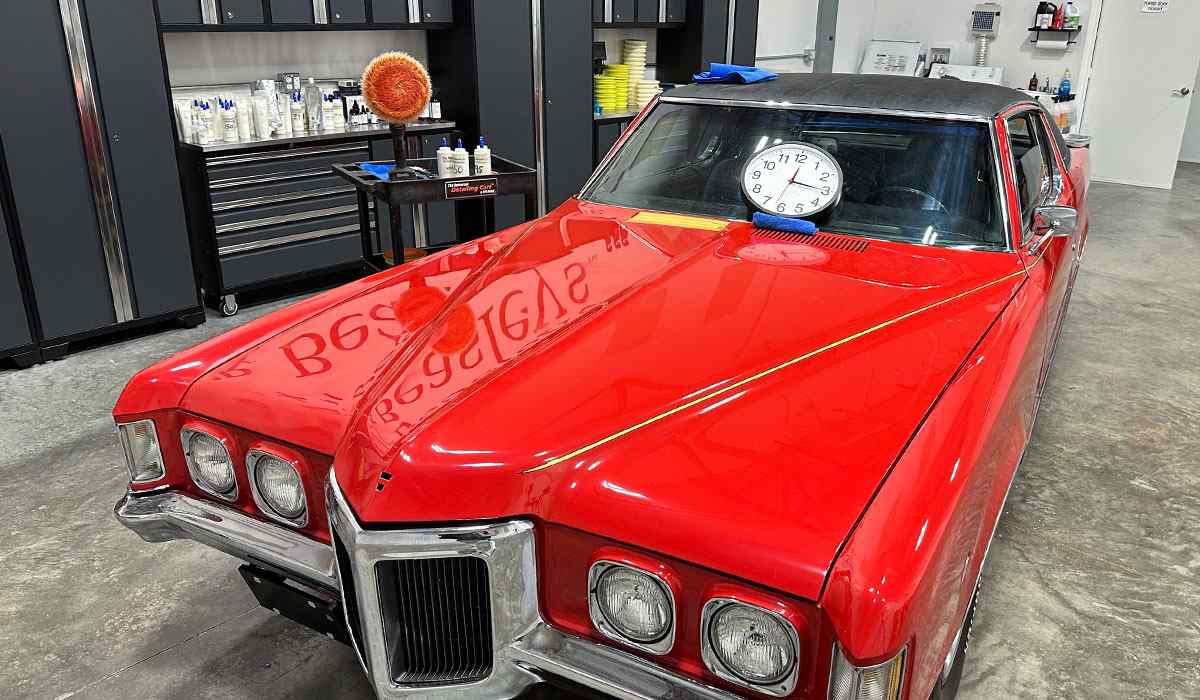
Here’s a few pictures showing I successfully removed all the original holograms, swirls, scratches, oxidation, and water spots out of this aged single stage paint.
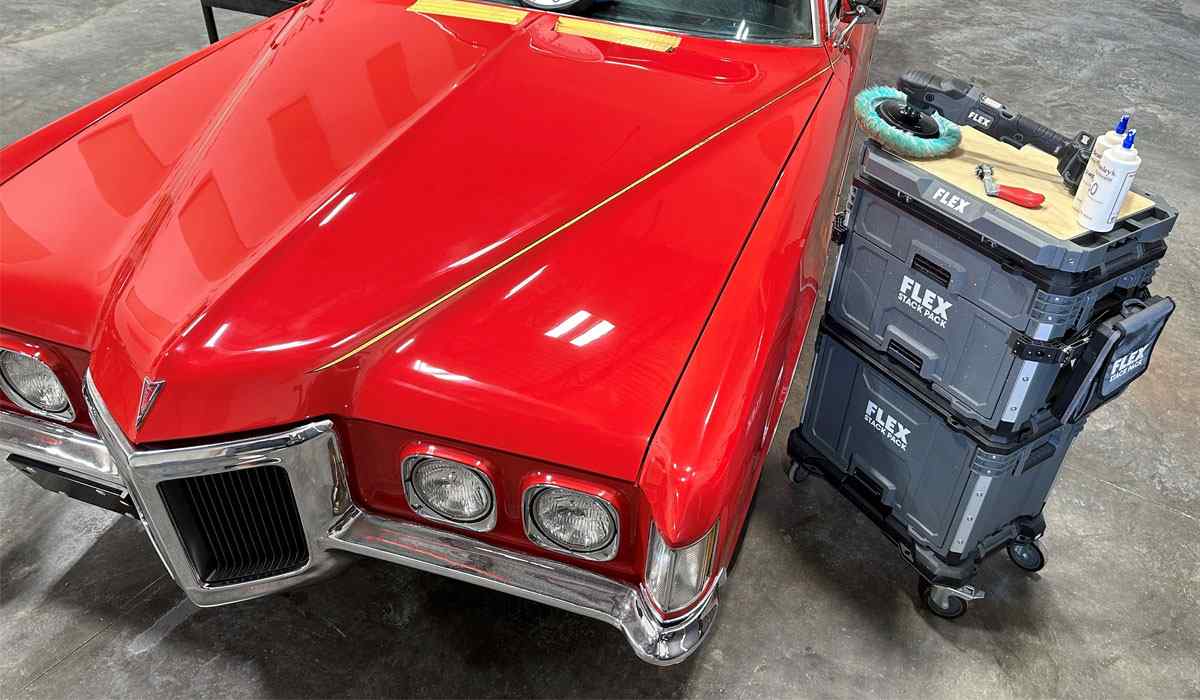
There are of course still holograms because I cut the paint using a wool pad on a rotary polisher. The DIFFERENCE is, unlike the other person, the holograms I left behind are SHALLOW due to the abrasive technology used in Dr. Beasley’s NSP Primers.
This means they will buff out fast and easy when I test the new FLEX 24 Volt CBEAST. I will have a dedicated article and video for this tool as well as the new 24 Volt Finisher.
Verdict: RECOMMENDED for Professionals & Experienced Enthusiasts
I love this tool. Like the original, I like that it’s lightweight, quiet, smooth operating and compact in size. Only time will tell if it holds up as long as the prototype I’ve been using since 2017—8 years as I type in October 2024—but I’ve got a good feeling it will.
To be honest, I couldn’t tell from use that the new improved gear ratios performed better or worse than the original gear sets in the FLEX PE-150. I did some prototype testing for FLEX for this new gear set a few years ago and I think the primary benefit was cooler running, quieter and more torque.
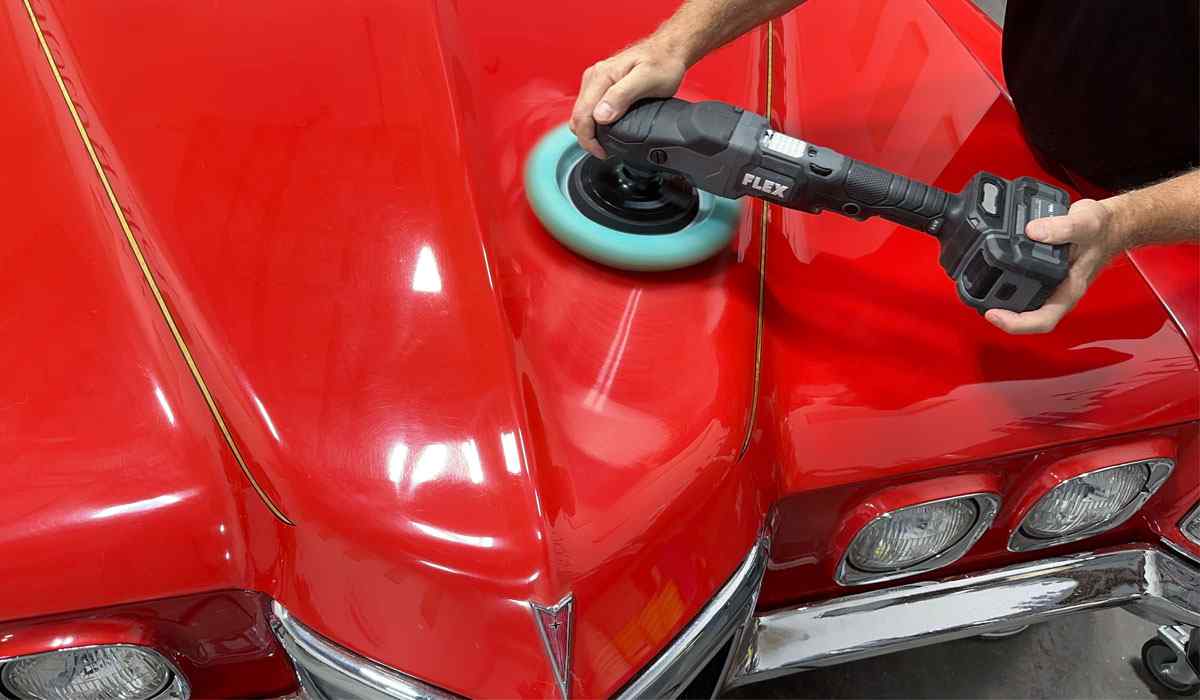
The tool functioned flawlessly as I buffed out the driver’s side hood.
I actually like the new color scheme, light, and dark gray.
Ultimately, beyond the new color and gear sets, I don’t notice much difference compared to using my trusty, dusty, prototype Flex PE-150.
But that’s a good thing.
Instead of trying to fix something that wasn’t broken, Flex simply improved on an already great machine with some solid quality-of-life improvements.
How Long Do Flex 24V Lithium Batteries Last?
10 Amp Stacked Lithium Battery Runtime
For this test, I used the optional 10 Amp Stacked Lithium Battery. In hindsight, I should have started with the included 5 Amp cylindrical battery, but I knew I was going to be pressing hard on this polisher in order to fully remove the sanding marks on such a large hood.
After 10 minutes of solid buffing I had used up 1 bar of power, and the battery shows 3 bars of power still remaining.
10 Amp Cylindrical Lithium Battery Runtime
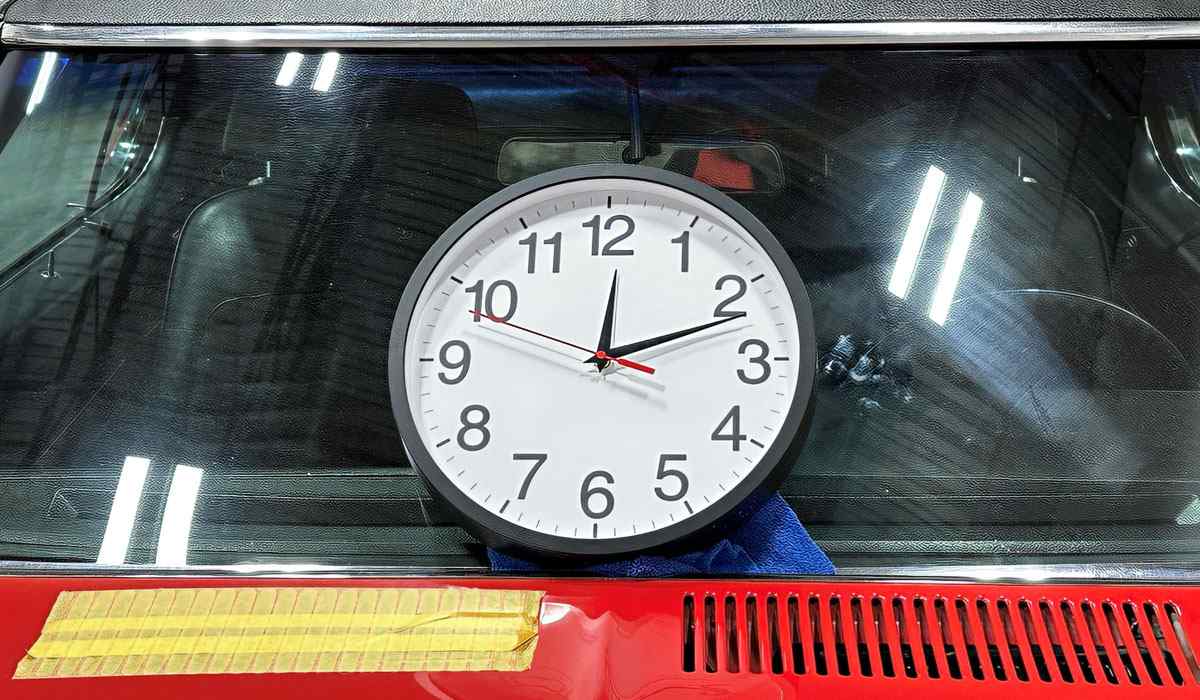
For the passenger side, I did use the included 5 Amp Cylindrical and from start to end, the battery lasted 17 minutes. Keep in mind, this was CONSTANT buffing.
This is an extreme example because in the real-world, no one buffs non-stop. Most of us turn our polishers off, wipe-off residue from the section we just buffed and inspect before moving to a new section. Anytime you’re not running the tool the battery run-time of course will increase. Just keep this in mind when comparing or discussing the run time for any brand of tool or battery.
For this test, I machine sanded the passenger side of the hood using 1500 grit, 2000 grit and finished with 2500 grit. Then I compounded using a fully charged 5 Amp Cylindrical Lithium Battery.


And with 14 minutes of constant run time I removed the sanding marks out of the passenger side hood except for this small section — that’s where the battery finally died.
How Long Do Flex 24V Lithium Batteries Take to Charge?
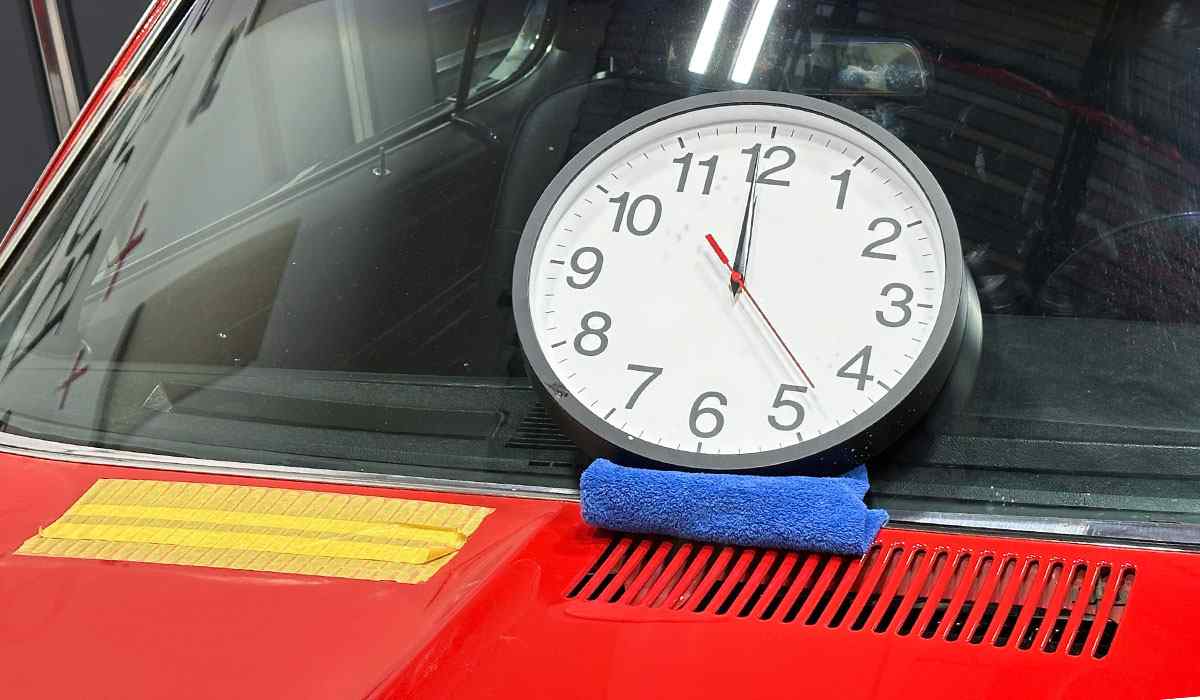
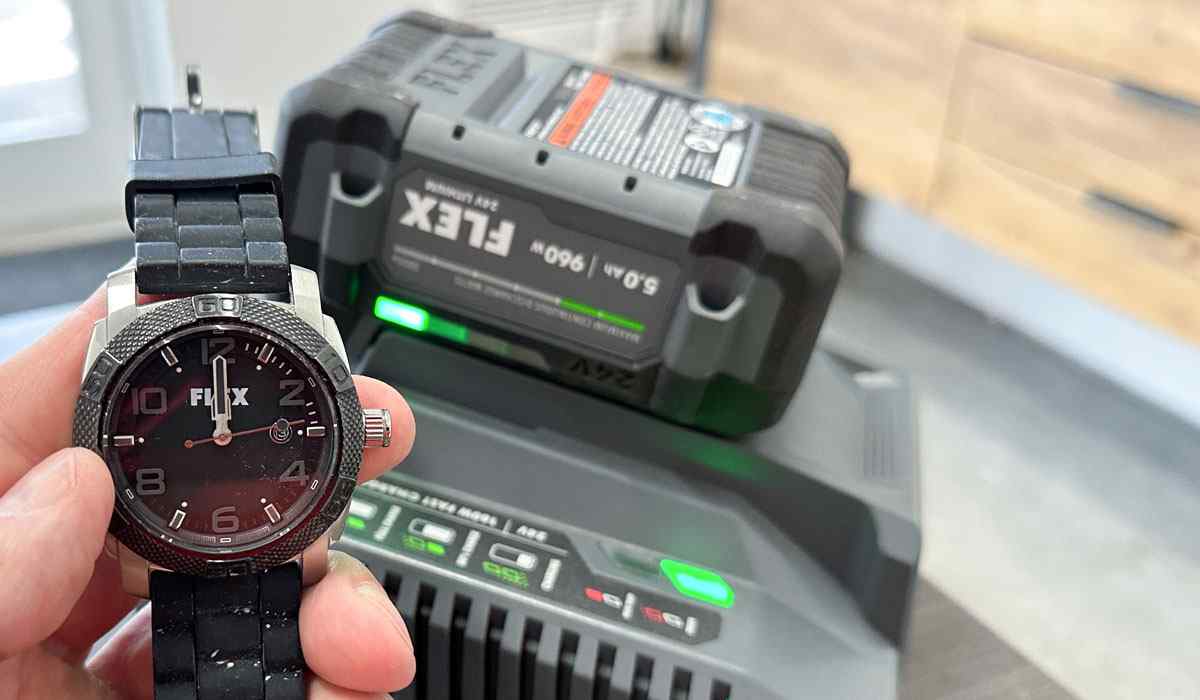
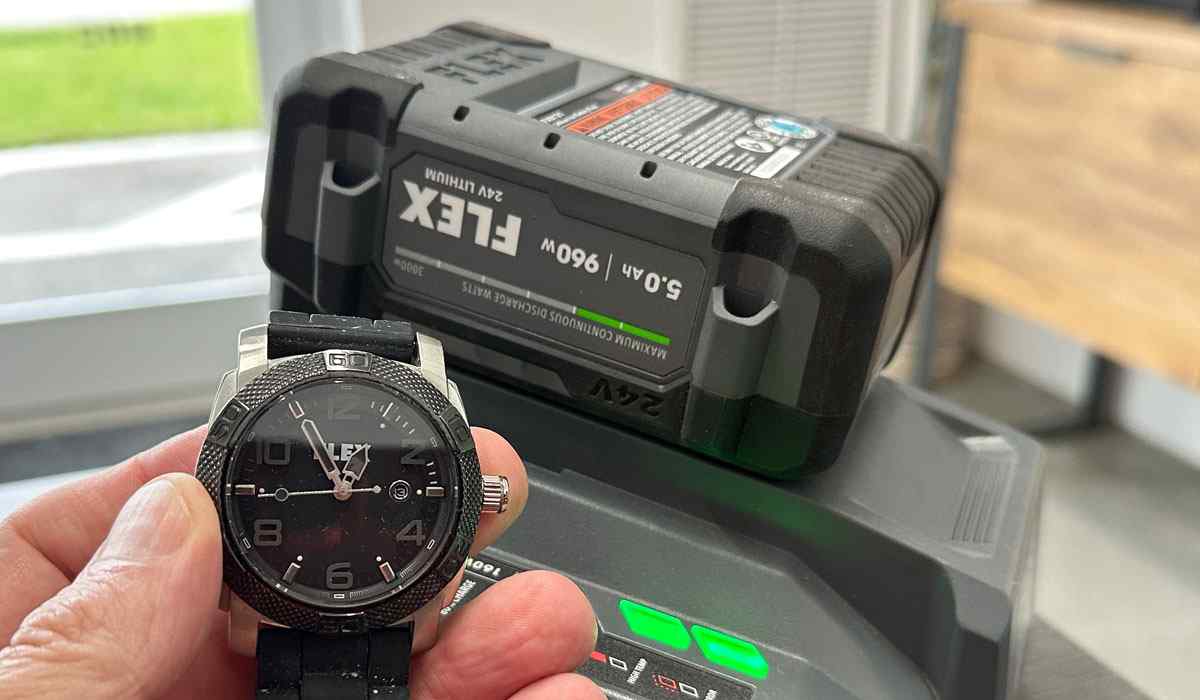
I ran the battery all the way down to empty charge, and then repeated the charging process documenting the time need to bring a fully drained battery back to full charge. According to my trusty, dusty FLEX wrist watch, it took approximately 55 minutes.
Read My Other Flex 24V Polisher Reviews
This is the second of three reviews for the new 24 volt FLEX polishers. Below are the links to the other two tool reviews.
As I worked through using these tools, making videos, and writing these reviews, you can watch the transformation and extreme makeover to the 1970 Pontiac Grand Prix Model SJ as I used all three tools to torture test the tools and the lithium battery technology.
- Review: FLEX FX3331 24 Volt Cordless 8mm Gear-driven Orbital Polisher aka CBEAST
- Review: FLEX FX3321 24 Volt Cordless Finisher
Next Review: Flex FX3331 24V Cordless Gear-Driven Polisher (“CBEAST”)
Next I’m going to unbox the new 24 Volt FLEX CBEAST or if you like to refer to tools by their part number, the FLEX FX3331.
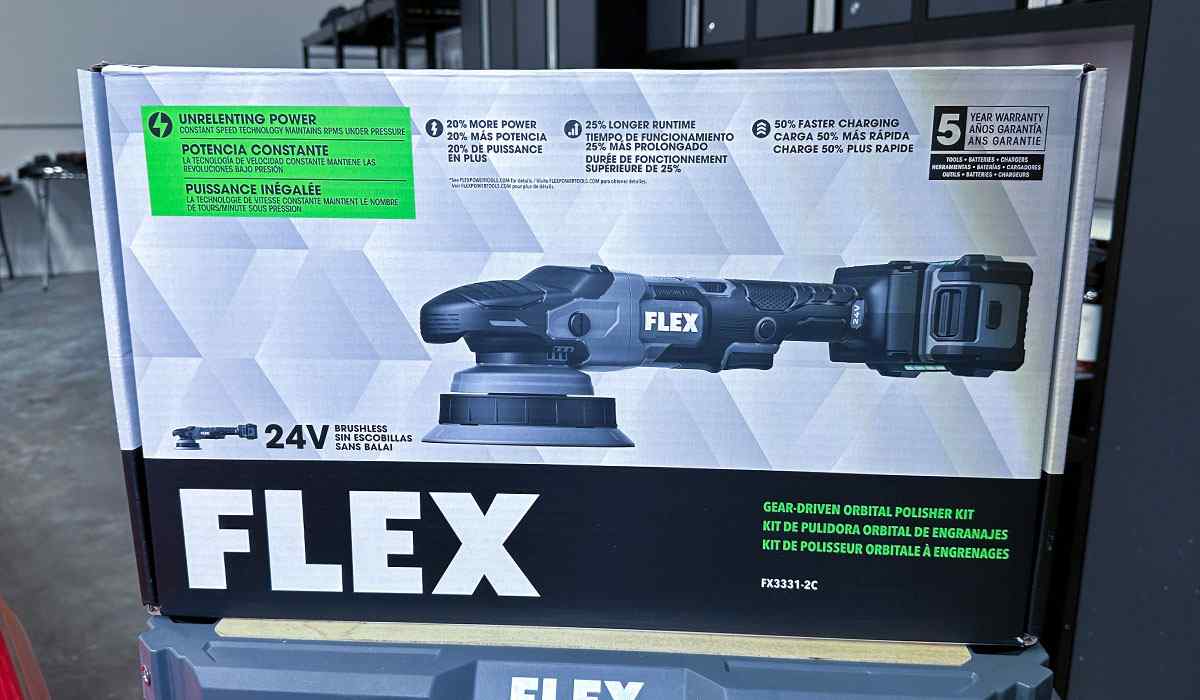
I’ll test out this new version of the CBEAST to remove the holograms as well as get some hands-on time behind this new tool as well as monitor battery life. After testing out the new CBEAST, I’ll finish out this 1970 Pontiac by using and testing out the new 24 Volt Finisher, or FX3321 if you prefer to use the part number.
My Personal Offer to Help
I’ve been answering car detailing questions professionally since 2002 and moving forward, if after reading this article you have any questions about polishing and waxing, or how to use an AIO, my contact information is below, reach out to me, I’m always happy to help.
Would You Like to Learn How to Machine Polish Like a Pro?
Would you like to take your detailing skills to a higher level? Do you find you learn better by doing versus sitting in a chair looking at a PowerPoint presentation about car detailing?
Here at Dr. Beasley’s O.R., (Operating Room), in sunny Stuart, Florida, we teach the most hands-on car and boat detailing classes on planet Earth. And we prove it too. You can find write-ups on the Dr. Beasley’s Blog that photo-documents just how hands-on our classes are plus you’ll see the kinds of cars and boats you’ll be training on.
Click the link below to find the dates, locations, topics, and prices for all upcoming detailing classes.
Upcoming Detailing Classes – Prices – Info – Topics – Locations
And if you ever have any questions, always feel free to reach out to me personally via text, phone call or email.
I hope to see you in a future detailing class!
Sincerely,
Mike Phillips
Chief Education Officer for Dr. Beasley’s
Mike@drbeasleys.com
760-515-0444
Love your work