


Last Updated March 16, 2026

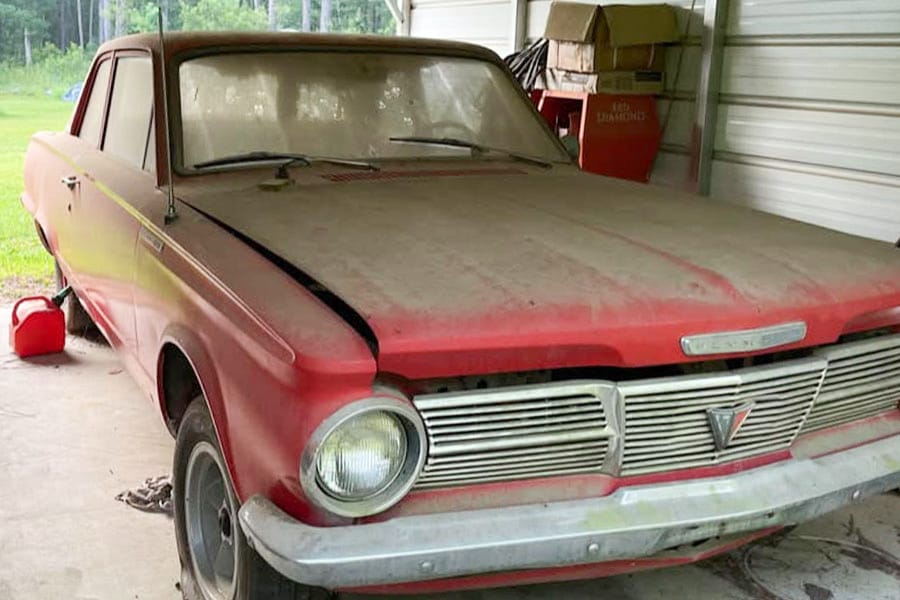
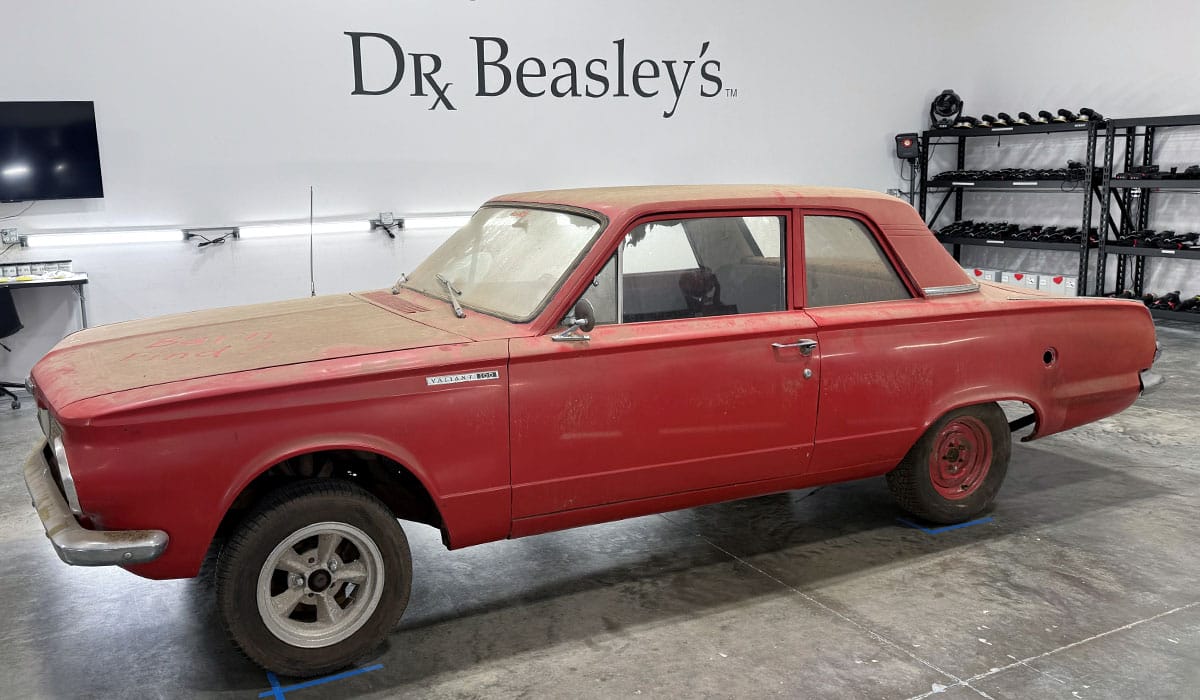
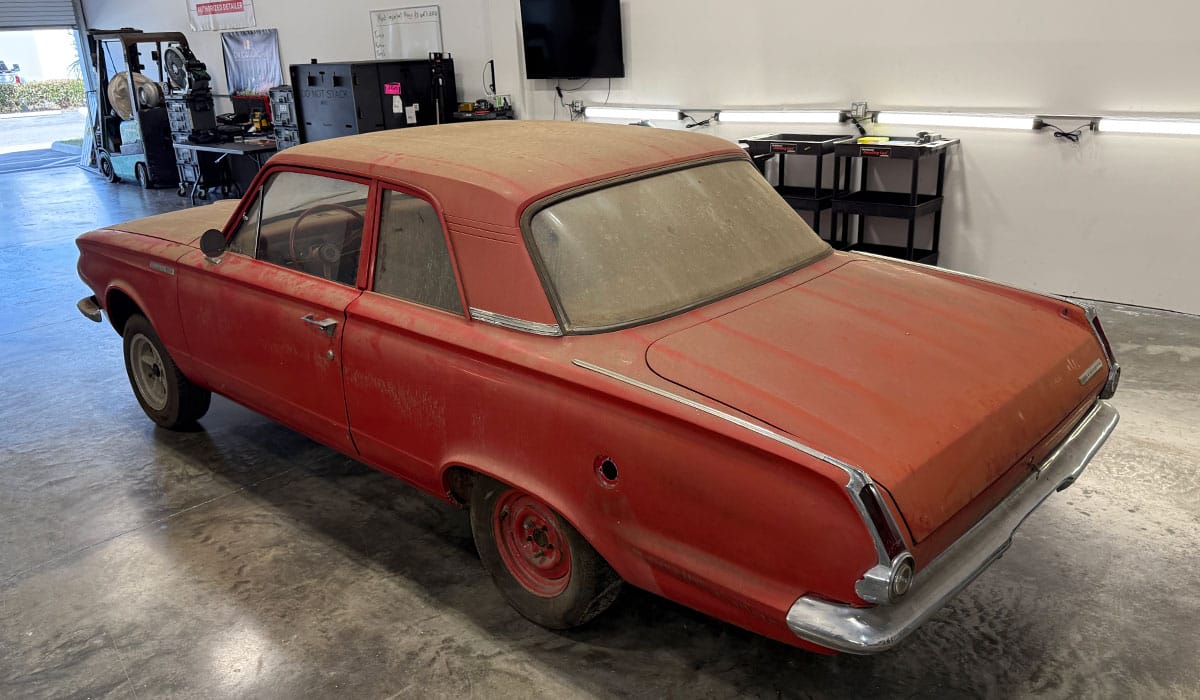
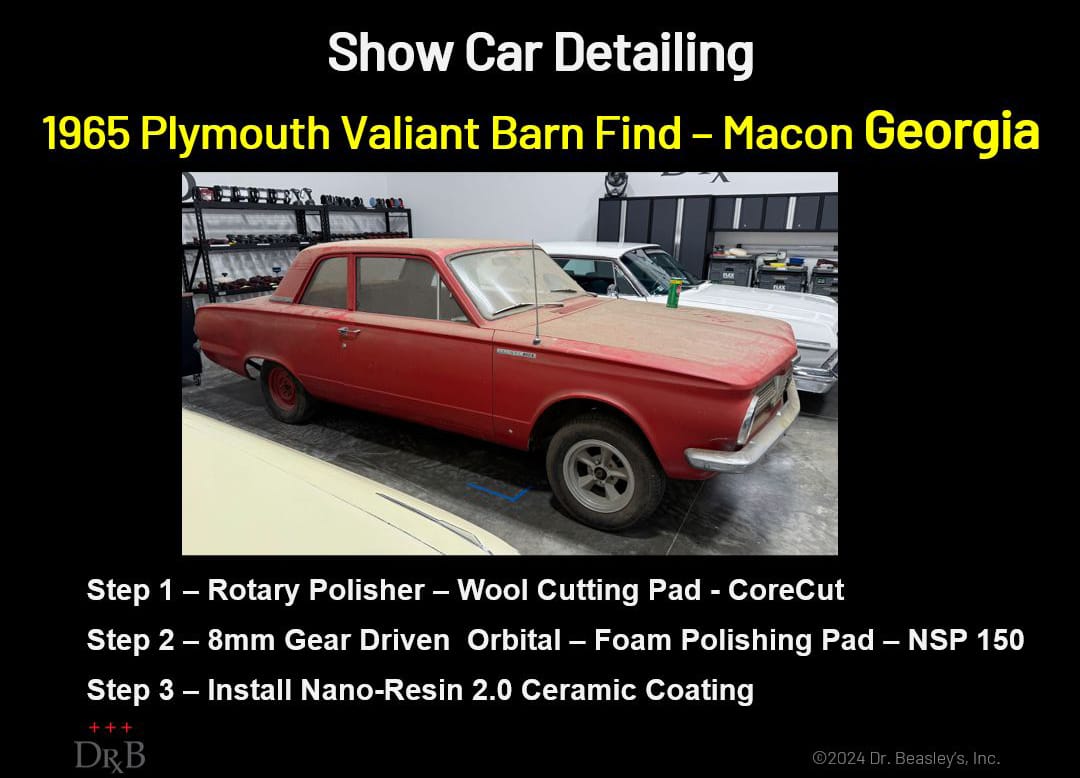
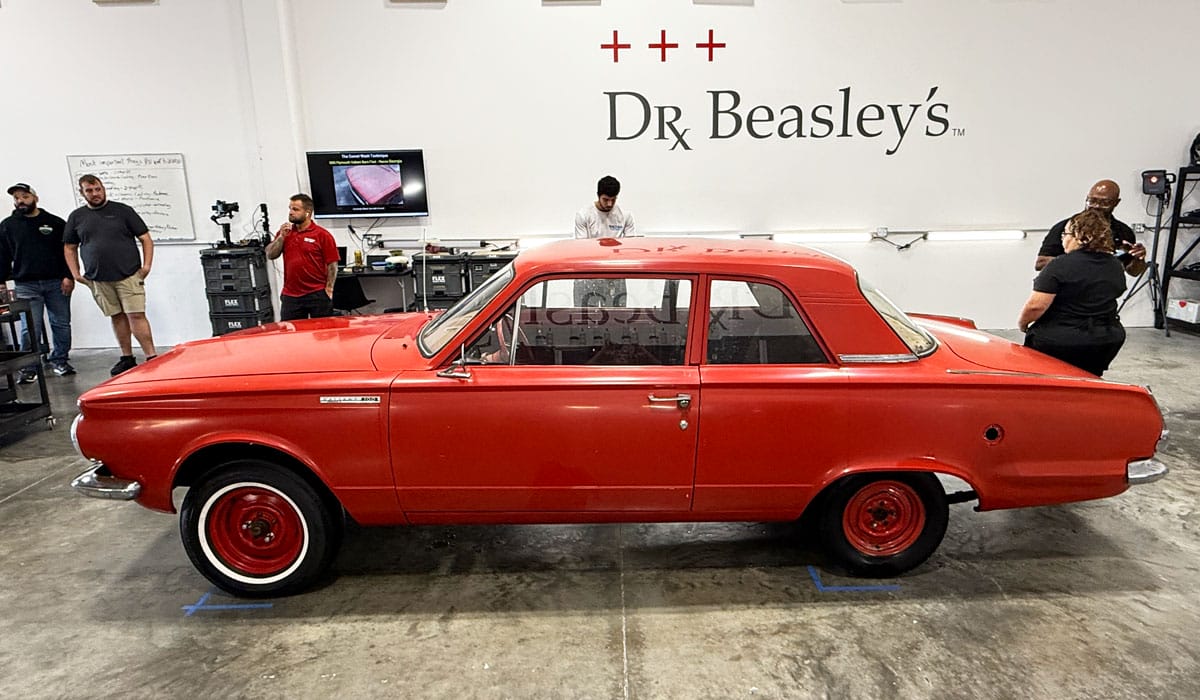
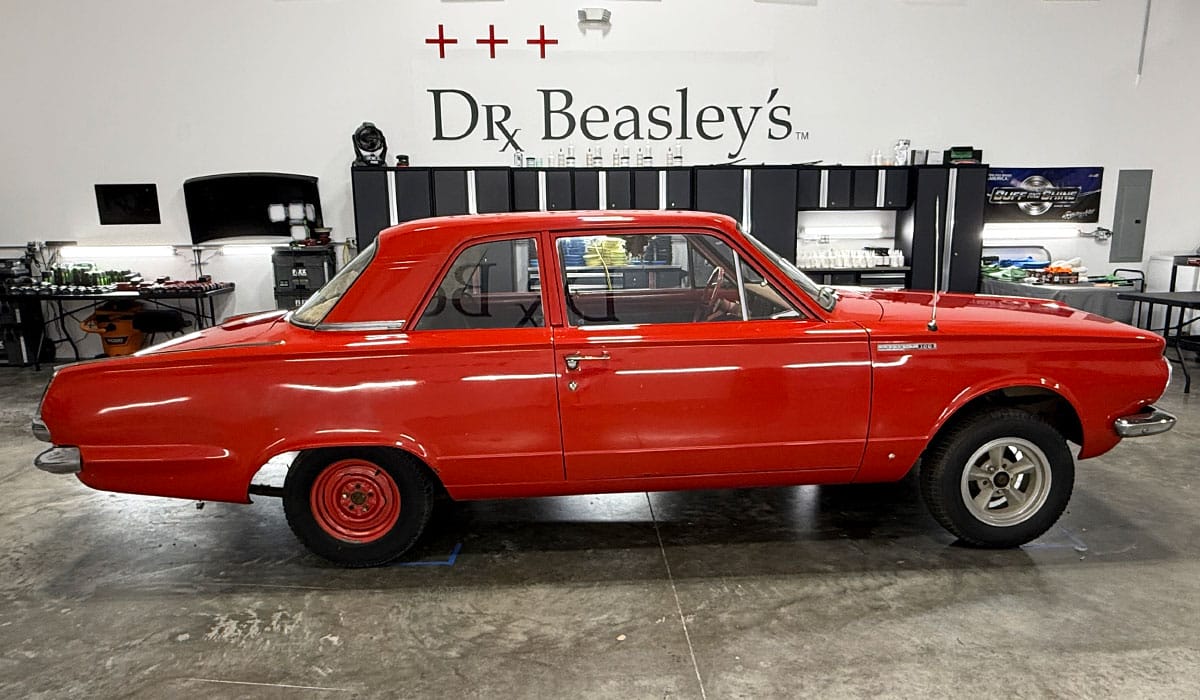
This 1965 Plymouth Valiant was discovered in a Pole Barn in Macon, Georgia. It was purchased by my long-time friend Darrel, who has brought me 2 other Barn Find Cars in the past. Darrel had this car picked up and shipped directly to Dr. Beasley’s in Stuart, Florida and we appreciate his trust.
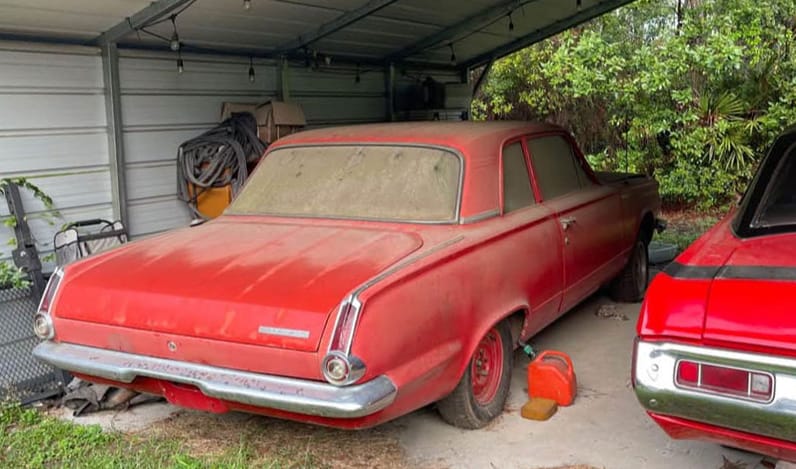
Here she is in the Pole Barn where the car was discovered.
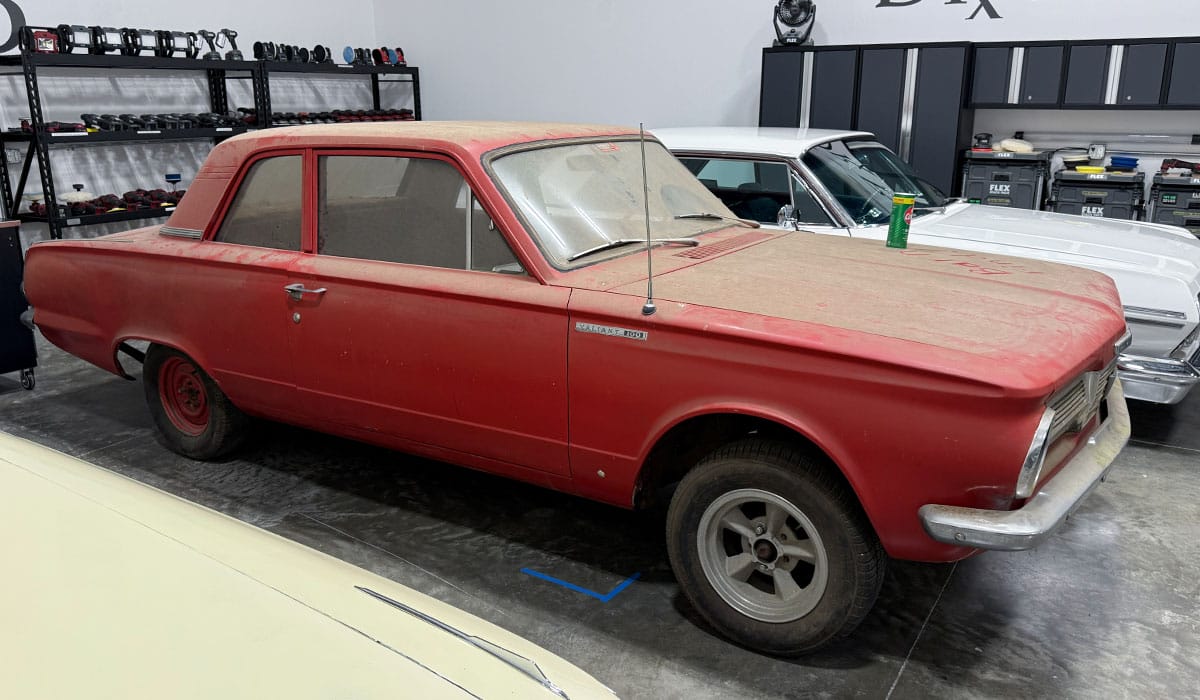
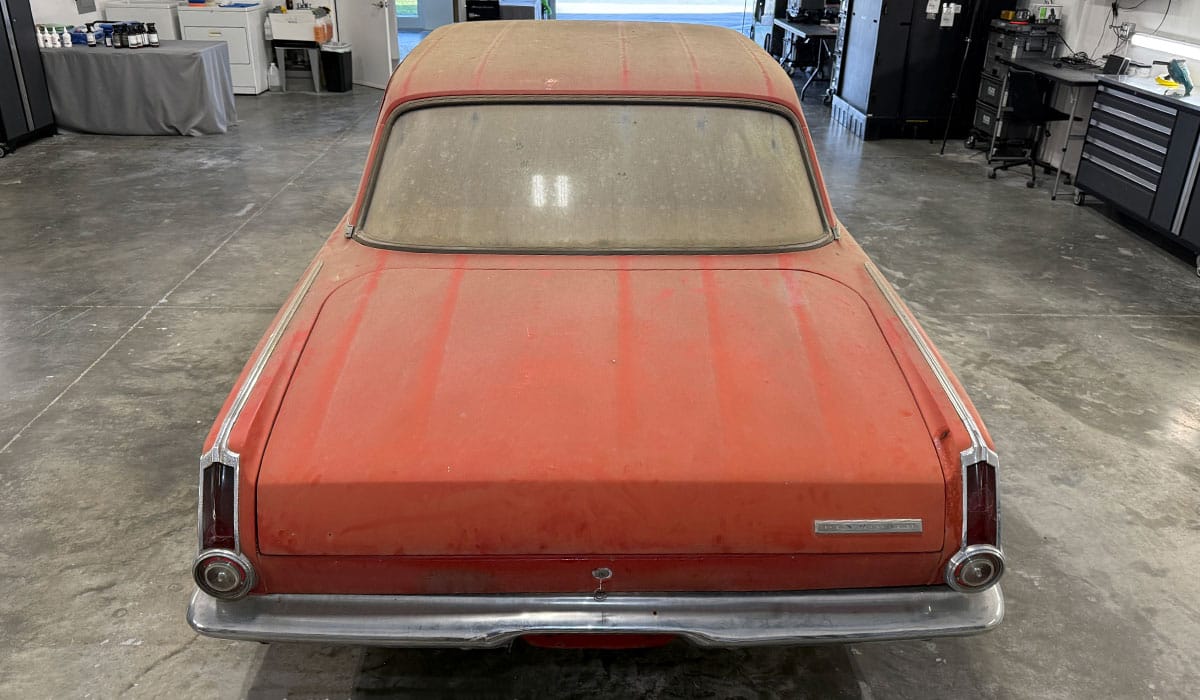
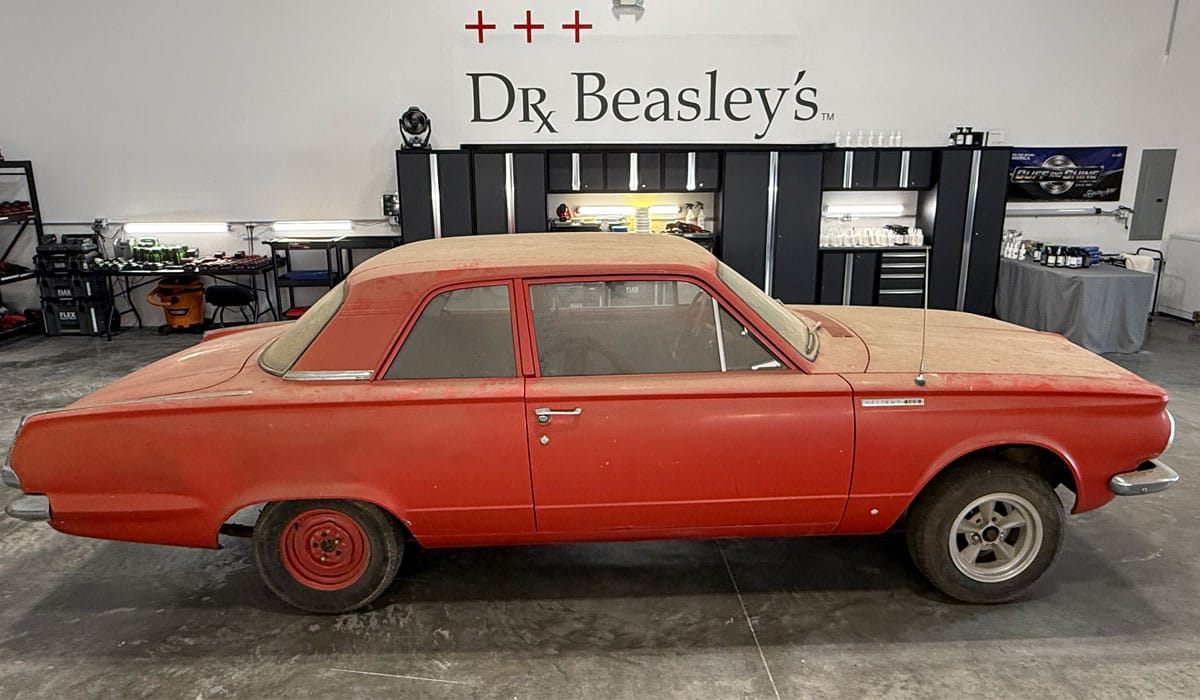
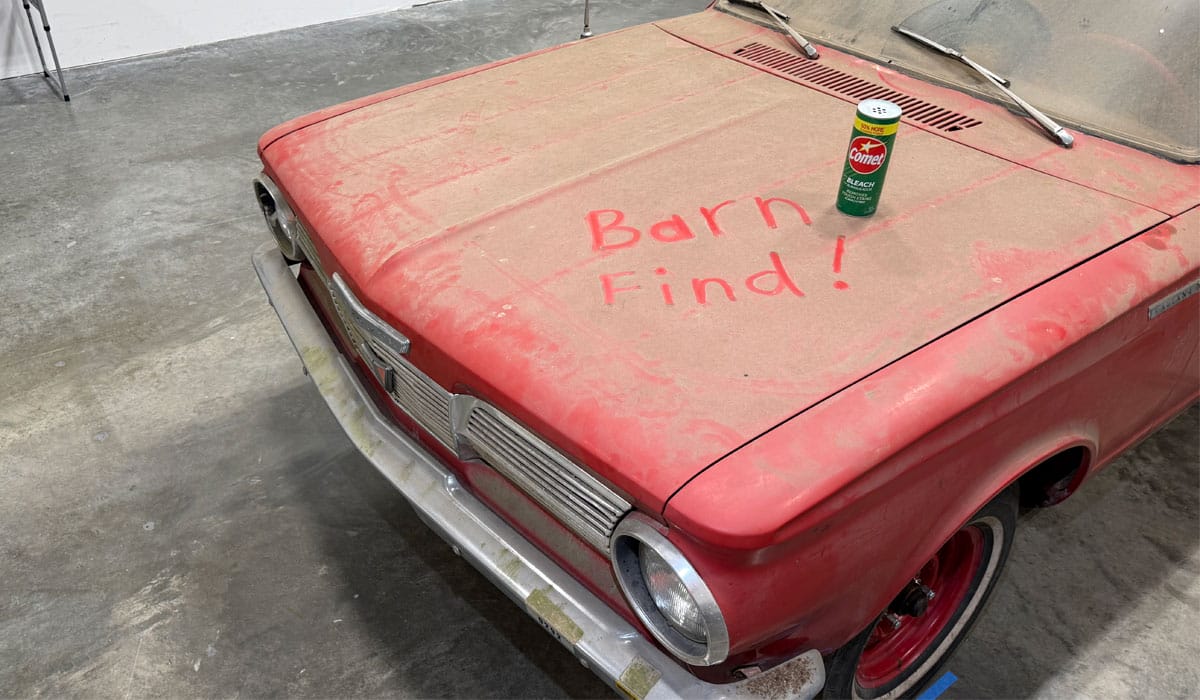
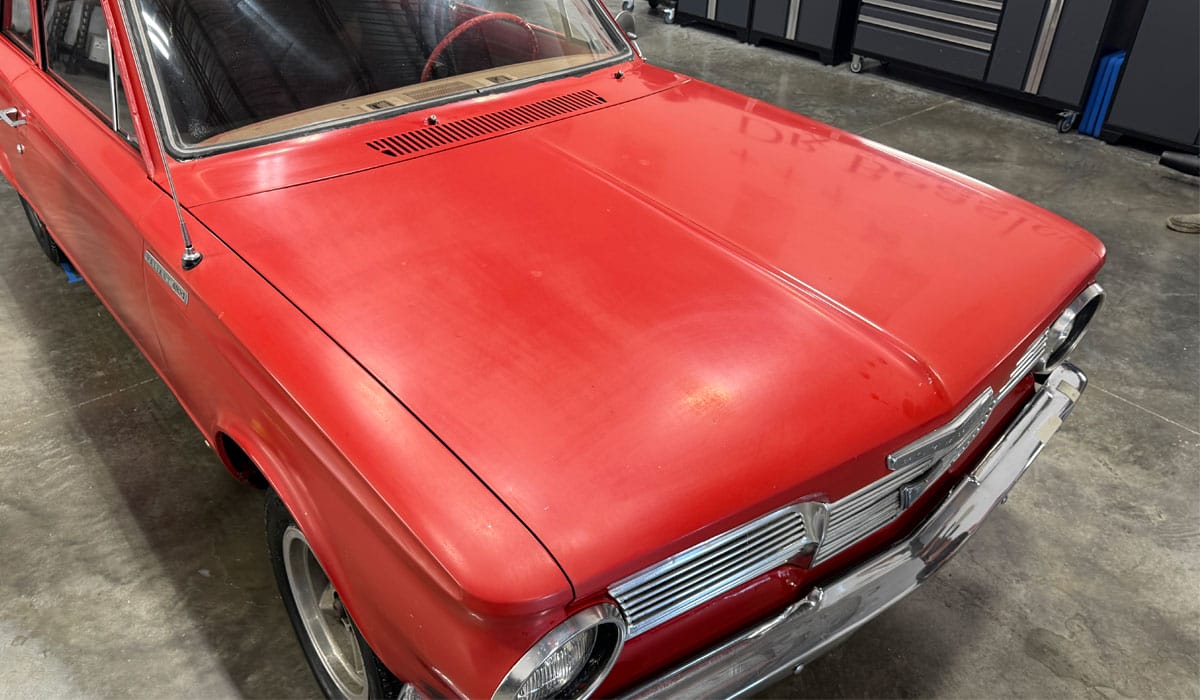
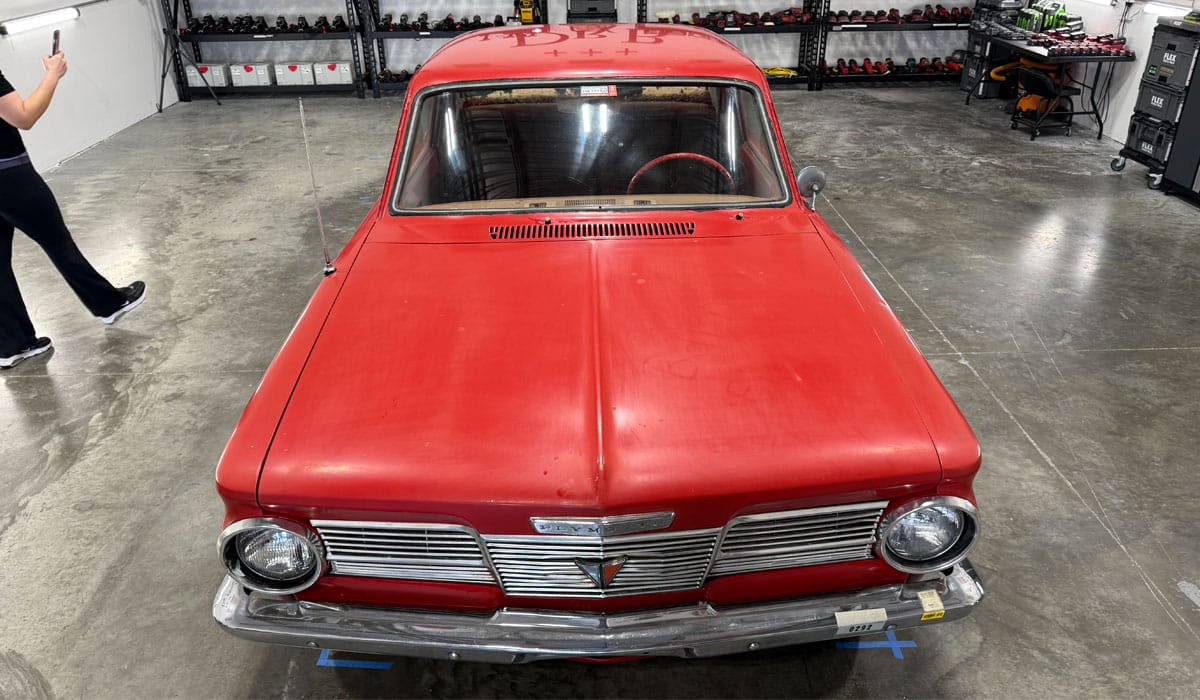
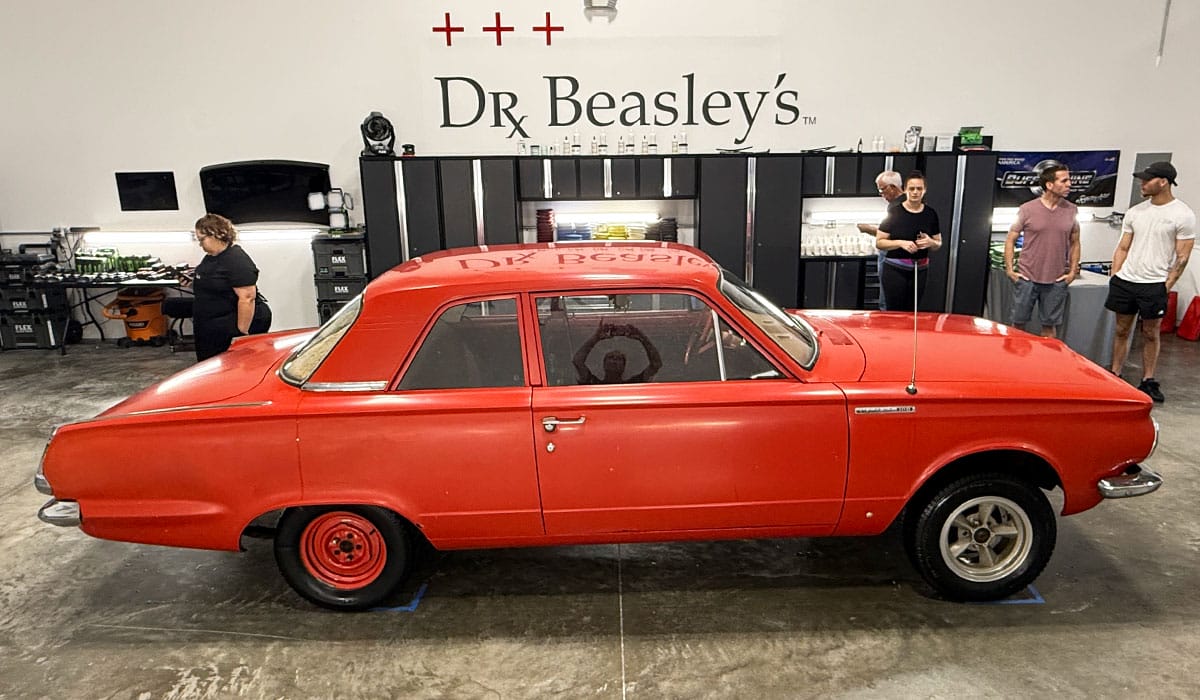
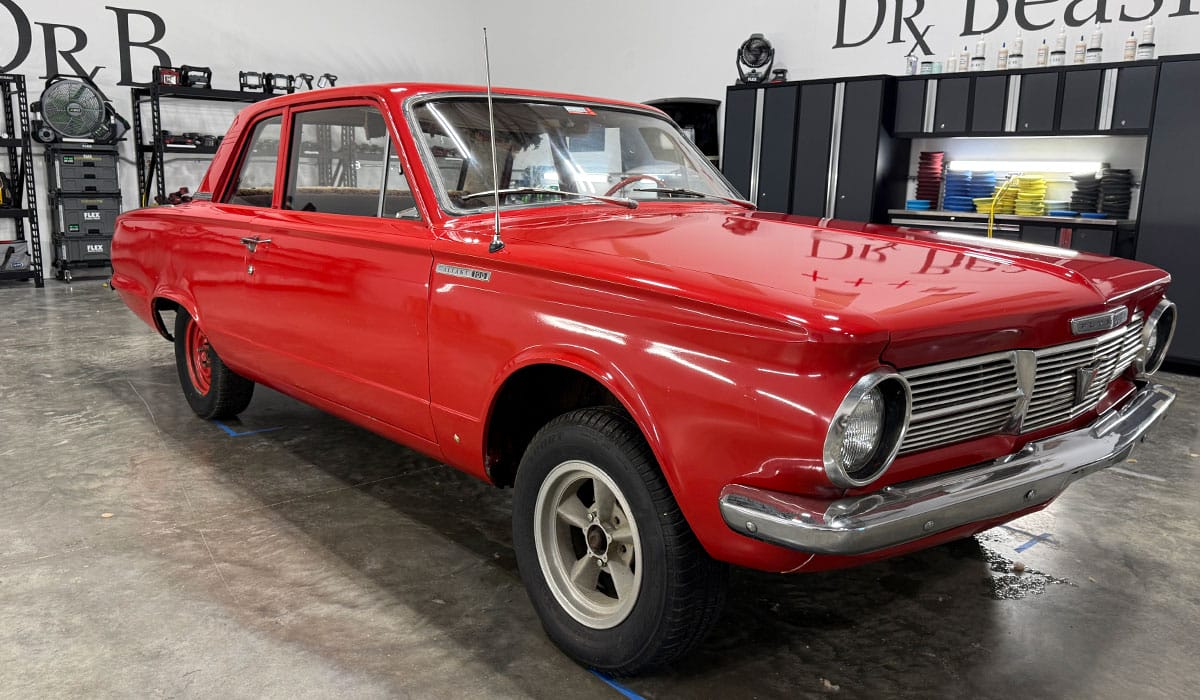
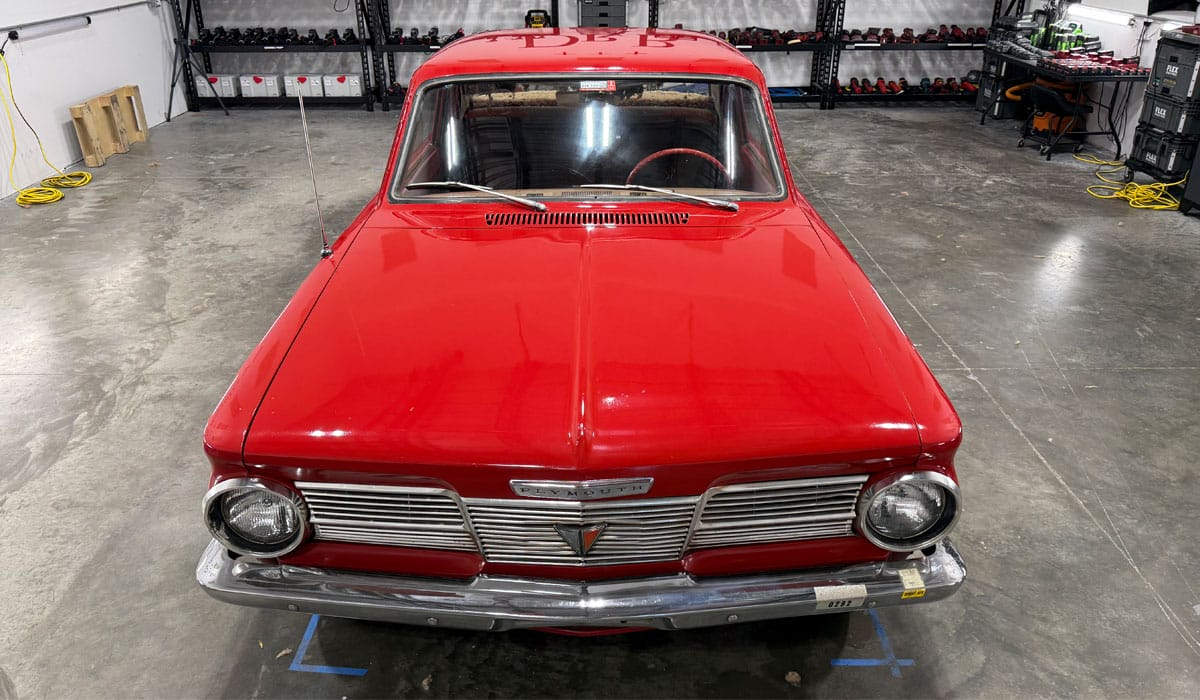
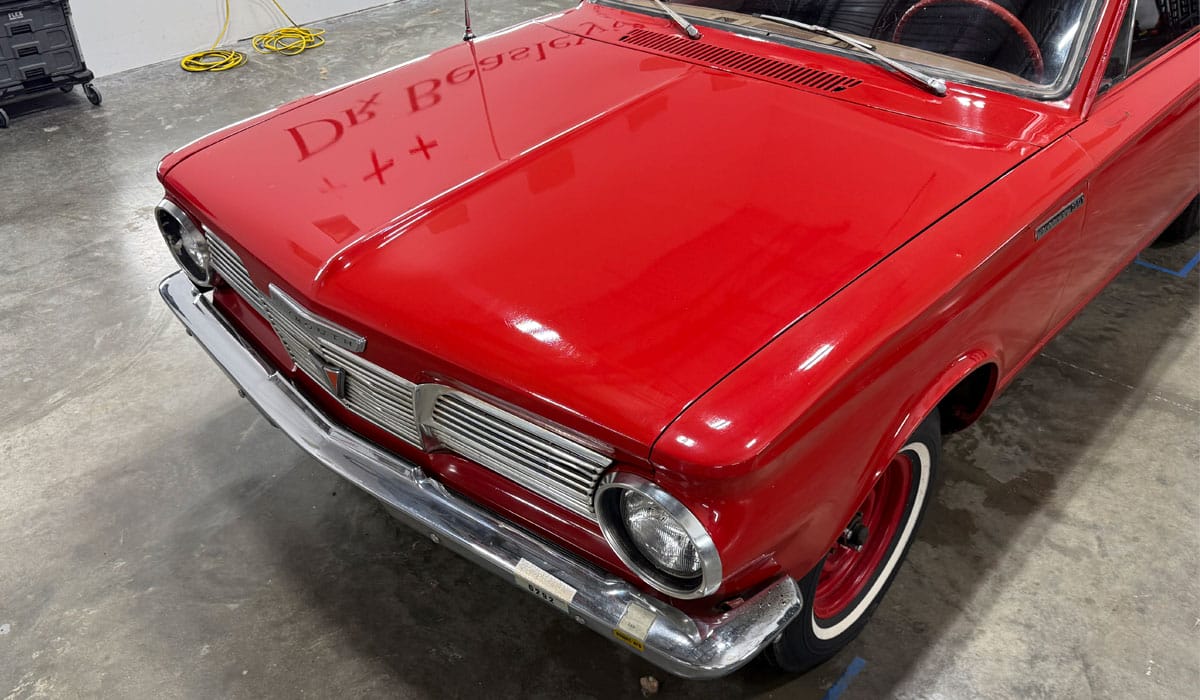
Here she is after she arrived to Dr. Beasley’s Training Center in sunny, Stuart, Florida!

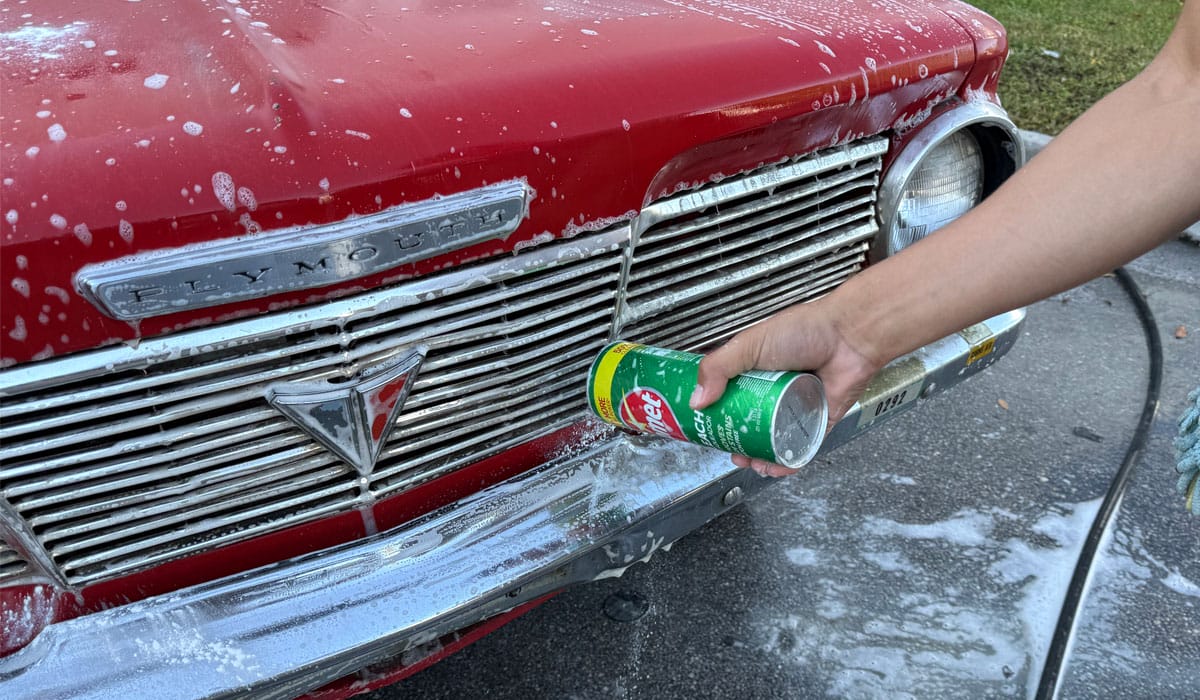
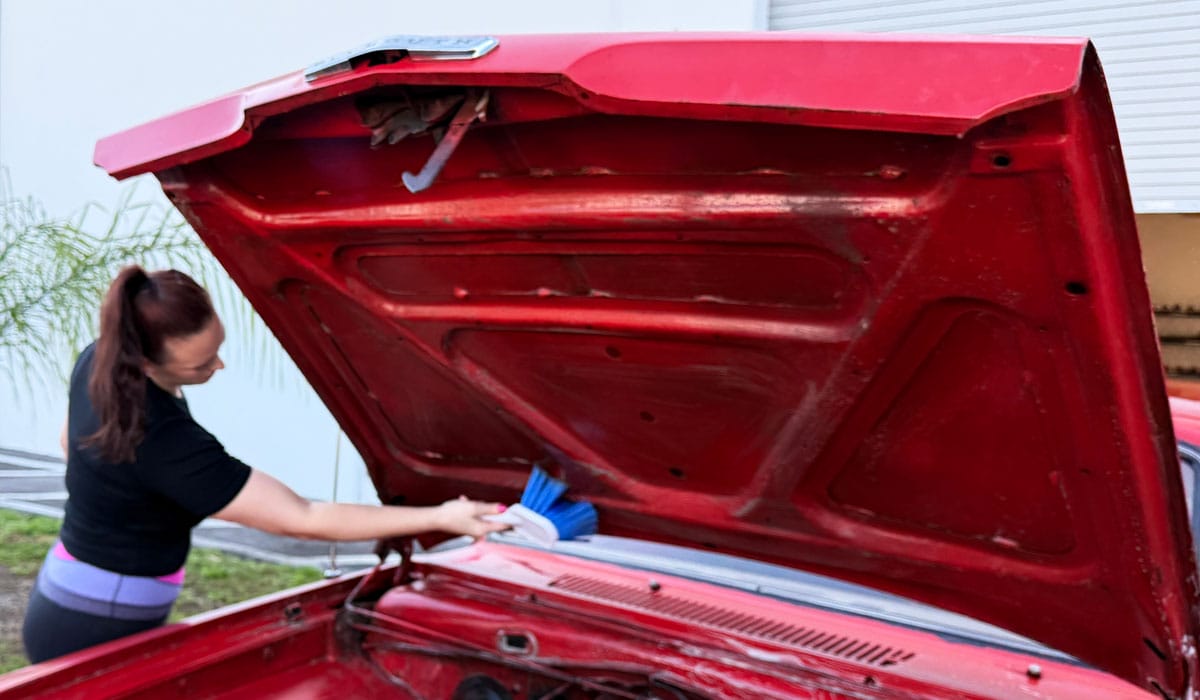
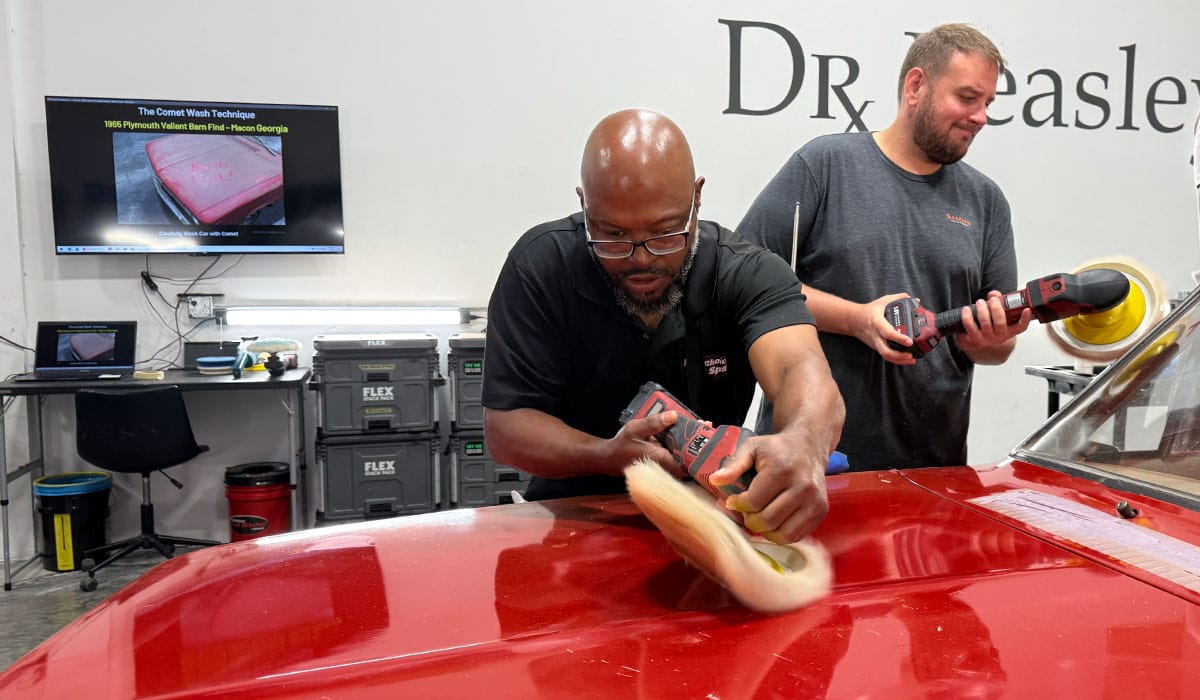
The Comet Wash Technique
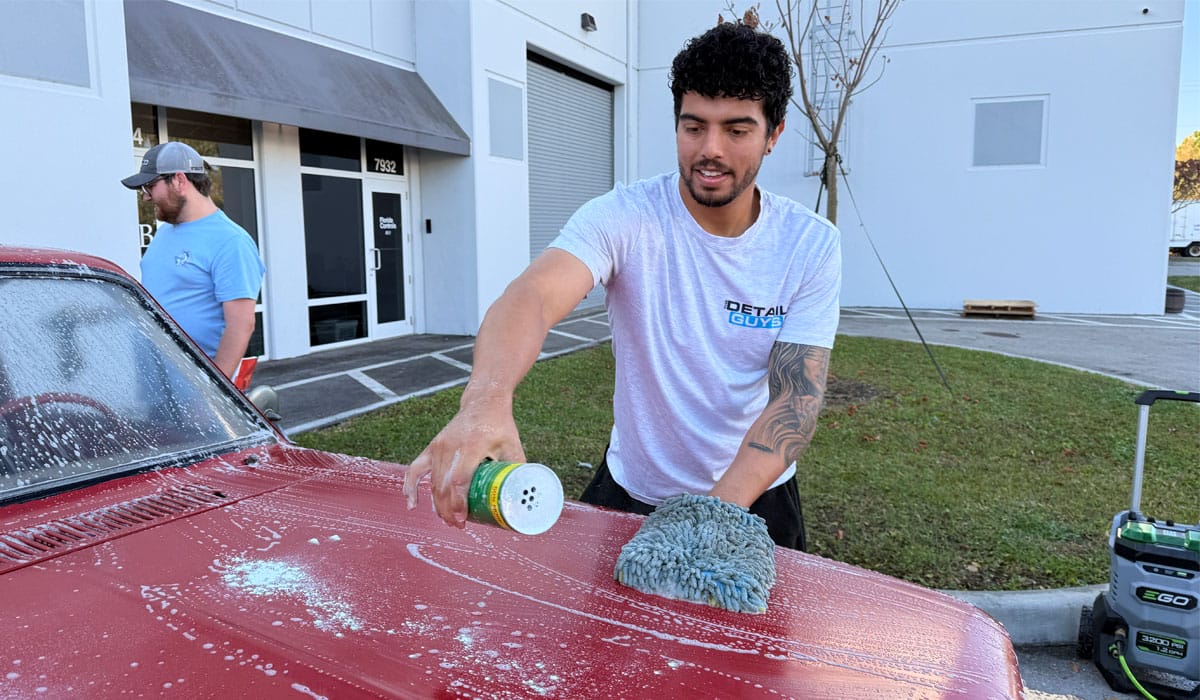
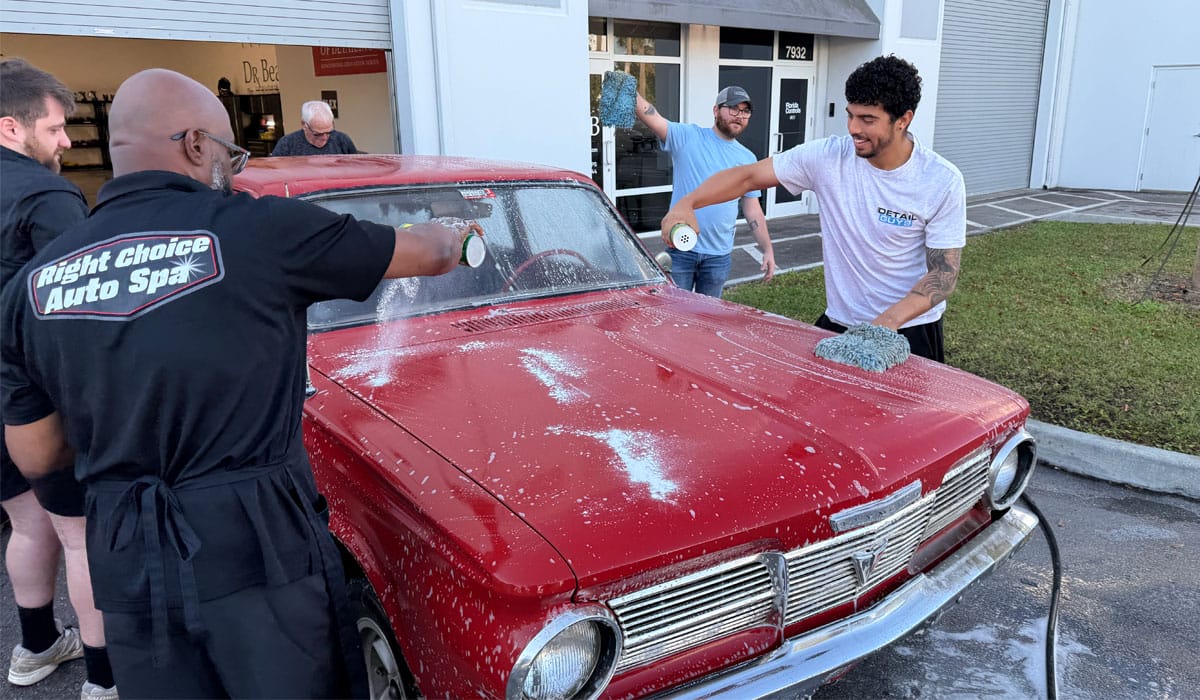
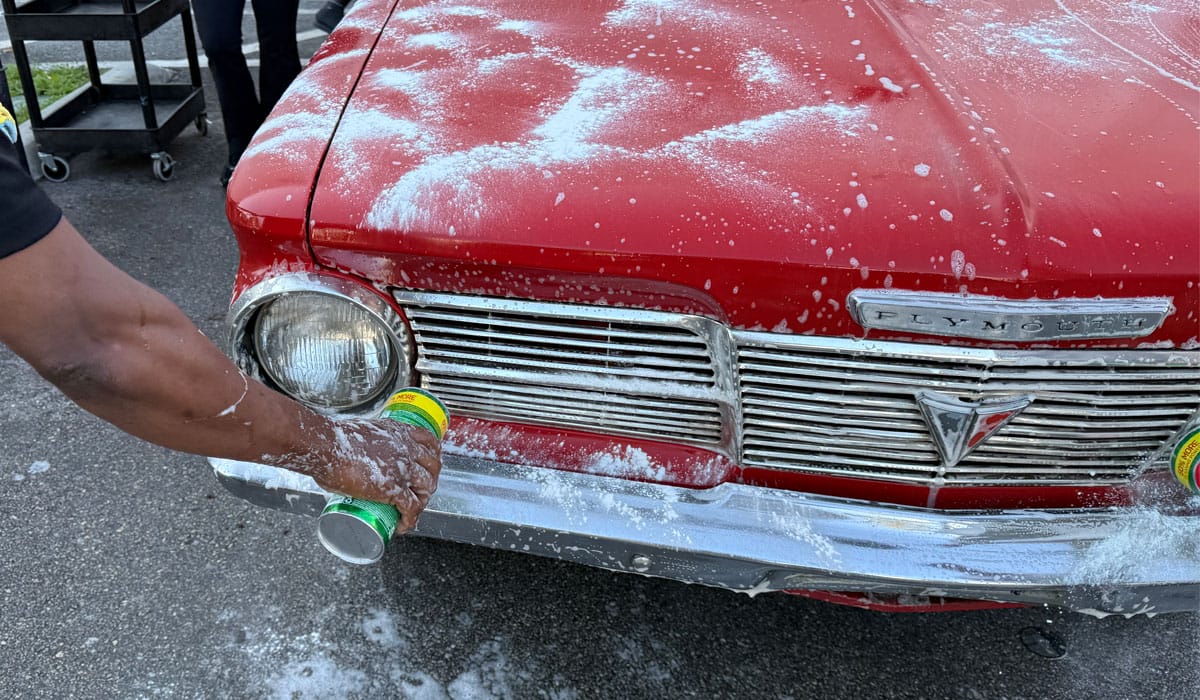
The Comet Wash Technique is an old-school technique for removing years of oxidation, dirt and traffic film during the wash process.
NOTE: This is NOT for modern cars with clearcoat paint jobs. This is ONLY for older cars, with extremely oxidized single stage paint.
The BIG PICTURE IDEA?
The big picture idea behind washing an older, extremely oxidized car with Comet is that you will remove years, even DECADES of dirt and oxidation during the wash process, which you need to do anyways before detailing a dirty car. Besides getting the paint, glass and chrome spotlessly clean, when you do move forward with the first paint correction step, you won’t simply load-up your buffing pads with years of oxidized, dead paint. Washing using the old-school Comet Technique makes quick work of getting ALL of the car clean and gets the car’s paint to a fresh base layer of paint, ready for paint correction.
No PowerPoint Presentation – Kind of
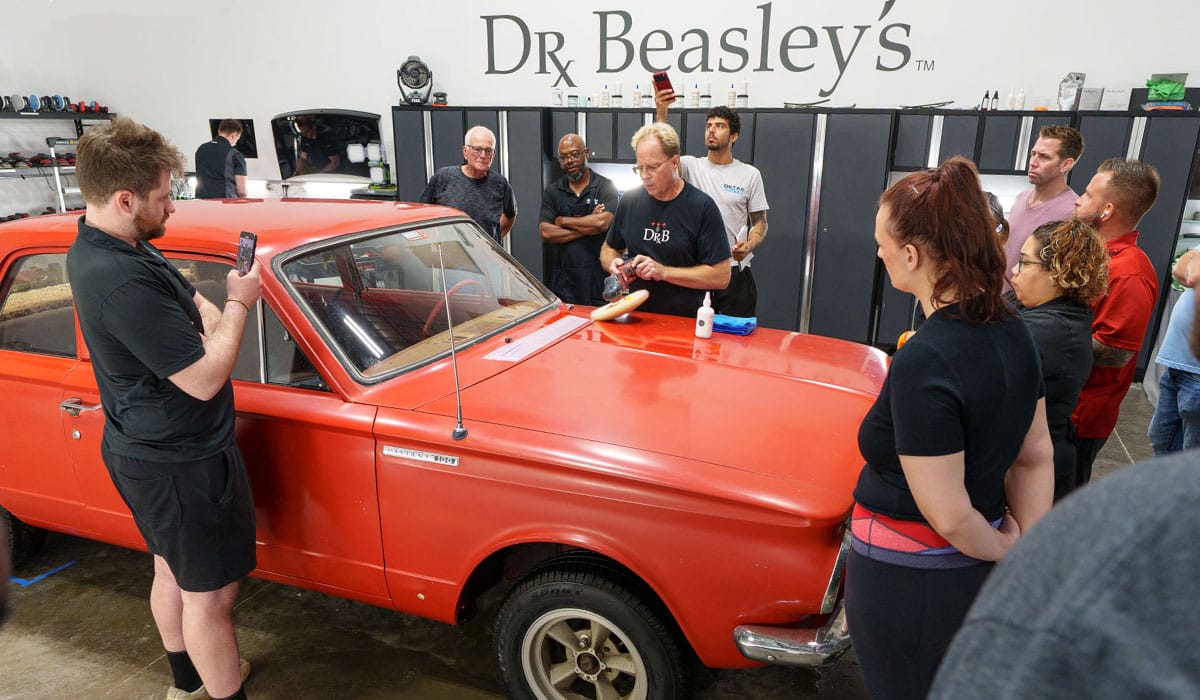
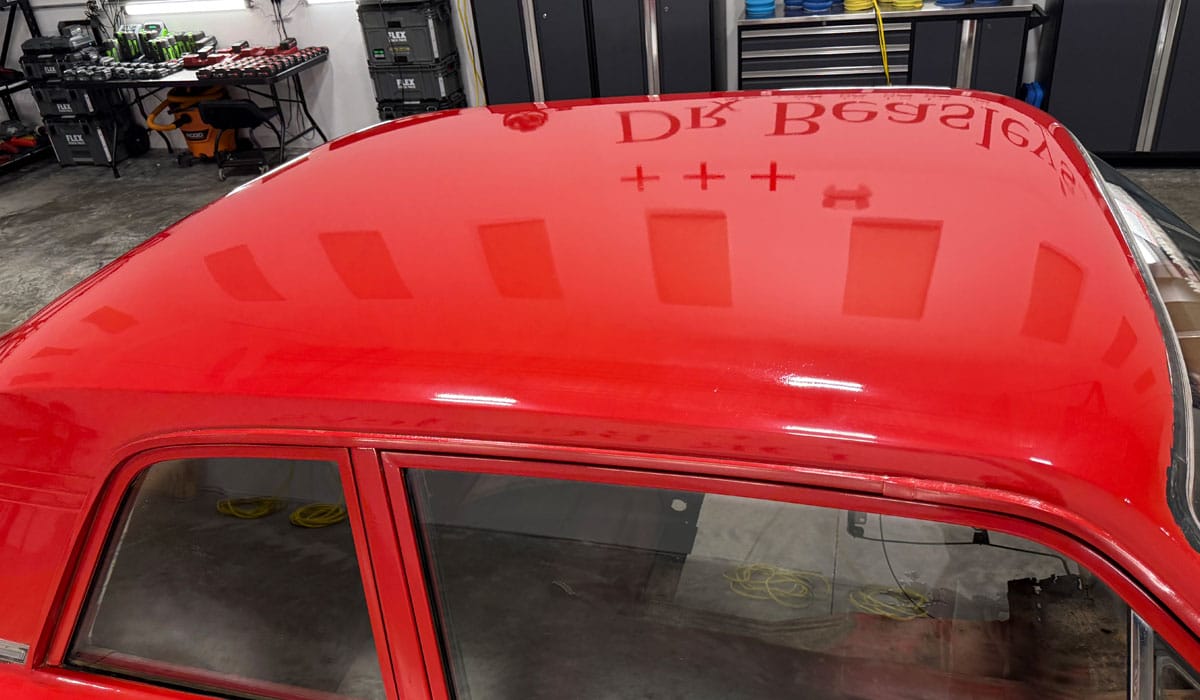
Here’s the PowerPoint slide for this car on the first day of this 2-day class. This is the only type of PowerPoint slide used in our classes. The slide shares the topic, the car and the process. That’s it. You don’t sit for hours in our classes sitting in a chair watching a PowerPoint presentation. You train on cars. So there is a PowerPoint, but it’s only a single slide for each topic.
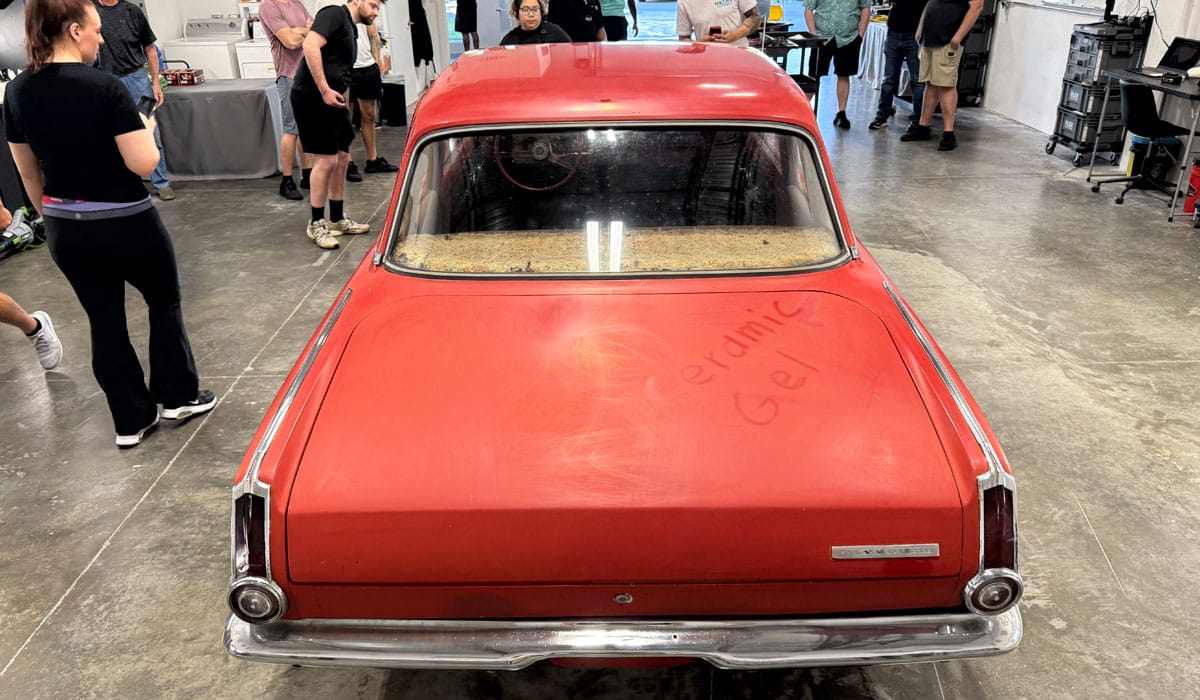
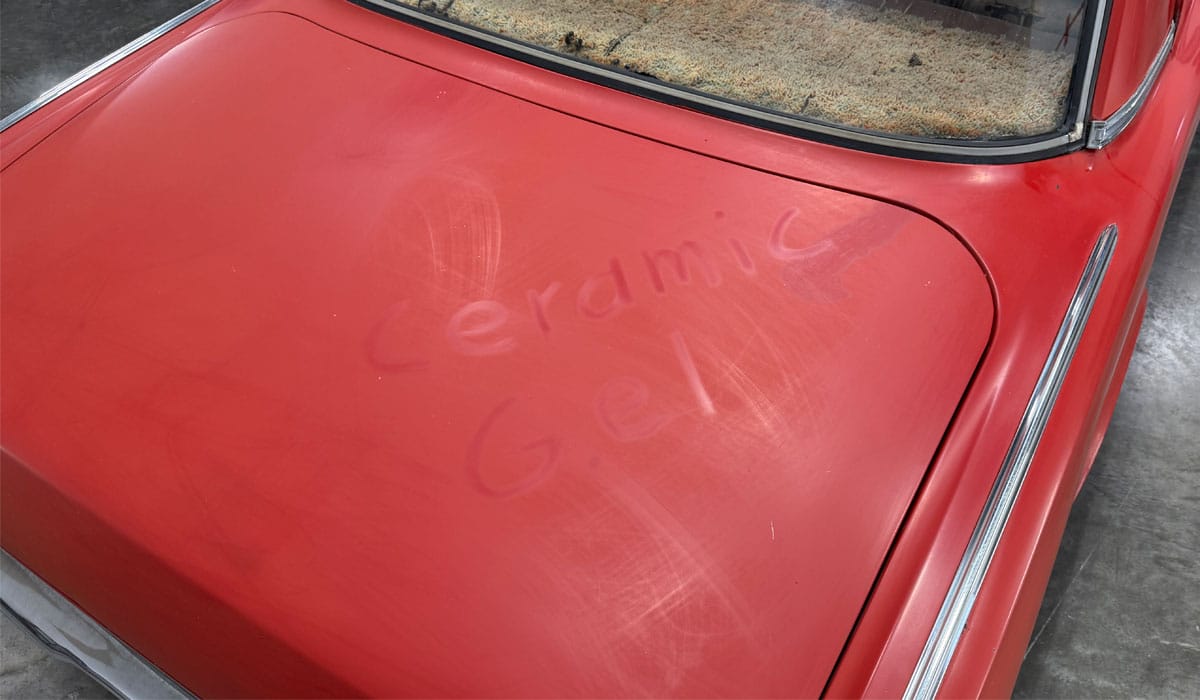
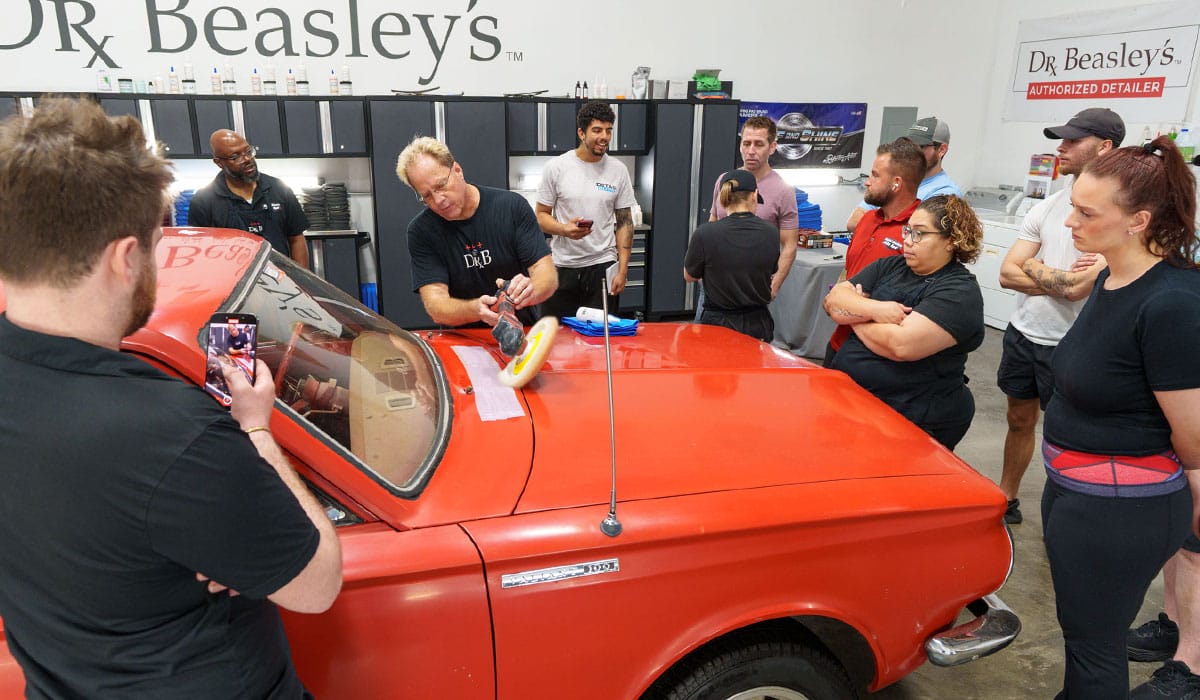
The Power in the AFTER pictures is created in the BEFORE pictures
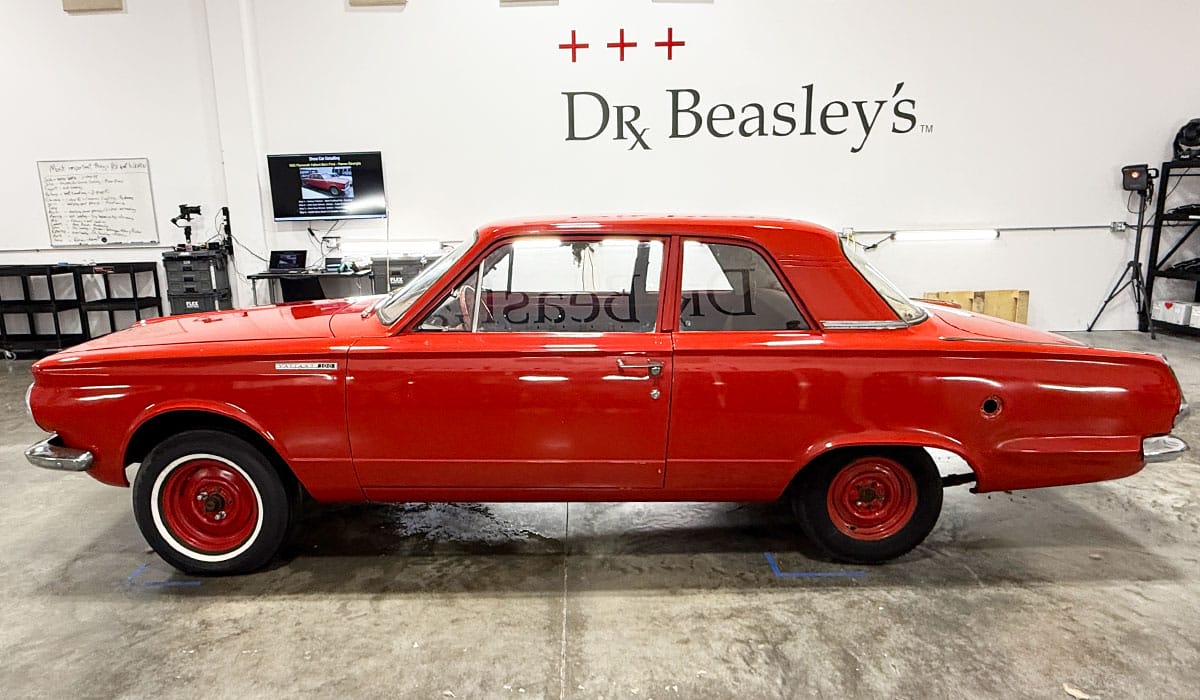
Here’s the car staged in our training center for all the students to get their BEFORE pictures. Always remember, once you wash a Barn Find, there’s no going back in time to get the before pictures and the before pictures are the MOST important pictures.
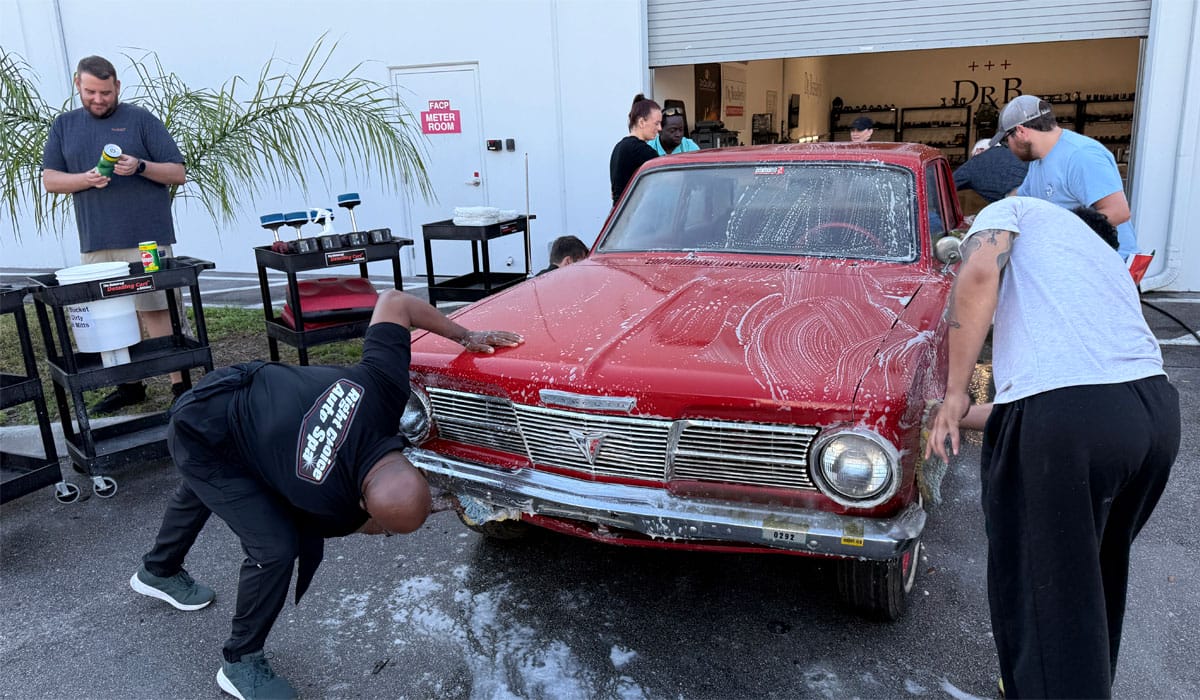
7:30am and it’s Go Time!
No chairs, zero sitting – from start to finish our classes are hands-on and you’re training on multiple, multiple cars. No demo hoods and no test panels.

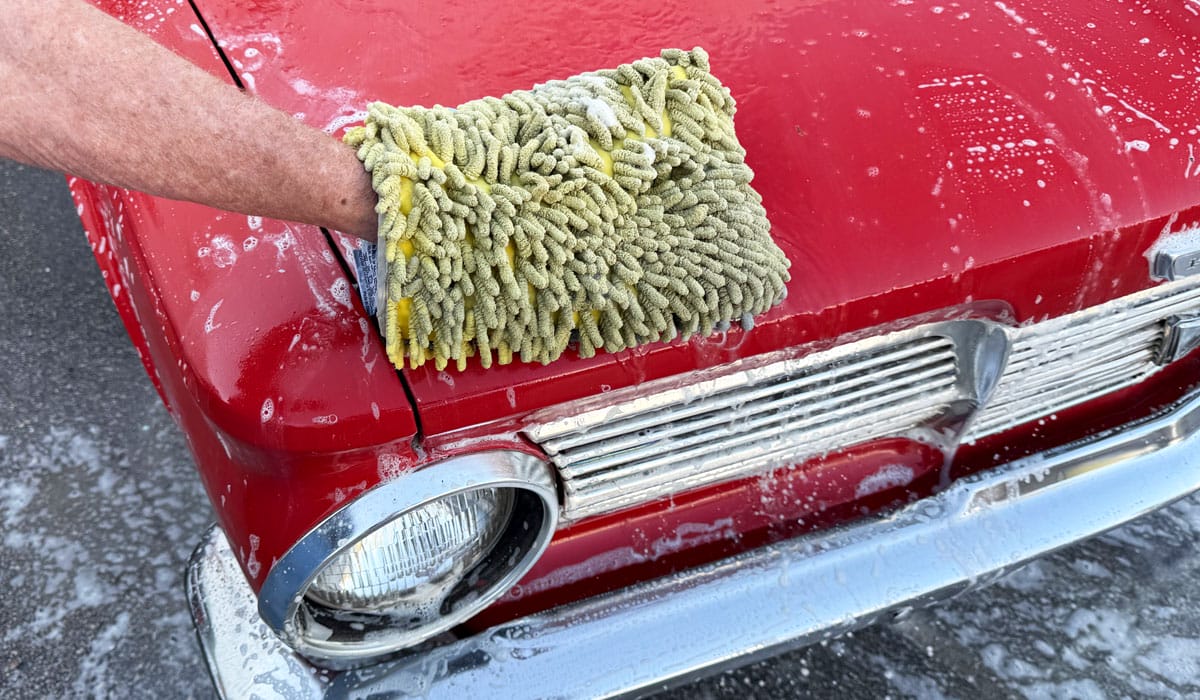
Look how dirty the bright yellow fibers of the wash mitt have become!
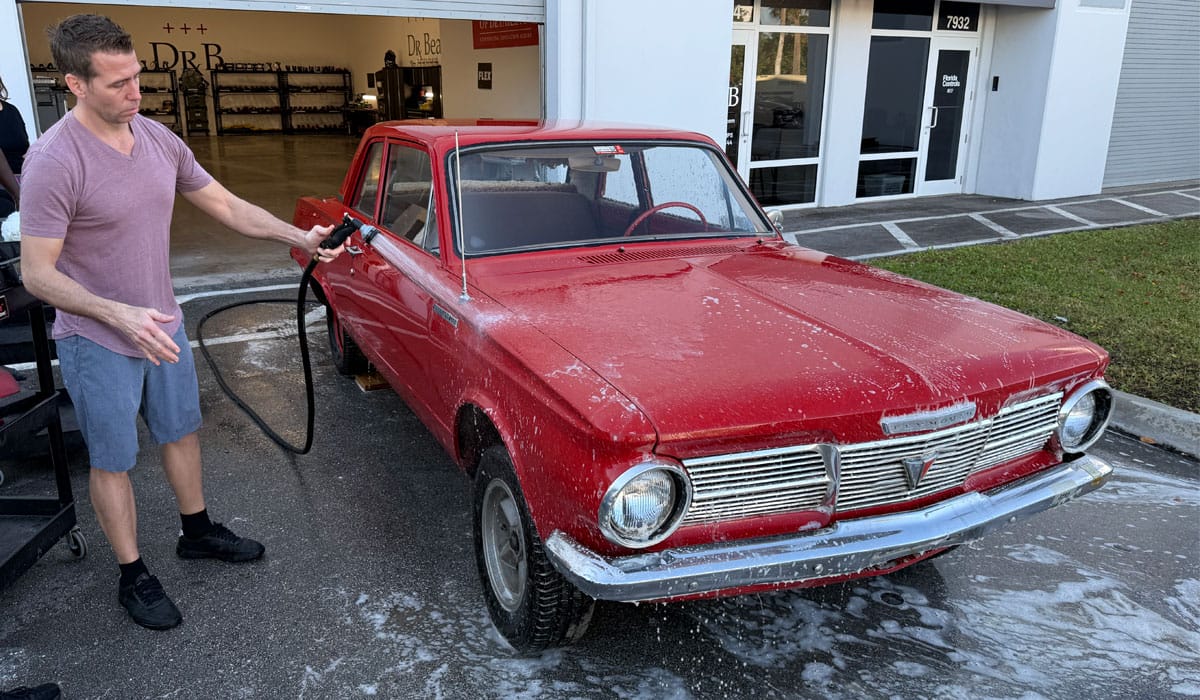
After a very thorough wash job, Josh gives our Barn Find a thorough rinse.
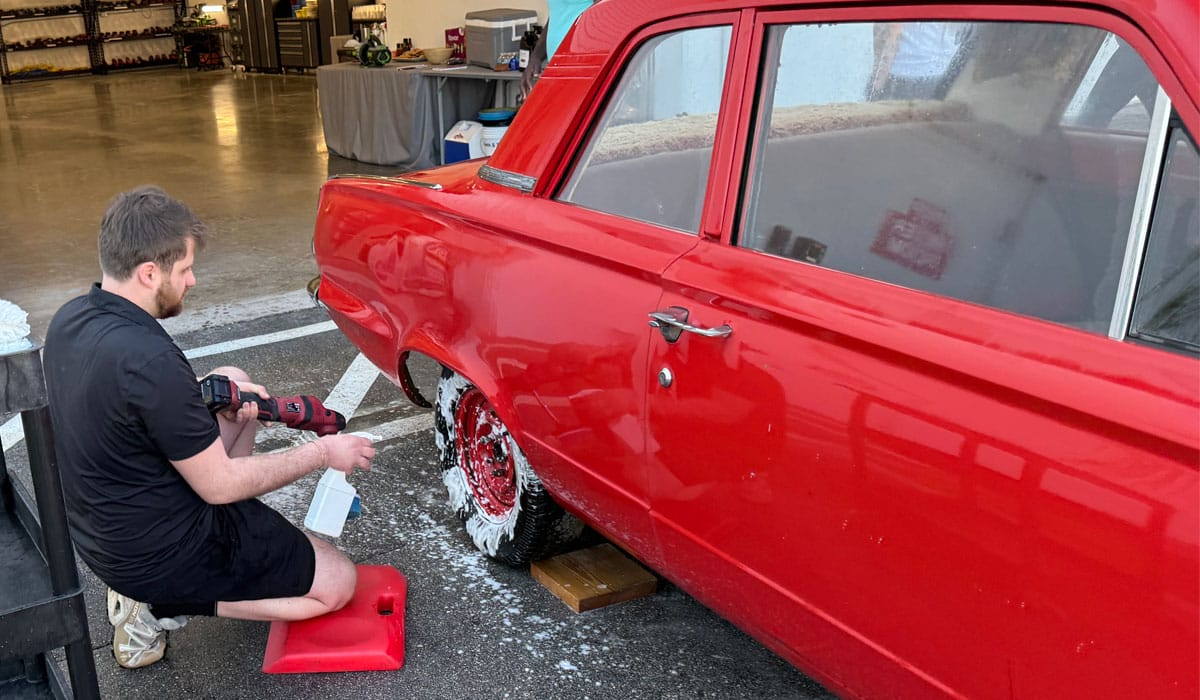
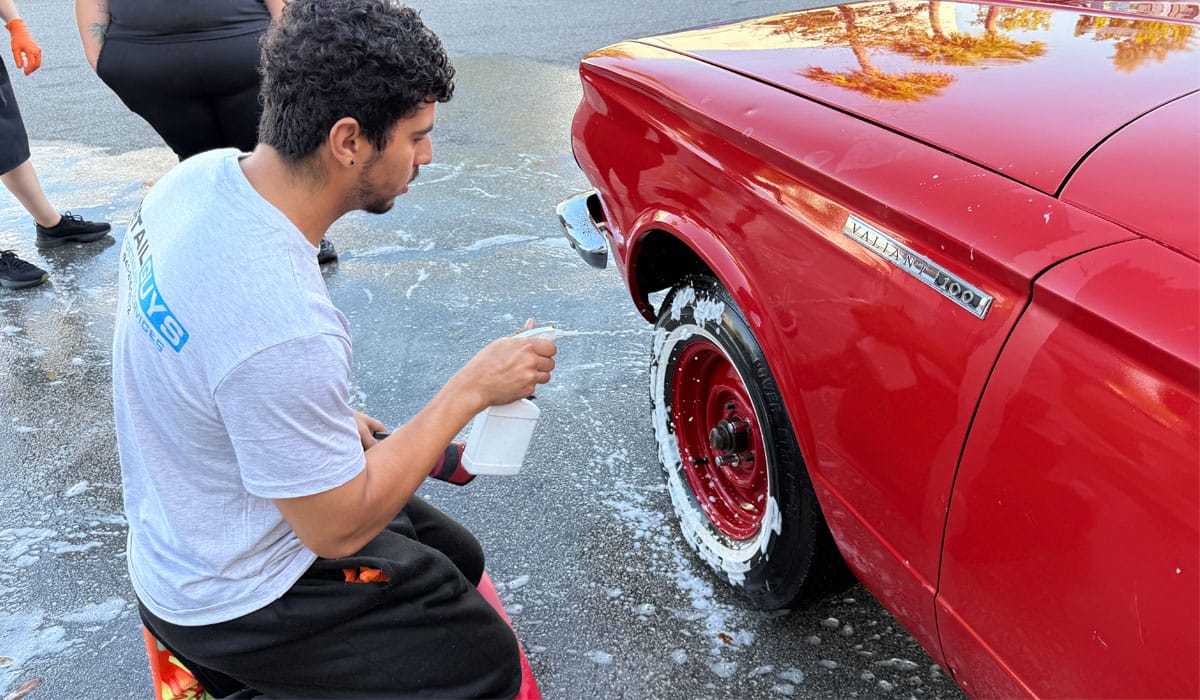
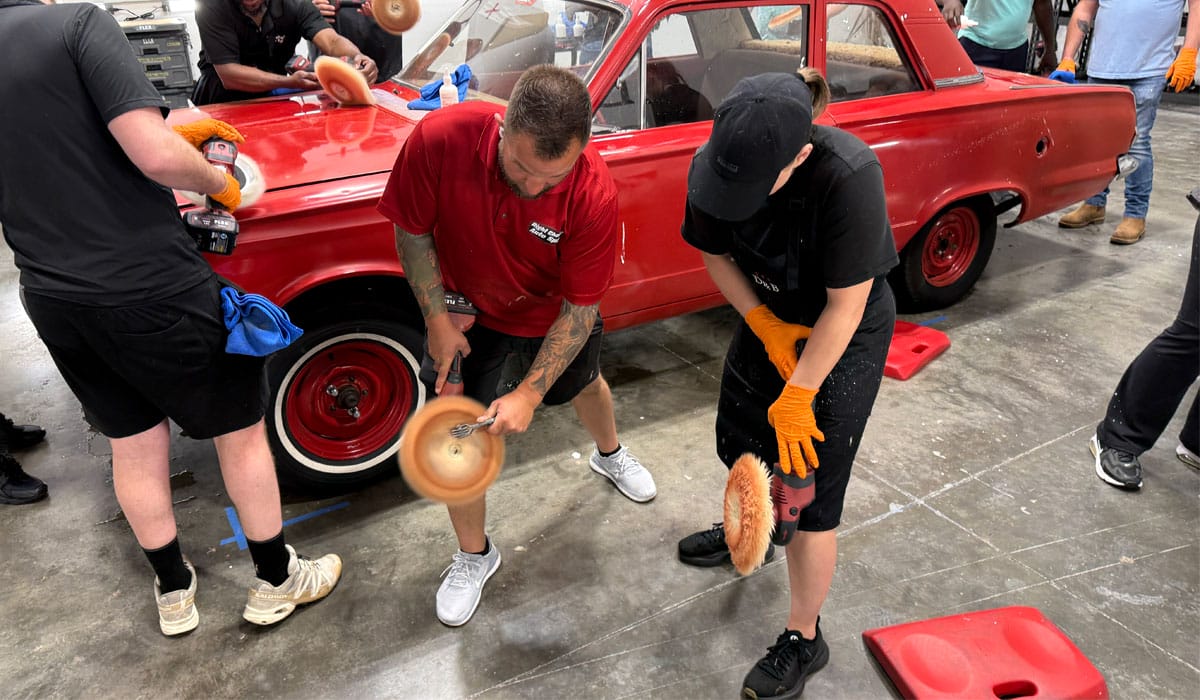
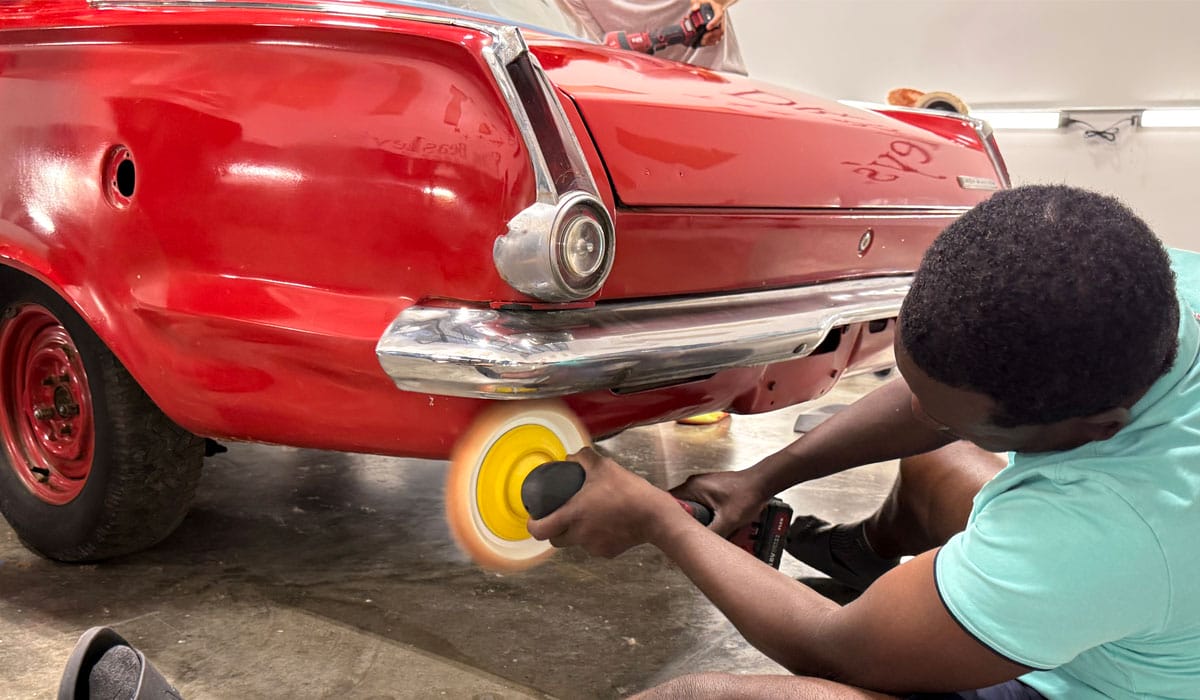
Wheels & Tires First
Normally we practice and teach to wash the wheels and tires first before washing the entire vehicle, but this is the exception to the rule. Thus after doing the Comet Wash Technique to the car itself, next up is tackling the wheels and tires.
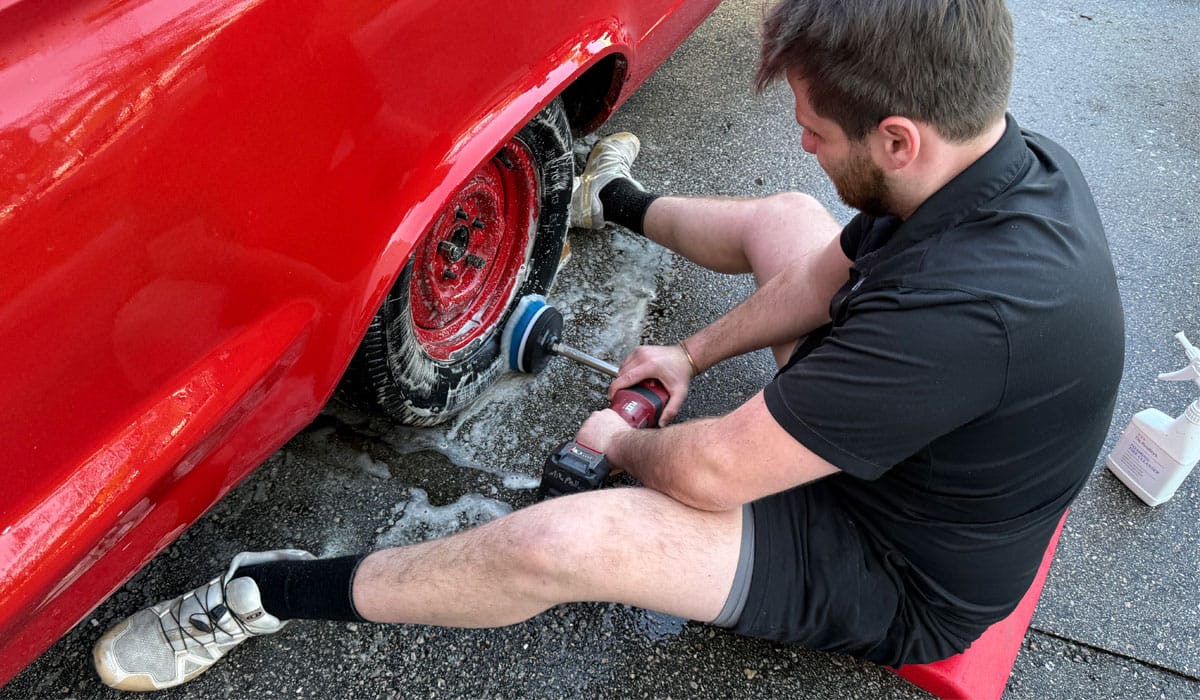
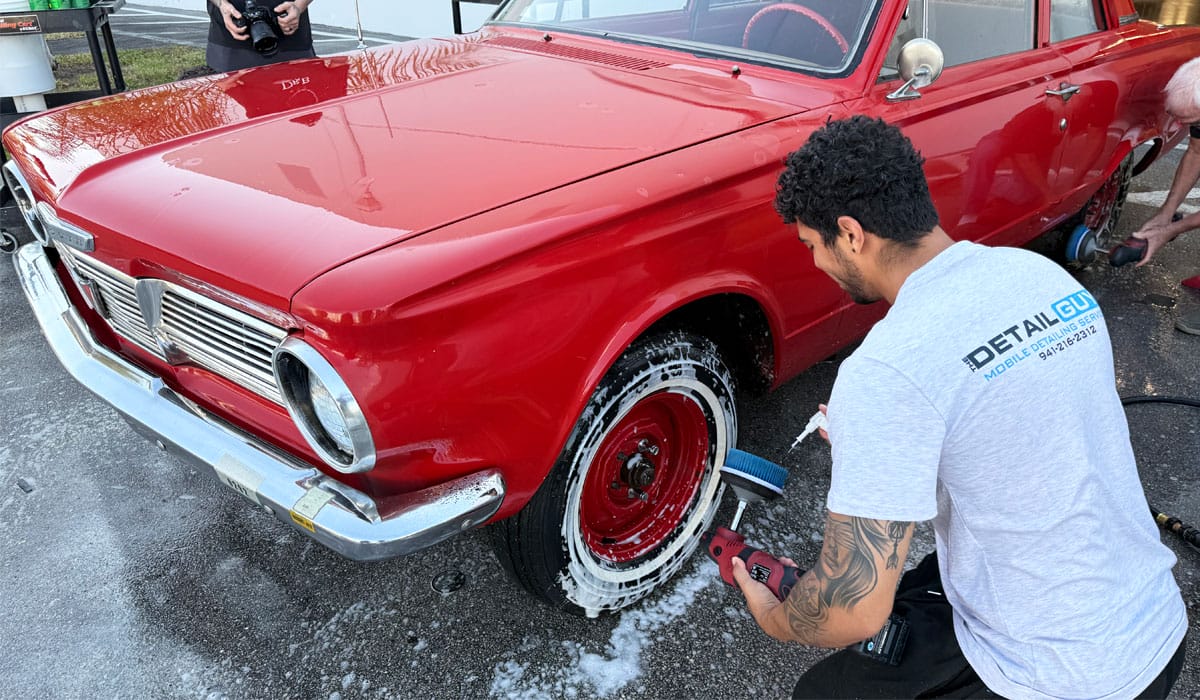
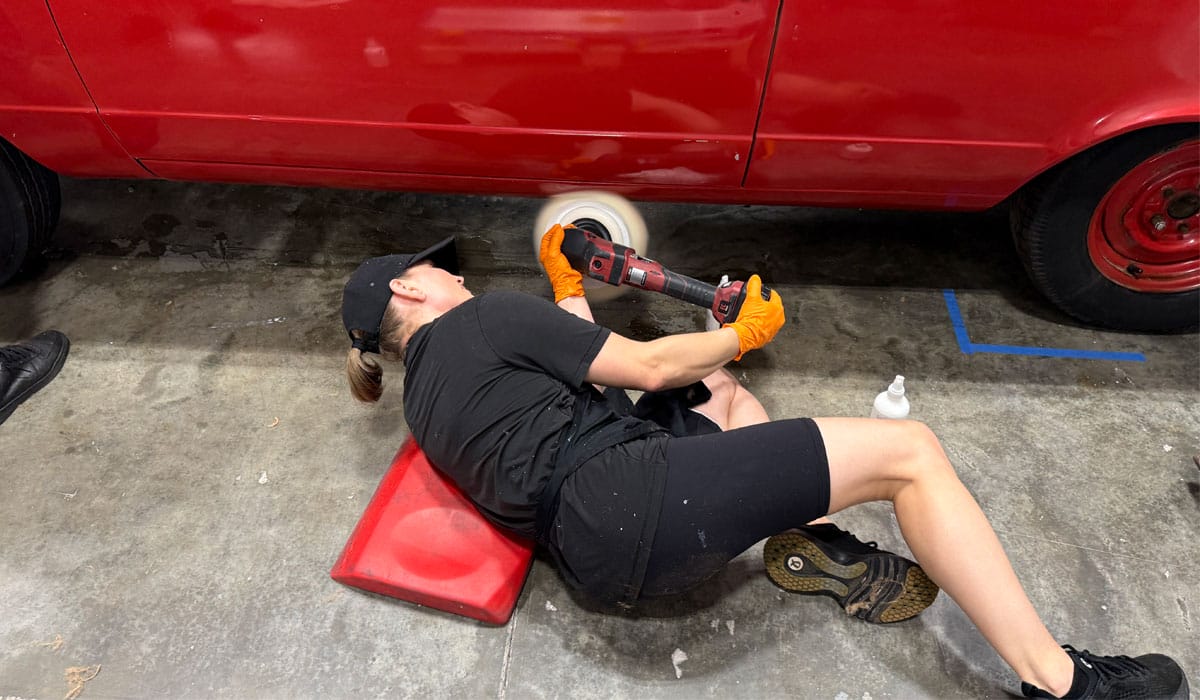
Action Shots – Machine Scrubbing Tires
Back in 2013, I posted what I believe to be the first video showing how to machine scrub tires. Back then, the FLEX cordless rotary polisher had not been yet invented, so I used a Porter Cable 7424XP with a Cyclo Aqua Carpet Cleaning Brush. Because the Porter Cable 7424XP is a free spinning, random orbital polisher, just like when using it with buffing pads, when using this tool a brush attached – there was brush stalling. This is why I’ve switched all machine scrubbing to gear-driven rotary polishers – zero brush stalling.
Teaching Technique
This car has old, worn-out tires, thus I did not teach the class how to get old tires clean, I taught the technique of machine scrubbing tires. This means hands-on experience, which build confidence, and muscle memory. The goal being when the class returns to their world, they’ll know how to do this type of machine tire scrubbing on good tires.
No Electrical Shock Hazard
You see everyone in this class using CORDLESS rotary polishers, this is by design. I’ve been shocked using corded tool to machine scrub tires, so once FLEX introduced their cordless rotary polisher at SEMA in 2017 – I immediately included these tools for machine scrubbing all types of things/surfaces to keep everyone safe.
Here’s Josh machine scrubbing tires
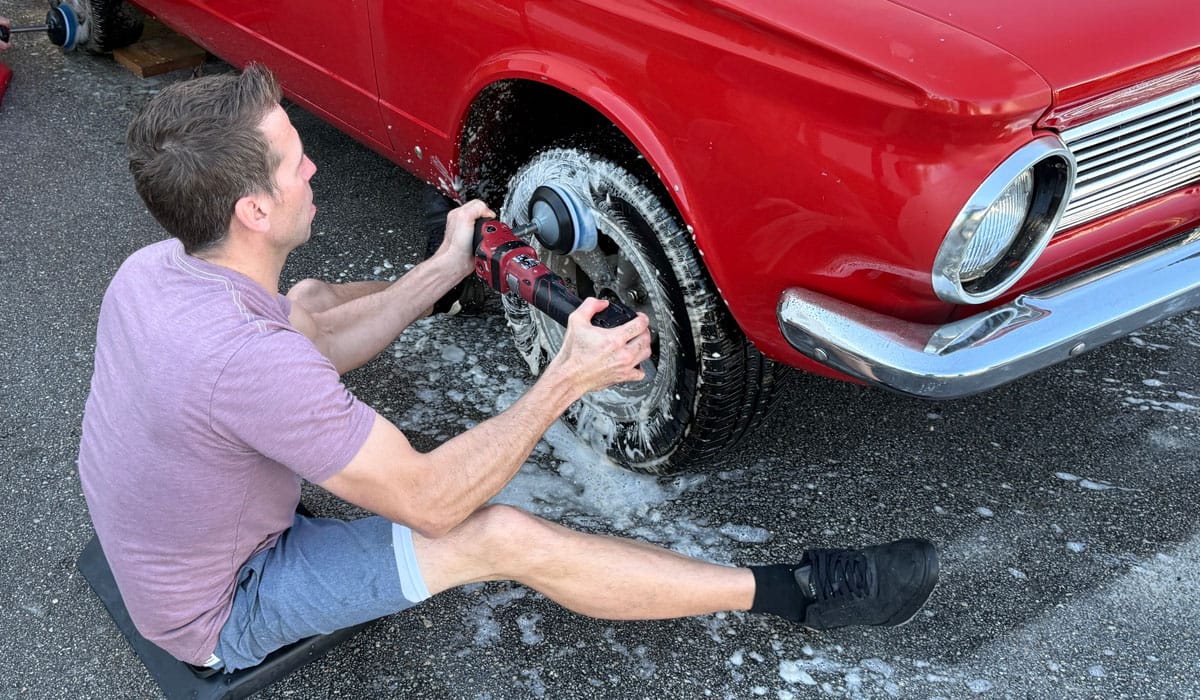
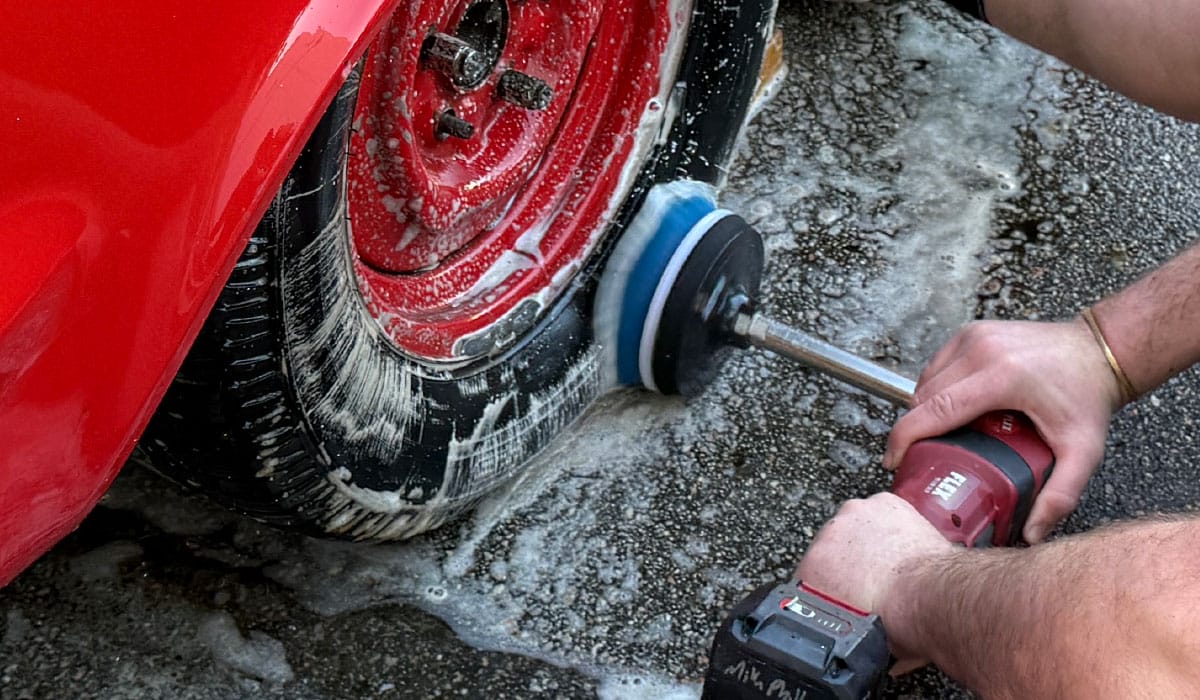
See the tire cleaning foam turning white? That’s also by design.
Here’s Nic machine scrubbing tires
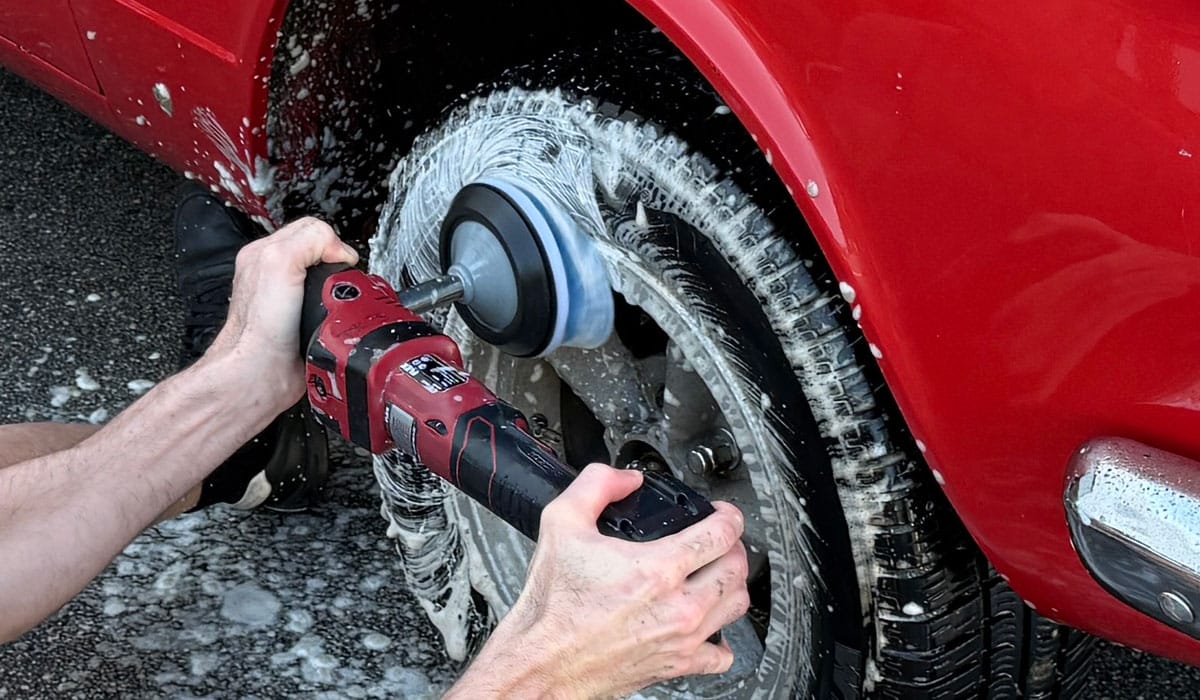
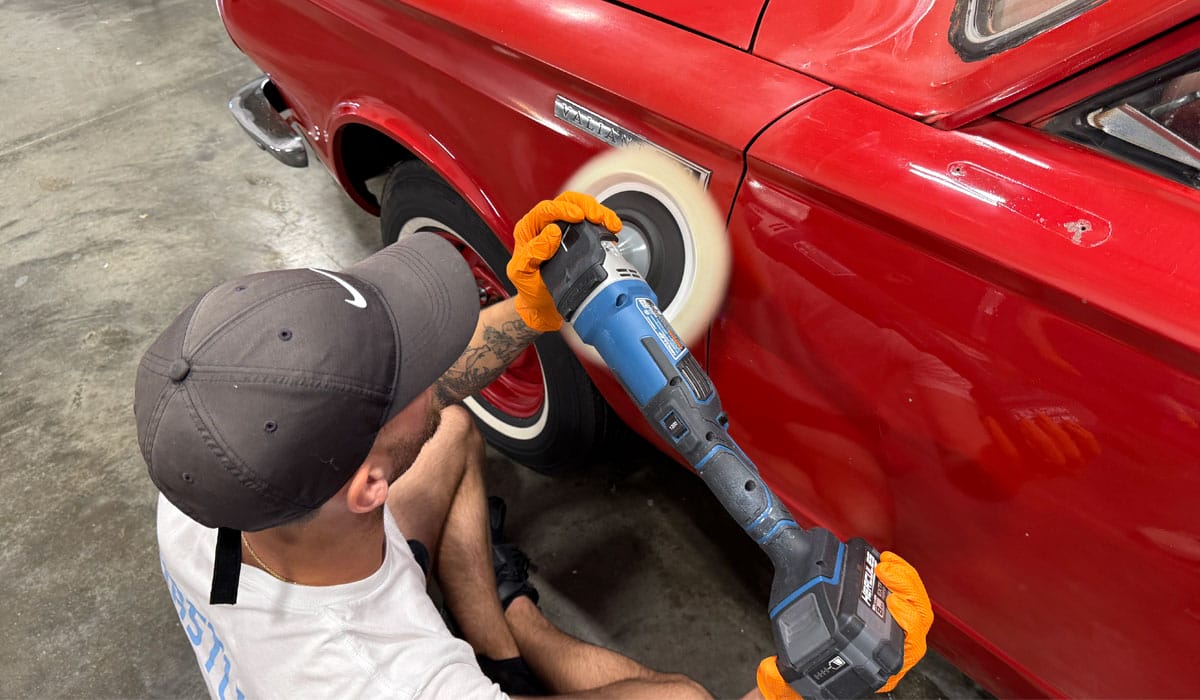
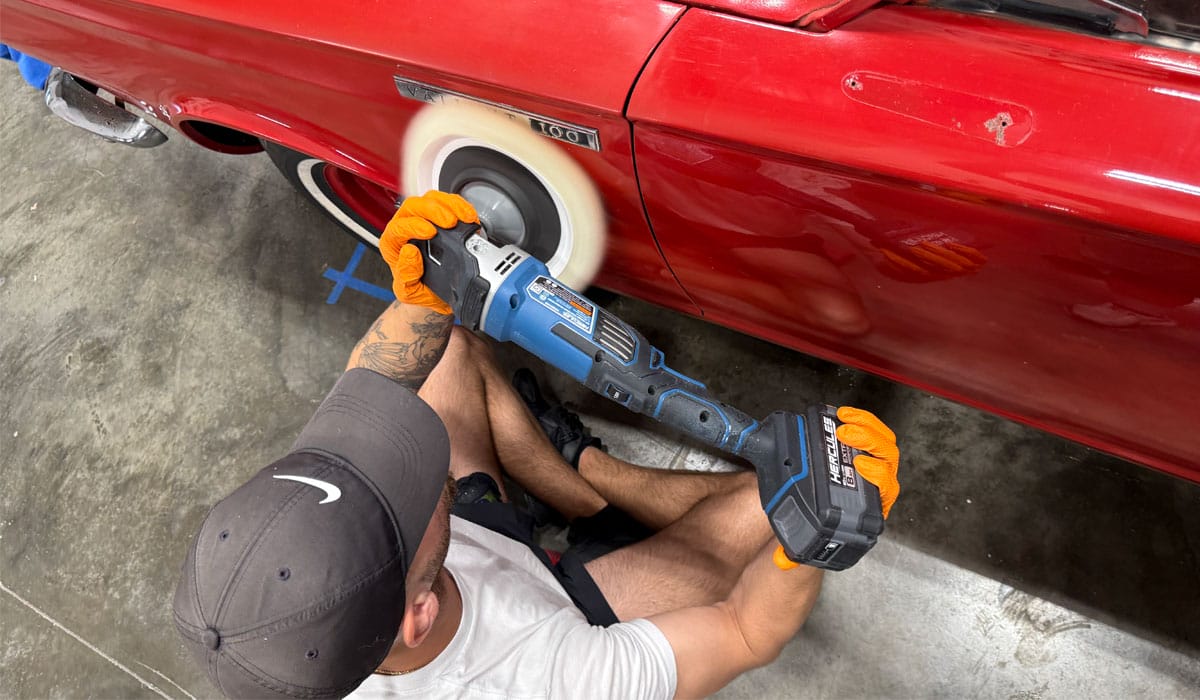
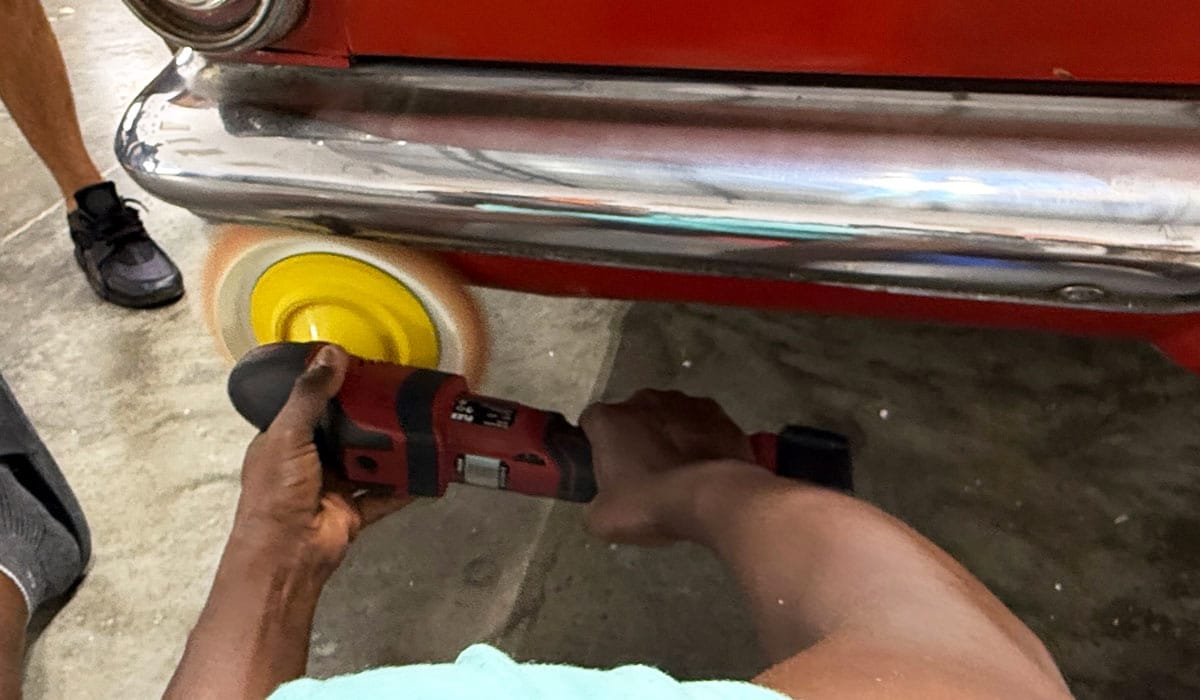
Rotary Polisher Extensions
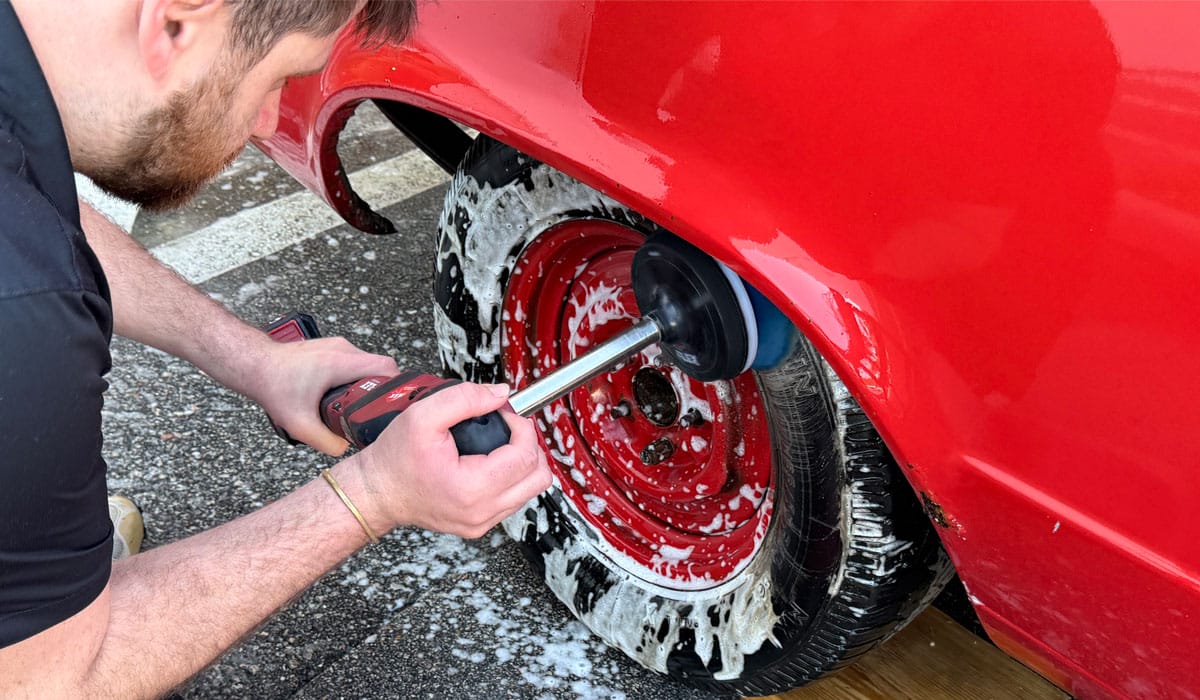
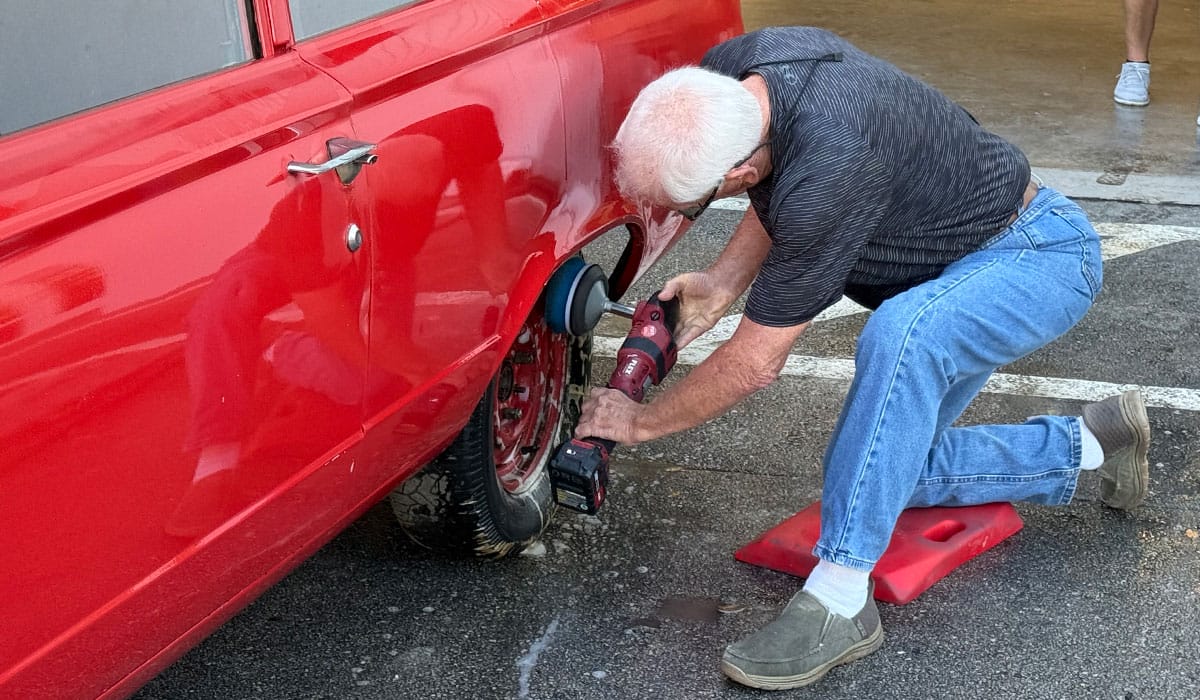
This picture tells the whole story as to why I put extensions on rotary polishers. The extension moves the body of the polisher away from the tire and this enables you to PUSH the spinning brush bristles against the flat spot on the tire to get it as clean as all the other areas of the tire sidewall. Normally, we use 3″ extensions, but one of my 3″ extensions was missing, so Nic is using a 6″ extension. Both sizes will do the same thing, but you have more control over the polisher with the shorter 3″ extension.
See it?
And sometimes, depending upon the body styling, the extension enables you to reach behind the fender to get the high side of the sidewall.
NEW! Dr. Beasley’s Foaming Tire Cleaner
This new product is something we started working on the summer of 2025 and it will be launching in the April/May time frame along with our new Tire Coating. Here’s Marcus spraying the new Foaming Tire Cleaner onto the tire sidewall.
Machine scrubbing tires gets them cleaner with less physical work on your part. You can also use a cordless drill with a brush attachment.
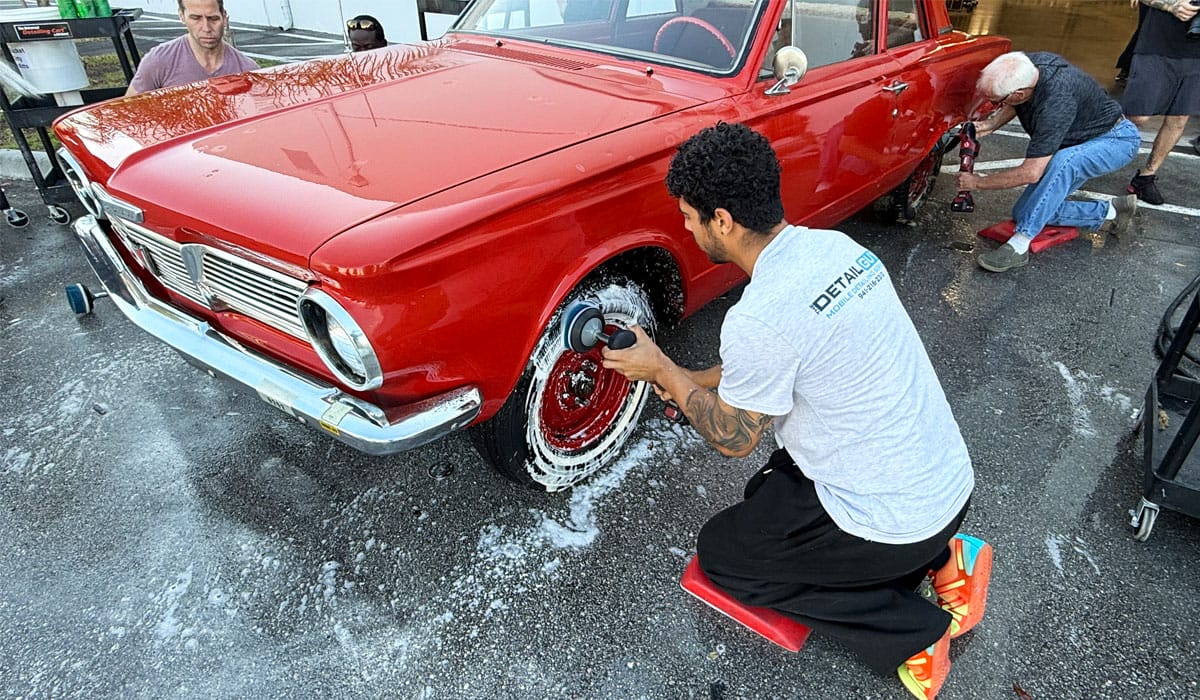
Here’s Clarence tackling the driver’s side rear tire. Note his cordless rotary has the correct, 3″ extension.
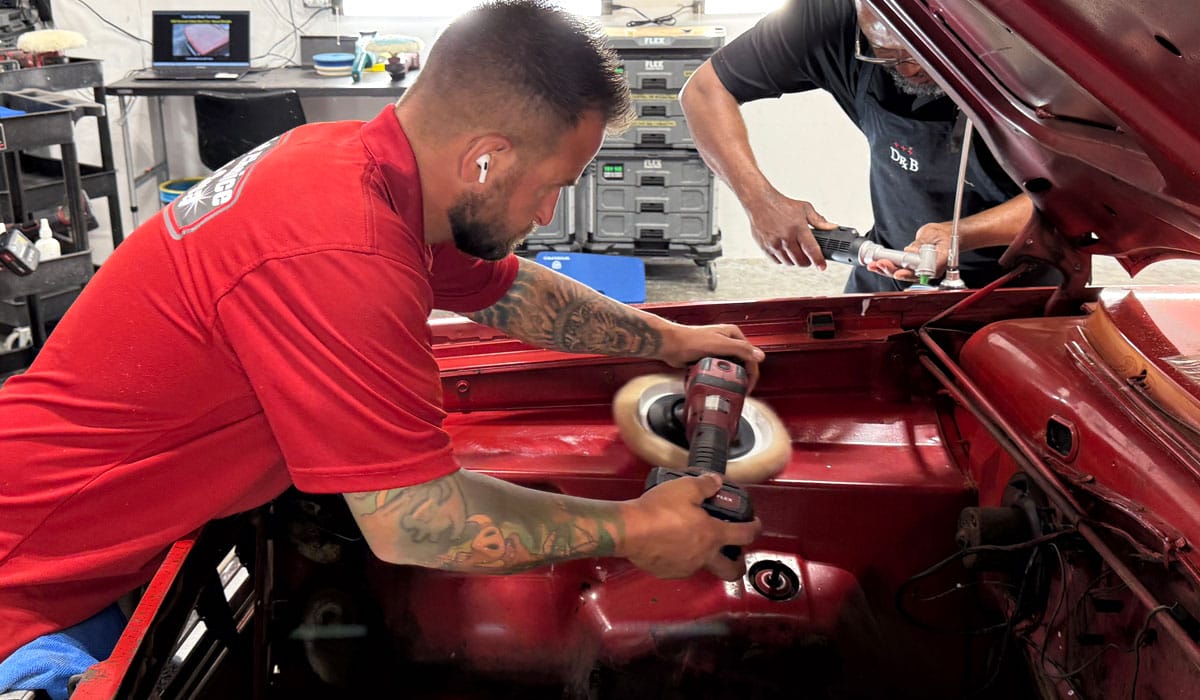
Action Shots – Wet Wash Engine Detail
This car arrived without an engine and transmission, so while there wasn’t an engine to clean, the engine compartment was just as dirty as the outside of the car. We used this Barn Find 1965 Plymouth Valiant to teach how to correctly do a Wet Wash Engine Detailer to build experience and confidence.
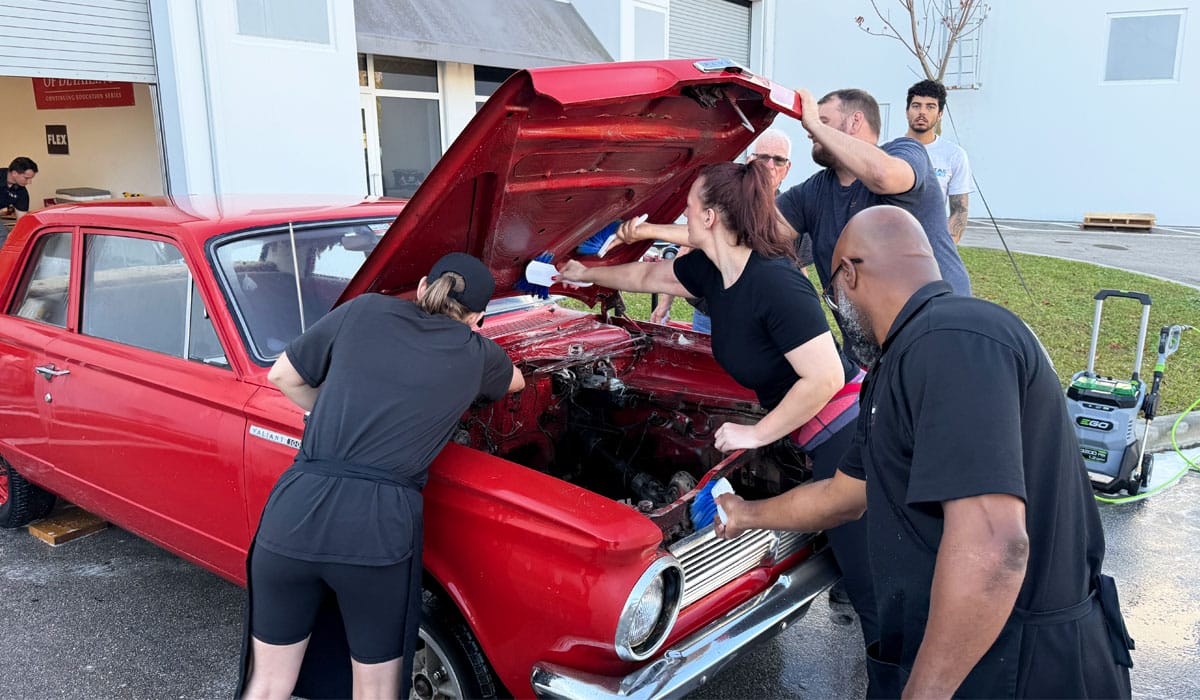
Thank you Brittany, and everyone else for all the focused attention to details this early in the morning.
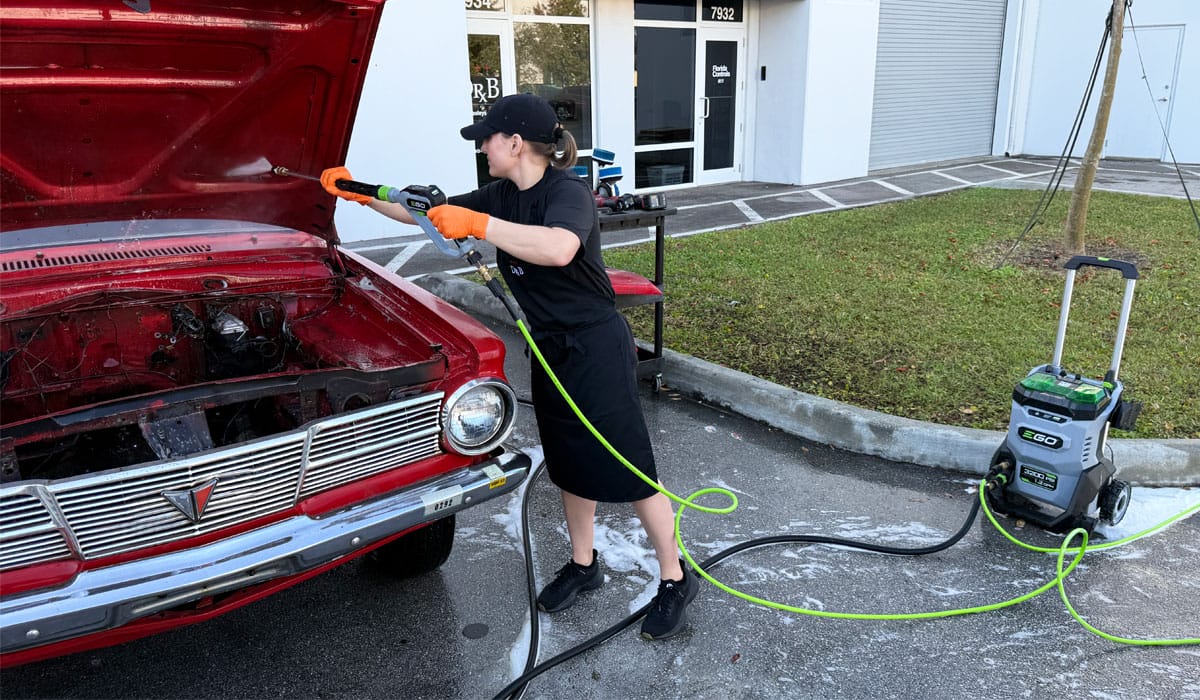
EGO Cordless Pressure Washer
After a thorough scrubbing, Julia rinses down the hood and engine compartment using the EGO Cordless Pressure Washer.

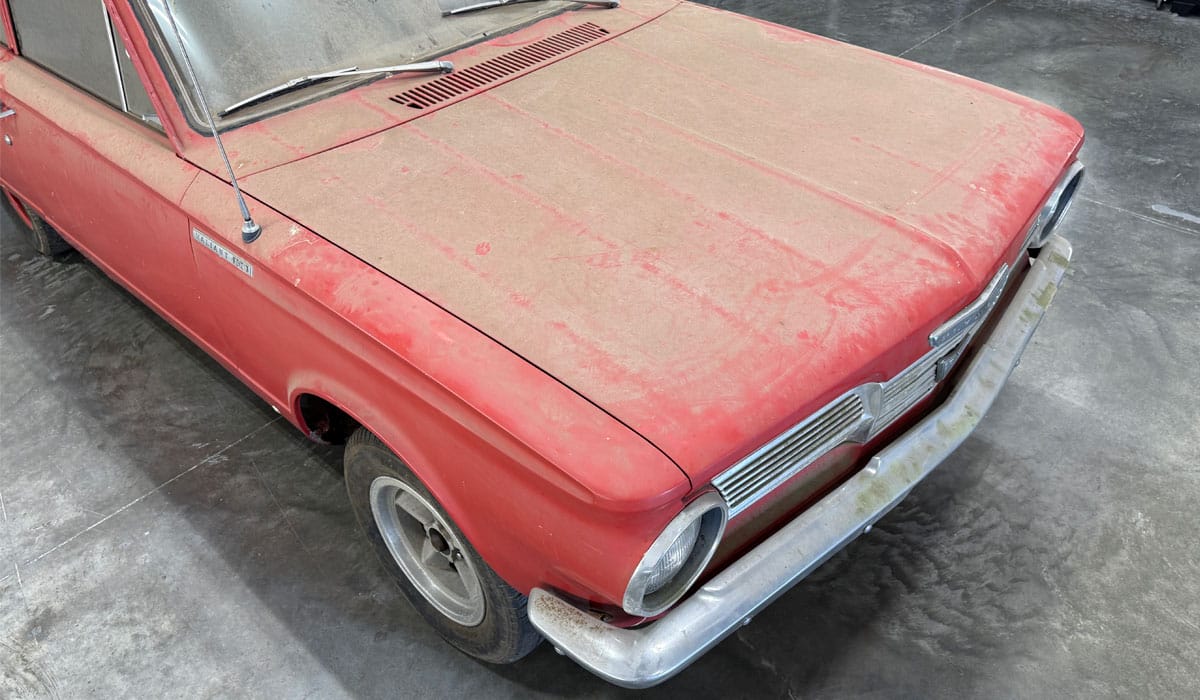
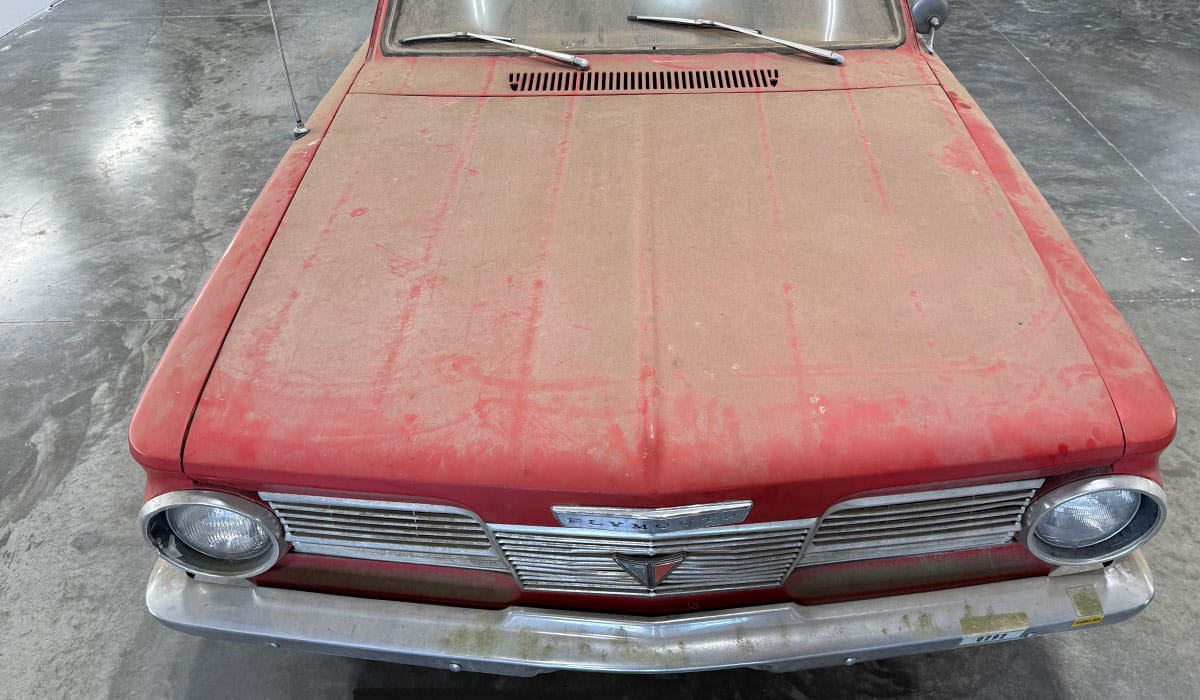
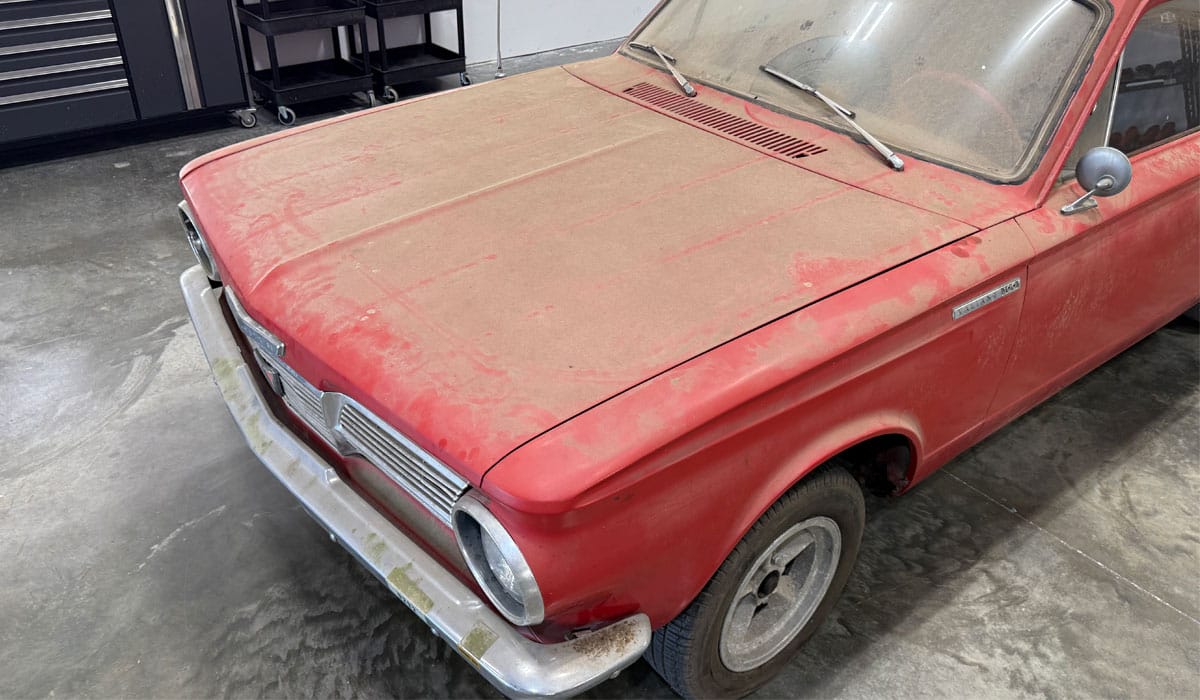
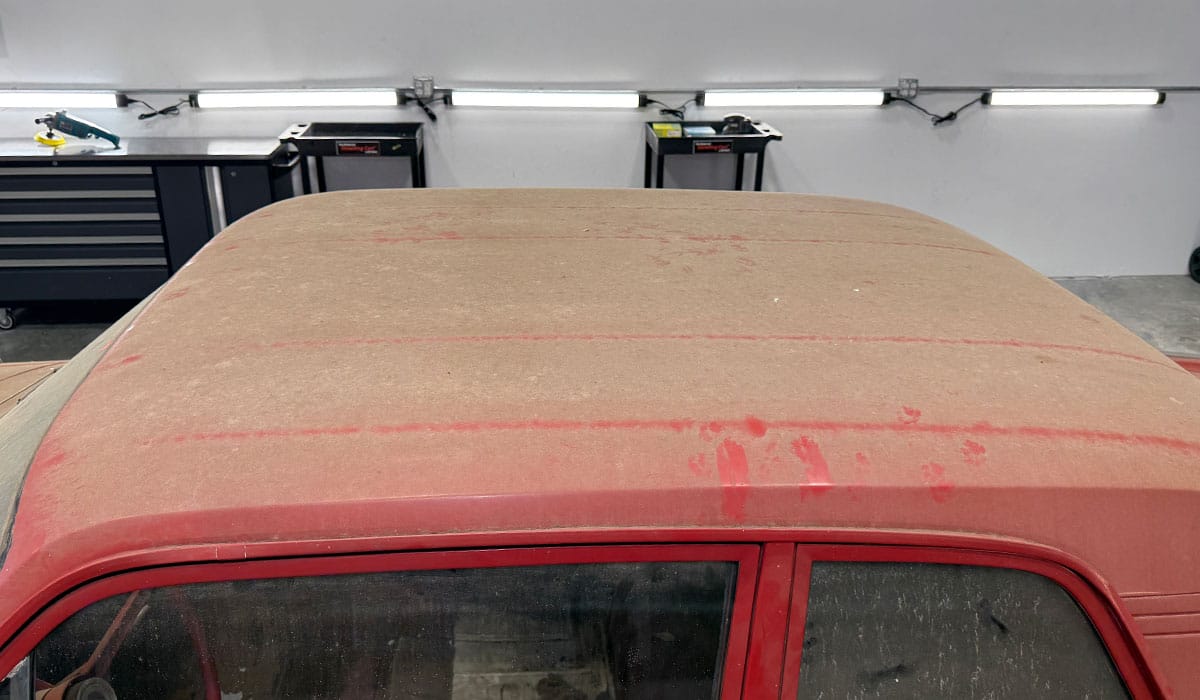
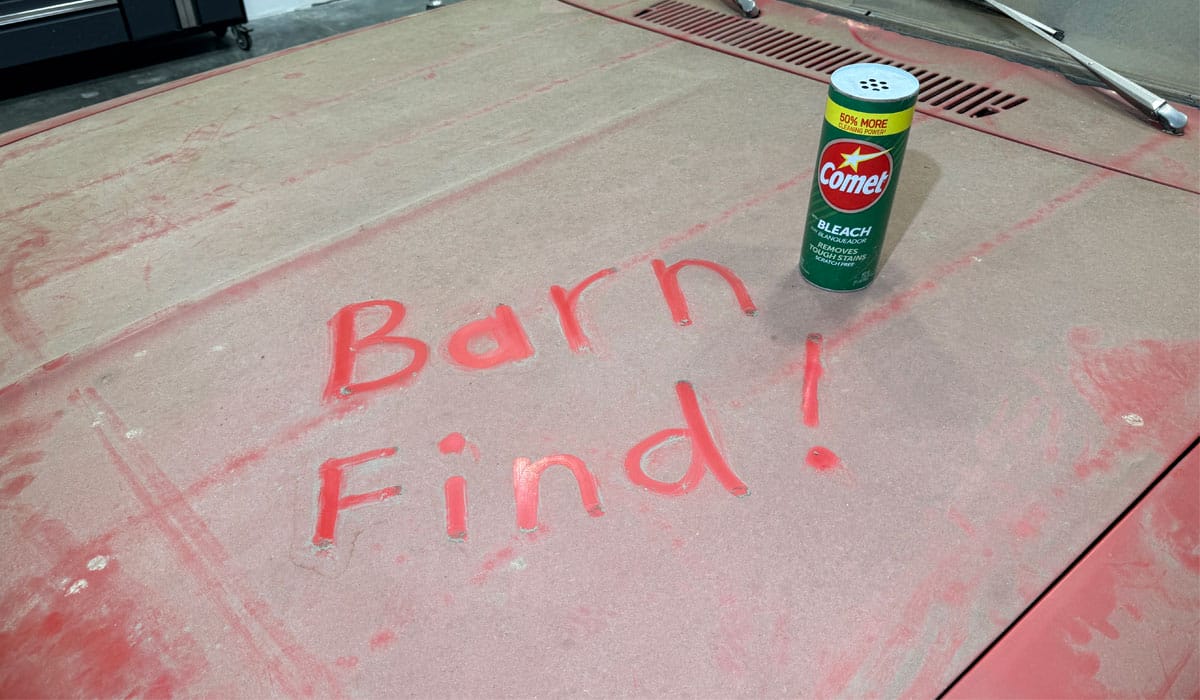
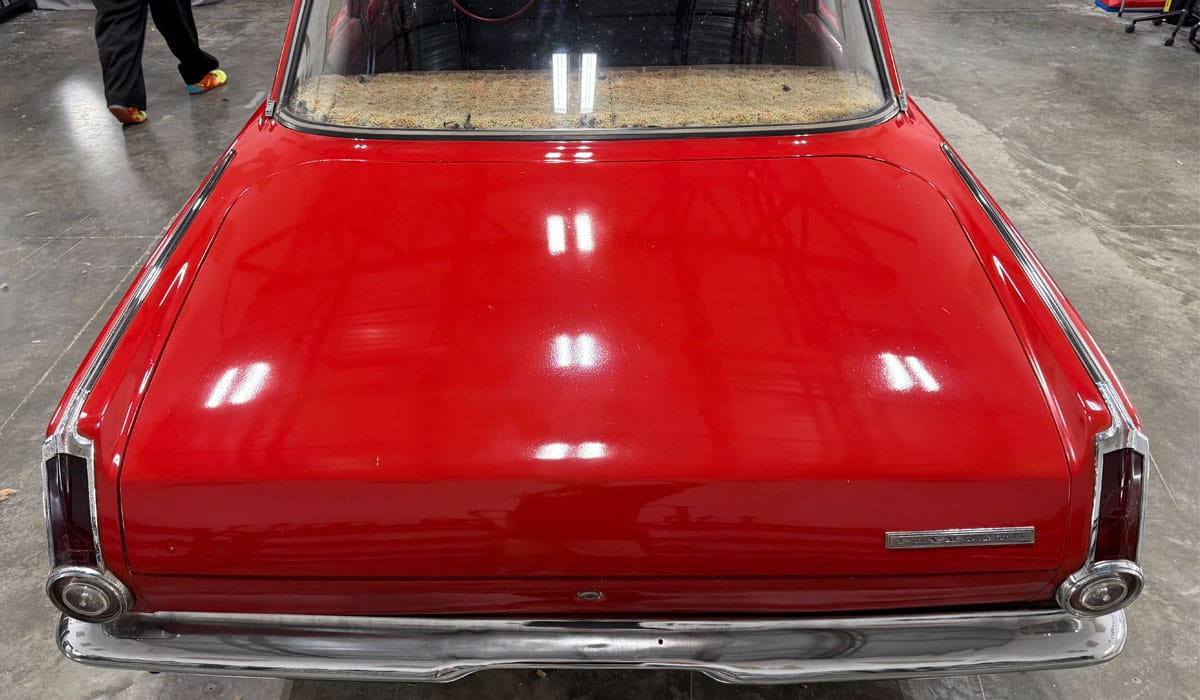
AFTER Results – The Comet Wash Technique
Check out the dramatic transformation to the paint, glass and chrome, and we haven’t started buffing yet!
IMPORTANT – Using Comet (or any product like Comet) is ONLY for old cars with old chalky, oxidized SINGLE STAGE PAINT.
Never use the Comet Technique on any car with a modern basecoat/clearcoat paint job.
Next up, learning the way of the rotary polisher…
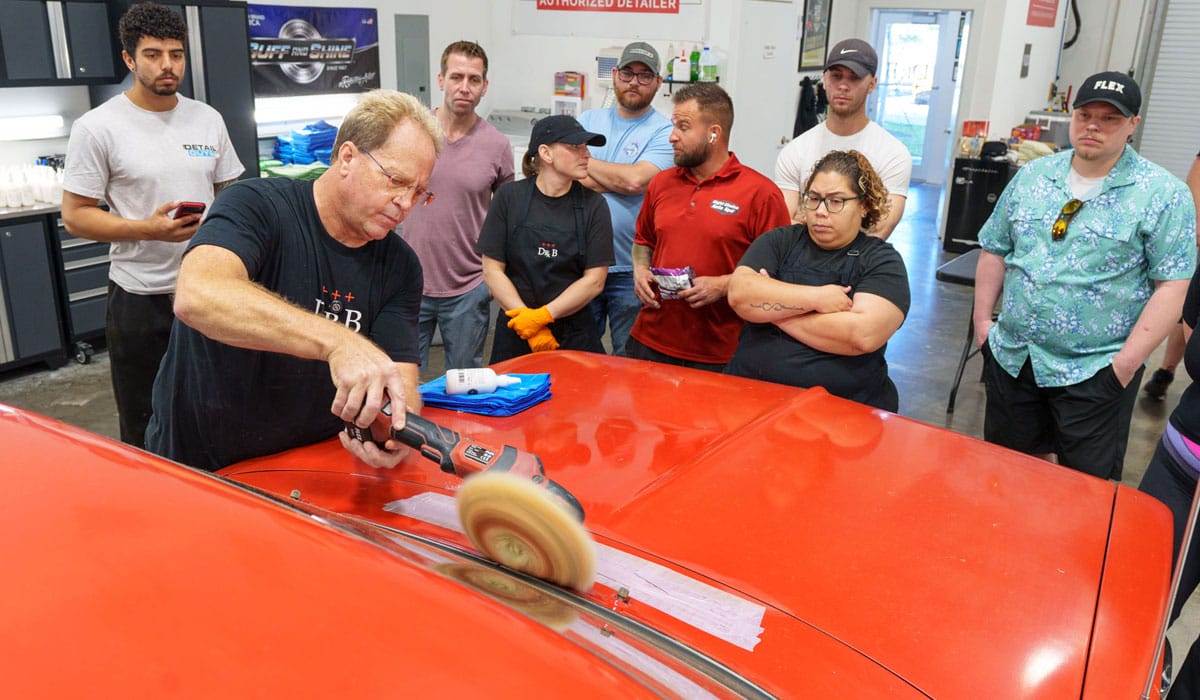
First Tool. First Day. First thing in the morning – the Rotary Polisher
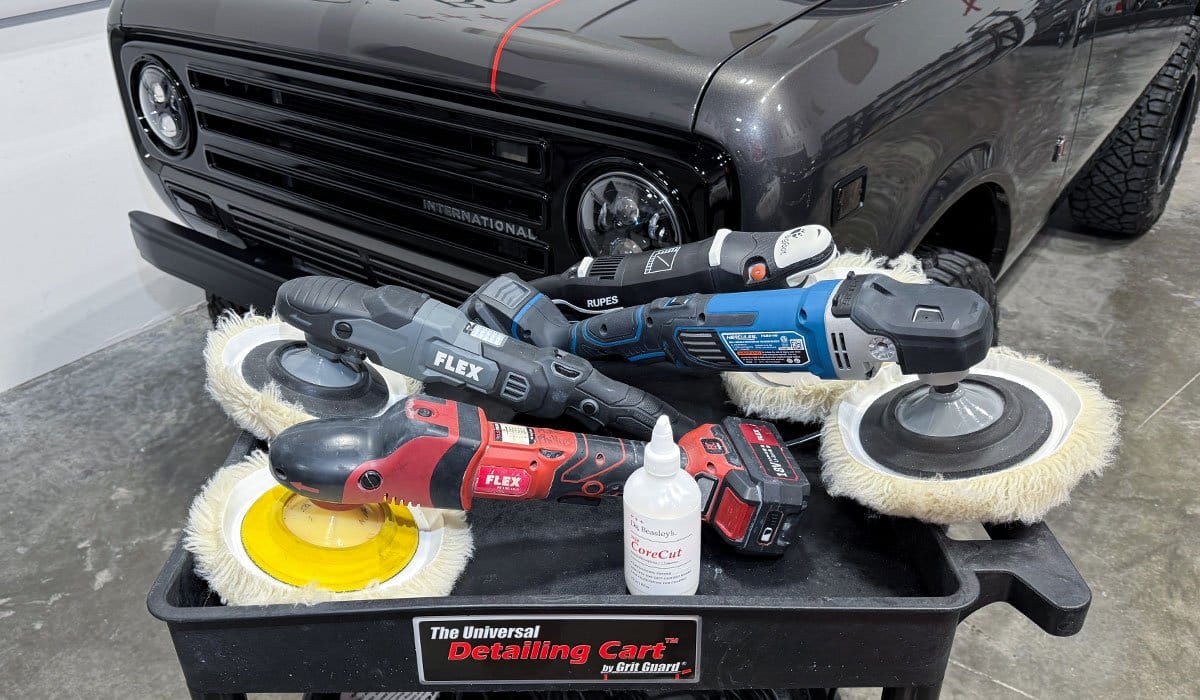
We have over 40 rotary polishers in our Stuart training center, all the 12 gauge power cords to power them up and the electrical supply to never throw a breaker even with 20 rotary pushing hard. We also have 40+ orbital polishers, all makes and models for you to use. This way, you can try before you buy any tool you’re interested in or have seen on social media and then make up your own mind which tools are best for you and your style. And “NO” we don’t sell tools, so there’s never any pressure to use one type or ne brand over the other.
There’s an old saying that goes like this,
Use the right tool for the job
Sometimes, in the car detailing world, the right tool for the job is the rotary polisher. When people take any class I’m teaching, when they leave and go back to their world, I want them to possess,
1: Know when to use a rotary polisher.
2: Know how to use a rotary polisher.
3: Feel comfortable using the rotary polisher.
4: Have confidence when using the rotary polisher.
1988 Makita Model 9207 SPC Variable Speed Rotary Polisher
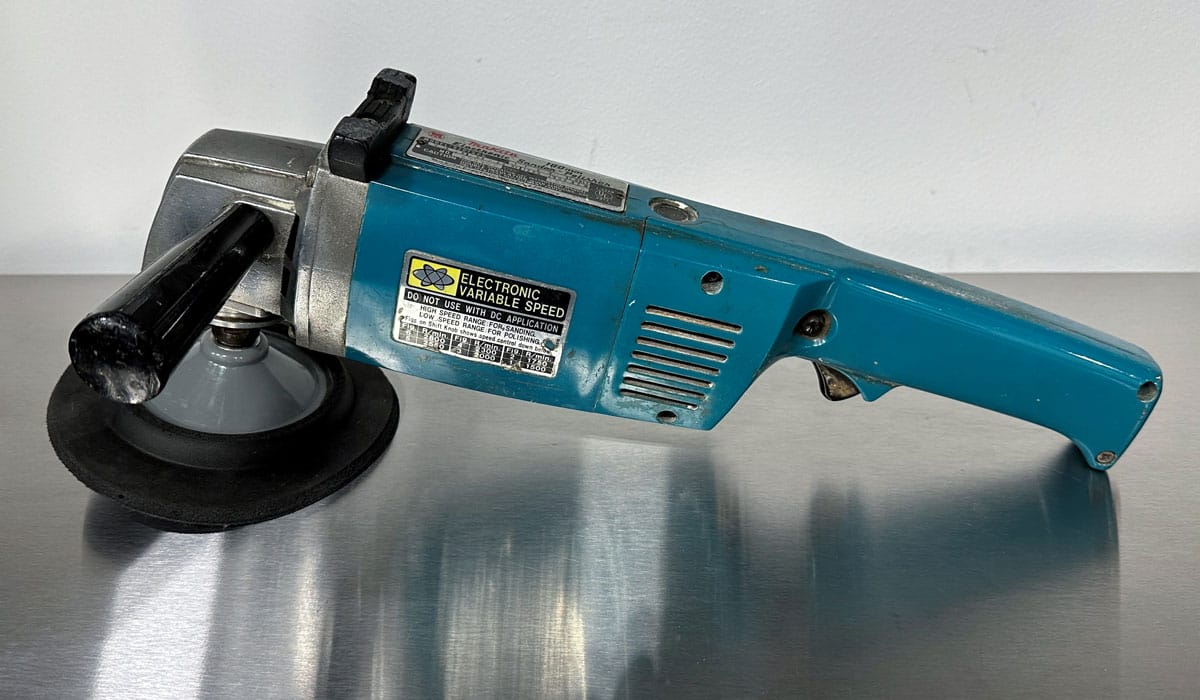
This is my first rotary polisher that I purchased in 1988. This was the first VARIABLE speed rotary polisher so in its day, it was King of Rotary Polishers. I cannot count how many cars I’ve buffed out with this rotary, but I used it until the gears in the head of the polisher were completely wore out. I keep it around and show everyone that takes a class I’m teaching and say,
If you’re going to learn how to use a rotary polisher, it’s a good idea to learn from someone that’s actually used one – a lot.
I can’t make you an expert in a single day
But I will give you a SOLID FOUNDATION that you can build on moving forward after the class.
A MUST HAVE skill if you’re going to wetsand entire cars
I see all the detailing personalities sharing their opinions on removing sanding scratches using some kind of ORBITAL polishers.
Question: Can you use an orbital polisher to remove sanding marks after wetsanding an entire car.
Answer: Yes – but it’s going to take you a much longer time to get the job done as compared to using a rotary polisher.
So use whatever tool you like and follow your choice of detailing personality, but here in the real-world, If you’re going to sand down an entire car, you need to be proficient with a rotary polisher with a LARGE WOOL PAD to make quick work of removing 100% of the sanding marks out of the paint. And that is my criteria for myself and my classes – 100% sanding mark removal.
One reason we start the first day, first thing in the morning and the first car using the rotary polisher is because, the next day, in our Stuart classes, we sand down entire cars to remove orange peel and I need my class to,
1: Know when to use a rotary polisher.
2: Know how to use a rotary polisher.
3: Feel comfortable using the rotary polisher.
4: Have confidence when using the rotary polisher.
So I bring in cars in really bad shape and teach the class how to use one so when it comes the sanding car, they have a solid idea as to what to do. In other words, I can’t have people LEARNING how to use a rotary polisher with a large wool pad to buff out the sanding marks on a custom paint job. I need them ready to go. So we start all our Stuart classes learning how to use a rotary polisher.
Rotary Polisher Techniques
Keep in mind, many of the people in this specific class have never used a rotary polisher. Out of all the different types of polishers, in my opinion and experience, the rotary polisher is the most difficult tool to learn how to use and master. That’s two things by the way, not just one thing.
In the below pictures, I’m showing the class how to put a rotary polisher on edge to buff thin panels and intricate areas. NOT PICTURED are when I was showing a list of other techniques, including,
- How to center a pad on a backing plate – most important thing.
- How to use the 10@10 Technique to pick up a strip or bead of product, which is a great skill to have for horizontal panels
- How to apply product directly to the face of the pad to buff out vertical panels.
- How to buff with the pad flat to the surface.
- How to buff by tilting the polisher and going-up-on-edge
- How to buff off an edge
- How to use a spur to clean your pad as you work around a car.
- How to edge a panel with an 8″ wool pad – of course, feel free to use tiny 1″ pads on microtools. Me? I make the tool already in my hand do what I need it to do.
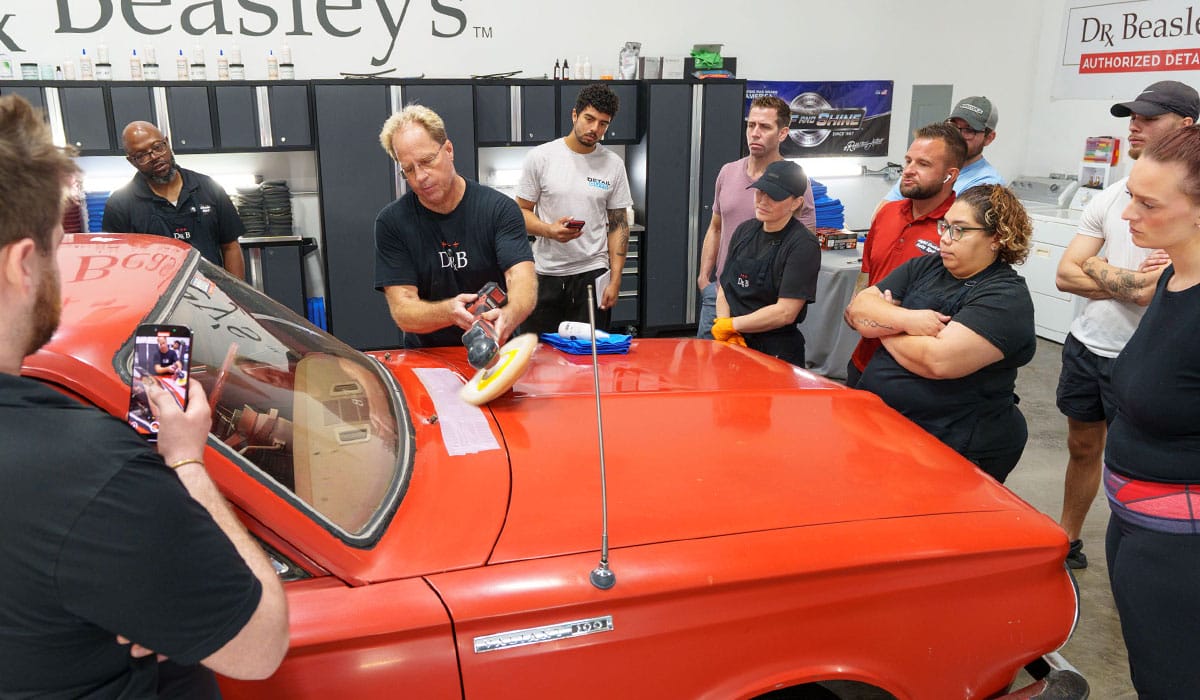
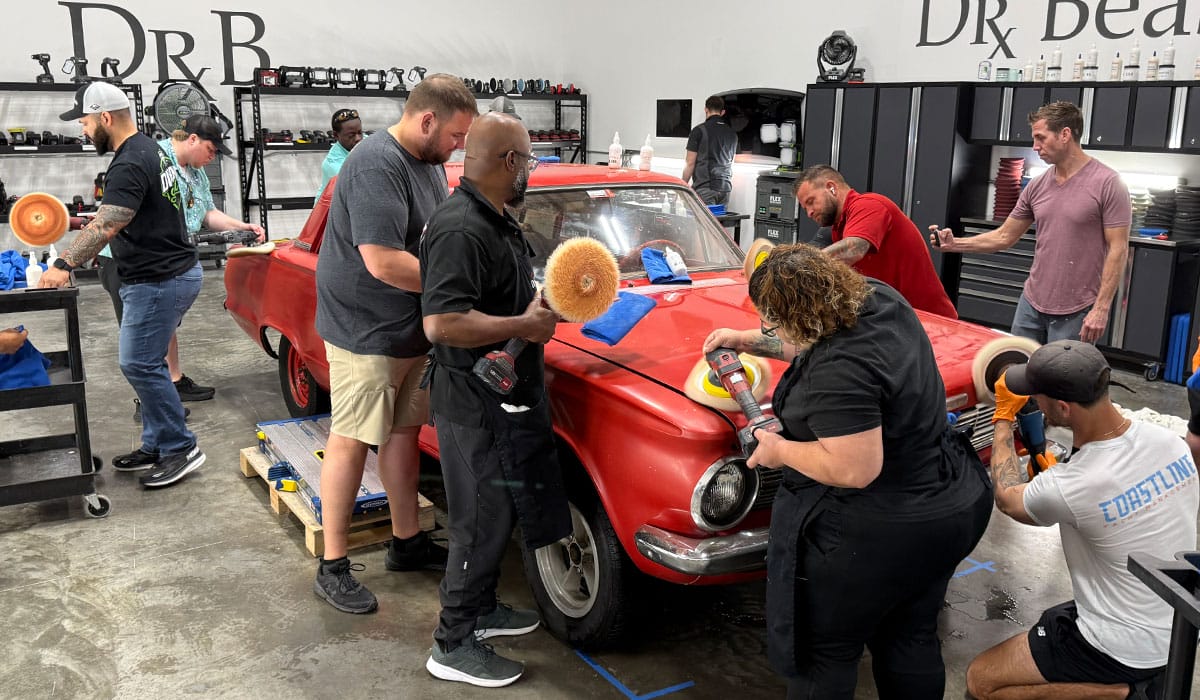
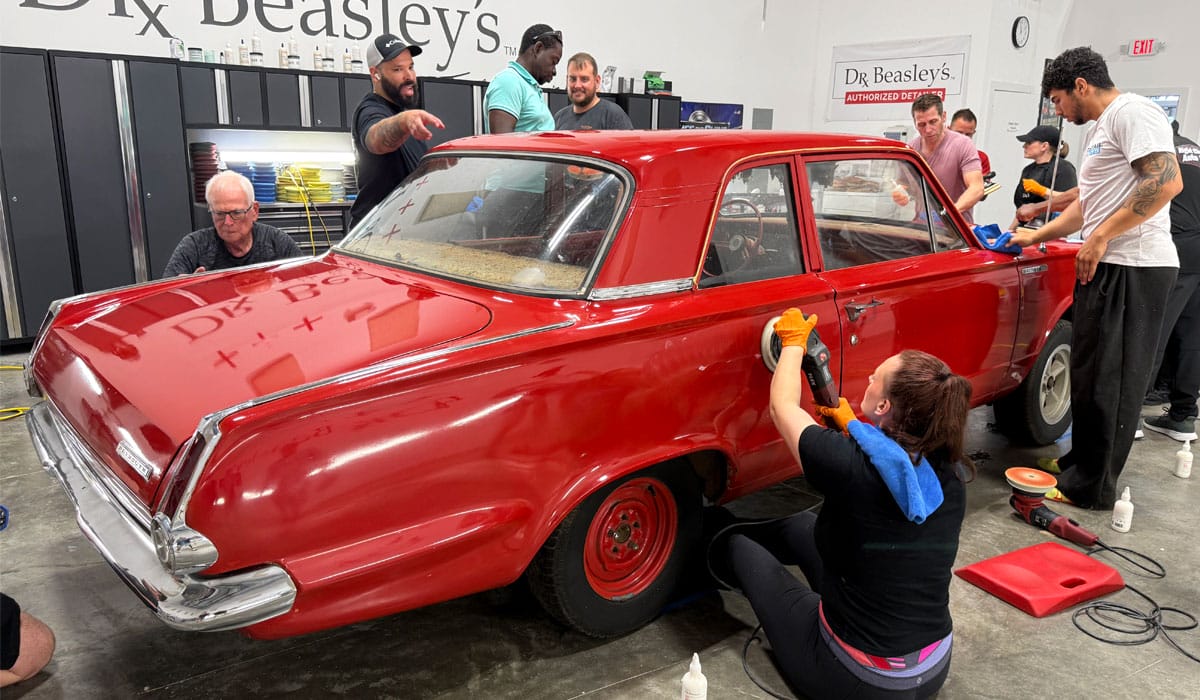
Let’s get this Barn Find Party Started!
The first thing I like to teach is how to select the right speed setting and then use the speed setting lock button to lock the trigger in place. This enables you to place one hand on the head of the polisher and the other hand at the back of the polisher, which gives you the most leverage over the tool.
Because I’m a huge fan of the cordless rotary polishers, I also show the class that besides providing you with the most leverage over the tool, by placing one of your hands at the back of the rotary polisher gripping the BATTERY – you then support the weight of the battery as you buff and this makes buffing a lot more comfortable on you plus the best control over the tool.
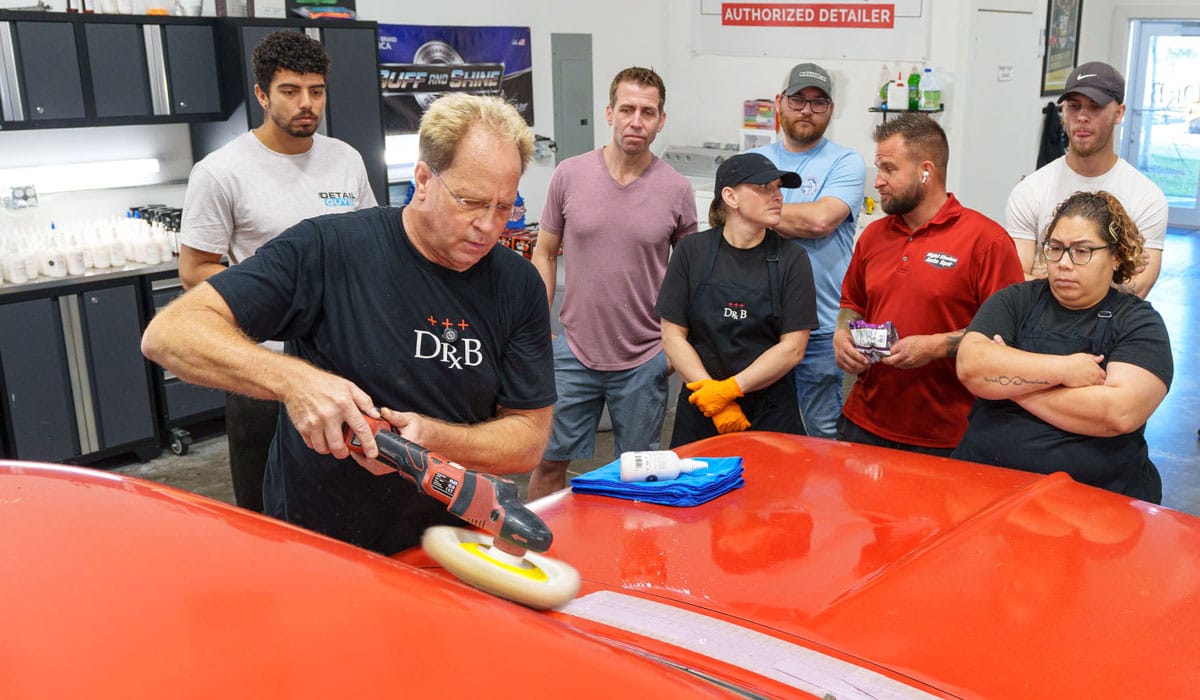
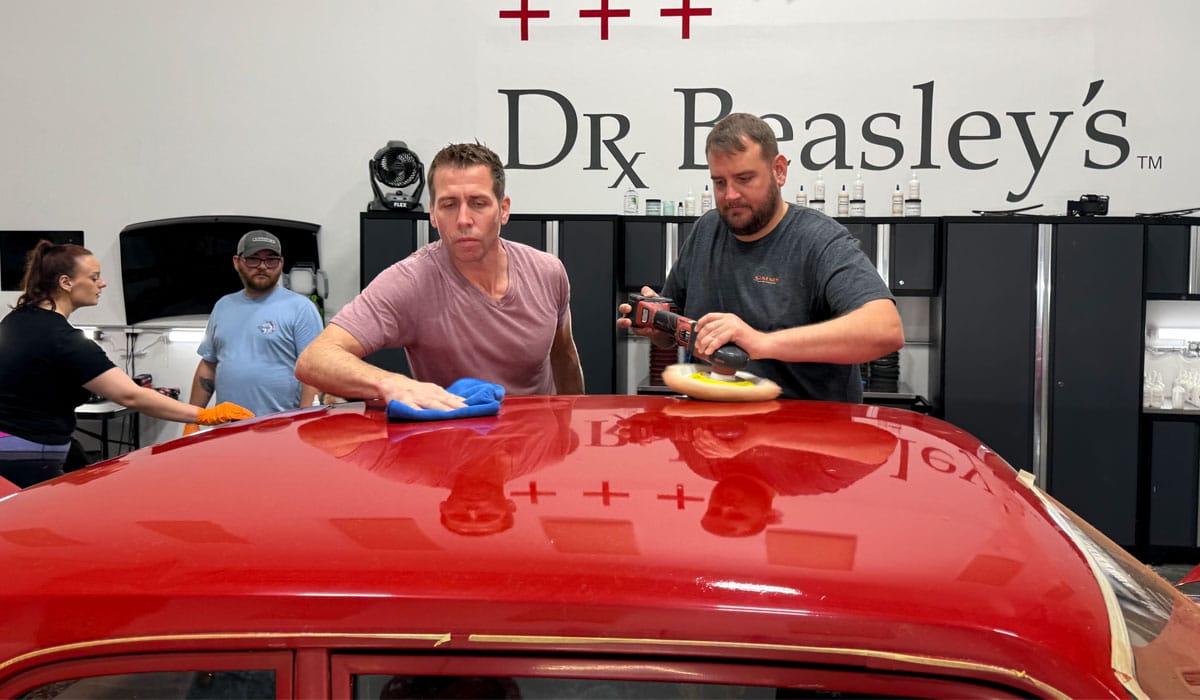
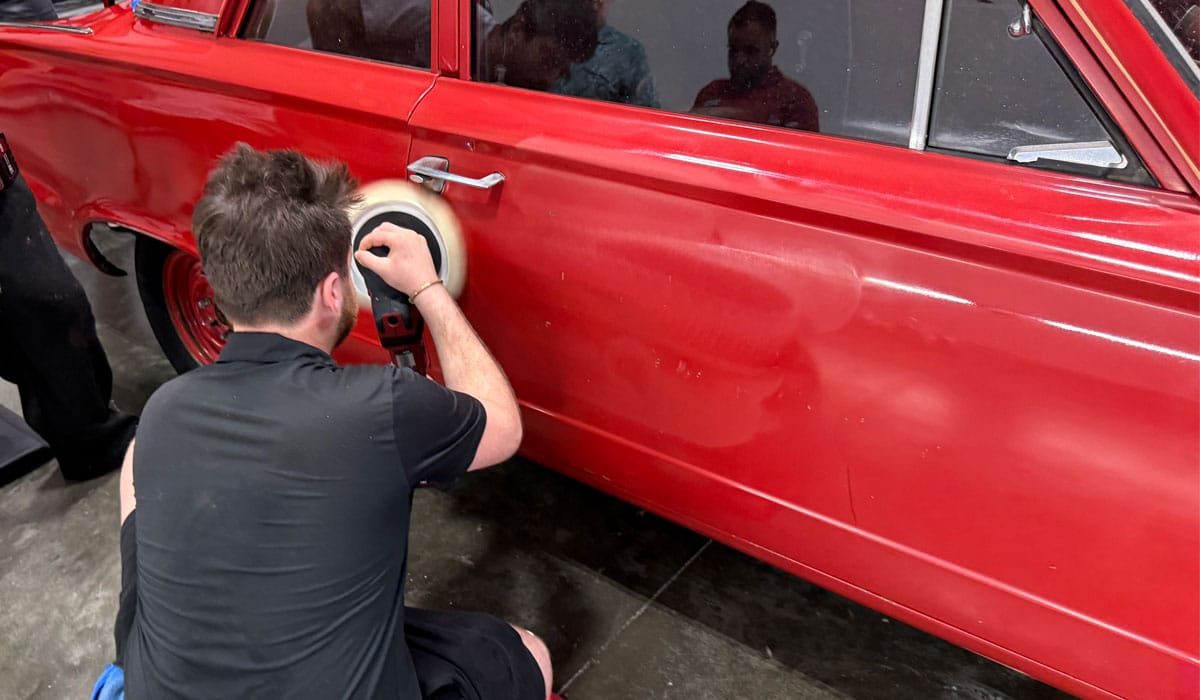
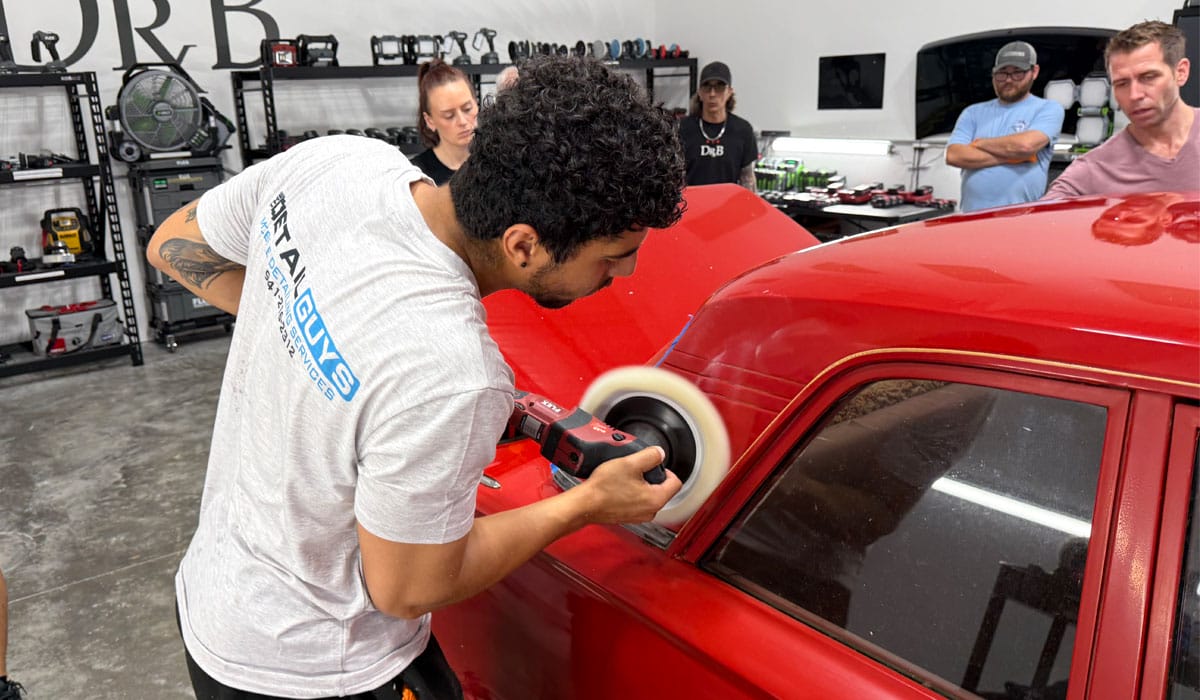
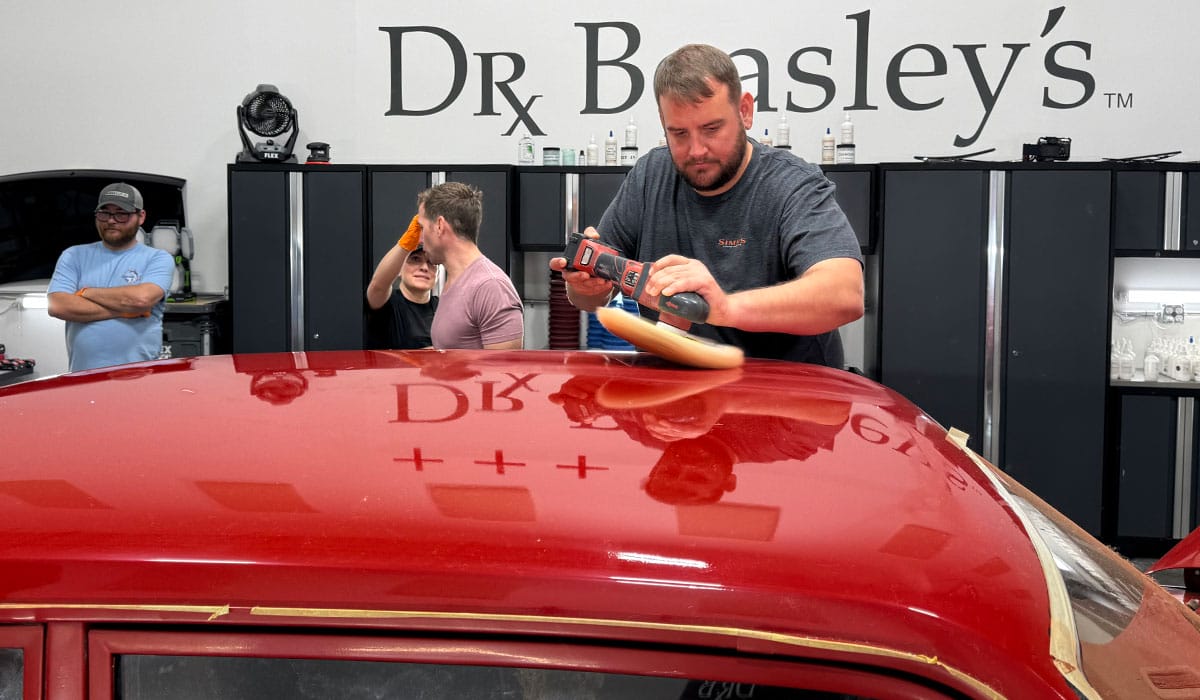
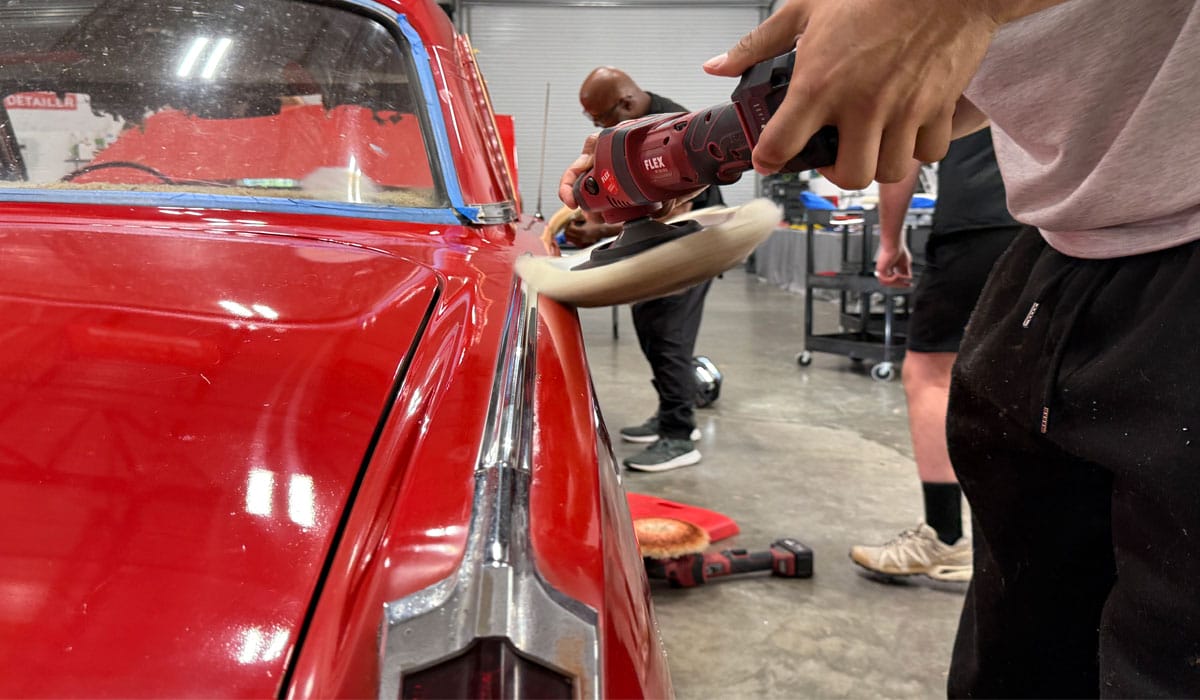
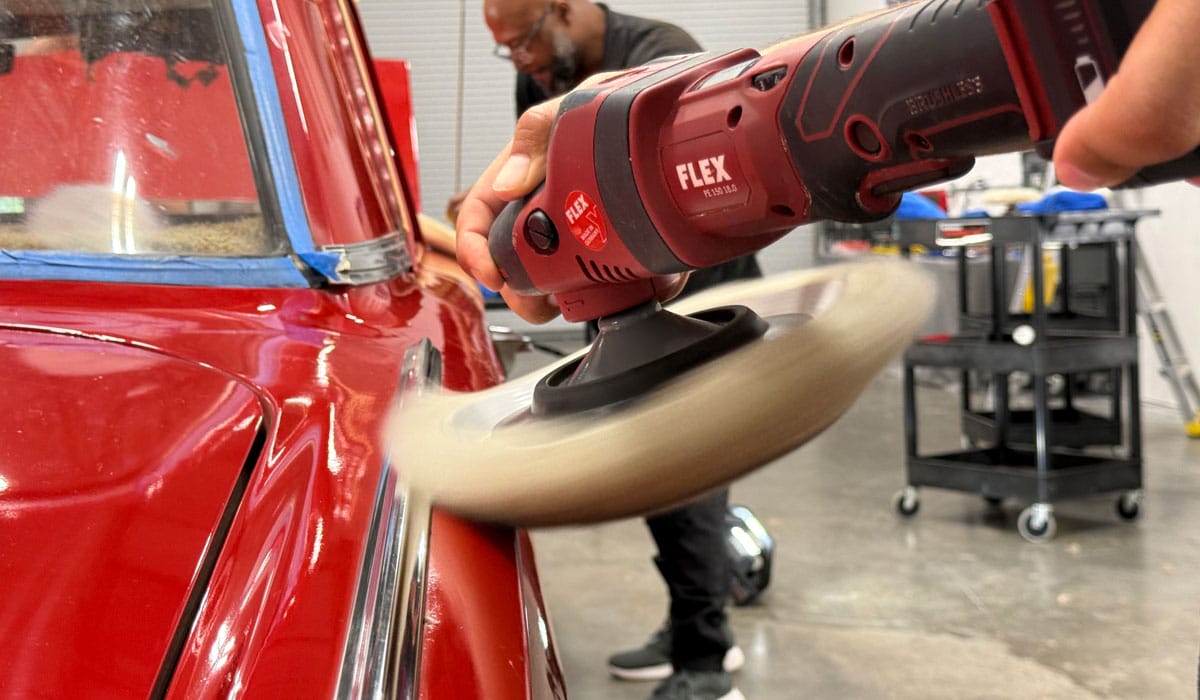
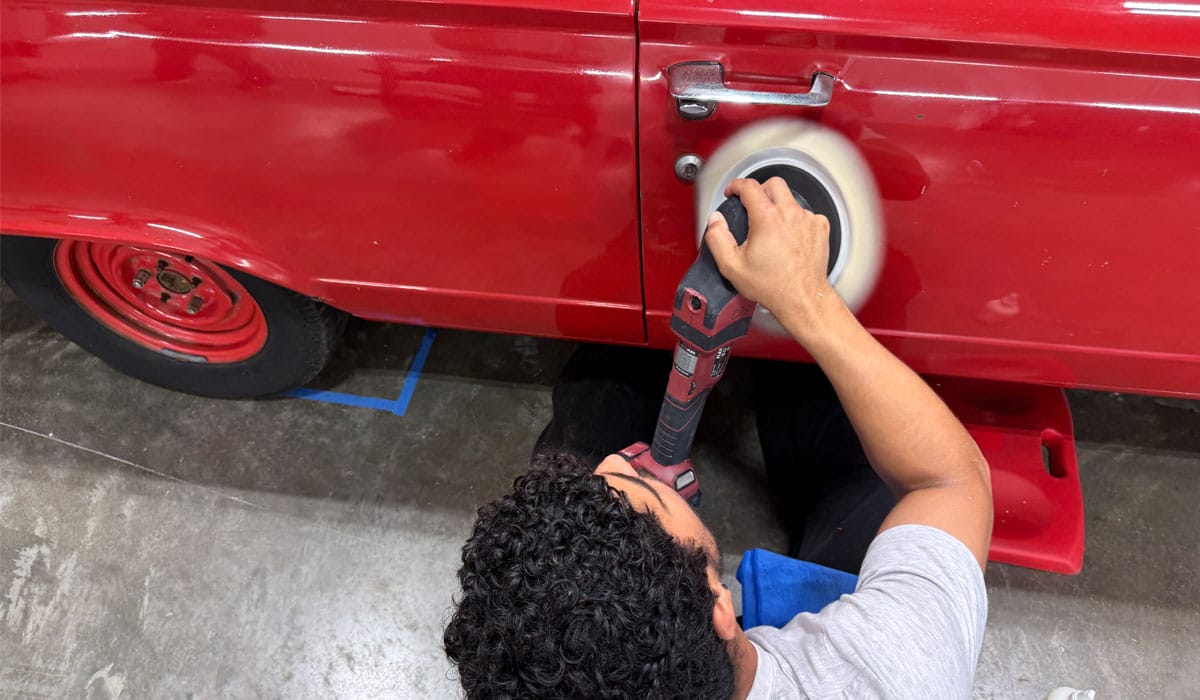
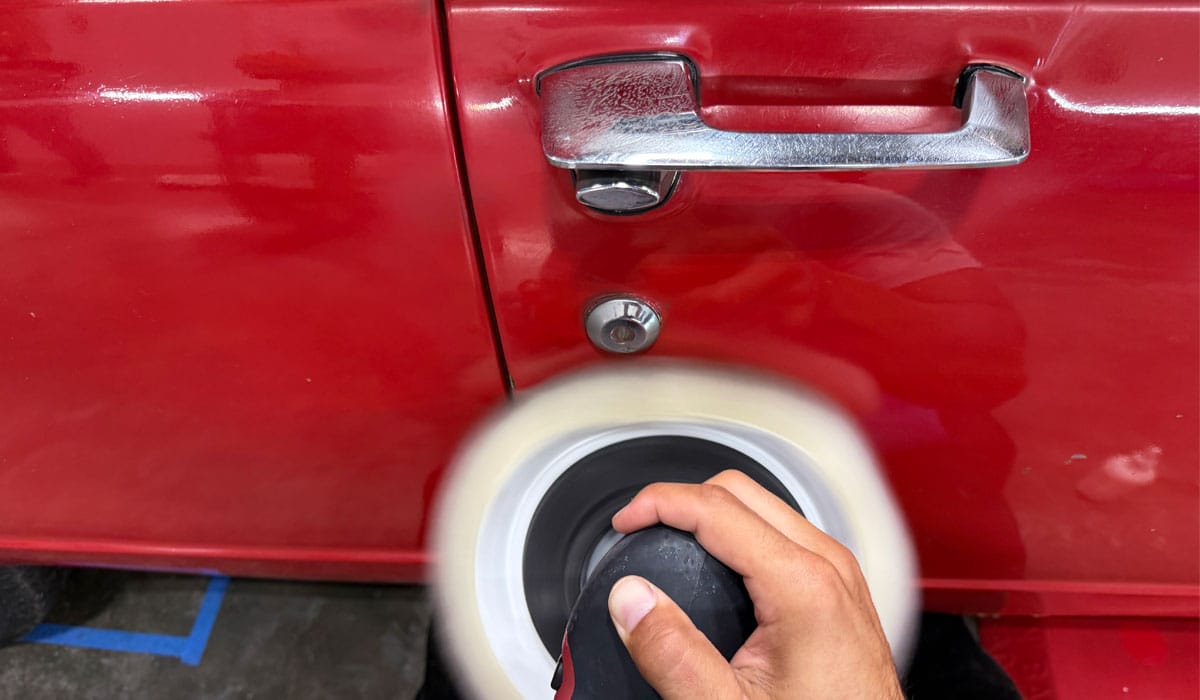
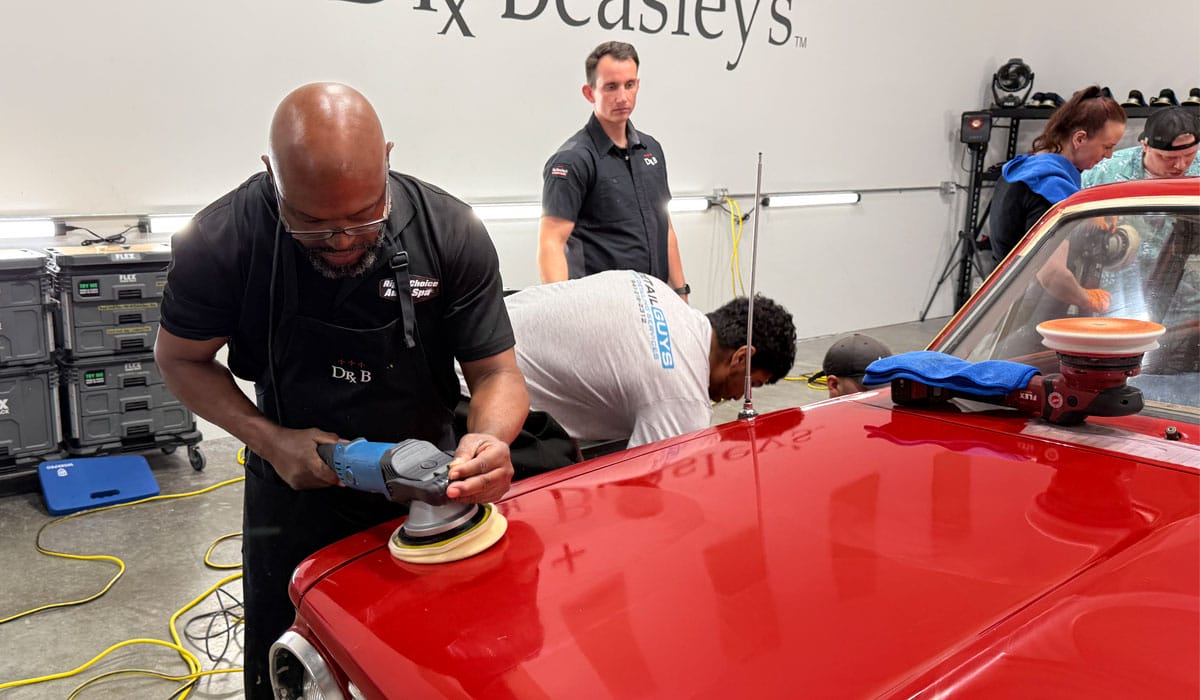
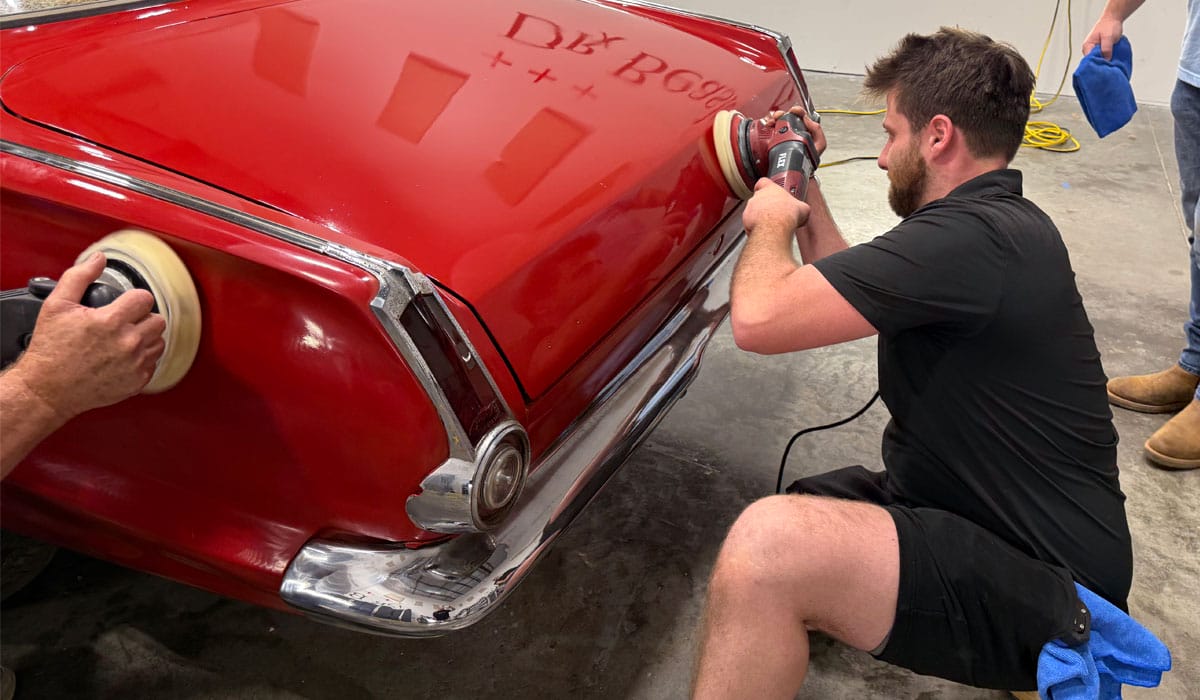
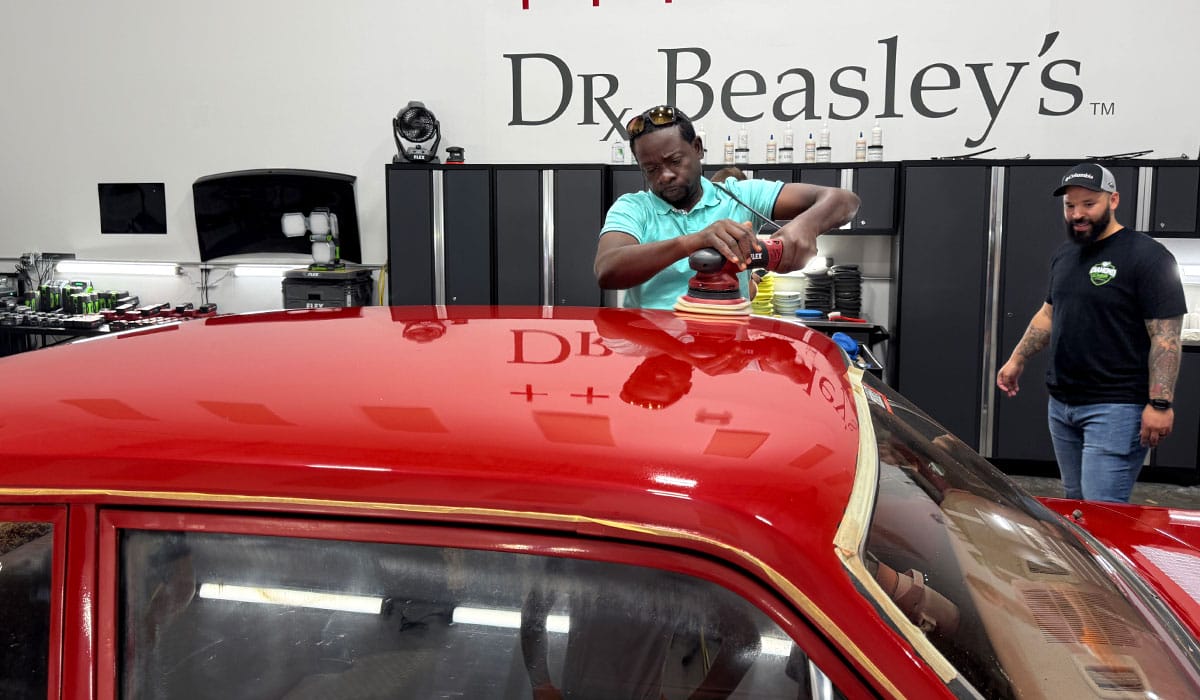
How To Buff Out Thin Panels
Buffing out the middle of the hood, a door or the roof is easy. Buffing out thin panels or intricate areas is a tick more tricky, so I simply share tips and techniques to make it both safe and easy on you.
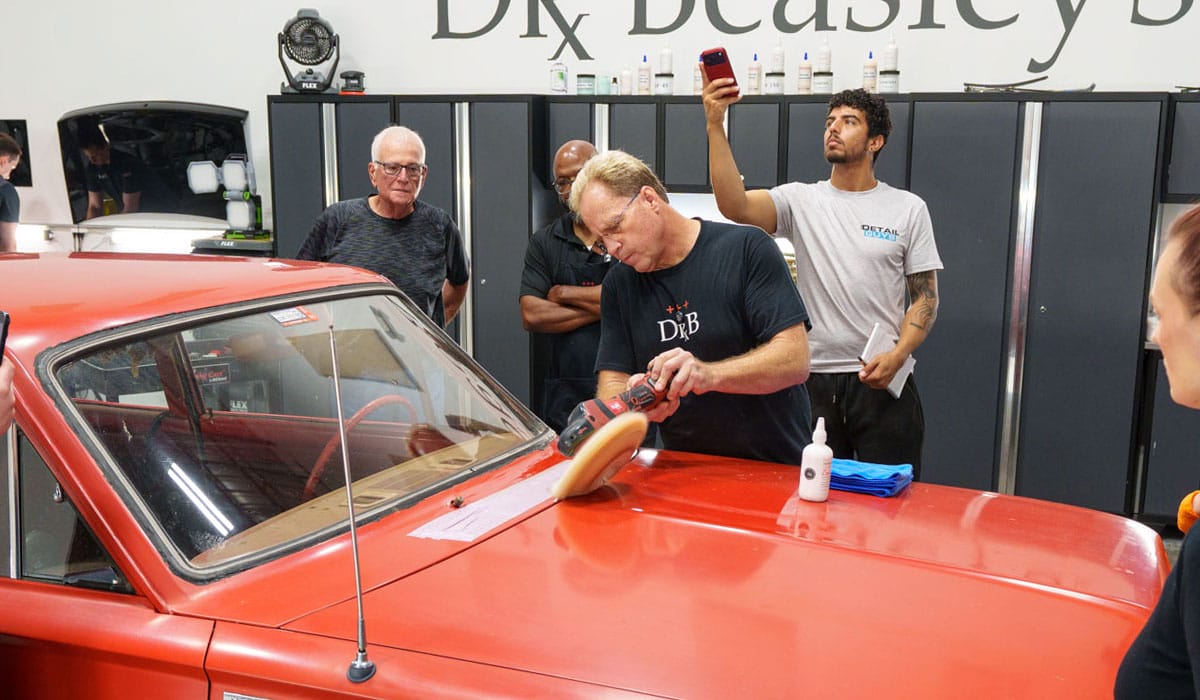
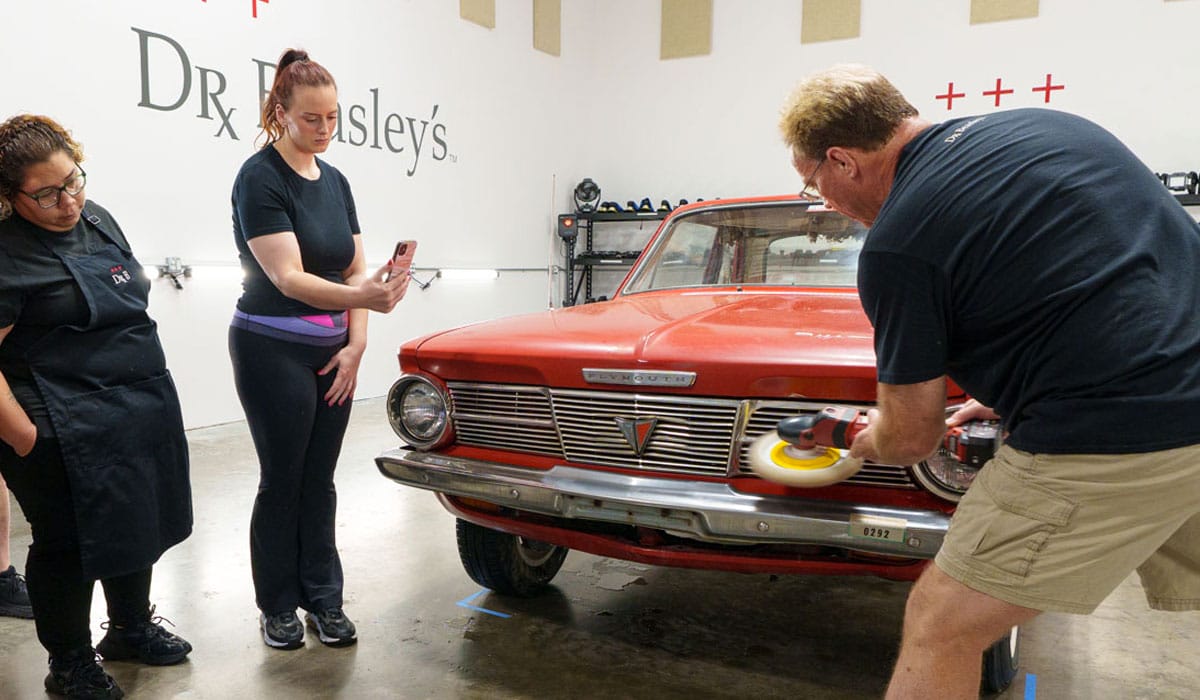
You see me looking at a student answering a question, but at the same time I’m removing years of oxidation on the intricate shaped body panel that surrounds the threaded spline, where the wiper arms attach. I also shared the Dorman Windshield Wiper Arm Removal Tool to safely remove wiper arms off classic cars. These classes are literal brain dumps with 40+ years f buffing-out just about everything under the sun.
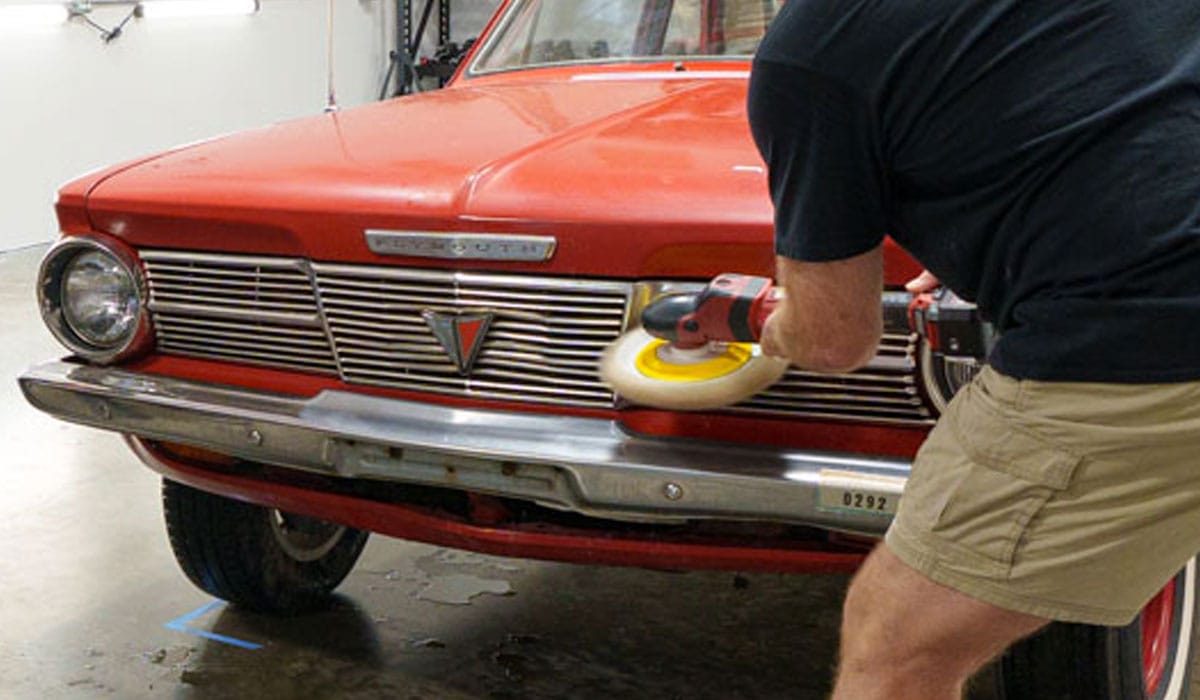
Fresh Air Grills – Classic Cars
And of course, after tackling the areas furthest away from me, next I hit the paint next to the tape that’s protecting the fresh air grill. Later, I show how to buff out the fresh air grill so the paint on the ribs of the fresh air grill will be just as shiny as the rest of the paint.
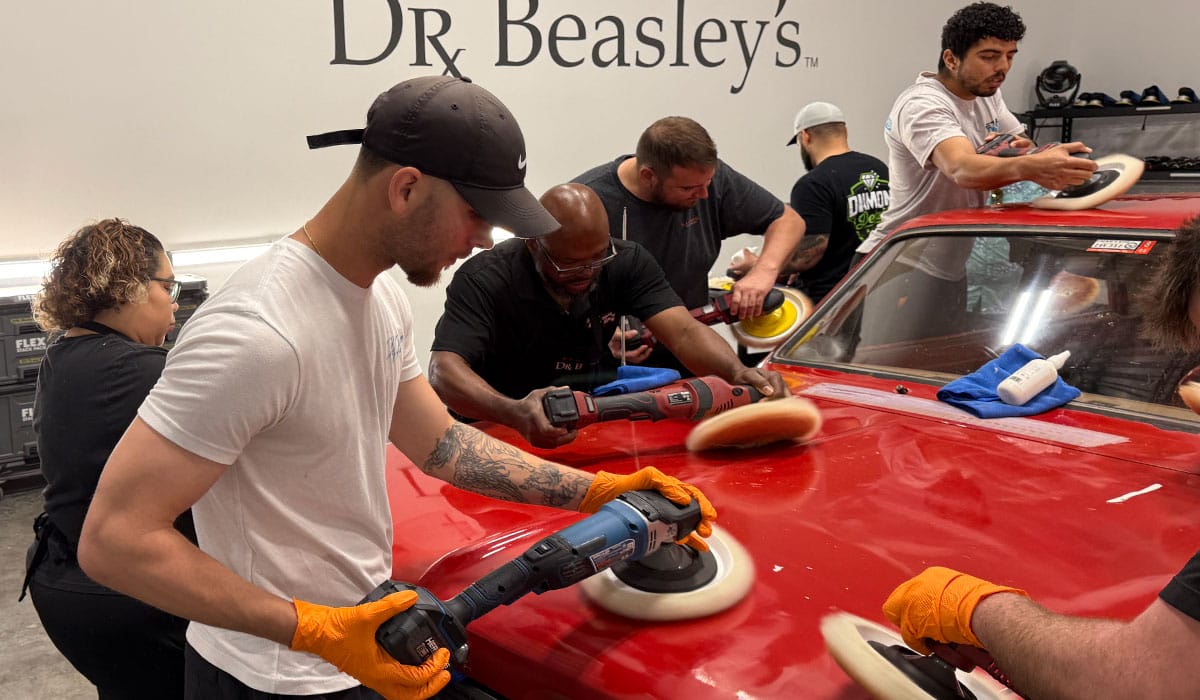
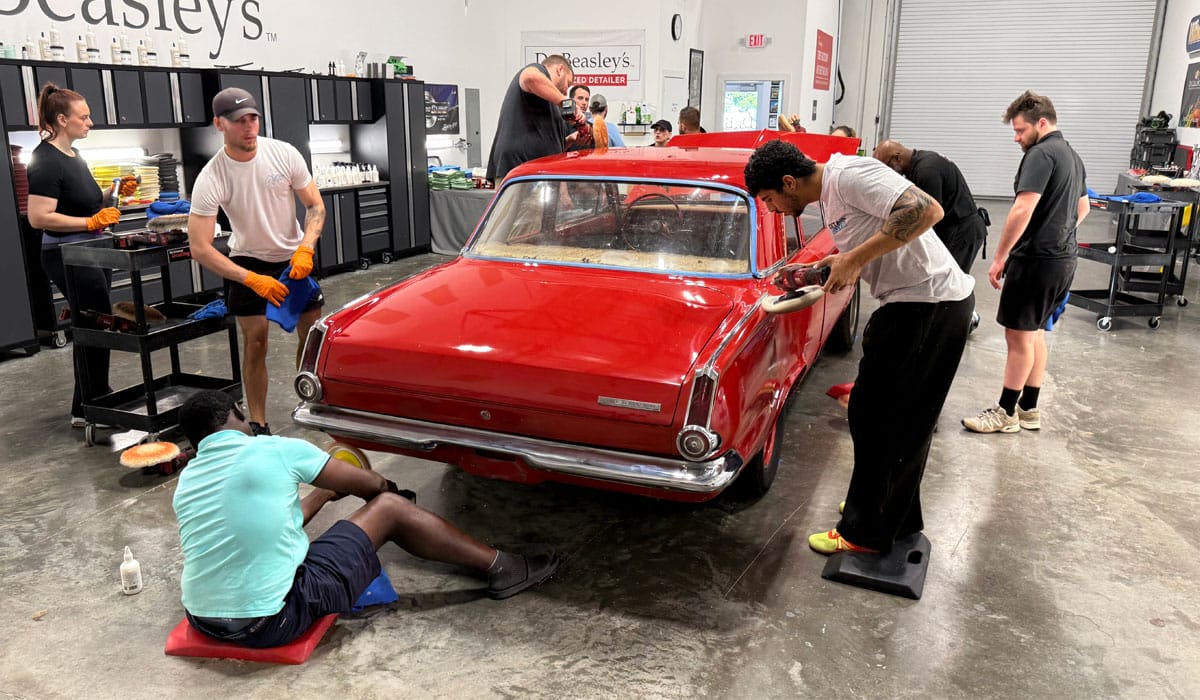
Everything gets buffed on a Barn Find!
Sure the owner plans to replace the grill, but I shared how to buff out the oxidized aluminum grill, all the brightwork, like door handles and the chrome buffers. When it comes to a Barn Find, it’s not like you can hurt anything, the car is already hurting.
Here’s another one of my quotes,
If you spend enough time behind any tool you can make it dance on paint
This simply means what I said early, I can’t make a newbie to the rotary polisher an expert in a one or even two day class. But I can provide a strong foundation for them to build on. Then if a person is so inclined, if they’re willing to put the time in behind the polisher, well that’s how you get good.
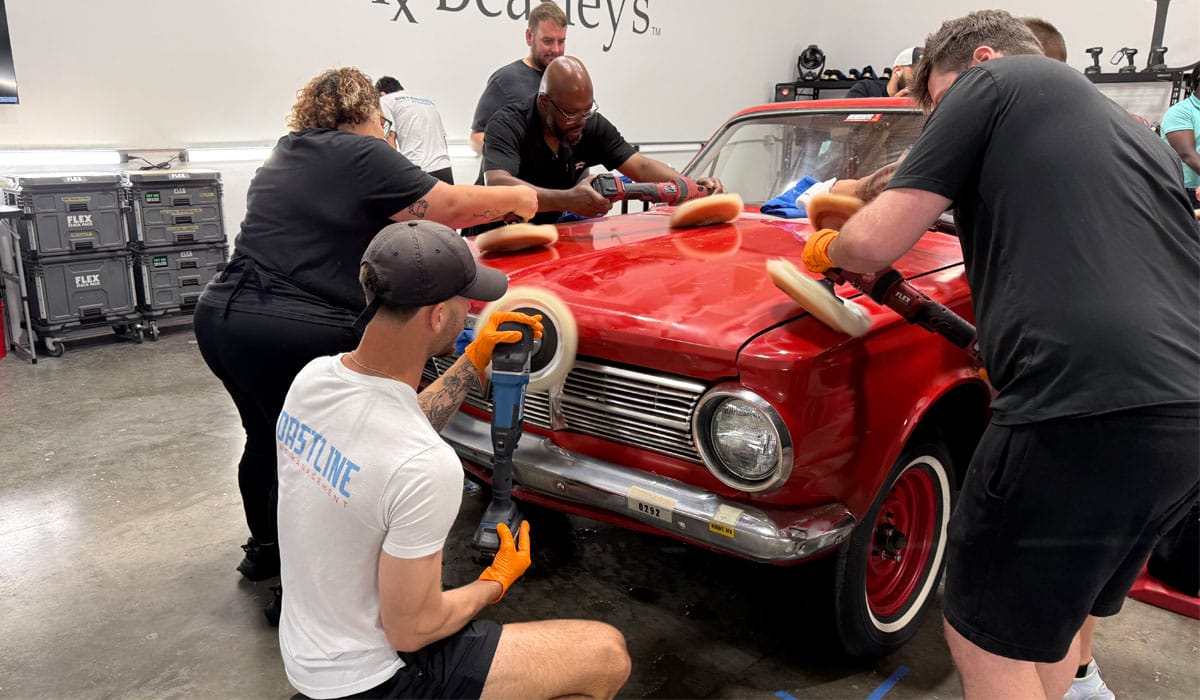
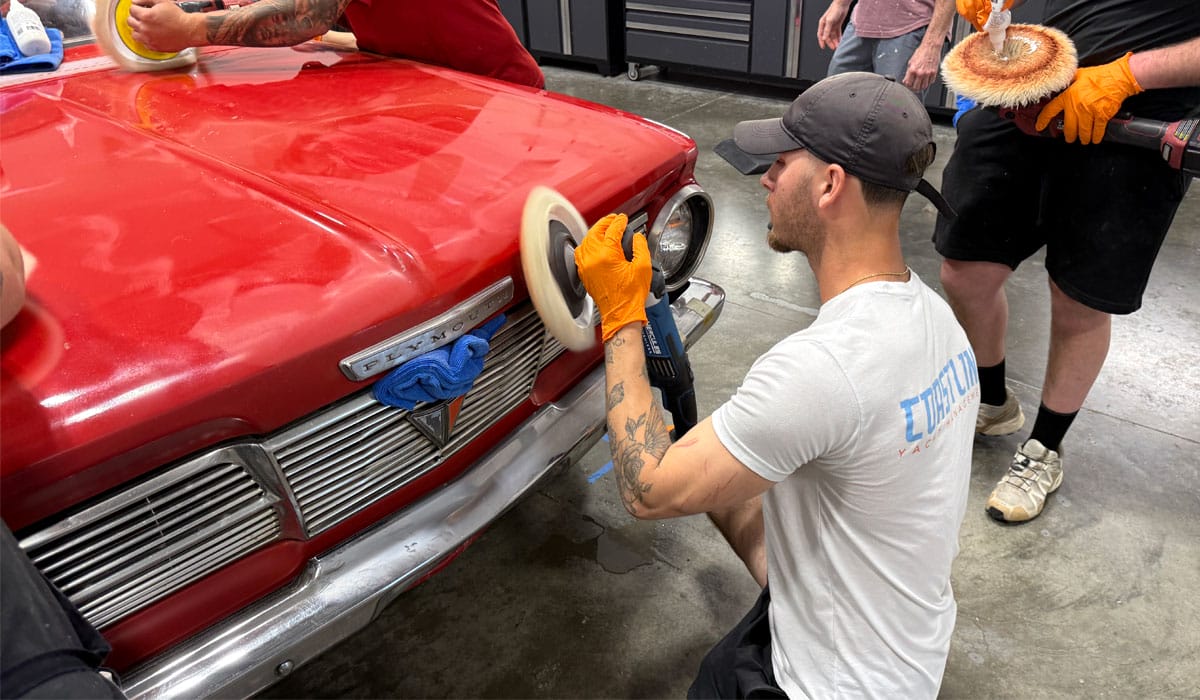
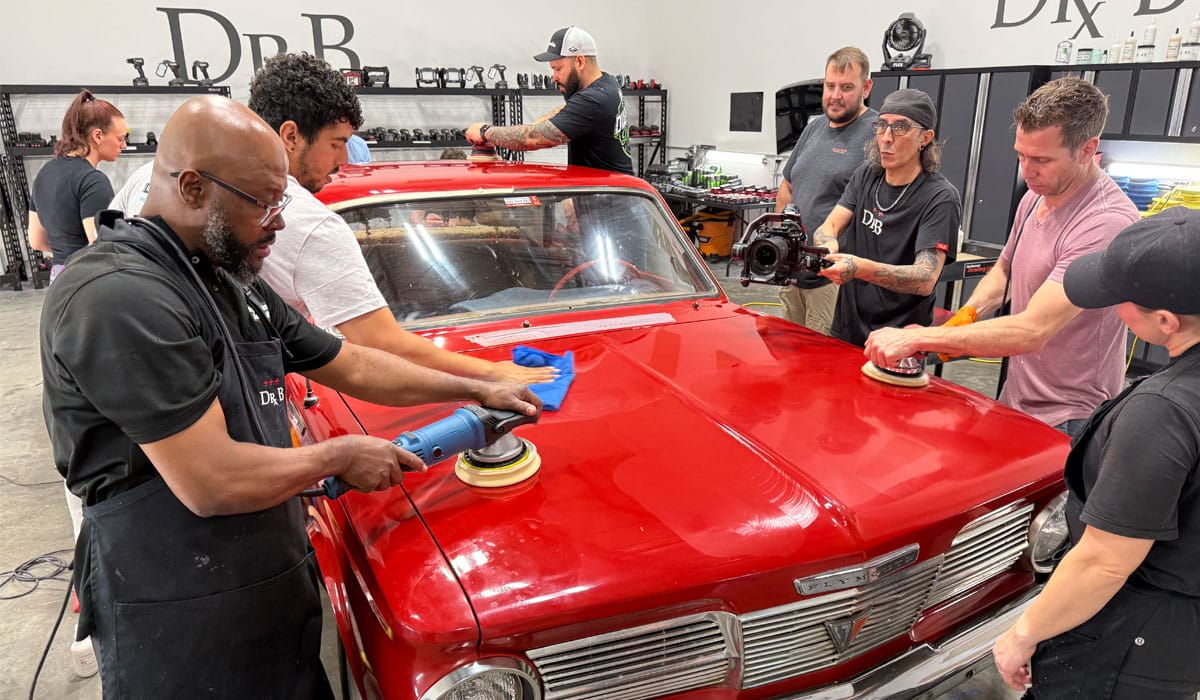
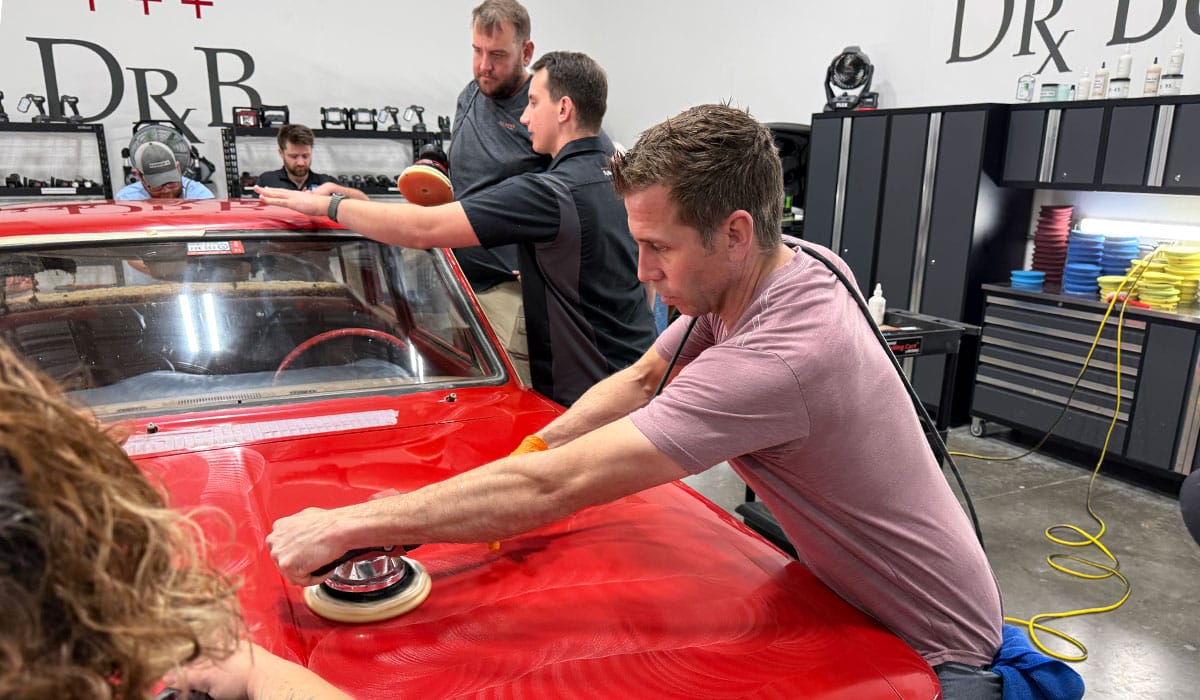
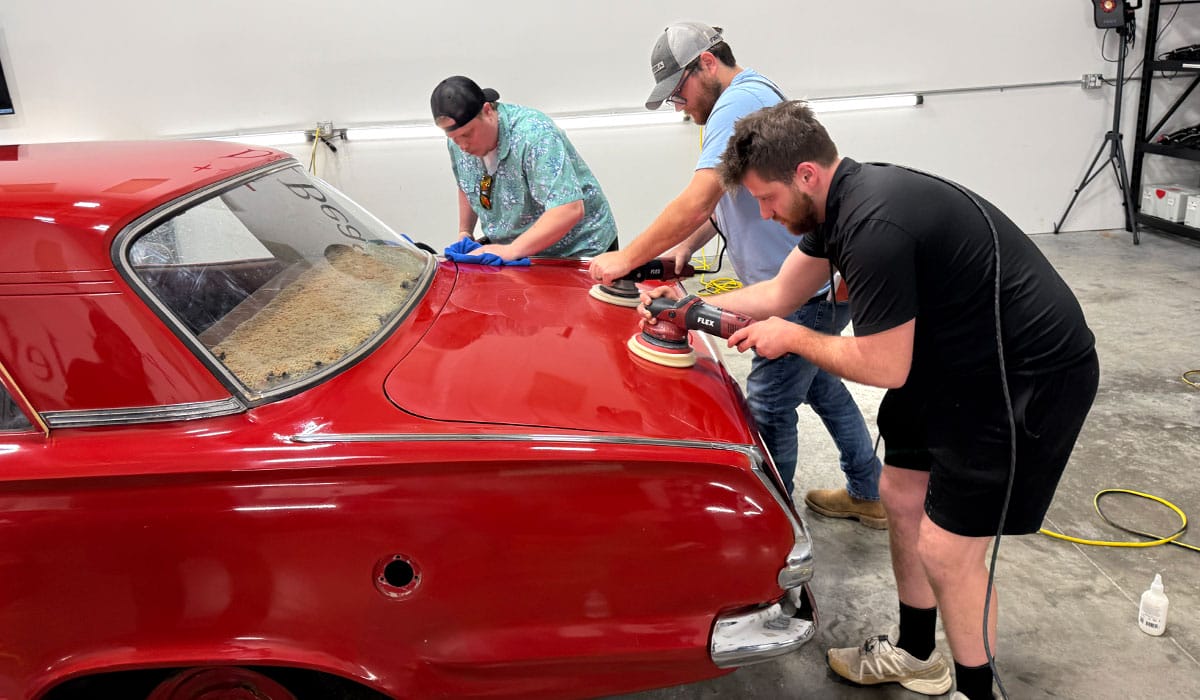
Time for the class to take over!

Notice there is a PowerPoint slide on the TV on the wall – BUT it’s minimal. It’s just the title of the topic, the year, make and model of the car plus the steps the class will use.
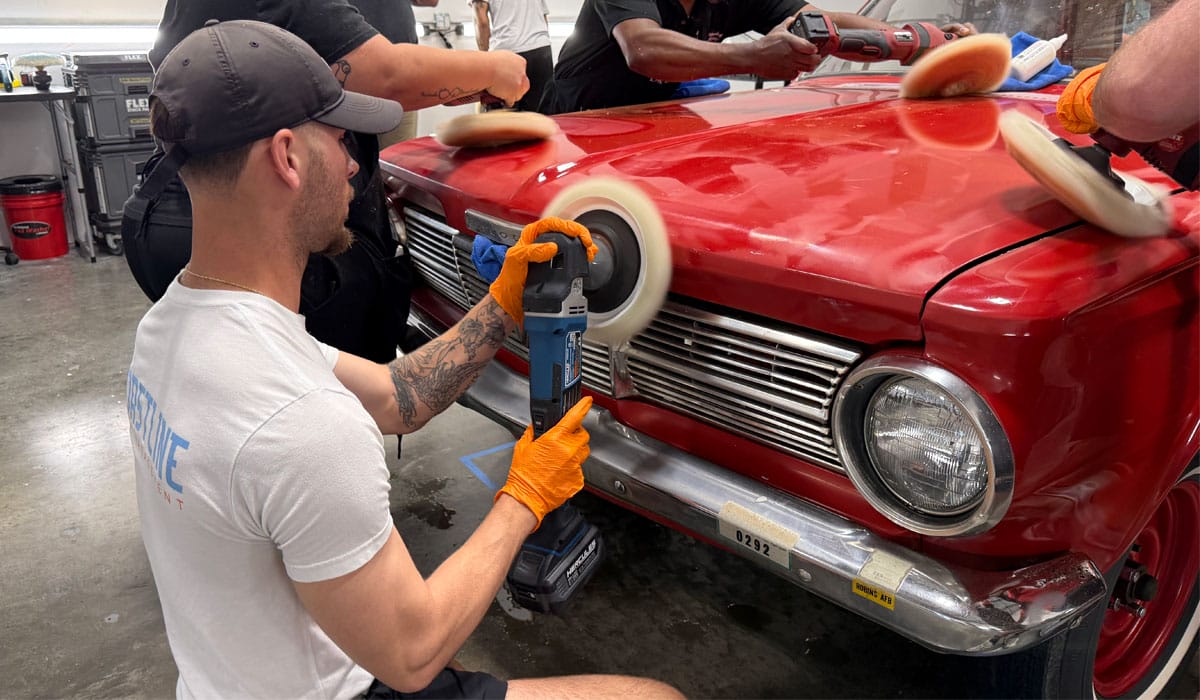
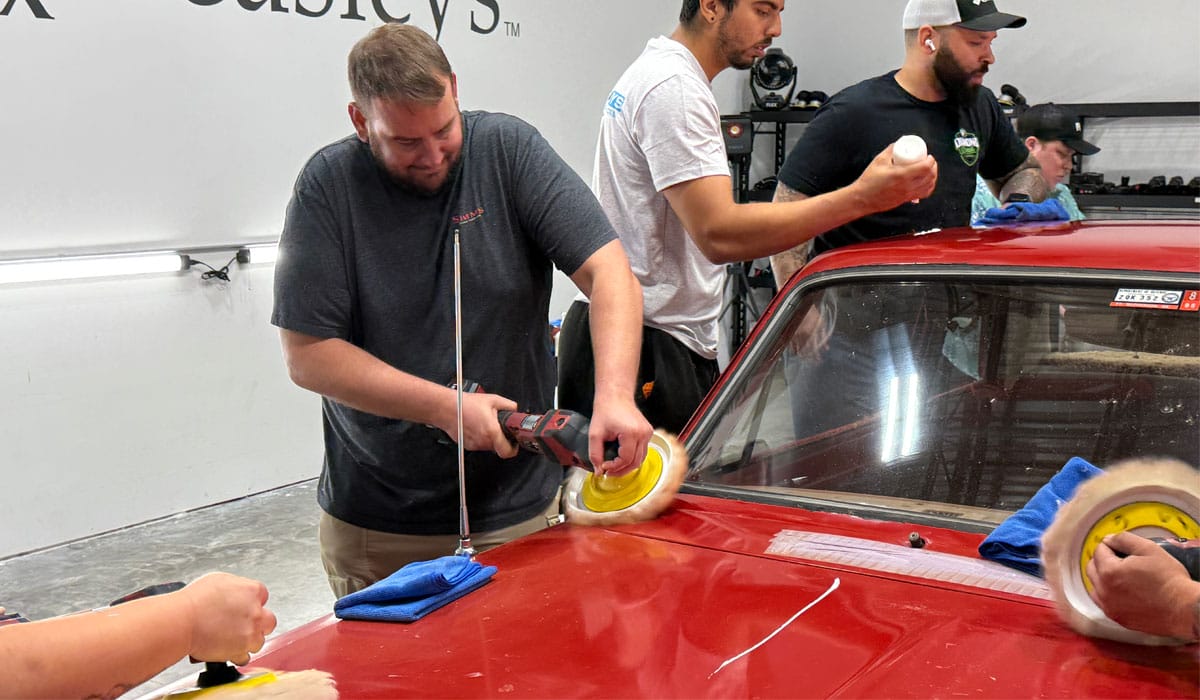
Here’s John working on the passenger side hood.
Here’s Taggert tackling the front of the hood
Here’s Nic, with Corey behind him, tackling the driver’s side of the hood.
Looks like Taggert is checking out the Harbor Freight cordless rotary polisher.
Here’s Corey putting the rotary on edge to buff out the paint right next to the back edge of the hood.
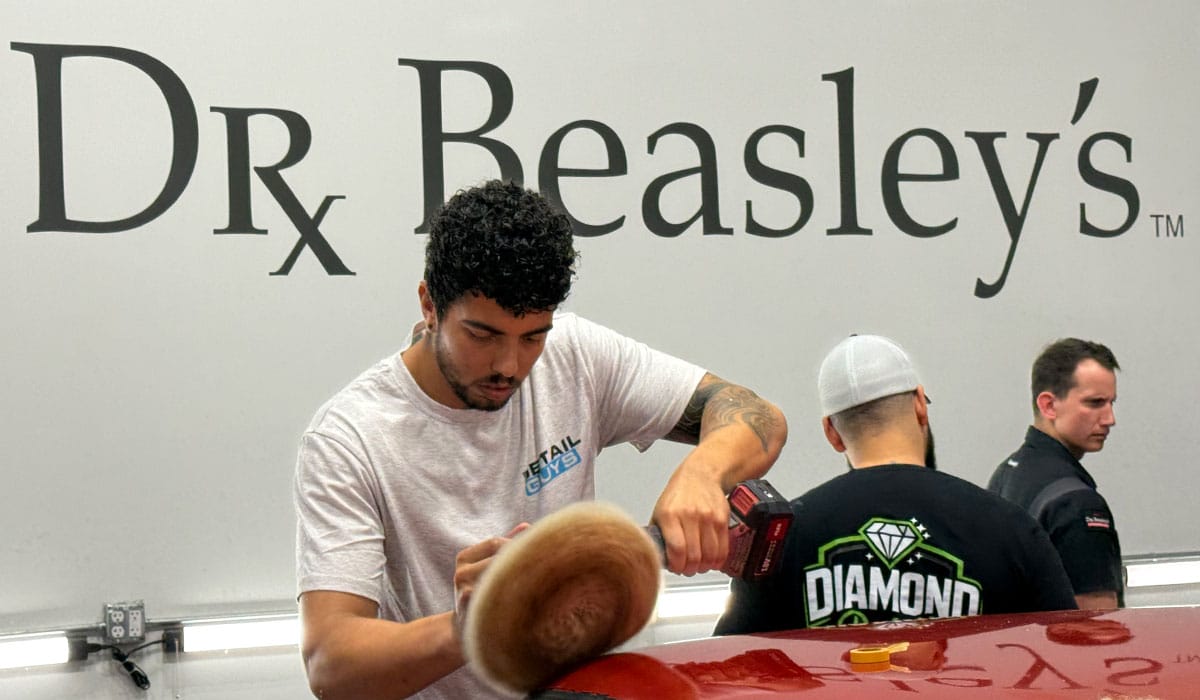
Here’s Will making the rotary dance on paint
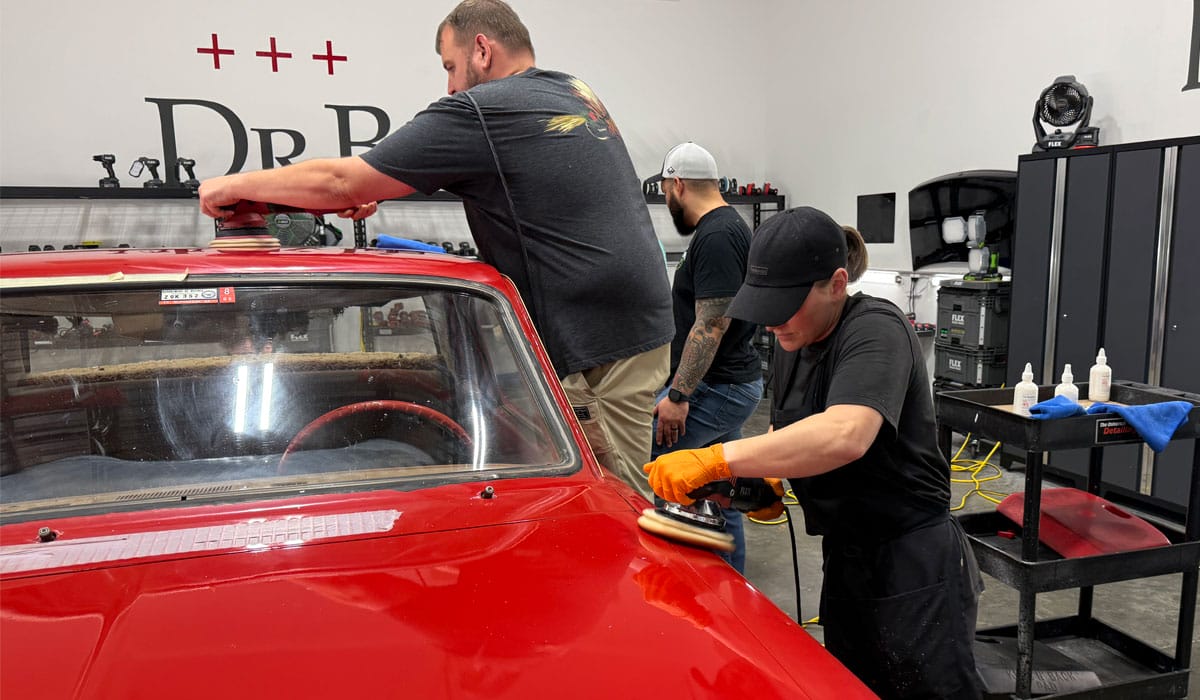
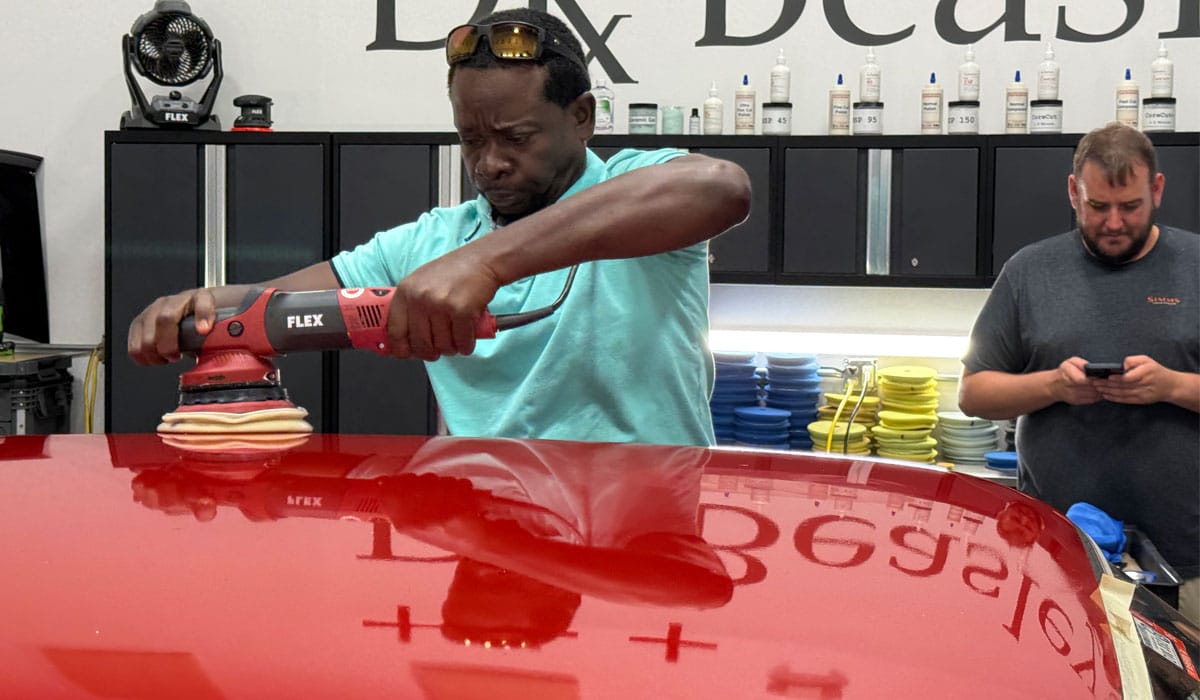
Here’s Marcus working on the outer section of the passenger side roof.
Here’s Marcus and Rich tackling the passenger side roof.
Josh is removing some CoreCut while Will removes oxidation.
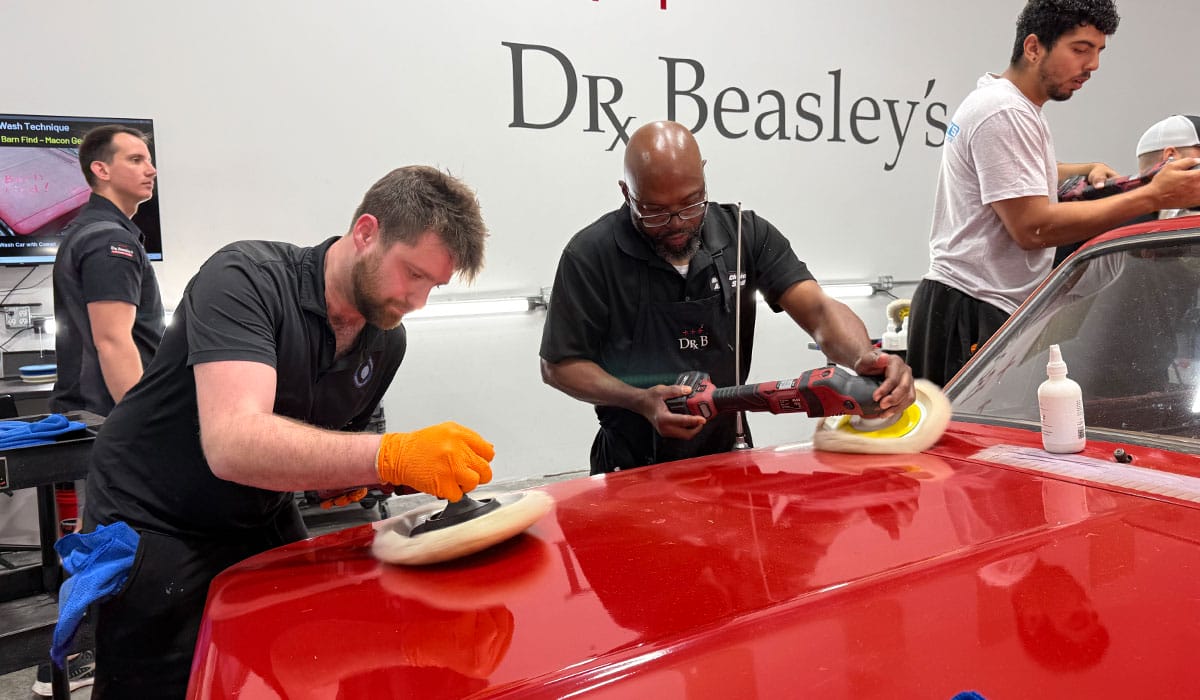
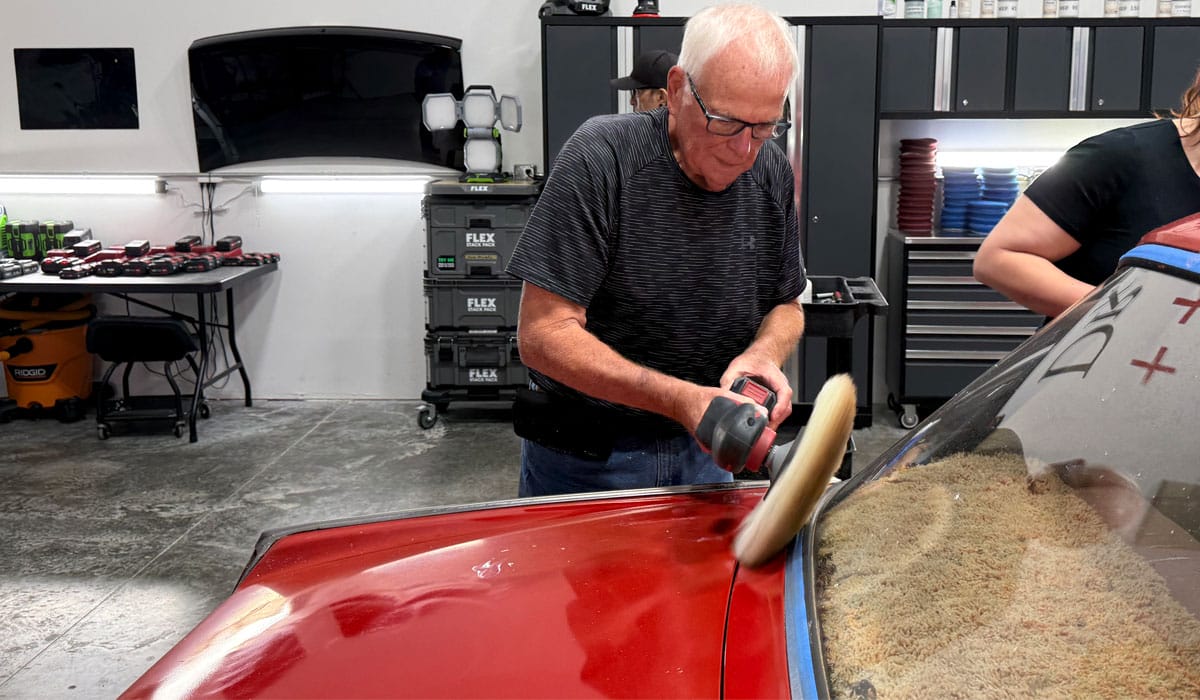
Here’s Clarence working the rotary polisher like a BOSS!
Here’s Julia and Brittany knocking out the vertical panels on the driver’s side.
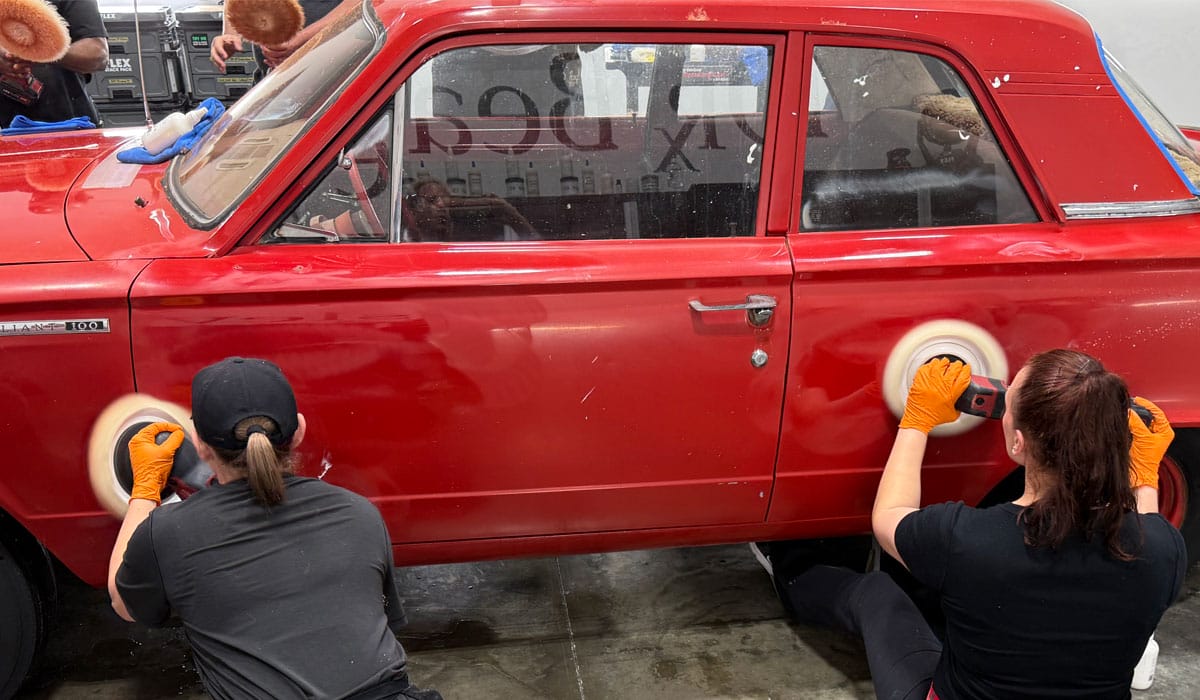
I love that Julia is passionate about doing a thorough job.
Taggert making quick work of removing decades of oxidation.

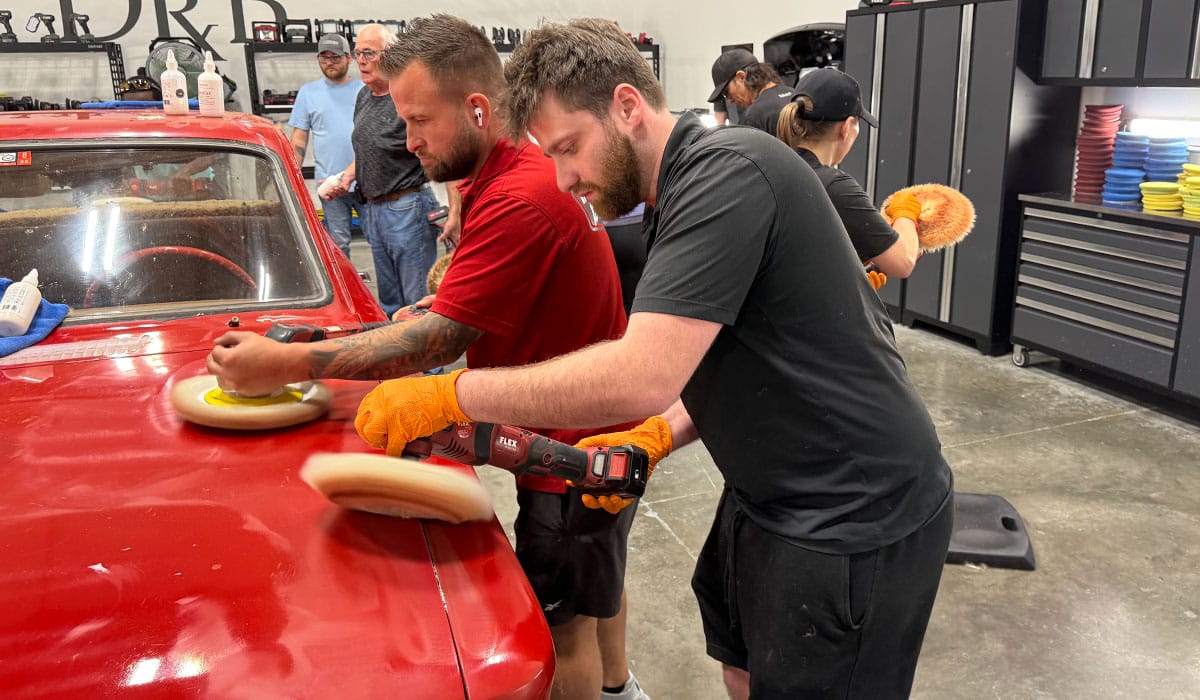
Correct Technique for Holding a Cordless Rotary Polisher
See how Taggert has locked the speed lock button and moved his had all they way to the back of the tool to better support the weight of the battery and just as important – to provide the maximum leverage over the tool.
Here’s Taggert really getting comfortable with the rotary polisher. Notice there’s no chairs, zero sitting and no boring PowerPoint
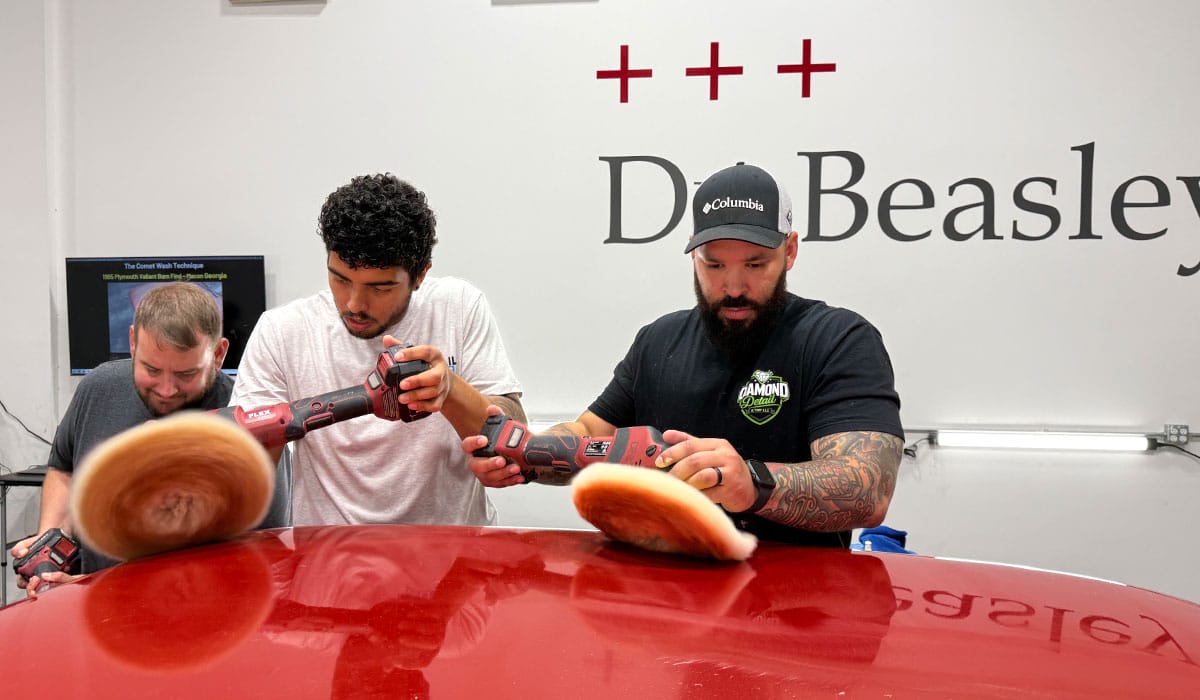
Look how Nic is doing EDGEWORK with an 8″ wool pad on a rotary polisher. Nice.
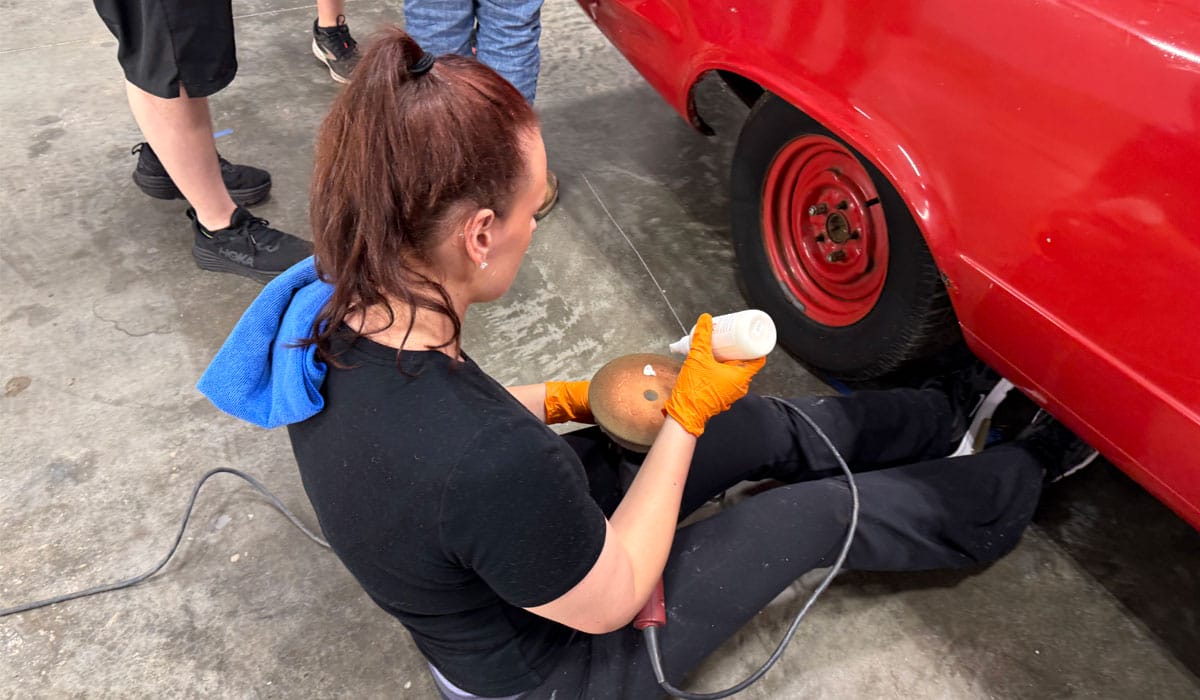
Pad Cleaning Spurs
Here’s Corey and Julia cleaning the face of their wool buffing pads using pad cleaning spurs. It is VITALLY important to clean your pads OFTEN. And I shared in the class how often I clean my wool pad when buffing out barn finds.
Here’s Marcus doing some very thorough work to the Sail Panels and around the rain gutter.
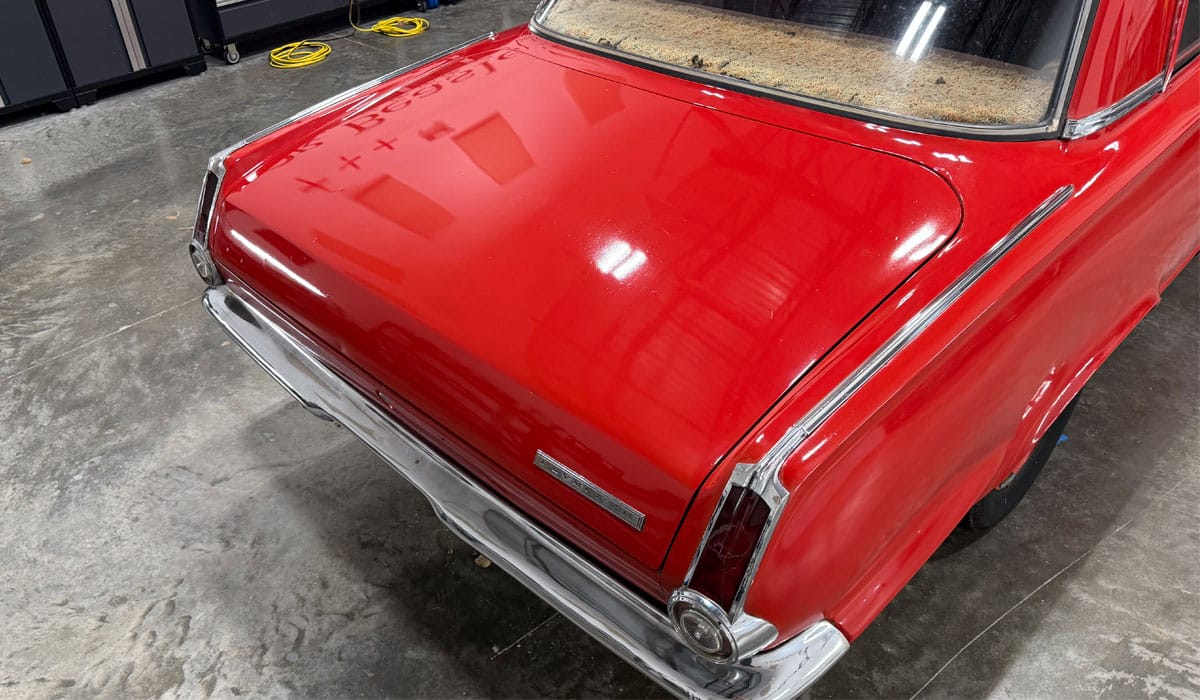
Here’s Brittany buffing out the back edge of the trunk lid with an emphasis around the Valiant Emblem.
Here’s Will using correct technique for both holding and using a rotary polisher with a wool cutting pad.
Remember what I told all of you about what the social media experts say about going up on edge with a rotary buffer? And when people tell me the correct technique is to constantly hold a wool cutting pad FLAT to the surface? And how this reveals to me – they’ve NEVER buffed out a BOAT. LOL
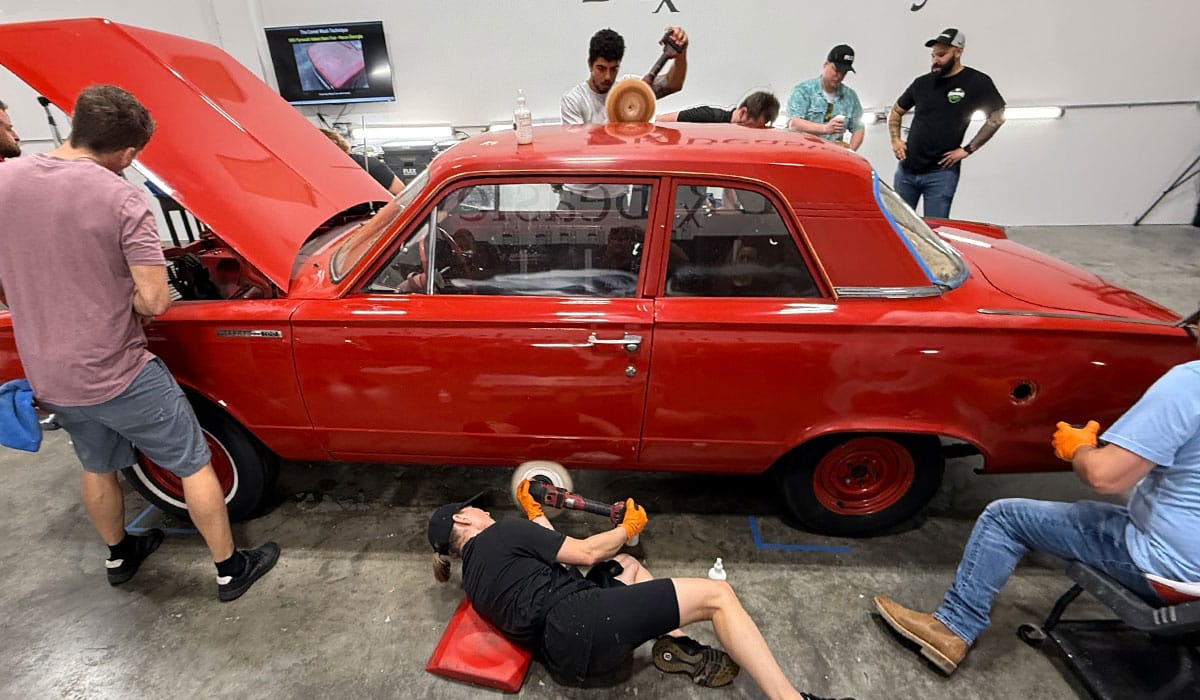
We have Tony tackling the lower quarter panels and rear valance on the passenger side while Marcus continuous down from the Sail Panel to the tops of the rear fender buffing hard right next to the chrome trim.
Love Tony’s passion for perfection!
Here’s Marcus using text-book correct technique for both holding and using a rotary polisher with an 8″ wool pad to get in and cut the paint right next to the trim. Edgework using an 8″ woold pad. LOL
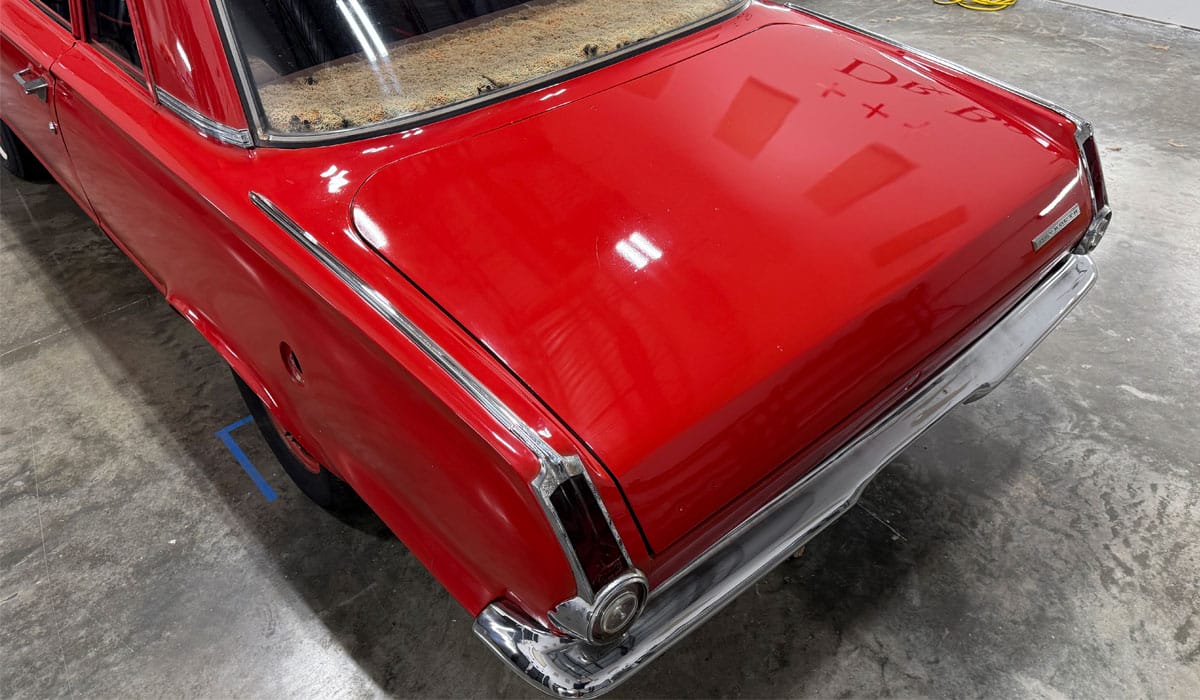
Here’s Cameron restoring the shine to the rear chrome bumper removing years of oxidation and tarnish.
And you can see here, he’s using the correct technique to use and hold a rotary polisher. Leading hand at the head of the polisher and the other hand supporting the weight of the battery while maximizing full leverage over the tool.
Here’s Marcus knocking out the vertical panels on the passenger side.
When it comes to a Barn Find, if it has paint – it gets polished. Here’s Corey restoring some shine to the engine compartment that we cleaned at the very start of this class. Thanks Corey!

Wow! I’m tired just by LOOKING at the above pictures!
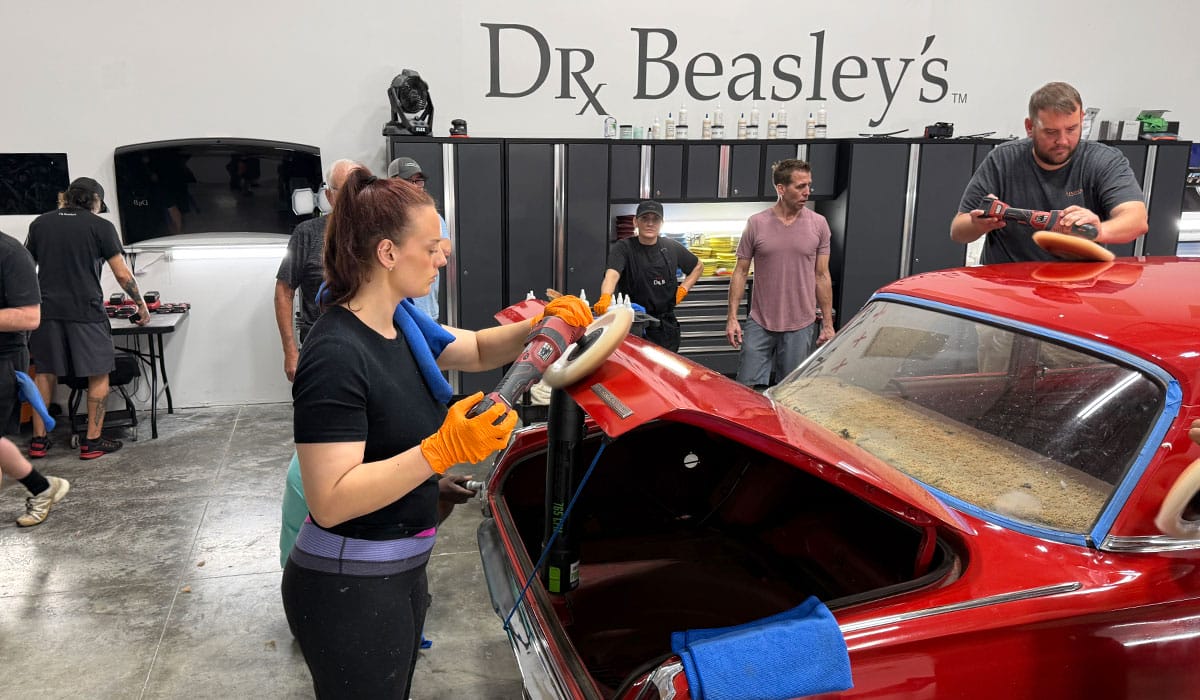
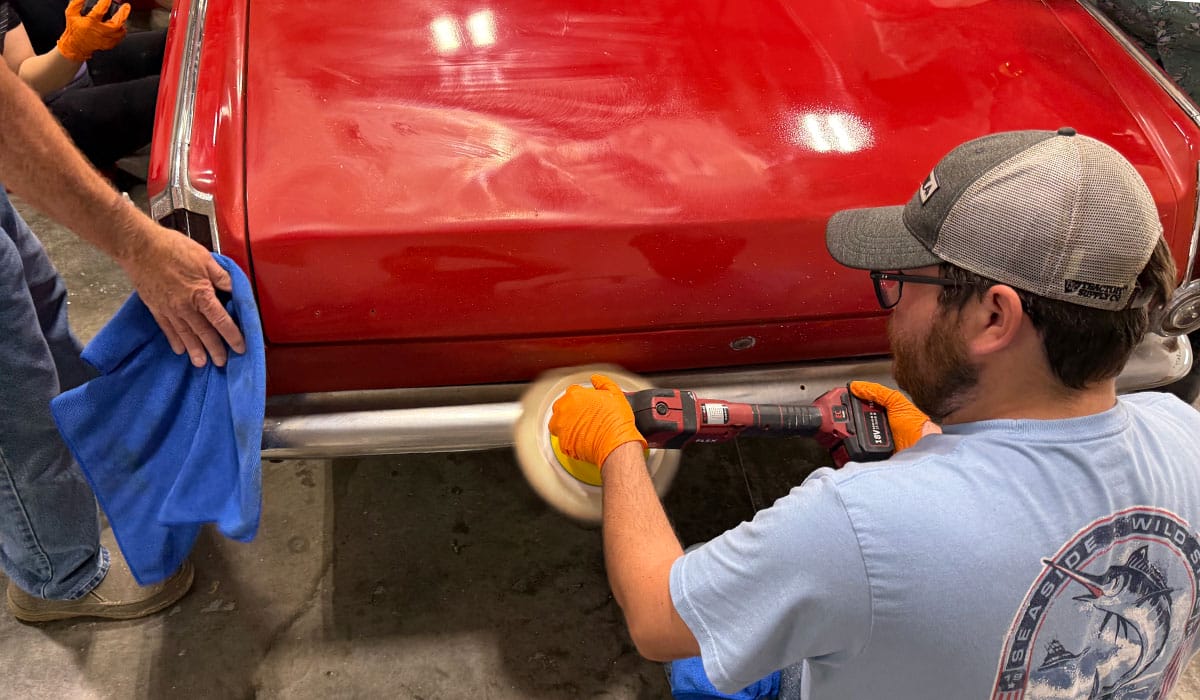
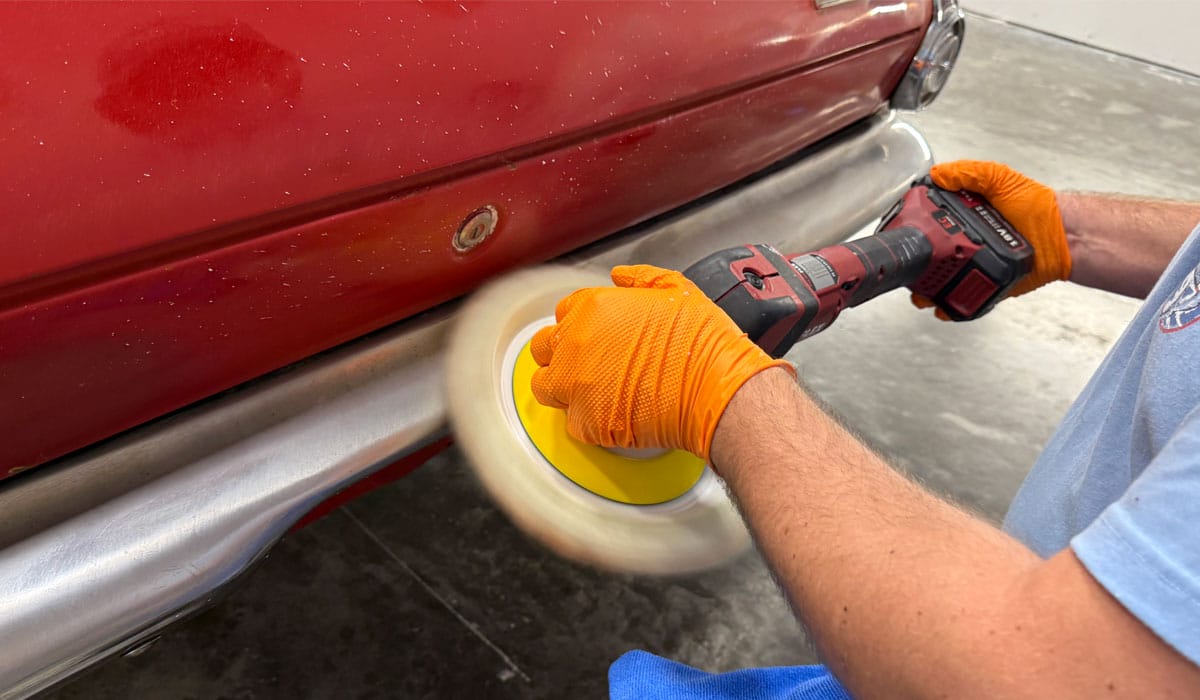
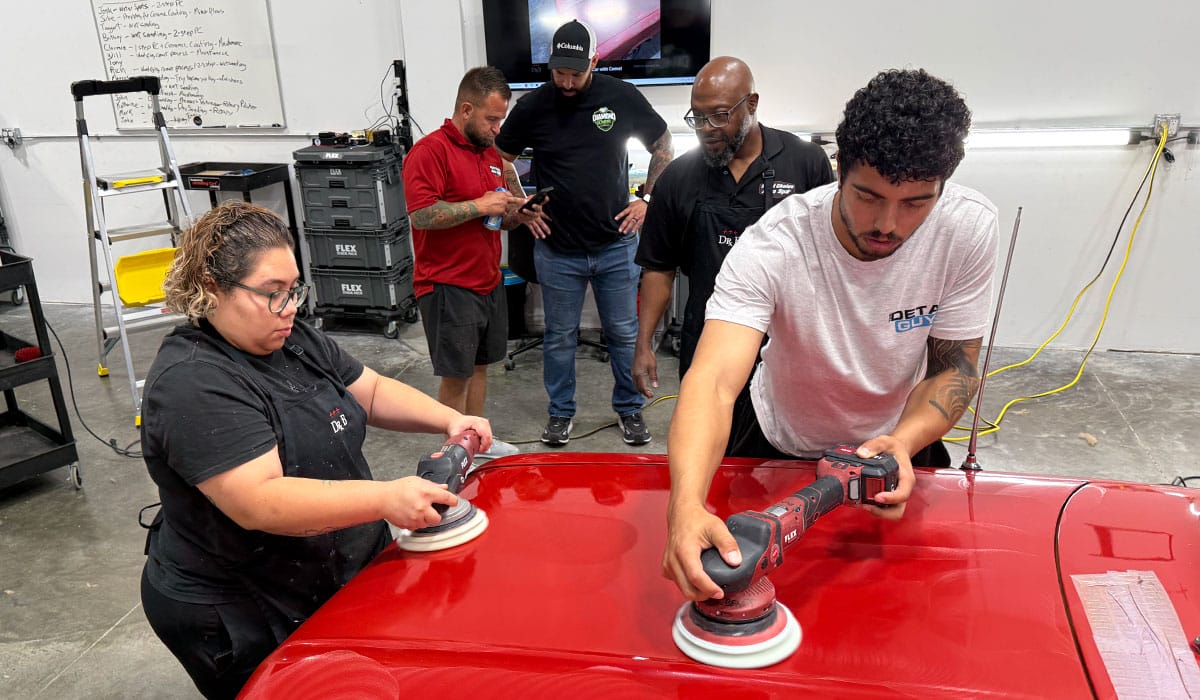
Gear-Driven Orbital Polishers
While everyone is welcome to experiment and test out any of the polishers in our shop, I do in FACT put a heavy emphasis on using gear-driven orbital polishes like the FLEX, RUPES and Harbor Freight gear-driven orbital polishers.
Why? Because newbies need to learn how to do the paint correction steps faster, not slower. So I put both gear-driven polishers and free spinning, random orbital polishers in their hands and then tell them to watch for good pad rotation and pad oscillation when using the free spinning units.
What they find out is what I want them to find out and if you want to go fast, you need a gear-driven orbital polisher. If you’re NOT in a hurry, for example you’re a do-it-yourselfer, then by all means, use free spinning, random orbital polishers.
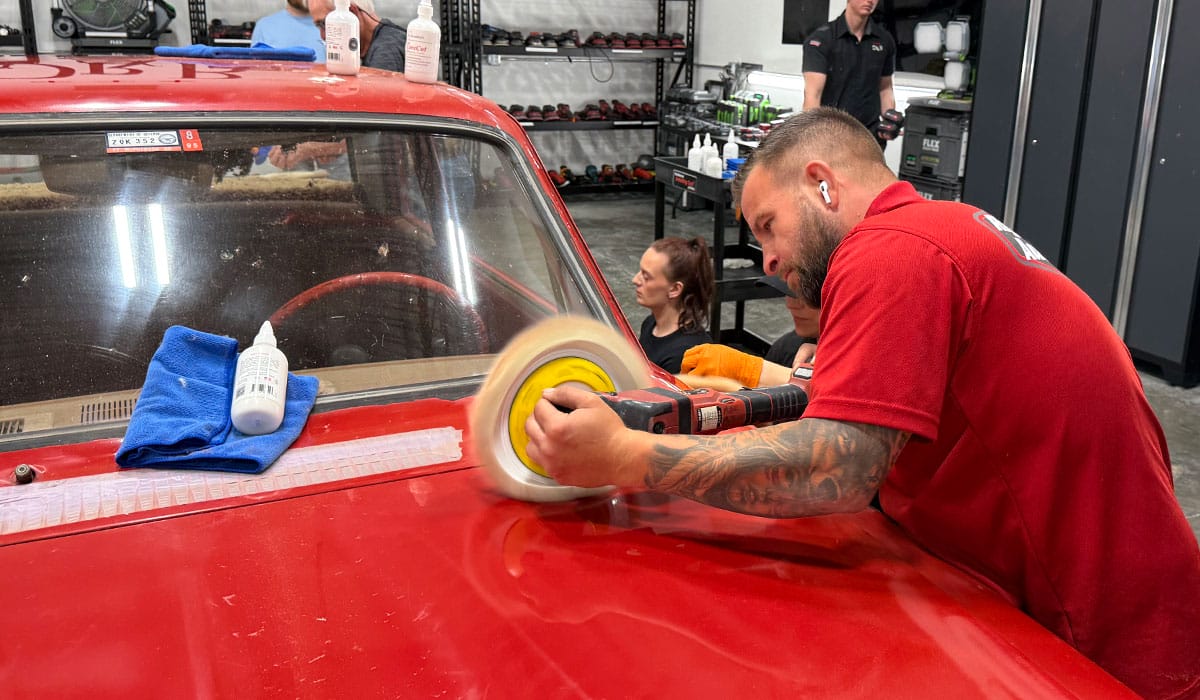
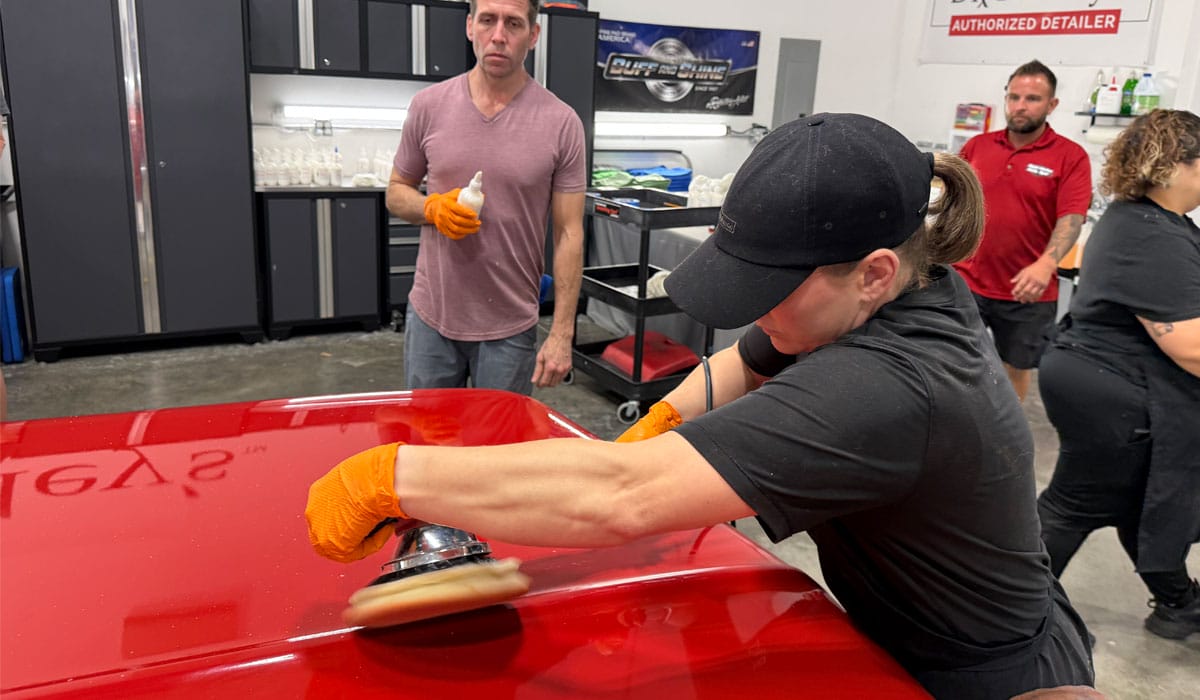
Gear-Driven Orbitals with Buff and Shine EdgeGuard White Foam Polishing Pads and Dr. Beasley’s NSP 150
Here’s John testing out the Harbor Freight copy of the FLEX BEAST.
Here’s Josh using my FLEX RBI or Red BEAST Inside
This is Number #66 of 1000 built and personally handed to me by the President of FLEX – Christian Neuner at Automechanika in Germany at their 100th year anniversary.
Here’s Will on the driver’s side roof and Julia working on the hood and top of the fender.
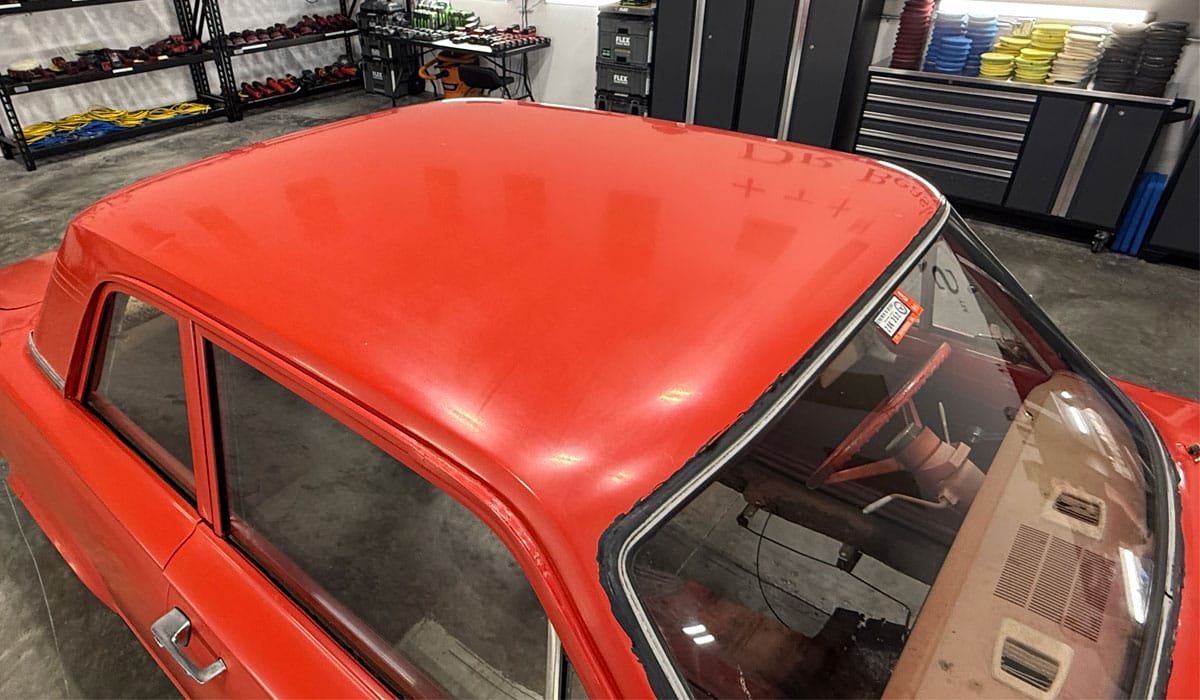
Notice the COLOR CHANGE?
Go back and look at the BEFORE pictures and it will click.
Out back we have Cameron and Nick using FLEX Supa BEASTS.
Here’s Marcus testing out the CBEAST or Cordless BEAST
I love the idea of a cordless gear-driven orbital, but the honest truth is, for cars with really bad paint that need heavy paint correction, the corded version is much faster.

Here’s Katherine up front working with the original FLEX BEAST aka the FLEX XC 3401 VRG
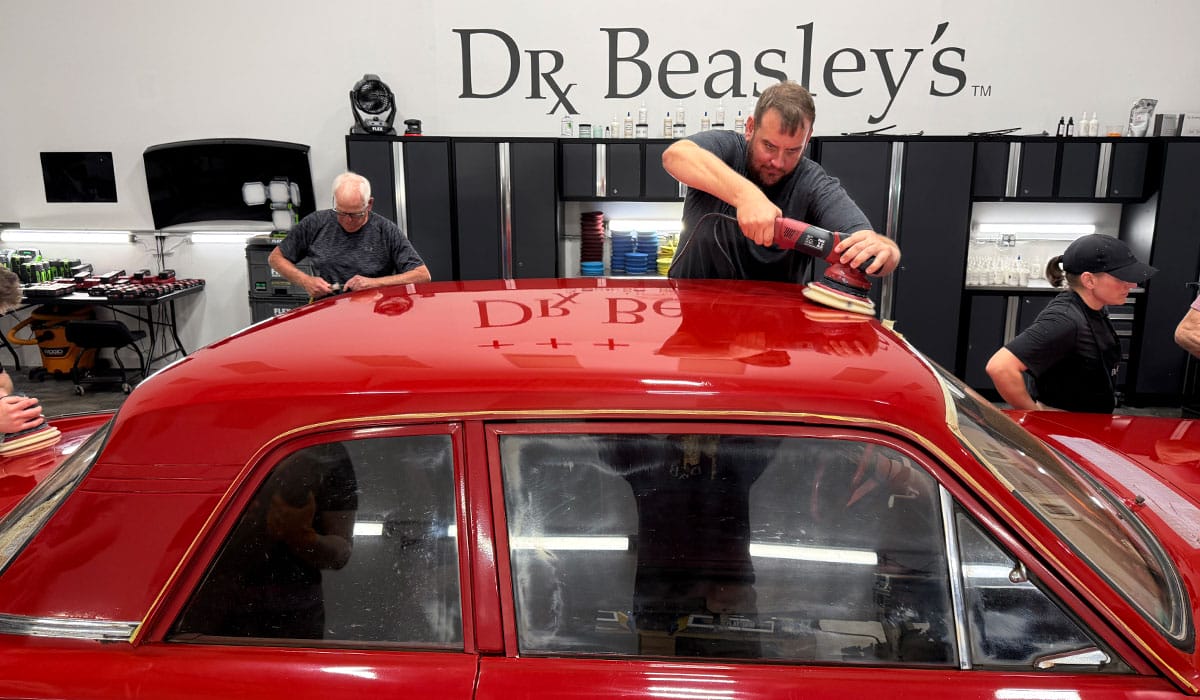
Here’s Rich finishing out the driver’s side rear roof
Here’s Clarence working with the original FLEX BEAST on the rear driver’s side fender
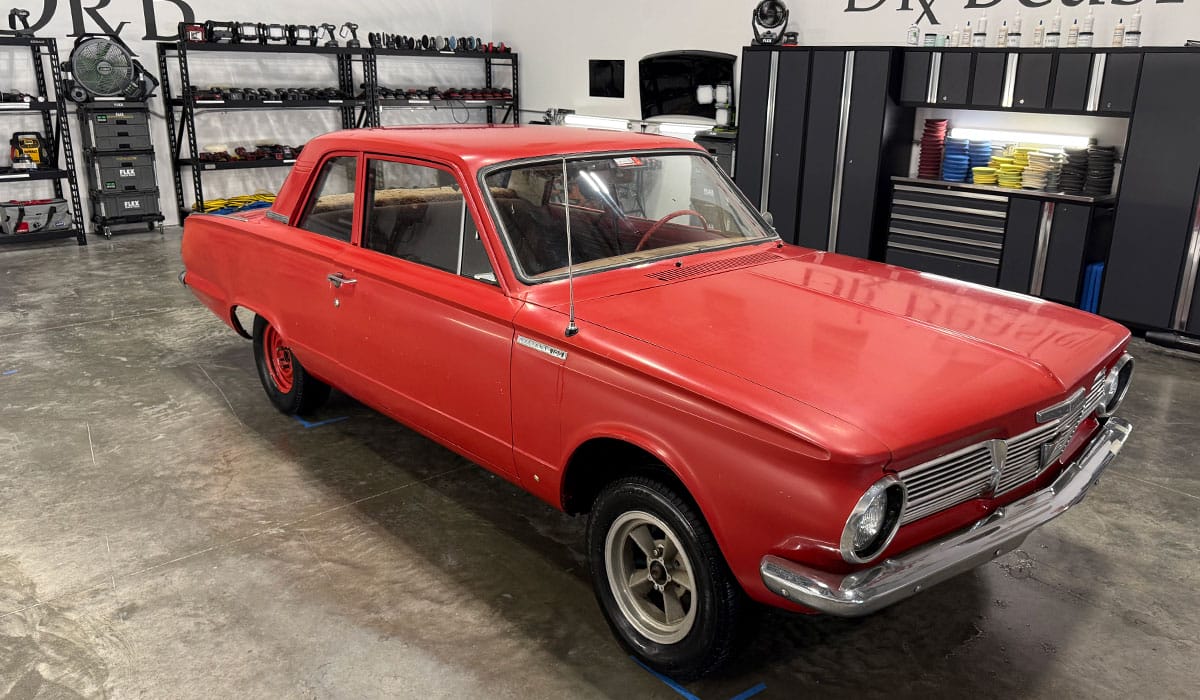
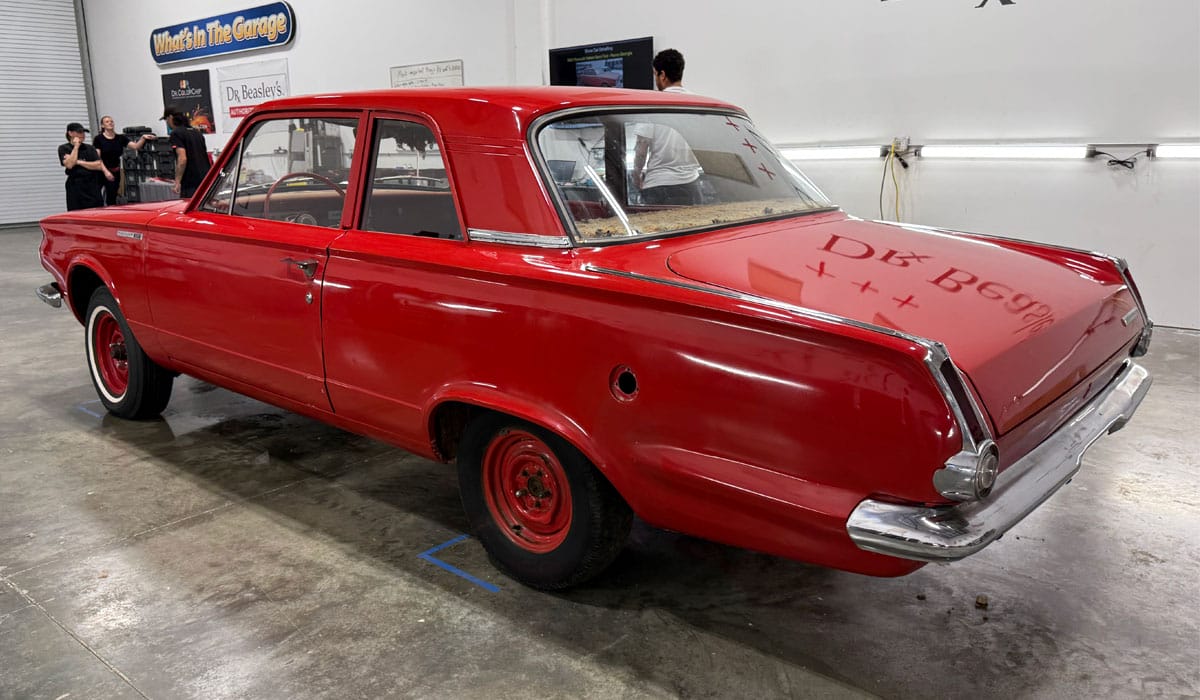
Wow! Look at the rich color the class has restored to his very neglected Barn Find!
Here’s Taggert knocking out the passenger side door.

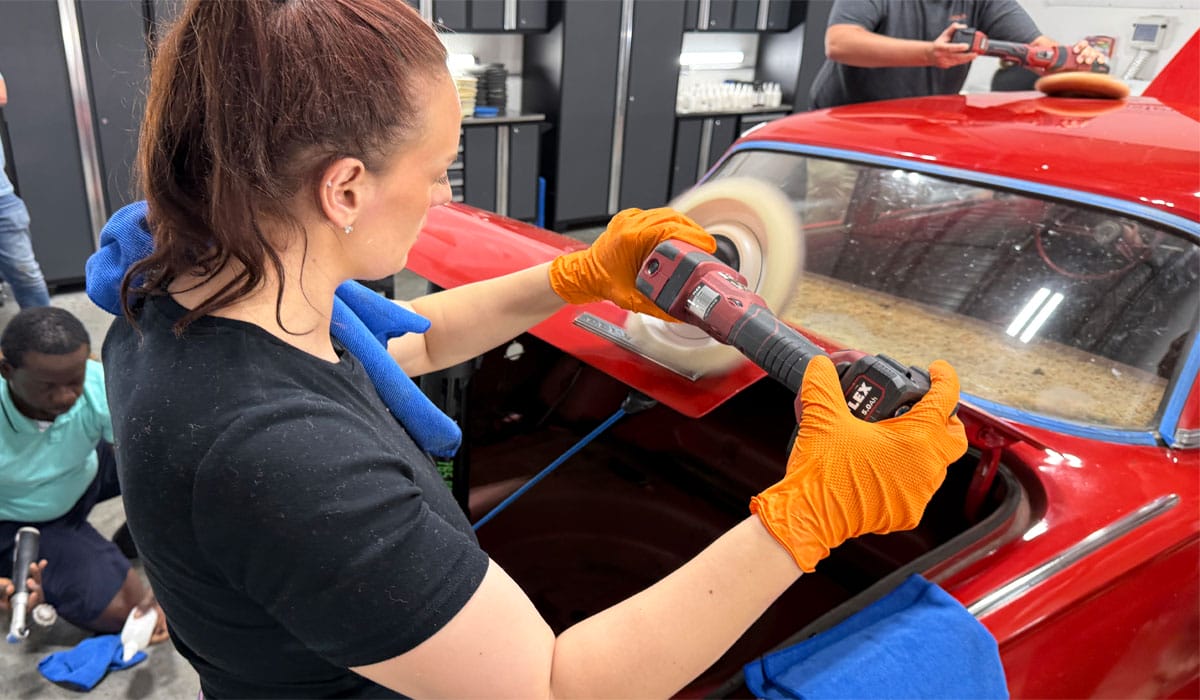
Here’s Julia putting a FLEX 3401 on EDGE
This is something that you can only do with a gear-driven orbital polisher. With a free spinning, random orbital polisher the pad will simply stall out and now you’re wasting time.
Here’s Brittany applying some product to the face of the buffing pad and next she’s tackling the passenger side fender.
Way to get after it Brittany!

Here’s Tony finishing out the driver’s side of the roof using the FLEX Supa BEAST
Look at his reflection in the paint – this is an incredible extreme transformation from where we started at 7:30am this morning!
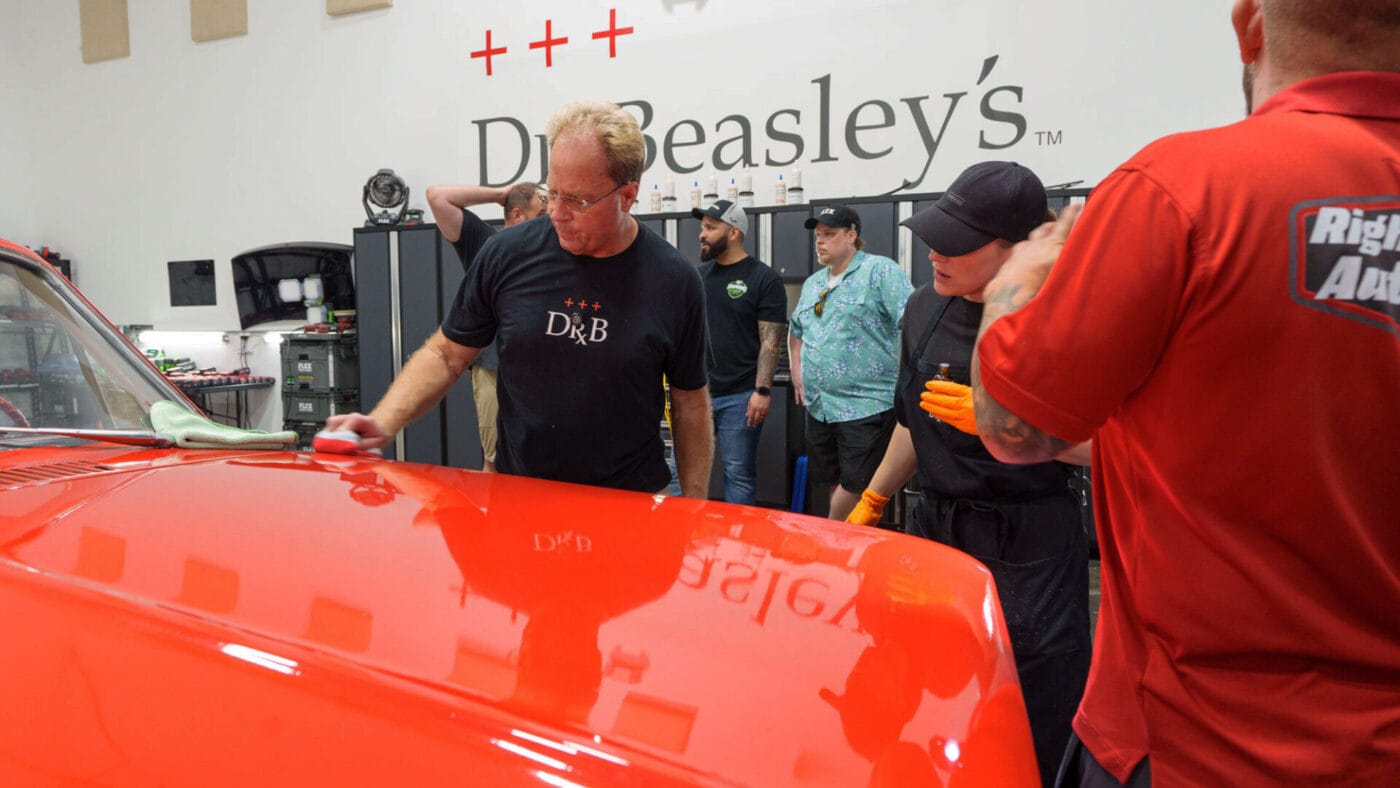
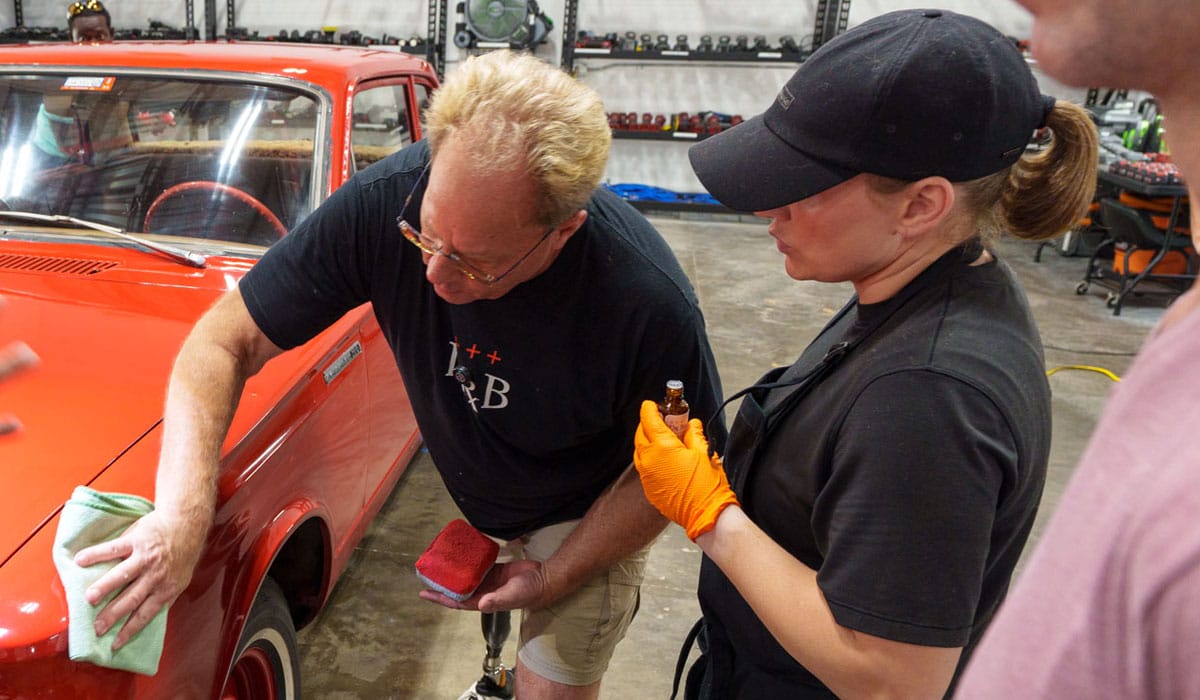
Installing the Ceramic Coating
After all the paint correction steps, next there was a demonstration and explanation on how to install the ceramic coating and then the class took over and completed the job.
Let’s take a look down memory lane before we see the after pictures.
Here she is in the Pole Barn where the car was discovered.
Here she is after she arrived to Dr. Beasley’s Training Center in sunny, Stuart, Florida!

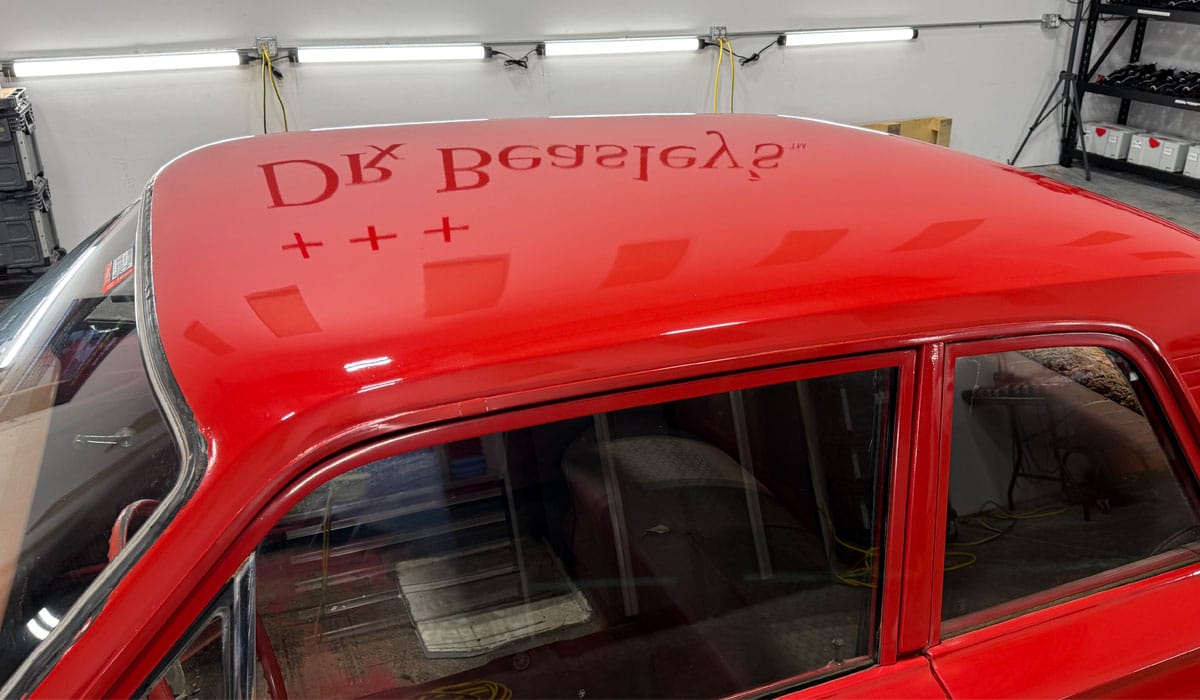
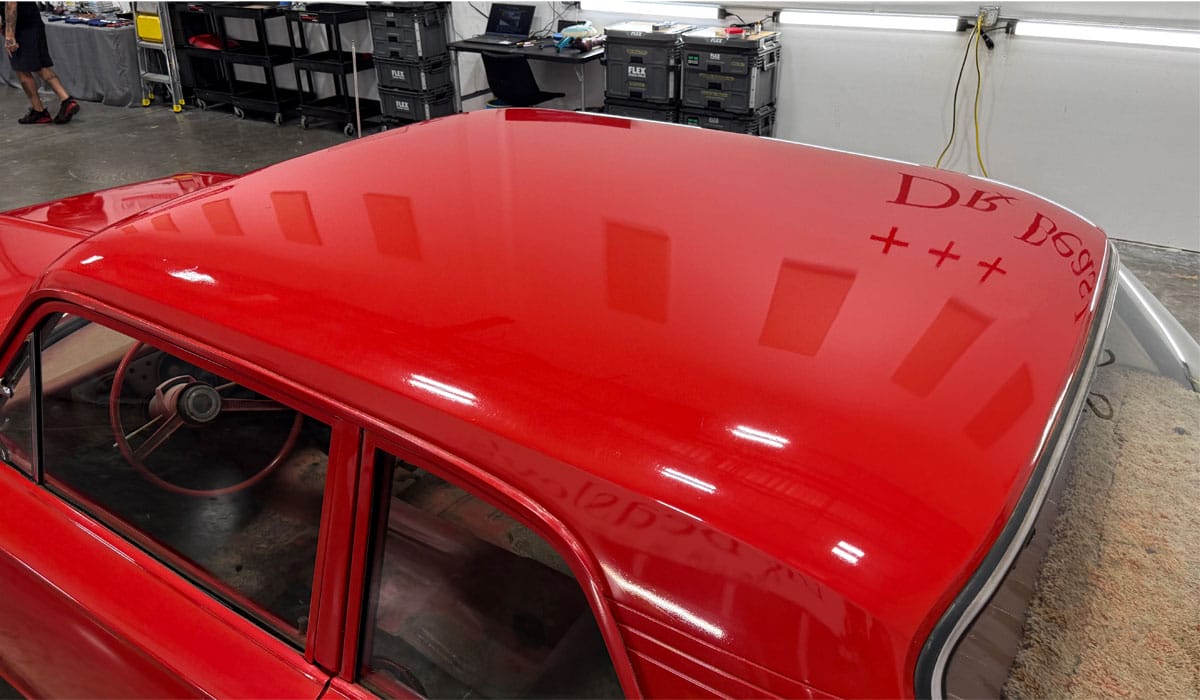
Here’s the final results!

Besides learning,
- How to use a rotary polisher with an 8″ wool cutting pad to chop off decade of oxidation the correct way.
- How to use a gear-driven orbital polisher to remove any holograms and maximizing gloss and richness-of-color.
- How to install a ceramic coating.
- How to machine scrub tires.
And the coolest thing? How to do the Comet Wash Technique in a CLASS.
You guys killed it! Great job!
Primary tools and product used

You can take this class!
You can’t take this class because it’s over. However, we hold this style of class 3 times a year in Stuart, Florida. We hold these classes the SAME TIME each year. February, May and September. Get more information about the classes or get signed-up using the link below.
More info plus dates and topics for Dr. Beasley’s Car Detailing Classes in Stuart, Florida
Questions?
If you have questions or need help, feel free to reach out to me and I’ll do the best I can to see you through to success.
Mike Phillips – mike@drbeasleys.com – Cell: 760-515-0444
Questions? Comments?
Email Us